microscopy and wet mount
TRANSCRIPT
PRINCESS NORA UNIVERSITY
College of Health and RehabilitationSciences of Health Sciences
Microbiology and Immunology DHS 325, (Laboratory Component),
Sarah Shamra, MS., Lecturer

Objectives
1. Microscopy2. Wet mount3. Preparation of Cheek swab4. Preparation of Onion cells
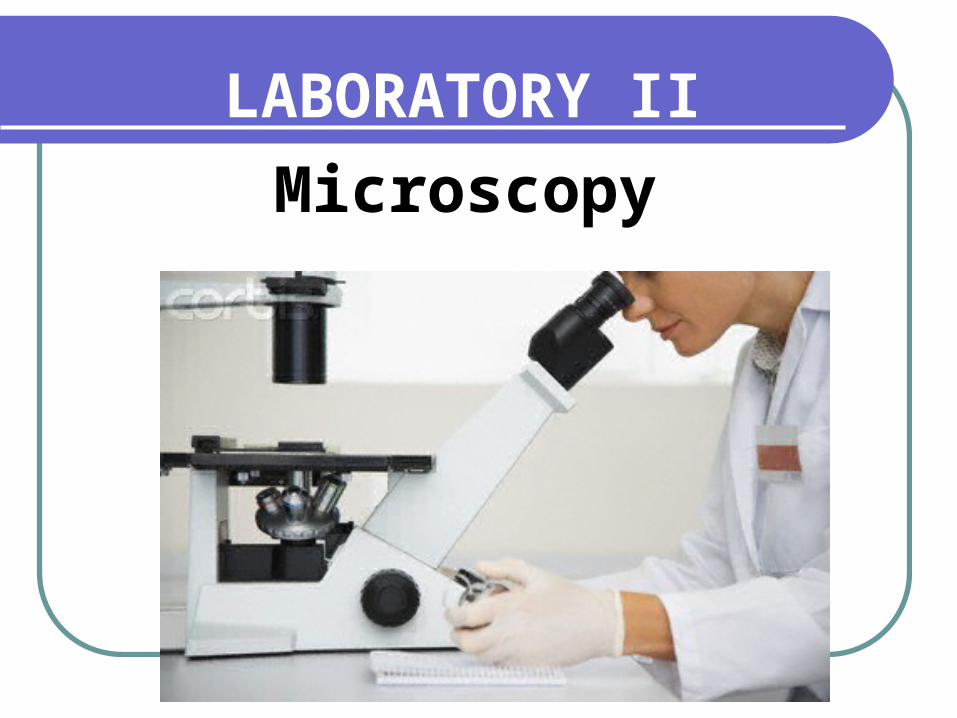
LABORATORY IIMicroscopy
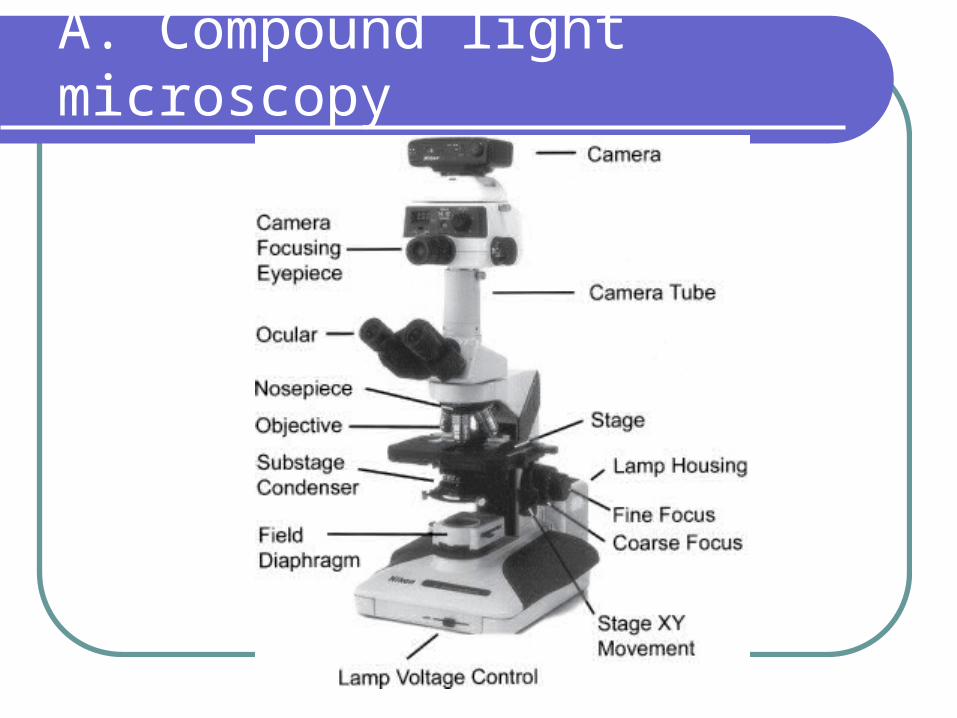
A. Compound light microscopy
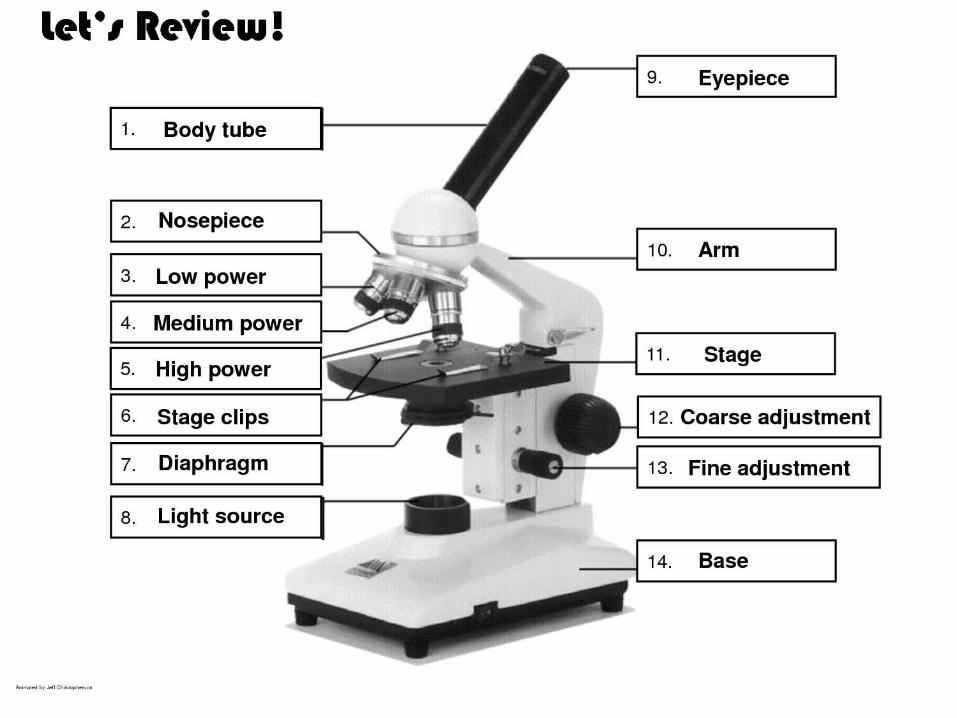
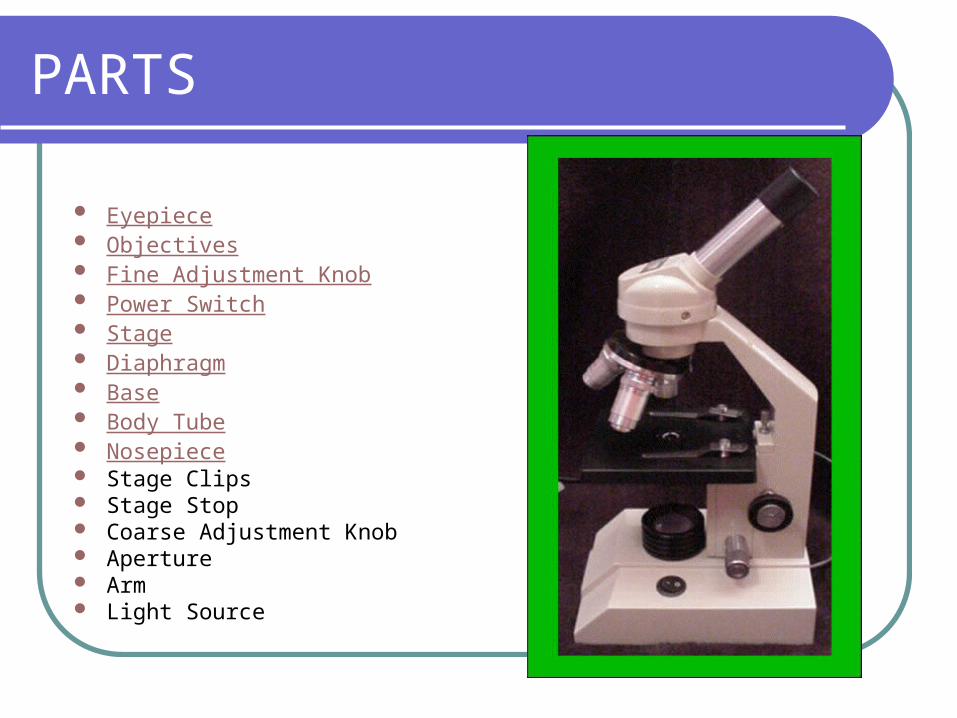
PARTS
Eyepiece Objectives Fine Adjustment Knob Power Switch Stage Diaphragm Base Body Tube Nosepiece Stage Clips Stage Stop Coarse Adjustment Knob Aperture Arm Light Source
PARTS Cont’d Two optical systems in a compound microscope:1. Eyepiece or Ocular is what you look through at the top of
the microscope. Typically, standard eyepieces have a magnifying power of 10x. Optional eyepieces of varying powers are available, typically from 5x-30x.
2. Objective Lenses are the primary optical lenses on a microscope Standard objectives include 4x, 10x, 40x and 100x although different power objectives are available.
Eyepiece Tube holds the eyepieces in place above the objective lens. Binocular microscope heads typically incorporate a diopter adjustment ring that allows for the possible inconsistencies of our eyesight in one or both eyes. Binocular microscopes also swivel (Interpupillary Adjustment) to allow for different distances between the eyes of different individuals.
PARTS Cont’d Nosepiece houses the objectives. Coarse and Fine Focus knobs are used to focus the microscope.
Stage is where the specimen to be viewed is placed.
Stage Clips The viewer is required to move the slide manually to view different sections of the specimen.
Aperture is the hole in the stage through which the base (transmitted) light reaches the stage.
Illuminator is the light source for a microscope, typically located in the base of the microscope.
PARTS Cont’d Condenser is used to collect and focus the light from the illuminator on to the specimen. It is located under the stage often in conjunction with an iris diaphragm.
Iris Diaphragm controls the amount of light reaching the specimen. It is located above the condenser and below the stage.
Condenser Focus Knob moves the condenser up or down to control the lighting focus on the specimen.
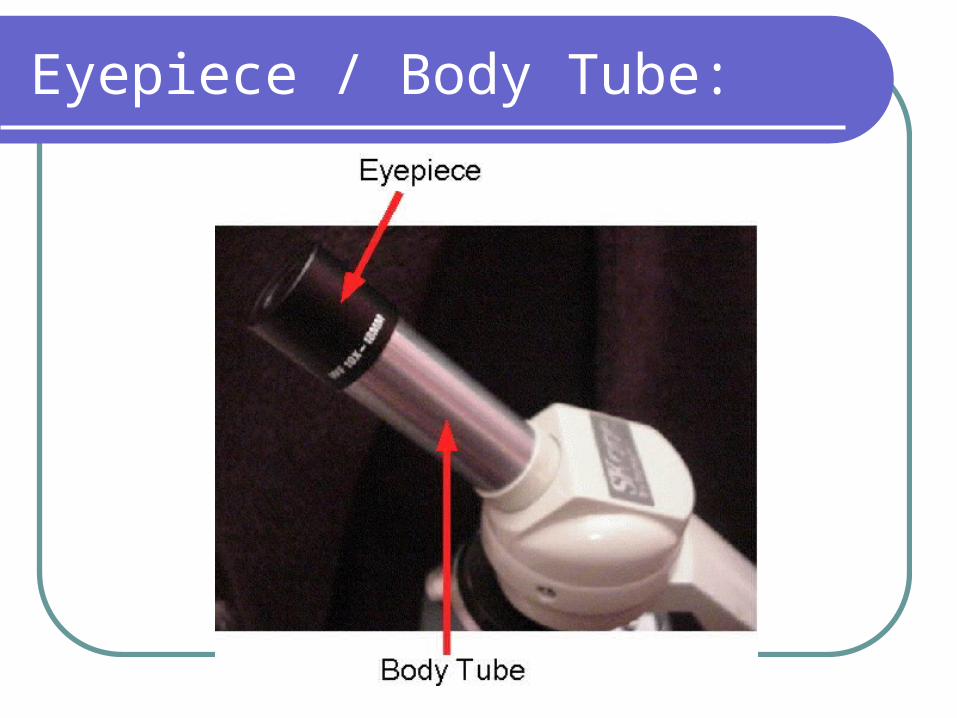
Eyepiece / Body Tube:
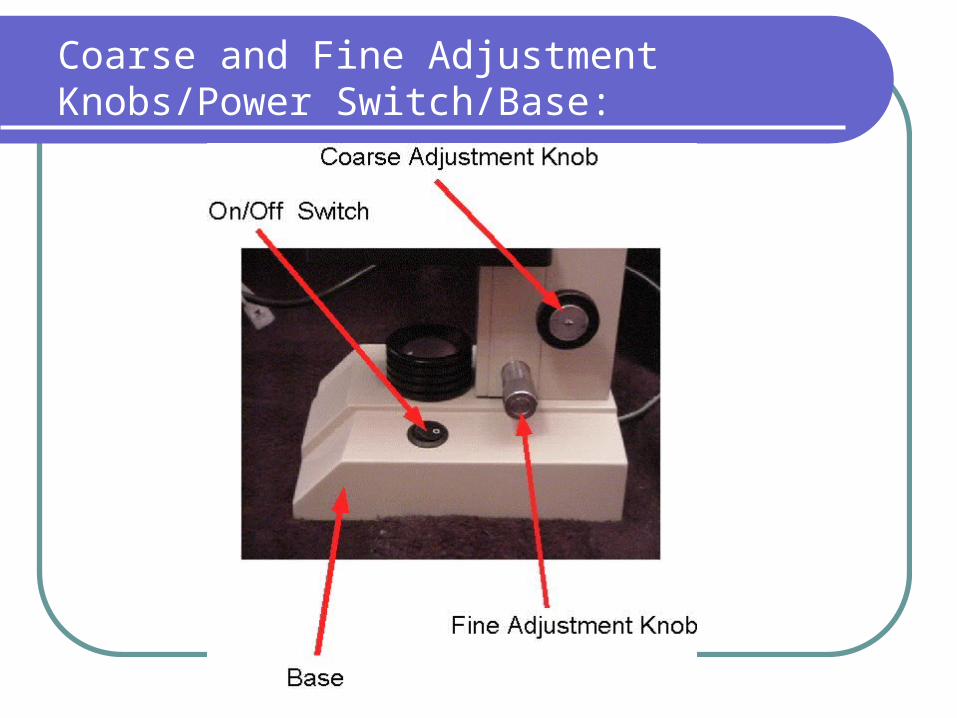
Coarse and Fine Adjustment Knobs/Power Switch/Base:
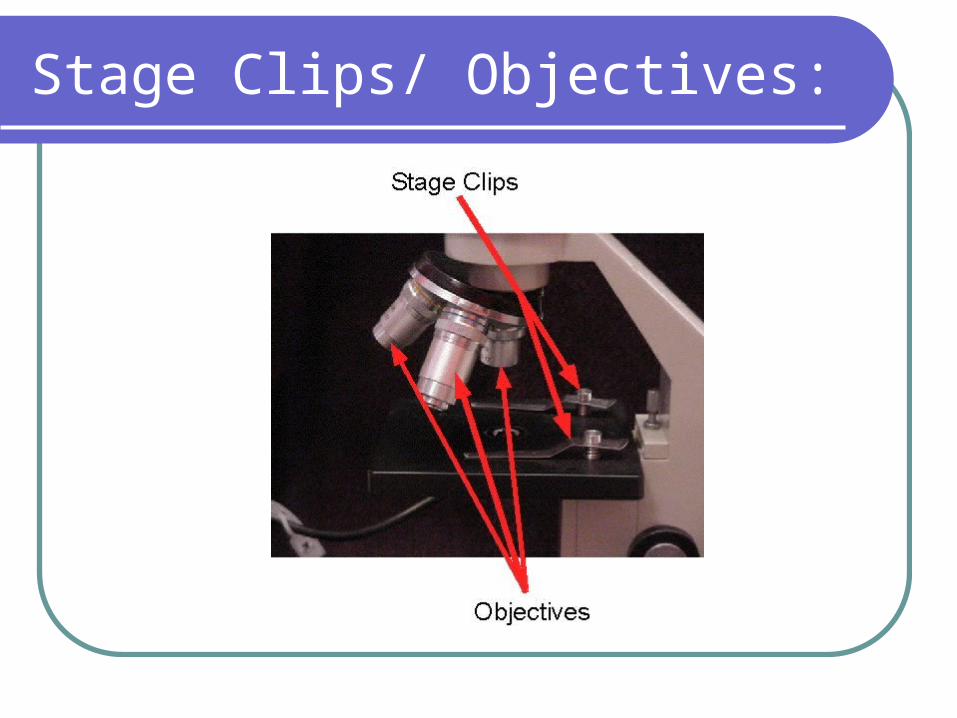
Stage Clips/ Objectives:
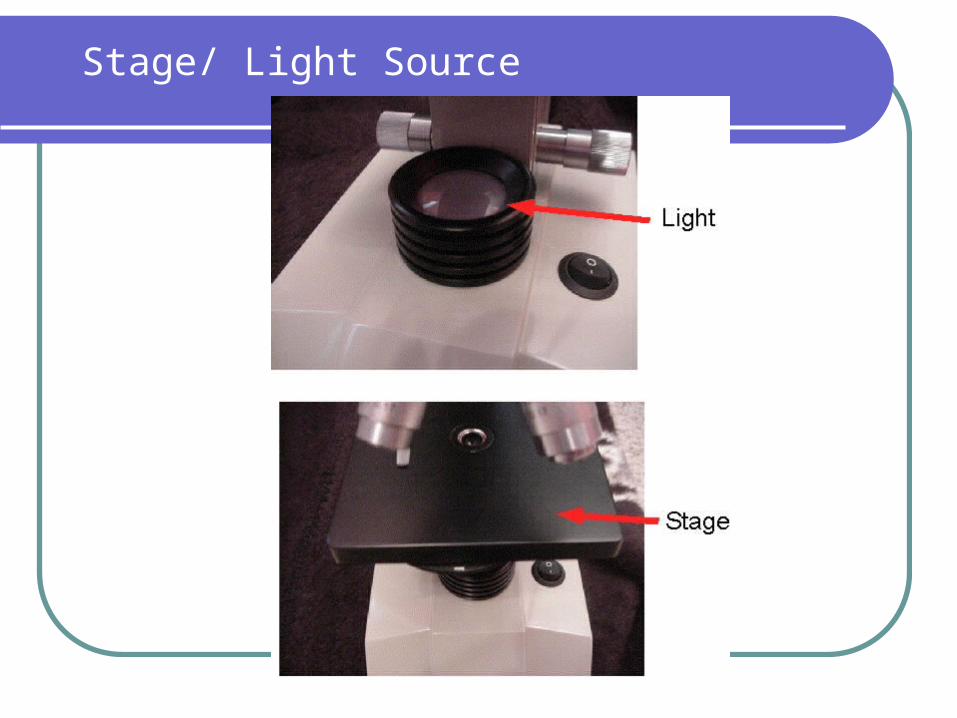
Stage/ Light Source
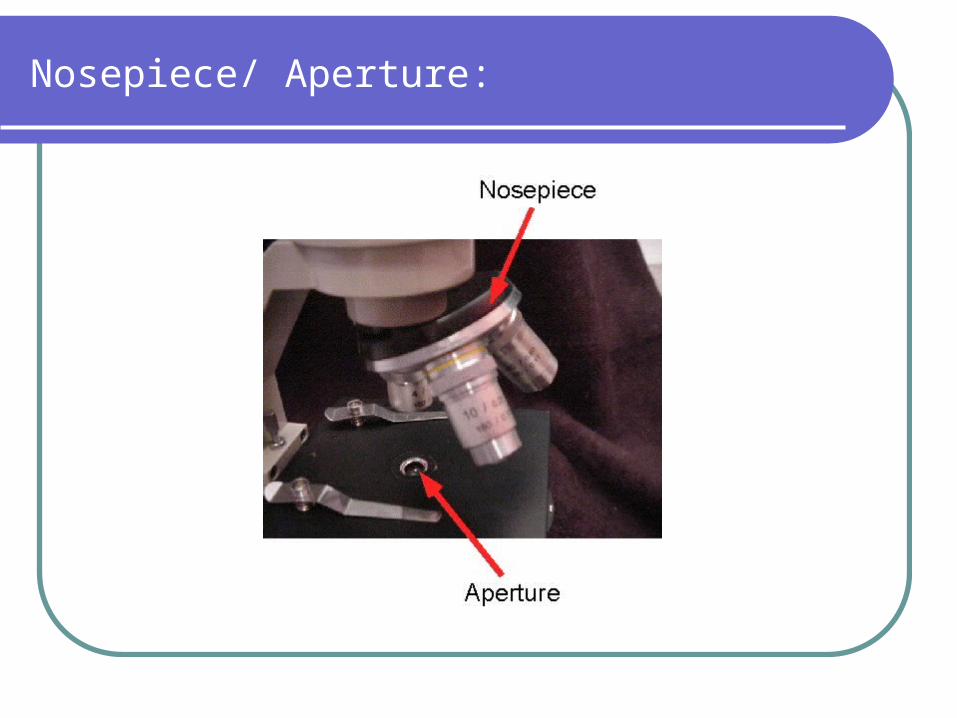
Nosepiece/ Aperture:
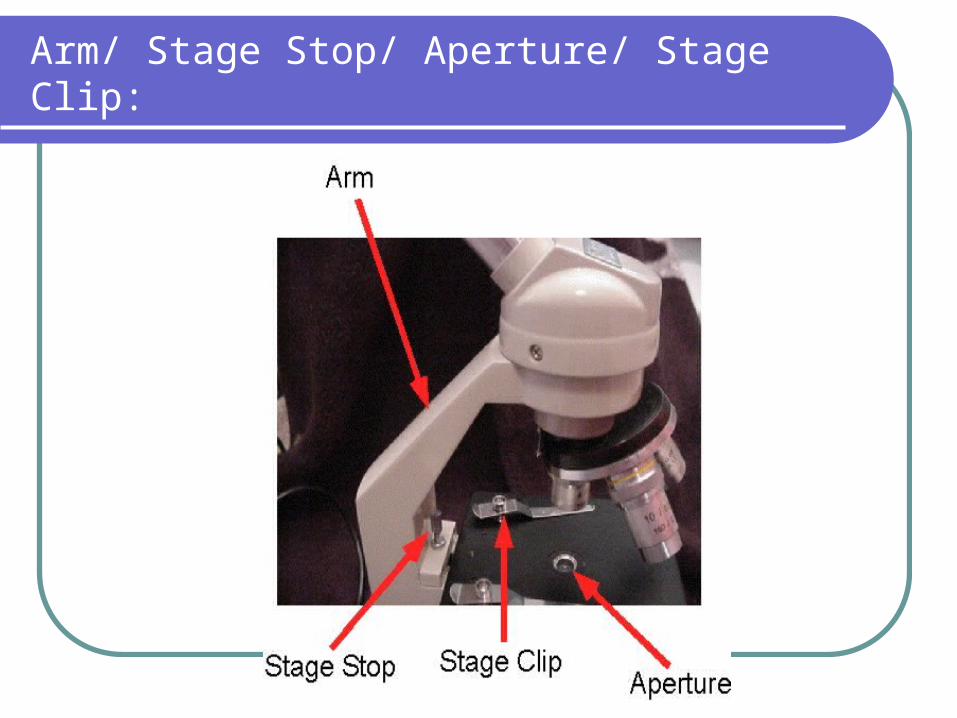
Arm/ Stage Stop/ Aperture/ Stage Clip:
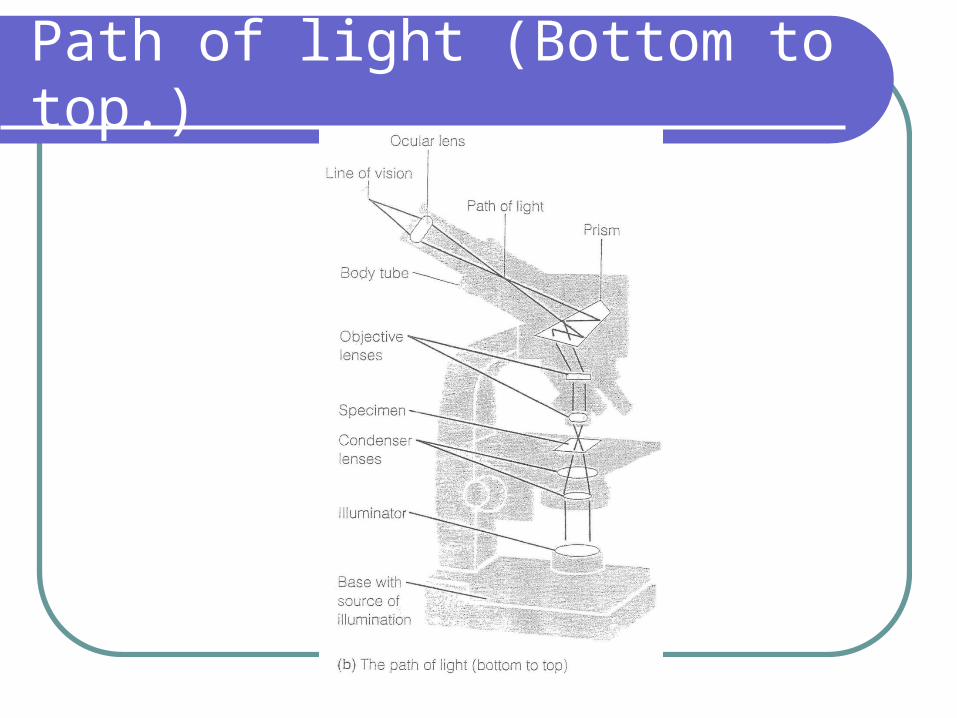
Path of light (Bottom to top.)

Diagram Showing Light Traveling Through The Microscope.
Compound Light Microscope:
•The term light refers to the method by which light transmits the image to your eye.
•Compound deals with the microscope having more than one lens.
•Microscope is the combination of two words; "micro" meaning small and "scope" meaning view.
•Modern compound light microscopes, under optimal conditions, can magnify an object from 1000X to 2000X (times) the specimens original diameter.
How it works?
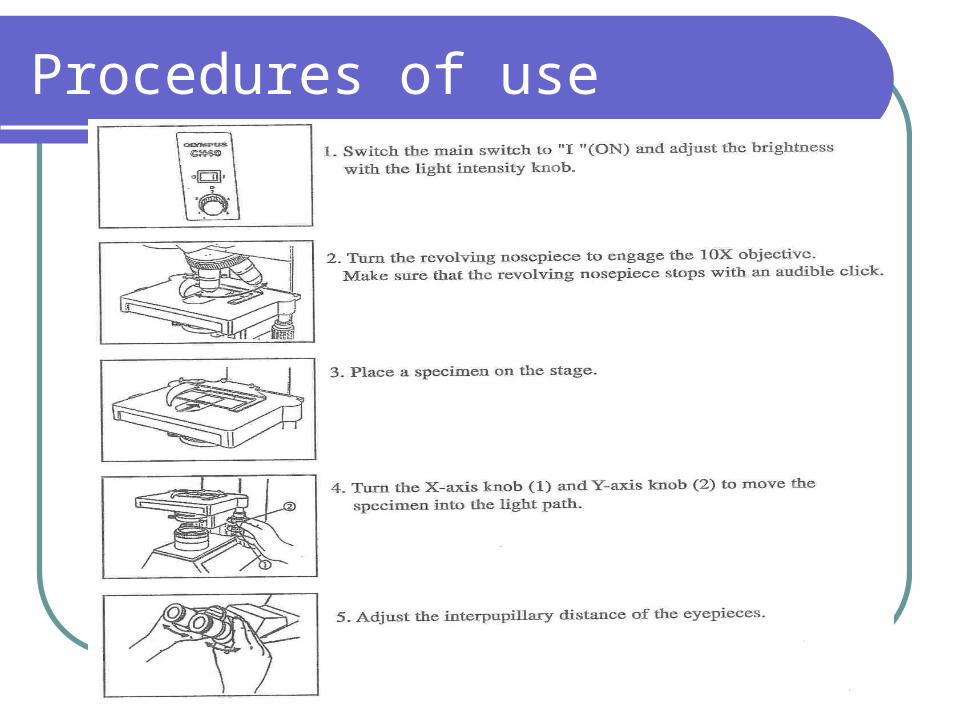
Procedures of use
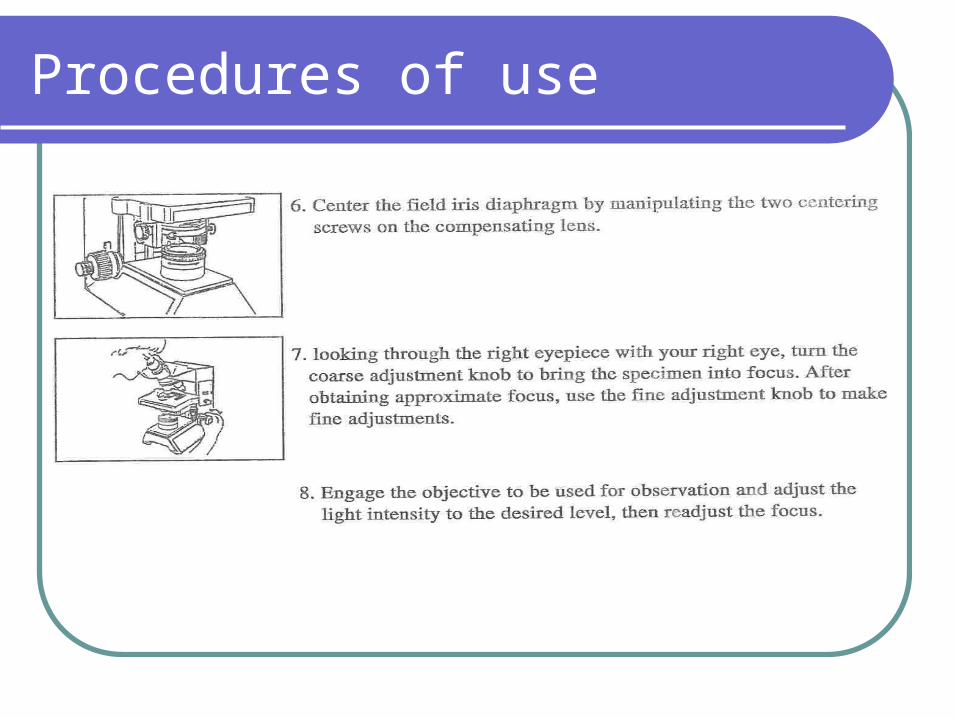
Procedures of use
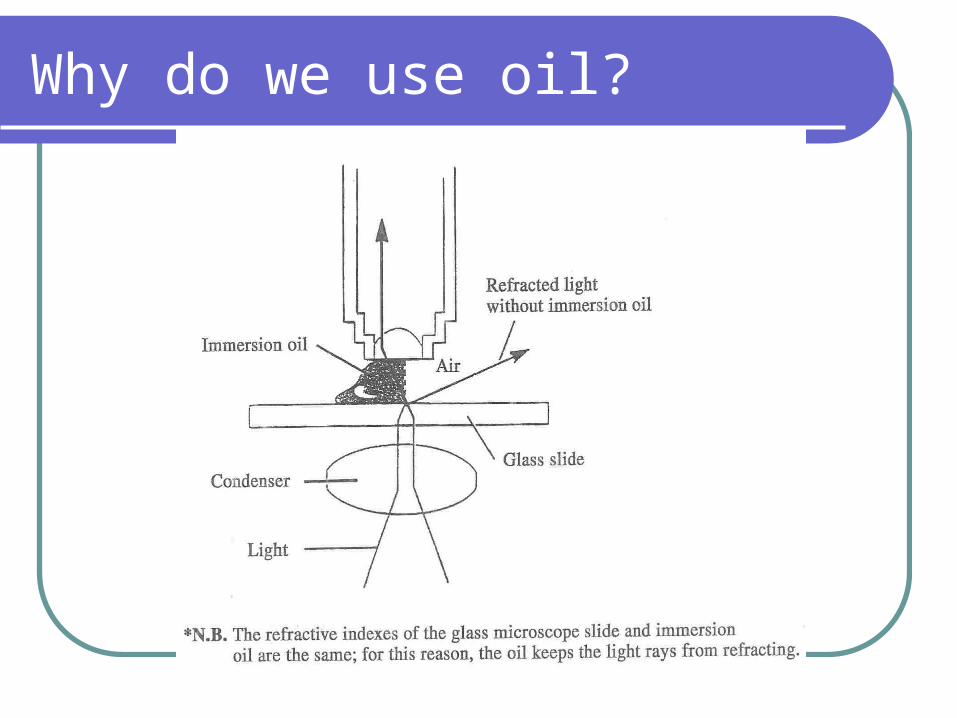
Why do we use oil?
Wet mount Place a sample on the slide. Using an dropper put a drop of water on the sample. Place one end of the cover slip on the slide and
slowly lower the other end using the end of a toothpick. (This will help to prevent air bubbles from getting trapped under the cover slip.)
The water should just fill the space between the cover slip and the slide.
Now compare wet mounts and dry mounts. Cut two small pieces of your hair. Place one on a slide and put a cover slip on it. This is a dry mount. Place the other piece of hair on the other slide and make a wet mount. Look at both slides. Does one slide look better than the other?.
Preparation of Cheek swab
Take a clean toothpick and gently scrape the inside of your mouth.
Smear the cotton swab on the center of the microscope slide for 2 to 3 seconds.
Add a drop of methylene blue solution and place a coverslip on top. Concentrated methylene blue is toxic if ingested. Wear gloves and do NOT allow children to handle methylene blue solution or have access to the bottle of solution.
Remove any excess solution by allowing a paper towel to touch one side of the coverslip.
Place the slide on the microscope, with 4 x or 10 x objective in position and find a cell. Then view at higher magnification.
The cells seen are squamous epithelial cells from the outer epithelial layer of the mouth. The small blue dots are bacteria from our teeth and mouth.
Preparation of onion cells
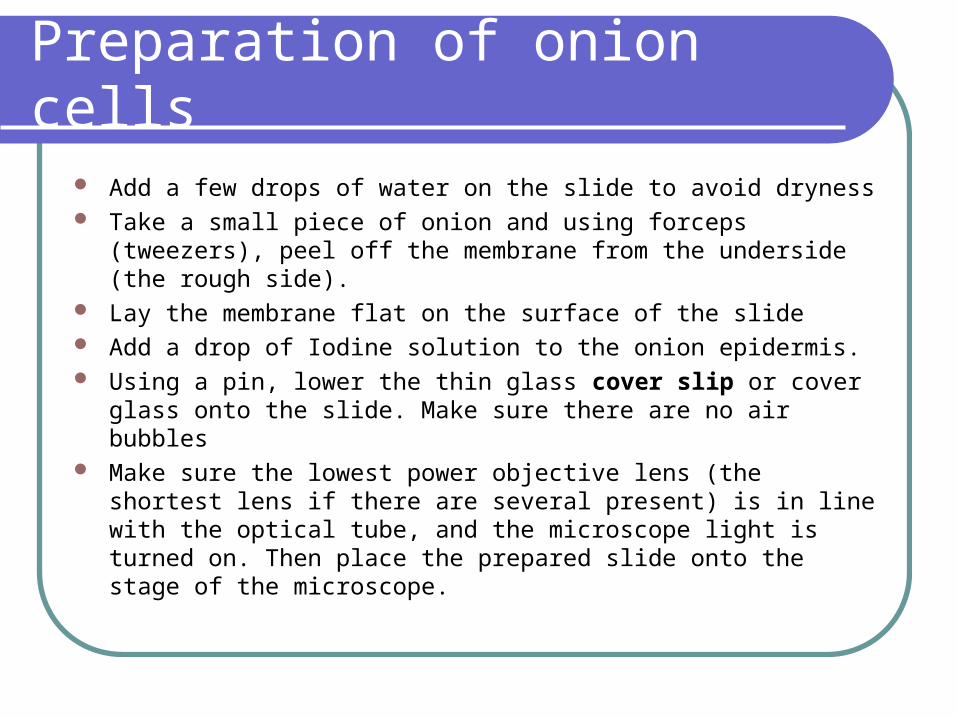
Add a few drops of water on the slide to avoid dryness Take a small piece of onion and using forceps
(tweezers), peel off the membrane from the underside (the rough side).
Lay the membrane flat on the surface of the slide Add a drop of Iodine solution to the onion epidermis. Using a pin, lower the thin glass cover slip or cover
glass onto the slide. Make sure there are no air bubbles
Make sure the lowest power objective lens (the shortest lens if there are several present) is in line with the optical tube, and the microscope light is turned on. Then place the prepared slide onto the stage of the microscope.
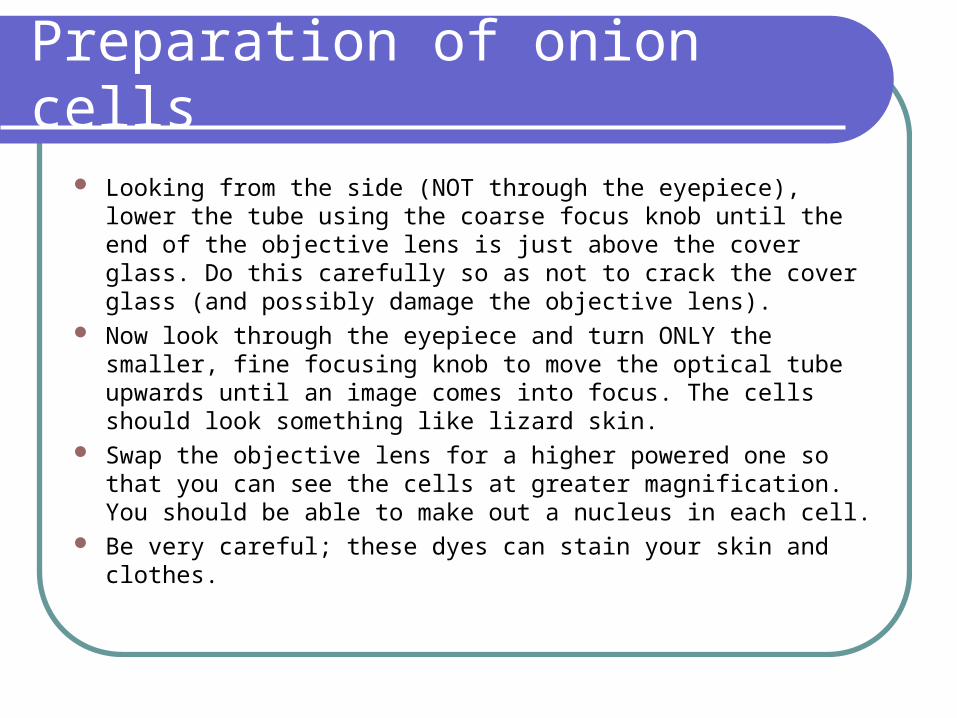
Looking from the side (NOT through the eyepiece), lower the tube using the coarse focus knob until the end of the objective lens is just above the cover glass. Do this carefully so as not to crack the cover glass (and possibly damage the objective lens).
Now look through the eyepiece and turn ONLY the smaller, fine focusing knob to move the optical tube upwards until an image comes into focus. The cells should look something like lizard skin.
Swap the objective lens for a higher powered one so that you can see the cells at greater magnification. You should be able to make out a nucleus in each cell.
Be very careful; these dyes can stain your skin and clothes.
Preparation of onion cells
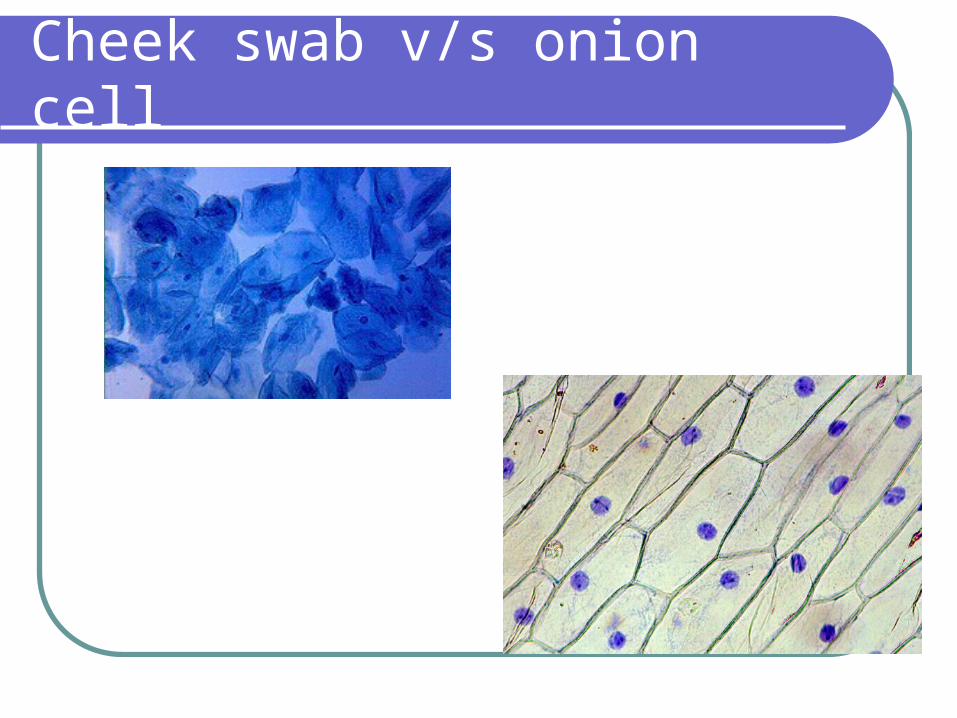
Cheek swab v/s onion cell

Virtual Microbiology Classroom (VMC)!
www.ScienceProfOnline.com