megapath duet hosted manual personal portal v2 · duet hosted voice personal portal manual ......
TRANSCRIPT
©2010 MegaPath, Inc. • Confidential and Proprietary
DDuueett HHoosstteedd VVooiiccee
PPeerrssoonnaall PPoorrttaall MMaannuuaall
June 2010
For Internal Use Only

©2010MegaPath, Inc. • Confidential and Proprietary
2
1. Personal Portal........................................................................................................ 3 2. Personal Portal Menus............................................................................................ 4 3. Profile Menu ........................................................................................................... 5 4. Incoming Call Menu .............................................................................................. 14 5. Outgoing Calls ....................................................................................................... 58 6. Call Control Menu ................................................................................................. 73 7. Calling Plans Menu................................................................................................ 96 8. Client Applications Menu.................................................................................... 100 9. Messaging Menu................................................................................................. 109 10. Service Scripts Menu........................................................................................... 111 11. Utilities Menu...................................................................................................... 114 12. Utilities Menu...................................................................................................... 115

©2010MegaPath, Inc. • Confidential and Proprietary
3
Personal Portal
(User)
©2010MegaPath, Inc. • Confidential and Proprietary
4
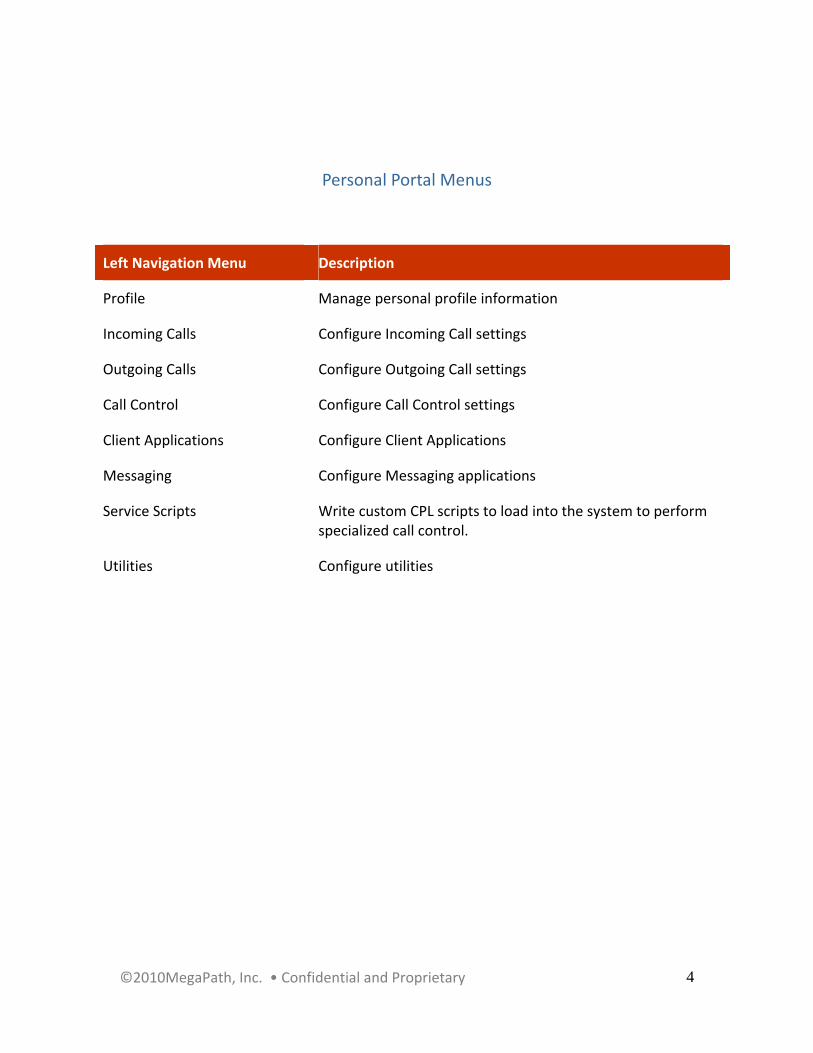
Personal Portal Menus
Left Navigation Menu Description
Profile Manage personal profile information
Incoming Calls Configure Incoming Call settings
Outgoing Calls Configure Outgoing Call settings
Call Control Configure Call Control settings
Client Applications Configure Client Applications
Messaging Configure Messaging applications
Service Scripts Write custom CPL scripts to load into the system to perform specialized call control.
Utilities Configure utilities

©2010MegaPath, Inc. • Confidential and Proprietary
5
Profile Menu
Basic Menu Description Advanced Menu Description
Profile Display and configure profile information such
as your name, department and
address.
Call Policies Configure user Call Policies
Addresses Addresses allows you to view and maintain your phone numbers and
other identities that are used to make and
receive calls.
Privacy Set your visibility within the Enterprise or Group
Passwords Set web access and voice portal passwords.
Time Schedule Add, modify, or remove time schedules
©2010MegaPath, Inc. • Confidential and Proprietary
6
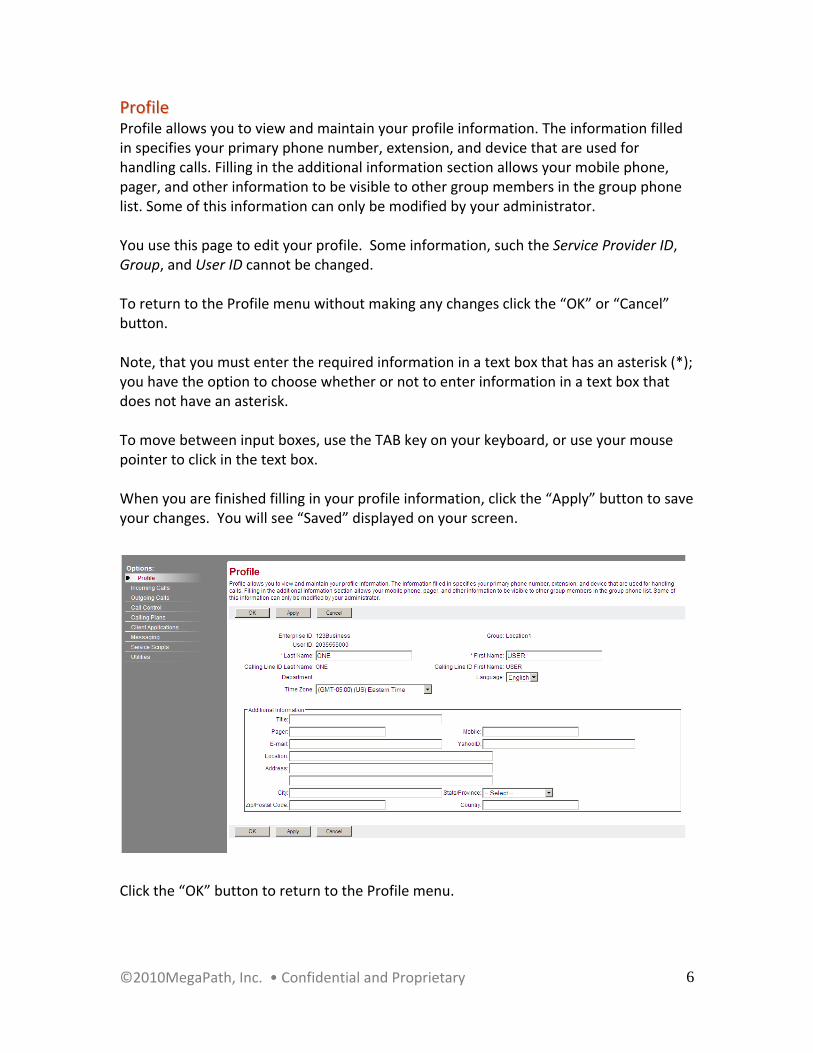
PPrrooffiillee Profile allows you to view and maintain your profile information. The information filled in specifies your primary phone number, extension, and device that are used for handling calls. Filling in the additional information section allows your mobile phone, pager, and other information to be visible to other group members in the group phone list. Some of this information can only be modified by your administrator. You use this page to edit your profile. Some information, such the Service Provider ID, Group, and User ID cannot be changed. To return to the Profile menu without making any changes click the “OK” or “Cancel” button. Note, that you must enter the required information in a text box that has an asterisk (*); you have the option to choose whether or not to enter information in a text box that does not have an asterisk. To move between input boxes, use the TAB key on your keyboard, or use your mouse pointer to click in the text box. When you are finished filling in your profile information, click the “Apply” button to save your changes. You will see “Saved” displayed on your screen.
Click the “OK” button to return to the Profile menu.

©2010MegaPath, Inc. • Confidential and Proprietary
7
AAddddrreesssseess Addresses allows you to view your phone numbers and other identities that are used to make and receive calls. Click the “OK” button to return to the Profile menu.
©2010MegaPath, Inc. • Confidential and Proprietary
8
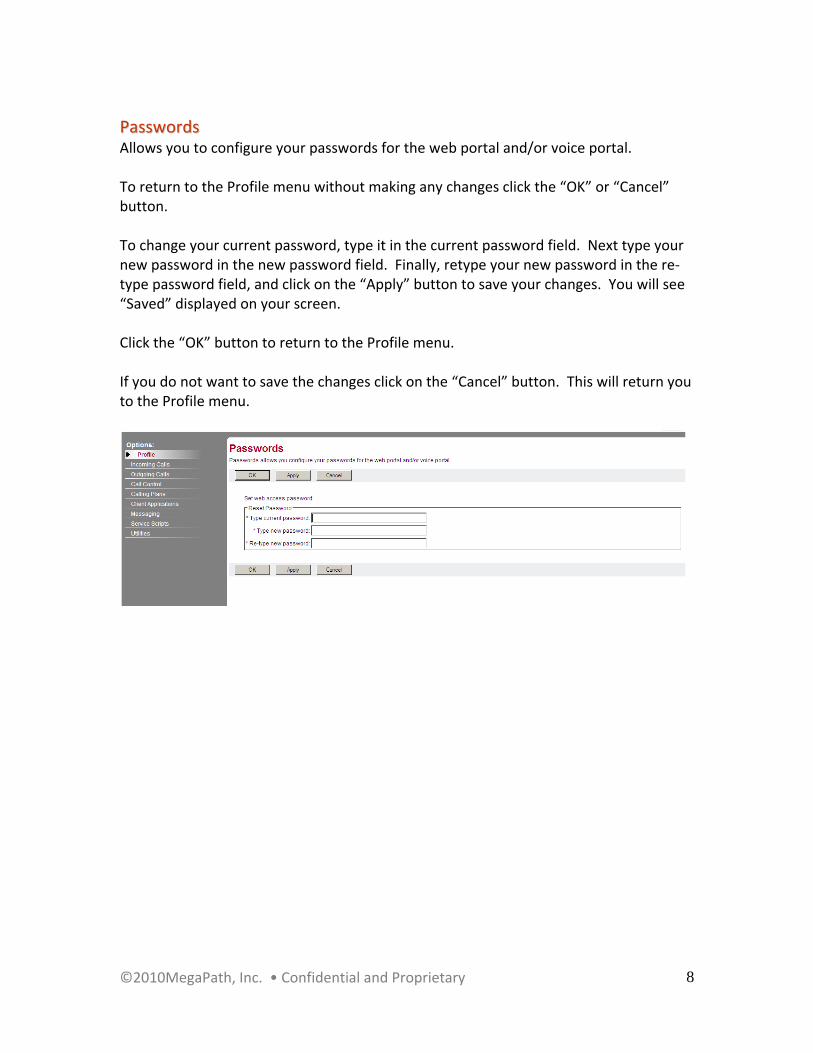
PPaasssswwoorrddss Allows you to configure your passwords for the web portal and/or voice portal. To return to the Profile menu without making any changes click the “OK” or “Cancel” button. To change your current password, type it in the current password field. Next type your new password in the new password field. Finally, retype your new password in the re‐type password field, and click on the “Apply” button to save your changes. You will see “Saved” displayed on your screen. Click the “OK” button to return to the Profile menu. If you do not want to save the changes click on the “Cancel” button. This will return you to the Profile menu.
©2010MegaPath, Inc. • Confidential and Proprietary
9
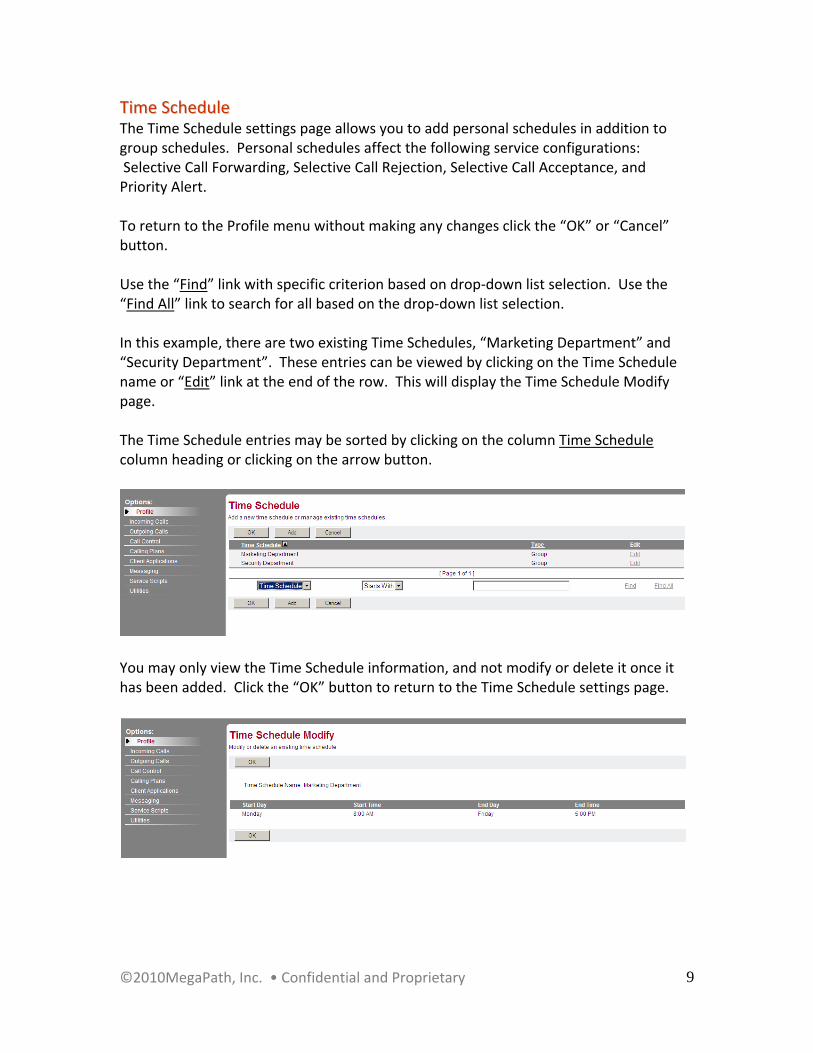
TTiimmee SScchheedduullee The Time Schedule settings page allows you to add personal schedules in addition to group schedules. Personal schedules affect the following service configurations: Selective Call Forwarding, Selective Call Rejection, Selective Call Acceptance, and Priority Alert. To return to the Profile menu without making any changes click the “OK” or “Cancel” button. Use the “Find” link with specific criterion based on drop‐down list selection. Use the “Find All” link to search for all based on the drop‐down list selection. In this example, there are two existing Time Schedules, “Marketing Department” and “Security Department”. These entries can be viewed by clicking on the Time Schedule name or “Edit” link at the end of the row. This will display the Time Schedule Modify page. The Time Schedule entries may be sorted by clicking on the column Time Schedule column heading or clicking on the arrow button.
You may only view the Time Schedule information, and not modify or delete it once it has been added. Click the “OK” button to return to the Time Schedule settings page.
©2010MegaPath, Inc. • Confidential and Proprietary
10
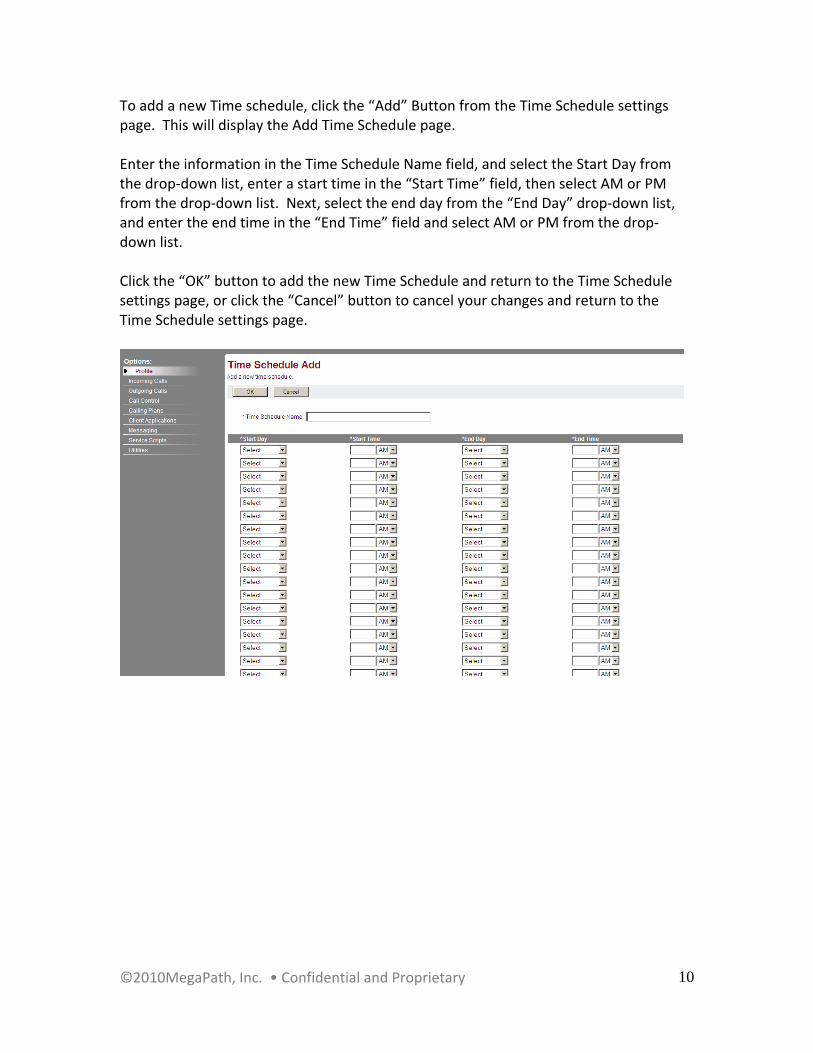
To add a new Time schedule, click the “Add” Button from the Time Schedule settings page. This will display the Add Time Schedule page. Enter the information in the Time Schedule Name field, and select the Start Day from the drop‐down list, enter a start time in the “Start Time” field, then select AM or PM from the drop‐down list. Next, select the end day from the “End Day” drop‐down list, and enter the end time in the “End Time” field and select AM or PM from the drop‐down list. Click the “OK” button to add the new Time Schedule and return to the Time Schedule settings page, or click the “Cancel” button to cancel your changes and return to the Time Schedule settings page.

©2010MegaPath, Inc. • Confidential and Proprietary
11
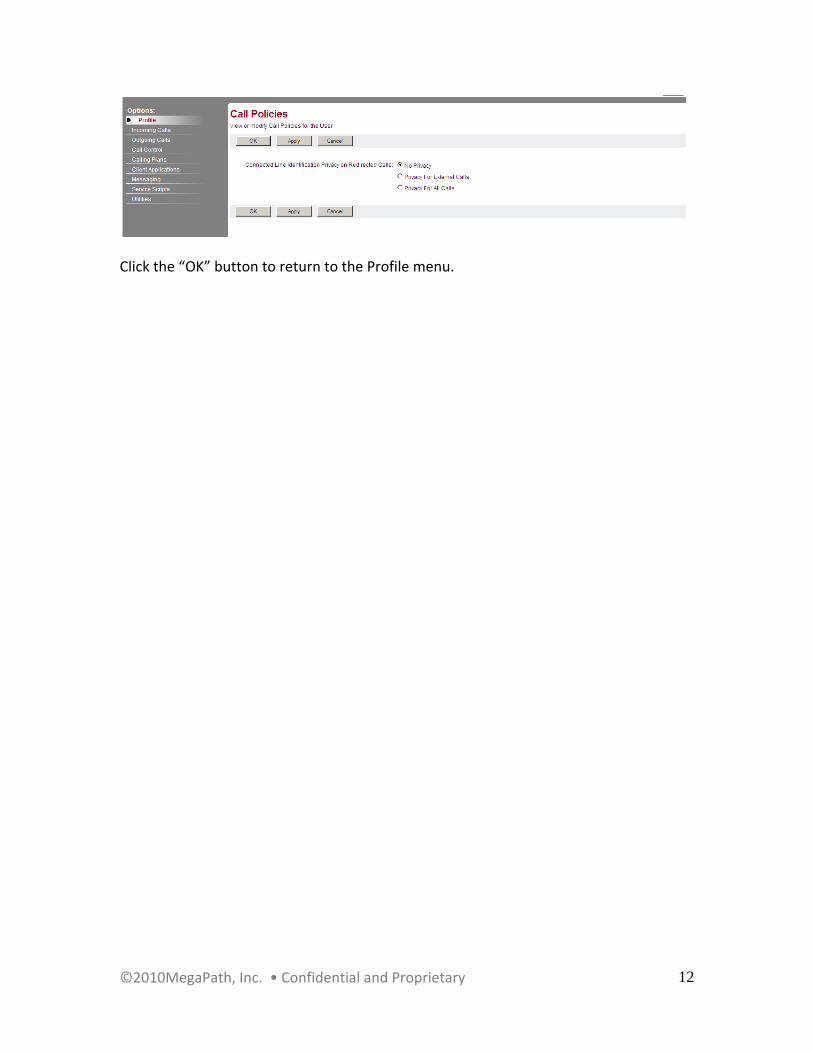
CCaallll PPoolliicciieess View or modify Call Policies for the User The Call Policies settings page is used to view or modify call policies for a user. To return to the Profile menu without making any changes click the “OK” or “Cancel” button. The Connected Line Identification Privacy on Redirected Calls option applies to redirections and forkings before and after answer including Call Forwarding, Blind Transfer, Transfer with Consultation, Sequential Ringing, and Simultaneous Ringing. This option does not apply to services that are not considered redirections or forkings, such as Automatic Hold/Retrieve, Call Pickup, Call Park, Directed Call Pickup, Directed Call Pickup with Barge‐in, all types of Recalls, and so on.
No Privacy" ‐ This is the default value. When set to this option, the redirecting party allows the Connected Line Identification Presentation of the redirect destination to be sent to the remote party.
"Privacy for External Calls" ‐ When this option is selected, the redirecting party allows the Connected Line Identification Presentation of the redirect destination to be sent to the remote party only when the remote party is in the same group/enterprise as the redirecting party. If the remote party is not in the same group/enterprise as the redirecting party (in other words, is viewed as a network subscriber), then the Connected Line Identification Presentation sent to the remote party is the Connected Line Identification Presentation of the redirecting party, and not the Connected Line Identification Presentation of the redirect destination.
"Privacy for All Calls" ‐ When this option is selected, the redirecting party never allows the Connected Line Identification Presentation of the redirect destination to be sent to the remote party. The Connected Line Identification Presentation sent to the remote party is always the Connected Line Identification Presentation of the redirecting party, and not the Connected Line Identification Presentation of the redirect destination.
No privacy is the default value. To change the setting, from the default, select one of the alternative call policies, either “Privacy for External Calls” or “Privacy for All Calls”. Click the “Apply” button to save the changes. You will see “Saved” displayed on your screen.
©2010MegaPath, Inc. • Confidential and Proprietary
12
Click the “OK” button to return to the Profile menu.

©2010MegaPath, Inc. • Confidential and Proprietary
13
PPrriivvaaccyy User Privacy allows you to exclude yourself from Group and Enterprise Directory listings. By default all user names and numbers appear in Group and Enterprise directory listings. These listings are accessible via the User – Utilities menu and the Call Manager Group/Enterprise tab. The Profile – Privacy setting page allows you to eliminate your name from these directory listings. With privacy on, when another user does a directory listing, your name and information will not appear. With privacy off, you name appears as usual. NOTE: Turning Privacy on hides your name and number from other users in your own group/enterprise and from group administrators. It does not hide it in LDAP listings or Outlook listings, nor does it remove it from people’s personal directories. To return to the Profile menu without making any changes click the “OK” or “Cancel” button. Enable Directory Privacy “Off” is the default value. To change the setting, from the default, click the “On” option. Click the “Apply” button to save the changes. You will see “Saved” displayed on your screen.
Click the “OK” button to return to the Profile menu.
©2010MegaPath, Inc. • Confidential and Proprietary
14
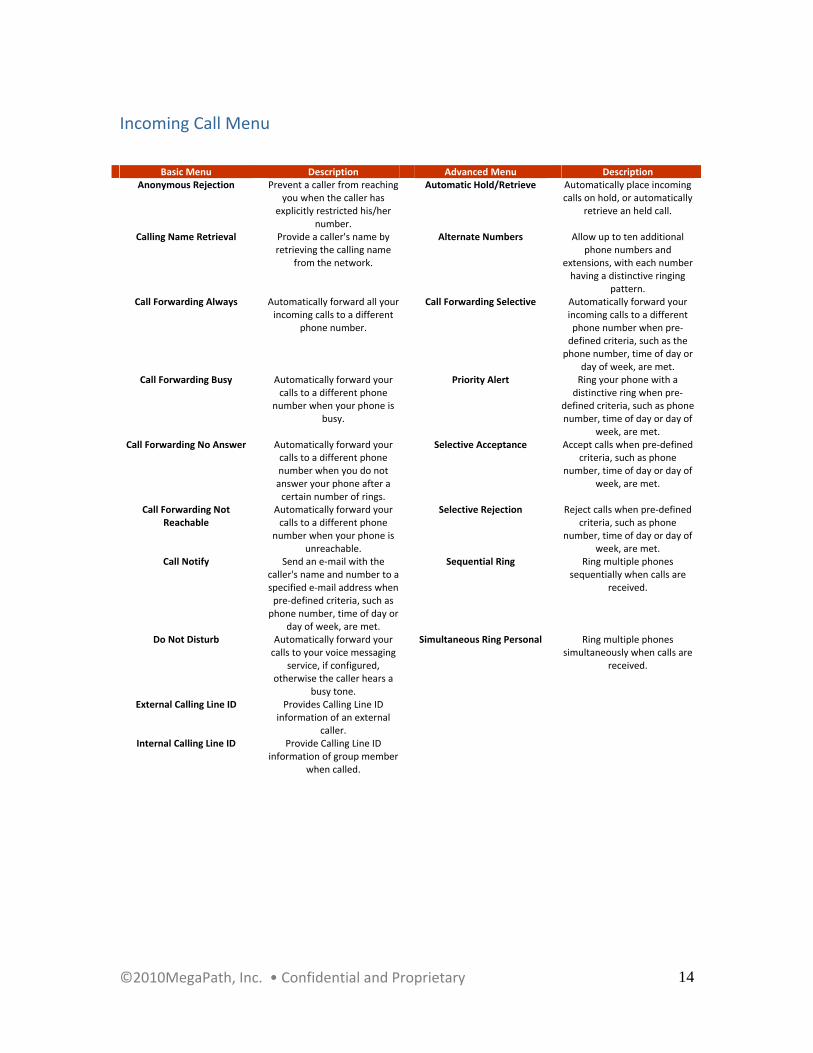
Incoming Call Menu
Basic Menu Description Advanced Menu Description
Anonymous Rejection Prevent a caller from reaching you when the caller has
explicitly restricted his/her number.
Automatic Hold/Retrieve Automatically place incoming calls on hold, or automatically
retrieve an held call.
Calling Name Retrieval Provide a caller's name by retrieving the calling name
from the network.
Alternate Numbers Allow up to ten additional phone numbers and
extensions, with each number having a distinctive ringing
pattern. Call Forwarding Always Automatically forward all your
incoming calls to a different phone number.
Call Forwarding Selective Automatically forward your incoming calls to a different phone number when pre‐defined criteria, such as the phone number, time of day or
day of week, are met. Call Forwarding Busy Automatically forward your
calls to a different phone number when your phone is
busy.
Priority Alert Ring your phone with a distinctive ring when pre‐
defined criteria, such as phone number, time of day or day of
week, are met. Call Forwarding No Answer Automatically forward your
calls to a different phone number when you do not answer your phone after a certain number of rings.
Selective Acceptance Accept calls when pre‐defined criteria, such as phone
number, time of day or day of week, are met.
Call Forwarding Not Reachable
Automatically forward your calls to a different phone
number when your phone is unreachable.
Selective Rejection Reject calls when pre‐defined criteria, such as phone
number, time of day or day of week, are met.
Call Notify Send an e‐mail with the caller's name and number to a specified e‐mail address when pre‐defined criteria, such as phone number, time of day or
day of week, are met.
Sequential Ring Ring multiple phones sequentially when calls are
received.
Do Not Disturb Automatically forward your calls to your voice messaging
service, if configured, otherwise the caller hears a
busy tone.
Simultaneous Ring Personal Ring multiple phones simultaneously when calls are
received.
External Calling Line ID Provides Calling Line ID information of an external
caller.
Internal Calling Line ID Provide Calling Line ID information of group member
when called.

©2010MegaPath, Inc. • Confidential and Proprietary
15

©2010MegaPath, Inc. • Confidential and Proprietary
16
AAnnoonnyymmoouuss RReejjeeccttiioonn Anonymous Rejection is a feature that prevents a caller from reaching you when the caller has explicitly restricted his/her phone number. Anonymous Call Rejection allows you to reject calls from callers who have blocked the display of their number. Only deliberate anonymous numbers are rejected. Callers whose numbers are unavailable are not rejected. Callers that are rejected are informed that you are not accepting calls from unidentified callers. Your phone does not ring and you do not receive any indication that they called. However, this does not apply to calls within your group. To return to the Incoming Calls menu without making any changes click the “OK” or “Cancel” button. This feature is an “On” or “Off” feature. The default setting is “Off”. To turn this feature “On”, go to the Incoming Calls menu, and select Anonymous Call Rejection – Off. After you select Anonymous Call Rejection – Off, the Anonymous Call Rejection settings page is displayed.
To turn Anonymous Call Rejection “On”, click the “On” option, and then click “Apply” to save the setting.
©2010MegaPath, Inc. • Confidential and Proprietary
17
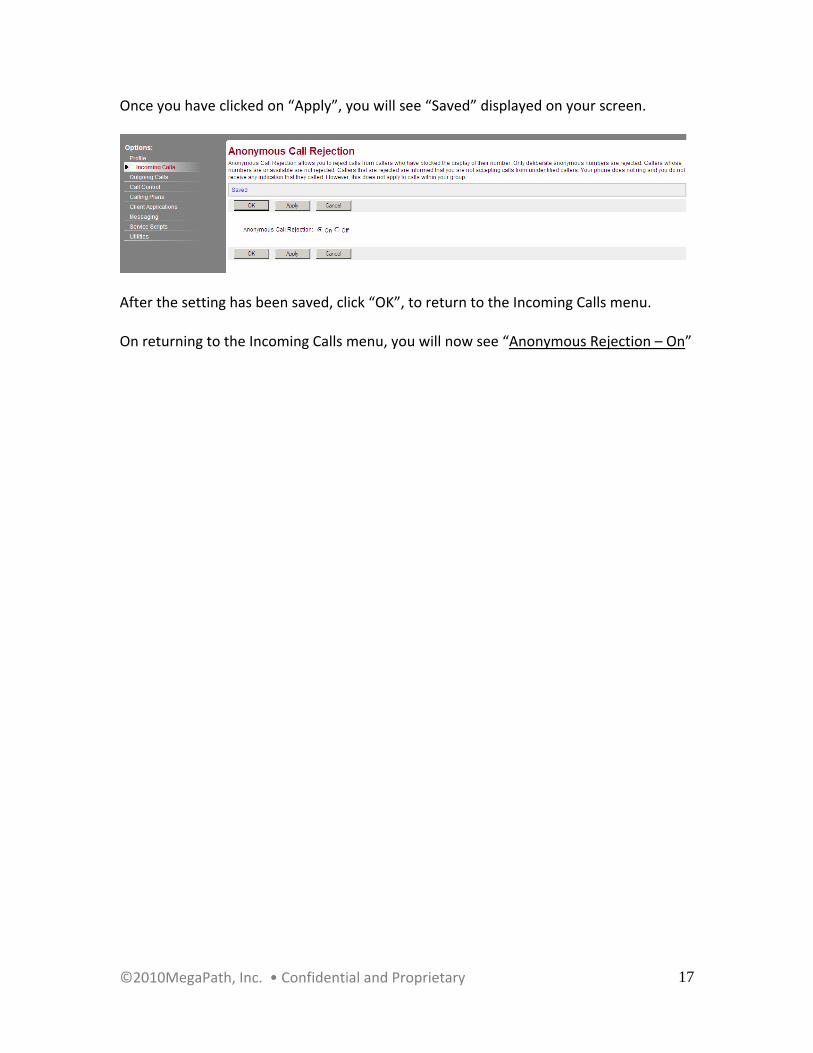
Once you have clicked on “Apply”, you will see “Saved” displayed on your screen.
After the setting has been saved, click “OK”, to return to the Incoming Calls menu. On returning to the Incoming Calls menu, you will now see “Anonymous Rejection – On”
©2010MegaPath, Inc. • Confidential and Proprietary
18
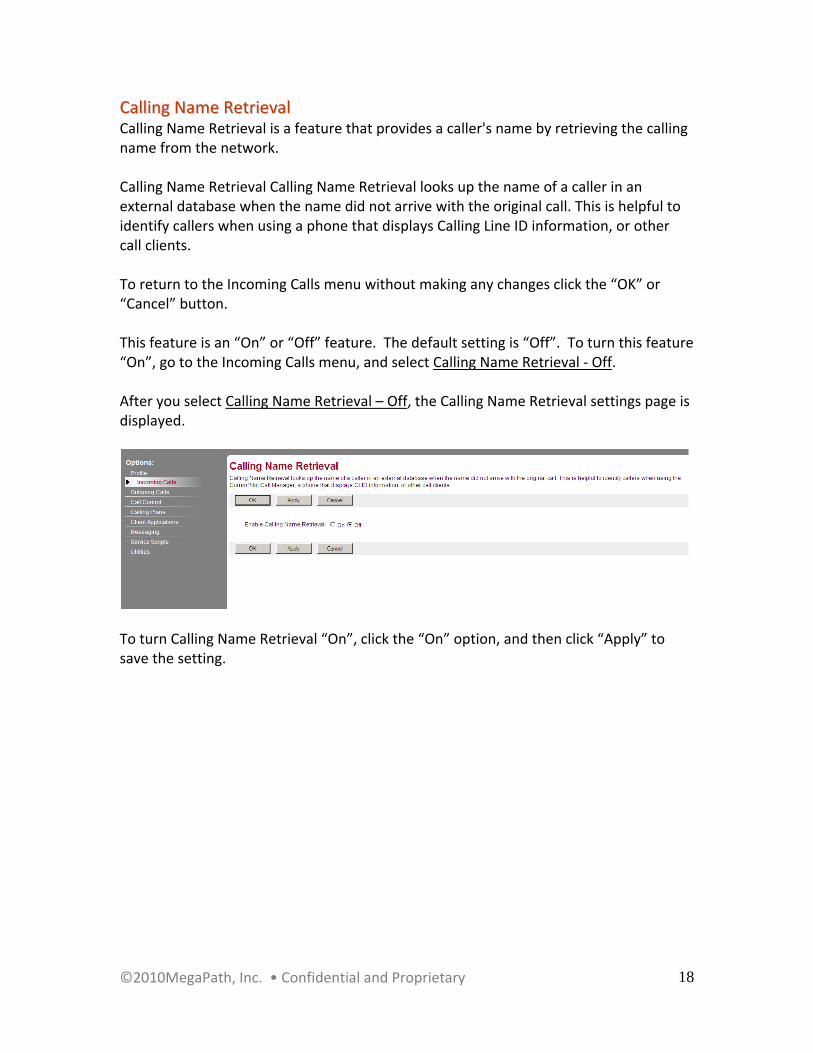
CCaalllliinngg NNaammee RReettrriieevvaall Calling Name Retrieval is a feature that provides a caller's name by retrieving the calling name from the network. Calling Name Retrieval Calling Name Retrieval looks up the name of a caller in an external database when the name did not arrive with the original call. This is helpful to identify callers when using a phone that displays Calling Line ID information, or other call clients. To return to the Incoming Calls menu without making any changes click the “OK” or “Cancel” button. This feature is an “On” or “Off” feature. The default setting is “Off”. To turn this feature “On”, go to the Incoming Calls menu, and select Calling Name Retrieval ‐ Off. After you select Calling Name Retrieval – Off, the Calling Name Retrieval settings page is displayed.
To turn Calling Name Retrieval “On”, click the “On” option, and then click “Apply” to save the setting.

©2010MegaPath, Inc. • Confidential and Proprietary
19
Once you have clicked on “Apply”, you will see “Saved” displayed on your screen.
After the setting has been saved, click “OK”, to return to the Incoming Calls menu. On returning to the Incoming Calls menu, you will now see “Calling Name Retrieval – On”
©2010MegaPath, Inc. • Confidential and Proprietary
20
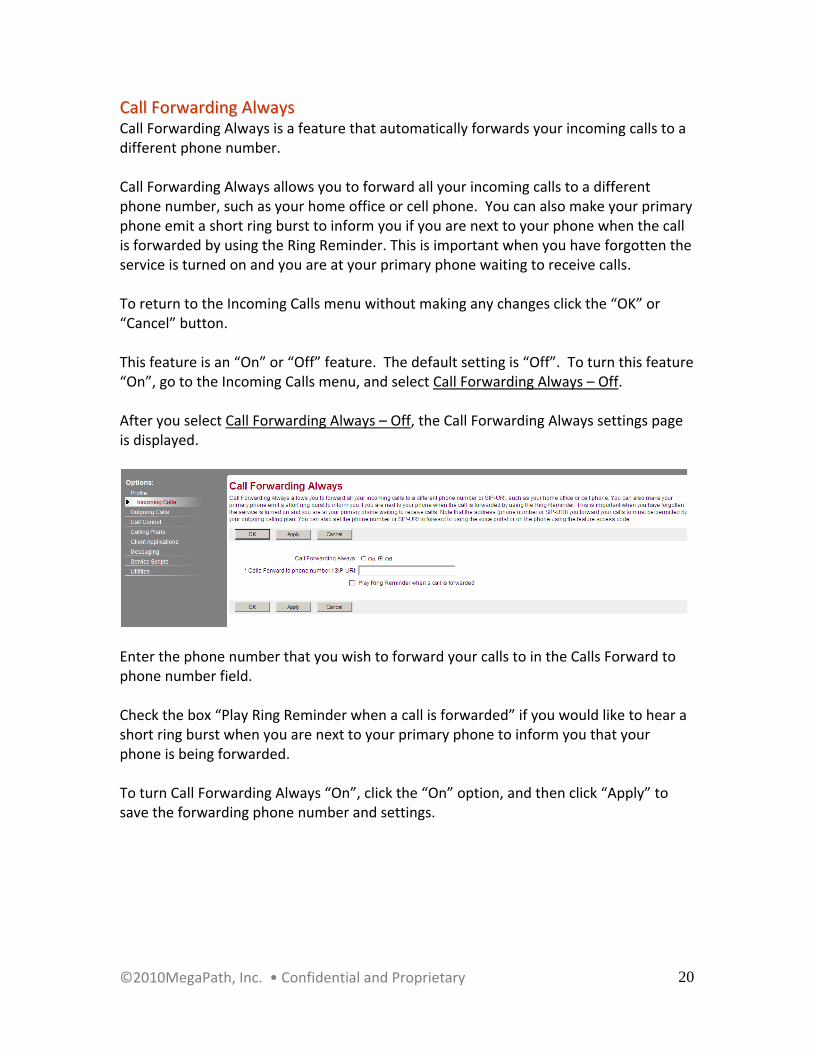
CCaallll FFoorrwwaarrddiinngg AAllwwaayyss Call Forwarding Always is a feature that automatically forwards your incoming calls to a different phone number. Call Forwarding Always allows you to forward all your incoming calls to a different phone number, such as your home office or cell phone. You can also make your primary phone emit a short ring burst to inform you if you are next to your phone when the call is forwarded by using the Ring Reminder. This is important when you have forgotten the service is turned on and you are at your primary phone waiting to receive calls. To return to the Incoming Calls menu without making any changes click the “OK” or “Cancel” button. This feature is an “On” or “Off” feature. The default setting is “Off”. To turn this feature “On”, go to the Incoming Calls menu, and select Call Forwarding Always – Off. After you select Call Forwarding Always – Off, the Call Forwarding Always settings page is displayed.
Enter the phone number that you wish to forward your calls to in the Calls Forward to phone number field. Check the box “Play Ring Reminder when a call is forwarded” if you would like to hear a short ring burst when you are next to your primary phone to inform you that your phone is being forwarded. To turn Call Forwarding Always “On”, click the “On” option, and then click “Apply” to save the forwarding phone number and settings.

©2010MegaPath, Inc. • Confidential and Proprietary
21
Once you have clicked on “Apply”, you will see “Saved” displayed on your screen.
All of your incoming calls will now be forwarded to the phone number that you specified. After the setting has been saved, click “OK”, to return to the Incoming Calls menu. On returning to the Incoming Calls menu, you will now see “Call Forwarding Always – On” Note: If you return and turn the Call Forwarding Always setting “Off”, the number that you previously entered in the Calls Forward to phone number field is stored for future use. In addition, the “Play Ring Reminder” field remains checked.
©2010MegaPath, Inc. • Confidential and Proprietary
22
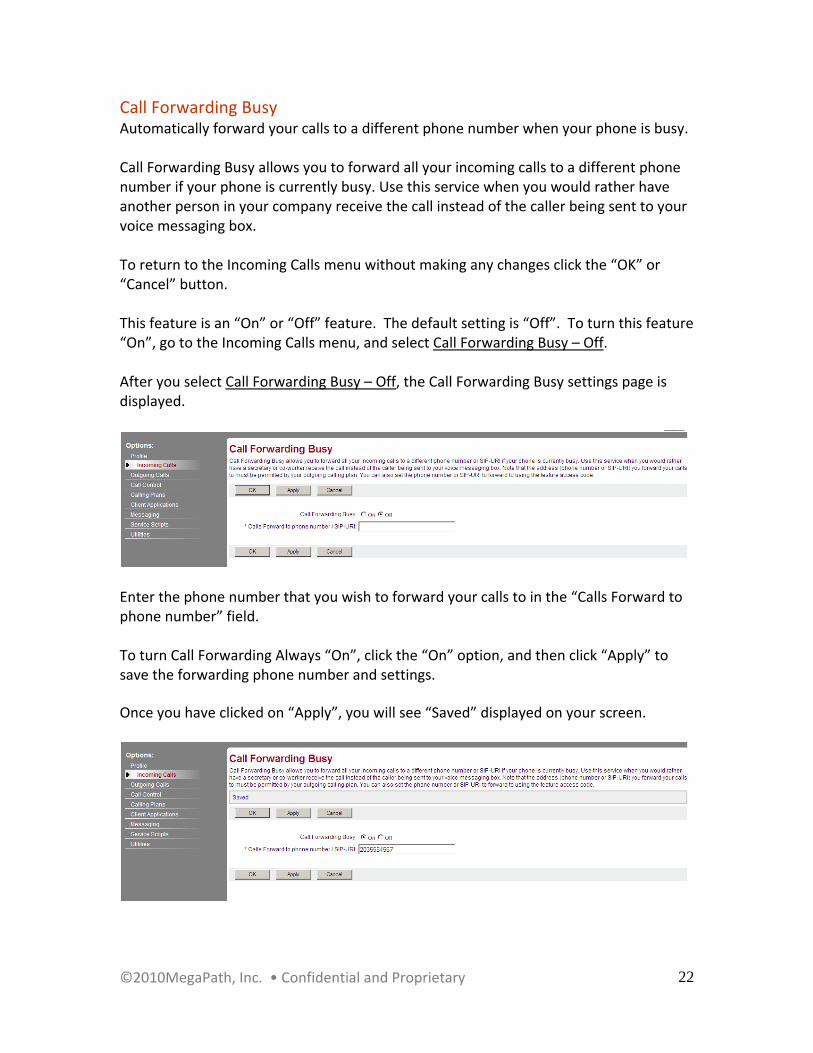
Call Forwarding Busy Automatically forward your calls to a different phone number when your phone is busy. Call Forwarding Busy allows you to forward all your incoming calls to a different phone number if your phone is currently busy. Use this service when you would rather have another person in your company receive the call instead of the caller being sent to your voice messaging box. To return to the Incoming Calls menu without making any changes click the “OK” or “Cancel” button. This feature is an “On” or “Off” feature. The default setting is “Off”. To turn this feature “On”, go to the Incoming Calls menu, and select Call Forwarding Busy – Off. After you select Call Forwarding Busy – Off, the Call Forwarding Busy settings page is displayed.
Enter the phone number that you wish to forward your calls to in the “Calls Forward to phone number” field. To turn Call Forwarding Always “On”, click the “On” option, and then click “Apply” to save the forwarding phone number and settings. Once you have clicked on “Apply”, you will see “Saved” displayed on your screen.
©2010MegaPath, Inc. • Confidential and Proprietary
23
All of your incoming calls will now be forwarded to the phone number that you specified. After the setting has been saved, click “OK”, to return to the Incoming Calls menu. On returning to the Incoming Calls menu, you will now see “Call Forwarding Busy – On” Note: If you return and turn the Call Forwarding Busy setting “Off”, the number that you previously entered in the “Calls Forward to phone number” field is stored for future use.

©2010MegaPath, Inc. • Confidential and Proprietary
24
CCaallll FFoorrwwaarrddiinngg NNoo AAnnsswweerr Call Forwarding No Answer is a feature that automatically forward your calls to a different phone number when you do not answer your phone after a certain number of rings. Call Forwarding No Answer allows you to forward all your incoming calls to a different phone number if your phone is currently busy. Use this service when you would rather have another person in your company receive the call instead of the caller being sent to your voice messaging box. To return to the Incoming Calls menu without making any changes click the “OK” or “Cancel” button. This feature is an “On” or “Off” feature. The default setting is “Off”. To turn this feature “On”, go to the Incoming Calls menu and select Call Forwarding No Answer – Off. After you select Call Forwarding No Answer – Off, the Call Forwarding No Answer settings page is displayed.
Enter the phone number that you wish to forward your calls to in the “Calls Forward to phone number” field. Enter the number of times you want your phone to ring before it is forwarded by clicking the number of rings you wish to set in the “Number of rings before forwarding” field. The options are None, 1, 2, 3, 4, 5, and 6. To turn Call Forwarding No Answer “On”, click the “On” option, and then click “Apply” to save the forwarding phone number and settings. Once you have clicked on “Apply”, you will see “Saved” displayed on your screen.

©2010MegaPath, Inc. • Confidential and Proprietary
25
All of your incoming calls will now be forwarded to the phone number that you specified. After the setting has been saved, click “OK”, to return to the Incoming Calls menu. On returning to the Incoming Calls menu, you will now see “Call Forwarding No Answer – On” Note: If turn the Call Forwarding No Answer setting “Off”, the phone number that you previously entered in the Calls Forward to phone number field is stored for future use. In addition, the setting for the number of rings before forwarding is saved.
©2010MegaPath, Inc. • Confidential and Proprietary
26
CCaallll FFoorrwwaarrddiinngg NNoott RReeaacchhaabbllee Call Forwarding Not Reachable is a feature that automatically forwards your calls to a different phone number when your phone is unreachable.
Call Forwarding Not Reachable allows you to forward all your incoming calls to a different phone when your device is not accessible by the system. To return to the Incoming Calls menu without making any changes click the “OK” or “Cancel” button.
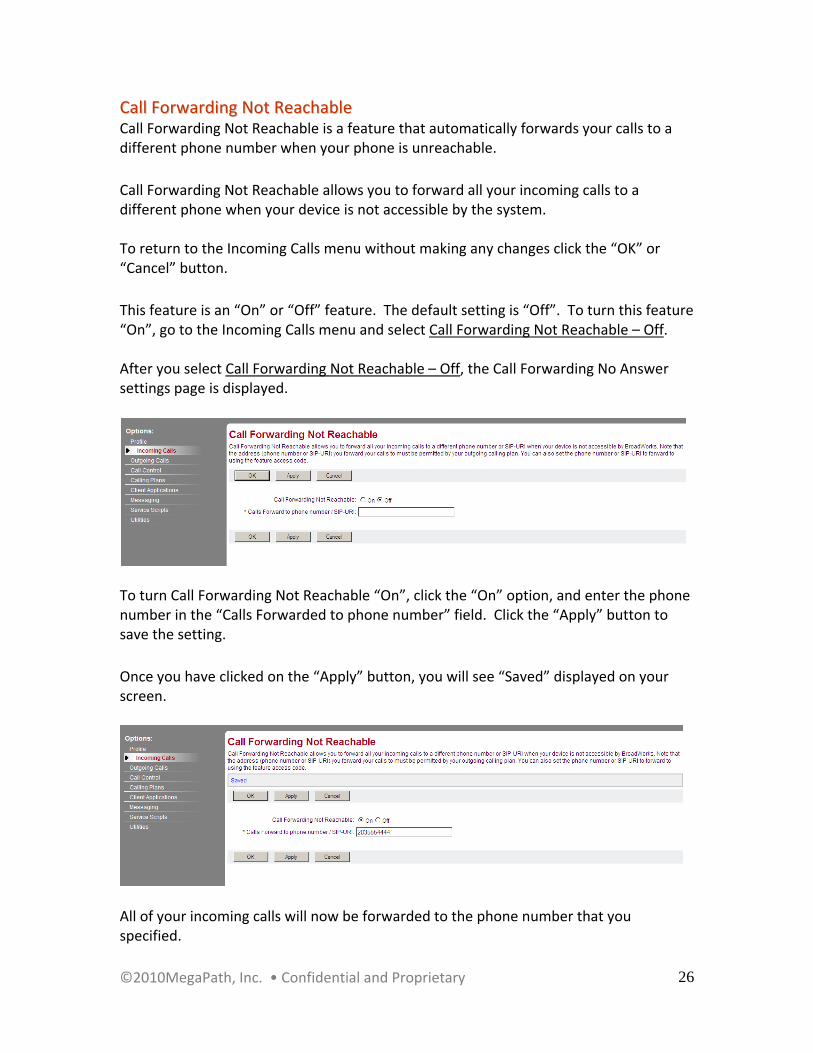
This feature is an “On” or “Off” feature. The default setting is “Off”. To turn this feature “On”, go to the Incoming Calls menu and select Call Forwarding Not Reachable – Off. After you select Call Forwarding Not Reachable – Off, the Call Forwarding No Answer settings page is displayed.
To turn Call Forwarding Not Reachable “On”, click the “On” option, and enter the phone number in the “Calls Forwarded to phone number” field. Click the “Apply” button to save the setting.
Once you have clicked on the “Apply” button, you will see “Saved” displayed on your screen.
All of your incoming calls will now be forwarded to the phone number that you specified.

©2010MegaPath, Inc. • Confidential and Proprietary
27
After the setting has been saved, click “OK”, to return to the Incoming Calls menu. On returning to the Incoming Calls menu, you will now see “Call Forwarding Not Reachable – On”

©2010MegaPath, Inc. • Confidential and Proprietary
28
CCaallll NNoottiiffyy Call Notify is a feature that sends an e‐mail with a caller's name and number to a specified e‐mail address based on criteria you set. Call Notify allows you to send a notification e‐mail containing the caller's name and number, if available, when the call matches your pre‐defined criteria. Use this feature to create an archive of callers or to determine if you missed any important calls. To return to the Incoming Calls menu without making any changes click the “OK” or “Cancel” button.
This feature is an “On” or “Off” feature. The default setting is “Off”. To turn this feature “On”, go to the Incoming Calls menu and select Call Notify – Off. After you select Call Notify – Off, the Call Notify settings page is displayed.
Enter the email address that you wish send the caller information collected, and then click the “Apply” button to save the email address. Once you have clicked on the “Apply” button, you will see “Saved” displayed on your screen.
Click on the “Add” button to create your pre‐defined criteria. This will display the “Call Notify Add” page.
©2010MegaPath, Inc. • Confidential and Proprietary
29
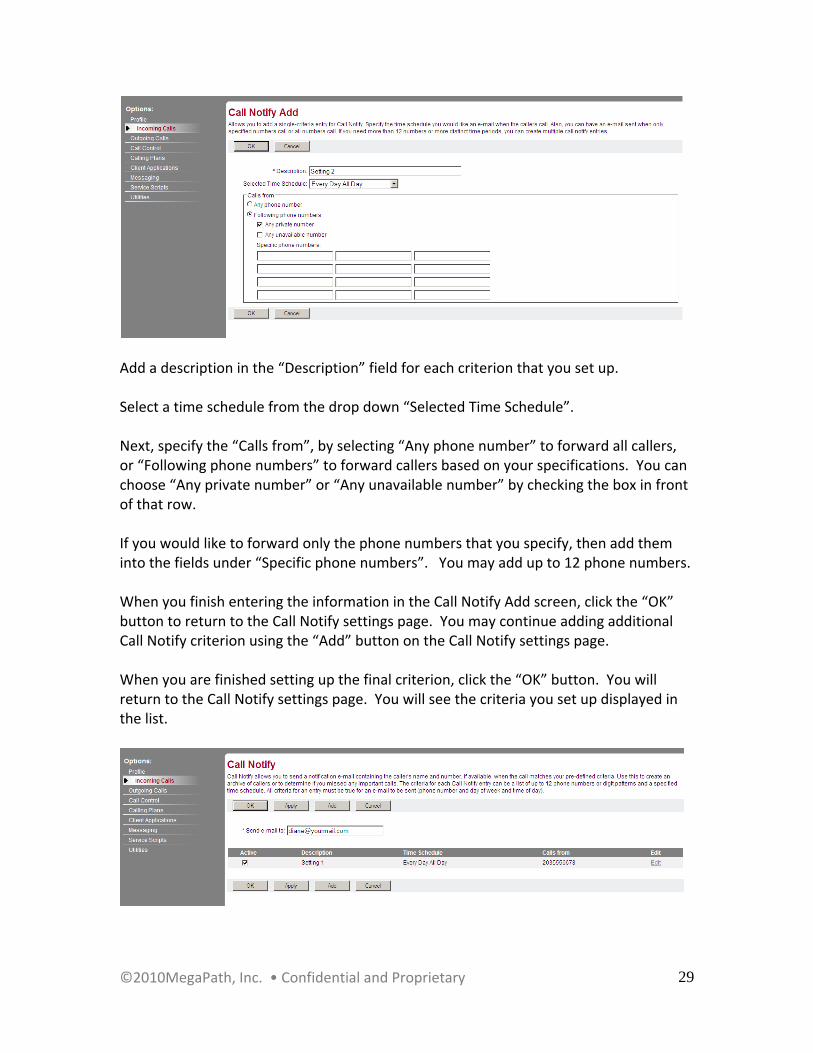
Add a description in the “Description” field for each criterion that you set up. Select a time schedule from the drop down “Selected Time Schedule”. Next, specify the “Calls from”, by selecting “Any phone number” to forward all callers, or “Following phone numbers” to forward callers based on your specifications. You can choose “Any private number” or “Any unavailable number” by checking the box in front of that row. If you would like to forward only the phone numbers that you specify, then add them into the fields under “Specific phone numbers”. You may add up to 12 phone numbers. When you finish entering the information in the Call Notify Add screen, click the “OK” button to return to the Call Notify settings page. You may continue adding additional Call Notify criterion using the “Add” button on the Call Notify settings page. When you are finished setting up the final criterion, click the “OK” button. You will return to the Call Notify settings page. You will see the criteria you set up displayed in the list.

©2010MegaPath, Inc. • Confidential and Proprietary
30
You can activate and deactivate Call Notify settings by checking or un‐checking the “Active” box in the front of the row you wish to activate or deactivate. To edit or delete an entry in the list click on the “Edit” link from the Call Notify settings page in the row that you wish to edit. When you click the “Edit” link, the “Call Notify Modify” page is displayed.
Once you are finished editing the Call Notify Modify page, click on the “OK” button to save the modifications, and return to Call Notify settings page. To turn Call Notify “On”, click the “OK” button. You will be returned to the Incoming Calls menu. On returning to the Incoming Calls menu, you will now see “Call Notify – On” To turn Call Notify “Off”, deselect any “Active” check boxes. Once all of the entries are deselected, and you click the “OK” button, Call Notify will be turned “Off” again, and you will see this on the Incoming Calls menu.

©2010MegaPath, Inc. • Confidential and Proprietary
31
DDoo NNoott DDiissttuurrbb Do Not Disturb is a feature that allows you to automatically forward your calls to your voice messaging service, if configured, otherwise the caller hears a busy tone. Do Not Disturb allows you to send your calls directly to your voice messaging box without ringing your phone. In addition, you can make your primary phone emit a short ring burst to remind you when the call is being sent to voice messaging by using the Ring Reminder. This is important when you have forgotten the service is turned on and you are at your phone waiting to receive calls. To return to the Incoming Calls menu without making any changes click the “OK” or “Cancel” button.
This feature is an “On” or “Off” feature. The default setting is “Off”. To turn this feature “On”, go to the Incoming Calls menu and select Do Not Disturb – Off. After you select Do Not Disturb – Off, the Do Not Disturb settings page is displayed.
To turn Do Not Disturb “On”, click the “On” selection. If you would like to play a ring reminder when a call is blocked, check the box “Play Ring Reminder when a call is blocked”. Click on “Apply” to save the setting, and then click on “OK” to return to the Incoming Calls menu.

©2010MegaPath, Inc. • Confidential and Proprietary
32
Once you have clicked on the “Apply” button, you will see “Saved” displayed on your screen.
On returning to the Incoming Calls menu, you will now see “Do Not Disturb – On” Note: When you turn “Do Not Disturb” Off, the “Play Ring Reminder when a call is blocked” selection remains checked.
©2010MegaPath, Inc. • Confidential and Proprietary
33
EExxtteerrnnaall CCaalllliinngg LLiinnee IIDD External Calling Line ID is a feature that provides Calling Line ID information of an external caller. External Calling Line ID Delivery allows the Calling Line name and number for callers from outside your group to be displayed. To return to the Incoming Calls menu without making any changes click the “OK” or “Cancel” button.
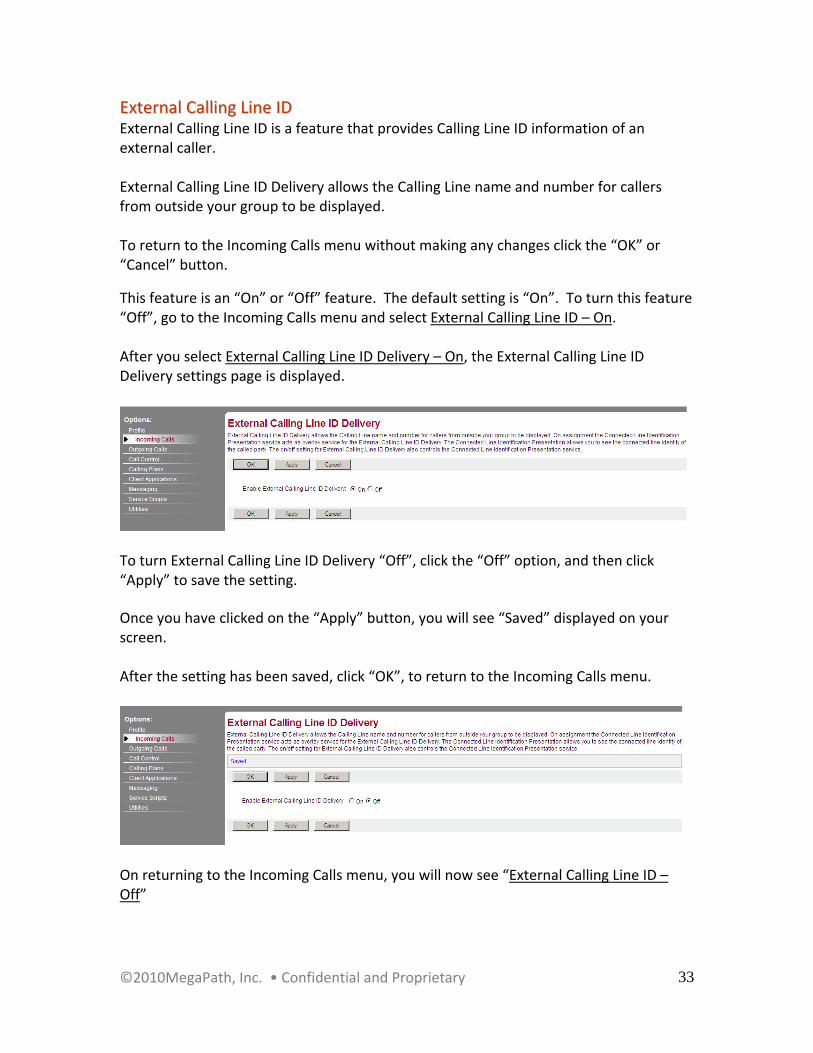
This feature is an “On” or “Off” feature. The default setting is “On”. To turn this feature “Off”, go to the Incoming Calls menu and select External Calling Line ID – On. After you select External Calling Line ID Delivery – On, the External Calling Line ID Delivery settings page is displayed.
To turn External Calling Line ID Delivery “Off”, click the “Off” option, and then click “Apply” to save the setting. Once you have clicked on the “Apply” button, you will see “Saved” displayed on your screen. After the setting has been saved, click “OK”, to return to the Incoming Calls menu.
On returning to the Incoming Calls menu, you will now see “External Calling Line ID – Off”

©2010MegaPath, Inc. • Confidential and Proprietary
34
IInntteerrnnaall CCaalllliinngg LLiinnee IIDD Internal Calling Line ID is a feature that provides Calling Line ID information of your group member when called. Internal Calling Line ID Delivery allows the Calling Line name and number for callers from inside your group to be displayed. To return to the Incoming Calls menu without making any changes click the “OK” or “Cancel” button.
This feature is an “On” or “Off” feature. The default setting is “On”. To turn this feature “Off”, go to the Incoming Calls menu and select Internal Calling Line ID – On. After you select Internal Calling Line ID Delivery – On, the Internal Calling Line ID Delivery settings page is displayed.
To turn Internal Calling Line ID Delivery “Off”, click the “Off” option, and then click the “Apply” button to save the setting. Once you have clicked on the “Apply” button, you will see “Saved” displayed on your screen.
After the setting has been saved, click “OK”, to return to the Incoming Calls menu. On returning to the Incoming Calls menu, you will now see “Internal Calling Line ID – Off”

©2010MegaPath, Inc. • Confidential and Proprietary
35
AAuuttoommaattiicc HHoolldd//RReettrriieevvee Automatically place incoming calls on hold, or automatically retrieve an held call. Automatic Hold and Retrieve provides an alternate method to hold and retrieve calls. Incoming calls are automatically held and retrieved without having to use feature access codes. To return to the Incoming Calls menu without making any changes click the “OK” or “Cancel” button.
This feature is an “On” or “Off” feature. The default setting is “Off”. To turn this feature “On”, go to the Incoming Calls menu and select Automatic Hold/Retrieve – Off. After you select Automatic Hold/Retrieve – Off, the Automatic Hold/Retrieve settings page is displayed.
To turn Automatic Hold/Retrieve “On”, click the “On” option. You can also set the number of seconds before the system automatically retrieves a call. The default is 120 seconds. After you are finished with your settings, click the “Apply” button to save the settings.

©2010MegaPath, Inc. • Confidential and Proprietary
36
Once you have clicked on the “Apply” button, you will see “Saved” displayed on your screen.
After the setting has been saved, click “OK”, to return to the Incoming Calls menu. On returning to the Incoming Calls menu, you will now see “Automatic Hold/Retrieve – On”

©2010MegaPath, Inc. • Confidential and Proprietary
37
AAlltteerrnnaattee NNuummbbeerrss The Alternate Numbers feature allows up to ten additional phone numbers and extensions, with each number having a distinctive ringing pattern be assigned to you.
Alternate Numbers allows up to ten additional phone numbers or extensions to be assigned in addition to your primary number and extension. All additional numbers and extensions ring your phone(s) just like your primary phone. In addition, you can specify a distinctive ringing pattern for each number, if your phone supports it. Only your administrator can configure new numbers and extensions for you. To return to the Incoming Calls menu without making any changes click the “OK” or “Cancel” button. To configure this feature, go to the Incoming Calls menu and select Alternate Numbers ‐ On. The default setting is “On”. To turn Distinctive Ring off, click on the “Off” option. After you select Alternate Numbers – On, the Alternate Numbers settings page is displayed.
To set up Alternate Numbers, select from the list of numbers in the Phone Number drop‐down list. This example does not contain any Alternate Numbers; therefore there is no list to choose from. NOTE: Your administrator will have to configure numbers for you first. Next add the Extension number in the provided field. Finally choose the ring pattern from the drop down options for the applicable “Alternate Number ID”. You may set up to 10 Alternate Number IDs.

©2010MegaPath, Inc. • Confidential and Proprietary
38
NOTE: There is no “modify” page for this feature. Modifications are made using the drop‐down lists.

©2010MegaPath, Inc. • Confidential and Proprietary
39
CCaallll FFoorrwwaarrddiinngg SSeelleeccttiivvee Call Forwarding Selective is a feature that allows you to automatically forward your incoming calls to a different phone number when pre‐defined criteria, such as the phone number, time of day or day of week, are met. Call Forwarding Selective allows you to forward specific calls matching your pre‐defined criteria to a different phone number. For example, use this service to forward calls from your manager, or an important customer to your cell phone, alternate business phone, or home phone. To return to the Incoming Calls menu without making any changes click the “OK” or “Cancel” button. This feature is an “On” or “Off” feature. The default setting is “Off”. To turn this feature “On”, go to the Incoming Calls menu and select Call Forwarding Selective – Off. After you select Call Forwarding Selective – Off, the Call Forwarding Selective settings page is displayed.
Begin by adding the phone number that you wish to receive your calls in the “Default Call Forward to phone number” field, and click on the “Apply” button to save the Default Call Forward phone number.

©2010MegaPath, Inc. • Confidential and Proprietary
40
Once you have clicked on the “Apply” button, you will see “Saved” displayed on your screen.
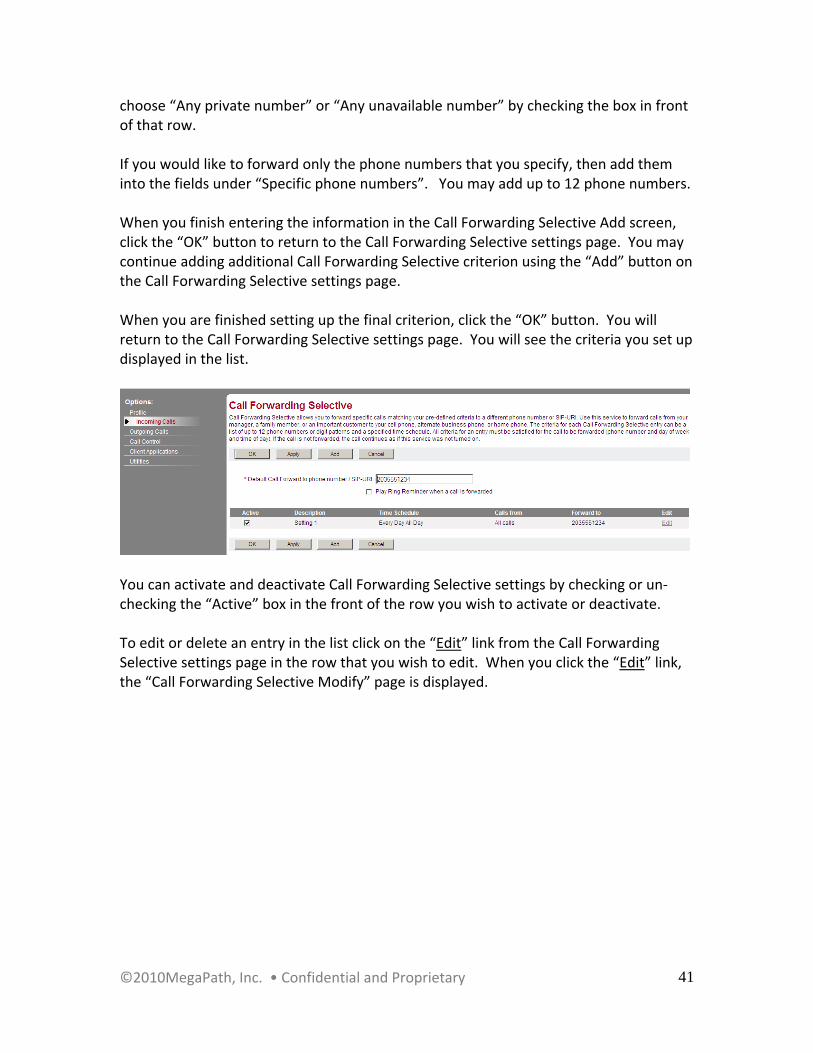
If you would like to ring your primary phone as a reminder that your phone is forwarded, check the box “Play Ring Reminder when a call is forwarded”. Click on the “Add” button to create your pre‐defined criteria. This will display the “Call Forwarding Selective Add” page.
Add a description in the “Description” field for each criterion that you set up. Select a time schedule from the drop down “Selected Time Schedule”. Select from the “Use Default Forward number” or “Forward to another number” selections. If you choose “Forward to another number”, then add a phone number in the field. Next, specify the “Calls from”, by selecting “Any phone number” to forward all callers, or “Following phone numbers” to forward callers based on your specifications. You can
©2010MegaPath, Inc. • Confidential and Proprietary
41
choose “Any private number” or “Any unavailable number” by checking the box in front of that row. If you would like to forward only the phone numbers that you specify, then add them into the fields under “Specific phone numbers”. You may add up to 12 phone numbers. When you finish entering the information in the Call Forwarding Selective Add screen, click the “OK” button to return to the Call Forwarding Selective settings page. You may continue adding additional Call Forwarding Selective criterion using the “Add” button on the Call Forwarding Selective settings page. When you are finished setting up the final criterion, click the “OK” button. You will return to the Call Forwarding Selective settings page. You will see the criteria you set up displayed in the list.
You can activate and deactivate Call Forwarding Selective settings by checking or un‐checking the “Active” box in the front of the row you wish to activate or deactivate. To edit or delete an entry in the list click on the “Edit” link from the Call Forwarding Selective settings page in the row that you wish to edit. When you click the “Edit” link, the “Call Forwarding Selective Modify” page is displayed.

©2010MegaPath, Inc. • Confidential and Proprietary
42
Once you are finished deleting or editing the Call Forwarding Selective Modify page, click on the “OK” button to save the modifications, and return to Call Forwarding Selective settings page. To turn Call Forwarding Selective “On”, click the “OK” button. You will be returned to the Incoming Calls menu. On returning to the Incoming Calls menu, you will now see “Call Forwarding Selective – On” To turn Call Forwarding Selective “Off”, deselect the “Active” check boxes from the Call Forwarding Selective settings page. Once all of the entries are deselected, and you click the “OK” button, Call Forwarding Selective will be turned “Off” again, and you will see this on the Incoming Calls menu.

©2010MegaPath, Inc. • Confidential and Proprietary
43
PPrriioorriittyy AAlleerrtt Ring your phone with a distinctive ring when pre‐defined criteria, such as phone number, time of day or day of week, are met.
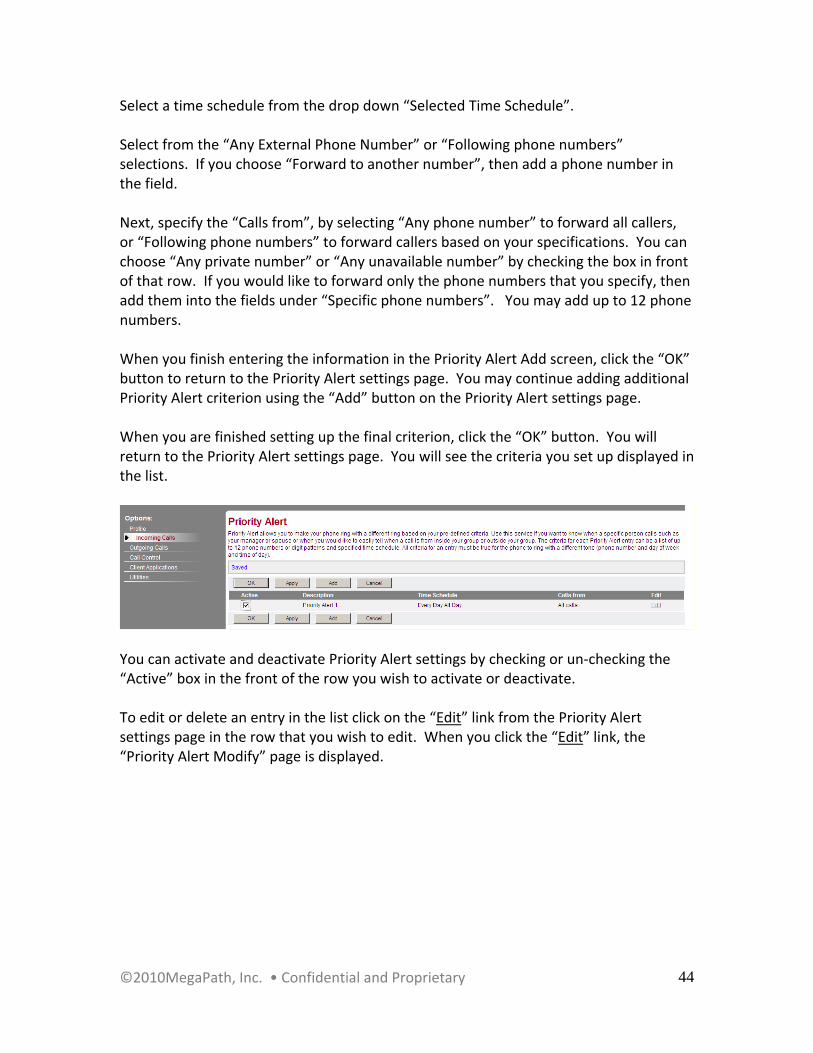
Priority Alert allows you to make your phone ring with a different ring based on your pre‐defined criteria. Use this service if you want to know when a specific person calls such as your manager or spouse or when you would like to easily tell when a call is from inside your group or outside your group. You may add up to 12 phone numbers with your defined criteria. To return to the Incoming Calls menu without making any changes click the “OK” or “Cancel” button. This feature is an “On” or “Off” feature. The default setting is “Off”. To turn this feature “On”, go to the Incoming Calls menu and select Priority Alert – Off. After you select Priority Alert – Off, the Priority Alert settings page is displayed.
To add Priority Alert settings, click the “Add” button. This will take you to the Priority Alert Add page.
Add a description in the “Description” field for each criterion that you set up.
©2010MegaPath, Inc. • Confidential and Proprietary
44
Select a time schedule from the drop down “Selected Time Schedule”. Select from the “Any External Phone Number” or “Following phone numbers” selections. If you choose “Forward to another number”, then add a phone number in the field. Next, specify the “Calls from”, by selecting “Any phone number” to forward all callers, or “Following phone numbers” to forward callers based on your specifications. You can choose “Any private number” or “Any unavailable number” by checking the box in front of that row. If you would like to forward only the phone numbers that you specify, then add them into the fields under “Specific phone numbers”. You may add up to 12 phone numbers. When you finish entering the information in the Priority Alert Add screen, click the “OK” button to return to the Priority Alert settings page. You may continue adding additional Priority Alert criterion using the “Add” button on the Priority Alert settings page. When you are finished setting up the final criterion, click the “OK” button. You will return to the Priority Alert settings page. You will see the criteria you set up displayed in the list.
You can activate and deactivate Priority Alert settings by checking or un‐checking the “Active” box in the front of the row you wish to activate or deactivate. To edit or delete an entry in the list click on the “Edit” link from the Priority Alert settings page in the row that you wish to edit. When you click the “Edit” link, the “Priority Alert Modify” page is displayed.

©2010MegaPath, Inc. • Confidential and Proprietary
45
Once you are finished deleting or editing the Priority Alert Modify page, click on the “OK” button to save the modifications, and return to Priority Alert settings page. To turn Priority Alert “On”, click the “OK” button. You will be returned to the Incoming Calls menu. On returning to the Incoming Calls menu, you will now see “Priority Alert – On” To turn Priority Alert “Off”, deselect the “Active” check boxes from the Priority Alert settings page. Once all of the entries are deselected, and you click the “OK” button, Priority Alert will be turned “Off” again, and you will see this on the Incoming Calls menu.

©2010MegaPath, Inc. • Confidential and Proprietary
46
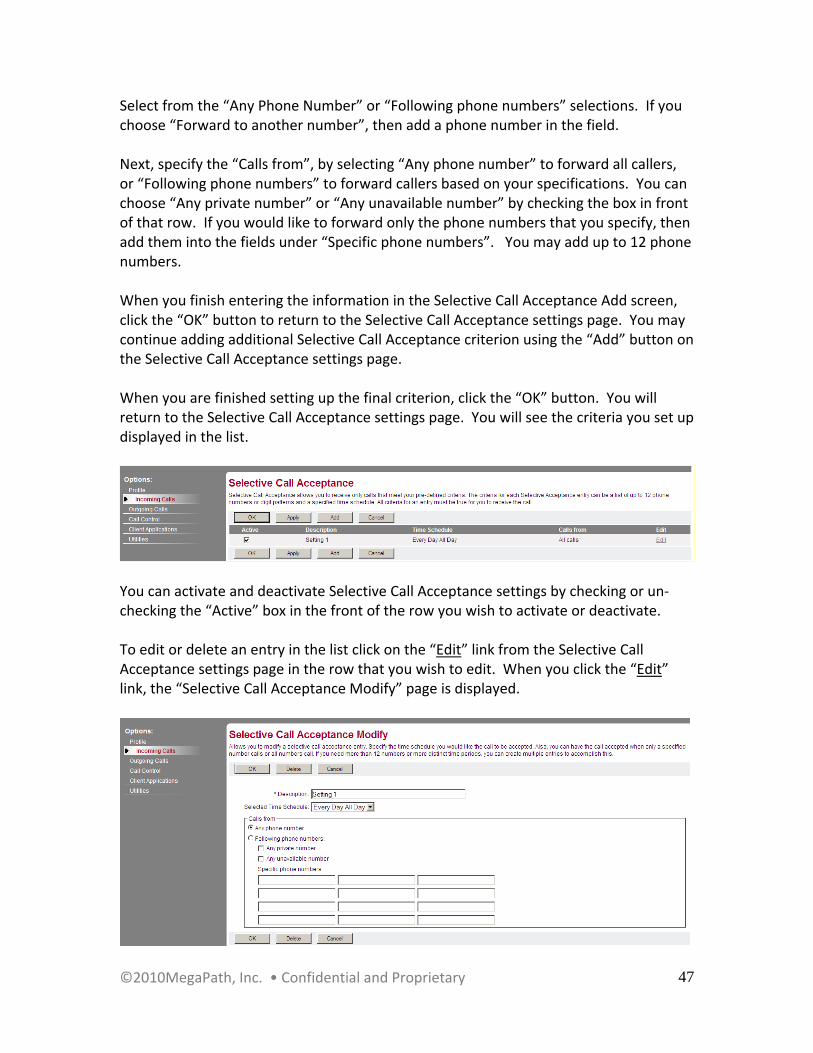
SSeelleeccttiivvee AAcccceeppttaannccee Selective Acceptance is a feature that allows you to accept calls when pre‐defined criteria, such as phone number, time of day or day of week, are met. Selective Call Acceptance allows you to receive only calls that meet your pre‐defined criteria. The criteria for each Selective Acceptance entry can be a list of up to 12 phone numbers. To return to the Incoming Calls menu without making any changes click the “OK” or “Cancel” button. This feature is an “On” or “Off” feature. The default setting is “Off”. To turn this feature “On”, go to the Incoming Calls menu and select Selective Acceptance – Off. After you select Selective Acceptance – Off, the Selective Call Acceptance settings page is displayed.
To add Selective Call Acceptance settings, click the “Add” button. This will take you to the “Selective Call Acceptance Add” page.
Add a description in the “Description” field for each criterion that you set up. Select a time schedule from the drop down “Selected Time Schedule”.
©2010MegaPath, Inc. • Confidential and Proprietary
47
Select from the “Any Phone Number” or “Following phone numbers” selections. If you choose “Forward to another number”, then add a phone number in the field. Next, specify the “Calls from”, by selecting “Any phone number” to forward all callers, or “Following phone numbers” to forward callers based on your specifications. You can choose “Any private number” or “Any unavailable number” by checking the box in front of that row. If you would like to forward only the phone numbers that you specify, then add them into the fields under “Specific phone numbers”. You may add up to 12 phone numbers. When you finish entering the information in the Selective Call Acceptance Add screen, click the “OK” button to return to the Selective Call Acceptance settings page. You may continue adding additional Selective Call Acceptance criterion using the “Add” button on the Selective Call Acceptance settings page. When you are finished setting up the final criterion, click the “OK” button. You will return to the Selective Call Acceptance settings page. You will see the criteria you set up displayed in the list.
You can activate and deactivate Selective Call Acceptance settings by checking or un‐checking the “Active” box in the front of the row you wish to activate or deactivate. To edit or delete an entry in the list click on the “Edit” link from the Selective Call Acceptance settings page in the row that you wish to edit. When you click the “Edit” link, the “Selective Call Acceptance Modify” page is displayed.

©2010MegaPath, Inc. • Confidential and Proprietary
48
Once you are finished deleting or editing the Selective Call Acceptance Modify page, click on the “OK” button to save the modifications, and return to Selective Call Acceptance settings page. To turn Selective Acceptance “On”, click the “OK” button. You will be returned to the Incoming Calls menu. On returning to the Incoming Calls menu, you will now see “Selective Acceptance – On” To turn Selective Acceptance “Off”, deselect the “Active” check boxes from the Selective Call Acceptance settings page. Once all of the entries are deselected, and you click the “OK” button, Selective Acceptance will be turned “Off” again, and you will see this on the Incoming Calls menu.

©2010MegaPath, Inc. • Confidential and Proprietary
49
SSeelleeccttiivvee RReejjeeccttiioonn Selective Rejection is a feature that allows you to reject calls when pre‐defined criteria, such as phone number, time of day or day of week, are met.
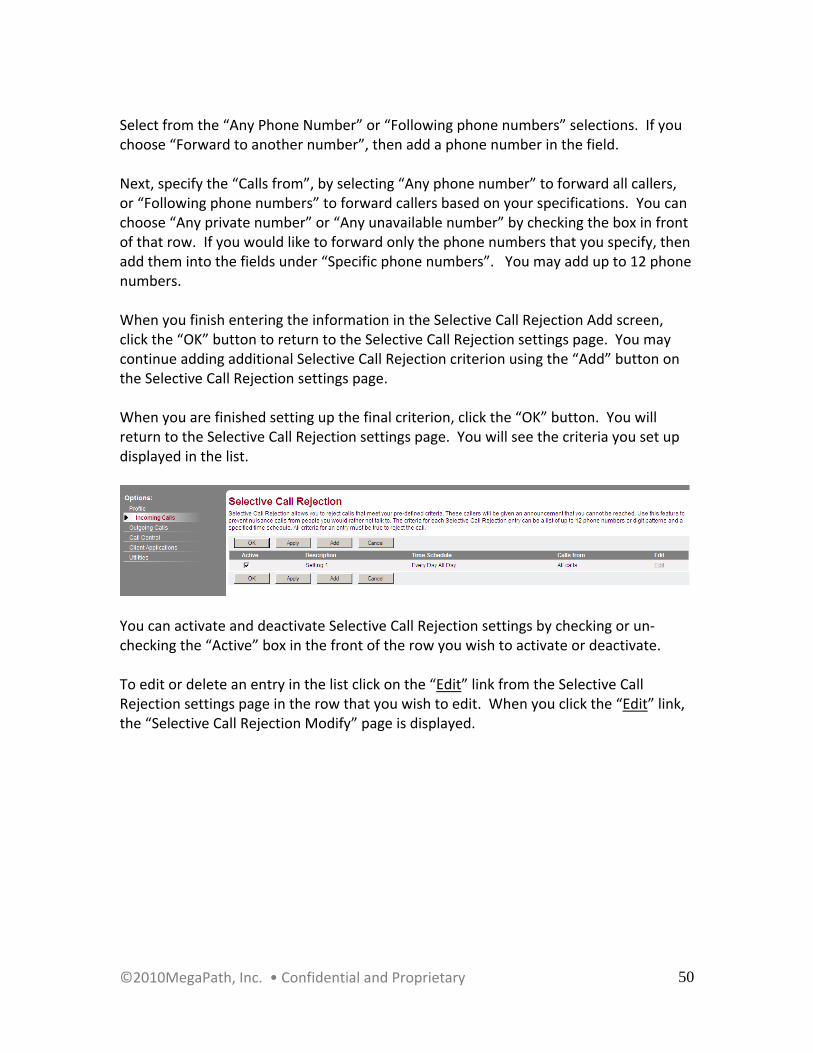
Selective Call Rejection allows you to reject calls that meet your pre‐defined criteria. These callers will be given an announcement that you cannot be reached. Use this feature to prevent nuisance calls from people you would rather not talk to. The criteria for each Selective Call Rejection entry can be a list of up to 12 phone numbers. To return to the Incoming Calls menu without making any changes click the “OK” or “Cancel” button. This feature is an “On” or “Off” feature. The default setting is “Off”. To turn this feature “On”, go to the Incoming Calls menu and select Selective Rejection – Off. After you select Selective Rejection – Off, the Custom Ringback User settings page is displayed.
To add Selective Call Rejection settings, click the “Add” button. This will take you to the “Selective Call Rejection Add” page.
Add a description in the “Description” field for each criterion that you set up. Select a time schedule from the drop down “Selected Time Schedule”.
©2010MegaPath, Inc. • Confidential and Proprietary
50
Select from the “Any Phone Number” or “Following phone numbers” selections. If you choose “Forward to another number”, then add a phone number in the field. Next, specify the “Calls from”, by selecting “Any phone number” to forward all callers, or “Following phone numbers” to forward callers based on your specifications. You can choose “Any private number” or “Any unavailable number” by checking the box in front of that row. If you would like to forward only the phone numbers that you specify, then add them into the fields under “Specific phone numbers”. You may add up to 12 phone numbers. When you finish entering the information in the Selective Call Rejection Add screen, click the “OK” button to return to the Selective Call Rejection settings page. You may continue adding additional Selective Call Rejection criterion using the “Add” button on the Selective Call Rejection settings page. When you are finished setting up the final criterion, click the “OK” button. You will return to the Selective Call Rejection settings page. You will see the criteria you set up displayed in the list.
You can activate and deactivate Selective Call Rejection settings by checking or un‐checking the “Active” box in the front of the row you wish to activate or deactivate. To edit or delete an entry in the list click on the “Edit” link from the Selective Call Rejection settings page in the row that you wish to edit. When you click the “Edit” link, the “Selective Call Rejection Modify” page is displayed.

©2010MegaPath, Inc. • Confidential and Proprietary
51
Once you are finished deleting or editing the Selective Call Rejection Modify page, click on the “OK” button to save the modifications, and return to Selective Call Rejection settings page. To turn Selective Rejection “On”, click the “OK” button. You will be returned to the Incoming Calls menu. On returning to the Incoming Calls menu, you will now see “Selective Rejection – On” To turn Selective Rejection “Off”, deselect the “Active” check boxes from the Selective Call Rejection settings page. Once all of the entries are deselected, and you click the “OK” button, Selective Rejection will be turned “Off” again, and you will see this on the Incoming Calls menu.
©2010MegaPath, Inc. • Confidential and Proprietary
52
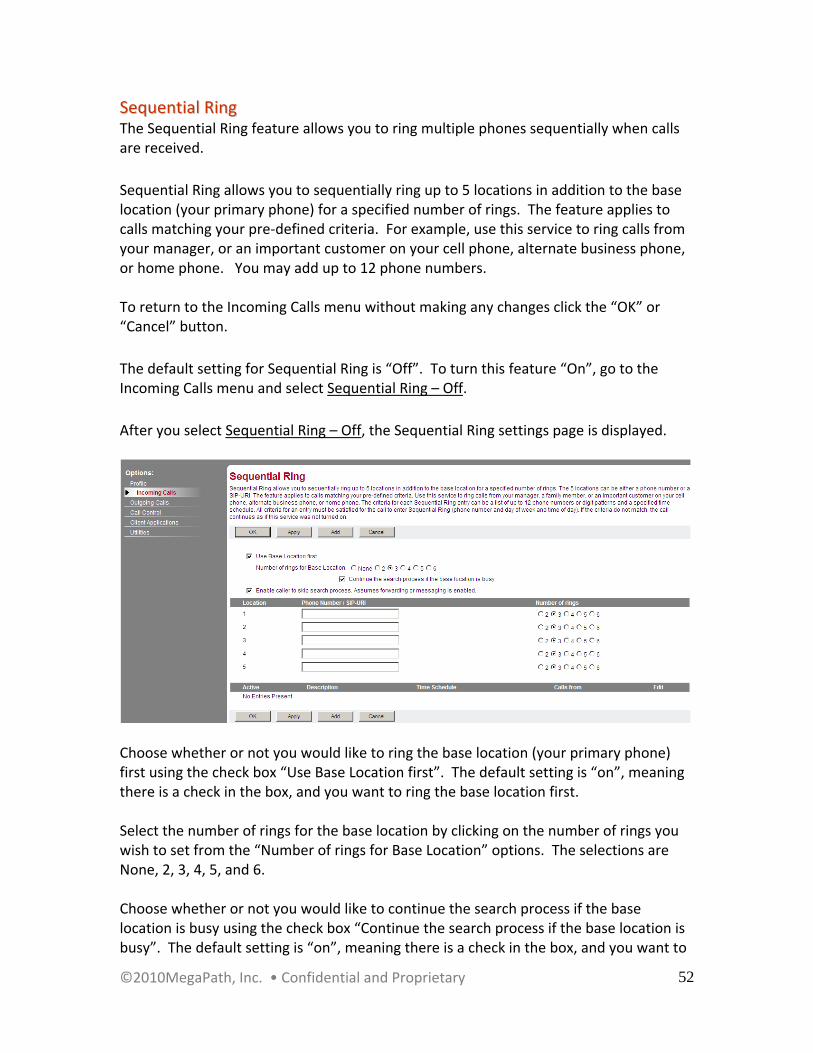
SSeeqquueennttiiaall RRiinngg The Sequential Ring feature allows you to ring multiple phones sequentially when calls are received.
Sequential Ring allows you to sequentially ring up to 5 locations in addition to the base location (your primary phone) for a specified number of rings. The feature applies to calls matching your pre‐defined criteria. For example, use this service to ring calls from your manager, or an important customer on your cell phone, alternate business phone, or home phone. You may add up to 12 phone numbers. To return to the Incoming Calls menu without making any changes click the “OK” or “Cancel” button.
The default setting for Sequential Ring is “Off”. To turn this feature “On”, go to the Incoming Calls menu and select Sequential Ring – Off.
After you select Sequential Ring – Off, the Sequential Ring settings page is displayed.
Choose whether or not you would like to ring the base location (your primary phone) first using the check box “Use Base Location first”. The default setting is “on”, meaning there is a check in the box, and you want to ring the base location first. Select the number of rings for the base location by clicking on the number of rings you wish to set from the “Number of rings for Base Location” options. The selections are None, 2, 3, 4, 5, and 6. Choose whether or not you would like to continue the search process if the base location is busy using the check box “Continue the search process if the base location is busy”. The default setting is “on”, meaning there is a check in the box, and you want to

©2010MegaPath, Inc. • Confidential and Proprietary
53
search for other phones to receive a caller if the base location (your primary phone) is busy. Enter up to five phone numbers in the “Location” list, in the “Phone Number” field. For each “Location”, select the number of rings you would like for each location phone to ring before it is sent to the next location. The “Number of rings” can be set to 2, 3, 4, 5, or 6. Once you have clicked on the “Apply” button, you will see “Saved” displayed on your screen.
To add Sequential Ring criteria, click the “Add” button. This will take you to the “Sequential Ring Add” page.
Add a description in the “Description” field for each criterion that you set up.
©2010MegaPath, Inc. • Confidential and Proprietary
54
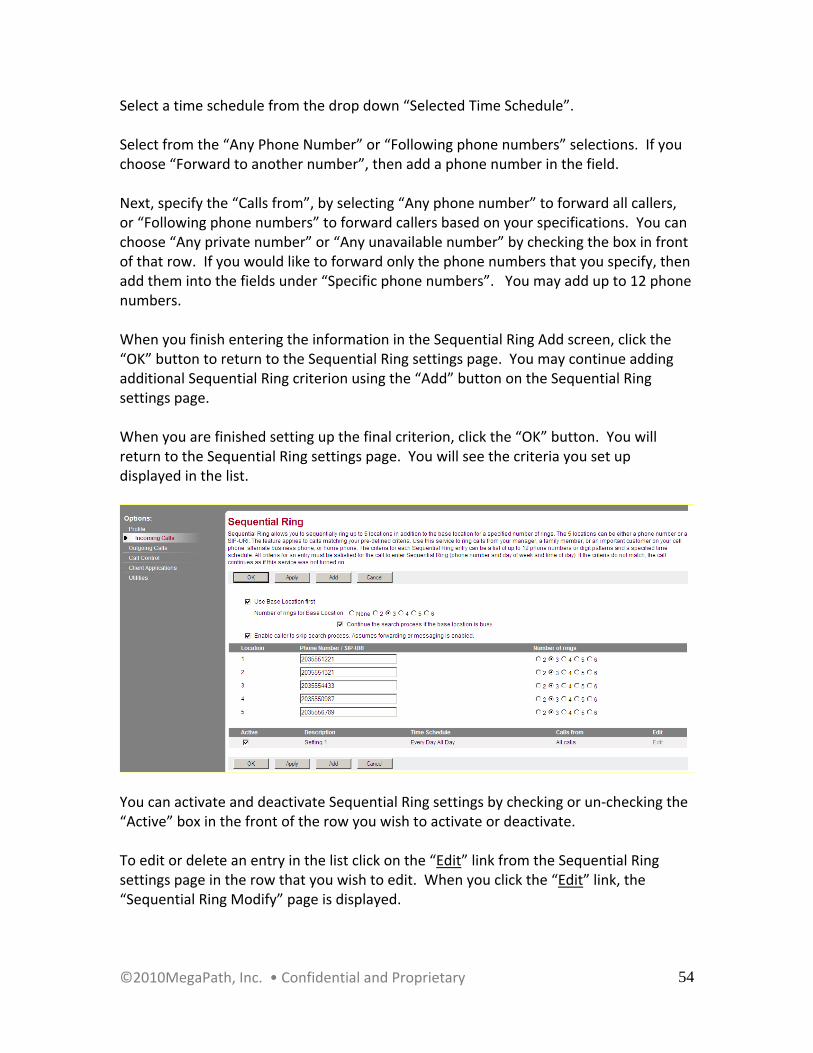
Select a time schedule from the drop down “Selected Time Schedule”. Select from the “Any Phone Number” or “Following phone numbers” selections. If you choose “Forward to another number”, then add a phone number in the field. Next, specify the “Calls from”, by selecting “Any phone number” to forward all callers, or “Following phone numbers” to forward callers based on your specifications. You can choose “Any private number” or “Any unavailable number” by checking the box in front of that row. If you would like to forward only the phone numbers that you specify, then add them into the fields under “Specific phone numbers”. You may add up to 12 phone numbers. When you finish entering the information in the Sequential Ring Add screen, click the “OK” button to return to the Sequential Ring settings page. You may continue adding additional Sequential Ring criterion using the “Add” button on the Sequential Ring settings page. When you are finished setting up the final criterion, click the “OK” button. You will return to the Sequential Ring settings page. You will see the criteria you set up displayed in the list.
You can activate and deactivate Sequential Ring settings by checking or un‐checking the “Active” box in the front of the row you wish to activate or deactivate. To edit or delete an entry in the list click on the “Edit” link from the Sequential Ring settings page in the row that you wish to edit. When you click the “Edit” link, the “Sequential Ring Modify” page is displayed.

©2010MegaPath, Inc. • Confidential and Proprietary
55
Once you are finished deleting or editing the Sequential Ring Modify page, click on the “OK” button to save the modifications, and return to Sequential Ring settings page. To turn Sequential Ring “On”, click the “OK” button. You will be returned to the Incoming Calls menu. On returning to the Incoming Calls menu, you will now see “Sequential Ring – On” To turn Sequential Ring “Off”, deselect the “Active” check boxes from the Sequential Ring settings page. Once all of the entries are deselected, and you click the “OK” button, Sequential Ring will be turned “Off” again, and you will see this on the Incoming Calls menu.

©2010MegaPath, Inc. • Confidential and Proprietary
56
SSiimmuullttaanneeoouuss PPeerrssoonnaall RRiinngg Simultaneous Personal Ring is a feature that allows you to ring multiple phones simultaneously when calls are received. Simultaneous Ring Personal allows you to list phone numbers you would like to ring in addition to your primary phone when you receive a call. This feature is helpful when you are not at your phone but you would like your cell or other alternate phone to ring when you get a call. To return to the Incoming Calls menu without making any changes click the “OK” or “Cancel” button. This feature is an “On” or “Off” feature. The default setting is “Off”. To turn this feature “On”, go to the Incoming Calls menu and select Simultaneous Ring Personal – Off. After you select Simultaneous Ring Personal – Off, the Custom Ringback User settings page is displayed.
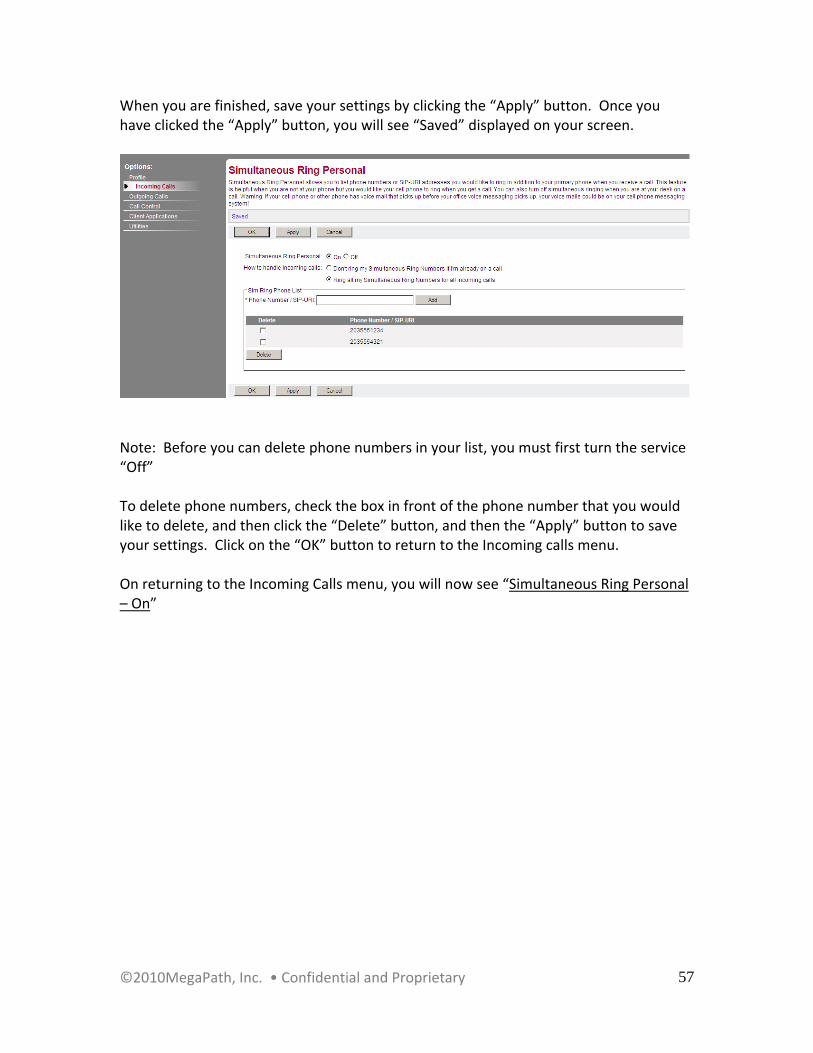
From the Simultaneous Ring settings page you can turn Simultaneous Ring Personal “On” and “Off” by clicking the appropriate selection. In addition you can choose how to handle incoming calls. There are two options “How to handle incoming calls”: “Don’t ring my Simultaneous Ring Numbers if I’m already on a call” and “Ring all my Simultaneous Ring Number for all incoming calls”. Make the appropriate selection. Next, you will add phone numbers in the “Sim Ring Phone List” by entering a phone number in the “Phone Number” field, and clicking the “Add” button. Once you have added the phone numbers, you will see them in list form in the “Phone Numbers” section.
©2010MegaPath, Inc. • Confidential and Proprietary
57
When you are finished, save your settings by clicking the “Apply” button. Once you have clicked the “Apply” button, you will see “Saved” displayed on your screen.
Note: Before you can delete phone numbers in your list, you must first turn the service “Off” To delete phone numbers, check the box in front of the phone number that you would like to delete, and then click the “Delete” button, and then the “Apply” button to save your settings. Click on the “OK” button to return to the Incoming calls menu. On returning to the Incoming Calls menu, you will now see “Simultaneous Ring Personal – On”
©2010MegaPath, Inc. • Confidential and Proprietary
58
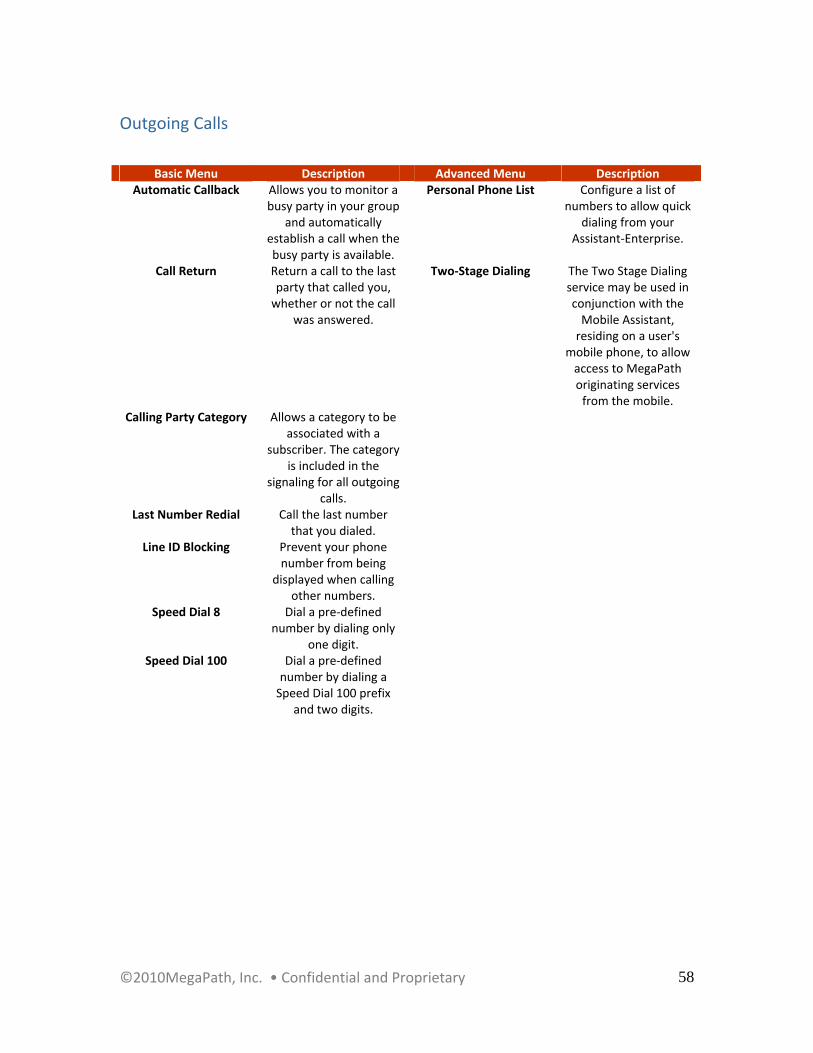
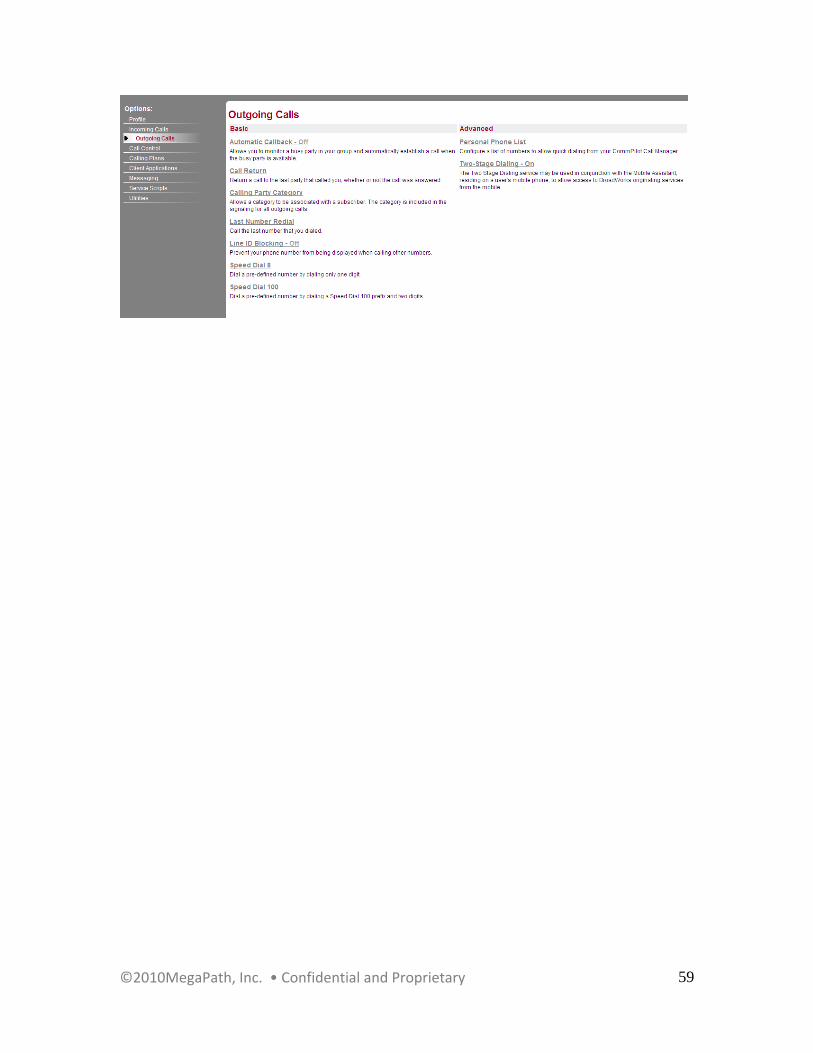
Outgoing Calls
Basic Menu Description Advanced Menu Description
Automatic Callback Allows you to monitor a busy party in your group
and automatically establish a call when the busy party is available.
Personal Phone List Configure a list of numbers to allow quick
dialing from your Assistant‐Enterprise.
Call Return Return a call to the last party that called you, whether or not the call
was answered.
Two‐Stage Dialing The Two Stage Dialing service may be used in conjunction with the Mobile Assistant, residing on a user's
mobile phone, to allow access to MegaPath originating services from the mobile.
Calling Party Category Allows a category to be associated with a
subscriber. The category is included in the
signaling for all outgoing calls.
Last Number Redial Call the last number that you dialed.
Line ID Blocking Prevent your phone number from being
displayed when calling other numbers.
Speed Dial 8 Dial a pre‐defined number by dialing only
one digit.
Speed Dial 100 Dial a pre‐defined number by dialing a Speed Dial 100 prefix
and two digits.
©2010MegaPath, Inc. • Confidential and Proprietary
59
©2010MegaPath, Inc. • Confidential and Proprietary
60
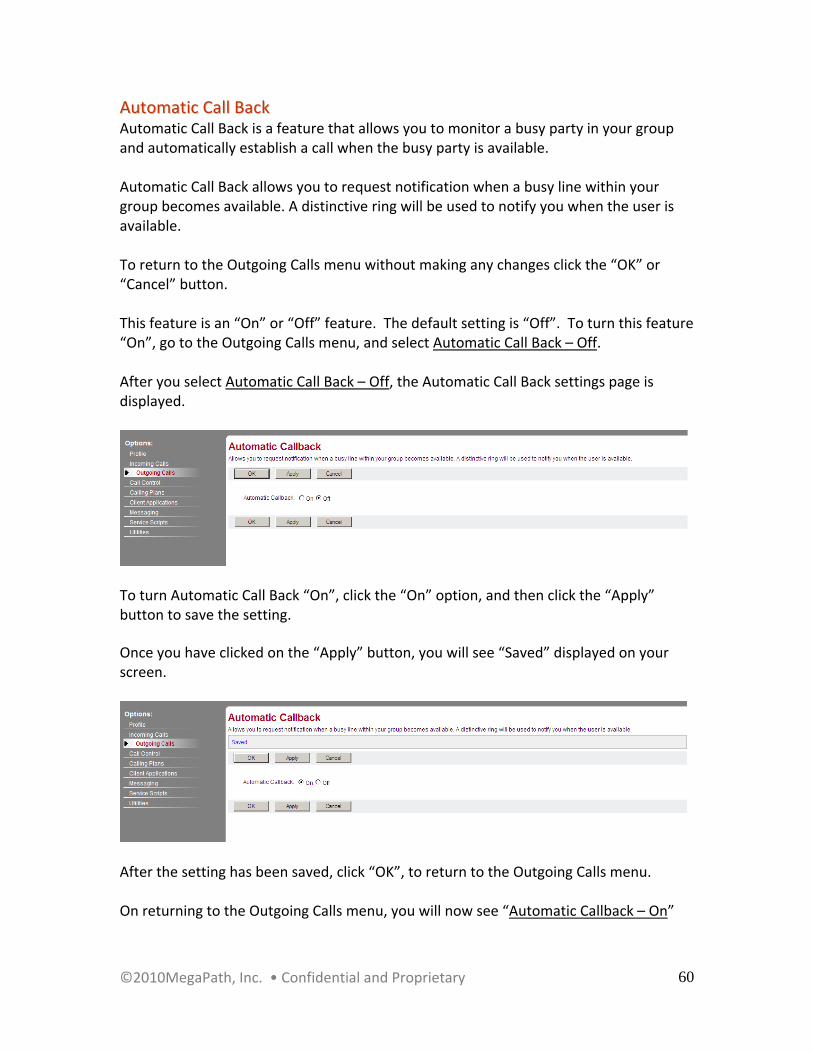
AAuuttoommaattiicc CCaallll BBaacckk Automatic Call Back is a feature that allows you to monitor a busy party in your group and automatically establish a call when the busy party is available. Automatic Call Back allows you to request notification when a busy line within your group becomes available. A distinctive ring will be used to notify you when the user is available. To return to the Outgoing Calls menu without making any changes click the “OK” or “Cancel” button. This feature is an “On” or “Off” feature. The default setting is “Off”. To turn this feature “On”, go to the Outgoing Calls menu, and select Automatic Call Back – Off. After you select Automatic Call Back – Off, the Automatic Call Back settings page is displayed.
To turn Automatic Call Back “On”, click the “On” option, and then click the “Apply” button to save the setting. Once you have clicked on the “Apply” button, you will see “Saved” displayed on your screen.
After the setting has been saved, click “OK”, to return to the Outgoing Calls menu. On returning to the Outgoing Calls menu, you will now see “Automatic Callback – On”
©2010MegaPath, Inc. • Confidential and Proprietary
61
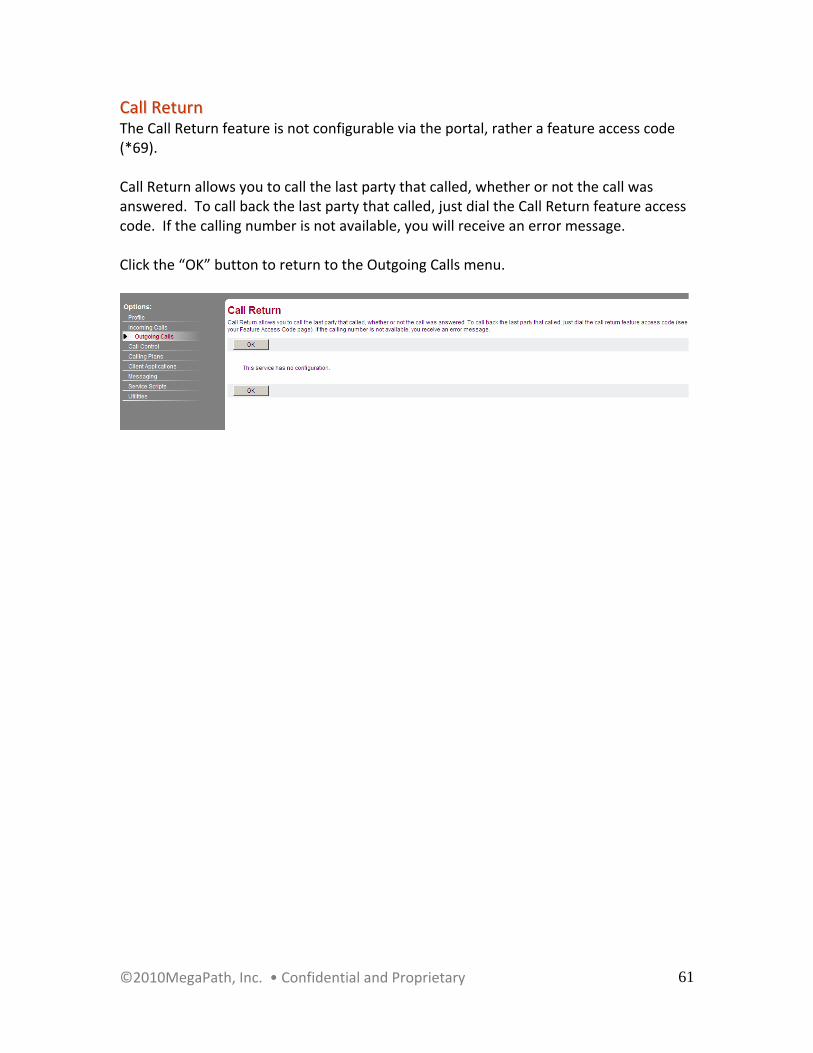
CCaallll RReettuurrnn The Call Return feature is not configurable via the portal, rather a feature access code (*69). Call Return allows you to call the last party that called, whether or not the call was answered. To call back the last party that called, just dial the Call Return feature access code. If the calling number is not available, you will receive an error message. Click the “OK” button to return to the Outgoing Calls menu.

©2010MegaPath, Inc. • Confidential and Proprietary
62
CCaalllliinngg PPaarrttyy CCaatteeggoorryy The Calling Party Category feature allows a category to be associated with a subscriber. The category is included in the signaling for all outgoing calls. Calling Party Category service allows a category to be associated with a user. The category is included in the signaling for all outgoing calls. It is used by a softswitch or switching system for call routing, and is also used by operator services system to determine the allowed policies for a user. This feature is not configurable by the user. Click the “OK” button to return to the Outgoing Calls menu.
©2010MegaPath, Inc. • Confidential and Proprietary
63
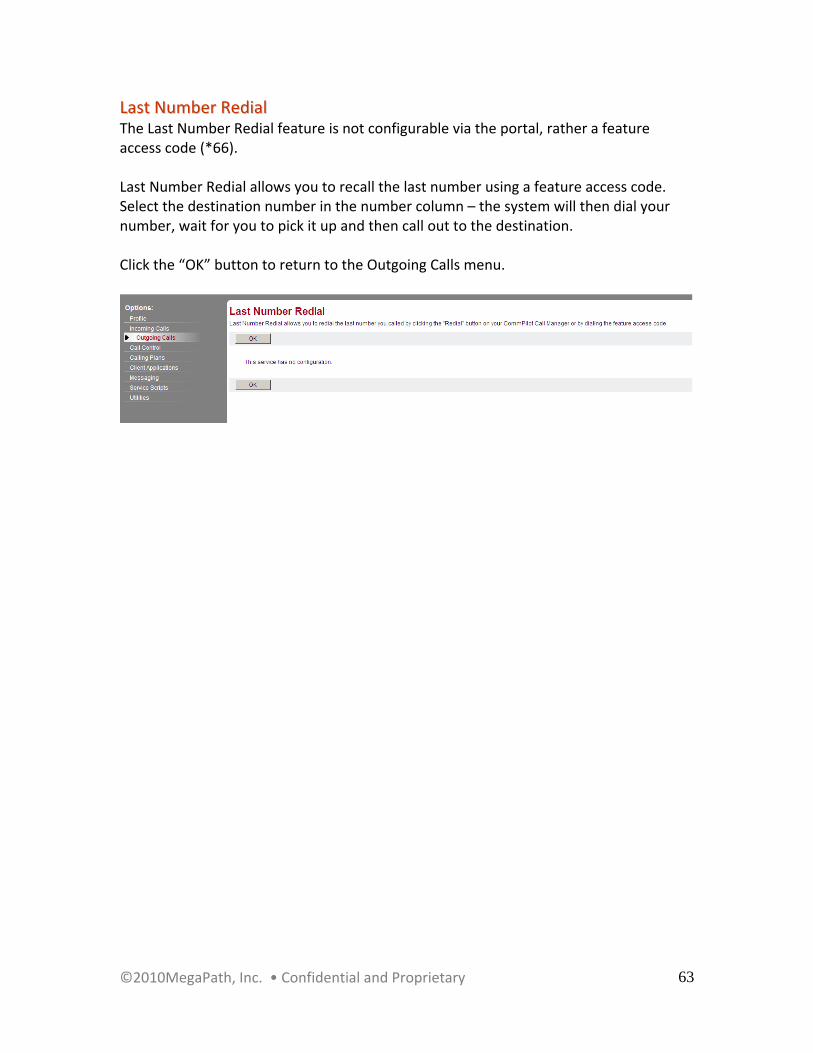
LLaasstt NNuummbbeerr RReeddiiaall The Last Number Redial feature is not configurable via the portal, rather a feature access code (*66). Last Number Redial allows you to recall the last number using a feature access code. Select the destination number in the number column – the system will then dial your number, wait for you to pick it up and then call out to the destination. Click the “OK” button to return to the Outgoing Calls menu.

©2010MegaPath, Inc. • Confidential and Proprietary
64
LLiinnee IIDD BBlloocckkiinngg ((CCaalllliinngg LLiinnee IIDD DDeelliivveerryy BBlloocckkiinngg)) The Line ID Blocking feature prevents your phone number from being displayed when calling other numbers.
Calling Line ID Delivery Blocking allows you to block your number from being shown when calling other numbers. Members of your group can still see your number when they are called. You have the choice of turning it on or off for all calls. To return to the Outgoing Calls menu without making any changes click the “OK” or “Cancel” button. This feature is an “On” or “Off” feature. The default setting is “Off”. To turn this feature “On”, go to the Outgoing Calls menu, and select Line ID Blocking – Off. After you select Line ID Blocking – Off, the Calling Line ID Delivery Blocking settings page is displayed.
To turn Automatic Call Back “On”, click the “On” option, and then click the “Apply” button to save the setting. Once you have clicked on the “Apply” button, you will see “Saved” displayed on your screen.
After the setting has been saved, click “OK”, to return to the Outgoing Calls menu. On returning to the Outgoing Calls menu, you will now see “Line ID Blocking – On”
©2010MegaPath, Inc. • Confidential and Proprietary
65
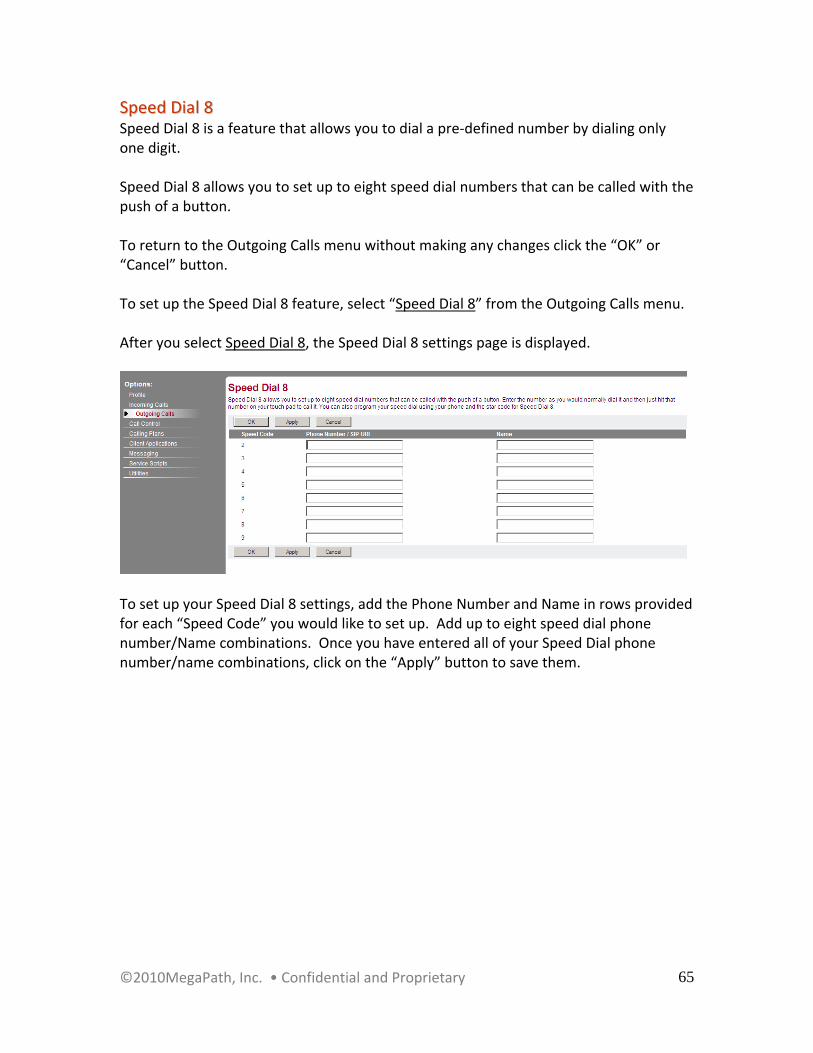
SSppeeeedd DDiiaall 88 Speed Dial 8 is a feature that allows you to dial a pre‐defined number by dialing only one digit. Speed Dial 8 allows you to set up to eight speed dial numbers that can be called with the push of a button. To return to the Outgoing Calls menu without making any changes click the “OK” or “Cancel” button. To set up the Speed Dial 8 feature, select “Speed Dial 8” from the Outgoing Calls menu. After you select Speed Dial 8, the Speed Dial 8 settings page is displayed.
To set up your Speed Dial 8 settings, add the Phone Number and Name in rows provided for each “Speed Code” you would like to set up. Add up to eight speed dial phone number/Name combinations. Once you have entered all of your Speed Dial phone number/name combinations, click on the “Apply” button to save them.
©2010MegaPath, Inc. • Confidential and Proprietary
66
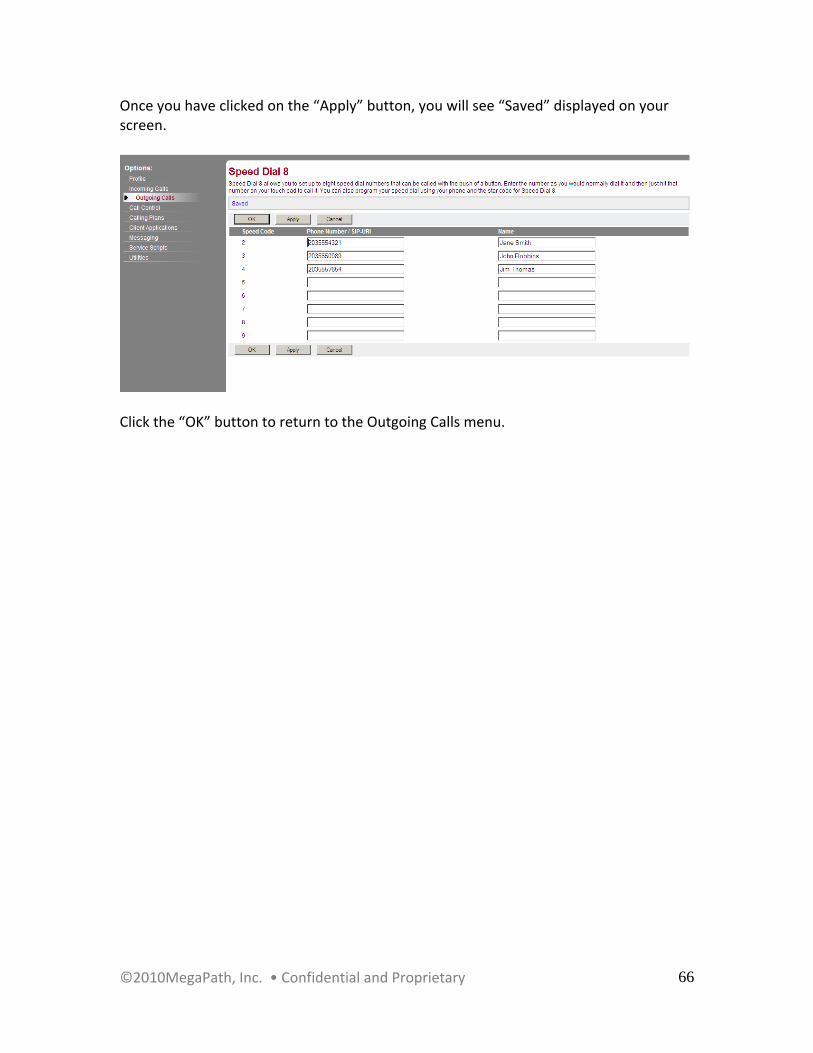
Once you have clicked on the “Apply” button, you will see “Saved” displayed on your screen.
Click the “OK” button to return to the Outgoing Calls menu.

©2010MegaPath, Inc. • Confidential and Proprietary
67
SSppeeeedd DDiiaall 110000 Speed Dial 100 is a feature that allows you to dial a pre‐defined number by dialing a Speed Dial 100 prefix and two digits. To return to the Outgoing Calls menu without making any changes click the “OK” or “Cancel” button. To set up the Speed Dial 100 feature, select “Speed Dial 100” from the Outgoing Calls menu. After you select Speed Dial 100, the Speed Dial 100 settings page is displayed. When there is a list of entries, they are sortable by Speed Code 100, Phone Number, and Description by clicking on the column heading.
Click on the “Add” button to add Speed Dial 100 entries. After clicking the “Add” button, the “Speed Dial 100 Add” page is displayed. The speed Codes in the drop down automatically sequence as you add additional entries. Enter a description in the “Description” field, and then enter the phone number in the “Phone Number” field.

©2010MegaPath, Inc. • Confidential and Proprietary
68
Click on “OK” to create the entry and save it to the Speed Dial 100 list on the Speed Dial 100 settings page. Continue this process until you have entered all of your Speed Dial 100 entries.
You may sort the entries by clicking on the column headings Speed Code 100, Phone Number, and Description. To delete speed dial codes use the check box in front of the row that you wish to delete and then click the “Apply” button to delete the entry. Once you have clicked the “Apply” button, you will see “Deleted successfully” displayed on your screen.
To edit your Speed Dial 100 entries, click on the “Edit” link. This will take you to the “Speed Dial 100 Modify” page.
To exit the Speed Dial Modify page without making any changes, click on the “Cancel” button to return to the Speed Dial 100 settings page.

©2010MegaPath, Inc. • Confidential and Proprietary
69
After you have finished editing the Speed Dial 100 entry, click the “OK” button the return to the Speed Dial 100 settings page. You will see your updates on the Speed Dial 100 settings page. Finally, click the “OK” button to return to the Outgoing Calls menu.

©2010MegaPath, Inc. • Confidential and Proprietary
70
PPeerrssoonnaall PPhhoonnee LLiisstt Personal Phone List allows you to store frequently called numbers to be dialed from your Assistant‐Enterprise Toolbar. You can also import multiple numbers for this list quickly by loading them from a CSV file. To return to the Outgoing Calls menu without making any changes click the “OK” or “Cancel” button. When there is a list of entries, they are sortable by Name and Phone Number by clicking on the column heading.
Click on the “Import Phone List” link to import a CSV file using the browse function.
To modify or delete a contact click the “Edit” link in the row of the Name or Number you want to change. This will display the Personal Phone List Modify page. You may also delete a contact from this page by adding a check to the box next to the contact you wish to delete. Click the “Apply” button to save your changes. You will see “Saved” displayed on your screen. Click the “OK” button to return to the Personal Phone List settings page. To exit the Personal Phone List Modify page without making any changes, click on the “Cancel” button to return to the Personal Phone List settings page. NOTE: This action cannot be undone. Once you click the “Apply” or “OK” button, the contact is permanently deleted.
©2010MegaPath, Inc. • Confidential and Proprietary
71
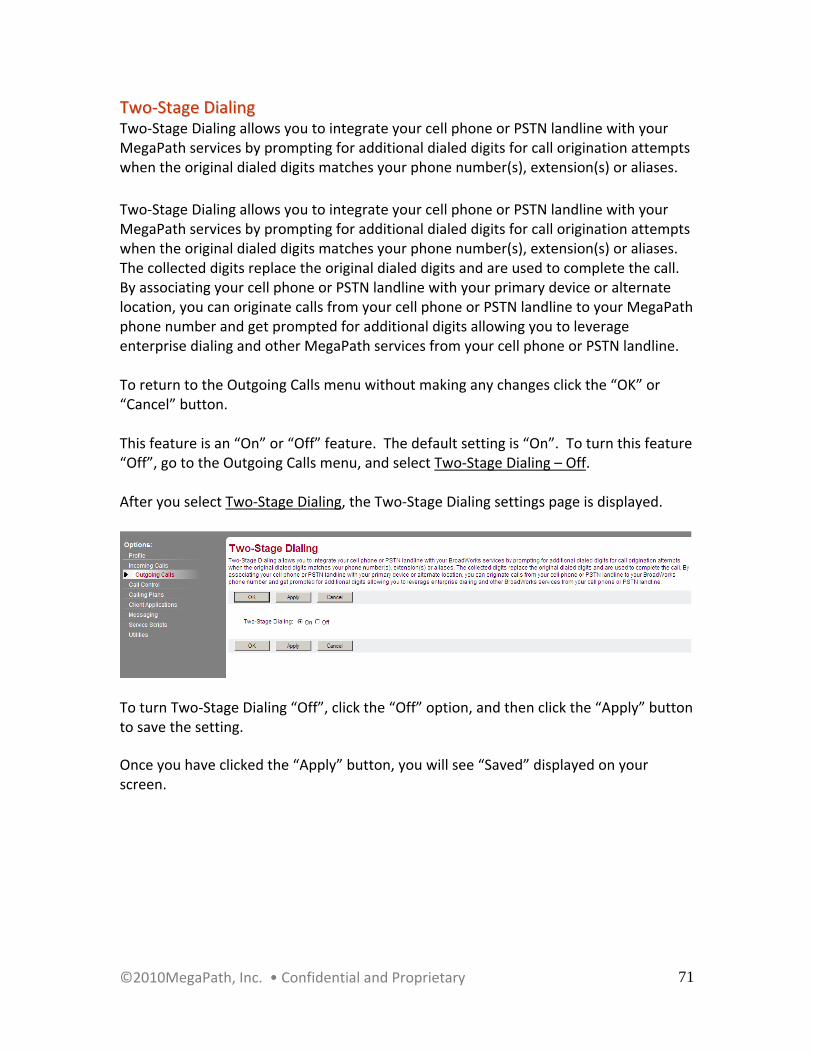
TTwwoo‐‐SSttaaggee DDiiaalliinngg Two‐Stage Dialing allows you to integrate your cell phone or PSTN landline with your MegaPath services by prompting for additional dialed digits for call origination attempts when the original dialed digits matches your phone number(s), extension(s) or aliases. Two‐Stage Dialing allows you to integrate your cell phone or PSTN landline with your MegaPath services by prompting for additional dialed digits for call origination attempts when the original dialed digits matches your phone number(s), extension(s) or aliases. The collected digits replace the original dialed digits and are used to complete the call. By associating your cell phone or PSTN landline with your primary device or alternate location, you can originate calls from your cell phone or PSTN landline to your MegaPath phone number and get prompted for additional digits allowing you to leverage enterprise dialing and other MegaPath services from your cell phone or PSTN landline. To return to the Outgoing Calls menu without making any changes click the “OK” or “Cancel” button. This feature is an “On” or “Off” feature. The default setting is “On”. To turn this feature “Off”, go to the Outgoing Calls menu, and select Two‐Stage Dialing – Off. After you select Two‐Stage Dialing, the Two‐Stage Dialing settings page is displayed.
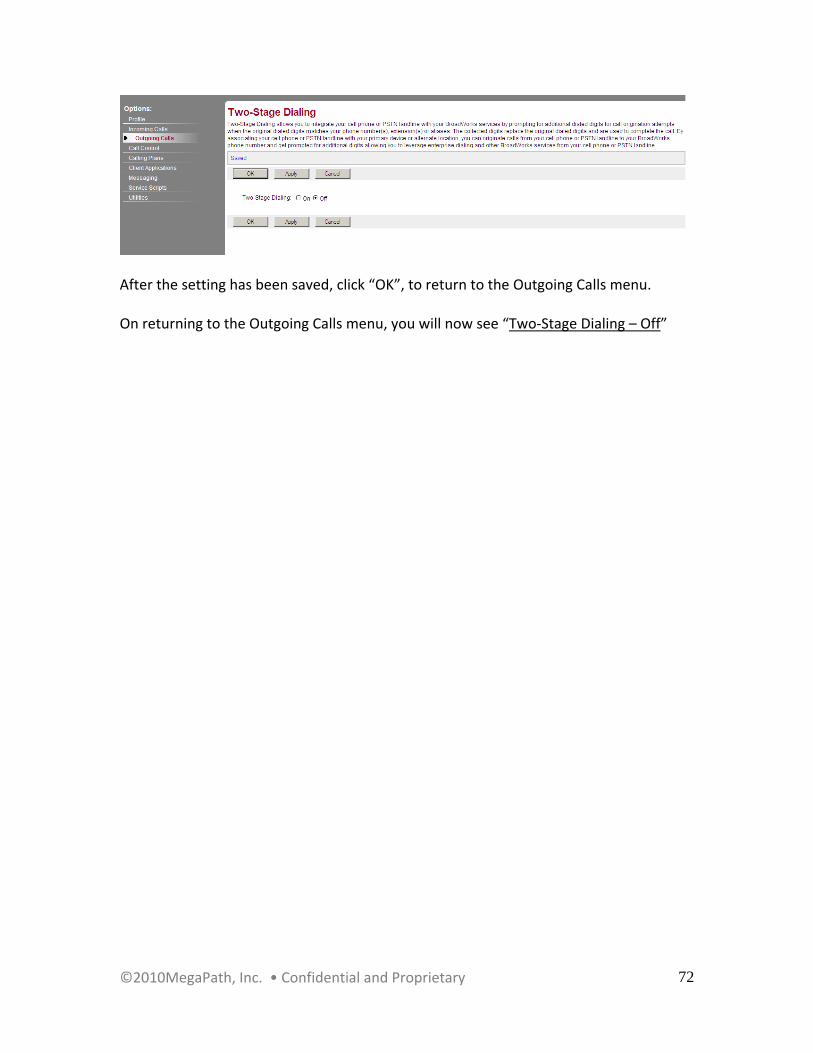
To turn Two‐Stage Dialing “Off”, click the “Off” option, and then click the “Apply” button to save the setting. Once you have clicked the “Apply” button, you will see “Saved” displayed on your screen.
©2010MegaPath, Inc. • Confidential and Proprietary
72
After the setting has been saved, click “OK”, to return to the Outgoing Calls menu. On returning to the Outgoing Calls menu, you will now see “Two‐Stage Dialing – Off”
©2010MegaPath, Inc. • Confidential and Proprietary
73
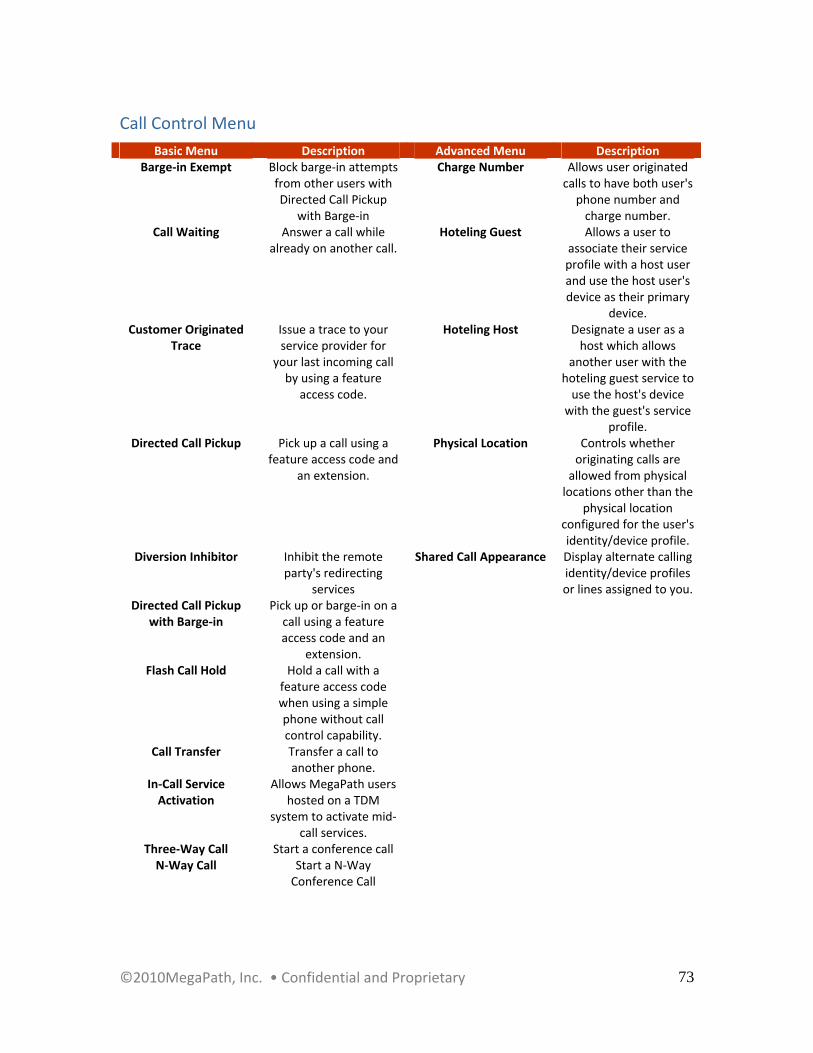
Call Control Menu
Basic Menu Description Advanced Menu Description Barge‐in Exempt Block barge‐in attempts
from other users with Directed Call Pickup
with Barge‐in
Charge Number Allows user originated calls to have both user's phone number and charge number.
Call Waiting Answer a call while already on another call.
Hoteling Guest Allows a user to associate their service profile with a host user and use the host user's device as their primary
device. Customer Originated
Trace Issue a trace to your service provider for
your last incoming call by using a feature
access code.
Hoteling Host Designate a user as a host which allows
another user with the hoteling guest service to use the host's device
with the guest's service profile.
Directed Call Pickup Pick up a call using a feature access code and
an extension.
Physical Location Controls whether originating calls are allowed from physical locations other than the
physical location configured for the user's identity/device profile.
Diversion Inhibitor Inhibit the remote party's redirecting
services
Shared Call Appearance Display alternate calling identity/device profiles or lines assigned to you.
Directed Call Pickup with Barge‐in
Pick up or barge‐in on a call using a feature access code and an
extension.
Flash Call Hold Hold a call with a feature access code when using a simple phone without call control capability.
Call Transfer Transfer a call to another phone.
In‐Call Service Activation
Allows MegaPath users hosted on a TDM
system to activate mid‐call services.
Three‐Way Call Start a conference call N‐Way Call Start a N‐Way
Conference Call

©2010MegaPath, Inc. • Confidential and Proprietary
74
©2010MegaPath, Inc. • Confidential and Proprietary
75
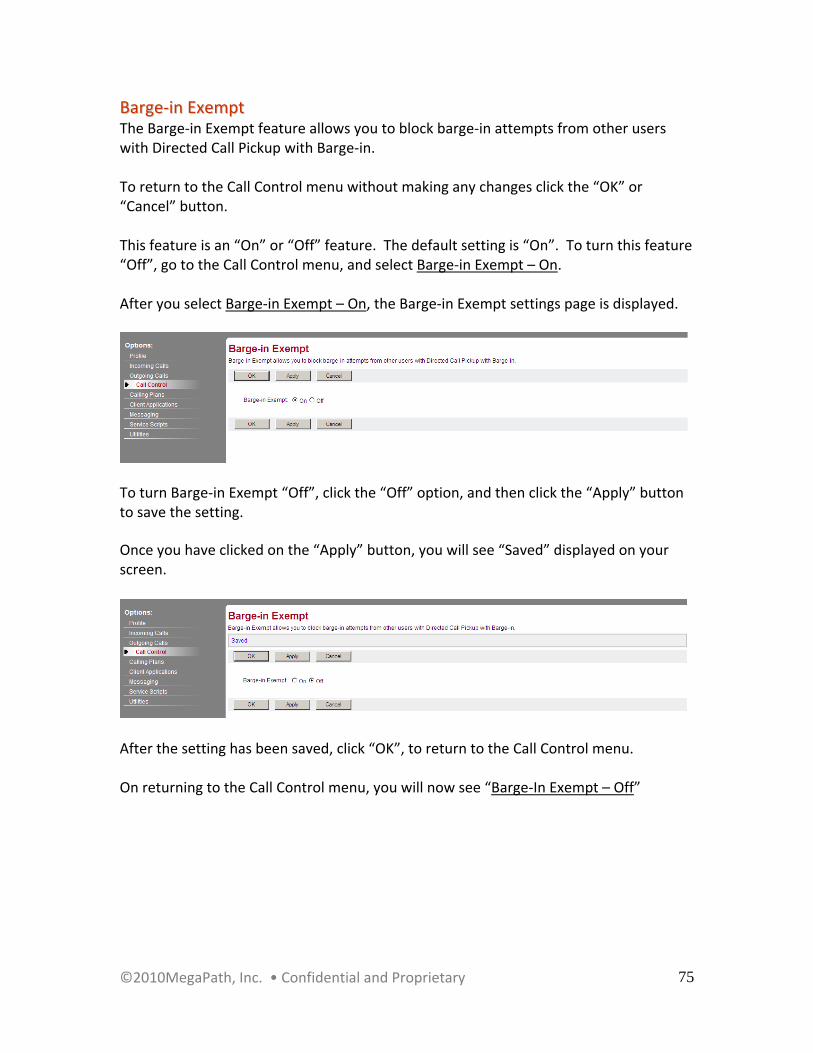
BBaarrggee‐‐iinn EExxeemmpptt The Barge‐in Exempt feature allows you to block barge‐in attempts from other users with Directed Call Pickup with Barge‐in. To return to the Call Control menu without making any changes click the “OK” or “Cancel” button. This feature is an “On” or “Off” feature. The default setting is “On”. To turn this feature “Off”, go to the Call Control menu, and select Barge‐in Exempt – On. After you select Barge‐in Exempt – On, the Barge‐in Exempt settings page is displayed.
To turn Barge‐in Exempt “Off”, click the “Off” option, and then click the “Apply” button to save the setting. Once you have clicked on the “Apply” button, you will see “Saved” displayed on your screen.
After the setting has been saved, click “OK”, to return to the Call Control menu. On returning to the Call Control menu, you will now see “Barge‐In Exempt – Off”
©2010MegaPath, Inc. • Confidential and Proprietary
76
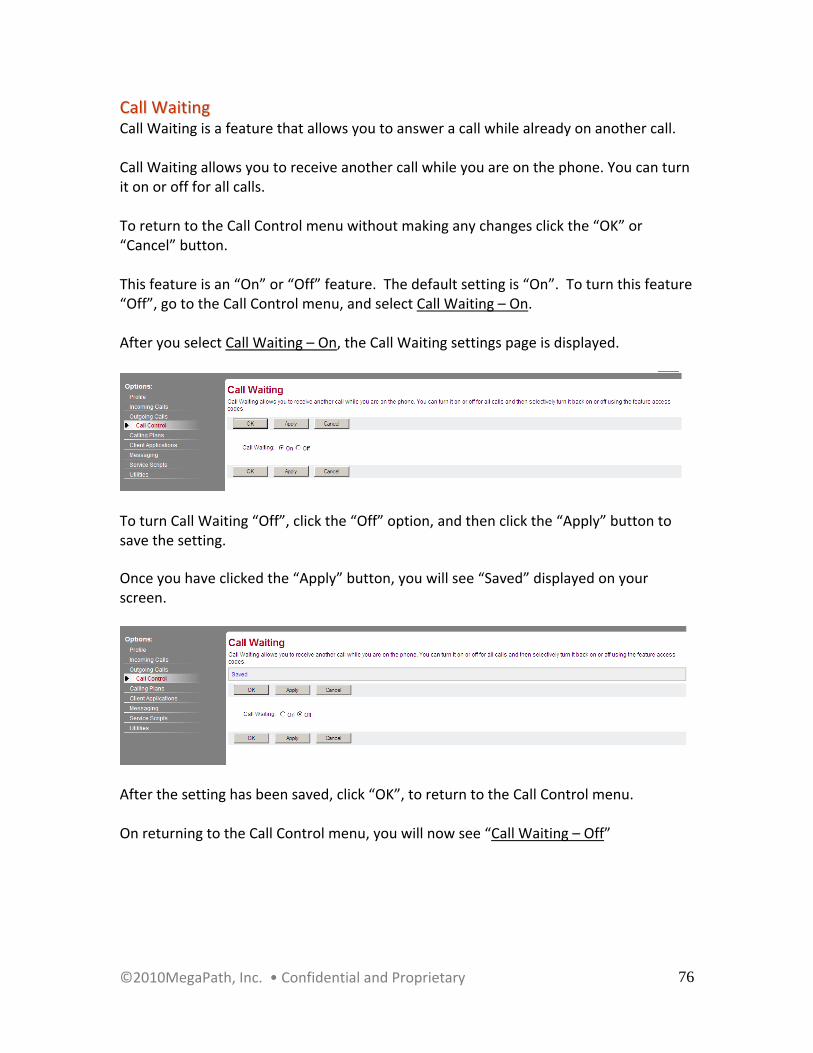
CCaallll WWaaiittiinngg Call Waiting is a feature that allows you to answer a call while already on another call. Call Waiting allows you to receive another call while you are on the phone. You can turn it on or off for all calls. To return to the Call Control menu without making any changes click the “OK” or “Cancel” button. This feature is an “On” or “Off” feature. The default setting is “On”. To turn this feature “Off”, go to the Call Control menu, and select Call Waiting – On. After you select Call Waiting – On, the Call Waiting settings page is displayed.
To turn Call Waiting “Off”, click the “Off” option, and then click the “Apply” button to save the setting. Once you have clicked the “Apply” button, you will see “Saved” displayed on your screen.
After the setting has been saved, click “OK”, to return to the Call Control menu. On returning to the Call Control menu, you will now see “Call Waiting – Off”
©2010MegaPath, Inc. • Confidential and Proprietary
77
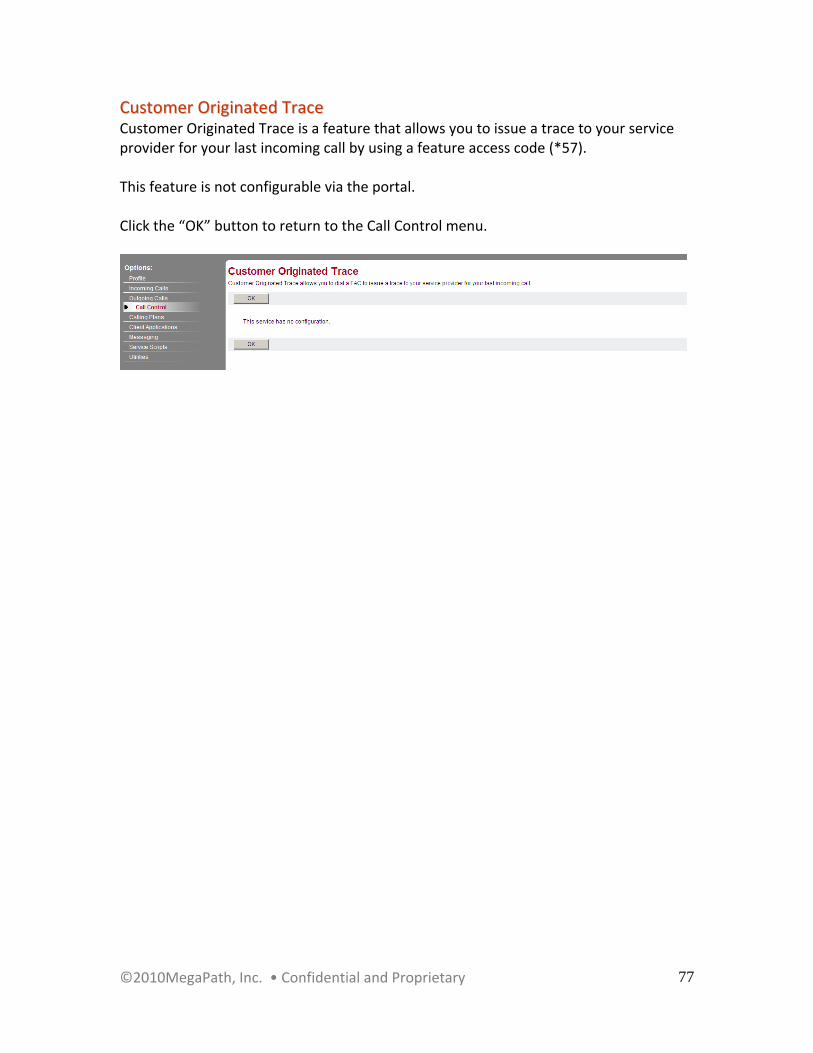
CCuussttoommeerr OOrriiggiinnaatteedd TTrraaccee Customer Originated Trace is a feature that allows you to issue a trace to your service provider for your last incoming call by using a feature access code (*57). This feature is not configurable via the portal. Click the “OK” button to return to the Call Control menu.
©2010MegaPath, Inc. • Confidential and Proprietary
78
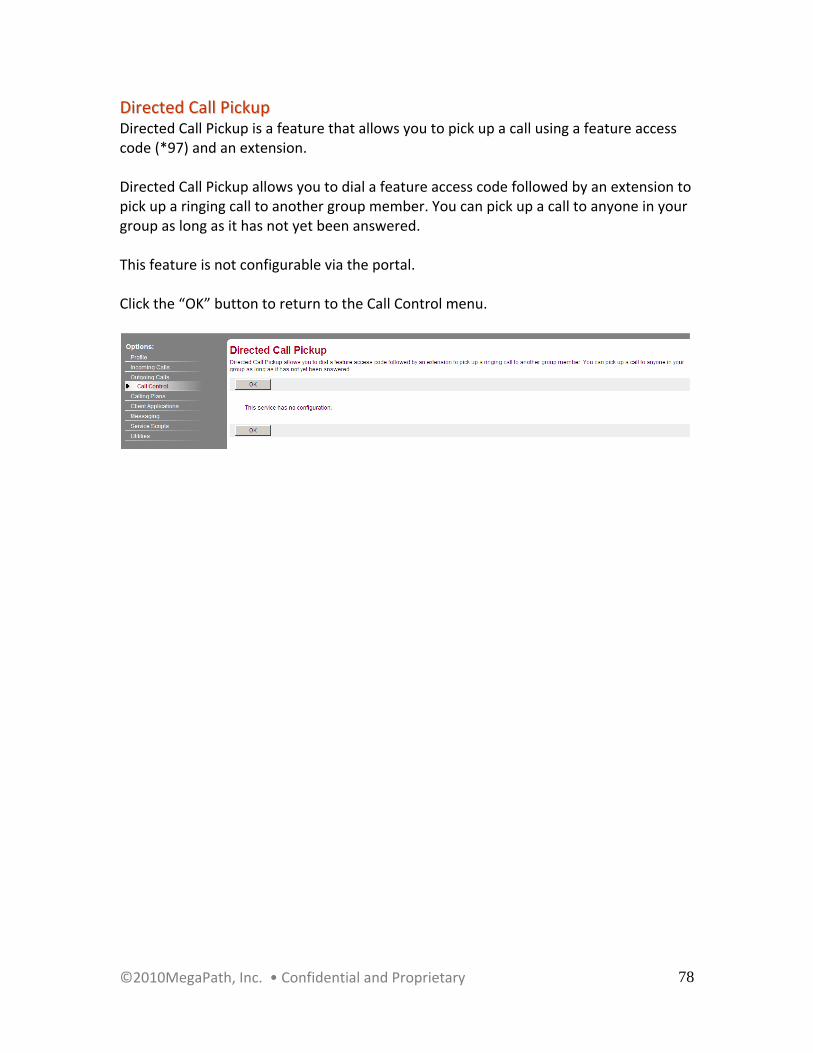
DDiirreecctteedd CCaallll PPiicckkuupp Directed Call Pickup is a feature that allows you to pick up a call using a feature access code (*97) and an extension. Directed Call Pickup allows you to dial a feature access code followed by an extension to pick up a ringing call to another group member. You can pick up a call to anyone in your group as long as it has not yet been answered. This feature is not configurable via the portal. Click the “OK” button to return to the Call Control menu.

©2010MegaPath, Inc. • Confidential and Proprietary
79
DDiivveerrssiioonn IInnhhiibbiittoorr Diversion Inhibitor is a feature that allows you to inhibit the remote party's redirecting services using a feature access code (*80). Diversion Inhibitor allows you to inhibit the remote party's redirecting of a call through the use of a feature access code. This can only be used for calls within a Group or Enterprise. This feature is not configurable via the portal. Click the “OK” button to return to the Call Control menu.

©2010MegaPath, Inc. • Confidential and Proprietary
80
DDiirreecctteedd CCaallll PPiicckkuupp wwiitthh BBaarrggee‐‐iinn Directed Call Pickup with Barge‐in is a feature that allows you to pick up or barge‐in on a call using a feature access code (*33) and an extension. Directed Call Pickup with Barge‐in allows you to dial a feature access code followed by an extension to pick up or barge‐in on a call to another group member. If the call has not been answered, then it is picked up. If the call has been answered, then barge‐in occurs. A barge‐in results in a three‐way call being created between you, the group member being barged‐in on, and the other party the group member is connected to. You are the controller of the barge‐in three‐way call. This feature is not configurable by the User. Click the “OK” button to return to the Call Control menu.
©2010MegaPath, Inc. • Confidential and Proprietary
81
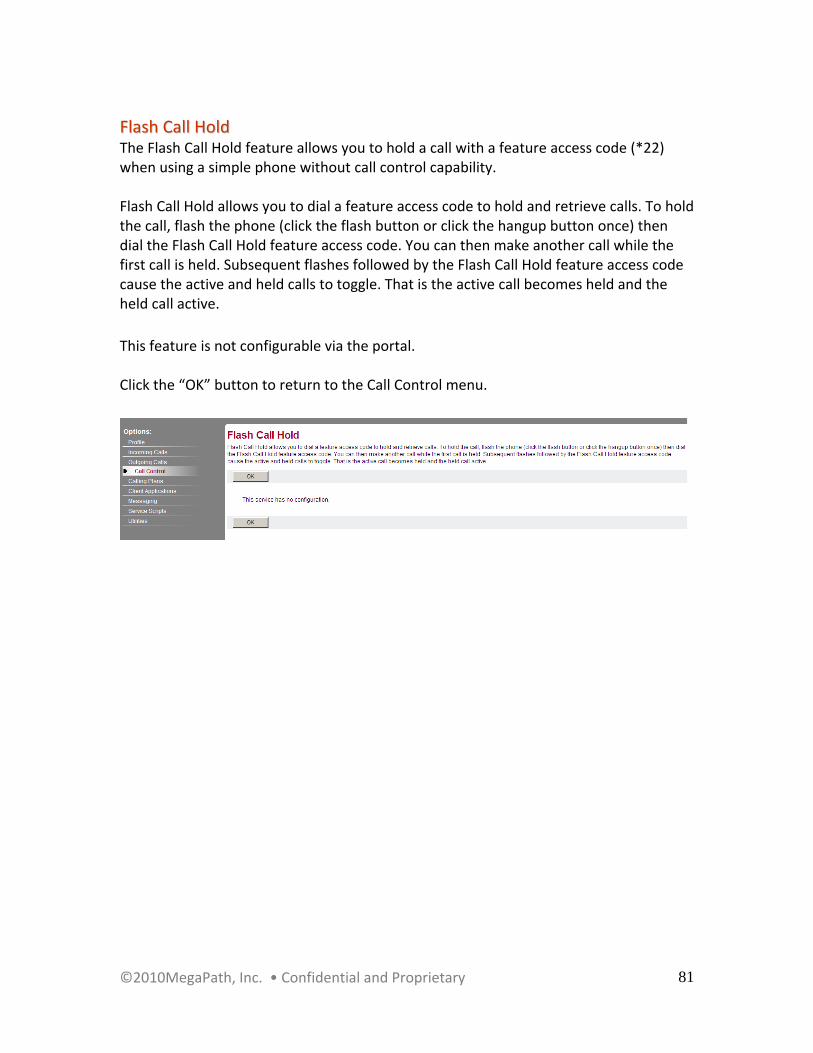
FFllaasshh CCaallll HHoolldd The Flash Call Hold feature allows you to hold a call with a feature access code (*22) when using a simple phone without call control capability. Flash Call Hold allows you to dial a feature access code to hold and retrieve calls. To hold the call, flash the phone (click the flash button or click the hangup button once) then dial the Flash Call Hold feature access code. You can then make another call while the first call is held. Subsequent flashes followed by the Flash Call Hold feature access code cause the active and held calls to toggle. That is the active call becomes held and the held call active.
This feature is not configurable via the portal. Click the “OK” button to return to the Call Control menu.
©2010MegaPath, Inc. • Confidential and Proprietary
82
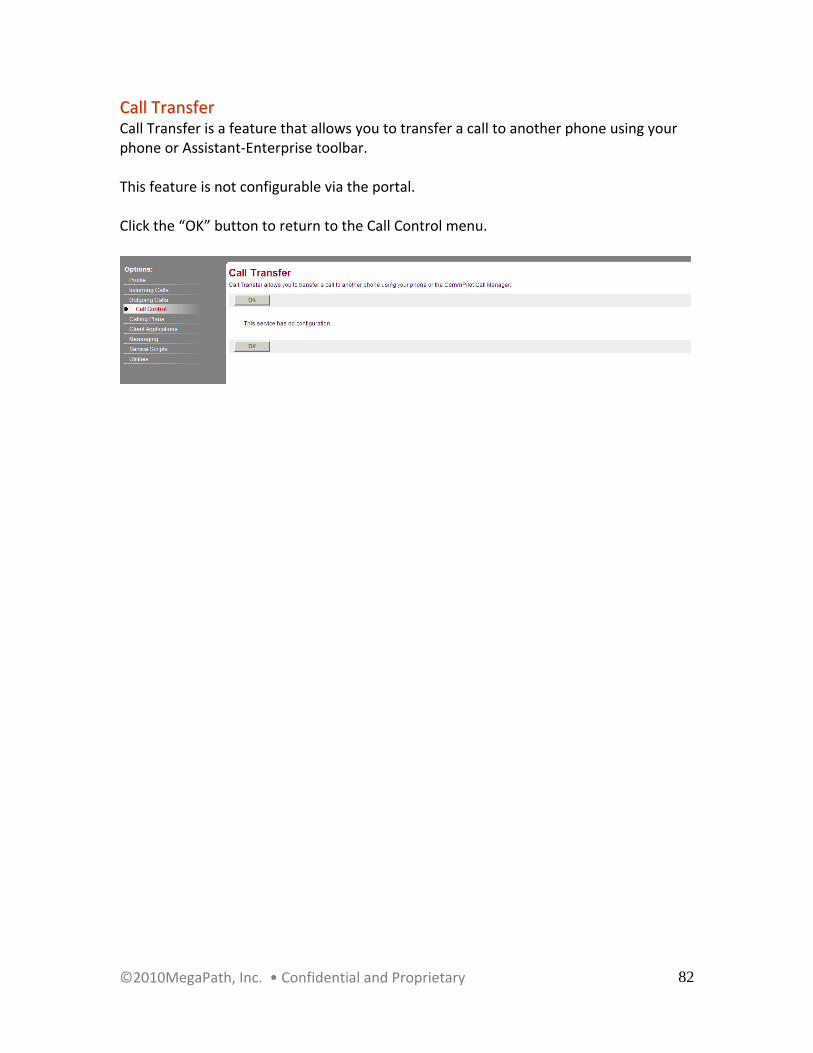
CCaallll TTrraannssffeerr Call Transfer is a feature that allows you to transfer a call to another phone using your phone or Assistant‐Enterprise toolbar. This feature is not configurable via the portal. Click the “OK” button to return to the Call Control menu.

©2010MegaPath, Inc. • Confidential and Proprietary
83
IInn‐‐CCaallll SSeerrvviiccee AAccttiivvaattiioonn In‐Call Service Activation allows MegaPath users hosted on a TDM system to activate mid‐call services (i.e. flash services) transparently. To return to the Call Control menu without making any changes click the “OK” or “Cancel” button. This feature is an “On” or “Off” feature. The default setting is “Off”. To turn this feature “On”, go to the Call Control menu, and select In‐Call Service Activation – Off. After you select In‐Call Service Activation – Off, the In‐Call Service Activation settings page is displayed.
To turn In‐Call Service Activation “On”, click the “On” option, and then click the “Apply” button to save the setting. Once you have clicked the “Apply” button, you will see “Saved” displayed on your screen.
After the setting has been saved, click “OK”, to return to the Call Control menu. On returning to the Call Control menu, you will now see “In‐Call Service Activation – On”

©2010MegaPath, Inc. • Confidential and Proprietary
84
TThhrreeee‐‐WWaayy CCaallll The Three‐Way Calling feature allows you to perform a conference call that can be initiated from your phone or Assistant‐Enterprise toolbar. This feature is not configurable via the portal. Click the “OK” button to return to the Call Control menu.
©2010MegaPath, Inc. • Confidential and Proprietary
85
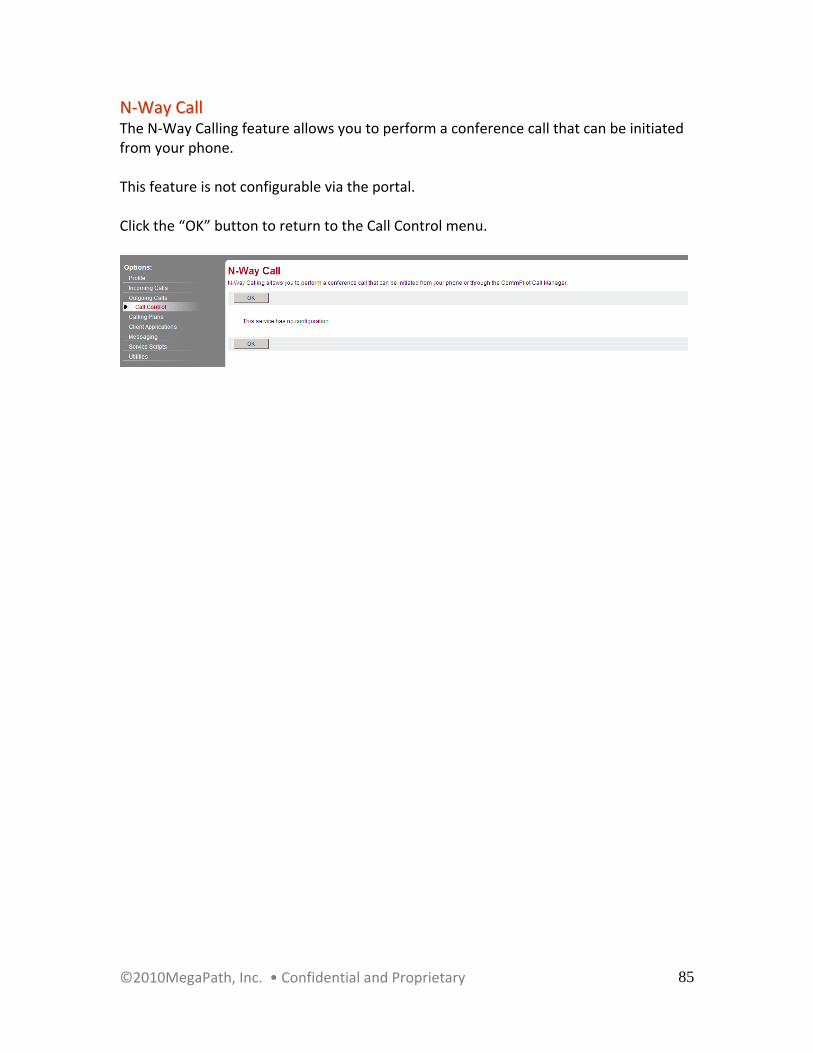
NN‐‐WWaayy CCaallll The N‐Way Calling feature allows you to perform a conference call that can be initiated from your phone. This feature is not configurable via the portal. Click the “OK” button to return to the Call Control menu.
©2010MegaPath, Inc. • Confidential and Proprietary
86
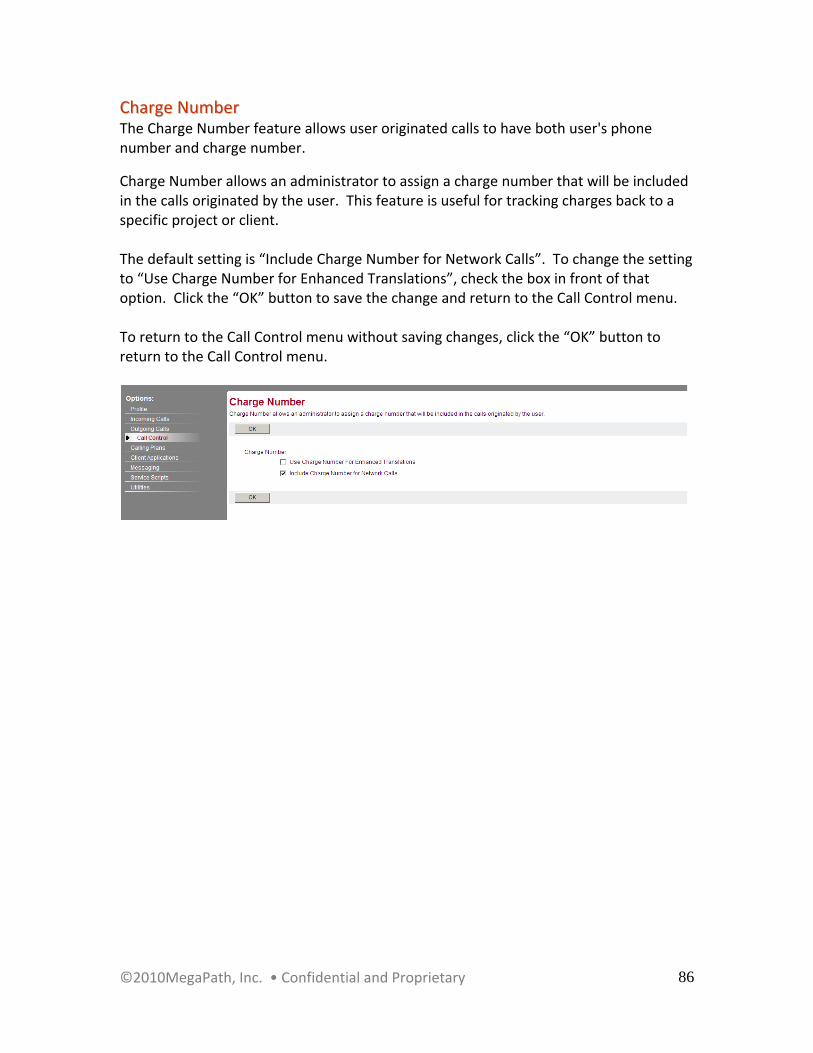
CChhaarrggee NNuummbbeerr The Charge Number feature allows user originated calls to have both user's phone number and charge number.
Charge Number allows an administrator to assign a charge number that will be included in the calls originated by the user. This feature is useful for tracking charges back to a specific project or client. The default setting is “Include Charge Number for Network Calls”. To change the setting to “Use Charge Number for Enhanced Translations”, check the box in front of that option. Click the “OK” button to save the change and return to the Call Control menu. To return to the Call Control menu without saving changes, click the “OK” button to return to the Call Control menu.
©2010MegaPath, Inc. • Confidential and Proprietary
87
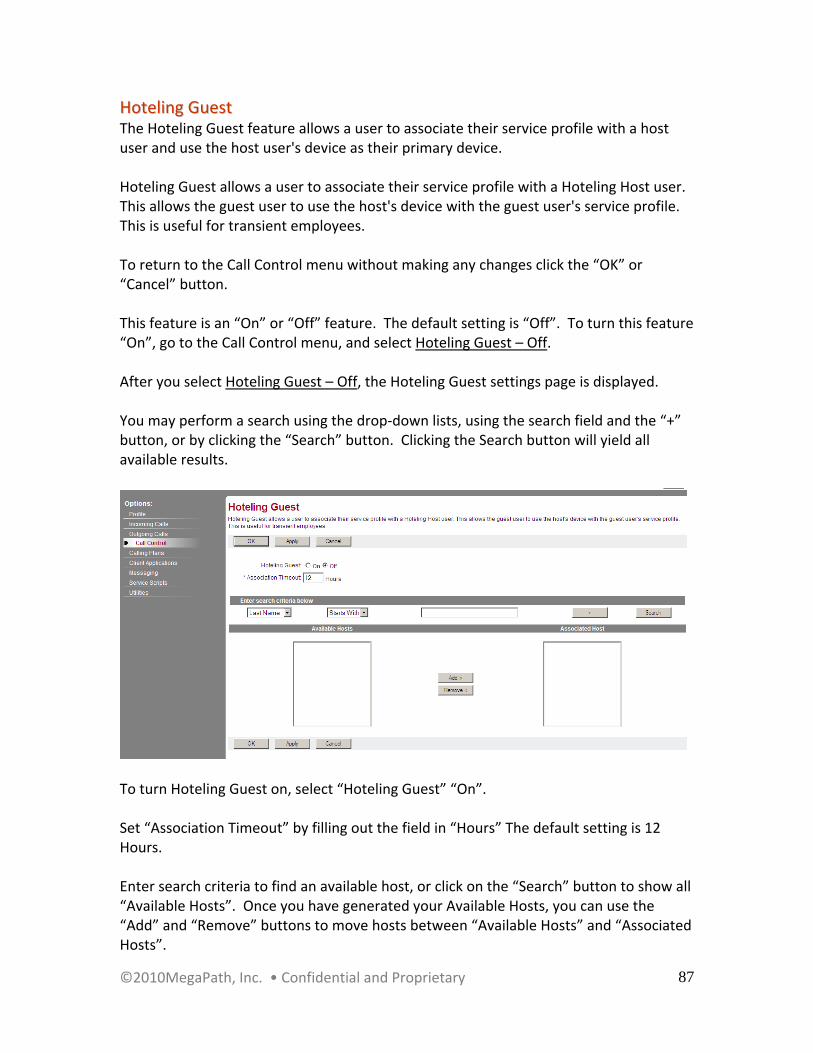
HHootteelliinngg GGuueesstt The Hoteling Guest feature allows a user to associate their service profile with a host user and use the host user's device as their primary device. Hoteling Guest allows a user to associate their service profile with a Hoteling Host user. This allows the guest user to use the host's device with the guest user's service profile. This is useful for transient employees. To return to the Call Control menu without making any changes click the “OK” or “Cancel” button. This feature is an “On” or “Off” feature. The default setting is “Off”. To turn this feature “On”, go to the Call Control menu, and select Hoteling Guest – Off. After you select Hoteling Guest – Off, the Hoteling Guest settings page is displayed. You may perform a search using the drop‐down lists, using the search field and the “+” button, or by clicking the “Search” button. Clicking the Search button will yield all available results.
To turn Hoteling Guest on, select “Hoteling Guest” “On”. Set “Association Timeout” by filling out the field in “Hours” The default setting is 12 Hours. Enter search criteria to find an available host, or click on the “Search” button to show all “Available Hosts”. Once you have generated your Available Hosts, you can use the “Add” and “Remove” buttons to move hosts between “Available Hosts” and “Associated Hosts”.

©2010MegaPath, Inc. • Confidential and Proprietary
88
©2010MegaPath, Inc. • Confidential and Proprietary
89
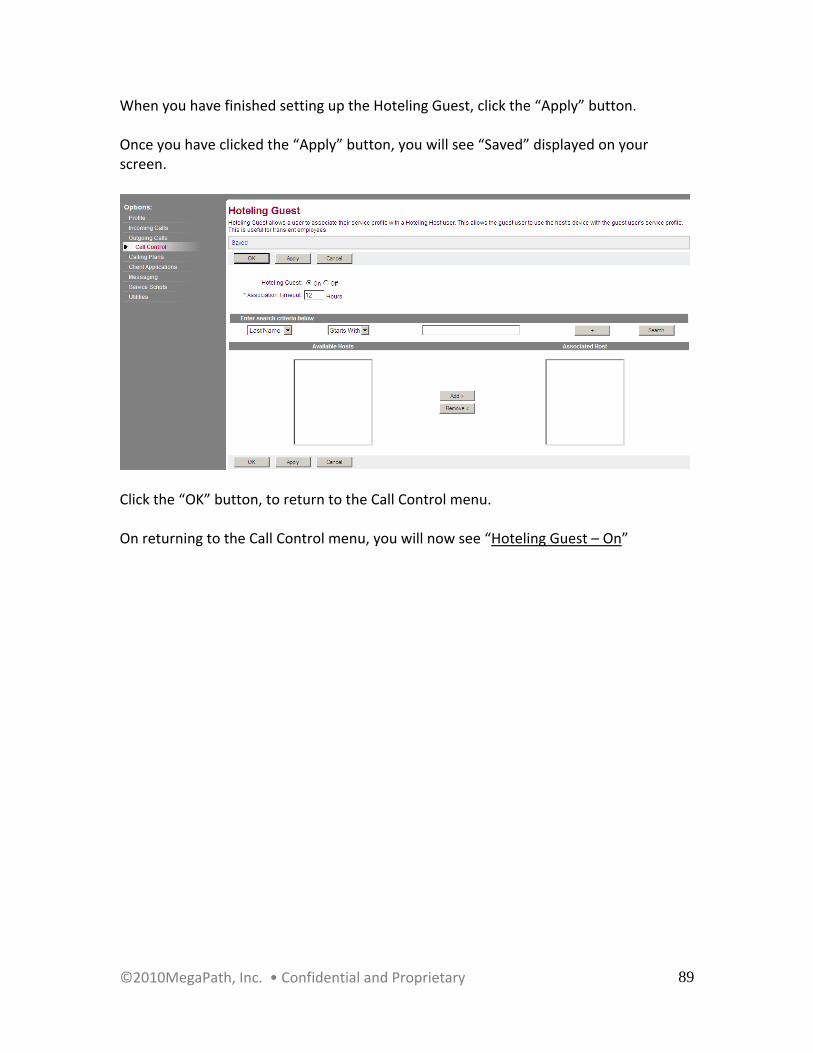
When you have finished setting up the Hoteling Guest, click the “Apply” button. Once you have clicked the “Apply” button, you will see “Saved” displayed on your screen.
Click the “OK” button, to return to the Call Control menu. On returning to the Call Control menu, you will now see “Hoteling Guest – On”
©2010MegaPath, Inc. • Confidential and Proprietary
90
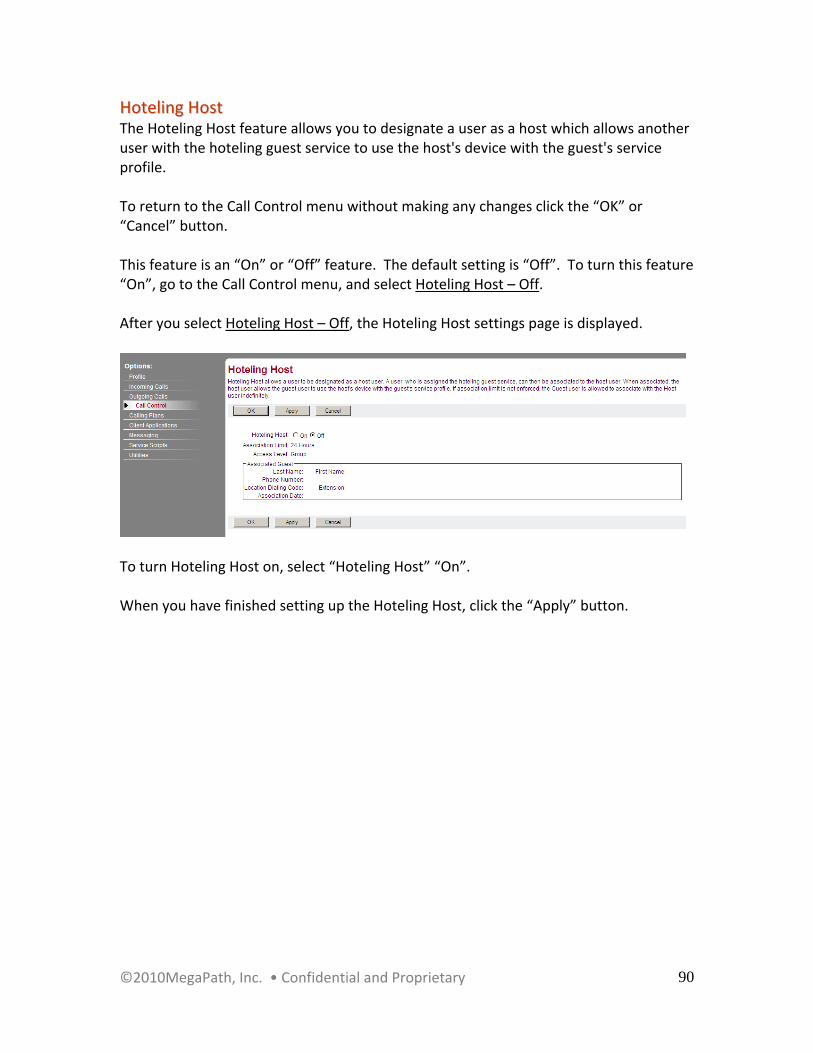
HHootteelliinngg HHoosstt The Hoteling Host feature allows you to designate a user as a host which allows another user with the hoteling guest service to use the host's device with the guest's service profile. To return to the Call Control menu without making any changes click the “OK” or “Cancel” button. This feature is an “On” or “Off” feature. The default setting is “Off”. To turn this feature “On”, go to the Call Control menu, and select Hoteling Host – Off. After you select Hoteling Host – Off, the Hoteling Host settings page is displayed.
To turn Hoteling Host on, select “Hoteling Host” “On”. When you have finished setting up the Hoteling Host, click the “Apply” button.
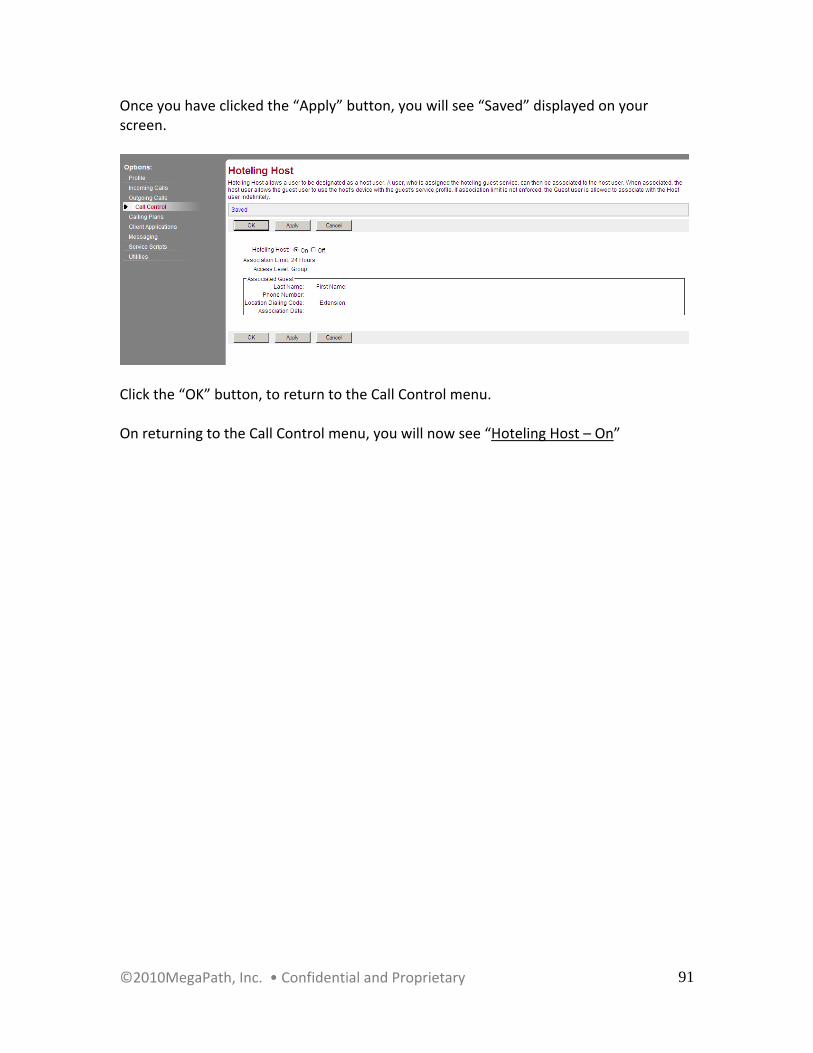
©2010MegaPath, Inc. • Confidential and Proprietary
91
Once you have clicked the “Apply” button, you will see “Saved” displayed on your screen.
Click the “OK” button, to return to the Call Control menu. On returning to the Call Control menu, you will now see “Hoteling Host – On”

©2010MegaPath, Inc. • Confidential and Proprietary
92
PPhhyyssiiccaall LLooccaattiioonn The Physical Location feature controls whether originating calls are allowed from physical locations other than the physical location configured for the user's identity/device profile. Physical Location allows proper support of emergency calling in countries and regions where the location of a user cannot be derived from a user's phone number. This feature is not configurable by the user. Click the “OK” button to return to the Call Control menu.
©2010MegaPath, Inc. • Confidential and Proprietary
93
SShhaarreedd CCaallll AAppppeeaarraannccee Shared Call Appearance is a feature that allows you to display alternate calling identity/device profiles or lines assigned to you. Shared Call Appearance allows administrators to allocate additional devices or lines to you. These devices or lines also ring just like your primary phone. You cannot add or remove these devices or lines. If you need assistance, contact your administrator. You use this page to list and manage the devices or lines assigned to you as appearances. These appearances ring just like your primary phone. You can have a maximum of 35 appearances assigned to you. Shared Call Appearances are assigned by your administrator. To return to the Call Control menu without making any changes click the “OK” or “Cancel” button. This feature is an “On” or “Off” feature. The default setting is “On”. To turn this feature “Off”, go to the Call Control menu, and select Shared Call Appearance – On. After you select Shared Call Appearance – On, the Shared Call Appearance settings page is displayed. Use the “Find” link with specific criterion based on drop‐down list selection. Use the “Find All” link to search for all based on the drop‐down list selection. When there are entries in the list, they can be sorted by Identity/Device Profile Type, Identity/Device Profile Name, and Line/Port. The configurable settings are:
Alert all appearances for Click‐to‐Dial calls
Multiple Call Arrangement On/Off, On is the default
Allow Bridging between locations
Bridge Warning tone - None (default) - Barge‐in‐only - Barge‐in and repeat every 30 seconds

©2010MegaPath, Inc. • Confidential and Proprietary
94
To alert all of your shared call appearance locations when you place calls from Assistant‐Enterprise Toolbar: Check the box before the “Alert all appearances for Click‐to‐Dial calls” option. When enabled, your primary and SCA locations are alerted for a Click‐to‐Dial call. Note this is the case only when you have no active location or have Multiple Call Arrangement (MCA) assigned and enabled. If you do not have MCA (or it is disabled) but have an active location, then only that active location is alerted. To allow each of your shared call appearance locations to be utilized while you are on a call: Click Multiple Call Arrangement "On". Otherwise, once you are on a call, only that shared call appearance location can be used. NOTE: This button appears only if the user is assigned this service. Click the “Apply” button to save your changes. You will see “Saved” displayed on your screen. Click the “OK” button to return to the Call Control menu.

©2010MegaPath, Inc. • Confidential and Proprietary
95
To allow bridging: Bridging allows another user to pick up the device at one of your other shared call appearance locations and barge in on your current call. To allow bridging, check the box before the “Allow bridging between SCA locations” option. To configure a warning tone to alert you that a third party is now on the line, turn on one of the Bridge Warning Tone options: Barge‐in only, or Barge‐in and repeat every 30 seconds.

©2010MegaPath, Inc. • Confidential and Proprietary
96
Calling Plans Menu
Basic Menu Description Advanced Menu Description Incoming Calling Plan Display the type of
phone numbers you can receive calls from.
Outgoing Calling Plan Display the type of phone numbers you can
call. Outgoing Digit Plan Display the special type
of phone numbers you can call.
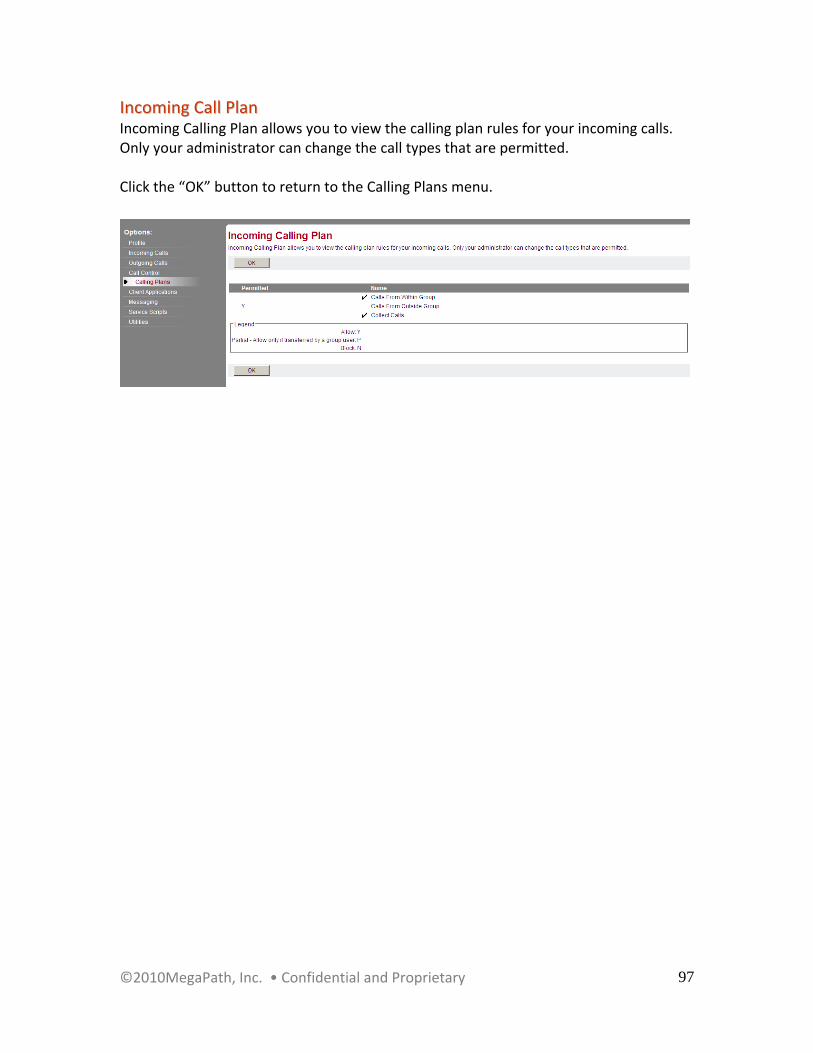
©2010MegaPath, Inc. • Confidential and Proprietary
97
IInnccoommiinngg CCaallll PPllaann Incoming Calling Plan allows you to view the calling plan rules for your incoming calls. Only your administrator can change the call types that are permitted. Click the “OK” button to return to the Calling Plans menu.

©2010MegaPath, Inc. • Confidential and Proprietary
98
OOuuttggooiinngg CCaallll PPllaann Outgoing Calling Plan allows you to view the calling plan rules for your outgoing calls. Only your administrator can change which call types are permitted. You can view the rules for your Originating Calls, Initiating Call Forwards/Transfers, and Being Forwarded/Transferred by clicking on the tabbed headings. Click the “OK” button to return to the Calling Plans menu.

©2010MegaPath, Inc. • Confidential and Proprietary
99
OOuuttggooiinngg DDiiggiitt PPllaann Outgoing Digit Plan allows you to view the digit calling plan rules for your outgoing calls. Only your administrator can change which call types are permitted. You can view the rules for your Originating Calls and Initiating Call Forwards/Transfers by clicking on the tabbed headings. Click the “OK” button to return to the Calling Plans menu.

©2010MegaPath, Inc. • Confidential and Proprietary
100
Client Applications Menu
Basic Menu Description Advanced Menu Description Busy Lamp Field Allows monitoring user
phone status via a SIP Attendant Console Phone
Assistant‐Enterprise Assistant ‐ Enterprise is a toolbar for Microsoft
Outlook and web browsers (Internet Explorer and Mozilla Firefox) that
enables users to perform basic call control, and
configure commonly used services.
Client Call Control Provide access to your account for third‐party call
control applications.
Outlook Integration Access your Outlook contact information from your Assistant‐Enterprise
toolbar
Phone Status Monitoring
Allows user to manage the list of monitored users to be used by an attendant console application.
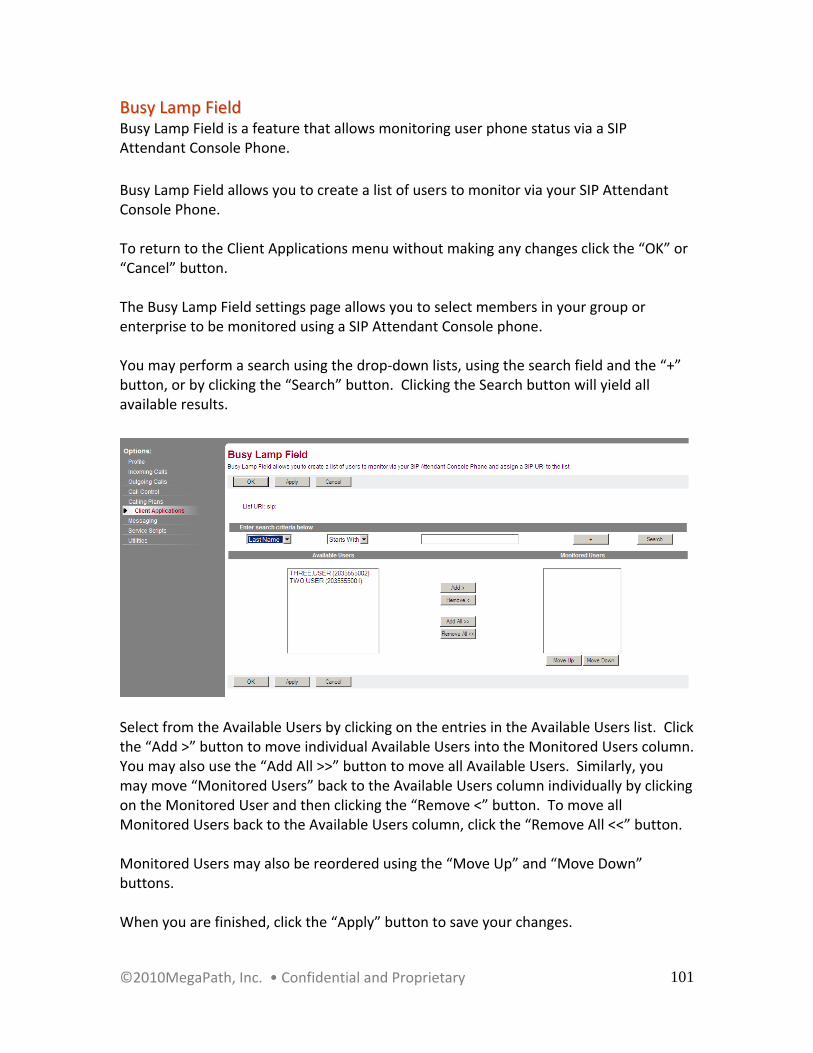
©2010MegaPath, Inc. • Confidential and Proprietary
101
BBuussyy LLaammpp FFiieelldd Busy Lamp Field is a feature that allows monitoring user phone status via a SIP Attendant Console Phone.
Busy Lamp Field allows you to create a list of users to monitor via your SIP Attendant Console Phone. To return to the Client Applications menu without making any changes click the “OK” or “Cancel” button. The Busy Lamp Field settings page allows you to select members in your group or enterprise to be monitored using a SIP Attendant Console phone. You may perform a search using the drop‐down lists, using the search field and the “+” button, or by clicking the “Search” button. Clicking the Search button will yield all available results.
Select from the Available Users by clicking on the entries in the Available Users list. Click the “Add >” button to move individual Available Users into the Monitored Users column. You may also use the “Add All >>” button to move all Available Users. Similarly, you may move “Monitored Users” back to the Available Users column individually by clicking on the Monitored User and then clicking the “Remove <” button. To move all Monitored Users back to the Available Users column, click the “Remove All <<” button. Monitored Users may also be reordered using the “Move Up” and “Move Down” buttons. When you are finished, click the “Apply” button to save your changes.
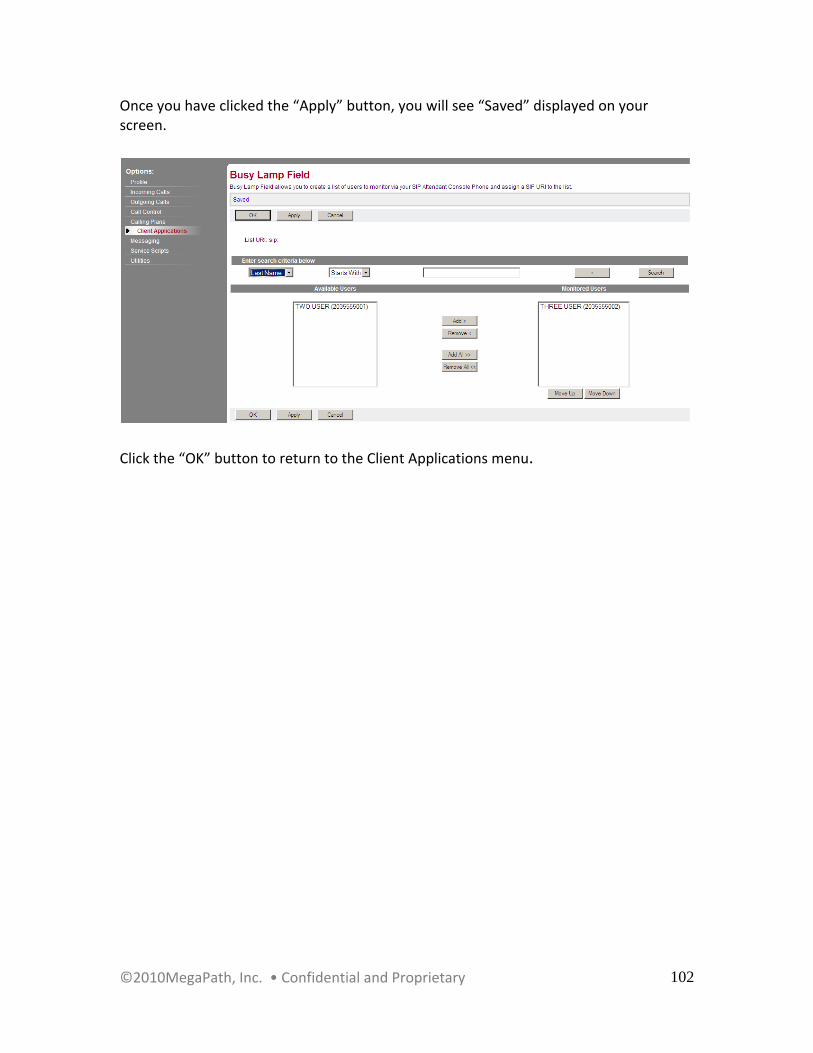
©2010MegaPath, Inc. • Confidential and Proprietary
102
Once you have clicked the “Apply” button, you will see “Saved” displayed on your screen.
Click the “OK” button to return to the Client Applications menu.
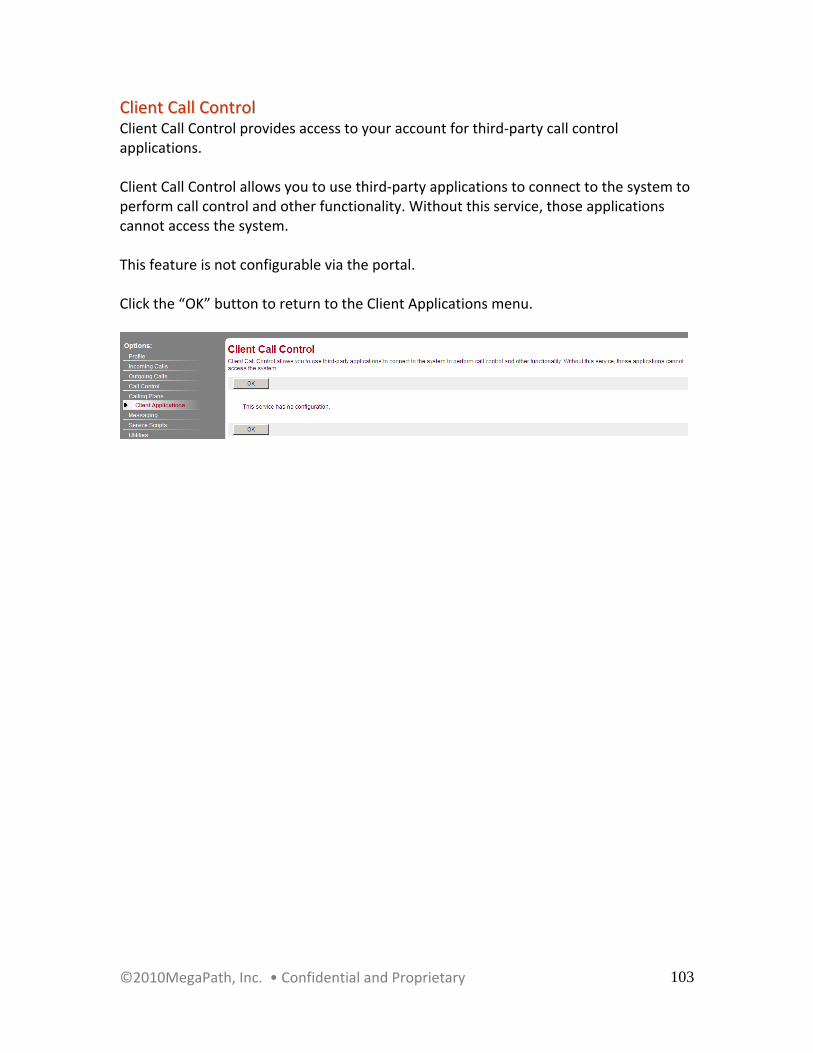
©2010MegaPath, Inc. • Confidential and Proprietary
103
CClliieenntt CCaallll CCoonnttrrooll Client Call Control provides access to your account for third‐party call control applications. Client Call Control allows you to use third‐party applications to connect to the system to perform call control and other functionality. Without this service, those applications cannot access the system. This feature is not configurable via the portal. Click the “OK” button to return to the Client Applications menu.

©2010MegaPath, Inc. • Confidential and Proprietary
104
OOuuttllooookk IInntteeggrraattiioonn Outlook Integration enables you to integrate your personal contacts in Microsoft Outlook with your Assistant‐Enterprise toolbar. To return to the Client Applications menu without making any changes click the “OK” or “Cancel” button. This feature is an “On” or “Off” feature. The default setting is “On”. To turn this feature “Off”, go to the Client Applications menu, and select Outlook Integration – On. After you select Outlook Integration – On, the Outlook Integration settings page is displayed.
In addition to turning this feature on or off, you can select to “Retrieve Contacts From Default Contact Folder Only” or “Retrieve All Contacts” by choosing one option or the other. To turn Outlook Integration “Off”, make the “Off” selection. Once you are finished with your edits, click the “Apply” button to save your settings. Once you have clicked the “Apply” button, you will see “Saved” displayed on your screen.
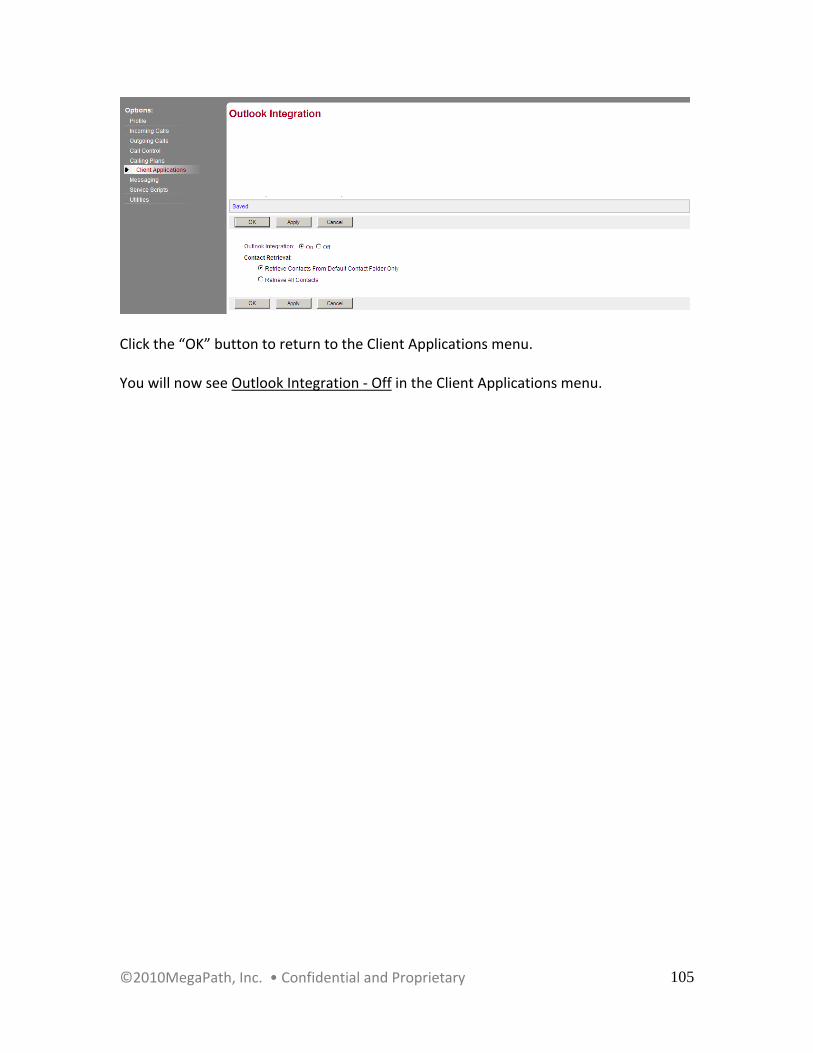
©2010MegaPath, Inc. • Confidential and Proprietary
105
Click the “OK” button to return to the Client Applications menu. You will now see Outlook Integration ‐ Off in the Client Applications menu.
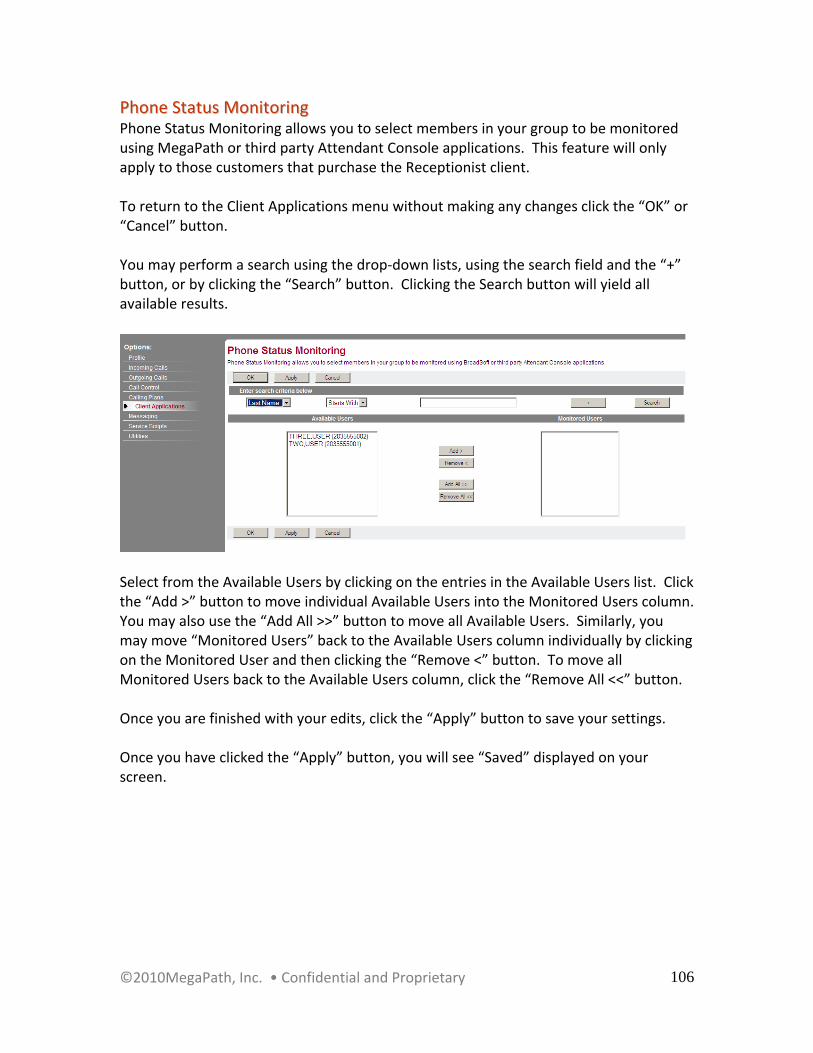
©2010MegaPath, Inc. • Confidential and Proprietary
106
PPhhoonnee SSttaattuuss MMoonniittoorriinngg Phone Status Monitoring allows you to select members in your group to be monitored using MegaPath or third party Attendant Console applications. This feature will only apply to those customers that purchase the Receptionist client. To return to the Client Applications menu without making any changes click the “OK” or “Cancel” button. You may perform a search using the drop‐down lists, using the search field and the “+” button, or by clicking the “Search” button. Clicking the Search button will yield all available results.
Select from the Available Users by clicking on the entries in the Available Users list. Click the “Add >” button to move individual Available Users into the Monitored Users column. You may also use the “Add All >>” button to move all Available Users. Similarly, you may move “Monitored Users” back to the Available Users column individually by clicking on the Monitored User and then clicking the “Remove <” button. To move all Monitored Users back to the Available Users column, click the “Remove All <<” button. Once you are finished with your edits, click the “Apply” button to save your settings. Once you have clicked the “Apply” button, you will see “Saved” displayed on your screen.

©2010MegaPath, Inc. • Confidential and Proprietary
107
Click the “OK” button to return to the Client Applications menu.
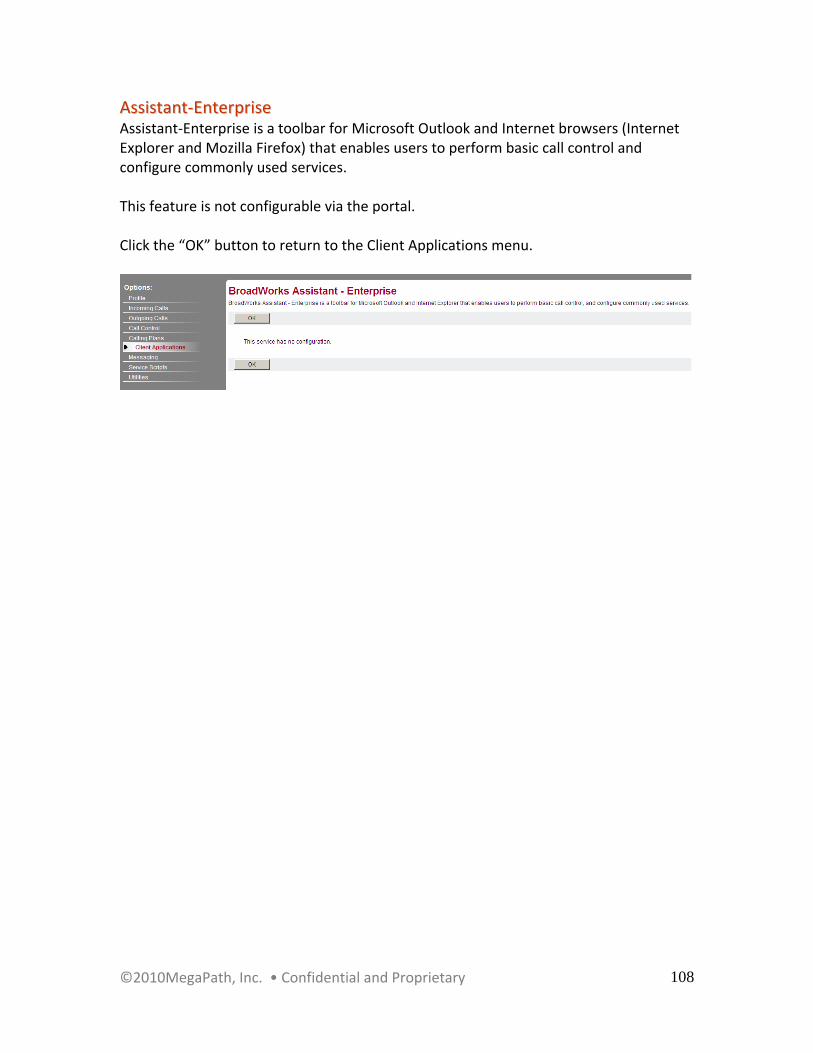
©2010MegaPath, Inc. • Confidential and Proprietary
108
AAssssiissttaanntt‐‐EEnntteerrpprriissee Assistant‐Enterprise is a toolbar for Microsoft Outlook and Internet browsers (Internet Explorer and Mozilla Firefox) that enables users to perform basic call control and configure commonly used services. This feature is not configurable via the portal. Click the “OK” button to return to the Client Applications menu.

©2010MegaPath, Inc. • Confidential and Proprietary
109
Messaging Menu
Basic Menu Description Advanced Menu Description
Voice Portal Calling Originate calls from the Voice Portal.

©2010MegaPath, Inc. • Confidential and Proprietary
110
VVooiiccee PPoorrttaall CCaalllliinngg Voice Portal Calling allows you to originate calls from the voice portal. To return to the Messaging menu without making any changes click the “OK” or “Cancel” button. This feature is an “On” or “Off” feature. The default setting is “On”. To turn this feature “Off”, go to the Messaging menu, and select Voice Portal Calling – On. After you select Voice Portal Calling – On, the Voice Portal Calling settings page is displayed.
To turn this feature “Off”, select the “Off” option. After you are finished with your edits, click the “Apply” button to save your settings. Once you have clicked on “Apply”, you will see “Saved” displayed on your screen.
Click the “OK” button to return to the Messaging menu. You will now see Voice Portal Calling ‐ Off in the Messaging menu.
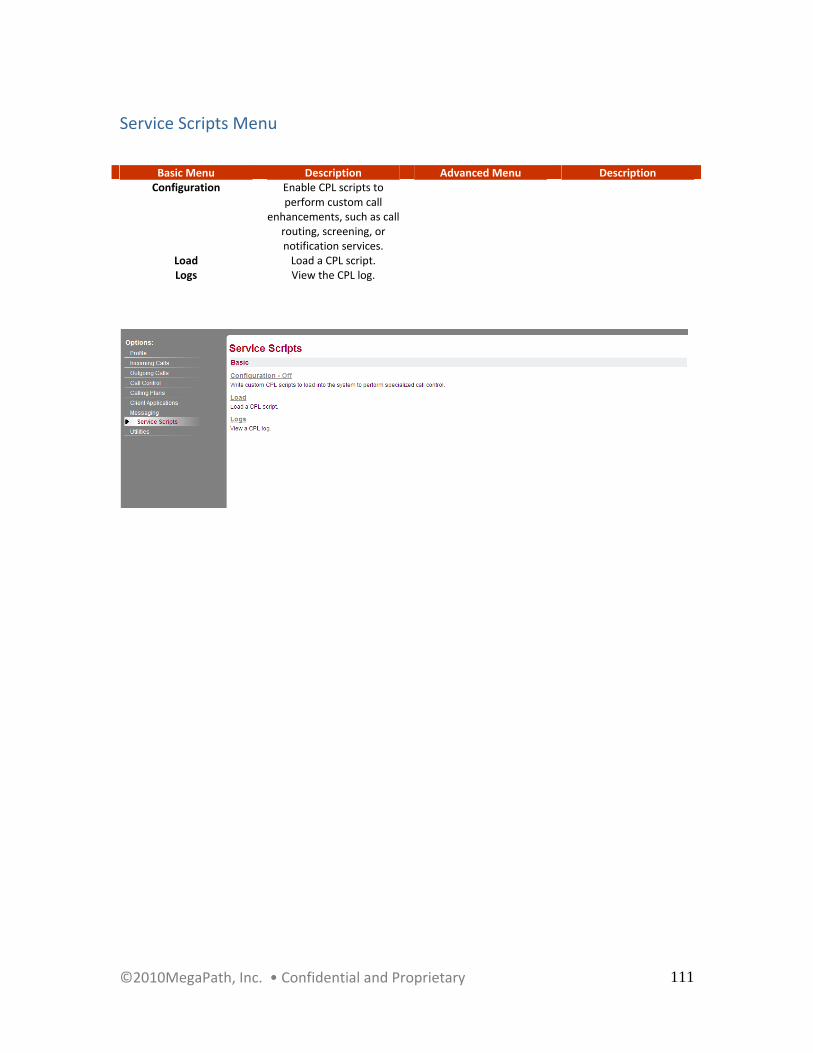
©2010MegaPath, Inc. • Confidential and Proprietary
111
Service Scripts Menu
Basic Menu Description Advanced Menu Description Configuration Enable CPL scripts to
perform custom call enhancements, such as call
routing, screening, or notification services.
Load Load a CPL script. Logs View the CPL log.

©2010MegaPath, Inc. • Confidential and Proprietary
112
SSeerrvviiccee SSccrriippttss Service Scripts allow you to write custom Call Processing Language scripts to load into the system to perform specialized call control. You use this page to configure Call Processing Language (CPL) script files. The call processing language is used for service scripting to manage incoming and outgoing calls. For example, with this service many specific user requirements can be implemented such as forwarding calls at specific times to specific locations. Note: A Service Script enabled at the User level takes precedence over one enabled at the Group level. To return to the Service Scripts menu without making any changes click the “OK” or “Cancel” button. This feature is an “On” or “Off” feature. The default setting is “Off”. To turn this feature “Off”, go to the Service Scripts menu, and select Configuration – Off. After you select Configuration – Off, the Configuration settings page is displayed. To turn the Service Scripts configuration “On” select the “Enabled” option. Click the “Apply” button to save your settings. Once you have clicked on “Apply”, you will see “Saved” displayed on your screen.
Click the “OK” button to return to the Service Scripts menu. Upon returning to the Service Scripts menu, you will now see Configuration – On.
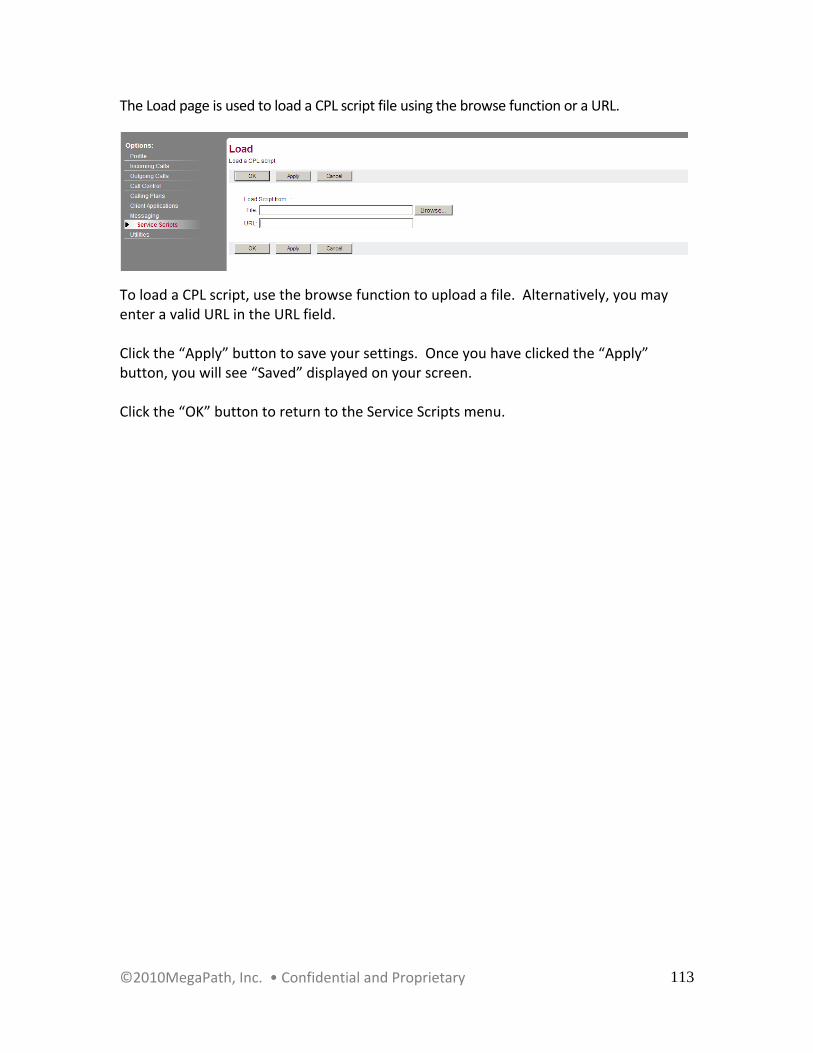
©2010MegaPath, Inc. • Confidential and Proprietary
113
The Load page is used to load a CPL script file using the browse function or a URL.
To load a CPL script, use the browse function to upload a file. Alternatively, you may enter a valid URL in the URL field. Click the “Apply” button to save your settings. Once you have clicked the “Apply” button, you will see “Saved” displayed on your screen. Click the “OK” button to return to the Service Scripts menu.

©2010MegaPath, Inc. • Confidential and Proprietary
114
The Logs page allows you to view the CPL log. You may also clear logs from this page. To clear logs, add a check to the box before Clear Logs. Click the “Apply” button to save your settings. Once you have clicked on “Apply”, you will see “Saved” displayed on your screen. Click the “OK” button to return to the Service Scripts menu.

©2010MegaPath, Inc. • Confidential and Proprietary
115
Utilities Menu
Basic Menu Description Advanced Menu Description Authentication Perform authentication
upon the registration of an IP phone to prevent unauthorized access to
the system.
Feature Access Codes Display the feature access codes (star
codes) for your services.
Enterprise Directory Display the enterprise directory list.
Intercept User Prevent your phone number from receiving
calls.
Registrations Displays all the static and dynamic registrations for a user.

©2010MegaPath, Inc. • Confidential and Proprietary
116
AAuutthheennttiiccaattiioonn Authentication allows you to perform authentication upon the registration of an IP phone to prevent unauthorized access to the system.
Authentication allows you to use encryption to safely determine that the user at a given phone is who they say they are. This helps prevent hijacking of service in hosted communications networks. The user name and password must match the user name and password configured on your phone, or in your phone's configuration file. To return to the Utilities menu without making any changes click the “OK” or “Cancel” button. Add the User information into the provided fields, and then click the “Apply” button to save them. You will see “Saved” displayed on your screen.
After the setting has been saved, click “OK”, to return to the Utilities menu.

©2010MegaPath, Inc. • Confidential and Proprietary
117
FFeeaattuurree AAcccceessss CCooddeess Display the feature access codes (star codes) for your services.
Feature Access Codes list the star codes for services that you have. To activate a service, hit the * key and the number followed by the # key. Some require additional information such as a phone number, but you are prompted for that information. You cannot change your feature access codes. Click the “OK” button to return to the Utilities menu.
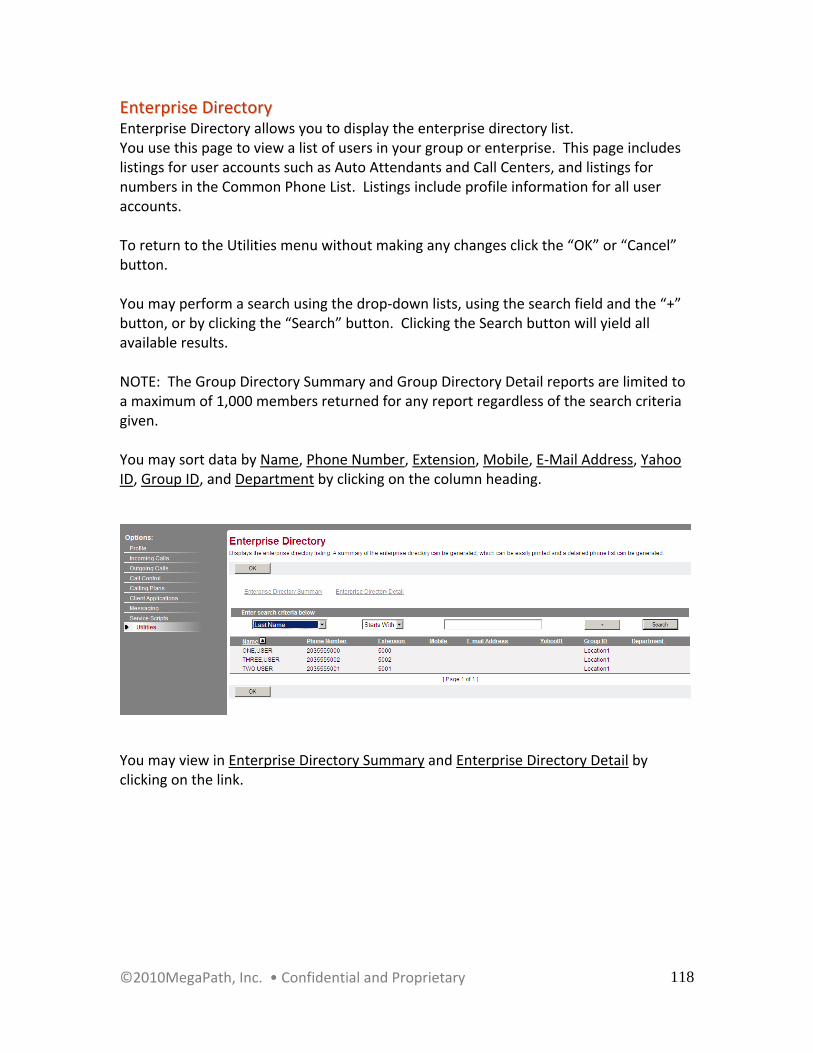
©2010MegaPath, Inc. • Confidential and Proprietary
118
EEnntteerrpprriissee DDiirreeccttoorryy Enterprise Directory allows you to display the enterprise directory list. You use this page to view a list of users in your group or enterprise. This page includes listings for user accounts such as Auto Attendants and Call Centers, and listings for numbers in the Common Phone List. Listings include profile information for all user accounts. To return to the Utilities menu without making any changes click the “OK” or “Cancel” button. You may perform a search using the drop‐down lists, using the search field and the “+” button, or by clicking the “Search” button. Clicking the Search button will yield all available results. NOTE: The Group Directory Summary and Group Directory Detail reports are limited to a maximum of 1,000 members returned for any report regardless of the search criteria given. You may sort data by Name, Phone Number, Extension, Mobile, E‐Mail Address, Yahoo ID, Group ID, and Department by clicking on the column heading.
You may view in Enterprise Directory Summary and Enterprise Directory Detail by clicking on the link.
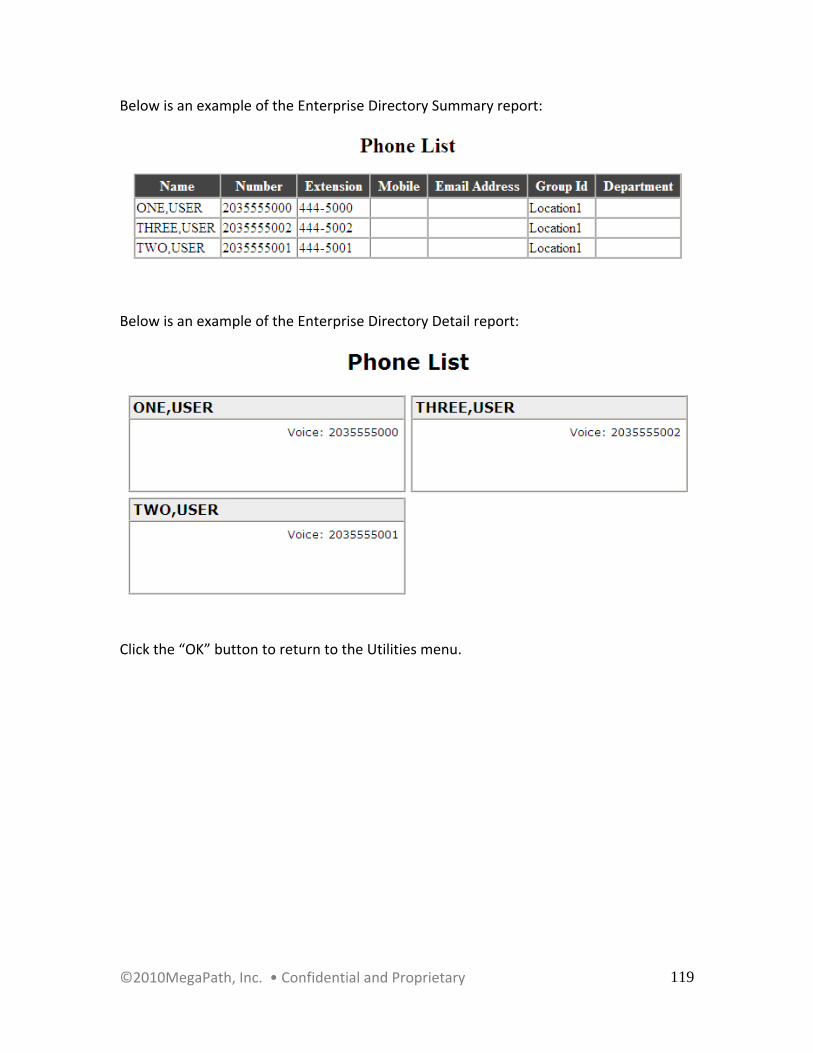
©2010MegaPath, Inc. • Confidential and Proprietary
119
Below is an example of the Enterprise Directory Summary report:
Below is an example of the Enterprise Directory Detail report:
Click the “OK” button to return to the Utilities menu.

©2010MegaPath, Inc. • Confidential and Proprietary
120
IInntteerrcceepptt UUsseerr Intercept User allows your administrator to take your phone out of service while providing callers with announcements and alternate routing options. The default setting is “Off”. Click the “OK” button to return to the Utilities menu.

©2010MegaPath, Inc. • Confidential and Proprietary
121
RReeggiissttrraattiioonnss Registrations displays all the static and dynamic registrations for a user. This feature is not configurable via the portal. Click the “OK” button to return to the Utilities menu.