ocean next - quick check - rti group
TRANSCRIPT
Ocean Next Quick Check - English - Version 1.4A
RTI part number: 4704.002106
Ocean Next
Quick Check
Welcome to Quick Check
Ocean Next with Quick Check is a is a powerfultool for everybody working with Quality Assuranceof X-ray systems. Ocean Next can be used withthe X-ray meters Piranha and Cobia from RTI.
NOTICE
RTI Group AB reserves all rights to make changes in the Ocean Next software,and the information in this document without prior notice.RTI Group AB assumes no responsibility for any errors or consequentialdamages that may result from the use or misinterpretation of any informationcontained in this document.
Copyright © 2020-2021 by RTI Group AB. All rights reserved.Content of this document may not be reproduced for any other purpose thansupporting the use of the product without prior permission from RTI Group AB.
Microsoft, Microsoft Excel, Microsoft Access, Windows, Win32, Windows 95, 98, ME, NT, 2000, XP, 2003,Vista, Windows 7 and Windows 8 are either registered trademarks or trademarks of Microsoft Corporation inthe United States and/or other countries.
OpenOffice.org and OpenOffice.org Calc are registred trademarks of OpenOffice.org.
BLUETOOTH is a trademark owned by Bluetooth SIG, Inc., USA.
RTI Electronics Inc.33 Jacksonville Road, Building 1Towaco, NJ 07082USA
Phone: 800-222-7537 (Toll free)
Int. +1-973-439-0242
Fax: Int. +1-973-439-0248
E-mailSales: [email protected]: [email protected]: [email protected]
Web site: https://www.rtigroup.com
Contact Information -
United States
RTI Group ABFlöjelbergsgatan 8 CSE-431 37 MÖLNDALSweden
Phone: Int. +46 31 7463600
E-mailSales: [email protected]: [email protected]: [email protected]
Web site: https://www.rtigroup.com
Contact Information -
World-Wide
2021-01-04/1.4A Ocean Next Quick Check
Intended Use of the Ocean Software
Together with instruments from RTI Group AB the Ocean Software is intended to be used forindependent service and quality control, including measurements of kerma, kerma rate, kVp, tubecurrent, exposure time, luminance, illuminance, and dose area product, within limitations statedbelow.
If installed according to accompanying documents, the product is intended to be used together withall diagnostic X-ray equipment except for:- therapeutical X-ray sources.- X-ray equipment w ith tube potential below 18 kV or above 160 kV.- X-ray equipment on w hich the instrument cannot be mounted properly.- specific types of X-ray equipment listed in the instructions for use or in additional information fromthe manufacturer.
With the X-ray installation without patient present, the product is intended to be used:- for assessing the performance of the X-ray equipment.- for evaluation of examination techniques and procedures.- for service and maintenance of the X-ray equipment.- for quality control of the X-ray equipment.- for educational purposes, authority supervision etc.
The product is intended to be used by hospital physicists, X-ray engineers, manufacturer's serviceteams, and other professionals w ith similar tasks and competencies. The operator needs trainingto be able to use the product as intended. This training can be achieved either by study of themanual, study of the built-in help function in measurement softw are or, on request, by a courseordered from the manufacturer.
The product is intended to be used inside X-ray rooms ready for clinical use and can safely be leftsw itched on and in any measuring mode in the vicinity of patients.
The product is NOT intended to be used:- for direct control of diagnostic X-ray equipment performance during irradiation of a patient.- so that patients or other unqualified persons can change settings of operating parametersduring, immediately before, or after measurements.- for any guidance to diagnosis of patients.
Ocean Next Quick Check 2021-01-04/1.4A
2021-01-04/1.4A
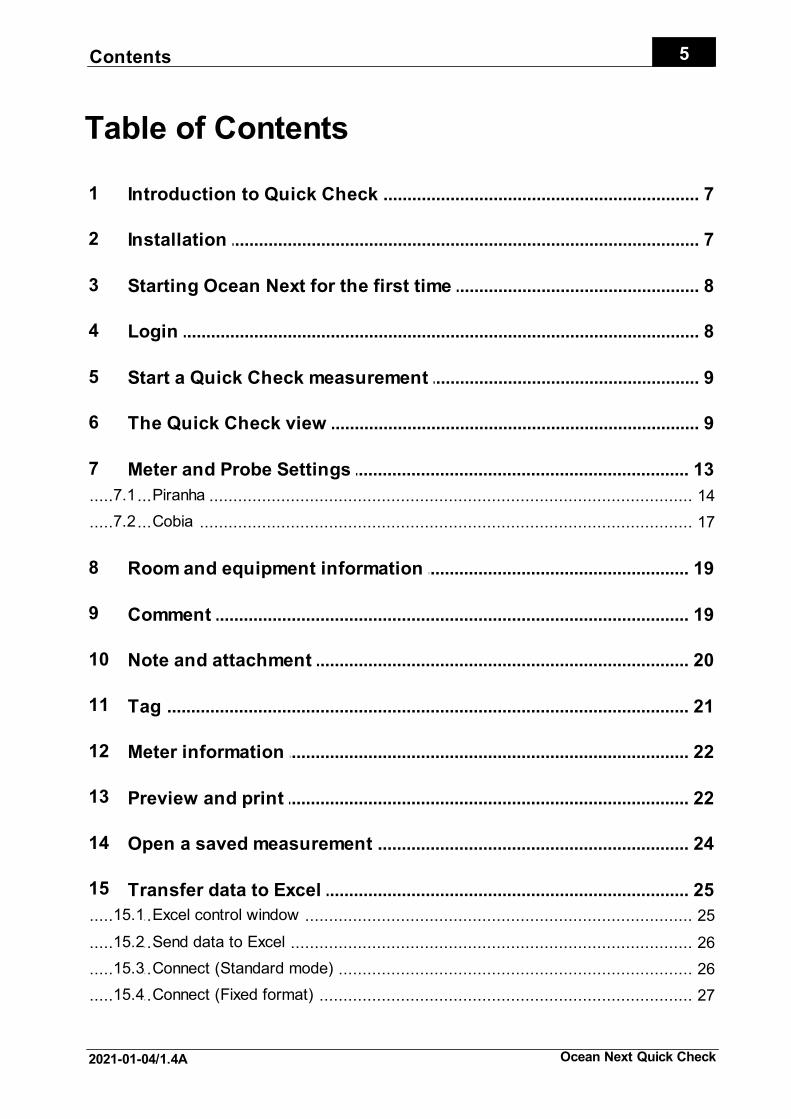
5Contents
Ocean Next Quick Check
Table of Contents
.............................................................................................................. 7Introduction to Quick Check 1
.............................................................................................................. 7Installation 2
.............................................................................................................. 8Starting Ocean Next for the first time 3
.............................................................................................................. 8Login 4
.............................................................................................................. 9Start a Quick Check measurement 5
.............................................................................................................. 9The Quick Check view 6
.............................................................................................................. 13Meter and Probe Settings 7
.............................................................................................................................. 14Piranha 7.1
.............................................................................................................................. 17Cobia 7.2
.............................................................................................................. 19Room and equipment information 8
.............................................................................................................. 19Comment 9
.............................................................................................................. 20Note and attachment 10
.............................................................................................................. 21Tag 11
.............................................................................................................. 22Meter information 12
.............................................................................................................. 22Preview and print 13
.............................................................................................................. 24Open a saved measurement 14
.............................................................................................................. 25Transfer data to Excel 15
.............................................................................................................................. 25Excel control window 15.1
.............................................................................................................................. 26Send data to Excel 15.2
.............................................................................................................................. 26Connect (Standard mode) 15.3
.............................................................................................................................. 27Connect (Fixed format) 15.4
2021-01-04/1.4A
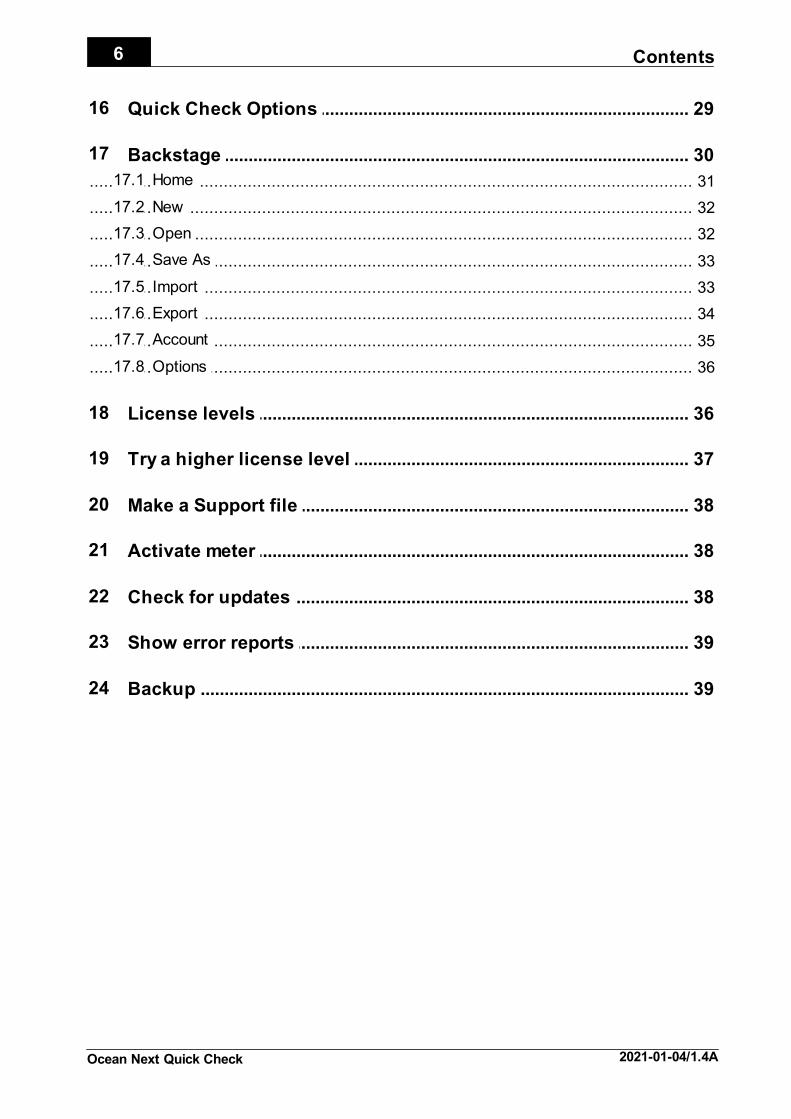
Contents6
Ocean Next Quick Check
.............................................................................................................. 29Quick Check Options 16
.............................................................................................................. 30Backstage 17
.............................................................................................................................. 31Home 17.1
.............................................................................................................................. 32New 17.2
.............................................................................................................................. 32Open 17.3
.............................................................................................................................. 33Save As 17.4
.............................................................................................................................. 33Import 17.5
.............................................................................................................................. 34Export 17.6
.............................................................................................................................. 35Account 17.7
.............................................................................................................................. 36Options 17.8
.............................................................................................................. 36License levels 18
.............................................................................................................. 37Try a higher license level 19
.............................................................................................................. 38Make a Support file 20
.............................................................................................................. 38Activate meter 21
.............................................................................................................. 38Check for updates 22
.............................................................................................................. 39Show error reports 23
.............................................................................................................. 39Backup 24
7Introduction to Quick Check
2021-01-04/1.4A Ocean Next Quick Check
1 Introduction to Quick CheckQuick Check is the display for your meter when you just need to make a quick measurement. Quick Checkuses plug-and-play and adapts to the meter you use and the detector you have connected.
You can do the following with Quick Check:
· Quick measurements
· Save your measurements
· Print a simple report
· Export to Excel
Quick Check is part of Ocean Next and corresponds to the first license level called QUICK that is included witheach meter. It is possible to upgrade to ADVANTAGE or PROFESSIONAL to get more capabilities.
2 InstallationOcean Next requires Windows 10 or 8.1.
The screen you use must at least have resolution of 1280 x 800 with factor of 100% (setting in Windows).The table below shows minimum screen size with other scale factors:
Scale factor Minimum screen size
100% 1280 x 800
125% 1600 x 1000
150% 1920 x 1200
175% 2240 x 1400
200% 2560 x 1600
250% 3200 x 2000
300% 3840 x 2400
350% 4480 x 2800
400% 5120 x 3200
Example: Your screen has a resolution of 1920 x 1080, maximum scaling you can use in Windows is 125%.
Ocean will warn if screen size is incorrect and continue to run but certain objects may not be visible on thescreen and it might be confusing and difficult to use the application.
InstallationQuick Check is installed with the Ocean Next installer. Run the installer and follow the on screen instructions. Incase you have Ocean 2014 installed on your computer, you will be asked during the installation process if youwant to import your data from Ocean 2014. If you accept this, all your data from Ocean 2014 will be importedand available in Ocean Next. It will take some extra time the first time you start Ocean Next since all your olddata needs to be converted to the new Ocean Next format. Your old data and Ocean 2014 will be left exactlyas it is and Ocean 2014 will continue to run as before. In case you want to use an Ocean 2014 database fromanother computer, use the Database Buckup function to make a copy of the database, move the file to thecomputer with Ocean Next, and use the Restore Database function to load the database.
Ocean Next is installed for one user and will require you to specify a username and password. Username mustbe an e-mail address.
It is recommended, in case you are more than one person using the same computer to run Ocean, that eachuser has a personal Windows account on the computer and installs their own copy of Ocean with his ownusername and password. Working in this way, will make your and your colleagues setup more compatible withfuture functions coming from RTI Group.
Starting Ocean Next for the first time8
Ocean Next Quick Check 2021-01-04/1.4A
3 Starting Ocean Next for the first timeWhen you start Quick Check (Ocean Next) for the first time you are asked to specify a user profile:
Fill in the required information. It is recommended that use your personal e-mail as username, this will makeyour setup more "future proof" when RTI Group in a near future releases new functions related to OceanNext. At this point is the information you enter here only stored locally on your computer, and your e-mailaddress will only be used in case you chose to send a support file to RTI Group. Your name andorganization/company are automatically used in the corresponding fields to specify who the "tester" is whenOcean creates a printed report. You always have the option to change or remove this information.
Important: You can't change your username once you have created the account. If you have any problem,please contact RTI Support. You must contact RTI Support if you forget your password. You will get a "resetkey" sent to the e-mail address you use as username.
The information will not be used for any other purpose without your approval.
After you have created your account, the start-up procedure continues. If you, during the installation process,choosed to import a database from Ocean 2014, a migration process starts that will take a few minutesdepending on the size of the database. The progress is shown on your screen. Note that your existinginstallation of Ocean 2014 is not affected, it is kept exactly as it is.
You are ready to start when Ocean Next Backstage view is shown.
4 LoginIf you have unchecked "Keep me logged in", you will have to enter your username and password every timeyou start Ocean Next:
If you have forgotten your password you can reset it in the following way:
1. Click on the text "I have forgotten my password".2. A new dialogue is shown:
3. Send your username to Support or call to get a "reset key".4. When you have the "reset key" enter it in the field and click on the "Login" bytton.
9Start a Quick Check measurement
2021-01-04/1.4A Ocean Next Quick Check
5 Start a Quick Check measurementWhen Ocean Next is started, the Backstage Home page is show. You can read more about the BackstageHome page here... (section "Backstage").
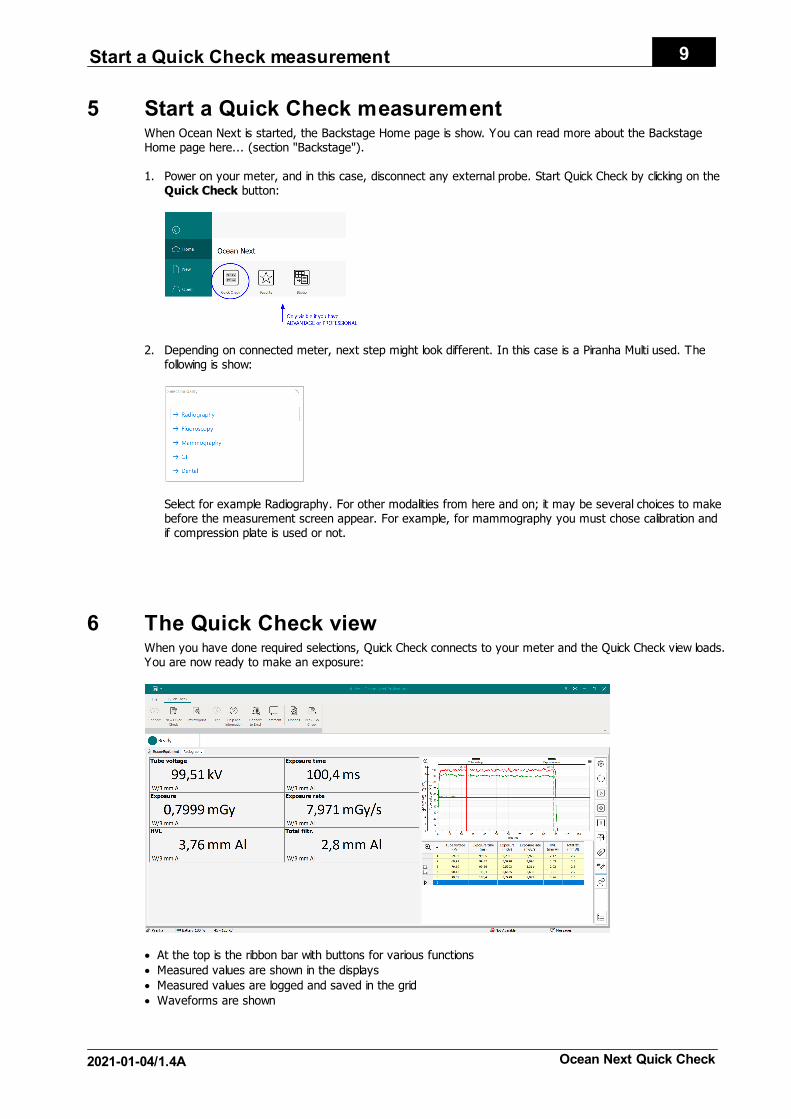
1. Power on your meter, and in this case, disconnect any external probe. Start Quick Check by clicking on theQuick Check button:
2. Depending on connected meter, next step might look different. In this case is a Piranha Multi used. Thefollowing is show:
Select for example Radiography. For other modalities from here and on; it may be several choices to makebefore the measurement screen appear. For example, for mammography you must chose calibration andif compression plate is used or not.
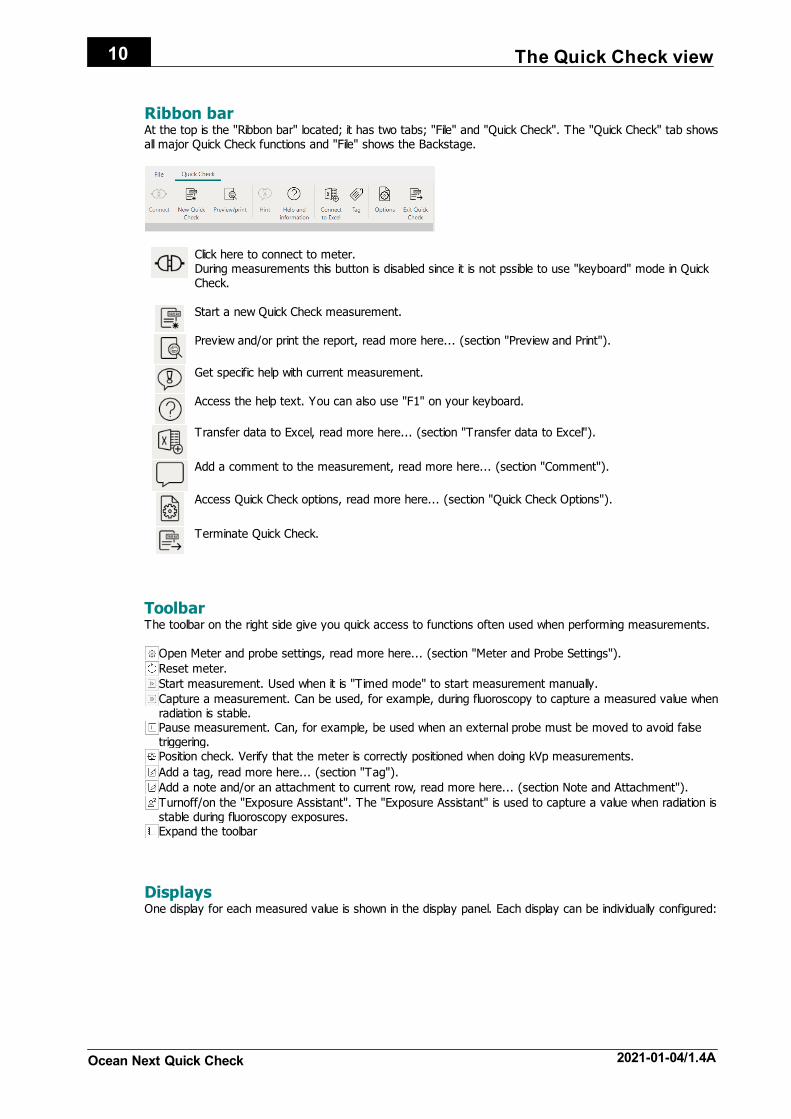
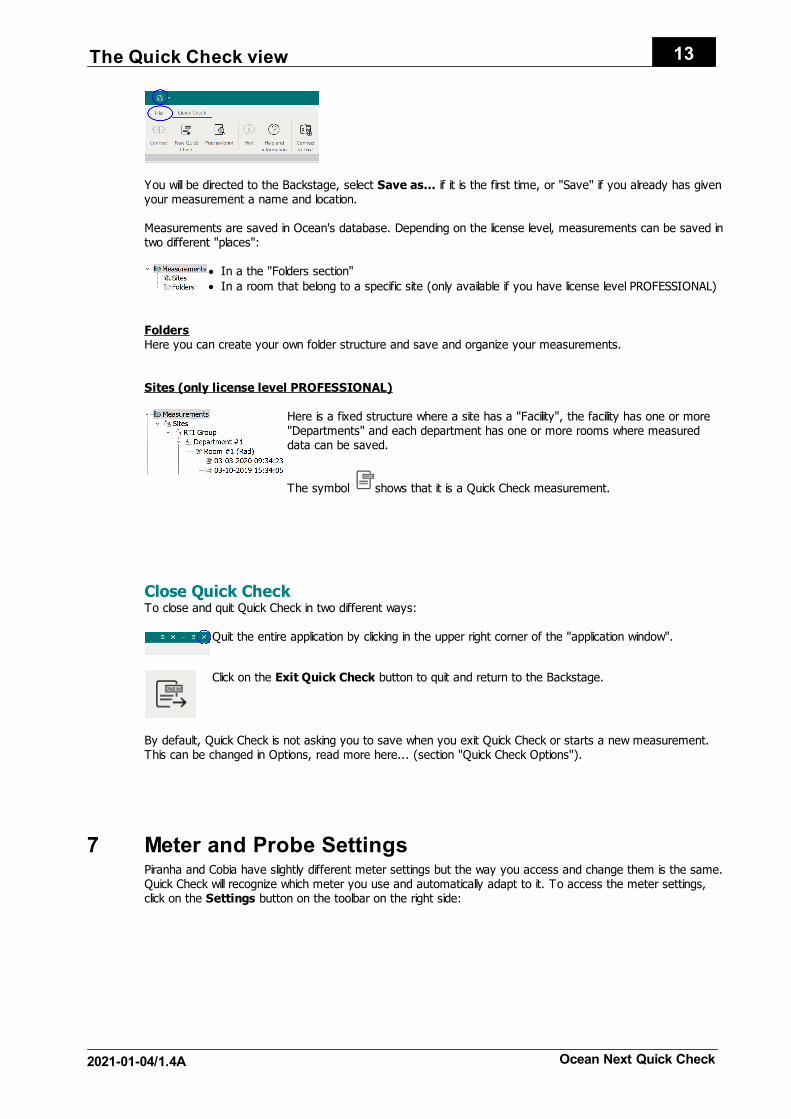
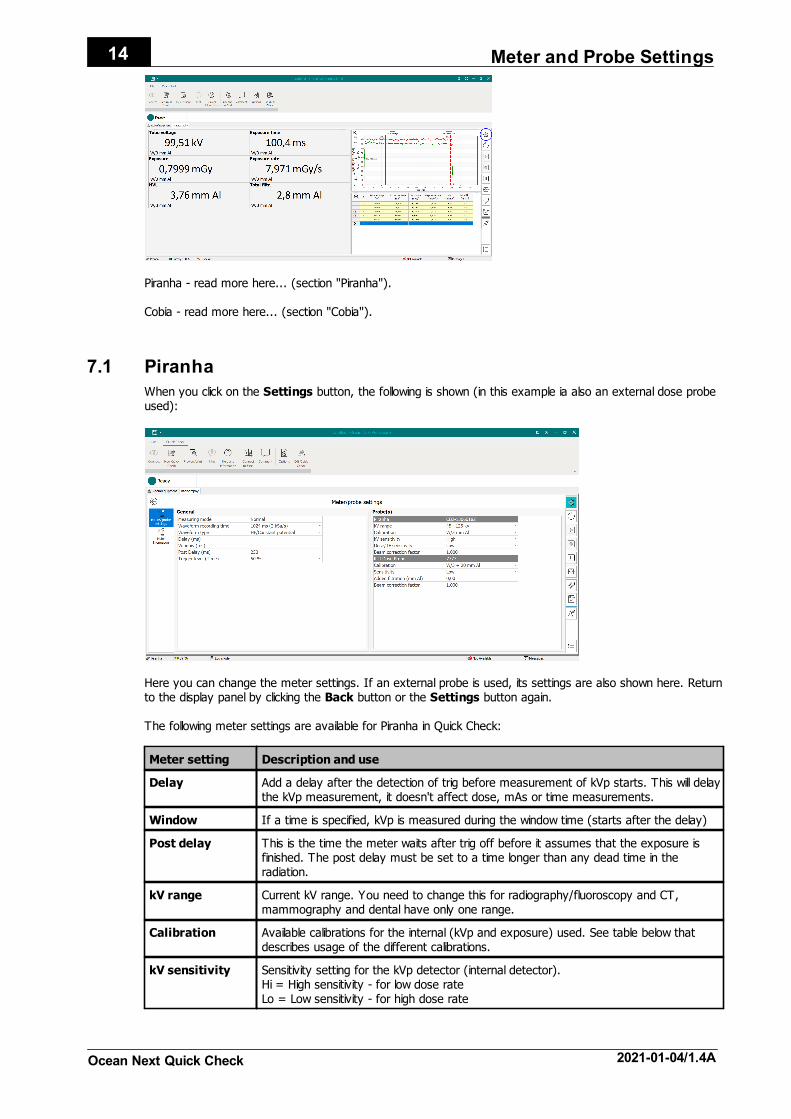
6 The Quick Check viewWhen you have done required selections, Quick Check connects to your meter and the Quick Check view loads.You are now ready to make an exposure:
· At the top is the ribbon bar with buttons for various functions
· Measured values are shown in the displays
· Measured values are logged and saved in the grid
· Waveforms are shown
The Quick Check view10
Ocean Next Quick Check 2021-01-04/1.4A
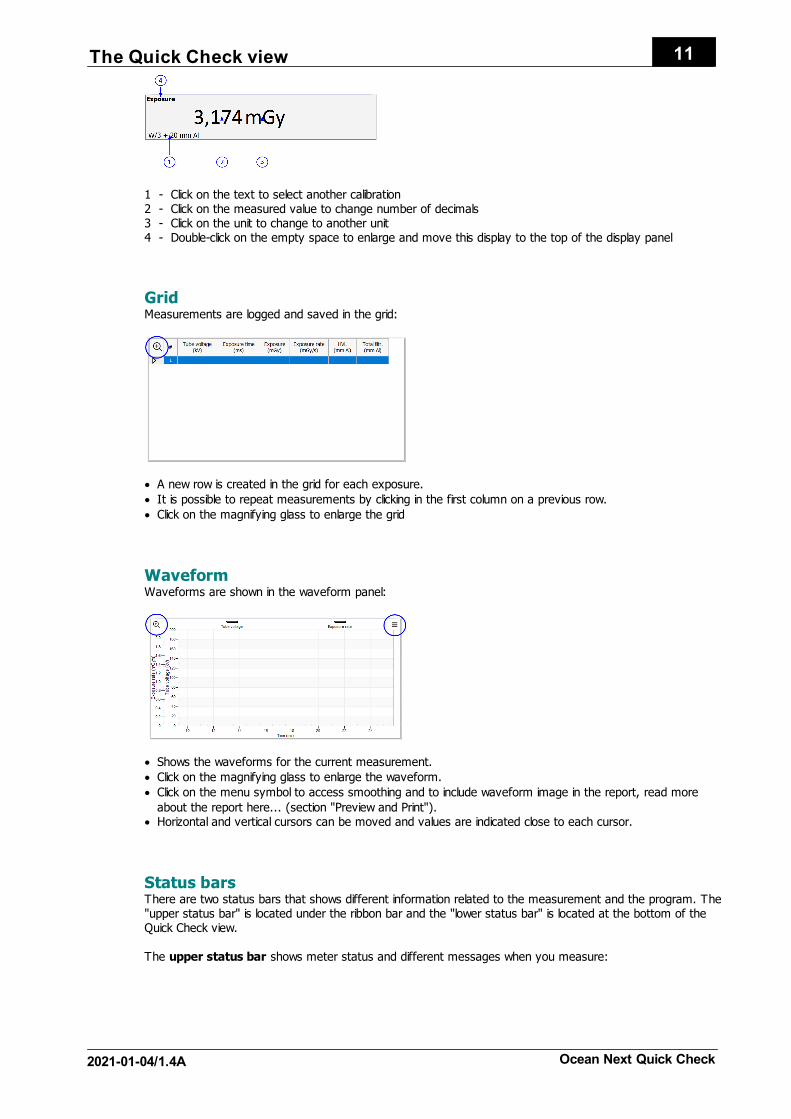
Ribbon barAt the top is the "Ribbon bar" located; it has two tabs; "File" and "Quick Check". The "Quick Check" tab showsall major Quick Check functions and "File" shows the Backstage.
Click here to connect to meter.During measurements this button is disabled since it is not pssible to use "keyboard" mode in QuickCheck.
Start a new Quick Check measurement.
Preview and/or print the report, read more here... (section "Preview and Print").
Get specific help with current measurement.
Access the help text. You can also use "F1" on your keyboard.
Transfer data to Excel, read more here... (section "Transfer data to Excel").
Add a comment to the measurement, read more here... (section "Comment").
Access Quick Check options, read more here... (section "Quick Check Options").
Terminate Quick Check.
ToolbarThe toolbar on the right side give you quick access to functions often used when performing measurements.
Open Meter and probe settings, read more here... (section "Meter and Probe Settings").
Reset meter.
Start measurement. Used when it is "Timed mode" to start measurement manually.
Capture a measurement. Can be used, for example, during fluoroscopy to capture a measured value whenradiation is stable.Pause measurement. Can, for example, be used when an external probe must be moved to avoid falsetriggering.Position check. Verify that the meter is correctly positioned when doing kVp measurements.
Add a tag, read more here... (section "Tag").
Add a note and/or an attachment to current row, read more here... (section Note and Attachment").
Turnoff/on the "Exposure Assistant". The "Exposure Assistant" is used to capture a value when radiation isstable during fluoroscopy exposures. Expand the toolbar
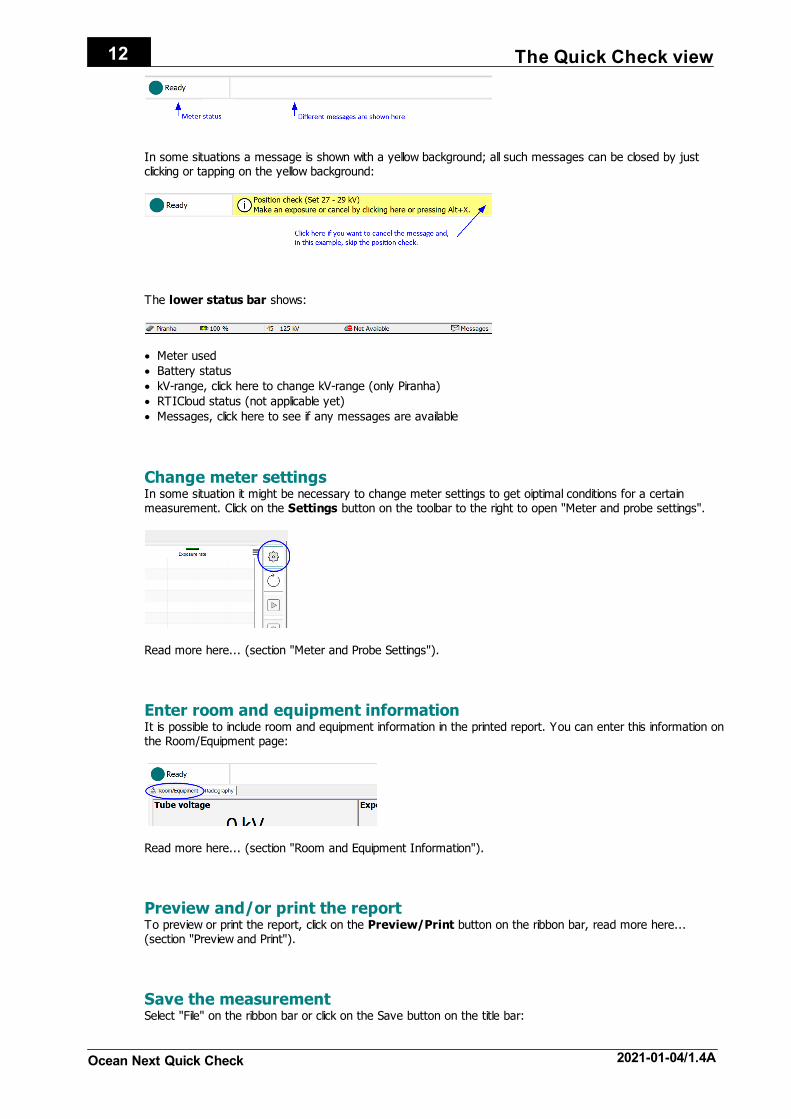
DisplaysOne display for each measured value is shown in the display panel. Each display can be individually configured:
11The Quick Check view
2021-01-04/1.4A Ocean Next Quick Check
1 - Click on the text to select another calibration2 - Click on the measured value to change number of decimals3 - Click on the unit to change to another unit4 - Double-click on the empty space to enlarge and move this display to the top of the display panel
GridMeasurements are logged and saved in the grid:
· A new row is created in the grid for each exposure.
· It is possible to repeat measurements by clicking in the first column on a previous row.
· Click on the magnifying glass to enlarge the grid
WaveformWaveforms are shown in the waveform panel:
· Shows the waveforms for the current measurement.
· Click on the magnifying glass to enlarge the waveform.
· Click on the menu symbol to access smoothing and to include waveform image in the report, read more
about the report here... (section "Preview and Print").· Horizontal and vertical cursors can be moved and values are indicated close to each cursor.
Status barsThere are two status bars that shows different information related to the measurement and the program. The"upper status bar" is located under the ribbon bar and the "lower status bar" is located at the bottom of theQuick Check view.
The upper status bar shows meter status and different messages when you measure:
The Quick Check view12
Ocean Next Quick Check 2021-01-04/1.4A
In some situations a message is shown with a yellow background; all such messages can be closed by justclicking or tapping on the yellow background:
The lower status bar shows:
· Meter used
· Battery status
· kV-range, click here to change kV-range (only Piranha)
· RTICloud status (not applicable yet)
· Messages, click here to see if any messages are available
Change meter settingsIn some situation it might be necessary to change meter settings to get oiptimal conditions for a certainmeasurement. Click on the Settings button on the toolbar to the right to open "Meter and probe settings".
Read more here... (section "Meter and Probe Settings").
Enter room and equipment informationIt is possible to include room and equipment information in the printed report. You can enter this information onthe Room/Equipment page:
Read more here... (section "Room and Equipment Information").
Preview and/or print the reportTo preview or print the report, click on the Preview/Print button on the ribbon bar, read more here...(section "Preview and Print").
Save the measurementSelect "File" on the ribbon bar or click on the Save button on the title bar:
13The Quick Check view
2021-01-04/1.4A Ocean Next Quick Check
You will be directed to the Backstage, select Save as... if it is the first time, or "Save" if you already has givenyour measurement a name and location.
Measurements are saved in Ocean's database. Depending on the license level, measurements can be saved intwo different "places":
· In a the "Folders section"
· In a room that belong to a specific site (only available if you have license level PROFESSIONAL)
FoldersHere you can create your own folder structure and save and organize your measurements.
Sites (only license level PROFESSIONAL)
Here is a fixed structure where a site has a "Facility", the facility has one or more"Departments" and each department has one or more rooms where measureddata can be saved.
The symbol shows that it is a Quick Check measurement.
Close Quick CheckTo close and quit Quick Check in two different ways:
Quit the entire application by clicking in the upper right corner of the "application window".
Click on the Exit Quick Check button to quit and return to the Backstage.
By default, Quick Check is not asking you to save when you exit Quick Check or starts a new measurement.This can be changed in Options, read more here... (section "Quick Check Options").
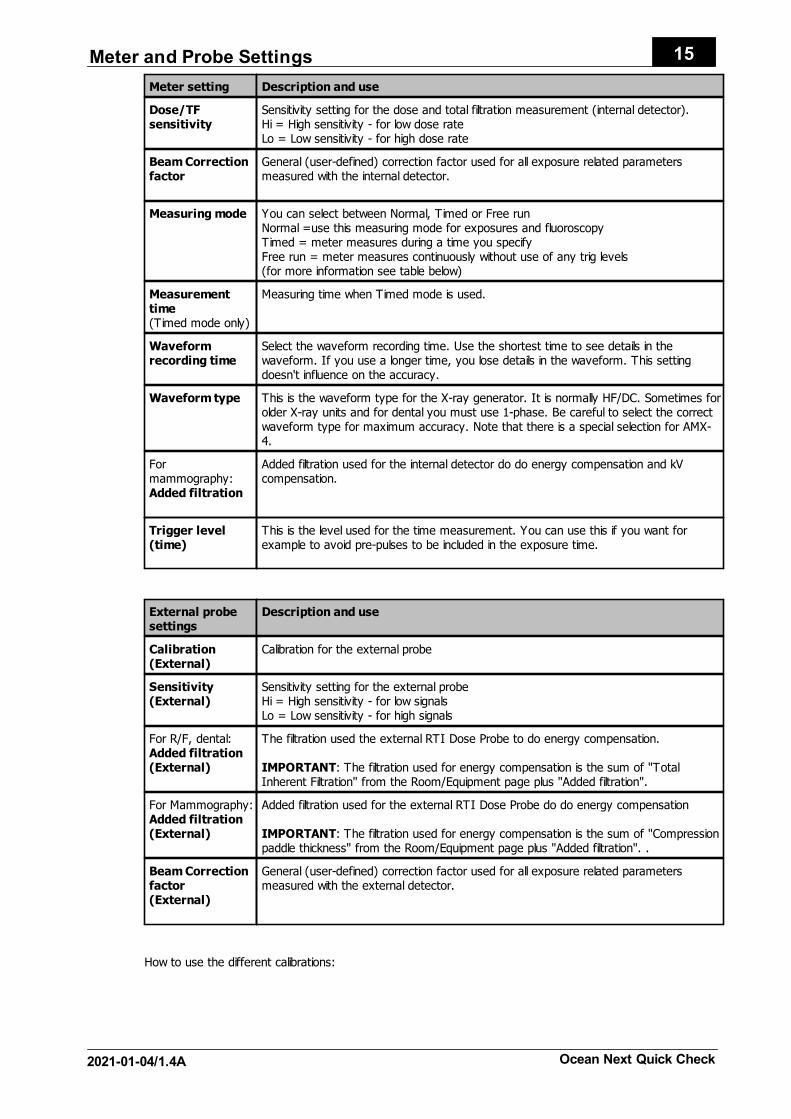
7 Meter and Probe SettingsPiranha and Cobia have slightly different meter settings but the way you access and change them is the same.Quick Check will recognize which meter you use and automatically adapt to it. To access the meter settings,click on the Settings button on the toolbar on the right side:
Meter and Probe Settings14
Ocean Next Quick Check 2021-01-04/1.4A
Piranha - read more here... (section "Piranha").
Cobia - read more here... (section "Cobia").
7.1 Piranha
When you click on the Settings button, the following is shown (in this example ia also an external dose probeused):
Here you can change the meter settings. If an external probe is used, its settings are also shown here. Returnto the display panel by clicking the Back button or the Settings button again.
The following meter settings are available for Piranha in Quick Check:
Meter setting Description and use
Delay Add a delay after the detection of trig before measurement of kVp starts. This will delaythe kVp measurement, it doesn't affect dose, mAs or time measurements.
Window If a time is specified, kVp is measured during the window time (starts after the delay)
Post delay This is the time the meter waits after trig off before it assumes that the exposure isfinished. The post delay must be set to a time longer than any dead time in theradiation.
kV range Current kV range. You need to change this for radiography/fluoroscopy and CT,mammography and dental have only one range.
Calibration Available calibrations for the internal (kVp and exposure) used. See table below thatdescribes usage of the different calibrations.
kV sensitivity Sensitivity setting for the kVp detector (internal detector).Hi = High sensitivity - for low dose rateLo = Low sensitivity - for high dose rate
15Meter and Probe Settings
2021-01-04/1.4A Ocean Next Quick Check
Meter setting Description and use
Dose/TFsensitivity
Sensitivity setting for the dose and total filtration measurement (internal detector).Hi = High sensitivity - for low dose rateLo = Low sensitivity - for high dose rate
Beam Correctionfactor
General (user-defined) correction factor used for all exposure related parametersmeasured with the internal detector.
Measuring mode You can select between Normal, Timed or Free runNormal =use this measuring mode for exposures and fluoroscopyTimed = meter measures during a time you specifyFree run = meter measures continuously without use of any trig levels(for more information see table below)
Measurementtime(Timed mode only)
Measuring time when Timed mode is used.
Waveformrecording time
Select the waveform recording time. Use the shortest time to see details in thewaveform. If you use a longer time, you lose details in the waveform. This settingdoesn't influence on the accuracy.
Waveform type This is the waveform type for the X-ray generator. It is normally HF/DC. Sometimes forolder X-ray units and for dental you must use 1-phase. Be careful to select the correctwaveform type for maximum accuracy. Note that there is a special selection for AMX-4.
Formammography:Added filtration
Added filtration used for the internal detector do do energy compensation and kVcompensation.
Trigger level(time)
This is the level used for the time measurement. You can use this if you want forexample to avoid pre-pulses to be included in the exposure time.
External probesettings
Description and use
Calibration(External)
Calibration for the external probe
Sensitivity(External)
Sensitivity setting for the external probeHi = High sensitivity - for low signalsLo = Low sensitivity - for high signals
For R/F, dental:Added filtration(External)
The filtration used the external RTI Dose Probe to do energy compensation.
IMPORTANT: The filtration used for energy compensation is the sum of "TotalInherent Filtration" from the Room/Equipment page plus "Added filtration".
For Mammography:Added filtration(External)
Added filtration used for the external RTI Dose Probe do do energy compensation
IMPORTANT: The filtration used for energy compensation is the sum of "Compressionpaddle thickness" from the Room/Equipment page plus "Added filtration". .
Beam Correctionfactor(External)
General (user-defined) correction factor used for all exposure related parametersmeasured with the external detector.
How to use the different calibrations:
Meter and Probe Settings16
Ocean Next Quick Check 2021-01-04/1.4A
Code Calibration Usage
R1C1
W/3 mm Al General radiography, fluoroscopy, dental and CT
C3 Straton (Siem1) Suitable for Siemens CT with Straton tube
C4 GECT (7°) Suitable for GE CT tubes with a 7° anode angle as well as for othermanufactures CT tubes and replacement tubes with a 7° anode angle
C5 Aquillion 64- Suitable for Toshiba Aquillion 64-320 CT
C6 GECT (10.5°) Suitable for GE CT tubes with a 10.5° anode angle
C7 GECT (Cardiographe) Suitable for GE CT Cardiographe
M1 Mo/30 µm Mo General mammography
M3 Mo/25 µm Rh General mammography
M4 Rh/25 µm Rh General mammography
M6 W/50 µm Rh General mammography - suitable for Hologic Selenia Dimensions andFujifilm Amulet
M7 W/0.50 mm Al General mammography - suitable for Philips MicroDose (Sectra)
M8 Mo/1 mm Al General mammography
M10 W/50 µm Ag General mammography - suitable for Hologic Selenia Dimensions andFujifilm Amulet
M11 W/75 µm Ag General mammography
M12 W/50 µm Rh (Gio) Suitable for Giotto Mammography
M15 W/0.70 mm Al General mammography - suitable for Hologic Selenia Dimensions andFujifilm Amulet
M16 W/50 µm Ag (Sel) Suitable for Hologic Selenia
M17 W/50 µm Rh (Sel) Suitable for Hologic Selenia
M18 W/0.30 mm Cu General mammography - Suitable for Hologic Selenia Dimensions andFujifilm Innovality/Cristalle
M19 W/0.70 mm Al(Inno/Crist)
Suitable for Fujifilm Innovality/Cristalle
M20 W/50 µm Rh(Inno/Crist)
Suitable for Fujifilm Innovality/Cristalle
M21 Mo/25 µm Rh (Sel) Suitable for Hologic Selenia
M22 Rh/30 µm Ag (GE HC) Suitable for GE Senographe Prestina
M23 Rh/30 µm Ag IQST (GEHC)
Suitable for GE Senographe Prestina
M24 Mo/0.25 mm Cu (GEHC)
Suitable for GE Senographe Prestina
M25 Rh/0.25 mm Cu (GE HC) Suitable for GE Senographe Prestina
M26 Mo/30 µm Mo (GE HC) Suitable for GE Senographe Prestina
M27 Affirm Prone W/Ag Suitable for Hologic Affirm Prone
M28 Affirm Prone W/Al Suitable for Hologic Affirm Prone
There are three different measuring modes available using the Piranha. They are as follows:
17Meter and Probe Settings
2021-01-04/1.4A Ocean Next Quick Check
Measuring mode Description and use
Normal The Normal mode is used for short and long (fluoro) exposures. In this mode, yourmeter will automatically sense if there is a signal and when it is above a certain triggerlevel. If the exposure is long, the displays/grid will be updated with new data every 2seconds. If the exposure is short, the results are displayed as soon as the trigger is off.
Free run The free run mode has no trigger level. As soon as the meter is told to beginmeasuring, it starts to measure even if there is no signal. This measuring mode isuseful when the signal you want to measure is very low. Free run is recommended forlight measurements, especially when measuring "ambient" light (when no shutter ispresent).
Timed The Timed mode setting measures during a pre-defined time period. Measurements inTimed mode must be started manually. This measuring mode is very useful when youwant to measure a very low signal. You can use the "very high" sensitivity setting inTimed mode and it will further improve the meter's capability to measure very lowsignals.
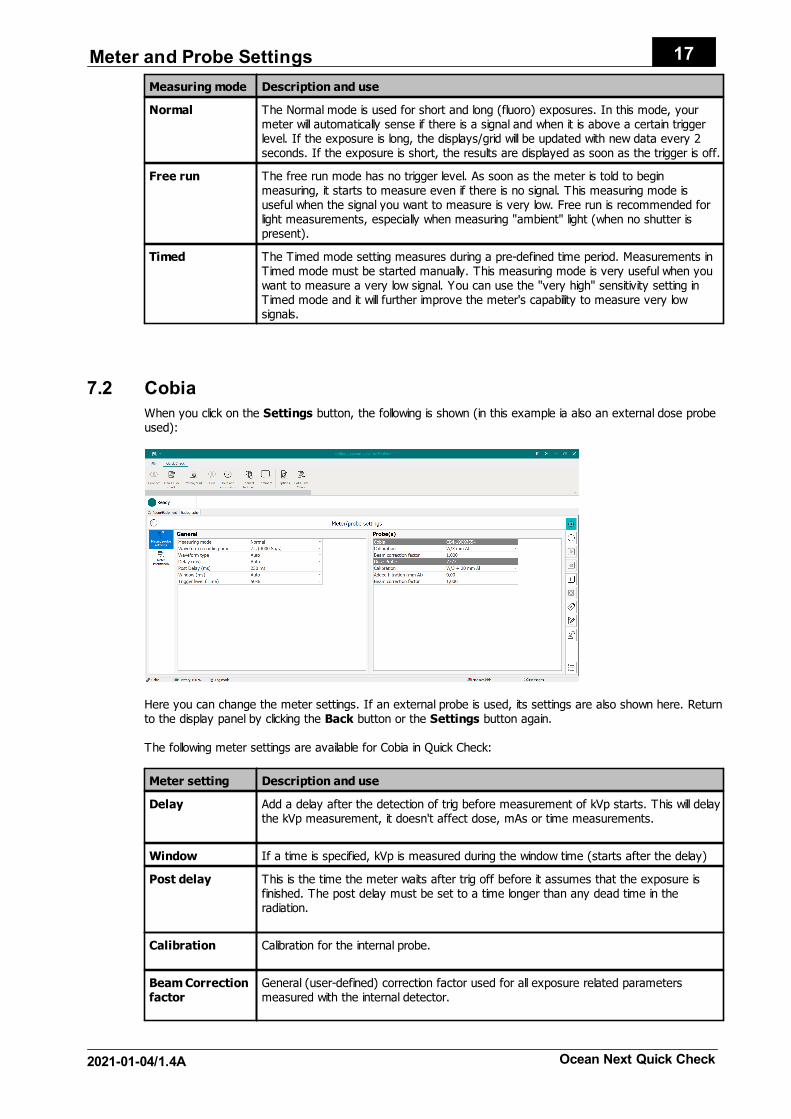
7.2 Cobia
When you click on the Settings button, the following is shown (in this example ia also an external dose probeused):
Here you can change the meter settings. If an external probe is used, its settings are also shown here. Returnto the display panel by clicking the Back button or the Settings button again.
The following meter settings are available for Cobia in Quick Check:
Meter setting Description and use
Delay Add a delay after the detection of trig before measurement of kVp starts. This will delaythe kVp measurement, it doesn't affect dose, mAs or time measurements.
Window If a time is specified, kVp is measured during the window time (starts after the delay)
Post delay This is the time the meter waits after trig off before it assumes that the exposure isfinished. The post delay must be set to a time longer than any dead time in theradiation.
Calibration Calibration for the internal probe.
Beam Correctionfactor
General (user-defined) correction factor used for all exposure related parametersmeasured with the internal detector.
Meter and Probe Settings18
Ocean Next Quick Check 2021-01-04/1.4A
Meter setting Description and use
Measuring mode You can select between Normal or TimedNormal =use this measuring mode for exposures and fluoroscopyTimed = meter measures during a time you specify(for more information see table below)
Measurementtime(Timed mode only)
Measuring time when Timed mode is used.
Waveform type Select "Auto" for all types except AMX-4.
Waveformrecording time
Select the waveform recording time. Use the shortest time to see details in thewaveform. If you use a longer time, you lose details in the waveform. This settingdoesn't influence on the accuracy.
Trigger level(time)
This is the level used for the time measurement. You can use this if you want forexample to avoid pre-pulses to be included in the exposure time.
External probesetting
Description and use
Calibration(External)
Calibration for the external probe.
For R/F, dentalAdded filtration(External)
The filtration used the external RTI Dose Probe to do energy compensation.
IMPORTANT: The filtration used for energy compensation is the sum of "TotalInherent Filtration" from the Room/Equipment page plus "Added filtration".
Beam Correctionfactor(External)
General (user-defined) correction factor used for all exposure related parametersmeasured with the external detector.
How to use the different calibrations (only one calibration is available for Cobia):
Code Calibration Usage
R1 W/3 mm Al General radiography, fluoroscopy and dental
There are two different measuring modes available using the Cobia. They are as follows:
Measuring mode Description and use
Normal The Normal mode is used for short and long (fluoro) exposures. In this mode, yourmeter will automatically sense if there is a signal and when it is above a certain triggerlevel. If the exposure is long, the displays/grid will be updated with new data every 2seconds. If the exposure is short, the results are displayed as soon as the trigger is off.
Timed The Timed mode setting measures during a pre-defined time period. Measurements inTimed mode must be started manually. This measuring mode is very useful when youwant to measure a very low signal. You can use the "very high" sensitivity setting inTimed mode and it will further improve the meter's capability to measure very lowsignals.
19Room and equipment information
2021-01-04/1.4A Ocean Next Quick Check
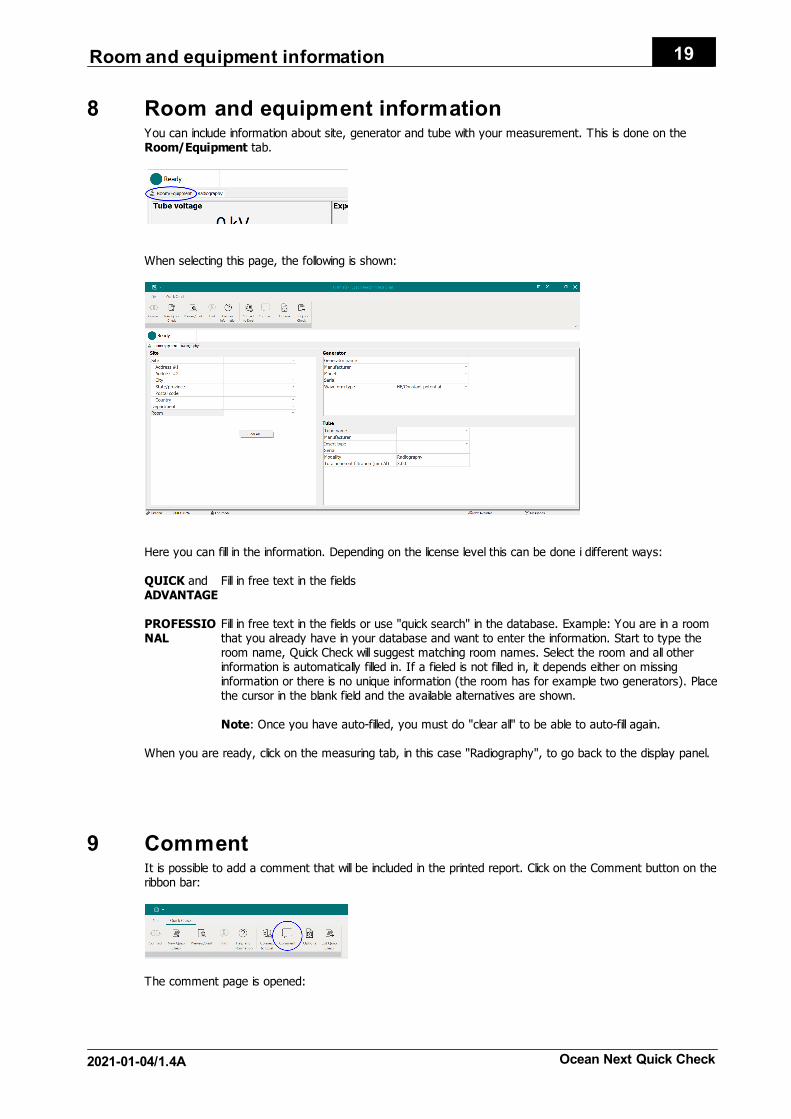
8 Room and equipment informationYou can include information about site, generator and tube with your measurement. This is done on theRoom/Equipment tab.
When selecting this page, the following is shown:
Here you can fill in the information. Depending on the license level this can be done i different ways:
QUICK andADVANTAGE
Fill in free text in the fields
PROFESSIONAL
Fill in free text in the fields or use "quick search" in the database. Example: You are in a roomthat you already have in your database and want to enter the information. Start to type theroom name, Quick Check will suggest matching room names. Select the room and all otherinformation is automatically filled in. If a fieled is not filled in, it depends either on missinginformation or there is no unique information (the room has for example two generators). Placethe cursor in the blank field and the available alternatives are shown.
Note: Once you have auto-filled, you must do "clear all" to be able to auto-fill again.
When you are ready, click on the measuring tab, in this case "Radiography", to go back to the display panel.
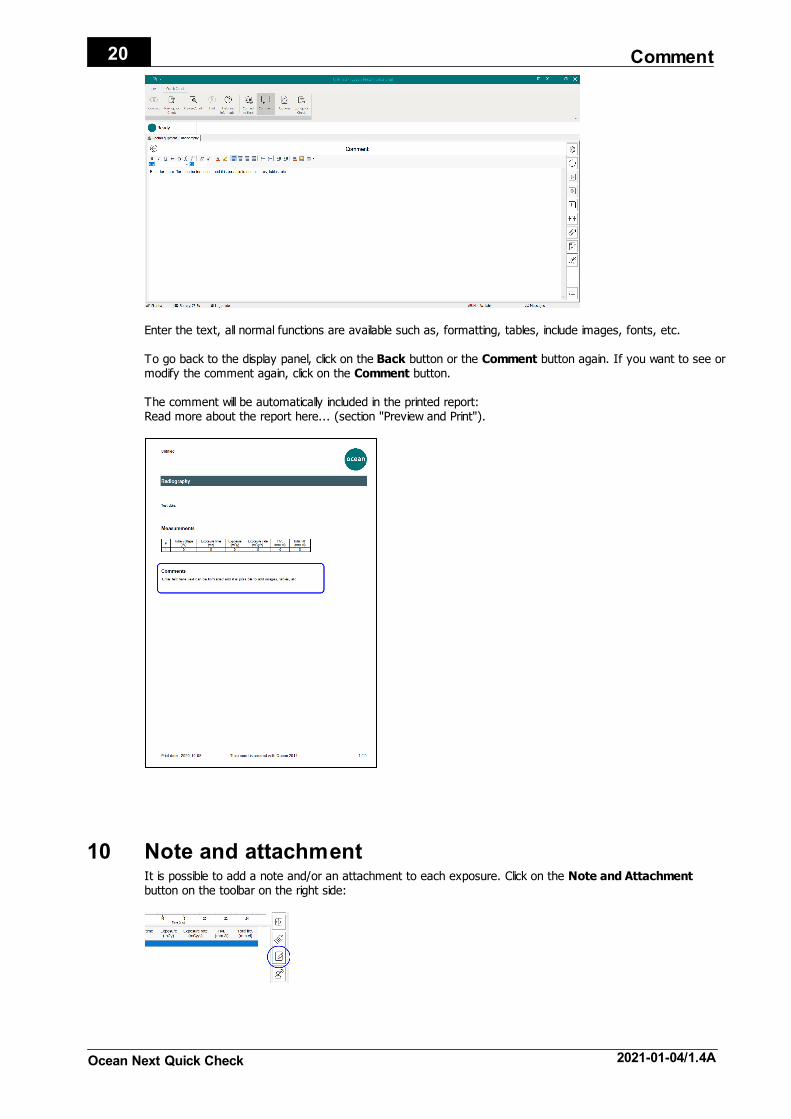
9 CommentIt is possible to add a comment that will be included in the printed report. Click on the Comment button on theribbon bar:
The comment page is opened:
Comment20
Ocean Next Quick Check 2021-01-04/1.4A
Enter the text, all normal functions are available such as, formatting, tables, include images, fonts, etc.
To go back to the display panel, click on the Back button or the Comment button again. If you want to see ormodify the comment again, click on the Comment button.
The comment will be automatically included in the printed report:Read more about the report here... (section "Preview and Print").
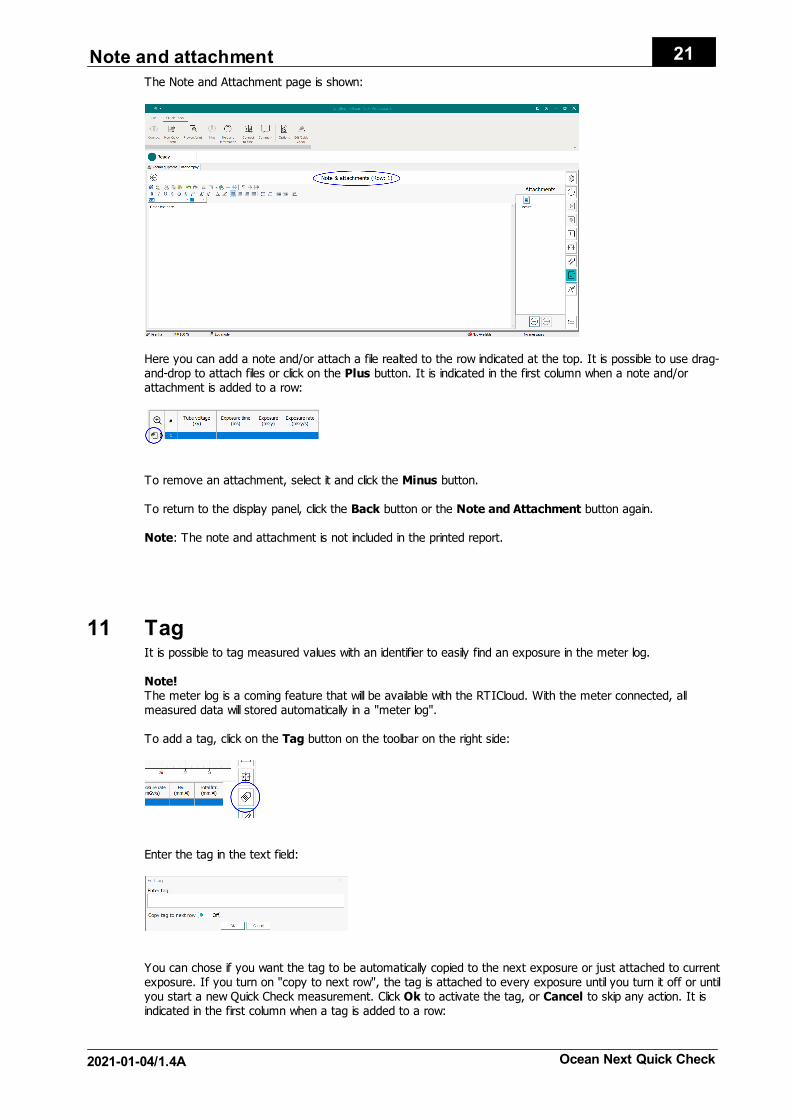
10 Note and attachmentIt is possible to add a note and/or an attachment to each exposure. Click on the Note and Attachmentbutton on the toolbar on the right side:
21Note and attachment
2021-01-04/1.4A Ocean Next Quick Check
The Note and Attachment page is shown:
Here you can add a note and/or attach a file realted to the row indicated at the top. It is possible to use drag-and-drop to attach files or click on the Plus button. It is indicated in the first column when a note and/orattachment is added to a row:
To remove an attachment, select it and click the Minus button.
To return to the display panel, click the Back button or the Note and Attachment button again.
Note: The note and attachment is not included in the printed report.
11 TagIt is possible to tag measured values with an identifier to easily find an exposure in the meter log.
Note!The meter log is a coming feature that will be available with the RTICloud. With the meter connected, allmeasured data will stored automatically in a "meter log".
To add a tag, click on the Tag button on the toolbar on the right side:
Enter the tag in the text field:
You can chose if you want the tag to be automatically copied to the next exposure or just attached to currentexposure. If you turn on "copy to next row", the tag is attached to every exposure until you turn it off or untilyou start a new Quick Check measurement. Click Ok to activate the tag, or Cancel to skip any action. It isindicated in the first column when a tag is added to a row:

Tag22
Ocean Next Quick Check 2021-01-04/1.4A
12 Meter informationTo view the Meter information, click on the Settings button on the toolbar on the right side and then theMeter Information button on the left side:
The Meter Settings page shows information about currently used meter and external probe(if connected):
Close the Meter Information page by clicking on the Back button or on the Settings button again.
13 Preview and printYou can directly print your measured data (or create a PDF file) just click on the Preview/Print button onthe Quick Check ribbon bar:
A preview of the print-out is shown on the screen:
23Preview and print
2021-01-04/1.4A Ocean Next Quick Check
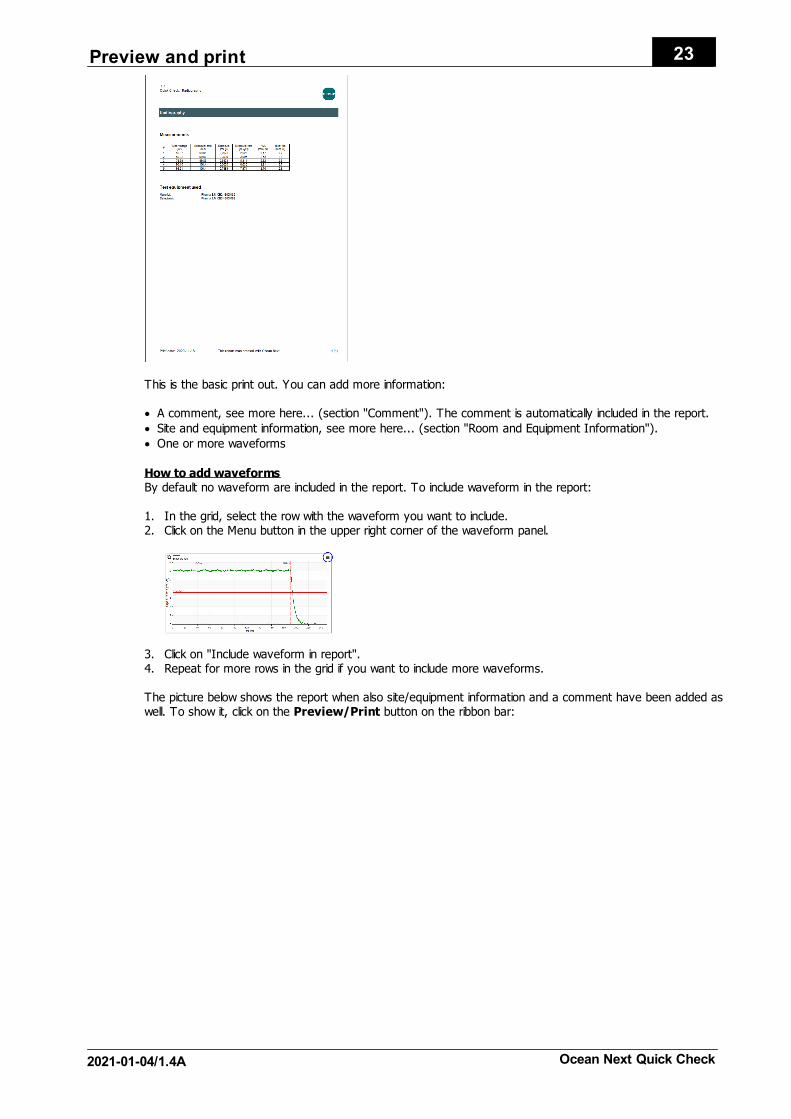
This is the basic print out. You can add more information:
· A comment, see more here... (section "Comment"). The comment is automatically included in the report.
· Site and equipment information, see more here... (section "Room and Equipment Information").
· One or more waveforms
How to add waveformsBy default no waveform are included in the report. To include waveform in the report:
1. In the grid, select the row with the waveform you want to include.2. Click on the Menu button in the upper right corner of the waveform panel.
3. Click on "Include waveform in report".4. Repeat for more rows in the grid if you want to include more waveforms.
The picture below shows the report when also site/equipment information and a comment have been added aswell. To show it, click on the Preview/Print button on the ribbon bar:

Preview and print24
Ocean Next Quick Check 2021-01-04/1.4A
To print on a printer or create a PDF file, click on the Print or PDF button:
14 Open a saved measurementYou can re-open a Quick Check measurement that you have saved to continue to measure, to view it and/orto print it. To just open and view or print you must not have a meter connected, this can be done in off-linemode.
If you intend to continue to measure; make sure that you have the correct meter and required probeconnected. To open a saved Quick Check measurement:
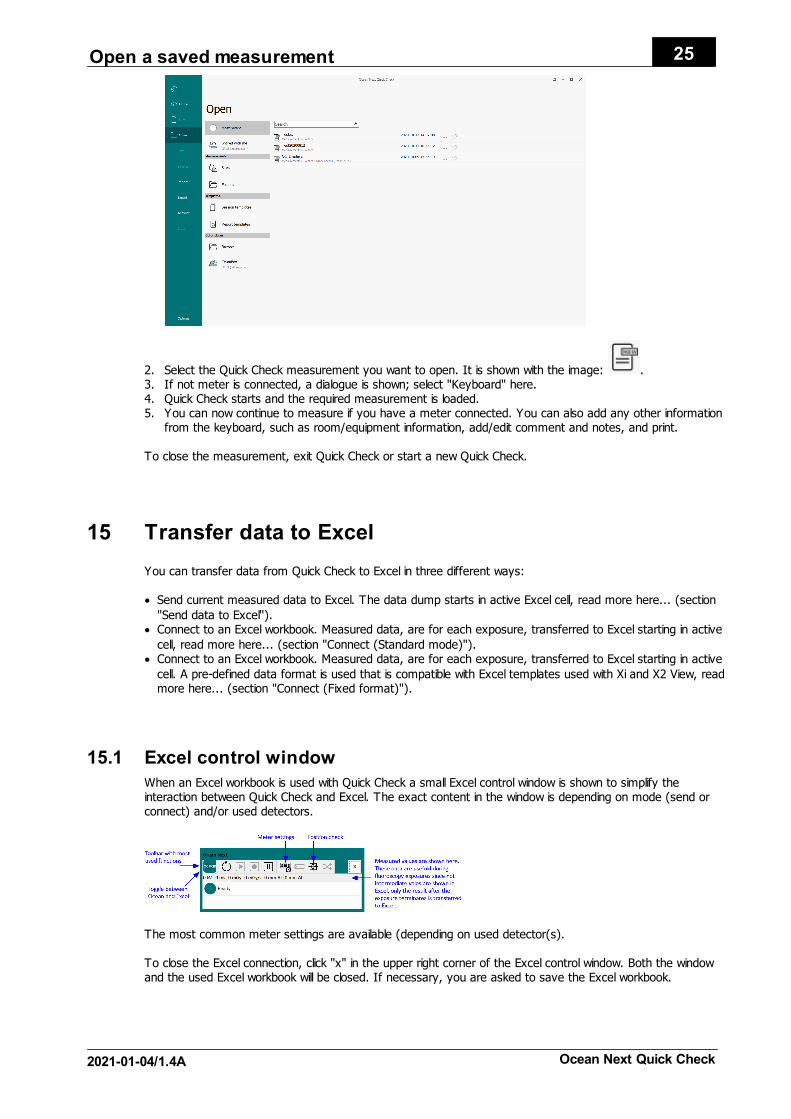
1. Select Open from the Backstage:
25Open a saved measurement
2021-01-04/1.4A Ocean Next Quick Check
2. Select the Quick Check measurement you want to open. It is shown with the image: .3. If not meter is connected, a dialogue is shown; select "Keyboard" here.4. Quick Check starts and the required measurement is loaded.5. You can now continue to measure if you have a meter connected. You can also add any other information
from the keyboard, such as room/equipment information, add/edit comment and notes, and print.
To close the measurement, exit Quick Check or start a new Quick Check.
15 Transfer data to Excel
You can transfer data from Quick Check to Excel in three different ways:
· Send current measured data to Excel. The data dump starts in active Excel cell, read more here... (section
"Send data to Excel").· Connect to an Excel workbook. Measured data, are for each exposure, transferred to Excel starting in active
cell, read more here... (section "Connect (Standard mode)").· Connect to an Excel workbook. Measured data, are for each exposure, transferred to Excel starting in active
cell. A pre-defined data format is used that is compatible with Excel templates used with Xi and X2 View, readmore here... (section "Connect (Fixed format)").
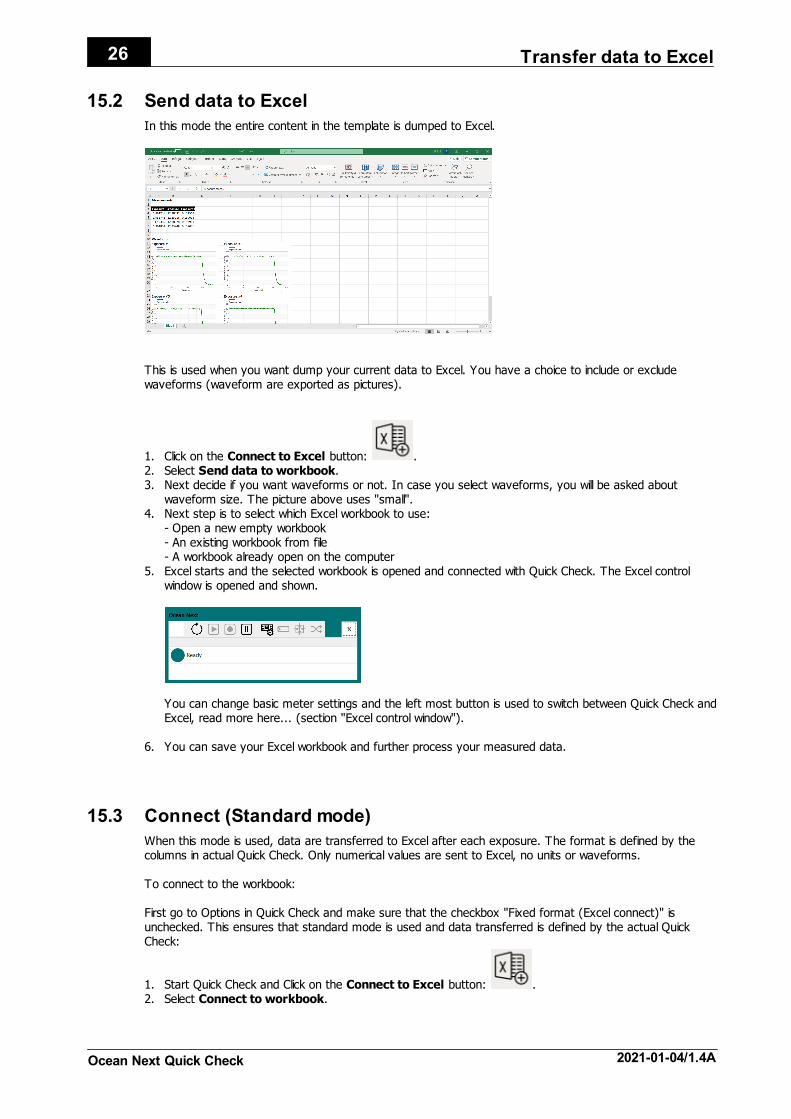
15.1 Excel control window
When an Excel workbook is used with Quick Check a small Excel control window is shown to simplify theinteraction between Quick Check and Excel. The exact content in the window is depending on mode (send orconnect) and/or used detectors.
The most common meter settings are available (depending on used detector(s).
To close the Excel connection, click "x" in the upper right corner of the Excel control window. Both the windowand the used Excel workbook will be closed. If necessary, you are asked to save the Excel workbook.
Transfer data to Excel26
Ocean Next Quick Check 2021-01-04/1.4A
15.2 Send data to Excel
In this mode the entire content in the template is dumped to Excel.
This is used when you want dump your current data to Excel. You have a choice to include or excludewaveforms (waveform are exported as pictures).
1. Click on the Connect to Excel button: .2. Select Send data to workbook.3. Next decide if you want waveforms or not. In case you select waveforms, you will be asked about
waveform size. The picture above uses "small".4. Next step is to select which Excel workbook to use:
- Open a new empty workbook- An existing workbook from file- A workbook already open on the computer
5. Excel starts and the selected workbook is opened and connected with Quick Check. The Excel controlwindow is opened and shown.
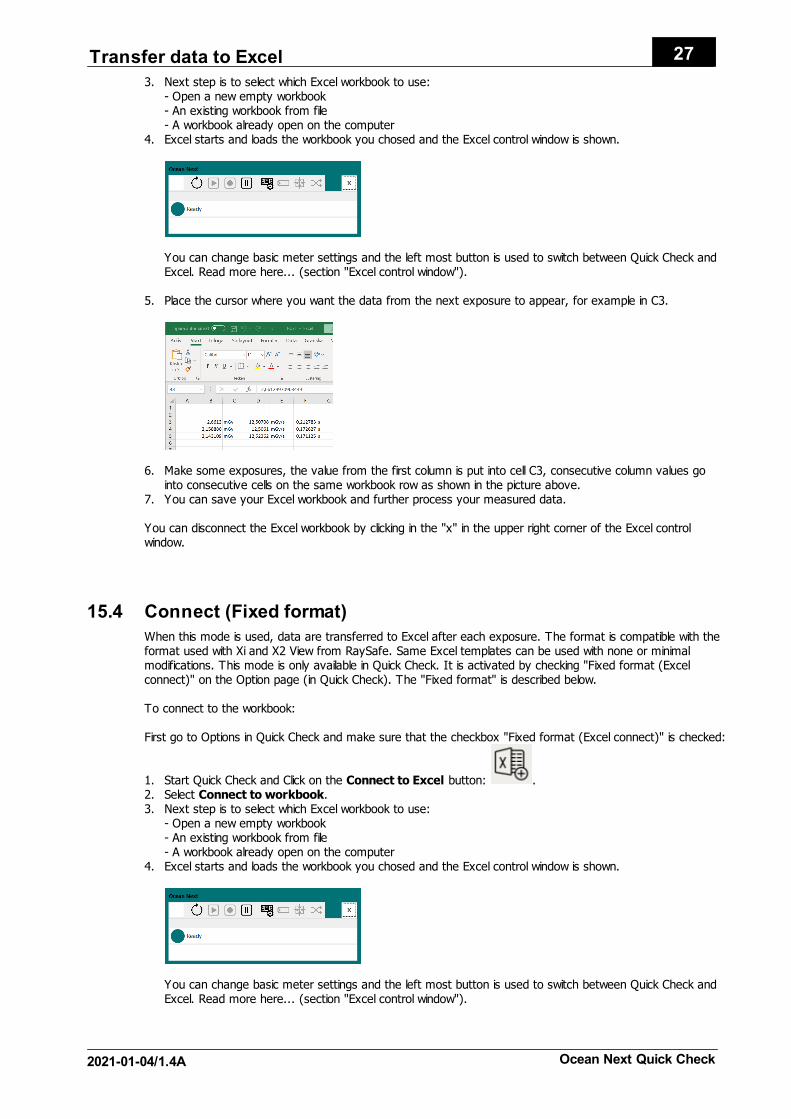
You can change basic meter settings and the left most button is used to switch between Quick Check andExcel, read more here... (section "Excel control window").
6. You can save your Excel workbook and further process your measured data.
15.3 Connect (Standard mode)
When this mode is used, data are transferred to Excel after each exposure. The format is defined by thecolumns in actual Quick Check. Only numerical values are sent to Excel, no units or waveforms.
To connect to the workbook:
First go to Options in Quick Check and make sure that the checkbox "Fixed format (Excel connect)" isunchecked. This ensures that standard mode is used and data transferred is defined by the actual QuickCheck:
1. Start Quick Check and Click on the Connect to Excel button: .2. Select Connect to workbook.
27Transfer data to Excel
2021-01-04/1.4A Ocean Next Quick Check
3. Next step is to select which Excel workbook to use:- Open a new empty workbook- An existing workbook from file- A workbook already open on the computer
4. Excel starts and loads the workbook you chosed and the Excel control window is shown.
You can change basic meter settings and the left most button is used to switch between Quick Check andExcel. Read more here... (section "Excel control window").
5. Place the cursor where you want the data from the next exposure to appear, for example in C3.
6. Make some exposures, the value from the first column is put into cell C3, consecutive column values gointo consecutive cells on the same workbook row as shown in the picture above.
7. You can save your Excel workbook and further process your measured data.
You can disconnect the Excel workbook by clicking in the "x" in the upper right corner of the Excel controlwindow.
15.4 Connect (Fixed format)
When this mode is used, data are transferred to Excel after each exposure. The format is compatible with theformat used with Xi and X2 View from RaySafe. Same Excel templates can be used with none or minimalmodifications. This mode is only available in Quick Check. It is activated by checking "Fixed format (Excelconnect)" on the Option page (in Quick Check). The "Fixed format" is described below.
To connect to the workbook:
First go to Options in Quick Check and make sure that the checkbox "Fixed format (Excel connect)" is checked:
1. Start Quick Check and Click on the Connect to Excel button: .2. Select Connect to workbook.3. Next step is to select which Excel workbook to use:
- Open a new empty workbook- An existing workbook from file- A workbook already open on the computer
4. Excel starts and loads the workbook you chosed and the Excel control window is shown.
You can change basic meter settings and the left most button is used to switch between Quick Check andExcel. Read more here... (section "Excel control window").
Transfer data to Excel28
Ocean Next Quick Check 2021-01-04/1.4A
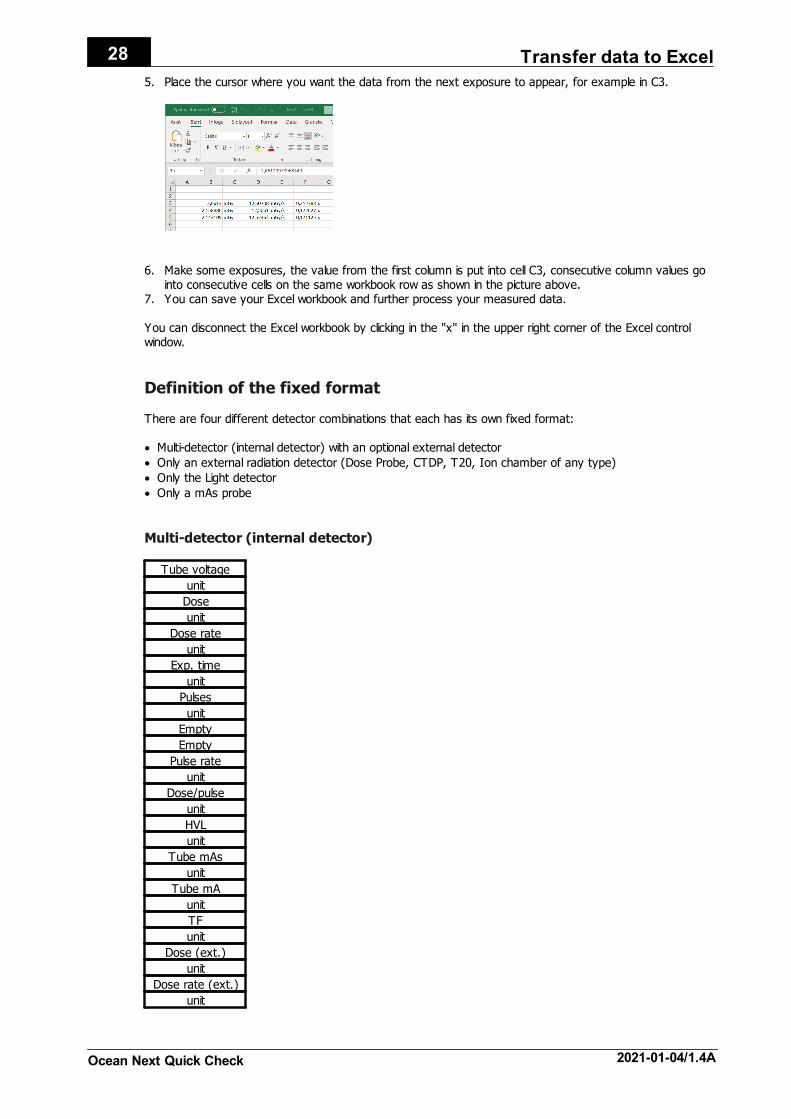
5. Place the cursor where you want the data from the next exposure to appear, for example in C3.
6. Make some exposures, the value from the first column is put into cell C3, consecutive column values gointo consecutive cells on the same workbook row as shown in the picture above.
7. You can save your Excel workbook and further process your measured data.
You can disconnect the Excel workbook by clicking in the "x" in the upper right corner of the Excel controlwindow.
Definition of the fixed format
There are four different detector combinations that each has its own fixed format:
· Multi-detector (internal detector) with an optional external detector
· Only an external radiation detector (Dose Probe, CTDP, T20, Ion chamber of any type)
· Only the Light detector
· Only a mAs probe
Multi-detector (internal detector)
Tube voltage
unit
Dose
unit
Dose rate
unit
Exp. time
unit
Pulses
unit
Empty
Empty
Pulse rate
unit
Dose/pulse
unit
HVL
unit
Tube mAs
unit
Tube mA
unit
TF
unit
Dose (ext.)
unit
Dose rate (ext.)
unit
29Transfer data to Excel
2021-01-04/1.4A Ocean Next Quick Check
Units are defined by Defult units in Program options in Ocean 2014 (not available in Quick Check).
Only external radiation detector
Dose
unit
Dose rate
unit
Exp. time
unit
Pulses
unit
Empty
Empty
Pulse rate
unit
Dose/pulse
unit
Units are defined by "Default units" in Program options in Ocean 2014 (not available in Quick Check).
Only light detector
Lumunance or Illuminance
unit
Units are defined by "Default units" in Program options in Ocean 2014 (not available in Quick Check).
Only mAs probe
Tube mAs
unit
Tube mA
unit
Exp. time
unit
Units are defined by "Default units" set in Program options found on the Backstage Home page.
16 Quick Check Options
Click the Options button on the Quick Check ribbon bar and select "Options" from the menushown.
The Quick Check options are shown:
Quick Check Options30
Ocean Next Quick Check 2021-01-04/1.4A
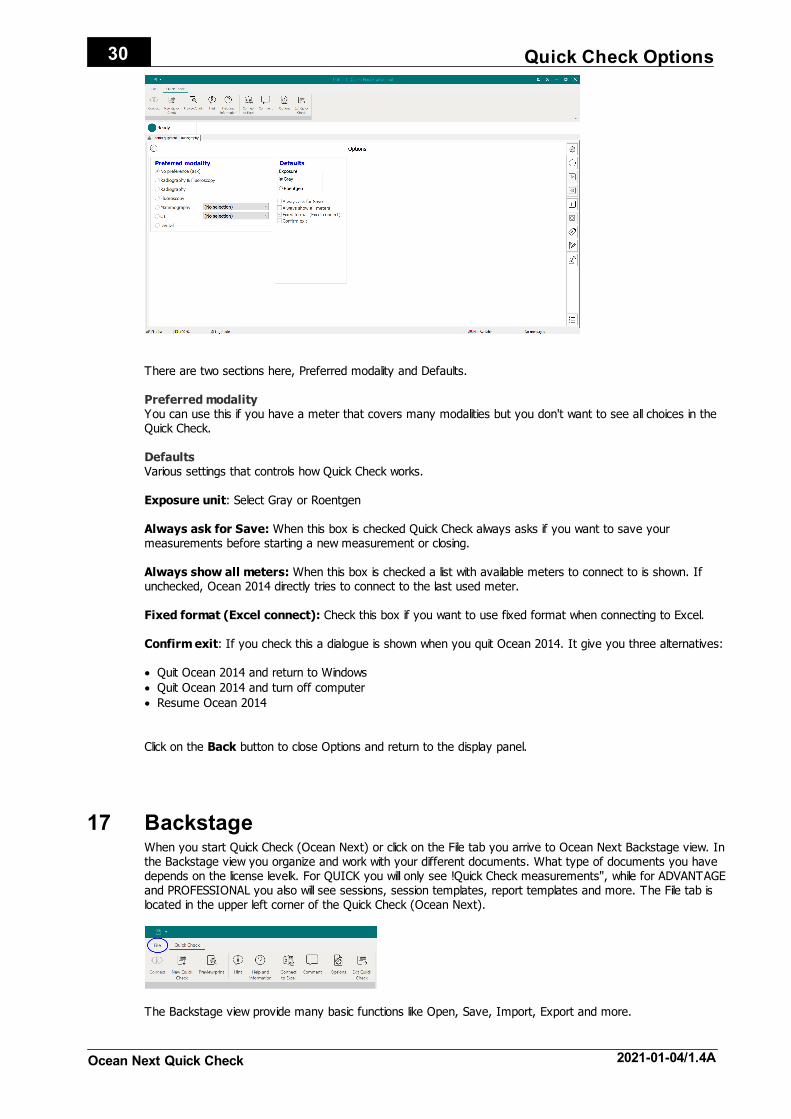
There are two sections here, Preferred modality and Defaults.
Preferred modalityYou can use this if you have a meter that covers many modalities but you don't want to see all choices in theQuick Check.
DefaultsVarious settings that controls how Quick Check works.
Exposure unit: Select Gray or Roentgen
Always ask for Save: When this box is checked Quick Check always asks if you want to save yourmeasurements before starting a new measurement or closing.
Always show all meters: When this box is checked a list with available meters to connect to is shown. Ifunchecked, Ocean 2014 directly tries to connect to the last used meter.
Fixed format (Excel connect): Check this box if you want to use fixed format when connecting to Excel.
Confirm exit: If you check this a dialogue is shown when you quit Ocean 2014. It give you three alternatives:
· Quit Ocean 2014 and return to Windows
· Quit Ocean 2014 and turn off computer
· Resume Ocean 2014
Click on the Back button to close Options and return to the display panel.
17 BackstageWhen you start Quick Check (Ocean Next) or click on the File tab you arrive to Ocean Next Backstage view. Inthe Backstage view you organize and work with your different documents. What type of documents you havedepends on the license levelk. For QUICK you will only see !Quick Check measurements", while for ADVANTAGEand PROFESSIONAL you also will see sessions, session templates, report templates and more. The File tab islocated in the upper left corner of the Quick Check (Ocean Next).
The Backstage view provide many basic functions like Open, Save, Import, Export and more.
31Backstage
2021-01-04/1.4A Ocean Next Quick Check
Read more here:
· Home
· New
· Open
· Save As
· Import
· Export
· Account
· Options
17.1 Home
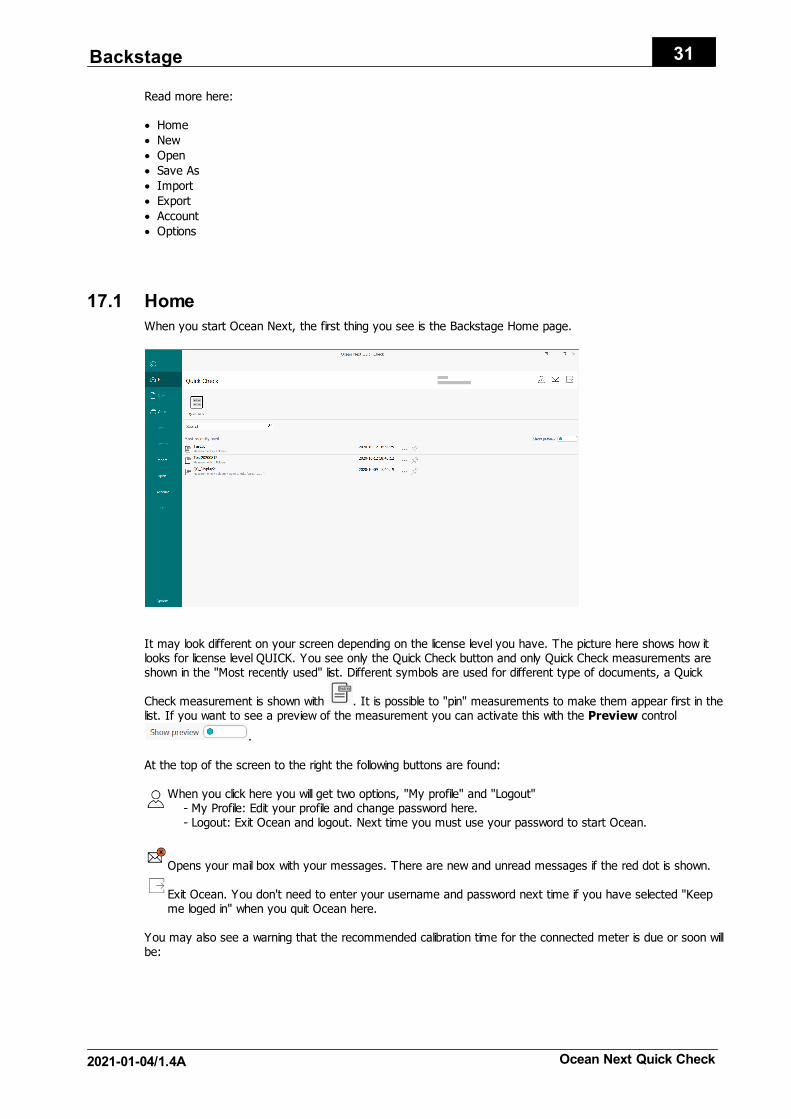
When you start Ocean Next, the first thing you see is the Backstage Home page.
It may look different on your screen depending on the license level you have. The picture here shows how itlooks for license level QUICK. You see only the Quick Check button and only Quick Check measurements areshown in the "Most recently used" list. Different symbols are used for different type of documents, a Quick
Check measurement is shown with . It is possible to "pin" measurements to make them appear first in thelist. If you want to see a preview of the measurement you can activate this with the Preview control
.
At the top of the screen to the right the following buttons are found:
When you click here you will get two options, "My profile" and "Logout" - My Profile: Edit your profile and change password here. - Logout: Exit Ocean and logout. Next time you must use your password to start Ocean.
Opens your mail box with your messages. There are new and unread messages if the red dot is shown.
Exit Ocean. You don't need to enter your username and password next time if you have selected "Keepme loged in" when you quit Ocean here.
You may also see a warning that the recommended calibration time for the connected meter is due or soon willbe:
Backstage32
Ocean Next Quick Check 2021-01-04/1.4A
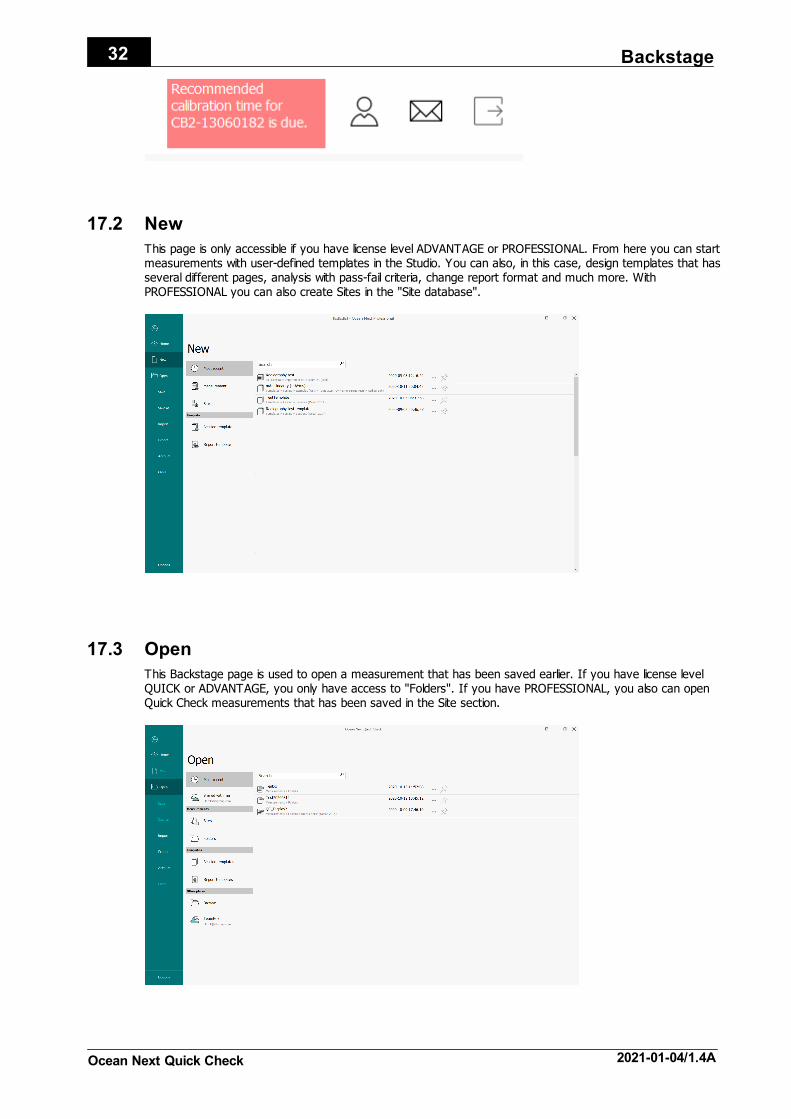
17.2 New
This page is only accessible if you have license level ADVANTAGE or PROFESSIONAL. From here you can startmeasurements with user-defined templates in the Studio. You can also, in this case, design templates that hasseveral different pages, analysis with pass-fail criteria, change report format and much more. WithPROFESSIONAL you can also create Sites in the "Site database".
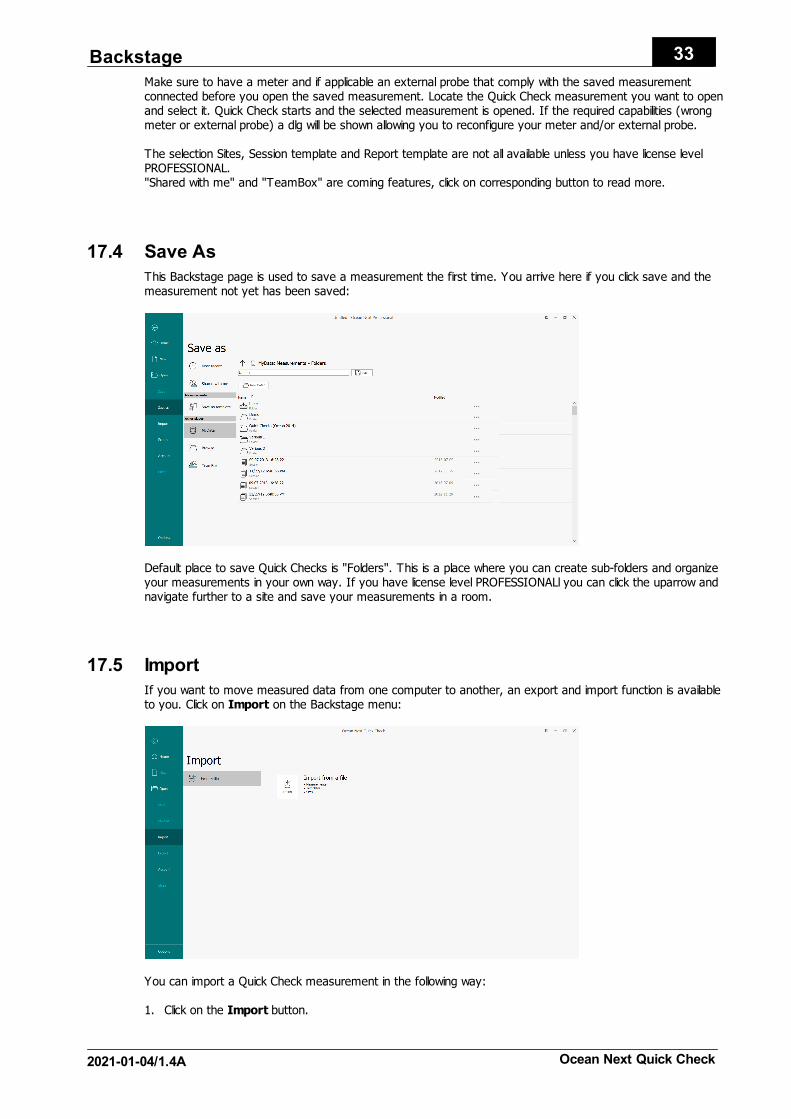
17.3 Open
This Backstage page is used to open a measurement that has been saved earlier. If you have license levelQUICK or ADVANTAGE, you only have access to "Folders". If you have PROFESSIONAL, you also can openQuick Check measurements that has been saved in the Site section.
33Backstage
2021-01-04/1.4A Ocean Next Quick Check
Make sure to have a meter and if applicable an external probe that comply with the saved measurementconnected before you open the saved measurement. Locate the Quick Check measurement you want to openand select it. Quick Check starts and the selected measurement is opened. If the required capabilities (wrongmeter or external probe) a dlg will be shown allowing you to reconfigure your meter and/or external probe.
The selection Sites, Session template and Report template are not all available unless you have license levelPROFESSIONAL."Shared with me" and "TeamBox" are coming features, click on corresponding button to read more.
17.4 Save As
This Backstage page is used to save a measurement the first time. You arrive here if you click save and themeasurement not yet has been saved:
Default place to save Quick Checks is "Folders". This is a place where you can create sub-folders and organizeyour measurements in your own way. If you have license level PROFESSIONALl you can click the uparrow andnavigate further to a site and save your measurements in a room.
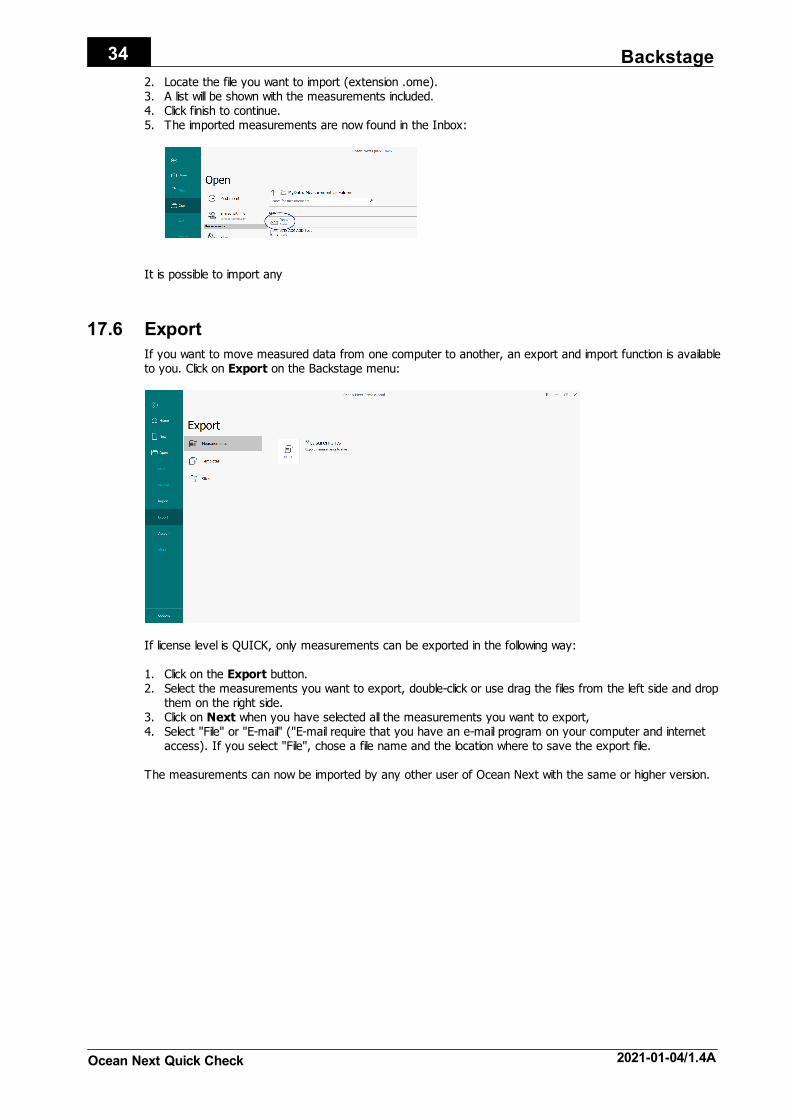
17.5 Import
If you want to move measured data from one computer to another, an export and import function is availableto you. Click on Import on the Backstage menu:
You can import a Quick Check measurement in the following way:
1. Click on the Import button.
Backstage34
Ocean Next Quick Check 2021-01-04/1.4A
2. Locate the file you want to import (extension .ome).3. A list will be shown with the measurements included.4. Click finish to continue.5. The imported measurements are now found in the Inbox:
It is possible to import any
17.6 Export
If you want to move measured data from one computer to another, an export and import function is availableto you. Click on Export on the Backstage menu:
If license level is QUICK, only measurements can be exported in the following way:
1. Click on the Export button.2. Select the measurements you want to export, double-click or use drag the files from the left side and drop
them on the right side.3. Click on Next when you have selected all the measurements you want to export, 4. Select "File" or "E-mail" ("E-mail require that you have an e-mail program on your computer and internet
access). If you select "File", chose a file name and the location where to save the export file.
The measurements can now be imported by any other user of Ocean Next with the same or higher version.
35Backstage
2021-01-04/1.4A Ocean Next Quick Check
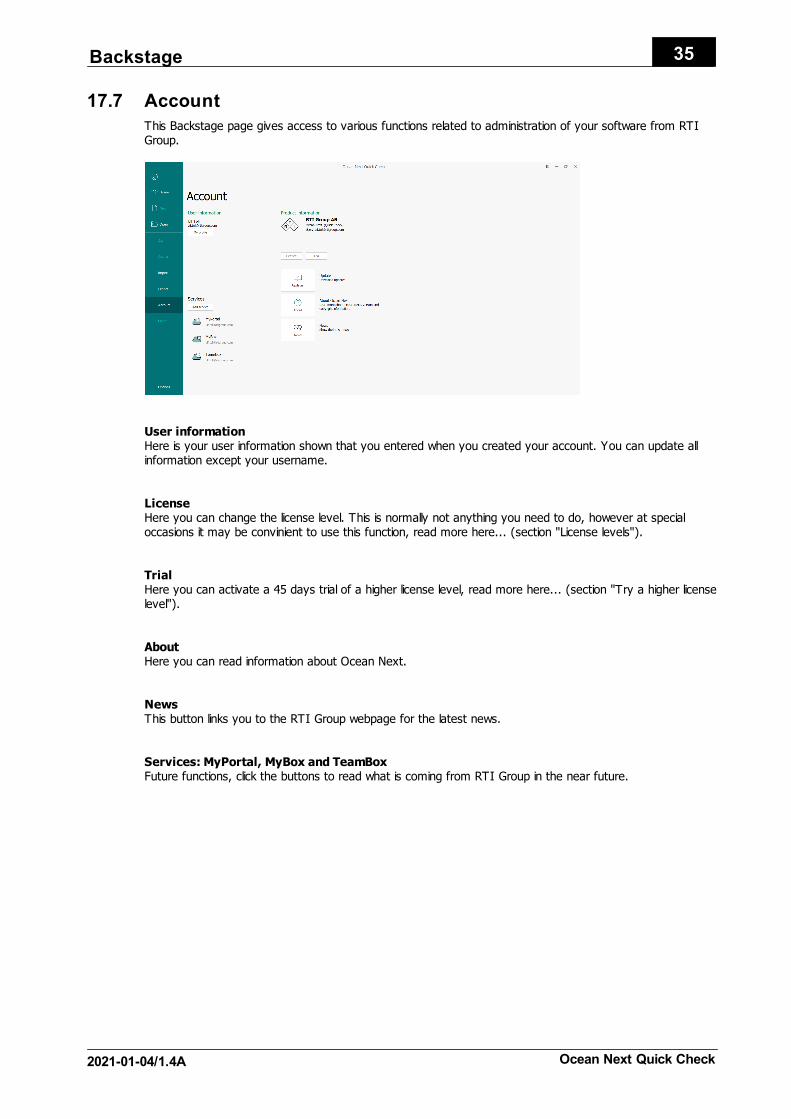
17.7 Account
This Backstage page gives access to various functions related to administration of your software from RTIGroup.
User informationHere is your user information shown that you entered when you created your account. You can update allinformation except your username.
LicenseHere you can change the license level. This is normally not anything you need to do, however at specialoccasions it may be convinient to use this function, read more here... (section "License levels").
TrialHere you can activate a 45 days trial of a higher license level, read more here... (section "Try a higher licenselevel").
AboutHere you can read information about Ocean Next.
NewsThis button links you to the RTI Group webpage for the latest news.
Services: MyPortal, MyBox and TeamBoxFuture functions, click the buttons to read what is coming from RTI Group in the near future.
Backstage36
Ocean Next Quick Check 2021-01-04/1.4A
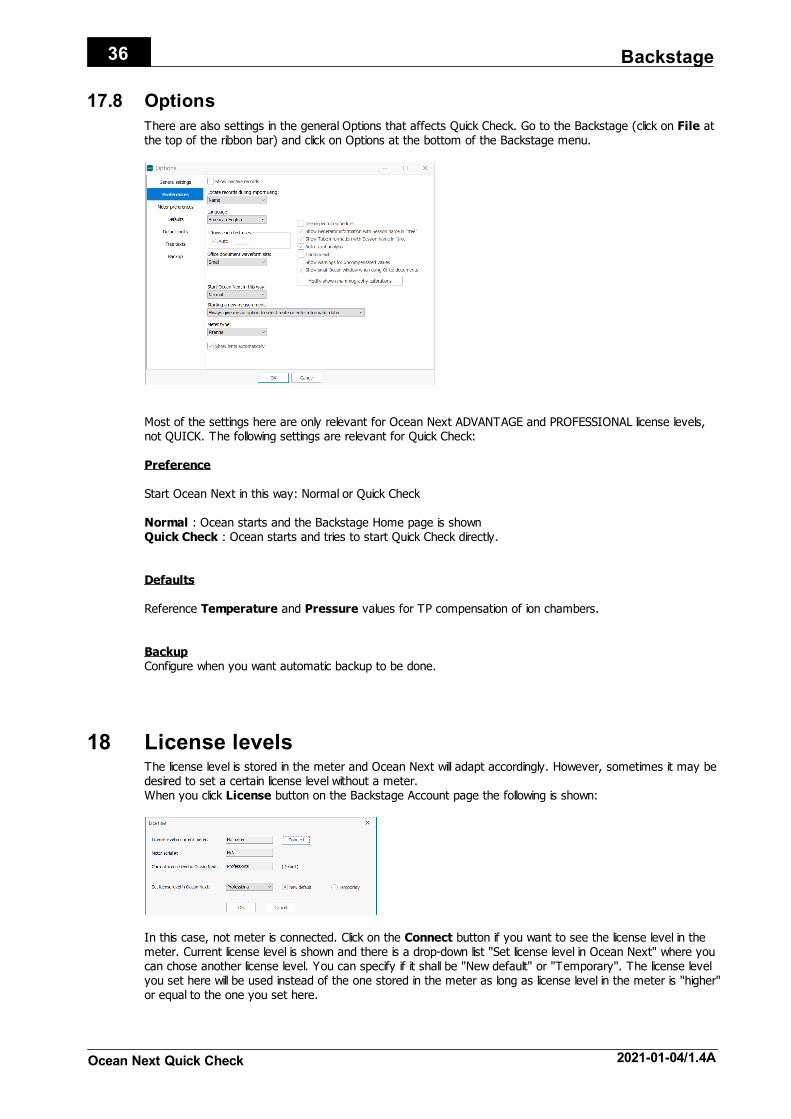
17.8 Options
There are also settings in the general Options that affects Quick Check. Go to the Backstage (click on File atthe top of the ribbon bar) and click on Options at the bottom of the Backstage menu.
Most of the settings here are only relevant for Ocean Next ADVANTAGE and PROFESSIONAL license levels,not QUICK. The following settings are relevant for Quick Check:
Preference
Start Ocean Next in this way: Normal or Quick Check
Normal : Ocean starts and the Backstage Home page is shownQuick Check : Ocean starts and tries to start Quick Check directly.
Defaults
Reference Temperature and Pressure values for TP compensation of ion chambers.
BackupConfigure when you want automatic backup to be done.
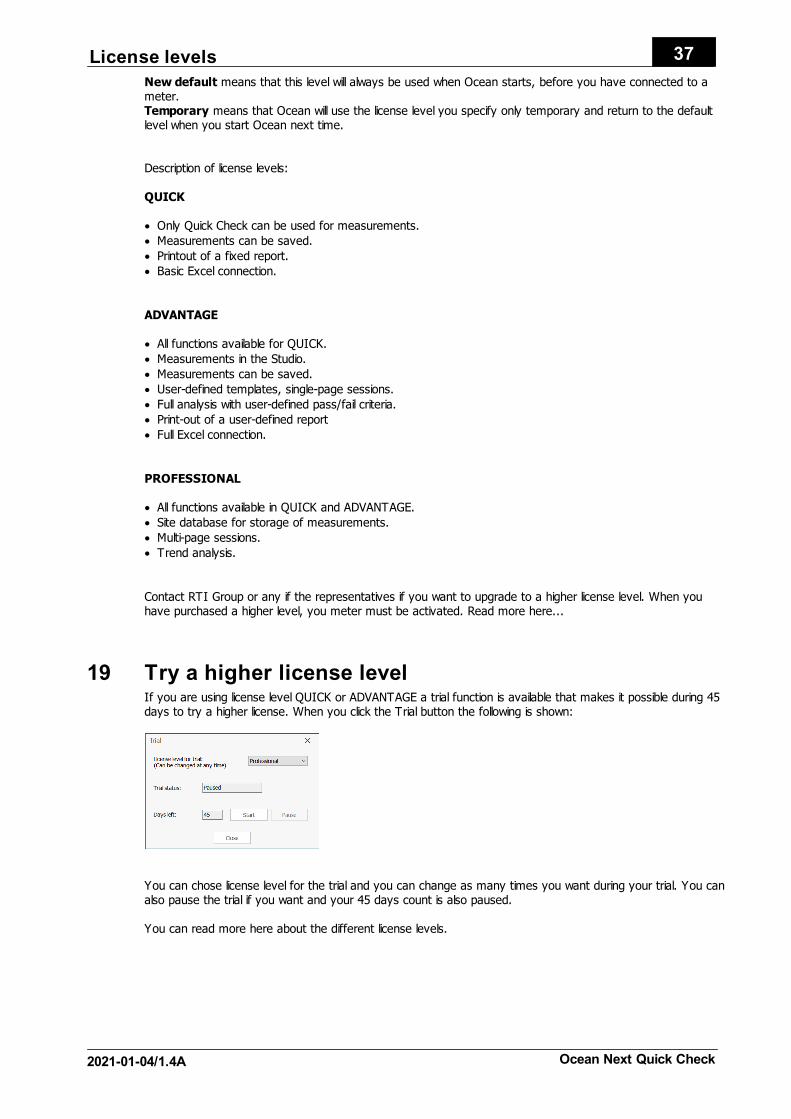
18 License levelsThe license level is stored in the meter and Ocean Next will adapt accordingly. However, sometimes it may bedesired to set a certain license level without a meter.When you click License button on the Backstage Account page the following is shown:
In this case, not meter is connected. Click on the Connect button if you want to see the license level in themeter. Current license level is shown and there is a drop-down list "Set license level in Ocean Next" where youcan chose another license level. You can specify if it shall be "New default" or "Temporary". The license levelyou set here will be used instead of the one stored in the meter as long as license level in the meter is "higher"or equal to the one you set here.
37License levels
2021-01-04/1.4A Ocean Next Quick Check
New default means that this level will always be used when Ocean starts, before you have connected to ameter.Temporary means that Ocean will use the license level you specify only temporary and return to the defaultlevel when you start Ocean next time.
Description of license levels:
QUICK
· Only Quick Check can be used for measurements.
· Measurements can be saved.
· Printout of a fixed report.
· Basic Excel connection.
ADVANTAGE
· All functions available for QUICK.
· Measurements in the Studio.
· Measurements can be saved.
· User-defined templates, single-page sessions.
· Full analysis with user-defined pass/fail criteria.
· Print-out of a user-defined report
· Full Excel connection.
PROFESSIONAL
· All functions available in QUICK and ADVANTAGE.
· Site database for storage of measurements.
· Multi-page sessions.
· Trend analysis.
Contact RTI Group or any if the representatives if you want to upgrade to a higher license level. When youhave purchased a higher level, you meter must be activated. Read more here...
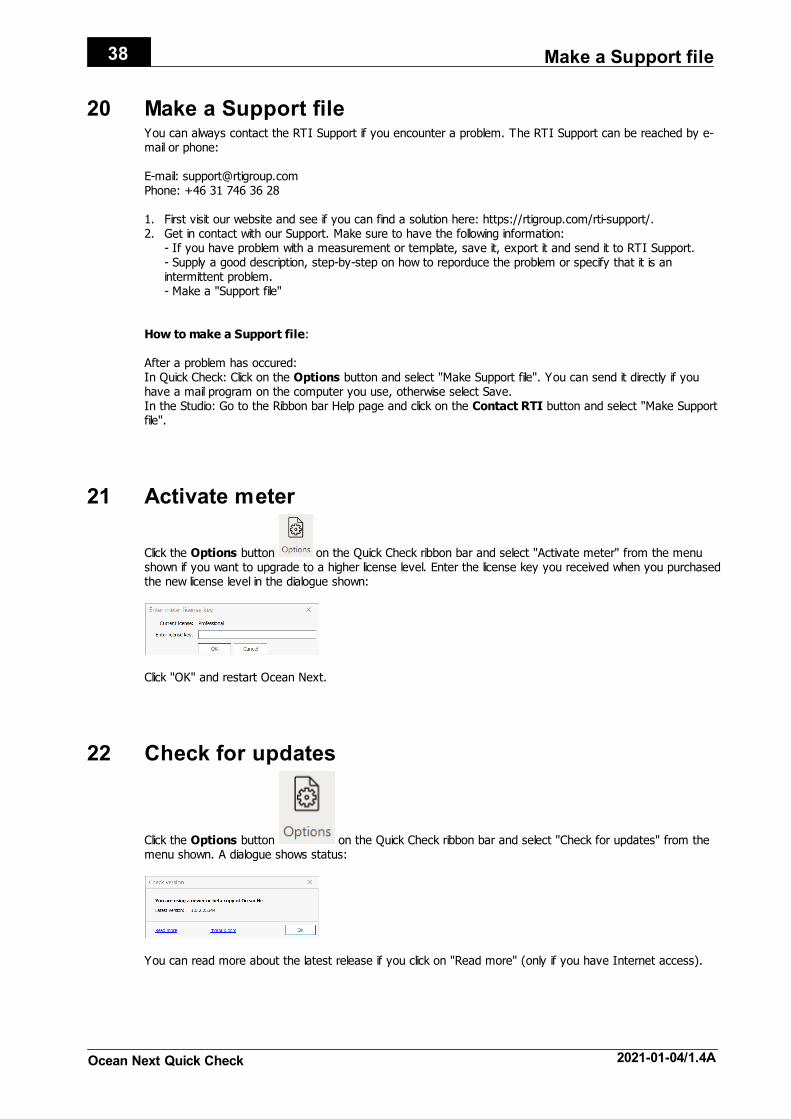
19 Try a higher license levelIf you are using license level QUICK or ADVANTAGE a trial function is available that makes it possible during 45days to try a higher license. When you click the Trial button the following is shown:
You can chose license level for the trial and you can change as many times you want during your trial. You canalso pause the trial if you want and your 45 days count is also paused.
You can read more here about the different license levels.
Make a Support file38
Ocean Next Quick Check 2021-01-04/1.4A
20 Make a Support fileYou can always contact the RTI Support if you encounter a problem. The RTI Support can be reached by e-mail or phone:
E-mail: [email protected]: +46 31 746 36 28
1. First visit our website and see if you can find a solution here: https://rtigroup.com/rti-support/.2. Get in contact with our Support. Make sure to have the following information:
- If you have problem with a measurement or template, save it, export it and send it to RTI Support.- Supply a good description, step-by-step on how to reporduce the problem or specify that it is anintermittent problem.- Make a "Support file"
How to make a Support file:
After a problem has occured:In Quick Check: Click on the Options button and select "Make Support file". You can send it directly if youhave a mail program on the computer you use, otherwise select Save.In the Studio: Go to the Ribbon bar Help page and click on the Contact RTI button and select "Make Supportfile".
21 Activate meter
Click the Options button on the Quick Check ribbon bar and select "Activate meter" from the menushown if you want to upgrade to a higher license level. Enter the license key you received when you purchasedthe new license level in the dialogue shown:
Click "OK" and restart Ocean Next.
22 Check for updates
Click the Options button on the Quick Check ribbon bar and select "Check for updates" from themenu shown. A dialogue shows status:
You can read more about the latest release if you click on "Read more" (only if you have Internet access).
39Show error reports
2021-01-04/1.4A Ocean Next Quick Check
23 Show error reports
Click the Options button on the Quick Check ribbon bar and select "Show error reports" from the menushown. The file browser is opened and shows the folder where Ocean Next stores all error reports that areautomatically created.
24 BackupCreate a backup
Click the Options button on the Quick Check ribbon bar and select "Backup" from the menu shown.The file save dialogue is shown, locate the folder where you want to save your backup and save it.
Restore a backup
Click the Options button on the Quick Check ribbon bar and select "Restore from backup" from themenu shown.The folder where automatic backups are stored will be shown, you can select a database here orbrowse and select another backup to restore.
Warning!Restoring the database will overwrite current database.

Ocean Next Quick Check 2021-01-04/1.4A
41Index
2021-01-04/1.4A Ocean Next Quick Check
Index
- 1 -
1-phase 14, 17
- 2 -
2014 8
- A -
Account 35create 8
Activate meter 38
Added filtration 14, 17
Adjust meter 13
AMX-4 14, 17
Attachment 20
- B -
Backstage 30, 31, 32, 33, 34, 35, 36
Backup recover 39
Beam correction factor 14, 17
- C -
Calibrations 14, 17
Cobia 17
Comment 19
Compression paddle thickness 19
Connect 26
Control window 25
Create account 8
- D -
Database 8
Delay 14, 17
Displays 9
- E -
Equipment 19
Error report 39
Excel 25fixed format 27
Export 34
- F -
Filtration 14, 17
Firmware 22
Fixed format 27
Forgett 8
Free run 14, 17
- G -
Grid 9
- H -
Hardware 22
HF/DC 14, 17
Home 31
- I -
Import 33
Installation 7
- L -
Latest version 38
License change 36
levels 36
upgrade 38
Lost 8
- M -
Measurement open 24
start Quick Check 9
Measuring mode free run 14, 17
normal 14, 17
timed 14, 17
Meter adjust 13, 14, 17
settings 13, 14, 17
Meter information 22
Migration 8
Modality 19
Index42
Ocean Next Quick Check 2021-01-04/1.4A
- N -
New 32
Note 20
- O -
Ocean 2014 8
Open 24, 32
Options General 36
Quick Check 29
- P -
Password 8forgett 8
lost 8
Piranha 14
Post delay 14, 17
Preview 22
Print 22
- Q -
Quick Check Excel 26
export to excel 26
workbook 26
Quick Check view 9
- R -
Raysafe 27
Recording time 14, 17
Recover backup 39
Ribbon bar 9
Room 19
- S -
Save As 33
Sensitivity 14, 17
Standard mode 26
Status bar 9
Support file 38
- T -
Tag 21
Timed 14, 17
Toolbar 9
Total inherent filtration 19
Trial 37
- U -
Unfors 27
Update check 38
Upgrade license 38
Username 8
- V -
Version Frimware 22
Hardware 22
- W -
Waveform 9recording time 14, 17
Waveform type 14, 17, 19
Window 14, 17