node up and running (1)
TRANSCRIPT


Node: Up and Running
Tom Hughes-Croucher and Mike Wilson
Beijing • Cambridge • Farnham • Köln • Sebastopol • Tokyo
www.it-ebooks.info

Node: Up and Runningby Tom Hughes-Croucher and Mike Wilson
Copyright © 2012 Tom Hughes-Croucher, Mike Wilson. All rights reserved.Printed in the United States of America.
Published by O’Reilly Media, Inc., 1005 Gravenstein Highway North, Sebastopol, CA 95472.
O’Reilly books may be purchased for educational, business, or sales promotional use. Online editionsare also available for most titles (http://my.safaribooksonline.com). For more information, contact ourcorporate/institutional sales department: (800) 998-9938 or [email protected].
Editors: Andy Oram and Simon St.LaurentProduction Editor: Kristen BorgCopyeditor: Genevieve d’EntremontProofreader: Rachel Monaghan
Indexer: Lucie HaskinsCover Designer: Karen MontgomeryInterior Designer: David FutatoIllustrators: Robert Romano and Rebecca Demarest
May 2012: First Edition.
Revision History for the First Edition:2012-04-20 First release
See http://oreilly.com/catalog/errata.csp?isbn=9781449398583 for release details.
Nutshell Handbook, the Nutshell Handbook logo, and the O’Reilly logo are registered trademarks ofO’Reilly Media, Inc. Node: Up and Running, the image of a common tree shrew, and related trade dressare trademarks of O’Reilly Media, Inc.
Many of the designations used by manufacturers and sellers to distinguish their products are claimed astrademarks. Where those designations appear in this book, and O’Reilly Media, Inc., was aware of atrademark claim, the designations have been printed in caps or initial caps.
While every precaution has been taken in the preparation of this book, the publisher and authors assumeno responsibility for errors or omissions, or for damages resulting from the use of the information con-tained herein.
ISBN: 978-1-449-39858-3
[LSI]
1334953364
www.it-ebooks.info
Table of Contents
Foreword by Ryan Dahl . . . . . . . . . . . . . . . . . . . . . . . . . . . . . . . . . . . . . . . . . . . . . . . . . . . . . . . vii
Foreword by Brendan Eich . . . . . . . . . . . . . . . . . . . . . . . . . . . . . . . . . . . . . . . . . . . . . . . . . . . . . ix
Preface . . . . . . . . . . . . . . . . . . . . . . . . . . . . . . . . . . . . . . . . . . . . . . . . . . . . . . . . . . . . . . . . . . . . . xi
Part I. Up and Running
1. A Very Brief Introduction to Node.js . . . . . . . . . . . . . . . . . . . . . . . . . . . . . . . . . . . . . . . . 3Installing Node.js 4First Steps in Code 7
Node REPL 7A First Server 9
Why Node? 11High-Performance Web Servers 11Professionalism in JavaScript 12Browser Wars 2.0 13
2. Doing Interesting Things . . . . . . . . . . . . . . . . . . . . . . . . . . . . . . . . . . . . . . . . . . . . . . . . 15Building a Chat Server 15Let’s Build Twitter 23
3. Building Robust Node Applications . . . . . . . . . . . . . . . . . . . . . . . . . . . . . . . . . . . . . . . 33The Event Loop 33Patterns 40
The I/O Problem Space 40Writing Code for Production 45
Error Handling 46Using Multiple Processors 47
iii
www.it-ebooks.info

Part II. Deep Dive and API Reference
4. Core APIs . . . . . . . . . . . . . . . . . . . . . . . . . . . . . . . . . . . . . . . . . . . . . . . . . . . . . . . . . . . . . 55Events 55
EventEmitter 56Callback Syntax 57
HTTP 59HTTP Servers 59HTTP Clients 61URL 65querystring 67
I/O 68Streams 68Filesystem 69Buffers 70console.log 76
5. Helper APIs . . . . . . . . . . . . . . . . . . . . . . . . . . . . . . . . . . . . . . . . . . . . . . . . . . . . . . . . . . . 77DNS 77Crypto 79
Hashing 79HMAC 81Public Key Cryptography 82
Processes 86process Module 86Child Process 94
Testing Through assert 101VM 104
6. Data Access . . . . . . . . . . . . . . . . . . . . . . . . . . . . . . . . . . . . . . . . . . . . . . . . . . . . . . . . . . 107NoSQL and Document Stores 107
CouchDB 107Redis 115MongoDB 123
Relational Databases 127MySQL 127PostgreSQL 134
Connection Pooling 137MQ Protocols 139
RabbitMQ 140
iv | Table of Contents
www.it-ebooks.info

7. Important External Modules . . . . . . . . . . . . . . . . . . . . . . . . . . . . . . . . . . . . . . . . . . . . 145Express 145
A Basic Express App 145Setting Up Routes in Express 146Handling Form Data 151Template Engines 152Middleware 155
Socket.IO 159Namespaces 161Using Socket.IO with Express 163
8. Extending Node . . . . . . . . . . . . . . . . . . . . . . . . . . . . . . . . . . . . . . . . . . . . . . . . . . . . . . 169Modules 169Package Manager 169
Searching Packages 170Creating Packages 170Publishing Packages 171Linking 171
Add-ons 172
Glossary . . . . . . . . . . . . . . . . . . . . . . . . . . . . . . . . . . . . . . . . . . . . . . . . . . . . . . . . . . . . . . . . . . . 173
Index . . . . . . . . . . . . . . . . . . . . . . . . . . . . . . . . . . . . . . . . . . . . . . . . . . . . . . . . . . . . . . . . . . . . . 175
Table of Contents | v
www.it-ebooks.info

Foreword by Ryan Dahl
In 2008 I was searching for a new programming platform for making websites. Thiswas more than wanting a new language; indeed, the details of the language matteredvery little to me. Rather, I was concerned about the ability to program advanced pushfeatures into the website like I had seen in Gmail—the ability for the server to pushdata to the user instead of having to constantly poll. The existing platforms were tightlycoupled to the idea of the server as something that receives a request and issues aresponse sequentially. To push events to the browser, the platform needed to be ableto constantly handle a number of open and mostly idle connections.
I knew how to make this work at the system call layer, in C. If I used only nonblockingsockets, the overhead per connection was very small. In small tests, I could demonstratea server that could handle thousands of idle connections or pretty massive throughput.I knew that this was the optimal way for a user-space Unix server to be implemented.However, I didn’t want to work in C; I wanted the beautiful fluidness of a dynamiclanguage. Although it was possible to issue the exact system calls I wanted in everyprogramming language, it was very ugly and was always the “alternative” method ofsocket programming. My theory was that nonblocking sockets were not actually diffi-cult at all, as long as everything was nonblocking.
Google announced Chrome and its new JavaScript engine V8 in late 2008. A fasterJavaScript engine made for a faster Web—and V8 made the Web a lot faster. Suddenlythere was this idea of a JavaScript arms race between Google, Apple, Mozilla, andMicrosoft. This, combined with Doug Crockford’s book JavaScript: The Good Parts(O’Reilly), shifted JavaScript from the language everyone despised to an importantlanguage.
I had an idea: nonblocking sockets in JavaScript! Because JavaScript has no existingsocket libraries, I could be the first to introduce this new and hopefully better interface.Just take V8 and glue it to my nonblocking C code, and I should be done. I quit mycontracting job and began working on this idea full time. Once I made the very firstversion available, I immediately had users who reported bugs; I started fixing thosebugs, and then three years passed.
vii
www.it-ebooks.info
It turns out that JavaScript jibes extremely well with nonblocking sockets. This wasnot clear from the start. The closures made everything possible. People were able tobuild very complex nonblocking servers in just a couple of lines of JavaScript. My initialfear that the system would be unusably niche was quickly alleviated as hackers fromall over the world began to build libraries for it. The single event loop and pure non-blocking interface allowed libraries to add more and more complexity without intro-ducing expensive threads.
In Node, users find a system that scales well by default. Because of the choices madein the core system, nothing in the system is allowed to do anything too terrible (suchas block the current thread), and thus performance never degrades horribly. It is anorder of magnitude better than the traditional blocking approach, where “better” isdefined as the amount of traffic it can handle.
These days, Node is being used by a large number of startups and established companiesaround the world, from Voxer and Uber to Walmart and Microsoft. It’s safe to say thatbillions of requests are passing through Node every day. As more and more peoplecome to the project, the available third-party modules and extensions grow and increasein quality. Although I was once reserved about recommending it for mission-criticalapplications, I now heartily recommend Node for even the most demanding serversystems.
This book gracefully takes the reader through a discussion of and guided exercises forNode and many third-party modules. By learning the material covered here, you gofrom basic familiarity with JavaScript to building complex, interactive websites. Ifyou’ve used other server-side web frameworks in the past, you’ll be shocked at howeasy it is to build a server in Node.
—Ryan Dahl, creator of Node.js
viii | Foreword by Ryan Dahl
www.it-ebooks.info
Foreword by Brendan Eich
In April 1995 I joined Netscape in order to “add Scheme to the browser.” That recruit-ing bait from a month or two earlier immediately morphed into “do a scripting languagethat looks like Java.” Worse, because the negotiation to put Java in Netscape was un-derway, some at Netscape doubted that a “second language” was necessary. Otherswanted to build something like PHP, an HTML templating language for a plannedserver-side offering called LiveWire.
So in 10 days in May 1995, I prototyped “Mocha,” the code name Marc Andreessenhad chosen. Marc, Rick Schell (vice president of engineering at Netscape), and Bill Joyof Sun were the upper-management sponsors who supported my work against doubtsabout a “second language” after Java. (This is ironic since Java has all but disappearedin browsers, while JavaScript is dominant on the client side.)
To overcome all doubts, I needed a demo in 10 days. I worked day and night, andconsequently made a few language-design mistakes (some recapitulating bad designpaths in the evolution of LISP), but I met the deadline and did the demo.
People were amazed that I’d created a language compiler and runtime in less than twoweeks, but I’d had a lot of practice over the decade since switching from a physics majorin my third year to math/computer science. I had always loved formal language andautomata theory. I’d built my own parsers and parser generators for fun. At SiliconGraphics, I built network-monitoring tools that included packet-header matching andprotocol description languages and compilers. I was a huge fan of C and Unix. Soknocking out “Mocha” was really a matter of sustained application and concentration.
Sometime in the fall of 1995, Netscape marketing renamed Mocha “LiveScript,” tomatch the LiveWire server-side product name. Finally, in early December 1995, Net-scape and Sun concluded a trademark license, signed by “Bill Joy, Founder” on behalfof Sun, and LiveScript was renamed JavaScript (JS).
Because of the LiveWire server plans, in the first 10 days I implemented a bytecodecompiler and interpreter as well as a decompiler and runtime (the built-in JS objectsand functions we know today: Object, Array, Function, etc.). For small client-sidescripts, bytecode was overkill, but the LiveWire product included the feature of savingcompiled bytecode for faster server-app startup.
ix
www.it-ebooks.info
Of course, Netscape’s server-side JavaScript offering failed along with most of the restof Netscape’s business, as Microsoft tied Internet Explorer (IE) into Windows andentered the server markets into which Netscape was trying to diversify from its browsermarket, where commercial users who had once bought browser licenses no longer paidsince IE was being bundled with Windows for free.
So in spite of LiveWire’s failure, even in 1995 we could see the appeal of end-to-endJavaScript programming. Users saw it too, but this history is known only to a relativefew today. And LiveWire made a fatal error that Node.js avoided: it embraced blockinginput/output and a process-mob model on the server side…so it did not scale well.
Fast forward to the 2009’s JSConf EU, where Ryan presented Node.js. I was gratifiedto learn of Node and to see how well it realized the end-to-end JavaScript vision, es-pecially how it wisely built in nonblocking I/O from the roots up. Ryan and core folkshave done a great job keeping the core small. Isaac and all the module owners havebuilt an excellent module system to relieve pressure on the core, so it doesn’t grow toolarge. And the Node community that has evolved around the code is excellent, too.
The result is a really productive, fun system for building servers, to complement theincreasingly productive, fun JavaScript client side and to facilitate code reuse and co-evolution. Without Node, JavaScript would be still associated with its birthplace, theoverconstrained client side of the Web, with the much-maligned Document ObjectModel and other historical accidents looming too large. Node helps JavaScript by free-ing it from its limiting client-side patrimony.
This book nicely conveys the spirit of Node and the knowledge of how to use it well tobuild interactive web apps and sites. Node is a blast, and Node: Up and Running is afitting guide for it. Enjoy!
—Brendan Eich, creator of JavaScript
x | Foreword by Brendan Eich
www.it-ebooks.info
Preface
IntroductionNode.js is quickly becoming one of the most influential technologies in the Web de-velopment community. This book aims to give programmers the information they needto effectively learn how to get started with Node.
This book expects you to have some understanding of JavaScript and programming ingeneral, but we take the time to introduce you to the concepts that are important inevent-driven programming on the server, rather than just focusing on the APIs thatNode provides.
By reading this book you'll learn not just about Node, the platform, but also aboutsome of the most important modules for Node that will let you quickly and effectivelybuild highly scalable websites and services.
Conventions Used in This BookThe following typographical conventions are used in this book:
ItalicIndicates new terms, URLs, email addresses, filenames, and file extensions.
Constant widthUsed for program listings, as well as within paragraphs to refer to program elementssuch as variable or function names, databases, data types, environment variables,statements, and keywords.
Constant width boldShows commands or other text that should be typed literally by the user.
Constant width italicShows text that should be replaced with user-supplied values or by values deter-mined by context.
xi
www.it-ebooks.info
This icon signifies a tip, suggestion, or general note.
This icon indicates a warning or caution.
Using Code ExamplesThis book is here to help you get your job done. In general, you may use the code inthis book in your programs and documentation. You do not need to contact us forpermission unless you’re reproducing a significant portion of the code. For example,writing a program that uses several chunks of code from this book does not requirepermission. Selling or distributing a CD-ROM of examples from O’Reilly books doesrequire permission. Answering a question by citing this book and quoting examplecode does not require permission. Incorporating a significant amount of example codefrom this book into your product’s documentation does require permission.
We appreciate, but do not require, attribution. An attribution usually includes the title,author, publisher, and ISBN. For example: “Node: Up and Running by Tom Hughes-Croucher and Mike Wilson (O’Reilly). Copyright 2012 Tom Hughes-Croucher andMike Wilson, 978-1-449-39858-3.”
If you feel your use of code examples falls outside fair use or the permission given above,feel free to contact us at [email protected].
Safari® Books OnlineSafari Books Online (www.safaribooksonline.com) is an on-demand digitallibrary that delivers expert content in both book and video form from theworld’s leading authors in technology and business.
Technology professionals, software developers, web designers, and business and cre-ative professionals use Safari Books Online as their primary resource for research,problem solving, learning, and certification training.
Safari Books Online offers a range of product mixes and pricing programs for organi-zations, government agencies, and individuals. Subscribers have access to thousandsof books, training videos, and prepublication manuscripts in one fully searchable da-tabase from publishers like O’Reilly Media, Prentice Hall Professional, Addison-WesleyProfessional, Microsoft Press, Sams, Que, Peachpit Press, Focal Press, Cisco Press, JohnWiley & Sons, Syngress, Morgan Kaufmann, IBM Redbooks, Packt, Adobe Press, FTPress, Apress, Manning, New Riders, McGraw-Hill, Jones & Bartlett, Course
xii | Preface
www.it-ebooks.info

Technology, and dozens more. For more information about Safari Books Online, pleasevisit us online.
How to Contact UsPlease address comments and questions concerning this book to the publisher:
O’Reilly Media, Inc.1005 Gravenstein Highway NorthSebastopol, CA 95472800-998-9938 (in the United States or Canada)707-829-0515 (international or local)707-829-0104 (fax)
We have a web page for this book, where we list errata, examples, and any additionalinformation. You can access this page at:
http://oreil.ly/node_upandrunning
To comment or ask technical questions about this book, send email to:
For more information about our books, courses, conferences, and news, see our websiteat http://www.oreilly.com.
Find us on Facebook: http://facebook.com/oreilly
Follow us on Twitter: http://twitter.com/oreillymedia
Watch us on YouTube: http://www.youtube.com/oreillymedia
Acknowledgments
Tom’s ThanksTo my editors. Simon, it has been a long project, but you’ve been with me week afterweek. Andy, your eye for detail never fails to impress.
To Carlos. Your drive and talent make you the writer I would like to be. You are aninspiration.
To Nicole and Sean, for keeping me on track.
To Ryan and Isaac, who have put up with my endless stupid questions with the quietpatience of someone teaching a child.
To Rosemarie. Without you, I would never be where I am today.
Preface | xiii
www.it-ebooks.info

To my friends, who have listened to my bitching (especially Yta, Emily, Eric, Gris,Sarah, Allan, Harold and Daniella, and Hipster Ariel). To the countless people whohave given me encouragement, suggestions, and feedback. I couldn’t have done itwithout you.
To the readers of this tome, thank you for trusting me with your learning.
xiv | Preface
www.it-ebooks.info


CHAPTER 1
A Very Brief Introduction to Node.js
Node.js is many things, but mostly it’s a way of running JavaScript outside the webbrowser. This book will cover why that’s important and the benefits that Node.js pro-vides. This introduction attempts to sum up that explanation in a few paragraphs,rather than a few hundred pages.
Many people use the JavaScript programming language extensively for programmingthe interfaces of websites. Node.js allows this popular programming language to beapplied in many more contexts, in particular on web servers. There are several notablefeatures about Node.js that make it worthy of interest.
Node is a wrapper around the high-performance V8 JavaScript runtime from the GoogleChrome browser. Node tunes V8 to work better in contexts other than the browser,mostly by providing additional APIs that are optimized for specific use cases. For ex-ample, in a server context, manipulation of binary data is often necessary. This is poorlysupported by the JavaScript language and, as a result, V8. Node’s Buffer class provideseasy manipulation of binary data. Thus, Node doesn’t just provide direct access to theV8 JavaScript runtime. It also makes JavaScript more useful for the contexts in whichpeople use Node.
V8 itself uses some of the newest techniques in compiler technology. This often allowscode written in a high-level language such as JavaScript to perform similarly to codewritten in a lower-level language, such as C, with a fraction of the development cost.This focus on performance is a key aspect of Node.
JavaScript is an event-driven language, and Node uses this to its advantage to producehighly scalable servers. Using an architecture called an event loop, Node makes pro-gramming highly scalable servers both easy and safe. There are various strategies thatare used to make servers performant. Node has chosen an architecture that performsvery well but also reduces the complexity for the application developer. This is anextremely important feature. Programming concurrency is hard and fraught with dan-ger. Node sidesteps this challenge while still offering impressive performance. As al-ways, any approach still has trade-offs, and these are discussed in detail later in thebook.
3
www.it-ebooks.info
To support the event-loop approach, Node supplies a set of “nonblocking” libraries.In essence, these are interfaces to things such as the filesystem or databases, whichoperate in an event-driven way. When you make a request to the filesystem, rather thanrequiring Node to wait for the hard drive to spin up and retrieve the file, the nonblockinginterface simply notifies Node when it has access, in the same way that web browsersnotify your code about an onclick event. This model simplifies access to slow resourcesin a scalable way that is intuitive to JavaScript programmers and easy to learn for ev-eryone else.
Although not unique to Node, supporting JavaScript on the server is also a powerfulfeature. Whether we like it or not, the browser environment gives us little choice ofprogramming languages. Certainly, JavaScript is the only choice if we would like ourcode to work in any reasonable percentage of browsers. To achieve any aspirations ofsharing code between the server and the browser, we must use JavaScript. Due to theincreasing complexity of client applications that we are building in the browser usingJavaScript (such as Gmail), the more code we can share between the browser and theserver, the more we can reduce the cost of creating rich web applications. Because wemust rely on JavaScript in the browser, having a server-side environment that usesJavaScript opens the door to code sharing in a way that is not possible with other server-side languages, such as PHP, Java, Ruby, or Python. Although there are other platformsthat support programming web servers with JavaScript, Node is quickly becoming thedominant platform in the space.
Aside from what you can build with Node, one extremely pleasing aspect is how muchyou can build for Node. Node is extremely extensible, with a large volume of commu-nity modules that have been built in the relatively short time since the project’s release.Many of these are drivers to connect with databases or other software, but many arealso useful software applications in their own right.
The last reason to celebrate Node, but certainly not the least important, is its commu-nity. The Node project is still very young, and yet rarely have we seen such fervor arounda project. Both novices and experts have coalesced around the project to use and con-tribute to Node, making it both a pleasure to explore and a supportive place to shareand get advice.
Installing Node.jsInstalling Node.js is extremely simple. Node runs on Windows, Linux, Mac, and otherPOSIX OSes (such as Solaris and BSD). Node.js is available from two primary locations:the project’s website or the GitHub repository. You’re probably better off with theNode website because it contains the stable releases. The latest cutting-edge featuresare hosted on GitHub for the core development team and anyone else who wants acopy. Although these features are new and often intriguing, they are also less reliablethan those in a stable release.
4 | Chapter 1: A Very Brief Introduction to Node.js
www.it-ebooks.info
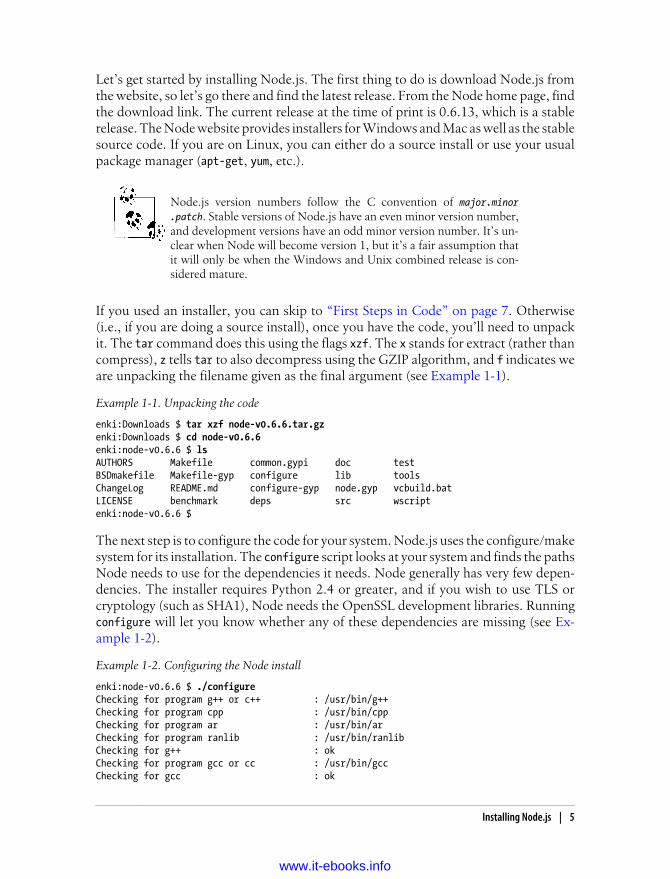
Let’s get started by installing Node.js. The first thing to do is download Node.js fromthe website, so let’s go there and find the latest release. From the Node home page, findthe download link. The current release at the time of print is 0.6.13, which is a stablerelease. The Node website provides installers for Windows and Mac as well as the stablesource code. If you are on Linux, you can either do a source install or use your usualpackage manager (apt-get, yum, etc.).
Node.js version numbers follow the C convention of major.minor.patch. Stable versions of Node.js have an even minor version number,and development versions have an odd minor version number. It’s un-clear when Node will become version 1, but it’s a fair assumption thatit will only be when the Windows and Unix combined release is con-sidered mature.
If you used an installer, you can skip to “First Steps in Code” on page 7. Otherwise(i.e., if you are doing a source install), once you have the code, you’ll need to unpackit. The tar command does this using the flags xzf. The x stands for extract (rather thancompress), z tells tar to also decompress using the GZIP algorithm, and f indicates weare unpacking the filename given as the final argument (see Example 1-1).
Example 1-1. Unpacking the code
enki:Downloads $ tar xzf node-v0.6.6.tar.gz enki:Downloads $ cd node-v0.6.6enki:node-v0.6.6 $ lsAUTHORS Makefile common.gypi doc testBSDmakefile Makefile-gyp configure lib toolsChangeLog README.md configure-gyp node.gyp vcbuild.batLICENSE benchmark deps src wscriptenki:node-v0.6.6 $
The next step is to configure the code for your system. Node.js uses the configure/makesystem for its installation. The configure script looks at your system and finds the pathsNode needs to use for the dependencies it needs. Node generally has very few depen-dencies. The installer requires Python 2.4 or greater, and if you wish to use TLS orcryptology (such as SHA1), Node needs the OpenSSL development libraries. Runningconfigure will let you know whether any of these dependencies are missing (see Ex-ample 1-2).
Example 1-2. Configuring the Node install
enki:node-v0.6.6 $ ./configureChecking for program g++ or c++ : /usr/bin/g++ Checking for program cpp : /usr/bin/cpp Checking for program ar : /usr/bin/ar Checking for program ranlib : /usr/bin/ranlib Checking for g++ : ok Checking for program gcc or cc : /usr/bin/gcc Checking for gcc : ok
Installing Node.js | 5
www.it-ebooks.info

Checking for library dl : yes Checking for openssl : not found Checking for function SSL_library_init : yes Checking for header openssl/crypto.h : yes Checking for library util : yes Checking for library rt : not found Checking for fdatasync(2) with c++ : no 'configure' finished successfully (0.991s)enki:node-v0.6.6 $
The next installation step is to make the project (Example 1-3). This compiles Node andbuilds the binary version that you will use into a build subdirectory of the source di-rectory we’ve been using. Node numbers each of the build steps it needs to completeso you can follow the progress it makes during the compile.
Example 1-3. Compiling Node with the make command
enki:node-v0.6.6 $ makeWaf: Entering directory `/Users/sh1mmer/Downloads/node-v0.6.6/out'DEST_OS: darwinDEST_CPU: x64Parallel Jobs: 1Product type: program[ 1/35] copy: src/node_config.h.in -> out/Release/src/node_config.h[ 2/35] cc: deps/http_parser/http_parser.c -> out/Release/deps/http_parser/http_parser_3.o/usr/bin/gcc -rdynamic -pthread -arch x86_64 -g -O3 -DHAVE_OPENSSL=1 -D_LARGEFILE_SOURCE ...[ 3/35] src/node_natives.h: src/node.js lib/dgram.js lib/console.js lib/buffer.js ...[ 4/35] uv: deps/uv/include/uv.h -> out/Release/deps/uv/uv.a
...
f: Leaving directory `/Users/sh1mmer/Downloads/node-v0.6.6/out''build' finished successfully (2m53.573s)-rwxr-xr-x 1 sh1mmer staff 6.8M Jan 3 21:56 out/Release/nodeenki:node-v0.6.6 $
The final step is to use make to install Node. First, Example 1-4 shows how to installNode globally for the whole system. This requires you to have either access to theroot user or sudo privileges that let you act as root.
Example 1-4. Installing Node for the whole system
enki:node-v0.6.6 $ sudo make installPassword:Waf: Entering directory `/Users/sh1mmer/Downloads/node-v0.6.6/out'DEST_OS: darwinDEST_CPU: x64Parallel Jobs: 1Product type: program* installing deps/uv/include/ares.h as /usr/local/include/node/ares.h* installing deps/uv/include/ares_version.h as /usr/local/include/node/ares_version.h* installing deps/uv/include/uv.h as /usr/local/include/node/uv.h
...
6 | Chapter 1: A Very Brief Introduction to Node.js
www.it-ebooks.info
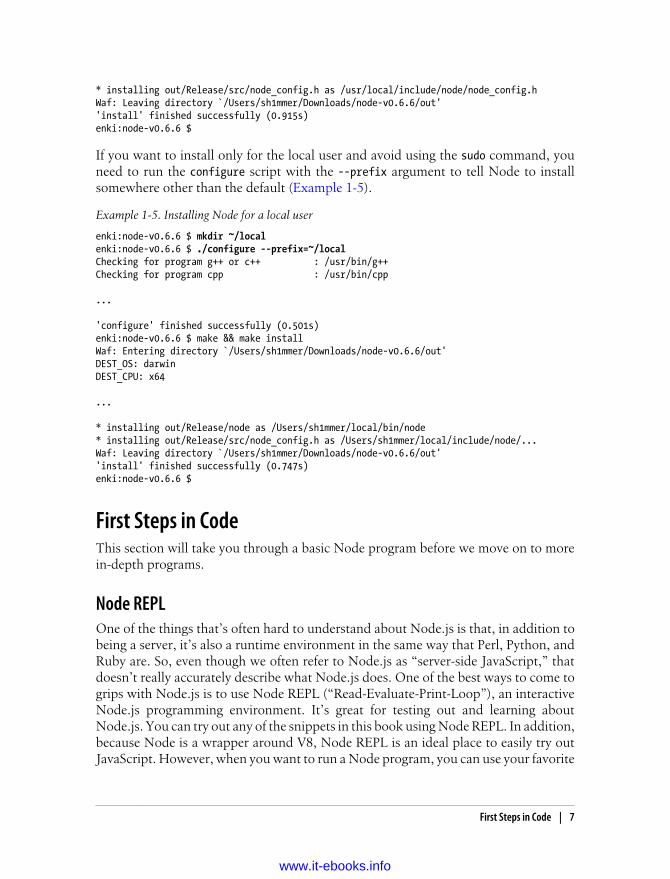
* installing out/Release/src/node_config.h as /usr/local/include/node/node_config.hWaf: Leaving directory `/Users/sh1mmer/Downloads/node-v0.6.6/out''install' finished successfully (0.915s)enki:node-v0.6.6 $
If you want to install only for the local user and avoid using the sudo command, youneed to run the configure script with the --prefix argument to tell Node to installsomewhere other than the default (Example 1-5).
Example 1-5. Installing Node for a local user
enki:node-v0.6.6 $ mkdir ~/localenki:node-v0.6.6 $ ./configure --prefix=~/localChecking for program g++ or c++ : /usr/bin/g++ Checking for program cpp : /usr/bin/cpp
...
'configure' finished successfully (0.501s)enki:node-v0.6.6 $ make && make installWaf: Entering directory `/Users/sh1mmer/Downloads/node-v0.6.6/out'DEST_OS: darwinDEST_CPU: x64
...
* installing out/Release/node as /Users/sh1mmer/local/bin/node* installing out/Release/src/node_config.h as /Users/sh1mmer/local/include/node/...Waf: Leaving directory `/Users/sh1mmer/Downloads/node-v0.6.6/out''install' finished successfully (0.747s)enki:node-v0.6.6 $
First Steps in CodeThis section will take you through a basic Node program before we move on to morein-depth programs.
Node REPLOne of the things that’s often hard to understand about Node.js is that, in addition tobeing a server, it’s also a runtime environment in the same way that Perl, Python, andRuby are. So, even though we often refer to Node.js as “server-side JavaScript,” thatdoesn’t really accurately describe what Node.js does. One of the best ways to come togrips with Node.js is to use Node REPL (“Read-Evaluate-Print-Loop”), an interactiveNode.js programming environment. It’s great for testing out and learning aboutNode.js. You can try out any of the snippets in this book using Node REPL. In addition,because Node is a wrapper around V8, Node REPL is an ideal place to easily try outJavaScript. However, when you want to run a Node program, you can use your favorite
First Steps in Code | 7
www.it-ebooks.info
text editor, save it in a file, and simply run node filename.js. REPL is a great learningand exploration tool, but we don’t use it for production code.
Let’s launch Node REPL and try out a few bits of JavaScript to warm up (Exam-ple 1-6). Open up a console on your system. I’m using a Mac with a custom commandprompt, so your system might look a little different, but the commands should be thesame.
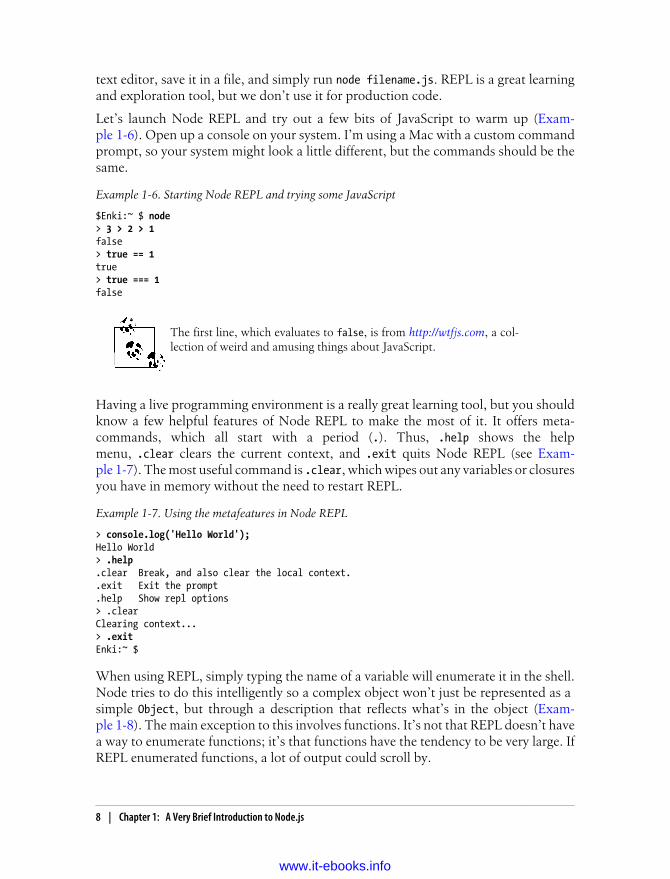
Example 1-6. Starting Node REPL and trying some JavaScript
$Enki:~ $ node> 3 > 2 > 1false> true == 1true> true === 1false
The first line, which evaluates to false, is from http://wtfjs.com, a col-lection of weird and amusing things about JavaScript.
Having a live programming environment is a really great learning tool, but you shouldknow a few helpful features of Node REPL to make the most of it. It offers meta-commands, which all start with a period (.). Thus, .help shows the helpmenu, .clear clears the current context, and .exit quits Node REPL (see Exam-ple 1-7). The most useful command is .clear, which wipes out any variables or closuresyou have in memory without the need to restart REPL.
Example 1-7. Using the metafeatures in Node REPL
> console.log('Hello World');Hello World> .help.clear Break, and also clear the local context..exit Exit the prompt.help Show repl options> .clearClearing context...> .exitEnki:~ $
When using REPL, simply typing the name of a variable will enumerate it in the shell.Node tries to do this intelligently so a complex object won’t just be represented as a simple Object, but through a description that reflects what’s in the object (Exam-ple 1-8). The main exception to this involves functions. It’s not that REPL doesn’t havea way to enumerate functions; it’s that functions have the tendency to be very large. IfREPL enumerated functions, a lot of output could scroll by.
8 | Chapter 1: A Very Brief Introduction to Node.js
www.it-ebooks.info
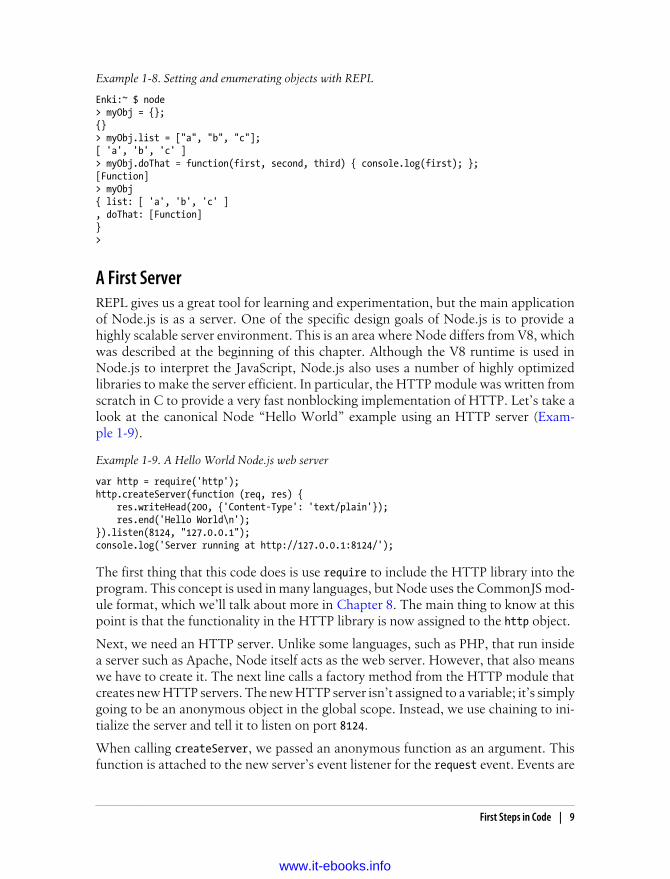
Example 1-8. Setting and enumerating objects with REPL
Enki:~ $ node> myObj = {};{}> myObj.list = ["a", "b", "c"];[ 'a', 'b', 'c' ]> myObj.doThat = function(first, second, third) { console.log(first); };[Function]> myObj{ list: [ 'a', 'b', 'c' ], doThat: [Function]}>
A First ServerREPL gives us a great tool for learning and experimentation, but the main applicationof Node.js is as a server. One of the specific design goals of Node.js is to provide ahighly scalable server environment. This is an area where Node differs from V8, whichwas described at the beginning of this chapter. Although the V8 runtime is used inNode.js to interpret the JavaScript, Node.js also uses a number of highly optimizedlibraries to make the server efficient. In particular, the HTTP module was written fromscratch in C to provide a very fast nonblocking implementation of HTTP. Let’s take alook at the canonical Node “Hello World” example using an HTTP server (Exam-ple 1-9).
Example 1-9. A Hello World Node.js web server
var http = require('http'); http.createServer(function (req, res) { res.writeHead(200, {'Content-Type': 'text/plain'}); res.end('Hello World\n'); }).listen(8124, "127.0.0.1"); console.log('Server running at http://127.0.0.1:8124/');
The first thing that this code does is use require to include the HTTP library into theprogram. This concept is used in many languages, but Node uses the CommonJS mod-ule format, which we’ll talk about more in Chapter 8. The main thing to know at thispoint is that the functionality in the HTTP library is now assigned to the http object.
Next, we need an HTTP server. Unlike some languages, such as PHP, that run insidea server such as Apache, Node itself acts as the web server. However, that also meanswe have to create it. The next line calls a factory method from the HTTP module thatcreates new HTTP servers. The new HTTP server isn’t assigned to a variable; it’s simplygoing to be an anonymous object in the global scope. Instead, we use chaining to ini-tialize the server and tell it to listen on port 8124.
When calling createServer, we passed an anonymous function as an argument. Thisfunction is attached to the new server’s event listener for the request event. Events are
First Steps in Code | 9
www.it-ebooks.info
central to both JavaScript and Node. In this case, whenever there is a new request tothe web server, it will call the method we’ve passed to deal with the request. We callthese kinds of methods callbacks because whenever an event happens, we “call back”all the methods listening for that event.
Perhaps a good analogy would be ordering a book from a bookshop. When your bookis in stock, they call back to let you know you can come and collect it. This specificcallback takes the arguments req for the request object and res for the response object.
Inside the function we created for the callback, we call a couple of methods on theres object. These calls modify the response. Example 1-9 doesn’t use the request, buttypically you would use both the request and response objects.
The first thing we must do is set the HTTP response header. We can’t send any actualresponse to the client without it. The res.writeHead method does this. We set the valueto 200 (for the HTTP status code “200 OK”) and pass a list of HTTP headers. In thiscase, the only header we specify is Content-type.
After we’ve written the HTTP header to the client, we can write the HTTP body. Inthis case, we use a single method to both write the body and close the connection. Theend method closes the HTTP connection, but since we also passed it a string, it willsend that to the client before it closes the connection.
Finally, the last line of our example uses the console.log. This simply prints informationto stdout, much like the browser counterpart supported by Firebug and Web Inspector.
Let’s run this with Node.js on the console and see what we get (Example 1-10).
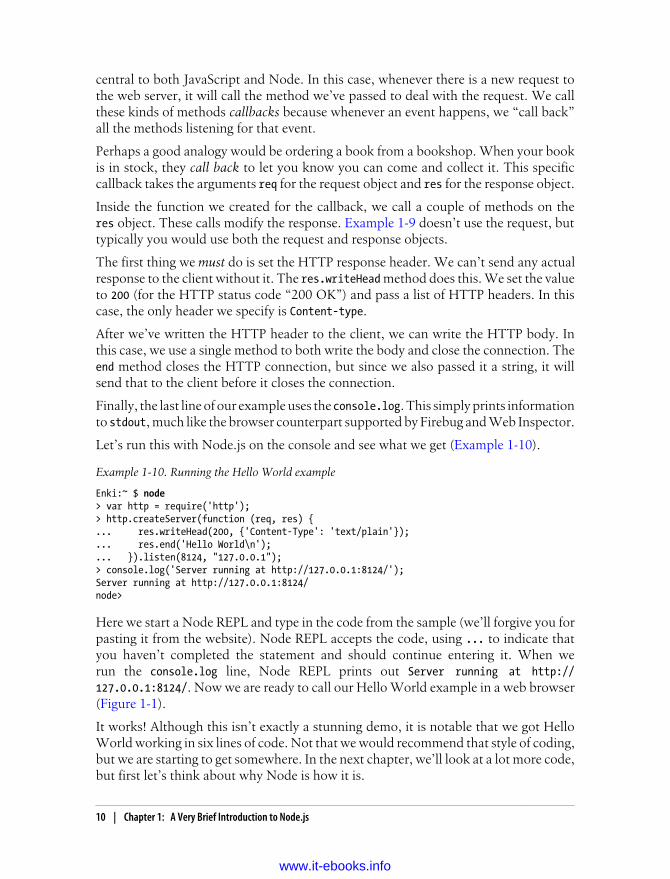
Example 1-10. Running the Hello World example
Enki:~ $ node> var http = require('http'); > http.createServer(function (req, res) { ... res.writeHead(200, {'Content-Type': 'text/plain'}); ... res.end('Hello World\n'); ... }).listen(8124, "127.0.0.1"); > console.log('Server running at http://127.0.0.1:8124/'); Server running at http://127.0.0.1:8124/ node>
Here we start a Node REPL and type in the code from the sample (we’ll forgive you forpasting it from the website). Node REPL accepts the code, using ... to indicate thatyou haven’t completed the statement and should continue entering it. When werun the console.log line, Node REPL prints out Server running at http://127.0.0.1:8124/. Now we are ready to call our Hello World example in a web browser(Figure 1-1).
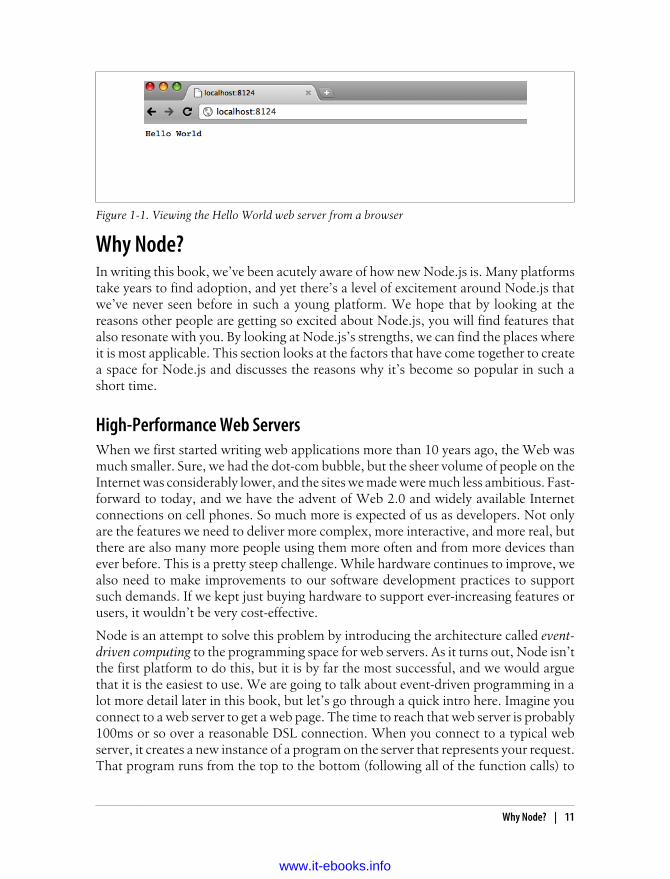
It works! Although this isn’t exactly a stunning demo, it is notable that we got HelloWorld working in six lines of code. Not that we would recommend that style of coding,but we are starting to get somewhere. In the next chapter, we’ll look at a lot more code,but first let’s think about why Node is how it is.
10 | Chapter 1: A Very Brief Introduction to Node.js
www.it-ebooks.info
Why Node?In writing this book, we’ve been acutely aware of how new Node.js is. Many platformstake years to find adoption, and yet there’s a level of excitement around Node.js thatwe’ve never seen before in such a young platform. We hope that by looking at thereasons other people are getting so excited about Node.js, you will find features thatalso resonate with you. By looking at Node.js’s strengths, we can find the places whereit is most applicable. This section looks at the factors that have come together to createa space for Node.js and discusses the reasons why it’s become so popular in such ashort time.
High-Performance Web ServersWhen we first started writing web applications more than 10 years ago, the Web wasmuch smaller. Sure, we had the dot-com bubble, but the sheer volume of people on theInternet was considerably lower, and the sites we made were much less ambitious. Fast-forward to today, and we have the advent of Web 2.0 and widely available Internetconnections on cell phones. So much more is expected of us as developers. Not onlyare the features we need to deliver more complex, more interactive, and more real, butthere are also many more people using them more often and from more devices thanever before. This is a pretty steep challenge. While hardware continues to improve, wealso need to make improvements to our software development practices to supportsuch demands. If we kept just buying hardware to support ever-increasing features orusers, it wouldn’t be very cost-effective.
Node is an attempt to solve this problem by introducing the architecture called event-driven computing to the programming space for web servers. As it turns out, Node isn’tthe first platform to do this, but it is by far the most successful, and we would arguethat it is the easiest to use. We are going to talk about event-driven programming in alot more detail later in this book, but let’s go through a quick intro here. Imagine youconnect to a web server to get a web page. The time to reach that web server is probably100ms or so over a reasonable DSL connection. When you connect to a typical webserver, it creates a new instance of a program on the server that represents your request.That program runs from the top to the bottom (following all of the function calls) to
Figure 1-1. Viewing the Hello World web server from a browser
Why Node? | 11
www.it-ebooks.info
provide your web page. This means that the server has to allocate a fixed amount ofmemory to that request until it is totally finished, including the 100ms+ to send thedata back to you. Node doesn’t work that way. Instead, Node keeps all users in a singleprogram. Whenever Node has to do something slow, like wait for a confirmation thatyou got your data (so it can mark your request as finished), it simply moves on toanother user. We’re glossing over the details a bit, but this means Node is much moreefficient with memory than traditional servers and can keep providing a very fast re-sponse time with lots and lots of concurrent users. This is a huge win. This approachis one of the main reasons people like Node.
Professionalism in JavaScriptAnother reason people like Node is JavaScript. JavaScript was created by Brendan Eichin 1995 to be a simple scripting language for use in web pages on the Netscape browserplatform. Surprisingly, almost since its inception JavaScript has been used in non-browser settings. Some of the early Netscape server products supported JavaScript(known then as LiveScript) as a server-side scripting language. Although server-sideJavaScript didn’t really catch on then, that certainly wasn’t true for the explodingbrowser market. On the Web, JavaScript competed with Microsoft’s VBScript to pro-vide programming functionality in web pages. It’s hard to say why JavaScript won, butperhaps Microsoft allowing JavaScript in Internet Explorer did it,1 or perhaps it wasthe JavaScript language itself, but win it did. This meant by the early 2000s, JavaScripthad emerged as the web language—not just the first choice, but the only choice forprogramming with HTML in browsers.
What does this have to do with Node.js? Well, the important thing to remember is thatwhen the AJAX revolution happened and the Web became big business (think Yahoo!,Amazon, Google, etc.), the only choice for the “J” in AJAX was JavaScript. There simplywasn’t an alternative. As a result, a whole industry needed an awful lot of JavaScriptprogrammers, and really good ones at that, rather fast. The emergence of the Web asa serious platform and JavaScript as its programming language meant that we, as Java-Script programmers, needed to shape up. We can equate the change in JavaScript asthe second or third programming language of a programmer to the change in perceptionof its importance. We started to get emerging experts who led the charge in makingJavaScript respectable.
Arguably at the head of this movement was Douglas Crockford. His popular articlesand videos on JavaScript have helped many programmers discover that inside thismuch-maligned language there is a lot of beauty. Most programmers working withJavaScript spent the majority of their time working with the browser implementation
1. Internet Explorer doesn’t actually support JavaScript or ECMAScript; it supports a language variety calledJScript. In recent years, JScript has fully supported the ECMAScript 3 standard and has some ECMAScript5 support. However, JScript also implements proprietary extensions in the same way that MozillaJavaScript does and has features that ECMAScript does not.
12 | Chapter 1: A Very Brief Introduction to Node.js
www.it-ebooks.info
of the W3C DOM API for manipulating HTML or XML documents. Unfortunately,the DOM is probably not the prettiest API ever conceived, but worse, its various im-plementations in the browsers are inconsistent and incomplete. No wonder that for adecade after its release JavaScript was not thought of as a “proper” language by so manyprogrammers. More recently, Douglas’s work on “the good parts” of JavaScript havehelped create a movement of advocates of the language who recognize that it has a lotgoing for it, despite the warts.
In 2012, we now have a proliferation of JavaScript experts advocating well-written,performant, maintainable JavaScript code. People such as Douglas Crockford, DionAlmaer, Peter Paul Koch (PPK), John Resig, Alex Russell, Thomas Fuchs, and manymore have provided research, advice, tools, and primarily libraries that have allowedthousands of professional JavaScript programmers worldwide to practice their tradewith a spirit of excellence. Libraries such as jQuery, YUI, Dojo, Prototype, Mootools,Sencha, and many others are now used daily by thousands of people and deployed onmillions of websites. It is in this environment—where JavaScript is not only accepted,but widely used and celebrated—that a platform larger than the Web makes sense.When so many programmers know JavaScript, its ubiquity is a distinct advantage.
When a roomful of web programmers is asked what languages they use, Java and PHPare very popular, Ruby is probably the next most popular these days (or at least closelytied with Python), and Perl still has a huge following. However, almost without ex-ception, anyone who does any programming for the Web has programmed inJavaScript. Although backend languages are fractured in-browser, programming isunited by the necessities of deployment. Various browsers and browser plug-ins allowthe use of other languages, but they simply aren’t universal enough for the Web. Sohere we are with a single, universal web language. How can we get it on the server?
Browser Wars 2.0Fairly early in the days of the Web, we had the infamous browser wars. Internet Explorerand Netscape competed viciously on web features, adding various incompatible pro-grammatic features to their own browser and not supporting the features in the otherbrowser. For those of us who programmed for the Web, this was the cause of muchanguish because it made web programming really tiresome. Internet Explorer more orless emerged as the winner of that round and became the dominant browser. Fast-forward a few years, and Internet Explorer has been languishing at version 6, and a newcontender, Firefox, emerges from the remnants of Netscape. Firefox kicks off a resur-gence in browsers, followed by WebKit (Safari) and then Chrome. Most interestingabout this current trend is the resurgence of competition in the browser market.
Unlike the first iteration of the browser wars, today’s browsers compete on two fronts:adhering to the standards that emerged after the previous browser war, and perfor-mance. As websites have become more complex, users want the fastest experiencepossible. This has meant that browsers not only need to support the web standards
Why Node? | 13
www.it-ebooks.info

well, allowing developers to optimize, but also to do a little optimization of their own.With JavaScript as a core component of Web 2.0, AJAX websites have become part ofthe battleground.
Each browser has its own JavaScript runtime: Spider Monkey for Firefox, Squirrel FishExtreme for Safari, Karakan for Opera, and finally V8 for Chrome. As these runtimescompete on performance, it creates an environment of innovation for JavaScript. Andin order to differentiate their browsers, vendors are going to great lengths to make themas fast as possible.
14 | Chapter 1: A Very Brief Introduction to Node.js
www.it-ebooks.info
CHAPTER 2
Doing Interesting Things
The programming trends of the last few years have made it progressively easier to writemore complex applications with ease. It’s important that we don’t lose that, but Nodeis specifically focused on solving the problem of building network applications—thatis, applications that do a lot of input/output (I/O). Let’s build a few I/O-type apps andsee how easy it is to do this with Node in a way that really scales.
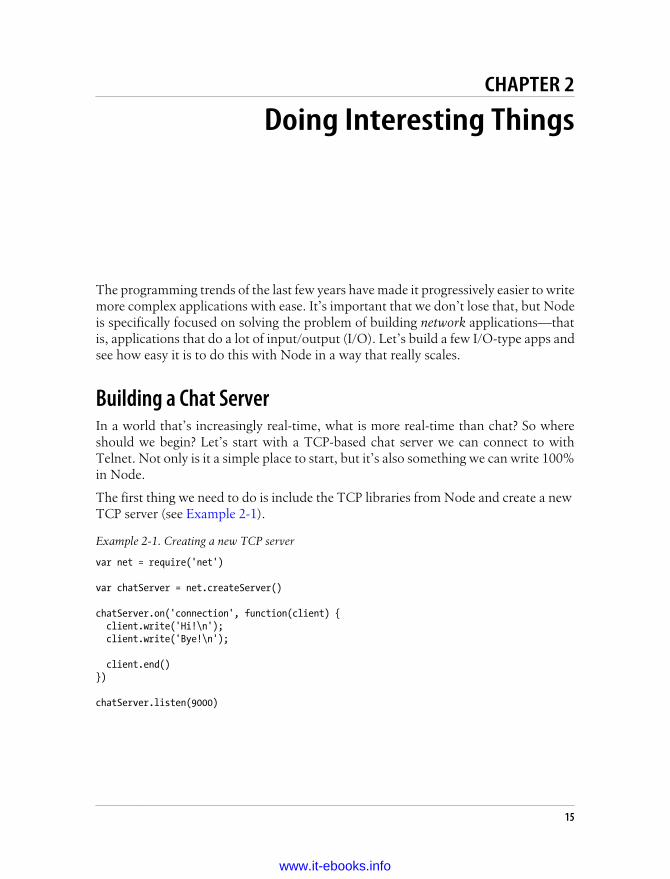
Building a Chat ServerIn a world that’s increasingly real-time, what is more real-time than chat? So whereshould we begin? Let’s start with a TCP-based chat server we can connect to withTelnet. Not only is it a simple place to start, but it’s also something we can write 100%in Node.
The first thing we need to do is include the TCP libraries from Node and create a new TCP server (see Example 2-1).
Example 2-1. Creating a new TCP server
var net = require('net')
var chatServer = net.createServer()
chatServer.on('connection', function(client) { client.write('Hi!\n'); client.write('Bye!\n');
client.end()})
chatServer.listen(9000)
15
www.it-ebooks.info
First, we include the net module. This contains all the TCP stuff for Node. From that,we can create a TCP server by calling the net.createServer() method. Now that wehave a server, we want it to do stuff. So we add an event listener by using the on()method. Whenever the connection event happens, the event listener will call the func-tion we gave it. A connection event happens when a new client connects to the server.
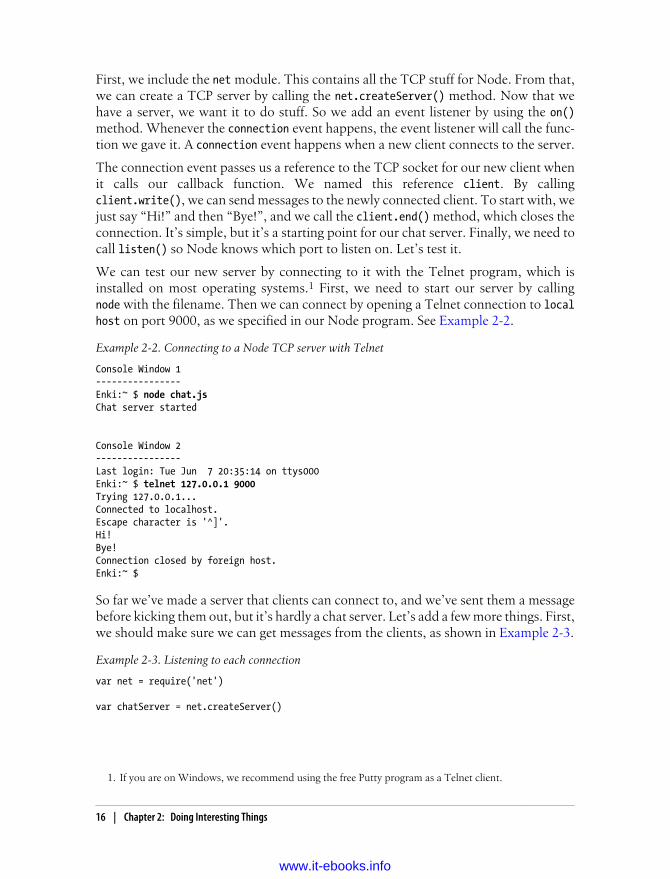
The connection event passes us a reference to the TCP socket for our new client whenit calls our callback function. We named this reference client. By callingclient.write(), we can send messages to the newly connected client. To start with, wejust say “Hi!” and then “Bye!”, and we call the client.end() method, which closes theconnection. It’s simple, but it’s a starting point for our chat server. Finally, we need tocall listen() so Node knows which port to listen on. Let’s test it.
We can test our new server by connecting to it with the Telnet program, which isinstalled on most operating systems.1 First, we need to start our server by callingnode with the filename. Then we can connect by opening a Telnet connection to localhost on port 9000, as we specified in our Node program. See Example 2-2.
Example 2-2. Connecting to a Node TCP server with Telnet
Console Window 1----------------Enki:~ $ node chat.jsChat server started
Console Window 2----------------Last login: Tue Jun 7 20:35:14 on ttys000Enki:~ $ telnet 127.0.0.1 9000Trying 127.0.0.1...Connected to localhost.Escape character is '^]'.Hi!Bye!Connection closed by foreign host.Enki:~ $
So far we’ve made a server that clients can connect to, and we’ve sent them a messagebefore kicking them out, but it’s hardly a chat server. Let’s add a few more things. First,we should make sure we can get messages from the clients, as shown in Example 2-3.
Example 2-3. Listening to each connection
var net = require('net')
var chatServer = net.createServer()
1. If you are on Windows, we recommend using the free Putty program as a Telnet client.
16 | Chapter 2: Doing Interesting Things
www.it-ebooks.info
chatServer.on('connection', function(client) { client.write('Hi!\n');
client.on('data', function(data) { console.log(data) })
})
chatServer.listen(9000)
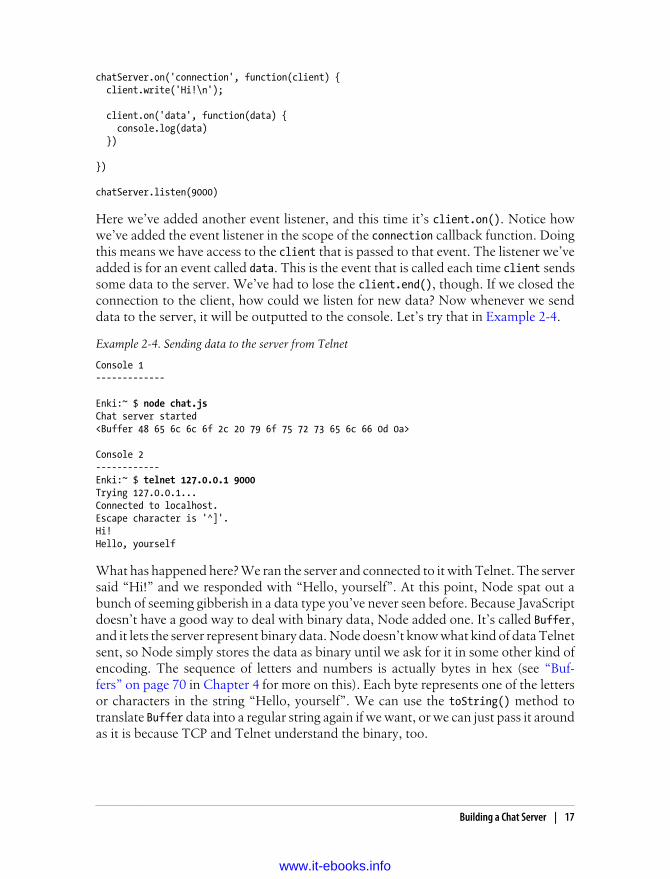
Here we’ve added another event listener, and this time it’s client.on(). Notice howwe’ve added the event listener in the scope of the connection callback function. Doingthis means we have access to the client that is passed to that event. The listener we’veadded is for an event called data. This is the event that is called each time client sendssome data to the server. We’ve had to lose the client.end(), though. If we closed theconnection to the client, how could we listen for new data? Now whenever we senddata to the server, it will be outputted to the console. Let’s try that in Example 2-4.
Example 2-4. Sending data to the server from Telnet
Console 1-------------
Enki:~ $ node chat.js Chat server started<Buffer 48 65 6c 6c 6f 2c 20 79 6f 75 72 73 65 6c 66 0d 0a>
Console 2------------Enki:~ $ telnet 127.0.0.1 9000Trying 127.0.0.1...Connected to localhost.Escape character is '^]'.Hi!Hello, yourself
What has happened here? We ran the server and connected to it with Telnet. The serversaid “Hi!” and we responded with “Hello, yourself”. At this point, Node spat out abunch of seeming gibberish in a data type you’ve never seen before. Because JavaScriptdoesn’t have a good way to deal with binary data, Node added one. It’s called Buffer,and it lets the server represent binary data. Node doesn’t know what kind of data Telnetsent, so Node simply stores the data as binary until we ask for it in some other kind ofencoding. The sequence of letters and numbers is actually bytes in hex (see “Buf-fers” on page 70 in Chapter 4 for more on this). Each byte represents one of the lettersor characters in the string “Hello, yourself”. We can use the toString() method totranslate Buffer data into a regular string again if we want, or we can just pass it aroundas it is because TCP and Telnet understand the binary, too.
Building a Chat Server | 17
www.it-ebooks.info
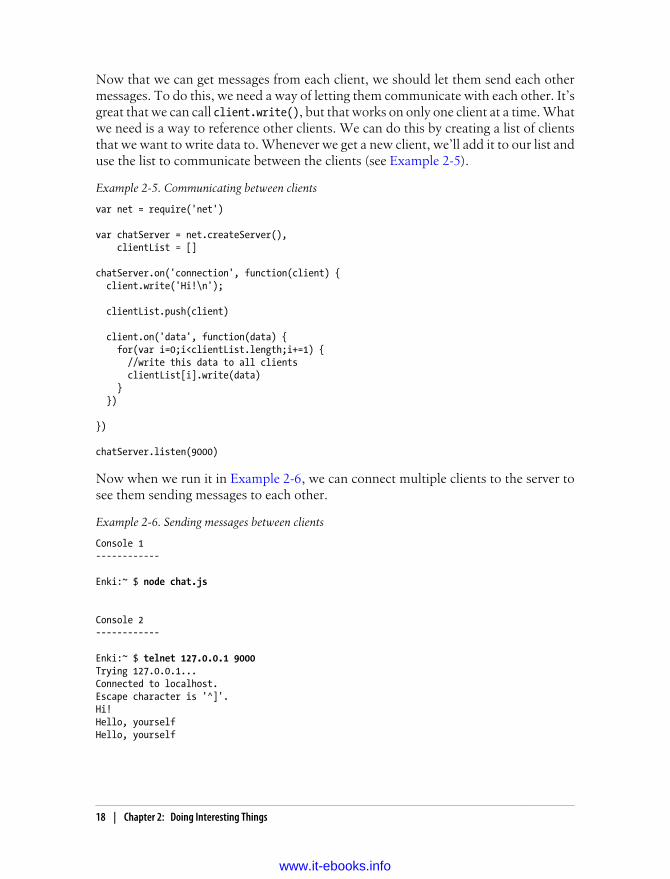
Now that we can get messages from each client, we should let them send each othermessages. To do this, we need a way of letting them communicate with each other. It’sgreat that we can call client.write(), but that works on only one client at a time. Whatwe need is a way to reference other clients. We can do this by creating a list of clientsthat we want to write data to. Whenever we get a new client, we’ll add it to our list anduse the list to communicate between the clients (see Example 2-5).
Example 2-5. Communicating between clients
var net = require('net')
var chatServer = net.createServer(), clientList = []
chatServer.on('connection', function(client) { client.write('Hi!\n');
clientList.push(client)
client.on('data', function(data) { for(var i=0;i<clientList.length;i+=1) { //write this data to all clients clientList[i].write(data) } })
})
chatServer.listen(9000)
Now when we run it in Example 2-6, we can connect multiple clients to the server tosee them sending messages to each other.
Example 2-6. Sending messages between clients
Console 1------------
Enki:~ $ node chat.js
Console 2------------
Enki:~ $ telnet 127.0.0.1 9000Trying 127.0.0.1...Connected to localhost.Escape character is '^]'.Hi!Hello, yourselfHello, yourself
18 | Chapter 2: Doing Interesting Things
www.it-ebooks.info

Console 3------------
Enki:~ $ telnet 127.0.0.1 9000Trying 127.0.0.1...Connected to localhost.Escape character is '^]'.Hi!Hello, yourself
This time, the server isn’t logging any messages it receives, and instead we loop throughthe array and send them back to the clients. Notice that when the Telnet client interminal 2 sends a message, it gets sent to the Telnet client in terminal 3, but it also getssent back to Telnet in terminal 2 as well. This is because when we send the message,we aren’t checking who the sender was; we just send to our entire array of clients. It’salso not clear just by looking at Telnet which messages were things we sent and whichwere things we received. We can improve on this. In Example 2-7, let’s create a functionto send messages to all the clients, and use it to tidy up some of these issues.
Example 2-7. Improving the sending of messages
var net = require('net')
var chatServer = net.createServer(), clientList = []
chatServer.on('connection', function(client) { client.name = client.remoteAddress + ':' + client.remotePort client.write('Hi ' + client.name + '!\n');
clientList.push(client)
client.on('data', function(data) { broadcast(data, client) })
})
function broadcast(message, client) { for(var i=0;i<clientList.length;i+=1) { if(client !== clientList[i]) { clientList[i].write(client.name + " says " + message) } }}
chatServer.listen(9000)
The first thing we’ve added to the connection event listener is a command to add aname property to each client. Note how we are able to decorate the client object withadditional properties. This is because the closure binds each client object to a specificrequest. The existing properties of the client are used to create the name, and the
Building a Chat Server | 19
www.it-ebooks.info
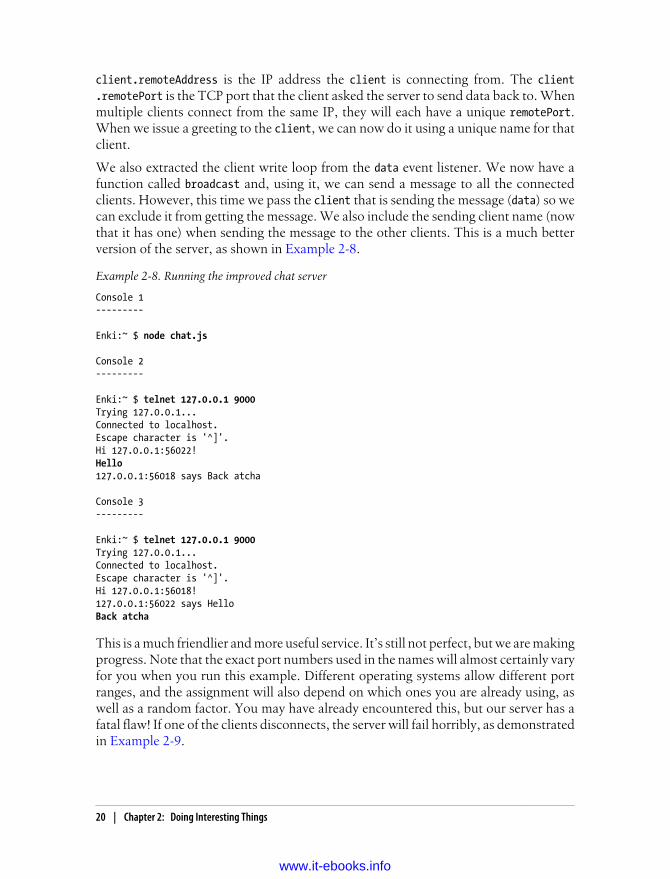
client.remoteAddress is the IP address the client is connecting from. The client.remotePort is the TCP port that the client asked the server to send data back to. Whenmultiple clients connect from the same IP, they will each have a unique remotePort.When we issue a greeting to the client, we can now do it using a unique name for thatclient.
We also extracted the client write loop from the data event listener. We now have afunction called broadcast and, using it, we can send a message to all the connectedclients. However, this time we pass the client that is sending the message (data) so wecan exclude it from getting the message. We also include the sending client name (nowthat it has one) when sending the message to the other clients. This is a much betterversion of the server, as shown in Example 2-8.
Example 2-8. Running the improved chat server
Console 1---------
Enki:~ $ node chat.js
Console 2---------
Enki:~ $ telnet 127.0.0.1 9000Trying 127.0.0.1...Connected to localhost.Escape character is '^]'.Hi 127.0.0.1:56022!Hello127.0.0.1:56018 says Back atcha
Console 3---------
Enki:~ $ telnet 127.0.0.1 9000Trying 127.0.0.1...Connected to localhost.Escape character is '^]'.Hi 127.0.0.1:56018!127.0.0.1:56022 says HelloBack atcha
This is a much friendlier and more useful service. It’s still not perfect, but we are makingprogress. Note that the exact port numbers used in the names will almost certainly varyfor you when you run this example. Different operating systems allow different portranges, and the assignment will also depend on which ones you are already using, aswell as a random factor. You may have already encountered this, but our server has afatal flaw! If one of the clients disconnects, the server will fail horribly, as demonstratedin Example 2-9.
20 | Chapter 2: Doing Interesting Things
www.it-ebooks.info

Example 2-9. Causing the server to fail by disconnecting a client
Console 1----------
Enki:~ $ node book-chat.js
net.js:392 throw new Error('Socket is not writable'); ^Error: Socket is not writable at Socket._writeOut (net.js:392:11) at Socket.write (net.js:378:17) at broadcast (/Users/sh1mmer/book-chat.js:21:21) at Socket.<anonymous> (/Users/sh1mmer/book-chat.js:13:5) at Socket.emit (events.js:64:17) at Socket._onReadable (net.js:679:14) at IOWatcher.onReadable [as callback] (net.js:177:10)Enki:~ $
Console 2---------
Enki:~ $ telnet 127.0.0.1 9000 Trying 127.0.0.1...Connected to localhost.Escape character is '^]'.Hi 127.0.0.1:56910!^]telnet> quit Connection closed.Enki:~ $
Console 3---------
Enki:~ $ telnet 127.0.0.1 9000 Trying 127.0.0.1...Connected to localhost.Escape character is '^]'.Hi 127.0.0.1:56911!You still there? Connection closed by foreign host. Enki:~ $
We start the server as normal and connect some clients , but when the client inConsole 2 disconnects , we have a bit of a problem. The next time we use broadcast(), in this case when Console 3 sends a message , the server tries to write to adisconnected client . When the client from Console 2 disconnected , its socketstopped being writable or readable. When we try to call write() on a socket that isclosed, we get an exception in the Node process. This also causes the disconnection ofall the remaining clients . Obviously, this is extremely brittle and not acceptable fora server.
Building a Chat Server | 21
www.it-ebooks.info
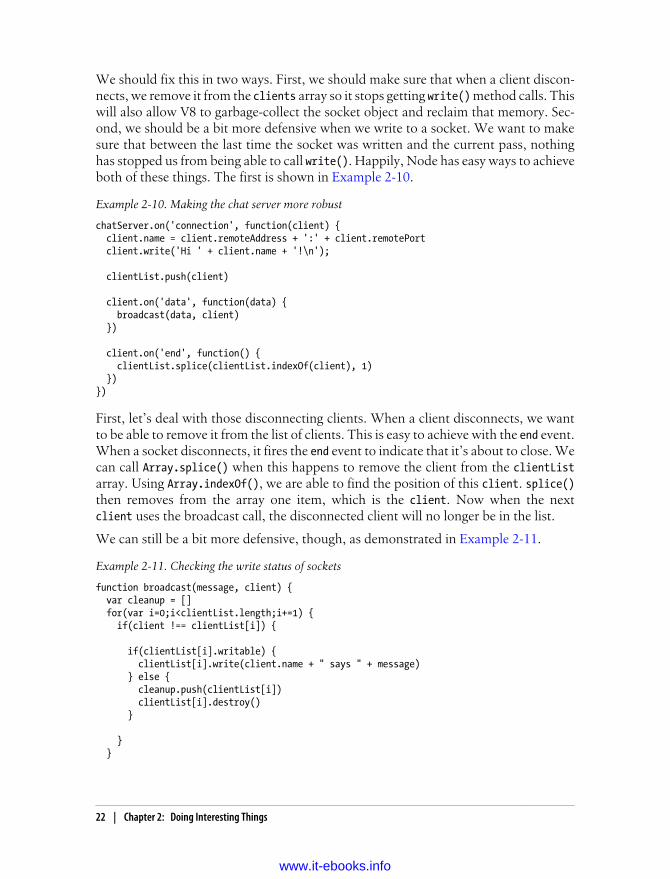
We should fix this in two ways. First, we should make sure that when a client discon-nects, we remove it from the clients array so it stops getting write() method calls. Thiswill also allow V8 to garbage-collect the socket object and reclaim that memory. Sec-ond, we should be a bit more defensive when we write to a socket. We want to makesure that between the last time the socket was written and the current pass, nothinghas stopped us from being able to call write(). Happily, Node has easy ways to achieveboth of these things. The first is shown in Example 2-10.
Example 2-10. Making the chat server more robust
chatServer.on('connection', function(client) { client.name = client.remoteAddress + ':' + client.remotePort client.write('Hi ' + client.name + '!\n');
clientList.push(client)
client.on('data', function(data) { broadcast(data, client) })
client.on('end', function() { clientList.splice(clientList.indexOf(client), 1) })})
First, let’s deal with those disconnecting clients. When a client disconnects, we wantto be able to remove it from the list of clients. This is easy to achieve with the end event.When a socket disconnects, it fires the end event to indicate that it’s about to close. Wecan call Array.splice() when this happens to remove the client from the clientListarray. Using Array.indexOf(), we are able to find the position of this client. splice()then removes from the array one item, which is the client. Now when the nextclient uses the broadcast call, the disconnected client will no longer be in the list.
We can still be a bit more defensive, though, as demonstrated in Example 2-11.
Example 2-11. Checking the write status of sockets
function broadcast(message, client) { var cleanup = [] for(var i=0;i<clientList.length;i+=1) { if(client !== clientList[i]) {
if(clientList[i].writable) { clientList[i].write(client.name + " says " + message) } else { cleanup.push(clientList[i]) clientList[i].destroy() }
} }
22 | Chapter 2: Doing Interesting Things
www.it-ebooks.info
//Remove dead Nodes out of write loop to avoid trashing loop index for(i=0;i<cleanup.length;i+=1) { clientList.splice(clientList.indexOf(cleanup[i]), 1) }}
By adding a check for the write status of the socket during the broadcast call, we canmake sure that any sockets that are not available to be written don’t cause an exception.Moreover, we can make sure that any sockets that can’t be written to are closed (usingSocket.destroy()) and then removed from the clientList. Note that we don’t removethe sockets from the clientList while we are looping through it, because we don’t wantto cause side effects on the current loop we are in. Our server is now much more robust.There is one more thing we should do before we are really ready to deploy it: log theerrors (Example 2-12).
Example 2-12. Logging errors
chatServer.on('connection', function(client) { client.name = client.remoteAddress + ':' + client.remotePort client.write('Hi ' + client.name + '!\n'); console.log(client.name + ' joined')
clientList.push(client)
client.on('data', function(data) { broadcast(data, client) })
client.on('end', function() { console.log(client.name + ' quit') clientList.splice(clientList.indexOf(client), 1) }) client.on('error', function(e) { console.log(e) })})
By adding a console.log() call to the error event for the client objects, we can ensurethat any errors that occur to clients are logged, even as our previous code makes surethat clients throwing errors are not able to cause the server to abort with an exception.
Let’s Build TwitterThe previous example shows how easy it is to write something extremely real-time withNode, but often you just want to write a web application. Let’s try to create somethingsimilar to Twitter with Node so we can see what it’s like to make a web application.The first thing we should do is install the Express module (Example 2-13). This webframework for Node makes it much easier to create web applications by adding supportfor common tasks, such as MVC, to the existing http server.
Let’s Build Twitter | 23
www.it-ebooks.info
Example 2-13. Installing the Express module
Enki:~ $ npm install [email protected] ./node_modules/express ├── [email protected]├── [email protected]└── [email protected]:~ $
Installing Express is easy using the Node Package Manager (npm). Once we have theframework installed, we can make a basic web application (Example 2-14). This looksa lot like the application we built in Chapter 1.
You can read more about npm in Chapters 6 and 7.
Example 2-14. A basic web server with Express
var express = require('express')
var app = express.createServer()
app.get('/', function(req, res) { res.send('Welcome to Node Twitter')})
app.listen(8000)
This code looks pretty similar to the basic web server code from Chapter 1. Instead ofincluding the http module, however, we include express. Express is actually gettinghttp behind the scenes, but we don’t have to get that ourselves, because Node willautomatically resolve the dependencies. Like with http and net, we call createServer() to make a server and call listen() to make it listen to a specific port. Insteadof attaching an event listener to the request event with Express, we can call methodsmatching the HTTP verbs. In this case, when we call get(), we can create a callbackfunction that will match GET requests only to a URL that matches the first argumentof the call. This has immediately added two things that the http server didn’t have: theability to filter based on HTTP verbs, and the ability to filter based on specific URLs.
When we get the callback, it looks a lot like the one from the http server—because itis. However, Express has added some extra methods. With the http server, we neededto create the HTTP headers and send them to the client before sending the body of therequest. Express provides a convenience method on the res (http.response) object callnamed send(), and this method issues both the HTTP headers as well as aresponse.end() call. So far, we haven’t done much more than the original Hello Worldserver from Chapter 1. However, this server will respond only to a GET request to /
24 | Chapter 2: Doing Interesting Things
www.it-ebooks.info
without throwing an error. This is in contrast to the previous example, which wouldrespond to any request with any path.
Let’s start adding some features to this server in order to provide some of the Twitterfunctionality (Example 2-15). At least to start with, we aren’t going to worry aboutmaking it super-robust or scalable. We are going to make a few assumptions so youcan see how to create applications.
Example 2-15. Adding a basic API
var express = require('express')
var app = express.createServer()app.listen(8000)
var tweets = []
app.get('/', function(req, res) { res.send('Welcome to Node Twitter')})
app.post('/send', express.bodyParser(), function(req, res) { if (req.body && req.body.tweet) { tweets.push(req.body.tweet) res.send({status:"ok", message:"Tweet received"}) } else { //no tweet? res.send({status:"nok", message:"No tweet received"}) }})
app.get('/tweets', function(req,res) { res.send(tweets)})
Building on the basic Express app, we’ve added a couple of functions to provide anextremely basic API. But first let’s talk about another change we made. We moved theapp.listen() call to the top of the file. It’s important to understand why this doesn’tcause a race condition for the functions that respond to requests. You might imaginethat when we call app.listen(), any requests that happen between the app.listen()call and the time it takes to run those functions will be ignored. This is incorrect fortwo reasons. The first is that in JavaScript everything happens in an event loop. Thatmeans new events don’t get called until we’ve finished evaluating the code of the ex-isting loop pass. In this case, no request events will be called (and thus our request-based functions) until we’ve evaluated all the initialization code in the file. The otherreason is that the app.listen() call is actually asynchronous because binding to a TCPport takes time. The addition of event listeners (via app.get() and app.post()), on theother hand, is synchronous.
Let’s Build Twitter | 25
www.it-ebooks.info
To get some very basic tweeting action going, we’ve added a POST “route” for /sendusing the app.post() call. This call is a little bit different from the previous example.Obviously, it’s an app.post() rather than an app.get() request. This simply means itaccepts HTTP POST requests instead of HTTP GET requests. The significant differenceis that we’ve passed an extra argument to the function. You don’t need to do this onall app.post() calls, or any, in fact. The extra argument after the url is a middleware.
A middleware is a small piece of code that sits in between the original request eventand the route we defined with app.post(). We use middleware to reuse code for com-mon tasks such as authentication or logging. In this case the middleware’s job is tostream the POST data from the client and then turn it into a JavaScript object that wecan use. This middleware is one that is included in Express itself, called bodyParser.We simply include it by specifying it in the arguments we give to the app.post() route.Notice that we call express.bodyParser(). This function call actually returns anotherfunction. We use this standard style for middleware to allow you to pass configurationto the middleware if you want to.
If we didn’t include the middleware, we would have to manually write code to acceptthe data event provided by the request (req) object. Only after we had streamed in allthe POST data could we call the code in the app.post() route. Using the middlewarenot only helps with code reuse but also with clarity.
The express.bodyParser adds a property to req called req.body. This property (if itexists) contains an object representing the POST data. The express.bodyParser mid-dleware will work only for POST requests with the content-type HTTP header ofapplication/x-www-form-urlencoded or application/json. Both of these are easy toparse into key/value pairs as properties of the req.body object.
This means that in the app.post() route we made, the first thing we do is check whetherexpress.bodyParser found any data. We can simply check to see whether req.body wascreated. If it was, we look for a property called req.body.tweet to represent the tweet.If we find a tweet, we stash it in a global array called tweets and send a JSON stringback to the client noting success. If we couldn’t find req.body or req.body.tweet, wesend JSON back to the client, noting the failure. Notice how we didn’t serialize thedata in the res.send() calls. If we give res.send() an object, it automatically serializesit as JSON and sends the correct HTTP headers.
Finally, to make our basic API complete, we create an app.get() route that listensto /tweets. This route simply sends back JSON for the tweets array.
We can write a few tests for our simple API to make sure it’s working (Example 2-16).This is a good habit to get into, even if you don’t do full test-driven development (TDD).
Example 2-16. A test for the POST API
var http = require('http'), assert = require('assert')
26 | Chapter 2: Doing Interesting Things
www.it-ebooks.info
var opts = { host: 'localhost', port: 8000, path: '/send', method: 'POST', headers: {'content-type':'application/x-www-form-urlencoded'}}
var req = http.request(opts, function(res) { res.setEncoding('utf8')
var data = "" res.on('data', function(d) { data += d })
res.on('end', function() { assert.strictEqual(data, '{"status":"ok","message":"Tweet received"}') })})
req.write('tweet=test')req.end()
We need the http and assert2 modules in order to send HTTP requests and then testthe values returned. assert is a core module in Node that lets us test return values invarious ways. When a value doesn’t match the expected criteria, an exception is thrown.By making test scripts that check an expected behavior of our program, we can ensurethat it is doing what it should be.
The http library doesn’t just contain objects to serve HTTP; it also provides a client.In this test program, we use the http.request() factory method to create a newhttp.Request object. To create an http.Request, we need an options object. This is aconfiguration object we pass that has a list of properties defining the functionality wewant the http.Request to exhibit. You’ll see config objects used for constructing otherNode objects. In this case, we include the hostname (which will be resolved by dns), theport, URL path, HTTP method, and some HTTP headers. Here the settings of the configobject reflect what we used when creating our Express server.
The http.request() constructor takes two arguments: the first is the config object, andthe second is a callback. The callback is attached to the response event for thehttp.Request. It’s similar to an http.Server, except we have only one object in theresponse.
The first thing we do with the response is call setEncoding(). This allows us to definethe encoding of all the received data. By setting this to utf8, we ensure that any datawe receive will be treated as the right kind of string. Next, we define a variable, data,which we are going to use to stream all the responses from the server. In Express,
2. You can read more about assert in Chapter 5.
Let’s Build Twitter | 27
www.it-ebooks.info
we can use express.bodyDecoder to catch all the data in a request and stream it, but wedon’t have the same luxury in the client, so we’ll do it by hand. It’s really easy. Wesimply attach a function to the data event on response. Whenever data happens, weappend it to our data variable. We can listen for the end event of the response and thentake further action on all of the data. The API is set up this way because there are manyapplications in which it is possible to stream data. In these cases, we can do all of thework in the data event listener rather than aggregating first.
When we get the end event on response, it’s because we have all the data from the server.Now we can run our test on whatever the server sent. Our test in this case is to checkwhether the data variable has received what we expected from the server. If the serveris acting correctly, it should send us back a piece of JSON. By using assert.strictEqual, we are checking that data matches the expected data using ===. If it doesn’t, anassert exception is thrown. We are using the x-www-form-urlencoded format becausethat’s what a web page form would send.
Now that we’ve set up the request and the event handlers for it, we need to write somedata to the server. Calling write() on request lets us send data (since this is a POSTrequest). We send some test data to ensure that the server will respond correctly. Fi-nally, we call end() to indicate that we are finished sending data with the request object.
When we call this script, it will access the server we set up (if it is running) and send aPOST request. If it gets back the correct data, it will finish without output. If it can’tconnect to the server or if the server responds with the wrong output, it will throw anexception. The goal is to have a set of scripts we can run to check that the server isbehaving correctly as we build it.
Now that we have an API, we can start adding a web interface so that people can useour app. Right now, it’s basic, but the API allows people to send messages that everyonecan receive. Let’s make an interface to that.
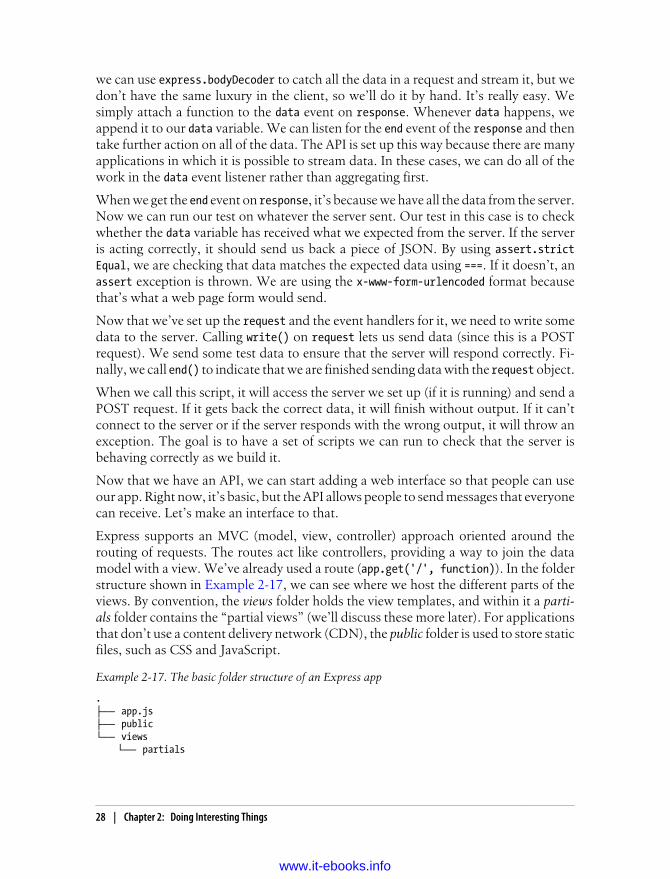
Express supports an MVC (model, view, controller) approach oriented around therouting of requests. The routes act like controllers, providing a way to join the datamodel with a view. We’ve already used a route (app.get('/', function)). In the folderstructure shown in Example 2-17, we can see where we host the different parts of theviews. By convention, the views folder holds the view templates, and within it a parti-als folder contains the “partial views” (we’ll discuss these more later). For applicationsthat don’t use a content delivery network (CDN), the public folder is used to store staticfiles, such as CSS and JavaScript.
Example 2-17. The basic folder structure of an Express app
.├── app.js├── public└── views └── partials
28 | Chapter 2: Doing Interesting Things
www.it-ebooks.info
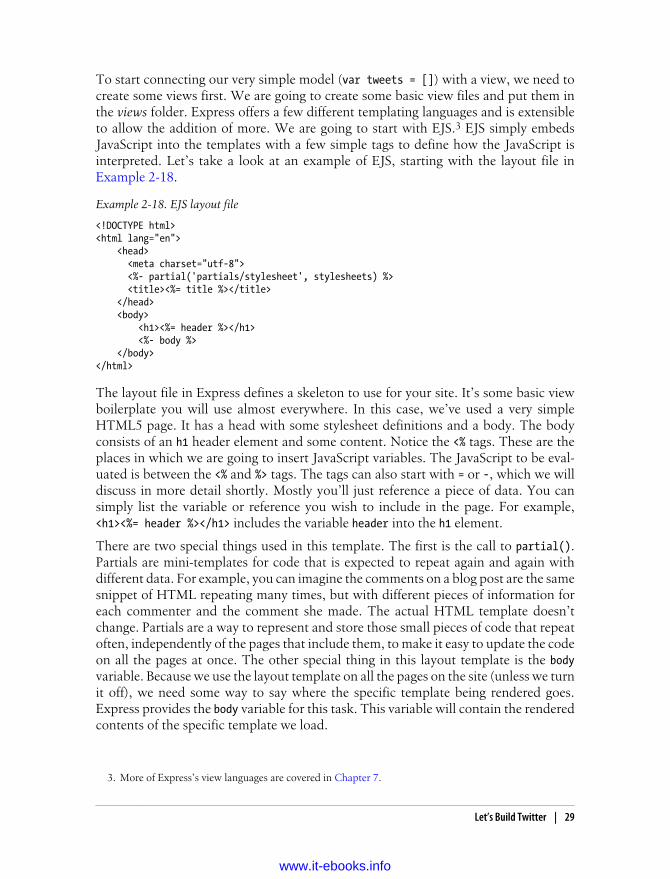
To start connecting our very simple model (var tweets = []) with a view, we need tocreate some views first. We are going to create some basic view files and put them inthe views folder. Express offers a few different templating languages and is extensibleto allow the addition of more. We are going to start with EJS.3 EJS simply embedsJavaScript into the templates with a few simple tags to define how the JavaScript isinterpreted. Let’s take a look at an example of EJS, starting with the layout file inExample 2-18.
Example 2-18. EJS layout file
<!DOCTYPE html><html lang="en"> <head> <meta charset="utf-8"> <%- partial('partials/stylesheet', stylesheets) %> <title><%= title %></title> </head> <body> <h1><%= header %></h1> <%- body %> </body></html>
The layout file in Express defines a skeleton to use for your site. It’s some basic viewboilerplate you will use almost everywhere. In this case, we’ve used a very simpleHTML5 page. It has a head with some stylesheet definitions and a body. The bodyconsists of an h1 header element and some content. Notice the <% tags. These are theplaces in which we are going to insert JavaScript variables. The JavaScript to be eval-uated is between the <% and %> tags. The tags can also start with = or -, which we willdiscuss in more detail shortly. Mostly you’ll just reference a piece of data. You cansimply list the variable or reference you wish to include in the page. For example,<h1><%= header %></h1> includes the variable header into the h1 element.
There are two special things used in this template. The first is the call to partial().Partials are mini-templates for code that is expected to repeat again and again withdifferent data. For example, you can imagine the comments on a blog post are the samesnippet of HTML repeating many times, but with different pieces of information foreach commenter and the comment she made. The actual HTML template doesn’tchange. Partials are a way to represent and store those small pieces of code that repeatoften, independently of the pages that include them, to make it easy to update the codeon all the pages at once. The other special thing in this layout template is the bodyvariable. Because we use the layout template on all the pages on the site (unless we turnit off), we need some way to say where the specific template being rendered goes.Express provides the body variable for this task. This variable will contain the renderedcontents of the specific template we load.
3. More of Express’s view languages are covered in Chapter 7.
Let’s Build Twitter | 29
www.it-ebooks.info
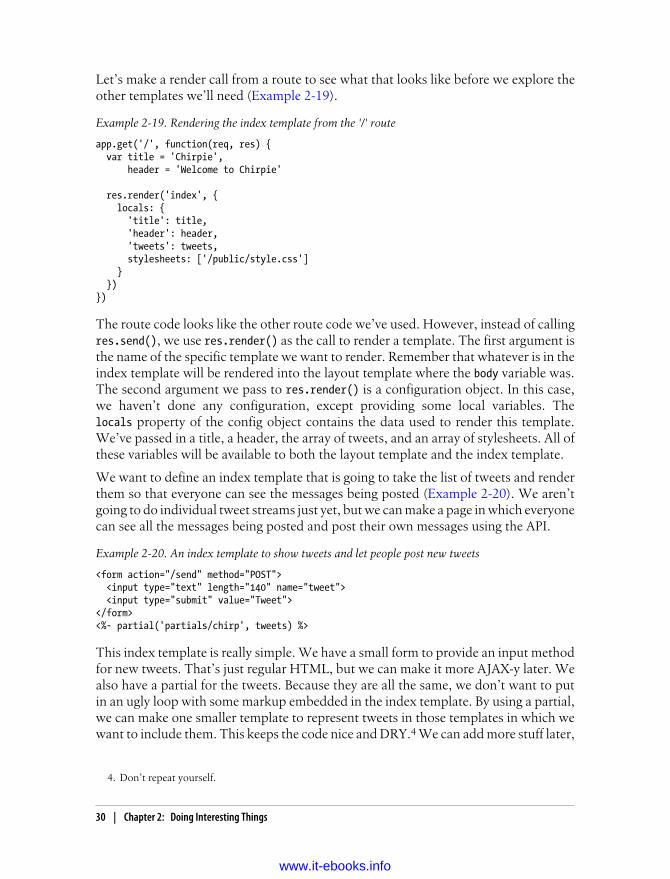
Let’s make a render call from a route to see what that looks like before we explore theother templates we’ll need (Example 2-19).
Example 2-19. Rendering the index template from the '/' route
app.get('/', function(req, res) { var title = 'Chirpie', header = 'Welcome to Chirpie'
res.render('index', { locals: { 'title': title, 'header': header, 'tweets': tweets, stylesheets: ['/public/style.css'] } })})
The route code looks like the other route code we’ve used. However, instead of callingres.send(), we use res.render() as the call to render a template. The first argument isthe name of the specific template we want to render. Remember that whatever is in theindex template will be rendered into the layout template where the body variable was.The second argument we pass to res.render() is a configuration object. In this case,we haven’t done any configuration, except providing some local variables. Thelocals property of the config object contains the data used to render this template.We’ve passed in a title, a header, the array of tweets, and an array of stylesheets. All ofthese variables will be available to both the layout template and the index template.
We want to define an index template that is going to take the list of tweets and renderthem so that everyone can see the messages being posted (Example 2-20). We aren’tgoing to do individual tweet streams just yet, but we can make a page in which everyonecan see all the messages being posted and post their own messages using the API.
Example 2-20. An index template to show tweets and let people post new tweets
<form action="/send" method="POST"> <input type="text" length="140" name="tweet"> <input type="submit" value="Tweet"></form><%- partial('partials/chirp', tweets) %>
This index template is really simple. We have a small form to provide an input methodfor new tweets. That’s just regular HTML, but we can make it more AJAX-y later. Wealso have a partial for the tweets. Because they are all the same, we don’t want to putin an ugly loop with some markup embedded in the index template. By using a partial,we can make one smaller template to represent tweets in those templates in which wewant to include them. This keeps the code nice and DRY.4 We can add more stuff later,
4. Don’t repeat yourself.
30 | Chapter 2: Doing Interesting Things
www.it-ebooks.info
but this gives us the basic functionality we need. We’ll still need to define the partialtemplates we use in the layout template and the index template (Examples 2-21 and2-22).
Example 2-21. A partial template for rendering chirps
<p><%= chirp %></p>
Example 2-22. A partial template for rendering stylesheets
<link rel="stylesheet" type="text/css" href="<%- stylesheet %>">
Both of these templates are really simple as well. They take some data and insert it intothe markup. Because they get passed an array, they will repeat for each item in the array;however, neither of them is doing anything complex with the items of data. The variableeach partial is using to access the array is the same as the name of the template. Thetemplate called chirp accesses its data in a variable of the same name. In this case, thedata is simple strings, but if we passed in an array of objects, we could do chirp.property or chirp['property'] to access the properties of the objects. Of course, youcan also call methods, such as chirp.method().
Now we have an application that allows us to post tweets. It’s very basic, and there aresome things that are pretty suboptimal. Let’s correct a few of those things. The firstobvious problem is that when we post a new tweet, it takes us to the “send JSON”endpoint. It’s not bad that we are accessing /send, but rather that it treats all clients thesame. The tweets are also coming out in chronological order and we haven’t been savinga timestamp, so we don’t know how fresh they are. We’ll fix that too.
Fixing the /send endpoint is pretty simple. When HTTP clients send a request, theycan specify the kind of response they want in order of preference. Typical browsersrequest text/html first and then various other formats. When performing API requests,however, the client can specify application/json in order to get the correct output. Bychecking for the accept HTTP header, we can make sure we send browsers back to thehome page but simply return JSON to API clients.
The accept HTTP header might look like text/html,application/xhtml+xml,application/xml;q=0.9,*/*;q=0.8. That header is from the Chrome browser, and it contains anumber of MIME types separated by commas. First, we need a small function to figureout whether text/html is in the accept header (Example 2-23), and then we can usethat to test the header and do some logic in the route.
Example 2-23. A small function to check for text/html in an accept header
function acceptsHtml(header) { var accepts = header.split(',') for(i=0;i<accepts.length;i+=0) { if (accepts[i] === 'text/html') { return true } }
Let’s Build Twitter | 31
www.it-ebooks.info
return false}
This function splits the header across the commas. Then we iterate over that array andsimply return true if any of them match text/html; otherwise, we’ll return false if noneof them matched. We can use this in our route function to check whether it is a requestfrom a web browser or an API request (Example 2-24).
Example 2-24. Redirect web browsers from the /send endpoint
app.post('/send', express.bodyParser(), function(req, res) { if (req.body && req.body.tweet) {
tweets.push(req.body.tweet) if(acceptsHtml(req.headers['accept'])) { res.redirect('/', 302) } else { res.send({status:"ok", message:"Tweet received"}) }
} else { //no tweet? res.send({status:"nok", message:"No tweet received"}) }})
Much of this code is the same as Example 2-10, but now we have a check for whetherthe accept header asks for text/html. If it does, we redirect back to / using the res.redirect command. We use a 302 status code because this isn’t a permanent move.Instead, we want the browser to still go to /send each time before redirecting.
32 | Chapter 2: Doing Interesting Things
www.it-ebooks.info
CHAPTER 3
Building Robust Node Applications
To make the most of the server-side JavaScript environment, it’s important to under-stand some core concepts behind the design choices that were made for Node.js andJavaScript in general. Understanding the decisions and trade-offs will make it easier foryou to write great code and architect your systems. It will also help you explain to otherpeople why Node.js is different from other systems they’ve used and where the per-formance gains come from. No engineer likes unknowns in her system. “Magic” is notan acceptable answer, so it helps to be able to explain why a particular architecture isbeneficial and under what circumstances.
This chapter will cover the coding styles, design patterns, and production know-howyou need to write good, robust Node code.
The Event LoopA fundamental part of Node is the event loop, a concept underlying the behavior ofJavaScript as well as most other interactive systems. In many languages, event modelsare bolted onto the side, but JavaScript events have always been a core part of thelanguage. This is because JavaScript has always dealt with user interaction. Anyonewho has used a modern web browser is accustomed to web pages that do things “on-click,” “onmouseover,” etc. These events are so common that we hardly think aboutthem when writing web page interaction, but having this event support in the languageis incredibly powerful. On the server, instead of the limited set of events based on theuser-driven interaction with the web page’s DOM, we have an infinite variety of eventsbased on what’s happening in the server software we use. For example, the HTTP servermodule provides an event called “request,” emitted when a user sends the web servera request.
The event loop is the system that JavaScript uses to deal with these incoming requestsfrom various parts of the system in a sane manner. There are a number of ways peopledeal with “real-time” or “parallel” issues in computing. Most of them are fairly complexand, frankly, make our brains hurt. JavaScript takes a simple approach that makes the
33
www.it-ebooks.info
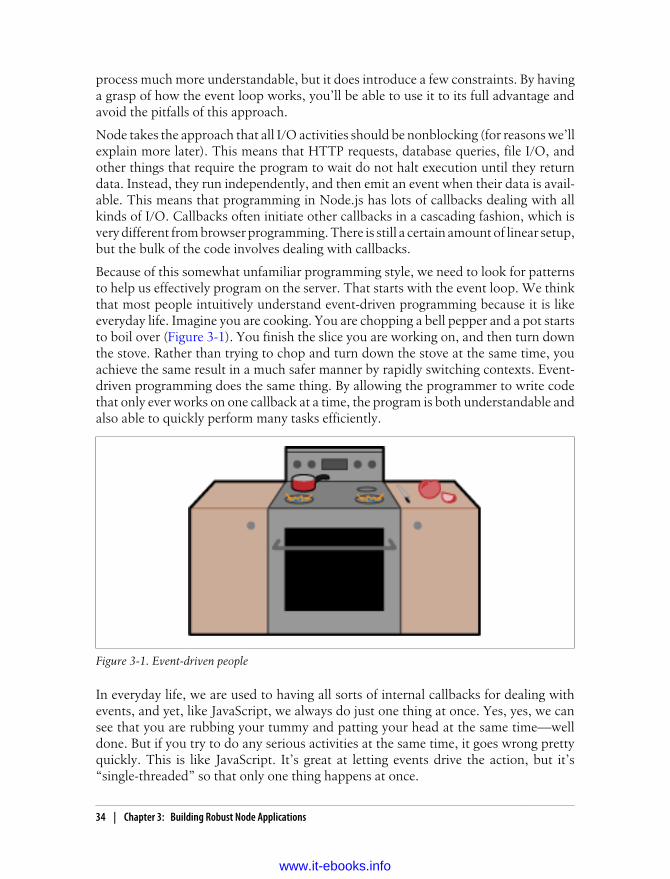
process much more understandable, but it does introduce a few constraints. By havinga grasp of how the event loop works, you’ll be able to use it to its full advantage andavoid the pitfalls of this approach.
Node takes the approach that all I/O activities should be nonblocking (for reasons we’llexplain more later). This means that HTTP requests, database queries, file I/O, andother things that require the program to wait do not halt execution until they returndata. Instead, they run independently, and then emit an event when their data is avail-able. This means that programming in Node.js has lots of callbacks dealing with allkinds of I/O. Callbacks often initiate other callbacks in a cascading fashion, which isvery different from browser programming. There is still a certain amount of linear setup,but the bulk of the code involves dealing with callbacks.
Because of this somewhat unfamiliar programming style, we need to look for patternsto help us effectively program on the server. That starts with the event loop. We thinkthat most people intuitively understand event-driven programming because it is likeeveryday life. Imagine you are cooking. You are chopping a bell pepper and a pot startsto boil over (Figure 3-1). You finish the slice you are working on, and then turn downthe stove. Rather than trying to chop and turn down the stove at the same time, youachieve the same result in a much safer manner by rapidly switching contexts. Event-driven programming does the same thing. By allowing the programmer to write codethat only ever works on one callback at a time, the program is both understandable andalso able to quickly perform many tasks efficiently.
Figure 3-1. Event-driven people
In everyday life, we are used to having all sorts of internal callbacks for dealing withevents, and yet, like JavaScript, we always do just one thing at once. Yes, yes, we cansee that you are rubbing your tummy and patting your head at the same time—welldone. But if you try to do any serious activities at the same time, it goes wrong prettyquickly. This is like JavaScript. It’s great at letting events drive the action, but it’s“single-threaded” so that only one thing happens at once.
34 | Chapter 3: Building Robust Node Applications
www.it-ebooks.info
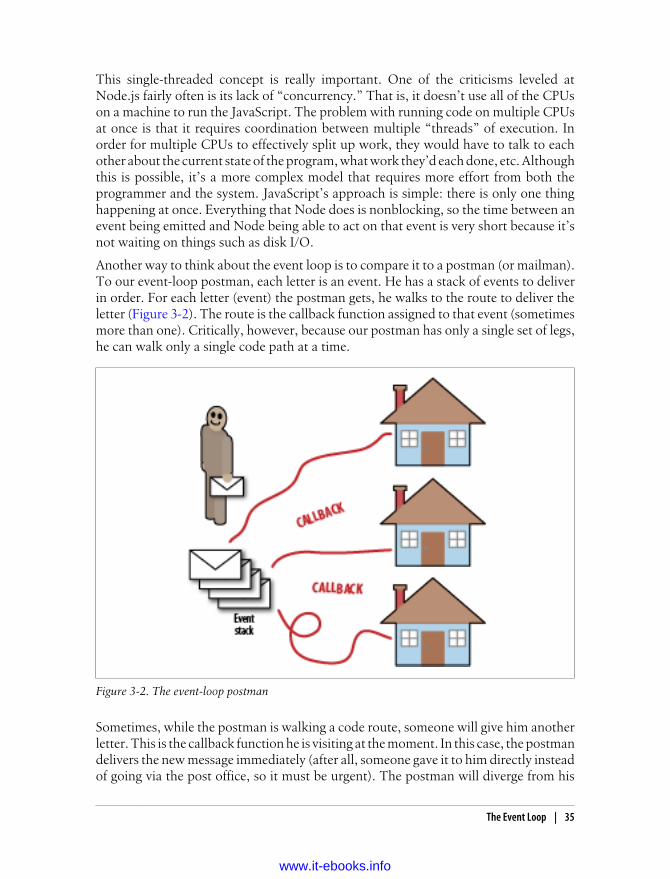
This single-threaded concept is really important. One of the criticisms leveled atNode.js fairly often is its lack of “concurrency.” That is, it doesn’t use all of the CPUson a machine to run the JavaScript. The problem with running code on multiple CPUsat once is that it requires coordination between multiple “threads” of execution. Inorder for multiple CPUs to effectively split up work, they would have to talk to eachother about the current state of the program, what work they’d each done, etc. Althoughthis is possible, it’s a more complex model that requires more effort from both theprogrammer and the system. JavaScript’s approach is simple: there is only one thinghappening at once. Everything that Node does is nonblocking, so the time between anevent being emitted and Node being able to act on that event is very short because it’snot waiting on things such as disk I/O.
Another way to think about the event loop is to compare it to a postman (or mailman).To our event-loop postman, each letter is an event. He has a stack of events to deliverin order. For each letter (event) the postman gets, he walks to the route to deliver theletter (Figure 3-2). The route is the callback function assigned to that event (sometimesmore than one). Critically, however, because our postman has only a single set of legs,he can walk only a single code path at a time.
Figure 3-2. The event-loop postman
Sometimes, while the postman is walking a code route, someone will give him anotherletter. This is the callback function he is visiting at the moment. In this case, the postmandelivers the new message immediately (after all, someone gave it to him directly insteadof going via the post office, so it must be urgent). The postman will diverge from his
The Event Loop | 35
www.it-ebooks.info
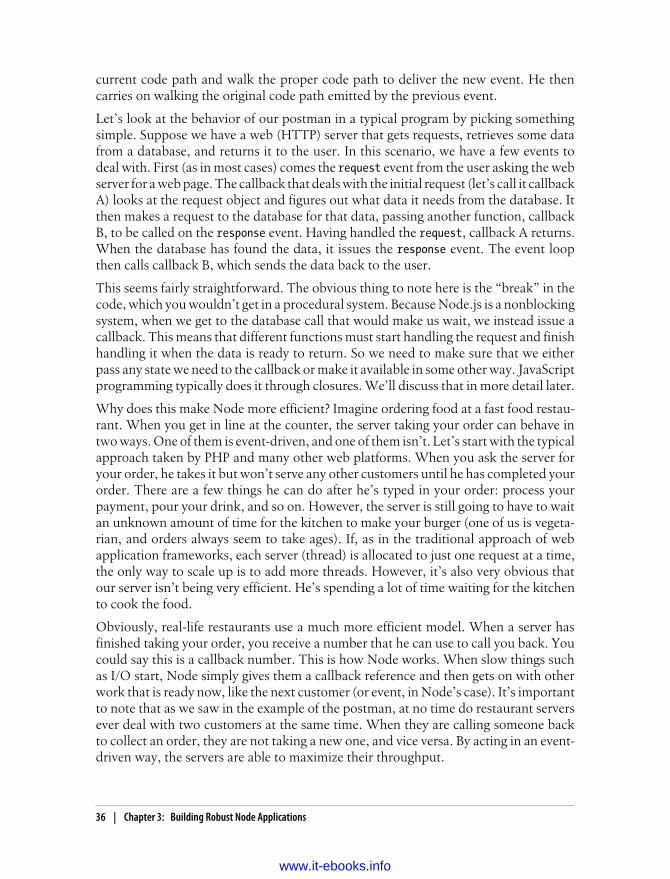
current code path and walk the proper code path to deliver the new event. He thencarries on walking the original code path emitted by the previous event.
Let’s look at the behavior of our postman in a typical program by picking somethingsimple. Suppose we have a web (HTTP) server that gets requests, retrieves some datafrom a database, and returns it to the user. In this scenario, we have a few events todeal with. First (as in most cases) comes the request event from the user asking the webserver for a web page. The callback that deals with the initial request (let’s call it callbackA) looks at the request object and figures out what data it needs from the database. Itthen makes a request to the database for that data, passing another function, callbackB, to be called on the response event. Having handled the request, callback A returns.When the database has found the data, it issues the response event. The event loopthen calls callback B, which sends the data back to the user.
This seems fairly straightforward. The obvious thing to note here is the “break” in thecode, which you wouldn’t get in a procedural system. Because Node.js is a nonblockingsystem, when we get to the database call that would make us wait, we instead issue acallback. This means that different functions must start handling the request and finishhandling it when the data is ready to return. So we need to make sure that we eitherpass any state we need to the callback or make it available in some other way. JavaScriptprogramming typically does it through closures. We’ll discuss that in more detail later.
Why does this make Node more efficient? Imagine ordering food at a fast food restau-rant. When you get in line at the counter, the server taking your order can behave intwo ways. One of them is event-driven, and one of them isn’t. Let’s start with the typicalapproach taken by PHP and many other web platforms. When you ask the server foryour order, he takes it but won’t serve any other customers until he has completed yourorder. There are a few things he can do after he’s typed in your order: process yourpayment, pour your drink, and so on. However, the server is still going to have to waitan unknown amount of time for the kitchen to make your burger (one of us is vegeta-rian, and orders always seem to take ages). If, as in the traditional approach of webapplication frameworks, each server (thread) is allocated to just one request at a time,the only way to scale up is to add more threads. However, it’s also very obvious thatour server isn’t being very efficient. He’s spending a lot of time waiting for the kitchento cook the food.
Obviously, real-life restaurants use a much more efficient model. When a server hasfinished taking your order, you receive a number that he can use to call you back. Youcould say this is a callback number. This is how Node works. When slow things suchas I/O start, Node simply gives them a callback reference and then gets on with otherwork that is ready now, like the next customer (or event, in Node’s case). It’s importantto note that as we saw in the example of the postman, at no time do restaurant serversever deal with two customers at the same time. When they are calling someone backto collect an order, they are not taking a new one, and vice versa. By acting in an event-driven way, the servers are able to maximize their throughput.
36 | Chapter 3: Building Robust Node Applications
www.it-ebooks.info
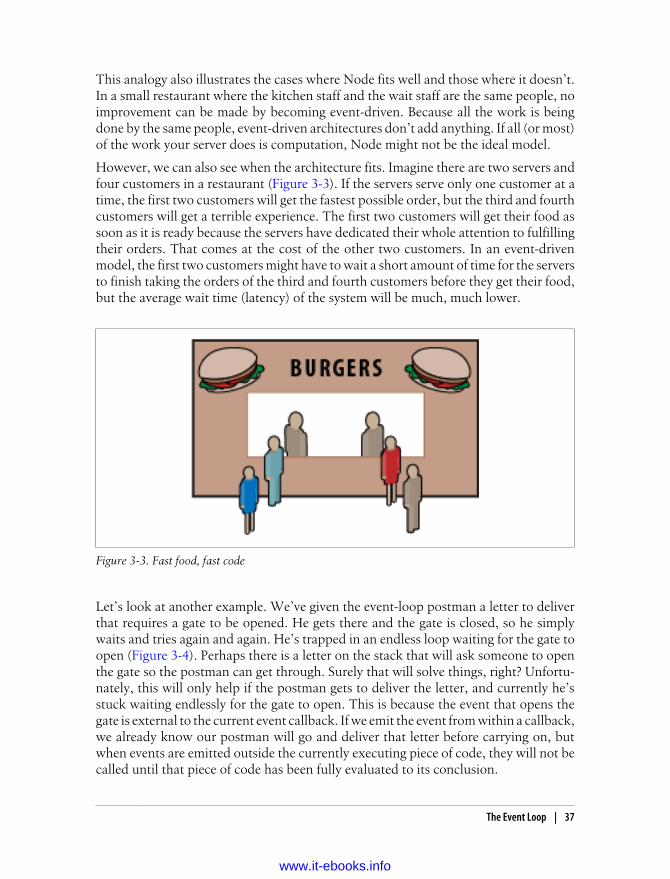
This analogy also illustrates the cases where Node fits well and those where it doesn’t.In a small restaurant where the kitchen staff and the wait staff are the same people, noimprovement can be made by becoming event-driven. Because all the work is beingdone by the same people, event-driven architectures don’t add anything. If all (or most)of the work your server does is computation, Node might not be the ideal model.
However, we can also see when the architecture fits. Imagine there are two servers andfour customers in a restaurant (Figure 3-3). If the servers serve only one customer at atime, the first two customers will get the fastest possible order, but the third and fourthcustomers will get a terrible experience. The first two customers will get their food assoon as it is ready because the servers have dedicated their whole attention to fulfillingtheir orders. That comes at the cost of the other two customers. In an event-drivenmodel, the first two customers might have to wait a short amount of time for the serversto finish taking the orders of the third and fourth customers before they get their food,but the average wait time (latency) of the system will be much, much lower.
Figure 3-3. Fast food, fast code
Let’s look at another example. We’ve given the event-loop postman a letter to deliverthat requires a gate to be opened. He gets there and the gate is closed, so he simplywaits and tries again and again. He’s trapped in an endless loop waiting for the gate toopen (Figure 3-4). Perhaps there is a letter on the stack that will ask someone to openthe gate so the postman can get through. Surely that will solve things, right? Unfortu-nately, this will only help if the postman gets to deliver the letter, and currently he’sstuck waiting endlessly for the gate to open. This is because the event that opens thegate is external to the current event callback. If we emit the event from within a callback,we already know our postman will go and deliver that letter before carrying on, butwhen events are emitted outside the currently executing piece of code, they will not becalled until that piece of code has been fully evaluated to its conclusion.
The Event Loop | 37
www.it-ebooks.info
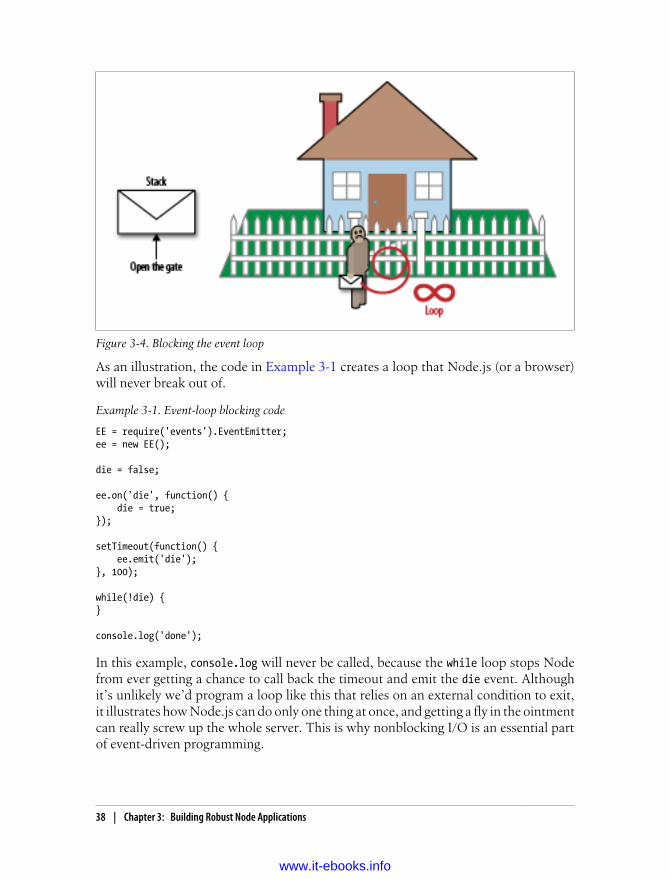
As an illustration, the code in Example 3-1 creates a loop that Node.js (or a browser)will never break out of.
Example 3-1. Event-loop blocking code
EE = require('events').EventEmitter;ee = new EE();
die = false;
ee.on('die', function() { die = true;});
setTimeout(function() { ee.emit('die');}, 100);
while(!die) {}
console.log('done');
In this example, console.log will never be called, because the while loop stops Nodefrom ever getting a chance to call back the timeout and emit the die event. Althoughit’s unlikely we’d program a loop like this that relies on an external condition to exit,it illustrates how Node.js can do only one thing at once, and getting a fly in the ointmentcan really screw up the whole server. This is why nonblocking I/O is an essential partof event-driven programming.
Figure 3-4. Blocking the event loop
38 | Chapter 3: Building Robust Node Applications
www.it-ebooks.info
Let’s consider some numbers. When we run an operation in the CPU (not a line ofJavaScript, but a single machine code operation), it takes about one-third of a nano-second (ns). A 3Ghz processor runs 3×10⁹ instructions a second, so each instructiontakes 10-9/3 seconds each. There are typically two types of memory in a CPU, L1 andL2 cache, each of which takes approximately 2–5ns to access. If we get data frommemory (RAM), it takes about 80ns, which is about two orders of magnitude slowerthan running an instruction. However, all of these things are in the same ballpark.Getting things from slower forms of I/O is not quite so good. Imagine that getting datafrom RAM is equivalent to the weight of a cat. Retrieving data from the hard drive,then, could be considered to be the weight of a whale. Getting things from the networkis like 100 whales. Think about how running var foo = "bar" versus a database queryis a single cat versus 100 blue whales. Blocking I/O doesn’t put an actual gate in frontof the event-loop postman, but it does send him via Timbuktu when he is deliveringhis events.
Given a basic understanding of the event loop, let’s look at the standard Node.js codefor creating an HTTP server, shown in Example 3-2.
Example 3-2. A basic HTTP server
var http = require('http');http.createServer(function (req, res) { res.writeHead(200, {'Content-Type': 'text/plain'}); res.end('Hello World\n');}).listen(8124, "127.0.0.1");console.log('Server running at http://127.0.0.1:8124/');
This code is the most basic example from the Node.js website (but as we’ll see soon,it’s not the ideal way to code). The example creates an HTTP server using a factorymethod in the http library. The factory method creates a new HTTP server and attachesa callback to the request event. The callback is specified as the argument to the createServer method. What’s interesting here is what happens when this code is run. Thefirst thing Node.js does is run the code in the example from top to bottom. This canbe considered the “setup” phase of Node programming. Because we attached someevent listeners, Node.js doesn’t exit, but instead waits for an event to be fired. If wedidn’t attach any events, Node.js would exit as soon as it had run the code.
So what happens when the server gets an HTTP request? Node.js emits the requestevent, which causes the callbacks attached to that event to be run in order. In this case,there is only one callback, the anonymous function we passed as an argument to createServer. Let’s assume it’s the first request the server has had since setup. Because thereis no other code running, the request event is handled immediately and the callback isrun. It’s a very simple callback, and it runs pretty fast.
Let’s assume that our site gets really popular and we get lots of requests. If, for the sakeof argument, our callback takes 1 second and we get a second request shortly after thefirst one, the second request isn’t going to be acted on for another second or so. Ob-viously, a second is a really long time, and as we look at the requirements of real-world
The Event Loop | 39
www.it-ebooks.info
applications, the problem of blocking the event loop becomes more damaging to theuser experience. The operating system kernel actually handles the TCP connections toclients for the HTTP server, so there isn’t a risk of rejecting new connections, but thereis a real danger of not acting on them. The upshot of this is that we want to keep Node.jsas event-driven and nonblocking as possible. In the same way that a slow I/O eventshould use callbacks to indicate the presence of data that Node.js can act on, theNode.js program itself should be written in such a way that no single callback ties upthe event loop for extended periods of time.
This means that you should follow two strategies when writing a Node.js server:
• Once setup has been completed, make all actions event-driven.
• If Node.js is required to process something that will take a long time, considerdelegating it to web workers.
Taking the event-driven approach works effectively with the event loop (the name is ahint that it would), but it’s also important to write event-driven code in a way that iseasy to read and understand. In the previous example, we used an anonymous functionas the event callback, which makes things hard in a couple of ways. First, we have nocontrol over where the code is used. An anonymous function’s call stack starts fromwhen it is used, rather than when the callback is attached to an event. This affectsdebugging. If everything is an anonymous event, it can be hard to distinguish similarcallbacks when an exception occurs.
PatternsEvent-driven programming is different from procedural programming. The easiest wayto learn it is to practice routine patterns that have been discovered by previous gener-ations of programmers. That is the purpose of this section.
Before we launch into patterns, we’ll take a look at what is really happening behindvarious programming styles to give the patterns some context. Most of this section willfocus on I/O, because, as discussed in the previous section, event-driven programmingis focused on solving problems with I/O. When it is working with data in memory thatdoesn’t require I/O, Node can be completely procedural.
The I/O Problem SpaceWe’ll start by looking at the types of I/O required in efficient systems. These will bethe basis of our patterns.
The first obvious distinction to look at is serial versus parallel I/O. Serial is obvious: dothis I/O, and after it is finished, do that I/O. Parallel is more complicated to implementbut also easy to understand: do this I/O and that I/O at the same time. The importantpoint here is that ordering is normally considered implicit in serial tasks, but paralleltasks could return in any order.
40 | Chapter 3: Building Robust Node Applications
www.it-ebooks.info
Groups of serial and parallel work can also be combined. For example, two groups ofparallel requests could execute serially: do this and that together, then do other andanother together.
In Node, we assume that all I/O has unbounded latency. This means that any I/O taskscould take from 0 to infinite time. We don’t know, and can’t assume, how long thesetasks take. So instead of waiting for them, we use placeholders (events), which thenfire callbacks when the I/O happens. Because we have assumed unbounded latency,it’s easy to perform parallel tasks. You simply make a number of calls for various I/Otasks. They will return whenever they are ready, in whatever order that happens to be.Ordered serial requests are also easy to make by nesting or referencing callbacks to-gether so that the first callback will initiate the second I/O request, the second callbackwill initiate the third, and so on. Even though each request is asynchronous and doesn’tblock the event loop, the requests are made in serial. This pattern of ordered requestsis useful when the results of one I/O operation have to inform the details of the nextI/O request.
So far, we have two ways to do I/O: ordered serial requests and unordered parallelrequests. Ordered parallel requests are also a useful pattern; they happen when weallow the I/O to take place in parallel, but we deal with the results in a particularsequence. Unordered serial I/O offers no particular benefits, so we won’t consider it asa pattern.
Unordered parallel I/O
Let’s start with unordered parallel I/O (Example 3-3) because it’s by far the easiest todo in Node. In fact, all I/O in Node is unordered parallel by default. This is because allI/O in Node is asynchronous and nonblocking. When we do any I/O, we simply throwthe request out there and see what happens. It’s possible that all the requests will hap-pen in the order we made them, but maybe they won’t. When we talk about unordered,we don’t mean randomized, but simply that there is no guaranteed order.
Example 3-3. Unordered parallel I/O in Node
fs.readFile('foo.txt', 'utf8', function(err, data) { console.log(data);};fs.readFile('bar.txt', 'utf8', function(err, data) { console.log(data);};
Simply making I/O requests with callbacks will create unordered parallel I/O. At somepoint in the future, both of these callbacks will fire. Which happens first is unknown,and either one could return an error rather than data without affecting the other request.
Patterns | 41
www.it-ebooks.info
Ordered serial I/O
In this pattern, we want to do some I/O (unbounded latency) tasks in sequence. Eachprevious task must be completed before the next task is started. In Node, this meansnesting callbacks so that the callback from each task starts the next task, as shown inExample 3-4.
Example 3-4. Nesting callbacks to produce serial requests
server.on('request', function(req, res) { //get session information from memcached memcached.getSession(req, function(session) { //get information from db db.get(session.user, function(userData) { //some other web service call ws.get(req, function(wsData) { //render page page = pageRender(req, session, userData, wsData); //output the response res.write(page); }); }); });});
Although nesting callbacks allows easy creation of ordered serial I/O, it also creates so-called “pyramid” code.1 This code can be hard to read and understand, and as a con-sequence, hard to maintain. For instance, a glance at Example 3-4 doesn’t reveal thatthe completion of the memcached.getSession request launches the db.get request, thatthe completion of the db.get request launches the ws.get request, and so on. There area few ways to make this code more readable without breaking the fundamental orderedserial pattern.
First, we can continue to use inline function declarations, but we can name them, asin Example 3-5. This makes debugging a lot easier as well as giving an indication ofwhat the callback is going to do.
Example 3-5. Naming function calls in callbacks
server.on('request', getMemCached(req, res) { memcached.getSession(req, getDbInfo(session) { db.get(session.user, getWsInfo(userData) { ws.get(req, render(wsData) { //render page page = pageRender(req, session, userData, wsData); //output the response res.write(page); }); });
1. This term was coined by Tim Caswell.
42 | Chapter 3: Building Robust Node Applications
www.it-ebooks.info
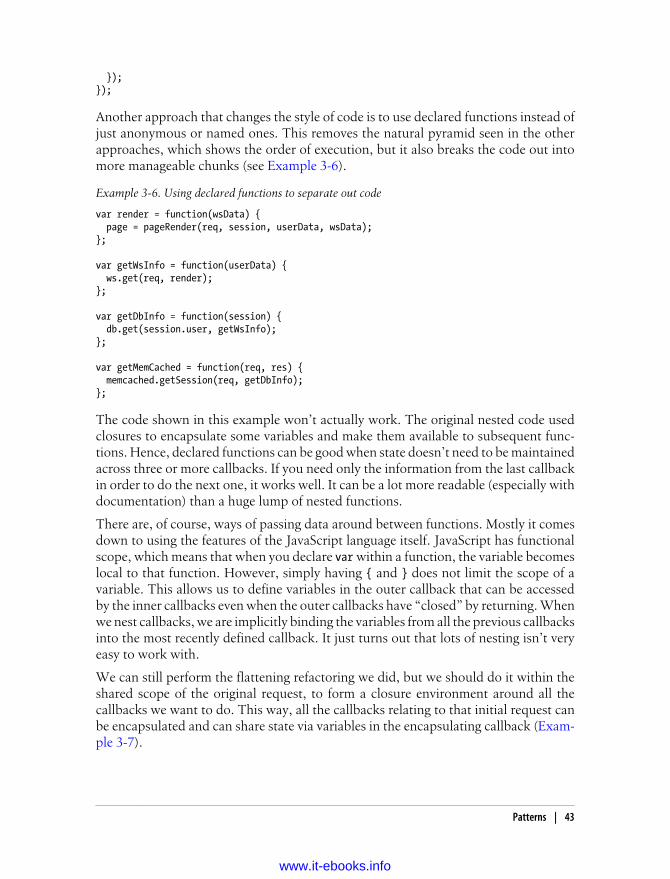
});});
Another approach that changes the style of code is to use declared functions instead ofjust anonymous or named ones. This removes the natural pyramid seen in the otherapproaches, which shows the order of execution, but it also breaks the code out intomore manageable chunks (see Example 3-6).
Example 3-6. Using declared functions to separate out code
var render = function(wsData) { page = pageRender(req, session, userData, wsData);};
var getWsInfo = function(userData) { ws.get(req, render);};
var getDbInfo = function(session) { db.get(session.user, getWsInfo);};
var getMemCached = function(req, res) { memcached.getSession(req, getDbInfo);};
The code shown in this example won’t actually work. The original nested code usedclosures to encapsulate some variables and make them available to subsequent func-tions. Hence, declared functions can be good when state doesn’t need to be maintainedacross three or more callbacks. If you need only the information from the last callbackin order to do the next one, it works well. It can be a lot more readable (especially withdocumentation) than a huge lump of nested functions.
There are, of course, ways of passing data around between functions. Mostly it comesdown to using the features of the JavaScript language itself. JavaScript has functionalscope, which means that when you declare var within a function, the variable becomeslocal to that function. However, simply having { and } does not limit the scope of avariable. This allows us to define variables in the outer callback that can be accessedby the inner callbacks even when the outer callbacks have “closed” by returning. Whenwe nest callbacks, we are implicitly binding the variables from all the previous callbacksinto the most recently defined callback. It just turns out that lots of nesting isn’t veryeasy to work with.
We can still perform the flattening refactoring we did, but we should do it within theshared scope of the original request, to form a closure environment around all thecallbacks we want to do. This way, all the callbacks relating to that initial request canbe encapsulated and can share state via variables in the encapsulating callback (Exam-ple 3-7).
Patterns | 43
www.it-ebooks.info
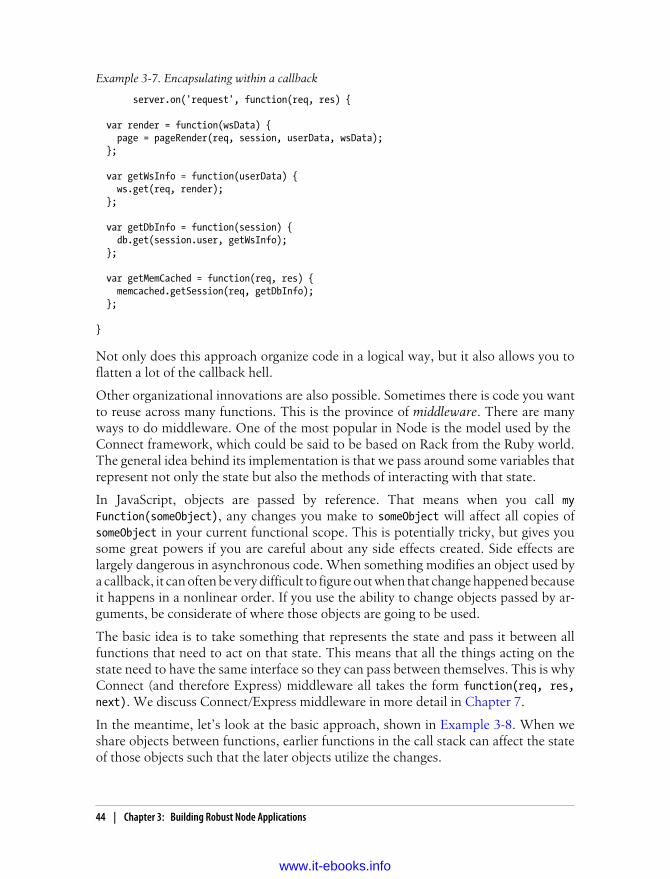
Example 3-7. Encapsulating within a callback
server.on('request', function(req, res) {
var render = function(wsData) { page = pageRender(req, session, userData, wsData); };
var getWsInfo = function(userData) { ws.get(req, render); };
var getDbInfo = function(session) { db.get(session.user, getWsInfo); };
var getMemCached = function(req, res) { memcached.getSession(req, getDbInfo); };
}
Not only does this approach organize code in a logical way, but it also allows you toflatten a lot of the callback hell.
Other organizational innovations are also possible. Sometimes there is code you wantto reuse across many functions. This is the province of middleware. There are manyways to do middleware. One of the most popular in Node is the model used by the Connect framework, which could be said to be based on Rack from the Ruby world.The general idea behind its implementation is that we pass around some variables thatrepresent not only the state but also the methods of interacting with that state.
In JavaScript, objects are passed by reference. That means when you call myFunction(someObject), any changes you make to someObject will affect all copies ofsomeObject in your current functional scope. This is potentially tricky, but gives yousome great powers if you are careful about any side effects created. Side effects arelargely dangerous in asynchronous code. When something modifies an object used bya callback, it can often be very difficult to figure out when that change happened becauseit happens in a nonlinear order. If you use the ability to change objects passed by ar-guments, be considerate of where those objects are going to be used.
The basic idea is to take something that represents the state and pass it between allfunctions that need to act on that state. This means that all the things acting on thestate need to have the same interface so they can pass between themselves. This is whyConnect (and therefore Express) middleware all takes the form function(req, res,next). We discuss Connect/Express middleware in more detail in Chapter 7.
In the meantime, let’s look at the basic approach, shown in Example 3-8. When weshare objects between functions, earlier functions in the call stack can affect the stateof those objects such that the later objects utilize the changes.
44 | Chapter 3: Building Robust Node Applications
www.it-ebooks.info
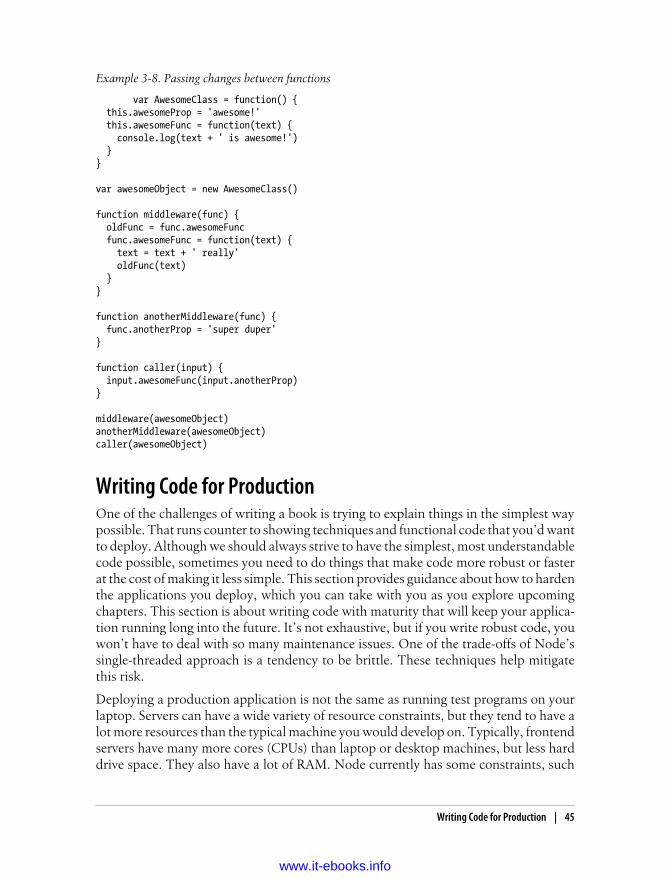
Example 3-8. Passing changes between functions
var AwesomeClass = function() { this.awesomeProp = 'awesome!' this.awesomeFunc = function(text) { console.log(text + ' is awesome!') }}
var awesomeObject = new AwesomeClass()
function middleware(func) { oldFunc = func.awesomeFunc func.awesomeFunc = function(text) { text = text + ' really' oldFunc(text) }}
function anotherMiddleware(func) { func.anotherProp = 'super duper' }
function caller(input) { input.awesomeFunc(input.anotherProp)}
middleware(awesomeObject)anotherMiddleware(awesomeObject)caller(awesomeObject)
Writing Code for ProductionOne of the challenges of writing a book is trying to explain things in the simplest waypossible. That runs counter to showing techniques and functional code that you’d wantto deploy. Although we should always strive to have the simplest, most understandablecode possible, sometimes you need to do things that make code more robust or fasterat the cost of making it less simple. This section provides guidance about how to hardenthe applications you deploy, which you can take with you as you explore upcomingchapters. This section is about writing code with maturity that will keep your applica-tion running long into the future. It’s not exhaustive, but if you write robust code, youwon’t have to deal with so many maintenance issues. One of the trade-offs of Node’ssingle-threaded approach is a tendency to be brittle. These techniques help mitigatethis risk.
Deploying a production application is not the same as running test programs on yourlaptop. Servers can have a wide variety of resource constraints, but they tend to have alot more resources than the typical machine you would develop on. Typically, frontendservers have many more cores (CPUs) than laptop or desktop machines, but less harddrive space. They also have a lot of RAM. Node currently has some constraints, such
Writing Code for Production | 45
www.it-ebooks.info
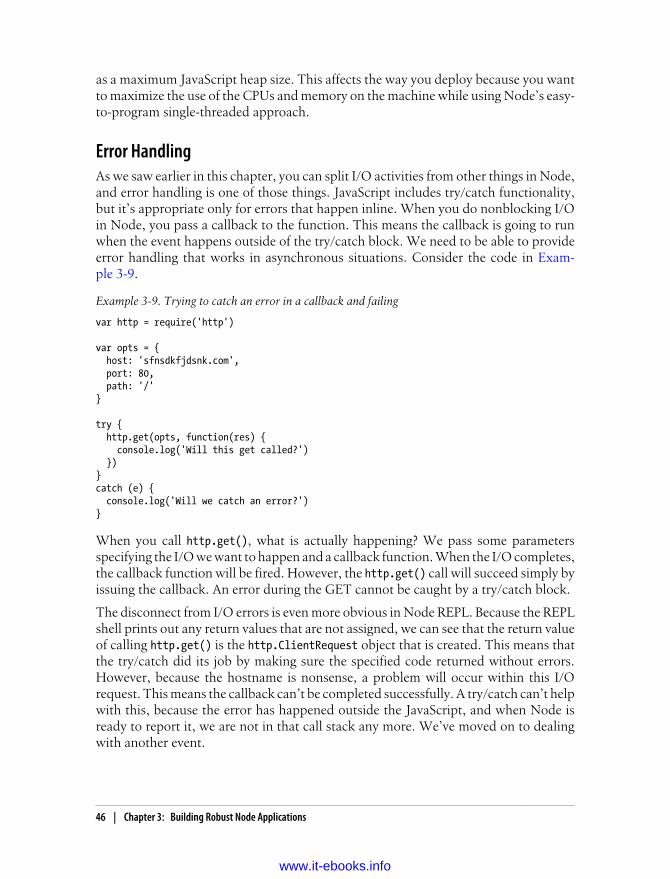
as a maximum JavaScript heap size. This affects the way you deploy because you wantto maximize the use of the CPUs and memory on the machine while using Node’s easy-to-program single-threaded approach.
Error HandlingAs we saw earlier in this chapter, you can split I/O activities from other things in Node,and error handling is one of those things. JavaScript includes try/catch functionality,but it’s appropriate only for errors that happen inline. When you do nonblocking I/Oin Node, you pass a callback to the function. This means the callback is going to runwhen the event happens outside of the try/catch block. We need to be able to provideerror handling that works in asynchronous situations. Consider the code in Exam-ple 3-9.
Example 3-9. Trying to catch an error in a callback and failing
var http = require('http')
var opts = { host: 'sfnsdkfjdsnk.com', port: 80, path: '/'}
try { http.get(opts, function(res) { console.log('Will this get called?') })}catch (e) { console.log('Will we catch an error?')}
When you call http.get(), what is actually happening? We pass some parametersspecifying the I/O we want to happen and a callback function. When the I/O completes,the callback function will be fired. However, the http.get() call will succeed simply byissuing the callback. An error during the GET cannot be caught by a try/catch block.
The disconnect from I/O errors is even more obvious in Node REPL. Because the REPLshell prints out any return values that are not assigned, we can see that the return valueof calling http.get() is the http.ClientRequest object that is created. This means thatthe try/catch did its job by making sure the specified code returned without errors.However, because the hostname is nonsense, a problem will occur within this I/Orequest. This means the callback can’t be completed successfully. A try/catch can’t helpwith this, because the error has happened outside the JavaScript, and when Node isready to report it, we are not in that call stack any more. We’ve moved on to dealingwith another event.
46 | Chapter 3: Building Robust Node Applications
www.it-ebooks.info
We deal with this in Node by using the error event. This is a special event that is firedwhen an error occurs. It allows a module engaging in I/O to fire an alternative event tothe one the callback was listening for to deal with the error. The error event allows usto deal with any errors that might occur in any of the callbacks that happen in anymodules we use. Let’s write the previous example correctly, as shown in Example 3-10.
Example 3-10. Catching an I/O error with the error event
var http = require('http')
var opts = { host: 'dskjvnfskcsjsdkcds.net', port: 80, path: '/'}
var req = http.get(opts, function(res) { console.log('This will never get called')})
req.on('error', function(e) { console.log('Got that pesky error trapped')})
By using the error event, we got to deal with the error (in this case by ignoring it).However, our program survived, which is the main thing. Like try/catch in JavaScript,the error event catches all kinds of exceptions. A good general approach to exceptionhandling is to set up conditionals to check for known error conditions and deal withthem if possible. Otherwise, catching any remaining errors, logging them, and keepingyour server running is probably the best approach.
Using Multiple ProcessorsAs we’ve mentioned, Node is single-threaded. This means Node is using only one pro-cessor to do its work. However, most servers have several “multicore” processors, anda single multicore processor has many processors. A server with two physical CPUsockets might have “24 logical cores”—that is, 24 processors exposed to the operatingsystem. To make the best use of Node, we should use those too. So if we don’t havethreads, how do we do that?
Node provides a module called cluster that allows you to delegate work to child pro-cesses. This means that Node creates a copy of its current program in another process(on Windows, it is actually another thread). Each child process has some special abil-ities, such as the ability to share a socket with other children. This allows us to writeNode programs that start many other Node programs and then delegate work to them.
It is important to understand that when you use cluster to share work between anumber of copies of a Node program, the master process isn’t involved in every trans-action. The master process manages the child processes, but when the children interact
Writing Code for Production | 47
www.it-ebooks.info
with I/O they do it directly, not through the master. This means that if you set up aweb server using cluster, requests don’t go through your master process, but directlyto the children. Hence, dispatching requests does not create a bottleneck in the system.
By using the cluster API, you can distribute work to a Node process on every availablecore of your server. This makes the best use of the resource. Let’s look at a simplecluster script in Example 3-11.
Example 3-11. Using cluster to distribute work
var cluster = require('cluster');var http = require('http');var numCPUs = require('os').cpus().length;
if (cluster.isMaster) { // Fork workers. for (var i = 0; i < numCPUs; i++) { cluster.fork(); }
cluster.on('death', function(worker) { console.log('worker ' + worker.pid + ' died'); });} else { // Worker processes have a http server. http.Server(function(req, res) { res.writeHead(200); res.end("hello world\n"); }).listen(8000);}
In this example, we use a few parts of Node core to evenly distribute the work acrossall of the CPUs available: the cluster module, the http module, and the os module.From the latter, we simply get the number of CPUs on the system.
The way cluster works is that each Node process becomes either a “master” or a“worker” process. When a master process calls the cluster.fork() method, it createsa child process that is identical to the master, except for two attributes that each processcan check to see whether it is a master or child. In the master process—the one in whichthe script has been directly invoked by calling it with Node—cluster.isMaster returnstrue, whereas cluster.isWorker returns false. cluster.isMaster returns false on thechild, whereas cluster.isWorker returns true.
The example shows a master script that invokes a worker for each CPU. Each childstarts an HTTP server, which is another unique aspect of cluster. When you listen() to a socket where cluster is in use, many processes can listen to the same socket.If you simply started serveral Node processes with node myscript.js, this wouldn’t bepossible, because the second process to start would throw the EADDRINUSE exception.cluster provides a cross-platform way to invoke several processes that share a socket.And even when the children all share a connection to a port, if one of them is jammed,it doesn’t stop the other workers from getting connections.
48 | Chapter 3: Building Robust Node Applications
www.it-ebooks.info
We can do more with cluster than simply share sockets, because it is based on thechild_process module. This gives us a number of attributes, and some of the mostuseful ones relate to the health of the child processes. In the previous example, whena child dies, the master process uses console.log() to print out a death notification.However, a more useful script would cluster.fork() a new child, as shown in Exam-ple 3-12.
Example 3-12. Forking a new worker when a death occurs
if (cluster.isMaster) { //Fork workers. for (var i=0; i<numCPUs; i++) { cluster.fork(); }
cluster.on('death', function(worker) { console.log('worker ' + worker.pid + ' died'); cluster.fork(); });}
This simple change means that our master process can keep restarting dying processesto keep our server firing on all CPUs. However, this is just a basic check for runningprocesses. We can also do some more fancy tricks. Because workers can pass messagesto the master, we can have each worker report some stats, such as memory usage, tothe master. This will allow the master to determine when workers are becoming unrulyor to confirm that workers are not freezing or getting stuck in long-running events (seeExample 3-13).
Example 3-13. Monitoring worker health using message passing
var cluster = require('cluster');var http = require('http');var numCPUs = require('os').cpus().length;
var rssWarn = (12 * 1024 * 1024) , heapWarn = (10 * 1024 * 1024)
if(cluster.isMaster) { for(var i=0; i<numCPUs; i++) { var worker = cluster.fork(); worker.on('message', function(m) { if (m.memory) { if(m.memory.rss > rssWarn) { console.log('Worker ' + m.process + ' using too much memory.') } } }) }} else { //Server http.Server(function(req,res) {
Writing Code for Production | 49
www.it-ebooks.info
res.writeHead(200); res.end('hello world\n') }).listen(8000) //Report stats once a second setInterval(function report(){ process.send({memory: process.memoryUsage(), process: process.pid}); }, 1000)}
In this example, workers report on their memory usage, and the master sends an alertto the log when a process uses too much memory. This replicates the functionality ofmany health reporting systems that operations teams already use. It gives control tothe master Node process, however, which has some benefits. This message-passinginterface allows the master process to send messages back to the workers too. Thismeans you can treat a master process as a lightly loaded admin interface to yourworkers.
There are other things we can do with message passing that we can’t do from the outsideof Node. Because Node relies on an event loop to do its work, there is the danger thatthe callback of an event in the loop could run for a long time. This means that otherusers of the process are not going to get their requests met until that long-runningevent’s callback has concluded. The master process has a connection to each worker,so we can tell it to expect an “all OK” notification periodically. This means we canvalidate that the event loop has the appropriate amount of turnover and that it hasn’tbecome stuck on one callback. Sadly, identifying a long-running callback doesn’t allowus to make a callback for termination. Because any notification we could send to theprocess will get added to the event queue, it would have to wait for the long-runningcallback to finish. Consequently, although using the master process allows us to iden-tify zombie workers, our only remedy is to kill the worker and lose all the tasks it wasdoing.
Some preparation can give you the capability to kill an individual worker that threatensto take over its processor; see Example 3-14.
Example 3-14. Killing zombie workers
var cluster = require('cluster');var http = require('http');var numCPUs = require('os').cpus().length;
var rssWarn = (50 * 1024 * 1024) , heapWarn = (50 * 1024 * 1024)
var workers = {}
if(cluster.isMaster) { for(var i=0; i<numCPUs; i++) { createWorker() }
50 | Chapter 3: Building Robust Node Applications
www.it-ebooks.info
setInterval(function() { var time = new Date().getTime() for(pid in workers) { if(workers.hasOwnProperty(pid) && workers[pid].lastCb + 5000 < time) {
console.log('Long running worker ' + pid + ' killed') workers[pid].worker.kill() delete workers[pid] createWorker() } } }, 1000)} else { //Server http.Server(function(req,res) { //mess up 1 in 200 reqs if (Math.floor(Math.random() * 200) === 4) { console.log('Stopped ' + process.pid + ' from ever finishing') while(true) { continue } } res.writeHead(200); res.end('hello world from ' + process.pid + '\n') }).listen(8000) //Report stats once a second setInterval(function report(){ process.send({cmd: "reportMem", memory: process.memoryUsage(), process: process.pid}) }, 1000)}
function createWorker() { var worker = cluster.fork() console.log('Created worker: ' + worker.pid) //allow boot time workers[worker.pid] = {worker:worker, lastCb: new Date().getTime()-1000} worker.on('message', function(m) { if(m.cmd === "reportMem") { workers[m.process].lastCb = new Date().getTime() if(m.memory.rss > rssWarn) { console.log('Worker ' + m.process + ' using too much memory.') } } })}
In this script, we’ve added an interval to the master as well as the workers. Now when-ever a worker sends a report to the master process, the master stores the time of thereport. Every second or so, the master process looks at all its workers to check whetherany of them haven’t responded in longer than 5 seconds (using > 5000 because timeoutsare in milliseconds). If that is the case, it kills the stuck worker and restarts it. To makethis process effective, we moved the creation of workers into a small function. Thisallows us to do the various pieces of setup in a single place, regardless of whether weare creating a new worker or restarting a dead one.
Writing Code for Production | 51
www.it-ebooks.info

We also made a small change to the HTTP server in order to give each request a 1 in200 chance of failing, so you can run the script and see what it’s like to get failures. Ifyou do a bunch of parallel requests from several sources, you’ll see the way this works.These are all entirely separate Node programs that interact via message passing, whichmeans that no matter what happens, the master process can check on the other pro-cesses because the master is a small program that won’t get jammed.
52 | Chapter 3: Building Robust Node Applications
www.it-ebooks.info


CHAPTER 4
Core APIs
There are a lot of APIs in Node, but some of them are more important than others.These core APIs will form the backbone of any Node app, and you’ll find yourself usingthem again and again.
EventsThe first API we are going to look at is the Events API. This is because, while abstract,it is a fundamental piece of making every other API work. By having a good grip on thisAPI, you’ll be able to use all the other APIs effectively.
If you’ve ever programmed JavaScript in the browser, you’ll have used events before.However, the event model used in the browser comes from the DOM rather than Java-Script itself, and a lot of the concepts in the DOM don’t necessarily make sense out ofthat context. Let’s look at the DOM model of events and compare it to the implemen-tation in Node.
The DOM has a user-driven event model based on user interaction, with a set of in-terface elements arranged in a tree structure (HTML, XML, etc.). This means that whena user interacts with a particular part of the interface, there is an event and a context,which is the HTML/XML element on which the click or other activity took place. Thatcontext has a parent and potentially children. Because the context is within a tree, themodel includes the concepts of bubbling and capturing, which allow elements eitherup or down the tree to receive the event that was called.
For example, in an HTML list, a click event on an <li> can be captured by a listeneron the <ul> that is its parent. Conversely, a click on the <ul> can be bubbled down toa listener on the <li>. Because JavaScript objects don’t have this kind of tree structure,the model in Node is much simpler.
55
www.it-ebooks.info
EventEmitterBecause the event model is tied to the DOM in browsers, Node created the EventEmitter class to provide some basic event functionality. All event functionality in Noderevolves around EventEmitter because it is also designed to be an interface class forother classes to extend. It would be unusual to call an EventEmitter instance directly.
EventEmitter has a handful of methods, the main two being on and emit. The classprovides these methods for use by other classes. The on method creates an event listenerfor an event, as shown in Example 4-1.
Example 4-1. Listening for an event with the on method
server.on('event', function(a, b, c) { //do things});
The on method takes two parameters: the name of the event to listen for and the functionto call when that event is emitted. Because EventEmitter is an interface pseudoclass,the class that inherits from EventEmitter is expected to be invoked with the new key-word. Let’s look at Example 4-2 to see how we create a new class as a listener.
Example 4-2. Creating a new class that supports events with EventEmitter
var utils = require('utils'), EventEmitter = require('events').EventEmitter;
var Server = function() { console.log('init');};
utils.inherits(Server, EventEmitter);
var s = new Server();
s.on('abc', function() { console.log('abc');});
We begin this example by including the utils module so we can use the inheritsmethod. inherits provides a way for the EventEmitter class to add its methods to theServer class we created. This means all new instances of Server can be used as EventEmitters.
We then include the events module. However, we want to access just the specificEventEmitter class inside that module. Note how EventEmitter is capitalized to showit is a class. We didn’t use a createEventEmitter method, because we aren’t planningto use an EventEmitter directly. We simply want to attach its methods to the Serverclass we are going to make.
56 | Chapter 4: Core APIs
www.it-ebooks.info
Once we have included the modules we need, the next step is to create our basicServer class. This offers just one simple function, which logs a message when it isinitialized. In a real implementation, we would decorate the Server class prototype withthe functions that the class would use. For the sake of simplicity, we’ve skipped that.The important step is to use sys.inherits to add EventEmitter as a superclass of ourServer class.
When we want to use the Server class, we instantiate it with new Server(). This instanceof Server will have access to the methods in the superclass (EventEmitter), which meanswe can add a listener to our instance using the on method.
Right now, however, the event listener we added will never be called, because the abcevent isn’t fired. We can fix this by adding the code in Example 4-3 to emit the event.
Example 4-3. Emitting an event
s.emit('abc');
Firing the event listener is as simple as calling the emit method that the Server instanceinherited from EventEmitter. It’s important to note that these events are instance-based.There are no global events. When you call the on method, you attach to a specificEventEmitter-based object. Even the various instances of the Server class don’t shareevents. s from the code in Example 4-3 will not share the same events as anotherServer instance, such as one created by var z = new Server();.
Callback SyntaxAn important part of using events is dealing with callbacks. Chapter 3 looks at bestpractices in much more depth, but we’ll look here at the mechanics of callbacks inNode. They use a few standard patterns, but first let’s discuss what is possible.
When calling emit, in addition to the event name, you can also pass an arbitrary list ofparameters. Example 4-4 includes three such parameters. These will be passed to thefunction listening to the event. When you receive a request event from the http server,for example, you receive two parameters: req and res. When the request event wasemitted, those parameters were passed as the second and third arguments to the emit.
Example 4-4. Passing parameters when emitting an event
s.emit('abc', a, b, c);
It is important to understand how Node calls the event listeners because it will affectyour programming style. When emit() is called with arguments, the code in Exam-ple 4-5 is used to call each event listener.
Example 4-5. Calling event listeners from emit
if (arguments.length <= 3) { // fast case
Events | 57
www.it-ebooks.info
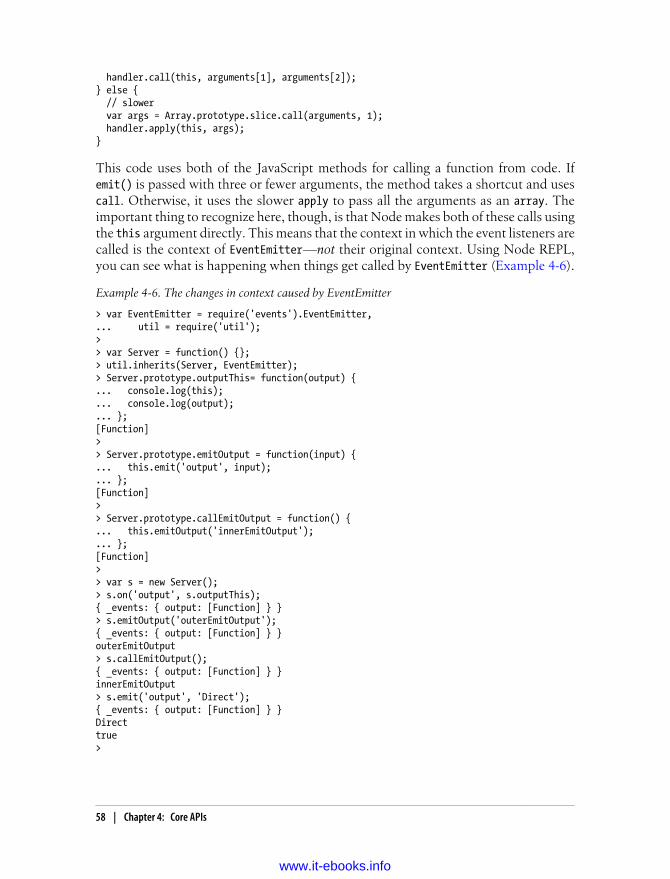
handler.call(this, arguments[1], arguments[2]);} else { // slower var args = Array.prototype.slice.call(arguments, 1); handler.apply(this, args);}
This code uses both of the JavaScript methods for calling a function from code. Ifemit() is passed with three or fewer arguments, the method takes a shortcut and usescall. Otherwise, it uses the slower apply to pass all the arguments as an array. Theimportant thing to recognize here, though, is that Node makes both of these calls usingthe this argument directly. This means that the context in which the event listeners arecalled is the context of EventEmitter—not their original context. Using Node REPL,you can see what is happening when things get called by EventEmitter (Example 4-6).
Example 4-6. The changes in context caused by EventEmitter
> var EventEmitter = require('events').EventEmitter,... util = require('util');> > var Server = function() {};> util.inherits(Server, EventEmitter);> Server.prototype.outputThis= function(output) {... console.log(this);... console.log(output); ... };[Function]> > Server.prototype.emitOutput = function(input) { ... this.emit('output', input);... };[Function]> > Server.prototype.callEmitOutput = function() {... this.emitOutput('innerEmitOutput');... };[Function]> > var s = new Server();> s.on('output', s.outputThis);{ _events: { output: [Function] } }> s.emitOutput('outerEmitOutput');{ _events: { output: [Function] } }outerEmitOutput> s.callEmitOutput();{ _events: { output: [Function] } }innerEmitOutput> s.emit('output', 'Direct');{ _events: { output: [Function] } }Directtrue>
58 | Chapter 4: Core APIs
www.it-ebooks.info
The sample output first sets up a Server class. It includes functions to emit theoutput event. The outputThis method is attached to the output event as an event listener.When we emit the output event from various contexts, we stay within the scope of theEventEmitter object, so the value of this that s.outputThis has access to is the onebelonging to the EventEmitter. Consequently, the this variable must be passed in as aparameter and assigned to a variable if we wish to make use of it in event callbackfunctions.
HTTPOne of the core tasks of Node.js is to act as a web server. This is such a key part of thesystem that when Ryan Dahl started the project, he rewrote the HTTP stack for V8 tomake it nonblocking. Although both the API and the internals for the original HTTP implementation have morphed a lot since it was created, the core activities are still thesame. The Node implementation of HTTP is nonblocking and fast. Much of the codehas moved from C into JavaScript.
HTTP uses a pattern that is common in Node. Pseudoclass factories provide an easyway to create a new server.1 The http.createServer() method provides us with a newinstance of the HTTP Server class, which is the class we use to define the actions takenwhen Node receives incoming HTTP requests. There are a few other main pieces of theHTTP module and other Node modules in general. These are the events the Serverclass fires and the data structures that are passed to the callbacks. Knowing about thesethree types of class allows you to use the HTTP module well.
HTTP ServersActing as an HTTP server is probably the most common current use case for Node. InChapter 1, we set up an HTTP server and used it to serve a very simple request. How-ever, HTTP is a lot more multifaceted than that. The server component of the HTTPmodule provides the raw tools to build complex and comprehensive web servers. Inthis chapter, we are going to explore the mechanics of dealing with requests and issuingresponses. Even if you end up using a higher-level server such as Express, many of theconcepts it uses are extensions of those defined here.
As we’ve already seen, the first step in using HTTP servers is to create a new serverusing the http.createServer() method. This returns a new instance of the Server class,which has only a few methods because most of the functionality is going to be providedthrough using events. The http server class has six events and three methods. The otherthing to notice is how most of the methods are used to initialize the server, whereasevents are used during its operation.
1. When we talk about a pseudoclass, we are referring to the definition found in Douglas Crockford’sJavaScript: The Good Parts (O’Reilly). From now on, we will use “class” to refer to a “pseudoclass.”
HTTP | 59
www.it-ebooks.info
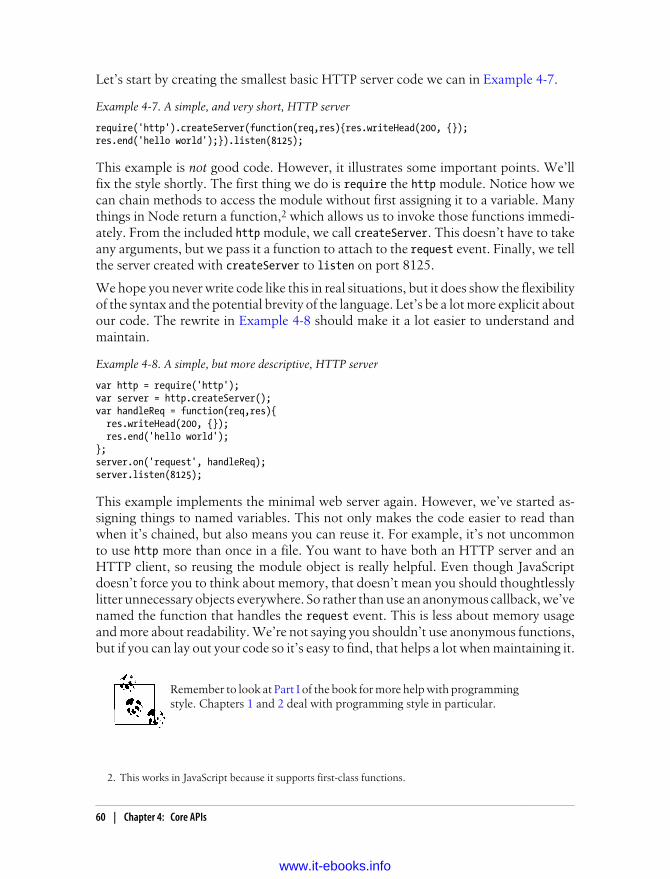
Let’s start by creating the smallest basic HTTP server code we can in Example 4-7.
Example 4-7. A simple, and very short, HTTP server
require('http').createServer(function(req,res){res.writeHead(200, {}); res.end('hello world');}).listen(8125);
This example is not good code. However, it illustrates some important points. We’llfix the style shortly. The first thing we do is require the http module. Notice how wecan chain methods to access the module without first assigning it to a variable. Manythings in Node return a function,2 which allows us to invoke those functions immedi-ately. From the included http module, we call createServer. This doesn’t have to takeany arguments, but we pass it a function to attach to the request event. Finally, we tellthe server created with createServer to listen on port 8125.
We hope you never write code like this in real situations, but it does show the flexibilityof the syntax and the potential brevity of the language. Let’s be a lot more explicit aboutour code. The rewrite in Example 4-8 should make it a lot easier to understand andmaintain.
Example 4-8. A simple, but more descriptive, HTTP server
var http = require('http');var server = http.createServer();var handleReq = function(req,res){ res.writeHead(200, {}); res.end('hello world');};server.on('request', handleReq);server.listen(8125);
This example implements the minimal web server again. However, we’ve started as-signing things to named variables. This not only makes the code easier to read thanwhen it’s chained, but also means you can reuse it. For example, it’s not uncommonto use http more than once in a file. You want to have both an HTTP server and anHTTP client, so reusing the module object is really helpful. Even though JavaScriptdoesn’t force you to think about memory, that doesn’t mean you should thoughtlesslylitter unnecessary objects everywhere. So rather than use an anonymous callback, we’venamed the function that handles the request event. This is less about memory usageand more about readability. We’re not saying you shouldn’t use anonymous functions,but if you can lay out your code so it’s easy to find, that helps a lot when maintaining it.
Remember to look at Part I of the book for more help with programmingstyle. Chapters 1 and 2 deal with programming style in particular.
2. This works in JavaScript because it supports first-class functions.
60 | Chapter 4: Core APIs
www.it-ebooks.info

Because we didn’t pass the request event listener as part of the factory method for thehttp Server object, we need to add an event listener explicitly. Calling the on methodfrom EventEmitter does this. Finally, as with the previous example, we call thelisten method with the port we want to listen on. The http class provides other func-tions, but this example illustrates the most important ones.
The http server supports a number of events, which are associated with either the TCPor HTTP connection to the client. The connection and close events indicate the buildupor teardown of a TCP connection to a client. It’s important to remember that someclients will be using HTTP 1.1, which supports keepalive. This means that their TCPconnections may remain open across multiple HTTP requests.
The request, checkContinue, upgrade, and clientError events are associated with HTTPrequests. We’ve already used the request event, which signals a new HTTP request.
The checkContinue event indicates a special event. It allows you to take more directcontrol of an HTTP request in which the client streams chunks of data to the server.As the client sends data to the server, it will check whether it can continue, at whichpoint this event will fire. If an event handler is created for this event, the request eventwill not be emitted.
The upgrade event is emitted when a client asks for a protocol upgrade. The http serverwill deny HTTP upgrade requests unless there is an event handler for this event.
Finally, the clientError event passes on any error events sent by the client.
The HTTP server can throw a few events. The most common one is request, but youcan also get events associated with the TCP connection for the request as well as otherparts of the request life cycle.
When a new TCP stream is created for a request, a connection event is emitted. Thisevent passes the TCP stream for the request as a parameter. The stream is also availableas a request.connection variable for each request that happens through it. However,only one connection event will be emitted for each stream. This means that manyrequests can happen from a client with only one connection event.
HTTP ClientsNode is also great when you want to make outgoing HTTP connections. This is usefulin many contexts, such as using web services, connecting to document store databases,or just scraping websites. You can use the same http module when doing HTTP re-quests, but should use the http.ClientRequest class. There are two factory methodsfor this class: a general-purpose one and a convenience method. Let’s take a look at thegeneral-purpose case in Example 4-9.
HTTP | 61
www.it-ebooks.info
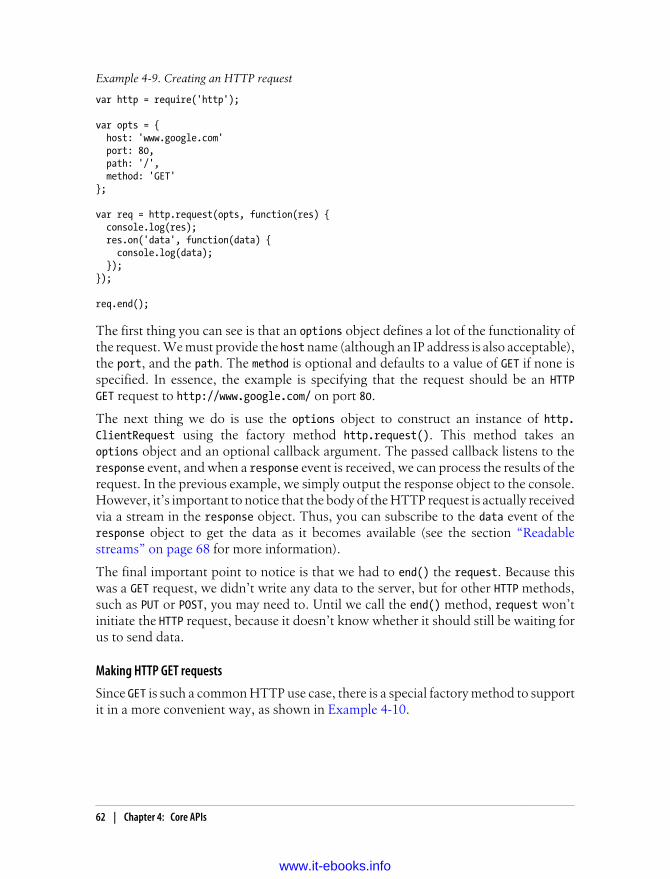
Example 4-9. Creating an HTTP request
var http = require('http');
var opts = { host: 'www.google.com' port: 80, path: '/', method: 'GET'};
var req = http.request(opts, function(res) { console.log(res); res.on('data', function(data) { console.log(data); });});
req.end();
The first thing you can see is that an options object defines a lot of the functionality ofthe request. We must provide the host name (although an IP address is also acceptable),the port, and the path. The method is optional and defaults to a value of GET if none isspecified. In essence, the example is specifying that the request should be an HTTPGET request to http://www.google.com/ on port 80.
The next thing we do is use the options object to construct an instance of http.ClientRequest using the factory method http.request(). This method takes anoptions object and an optional callback argument. The passed callback listens to theresponse event, and when a response event is received, we can process the results of therequest. In the previous example, we simply output the response object to the console.However, it’s important to notice that the body of the HTTP request is actually receivedvia a stream in the response object. Thus, you can subscribe to the data event of theresponse object to get the data as it becomes available (see the section “Readablestreams” on page 68 for more information).
The final important point to notice is that we had to end() the request. Because thiswas a GET request, we didn’t write any data to the server, but for other HTTP methods,such as PUT or POST, you may need to. Until we call the end() method, request won’tinitiate the HTTP request, because it doesn’t know whether it should still be waiting forus to send data.
Making HTTP GET requests
Since GET is such a common HTTP use case, there is a special factory method to supportit in a more convenient way, as shown in Example 4-10.
62 | Chapter 4: Core APIs
www.it-ebooks.info

Example 4-10. Simple HTTP GET requests
var http = require('http');
var opts = { host: 'www.google.com' port: 80, path: '/',};
var req = http.get(opts, function(res) { console.log(res); res.on('data', function(data) { console.log(data); });});
This example of http.get() does exactly the same thing as the previous example, butit’s slightly more concise. We’ve lost the method attribute of the config object, and leftout the call request.end() because it’s implied.
If you run the previous two examples, you are going to get back raw Buffer objects. Asdescribed later in this chapter, a Buffer is a special class defined in Node to supportthe storage of arbitrary, binary data. Although it’s certainly possible to work with these,you often want a specific encoding, such as UTF-8 (an encoding for Unicode charac-ters). You can specify this with the response.setEncoding() method (see Example 4-11).
Example 4-11. Comparing raw Buffer output to output with a specified encoding
> var http = require('http');> var req = http.get({host:'www.google.com', port:80, path:'/'}, function(res) { ... console.log(res); ... res.on('data', function(c) { console.log(c); }); ... });> <Buffer 3c 21 64 6f 63 74 79 70
...
65 2e 73 74><Buffer 61 72 74 54 69
...
69 70 74 3e>
>> var req = http.get({host:'www.google.com', port:80, path:'/'}, function(res) { ... res.setEncoding('utf8'); ... res.on('data', function(c) { console.log(c); }); ... });> <!doctype html><html><head><meta http-equiv="content-type
...
HTTP | 63
www.it-ebooks.info

load.t.prt=(f=(new Date).getTime());})();</script>
>
In the first case, we do not pass ClientResponse.setEncoding(), and we get chunks ofdata in Buffers. Although the output is abridged in the printout, you can see that itisn’t just a single Buffer, but that several Buffers have been returned with data. In thesecond example, the data is returned as UTF-8 because we specified res.setEncoding('utf8'). The chunks of data returned from the server are still the same, but aregiven to the program as strings in the correct encoding rather than as raw Buffers.Although the printout may not make this clear, there is one string for each of the original Buffers.
Uploading data for HTTP POST and PUT
Not all HTTP is GET. You might also need to call POST, PUT, and other HTTP methods thatalter data on the other end. This is functionally the same as making a GET request, exceptyou are going to write some data upstream, as shown in Example 4-12.
Example 4-12. Writing data to an upstream service
var options = { host: 'www.example.com', port: 80, path: '/submit', method: 'POST'};
var req = http.request(options, function(res) { res.setEncoding('utf8'); res.on('data', function (chunk) { console.log('BODY: ' + chunk); });});
req.write("my data");req.write("more of my data");
req.end();
This example is very similar to Example 4-10, but uses the http.ClientRequest.write() method. This method allows you to send data upstream, and as explainedearlier, it requires you to explicitly call http.ClientRequest.end() to indicate you’refinished sending data. Whenever ClientRequest.write() is called, the data is sent up-stream (it isn’t buffered), but the server will not respond until ClientRequest.end() iscalled.
64 | Chapter 4: Core APIs
www.it-ebooks.info

You can stream data to a server using ClientRequest.write() by coupling the writes tothe data event of a Stream. This is ideal if you need to, for example, send a file from diskto a remote server over HTTP.
The ClientResponse object
The ClientResponse object stores a variety of information about the request. In general,it is pretty intuitive. Some of its obvious properties that are often useful includestatusCode (which contains the HTTP status) and header (which is the response headerobject). Also hung off of ClientResponse are various streams and properties that youmay or may not want to interact with directly.
URLThe URL module provides tools for easily parsing and dealing with URL strings. It’sextremely useful when you have to deal with URLs. The module offers three methods:parse, format, and resolve. Let’s start by looking at Example 4-13, which demonstratesparse using Node REPL.
Example 4-13. Parsing a URL using the URL module
> var URL = require('url');> var myUrl = "http://www.nodejs.org/some/url/?with=query¶m=that&are=awesome#alsoahash";> myUrl'http://www.nodejs.org/some/url/?with=query¶m=that&are=awesome#alsoahash'> parsedUrl = URL.parse(myUrl);{ href: 'http://www.nodejs.org/some/url/?with=query¶m=that&are=awesome#alsoahash', protocol: 'http:', slashes: true, host: 'www.nodejs.org', hostname: 'www.nodejs.org', hash: '#alsoahash', search: '?with=query¶m=that&are=awesome', query: 'with=query¶m=that&are=awesome', pathname: '/some/url/'}> parsedUrl = URL.parse(myUrl, true);{ href: 'http://www.nodejs.org/some/url/?with=query¶m=that&are=awesome#alsoahash', protocol: 'http:', slashes: true, host: 'www.nodejs.org', hostname: 'www.nodejs.org', hash: '#alsoahash', search: '?with=query¶m=that&are=awesome', query: { with: 'query' , param: 'that' , are: 'awesome' }
HTTP | 65
www.it-ebooks.info
, pathname: '/some/url/'}>
The first thing we do, of course, is require the URL module. Note that the names ofmodules are always lowercase. We’ve created a url as a string containing all the partsthat will be parsed out. Parsing is really easy: we just call the parse method from theURL module on the string. It returns a data structure representing the parts of the parsedURL. The components it produces are:
• href
• protocol
• host
• auth
• hostname
• port
• pathname
• search
• query
• hash
The href is the full URL that was originally passed to parse. The protocol is the protocolused in the URL (e.g., http://, https://, ftp://, etc.). host is the fully qualified hostnameof the URL. This could be as simple as the hostname for a local server, such as printserver, or a fully qualified domain name such as www.google.com. It might also includea port number, such as 8080, or username and password credentials likeun:[email protected]. The various parts of the hostname are broken down further intoauth, containing just the user credentials; port, containing just the port; and hostname, containing the hostname portion of the URL. An important thing to know abouthostname is that it is still the full hostname, including the top-level domain (TLD;e.g., .com, .net, etc.) and the specific server. If the URL were http://sport.yahoo.com/nhl, hostname would not give you just the TLD (yahoo.com) or just the host (sport), butthe entire hostname (sport.yahoo.com). The URL module doesn’t have the capability tosplit the hostname down into its components, such as domain or TLD.
The next set of components of the URL relates to everything after the host. The pathname is the entire filepath after the host. In http://sports.yahoo.com/nhl, it is /nhl. Thenext component is the search component, which stores the HTTP GET parameters in theURL. For example, if the URL were http://mydomain.com/?foo=bar&baz=qux, thesearch component would be ?foo=bar&baz=qux. Note the inclusion of the ?. Thequery parameter is similar to the search component. It contains one of two things,depending on how parse was called.
66 | Chapter 4: Core APIs
www.it-ebooks.info
parse takes two arguments: the url string and an optional Boolean that determineswhether the queryString should be parsed using the querystring module, discussed inthe next section. If the second argument is false, query will just contain a string similarto that of search but without the leading ?. If you don’t pass anything for the secondargument, it defaults to false.
The final component is the fragment portion of the URL. This is the part of the URLafter the #. Commonly, this is used to refer to named anchors in HTML pages. For in-stance, http://abook.com/#chapter2 might refer to the second chapter on a web pagehosting a whole book. The hash component in this case would contain #chapter2.Again, note the included # in the string. Some sites, such as http://twitter.com, usemore complex fragments for AJAX applications, but the same rules apply. So the URLfor the Twitter mentions account, http://twitter.com/#!/mentions, would have a pathname of / but a hash of #!/mentions.
querystringThe querystring module is a very simple helper module to deal with query strings. Asdiscussed in the previous section, query strings are the parameters encoded at the endof a URL. However, when reported back as just a JavaScript string, the parameters arefiddly to deal with. The querystring module provides an easy way to create objectsfrom the query strings. The main methods it offers are parse and decode, but someinternal helper functions, —such as escape, unescape, unescapeBuffer, encode, andstringify, are also exposed. If you have a query string, you can use parse to turn it intoan object, as shown in Example 4-14.
Example 4-14. Parsing a query string with the querystring module in Node REPL
> var qs = require('querystring');> qs.parse('a=1&b=2&c=d');{ a: '1', b: '2', c: 'd' }>
Here, the class’s parse function turns the query string into an object in which the prop-erties are the keys and the values correspond to the ones in the query string. You shouldnotice a few things, though. First, the numbers are returned as strings, not numbers.Because JavaScript is loosely typed and will coerce a string into a number in a numericaloperation, this works pretty well. However, it’s worth bearing in mind for those timeswhen that coercion doesn’t work.
Additionally, it’s important to note that you must pass the query string without theleading ? that demarks it in the URL. A typical URL might look like http://www.bobsdiscount.com/?item=304&location=san+francisco. The query string starts with a ? toindicate where the filepath ends, but if you include the ? in the string you pass toparse, the first key will start with a ?, which is almost certainly not what you want.
HTTP | 67
www.it-ebooks.info
This library is really useful in a bunch of contexts because query strings are used insituations other than URLs. When you get content from an HTTP POST that is x-form-encoded, it will also be in query string form. All the browser manufacturers have stand-ardized around this approach. By default, forms in HTML will send data to the serverin this way also.
The querystring module is also used as a helper module to the URL module. Specifically,when decoding URLs, you can ask URL to turn the query string into an object for yourather than just a string. That’s described in more detail in the previous section, butthe parsing that is done uses the parse method from querystring.
Another important part of querystring is encode (Example 4-15). This function takesa query string’s key-value pair object and stringifies it. This is really useful when you’reworking with HTTP requests, especially POST data. It makes it easy to work with a Java-Script object until you need to send the data over the wire and then simply encode itat that point. Any JavaScript object can be used, but ideally you should use an objectthat has only the data that you want in it because the encode method will add all prop-erties of the object. However, if the property value isn’t a string, Boolean, or number,it won’t be serialized and the key will just be included with an empty value.
Example 4-15. Encoding an object into a query string
> var myObj = {'a':1, 'b':5, 'c':'cats', 'func': function(){console.log('dogs')}}> qs.encode(myObj);'a=1&b=5&c=cats&func='>
I/OI/O is one of the core pieces that makes Node different from other frameworks. Thissection explores the APIs that provide nonblocking I/O in Node.
StreamsMany components in Node provide continuous output or can process continuous in-put. To make these components act in a consistent way, the stream API provides anabstract interface for them. This API provides common methods and properties thatare available in specific implementations of streams. Streams can be readable, writable,or both. All streams are EventEmitter instances, allowing them to emit events.
Readable streams
The readable stream API is a set of methods and events that provides access to chunksof data as they are sent by an underlying data source. Fundamentally, readable streamsare about emitting data events. These events represent the stream of data as a stream
68 | Chapter 4: Core APIs
www.it-ebooks.info
of events. To make this manageable, streams have a number of features that allow youto configure how much data you get and how fast.
The basic stream in Example 4-16 simply reads data from a file in chunks. Every timea new chunk is made available, it is exposed to a callback in the variable called data.In this example, we simply log the data to the console. However, in real use cases, youmight either stream the data somewhere else or spool it into bigger pieces before youwork on it. In essence, the data event simply provides access to the data, and you haveto figure out what to do with each chunk.
Example 4-16. Creating a readable file stream
var fs = require('fs');var filehandle = fs.readFile('data.txt', function(err, data) { console.log(data)});
Let’s look in more detail at one of the common patterns used in dealing with streams.The spooling pattern is used when we need an entire resource available before we dealwith it. We know it’s important not to block the event loop for Node to perform well,so even though we don’t want to perform the next action on this data until we’vereceived all of it, we don’t want to block the event loop. In this scenario (Exam-ple 4-17), we use a stream to get the data, but use the data only when enough is available.Typically this means when the stream ends, but it could be another event or condition.
Example 4-17. Using the spooling pattern to read a complete stream
//abstract streamvar spool = "";stream.on('data', function(data) { spool += data;});stream.on('end', function() { console.log(spool);});
FilesystemThe filesystem module is obviously very helpful because you need it in order to accessfiles on disk. It closely mimics the POSIX style of file I/O. It is a somewhat uniquemodule in that all of the methods have both asynchronous and synchronous versions.However, we strongly recommend that you use the asynchronous methods, unless youare building command-line scripts with Node. Even then, it is often much better to usethe async versions, even though doing so adds a little extra code, so that you can accessmultiple files in parallel and reduce the running time of your script.
The main issue that people face while dealing with asynchronous calls is ordering, andthis is especially true with file I/O. It’s common to want to do a number of moves,renames, copies, reads, or writes at one time. However, if one of the operations depends
I/O | 69
www.it-ebooks.info
on another, this can create issues because return order is not guaranteed. This meansthat the first operation in the code could happen after the second operation in the code.Patterns exist to make ordering easy. We talked about them in detail in Chapter 3, butwe’ll provide a recap here.
Consider the case of reading and then deleting a file (Example 4-18). If the delete (un-link) happens before the read, it will be impossible to read the contents of the file.
Example 4-18. Reading and deleting a file asynchronously—but all wrong
var fs = require('fs');
fs.readFile('warandpeace.txt', function(e, data) { console.log('War and Peace: ' + data);});
fs.unlink('warandpeace.txt');
Notice that we are using the asynchronous methods, and although we have createdcallbacks, we haven’t written any code that defines in which order they get called. Thisoften becomes a problem for programmers who are not used to programming in eventloops. This code looks OK on the surface and sometimes it will work at runtime, butsometimes it won’t. Instead, we need to use a pattern in which we specify the orderingwe want for the calls. There are a few approaches. One common approach is to use nested callbacks. In Example 4-19, the asynchronous call to delete the file is nestedwithin the callback to the asynchronous function that reads the file.
Example 4-19. Reading and deleting a file asynchronously using nested callbacks
var fs = require('fs');
fs.readFile('warandpeace.txt', function(e, data) { console.log('War and Peace: ' + data); fs.unlink('warandpeace.txt');});
This approach is often very effective for discrete sets of operations. In our example withjust two operations, it’s easy to read and understand, but this pattern can potentiallyget out of control.
BuffersAlthough Node is JavaScript, it is JavaScript out of its usual environment. For instance,the browser requires JavaScript to perform many functions, but manipulating binarydata is rarely one of them. Although JavaScript does support bitwise operations, itdoesn’t have a native representation of binary data. This is especially troublesome whenyou also consider the limitations of the number type system in JavaScript, which mightotherwise lend itself to binary representation. Node introduces the Buffer class to makeup for this shortfall when you’re working with binary data.
70 | Chapter 4: Core APIs
www.it-ebooks.info
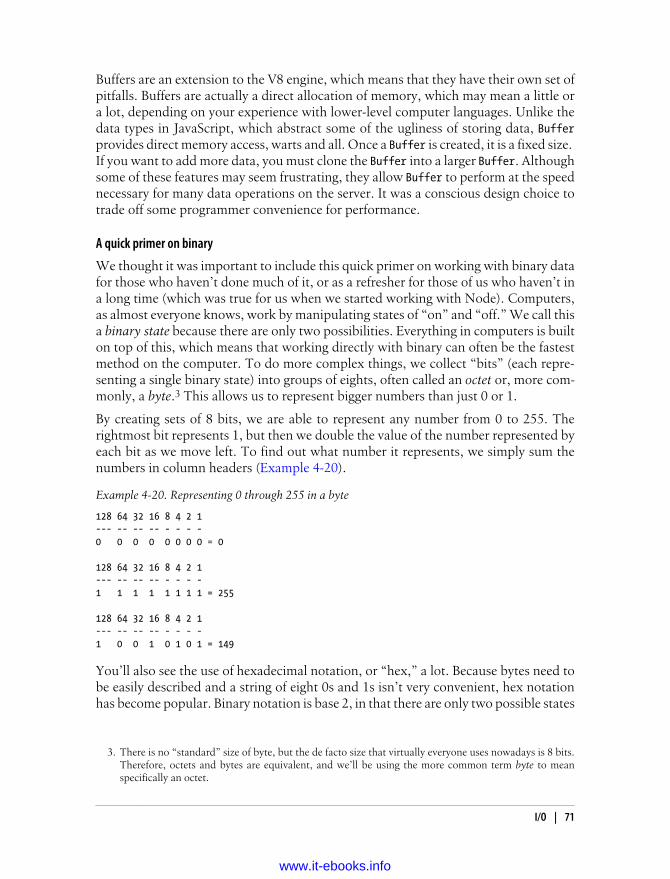
Buffers are an extension to the V8 engine, which means that they have their own set ofpitfalls. Buffers are actually a direct allocation of memory, which may mean a little ora lot, depending on your experience with lower-level computer languages. Unlike thedata types in JavaScript, which abstract some of the ugliness of storing data, Bufferprovides direct memory access, warts and all. Once a Buffer is created, it is a fixed size. If you want to add more data, you must clone the Buffer into a larger Buffer. Althoughsome of these features may seem frustrating, they allow Buffer to perform at the speednecessary for many data operations on the server. It was a conscious design choice totrade off some programmer convenience for performance.
A quick primer on binary
We thought it was important to include this quick primer on working with binary datafor those who haven’t done much of it, or as a refresher for those of us who haven’t ina long time (which was true for us when we started working with Node). Computers,as almost everyone knows, work by manipulating states of “on” and “off.” We call thisa binary state because there are only two possibilities. Everything in computers is builton top of this, which means that working directly with binary can often be the fastestmethod on the computer. To do more complex things, we collect “bits” (each repre-senting a single binary state) into groups of eights, often called an octet or, more com-monly, a byte.3 This allows us to represent bigger numbers than just 0 or 1.
By creating sets of 8 bits, we are able to represent any number from 0 to 255. Therightmost bit represents 1, but then we double the value of the number represented byeach bit as we move left. To find out what number it represents, we simply sum thenumbers in column headers (Example 4-20).
Example 4-20. Representing 0 through 255 in a byte
128 64 32 16 8 4 2 1--- -- -- -- - - - -0 0 0 0 0 0 0 0 = 0
128 64 32 16 8 4 2 1--- -- -- -- - - - -1 1 1 1 1 1 1 1 = 255
128 64 32 16 8 4 2 1--- -- -- -- - - - -1 0 0 1 0 1 0 1 = 149
You’ll also see the use of hexadecimal notation, or “hex,” a lot. Because bytes need tobe easily described and a string of eight 0s and 1s isn’t very convenient, hex notationhas become popular. Binary notation is base 2, in that there are only two possible states
3. There is no “standard” size of byte, but the de facto size that virtually everyone uses nowadays is 8 bits.Therefore, octets and bytes are equivalent, and we’ll be using the more common term byte to meanspecifically an octet.
I/O | 71
www.it-ebooks.info
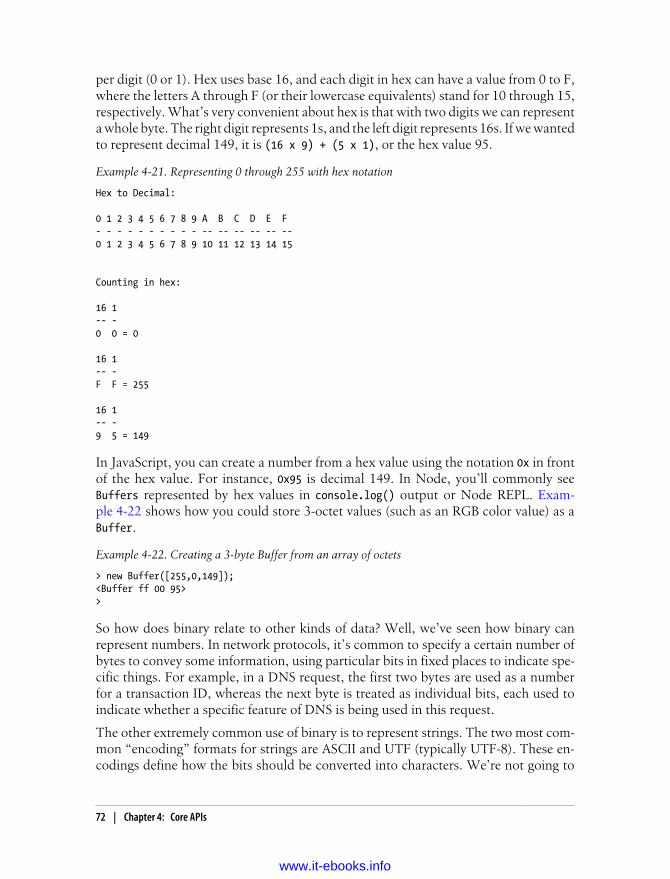
per digit (0 or 1). Hex uses base 16, and each digit in hex can have a value from 0 to F,where the letters A through F (or their lowercase equivalents) stand for 10 through 15,respectively. What’s very convenient about hex is that with two digits we can representa whole byte. The right digit represents 1s, and the left digit represents 16s. If we wantedto represent decimal 149, it is (16 x 9) + (5 x 1), or the hex value 95.
Example 4-21. Representing 0 through 255 with hex notation
Hex to Decimal:
0 1 2 3 4 5 6 7 8 9 A B C D E F- - - - - - - - - - -- -- -- -- -- --0 1 2 3 4 5 6 7 8 9 10 11 12 13 14 15
Counting in hex:
16 1-- -0 0 = 0
16 1-- -F F = 255
16 1-- -9 5 = 149
In JavaScript, you can create a number from a hex value using the notation 0x in frontof the hex value. For instance, 0x95 is decimal 149. In Node, you’ll commonly seeBuffers represented by hex values in console.log() output or Node REPL. Exam-ple 4-22 shows how you could store 3-octet values (such as an RGB color value) as aBuffer.
Example 4-22. Creating a 3-byte Buffer from an array of octets
> new Buffer([255,0,149]);<Buffer ff 00 95>>
So how does binary relate to other kinds of data? Well, we’ve seen how binary canrepresent numbers. In network protocols, it’s common to specify a certain number ofbytes to convey some information, using particular bits in fixed places to indicate spe-cific things. For example, in a DNS request, the first two bytes are used as a numberfor a transaction ID, whereas the next byte is treated as individual bits, each used toindicate whether a specific feature of DNS is being used in this request.
The other extremely common use of binary is to represent strings. The two most com-mon “encoding” formats for strings are ASCII and UTF (typically UTF-8). These en-codings define how the bits should be converted into characters. We’re not going to
72 | Chapter 4: Core APIs
www.it-ebooks.info

go into too much of the gory detail, but essentially, encodings work by having a lookuptable that maps the character to a specific number represented in bytes. To convert theencoding, the computer has to simply convert from the number to the character bylooking it up in a conversion table.
ASCII characters (some of which are nonvisible “control characters,” such as Return)are always exactly 7 bits each, so they can be represented by values from 0 to 127. Theeighth bit in a byte is often used to extend the character set to represent various choicesof international characters (such as ȳ or ȱ).
UTF is a little more complex. Its character set has a lot more characters, including manyinternational ones. Each character in UTF-8 is represented by at least 1 byte, but some-times up to 4. Essentially, the first 128 values are good old ASCII, whereas the othersare pushed further down in the map and represented by higher numbers. When a lesscommon character is referenced, the first byte uses a number that tells the computerto check out the next byte to find the real address of the character starting on the secondsheet of its map. If the character isn’t on the second sheet of the map, the second bytetells the computer to look at the third, and so on. This means that in UTF-8, the lengthof a string measured in characters isn’t necessarily the same as its length in bytes, as isalways true with ASCII.
Binary and strings
It is important to remember is that once you copy things to a Buffer, they will be storedas their binary representations. You can always convert the binary representation inthe buffer back into other things, such as strings, later. So a Buffer is defined only byits size, not by the encoding or any other indication of its meaning.
Given that Buffer is opaque, how big does it need to be in order to store a particularstring of input? As we’ve said, a UTF character can occupy up to 4 bytes, so to be safe,you should define a Buffer to be four times the size of the largest input you can accept,measured in UTF characters. There may be ways you can reduce this burden; for in-stance, if you limit your input to European languages, you’ll know there will be at most2 bytes per character.
Using Buffers
Buffers can be created using three possible parameters: the length of the Buffer in bytes,an array of bytes to copy into the Buffer, or a string to copy into the Buffer. The firstand last methods are by far the most common. There aren’t too many instances whereyou are likely to have a JavaScript array of bytes.4
4. It’s very memory-inefficient, for one thing. If you store each byte as a number, for instance, you are usinga 64-bit memory space to represent 8 bits.
I/O | 73
www.it-ebooks.info
Creating a Buffer of a particular size is a very common scenario and easy to deal with.Simply put, you specify the number of bytes as your argument when creating theBuffer (Example 4-23).
Example 4-23. Creating a Buffer using byte length
> new Buffer(10);<Buffer e1 43 17 05 01 00 00 00 41 90>>
As you can see from the previous example, when we create a Buffer we get a matchingnumber of bytes. However, because the Buffer is just getting an allocation of memorydirectly, it is uninitialized and the contents are left over from whatever happened tooccupy them before. This is unlike all the native JavaScript types, which initialize allmemory so that when you create a new primitive or object, it doesn’t assign whateverwas already in the memory space to the primitive or object you just created. Here is agood way to think about it. If you go to a busy cafe and you want a table, the fastestway to get one is to sit down as soon as some other people vacate one. However, al-though it’s fast, you are left with all their dirty dishes and the detritus from their meals.You might prefer to wait for one of the staff to clear the table and wipe it down beforeyou sit. This is a lot like Buffers versus native types. Buffers do very little to make thingseasy for you, but they do give you direct and fast access to memory. If you want to havea nicely zeroed set of bits, you’ll need to do it yourself (or find a helper library).
Creating a Buffer using byte length is most common when you are working with thingssuch as network transport protocols that have very specifically defined structures.When you know exactly how big the data is going to be (or you know exactly how bigit could be) and you want to allocate and reuse a Buffer for performance reasons, thisis the way to go.
Probably the most common way to use a Buffer is to create it with a string of eitherASCII or UTF-8 characters. Although a Buffer can hold any data, it is particularly usefulfor I/O with character data because the constraints we’ve already seen on Buffer canmake their operations much faster than operations on regular strings. So when you arebuilding really highly scalable apps, it’s often worth using Buffers to hold strings. Thisis especially true if you are just shunting the strings around the application withoutmodifying them. Therefore, even though strings exist as primitives in JavaScript, it’sstill very common to keep strings in Buffers in Node.
When we create a Buffer with a string, as shown in Example 4-24, it defaults to UTF-8.That is, if you don’t specify an encoding, it will be considered a UTF-8 string. That isnot to say that Buffer pads the string to fit any Unicode character (blindly allocating 4bytes per character), but rather that it will not truncate characters. In this example, wecan see that when taking a string with just lowercase alpha characters, the Buffer usesthe same byte structure, whatever the encoding, because they all fall in the same range.However, when we have an “é,” it’s encoded as 2 bytes in the default UTF-8 case or
74 | Chapter 4: Core APIs
www.it-ebooks.info
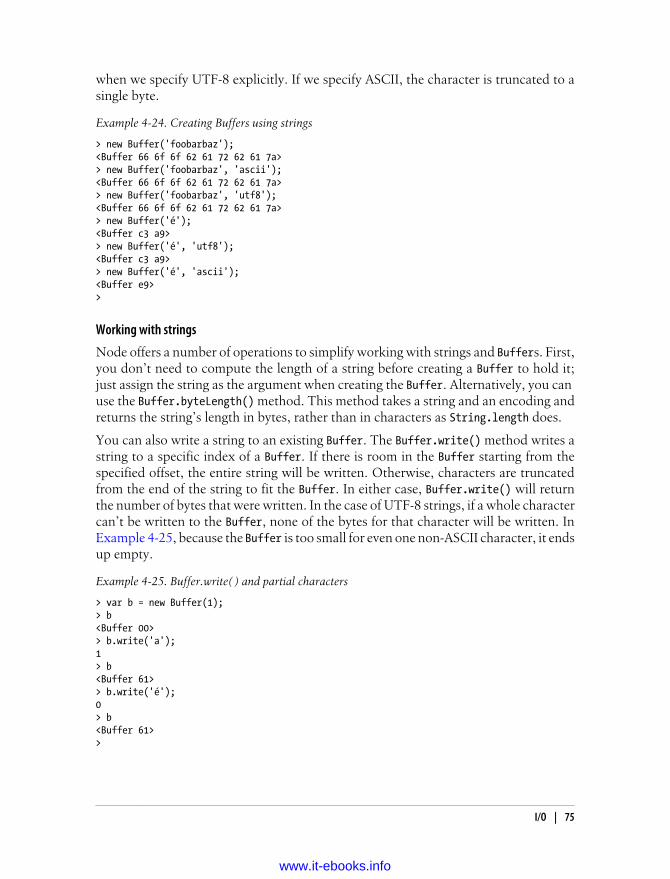
when we specify UTF-8 explicitly. If we specify ASCII, the character is truncated to asingle byte.
Example 4-24. Creating Buffers using strings
> new Buffer('foobarbaz');<Buffer 66 6f 6f 62 61 72 62 61 7a>> new Buffer('foobarbaz', 'ascii');<Buffer 66 6f 6f 62 61 72 62 61 7a>> new Buffer('foobarbaz', 'utf8');<Buffer 66 6f 6f 62 61 72 62 61 7a>> new Buffer('é');<Buffer c3 a9>> new Buffer('é', 'utf8');<Buffer c3 a9>> new Buffer('é', 'ascii');<Buffer e9>>
Working with strings
Node offers a number of operations to simplify working with strings and Buffers. First,you don’t need to compute the length of a string before creating a Buffer to hold it;just assign the string as the argument when creating the Buffer. Alternatively, you can use the Buffer.byteLength() method. This method takes a string and an encoding andreturns the string’s length in bytes, rather than in characters as String.length does.
You can also write a string to an existing Buffer. The Buffer.write() method writes astring to a specific index of a Buffer. If there is room in the Buffer starting from thespecified offset, the entire string will be written. Otherwise, characters are truncatedfrom the end of the string to fit the Buffer. In either case, Buffer.write() will returnthe number of bytes that were written. In the case of UTF-8 strings, if a whole charactercan’t be written to the Buffer, none of the bytes for that character will be written. InExample 4-25, because the Buffer is too small for even one non-ASCII character, it endsup empty.
Example 4-25. Buffer.write( ) and partial characters
> var b = new Buffer(1);> b<Buffer 00>> b.write('a');1> b<Buffer 61>> b.write('é');0> b<Buffer 61>>
I/O | 75
www.it-ebooks.info
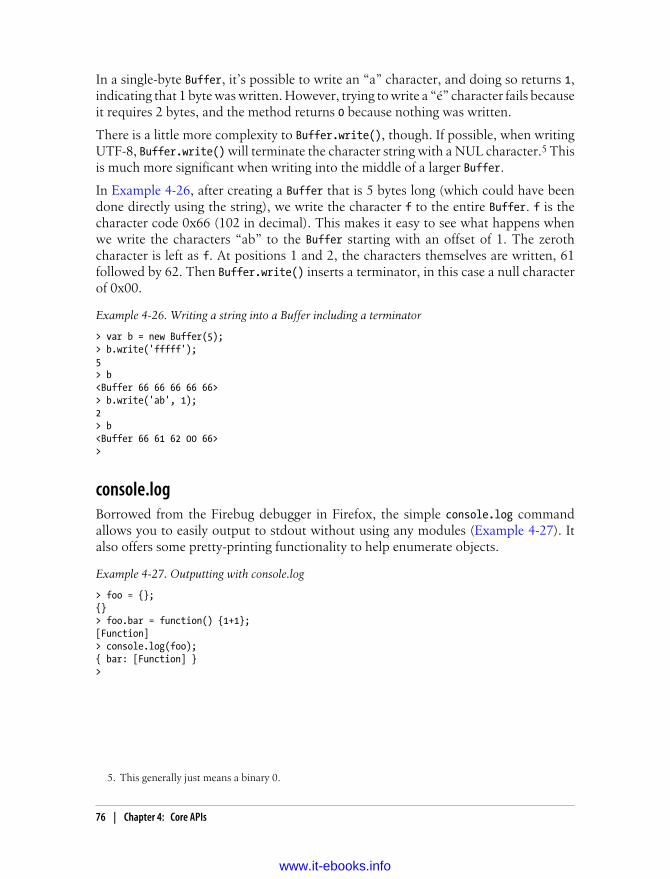
In a single-byte Buffer, it’s possible to write an “a” character, and doing so returns 1,indicating that 1 byte was written. However, trying to write a “é” character fails becauseit requires 2 bytes, and the method returns 0 because nothing was written.
There is a little more complexity to Buffer.write(), though. If possible, when writingUTF-8, Buffer.write() will terminate the character string with a NUL character.5 Thisis much more significant when writing into the middle of a larger Buffer.
In Example 4-26, after creating a Buffer that is 5 bytes long (which could have beendone directly using the string), we write the character f to the entire Buffer. f is thecharacter code 0x66 (102 in decimal). This makes it easy to see what happens whenwe write the characters “ab” to the Buffer starting with an offset of 1. The zerothcharacter is left as f. At positions 1 and 2, the characters themselves are written, 61followed by 62. Then Buffer.write() inserts a terminator, in this case a null characterof 0x00.
Example 4-26. Writing a string into a Buffer including a terminator
> var b = new Buffer(5);> b.write('fffff');5> b<Buffer 66 66 66 66 66>> b.write('ab', 1);2> b<Buffer 66 61 62 00 66>>
console.logBorrowed from the Firebug debugger in Firefox, the simple console.log commandallows you to easily output to stdout without using any modules (Example 4-27). Italso offers some pretty-printing functionality to help enumerate objects.
Example 4-27. Outputting with console.log
> foo = {};{}> foo.bar = function() {1+1};[Function]> console.log(foo);{ bar: [Function] }>
5. This generally just means a binary 0.
76 | Chapter 4: Core APIs
www.it-ebooks.info
CHAPTER 5
Helper APIs
This chapter covers a number of APIs that you’ll almost certainly use regularly butaren’t used as much as those discussed in Chapter 4.
DNSProgrammers, like end users, normally want to refer to things by their domain namesinstead of their IP addresses. The DNS module provides this lookup facility to you, butit is also used under the hood whenever you are able to use a domain name—for ex-ample, in HTTP clients.
The dns module consists of two main methods and a number of convenience methods.The two main methods are resolve(), which turns a domain name into a DNS record,and reverse(), which turns an IP address into a domain. All of the other methods inthe dns module are more specialized forms of these methods.
dns.resolve() takes three arguments:
A string containing the domain to be resolvedThis can include subdomains, such as www.yahoo.com. The www is technically a host-name, but the system will resolve it for you.
A string containing the types of records being requestedThis requires a little more understanding of DNS. Most people are familiar withthe “address” or A record type. This type of record maps an IPv4 domain to adomain name (as defined in the previous item). The “canonical name,” or CNAME,records allow you to create an alias of an A record or another CNAME. For ex-ample, www.example.com might be a CNAME of the A record at example.com. MXrecords point to the mail server for a domain for the use of SMTP. When you [email protected], the MX record for domain.com tells your email server where tosend their mail. Text records, or TXT, are notes attached to a domain. They havebeen used for all kinds of functions. The final type supported by this library is
77
www.it-ebooks.info
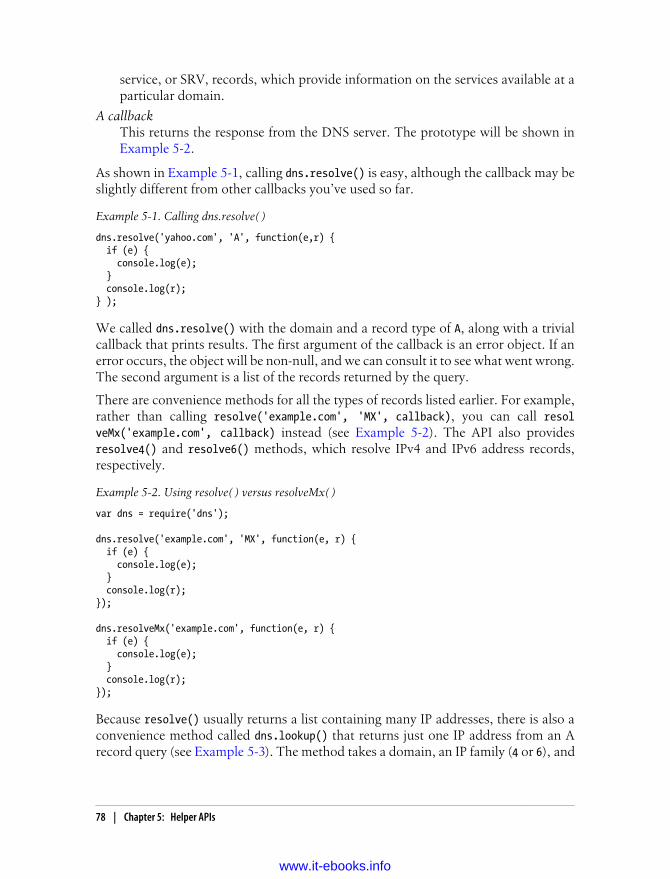
service, or SRV, records, which provide information on the services available at aparticular domain.
A callbackThis returns the response from the DNS server. The prototype will be shown inExample 5-2.
As shown in Example 5-1, calling dns.resolve() is easy, although the callback may beslightly different from other callbacks you’ve used so far.
Example 5-1. Calling dns.resolve( )
dns.resolve('yahoo.com', 'A', function(e,r) { if (e) { console.log(e); } console.log(r); } );
We called dns.resolve() with the domain and a record type of A, along with a trivialcallback that prints results. The first argument of the callback is an error object. If anerror occurs, the object will be non-null, and we can consult it to see what went wrong.The second argument is a list of the records returned by the query.
There are convenience methods for all the types of records listed earlier. For example,rather than calling resolve('example.com', 'MX', callback), you can call resolveMx('example.com', callback) instead (see Example 5-2). The API also providesresolve4() and resolve6() methods, which resolve IPv4 and IPv6 address records,respectively.
Example 5-2. Using resolve( ) versus resolveMx( )
var dns = require('dns');
dns.resolve('example.com', 'MX', function(e, r) { if (e) { console.log(e); } console.log(r);});
dns.resolveMx('example.com', function(e, r) { if (e) { console.log(e); } console.log(r);});
Because resolve() usually returns a list containing many IP addresses, there is also aconvenience method called dns.lookup() that returns just one IP address from an Arecord query (see Example 5-3). The method takes a domain, an IP family (4 or 6), and
78 | Chapter 5: Helper APIs
www.it-ebooks.info

a callback. However, unlike .dns.resolve(), it always returns a single address. If youdon’t pass an address, it defaults to the network interface’s current setting.
Example 5-3. Looking up a single A record with lookup( )
var dns = require('dns');
dns.lookup('google.com', 4, function(e, a) { console.log(a);});
CryptoCryptography is used in lots of places for a variety of tasks. Node uses the OpenSSLlibrary as the basis of its cryptography. This is because OpenSSL is already a well-tested,hardened implementation of cryptographic algorithms. But you have to compile Nodewith OpenSSL support in order to use the methods in this section.
The cryptograph module enables a number of different tasks. First, it powers the SSL/TLS parts of Node. Second, it contains hashing algorithms such as MD5 or SHA-1 thatyou might want to use in your application. Third, it allows you to use HMAC.1 Thereare some encryption methods to cipher the data with to ensure it is encrypted. Finally,HMAC contains other public key cryptographic functions to sign data and verifysignatures.
Each of the functions that cryptography does is contained within a class (or classes),which we’ll look at in the following sections.
HashingHashes are used for a few important functions, such as obfuscating data in a way thatallows it to be validated or providing a small checksum for a much larger piece of data.To use hashes in Node, you should create a Hash object using the factory methodcrypto.createHash(). This returns a new Hash instance using a specified hashing algo-rithm. Most popular algorithms are available. The exact ones depend on your versionof OpenSSL, but common ones are:
• md5
• sha1
• sha256
• sha512
• ripemd160
1. Hash-based Message Authentication Code (HMAC) is a crytographic way of verifying data. It is oftenused like hashing algorithms to verify that two pieces of data match, but it also verifies that the data hasn’tbeen tampered with.
Crypto | 79
www.it-ebooks.info
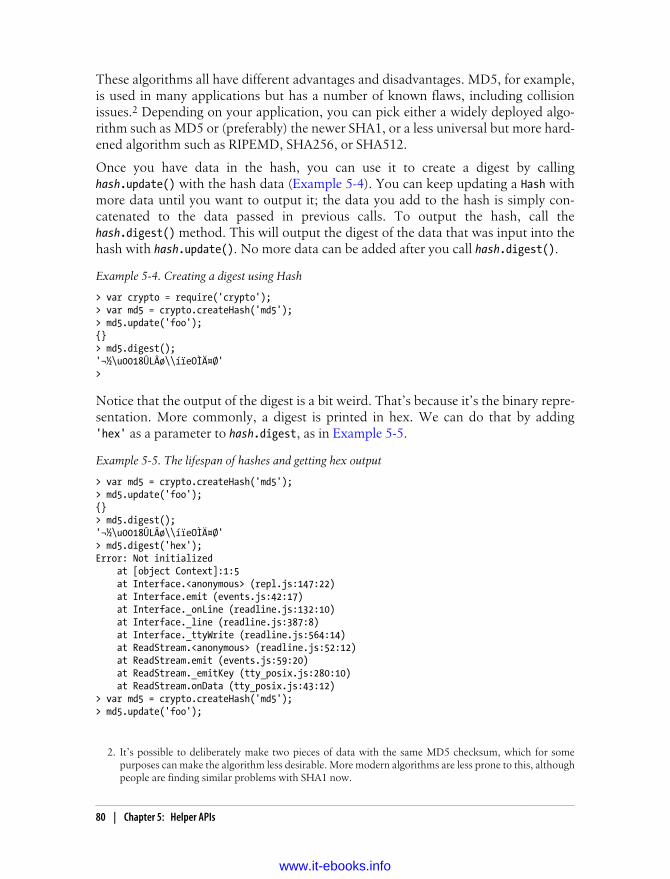
These algorithms all have different advantages and disadvantages. MD5, for example,is used in many applications but has a number of known flaws, including collisionissues.2 Depending on your application, you can pick either a widely deployed algo-rithm such as MD5 or (preferably) the newer SHA1, or a less universal but more hard-ened algorithm such as RIPEMD, SHA256, or SHA512.
Once you have data in the hash, you can use it to create a digest by callinghash.update() with the hash data (Example 5-4). You can keep updating a Hash withmore data until you want to output it; the data you add to the hash is simply con-catenated to the data passed in previous calls. To output the hash, call thehash.digest() method. This will output the digest of the data that was input into thehash with hash.update(). No more data can be added after you call hash.digest().
Example 5-4. Creating a digest using Hash
> var crypto = require('crypto');> var md5 = crypto.createHash('md5');> md5.update('foo');{}> md5.digest();'¬½\u0018ÛLÂø\\íïeOÌĤØ'>
Notice that the output of the digest is a bit weird. That’s because it’s the binary repre-sentation. More commonly, a digest is printed in hex. We can do that by adding'hex' as a parameter to hash.digest, as in Example 5-5.
Example 5-5. The lifespan of hashes and getting hex output
> var md5 = crypto.createHash('md5');> md5.update('foo');{}> md5.digest();'¬½\u0018ÛLÂø\\íïeOÌĤØ'> md5.digest('hex');Error: Not initialized at [object Context]:1:5 at Interface.<anonymous> (repl.js:147:22) at Interface.emit (events.js:42:17) at Interface._onLine (readline.js:132:10) at Interface._line (readline.js:387:8) at Interface._ttyWrite (readline.js:564:14) at ReadStream.<anonymous> (readline.js:52:12) at ReadStream.emit (events.js:59:20) at ReadStream._emitKey (tty_posix.js:280:10) at ReadStream.onData (tty_posix.js:43:12)> var md5 = crypto.createHash('md5');> md5.update('foo');
2. It’s possible to deliberately make two pieces of data with the same MD5 checksum, which for somepurposes can make the algorithm less desirable. More modern algorithms are less prone to this, althoughpeople are finding similar problems with SHA1 now.
80 | Chapter 5: Helper APIs
www.it-ebooks.info
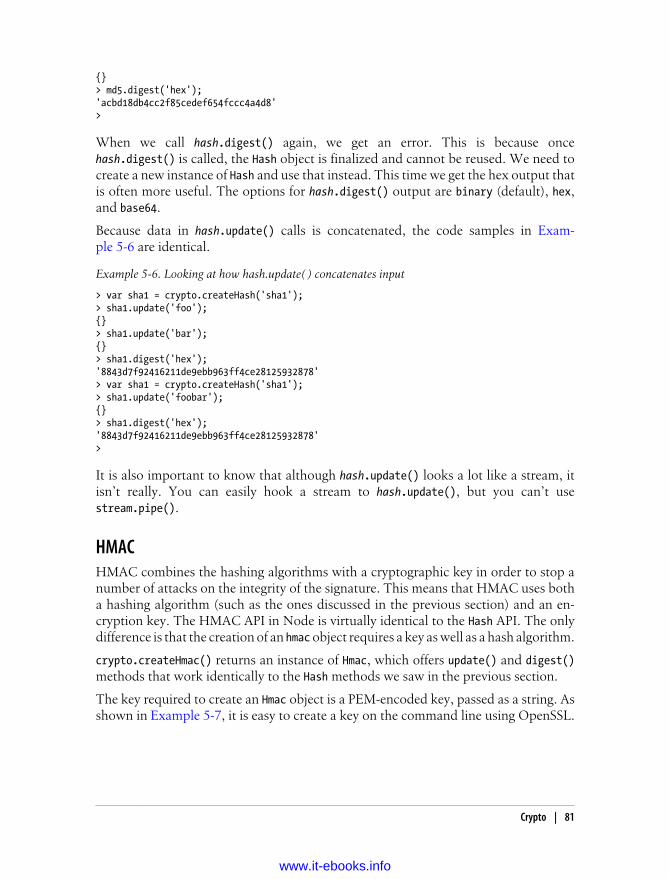
{}> md5.digest('hex');'acbd18db4cc2f85cedef654fccc4a4d8'>
When we call hash.digest() again, we get an error. This is because oncehash.digest() is called, the Hash object is finalized and cannot be reused. We need tocreate a new instance of Hash and use that instead. This time we get the hex output thatis often more useful. The options for hash.digest() output are binary (default), hex,and base64.
Because data in hash.update() calls is concatenated, the code samples in Exam-ple 5-6 are identical.
Example 5-6. Looking at how hash.update( ) concatenates input
> var sha1 = crypto.createHash('sha1');> sha1.update('foo');{}> sha1.update('bar');{}> sha1.digest('hex');'8843d7f92416211de9ebb963ff4ce28125932878'> var sha1 = crypto.createHash('sha1');> sha1.update('foobar');{}> sha1.digest('hex');'8843d7f92416211de9ebb963ff4ce28125932878'>
It is also important to know that although hash.update() looks a lot like a stream, itisn’t really. You can easily hook a stream to hash.update(), but you can’t usestream.pipe().
HMACHMAC combines the hashing algorithms with a cryptographic key in order to stop anumber of attacks on the integrity of the signature. This means that HMAC uses botha hashing algorithm (such as the ones discussed in the previous section) and an en-cryption key. The HMAC API in Node is virtually identical to the Hash API. The onlydifference is that the creation of an hmac object requires a key as well as a hash algorithm.
crypto.createHmac() returns an instance of Hmac, which offers update() and digest()methods that work identically to the Hash methods we saw in the previous section.
The key required to create an Hmac object is a PEM-encoded key, passed as a string. Asshown in Example 5-7, it is easy to create a key on the command line using OpenSSL.
Crypto | 81
www.it-ebooks.info

Example 5-7. Creating a PEM-encoded key
Enki:~ $ openssl genrsa -out key.pem 1024Generating RSA private key, 1024 bit long modulus...++++++............................++++++e is 65537 (0x10001)Enki:~ $
This example creates an RSA in PEM format and puts it into a file, in this case calledkey.pem. We also could have called the same functionality directly from Node usingthe process module (discussed later in this chapter) if we omitted the -out key.pemoption; with this approach, we would get the results on an stdout stream. Instead weare going to import the key from the file and use it to create an Hmac object and a digest(Example 5-8).
Example 5-8. Creating an Hmac digest
> var crypto = require('crypto');> var fs = require('fs');>> var pem = fs.readFileSync('key.pem');> var key = pem.toString('ascii');> > var hmac = crypto.createHmac('sha1', key);> > hmac.update('foo');{}> hmac.digest('hex');'7b058f2f33ca28da3ff3c6506c978825718c7d42'>
This example uses fs.readFileSync() because a lot of the time, loading keys will be aserver setup task. As such, it’s fine to load the keys synchronously (which might slowdown server startup time) because you aren’t serving clients yet, so blocking the eventloop is OK. In general, other than the use of the encryption key, using an Hmac exampleis exactly like using a Hash.
Public Key CryptographyThe public key cryptography functions are split into four classes: Cipher, Decipher,Sign, and Verify. Like all the other classes in crypto, they have factory methods. Cipher encrypts data, Decipher decrypts data, Sign creates a cryptographic signature for data,and Verify validates cryptographic signatures.
For the HMAC operations, we used a private key. For the operations in this section,we are going to use both the public and private keys. Public key cryptography hasmatched sets of keys. One, the private key, is kept by the owner and is used to decryptand sign data. The other, the public key, is made available to other parties. The public
82 | Chapter 5: Helper APIs
www.it-ebooks.info
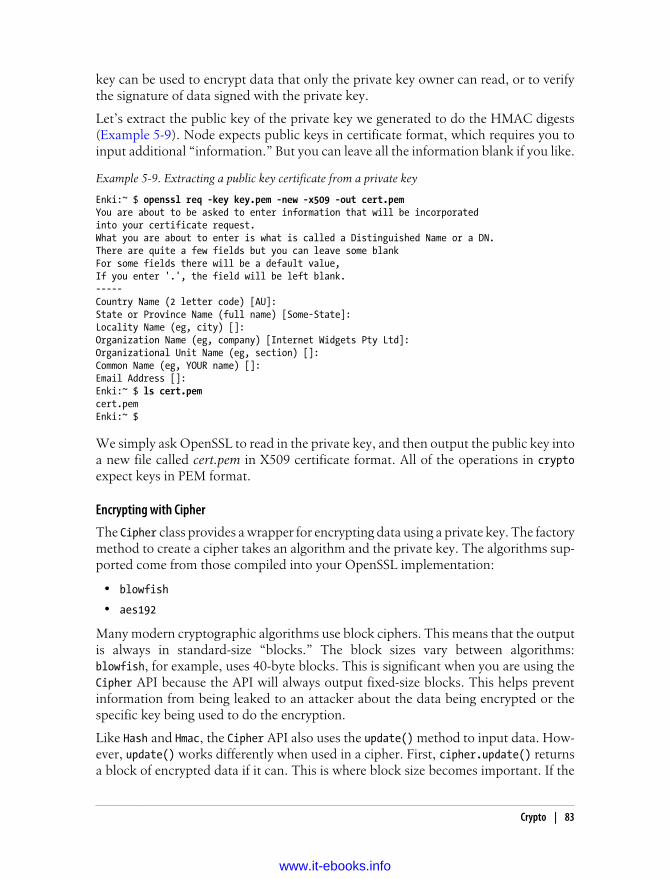
key can be used to encrypt data that only the private key owner can read, or to verifythe signature of data signed with the private key.
Let’s extract the public key of the private key we generated to do the HMAC digests(Example 5-9). Node expects public keys in certificate format, which requires you toinput additional “information.” But you can leave all the information blank if you like.
Example 5-9. Extracting a public key certificate from a private key
Enki:~ $ openssl req -key key.pem -new -x509 -out cert.pem You are about to be asked to enter information that will be incorporatedinto your certificate request.What you are about to enter is what is called a Distinguished Name or a DN.There are quite a few fields but you can leave some blankFor some fields there will be a default value,If you enter '.', the field will be left blank.-----Country Name (2 letter code) [AU]:State or Province Name (full name) [Some-State]:Locality Name (eg, city) []:Organization Name (eg, company) [Internet Widgets Pty Ltd]:Organizational Unit Name (eg, section) []:Common Name (eg, YOUR name) []:Email Address []:Enki:~ $ ls cert.pemcert.pemEnki:~ $
We simply ask OpenSSL to read in the private key, and then output the public key intoa new file called cert.pem in X509 certificate format. All of the operations in cryptoexpect keys in PEM format.
Encrypting with Cipher
The Cipher class provides a wrapper for encrypting data using a private key. The factorymethod to create a cipher takes an algorithm and the private key. The algorithms sup-ported come from those compiled into your OpenSSL implementation:
• blowfish
• aes192
Many modern cryptographic algorithms use block ciphers. This means that the outputis always in standard-size “blocks.” The block sizes vary between algorithms:blowfish, for example, uses 40-byte blocks. This is significant when you are using theCipher API because the API will always output fixed-size blocks. This helps preventinformation from being leaked to an attacker about the data being encrypted or thespecific key being used to do the encryption.
Like Hash and Hmac, the Cipher API also uses the update() method to input data. How-ever, update() works differently when used in a cipher. First, cipher.update() returnsa block of encrypted data if it can. This is where block size becomes important. If the
Crypto | 83
www.it-ebooks.info
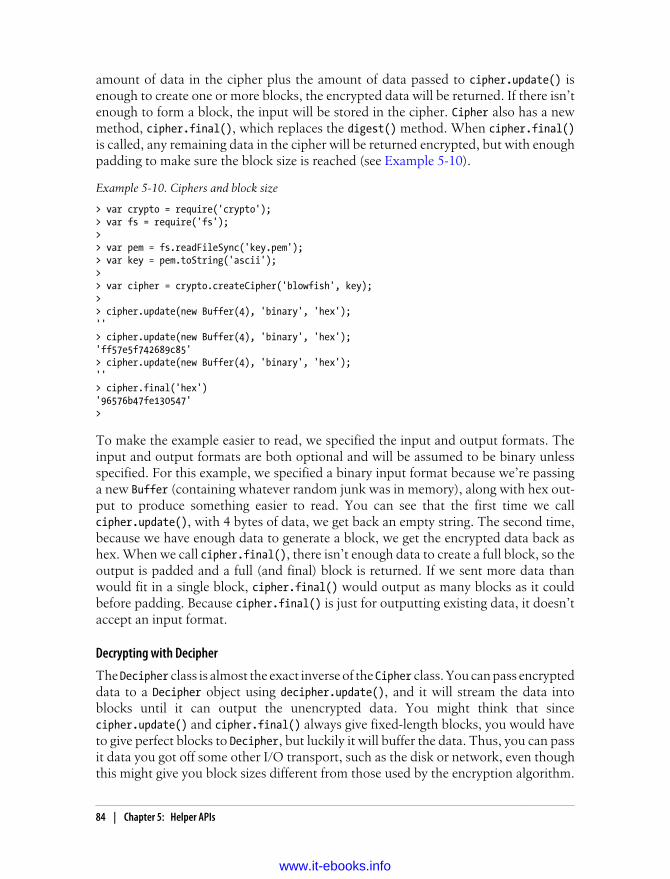
amount of data in the cipher plus the amount of data passed to cipher.update() isenough to create one or more blocks, the encrypted data will be returned. If there isn’tenough to form a block, the input will be stored in the cipher. Cipher also has a newmethod, cipher.final(), which replaces the digest() method. When cipher.final()is called, any remaining data in the cipher will be returned encrypted, but with enoughpadding to make sure the block size is reached (see Example 5-10).
Example 5-10. Ciphers and block size
> var crypto = require('crypto');> var fs = require('fs');>> var pem = fs.readFileSync('key.pem');> var key = pem.toString('ascii');>> var cipher = crypto.createCipher('blowfish', key);> > cipher.update(new Buffer(4), 'binary', 'hex');''> cipher.update(new Buffer(4), 'binary', 'hex');'ff57e5f742689c85'> cipher.update(new Buffer(4), 'binary', 'hex');''> cipher.final('hex')'96576b47fe130547'>
To make the example easier to read, we specified the input and output formats. Theinput and output formats are both optional and will be assumed to be binary unlessspecified. For this example, we specified a binary input format because we’re passinga new Buffer (containing whatever random junk was in memory), along with hex out-put to produce something easier to read. You can see that the first time we callcipher.update(), with 4 bytes of data, we get back an empty string. The second time,because we have enough data to generate a block, we get the encrypted data back ashex. When we call cipher.final(), there isn’t enough data to create a full block, so theoutput is padded and a full (and final) block is returned. If we sent more data thanwould fit in a single block, cipher.final() would output as many blocks as it couldbefore padding. Because cipher.final() is just for outputting existing data, it doesn’taccept an input format.
Decrypting with Decipher
The Decipher class is almost the exact inverse of the Cipher class. You can pass encrypteddata to a Decipher object using decipher.update(), and it will stream the data intoblocks until it can output the unencrypted data. You might think that sincecipher.update() and cipher.final() always give fixed-length blocks, you would haveto give perfect blocks to Decipher, but luckily it will buffer the data. Thus, you can passit data you got off some other I/O transport, such as the disk or network, even thoughthis might give you block sizes different from those used by the encryption algorithm.
84 | Chapter 5: Helper APIs
www.it-ebooks.info
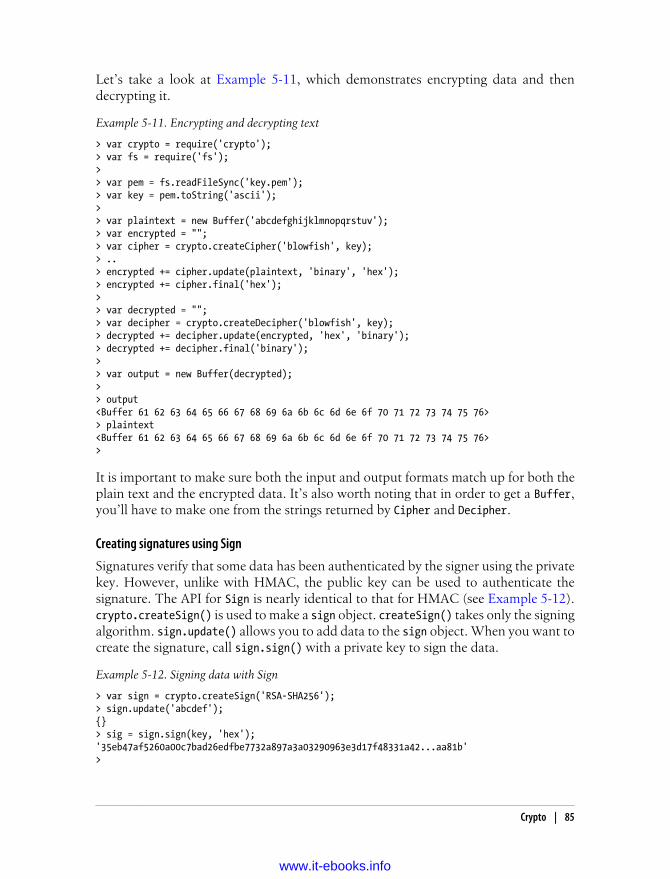
Let’s take a look at Example 5-11, which demonstrates encrypting data and thendecrypting it.
Example 5-11. Encrypting and decrypting text
> var crypto = require('crypto');> var fs = require('fs');> > var pem = fs.readFileSync('key.pem');> var key = pem.toString('ascii');> > var plaintext = new Buffer('abcdefghijklmnopqrstuv');> var encrypted = "";> var cipher = crypto.createCipher('blowfish', key);> ..> encrypted += cipher.update(plaintext, 'binary', 'hex');> encrypted += cipher.final('hex');> > var decrypted = "";> var decipher = crypto.createDecipher('blowfish', key);> decrypted += decipher.update(encrypted, 'hex', 'binary');> decrypted += decipher.final('binary');> > var output = new Buffer(decrypted);>> output<Buffer 61 62 63 64 65 66 67 68 69 6a 6b 6c 6d 6e 6f 70 71 72 73 74 75 76>> plaintext<Buffer 61 62 63 64 65 66 67 68 69 6a 6b 6c 6d 6e 6f 70 71 72 73 74 75 76>>
It is important to make sure both the input and output formats match up for both theplain text and the encrypted data. It’s also worth noting that in order to get a Buffer,you’ll have to make one from the strings returned by Cipher and Decipher.
Creating signatures using Sign
Signatures verify that some data has been authenticated by the signer using the privatekey. However, unlike with HMAC, the public key can be used to authenticate thesignature. The API for Sign is nearly identical to that for HMAC (see Example 5-12).crypto.createSign() is used to make a sign object. createSign() takes only the signingalgorithm. sign.update() allows you to add data to the sign object. When you want tocreate the signature, call sign.sign() with a private key to sign the data.
Example 5-12. Signing data with Sign
> var sign = crypto.createSign('RSA-SHA256');> sign.update('abcdef');{}> sig = sign.sign(key, 'hex');'35eb47af5260a00c7bad26edfbe7732a897a3a03290963e3d17f48331a42...aa81b'>
Crypto | 85
www.it-ebooks.info

Verifying signatures with Verify
The Verify API uses a method like the ones we’ve just discussed (see Example 5-13),verify.update(), to add data—and when you have added all the data to be verifiedagainst the signature, verify.verify() validates the signature. It takes the cert (thepublic key), the signature, and the format of the signature.
Example 5-13. Verifying signatures
> var crypto = require('crypto');> var fs = require('fs');> > var privatePem = fs.readFileSync('key.pem');> var publicPem = fs.readFileSync('cert.pem');> var key = privatePem.toString();> var pubkey = publicPem.toString();> > var data = "abcdef"> > var sign = crypto.createSign('RSA-SHA256');> sign.update(data);{}> var sig = sign.sign(key, 'hex');> > var verify = crypto.createVerify('RSA-SHA256');> verify.update(data);{}> verify.verify(pubkey, sig, 'hex');1
ProcessesAlthough Node abstracts a lot of things from the operating system, you are still runningin an operating system and may want to interact more directly with it. Node allows youto interact with system processes that already exist, as well as create new child processesto do work of various kinds. Although Node itself is generally a “fat” thread with asingle event loop, you are free to start other processes (threads) to do work outside ofthe event loop.
process ModuleThe process module enables you to get information about and change the settings ofthe current Node process. Unlike most modules, the process module is global and isalways available as the variable process.
86 | Chapter 5: Helper APIs
www.it-ebooks.info
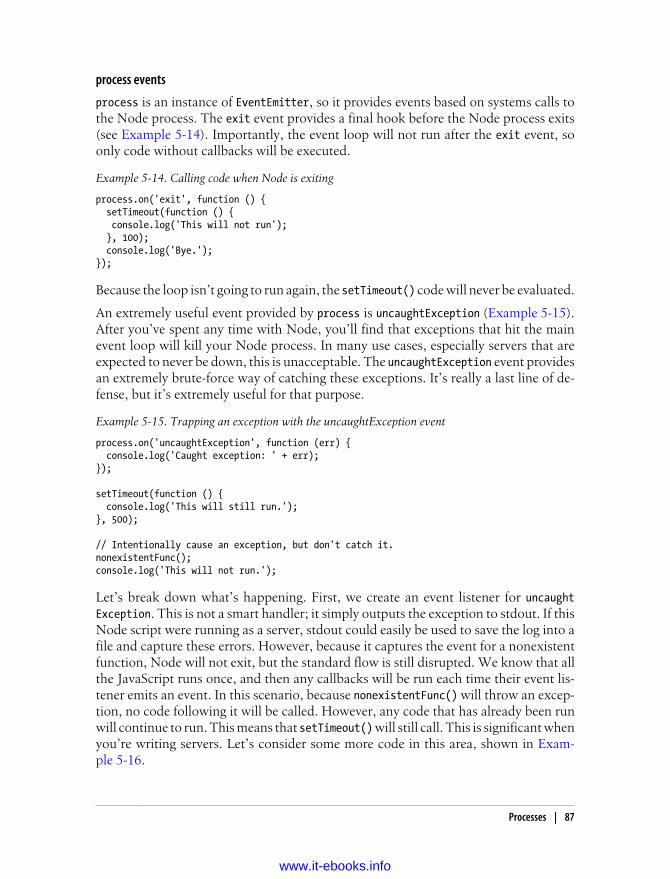
process events
process is an instance of EventEmitter, so it provides events based on systems calls tothe Node process. The exit event provides a final hook before the Node process exits(see Example 5-14). Importantly, the event loop will not run after the exit event, soonly code without callbacks will be executed.
Example 5-14. Calling code when Node is exiting
process.on('exit', function () { setTimeout(function () { console.log('This will not run'); }, 100); console.log('Bye.');});
Because the loop isn’t going to run again, the setTimeout() code will never be evaluated.
An extremely useful event provided by process is uncaughtException (Example 5-15).After you’ve spent any time with Node, you’ll find that exceptions that hit the mainevent loop will kill your Node process. In many use cases, especially servers that areexpected to never be down, this is unacceptable. The uncaughtException event providesan extremely brute-force way of catching these exceptions. It’s really a last line of de-fense, but it’s extremely useful for that purpose.
Example 5-15. Trapping an exception with the uncaughtException event
process.on('uncaughtException', function (err) { console.log('Caught exception: ' + err);});
setTimeout(function () { console.log('This will still run.');}, 500);
// Intentionally cause an exception, but don't catch it.nonexistentFunc();console.log('This will not run.');
Let’s break down what’s happening. First, we create an event listener for uncaughtException. This is not a smart handler; it simply outputs the exception to stdout. If thisNode script were running as a server, stdout could easily be used to save the log into afile and capture these errors. However, because it captures the event for a nonexistentfunction, Node will not exit, but the standard flow is still disrupted. We know that allthe JavaScript runs once, and then any callbacks will be run each time their event lis-tener emits an event. In this scenario, because nonexistentFunc() will throw an excep-tion, no code following it will be called. However, any code that has already been runwill continue to run. This means that setTimeout() will still call. This is significant whenyou’re writing servers. Let’s consider some more code in this area, shown in Exam-ple 5-16.
Processes | 87
www.it-ebooks.info

Example 5-16. The effect on callbacks of catching exceptions
var http = require('http');var server = http.createServer(function(req,res) { res.writeHead(200, {}); res.end('response'); badLoggingCall('sent response'); console.log('sent response');});
process.on('uncaughtException', function(e) { console.log(e);});
server.listen(8080);
This code creates a simple HTTP server and then listens for any uncaught exceptionsat the process level. In our HTTP server, the callback deliberately calls a bad functionafter we’ve sent the HTTP response. Example 5-17 shows the console output for thisscript.
Example 5-17. Output of Example 5-16
Enki:~ $ node ex-test.js { stack: [Getter/Setter], arguments: [ 'badLoggingCall' ], type: 'not_defined', message: [Getter/Setter] }{ stack: [Getter/Setter], arguments: [ 'badLoggingCall' ], type: 'not_defined', message: [Getter/Setter] }{ stack: [Getter/Setter], arguments: [ 'badLoggingCall' ], type: 'not_defined', message: [Getter/Setter] }{ stack: [Getter/Setter], arguments: [ 'badLoggingCall' ], type: 'not_defined', message: [Getter/Setter] }
When we start the example script, the server is available, and we have made a numberof HTTP requests to it. Notice that the server doesn’t shut down at any point. Instead,the errors are logged using the function attached to the uncaughtException event. How-ever, we are still serving complete HTTP requests. Why? Node deliberately preventedthe callback in process from proceeding and calling console.log(). The error affectedonly the process we spawned and the server kept running, so any other code was un-affected by the exception encapsulated in one specific code path.
It’s important to understand the way that listeners are implemented in Node. Let’s takea look at Example 5-18.
88 | Chapter 5: Helper APIs
www.it-ebooks.info

Example 5-18. The abbreviated listener code for EventEmitter
EventEmitter.prototype.emit = function(type) {
...
var handler = this._events[type];
...
} else if (isArray(handler)) { var args = Array.prototype.slice.call(arguments, 1);
var listeners = handler.slice(); for (var i = 0, l = listeners.length; i < l; i++) { listeners[i].apply(this, args); } return true;
...
};
After an event is emitted, one of the checks in the runtime handler is to see whetherthere is an array of listeners. If there is more than one listener, the runtime calls thelisteners by looping through the array in order. This means that the first attached lis-tener will be called first with apply(), then the second, and so on. What’s important tonote here is that all listeners on the same event are part of the same code path. So anuncaught exception in one callback will stop execution for all other callbacks on thesame event. However, an uncaught exception in one instance of an event won’t affectother events.
We also get access to a number of system events through process. When the processgets a signal, it is exposed to Node via events emitted by process. An operating systemcan generate a lot of POSIX system events, which can be found in the sigaction(2)manpage. Really common ones include SIGINT, the interrupt signal. Typically, aSIGINT is what happens when you press Ctrl-C in the terminal on a running process.Unless you handle the signal events via process, Node will just perform the defaultaction; in the case of a SIGINT, the default is to immediately kill the process. You canchange default behavior (except for a couple of signals that can never get caught)through the process.on() method (Example 5-19).
Example 5-19. Catching signals to the Node process
// Start reading from stdin so we don't exit.process.stdin.resume();
process.on('SIGINT', function () { console.log('Got SIGINT. Press Control-D to exit.');});
Processes | 89
www.it-ebooks.info
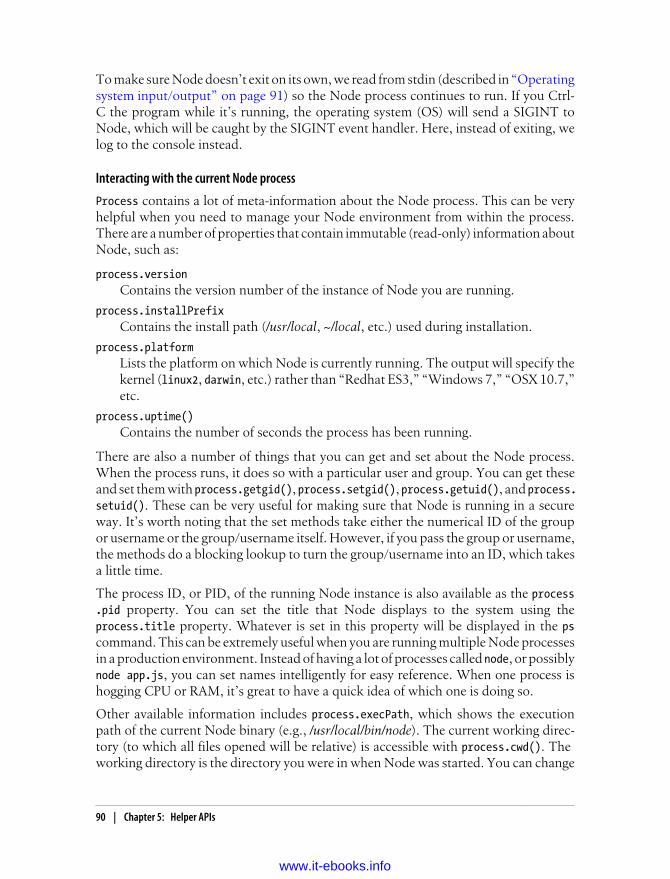
To make sure Node doesn’t exit on its own, we read from stdin (described in “Operatingsystem input/output” on page 91) so the Node process continues to run. If you Ctrl-C the program while it’s running, the operating system (OS) will send a SIGINT toNode, which will be caught by the SIGINT event handler. Here, instead of exiting, welog to the console instead.
Interacting with the current Node process
Process contains a lot of meta-information about the Node process. This can be veryhelpful when you need to manage your Node environment from within the process.There are a number of properties that contain immutable (read-only) information aboutNode, such as:
process.versionContains the version number of the instance of Node you are running.
process.installPrefixContains the install path (/usr/local, ~/local, etc.) used during installation.
process.platformLists the platform on which Node is currently running. The output will specify thekernel (linux2, darwin, etc.) rather than “Redhat ES3,” “Windows 7,” “OSX 10.7,”etc.
process.uptime()Contains the number of seconds the process has been running.
There are also a number of things that you can get and set about the Node process.When the process runs, it does so with a particular user and group. You can get theseand set them with process.getgid(), process.setgid(), process.getuid(), and process.setuid(). These can be very useful for making sure that Node is running in a secureway. It’s worth noting that the set methods take either the numerical ID of the groupor username or the group/username itself. However, if you pass the group or username,the methods do a blocking lookup to turn the group/username into an ID, which takesa little time.
The process ID, or PID, of the running Node instance is also available as the process.pid property. You can set the title that Node displays to the system using theprocess.title property. Whatever is set in this property will be displayed in the pscommand. This can be extremely useful when you are running multiple Node processesin a production environment. Instead of having a lot of processes called node, or possiblynode app.js, you can set names intelligently for easy reference. When one process ishogging CPU or RAM, it’s great to have a quick idea of which one is doing so.
Other available information includes process.execPath, which shows the executionpath of the current Node binary (e.g., /usr/local/bin/node). The current working direc-tory (to which all files opened will be relative) is accessible with process.cwd(). The working directory is the directory you were in when Node was started. You can change
90 | Chapter 5: Helper APIs
www.it-ebooks.info
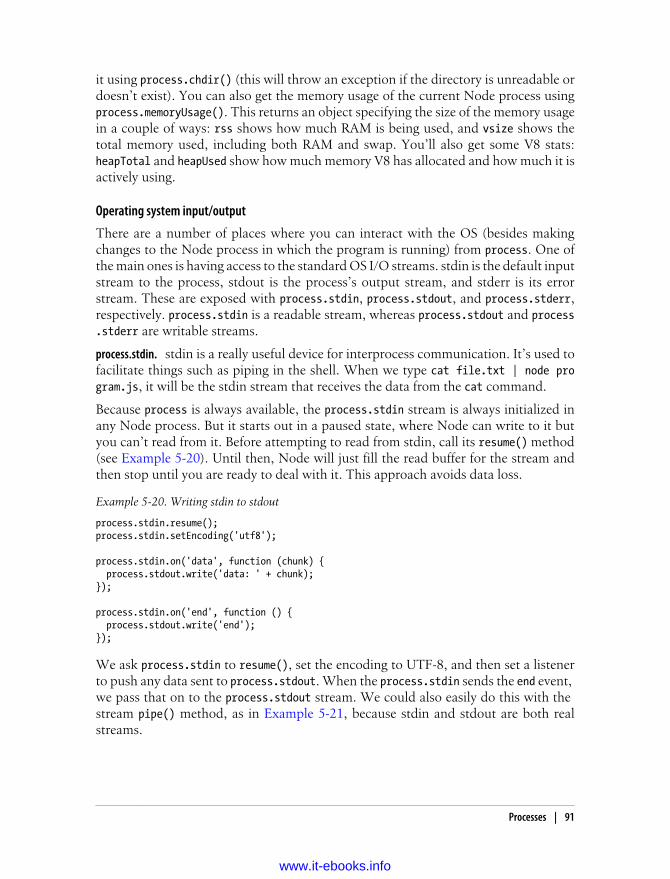
it using process.chdir() (this will throw an exception if the directory is unreadable ordoesn’t exist). You can also get the memory usage of the current Node process usingprocess.memoryUsage(). This returns an object specifying the size of the memory usagein a couple of ways: rss shows how much RAM is being used, and vsize shows thetotal memory used, including both RAM and swap. You’ll also get some V8 stats:heapTotal and heapUsed show how much memory V8 has allocated and how much it isactively using.
Operating system input/output
There are a number of places where you can interact with the OS (besides makingchanges to the Node process in which the program is running) from process. One ofthe main ones is having access to the standard OS I/O streams. stdin is the default inputstream to the process, stdout is the process’s output stream, and stderr is its errorstream. These are exposed with process.stdin, process.stdout, and process.stderr,respectively. process.stdin is a readable stream, whereas process.stdout and process.stderr are writable streams.
stdin is a really useful device for interprocess communication. It’s used tofacilitate things such as piping in the shell. When we type cat file.txt | node program.js, it will be the stdin stream that receives the data from the cat command.
Because process is always available, the process.stdin stream is always initialized inany Node process. But it starts out in a paused state, where Node can write to it butyou can’t read from it. Before attempting to read from stdin, call its resume() method(see Example 5-20). Until then, Node will just fill the read buffer for the stream andthen stop until you are ready to deal with it. This approach avoids data loss.
Example 5-20. Writing stdin to stdout
process.stdin.resume();process.stdin.setEncoding('utf8');
process.stdin.on('data', function (chunk) { process.stdout.write('data: ' + chunk);});
process.stdin.on('end', function () { process.stdout.write('end');});
We ask process.stdin to resume(), set the encoding to UTF-8, and then set a listenerto push any data sent to process.stdout. When the process.stdin sends the end event, we pass that on to the process.stdout stream. We could also easily do this with the stream pipe() method, as in Example 5-21, because stdin and stdout are both realstreams.
process.stdin.
Processes | 91
www.it-ebooks.info
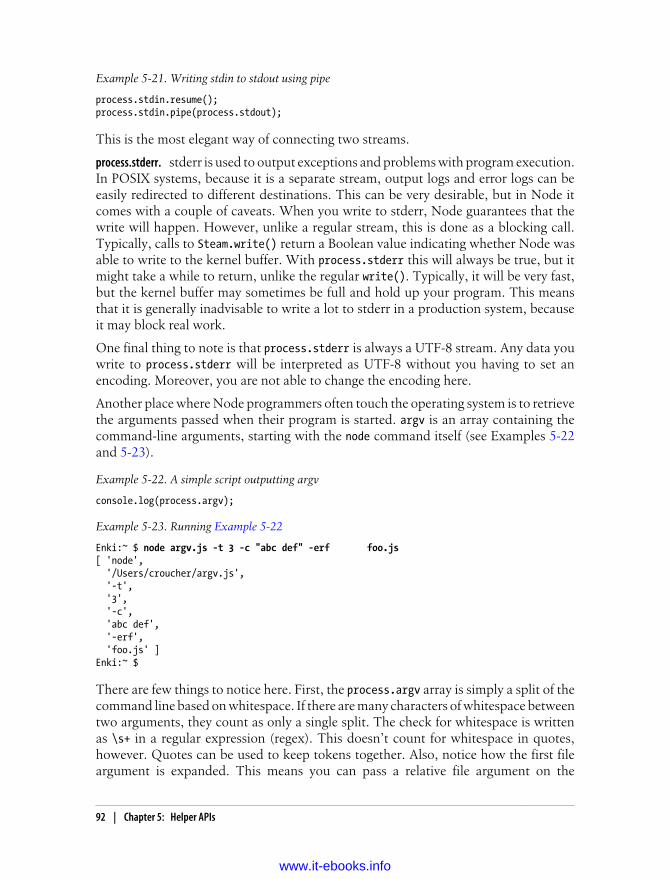
Example 5-21. Writing stdin to stdout using pipe
process.stdin.resume();process.stdin.pipe(process.stdout);
This is the most elegant way of connecting two streams.
stderr is used to output exceptions and problems with program execution.In POSIX systems, because it is a separate stream, output logs and error logs can beeasily redirected to different destinations. This can be very desirable, but in Node itcomes with a couple of caveats. When you write to stderr, Node guarantees that thewrite will happen. However, unlike a regular stream, this is done as a blocking call.Typically, calls to Steam.write() return a Boolean value indicating whether Node wasable to write to the kernel buffer. With process.stderr this will always be true, but itmight take a while to return, unlike the regular write(). Typically, it will be very fast,but the kernel buffer may sometimes be full and hold up your program. This meansthat it is generally inadvisable to write a lot to stderr in a production system, becauseit may block real work.
One final thing to note is that process.stderr is always a UTF-8 stream. Any data youwrite to process.stderr will be interpreted as UTF-8 without you having to set anencoding. Moreover, you are not able to change the encoding here.
Another place where Node programmers often touch the operating system is to retrievethe arguments passed when their program is started. argv is an array containing thecommand-line arguments, starting with the node command itself (see Examples 5-22and 5-23).
Example 5-22. A simple script outputting argv
console.log(process.argv);
Example 5-23. Running Example 5-22
Enki:~ $ node argv.js -t 3 -c "abc def" -erf foo.js[ 'node', '/Users/croucher/argv.js', '-t', '3', '-c', 'abc def', '-erf', 'foo.js' ]Enki:~ $
There are few things to notice here. First, the process.argv array is simply a split of thecommand line based on whitespace. If there are many characters of whitespace betweentwo arguments, they count as only a single split. The check for whitespace is writtenas \s+ in a regular expression (regex). This doesn’t count for whitespace in quotes,however. Quotes can be used to keep tokens together. Also, notice how the first fileargument is expanded. This means you can pass a relative file argument on the
process.stderr.
92 | Chapter 5: Helper APIs
www.it-ebooks.info
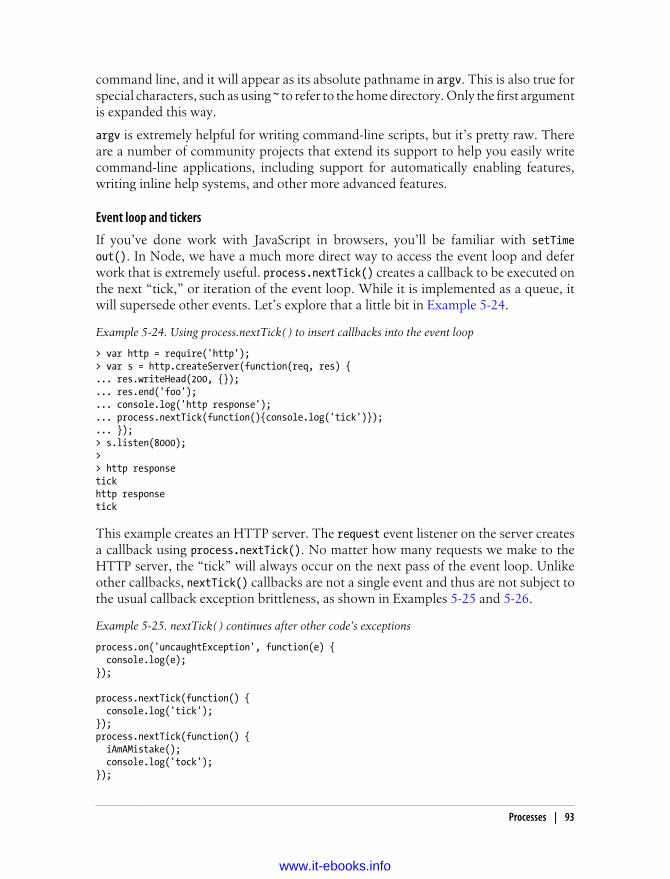
command line, and it will appear as its absolute pathname in argv. This is also true forspecial characters, such as using ~ to refer to the home directory. Only the first argumentis expanded this way.
argv is extremely helpful for writing command-line scripts, but it’s pretty raw. Thereare a number of community projects that extend its support to help you easily writecommand-line applications, including support for automatically enabling features,writing inline help systems, and other more advanced features.
Event loop and tickers
If you’ve done work with JavaScript in browsers, you’ll be familiar with setTimeout(). In Node, we have a much more direct way to access the event loop and deferwork that is extremely useful. process.nextTick() creates a callback to be executed onthe next “tick,” or iteration of the event loop. While it is implemented as a queue, itwill supersede other events. Let’s explore that a little bit in Example 5-24.
Example 5-24. Using process.nextTick( ) to insert callbacks into the event loop
> var http = require('http');> var s = http.createServer(function(req, res) {... res.writeHead(200, {});... res.end('foo');... console.log('http response');... process.nextTick(function(){console.log('tick')});... });> s.listen(8000);>> http response tickhttp responsetick
This example creates an HTTP server. The request event listener on the server createsa callback using process.nextTick(). No matter how many requests we make to theHTTP server, the “tick” will always occur on the next pass of the event loop. Unlikeother callbacks, nextTick() callbacks are not a single event and thus are not subject tothe usual callback exception brittleness, as shown in Examples 5-25 and 5-26.
Example 5-25. nextTick( ) continues after other code’s exceptions
process.on('uncaughtException', function(e) { console.log(e);});
process.nextTick(function() { console.log('tick');});process.nextTick(function() { iAmAMistake(); console.log('tock');});
Processes | 93
www.it-ebooks.info
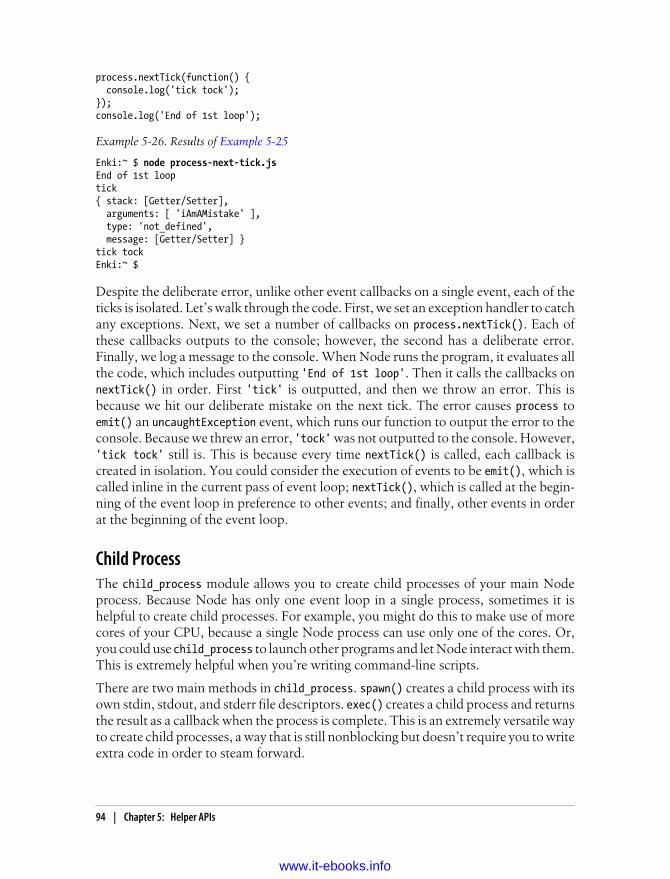
process.nextTick(function() { console.log('tick tock');});console.log('End of 1st loop');
Example 5-26. Results of Example 5-25
Enki:~ $ node process-next-tick.js End of 1st looptick{ stack: [Getter/Setter], arguments: [ 'iAmAMistake' ], type: 'not_defined', message: [Getter/Setter] }tick tockEnki:~ $
Despite the deliberate error, unlike other event callbacks on a single event, each of theticks is isolated. Let’s walk through the code. First, we set an exception handler to catchany exceptions. Next, we set a number of callbacks on process.nextTick(). Each ofthese callbacks outputs to the console; however, the second has a deliberate error.Finally, we log a message to the console. When Node runs the program, it evaluates allthe code, which includes outputting 'End of 1st loop'. Then it calls the callbacks onnextTick() in order. First 'tick' is outputted, and then we throw an error. This isbecause we hit our deliberate mistake on the next tick. The error causes process toemit() an uncaughtException event, which runs our function to output the error to theconsole. Because we threw an error, 'tock' was not outputted to the console. However,'tick tock' still is. This is because every time nextTick() is called, each callback iscreated in isolation. You could consider the execution of events to be emit(), which iscalled inline in the current pass of event loop; nextTick(), which is called at the begin-ning of the event loop in preference to other events; and finally, other events in orderat the beginning of the event loop.
Child ProcessThe child_process module allows you to create child processes of your main Nodeprocess. Because Node has only one event loop in a single process, sometimes it ishelpful to create child processes. For example, you might do this to make use of morecores of your CPU, because a single Node process can use only one of the cores. Or,you could use child_process to launch other programs and let Node interact with them.This is extremely helpful when you’re writing command-line scripts.
There are two main methods in child_process. spawn() creates a child process with itsown stdin, stdout, and stderr file descriptors. exec() creates a child process and returnsthe result as a callback when the process is complete. This is an extremely versatile wayto create child processes, a way that is still nonblocking but doesn’t require you to writeextra code in order to steam forward.
94 | Chapter 5: Helper APIs
www.it-ebooks.info
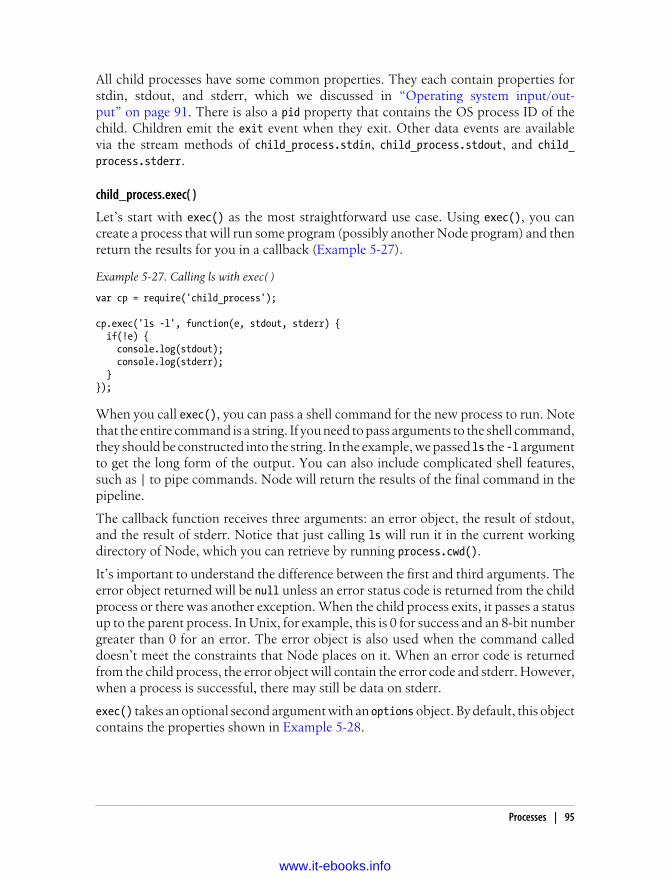
All child processes have some common properties. They each contain properties forstdin, stdout, and stderr, which we discussed in “Operating system input/out-put” on page 91. There is also a pid property that contains the OS process ID of thechild. Children emit the exit event when they exit. Other data events are availablevia the stream methods of child_process.stdin, child_process.stdout, and child_process.stderr.
child_process.exec( )
Let’s start with exec() as the most straightforward use case. Using exec(), you cancreate a process that will run some program (possibly another Node program) and thenreturn the results for you in a callback (Example 5-27).
Example 5-27. Calling ls with exec( )
var cp = require('child_process');
cp.exec('ls -l', function(e, stdout, stderr) { if(!e) { console.log(stdout); console.log(stderr); }});
When you call exec(), you can pass a shell command for the new process to run. Notethat the entire command is a string. If you need to pass arguments to the shell command,they should be constructed into the string. In the example, we passed ls the -l argumentto get the long form of the output. You can also include complicated shell features,such as | to pipe commands. Node will return the results of the final command in thepipeline.
The callback function receives three arguments: an error object, the result of stdout,and the result of stderr. Notice that just calling ls will run it in the current workingdirectory of Node, which you can retrieve by running process.cwd().
It’s important to understand the difference between the first and third arguments. Theerror object returned will be null unless an error status code is returned from the childprocess or there was another exception. When the child process exits, it passes a statusup to the parent process. In Unix, for example, this is 0 for success and an 8-bit numbergreater than 0 for an error. The error object is also used when the command calleddoesn’t meet the constraints that Node places on it. When an error code is returnedfrom the child process, the error object will contain the error code and stderr. However,when a process is successful, there may still be data on stderr.
exec() takes an optional second argument with an options object. By default, this objectcontains the properties shown in Example 5-28.
Processes | 95
www.it-ebooks.info
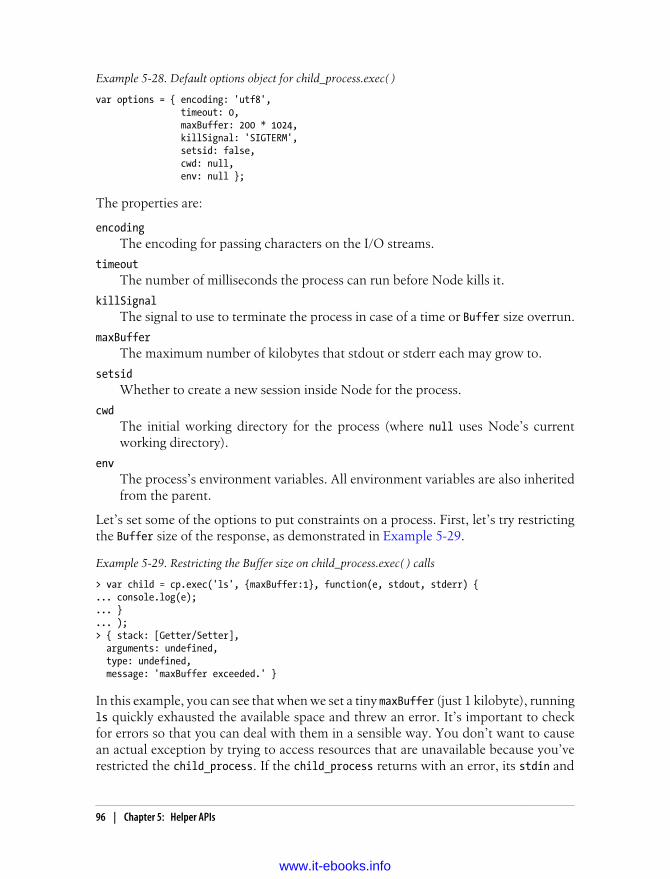
Example 5-28. Default options object for child_process.exec( )
var options = { encoding: 'utf8', timeout: 0, maxBuffer: 200 * 1024, killSignal: 'SIGTERM', setsid: false, cwd: null, env: null };
The properties are:
encodingThe encoding for passing characters on the I/O streams.
timeoutThe number of milliseconds the process can run before Node kills it.
killSignalThe signal to use to terminate the process in case of a time or Buffer size overrun.
maxBufferThe maximum number of kilobytes that stdout or stderr each may grow to.
setsidWhether to create a new session inside Node for the process.
cwdThe initial working directory for the process (where null uses Node’s currentworking directory).
envThe process’s environment variables. All environment variables are also inheritedfrom the parent.
Let’s set some of the options to put constraints on a process. First, let’s try restrictingthe Buffer size of the response, as demonstrated in Example 5-29.
Example 5-29. Restricting the Buffer size on child_process.exec( ) calls
> var child = cp.exec('ls', {maxBuffer:1}, function(e, stdout, stderr) {... console.log(e);... }... );> { stack: [Getter/Setter], arguments: undefined, type: undefined, message: 'maxBuffer exceeded.' }
In this example, you can see that when we set a tiny maxBuffer (just 1 kilobyte), runningls quickly exhausted the available space and threw an error. It’s important to checkfor errors so that you can deal with them in a sensible way. You don’t want to causean actual exception by trying to access resources that are unavailable because you’verestricted the child_process. If the child_process returns with an error, its stdin and
96 | Chapter 5: Helper APIs
www.it-ebooks.info
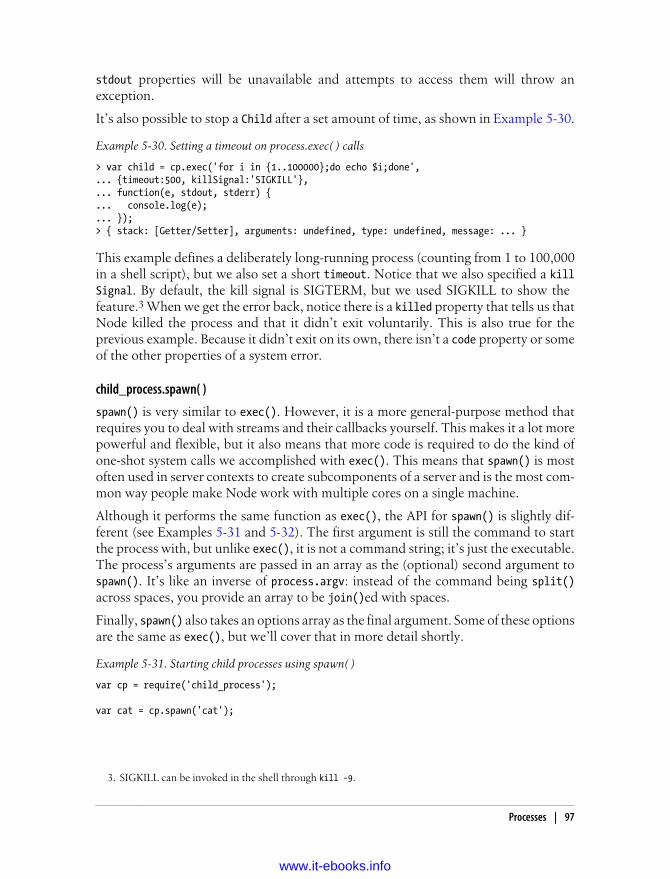
stdout properties will be unavailable and attempts to access them will throw anexception.
It’s also possible to stop a Child after a set amount of time, as shown in Example 5-30.
Example 5-30. Setting a timeout on process.exec( ) calls
> var child = cp.exec('for i in {1..100000};do echo $i;done',... {timeout:500, killSignal:'SIGKILL'},... function(e, stdout, stderr) {... console.log(e);... });> { stack: [Getter/Setter], arguments: undefined, type: undefined, message: ... }
This example defines a deliberately long-running process (counting from 1 to 100,000in a shell script), but we also set a short timeout. Notice that we also specified a killSignal. By default, the kill signal is SIGTERM, but we used SIGKILL to show the feature.3 When we get the error back, notice there is a killed property that tells us thatNode killed the process and that it didn’t exit voluntarily. This is also true for theprevious example. Because it didn’t exit on its own, there isn’t a code property or someof the other properties of a system error.
child_process.spawn( )
spawn() is very similar to exec(). However, it is a more general-purpose method thatrequires you to deal with streams and their callbacks yourself. This makes it a lot morepowerful and flexible, but it also means that more code is required to do the kind ofone-shot system calls we accomplished with exec(). This means that spawn() is mostoften used in server contexts to create subcomponents of a server and is the most com-mon way people make Node work with multiple cores on a single machine.
Although it performs the same function as exec(), the API for spawn() is slightly dif-ferent (see Examples 5-31 and 5-32). The first argument is still the command to startthe process with, but unlike exec(), it is not a command string; it’s just the executable.The process’s arguments are passed in an array as the (optional) second argument tospawn(). It’s like an inverse of process.argv: instead of the command being split()across spaces, you provide an array to be join()ed with spaces.
Finally, spawn() also takes an options array as the final argument. Some of these optionsare the same as exec(), but we’ll cover that in more detail shortly.
Example 5-31. Starting child processes using spawn( )
var cp = require('child_process');
var cat = cp.spawn('cat');
3. SIGKILL can be invoked in the shell through kill -9.
Processes | 97
www.it-ebooks.info
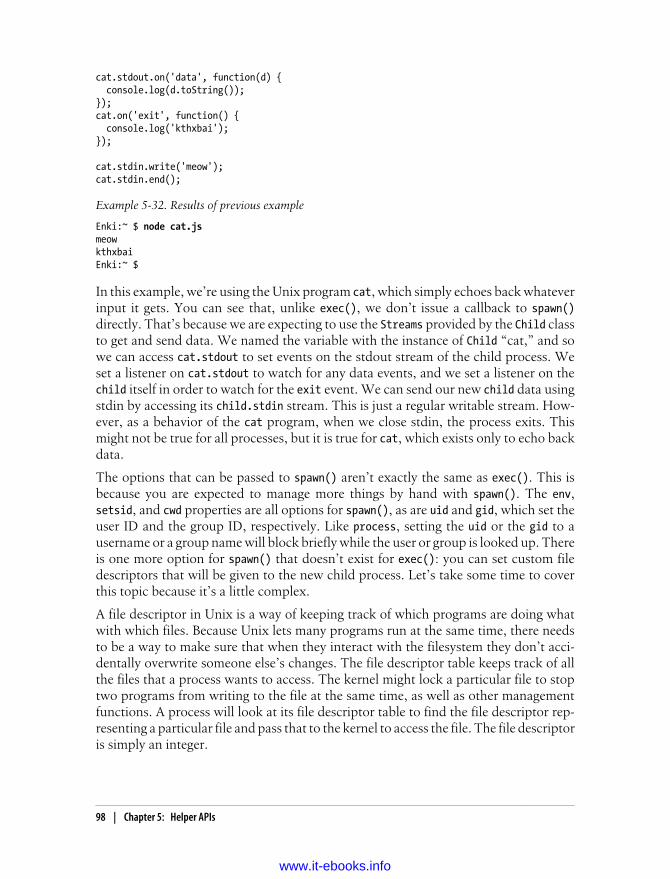
cat.stdout.on('data', function(d) { console.log(d.toString());});cat.on('exit', function() { console.log('kthxbai');});
cat.stdin.write('meow');cat.stdin.end();
Example 5-32. Results of previous example
Enki:~ $ node cat.js meowkthxbaiEnki:~ $
In this example, we’re using the Unix program cat, which simply echoes back whateverinput it gets. You can see that, unlike exec(), we don’t issue a callback to spawn()directly. That’s because we are expecting to use the Streams provided by the Child classto get and send data. We named the variable with the instance of Child “cat,” and sowe can access cat.stdout to set events on the stdout stream of the child process. Weset a listener on cat.stdout to watch for any data events, and we set a listener on thechild itself in order to watch for the exit event. We can send our new child data usingstdin by accessing its child.stdin stream. This is just a regular writable stream. How-ever, as a behavior of the cat program, when we close stdin, the process exits. Thismight not be true for all processes, but it is true for cat, which exists only to echo backdata.
The options that can be passed to spawn() aren’t exactly the same as exec(). This isbecause you are expected to manage more things by hand with spawn(). The env,setsid, and cwd properties are all options for spawn(), as are uid and gid, which set theuser ID and the group ID, respectively. Like process, setting the uid or the gid to ausername or a group name will block briefly while the user or group is looked up. Thereis one more option for spawn() that doesn’t exist for exec(): you can set custom filedescriptors that will be given to the new child process. Let’s take some time to coverthis topic because it’s a little complex.
A file descriptor in Unix is a way of keeping track of which programs are doing whatwith which files. Because Unix lets many programs run at the same time, there needsto be a way to make sure that when they interact with the filesystem they don’t acci-dentally overwrite someone else’s changes. The file descriptor table keeps track of allthe files that a process wants to access. The kernel might lock a particular file to stoptwo programs from writing to the file at the same time, as well as other managementfunctions. A process will look at its file descriptor table to find the file descriptor rep-resenting a particular file and pass that to the kernel to access the file. The file descriptoris simply an integer.
98 | Chapter 5: Helper APIs
www.it-ebooks.info
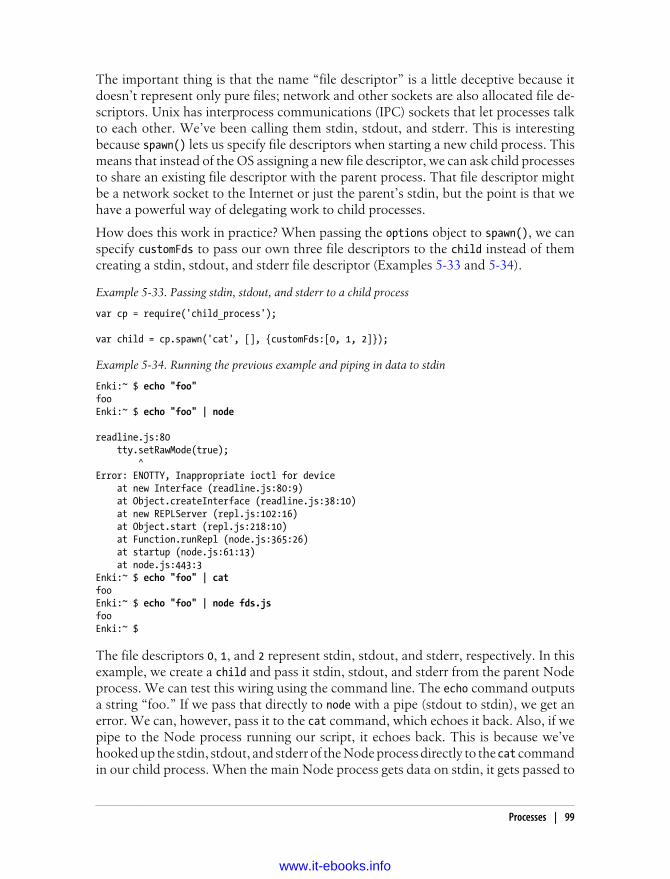
The important thing is that the name “file descriptor” is a little deceptive because itdoesn’t represent only pure files; network and other sockets are also allocated file de-scriptors. Unix has interprocess communications (IPC) sockets that let processes talkto each other. We’ve been calling them stdin, stdout, and stderr. This is interestingbecause spawn() lets us specify file descriptors when starting a new child process. Thismeans that instead of the OS assigning a new file descriptor, we can ask child processesto share an existing file descriptor with the parent process. That file descriptor mightbe a network socket to the Internet or just the parent’s stdin, but the point is that wehave a powerful way of delegating work to child processes.
How does this work in practice? When passing the options object to spawn(), we canspecify customFds to pass our own three file descriptors to the child instead of themcreating a stdin, stdout, and stderr file descriptor (Examples 5-33 and 5-34).
Example 5-33. Passing stdin, stdout, and stderr to a child process
var cp = require('child_process');
var child = cp.spawn('cat', [], {customFds:[0, 1, 2]});
Example 5-34. Running the previous example and piping in data to stdin
Enki:~ $ echo "foo"fooEnki:~ $ echo "foo" | node
readline.js:80 tty.setRawMode(true); ^Error: ENOTTY, Inappropriate ioctl for device at new Interface (readline.js:80:9) at Object.createInterface (readline.js:38:10) at new REPLServer (repl.js:102:16) at Object.start (repl.js:218:10) at Function.runRepl (node.js:365:26) at startup (node.js:61:13) at node.js:443:3Enki:~ $ echo "foo" | catfooEnki:~ $ echo "foo" | node fds.js fooEnki:~ $
The file descriptors 0, 1, and 2 represent stdin, stdout, and stderr, respectively. In thisexample, we create a child and pass it stdin, stdout, and stderr from the parent Nodeprocess. We can test this wiring using the command line. The echo command outputsa string “foo.” If we pass that directly to node with a pipe (stdout to stdin), we get anerror. We can, however, pass it to the cat command, which echoes it back. Also, if wepipe to the Node process running our script, it echoes back. This is because we’vehooked up the stdin, stdout, and stderr of the Node process directly to the cat commandin our child process. When the main Node process gets data on stdin, it gets passed to
Processes | 99
www.it-ebooks.info
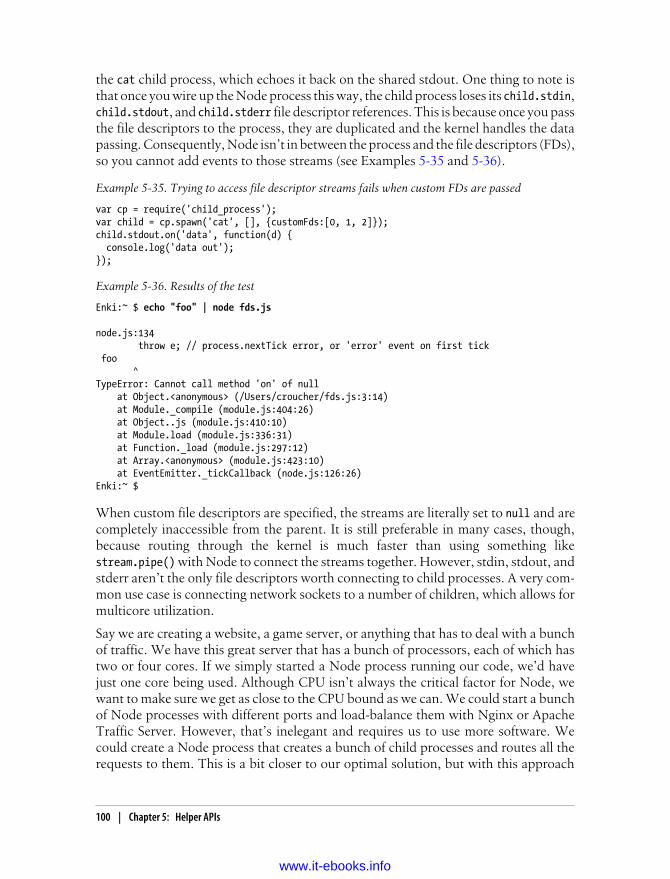
the cat child process, which echoes it back on the shared stdout. One thing to note isthat once you wire up the Node process this way, the child process loses its child.stdin,child.stdout, and child.stderr file descriptor references. This is because once you passthe file descriptors to the process, they are duplicated and the kernel handles the datapassing. Consequently, Node isn’t in between the process and the file descriptors (FDs),so you cannot add events to those streams (see Examples 5-35 and 5-36).
Example 5-35. Trying to access file descriptor streams fails when custom FDs are passed
var cp = require('child_process');var child = cp.spawn('cat', [], {customFds:[0, 1, 2]});child.stdout.on('data', function(d) { console.log('data out');});
Example 5-36. Results of the test
Enki:~ $ echo "foo" | node fds.js
node.js:134 throw e; // process.nextTick error, or 'error' event on first tick foo ^TypeError: Cannot call method 'on' of null at Object.<anonymous> (/Users/croucher/fds.js:3:14) at Module._compile (module.js:404:26) at Object..js (module.js:410:10) at Module.load (module.js:336:31) at Function._load (module.js:297:12) at Array.<anonymous> (module.js:423:10) at EventEmitter._tickCallback (node.js:126:26)Enki:~ $
When custom file descriptors are specified, the streams are literally set to null and arecompletely inaccessible from the parent. It is still preferable in many cases, though,because routing through the kernel is much faster than using something likestream.pipe() with Node to connect the streams together. However, stdin, stdout, andstderr aren’t the only file descriptors worth connecting to child processes. A very com-mon use case is connecting network sockets to a number of children, which allows formulticore utilization.
Say we are creating a website, a game server, or anything that has to deal with a bunchof traffic. We have this great server that has a bunch of processors, each of which hastwo or four cores. If we simply started a Node process running our code, we’d havejust one core being used. Although CPU isn’t always the critical factor for Node, wewant to make sure we get as close to the CPU bound as we can. We could start a bunchof Node processes with different ports and load-balance them with Nginx or ApacheTraffic Server. However, that’s inelegant and requires us to use more software. Wecould create a Node process that creates a bunch of child processes and routes all therequests to them. This is a bit closer to our optimal solution, but with this approach
100 | Chapter 5: Helper APIs
www.it-ebooks.info

we just created a single point of failure because only one Node process routes all thetraffic. This isn’t ideal. This is where passing custom FDs comes into its own. In thesame way that we can pass the stdin, stdout, and stderr of a master process, we cancreate other sockets and pass those in to child processes. However, because we arepassing file descriptors instead of messages, the kernel will deal with the routing. Thismeans that although the master Node process is still required, it isn’t bearing the loadfor all the traffic.
Testing Through assertassert is a core library that provides the basis for testing code. Node’s assertions workspretty much like the same feature in other languages and environments: they allow youto make claims about objects and function calls and send out messages when the as-sertions are violated. These methods are really easy to get started with and provide agreat way to unit test your code’s features. Node’s own tests are written with assert.
Most assert methods come in pairs: one method providing the positive test and theother providing the negative one. For instance, Example 5-37 shows equal() and notEqual(). The methods take two arguments: the first is the expected value, and thesecond is the actual value.
Example 5-37. Basic assertions
> var assert = require('assert');> assert.equal(1, true, 'Truthy');> assert.notEqual(1, true, 'Truthy');AssertionError: Truthy at [object Context]:1:8 at Interface.<anonymous> (repl.js:171:22) at Interface.emit (events.js:64:17) at Interface._onLine (readline.js:153:10) at Interface._line (readline.js:408:8) at Interface._ttyWrite (readline.js:585:14) at ReadStream.<anonymous> (readline.js:73:12) at ReadStream.emit (events.js:81:20) at ReadStream._emitKey (tty_posix.js:307:10) at ReadStream.onData (tty_posix.js:70:12)>
The most obvious thing here is that when an assert method doesn’t pass, it throws anexception. This is a fundamental principle in the test suites. When a test suite runs, itshould just run, without throwing an exception. If that is the case, the test is successful.
There are just a few assertions. equal() and notEqual() check for the == equalityand != inequality operators. This means they test weakly for truthy and falsy values, asCrockford termed them. In brief, when tested as a Boolean, falsy values consist offalse, 0, empty strings (i.e., ""), null, undefined, and NaN. All other values are truthy.A string such as "false" is truthy. A string containing "0" is also truthy. As such,equal() and notEqual() are fine to compare simple values (strings, numbers, etc.) with
Testing Through assert | 101
www.it-ebooks.info
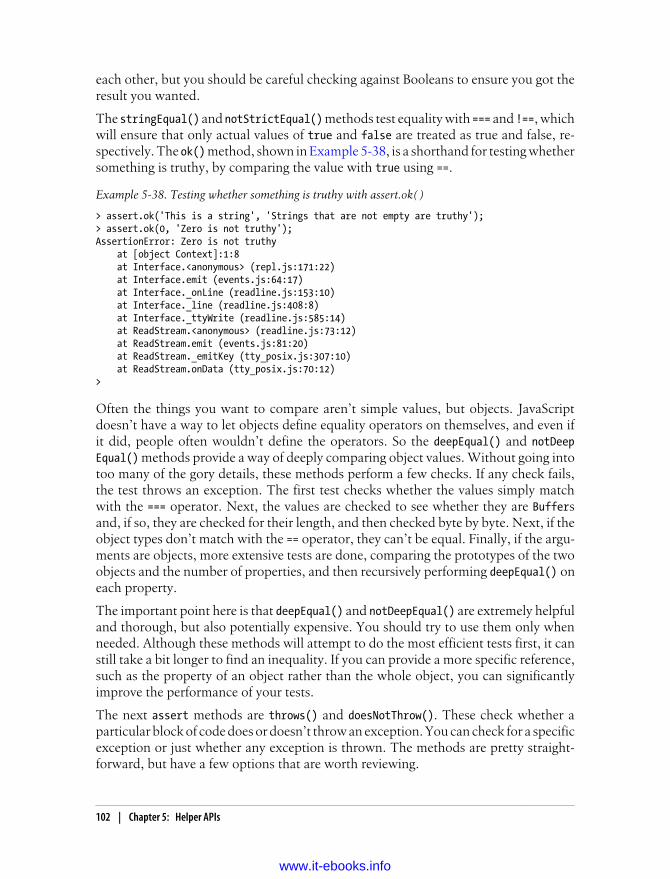
each other, but you should be careful checking against Booleans to ensure you got theresult you wanted.
The stringEqual() and notStrictEqual() methods test equality with === and !==, whichwill ensure that only actual values of true and false are treated as true and false, re-spectively. The ok() method, shown in Example 5-38, is a shorthand for testing whethersomething is truthy, by comparing the value with true using ==.
Example 5-38. Testing whether something is truthy with assert.ok( )
> assert.ok('This is a string', 'Strings that are not empty are truthy');> assert.ok(0, 'Zero is not truthy');AssertionError: Zero is not truthy at [object Context]:1:8 at Interface.<anonymous> (repl.js:171:22) at Interface.emit (events.js:64:17) at Interface._onLine (readline.js:153:10) at Interface._line (readline.js:408:8) at Interface._ttyWrite (readline.js:585:14) at ReadStream.<anonymous> (readline.js:73:12) at ReadStream.emit (events.js:81:20) at ReadStream._emitKey (tty_posix.js:307:10) at ReadStream.onData (tty_posix.js:70:12)>
Often the things you want to compare aren’t simple values, but objects. JavaScriptdoesn’t have a way to let objects define equality operators on themselves, and even ifit did, people often wouldn’t define the operators. So the deepEqual() and notDeepEqual() methods provide a way of deeply comparing object values. Without going intotoo many of the gory details, these methods perform a few checks. If any check fails,the test throws an exception. The first test checks whether the values simply matchwith the === operator. Next, the values are checked to see whether they are Buffersand, if so, they are checked for their length, and then checked byte by byte. Next, if theobject types don’t match with the == operator, they can’t be equal. Finally, if the argu-ments are objects, more extensive tests are done, comparing the prototypes of the twoobjects and the number of properties, and then recursively performing deepEqual() oneach property.
The important point here is that deepEqual() and notDeepEqual() are extremely helpfuland thorough, but also potentially expensive. You should try to use them only whenneeded. Although these methods will attempt to do the most efficient tests first, it canstill take a bit longer to find an inequality. If you can provide a more specific reference,such as the property of an object rather than the whole object, you can significantlyimprove the performance of your tests.
The next assert methods are throws() and doesNotThrow(). These check whether aparticular block of code does or doesn’t throw an exception. You can check for a specificexception or just whether any exception is thrown. The methods are pretty straight-forward, but have a few options that are worth reviewing.
102 | Chapter 5: Helper APIs
www.it-ebooks.info
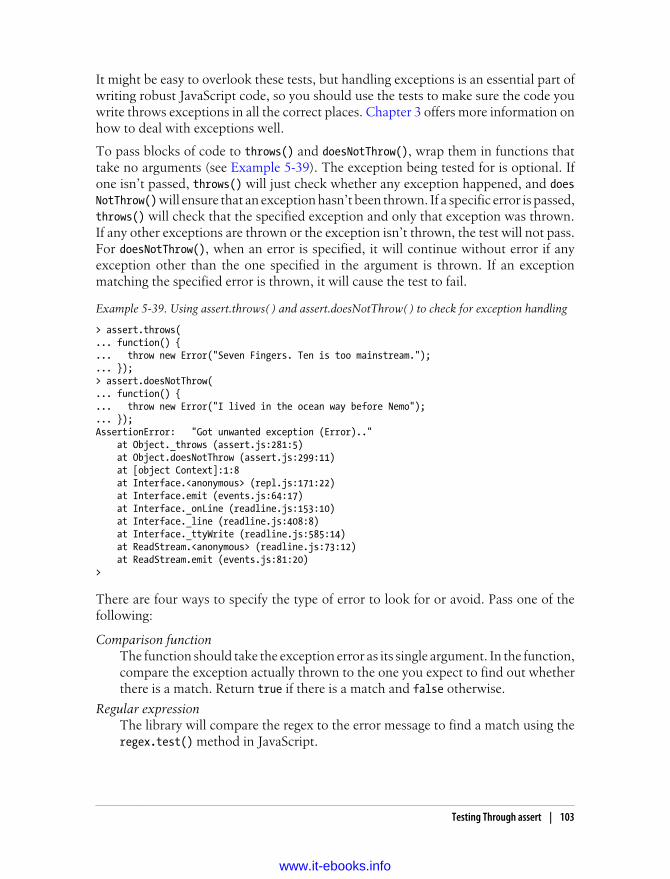
It might be easy to overlook these tests, but handling exceptions is an essential part ofwriting robust JavaScript code, so you should use the tests to make sure the code youwrite throws exceptions in all the correct places. Chapter 3 offers more information onhow to deal with exceptions well.
To pass blocks of code to throws() and doesNotThrow(), wrap them in functions thattake no arguments (see Example 5-39). The exception being tested for is optional. Ifone isn’t passed, throws() will just check whether any exception happened, and doesNotThrow() will ensure that an exception hasn’t been thrown. If a specific error is passed,throws() will check that the specified exception and only that exception was thrown.If any other exceptions are thrown or the exception isn’t thrown, the test will not pass.For doesNotThrow(), when an error is specified, it will continue without error if anyexception other than the one specified in the argument is thrown. If an exceptionmatching the specified error is thrown, it will cause the test to fail.
Example 5-39. Using assert.throws( ) and assert.doesNotThrow( ) to check for exception handling
> assert.throws(... function() {... throw new Error("Seven Fingers. Ten is too mainstream.");... });> assert.doesNotThrow(... function() {... throw new Error("I lived in the ocean way before Nemo");... });AssertionError: "Got unwanted exception (Error).." at Object._throws (assert.js:281:5) at Object.doesNotThrow (assert.js:299:11) at [object Context]:1:8 at Interface.<anonymous> (repl.js:171:22) at Interface.emit (events.js:64:17) at Interface._onLine (readline.js:153:10) at Interface._line (readline.js:408:8) at Interface._ttyWrite (readline.js:585:14) at ReadStream.<anonymous> (readline.js:73:12) at ReadStream.emit (events.js:81:20)>
There are four ways to specify the type of error to look for or avoid. Pass one of thefollowing:
Comparison functionThe function should take the exception error as its single argument. In the function,compare the exception actually thrown to the one you expect to find out whetherthere is a match. Return true if there is a match and false otherwise.
Regular expressionThe library will compare the regex to the error message to find a match using theregex.test() method in JavaScript.
Testing Through assert | 103
www.it-ebooks.info
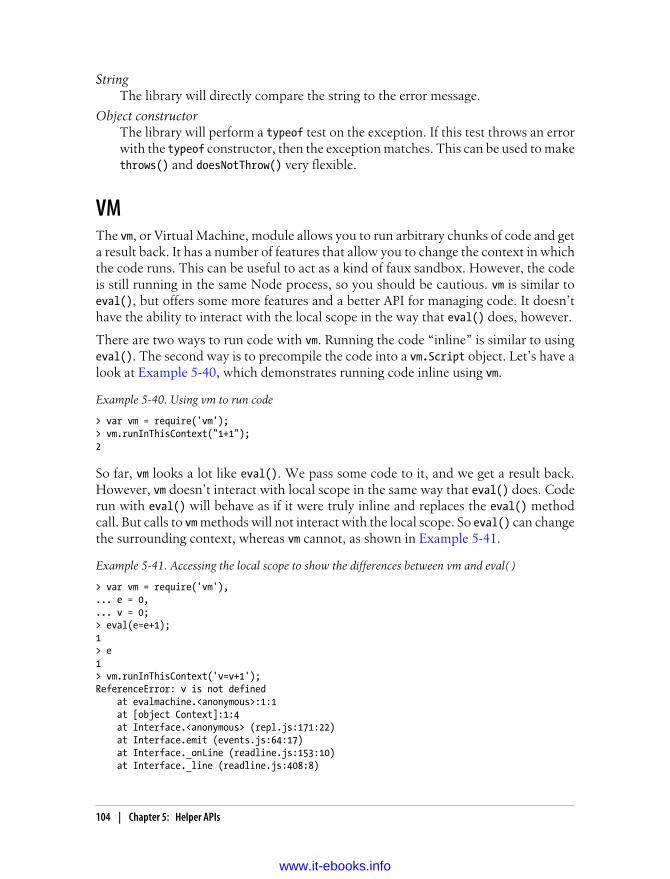
StringThe library will directly compare the string to the error message.
Object constructorThe library will perform a typeof test on the exception. If this test throws an errorwith the typeof constructor, then the exception matches. This can be used to makethrows() and doesNotThrow() very flexible.
VMThe vm, or Virtual Machine, module allows you to run arbitrary chunks of code and geta result back. It has a number of features that allow you to change the context in whichthe code runs. This can be useful to act as a kind of faux sandbox. However, the codeis still running in the same Node process, so you should be cautious. vm is similar toeval(), but offers some more features and a better API for managing code. It doesn’thave the ability to interact with the local scope in the way that eval() does, however.
There are two ways to run code with vm. Running the code “inline” is similar to usingeval(). The second way is to precompile the code into a vm.Script object. Let’s have alook at Example 5-40, which demonstrates running code inline using vm.
Example 5-40. Using vm to run code
> var vm = require('vm');> vm.runInThisContext("1+1");2
So far, vm looks a lot like eval(). We pass some code to it, and we get a result back.However, vm doesn’t interact with local scope in the same way that eval() does. Coderun with eval() will behave as if it were truly inline and replaces the eval() methodcall. But calls to vm methods will not interact with the local scope. So eval() can changethe surrounding context, whereas vm cannot, as shown in Example 5-41.
Example 5-41. Accessing the local scope to show the differences between vm and eval( )
> var vm = require('vm'),... e = 0,... v = 0;> eval(e=e+1);1> e1> vm.runInThisContext('v=v+1');ReferenceError: v is not defined at evalmachine.<anonymous>:1:1 at [object Context]:1:4 at Interface.<anonymous> (repl.js:171:22) at Interface.emit (events.js:64:17) at Interface._onLine (readline.js:153:10) at Interface._line (readline.js:408:8)
104 | Chapter 5: Helper APIs
www.it-ebooks.info
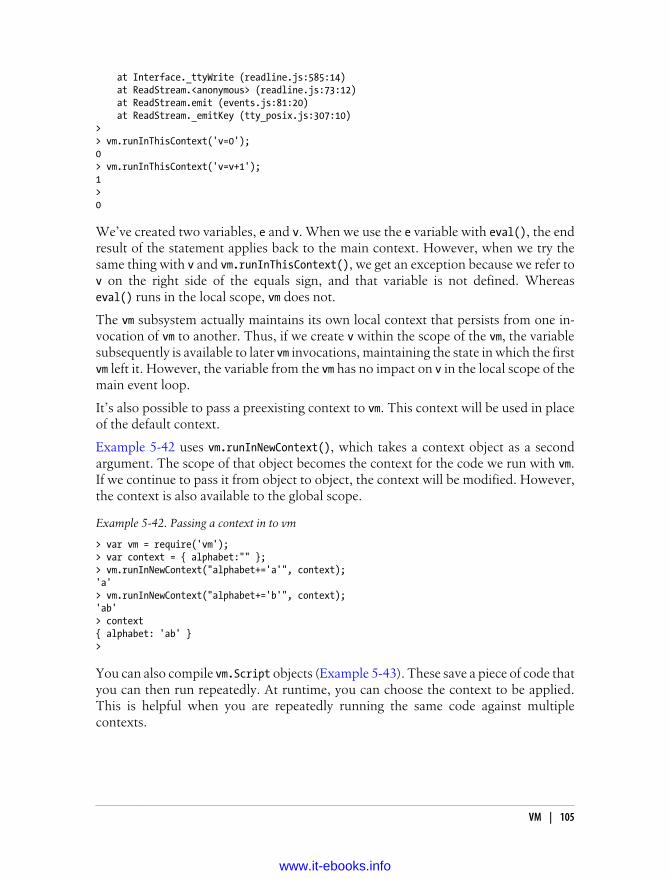
at Interface._ttyWrite (readline.js:585:14) at ReadStream.<anonymous> (readline.js:73:12) at ReadStream.emit (events.js:81:20) at ReadStream._emitKey (tty_posix.js:307:10)>> vm.runInThisContext('v=0');0> vm.runInThisContext('v=v+1');1>0
We’ve created two variables, e and v. When we use the e variable with eval(), the endresult of the statement applies back to the main context. However, when we try thesame thing with v and vm.runInThisContext(), we get an exception because we refer tov on the right side of the equals sign, and that variable is not defined. Whereaseval() runs in the local scope, vm does not.
The vm subsystem actually maintains its own local context that persists from one in-vocation of vm to another. Thus, if we create v within the scope of the vm, the variablesubsequently is available to later vm invocations, maintaining the state in which the firstvm left it. However, the variable from the vm has no impact on v in the local scope of themain event loop.
It’s also possible to pass a preexisting context to vm. This context will be used in placeof the default context.
Example 5-42 uses vm.runInNewContext(), which takes a context object as a secondargument. The scope of that object becomes the context for the code we run with vm.If we continue to pass it from object to object, the context will be modified. However,the context is also available to the global scope.
Example 5-42. Passing a context in to vm
> var vm = require('vm');> var context = { alphabet:"" };> vm.runInNewContext("alphabet+='a'", context);'a'> vm.runInNewContext("alphabet+='b'", context);'ab'> context{ alphabet: 'ab' }>
You can also compile vm.Script objects (Example 5-43). These save a piece of code thatyou can then run repeatedly. At runtime, you can choose the context to be applied.This is helpful when you are repeatedly running the same code against multiplecontexts.
VM | 105
www.it-ebooks.info
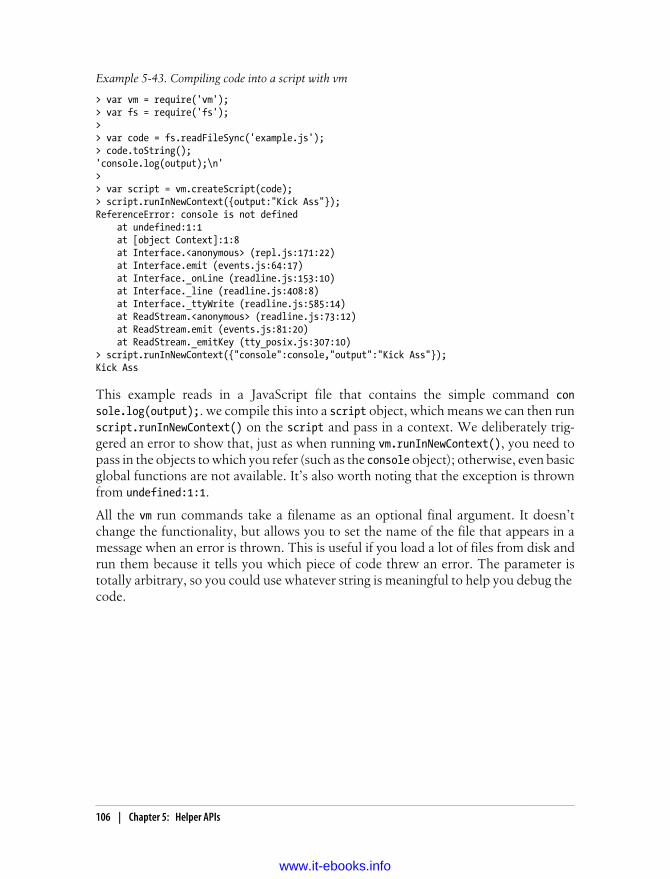
Example 5-43. Compiling code into a script with vm
> var vm = require('vm');> var fs = require('fs');> > var code = fs.readFileSync('example.js');> code.toString();'console.log(output);\n'>> var script = vm.createScript(code);> script.runInNewContext({output:"Kick Ass"});ReferenceError: console is not defined at undefined:1:1 at [object Context]:1:8 at Interface.<anonymous> (repl.js:171:22) at Interface.emit (events.js:64:17) at Interface._onLine (readline.js:153:10) at Interface._line (readline.js:408:8) at Interface._ttyWrite (readline.js:585:14) at ReadStream.<anonymous> (readline.js:73:12) at ReadStream.emit (events.js:81:20) at ReadStream._emitKey (tty_posix.js:307:10)> script.runInNewContext({"console":console,"output":"Kick Ass"});Kick Ass
This example reads in a JavaScript file that contains the simple command console.log(output);. we compile this into a script object, which means we can then runscript.runInNewContext() on the script and pass in a context. We deliberately trig-gered an error to show that, just as when running vm.runInNewContext(), you need topass in the objects to which you refer (such as the console object); otherwise, even basicglobal functions are not available. It’s also worth noting that the exception is thrownfrom undefined:1:1.
All the vm run commands take a filename as an optional final argument. It doesn’tchange the functionality, but allows you to set the name of the file that appears in amessage when an error is thrown. This is useful if you load a lot of files from disk andrun them because it tells you which piece of code threw an error. The parameter istotally arbitrary, so you could use whatever string is meaningful to help you debug the code.
106 | Chapter 5: Helper APIs
www.it-ebooks.info
CHAPTER 6
Data Access
Like any web server, Node needs access to data stores for persistent storage; withoutpersistence, all you have is a brochure website, which would make using Node point-less. In this chapter, we’ll run through the basic ways to connect to common opensource database choices and to store and retrieve data.
NoSQL and Document StoresThe following NoSQL and document stores are increasingly popular for web-facingapplications and are easy to use with Node.
CouchDBCouchDB provides MVCC-based1 document storage in a JavaScript environment.When documents (records) are added or updated in CouchDB, the entire dataset issaved to storage and older versions of that data marked obsolete. Older versions of therecord can still be merged into the newest version, but in every case a whole new versionis created and written to contiguous memory for faster read times. CouchDB is said tobe “eventually consistent.” In a large, scalable deployment, multiple instances cansometimes serve older, unsynced versions of records to clients with the expectationthat any changes to those records will eventually be merged into the master.
Installation
Specific CouchDB libraries are not required to access the database, but they are usefulfor providing a high level of abstraction and making code easier to work with. ACouchDB server is needed to test any examples, but it does not require a lot of workto get it running.
1. MVCC stands for multi-version concurrency control.
107
www.it-ebooks.info

The most recent version of CouchDB can be installed from the Apacheproject page. Installation instructions for a wide array of platforms can be found on thewiki.
If you’re running Windows, you will find a number of binary installers as well as in-structions for building from source. As with many of the NoSQL options, installationis easiest and best supported on a Linux-based system, but don’t be dissuaded.
Additional modules are not strictly necessary, becauseCouchDB exposes all of its services through REST, as described in more detail later.
Using CouchDB over HTTP
One of the nice things about CouchDB is that its API is actually all just HTTP. BecauseNode is great at interacting with HTTP, this means it is really easy to work withCouchDB. Exploiting this fact, it is possible to perform database operations directlywithout any additional client libraries.
Example 6-1 shows how to generate a list of databases in the current CouchDB instal-lation. In this case, there is no authentication or administrative permission on theCouchDB server—a decidedly bad idea for a database connected to the Internet, butsuitable for demonstration purposes.
Example 6-1. Retrieving a list of CouchDB stores via HTTP
var http = require('http');
http.createServer(function (req, res) { var client = http.createClient(5984, "127.0.0.1"); var request = client.request("GET", "/_all_dbs"); request.end();
request.on("response", function(response) { var responseBody = "";
response.on("data", function(chunk) { responseBody += chunk; });
response.on("end", function() { res.writeHead(200, {'Content-Type': 'text/plain'}); res.write(responseBody); res.end(); }); });}).listen(8080);
Installing CouchDB.
Installing CouchDB’s Node module.
108 | Chapter 6: Data Access
www.it-ebooks.info
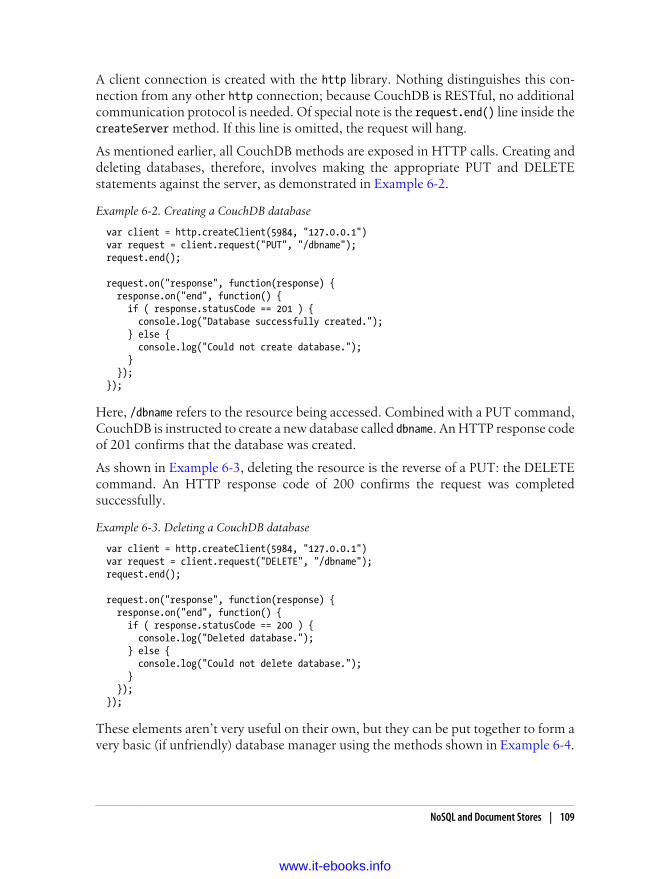
A client connection is created with the http library. Nothing distinguishes this con-nection from any other http connection; because CouchDB is RESTful, no additionalcommunication protocol is needed. Of special note is the request.end() line inside thecreateServer method. If this line is omitted, the request will hang.
As mentioned earlier, all CouchDB methods are exposed in HTTP calls. Creating anddeleting databases, therefore, involves making the appropriate PUT and DELETEstatements against the server, as demonstrated in Example 6-2.
Example 6-2. Creating a CouchDB database
var client = http.createClient(5984, "127.0.0.1") var request = client.request("PUT", "/dbname"); request.end();
request.on("response", function(response) { response.on("end", function() { if ( response.statusCode == 201 ) { console.log("Database successfully created."); } else { console.log("Could not create database."); } }); });
Here, /dbname refers to the resource being accessed. Combined with a PUT command,CouchDB is instructed to create a new database called dbname. An HTTP response codeof 201 confirms that the database was created.
As shown in Example 6-3, deleting the resource is the reverse of a PUT: the DELETEcommand. An HTTP response code of 200 confirms the request was completedsuccessfully.
Example 6-3. Deleting a CouchDB database
var client = http.createClient(5984, "127.0.0.1") var request = client.request("DELETE", "/dbname"); request.end();
request.on("response", function(response) { response.on("end", function() { if ( response.statusCode == 200 ) { console.log("Deleted database."); } else { console.log("Could not delete database."); } }); });
These elements aren’t very useful on their own, but they can be put together to form avery basic (if unfriendly) database manager using the methods shown in Example 6-4.
NoSQL and Document Stores | 109
www.it-ebooks.info
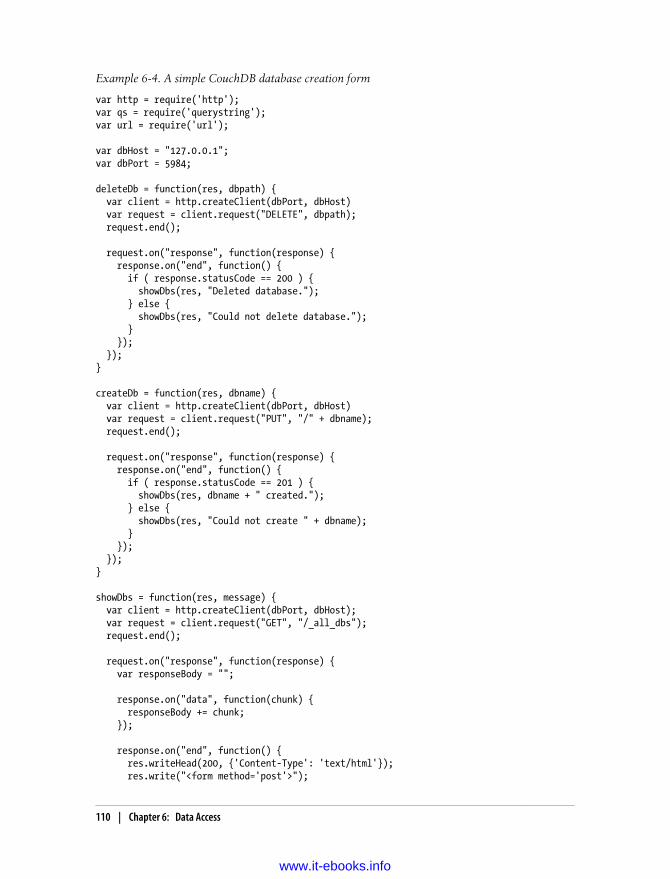
Example 6-4. A simple CouchDB database creation form
var http = require('http');var qs = require('querystring');var url = require('url');
var dbHost = "127.0.0.1";var dbPort = 5984;
deleteDb = function(res, dbpath) { var client = http.createClient(dbPort, dbHost) var request = client.request("DELETE", dbpath); request.end();
request.on("response", function(response) { response.on("end", function() { if ( response.statusCode == 200 ) { showDbs(res, "Deleted database."); } else { showDbs(res, "Could not delete database."); } }); });}
createDb = function(res, dbname) { var client = http.createClient(dbPort, dbHost) var request = client.request("PUT", "/" + dbname); request.end();
request.on("response", function(response) { response.on("end", function() { if ( response.statusCode == 201 ) { showDbs(res, dbname + " created."); } else { showDbs(res, "Could not create " + dbname); } }); });}
showDbs = function(res, message) { var client = http.createClient(dbPort, dbHost); var request = client.request("GET", "/_all_dbs"); request.end();
request.on("response", function(response) { var responseBody = "";
response.on("data", function(chunk) { responseBody += chunk; });
response.on("end", function() { res.writeHead(200, {'Content-Type': 'text/html'}); res.write("<form method='post'>");
110 | Chapter 6: Data Access
www.it-ebooks.info
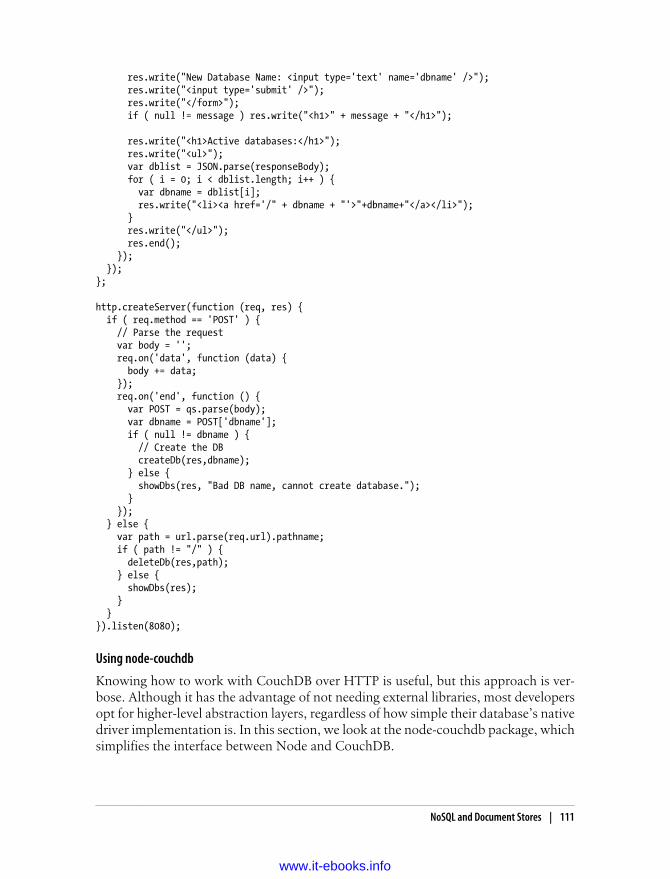
res.write("New Database Name: <input type='text' name='dbname' />"); res.write("<input type='submit' />"); res.write("</form>"); if ( null != message ) res.write("<h1>" + message + "</h1>");
res.write("<h1>Active databases:</h1>"); res.write("<ul>"); var dblist = JSON.parse(responseBody); for ( i = 0; i < dblist.length; i++ ) { var dbname = dblist[i]; res.write("<li><a href='/" + dbname + "'>"+dbname+"</a></li>"); } res.write("</ul>"); res.end(); }); });};
http.createServer(function (req, res) { if ( req.method == 'POST' ) { // Parse the request var body = ''; req.on('data', function (data) { body += data; }); req.on('end', function () { var POST = qs.parse(body); var dbname = POST['dbname']; if ( null != dbname ) { // Create the DB createDb(res,dbname); } else { showDbs(res, "Bad DB name, cannot create database."); } }); } else { var path = url.parse(req.url).pathname; if ( path != "/" ) { deleteDb(res,path); } else { showDbs(res); } }}).listen(8080);
Using node-couchdb
Knowing how to work with CouchDB over HTTP is useful, but this approach is ver-bose. Although it has the advantage of not needing external libraries, most developersopt for higher-level abstraction layers, regardless of how simple their database’s nativedriver implementation is. In this section, we look at the node-couchdb package, whichsimplifies the interface between Node and CouchDB.
NoSQL and Document Stores | 111
www.it-ebooks.info
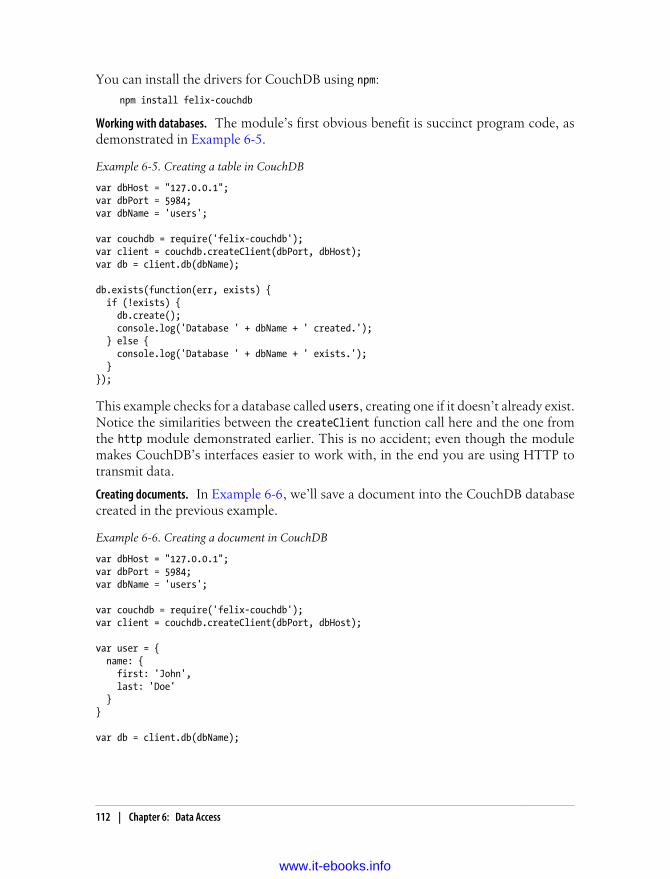
You can install the drivers for CouchDB using npm:
npm install felix-couchdb
The module’s first obvious benefit is succinct program code, asdemonstrated in Example 6-5.
Example 6-5. Creating a table in CouchDB
var dbHost = "127.0.0.1";var dbPort = 5984;var dbName = 'users';
var couchdb = require('felix-couchdb');var client = couchdb.createClient(dbPort, dbHost);var db = client.db(dbName);
db.exists(function(err, exists) { if (!exists) { db.create(); console.log('Database ' + dbName + ' created.'); } else { console.log('Database ' + dbName + ' exists.'); }});
This example checks for a database called users, creating one if it doesn’t already exist.Notice the similarities between the createClient function call here and the one fromthe http module demonstrated earlier. This is no accident; even though the modulemakes CouchDB’s interfaces easier to work with, in the end you are using HTTP totransmit data.
In Example 6-6, we’ll save a document into the CouchDB databasecreated in the previous example.
Example 6-6. Creating a document in CouchDB
var dbHost = "127.0.0.1";var dbPort = 5984;var dbName = 'users';
var couchdb = require('felix-couchdb');var client = couchdb.createClient(dbPort, dbHost);
var user = { name: { first: 'John', last: 'Doe' }}
var db = client.db(dbName);
Working with databases.
Creating documents.
112 | Chapter 6: Data Access
www.it-ebooks.info
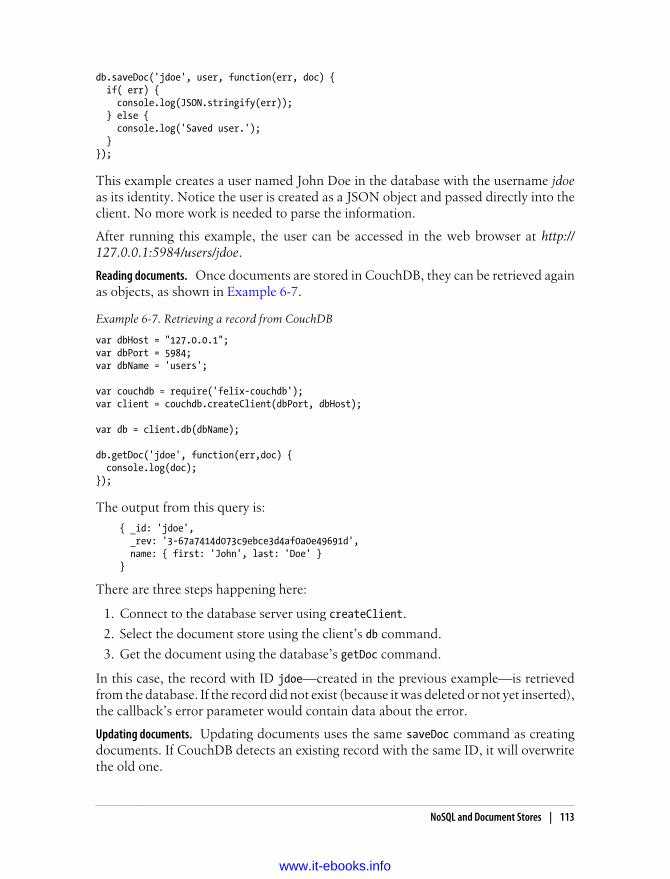
db.saveDoc('jdoe', user, function(err, doc) { if( err) { console.log(JSON.stringify(err)); } else { console.log('Saved user.'); }});
This example creates a user named John Doe in the database with the username jdoeas its identity. Notice the user is created as a JSON object and passed directly into theclient. No more work is needed to parse the information.
After running this example, the user can be accessed in the web browser at http://127.0.0.1:5984/users/jdoe.
Once documents are stored in CouchDB, they can be retrieved againas objects, as shown in Example 6-7.
Example 6-7. Retrieving a record from CouchDB
var dbHost = "127.0.0.1";var dbPort = 5984;var dbName = 'users';
var couchdb = require('felix-couchdb');var client = couchdb.createClient(dbPort, dbHost);
var db = client.db(dbName);
db.getDoc('jdoe', function(err,doc) { console.log(doc);});
The output from this query is:
{ _id: 'jdoe', _rev: '3-67a7414d073c9ebce3d4af0a0e49691d', name: { first: 'John', last: 'Doe' }}
There are three steps happening here:
1. Connect to the database server using createClient.
2. Select the document store using the client’s db command.
3. Get the document using the database’s getDoc command.
In this case, the record with ID jdoe—created in the previous example—is retrievedfrom the database. If the record did not exist (because it was deleted or not yet inserted),the callback’s error parameter would contain data about the error.
Updating documents uses the same saveDoc command as creatingdocuments. If CouchDB detects an existing record with the same ID, it will overwritethe old one.
Reading documents.
Updating documents.
NoSQL and Document Stores | 113
www.it-ebooks.info
Example 6-8 demonstrates how to update a document after reading it from the datastore.
Example 6-8. Updating a record in CouchDB
var dbHost = "127.0.0.1";var dbPort = 5984;var dbName = 'users';
var couchdb = require('felix-couchdb');var client = couchdb.createClient(dbPort, dbHost);
var db = client.db(dbName);
db.getDoc('jdoe', function(err,doc) { doc.name.first = 'Johnny'; doc.email = '[email protected]';
db.saveDoc('jdoe', doc );
db.getDoc('jdoe', function(err,revisedUser) { console.log(revisedUser); });});
The output from this operation is:
{ _id: 'jdoe', _rev: '7-1fb9a3bb6db27cbbbf1c74b2d601ccaa', name: { first: 'Johnny', last: 'Doe' }, email: '[email protected]'}
This example reads information about the jdoe user from the data store, gives it anemail address and a new first name, and saves it back into CouchDB.
Notice that saveDoc and getDoc follow the initial read, instead of putting getDoc insidesaveDoc’s callback. The CouchDB drivers queue commands and execute them sequen-tially, so this example will not result in a race condition where the document readcompletes before the updates are saved.
To delete a document from CouchDB, you need to supply both anID and a revision number. Fortunately, this is easy after a read, as shown in Exam-ple 6-9.
Example 6-9. Deleting from CouchDB
var dbHost = "127.0.0.1";var dbPort = 5984;var dbName = 'users';
var couchdb = require('felix-couchdb');var client = couchdb.createClient(dbPort, dbHost);
var db = client.db(dbName);
Deleting documents.
114 | Chapter 6: Data Access
www.it-ebooks.info
db.getDoc('jdoe', function(err,doc) { db.removeDoc(doc._id, doc._rev);});
After connecting to the CouchDB datastore, a getDoc command is issued here to getthe internal ID (the _id field) and revision number (_rev field) for that document. Oncethis information has been obtained, a removeDoc command is issued, which sends aDELETE request to the database.
RedisRedis is a memory-centric key-value store with persistence that will feel very familiar ifyou have experience with key-value caches such as Memcache. Redis is used whenperformance and scaling are important; in many cases, developers choose to use it asa cache for data retrieved from a relational database such as MySQL, although it iscapable of much more.
Beyond its key-value storage capabilities, Redis provides network-accessible sharedmemory, is a nonblocking event bus, and exposes subscription and publishingcapabilities.
Installation
As with many of the rest of the database engines, using Redis requires installing thedatabase application as well as the Node drivers to communicate with it.
Redis is available in source form. There isn’t anything to do in the wayof configuration; just download and compile per the instructions on the website.
If you are using Windows, you are on your own at the time of this writing because Redisis not supported on Windows. Fortunately, there is a passionate community behindRedis development, and several ports have been made available for both Cygwin andnative compilation. The port at https://github.com/dmajkic/redis compiles to a nativeWindows binary using MinGW.
The redis module is available from GitHub, but can be in-stalled using npm:
npm install redis
Optionally, you may install the mimimalist hiredis library along with Node’s redismodule.
Basic usage
Example 6-10 demonstrates a basic set and get operation against Redis by Node.
Installing Redis.
Installing Redis’s Node module.
NoSQL and Document Stores | 115
www.it-ebooks.info
Example 6-10. A basic get and set operation against Redis
var redis = require('redis'), client = redis.createClient();
client.on("error", function (err) { console.log("Error " + err);});
console.log("Setting key1");client.set("key1", "My string!", redis.print);console.log("Getting key1");client.get("key1", function (err, reply) { console.log("Results for key1:"); console.log(reply); client.end();});
This example begins by creating a connection to the Redis database and setting a call-back to handle errors. If you are not running an instance of the Redis server, you willreceive an error like this:
Error Error: Redis connection to 127.0.0.1:6379 failed - ECONNREFUSED, Connection refused
Note the lack of callbacks in this example. If you need to perform da-tabase reads immediately after writing, it is safer to use a callback, toensure your code is executed in the correct sequence.
After the connection is opened, the client sets basic data for a string key and hash key,and then reads those values back from the store. Library calls have the same names asbasic Redis commands (set, hset, get). Redis treats data coming through the set com-mand as strings, and allows for values up to 512 MB in size.
Hashes
Hashes are objects that contain multiple keys. Example 6-11 sets a single key at a time.
Example 6-11. Setting hash values one key at a time
var redis = require('redis'), client = redis.createClient();
client.on("error", function (err) { console.log("Error " + err);});
console.log("Setting user hash");client.hset("user", "username", "johndoe");client.hset("user", "firstname", "john");client.hset("user", "lastname", "doe");
116 | Chapter 6: Data Access
www.it-ebooks.info
client.hkeys("user", function(err,replies) { console.log("Results for user:"); console.log(replies.length + " replies:"); replies.forEach(function (reply, i) { console.log(i + ": " + reply ); }); client.end();});
Example 6-12 shows how to set multiple keys at the same time.
Example 6-12. Setting multiple hash values simultaneously
var redis = require('redis'), client = redis.createClient();
client.on("error", function (err) { console.log("Error " + err);});
console.log("Setting user hash");client.hmset("user", "username", "johndoe", "firstname", "john", "lastname", "doe");
client.hkeys("user", function(err,replies) { console.log("Results for user:"); console.log(replies.length + " replies:"); replies.forEach(function (reply, i) { console.log(i + ": " + reply ); }); client.end();});
We could accomplish the same thing by providing a more developer-friendly object,rather than breaking it out into a list, as shown in Example 6-13.
Example 6-13. Setting multiple hash values using an object
var redis = require('redis'), client = redis.createClient();
client.on("error", function (err) { console.log("Error " + err);});
var user = { username: 'johndoe', firstname: 'John', lastname: 'Doe', email: '[email protected]', website: 'http://www.johndoe.com'}
console.log("Setting user hash");client.hmset("user", user);
NoSQL and Document Stores | 117
www.it-ebooks.info
client.hkeys("user", function(err,replies) { console.log("Results for user:"); console.log(replies.length + " replies:"); replies.forEach(function (reply, i) { console.log(i + ": " + reply ); }); client.end();});
Instead of manually supplying each field to Redis, you can pass an entire object intohmset, which will parse the fields and send the correct information to Redis.
Be careful to use hmset and not hset when adding multiple objects. For-getting that a single object contains multiple values is a common pitfall.
Lists
The list type can be thought of as multiple values inside one key (see Example 6-14).Because it’s possible to push content to the beginning or end of a list, these collectionsare ideal for showing ordered events, such as lists of users who have recently receivedan honor.
Example 6-14. Using a list in Redis
var redis = require('redis'), client = redis.createClient();
client.on("error", function (err) { console.log("Error " + err);});
client.lpush("pendingusers", "user1" );client.lpush("pendingusers", "user2" );client.lpush("pendingusers", "user3" );client.lpush("pendingusers", "user4" );
client.rpop("pendingusers", function(err,username) { if( !err ) { console.log("Processing " + username); } client.end();});
The output from this example is:
Processing user1
This example demonstrates a first-in-first-out (FIFO) queue using Redis’s list com-mands. A real-world use for FIFO is in registration systems: the quantity of incomingregistration requests is too great to handle in real time, so registration data is hived offto a queue for processing outside the main application. Registrations will be processed
118 | Chapter 6: Data Access
www.it-ebooks.info
in the order they were received, but the primary application is not slowed down byhandling the actual record creation and introductory tasks such as welcome emails.
Sets
Sets are used in situations where it is desirable to have lists of nonrepeated items, as inExample 6-15.
Example 6-15. Using Redis’s set commands
var redis = require('redis'), client = redis.createClient();
client.on("error", function (err) { console.log("Error " + err);});
client.sadd( "myteam", "Neil" );client.sadd( "myteam", "Peter" );client.sadd( "myteam", "Brian" );client.sadd( "myteam", "Scott" );client.sadd( "myteam", "Brian" );
client.smembers( "myteam", function(err, members) { console.log( members ); client.end();});
The output is:
[ 'Brian', 'Scott', 'Neil', 'Peter' ]
Even though “Brian” was given to the list twice, he was added only once. In a real-worldsituation, it would be entirely possible to have two team members named Brian; thishighlights the importance of ensuring that your values are unique when they need tobe. Otherwise, the set can cause unintended behavior when you expect more elementsthan are actually present due to the removal of repeated items.
Sorted sets
Like regular sets, sorted sets do not allow duplicate members. Sorted sets add the con-cept of weighting, enabling score-based operations on data such as leaderboards, topscores, and content tables.
The producers of the American weight-loss reality show The Biggest Loser are real-world fans of sorted sets. In the 11th season of the series, the contestants were split intothree groups based upon their age. On air, they had to perform a crude sorting operationby checking a number printed on everyone’s shirts and then line up in ascending orderunder the hot sun. If one of the contestants had brought her Node- and Redis-equipped laptop to the competition, she might have made a small program to do thework for them, such as the one in Example 6-16.
NoSQL and Document Stores | 119
www.it-ebooks.info
Example 6-16. Ranking a sorted list using Redis
var redis = require('redis'), client = redis.createClient();
client.on("error", function (err) { console.log("Error " + err);});
client.zadd( "contestants", 60, "Deborah" );client.zadd( "contestants", 65, "John" );client.zadd( "contestants", 26, "Patrick" );client.zadd( "contestants", 62, "Mike" );client.zadd( "contestants", 24, "Courtney" );client.zadd( "contestants", 39, "Jennifer" );client.zadd( "contestants", 26, "Jessica" );client.zadd( "contestants", 46, "Joe" );client.zadd( "contestants", 63, "Bonnie" );client.zadd( "contestants", 27, "Vinny" );client.zadd( "contestants", 27, "Ramon" );client.zadd( "contestants", 51, "Becky" );client.zadd( "contestants", 41, "Sunny" );client.zadd( "contestants", 47, "Antone" );client.zadd( "contestants", 40, "John" );
client.zcard( "contestants", function( err, length ) { if( !err ) { var contestantCount = length; var membersPerTeam = Math.ceil( contestantCount / 3 ); client.zrange( "contestants", membersPerTeam * 0, membersPerTeam * 1 - 1, function(err, values) { console.log('Young team: ' + values); }); client.zrange( "contestants", membersPerTeam * 1, membersPerTeam * 2 - 1, function(err, values) { console.log('Middle team: ' + values); }); client.zrange( "contestants", membersPerTeam * 2, contestantCount, function(err, values) { console.log('Elder team: ' + values); client.end(); }); }});
The output is:
Young team: Courtney,Jessica,Patrick,Ramon,VinnyMiddle team: Jennifer,John,Sunny,Joe,AntoneElder team: Becky,Deborah,Mike,Bonnie
Adding members to a sorted set follows a pattern similar to the one for adding membersto a normal set, with the addition of a rank. This allows for interesting slicing anddicing, as in this example. Knowing that each team consists of similarly aged individ-uals, getting three teams from a sorted list is a matter of pulling three equal groups
120 | Chapter 6: Data Access
www.it-ebooks.info
straight out of the set. The number of contestants (14) is not perfectly divisible by 3,so the final group has only 4 members.
Subscriptions
Redis supports the publish-subscribe (or pub-sub) messaging pattern, allowing senders(publishers) to issue messages into channels for use by receivers (subscribers) whomthey know nothing about (see Example 6-17). Subscribers register their areas of inter-ests (channels), and Redis pushes all relevant messages to them. Publishers do not needto be registered to specific channels, nor do subscribers need to be listening when mes-sages are sent. Redis takes care of the brokering, which allows for a great deal of flex-ibility, as neither the publisher nor the subscriber needs to be aware of the other.
Example 6-17. Subscribing and publishing with Redis
var redis = require("redis"), talkativeClient = redis.createClient(), pensiveClient = redis.createClient();
pensiveClient.on("subscribe", function (channel, count) { talkativeClient.publish( channel, "Welcome to " + channel ); talkativeClient.publish( channel, "You subscribed to " + count + " channels!" );});
pensiveClient.on("unsubscribe", function(channel, count) { if (count === 0) { talkativeClient.end(); pensiveClient.end(); }});
pensiveClient.on("message", function (channel, message) { console.log(channel + ': ' + message);});
pensiveClient.on("ready", function() { pensiveClient.subscribe("quiet channel", "peaceful channel", "noisy channel" ); setTimeout(function() { pensiveClient.unsubscribe("quiet channel", "peaceful channel", "noisy channel" ); }, 1000);});
The output is:
quiet channel: Welcome to quiet channelquiet channel: You subscribed to 1 channels!peaceful channel: Welcome to peaceful channelpeaceful channel: You subscribed to 2 channels!noisy channel: Welcome to noisy channelnoisy channel: You subscribed to 3 channels!
NoSQL and Document Stores | 121
www.it-ebooks.info
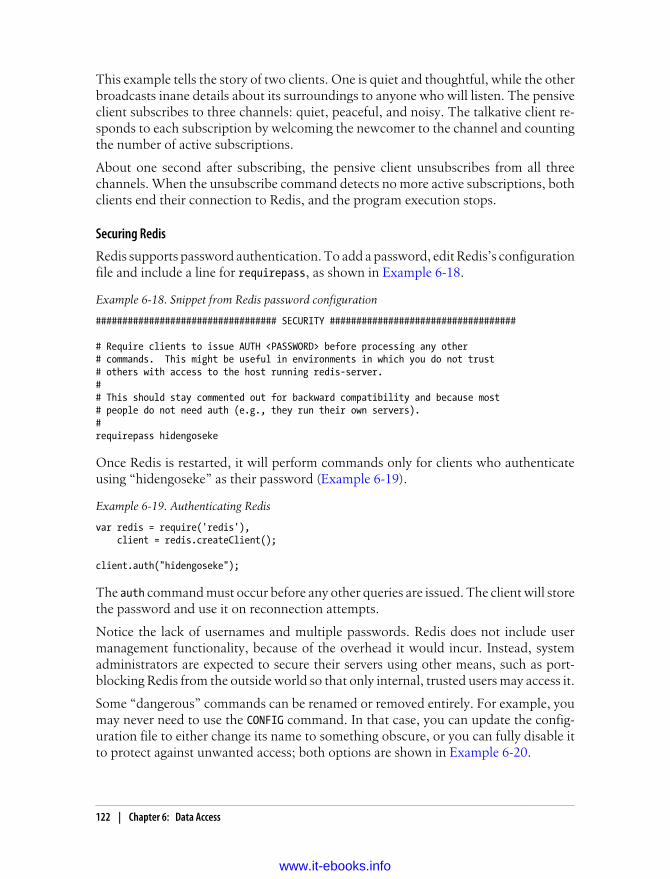
This example tells the story of two clients. One is quiet and thoughtful, while the otherbroadcasts inane details about its surroundings to anyone who will listen. The pensiveclient subscribes to three channels: quiet, peaceful, and noisy. The talkative client re-sponds to each subscription by welcoming the newcomer to the channel and countingthe number of active subscriptions.
About one second after subscribing, the pensive client unsubscribes from all threechannels. When the unsubscribe command detects no more active subscriptions, bothclients end their connection to Redis, and the program execution stops.
Securing Redis
Redis supports password authentication. To add a password, edit Redis’s configurationfile and include a line for requirepass, as shown in Example 6-18.
Example 6-18. Snippet from Redis password configuration
################################## SECURITY ###################################
# Require clients to issue AUTH <PASSWORD> before processing any other# commands. This might be useful in environments in which you do not trust# others with access to the host running redis-server.## This should stay commented out for backward compatibility and because most# people do not need auth (e.g., they run their own servers).#requirepass hidengoseke
Once Redis is restarted, it will perform commands only for clients who authenticateusing “hidengoseke” as their password (Example 6-19).
Example 6-19. Authenticating Redis
var redis = require('redis'), client = redis.createClient();
client.auth("hidengoseke");
The auth command must occur before any other queries are issued. The client will storethe password and use it on reconnection attempts.
Notice the lack of usernames and multiple passwords. Redis does not include usermanagement functionality, because of the overhead it would incur. Instead, systemadministrators are expected to secure their servers using other means, such as port-blocking Redis from the outside world so that only internal, trusted users may access it.
Some “dangerous” commands can be renamed or removed entirely. For example, youmay never need to use the CONFIG command. In that case, you can update the config-uration file to either change its name to something obscure, or you can fully disable itto protect against unwanted access; both options are shown in Example 6-20.
122 | Chapter 6: Data Access
www.it-ebooks.info

Example 6-20. Renaming Redis commands
# Change CONFIG command to something obscurerename-command CONFIG 923jfiosflkja98rufadskjgfwefu89awtsga09nbhsdalkjf3p49
# Clear CONFIG command, so no one can use itrename-command CONFIG ""
MongoDBBecause Mongo supplies a JavaScript environment with BSON object storage (a binaryadaption of JSON), reading and writing data from Node is extremely efficient. Mongostores incoming records in memory, so it is ideal in high-write situations. Each newversion adds improved clustering, replication, and sharding.
Because incoming records are stored in memory, inserting data into Mongo is non-blocking, making it ideal for logging operations and telemetry data. Mongo supportsJavaScript functions inside queries, making it very powerful in read situations, includ-ing MapReduce queries.
Using MongoDB’s document-based storage allows you to store child records insideparent records. For example, a blog article and all of its associated comments can bestored inside a single record, allowing for incredibly fast retrieval.
MongoDB native driver
The native MongoDB driver by Christian Kvaleim provides nonblocking access toMongoDB. Previous versions of the module included a C/C++ BSON parser/serializer,which has been deprecated due to improvements in the JavaScript parser/serializer.
The native MongoDB driver is a good choice when you need precise control over yourMongoDB connection.
To install the driver, run the following command:
npm install mongodb
“mongodb” is not to be confused with “mongo,” discussed later in thischapter.
Node’s MongoDB driver supports the data types listed in Table 6-1.
Table 6-1. Data types supported for MongoDB
Type Description Example
Array A list of items cardsInHand: [9,4,3]
Boolean A true/false condition hasBeenRead: false
Installation.
Data types.
NoSQL and Document Stores | 123
www.it-ebooks.info
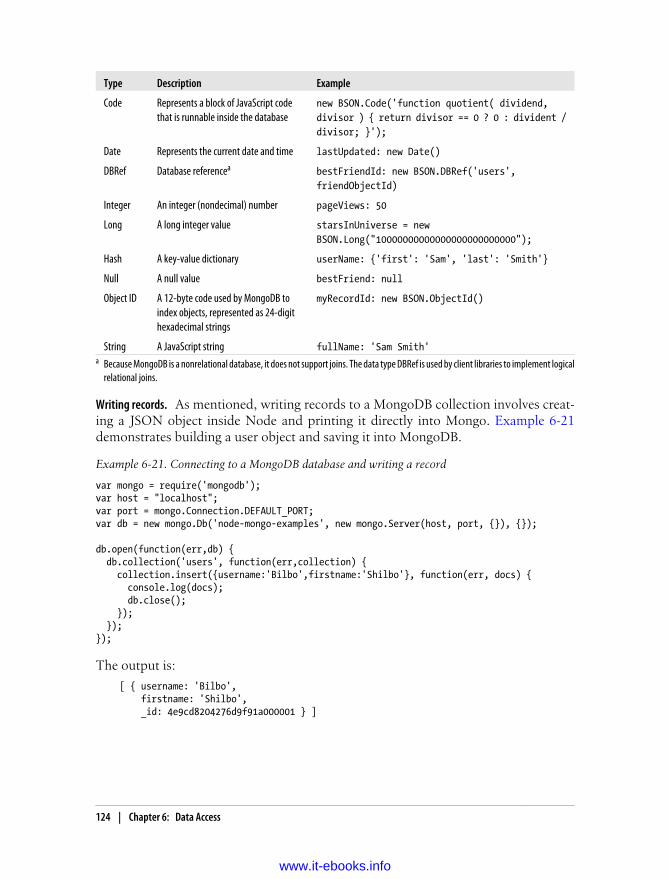
Type Description Example
Code Represents a block of JavaScript codethat is runnable inside the database
new BSON.Code('function quotient( dividend,divisor ) { return divisor == 0 ? 0 : divident /divisor; }');
Date Represents the current date and time lastUpdated: new Date()
DBRef Database referencea bestFriendId: new BSON.DBRef('users',friendObjectId)
Integer An integer (nondecimal) number pageViews: 50
Long A long integer value starsInUniverse = newBSON.Long("10000000000000000000000000");
Hash A key-value dictionary userName: {'first': 'Sam', 'last': 'Smith'}
Null A null value bestFriend: null
Object ID A 12-byte code used by MongoDB toindex objects, represented as 24-digithexadecimal strings
myRecordId: new BSON.ObjectId()
String A JavaScript string fullName: 'Sam Smith'a Because MongoDB is a nonrelational database, it does not support joins. The data type DBRef is used by client libraries to implement logical
relational joins.
As mentioned, writing records to a MongoDB collection involves creat-ing a JSON object inside Node and printing it directly into Mongo. Example 6-21demonstrates building a user object and saving it into MongoDB.
Example 6-21. Connecting to a MongoDB database and writing a record
var mongo = require('mongodb');var host = "localhost";var port = mongo.Connection.DEFAULT_PORT;var db = new mongo.Db('node-mongo-examples', new mongo.Server(host, port, {}), {});
db.open(function(err,db) { db.collection('users', function(err,collection) { collection.insert({username:'Bilbo',firstname:'Shilbo'}, function(err, docs) { console.log(docs); db.close(); }); });});
The output is:
[ { username: 'Bilbo', firstname: 'Shilbo', _id: 4e9cd8204276d9f91a000001 } ]
Writing records.
124 | Chapter 6: Data Access
www.it-ebooks.info
Mongoose
Node has a tremendous base of support for Mongo through its Mongoose library.Compared to the native drivers, Mongoose is an expressive environment that makesmodels and schemas more intuitive.
The fastest way to get up and running with Mongoose is by installing it withnpm:
npm install mongo
Alternatively, you can download the most recent version from source and compile ityourself using instructions from the Mongoose project’s home page at http://mongoosejs.com.
When you use MongoDB, you don’t need to define a data schema asyou would with a relational database. Whenever requirements change or you need tostore a new piece of information, you just save a new record containing the informationyou need, and you can query against it immediately. You can transform old data toinclude default or empty values for the new field, but MongoDB does not require thatstep.
Even though schemas aren’t important to MongoDB, they are useful because they helphumans understand the contents of the database and implicit rules for working withdomain data. Mongoose is useful because it works using human-readable schemas,providing a clean interface to communicate with the database.
What is a schema? Many programmers tend to think in terms of models that definedata structures, but don’t think much about the underlying databases those modelsrepresent. A table inside an SQL database needs to be created before you can write datato it, and the fields inside that table probably closely match the fields in your model.The schema—that is, the definition of the model inside the database—is created sep-arately from your program; therefore, the schema predates your data.
MongoDB—as well as the other NoSQL datastores—is often said to be schemalessbecause it doesn’t require explicitly defined structure for stored data. In reality,MongoDB does have a schema, but it is defined by the data as it gets stored. You mayadd a new property to your model months after you begin work on your application,but you don’t have to redefine the schema of previously entered information in orderto search against the new field.
Example 6-22 illustrates how to define a sample schema for an article database andwhat information should be stored in each type of model. Once again, Mongo does notenforce schemas, but programmers need to define consistent access patterns in theirown programs.
Installation.
Defining schemas.
NoSQL and Document Stores | 125
www.it-ebooks.info
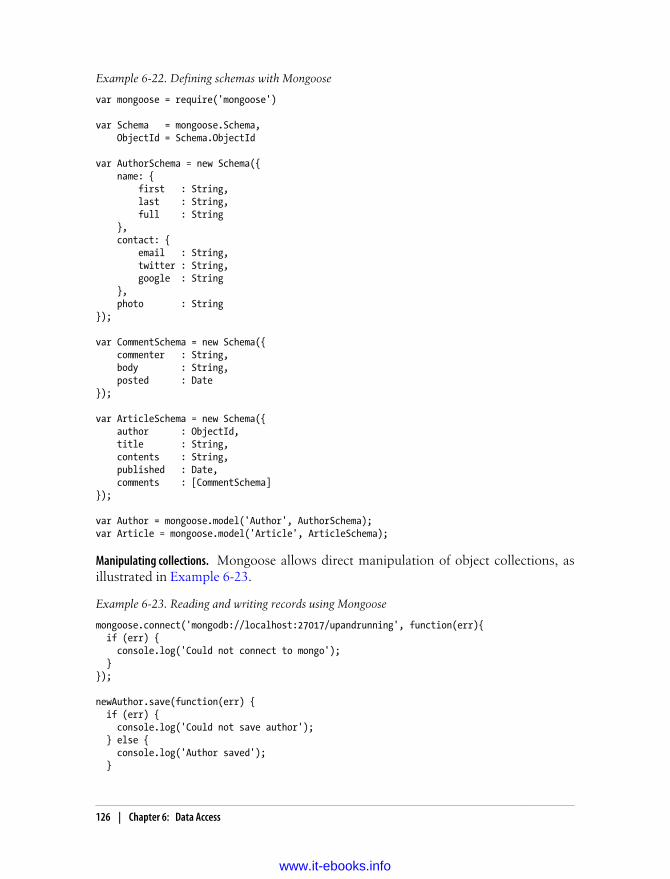
Example 6-22. Defining schemas with Mongoose
var mongoose = require('mongoose')
var Schema = mongoose.Schema, ObjectId = Schema.ObjectId
var AuthorSchema = new Schema({ name: { first : String, last : String, full : String }, contact: { email : String, twitter : String, google : String }, photo : String});
var CommentSchema = new Schema({ commenter : String, body : String, posted : Date});
var ArticleSchema = new Schema({ author : ObjectId, title : String, contents : String, published : Date, comments : [CommentSchema]});
var Author = mongoose.model('Author', AuthorSchema);var Article = mongoose.model('Article', ArticleSchema);
Mongoose allows direct manipulation of object collections, asillustrated in Example 6-23.
Example 6-23. Reading and writing records using Mongoose
mongoose.connect('mongodb://localhost:27017/upandrunning', function(err){ if (err) { console.log('Could not connect to mongo'); }});
newAuthor.save(function(err) { if (err) { console.log('Could not save author'); } else { console.log('Author saved'); }
Manipulating collections.
126 | Chapter 6: Data Access
www.it-ebooks.info
});
Author.find(function(err,doc){ console.log(doc);});
This example saves an author into the database and logs all authors to the screen.
When you work with Mongoose, you don’t need to maintain a connectionto MongoDB, because all of your schema definitions and queries are buffered until youconnect. This is a big deal, and an important way Mongoose serves Node’s methodol-ogy. By issuing all of the “live” commands at once against Mongo, you limit the amountof time and the number of callbacks to work with your data and greatly increase thenumber of operations your application is able to perform.
Relational DatabasesThere are still many good reasons to use a traditional database with SQL, and Nodeinterfaces with popular open source choices.
MySQLMySQL has become the workhorse of the open source world for good reason: it pro-vides many of the same capabilities as larger commercial databases for free. In its currentform, MySQL is performant and feature-rich.
Using NodeDB
The node-db module provides a native code interface to popular database systems,including MySQL, using a common API that the module exposes to Node. Althoughnode-db supports more than just MySQL, this section focuses on using MySQL in yourapplication code. Since Oracle’s purchase of Sun Microsystems, the future of MySQLand its community has come under much speculation. Some groups advocate movingto a drop-in replacement such as MariaDB or switching to a different relational databasemanagement system (RDBMS) entirely. Although MySQL isn’t going away anytimesoon, you need to decide for yourself whether it will be the right choice of software foryour work.
The MySQL client development libraries are a prerequisite for the Nodedatabase module. On Ubuntu, you can install the libraries using apt:
sudo apt-get install libmysqlclient-dev
Using npm, install a package named db-mysql:
npm install -g db-mysql
Performance.
Installation.
Relational Databases | 127
www.it-ebooks.info
To run the examples in this section, you will need to have a database called upandrunning with a user dev who has the password dev. The following script will create thedatabase table and basic schema:
DROP DATABASE IF EXISTS upandrunning;
CREATE DATABASE upandrunning;
GRANT ALL PRIVILEGES ON upandrunning.* TO 'dev'@'%' IDENTIFIED BY 'dev';
USE upandrunning;
CREATE TABLE users( id int auto_increment primary key, user_login varchar(25), user_nicename varchar(75) );
Example 6-24 selects all ID and user_name columns from a WordPress usertable.
Example 6-24. Selecting from MySQL
var mysql = require( 'db-mysql' );
var connectParams = { 'hostname': 'localhost', 'user': 'dev', 'password': 'dev', 'database': 'upandrunning'}
var db = new mysql.Database( connectParams );
db.connect(function(error) { if ( error ) return console.log("Failed to connect");
this.query() .select(['id', 'user_login']) .from('users') .execute(function(error, rows, columns) { if ( error ) { console.log("Error on query"); } else { console.log(rows); } });});
As you can probably guess, this executes the equivalent of the SQL command SELECTid, user_login FROM users. The output is:
{ id: 1, user_login: 'mwilson' }
Selection.
128 | Chapter 6: Data Access
www.it-ebooks.info
Inserting data is very similar to selection because commands are chained inthe same way. Example 6-25 shows how to generate the equivalent to INSERT INTOusers ( user_login ) VALUES ( 'newbie');.
Example 6-25. Inserting into MySQL
var mysql = require( 'db-mysql' );
var connectParams = { 'hostname': 'localhost', 'user': 'dev', 'password': 'dev', 'database': 'upandrunning'}
var db = new mysql.Database( connectParams );
db.connect(function(error) { if ( error ) return console.log("Failed to connect");
this.query() .insert('users', ['user_login'], ['newbie']) .execute(function(error, rows, columns) { if ( error ) { console.log("Error on query"); console.log(error); } else console.log(rows); });});
The output is:
{ id: 2, affected: 1, warning: 0 }
The .insert command takes three parameters:
• The table name
• The column names being inserted
• The values to insert in each column
The database drivers take care of escaping and converting the data types in your columnvalues, so you don’t have to worry about SQL injection attacks from code passingthrough this module.
Like selection and insertion, updates rely on chained functions to generateequivalent SQL queries. Example 6-26 demonstrates the use of a query parameter tofilter the update, rather than performing it across all records in the database table.
Insertion.
Updating.
Relational Databases | 129
www.it-ebooks.info
Example 6-26. Updating data in MySQL
var mysql = require( 'db-mysql' );
var connectParams = { 'hostname': 'localhost', 'user': 'dev', 'password': 'dev', 'database': 'unandrunning'}
var db = new mysql.Database( connectParams );
db.connect(function(error) { if ( error ) return console.log("Failed to connect");
this.query() .update('users') .set({'user_nicename': 'New User' }) .where('user_login = ?', [ 'newbie' ]) .execute(function(error, rows, columns) { if ( error ) { console.log("Error on query"); console.log(error); } else console.log(rows); });});
The output is:
{ id: 0, affected: 1, warning: 0 }
Updating a row consists of three parts:
• The .update command, which takes the table name (users, in this case) as aparameter
• The .set command, which uses a key-value object pair to identify the columnnames to update and their values
• The .where command, which tells MySQL how to filter the rows that will beupdated
As shown in Example 6-27, deletion is very similar to updates, except that inthe case of a delete, there are no columns to update. If no where conditions are specified,all records in the table will be deleted.
Example 6-27. Deleting data in MySQL
var mysql = require( 'db-mysql' );
var connectParams = { 'hostname': 'localhost', 'user': 'dev',
Deletion.
130 | Chapter 6: Data Access
www.it-ebooks.info
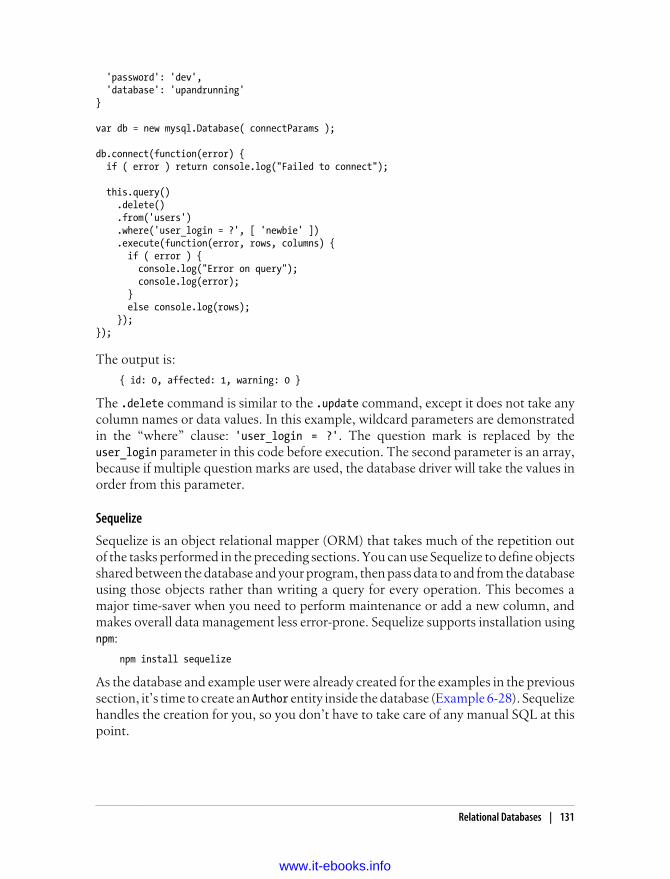
'password': 'dev', 'database': 'upandrunning'}
var db = new mysql.Database( connectParams );
db.connect(function(error) { if ( error ) return console.log("Failed to connect");
this.query() .delete() .from('users') .where('user_login = ?', [ 'newbie' ]) .execute(function(error, rows, columns) { if ( error ) { console.log("Error on query"); console.log(error); } else console.log(rows); });});
The output is:
{ id: 0, affected: 1, warning: 0 }
The .delete command is similar to the .update command, except it does not take anycolumn names or data values. In this example, wildcard parameters are demonstratedin the “where” clause: 'user_login = ?'. The question mark is replaced by theuser_login parameter in this code before execution. The second parameter is an array,because if multiple question marks are used, the database driver will take the values inorder from this parameter.
Sequelize
Sequelize is an object relational mapper (ORM) that takes much of the repetition outof the tasks performed in the preceding sections. You can use Sequelize to define objectsshared between the database and your program, then pass data to and from the databaseusing those objects rather than writing a query for every operation. This becomes amajor time-saver when you need to perform maintenance or add a new column, andmakes overall data management less error-prone. Sequelize supports installation usingnpm:
npm install sequelize
As the database and example user were already created for the examples in the previoussection, it’s time to create an Author entity inside the database (Example 6-28). Sequelizehandles the creation for you, so you don’t have to take care of any manual SQL at thispoint.
Relational Databases | 131
www.it-ebooks.info
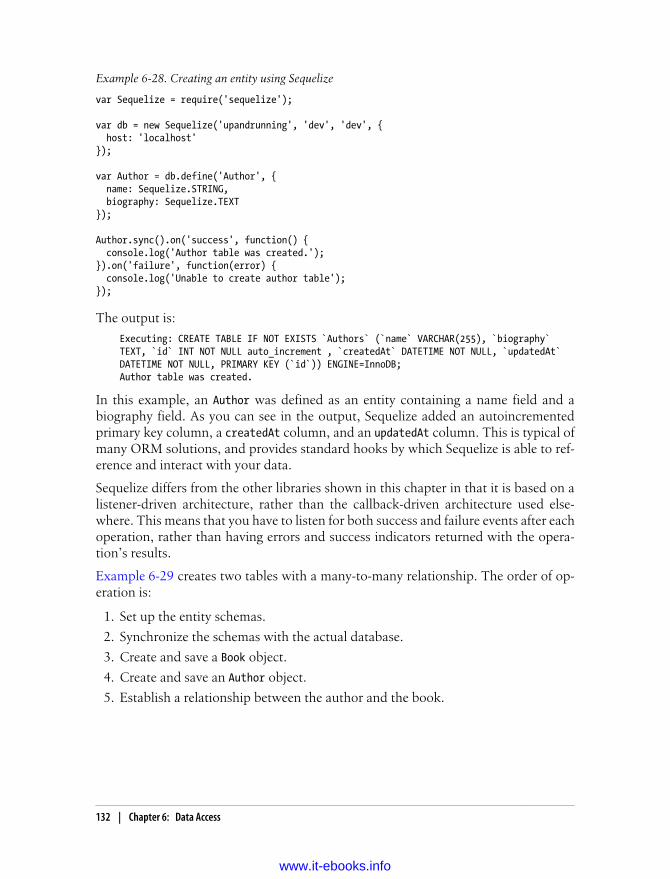
Example 6-28. Creating an entity using Sequelize
var Sequelize = require('sequelize');
var db = new Sequelize('upandrunning', 'dev', 'dev', { host: 'localhost'});
var Author = db.define('Author', { name: Sequelize.STRING, biography: Sequelize.TEXT});
Author.sync().on('success', function() { console.log('Author table was created.');}).on('failure', function(error) { console.log('Unable to create author table');});
The output is:
Executing: CREATE TABLE IF NOT EXISTS `Authors` (`name` VARCHAR(255), `biography`TEXT, `id` INT NOT NULL auto_increment , `createdAt` DATETIME NOT NULL, `updatedAt`DATETIME NOT NULL, PRIMARY KEY (`id`)) ENGINE=InnoDB;Author table was created.
In this example, an Author was defined as an entity containing a name field and abiography field. As you can see in the output, Sequelize added an autoincrementedprimary key column, a createdAt column, and an updatedAt column. This is typical ofmany ORM solutions, and provides standard hooks by which Sequelize is able to ref-erence and interact with your data.
Sequelize differs from the other libraries shown in this chapter in that it is based on alistener-driven architecture, rather than the callback-driven architecture used else-where. This means that you have to listen for both success and failure events after eachoperation, rather than having errors and success indicators returned with the opera-tion’s results.
Example 6-29 creates two tables with a many-to-many relationship. The order of op-eration is:
1. Set up the entity schemas.
2. Synchronize the schemas with the actual database.
3. Create and save a Book object.
4. Create and save an Author object.
5. Establish a relationship between the author and the book.
132 | Chapter 6: Data Access
www.it-ebooks.info
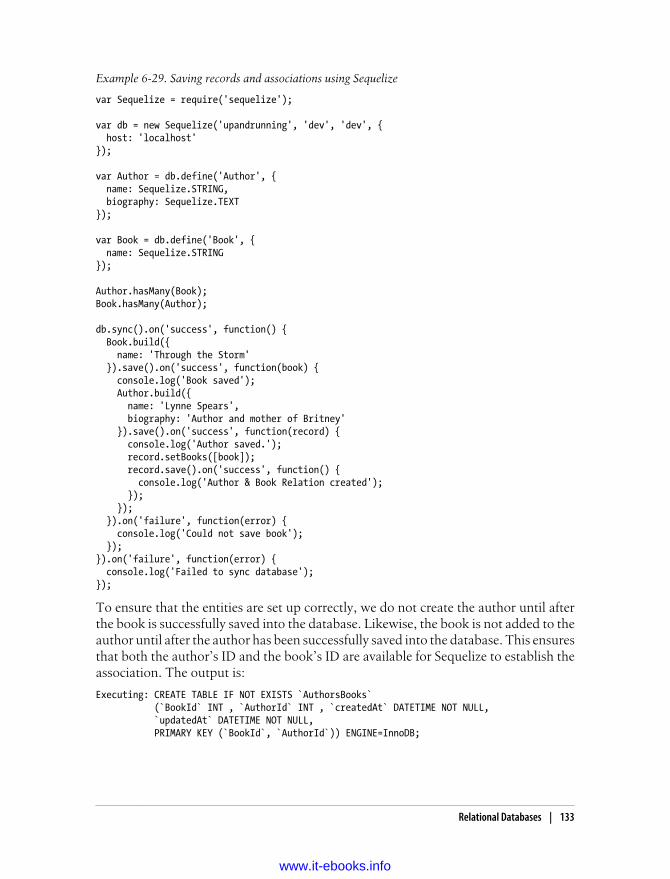
Example 6-29. Saving records and associations using Sequelize
var Sequelize = require('sequelize');
var db = new Sequelize('upandrunning', 'dev', 'dev', { host: 'localhost'});
var Author = db.define('Author', { name: Sequelize.STRING, biography: Sequelize.TEXT});
var Book = db.define('Book', { name: Sequelize.STRING});
Author.hasMany(Book);Book.hasMany(Author);
db.sync().on('success', function() { Book.build({ name: 'Through the Storm' }).save().on('success', function(book) { console.log('Book saved'); Author.build({ name: 'Lynne Spears', biography: 'Author and mother of Britney' }).save().on('success', function(record) { console.log('Author saved.'); record.setBooks([book]); record.save().on('success', function() { console.log('Author & Book Relation created'); }); }); }).on('failure', function(error) { console.log('Could not save book'); });}).on('failure', function(error) { console.log('Failed to sync database');});
To ensure that the entities are set up correctly, we do not create the author until afterthe book is successfully saved into the database. Likewise, the book is not added to theauthor until after the author has been successfully saved into the database. This ensuresthat both the author’s ID and the book’s ID are available for Sequelize to establish theassociation. The output is:
Executing: CREATE TABLE IF NOT EXISTS `AuthorsBooks` (`BookId` INT , `AuthorId` INT , `createdAt` DATETIME NOT NULL, `updatedAt` DATETIME NOT NULL, PRIMARY KEY (`BookId`, `AuthorId`)) ENGINE=InnoDB;
Relational Databases | 133
www.it-ebooks.info
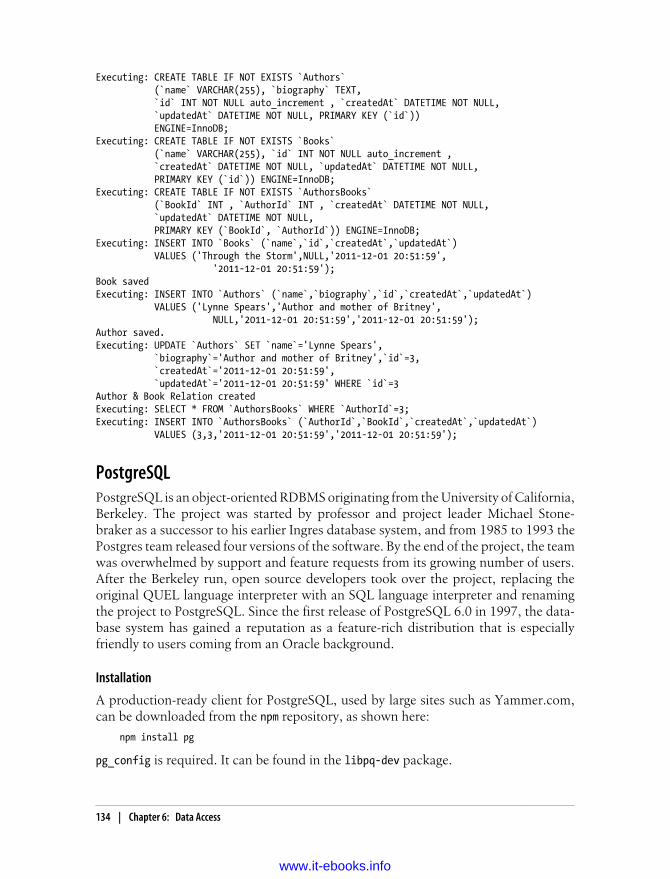
Executing: CREATE TABLE IF NOT EXISTS `Authors` (`name` VARCHAR(255), `biography` TEXT, `id` INT NOT NULL auto_increment , `createdAt` DATETIME NOT NULL, `updatedAt` DATETIME NOT NULL, PRIMARY KEY (`id`)) ENGINE=InnoDB;Executing: CREATE TABLE IF NOT EXISTS `Books` (`name` VARCHAR(255), `id` INT NOT NULL auto_increment , `createdAt` DATETIME NOT NULL, `updatedAt` DATETIME NOT NULL, PRIMARY KEY (`id`)) ENGINE=InnoDB;Executing: CREATE TABLE IF NOT EXISTS `AuthorsBooks` (`BookId` INT , `AuthorId` INT , `createdAt` DATETIME NOT NULL, `updatedAt` DATETIME NOT NULL, PRIMARY KEY (`BookId`, `AuthorId`)) ENGINE=InnoDB;Executing: INSERT INTO `Books` (`name`,`id`,`createdAt`,`updatedAt`) VALUES ('Through the Storm',NULL,'2011-12-01 20:51:59', '2011-12-01 20:51:59');Book savedExecuting: INSERT INTO `Authors` (`name`,`biography`,`id`,`createdAt`,`updatedAt`) VALUES ('Lynne Spears','Author and mother of Britney', NULL,'2011-12-01 20:51:59','2011-12-01 20:51:59');Author saved.Executing: UPDATE `Authors` SET `name`='Lynne Spears', `biography`='Author and mother of Britney',`id`=3, `createdAt`='2011-12-01 20:51:59', `updatedAt`='2011-12-01 20:51:59' WHERE `id`=3Author & Book Relation createdExecuting: SELECT * FROM `AuthorsBooks` WHERE `AuthorId`=3;Executing: INSERT INTO `AuthorsBooks` (`AuthorId`,`BookId`,`createdAt`,`updatedAt`) VALUES (3,3,'2011-12-01 20:51:59','2011-12-01 20:51:59');
PostgreSQLPostgreSQL is an object-oriented RDBMS originating from the University of California,Berkeley. The project was started by professor and project leader Michael Stone-braker as a successor to his earlier Ingres database system, and from 1985 to 1993 thePostgres team released four versions of the software. By the end of the project, the teamwas overwhelmed by support and feature requests from its growing number of users.After the Berkeley run, open source developers took over the project, replacing theoriginal QUEL language interpreter with an SQL language interpreter and renamingthe project to PostgreSQL. Since the first release of PostgreSQL 6.0 in 1997, the data-base system has gained a reputation as a feature-rich distribution that is especiallyfriendly to users coming from an Oracle background.
Installation
A production-ready client for PostgreSQL, used by large sites such as Yammer.com,can be downloaded from the npm repository, as shown here:
npm install pg
pg_config is required. It can be found in the libpq-dev package.
134 | Chapter 6: Data Access
www.it-ebooks.info
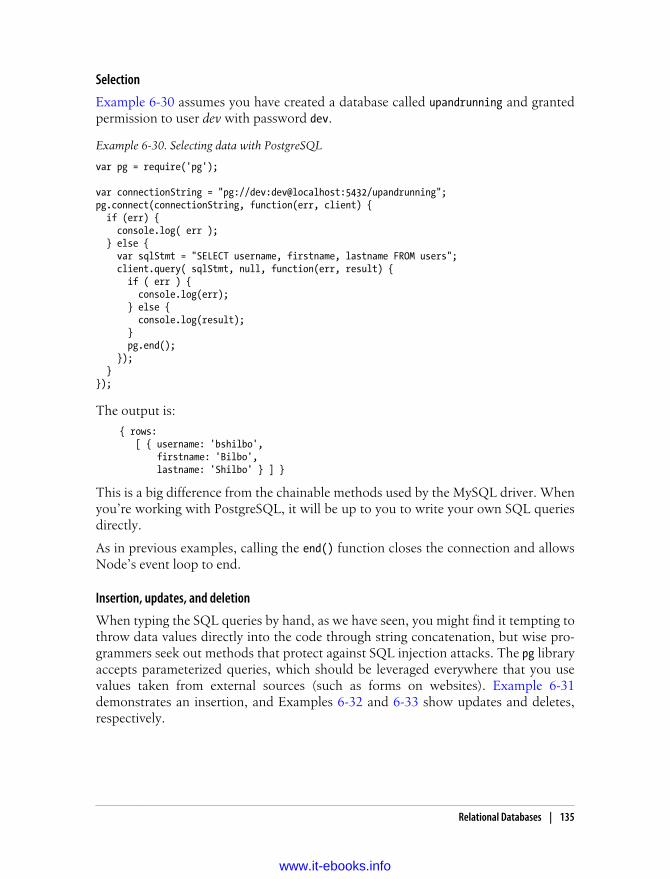
Selection
Example 6-30 assumes you have created a database called upandrunning and grantedpermission to user dev with password dev.
Example 6-30. Selecting data with PostgreSQL
var pg = require('pg');
var connectionString = "pg://dev:dev@localhost:5432/upandrunning";pg.connect(connectionString, function(err, client) { if (err) { console.log( err ); } else { var sqlStmt = "SELECT username, firstname, lastname FROM users"; client.query( sqlStmt, null, function(err, result) { if ( err ) { console.log(err); } else { console.log(result); } pg.end(); }); }});
The output is:
{ rows: [ { username: 'bshilbo', firstname: 'Bilbo', lastname: 'Shilbo' } ] }
This is a big difference from the chainable methods used by the MySQL driver. Whenyou’re working with PostgreSQL, it will be up to you to write your own SQL queriesdirectly.
As in previous examples, calling the end() function closes the connection and allowsNode’s event loop to end.
Insertion, updates, and deletion
When typing the SQL queries by hand, as we have seen, you might find it tempting tothrow data values directly into the code through string concatenation, but wise pro-grammers seek out methods that protect against SQL injection attacks. The pg libraryaccepts parameterized queries, which should be leveraged everywhere that you usevalues taken from external sources (such as forms on websites). Example 6-31demonstrates an insertion, and Examples 6-32 and 6-33 show updates and deletes,respectively.
Relational Databases | 135
www.it-ebooks.info
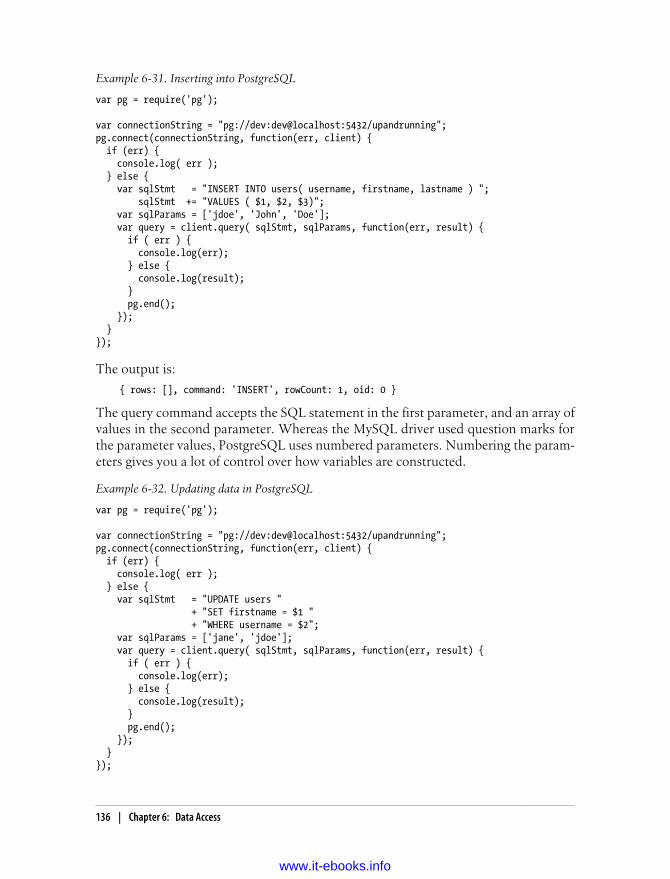
Example 6-31. Inserting into PostgreSQL
var pg = require('pg');
var connectionString = "pg://dev:dev@localhost:5432/upandrunning";pg.connect(connectionString, function(err, client) { if (err) { console.log( err ); } else { var sqlStmt = "INSERT INTO users( username, firstname, lastname ) "; sqlStmt += "VALUES ( $1, $2, $3)"; var sqlParams = ['jdoe', 'John', 'Doe']; var query = client.query( sqlStmt, sqlParams, function(err, result) { if ( err ) { console.log(err); } else { console.log(result); } pg.end(); }); }});
The output is:
{ rows: [], command: 'INSERT', rowCount: 1, oid: 0 }
The query command accepts the SQL statement in the first parameter, and an array ofvalues in the second parameter. Whereas the MySQL driver used question marks forthe parameter values, PostgreSQL uses numbered parameters. Numbering the param-eters gives you a lot of control over how variables are constructed.
Example 6-32. Updating data in PostgreSQL
var pg = require('pg');
var connectionString = "pg://dev:dev@localhost:5432/upandrunning";pg.connect(connectionString, function(err, client) { if (err) { console.log( err ); } else { var sqlStmt = "UPDATE users " + "SET firstname = $1 " + "WHERE username = $2"; var sqlParams = ['jane', 'jdoe']; var query = client.query( sqlStmt, sqlParams, function(err, result) { if ( err ) { console.log(err); } else { console.log(result); } pg.end(); }); }});
136 | Chapter 6: Data Access
www.it-ebooks.info
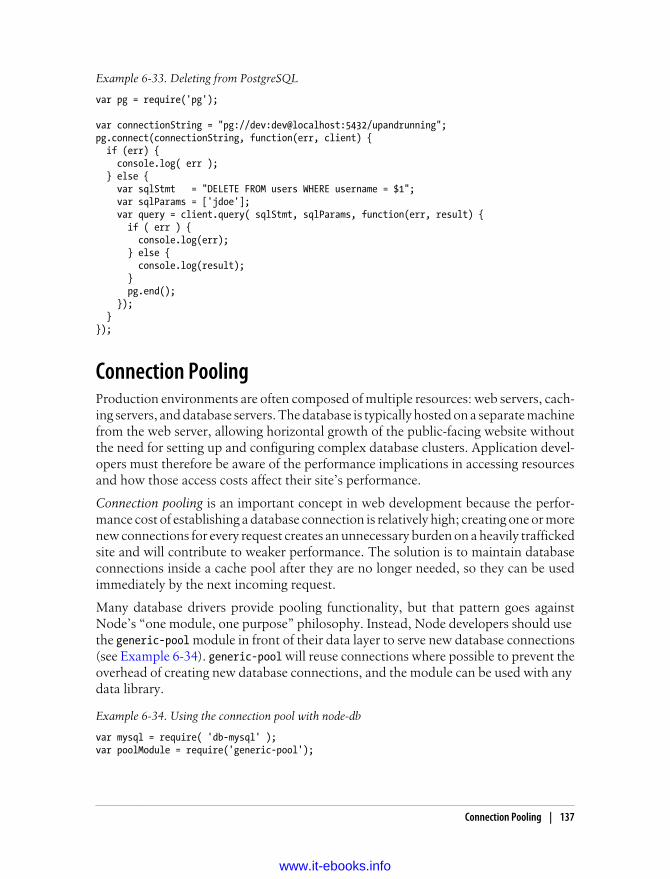
Example 6-33. Deleting from PostgreSQL
var pg = require('pg');
var connectionString = "pg://dev:dev@localhost:5432/upandrunning";pg.connect(connectionString, function(err, client) { if (err) { console.log( err ); } else { var sqlStmt = "DELETE FROM users WHERE username = $1"; var sqlParams = ['jdoe']; var query = client.query( sqlStmt, sqlParams, function(err, result) { if ( err ) { console.log(err); } else { console.log(result); } pg.end(); }); }});
Connection PoolingProduction environments are often composed of multiple resources: web servers, cach-ing servers, and database servers. The database is typically hosted on a separate machinefrom the web server, allowing horizontal growth of the public-facing website withoutthe need for setting up and configuring complex database clusters. Application devel-opers must therefore be aware of the performance implications in accessing resourcesand how those access costs affect their site’s performance.
Connection pooling is an important concept in web development because the perfor-mance cost of establishing a database connection is relatively high; creating one or morenew connections for every request creates an unnecessary burden on a heavily traffickedsite and will contribute to weaker performance. The solution is to maintain databaseconnections inside a cache pool after they are no longer needed, so they can be usedimmediately by the next incoming request.
Many database drivers provide pooling functionality, but that pattern goes againstNode’s “one module, one purpose” philosophy. Instead, Node developers should use the generic-pool module in front of their data layer to serve new database connections(see Example 6-34). generic-pool will reuse connections where possible to prevent theoverhead of creating new database connections, and the module can be used with any data library.
Example 6-34. Using the connection pool with node-db
var mysql = require( 'db-mysql' );var poolModule = require('generic-pool');
Connection Pooling | 137
www.it-ebooks.info
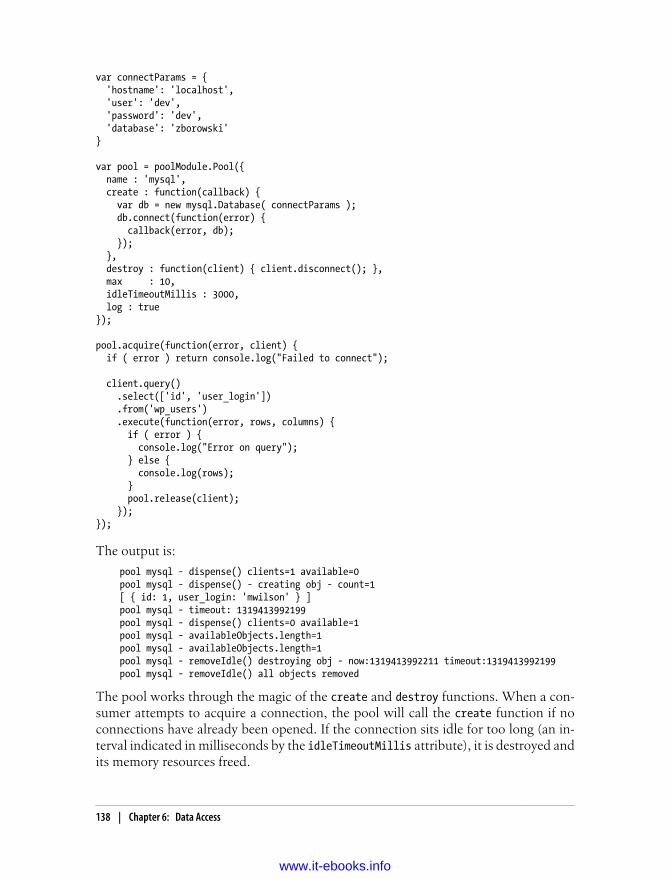
var connectParams = { 'hostname': 'localhost', 'user': 'dev', 'password': 'dev', 'database': 'zborowski'}
var pool = poolModule.Pool({ name : 'mysql', create : function(callback) { var db = new mysql.Database( connectParams ); db.connect(function(error) { callback(error, db); }); }, destroy : function(client) { client.disconnect(); }, max : 10, idleTimeoutMillis : 3000, log : true});
pool.acquire(function(error, client) { if ( error ) return console.log("Failed to connect");
client.query() .select(['id', 'user_login']) .from('wp_users') .execute(function(error, rows, columns) { if ( error ) { console.log("Error on query"); } else { console.log(rows); } pool.release(client); });});
The output is:
pool mysql - dispense() clients=1 available=0pool mysql - dispense() - creating obj - count=1[ { id: 1, user_login: 'mwilson' } ]pool mysql - timeout: 1319413992199pool mysql - dispense() clients=0 available=1pool mysql - availableObjects.length=1pool mysql - availableObjects.length=1pool mysql - removeIdle() destroying obj - now:1319413992211 timeout:1319413992199pool mysql - removeIdle() all objects removed
The pool works through the magic of the create and destroy functions. When a con-sumer attempts to acquire a connection, the pool will call the create function if noconnections have already been opened. If the connection sits idle for too long (an in-terval indicated in milliseconds by the idleTimeoutMillis attribute), it is destroyed andits memory resources freed.
138 | Chapter 6: Data Access
www.it-ebooks.info
The beauty of Node’s pool is that any persistent resource can be represented. Databasesare a natural fit, but you can just as easily write commands to maintain connections toan outside session cache, or even to hardware interfaces.
MQ ProtocolsWe used a mailman analogy earlier to describe Node’s event loop. If the mailman wereto arrive at a closed gate, he would be unable to deliver his message; but imagine anelderly and kind groundskeeper was in the process of opening the gate so the mailmancould pass through. Being elderly and somewhat frail from his years of service, it takesthe groundskeeper some time to clear the way—time during which the mailman isunable to deliver any messages.
This situation is a blocking process, but it is not a permanent state. Evenually thegroundskeeper will manage to get the gate open, and the mailman will go about hisbusiness. Every house the mailman reaches with a similar gate-opening process willslow down the overall route. In the context of a Node application, this type of blockwill seriously degrade performance.
In the computer realm, similar situations may be caused by sending a user email duringa registration process, by lots of math that needs to be done as a result of user input,or by any situation in which the time it takes to complete a task exceeds a user’s nor-mally expected wait times. Node’s event-driven design handles the majority of thesesituations for you by using asynchronous functions and callbacks, but when an eventis particularly “heavy” to process, it doesn’t make sense to process it inside Node. Nodeshould only take care of handling results and fast operations.
By way of example, consider a generic user registration process. When a user registersherself, the application saves a new record in the database, sends an email to that user,and perhaps records some statistics about the registration process, such as the numberof steps completed or amount of time taken. It probably doesn’t make sense to performall of those actions right away when the user hits the Submit button on your web page.For one thing, the email process could take several seconds (or if you’re unlucky, mi-nutes) to complete, the database call may not need to finish before the user is welcomed,and the statistics are probably separate from your main application flow. In this case,you might choose to generate a message that notifies other parts of your applicationinstead—perhaps running on a different machine entirely—that a user has registered.This is known as a publish-subscribe pattern.
Another example: suppose you have a cluster of machines running Node.js. When anew machine is added to the cluster, it issues a message requesting configuration in-formation. A configuration server responds to the message with a list of configurationinformation the new machine needs to integrate into the cluster. This is known as arequest-reply pattern.
MQ Protocols | 139
www.it-ebooks.info

Message queues allow programmers to publish events and move on, enabling improvedperformance through parallel processing and higher levels of scalability through inter-process communication channels.
RabbitMQRabbitMQ is a message broker that supports the advanced message queueing protocol(AMQP). It is useful in situations where data needs to be communicated between dif-ferent servers, or between different processes on the same server. Written in Erlang,RabbitMQ is capable of clustering for high availability, and is fairly straightforward toinstall and begin using.
Installing RabbitMQ
If you’re using Linux, RabbitMQ is available in package form for most distributions.Anyone can download the software from http://www.rabbitmq.com and compile it fromsource.
Once RabbitMQ has been installed and is running, use npm to retrieve Node’s AMQPdrivers:
npm install amqp
Publish and subscribe
RabbitMQ communicates using the standardized protocol AMQP. AMQP comes fromthe financial services industry, where reliable messaging is a matter of life or death. Itprovides a vendor-neutral and abstract specification for generic (not just financial)middleware messaging and is intended to solve the problem of communicating betweendifferent types of systems. AMQP is conceptually similar to email: email messages havespecifications for headers and format, but their contents can be anything from text tophotos and video. Just as two companies don’t need to run the same email server soft-ware to communicate, AMQP allows messaging between different platforms. For ex-ample, a publisher written in PHP can send a message to a consumer written inJavaScript.
Example 6-35 shows the most basic elements of RabbitMQ programming.
Example 6-35. AMQP/RabbitMQ usage
var connection = require('amqp').createConnection();
connection.on('ready', function() { console.log('Connected to ' + connection.serverProperties.product); var e = connection.exchange('up-and-running');
var q = connection.queue('up-and-running-queue');
140 | Chapter 6: Data Access
www.it-ebooks.info
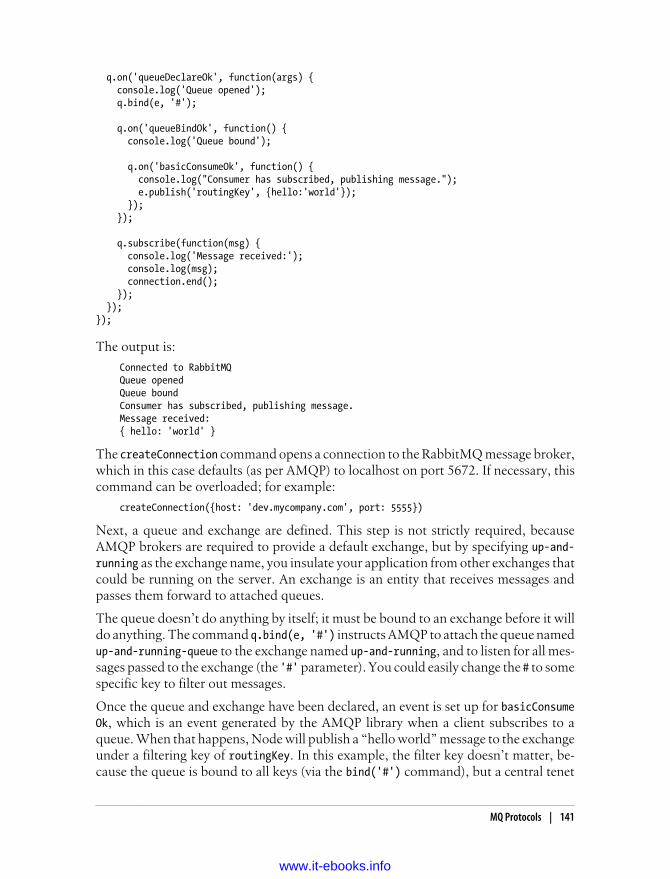
q.on('queueDeclareOk', function(args) { console.log('Queue opened'); q.bind(e, '#');
q.on('queueBindOk', function() { console.log('Queue bound');
q.on('basicConsumeOk', function() { console.log("Consumer has subscribed, publishing message."); e.publish('routingKey', {hello:'world'}); }); });
q.subscribe(function(msg) { console.log('Message received:'); console.log(msg); connection.end(); }); });});
The output is:
Connected to RabbitMQQueue openedQueue boundConsumer has subscribed, publishing message.Message received:{ hello: 'world' }
The createConnection command opens a connection to the RabbitMQ message broker,which in this case defaults (as per AMQP) to localhost on port 5672. If necessary, thiscommand can be overloaded; for example:
createConnection({host: 'dev.mycompany.com', port: 5555})
Next, a queue and exchange are defined. This step is not strictly required, becauseAMQP brokers are required to provide a default exchange, but by specifying up-and-running as the exchange name, you insulate your application from other exchanges thatcould be running on the server. An exchange is an entity that receives messages andpasses them forward to attached queues.
The queue doesn’t do anything by itself; it must be bound to an exchange before it willdo anything. The command q.bind(e, '#') instructs AMQP to attach the queue namedup-and-running-queue to the exchange named up-and-running, and to listen for all mes-sages passed to the exchange (the '#' parameter). You could easily change the # to somespecific key to filter out messages.
Once the queue and exchange have been declared, an event is set up for basicConsumeOk, which is an event generated by the AMQP library when a client subscribes to aqueue. When that happens, Node will publish a “hello world” message to the exchangeunder a filtering key of routingKey. In this example, the filter key doesn’t matter, be-cause the queue is bound to all keys (via the bind('#') command), but a central tenet
MQ Protocols | 141
www.it-ebooks.info
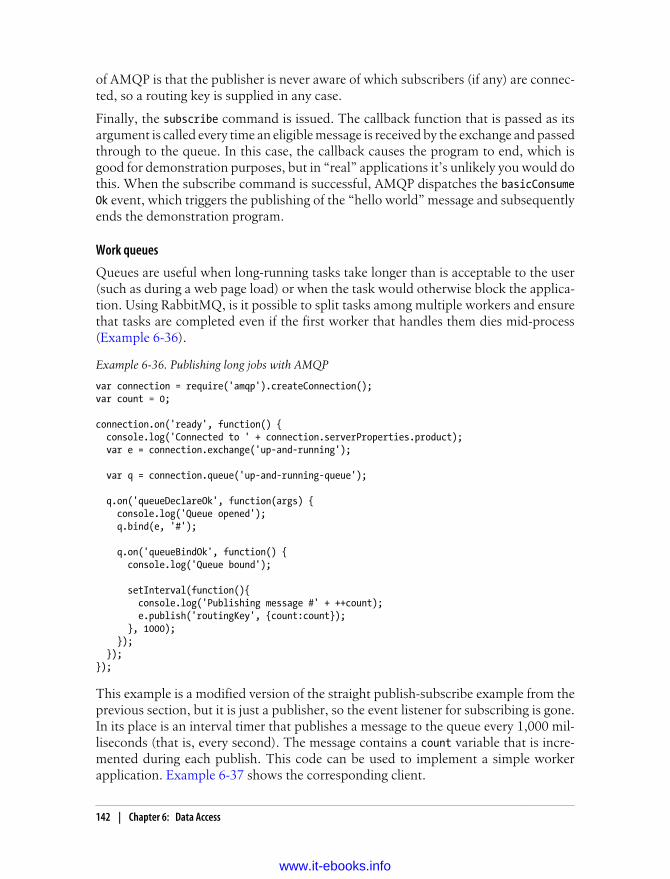
of AMQP is that the publisher is never aware of which subscribers (if any) are connec-ted, so a routing key is supplied in any case.
Finally, the subscribe command is issued. The callback function that is passed as itsargument is called every time an eligible message is received by the exchange and passedthrough to the queue. In this case, the callback causes the program to end, which isgood for demonstration purposes, but in “real” applications it’s unlikely you would dothis. When the subscribe command is successful, AMQP dispatches the basicConsumeOk event, which triggers the publishing of the “hello world” message and subsequentlyends the demonstration program.
Work queues
Queues are useful when long-running tasks take longer than is acceptable to the user(such as during a web page load) or when the task would otherwise block the applica-tion. Using RabbitMQ, is it possible to split tasks among multiple workers and ensurethat tasks are completed even if the first worker that handles them dies mid-process(Example 6-36).
Example 6-36. Publishing long jobs with AMQP
var connection = require('amqp').createConnection();var count = 0;
connection.on('ready', function() { console.log('Connected to ' + connection.serverProperties.product); var e = connection.exchange('up-and-running');
var q = connection.queue('up-and-running-queue');
q.on('queueDeclareOk', function(args) { console.log('Queue opened'); q.bind(e, '#');
q.on('queueBindOk', function() { console.log('Queue bound');
setInterval(function(){ console.log('Publishing message #' + ++count); e.publish('routingKey', {count:count}); }, 1000); }); });});
This example is a modified version of the straight publish-subscribe example from theprevious section, but it is just a publisher, so the event listener for subscribing is gone.In its place is an interval timer that publishes a message to the queue every 1,000 mil-liseconds (that is, every second). The message contains a count variable that is incre-mented during each publish. This code can be used to implement a simple workerapplication. Example 6-37 shows the corresponding client.
142 | Chapter 6: Data Access
www.it-ebooks.info
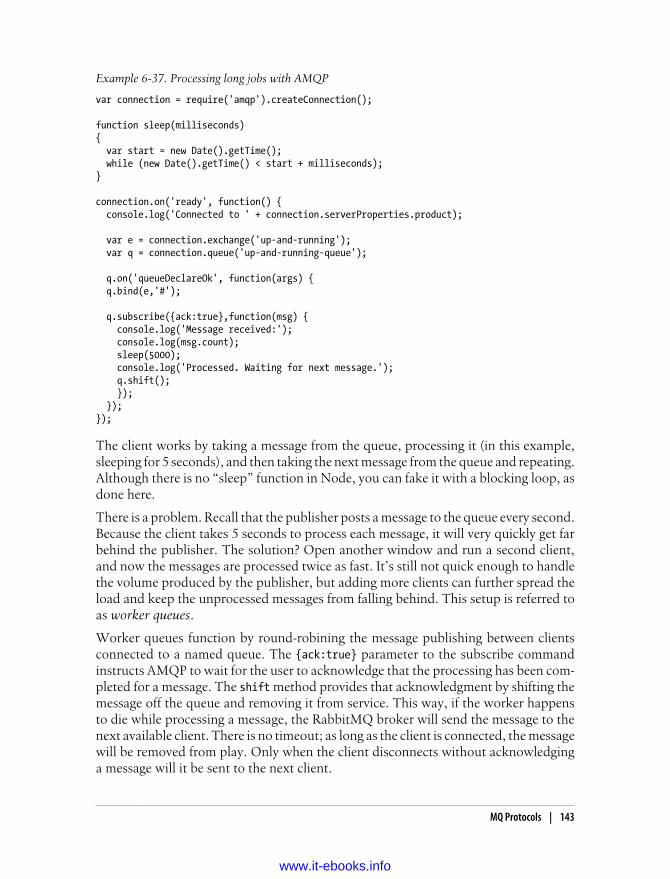
Example 6-37. Processing long jobs with AMQP
var connection = require('amqp').createConnection();
function sleep(milliseconds){ var start = new Date().getTime(); while (new Date().getTime() < start + milliseconds);}
connection.on('ready', function() { console.log('Connected to ' + connection.serverProperties.product);
var e = connection.exchange('up-and-running'); var q = connection.queue('up-and-running-queue');
q.on('queueDeclareOk', function(args) { q.bind(e,'#');
q.subscribe({ack:true},function(msg) { console.log('Message received:'); console.log(msg.count); sleep(5000); console.log('Processed. Waiting for next message.'); q.shift(); }); });});
The client works by taking a message from the queue, processing it (in this example,sleeping for 5 seconds), and then taking the next message from the queue and repeating.Although there is no “sleep” function in Node, you can fake it with a blocking loop, asdone here.
There is a problem. Recall that the publisher posts a message to the queue every second.Because the client takes 5 seconds to process each message, it will very quickly get farbehind the publisher. The solution? Open another window and run a second client,and now the messages are processed twice as fast. It’s still not quick enough to handlethe volume produced by the publisher, but adding more clients can further spread theload and keep the unprocessed messages from falling behind. This setup is referred toas worker queues.
Worker queues function by round-robining the message publishing between clientsconnected to a named queue. The {ack:true} parameter to the subscribe commandinstructs AMQP to wait for the user to acknowledge that the processing has been com-pleted for a message. The shift method provides that acknowledgment by shifting themessage off the queue and removing it from service. This way, if the worker happensto die while processing a message, the RabbitMQ broker will send the message to thenext available client. There is no timeout; as long as the client is connected, the messagewill be removed from play. Only when the client disconnects without acknowledginga message will it be sent to the next client.
MQ Protocols | 143
www.it-ebooks.info

A common “gotcha” occurs when developers forget to use theq.shift() command. If you forget it, your program will continue tofunction as normal, but as soon as your client disconnects, the serverwill place all of the messages the client processed back onto the queue.
Another side effect is that the memory usage by RabbitMQ will gradu-ally rise. This is because, although the messages are removed from activeduty on the queue, they are kept in memory until they are acknowledgedand deleted by the client.
144 | Chapter 6: Data Access
www.it-ebooks.info
CHAPTER 7
Important External Modules
Although the Node core is extremely useful, many of its abstractions are very low-level.So a lot of development in Node is done using higher abstraction libraries built by thecommunity, similar to how Ruby-based websites use Rails or Sinatra rather thancustom-written Ruby code. Although these modules aren’t technically Node itself, theyare extremely important for getting things done, and many of them are mature projectsin themselves. This chapter explores some of the most popular and useful communitymodules for Node.
ExpressExpress, an MVC framework for Node, is probably the most widely used Node module.It was inspired by the Sinatra framework for Ruby and enables a lot of features thatmake it very easy to throw together a website with Node.
A Basic Express AppExpress works by defining page handlers for routes. The routes can be as simple as apath, or much more complex. The handlers could be as simple as emitting “Hello,world” or as complex as a whole page-rendering system that interacts with a database.You’ll need to install Express using npm install express before you can start using it.Example 7-1 shows how to create a simple application with Express.
Example 7-1. Creating a simple Express app
var express = require('express');
var app = express.createServer();
app.get('/', function(req, res) { res.send('hello world');});
app.listen(9001);
145
www.it-ebooks.info
This code is obviously pretty similar to http in terms of creating a server. However, afew things are a lot more straightforward. First, app.get() is creating a response to aspecific route—in this case, '/'. Unlike a regular http server, which provides a listenerfor generic requests, Express offers a listener for specific HTTP verbs. So get() willanswer only GET requests, put() will answer only PUT requests, etc. Combine thatwith the route we specified, and you immediately have some powerful functionality. Atypical Express program specifies a series of expressions, and Express matches the routein each incoming request against each expression in turn, executing the code associatedwith the first expression that matches.
It is possible to have Express skip over expressions under certain con-ditions, using the next() function discussed later in this section.
The next thing to notice in the example is how we responded. We still use theresponse object as in http, but Express has provided a send() method. We didn’t needto provide any HTTP headers or call end(). The send() method figures out things suchas the HTTP headers that should be sent and includes end() automatically.
The point here is that Express takes the basic structure laid out by http and enriches itsignificantly with a lot of functionality to create real applications quickly. You shouldn’thave to create routing code every time you want to deal with HTTP requests, so Expresstakes care of that stuff.
Setting Up Routes in ExpressRoutes are one of the core concepts in Express, and one of the things that make it reallyuseful. As mentioned in the previous section, routes are applied to an HTTP verb viaa method with the same name, such as get() or post(). The routes consist of a simplestring or a regex and can contain variable declarations, wildcards, and optional keyflags. Let’s take a look at some examples, starting with Example 7-2.
Example 7-2. Route with variable and optional flag
var express = require('express');var app = express.createServer();
app.get('/:id?', function(req, res) { if(req.params.id) { res.send(req.params.id); } else { res.send('oh hai'); }});
app.listen(9001);
146 | Chapter 7: Important External Modules
www.it-ebooks.info
This example shows a route that includes an optional variable called id. The variablename does not have any special meaning to Express, but it will be available to use insidethe callback function. In Express routes, you use a preceding colon (:) to mark a variableyou want preserved. The string passed in the URL will be captured into the variable.All routes in Express are actually turned into regular expressions (more on this later)and tokenized1 for use by application code.2 The regex used will match up to the nextknown token in your route. Notice that this variable is also optional. If you run thisprogram and go to http://localhost:9001, you’ll just get “oh hai” back because you didnot put a slash after the port, and the variable part of the route was optional. If youappend anything else (so long as you don’t include another /), you’ll get it back as yourresponse body; matching the id token, it will be stored in req.params.id.
Express routes will always treat / as a token, but they will also treat it as optional if itterminates the request. So our route /:id? will match localhost, localhost/ localhost/tom, and localhost/tom/, but not localhost/tom/tom.
Routes can also use wildcards, as shown in Example 7-3. (*) will match anything exceptthe token following it (nongreedy regex matching).
Example 7-3. Using wildcards in routes
app.get('/a*', function(req,res) { res.send('a'); //matches /afoo /a.bar /a/qux etc.});
app.get('/b*/c*d', function(req,res) { res.send('b'); //matches /b/cd /b/cfood /b//c/d/ etc. //does not match /b/c/d/foo});
app.get('*', function(req, res) { res.send('*'); //matches /a /c /b/cd /b/c/d /b/c/d/foo //does not match /afoo /bfoo/cbard});
When you use a wildcard to make routes, any tokens between the wildcards mustmatch, unless they are optional. Wildcards are often used for things such as filenamescontaining periods (.). It’s also important to notice that unlike in many regular ex-pression languages, * does not mean zero or more characters; it means one or morecharacters. A forward slash (/) can be considered a character when matching withwildcards.
1. Tokenized refers to the process of breaking apart a string of text into chunks (or words) called tokens.
2. This functionality is actually part of a submodule of Express called router. You can look at the sourcecode of router to see the details of routing regexes.
Express | 147
www.it-ebooks.info
Another important thing to note is that routes are ordered. Multiple routes can matcha given URL, but only the first one that matches will trigger the associated activity. Thismeans that the order in which routes are defined is very significant. In the previousexample, the general wildcard will catch everything that wasn’t already caught by aprevious route, even though it matches all of them.
You can also use regexes to define routes (Example 7-4). If you do this, router won’tprocess the regex any further. Because you still might want to get variables out of theURL, you can use captures to define them.
Example 7-4. Using a regex to define a route
var express = require('express');var app = express.createServer();
app.get(/\/(\d+)/, function(req, res) { res.send(req.params[0]);});
app.listen(9001);
In this example, the regex will match only URLs that start with a number (\d matchesany digit, and the + allows one or more to match). This means that / will not match,but /12 will. However, the regex checking uses RegExp.match(), which finds a regexinside a larger string. This means that /12abc will also match. If you want to make surethat a regex represents the complete route, use the $ token at the end of the regex, suchas /\/(\d+)$/. $ checks for the end of the line, so the regex will match only if it termi-nates. You probably want to keep the default Express behavior of loosely matchinga / at the end of URLs, though. Do this with \/?$ instead of just $, to allow an op-tional / at the end of the string.
Notice how we accessed the capture in our regex in Example 7-4. If you use a regex foryour route, you can use req.params as an array to access the captures as variables. Thisalso works when router converts your route to a regex, but you probably want to usethe variable names in that case, as we showed earlier. You can also use regex to makebetter-named variables in routes by constraining what will match that variable, as inExample 7-5.
Example 7-5. Use regex to be more specific about variable types
var express = require('express');var app = express.createServer();
app.get('/:id(\\d+)', function(req, res) { res.send(req.params[0]);});
app.listen(9001);
148 | Chapter 7: Important External Modules
www.it-ebooks.info
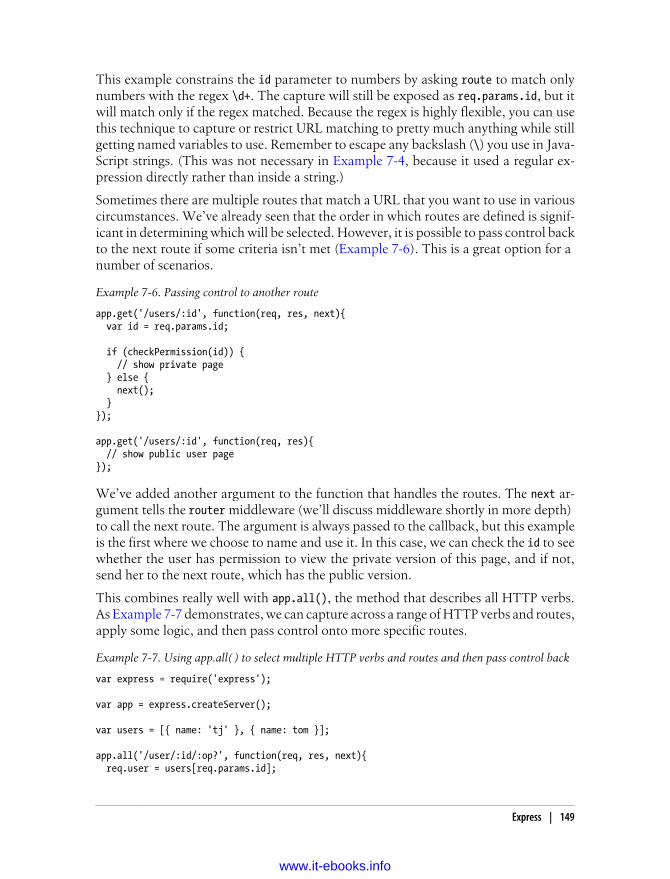
This example constrains the id parameter to numbers by asking route to match onlynumbers with the regex \d+. The capture will still be exposed as req.params.id, but itwill match only if the regex matched. Because the regex is highly flexible, you can usethis technique to capture or restrict URL matching to pretty much anything while stillgetting named variables to use. Remember to escape any backslash (\) you use in Java-Script strings. (This was not necessary in Example 7-4, because it used a regular ex-pression directly rather than inside a string.)
Sometimes there are multiple routes that match a URL that you want to use in variouscircumstances. We’ve already seen that the order in which routes are defined is signif-icant in determining which will be selected. However, it is possible to pass control backto the next route if some criteria isn’t met (Example 7-6). This is a great option for a number of scenarios.
Example 7-6. Passing control to another route
app.get('/users/:id', function(req, res, next){ var id = req.params.id;
if (checkPermission(id)) { // show private page } else { next(); }});
app.get('/users/:id', function(req, res){ // show public user page });
We’ve added another argument to the function that handles the routes. The next ar-gument tells the router middleware (we’ll discuss middleware shortly in more depth) to call the next route. The argument is always passed to the callback, but this exampleis the first where we choose to name and use it. In this case, we can check the id to seewhether the user has permission to view the private version of this page, and if not,send her to the next route, which has the public version.
This combines really well with app.all(), the method that describes all HTTP verbs.As Example 7-7 demonstrates, we can capture across a range of HTTP verbs and routes,apply some logic, and then pass control onto more specific routes.
Example 7-7. Using app.all( ) to select multiple HTTP verbs and routes and then pass control back
var express = require('express');
var app = express.createServer();
var users = [{ name: 'tj' }, { name: tom }];
app.all('/user/:id/:op?', function(req, res, next){ req.user = users[req.params.id];
Express | 149
www.it-ebooks.info

if (req.user) { next(); } else { next(new Error('Cannot find user with ID: ' + req.params.id)); }});
app.get('/user/:id', function(req, res){ res.send('Viewing ' + req.user.name);});
app.get('/user/:id/edit', function(req, res){ res.send('Editing ' + req.user.name);});
app.put('/user/:id', function(req, res){ res.send('Updating ' + req.user.name);});
app.get('*', function(req, res){ res.send('Danger, Will Robinson!', 404);});
app.listen(3000);
This example is similar to Example 7-6, in that we are validating whether a user existsbefore passing on control. However, we are not doing this only for all the subsequentroutes; we are also doing it across all HTTP verbs. Normally when only one routematches, this doesn’t make any difference, but it’s important to note how you can passstate between routes.
When the req.user attribute is added in the app.all() method, it is available in all thesubsequent methods because the middleware owns the request object. When eachcallback is fired, the variable .req is really a pointer to the request object owned by themiddleware, and any changes to the request object are visible to every other functionand route using the middleware.
Example 7-8 shows how a file extension can be made either optional or mandatorywithin a specific range. In the first get(), the :format parameter is optional (as denotedby the question mark), so Express will respond to requests for a user by ID, regardlessof which format has been requested. It is up to the programmer to capture the formats(JSON, XML, text, etc.) via a switch statement in order to do special processing.
In the second example, the :format parameter looks for json or xml as predefined filetypes. If those are not found, the book request will not be processed, regardless ofwhether the :id parameter is valid. This gives us greater control over which requestsare responded to and ensures that only formats for which a view can be generated areavailable to respond.
150 | Chapter 7: Important External Modules
www.it-ebooks.info
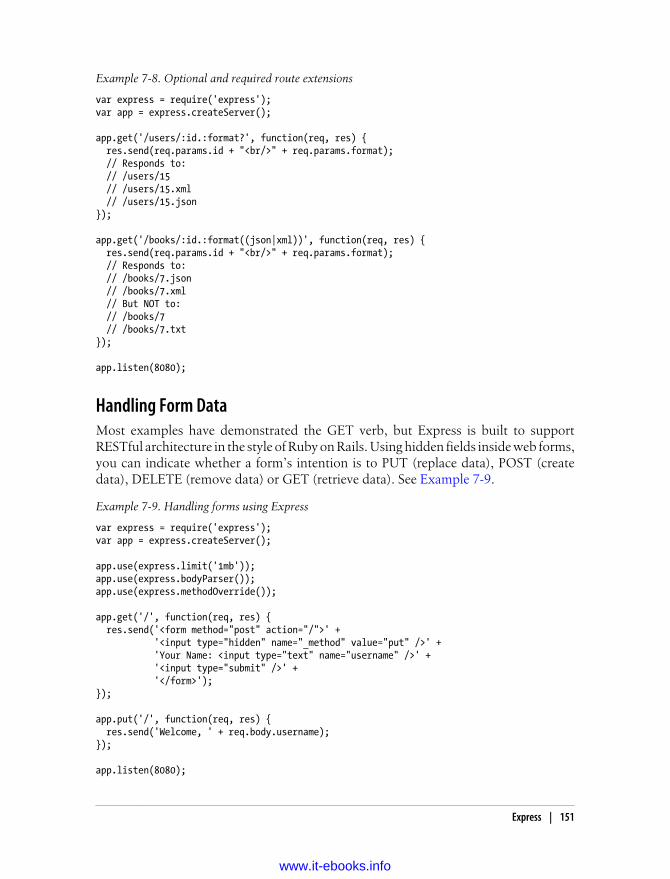
Example 7-8. Optional and required route extensions
var express = require('express');var app = express.createServer();
app.get('/users/:id.:format?', function(req, res) { res.send(req.params.id + "<br/>" + req.params.format); // Responds to: // /users/15 // /users/15.xml // /users/15.json});
app.get('/books/:id.:format((json|xml))', function(req, res) { res.send(req.params.id + "<br/>" + req.params.format); // Responds to: // /books/7.json // /books/7.xml // But NOT to: // /books/7 // /books/7.txt});
app.listen(8080);
Handling Form DataMost examples have demonstrated the GET verb, but Express is built to supportRESTful architecture in the style of Ruby on Rails. Using hidden fields inside web forms,you can indicate whether a form’s intention is to PUT (replace data), POST (createdata), DELETE (remove data) or GET (retrieve data). See Example 7-9.
Example 7-9. Handling forms using Express
var express = require('express');var app = express.createServer();
app.use(express.limit('1mb'));app.use(express.bodyParser());app.use(express.methodOverride());
app.get('/', function(req, res) { res.send('<form method="post" action="/">' + '<input type="hidden" name="_method" value="put" />' + 'Your Name: <input type="text" name="username" />' + '<input type="submit" />' + '</form>');});
app.put('/', function(req, res) { res.send('Welcome, ' + req.body.username);});
app.listen(8080);
Express | 151
www.it-ebooks.info
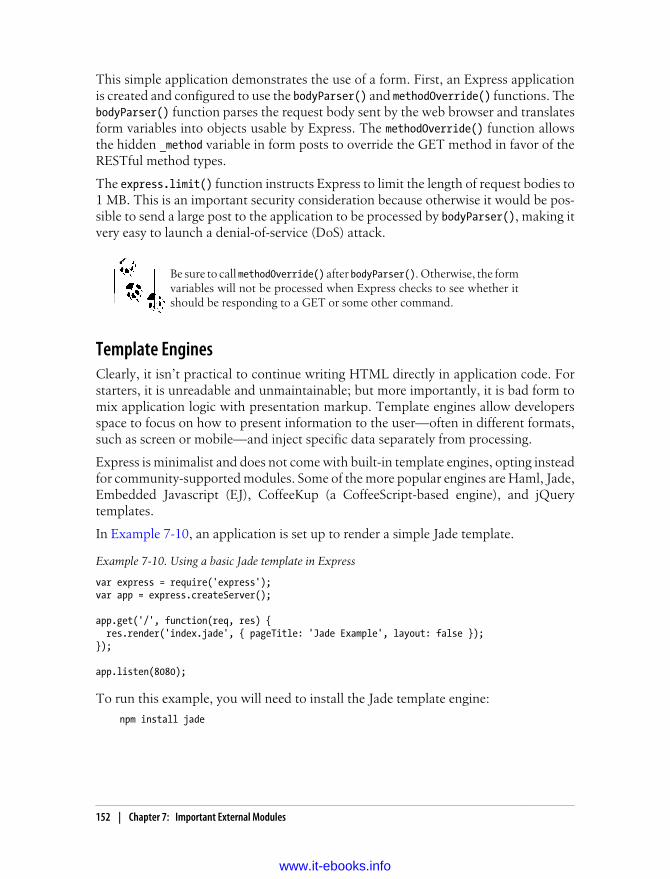
This simple application demonstrates the use of a form. First, an Express applicationis created and configured to use the bodyParser() and methodOverride() functions. ThebodyParser() function parses the request body sent by the web browser and translatesform variables into objects usable by Express. The methodOverride() function allowsthe hidden _method variable in form posts to override the GET method in favor of theRESTful method types.
The express.limit() function instructs Express to limit the length of request bodies to1 MB. This is an important security consideration because otherwise it would be pos-sible to send a large post to the application to be processed by bodyParser(), making itvery easy to launch a denial-of-service (DoS) attack.
Be sure to call methodOverride() after bodyParser(). Otherwise, the formvariables will not be processed when Express checks to see whether itshould be responding to a GET or some other command.
Template EnginesClearly, it isn’t practical to continue writing HTML directly in application code. Forstarters, it is unreadable and unmaintainable; but more importantly, it is bad form tomix application logic with presentation markup. Template engines allow developersspace to focus on how to present information to the user—often in different formats,such as screen or mobile—and inject specific data separately from processing.
Express is minimalist and does not come with built-in template engines, opting insteadfor community-supported modules. Some of the more popular engines are Haml, Jade,Embedded Javascript (EJ), CoffeeKup (a CoffeeScript-based engine), and jQuerytemplates.
In Example 7-10, an application is set up to render a simple Jade template.
Example 7-10. Using a basic Jade template in Express
var express = require('express');var app = express.createServer();
app.get('/', function(req, res) { res.render('index.jade', { pageTitle: 'Jade Example', layout: false });});
app.listen(8080);
To run this example, you will need to install the Jade template engine:
npm install jade
152 | Chapter 7: Important External Modules
www.it-ebooks.info
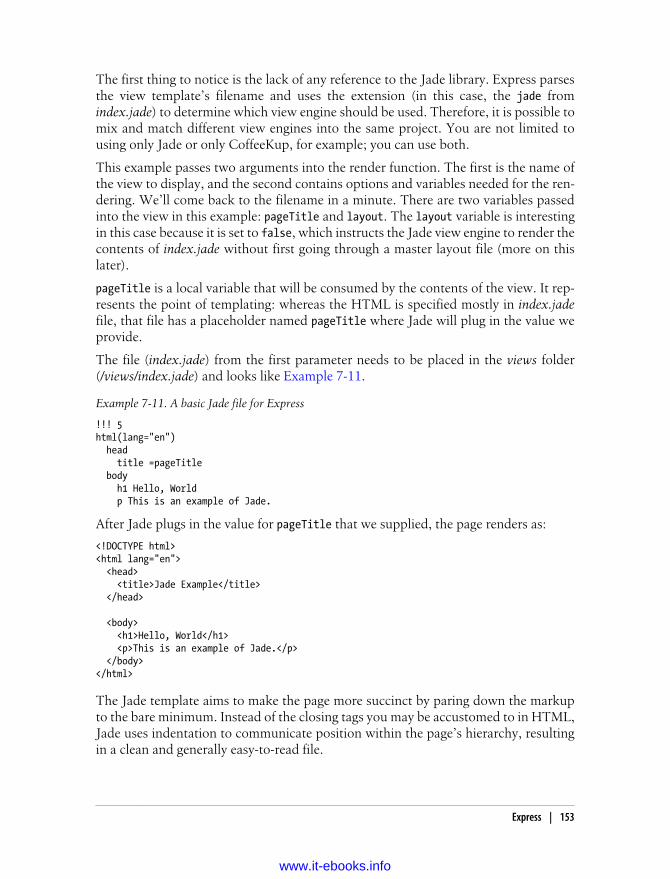
The first thing to notice is the lack of any reference to the Jade library. Express parsesthe view template’s filename and uses the extension (in this case, the jade fromindex.jade) to determine which view engine should be used. Therefore, it is possible tomix and match different view engines into the same project. You are not limited tousing only Jade or only CoffeeKup, for example; you can use both.
This example passes two arguments into the render function. The first is the name ofthe view to display, and the second contains options and variables needed for the ren-dering. We’ll come back to the filename in a minute. There are two variables passedinto the view in this example: pageTitle and layout. The layout variable is interestingin this case because it is set to false, which instructs the Jade view engine to render thecontents of index.jade without first going through a master layout file (more on thislater).
pageTitle is a local variable that will be consumed by the contents of the view. It rep-resents the point of templating: whereas the HTML is specified mostly in index.jadefile, that file has a placeholder named pageTitle where Jade will plug in the value weprovide.
The file (index.jade) from the first parameter needs to be placed in the views folder(/views/index.jade) and looks like Example 7-11.
Example 7-11. A basic Jade file for Express
!!! 5html(lang="en") head title =pageTitle body h1 Hello, World p This is an example of Jade.
After Jade plugs in the value for pageTitle that we supplied, the page renders as:
<!DOCTYPE html><html lang="en"> <head> <title>Jade Example</title> </head>
<body> <h1>Hello, World</h1> <p>This is an example of Jade.</p> </body></html>
The Jade template aims to make the page more succinct by paring down the markupto the bare minimum. Instead of the closing tags you may be accustomed to in HTML,Jade uses indentation to communicate position within the page’s hierarchy, resultingin a clean and generally easy-to-read file.
Express | 153
www.it-ebooks.info
The very first line, "!!! 5", identifies the content type as HTML5, manifesting as anHTML5 doctype in the resulting output. The default document types supported byJade are 5, xml, default (which is XHTML 1.0 Transitional), transitional (the default),strict, frameset, 1.1, basic, and mobile. You can supply your own, though, such asdoctype html PUBLIC "-//W3C//DATA XHTML Custom 1.10a//DE".
Look in the title tag on the fourth line of the Jade input. The string =pageTitle isinterpreted by Jade as “insert the contents of the variable named pageTitle here.” Inthe resulting output, this becomes Jade Example, the value provided by the previousapplication code.
As we mentioned, there are many other templating options, each of which does essen-tially what Jade does, but with different syntax and conventions.
Layouts and partial views
Layouts allow views to share common structural elements in your site, providing aneven greater separation of content and data. By standardizing parts of the layout, suchas navigation, header, and footer, you can focus your development efforts on the actualcontent for each view.
Example 7-12 takes the view engine concept already discussed and turns it into a “real”website.
Example 7-12. Defining global template engines in Express
var express = require('express');var app = express.createServer();
app.set('view engine', 'jade');
app.get('/', function(req, res) { res.render('battlestar')});
New to this example is the set command on the “view engine” parameter. The Jadeview engine will now be considered the default by Express, although it is still possibleto override it in the render method.
The render function is markedly different. Because the Jade engine has been set as thedefault view engine, this example does not need to specify the full filename, so battlestar actually refers to /views/battlestar.jade. The layout: false parameter from Exam-ple 7-10 is no longer needed, because this time Express will be making use of this layoutfile located at views/layout.jade, shown in Example 7-13.
Example 7-13. A Jade layout file in Express
html body h1 Battlestar Galactica Fan Page != body
154 | Chapter 7: Important External Modules
www.it-ebooks.info
The layout file is very similar to the view file created earlier, but in this case there is aspecial body variable. We’re talking here about the != body line; please don’t confusethat with the body keyword near the top of the file. The second body is not the name ofa variable passed in through the application code, so where does it come from?
When the layout option is set to true (the default) in Express, the render method worksby parsing the contents of the first parameter and passing the rendered output to thelayout as a variable called body. The battlestar.jade file looks like Example 7-14.
Example 7-14. A Jade partial view in Express
p Welcome to the fan page.
This is called a partial view because it does not contain the full content needed togenerate a page, and it needs to be combined with a layout to become useful output.The final web browser output for all this work looks like this:
<html> <body> <h1>Battlestar Galactica Fan Page</h1> <p>Welcome to the fan page.</p> </body></html>
Partial views are powerful because they allow developers to focus on the specific contentbeing displayed, rather than the web page as a whole. This means the contents don’thave to be tied to a web page and can be output to mobile web pages, AJAX requests(for in-place page refreshes), and more.
Be careful not to confuse the variable named body, which contains theactual content of your view, with the keyword body, which is an HTMLtag used by the web browser.
MiddlewareSome of the examples up to this point have included a rather innocuous-looking func-tion: app.use(). This function invokes the Connect library and exposes many powerfultools that make it simple to add functionality. Now it's time to take a step back andexamine what all this glue—known as middleware—is, and why it is so important todeveloping with Express.
Although it might sound like one of those obscure buzzwords that programmers liketo use when they want to appear “in the know,” middleware—as we’ve mentioned inprevious chapters—refers to a piece of software that acts as a link between two otherprograms, typically between a higher-level application and a wider network. In the realworld, middleware is analogous to the telephone lines you might find in your home oroffice building. All telephones (applications) connect to the same telephone lines
Express | 155
www.it-ebooks.info
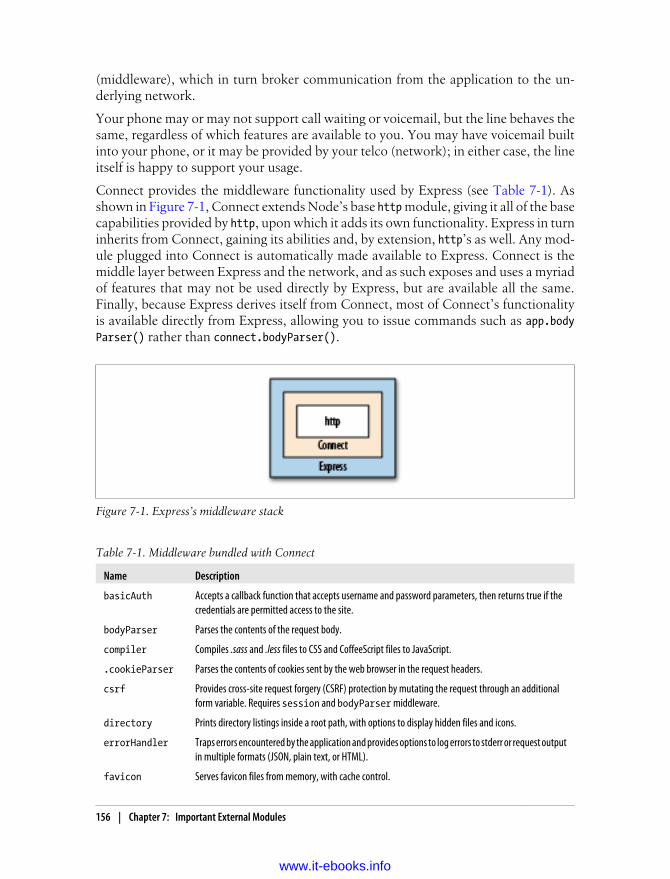
(middleware), which in turn broker communication from the application to the un-derlying network.
Your phone may or may not support call waiting or voicemail, but the line behaves thesame, regardless of which features are available to you. You may have voicemail builtinto your phone, or it may be provided by your telco (network); in either case, the lineitself is happy to support your usage.
Connect provides the middleware functionality used by Express (see Table 7-1). Asshown in Figure 7-1, Connect extends Node’s base http module, giving it all of the basecapabilities provided by http, upon which it adds its own functionality. Express in turninherits from Connect, gaining its abilities and, by extension, http’s as well. Any mod-ule plugged into Connect is automatically made available to Express. Connect is themiddle layer between Express and the network, and as such exposes and uses a myriadof features that may not be used directly by Express, but are available all the same.Finally, because Express derives itself from Connect, most of Connect’s functionalityis available directly from Express, allowing you to issue commands such as app.bodyParser() rather than connect.bodyParser().
Figure 7-1. Express’s middleware stack
Table 7-1. Middleware bundled with Connect
Name Description
basicAuth Accepts a callback function that accepts username and password parameters, then returns true if thecredentials are permitted access to the site.
bodyParser Parses the contents of the request body.
compiler Compiles .sass and .less files to CSS and CoffeeScript files to JavaScript.
.cookieParser Parses the contents of cookies sent by the web browser in the request headers.
csrf Provides cross-site request forgery (CSRF) protection by mutating the request through an additionalform variable. Requires session and bodyParser middleware.
directory Prints directory listings inside a root path, with options to display hidden files and icons.
errorHandler Traps errors encountered by the application and provides options to log errors to stderr or request outputin multiple formats (JSON, plain text, or HTML).
favicon Serves favicon files from memory, with cache control.
156 | Chapter 7: Important External Modules
www.it-ebooks.info
Name Description
limit Limits the size of requests accepted by the server to protect against DoS attacks.
logger Logs requests to output or a file, in multiple formats, either on response (default) or on request. Optionalbuffer size controls how many requests are collected before writing to disk.
methodOverride Combine with bodyParser to provide DELETE and PUT methods along with POST. Allows for moreexplicit route definitions; for example, use app.put() rather than detecting the user’s intention fromapp.post(). This technique enables RESTful application design.
profiler Typically placed before all other middleware, profiler records the response time and memorystatistics for requests.
query Parses query strings and populates the req.query parameter.
responseTime Populates the X-Response-Time header with the time (in milliseconds) to generate a response.
router Provides advanced routing (discussed in “Setting Up Routes in Express” on page 146)
session The session manager for persisting user data across requests.
static Enables streaming of static files from a root directory. Allows for partial downloads and custom expiryaging.
staticCache Adds a caching layer to the static middleware, keeping the most popular downloaded files in memoryfor greatly improved response times.
vhost Enables multiple sites for different vhosts on a single machine.
Middleware factories
By now you may have noticed that middleware consists of little more than functionsthat are executed sequentially by Express. JavaScript closures give us a lot of power toimplement the factory pattern3 inside Node, which can be exploited to provide con-textual functionality to your web routes.
Express’s routing functions use internal middleware during their processing cycle,which you can override to add extra functionality—for example, to add custom headersto your HTML output. Let’s look at Example 7-15 and see how we can use a middlewarefactory to intercept a page request and enforce role-based authentication.
Example 7-15. Middleware factories in Express
var express = require('express');var app = express.createServer( express.cookieParser(), express.session({ secret: 'secret key' }));
var roleFactory = function(role) { return function(req, res, next) { if ( req.session.role && req.session.role.indexOf(role) != -1 ) { next();
3. A factory is an object that creates other objects with specific parameters, whereas creating those objectsmanually would involve a lot of repetitive or complex program code.
Express | 157
www.it-ebooks.info
} else { res.send('You are not authenticated.'); } }};
app.get('/', roleFactory('admin'), function(req, res) { res.send('Welcome to Express!');});
app.get('/auth', function(req, res) { req.session.role = 'admin'; res.send('You have been authenticated.');});
app.listen(8080);
Right off the bat, if you visit http://localhost:8080/ you will receive the message “Youare not authenticated.” However, if you look at the contents of the route for '/', youwill notice that the actual page contents are 'Welcome to Express!'. The second pa-rameter, roleFactory('admin'), launched before the page was displayed and detectedthat there was no role property in your session, so it output its own message andstopped the page execution.
If you visit http://localhost:8080/auth followed by http://localhost:8080/ you will receivethe “Welcome to Express!” message. In this circumstance, the /auth URL attached the'admin' variable to your session’s role property, so when roleFactory was executed itpassed the execution control to next(), which is the app.get('/') function.
Therefore, it could be said that by using internal middleware, we changed the order ofexecution to:
1. roleFactory('admin')
2. app.get('/')
What if we wanted to authenticate based on more than one role? In that case, we couldchange the route to:
var powerUsers = [roleFactory('admin'),roleFactory('client')];app.get('/', powerUsers, function(req, res) { res.send('Welcome to Express!');});
Because we passed an array as the middleware, we have limited the page execution tousers belonging to the “admin” and “client” roles, and changed the order of executionto:
1. roleFactory('admin')
2. roleFactory('client')
3. app.get('/')
158 | Chapter 7: Important External Modules
www.it-ebooks.info

Because each roleFactory demands that the role be present in the session, the user mustbe both a “client” and an “admin” in order to access the page.
Socket.IOSocket.IO is a simple little library that’s a lot like Node’s core net library. Socket.IOallows you to send messages back and forth with browser clients that connect with yourNode server, using an efficient, low-level socket mechanism. One of the nice thingsabout the module is that it provides a shared interface between the browser and theserver. That is, you can write the same JavaScript on both in order to do messagingwork once you have a connection established.
Socket.IO is so named because it supports the HTML5 WebSockets standard on browsers that support it (and have it enabled). Fortunately, the library also supports anumber of fallbacks:
• WebSocket
• WebSocket over Flash
• XHR Polling
• XHR Multipart Streaming
• Forever Iframe
• JSONP Polling
These options ensure that you’ll be able to have some kind of persistent connection tothe browser in almost any environment. The Socket.IO module includes the code topower these connection paths on both the browser and the server side with the sameAPI.
Instantiating Socket.IO is as simple as including the module and creating a server. Oneof the things that’s a little different about Socket.IO is that it requires an HTTP serveras well; see Example 7-16.
Example 7-16. Creating a Socket.IO server
var http = require('http'), io = require('socket.io'); server = http.createServer();server.on('request', function(req, res){ //Typical HTTP server stuff res.writeHead(200, {'Content-Type': 'text/plain'}); res.end('Hello World');});
server.listen(80);
var socket = io.listen(server);
Socket.IO | 159
www.it-ebooks.info
socket.on('connection', function(client){ console.log('Client connected');});
The HTTP server in this example could do anything. In this case, we simply return“Hello World.” However, Socket.IO doesn’t care what the HTTP server will do; itsimply wraps its own event listener around all requests to your server. This listener willlook for any requests for Socket.IO’s client libraries and service these requests. It passeson all others to be handled by the HTTP server, which will function as usual.
The example creates a socket.io server by calling io.listen(), which is a factory method for the Listener class. listen() takes a function as an argument, which it usesas a callback when a client connects to the server. Because the sockets are persistentconnections, you aren’t dealing with a req and res object as you do with an HTTPserver. As with net, you need to use the passed client object to communicate with eachbrowser. Of course, it’s also important to have some code in the browser (Exam-ple 7-17) to interact with the server.
Example 7-17. A small web page to interact with a Socket.IO server
<!DOCTYPE html><html> <body> <script src="/socket.io/socket.io.js"></script> <script> var socket = io.connect('http://localhost:8080'); socket.on('message', function(data){ console.log(data) }) </script> </body></html>
This simple page starts by loading the necessary Socket.IO client library directly fromthe Node server, which is localhost on port 8080 in this case.
Although port 80 is the standard HTTP port, port 8080 is more conve-nient during development because many developers run web serverslocally for testing that would interfere with Node’s work. In addition,many Linux systems have built-in security policies preventing nonad-ministrator users from using port 80, so it is more convenient to use ahigher number.
Next, we create a new Socket object with the hostname of the Socket.IO server we areconnecting to. We ask the Socket to connect with socket.connect(). Then we add alistener for the message event. Notice how the API is like a Node API. Whenever theserver sends this client a message, the client will output it to the browser’s consolewindow.
Now let’s modify our server to send this page to clients so we can test it (Example 7-18).
160 | Chapter 7: Important External Modules
www.it-ebooks.info
Example 7-18. A simple Socket.IO server
var http = require('http'), io = require('socket.io'), fs = require('fs');
var sockFile = fs.readFileSync('socket.html');
server = http.createServer();server.on('request', function(req, res){ res.writeHead(200, {'content-type': 'text/html'}); res.end(sockFile); });
server.listen(8080);
var socket = io.listen(server);
socket.on('connection', function(client){ console.log('Client connected'); client.send('Welcome client ' + client.sessionId);});
The most striking change in this example is the addition of the fs.readFileSync func-tion, which brings the web page’s external file into the socket server. Now instead ofresponding to web browser requests with “Hello World,” the Node server will respondwith the contents of socket.html. Because readFileSync is a synchronous function, itwill block Node’s event loop until the file is read, ensuring that the file is ready to bedelivered to clients immediately when the server becomes available for connections.
Now whenever anyone requests anything from the server, unless it is a request to theSocket.IO client library, he will get a copy of socket.html (which might be the code inExample 7-17). The callback for connections has been extended to send a welcomemessage to clients, and a client running the code from Example 7-18 might get a mes-sage in its console like Welcome client 17844937089830637. Each client gets its ownsessionId. Currently, the ID is an integer generated using Math.random().
NamespacesCreating websockets as shown is fine when you are in full control of your applicationand architecture, but this will quickly lead to conflicts when you are attaching them toan existing application that uses sockets or when you are writing a service to be pluggedinto someone else’s project. Example 7-19 demonstrates how namespaces avoid thisproblem by effectively dividing Socket.IO’s listeners into channels.
Example 7-19. A modified web page to interact with Socket.IO namespaces
<!DOCTYPE html><html> <body> <script src="/socket.io/socket.io.js"></script>
Socket.IO | 161
www.it-ebooks.info
<script> var upandrunning = io.connect('http://localhost:8080/upandrunning'); var weather = io.connect('http://localhost:8080/weather'); upandrunning.on('message', function(data){ document.write('<br /><br />Node: Up and Running Update<br />'); document.write(data); }); weather.on('message', function(data){ document.write('<br /><br />Weather Update<br />'); document.write(data); }); </script> </body></html>
This updated socket.html makes two Socket.IO connections, one to http://localhost:8080/upandrunning and the other to http://localhost:8080/weather. Each connectionhas its own variable and its own .on() event listener. Apart from these differences,working with Socket.IO remains the same. Instead of logging to the console, Exam-ple 7-20 displays its message results within the web browser window.
Example 7-20. A namespace-enabled Socket.IO server
var sockFile = fs.readFileSync('socket.html');
server = http.createServer();server.on('request', function(req, res){ res.writeHead(200, {'content-type': 'text/html'}); res.end(sockFile);});
server.listen(8080);
var socket = io.listen(server);
socket.of('/upandrunning') .on('connection', function(client){ console.log('Client connected to Up and Running namespace.'); client.send("Welcome to 'Up and Running'");});
socket.of('/weather') .on('connection', function(client){ console.log('Client connected to Weather namespace.'); client.send("Welcome to 'Weather Updates'");});
The function socket.of splits the socket object into multiple unique namespaces, eachwith its own rules for handling connections. If a client were to connect to http://local-host:8080/weather and issue an emit() command, its results would be processed onlywithin that namespace, and not within the /upandrunning namespace.
162 | Chapter 7: Important External Modules
www.it-ebooks.info
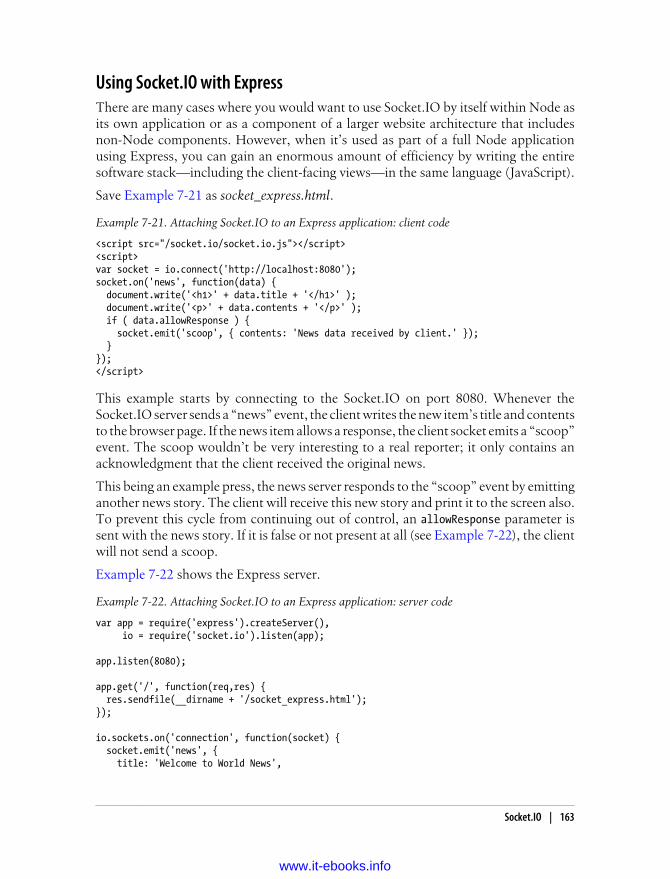
Using Socket.IO with ExpressThere are many cases where you would want to use Socket.IO by itself within Node asits own application or as a component of a larger website architecture that includesnon-Node components. However, when it’s used as part of a full Node applicationusing Express, you can gain an enormous amount of efficiency by writing the entiresoftware stack—including the client-facing views—in the same language (JavaScript).
Save Example 7-21 as socket_express.html.
Example 7-21. Attaching Socket.IO to an Express application: client code
<script src="/socket.io/socket.io.js"></script><script>var socket = io.connect('http://localhost:8080');socket.on('news', function(data) { document.write('<h1>' + data.title + '</h1>' ); document.write('<p>' + data.contents + '</p>' ); if ( data.allowResponse ) { socket.emit('scoop', { contents: 'News data received by client.' }); }});</script>
This example starts by connecting to the Socket.IO on port 8080. Whenever theSocket.IO server sends a “news” event, the client writes the new item’s title and contentsto the browser page. If the news item allows a response, the client socket emits a “scoop”event. The scoop wouldn’t be very interesting to a real reporter; it only contains anacknowledgment that the client received the original news.
This being an example press, the news server responds to the “scoop” event by emittinganother news story. The client will receive this new story and print it to the screen also.To prevent this cycle from continuing out of control, an allowResponse parameter issent with the news story. If it is false or not present at all (see Example 7-22), the clientwill not send a scoop.
Example 7-22 shows the Express server.
Example 7-22. Attaching Socket.IO to an Express application: server code
var app = require('express').createServer(), io = require('socket.io').listen(app);
app.listen(8080);
app.get('/', function(req,res) { res.sendfile(__dirname + '/socket_express.html');});
io.sockets.on('connection', function(socket) { socket.emit('news', { title: 'Welcome to World News',
Socket.IO | 163
www.it-ebooks.info
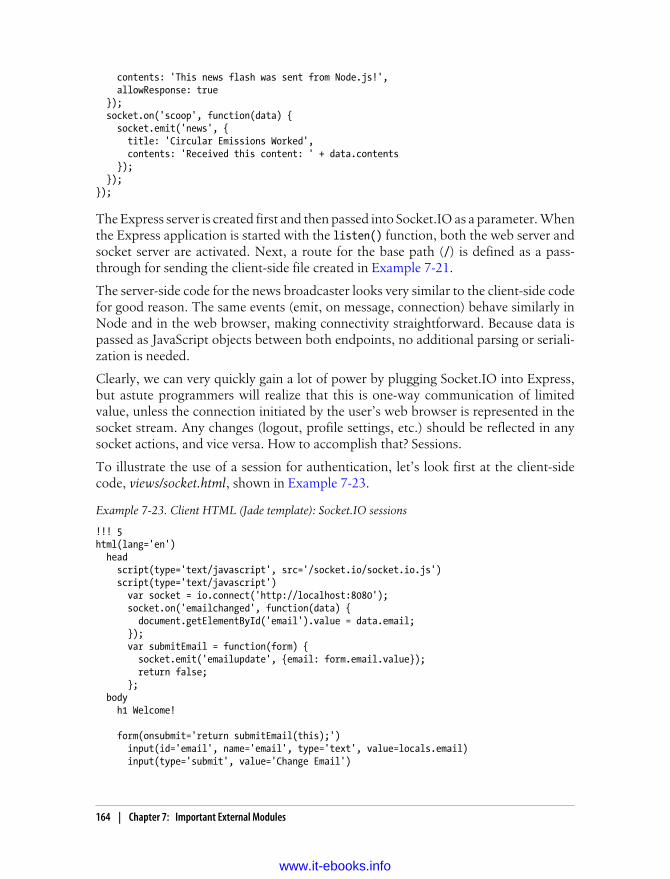
contents: 'This news flash was sent from Node.js!', allowResponse: true }); socket.on('scoop', function(data) { socket.emit('news', { title: 'Circular Emissions Worked', contents: 'Received this content: ' + data.contents }); });});
The Express server is created first and then passed into Socket.IO as a parameter. Whenthe Express application is started with the listen() function, both the web server andsocket server are activated. Next, a route for the base path (/) is defined as a pass-through for sending the client-side file created in Example 7-21.
The server-side code for the news broadcaster looks very similar to the client-side codefor good reason. The same events (emit, on message, connection) behave similarly inNode and in the web browser, making connectivity straightforward. Because data ispassed as JavaScript objects between both endpoints, no additional parsing or seriali-zation is needed.
Clearly, we can very quickly gain a lot of power by plugging Socket.IO into Express,but astute programmers will realize that this is one-way communication of limitedvalue, unless the connection initiated by the user’s web browser is represented in thesocket stream. Any changes (logout, profile settings, etc.) should be reflected in anysocket actions, and vice versa. How to accomplish that? Sessions.
To illustrate the use of a session for authentication, let’s look first at the client-sidecode, views/socket.html, shown in Example 7-23.
Example 7-23. Client HTML (Jade template): Socket.IO sessions
!!! 5html(lang='en') head script(type='text/javascript', src='/socket.io/socket.io.js') script(type='text/javascript') var socket = io.connect('http://localhost:8080'); socket.on('emailchanged', function(data) { document.getElementById('email').value = data.email; }); var submitEmail = function(form) { socket.emit('emailupdate', {email: form.email.value}); return false; }; body h1 Welcome!
form(onsubmit='return submitEmail(this);') input(id='email', name='email', type='text', value=locals.email) input(type='submit', value='Change Email')
164 | Chapter 7: Important External Modules
www.it-ebooks.info
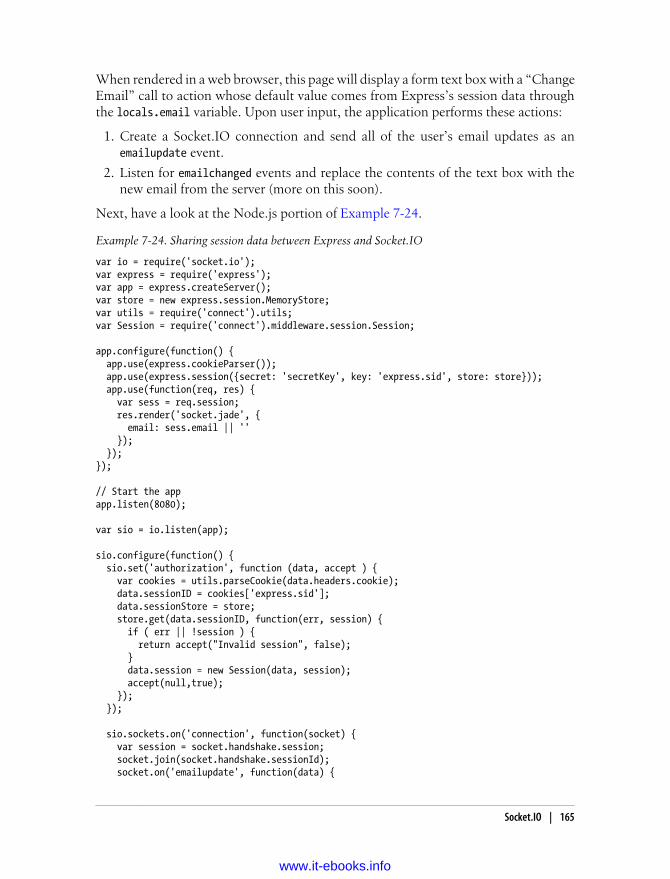
When rendered in a web browser, this page will display a form text box with a “ChangeEmail” call to action whose default value comes from Express’s session data throughthe locals.email variable. Upon user input, the application performs these actions:
1. Create a Socket.IO connection and send all of the user’s email updates as anemailupdate event.
2. Listen for emailchanged events and replace the contents of the text box with thenew email from the server (more on this soon).
Next, have a look at the Node.js portion of Example 7-24.
Example 7-24. Sharing session data between Express and Socket.IO
var io = require('socket.io');var express = require('express');var app = express.createServer();var store = new express.session.MemoryStore;var utils = require('connect').utils;var Session = require('connect').middleware.session.Session;
app.configure(function() { app.use(express.cookieParser()); app.use(express.session({secret: 'secretKey', key: 'express.sid', store: store})); app.use(function(req, res) { var sess = req.session; res.render('socket.jade', { email: sess.email || '' }); });});
// Start the appapp.listen(8080);
var sio = io.listen(app);
sio.configure(function() { sio.set('authorization', function (data, accept ) { var cookies = utils.parseCookie(data.headers.cookie); data.sessionID = cookies['express.sid']; data.sessionStore = store; store.get(data.sessionID, function(err, session) { if ( err || !session ) { return accept("Invalid session", false); } data.session = new Session(data, session); accept(null,true); }); });
sio.sockets.on('connection', function(socket) { var session = socket.handshake.session; socket.join(socket.handshake.sessionId); socket.on('emailupdate', function(data) {
Socket.IO | 165
www.it-ebooks.info
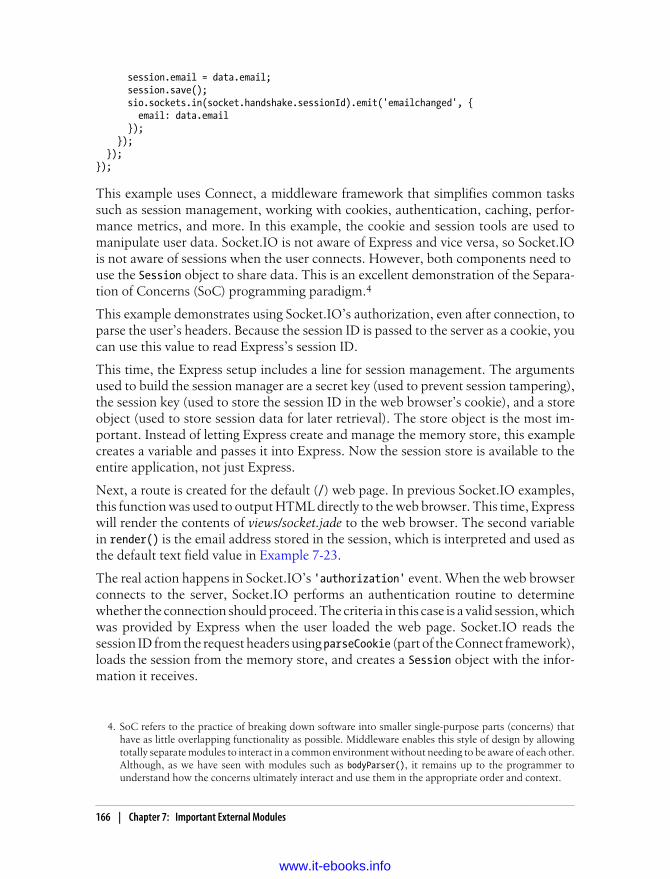
session.email = data.email; session.save(); sio.sockets.in(socket.handshake.sessionId).emit('emailchanged', { email: data.email }); }); });});
This example uses Connect, a middleware framework that simplifies common taskssuch as session management, working with cookies, authentication, caching, perfor-mance metrics, and more. In this example, the cookie and session tools are used tomanipulate user data. Socket.IO is not aware of Express and vice versa, so Socket.IOis not aware of sessions when the user connects. However, both components need to use the Session object to share data. This is an excellent demonstration of the Separa-tion of Concerns (SoC) programming paradigm.4
This example demonstrates using Socket.IO’s authorization, even after connection, toparse the user’s headers. Because the session ID is passed to the server as a cookie, youcan use this value to read Express’s session ID.
This time, the Express setup includes a line for session management. The argumentsused to build the session manager are a secret key (used to prevent session tampering),the session key (used to store the session ID in the web browser’s cookie), and a storeobject (used to store session data for later retrieval). The store object is the most im-portant. Instead of letting Express create and manage the memory store, this examplecreates a variable and passes it into Express. Now the session store is available to theentire application, not just Express.
Next, a route is created for the default (/) web page. In previous Socket.IO examples,this function was used to output HTML directly to the web browser. This time, Expresswill render the contents of views/socket.jade to the web browser. The second variablein render() is the email address stored in the session, which is interpreted and used asthe default text field value in Example 7-23.
The real action happens in Socket.IO’s 'authorization' event. When the web browserconnects to the server, Socket.IO performs an authentication routine to determinewhether the connection should proceed. The criteria in this case is a valid session, whichwas provided by Express when the user loaded the web page. Socket.IO reads thesession ID from the request headers using parseCookie (part of the Connect framework),loads the session from the memory store, and creates a Session object with the infor-mation it receives.
4. SoC refers to the practice of breaking down software into smaller single-purpose parts (concerns) thathave as little overlapping functionality as possible. Middleware enables this style of design by allowingtotally separate modules to interact in a common environment without needing to be aware of each other.Although, as we have seen with modules such as bodyParser(), it remains up to the programmer tounderstand how the concerns ultimately interact and use them in the appropriate order and context.
166 | Chapter 7: Important External Modules
www.it-ebooks.info

The data passed to the authorization event is stored in the socket’s handshake property.Therefore, saving the session object into the data object makes it available later in thesocket’s lifecycle. When creating the Session object, use the memory store that wascreated and passed into Express; now both Express and Socket.IO are able to accessthe same session data—Express by manipulating the req.session object, and socketsby manipulating the socket.handshake.session object.
Assuming all goes well, calling accept() authenticates the socket and allows the con-nection to continue.
Now suppose the user accesses your site from more than one tab in his web browser.There would be two connections from the same session created, so how would youhandle events that need to update connected sockets? Socket.IO provides support forrooms, or channels if you prefer. By initiating a join() command with sessionId as theargument in Example 7-24, the socket transparently created a dedicated channel youcan use to send messages to all connections currently in use by that user. Logging outis an obvious use for this technique: when the user logs out from one tab, the logoutcommand will instantly transmit to all the others, leaving all of the user’s views of theapplication in a consistent state.
Always remember to execute session.save() after changing sessiondata. Otherwise, the changes will not be reflected on subsequentrequests.
Socket.IO | 167
www.it-ebooks.info

CHAPTER 8
Extending Node
ModulesThe module system in Node makes it easy to create extensions to the platform. It issimple to learn and enables us to easily share reusable library code. The Node modulesystem is based on the commonJS module specification. We’ve already used lots ofmodules in the previous chapters, but here we’ll study how to create our own modules.Example 8-1 shows one simple implementation.
Example 8-1. A simple module
exports.myMethod = function() { console.log('Method output') };exports.property = "blue";
As you can see, writing a module is as simple as attaching properties to the exportsglobal variable. Any script that is included with require() will return its exports object.This means that everything returned from require() is in a closure, so you can useprivate variables in a module that are not exposed to the main scope of the program.
Node developers have created a few conventions around modules. First, it’s typical tocreate factory methods for a class. Although you might also expose the class itself,factory methods give us a clean way to instantiate objects. For I/O-related classes, oneof the arguments is normally a callback for either the I/O being done or one of its mostcommon aspects. For example, http.Server has a factory method called http.createServer() that takes a callback function for the request event, the most commonly usedhttp.Server event.
Package ManagerBeing able to make modules is great, but ultimately having a good way to distributethem and share them with the rest of your team or the community is essential. Thepackage manager for Node, npm, provides a way of distributing code, either locally orvia a global repository of Node modules. npm helps you manage code dependencies,
169
www.it-ebooks.info

installation, and other things associated with distributing code. Best of all, npm is allJavaScript and Node. So if you are already using Node, you are ready to use npm, too.npm provides both the installation tools for developers and the distribution tools forpackage maintainers.
Most developers will start by using npm to install packages using the simple npminstall command. You can install packages you have locally, but you’ll probably wantto use npm to install remote packages from the npm registry. The registry stores packagesthat other Node developers make available to you to use. There are many packages inthe registry: everything from database drivers to flow control libraries to math libraries.Most things you’ll install with npm are 100% JavaScript, but a few of them requirecompilation. Luckily, npm will do that for you. You can see what’s in the registry at http://search.npmjs.org.
Searching PackagesThe search command lists all packages in the global npm registry and filters for a packagename:
npm search packagename
If you don’t supply a package name, all of the available packages will be displayed.
If the package list is out of date (because you added or removed a package, or you knowthe package you want should be available but it isn’t), you can instruct npm to clean thecache using the following command:
npm cache clean
The next time you ask npm for a list of packages, the command will take longer becauseit will need to rebuild its cache.
Creating PackagesAlthough most of the packages you get using the npm install command are availableto anyone who uses Node, writing a package does not require publishing it to the world.Consolidating your own code into module packages makes it easy to reuse your workacross multiple projects, share it with other developers, or make it available to stagingor production servers running your application.
Packages do not have to be limited to modules or extensions; in many cases, packagescontain full applications intended for deployment. Package files make deployment easyby declaring dependencies, eliminating the library-labyrinth guesswork that was tra-ditionally required when moving from development to production environments.
Creating a package doesn’t require much more work than creating a package.json filewith some basic definitions about your module—its name and version number beingthe most critical components. To quickly generate a valid package file, run the
170 | Chapter 8: Extending Node
www.it-ebooks.info

command npm init from your module’s directory. You will be prompted to enterdescriptive information about your module. Then the command will emit apackages.json file into the directory. If a package file already exists, its attributes willbe used as the default values and you will be given a chance to overwrite them withnew information.
To use your package, install it using npm install /path/to/yourpackage. The path maybe a directory on your filesystem or an external URL (such as GitHub).
Publishing PackagesIf your module is useful to a broader audience and ready for prime time, you can releaseit to the world using npm’s publish command. To publish the contents of your package:
1. Create a user with the adduser command:
npm adduser
Follow the instructions that appear. You will be prompted for a username, pass-word, and email address.
2. Publish your package with the publish command:
npm publish
That’s all there is to the process. At present, no registration or validation is needed.
This raises an interesting point about npm: because anyone can publisha package without any prefiltering or oversight, the quality of the libra-ries you install using npm is uncertain. So “buyer beware.”
If you decide later to unpublish your package, you may do so with the npm unpublishcommand. Note that you will need to clear your package list cache.
LinkingAlthough npm excels at publishing and deploying, it was designed primarily as a toolfor managing dependencies during development. The npm link command creates asymbolic link between your project and its dependencies, so any changes in the de-pendencies are available to you as you work on your project.
There are two major reasons you would want to do this:
• You want to use requires() to access one of your projects from another one of yourprojects.
• You want to use the same package in multiple projects, without needing to main-tain its version in each of your projects.
Package Manager | 171
www.it-ebooks.info
Typing npm link with no arguments creates a symbolic link for the current project insidethe global packages path, making it available to npm in all other projects on your system.To use this feature, you need to have a packages.json file, described earlier. Using npminit is the fastest way to generate a barebones version of this file.
Typing npm link packagename creates a symbolic link from the project’s working di-rectory to the global modules path for that package. For example, typing npm linkexpress will install the Express framework in the global packages directory and includeit in your project. Whenever Express is updated, your project will automatically usethe latest version from the global packages directory. If you have linked Express in morethan one project, all of those projects will be synchronized to the most recent version,freeing you from having to update every one of them whenever Express is updated.
Add-onsWhereas modules are the JavaScript extensions for Node, add-ons are the C/C++ ex-tensions. Add-ons frequently wrap existing system libraries and expose their function-ality to Node. They can, of course, create new functionality too, although most peoplechoose to do that in JavaScript for obvious reasons. Add-ons are dynamically linkedshared objects.
To create an add-on, you’ll need at least two sets of files: the add-on code and the buildfiles. Node uses the waf build system written in Python. Let’s start with a “Hello World”example. Example 8-2 is equivalent to exports.hello = "world"; in JavaScript.
Example 8-2. A simple add-on for Node
#include <v8.h>
using namespace v8;
extern "C" void init (Handle<Object> target) { HandleScope scope; target->Set(String::New("hello"), String::New("world"));}
The first thing this code needs to do is include the v8 header file because Node is builton top of V8. This provides a lot of standard objects that we will use. Next, we declarethe namespace. Then we create the wrapper, which is required by all add-ons. Thewrapper functions like the exports global variable for JavaScript modules. We’ll hangeverything we expose from the add-on off a function with the signature extern 'C' voidinit (Handle<Object> target).
172 | Chapter 8: Extending Node
www.it-ebooks.info
Glossary
Blocking operationA blocking operation requires the programto halt while it is waiting for a slow resource.
Typically, this is either a hardware resource(such as a disk drive), or a network resource(such as an HTTP request). Because the re-quest cannot require a result from a slowresource, it blocks subsequent operationuntil it is complete, even if the computer orprogram still has available resources such asCPU or memory available.
CallbackA callback is a function that is “called back”to after a blocking operation. Typically, thisis an I/O operation such as disk access. Call-backs can take parameters.
ClassSee Pseudoclass.
FunctionA unit of code that can be invoked with a setof variable parameters. It may pass a singlereturn. In JavaScript, functions also have acontext, which defines the value of the re-served this variable. Functions in JavaScriptare considered first class in that they can alsobe treated as variables or properties ofobjects.
MethodA function that is a property of an object.
See also Function.
Nonblocking operationA nonblocking operation is one that doesnot block.
See also Blocking operation.
PseudoclassA pseudoclass is a way of creating an abtractobject in JavaScript that is intended to beinitialized into an object. Pseudoclassesshould be turned into objects using the newkeyword. Pseudoclass names start with aleading capital by convention to differenti-ate them from other kinds of objects. Forexample, Server would be a pseudoclass,and server might be an instance of thatpseudoclass.
173
www.it-ebooks.info


Index
Symbols. (period), 8
AA (address) records, 77accept HTTP header, 31add-ons, 172address (A) records, 77advanced message queueing protocol (AMQP),
140–143aes192 algorithm, 83Almaer, Dion, 13AMQP (advanced message queueing protocol),
140–143APIs, 55
(see also specific APIs)adding, 25core, 55–76helper, 77–106testing, 26
applications (see web applications)apt command, 127ASCII encoding format, 73, 74assert module
about, 27, 101–104deepEqual() method, 102doesNotThrow() method, 102equal() method, 101notDeepEqual() method, 102notEqual() method, 101notStringEqual() method, 102strictEqual() method, 28stringEqual() method, 102throws() method, 102
asynchronous communicationscallbacks and modified objects, 44error handling in, 46fs module and, 69I/O activities and, 41
auth command (Redis), 122authentication, password (Redis), 122
BbasicAuth middleware, 156binary data
about, 71–73strings and, 73
block ciphers, 83blocking operations, 173blowfish algorithm, 83bodyParser middleware, 26, 152, 156browsers (see web browsers)BSON object storage, 123Buffer class
about, 3, 17, 63, 70binary data and, 71–73binary data and strings, 73byteLength() method, 75size considerations, 71, 74toString() method, 17usage considerations, 73–75working with strings, 75–76write() method, 75
Ccallbacks
dealing with events, 57–59defined, 10, 173
We’d like to hear your suggestions for improving our indexes. Send email to [email protected].
175
www.it-ebooks.info

DNS module and, 78event-driven programming and, 34–40modified objects and, 44nesting, 42, 70unordered parallel I/O and, 41
canonical name (CNAME) records, 77Caswell, Tim, 42chat server application
about, 15causing server failure, 20checking write status of sockets, 22communicating between clients, 18connecting to TCP server, 16creating TCP server, 15disconnecting clients, 20improving chat server, 22improving message sending, 19listening to each connection, 16logging errors, 23running improved chat server, 20sending data to servers, 17sending messages between clients, 18
checkContinue event, 61child processes, 47–52, 94–101child_process module
about, 49, 94exec() method, 94–97pid property, 95spawn() method, 94, 97–101stderr property, 95, 99stdin property, 95, 97, 98stdout property, 95, 97, 98
Cipher classabout, 82, 83final() method, 84update() method, 83
.clear meta-command, 8clientError event, 61ClientRequest class
about, 61–65end() method, 62, 64write() method, 64
ClientResponse classabout, 65header property, 65setEncoding() method, 27, 64statusCode property, 65
close event, 61cluster module
about, 47–52fork() method, 48isMaster property, 48isWorker property, 48
CNAME (canonical name) records, 77code, writing (see writing code for production)CoffeeKup template engine, 152commonJS module format, 9, 169compiler middleware, 156CONFIG command, 122configure script
about, 5--prefix argument, 7
Connect library, 44, 155–157connection event, 16, 61connection pooling, 137–139console.log command
about, 76error event and, 23hex values in, 72printing information with, 10, 49
.cookieParser middleware, 156CouchDB database
about, 107createClient() function, 112creating documents in, 112creating tables in, 112deleting documents from, 114getDoc command, 113installing, 107Node module, 108, 111node-couchdb package, 111–115over HTTP, 108–111reading documents, 113removeDoc command, 115saveDoc command, 113updating records in, 113
createConnection command, 141Crockford, Douglas, 12, 59cross-site request forgery (CSRF) protection,
156crypto module
about, 79Cipher class, 82, 83createHash() method, 79createHmac() method, 81createSign() method, 85Decipher class, 82, 84Hash class, 80–81
176 | Index
www.it-ebooks.info

Hmac class, 81, 82Sign class, 82, 85Verify class, 82, 86
cryptographyhashing and, 79–81HMAC and, 79, 81–82OpenSSL and, 5, 81public key, 82–86usage considerations, 79
CSRF (cross-site request forgery) protection,156
csrf middleware, 156
DDahl, Ryan, 59data access
about, 107connection pooling, 137–139CouchDB database, 107–115MongoDB database, 123–127MQ protocols, 139–143MySQL database system, 127–133PostgreSQL database system, 134–136Redis key-value store, 115–122
data event, 69db-mysql package, 127Decipher class
about, 82, 84update() method, 84
.delete command (MySQL), 131DELETE verb (HTTP), 109, 151deleting
data in MySQL, 130data in PostgreSQL, 136documents from CouchDB, 114files, 70
denial-of-service (DoS) attack, 152die event, 38directory middleware, 156distributing work example, 48–52dns module
about, 77lookup() method, 78resolve() method, 77–79resolve4() method, 78resolve6() method, 78resolveMX() method, 78reverse() method, 77
DNS requests, 72
document storesCouchDB over HTTP, 108–111reading documents, 113Redis key-value store, 115–122
DOS (denial-of-service) attack, 152
EEADDRINUSE exception, 48Eich, Brendan, 12EJ (Embedded JavaScript) template engine,
152EJS layout file, 29emailchanged event, 165emailupdate event, 165Embedded JavaScript (EJ) template engine,
152encoding formats, 72, 74end event, 91error event, 23, 47error handling, 46errorHandler middleware, 156eval() method call, 104event listeners
about, 88calling, 57creating for events, 56firing, 57
event loopabout, 33–40callbacks and, 34–40patterns and, 34process module and, 93–94single-threaded concept, 35
event-driven programmingabout, 34callbacks and, 34–40nonblocking operations and, 38patterns and, 40–44single-threaded concept, 35
EventEmitter classabout, 56emit() method, 56, 57on() method, 56process module and, 87stream support, 68
events, 56(see also specific events)callback syntax, 57–59creating event listeners for, 56
Index | 177
www.it-ebooks.info

emitting, 57listening for, 56passing parameters when emitting, 57
Events APIabout, 55callback syntax, 57–59EventEmitter class, 56, 57, 68, 87
exit event, 87.exit meta-command, 8Express module
about, 23, 145–146app folder structure, 28bodyDecoder() method, 28bodyParser() function, 26, 152createServer() method, 24handling form data, 151http module and, 146installing, 23, 24, 145layout file in, 29limit() method, 152listen() method, 24methodOverride() function, 152middleware and, 155–159send() method, 146setting up routing in, 146–150, 157Socket.IO library and, 163–167template engines, 152–155
Ffactory pattern, 157–159favicon middleware, 156FIFO (first-in-first-out) queue, 118file descriptors, 98files
deleting, 70reading, 70
filesystem module (see fs module)first-in-first-out (FIFO) queue, 118fs module
about, 69readFile() method, 70readFileSync() method, 82, 161unlink() method, 70
Fuchs, Thomas, 13functional scope in JavaScript, 43functions
defined, 173functional scope and, 43hashing and, 79
Node REPL and, 8passing changes between, 44
Ggeneric-pool module, 137get command (Redis), 116GET verb (HTTP), 62–64, 146, 151getDoc command, 113GZIP algorithm, 5
HHaml template engine, 152Hash class
digest() method, 80–81update() method, 80–81
Hash-based Message Authentication Code(HMAC), 79, 81–82
hashes and hashing algorithmsabout, 79–81HMAC and, 79, 81–82native MongoDB driver support, 124Redis key-value store and, 116–118
“Hello World” example, 9.help meta-command, 8hexadecimal notation, 71HMAC (Hash-based Message Authentication
Code), 79, 81–82Hmac class
creating object, 82digest() method, 81update() method, 81
hmset command (Redis), 118hset command (Redis), 116, 118HTML5 WebSockets standard, 159HTTP clients, 27, 61–65http module
about, 27, 59ClientRequest class, 61–65ClientResponse class, 27, 64, 65Connect library and, 156createServer() method, 9, 39, 59, 109Express module and, 146get() method, 46, 62–64HTTP clients, 27, 61–65HTTP servers, 39, 59–61, 160including in code, 9request() method, 9, 27, 62Server class, 59, 60
178 | Index
www.it-ebooks.info

ServerResponse class, 10work distribution example, 48
HTTP serversabout, 59–61creating, 39Socket.IO library and, 160
HTTP, CouchDB over, 108–111
II/O activities, 41
(see also nonblocking operations)API support, 68–76Node approach, 34, 40ordered serial I/O, 42–44splitting out, 46unbounded latency, 41unordered parallel I/O, 41
Ingres database system, 134(see also PostgreSQL database system)
.insert command (MySQL), 129installing
CouchDB database, 107CouchDB Node module, 108db-mysql package, 127Express module, 23, 24, 145Mongoose library, 125native MongoDB driver, 123node-db module, 127Node.js, 4–7PostgreSQL database system, 134RabbitMQ message broker, 140Redis key-value store, 115Redis Node module, 115
IPv4 address records, 78IPv6 address records, 78
JJade template engine, 152–154JavaScript
about, 3–4, 12browser support, 12functional scope, 43hexadecimal notation and, 72maximum heap size, 46trycatch functionality, 46weird and amusing things about, 8
jQuery template engine, 152
Kkeys
PEM-encoded, 81, 83private, 82public, 82–86setting, 117
kill command, 97Koch, Peter Paul, 13Kvaleim, Christian, 123
Llayouts and partial views, 154–155.less files, 156libpq-dev package, 134limit middleware, 157list commands in Redis, 118Listener class, 160logger middleware, 157lpush command (Redis), 118
Mmail exchanger (MX) records, 77make command, 6master processes, 47–52MD5 hashing algorithm, 79, 80methodOverride middleware, 152, 157methods (term), 173middleware
about, 26, 155–157Connect library and, 44, 155factory pattern, 157–159route, 149
MongoDB databaseabout, 123defining schemas, 125Mongoose library, 125–127native MongoDB driver, 123writing records, 124
Mongoose libraryabout, 125defining schemas, 125installing, 125manipulating collections, 126performance considerations, 127
MQ protocolsabout, 139RabbitMQ, 140–143
multicore processors, 47–52
Index | 179
www.it-ebooks.info

MVCC (multi-version concurrency control),107
MX (mail exchanger) records, 77MySQL database system
about, 127node-db module, 127–131Sequelize ORM, 131–134
Nnamespaces, Socket.IO library, 161–162nesting callbacks, 42, 70net module
about, 16createServer() method, 16Server class, 16Socket class, 16, 20, 23
new keyword, 56Node module
CouchDB database, 108, 111Redis key-value store, 115
Node Package Manager (see npm)Node REPL, 7–8node-couchdb package
about, 111creating documents, 112deleting documents, 114reading documents, 113updating documents, 113working with databases, 112
node-db moduleabout, 127connection pooling and, 137deleting data, 130inserting data, 129installing, 127selecting data, 128updating data, 129
Node.jsabout, 3–4building chat server, 15–23building robust applications, 33–52building Twitter-like application, 23–32core APIs, 55–76extending, 169–172installing, 4–7as runtime environment, 7–8strengths of, 11–14version numbers, 5as web servers, 9–10, 11
nonblocking operationsAPI support, 68–76defined, 173error handling and, 46event-driven programming and, 38Node approach, 34
NoSQL systemsCouchDB database, 107–115MongoDB database, 123–127Redis key-value store, 115–122
npm (Node Package Manager)about, 169adduser command, 171creating packages, 170init command, 171install command, 170installing db-mysql package, 127installing Express module, 24installing Mongoose library, 125link command, 171linking dependencies, 171publish command, 171publishing packages, 171search command, 170searching packages, 170unpublish command, 171
Oobject relational mapper (ORM), 131–134objects
passing by reference, 44setting and enumerating, 8setting multiple hash values, 117
onclick event, 4OpenSSL
cryptography and, 5, 79PEM-encoded keys, 81, 83
ordered serial I/O, 42–44ORM (object relational mapper), 131–134os module, 48
Pparallel I/O
combining work groups, 41unordered, 41
passing objects by reference, 44password authentication (Redis), 122patterns
180 | Index
www.it-ebooks.info

about, 70event loop and, 34I/O considerations, 40–44middleware factories, 157–159spooling, 69
PEM-encoded keys, 81, 83period (.), 8pg_config utility, 134POST verb (HTTP), 64, 68, 151PostgreSQL database system
about, 134deleting data, 136inserting data, 135installing, 134selecting data, 135updating data, 136
private keys, 82process module
about, 86argv property, 92, 97chdir() method, 91cwd() method, 90, 95event loop and tickers, 93–94execPath property, 90exit event, 87getgid() method, 90installPrefix property, 90memoryUsage() method, 91nextTick() method, 93–94PEM-encoded keys and, 82pid property, 90platform property, 90setgid() method, 90setuid() method, 90stderr property, 91, 92stdin property, 91stdout property, 91title property, 90uncaughtException event, 87, 88, 94uptime() method, 90version property, 90
profiler middleware, 157ps command, 90pseudoclasses (term), 59, 173public key cryptography
about, 82creating signatures using Sign class, 85decrypting with Decipher class, 84encrypting with Cipher class, 83
verifying signatures with Verify class, 86publishing
packages, 171RabbitMQ message broker, 140–142Redis key-value store and, 121
PUT verb (HTTP), 64, 109, 151pyramid code, 42
Qq.shift() command, 143query middleware, 157querystring module
about, 67–68decode() method, 67encode() method, 67, 68escape() method, 67parse() method, 67–68stringify() method, 67unescape() method, 67unescapeBuffer() method, 67
queues, RabbitMQ message broker and, 142–143
RRabbitMQ message broker
about, 140createConnection command, 141installing, 140publishing and subscribing, 140–142subscribe command, 142work queues, 142–143
Read-Evaluate-Print-Loop (REPL), 7–8ReadableStream class
about, 68pipe() method, 91
Redis key-value storeabout, 115auth command, 122basic usage, 115get command, 116hashes and, 116–118hmset command, 118hset command, 116, 118installing, 115list commands, 118lpush command, 118password authentication, 122rpop command, 118
Index | 181
www.it-ebooks.info

sadd command, 119set command, 116smembers command, 119subscribe command, 121zadd command, 119zcard command, 119zrange command, 119
reference, passing by, 44RegExp class
match() method, 148test() method, 103
regular expressionsdefining routes, 148testing through assert, 103
relational databasesMySQL, 127–133PostgreSQL, 134–136
removeDoc command, 115REPL (Read-Evaluate-Print-Loop), 7–8request event, 36, 57require() function, 9, 60Resig, John, 13response event, 36, 62responseTime middleware, 157RIPEMD160 hashing algorithm, 79root user, 6router middleware, 157routes
Express module and, 146–150, 157passing control to, 149wildcards in, 147
rpop command (Redis), 118runtime environment, 7–8Russell, Alex, 13
Ssadd command (Redis), 119.sass files, 156saveDoc command, 113schemas
MongoDB and, 125Sequelize and, 132
Script classabout, 104, 105runInNewContext() method, 106
Separation of Concerns (SoC) paradigm, 166Sequelize object relational mapper, 131–134serial I/O
combining work groups, 41
ordered, 42–44Server class (http module)
about, 59checkContinue event, 61clientError event, 61close event, 61connection event, 61listen() method, 60upgrade event, 61
Server class (net module)connection event, 16listen() method, 16
ServerResponse classend() method, 10writeHead() method, 10
service (SRV) records, 78session middleware
about, 157, 166save() method, 167
.set command (MySQL), 130set command (Redis), 116SHA1 hashing algorithm, 79, 80SHA256 hashing algorithm, 79SHA512 hashing algorithm, 79SIGINT interrupt signal, 89SIGKILL interrupt signal, 97Sign class
about, 82, 85sign() method, 85update() method, 85
SIGTERM interrupt signal, 97single-threaded concept
about, 35multiple processor usage and, 47–52writing code for production, 46
smembers command (Redis), 119SoC (Separation of Concerns) paradigm, 166Socket class
accept() method, 167connect() method, 160destroy() method, 23end() method, 16handshake property, 167listen() method, 160remoteAddress property, 20remotePort property, 20write() method, 16
Socket.IO libraryabout, 159–161
182 | Index
www.it-ebooks.info

Express module and, 163–167namespaces and, 161–162
sorted sets, 119spooling pattern, 69SRV (service) records, 78static middleware, 157staticCache middleware, 157STDERR error stream
child_process module and, 95, 99process module and, 91, 92
STDIN input streamchild_process module and, 95, 97, 98process module and, 91
STDOUT output streamchild_process module and, 95, 97, 98process module and, 91
Stonebraker, Michael, 134stream API
about, 68ReadableStream class, 68, 91WritableStream class, 92
stringsbinary data and, 73working with, 75–76
subscribe commandRabbitMQ message broker, 142Redis key-value store, 121
subscribingRabbitMQ message broker, 140–142Redis key-value store, 121
sudo command, 6
Ttables, creating in CouchDB, 112tar command
f flag, 5x flag, 5z flag, 5
TCP serverscausing failure by disconnecting clients, 20checking writing status of sockets, 22communicating between clients, 18connecting to, 16creating, 15improving message sending, 19listening to connections, 16logging errors, 23making more robust, 22running improved, 20
sending data from Telnet, 17sending messages between clients, 18
Telnetconnecting TCP servers with, 16sending data to servers, 17
template enginesabout, 152–154layouts and partial views, 154–155
testing APIs, 26text (TXT) records, 77try/catch block, 46Twitter-like application
about, 23adding basic API, 25basic web server in, 24checking accept header, 31EJS layout file, 29folder structure, 28installing Express module, 23redirecting browsers, 32rendering chirps, 31rendering index template, 30rendering stylesheets, 31showing tweets, 30testing APIs, 26
TXT (text) records, 77
UuncaughtException event, 87, 88, 94unordered parallel I/O, 41.update command (MySQL), 130, 131upgrade event, 61URL module
about, 65format() method, 65parse() method, 65–67querystring module and, 68resolve() method, 65
UTF-8 encoding format, 72, 74util module
about, 56inherits() method, 56
VV8 JavaScript runtime
about, 3, 9Node REPL and, 7
Verify class
Index | 183
www.it-ebooks.info

about, 82, 86update() method, 86verify() method, 86
version numbers (Node.js), 5vhost middleware, 157view engines
mixing and matching, 153turning into real websites, 154
vm moduleabout, 104–106runInNewContext() method, 105, 106runInThisContext() method, 105Script class, 104, 105
Wweb applications
building chat server, 15–23building Twitter-like app, 23–32event loop, 33–40patterns, 40–44writing code for production, 45–52
web browsersbrowser wars, 13HTML5 WebSockets standard, 159JavaScript support, 12redirecting from endpoint, 32
web serversabout, 9–10, 59Express module support, 24high-performance, 11
.where command (MySQL), 130wildcard in routes, 147work distribution example, 48–52work queues, RabbitMQ, 142–143WritableStream.write() method, 92writing code for production
about, 45error handling, 46multiple processor usage, 47–52
XX-Response-Time header, 157
Zzadd command (Redis), 119zcard command (Redis), 119zombie workers, killing, 50
zrange command (Redis), 119
184 | Index
www.it-ebooks.info

About the AuthorsTom Hughes-Croucher is a developer and technology evangelist. He’s worked forand with numerous well-known brands, including Yahoo!, NASA, Tesco, Walmart,MySpace, Three Telecom, and UK Channel 4. Tom has contributed to a number ofweb standards for the World Wide Web Consortium (W3C) and the British StandardsInstitute (BSI).
Mike Wilson has had the privilege of working with some of the largest and most in-fluential brands in the world, including Disney, Microsoft, and McDonald’s. He hasyears of web development experience, designing and building everything from small-business sites to large MMO server clusters hosting millions of players. In his free time,Mike maintains his personal blog, contributes to forums, and experiments with emerg-ing frameworks and software. Mike lives in Vancouver with his wife and their threechildren.
ColophonThe animal on the cover of Node: Up and Running is a common tree shrew (Tupaiaglis). These arboreal mammals are found in the southern parts of Southeast Asia. Com-mon tree shrews live in forests, though they are also found in orchards and gardens.They are good climbers and can jump up to two feet between trees. They are activeduring the day, feeding on plants, seeds, and fruit, as well as ants, spiders, and smalllizards.
Common tree shrews are 6–8 inches long, with a thick bushy tail as long as their bodies.They have pointed snouts and five-toed clawed feet. Their fur is black, gray, or reddish,with white on the belly. The genus name Tupaia comes from the Malay for “squirrel,”which the creatures somewhat resemble. Tree shrews were also thought for some timeto be closely related to the primates, but they now have their own order, Scandentia.
Common tree shrews are sexually mature at a few months old, and they mate monog-amously. The male constructs two separate nests—one for the parents and one for theyoung. Parental care is scant; the female visits the offspring to nurse them for a fewminutes every two days.
The cover image is from Lydekker’s Natural History. The cover font is Adobe ITCGaramond. The text font is Linotype Birka; the heading font is Adobe Myriad Con-densed; and the code font is LucasFont’s TheSansMonoCondensed.
www.it-ebooks.info
