up and running with - emperex corporation
TRANSCRIPT
Up and Running with
Upgrade PrimeCode / RMS
v3.5.9 - D20.18
Note: This manual describes the process of upgrading from one version of RMS/PrimeCode to a newer major version.
This document does not apply if you are applying (upgrading) a minor update patch to your current version.
* RMS D20.18 and PrimeCode 3.5.9 must be installed together.
ii RMS – PrimeCode Upgrade Manual
PrimeCode is a trademark of Emperex Corporation. PrimeCode contains intellectual
property which is proprietary to and a trade secret of Emperex Corporation.
Unauthorized reproduction of this document is strictly prohibited.
For any occurrence of the words PrimeCode, the trademark is assumed. All other
brand names are trademarks or registered trademarks of their respective companies.
Copyright © 1999-2021. All rights reserved. No part of this document may be
reproduced in any form by any means without express written permission from
Emperex Corporation.
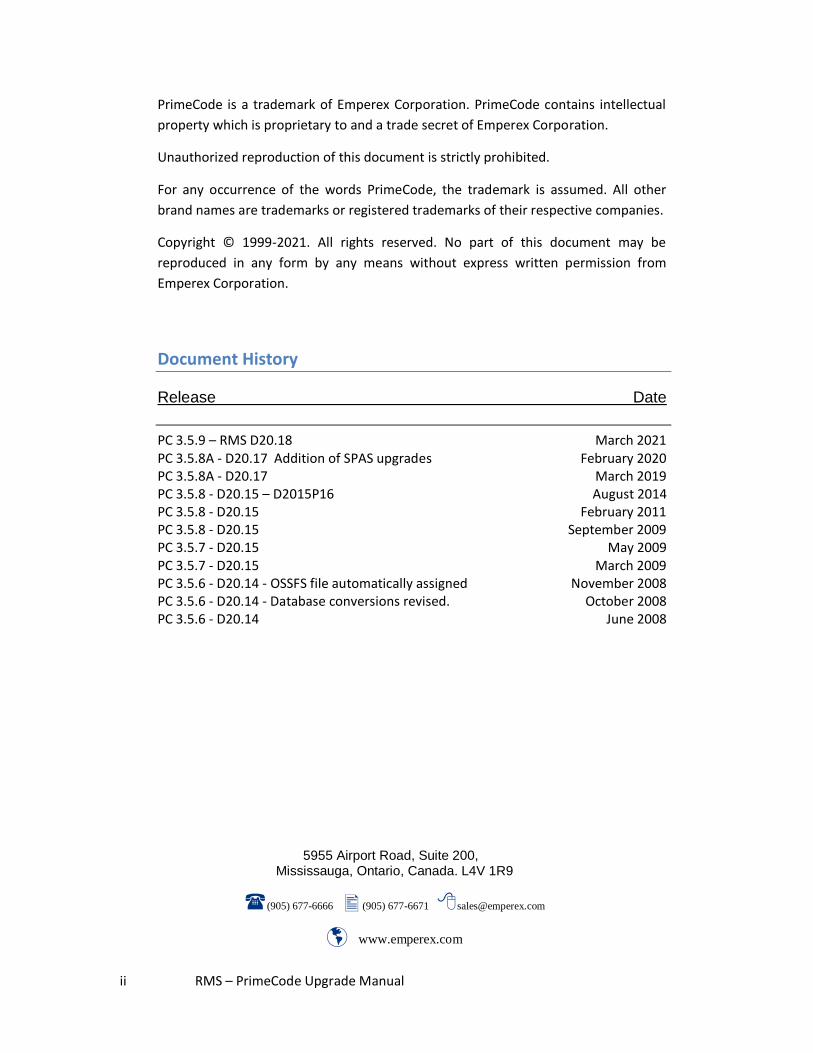
Document History
Release Date
PC 3.5.9 – RMS D20.18 March 2021 PC 3.5.8A - D20.17 Addition of SPAS upgrades February 2020 PC 3.5.8A - D20.17 March 2019 PC 3.5.8 - D20.15 – D2015P16 August 2014 PC 3.5.8 - D20.15 February 2011 PC 3.5.8 - D20.15 September 2009 PC 3.5.7 - D20.15 May 2009 PC 3.5.7 - D20.15 March 2009 PC 3.5.6 - D20.14 - OSSFS file automatically assigned November 2008 PC 3.5.6 - D20.14 - Database conversions revised. October 2008 PC 3.5.6 - D20.14 June 2008
5955 Airport Road, Suite 200, Mississauga, Ontario, Canada. L4V 1R9
(905) 677-6666 (905) 677-6671 [email protected]
www.emperex.com
iii RMS – PrimeCode Upgrade Manual
Foreword
The installation and upgrade procedures for PrimeCode and/or RMS have always
been met with a good deal of anticipation about how complicated or confusing it
can be.
This document may appear at first a bit overwhelming because of its size. It is
large, and it has continued to grow, but mostly because of our efforts to include
as much explanation for you as possible in the hopes of reducing the mystery
about what is happening during the process or to give you the understanding
required to make some optional choices.
Most of the content included in the first 17 pages is entirely devoted to a process
overview and assisting users in getting familiarized again (if necessary) with the
parameters of their current environment. The last 40+ pages are appendices
dealing with system requirements, security, and the sample text of macro outputs.
The installation or upgrade steps are followed in a specific order that is easy
enough to follow but knowing where things are and where things go is a
prerequisite for answering many of the questions the routines ask you along the
way.
Careful reading of every line might take longer but will prevent headaches and
problems during upgrade that can take longer to resolve.
If you have performed upgrades before and are familiar with your catalog you can
skip directly to the first of the procedural steps on page:
The steps commencing at page include advice, recommendations, choices,
clarifications, and explanations. A very short, point form version of these
steps is also provided in Appendix I at the end of this document but should
not be used as a guide for anyone who has not performed an update several
times before.
This is a generic upgrade document that applies to all upgrades. Most upgrades
are relatively straight forward if you are not jumping over some key versions,
which required database conversions prior to upgrading.
Files from D20.15 are referred to but if you are installing D20.14 for example, the
filename references are the same with the exception that version D20.15 is
reflected in these names.
iv RMS – PrimeCode Upgrade Manual
RMS Installation Documentation
Prior to the existence of PrimeCode, RMS (today referred to as the
core servers of PrimeCode) was distributed on tape and an
installation manual titled Install.pdf was included on that tape.
Since the first release of PrimeCode, which includes RMS, the
instructions for installing PrimeCode have included instructions for
installing RMS.
The original Install.pdf was included on the CD because it
contained still relevant material covering security of catalogs and a
useful overview of the organization of catalog structures.
Having two documents that related to installation was unfairly
complicating things for some new users and, material covering the
handling of tape was redundant.
This document now contains the sections of Install.pdf that are still
useful and Install.pdf is no longer included on the PrimeCode CD.
v RMS – PrimeCode Upgrade Manual
The Current Release
These are instructions for upgrading are issued with the current
release of PrimeCode v 3.5.8A and RMS D20.17 of the Core
servers.
This version of PrimeCode installs and runs on Windows 7, 8 and
10. The RMS CORE servers have all been certified most recently on
J06.22.00 and X86-L19.03.00 NonStops.
Please check our web site for troubleshooting tips on Installation
of the PrimeCode User Interface on Windows 7, 8, 10 at:
Support / Tech Bulletins (from the menu) or at this link:
Installing PrimeCode on Windows 7, 8, 10.
If you currently run PrimeCode 3.5.6 | D20.14 or anything older,
both the Core and Feature installation sections should be run.
vi RMS – PrimeCode Upgrade Manual
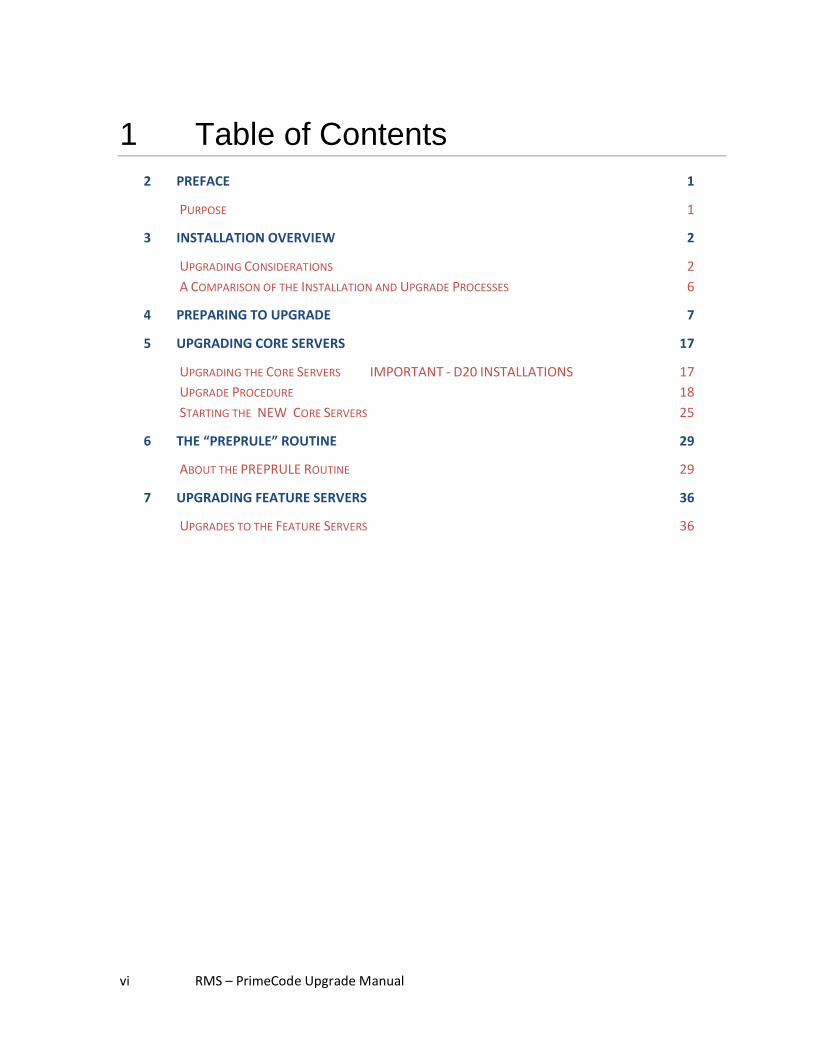
1 Table of Contents
2 PREFACE 1
PURPOSE 1
3 INSTALLATION OVERVIEW 2
UPGRADING CONSIDERATIONS 2
A COMPARISON OF THE INSTALLATION AND UPGRADE PROCESSES 6
4 PREPARING TO UPGRADE 7
5 UPGRADING CORE SERVERS 17
UPGRADING THE CORE SERVERS IMPORTANT - D20 INSTALLATIONS 17
UPGRADE PROCEDURE 18
STARTING THE NEW CORE SERVERS 25
6 THE “PREPRULE” ROUTINE 29
ABOUT THE PREPRULE ROUTINE 29
7 UPGRADING FEATURE SERVERS 36
UPGRADES TO THE FEATURE SERVERS 36
vii RMS – PrimeCode Upgrade Manual
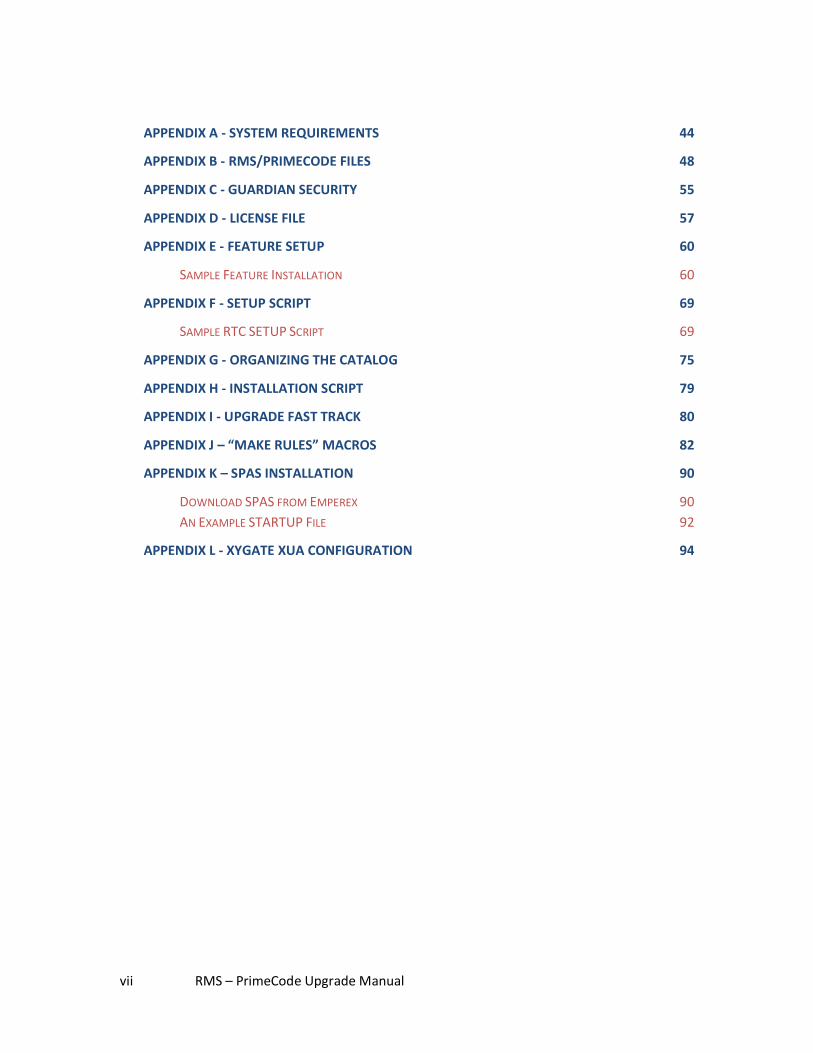
APPENDIX A - SYSTEM REQUIREMENTS 44
APPENDIX B - RMS/PRIMECODE FILES 48
APPENDIX C - GUARDIAN SECURITY 55
APPENDIX D - LICENSE FILE 57
APPENDIX E - FEATURE SETUP 60
SAMPLE FEATURE INSTALLATION 60
APPENDIX F - SETUP SCRIPT 69
SAMPLE RTC SETUP SCRIPT 69
APPENDIX G - ORGANIZING THE CATALOG 75
APPENDIX H - INSTALLATION SCRIPT 79
APPENDIX I - UPGRADE FAST TRACK 80
APPENDIX J – “MAKE RULES” MACROS 82
APPENDIX K – SPAS INSTALLATION 90
DOWNLOAD SPAS FROM EMPEREX 90
AN EXAMPLE STARTUP FILE 92
APPENDIX L - XYGATE XUA CONFIGURATION 94
1 RMS – PrimeCode Upgrade Manual
2 Preface
Purpose
This guide outlines the steps for installing PrimeCode (PrimeCode Feature Servers &
RMS Core Servers) as well as the Client (Graphical Interface) and Upgrade
installations. An HTML version of this document is also available on your CD and from
our Web site at www.emperex.com.
Who Should Read this Document
The installation of PrimeCode is usually handled by the Change Management staff who
will operate PrimeCode/RMS once it has been implemented. The Installation team
should also include a member with SUPER.SUPER privileges who will perform the final
phases of the installation where licensing is required.
Related Documents
The full installation guide provides both installation and upgrade procedures.
Book 1 - Installation and Configuration Manual
Book 2 - Implementation Guide
Book 3 - Process Rollout Guide
Customer Support
We offer three types of support. Send us an e-mail, call the numbers below or log an
issue with our Web-based Help Desk via the Emperex Corporation Web Site.
E-mail: [email protected]
Phone: (905) 677-6666
Regular Hours (Monday - Friday, 9 a.m. - 6 p.m. EST)
After Hours Support: (905) 677-6666, Press 7.
2 RMS – PrimeCode Upgrade Manual
3 Installation Overview
Upgrading Considerations
Installer User ID (for OSS licensees)
If PrimeCode is being upgraded to access an OSS environment the User
Id used when installing and running STARTUP must have OSS write
permission under the /usr directory and an initial OSS directory.
Support for Long Lines in non-GUARDIAN Source Files
PrimeCode/RMS uses managed files of type 2101 to maintain versions
of source components in the catalog. Submissions may be made to
components from OSS or other environments where the limits on the
length of source lines far exceed those allowed in GUARDIAN Edit files
(239 limit).
Long Lines support will accommodate lines as long as 1024.
PrimeCode/RMS can support source files with “long lines” only if it is
modified during an upgrade by a manual procedure that is performed
by the customer prior to running the SETUP command in the
upgrade. After this feature is enabled, RMS will begin to use*
managed files of type 2180 to maintain component versions.
Warning
The activation of support for long line submissions is a manual step to ensure that customers take this step only after consideration of its consequences. The sudden and seemingly random changing of file types (from 2101 to 2180) would alarm most users if they were unaware of what that change indicated or why it was occurring. More importantly, converting to the use of 2180 files to support long lines, once activated should not be deactivated. Care should be taken when upgrading, moving a catalog, or any procedure in which the SETUP command is re-run that the necessary files to maintain “Long Lines” support are all present.
Support for “Long Lines” can be inadvertently switched OFF by the omission of the
appropriately generated FCLIB file during the SETUP step of installation or upgrade!
If “Long Lines” support is dropped, intentionally or by accident, source
files containing longer lines than can be accommodated in a type 101
Edit file may fail to get submitted properly, have lines truncated or
cause unpredicted results when dealing with the managed file that was
converted from type 2180 to type 2101.
3 RMS – PrimeCode Upgrade Manual
*Only managed files of new components will start as 2180
files. Existing components, with 2101 managed files will remain type
2101 until they are acted upon by any RMS server during such
operations as SUBMIT, CONDENSE, ROLLOUT etc. and will then be
converted to type 2180 files.
How to Activate Support for Long Lines
RMS is shipped with files named FC101 and FC180. They are found in
the RMSCORE Subvolume.
Prior to running the SETUP step of installation or upgrade, FUP DUP
the file FC180 to a new file called FCLIB.
When loaded with any other routine libraries like USERLIB (if required),
the SETUP step will incorporate their content to create the file
RMSLIB.
The RMSLIB file is created for the catalog each time SETUP is run. A
default version of it will be created from the RMSBLIB file if no other
libraries are loaded to accompany it.
The creation of the RMSLIB file that supports long lines depends on the
existence of the FCLIB file that was created using FC180. Without it,
the default RMSLIB, based on FC101, will not support the long line
submissions.
Be sure that the FCLIB file is moved with other files if you move your
catalog and re-run SETUP or perform any upgrades.
Installing on Virtual Disks
Revised March 2005: PrimeCode may be installed successfully on a
Virtual Disk but that disk must be TMF audited - a requirement of any
disk where PrimeCode/RMS is installed. TACL macros used during the
running of SETUP and the OSSMKRULE will prompt users for a physical
location for storing temporary files required for the macros to
complete. This is necessary as OSS cannot locate paths on virtual
disks.
OSS Considerations
OSS applications that use the /G interface to access Guardian files
cannot access files on a virtual disk. In mixed Guardian and OSS file
environments, all files that OSS applications access must be on physical
volumes. One of the PrimeCode servers utilizes temporary scripts in
the user’s default Subvolume. Therefore it is required that all users
4 RMS – PrimeCode Upgrade Manual
ensure their Guardian default Subvolume is located on a physical
volume. It is recommended that each user also have an initial OSS
directory.
Additional Catalogs that share a Centralized Approvals Database
If your PrimeCode installation will be licensed with ACP (Task Security
and Approvals) you may wish to take advantage of PrimeCode’s ability
to share a centralized approvals database. This is one piece of the
PrimeCode database that does not have to be included in every
catalog. Some cross-catalog operations such as Full Node Distribute
and Remote Install, and may require approvals, have very strict
prerequisite requirements for the catalog structures.
PrimeCode Users only!
During the installation of the Feature Servers you are asked if you are
doing a “Remote” install. A ‘Remote’ install of PrimeCode implies that
you are installing a catalog which will NOT host the ACP Approvals
database. Such a catalog, which will rely on the Central Approvals
database in another catalog for all approvals and notifications, must be
created using the same names for all of the subvolumes where servers
and databases are created. The monitor process names must also
match.
Consult the installation checklist for the main catalog to get the
subvolume names of ;
<PCACP> The Feature server Objects Subvolume.
<PCACPDB> The PrimeCode database subvolume.
<PCCORE> The RMS Core Objects Subvolume.
<RMSCAT> The RMS database subvolume (your catalog).
Also match the monitor process name $<RMP>.

5 RMS – PrimeCode Upgrade Manual
XYGATE (XUA) User Authentication Requirements
Consult your System Security administrators to first confirm if your
system has implemented XYGATE User Authentication (XUA).
If your system is running the XYGATE (XUA) product AND you are
installing RMS D20.16 or later you MUST run SAFECMDS (not
FUPCMDS) at step 10 of the upgrading of the Core servers.
Additional configuration of the XYGATE UAACL configuration file is
also required to grant adequate permissions to the RMS Servers in
each PCCORE subvolume that supports an RMS/PrimeCode catalog.
See the appendix on XYGATE XUA Configuration for details and an
example of what is required.
6 RMS – PrimeCode Upgrade Manual
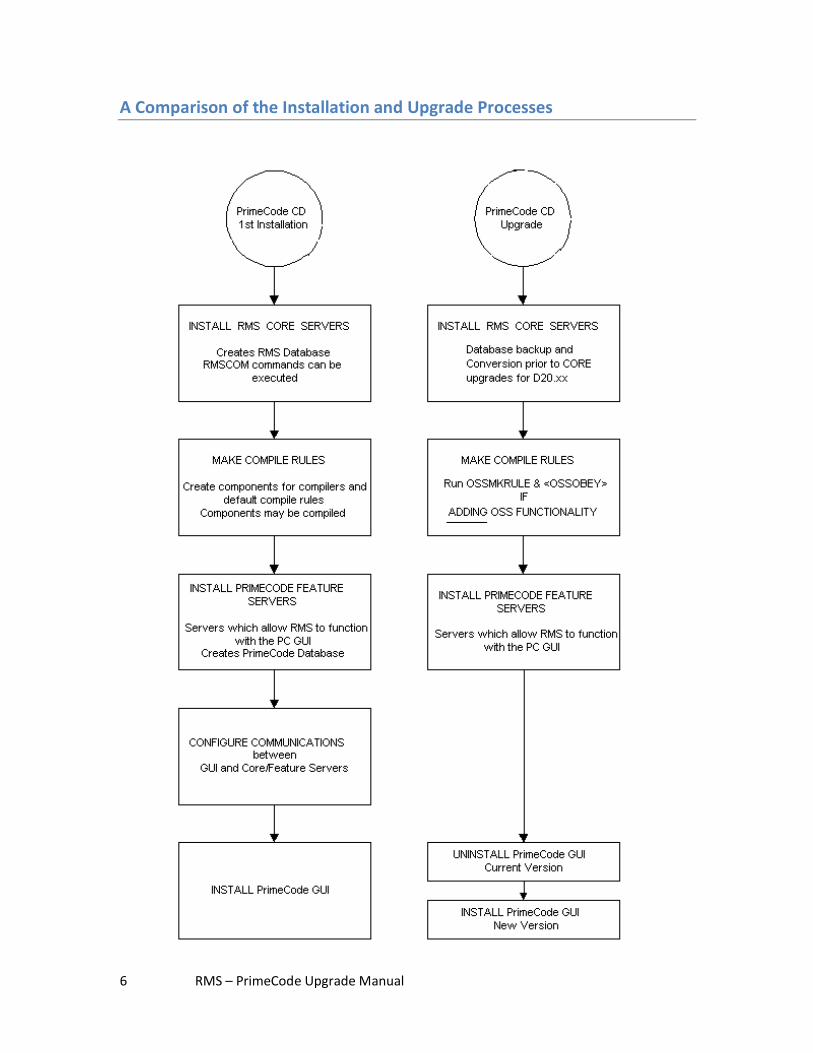
A Comparison of the Installation and Upgrade Processes
7 RMS – PrimeCode Upgrade Manual
4 Preparing To Upgrade
Conventions Used
Instructions on the following pages use the following conventions to differentiate
between explanations, text which you must enter and variables which change based
on your naming conventions.
TEXT
Text you must enter appears within a box in courier font.
Type this text and press Enter [Enter]
VARIABLES
Within these instructions there may be variables which you substitute
with appropriate custom values. Any words in <Angle Brackets> are to
be replaced by the appropriate information as it relates to your setup
and values you have defined earlier in the pre-install checklist.
e.g. <version number> may be replaced with 3.5.9
e.g. <DCORE> The suggested name for the distribution subvol of Core
Servers.
KEYSTROKES & BUTTONS
A key press on the keyboard is indicated by square brackets around the
name of the key.
i.e. [Enter] Press the Return or Enter key.
Clicking a button with the mouse is indicated in the same manner.
i.e. [OK] Click the OK button.
NOTES & ASSUMPTIONS
Notes and assumptions are indicated in italic font.
i.e. Drive D: is assumed to be your CD-ROM drive.
8 RMS – PrimeCode Upgrade Manual
A Suggested Naming Convention
There are default names for some of the subvolumes and processes
created in both the installation and the upgrade procedures.
You may wish to replace these with names that adhere to a naming
convention you prefer.
At Emperex we maintain several different catalogs to support various
different versions and to provide catalogs to numerous different
catalog owners. This convention is how we keep track of who owns a
catalog and its monitor as well as which version of RMS a database or a
process is related to.
Distribution Subvolume
This subvolume named <DCORE> in documentation could be named
with your own initials. i.e. CSCORE. The pak file CORE is unpaked here.
Core Servers Object Subvolume
<PCCORE> A subvolume named in the execution of the SETUP
command is the location of your RMS servers. We identify a set of
RMS servers for an RMS D20.18 catalog owned by John Smith by their
location in a subvolume named JS218SRV.
John Smith’s (D)2(0.)18 Servers.
RMS Catalog (Database)
<RMSCAT> A subvolume named in the macro STARTUP is the location
of the RMS database files. To identify this as the database associated
with the servers in JS218SRV, we designate a subvolume named
JS218DB.
RMS Monitor Process
$RMP is the default name of the monitor process started when you
bring up RMS and don’t name this process. To easily identify an RMS
process as your own and one that is configured to communicate with a
D20.18 version of the servers - name it $JS218.
Feature Distribution Subvolume
PrimeCode users only!
9 RMS – PrimeCode Upgrade Manual
This subvolume named <DFEATURE> in documentation could be
named with your own initials. i.e. CSFEATUR. The pak file FEATURE is
unpaked here.
Feature Servers Object Subvolume
<PCACP> A subvolume named during the execution of INSTALL routine
for PrimeCode installations and upgrades. This is the location of your
Feature servers - those that support the communication of the
PrimeCode interface with RMS. We identify a set of Feature servers
for a PrimeCode 3.5.8 catalog owned by John Smith by their location in
a subvolume named JS358SRV.
John Smith’s (PrimeCode)358 Servers.
PrimeCode Database
<PCACPDB> These letters stand for PrimeCode ACP Database. (Not
every PrimeCode installation will necessarily have ACP)
We do not refer to this subvolume as the catalog. The RMS database is
the “catalog” but this additional database is required to support the PC
interface of PrimeCode. This subvolume is also named during the
execution of INSTALL routine for PrimeCode installations and
upgrades. To identify this as the database associated with the servers
in JS359SRV, we designate a subvolume named JS359DB.
PrimeCode Pathway Monitor Process
$PCPM is the default name of the pathway monitor process started
when you Install PrimeCode and don’t name this process. To easily
identify a pathway process as your own and one that is configured to
assist communications between a D20.18 monitor and a PrimeCode
3.5.9 servers - name it with your initials ex. $JS359.
With a naming convention such as this all of the processes and subvolumes relating to your catalog can be easily identified and maintained.
10 RMS – PrimeCode Upgrade Manual
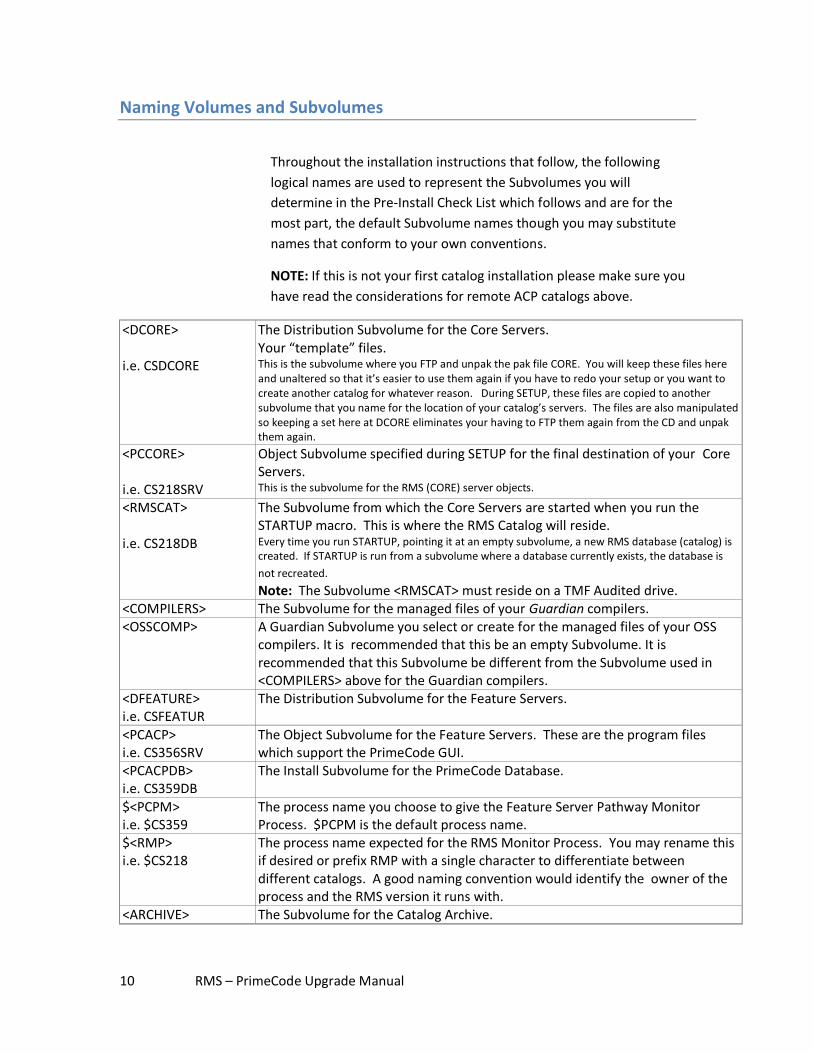
Naming Volumes and Subvolumes
Throughout the installation instructions that follow, the following
logical names are used to represent the Subvolumes you will
determine in the Pre-Install Check List which follows and are for the
most part, the default Subvolume names though you may substitute
names that conform to your own conventions.
NOTE: If this is not your first catalog installation please make sure you
have read the considerations for remote ACP catalogs above.
<DCORE> i.e. CSDCORE
The Distribution Subvolume for the Core Servers. Your “template” files. This is the subvolume where you FTP and unpak the pak file CORE. You will keep these files here and unaltered so that it’s easier to use them again if you have to redo your setup or you want to create another catalog for whatever reason. During SETUP, these files are copied to another subvolume that you name for the location of your catalog’s servers. The files are also manipulated so keeping a set here at DCORE eliminates your having to FTP them again from the CD and unpak them again.
<PCCORE> i.e. CS218SRV
Object Subvolume specified during SETUP for the final destination of your Core Servers. This is the subvolume for the RMS (CORE) server objects.
<RMSCAT> i.e. CS218DB
The Subvolume from which the Core Servers are started when you run the STARTUP macro. This is where the RMS Catalog will reside. Every time you run STARTUP, pointing it at an empty subvolume, a new RMS database (catalog) is created. If STARTUP is run from a subvolume where a database currently exists, the database is
not recreated. Note: The Subvolume <RMSCAT> must reside on a TMF Audited drive.
<COMPILERS> The Subvolume for the managed files of your Guardian compilers. <OSSCOMP> A Guardian Subvolume you select or create for the managed files of your OSS
compilers. It is recommended that this be an empty Subvolume. It is recommended that this Subvolume be different from the Subvolume used in <COMPILERS> above for the Guardian compilers.
<DFEATURE> i.e. CSFEATUR
The Distribution Subvolume for the Feature Servers.
<PCACP> i.e. CS356SRV
The Object Subvolume for the Feature Servers. These are the program files which support the PrimeCode GUI.
<PCACPDB> i.e. CS359DB
The Install Subvolume for the PrimeCode Database.
$<PCPM> i.e. $CS359
The process name you choose to give the Feature Server Pathway Monitor Process. $PCPM is the default process name.
$<RMP> i.e. $CS218
The process name expected for the RMS Monitor Process. You may rename this if desired or prefix RMP with a single character to differentiate between different catalogs. A good naming convention would identify the owner of the process and the RMS version it runs with.
<ARCHIVE> The Subvolume for the Catalog Archive.
11 RMS – PrimeCode Upgrade Manual
PrimeCode Pre-Install Checklist
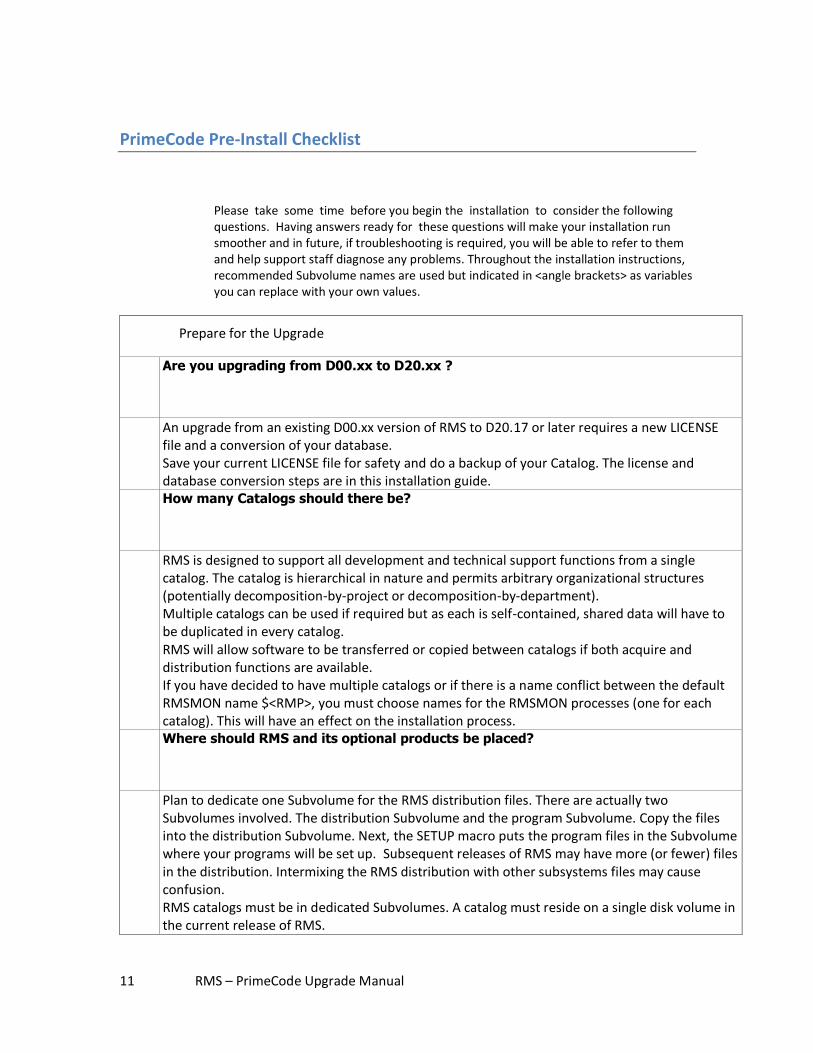
Please take some time before you begin the installation to consider the following questions. Having answers ready for these questions will make your installation run smoother and in future, if troubleshooting is required, you will be able to refer to them and help support staff diagnose any problems. Throughout the installation instructions, recommended Subvolume names are used but indicated in <angle brackets> as variables you can replace with your own values.
Prepare for the Upgrade
1
.
Are you upgrading from D00.xx to D20.xx ?
An upgrade from an existing D00.xx version of RMS to D20.17 or later requires a new LICENSE file and a conversion of your database. Save your current LICENSE file for safety and do a backup of your Catalog. The license and database conversion steps are in this installation guide.
2
.
How many Catalogs should there be?
RMS is designed to support all development and technical support functions from a single catalog. The catalog is hierarchical in nature and permits arbitrary organizational structures (potentially decomposition-by-project or decomposition-by-department). Multiple catalogs can be used if required but as each is self-contained, shared data will have to be duplicated in every catalog. RMS will allow software to be transferred or copied between catalogs if both acquire and distribution functions are available. If you have decided to have multiple catalogs or if there is a name conflict between the default RMSMON name $<RMP>, you must choose names for the RMSMON processes (one for each catalog). This will have an effect on the installation process.
3
.
Where should RMS and its optional products be placed?
Plan to dedicate one Subvolume for the RMS distribution files. There are actually two Subvolumes involved. The distribution Subvolume and the program Subvolume. Copy the files into the distribution Subvolume. Next, the SETUP macro puts the program files in the Subvolume where your programs will be set up. Subsequent releases of RMS may have more (or fewer) files in the distribution. Intermixing the RMS distribution with other subsystems files may cause confusion. RMS catalogs must be in dedicated Subvolumes. A catalog must reside on a single disk volume in the current release of RMS.
12 RMS – PrimeCode Upgrade Manual
4
.
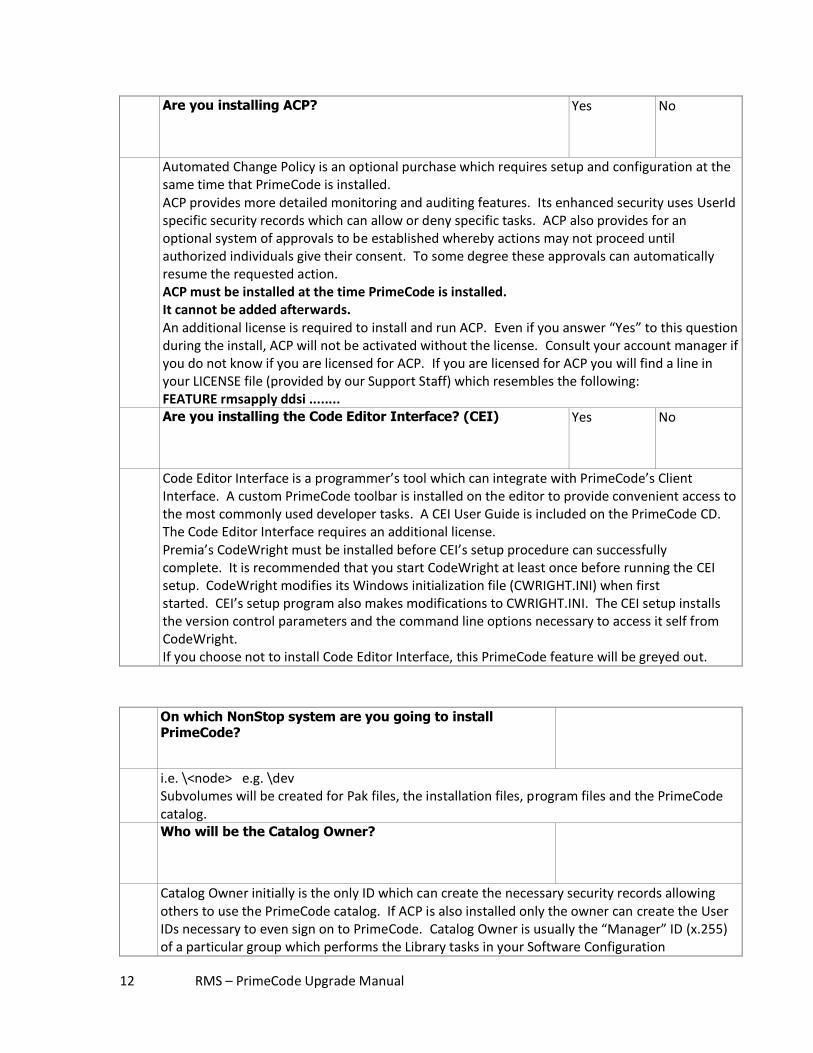
Are you installing ACP? Yes No
Automated Change Policy is an optional purchase which requires setup and configuration at the same time that PrimeCode is installed. ACP provides more detailed monitoring and auditing features. Its enhanced security uses UserId specific security records which can allow or deny specific tasks. ACP also provides for an optional system of approvals to be established whereby actions may not proceed until authorized individuals give their consent. To some degree these approvals can automatically resume the requested action. ACP must be installed at the time PrimeCode is installed. It cannot be added afterwards. An additional license is required to install and run ACP. Even if you answer “Yes” to this question during the install, ACP will not be activated without the license. Consult your account manager if you do not know if you are licensed for ACP. If you are licensed for ACP you will find a line in your LICENSE file (provided by our Support Staff) which resembles the following: FEATURE rmsapply ddsi ........
5
.
Are you installing the Code Editor Interface? (CEI) Yes No
Code Editor Interface is a programmer’s tool which can integrate with PrimeCode’s Client Interface. A custom PrimeCode toolbar is installed on the editor to provide convenient access to the most commonly used developer tasks. A CEI User Guide is included on the PrimeCode CD. The Code Editor Interface requires an additional license. Premia’s CodeWright must be installed before CEI’s setup procedure can successfully complete. It is recommended that you start CodeWright at least once before running the CEI setup. CodeWright modifies its Windows initialization file (CWRIGHT.INI) when first started. CEI’s setup program also makes modifications to CWRIGHT.INI. The CEI setup installs the version control parameters and the command line options necessary to access it self from CodeWright. If you choose not to install Code Editor Interface, this PrimeCode feature will be greyed out.
6
.
On which NonStop system are you going to install PrimeCode?
i.e. \<node> e.g. \dev Subvolumes will be created for Pak files, the installation files, program files and the PrimeCode catalog.
7
.
Who will be the Catalog Owner?
Catalog Owner initially is the only ID which can create the necessary security records allowing others to use the PrimeCode catalog. If ACP is also installed only the owner can create the User IDs necessary to even sign on to PrimeCode. Catalog Owner is usually the “Manager” ID (x.255) of a particular group which performs the Library tasks in your Software Configuration
13 RMS – PrimeCode Upgrade Manual
Management team.
8
.
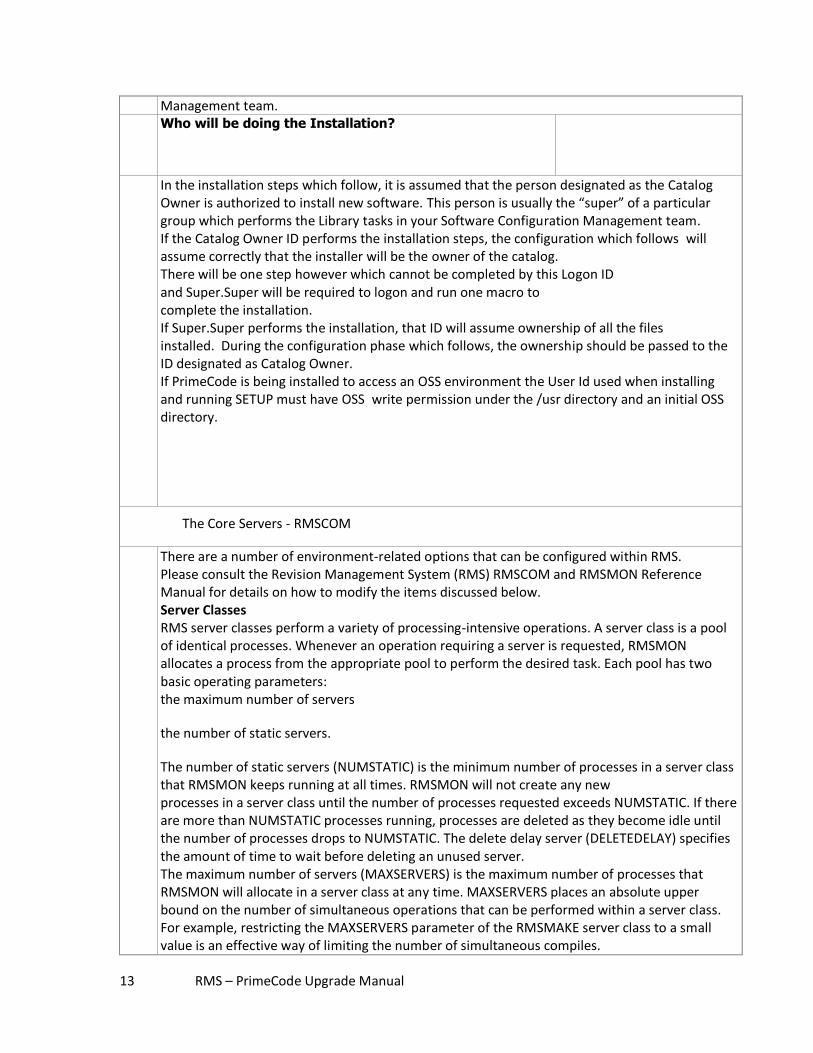
Who will be doing the Installation?
In the installation steps which follow, it is assumed that the person designated as the Catalog Owner is authorized to install new software. This person is usually the “super” of a particular group which performs the Library tasks in your Software Configuration Management team. If the Catalog Owner ID performs the installation steps, the configuration which follows will assume correctly that the installer will be the owner of the catalog. There will be one step however which cannot be completed by this Logon ID and Super.Super will be required to logon and run one macro to complete the installation. If Super.Super performs the installation, that ID will assume ownership of all the files installed. During the configuration phase which follows, the ownership should be passed to the ID designated as Catalog Owner. If PrimeCode is being installed to access an OSS environment the User Id used when installing and running SETUP must have OSS write permission under the /usr directory and an initial OSS directory.
The Core Servers - RMSCOM
There are a number of environment-related options that can be configured within RMS. Please consult the Revision Management System (RMS) RMSCOM and RMSMON Reference Manual for details on how to modify the items discussed below. Server Classes RMS server classes perform a variety of processing-intensive operations. A server class is a pool of identical processes. Whenever an operation requiring a server is requested, RMSMON allocates a process from the appropriate pool to perform the desired task. Each pool has two basic operating parameters: the maximum number of servers
the number of static servers.
The number of static servers (NUMSTATIC) is the minimum number of processes in a server class that RMSMON keeps running at all times. RMSMON will not create any new processes in a server class until the number of processes requested exceeds NUMSTATIC. If there are more than NUMSTATIC processes running, processes are deleted as they become idle until the number of processes drops to NUMSTATIC. The delete delay server (DELETEDELAY) specifies the amount of time to wait before deleting an unused server. The maximum number of servers (MAXSERVERS) is the maximum number of processes that RMSMON will allocate in a server class at any time. MAXSERVERS places an absolute upper bound on the number of simultaneous operations that can be performed within a server class. For example, restricting the MAXSERVERS parameter of the RMSMAKE server class to a small value is an effective way of limiting the number of simultaneous compiles.
14 RMS – PrimeCode Upgrade Manual
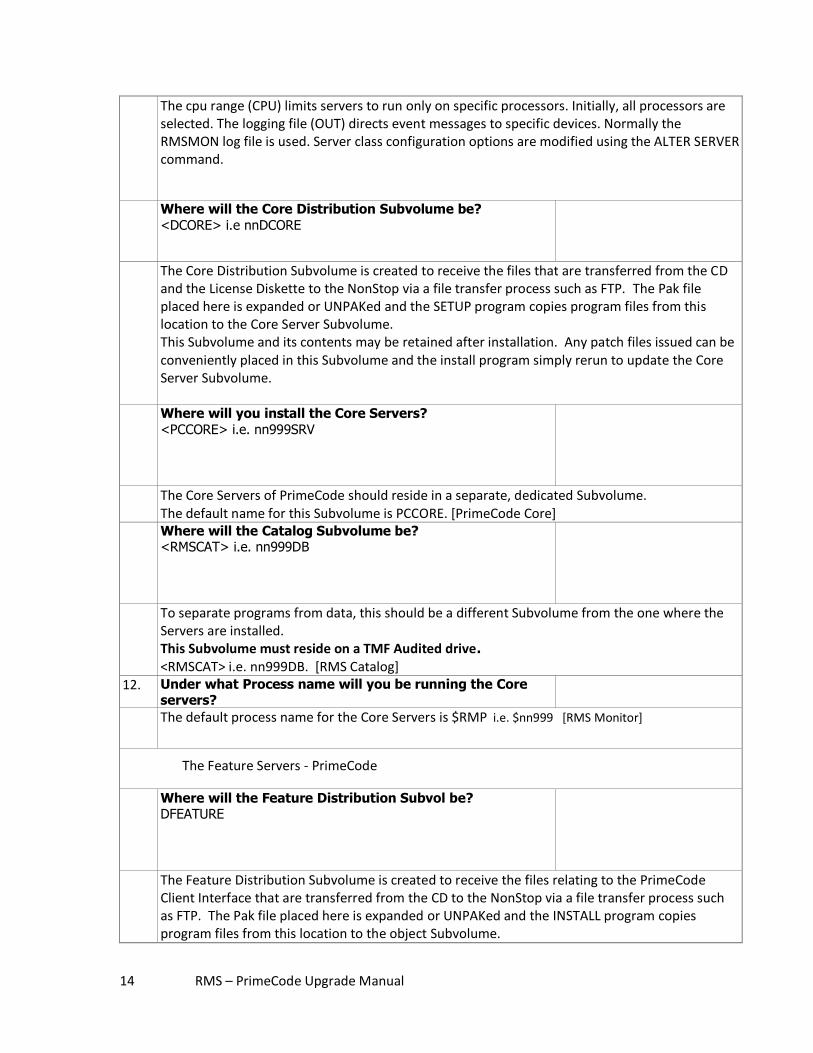
The cpu range (CPU) limits servers to run only on specific processors. Initially, all processors are selected. The logging file (OUT) directs event messages to specific devices. Normally the RMSMON log file is used. Server class configuration options are modified using the ALTER SERVER command.
9
.
Where will the Core Distribution Subvolume be?
<DCORE> i.e nnDCORE
The Core Distribution Subvolume is created to receive the files that are transferred from the CD and the License Diskette to the NonStop via a file transfer process such as FTP. The Pak file placed here is expanded or UNPAKed and the SETUP program copies program files from this location to the Core Server Subvolume. This Subvolume and its contents may be retained after installation. Any patch files issued can be conveniently placed in this Subvolume and the install program simply rerun to update the Core Server Subvolume.
1
0
.
Where will you install the Core Servers?
<PCCORE> i.e. nn999SRV
The Core Servers of PrimeCode should reside in a separate, dedicated Subvolume. The default name for this Subvolume is PCCORE. [PrimeCode Core]
1
1
.
Where will the Catalog Subvolume be? <RMSCAT> i.e. nn999DB
To separate programs from data, this should be a different Subvolume from the one where the Servers are installed. This Subvolume must reside on a TMF Audited drive. <RMSCAT> i.e. nn999DB. [RMS Catalog]
12. Under what Process name will you be running the Core servers?
The default process name for the Core Servers is $RMP i.e. $nn999 [RMS Monitor]
The Feature Servers - PrimeCode
1
3
.
Where will the Feature Distribution Subvol be? DFEATURE
The Feature Distribution Subvolume is created to receive the files relating to the PrimeCode Client Interface that are transferred from the CD to the NonStop via a file transfer process such as FTP. The Pak file placed here is expanded or UNPAKed and the INSTALL program copies program files from this location to the object Subvolume.

15 RMS – PrimeCode Upgrade Manual
This Subvolume and its contents may be retained after installation. Any patch files issued can be conveniently placed in this Subvolume and the install program simply rerun to update the Core Server Subvolume. [Distribution Feature]
1
4
.
Where will you install the Feature servers? <Object Subvolume> PCACP or nn999 i.e. NA356
The Feature Servers also, are best installed in their own empty Subvolume. This provides more options for assigning different security to these two Subvolumes. The object Subvolume for the Core Servers and the object Subvolume for the Feature Servers may be on the same drive or different drives. Performance may improve actually if they are on separate drives. The INSTALL program itself will suggest the name PCACP. [PrimeCode and ACP program files]
1
5
.
Where will you install the PrimeCode Database? <Install Subvolume> PCACPDB or nn999DB i.e. NA359DB
The INSTALL program will create this Subvolume for the PrimeCode database. It should be different from the Object Subvolume. This Subvolume must reside on a TMF Audited drive. The INSTALL program will suggest the name PCACPDB. [PrimeCode and ACP Database]
1
6
.
Under what Process Name will you be running the Feature servers?
The default process name for the Feature Servers is $PCPM [PrimeCode Pathway Monitor]. $CS359 by the suggested naming convention to identify the GUI as 3.5.9.
1
7
.
Who will the Initial User be for the Feature Servers?
The Catalog Owner should be the first user.
1
8
.
What will the home terminal be for the Feature Servers?
By default this is $VHS. Consider any hard copy device or a hard wired terminal. Do not choose a Telnet session or the Core Servers will shut down with each session termination.
1
9
Where should the License file be Installed?
16 RMS – PrimeCode Upgrade Manual
.
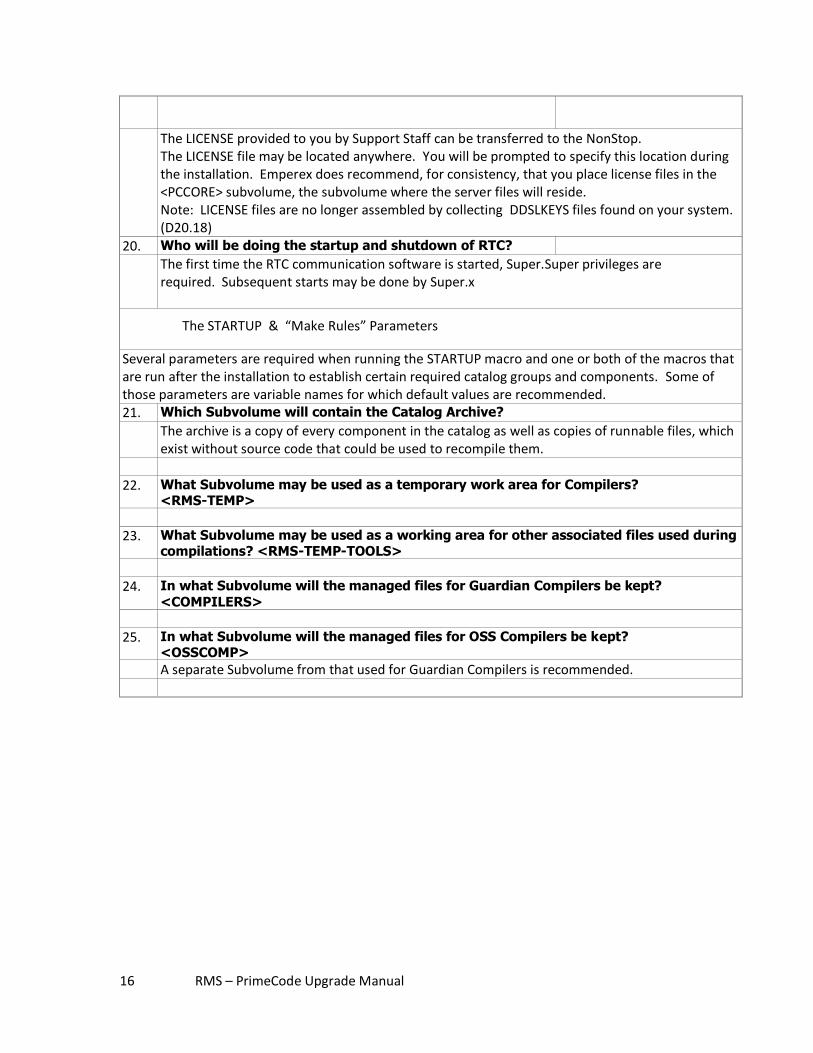
The LICENSE provided to you by Support Staff can be transferred to the NonStop. The LICENSE file may be located anywhere. You will be prompted to specify this location during the installation. Emperex does recommend, for consistency, that you place license files in the <PCCORE> subvolume, the subvolume where the server files will reside. Note: LICENSE files are no longer assembled by collecting DDSLKEYS files found on your system. (D20.18)
20. Who will be doing the startup and shutdown of RTC?
The first time the RTC communication software is started, Super.Super privileges are required. Subsequent starts may be done by Super.x
The STARTUP & “Make Rules” Parameters
Several parameters are required when running the STARTUP macro and one or both of the macros that are run after the installation to establish certain required catalog groups and components. Some of those parameters are variable names for which default values are recommended. 21. Which Subvolume will contain the Catalog Archive?
The archive is a copy of every component in the catalog as well as copies of runnable files, which exist without source code that could be used to recompile them.
22. What Subvolume may be used as a temporary work area for Compilers? <RMS-TEMP>
23. What Subvolume may be used as a working area for other associated files used during compilations? <RMS-TEMP-TOOLS>
24. In what Subvolume will the managed files for Guardian Compilers be kept?
<COMPILERS>
25. In what Subvolume will the managed files for OSS Compilers be kept? <OSSCOMP>
A separate Subvolume from that used for Guardian Compilers is recommended.
17 RMS – PrimeCode Upgrade Manual
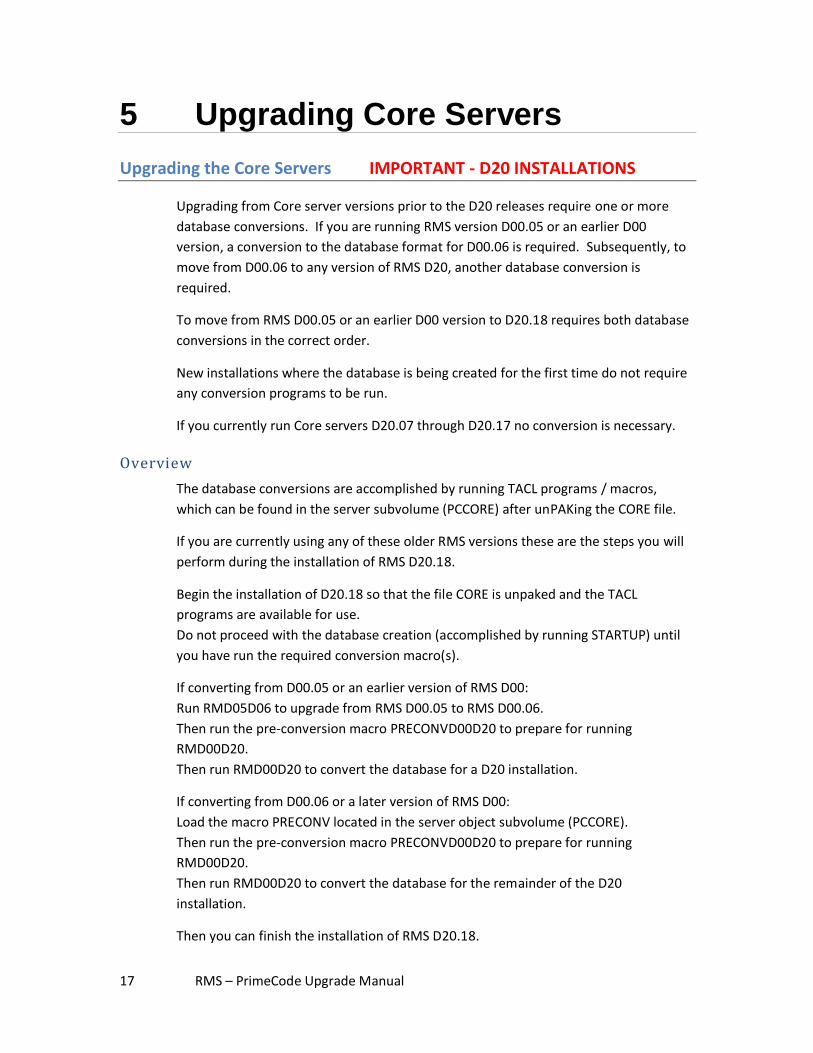
5 Upgrading Core Servers
Upgrading the Core Servers IMPORTANT - D20 INSTALLATIONS
Upgrading from Core server versions prior to the D20 releases require one or more
database conversions. If you are running RMS version D00.05 or an earlier D00
version, a conversion to the database format for D00.06 is required. Subsequently, to
move from D00.06 to any version of RMS D20, another database conversion is
required.
To move from RMS D00.05 or an earlier D00 version to D20.18 requires both database
conversions in the correct order.
New installations where the database is being created for the first time do not require
any conversion programs to be run.
If you currently run Core servers D20.07 through D20.17 no conversion is necessary.
Overview
The database conversions are accomplished by running TACL programs / macros,
which can be found in the server subvolume (PCCORE) after unPAKing the CORE file.
If you are currently using any of these older RMS versions these are the steps you will
perform during the installation of RMS D20.18.
Begin the installation of D20.18 so that the file CORE is unpaked and the TACL
programs are available for use.
Do not proceed with the database creation (accomplished by running STARTUP) until
you have run the required conversion macro(s).
If converting from D00.05 or an earlier version of RMS D00:
Run RMD05D06 to upgrade from RMS D00.05 to RMS D00.06.
Then run the pre-conversion macro PRECONVD00D20 to prepare for running
RMD00D20.
Then run RMD00D20 to convert the database for a D20 installation.
If converting from D00.06 or a later version of RMS D00:
Load the macro PRECONV located in the server object subvolume (PCCORE).
Then run the pre-conversion macro PRECONVD00D20 to prepare for running
RMD00D20.
Then run RMD00D20 to convert the database for the remainder of the D20
installation.
Then you can finish the installation of RMS D20.18.
18 RMS – PrimeCode Upgrade Manual
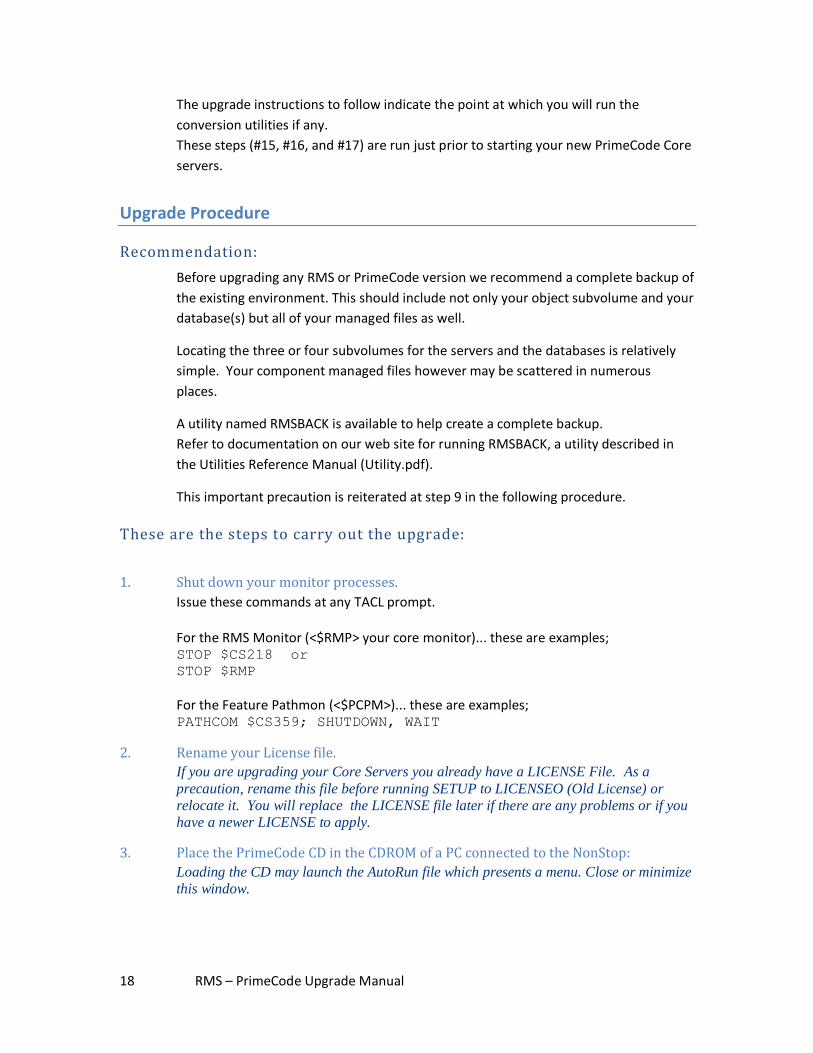
The upgrade instructions to follow indicate the point at which you will run the
conversion utilities if any.
These steps (#15, #16, and #17) are run just prior to starting your new PrimeCode Core
servers.
Upgrade Procedure
Recommendation:
Before upgrading any RMS or PrimeCode version we recommend a complete backup of
the existing environment. This should include not only your object subvolume and your
database(s) but all of your managed files as well.
Locating the three or four subvolumes for the servers and the databases is relatively
simple. Your component managed files however may be scattered in numerous
places.
A utility named RMSBACK is available to help create a complete backup.
Refer to documentation on our web site for running RMSBACK, a utility described in
the Utilities Reference Manual (Utility.pdf).
This important precaution is reiterated at step 9 in the following procedure.
These are the steps to carry out the upgrade:
1. Shut down your monitor processes.
Issue these commands at any TACL prompt. For the RMS Monitor (<$RMP> your core monitor)... these are examples; STOP $CS218 or
STOP $RMP
For the Feature Pathmon (<$PCPM>)... these are examples; PATHCOM $CS359; SHUTDOWN, WAIT
2. Rename your License file.
If you are upgrading your Core Servers you already have a LICENSE File. As a
precaution, rename this file before running SETUP to LICENSEO (Old License) or
relocate it. You will replace the LICENSE file later if there are any problems or if you
have a newer LICENSE to apply.
3. Place the PrimeCode CD in the CDROM of a PC connected to the NonStop:
Loading the CD may launch the AutoRun file which presents a menu. Close or minimize
this window.
19 RMS – PrimeCode Upgrade Manual
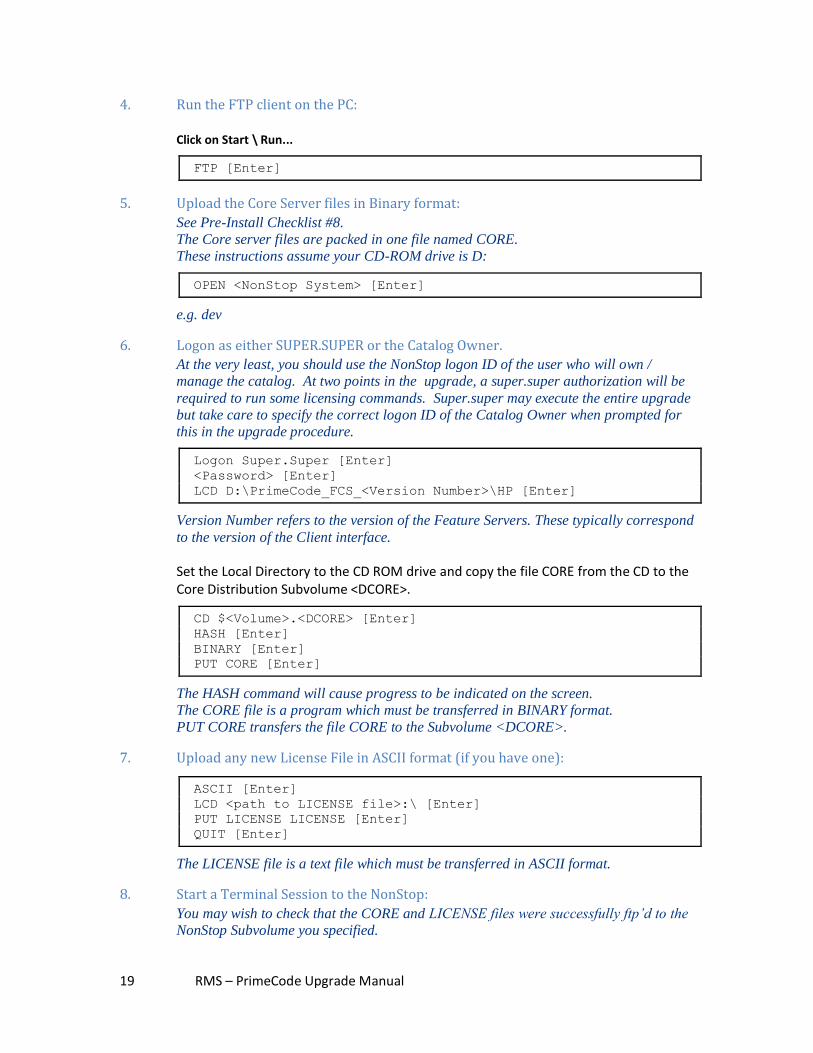
4. Run the FTP client on the PC:
Click on Start \ Run...
FTP [Enter]
5. Upload the Core Server files in Binary format:
See Pre-Install Checklist #8.
The Core server files are packed in one file named CORE.
These instructions assume your CD-ROM drive is D:
OPEN <NonStop System> [Enter]
e.g. dev
6. Logon as either SUPER.SUPER or the Catalog Owner.
At the very least, you should use the NonStop logon ID of the user who will own /
manage the catalog. At two points in the upgrade, a super.super authorization will be
required to run some licensing commands. Super.super may execute the entire upgrade
but take care to specify the correct logon ID of the Catalog Owner when prompted for
this in the upgrade procedure.
Logon Super.Super [Enter]
<Password> [Enter]
LCD D:\PrimeCode_FCS_<Version Number>\HP [Enter]
Version Number refers to the version of the Feature Servers. These typically correspond
to the version of the Client interface.
Set the Local Directory to the CD ROM drive and copy the file CORE from the CD to the Core Distribution Subvolume <DCORE>.
CD $<Volume>.<DCORE> [Enter]
HASH [Enter]
BINARY [Enter]
PUT CORE [Enter]
The HASH command will cause progress to be indicated on the screen.
The CORE file is a program which must be transferred in BINARY format.
PUT CORE transfers the file CORE to the Subvolume <DCORE>.
7. Upload any new License File in ASCII format (if you have one):
ASCII [Enter]
LCD <path to LICENSE file>:\ [Enter]
PUT LICENSE LICENSE [Enter]
QUIT [Enter]
The LICENSE file is a text file which must be transferred in ASCII format.
8. Start a Terminal Session to the NonStop:
You may wish to check that the CORE and LICENSE files were successfully ftp’d to the
NonStop Subvolume you specified.
20 RMS – PrimeCode Upgrade Manual
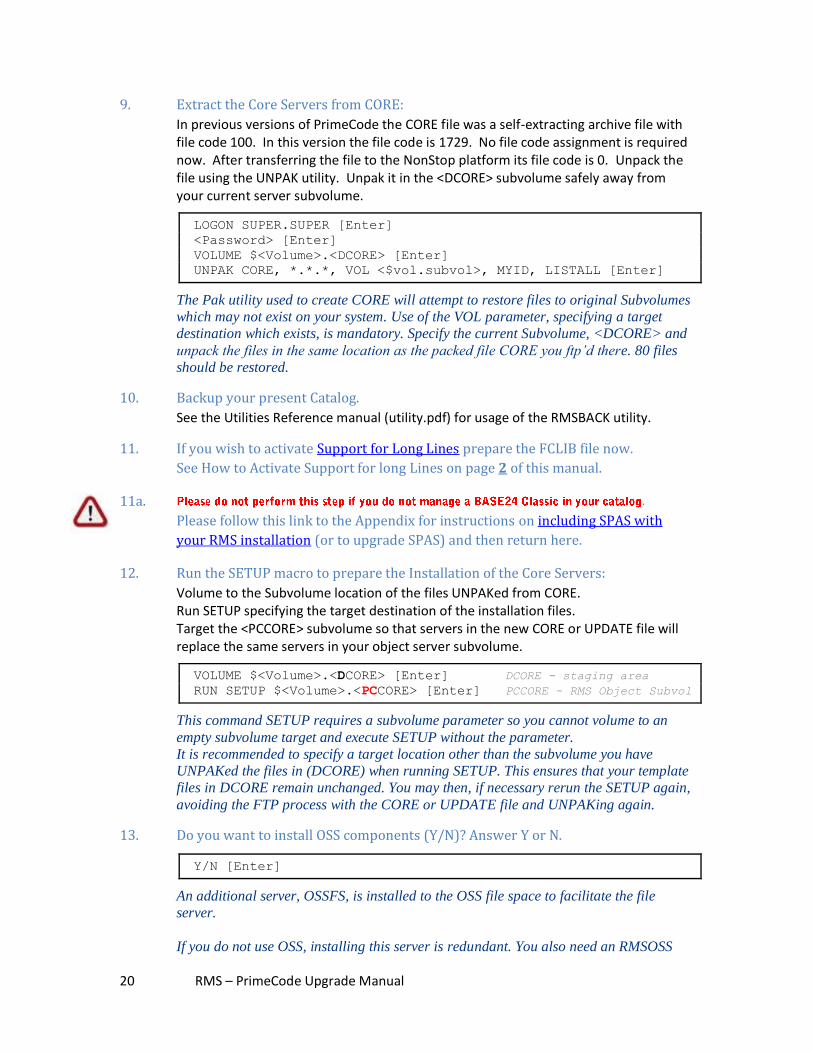
9. Extract the Core Servers from CORE:
In previous versions of PrimeCode the CORE file was a self-extracting archive file with file code 100. In this version the file code is 1729. No file code assignment is required now. After transferring the file to the NonStop platform its file code is 0. Unpack the file using the UNPAK utility. Unpak it in the <DCORE> subvolume safely away from your current server subvolume.
LOGON SUPER.SUPER [Enter]
<Password> [Enter]
VOLUME $<Volume>.<DCORE> [Enter]
UNPAK CORE, *.*.*, VOL <$vol.subvol>, MYID, LISTALL [Enter]
The Pak utility used to create CORE will attempt to restore files to original Subvolumes
which may not exist on your system. Use of the VOL parameter, specifying a target
destination which exists, is mandatory. Specify the current Subvolume, <DCORE> and
unpack the files in the same location as the packed file CORE you ftp’d there. 80 files
should be restored.
10. Backup your present Catalog.
See the Utilities Reference manual (utility.pdf) for usage of the RMSBACK utility.
11. If you wish to activate Support for Long Lines prepare the FCLIB file now.
See How to Activate Support for long Lines on page 2 of this manual.
11a.
Please follow this link to the Appendix for instructions on including SPAS with
your RMS installation (or to upgrade SPAS) and then return here.
12. Run the SETUP macro to prepare the Installation of the Core Servers:
Volume to the Subvolume location of the files UNPAKed from CORE. Run SETUP specifying the target destination of the installation files. Target the <PCCORE> subvolume so that servers in the new CORE or UPDATE file will replace the same servers in your object server subvolume.
VOLUME $<Volume>.<DCORE> [Enter] DCORE - staging area
RUN SETUP $<Volume>.<PCCORE> [Enter] PCCORE - RMS Object Subvol
This command SETUP requires a subvolume parameter so you cannot volume to an
empty subvolume target and execute SETUP without the parameter.
It is recommended to specify a target location other than the subvolume you have
UNPAKed the files in (DCORE) when running SETUP. This ensures that your template
files in DCORE remain unchanged. You may then, if necessary rerun the SETUP again,
avoiding the FTP process with the CORE or UPDATE file and UNPAKing again.
13. Do you want to install OSS components (Y/N)? Answer Y or N.
Y/N [Enter]
An additional server, OSSFS, is installed to the OSS file space to facilitate the file
server.
If you do not use OSS, installing this server is redundant. You also need an RMSOSS
21 RMS – PrimeCode Upgrade Manual
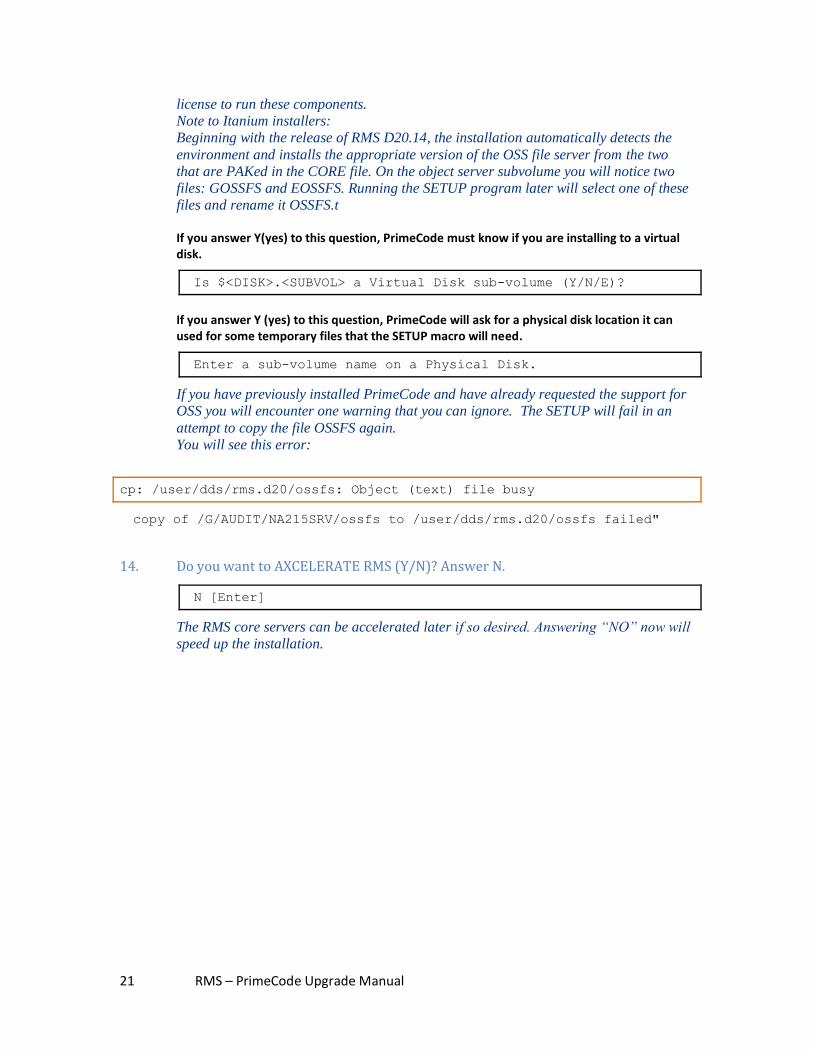
license to run these components.
Note to Itanium installers:
Beginning with the release of RMS D20.14, the installation automatically detects the
environment and installs the appropriate version of the OSS file server from the two
that are PAKed in the CORE file. On the object server subvolume you will notice two
files: GOSSFS and EOSSFS. Running the SETUP program later will select one of these
files and rename it OSSFS.t
If you answer Y(yes) to this question, PrimeCode must know if you are installing to a virtual disk.
Is $<DISK>.<SUBVOL> a Virtual Disk sub-volume (Y/N/E)?
If you answer Y (yes) to this question, PrimeCode will ask for a physical disk location it can used for some temporary files that the SETUP macro will need.
Enter a sub-volume name on a Physical Disk.
If you have previously installed PrimeCode and have already requested the support for
OSS you will encounter one warning that you can ignore. The SETUP will fail in an
attempt to copy the file OSSFS again.
You will see this error:
cp: /user/dds/rms.d20/ossfs: Object (text) file busy
copy of /G/AUDIT/NA215SRV/ossfs to /user/dds/rms.d20/ossfs failed"
14. Do you want to AXCELERATE RMS (Y/N)? Answer N.
N [Enter]
The RMS core servers can be accelerated later if so desired. Answering “NO” now will
speed up the installation.
22 RMS – PrimeCode Upgrade Manual
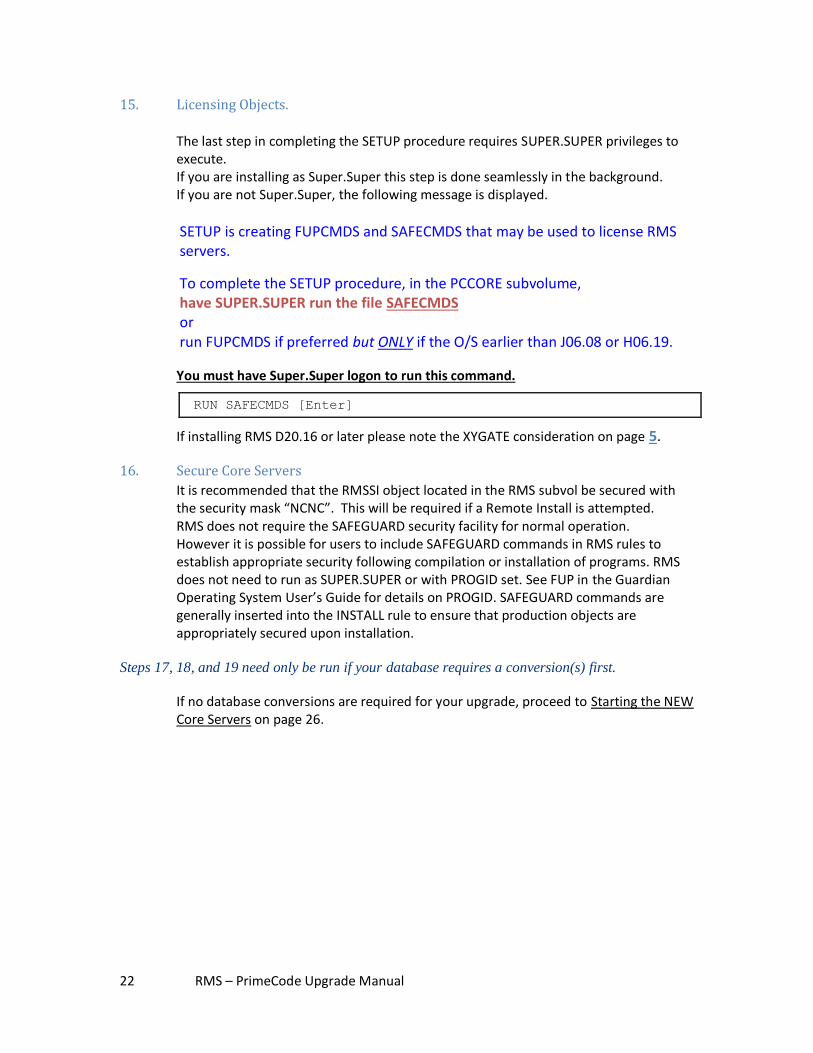
15. Licensing Objects.
The last step in completing the SETUP procedure requires SUPER.SUPER privileges to execute. If you are installing as Super.Super this step is done seamlessly in the background. If you are not Super.Super, the following message is displayed.
SETUP is creating FUPCMDS and SAFECMDS that may be used to license RMS servers.
To complete the SETUP procedure, in the PCCORE subvolume, have SUPER.SUPER run the file SAFECMDS or run FUPCMDS if preferred but ONLY if the O/S earlier than J06.08 or H06.19.
You must have Super.Super logon to run this command.
RUN SAFECMDS [Enter]
If installing RMS D20.16 or later please note the XYGATE consideration on page 5.
16. Secure Core Servers
It is recommended that the RMSSI object located in the RMS subvol be secured with the security mask “NCNC”. This will be required if a Remote Install is attempted. RMS does not require the SAFEGUARD security facility for normal operation. However it is possible for users to include SAFEGUARD commands in RMS rules to establish appropriate security following compilation or installation of programs. RMS does not need to run as SUPER.SUPER or with PROGID set. See FUP in the Guardian Operating System User’s Guide for details on PROGID. SAFEGUARD commands are generally inserted into the INSTALL rule to ensure that production objects are appropriately secured upon installation.
Steps 17, 18, and 19 need only be run if your database requires a conversion(s) first.
If no database conversions are required for your upgrade, proceed to Starting the NEW Core Servers on page 26.
23 RMS – PrimeCode Upgrade Manual
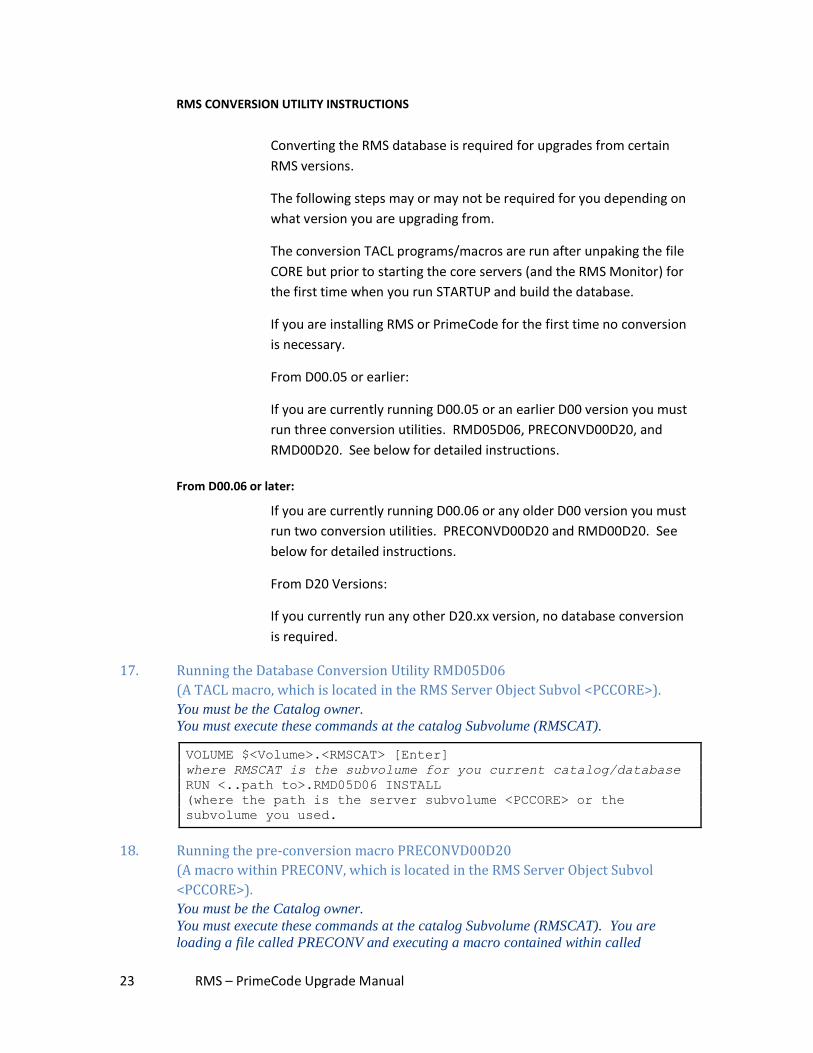
RMS CONVERSION UTILITY INSTRUCTIONS
Converting the RMS database is required for upgrades from certain
RMS versions.
The following steps may or may not be required for you depending on
what version you are upgrading from.
The conversion TACL programs/macros are run after unpaking the file
CORE but prior to starting the core servers (and the RMS Monitor) for
the first time when you run STARTUP and build the database.
If you are installing RMS or PrimeCode for the first time no conversion
is necessary.
From D00.05 or earlier:
If you are currently running D00.05 or an earlier D00 version you must
run three conversion utilities. RMD05D06, PRECONVD00D20, and
RMD00D20. See below for detailed instructions.
From D00.06 or later:
If you are currently running D00.06 or any older D00 version you must
run two conversion utilities. PRECONVD00D20 and RMD00D20. See
below for detailed instructions.
From D20 Versions:
If you currently run any other D20.xx version, no database conversion
is required.
17. Running the Database Conversion Utility RMD05D06
(A TACL macro, which is located in the RMS Server Object Subvol <PCCORE>).
You must be the Catalog owner.
You must execute these commands at the catalog Subvolume (RMSCAT).
VOLUME $<Volume>.<RMSCAT> [Enter]
where RMSCAT is the subvolume for you current catalog/database
RUN <..path to>.RMD05D06 INSTALL
(where the path is the server subvolume <PCCORE> or the
subvolume you used.
18. Running the pre-conversion macro PRECONVD00D20
(A macro within PRECONV, which is located in the RMS Server Object Subvol
<PCCORE>).
You must be the Catalog owner.
You must execute these commands at the catalog Subvolume (RMSCAT). You are
loading a file called PRECONV and executing a macro contained within called
24 RMS – PrimeCode Upgrade Manual
PRECONVD00D20.
VOLUME $<Volume>.<RMSCAT> [Enter]
where RMSCAT is the subvolume for you current catalog/database
LOAD / KEEP 1 / <PCCORE>.PRECONV
PRECONVD00D20
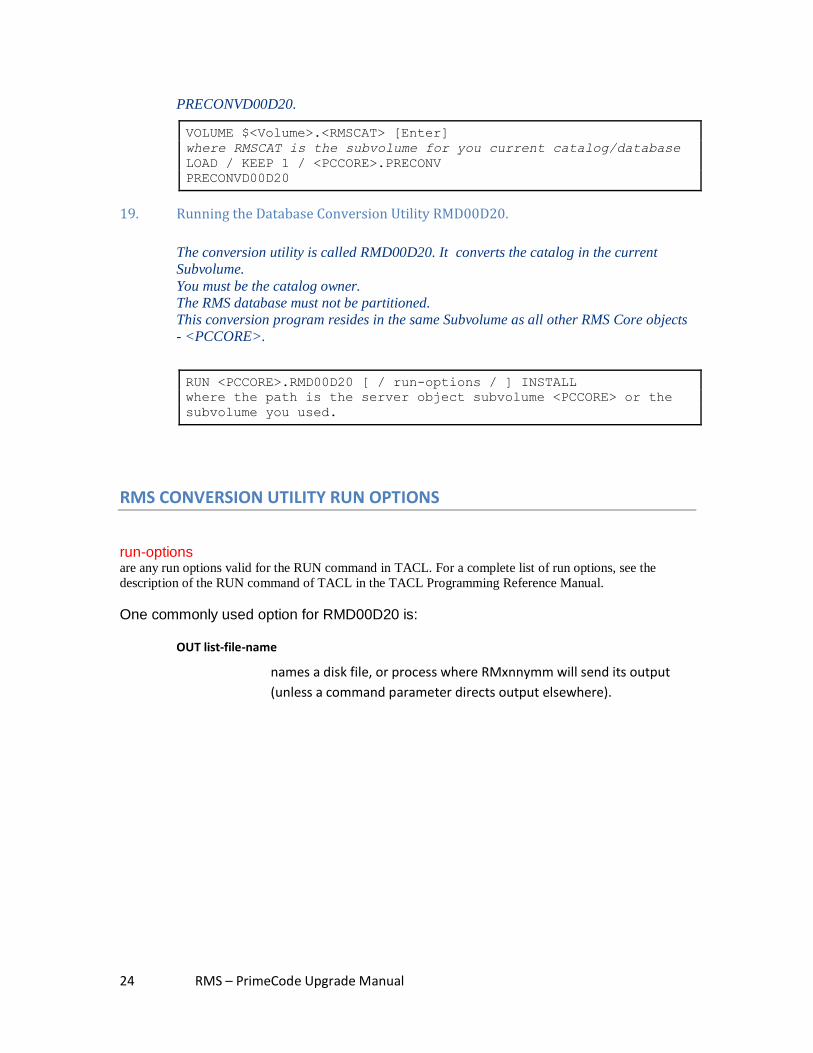
19. Running the Database Conversion Utility RMD00D20.
The conversion utility is called RMD00D20. It converts the catalog in the current
Subvolume.
You must be the catalog owner.
The RMS database must not be partitioned.
This conversion program resides in the same Subvolume as all other RMS Core objects
- <PCCORE>.
RUN <PCCORE>.RMD00D20 [ / run-options / ] INSTALL
where the path is the server object subvolume <PCCORE> or the
subvolume you used.
RMS CONVERSION UTILITY RUN OPTIONS
run-options are any run options valid for the RUN command in TACL. For a complete list of run options, see the
description of the RUN command of TACL in the TACL Programming Reference Manual.
One commonly used option for RMD00D20 is:
OUT list-file-name
names a disk file, or process where RMxnnymm will send its output
(unless a command parameter directs output elsewhere).
25 RMS – PrimeCode Upgrade Manual
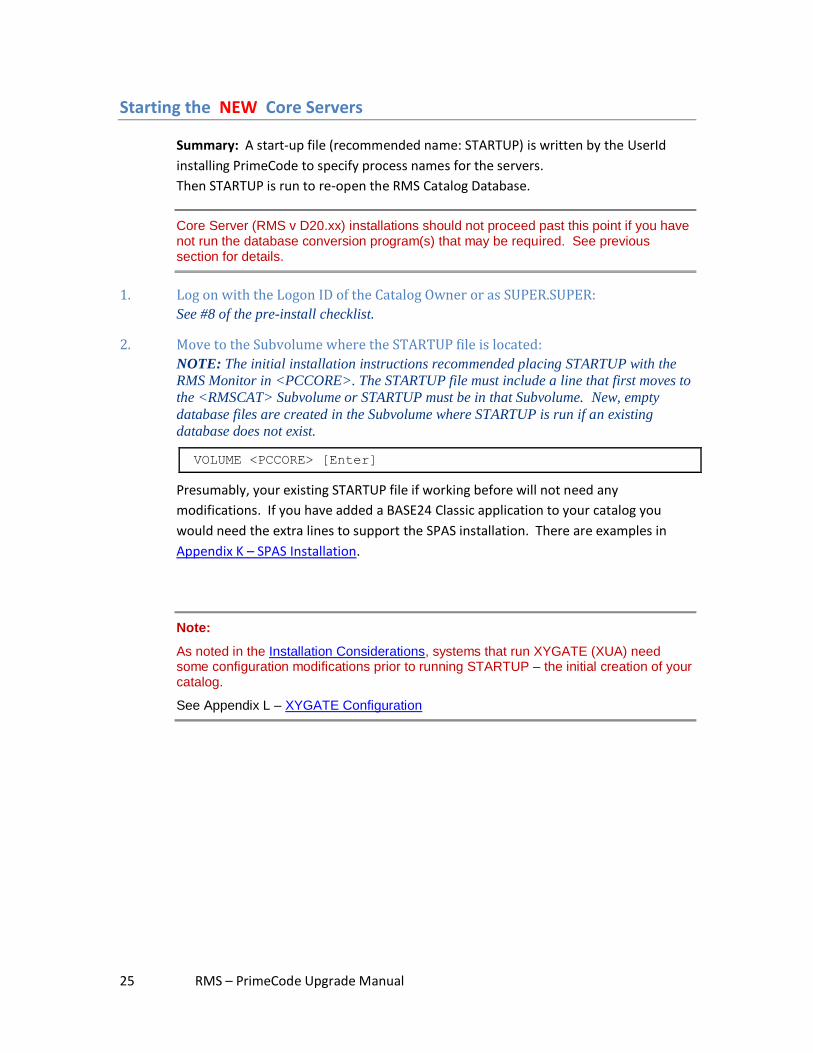
Starting the NEW Core Servers
Summary: A start-up file (recommended name: STARTUP) is written by the UserId
installing PrimeCode to specify process names for the servers.
Then STARTUP is run to re-open the RMS Catalog Database.
Core Server (RMS v D20.xx) installations should not proceed past this point if you have not run the database conversion program(s) that may be required. See previous section for details.
1. Log on with the Logon ID of the Catalog Owner or as SUPER.SUPER:
See #8 of the pre-install checklist.
2. Move to the Subvolume where the STARTUP file is located:
NOTE: The initial installation instructions recommended placing STARTUP with the
RMS Monitor in <PCCORE>. The STARTUP file must include a line that first moves to
the <RMSCAT> Subvolume or STARTUP must be in that Subvolume. New, empty
database files are created in the Subvolume where STARTUP is run if an existing
database does not exist.
VOLUME <PCCORE> [Enter]
Presumably, your existing STARTUP file if working before will not need any
modifications. If you have added a BASE24 Classic application to your catalog you
would need the extra lines to support the SPAS installation. There are examples in
Appendix K – SPAS Installation.
Note:
As noted in the Installation Considerations, systems that run XYGATE (XUA) need some configuration modifications prior to running STARTUP – the initial creation of your catalog.
See Appendix L – XYGATE Configuration
26 RMS – PrimeCode Upgrade Manual
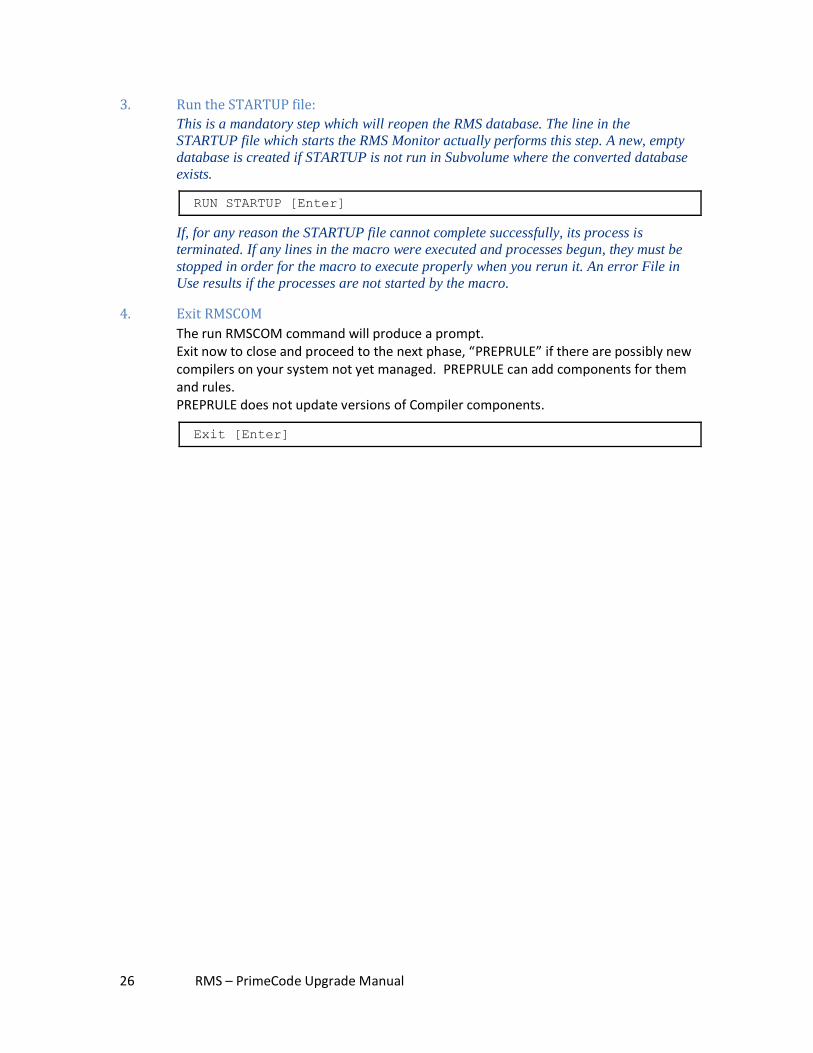
3. Run the STARTUP file:
This is a mandatory step which will reopen the RMS database. The line in the
STARTUP file which starts the RMS Monitor actually performs this step. A new, empty
database is created if STARTUP is not run in Subvolume where the converted database
exists.
RUN STARTUP [Enter]
If, for any reason the STARTUP file cannot complete successfully, its process is
terminated. If any lines in the macro were executed and processes begun, they must be
stopped in order for the macro to execute properly when you rerun it. An error File in
Use results if the processes are not started by the macro.
4. Exit RMSCOM
The run RMSCOM command will produce a prompt. Exit now to close and proceed to the next phase, “PREPRULE” if there are possibly new compilers on your system not yet managed. PREPRULE can add components for them and rules. PREPRULE does not update versions of Compiler components.
Exit [Enter]
27 RMS – PrimeCode Upgrade Manual
PREPRULE – Creating Default Compile Rules
Purpose
Designating Essential Compilation Subvolumes and Creating the
Default Compile Rules for all Processors managed in your PrimeCode
catalog.
Running PREPRULE
At any time after installing and running the PrimeCode Core Servers
you can run the file “PREPRULE”. Details follow in the next section.
The file PREPRULE is an obey file that loads PREPSERG to access
various routines within it. The process launched will guide you through
the creation of default compile rules for existing compilers which are
supported by PrimeCode. It also creates required components for
managing the processors, and temp directories where compile work is
done.
PREPRULE will let you decide if you want to add Guardian processors,
OSS processors or both.
PREPRULE has added support for Blade and Integrity processors
(TNS/E) to PrimeCode.
Note:
Since this guide is for Upgrading – it is assumed you have run PREPRULE before, after the initial installation. You do not need to run PREPRULE again unless you are seeking to update your catalog with components to manage compilers you have recently acquired and not manually added already to your catalog.
PREPRULE replaces both MAKRULES and OSSMKRUL beginning with D20.15 Update 16 (D2015P16).
See Appendix for notes on MAKRULES and OSSMKRUL.
28 RMS – PrimeCode Upgrade Manual
Maintenance Tip:
The utility RMSWATCH does a consistency check between what is contained in the RMS
Database (Catalog) and what is contained in the managed files for your components or
archived versions. The RMSWATCH report can alert you to versions in a component that do
not exist in the managed file and vis versa. If you run this utility weekly you can fix small
database inconsistencies easily. See the Utility reference manual (utility.pdf) on the
PrimeCode CD or download it from our Web site.
End of Section - Upgrading the PrimeCode Core Servers
29 RMS – PrimeCode Upgrade Manual
6 The “PREPRULE” Routine
About the PREPRULE Routine
These steps should be performed by the Catalog Owner.
These steps can be performed any time after the Core servers have
been secured and licensed. They can be performed either before or
after the installation of the Feature Servers but must be completed
before attempting to design or use your PrimeCode catalog. Nothing
can be compiled by RMS until it is made aware of available compilers
and established some compile rules.
The PREPRULE routine adds rules for Guardian and/or OSS processors
and supports Blade and Integrity processors too. It interactively builds
an obey file named “PREPOBEY” using some of your input as
parameters. The process analyses a specified catalog and can detect
what needs to be built. For this reason PREPRULE is re-runnable. Each
time you run PREPRULE, you create a new version of PREPOBEY. You
may edit PREPOBEY before you use it if you need to alter any of your
responses to questions asked during the execution of PREPRULE or you
can re-run PREPRULE. Either is safe. The latter is probably easier.
When you are satisfied with the file PREPOBEY you will use it as an IN-
FILE with an RMSCOM command to start RMS, executing RMSCOM
commands to add components, submit files to them, and create
default rules for all of your processors.
IMPORTANT
The obey file produced by PREPRULE is designed for a specific catalog only and also reflects the condition of the catalog at the time PREPRULE was run.
You should NOT re-run PREPOBEY or unexpected errors may result.
If, subsequently to the running of PREPOBEY you want to manage new processors that you have acquired, re-run PREPRULE and create an updated version of PREPOBEY. Then follow the same steps to create a new version of PREPOBEY.
PREPRULE can add Guardian rules and OSS rules. You may elect to add them separately. You are asked by PREPRULE, which rules you want to add. If you do this, use the PREPOBEY you created for Guardian Rules (or OSS rules) and then run
PREPRULE again for the others and run the second PREPOBEY to apply them.
30 RMS – PrimeCode Upgrade Manual
The <PREPOBEY> in-file will :
Create a group in the catalog for the compiler work area, the temp tools area, and the archive for the data base. Note that this step would only be required in the first run of a PREPOBEY on a new catalog. Running a PREPOBEY file with instructions to create these components in a catalog that already had them would not succeed.
Create components for each of the compilers found on your system.
Establish a default compile rule for each of them.
More advanced rules or additional compilers may be added by users
later as required on an individual basis or by running PREPRULE again
to produce a new PREPOBEY file.
31 RMS – PrimeCode Upgrade Manual
Checklist for PREPRULE
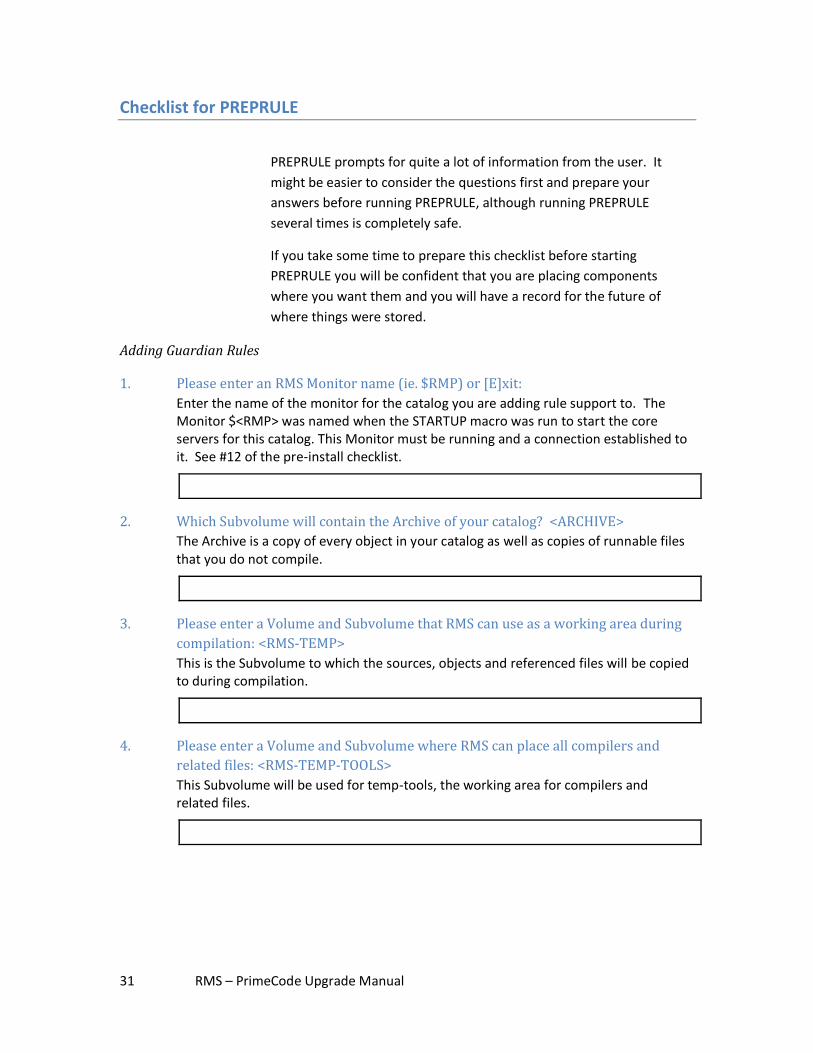
PREPRULE prompts for quite a lot of information from the user. It
might be easier to consider the questions first and prepare your
answers before running PREPRULE, although running PREPRULE
several times is completely safe.
If you take some time to prepare this checklist before starting
PREPRULE you will be confident that you are placing components
where you want them and you will have a record for the future of
where things were stored.
Adding Guardian Rules
1. Please enter an RMS Monitor name (ie. $RMP) or [E]xit:
Enter the name of the monitor for the catalog you are adding rule support to. The Monitor $<RMP> was named when the STARTUP macro was run to start the core servers for this catalog. This Monitor must be running and a connection established to it. See #12 of the pre-install checklist.
2. Which Subvolume will contain the Archive of your catalog? <ARCHIVE>
The Archive is a copy of every object in your catalog as well as copies of runnable files that you do not compile.
3. Please enter a Volume and Subvolume that RMS can use as a working area during
compilation: <RMS-TEMP>
This is the Subvolume to which the sources, objects and referenced files will be copied to during compilation.
4. Please enter a Volume and Subvolume where RMS can place all compilers and
related files: <RMS-TEMP-TOOLS>
This Subvolume will be used for temp-tools, the working area for compilers and related files.
32 RMS – PrimeCode Upgrade Manual
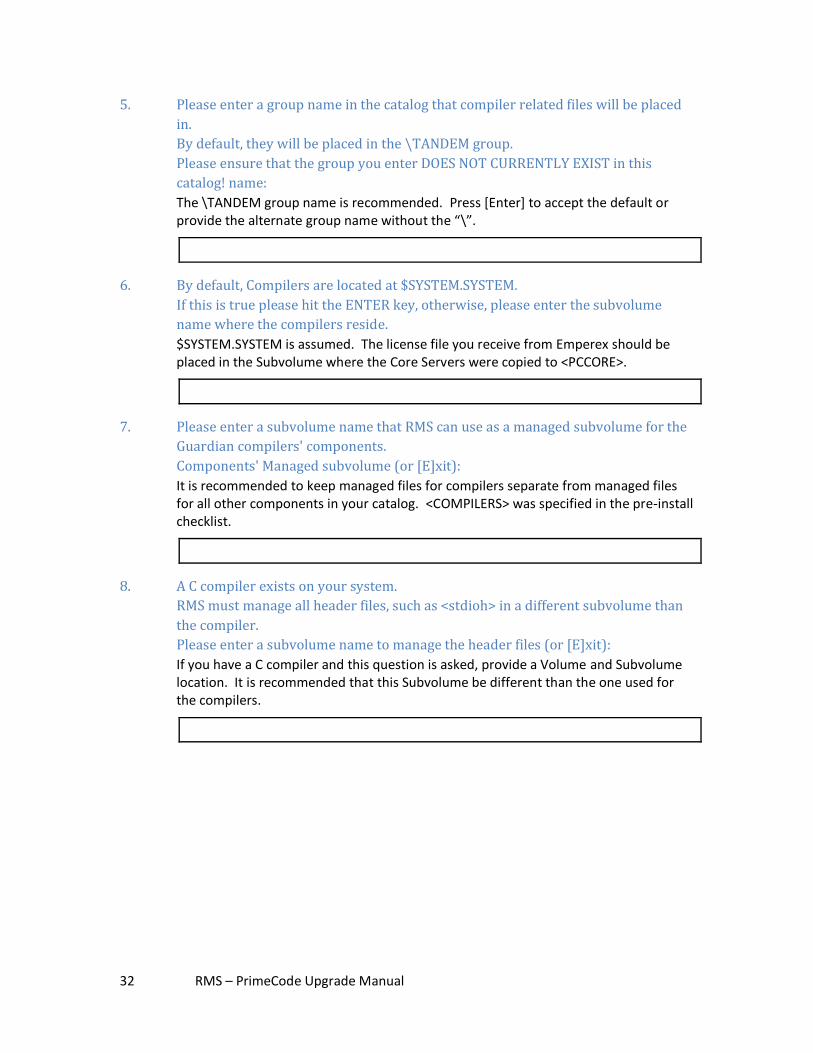
5. Please enter a group name in the catalog that compiler related files will be placed
in.
By default, they will be placed in the \TANDEM group.
Please ensure that the group you enter DOES NOT CURRENTLY EXIST in this
catalog! name:
The \TANDEM group name is recommended. Press [Enter] to accept the default or provide the alternate group name without the “\”.
6. By default, Compilers are located at $SYSTEM.SYSTEM.
If this is true please hit the ENTER key, otherwise, please enter the subvolume
name where the compilers reside.
$SYSTEM.SYSTEM is assumed. The license file you receive from Emperex should be placed in the Subvolume where the Core Servers were copied to <PCCORE>.
7. Please enter a subvolume name that RMS can use as a managed subvolume for the
Guardian compilers' components.
Components' Managed subvolume (or [E]xit):
It is recommended to keep managed files for compilers separate from managed files for all other components in your catalog. <COMPILERS> was specified in the pre-install checklist.
8. A C compiler exists on your system.
RMS must manage all header files, such as <stdioh> in a different subvolume than
the compiler.
Please enter a subvolume name to manage the header files (or [E]xit):
If you have a C compiler and this question is asked, provide a Volume and Subvolume location. It is recommended that this Subvolume be different than the one used for the compilers.
33 RMS – PrimeCode Upgrade Manual
Adding OSS Rules
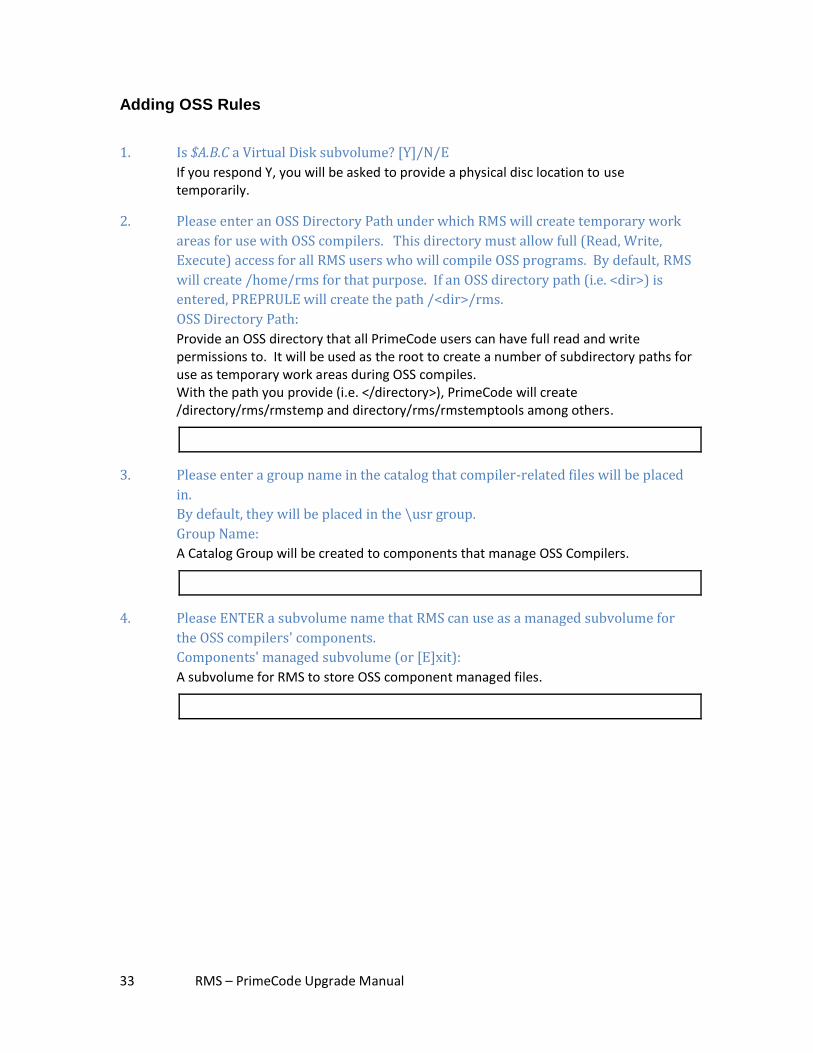
1. Is $A.B.C a Virtual Disk subvolume? [Y]/N/E
If you respond Y, you will be asked to provide a physical disc location to use temporarily.
2. Please enter an OSS Directory Path under which RMS will create temporary work
areas for use with OSS compilers. This directory must allow full (Read, Write,
Execute) access for all RMS users who will compile OSS programs. By default, RMS
will create /home/rms for that purpose. If an OSS directory path (i.e. <dir>) is
entered, PREPRULE will create the path /<dir>/rms.
OSS Directory Path:
Provide an OSS directory that all PrimeCode users can have full read and write permissions to. It will be used as the root to create a number of subdirectory paths for use as temporary work areas during OSS compiles. With the path you provide (i.e. </directory>), PrimeCode will create /directory/rms/rmstemp and directory/rms/rmstemptools among others.
3. Please enter a group name in the catalog that compiler-related files will be placed
in.
By default, they will be placed in the \usr group.
Group Name:
A Catalog Group will be created to components that manage OSS Compilers.
4. Please ENTER a subvolume name that RMS can use as a managed subvolume for
the OSS compilers' components.
Components' managed subvolume (or [E]xit):
A subvolume for RMS to store OSS component managed files.
34 RMS – PrimeCode Upgrade Manual
Running PREPRULE
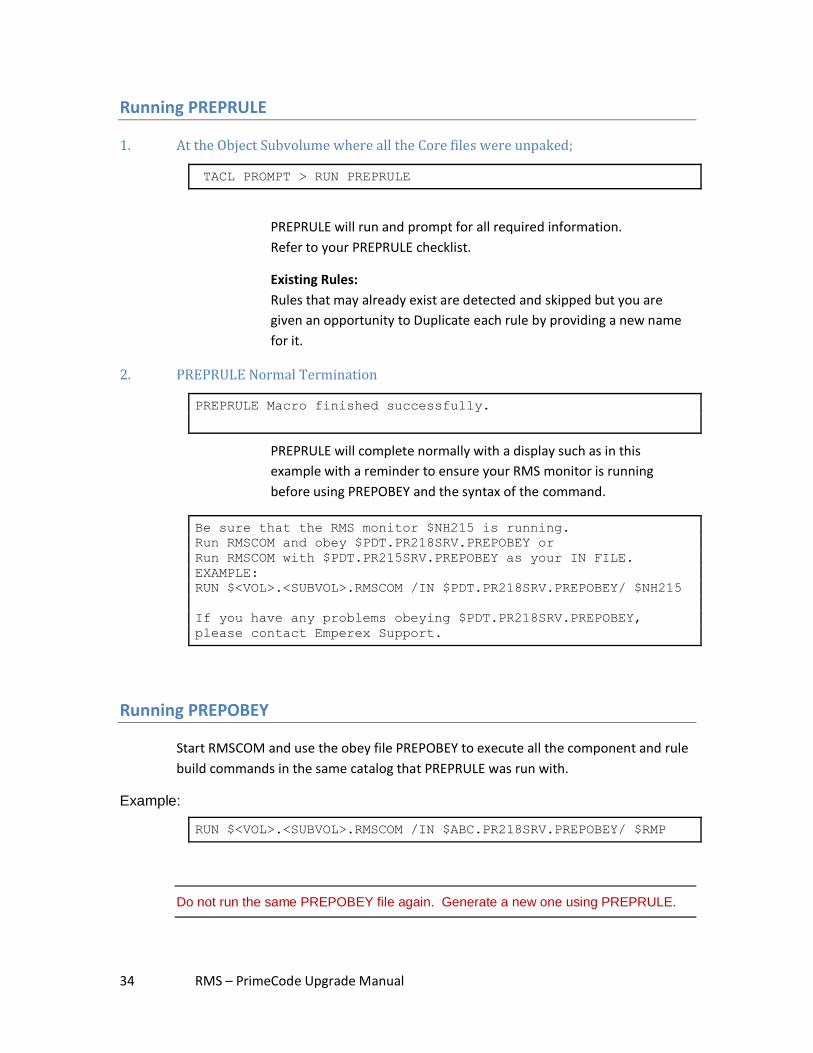
1. At the Object Subvolume where all the Core files were unpaked;
TACL PROMPT > RUN PREPRULE
PREPRULE will run and prompt for all required information.
Refer to your PREPRULE checklist.
Existing Rules:
Rules that may already exist are detected and skipped but you are
given an opportunity to Duplicate each rule by providing a new name
for it.
2. PREPRULE Normal Termination
PREPRULE Macro finished successfully.
PREPRULE will complete normally with a display such as in this
example with a reminder to ensure your RMS monitor is running
before using PREPOBEY and the syntax of the command.
Be sure that the RMS monitor $NH215 is running.
Run RMSCOM and obey $PDT.PR218SRV.PREPOBEY or
Run RMSCOM with $PDT.PR215SRV.PREPOBEY as your IN FILE.
EXAMPLE:
RUN $<VOL>.<SUBVOL>.RMSCOM /IN $PDT.PR218SRV.PREPOBEY/ $NH215
If you have any problems obeying $PDT.PR218SRV.PREPOBEY,
please contact Emperex Support.
Running PREPOBEY
Start RMSCOM and use the obey file PREPOBEY to execute all the component and rule
build commands in the same catalog that PREPRULE was run with.
Example:
RUN $<VOL>.<SUBVOL>.RMSCOM /IN $ABC.PR218SRV.PREPOBEY/ $RMP
Do not run the same PREPOBEY file again. Generate a new one using PREPRULE.

35 RMS – PrimeCode Upgrade Manual
PREPRULE will potentially create the following rules depending on the processors discovered on
your system.
RULE NAME BASED ON DISCOVERY OF FILE
Guardian Rules
BIND BIND
BINDER BIND & BINDER
C C
C++ (CPP) CFRONT, C, CFRONT, CPREP
COBOL COBOL85
DDL DDL
ENFORM ENFORM
FORTRAN FORTRAN
PASCAL PASCAL
PNA RDL
SCOBOL SCOBOLX
SQLCOBOL COBOL85, SQLCOBOL
TACL SEGMENT n/a
TAL TAL
TEMPLATE TEMPL
NMCOBOL NMCOBOL
NMC NMC
NMCPLUS NMCPLUS
PTAL PTAL
NLD NLD
PATHCNFG PXMCFG
CCOMP CCOMP
CPPCOMP CPPCOMP
EPTAL EPTAL
ECOBOL ECOBOL
ELD ELD
OSS Rules
OSS-NLD /usr/bin/nld
OSS-AR /usr/bin/ar
OSS-JAVAC /usr/tandem/java/bin/javac
OSS-JAR /usr/tandem/java/bin/jar
OSS-MXSQLCO /usr/tandem/sqlmx/bin/mxsqlco
OSS-MXSQLC /usr/tandem/sqlmx/bin/mxsqlc
OSS-C89 /usr/bin/c89
OSS-NMCOBOL /usr/bin/nmcobol
OSS-COBOL /usr/bin/cobol
At this point an RMS upgrade is complete.
If PrimeCode is also part of your environment you need to perform the following
sections of this manual to upgrade the FEATURE servers and configure communication
between the new RMS monitor and the PATHWAY that links to your database.
36 RMS – PrimeCode Upgrade Manual
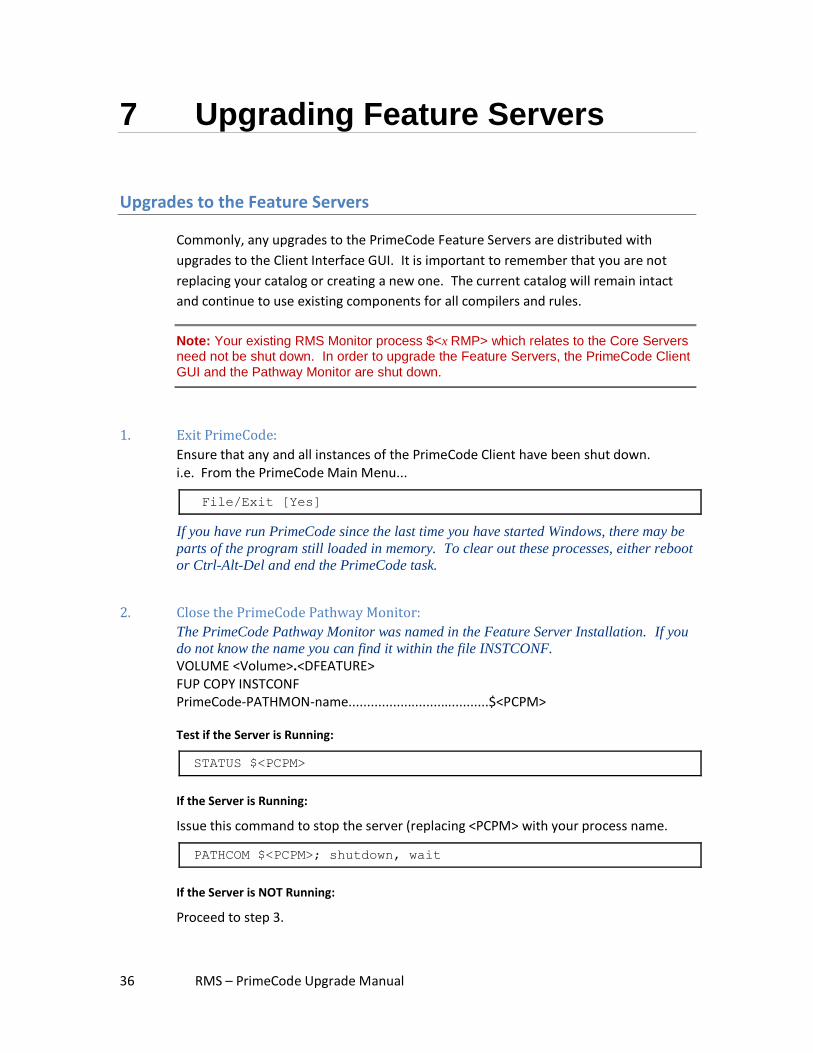
7 Upgrading Feature Servers
Upgrades to the Feature Servers
Commonly, any upgrades to the PrimeCode Feature Servers are distributed with
upgrades to the Client Interface GUI. It is important to remember that you are not
replacing your catalog or creating a new one. The current catalog will remain intact
and continue to use existing components for all compilers and rules.
Note: Your existing RMS Monitor process $<x RMP> which relates to the Core Servers need not be shut down. In order to upgrade the Feature Servers, the PrimeCode Client
GUI and the Pathway Monitor are shut down.
1. Exit PrimeCode:
Ensure that any and all instances of the PrimeCode Client have been shut down. i.e. From the PrimeCode Main Menu...
File/Exit [Yes]
If you have run PrimeCode since the last time you have started Windows, there may be
parts of the program still loaded in memory. To clear out these processes, either reboot
or Ctrl-Alt-Del and end the PrimeCode task.
2. Close the PrimeCode Pathway Monitor:
The PrimeCode Pathway Monitor was named in the Feature Server Installation. If you
do not know the name you can find it within the file INSTCONF.
VOLUME <Volume>.<DFEATURE> FUP COPY INSTCONF PrimeCode-PATHMON-name......................................$<PCPM>
Test if the Server is Running:
STATUS $<PCPM>
If the Server is Running:
Issue this command to stop the server (replacing <PCPM> with your process name.
PATHCOM $<PCPM>; shutdown, wait
If the Server is NOT Running:
Proceed to step 3.
37 RMS – PrimeCode Upgrade Manual
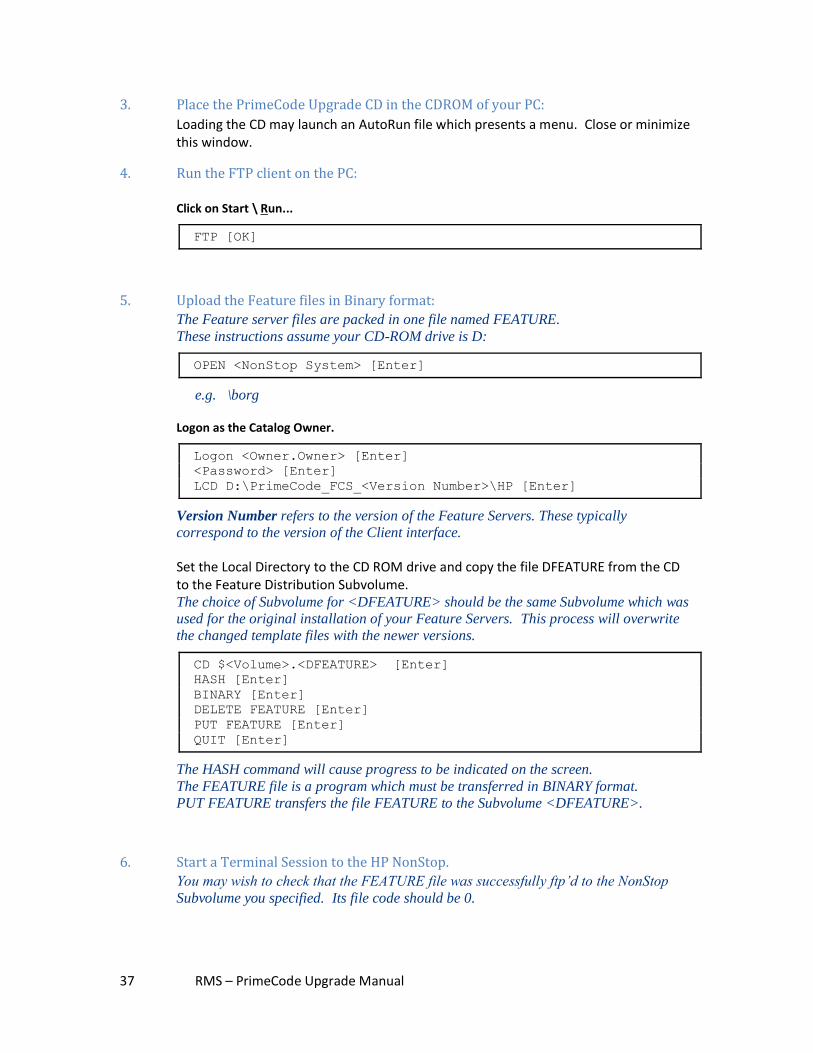
3. Place the PrimeCode Upgrade CD in the CDROM of your PC:
Loading the CD may launch an AutoRun file which presents a menu. Close or minimize this window.
4. Run the FTP client on the PC:
Click on Start \ Run...
FTP [OK]
5. Upload the Feature files in Binary format:
The Feature server files are packed in one file named FEATURE.
These instructions assume your CD-ROM drive is D:
OPEN <NonStop System> [Enter]
e.g. \borg
Logon as the Catalog Owner.
Logon <Owner.Owner> [Enter]
<Password> [Enter]
LCD D:\PrimeCode_FCS_<Version Number>\HP [Enter]
Version Number refers to the version of the Feature Servers. These typically
correspond to the version of the Client interface.
Set the Local Directory to the CD ROM drive and copy the file DFEATURE from the CD to the Feature Distribution Subvolume. The choice of Subvolume for <DFEATURE> should be the same Subvolume which was
used for the original installation of your Feature Servers. This process will overwrite
the changed template files with the newer versions.
CD $<Volume>.<DFEATURE> [Enter]
HASH [Enter]
BINARY [Enter]
DELETE FEATURE [Enter]
PUT FEATURE [Enter]
QUIT [Enter]
The HASH command will cause progress to be indicated on the screen.
The FEATURE file is a program which must be transferred in BINARY format.
PUT FEATURE transfers the file FEATURE to the Subvolume <DFEATURE>.
6. Start a Terminal Session to the HP NonStop.
You may wish to check that the FEATURE file was successfully ftp’d to the NonStop
Subvolume you specified. Its file code should be 0.
38 RMS – PrimeCode Upgrade Manual
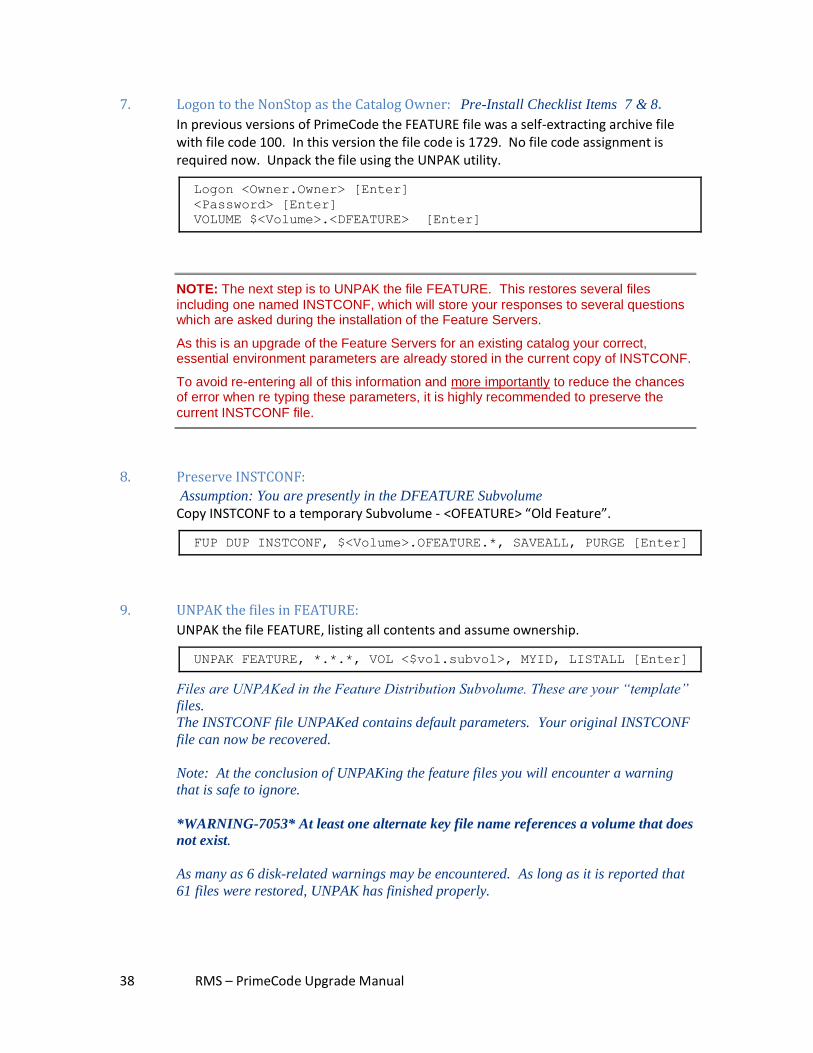
7. Logon to the NonStop as the Catalog Owner: Pre-Install Checklist Items 7 & 8.
In previous versions of PrimeCode the FEATURE file was a self-extracting archive file with file code 100. In this version the file code is 1729. No file code assignment is required now. Unpack the file using the UNPAK utility.
Logon <Owner.Owner> [Enter]
<Password> [Enter]
VOLUME $<Volume>.<DFEATURE> [Enter]
NOTE: The next step is to UNPAK the file FEATURE. This restores several files
including one named INSTCONF, which will store your responses to several questions which are asked during the installation of the Feature Servers.
As this is an upgrade of the Feature Servers for an existing catalog your correct, essential environment parameters are already stored in the current copy of INSTCONF.
To avoid re-entering all of this information and more importantly to reduce the chances of error when re typing these parameters, it is highly recommended to preserve the
current INSTCONF file.
8. Preserve INSTCONF:
Assumption: You are presently in the DFEATURE Subvolume
Copy INSTCONF to a temporary Subvolume - <OFEATURE> “Old Feature”.
FUP DUP INSTCONF, $<Volume>.OFEATURE.*, SAVEALL, PURGE [Enter]
9. UNPAK the files in FEATURE:
UNPAK the file FEATURE, listing all contents and assume ownership.
UNPAK FEATURE, *.*.*, VOL <$vol.subvol>, MYID, LISTALL [Enter]
Files are UNPAKed in the Feature Distribution Subvolume. These are your “template”
files.
The INSTCONF file UNPAKed contains default parameters. Your original INSTCONF
file can now be recovered.
Note: At the conclusion of UNPAKing the feature files you will encounter a warning
that is safe to ignore.
*WARNING-7053* At least one alternate key file name references a volume that does
not exist.
As many as 6 disk-related warnings may be encountered. As long as it is reported that
61 files were restored, UNPAK has finished properly.
39 RMS – PrimeCode Upgrade Manual
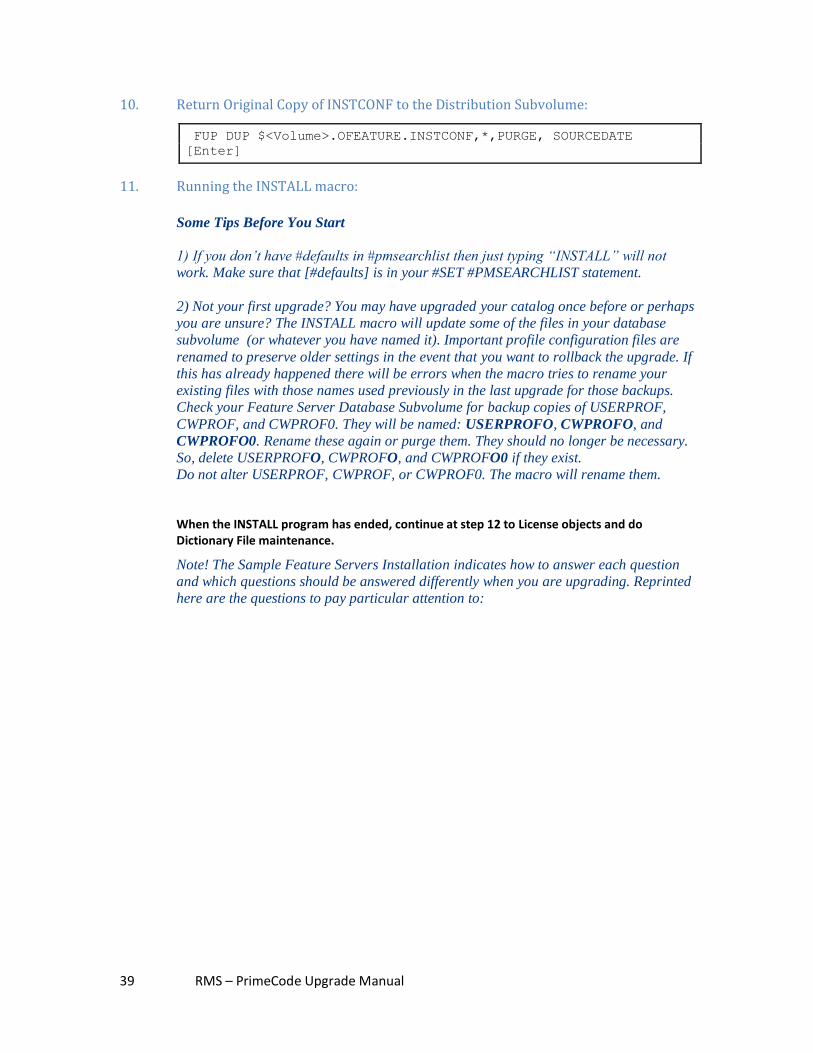
10. Return Original Copy of INSTCONF to the Distribution Subvolume:
FUP DUP $<Volume>.OFEATURE.INSTCONF,*,PURGE, SOURCEDATE
[Enter]
11. Running the INSTALL macro:
Some Tips Before You Start
1) If you don’t have #defaults in #pmsearchlist then just typing “INSTALL” will not
work. Make sure that [#defaults] is in your #SET #PMSEARCHLIST statement.
2) Not your first upgrade? You may have upgraded your catalog once before or perhaps
you are unsure? The INSTALL macro will update some of the files in your database
subvolume (or whatever you have named it). Important profile configuration files are
renamed to preserve older settings in the event that you want to rollback the upgrade. If
this has already happened there will be errors when the macro tries to rename your
existing files with those names used previously in the last upgrade for those backups.
Check your Feature Server Database Subvolume for backup copies of USERPROF,
CWPROF, and CWPROF0. They will be named: USERPROFO, CWPROFO, and
CWPROFO0. Rename these again or purge them. They should no longer be necessary.
So, delete USERPROFO, CWPROFO, and CWPROFO0 if they exist.
Do not alter USERPROF, CWPROF, or CWPROF0. The macro will rename them.
When the INSTALL program has ended, continue at step 12 to License objects and do Dictionary File maintenance.
Note! The Sample Feature Servers Installation indicates how to answer each question
and which questions should be answered differently when you are upgrading. Reprinted
here are the questions to pay particular attention to:
40 RMS – PrimeCode Upgrade Manual
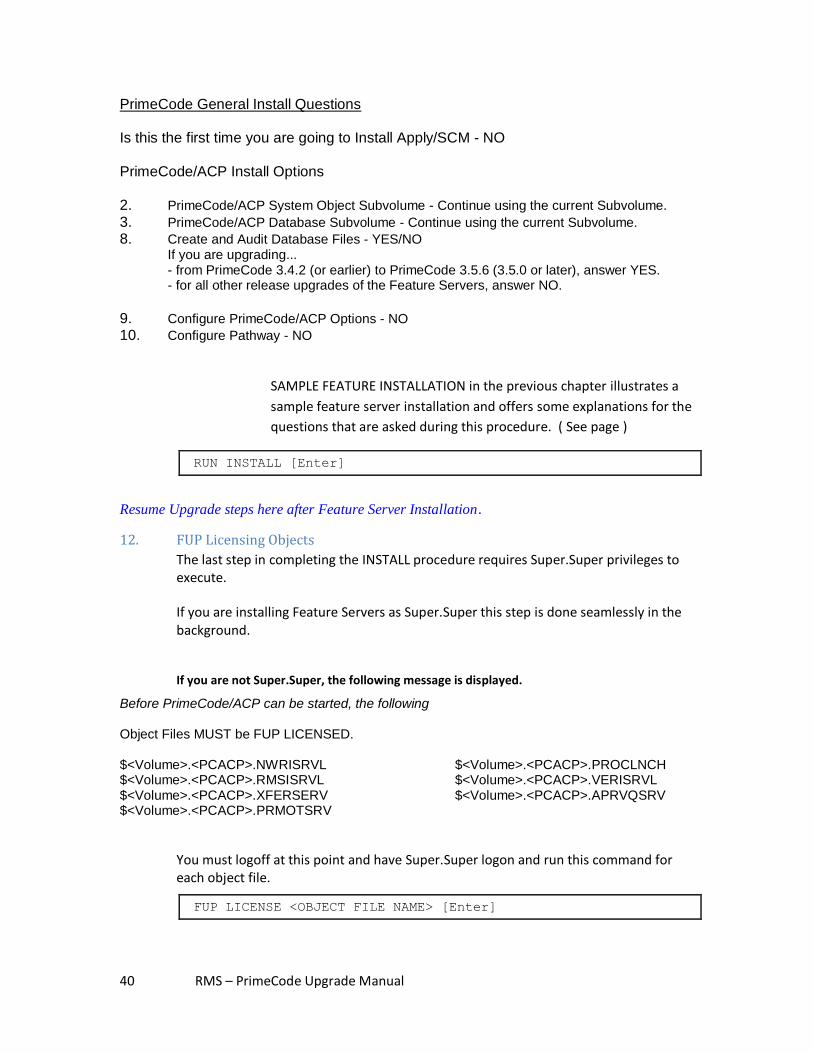
PrimeCode General Install Questions Is this the first time you are going to Install Apply/SCM - NO PrimeCode/ACP Install Options 2. PrimeCode/ACP System Object Subvolume - Continue using the current Subvolume. 3. PrimeCode/ACP Database Subvolume - Continue using the current Subvolume. 8. Create and Audit Database Files - YES/NO If you are upgrading... - from PrimeCode 3.4.2 (or earlier) to PrimeCode 3.5.6 (3.5.0 or later), answer YES. - for all other release upgrades of the Feature Servers, answer NO. 9. Configure PrimeCode/ACP Options - NO 10. Configure Pathway - NO
SAMPLE FEATURE INSTALLATION in the previous chapter illustrates a
sample feature server installation and offers some explanations for the
questions that are asked during this procedure. ( See page )
RUN INSTALL [Enter]
Resume Upgrade steps here after Feature Server Installation.
12. FUP Licensing Objects
The last step in completing the INSTALL procedure requires Super.Super privileges to execute.
If you are installing Feature Servers as Super.Super this step is done seamlessly in the background.
If you are not Super.Super, the following message is displayed.
Before PrimeCode/ACP can be started, the following Object Files MUST be FUP LICENSED. $<Volume>.<PCACP>.NWRISRVL $<Volume>.<PCACP>.PROCLNCH $<Volume>.<PCACP>.RMSISRVL $<Volume>.<PCACP>.VERISRVL $<Volume>.<PCACP>.XFERSERV $<Volume>.<PCACP>.APRVQSRV $<Volume>.<PCACP>.PRMOTSRV
You must logoff at this point and have Super.Super logon and run this command for each object file.
FUP LICENSE <OBJECT FILE NAME> [Enter]
41 RMS – PrimeCode Upgrade Manual
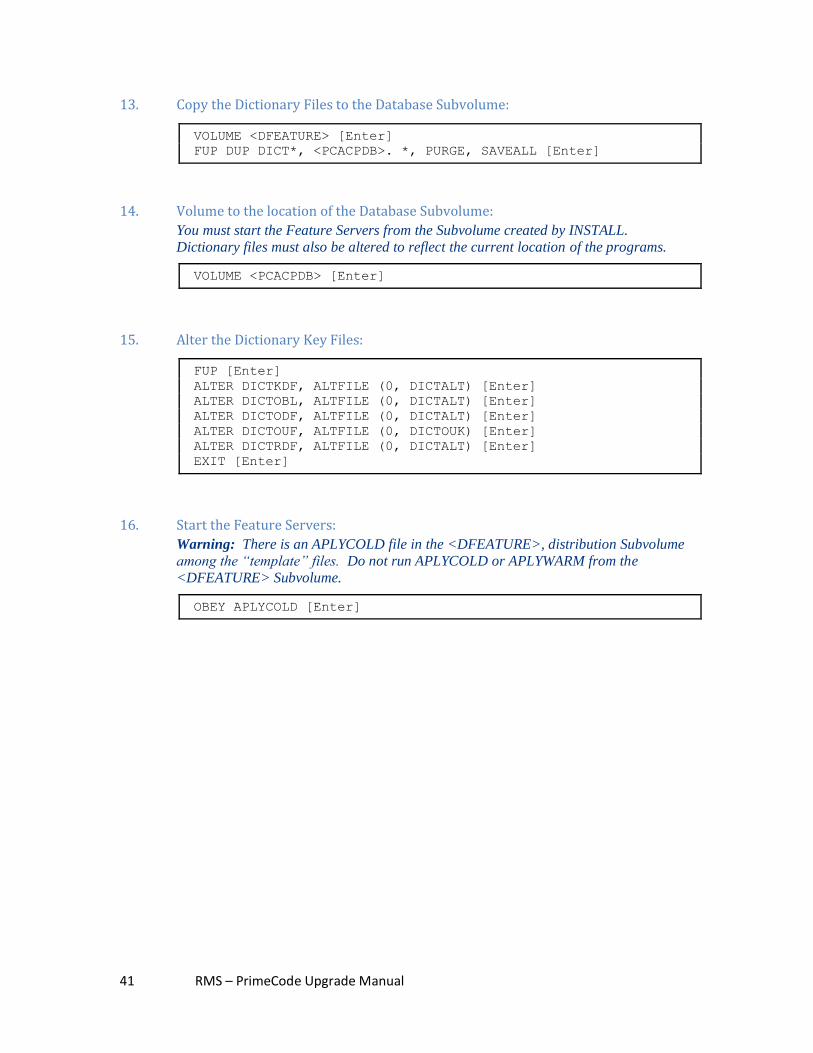
13. Copy the Dictionary Files to the Database Subvolume:
VOLUME <DFEATURE> [Enter]
FUP DUP DICT*, <PCACPDB>. *, PURGE, SAVEALL [Enter]
14. Volume to the location of the Database Subvolume:
You must start the Feature Servers from the Subvolume created by INSTALL.
Dictionary files must also be altered to reflect the current location of the programs.
VOLUME <PCACPDB> [Enter]
15. Alter the Dictionary Key Files:
FUP [Enter]
ALTER DICTKDF, ALTFILE (0, DICTALT) [Enter]
ALTER DICTOBL, ALTFILE (0, DICTALT) [Enter]
ALTER DICTODF, ALTFILE (0, DICTALT) [Enter]
ALTER DICTOUF, ALTFILE (0, DICTOUK) [Enter]
ALTER DICTRDF, ALTFILE (0, DICTALT) [Enter]
EXIT [Enter]
16. Start the Feature Servers:
Warning: There is an APLYCOLD file in the <DFEATURE>, distribution Subvolume
among the “template” files. Do not run APLYCOLD or APLYWARM from the
<DFEATURE> Subvolume.
OBEY APLYCOLD [Enter]
42 RMS – PrimeCode Upgrade Manual
Upgrades to the PC Client Interface
New versions of the PC Client Interface are not upgraded. You must uninstall the
current PC application and then install the new version.
To thoroughly uninstall PrimeCode, use the Add/Remove programs utility in your
Windows Control Panel.
To Remove PrimeCode from Windows
1. Click on the Start button on the Windows Task Bar
2. Select Settings \ Control Panel
3. Double-click on the “Add/Remove Programs” icon.
4. Scroll through the programs listed and select “PrimeCode”.
5. Click the “Add/Remove..” button.
6. Click “Yes” to confirm your choice or “No” to cancel.
7. Delete any shared files that are discovered.
8. Click the OK button to finish.
9. Click OK to close the Add/Remove Dialog.
10. Close the Control Panel.
43 RMS – PrimeCode Upgrade Manual
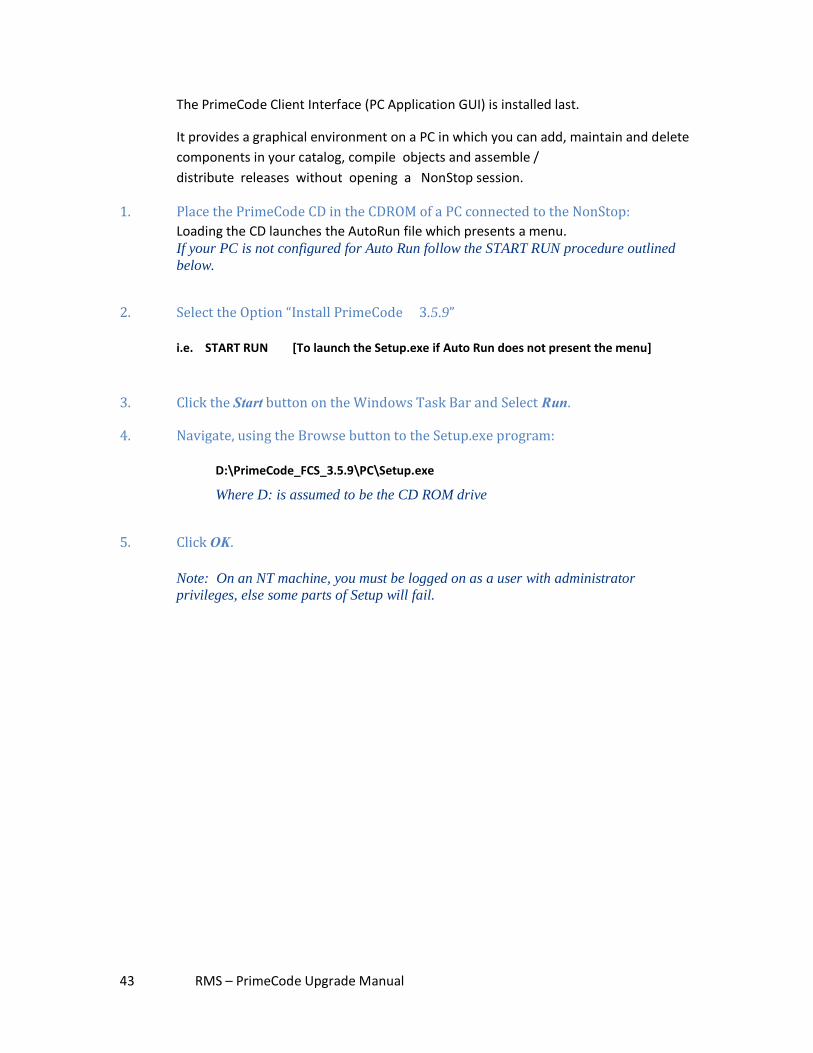
The PrimeCode Client Interface (PC Application GUI) is installed last.
It provides a graphical environment on a PC in which you can add, maintain and delete
components in your catalog, compile objects and assemble /
distribute releases without opening a NonStop session.
1. Place the PrimeCode CD in the CDROM of a PC connected to the NonStop:
Loading the CD launches the AutoRun file which presents a menu. If your PC is not configured for Auto Run follow the START RUN procedure outlined
below.
2. Select the Option “Install PrimeCode 3.5.9”
i.e. START RUN [To launch the Setup.exe if Auto Run does not present the menu]
3. Click the Start button on the Windows Task Bar and Select Run.
4. Navigate, using the Browse button to the Setup.exe program:
D:\PrimeCode_FCS_3.5.9\PC\Setup.exe
Where D: is assumed to be the CD ROM drive
5. Click OK.
Note: On an NT machine, you must be logged on as a user with administrator
privileges, else some parts of Setup will fail.
44 RMS – PrimeCode Upgrade Manual
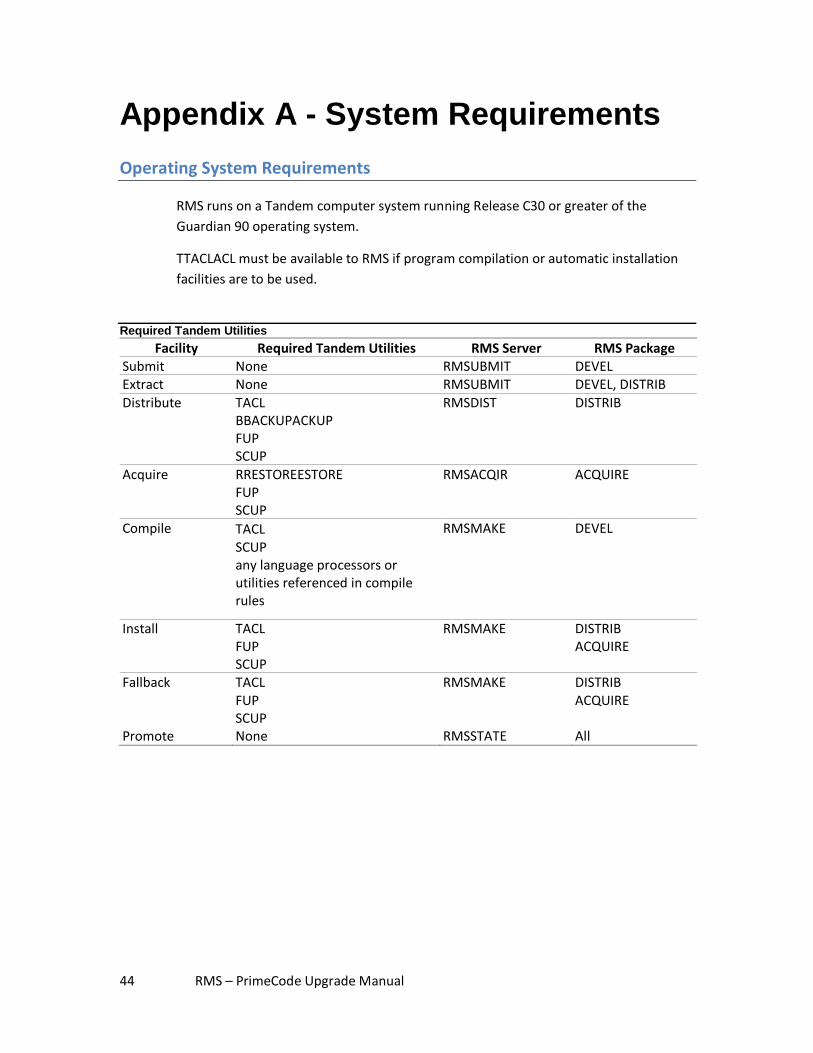
Appendix A - System Requirements
Operating System Requirements
RMS runs on a Tandem computer system running Release C30 or greater of the
Guardian 90 operating system.
TTACLACL must be available to RMS if program compilation or automatic installation
facilities are to be used.
Required Tandem Utilities
Facility Required Tandem Utilities RMS Server RMS Package Submit None RMSUBMIT DEVEL Extract None RMSUBMIT DEVEL, DISTRIB
Distribute TACL BBACKUPACKUP FUP SCUP
RMSDIST DISTRIB
Acquire RRESTOREESTORE FUP SCUP
RMSACQIR ACQUIRE
Compile TACL SCUP any language processors or utilities referenced in compile rules
RMSMAKE DEVEL
Install TACL FUP SCUP
RMSMAKE DISTRIB ACQUIRE
Fallback TACL FUP SCUP
RMSMAKE DISTRIB ACQUIRE
Promote None RMSSTATE All
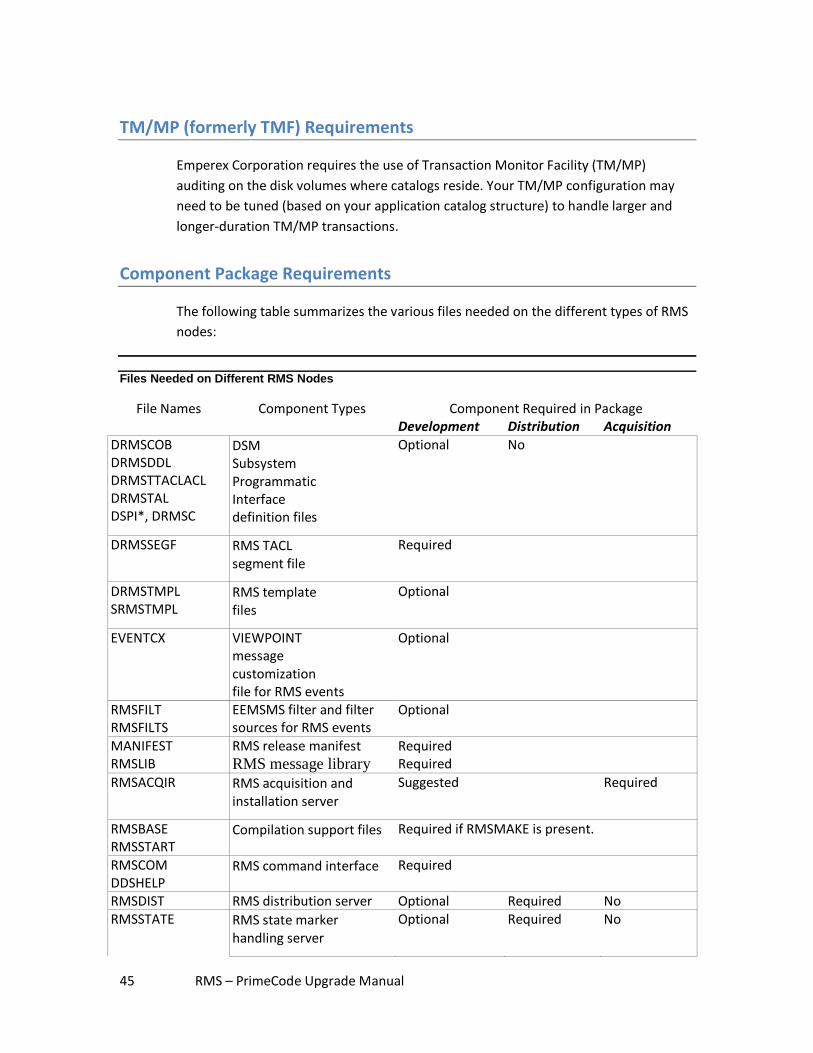
45 RMS – PrimeCode Upgrade Manual
TM/MP (formerly TMF) Requirements
Emperex Corporation requires the use of Transaction Monitor Facility (TM/MP)
auditing on the disk volumes where catalogs reside. Your TM/MP configuration may
need to be tuned (based on your application catalog structure) to handle larger and
longer-duration TM/MP transactions.
Component Package Requirements
The following table summarizes the various files needed on the different types of RMS
nodes:
Files Needed on Different RMS Nodes
File Names Component Types Component Required in Package Development Distribution Acquisition
DRMSCOB DRMSDDL DRMSTTACLACL DRMSTAL DSPI*, DRMSC
DSM Subsystem Programmatic Interface definition files
Optional No
DRMSSEGF RMS TACL segment file
Required
DRMSTMPL SRMSTMPL
RMS template files
Optional
EVENTCX VIEWPOINT message customization file for RMS events
Optional
RMSFILT RMSFILTS
EEMSMS filter and filter sources for RMS events
Optional
MANIFEST RMS release manifest Required RMSLIB RMS message library Required
RMSACQIR RMS acquisition and installation server
Suggested Required
RMSBASE RMSSTART
Compilation support files Required if RMSMAKE is present.
RMSCOM DDSHELP
RMS command interface Required
RMSDIST RMS distribution server Optional Required No RMSSTATE RMS state marker
handling server
Optional Required No
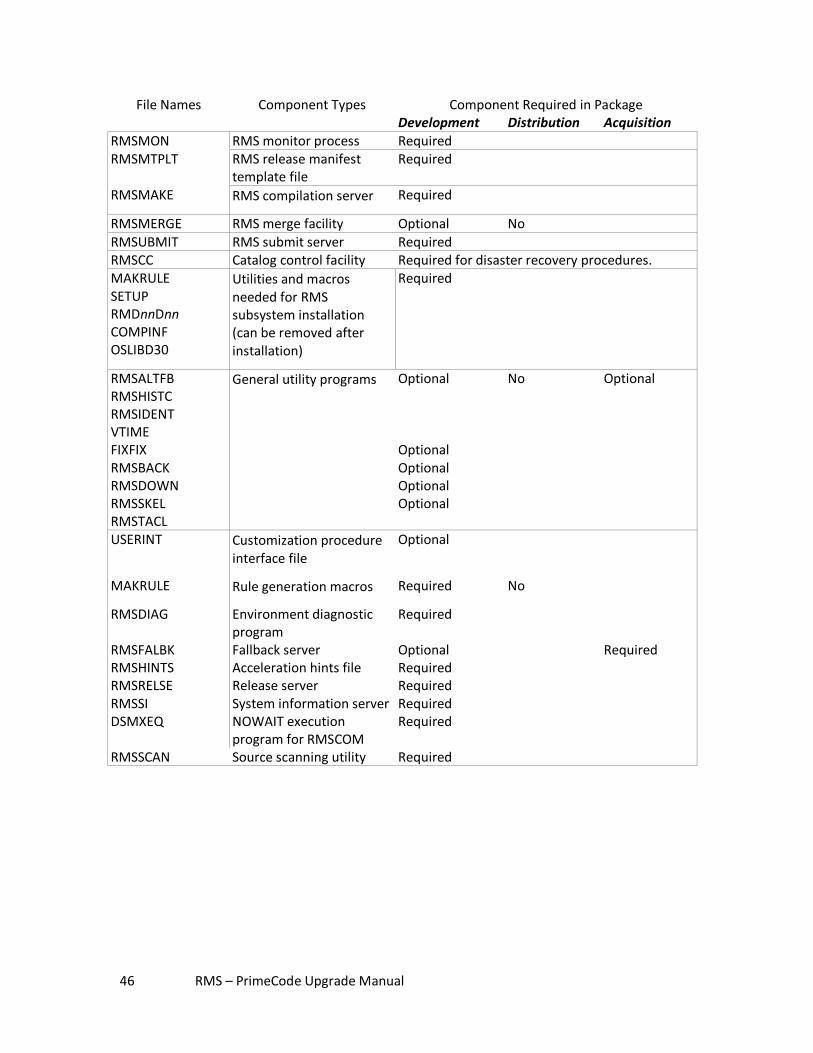
46 RMS – PrimeCode Upgrade Manual
File Names Component Types Component Required in Package Development Distribution Acquisition
RMSMON RMS monitor process Required RMSMTPLT RMS release manifest
template file Required
RMSMAKE RMS compilation server Required
RMSMERGE RMS merge facility Optional No
RMSUBMIT RMS submit server Required RMSCC Catalog control facility Required for disaster recovery procedures. MAKRULE SETUP RMDnnDnn COMPINF OSLIBD30
Utilities and macros needed for RMS subsystem installation (can be removed after installation)
Required
RMSALTFB RMSHISTC RMSIDENT VTIME FIXFIX RMSBACK RMSDOWN RMSSKEL RMSTACL
General utility programs
Optional Optional Optional Optional Optional
No Optional
USERINT Customization procedure interface file
Optional
MAKRULE Rule generation macros Required No
RMSDIAG Environment diagnostic program
Required
RMSFALBK Fallback server Optional Required RMSHINTS Acceleration hints file Required RMSRELSE Release server Required RMSSI System information server Required DSMXEQ NOWAIT execution
program for RMSCOM Required
RMSSCAN Source scanning utility Required
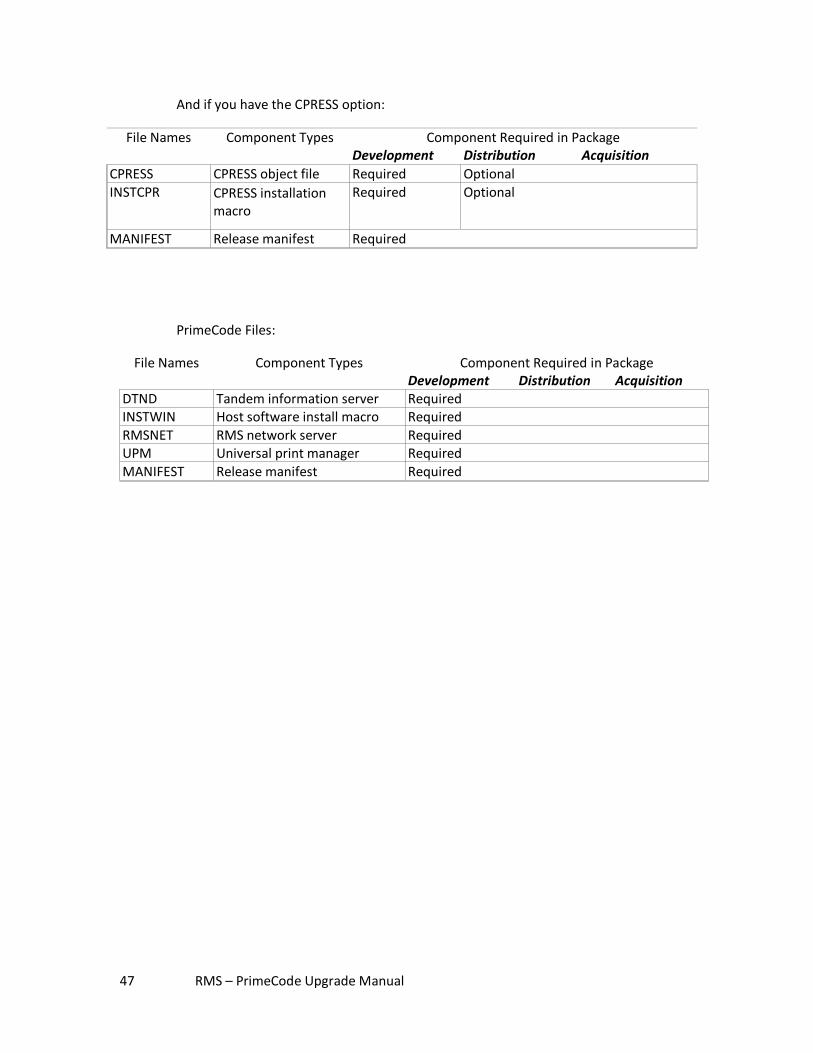
47 RMS – PrimeCode Upgrade Manual
And if you have the CPRESS option:
File Names Component Types Component Required in Package
Development Distribution Acquisition
CPRESS CPRESS object file Required Optional
INSTCPR CPRESS installation macro
Required Optional
MANIFEST Release manifest Required
PrimeCode Files:
File Names Component Types Component Required in Package Development Distribution Acquisition DTND Tandem information server Required INSTWIN Host software install macro Required
RMSNET RMS network server Required UPM Universal print manager Required
MANIFEST Release manifest Required
48 RMS – PrimeCode Upgrade Manual
Appendix B - RMS/PrimeCode Files 2
Appendix F
Contents of the Installation CD
This section describes the files that you can expect to be in the RMS distribution PAK
file on your CD.
RMS Distribution Files
CNREPORT
Users with a CorpNet license can produce a report about the number
of remote installs which have taken place.
CRPFILT
Filter used for CNREPORT above.
DDSHELP
Is the help file for all RMS utilities.
DRMS*, DSPI*
Is the RMS Subsystem Programmatic Interface (SPI) definition files.
DRMSTMPL
Is the Event Message Template file for the RMS subsystem. This file is
compatible with the output of the DSM TEMPL compiler. Use COUP as
described in the DSM Template Facilities Manual to install this
template file.
DSMXEQ
Is the NOWAIT execution program for RMSCOM.
EVENTCX
Is the partial VIEWPOINT EVENTCX file for the RMS subsystem.
FC101
Library file instructing managed files to be of file code 2101.
FC180
Library file instructing managed files to be of file code 2180 for long
text lines.
49 RMS – PrimeCode Upgrade Manual
FIXFIX
Is the FIXERRS ERRORFILE redirection utility.
MAKRULE
Is the rule generation macros file.
MOVECAT
A utility for repairing the alternate key file pointers after a catalog has
been moved.
MOVEPCCAT
NFSDIST
A program for distributions through NFS.
OSSFS
OSS File Server creates and deletes directories, files etc.
OSSMKRUL
A macro that creates components for compilers and compile rules for
the OSS environment.
REIDX
Utility rebuilds a Segmented Source Library’s managed file.
RMD00D20
Is the catalog conversion program for converting from RMSD00.06 or
higher to RMSD20.nn
RMD05D06
The Catalog conversion program for converting from RMSD00.05 to
RMSD00.06.
RMSACQIR
Is the release acquisition server program object file.
RMSALTFB
Is the alternate keyfile, fixup program.
RMSBACK
Is the backup file generator.
RMSBASE
50 RMS – PrimeCode Upgrade Manual
This file contains TACL macros which support program compilation.
These macros include those callable by user RULES. See the Revision
Management System (RMS) RMSCOM and RMSMON Reference
Manual - Program Compilation for details.
RMSCC
Is the change catalog program.
RMSCOM
Is the RMS user-interface or command interpreter program object file.
RMSCP
New server for D20 performs copies from Guardian to OSS.
RMSDIAG
Is the environment diagnostic program.
RMSDIST
Is the release distribution server program object file.
RMSDOWN
Is the shutdown program, used when RMSMON is PROG-ID’d with
SAFEGUARD.
RMSEMPTY
An empty edit file.
RMSFALBK
Is the fallback server.
RMSFILT
Is the Event Management System (EMS) filter to select only RMS
events from an EMS collector. See the Event Management System
Reference Manual for specifics on EMS filters and printing distributors.
RMSFILTS
Is the EMS Filter source for RMSFILT.
RMSHINTS
Is the acceleration hints file.
RMSHISTC
51 RMS – PrimeCode Upgrade Manual
Is the catalog history program.
RMSHUNT
Is the PrimeCode synchronization server, used to interface with
PrimeCode.
RMSIDENT
Is the object identification utility.
RMSMAKE
Is the program compilation server program object file.
RMSMERGE
Is the RMS merge facility program object file.
RMSMON
Is the RMS Monitor program object file. This program will be called the
Monitor or RMSMON in RMS documentation.
RMSMTPLT
Is the release manifest template file. This file is used as the default
manifest that is established when a release is created.
RMSPPM
The Preprocessor for External Make.
RMSRELSE
Is the release management server program object file.
RMSRULES
This file contains the default compilation rules supplied with RMS. This
file is an RMSCOM input file.
RMSSCAN
Is the source scanning utility.
RMSSI
Is the RMS program which checks system information when you do a
remote install.
RMSSKEL
Is the skeleton processor utility.
52 RMS – PrimeCode Upgrade Manual
RMSSTART
Is the TACL initialization file used during all program compilation and
rule execution.
MANIFEST
Is the RMS release manifest.
RMSSTATE
Is the state marker handling program object file.
RMSTACL
Is the Sample TACL Macros illustrating the use of the RMS
Programmatic Interface.
RMSUBMIT
Is the source-code control server program object file.
RMSWATCH
A program that checks the managed files correspond correctly to
information in the database about existing components.
SCRIPT
A macro, working with the new OSSMKRUL, checks for the existence of
required OSS files or creates them.
SECFIX
A utility for adjusting security records in a catalog that has been moved
to another node.
SRMSTMPL
Is the EMS template source file.
USERINT
Is the external procedure declaration file for RMS user-customization
routines.
VTIME
Is the version time utility.
53 RMS – PrimeCode Upgrade Manual
and if you have the CPRESS option:
COMPINF
Is the utility providing selected BINDER information from object files.
CPRESS
Is the CPRESS object file.
DTND
Is the PrimeCode information server.
MANIFEST
Is the CPRESS release manifest.
OSLIBD30
Is the Guardian Operating system compatibility library.
RMSLIB
Is the RMS basic library routine.
RMSNET
Is the RMS network server.
SETUP
Is the RMS installation program which performs any and all required
tasks to get the RMS subsystems to install correctly.
UPM
Is the universal print manager server.
Note!
AXCELLED and RMSLIB are no longer included. AXCELLED is now provided as shareware from IRUG. You can download it from our website at www.emperex.com.
Note! These files are built by SETUP:
RMSLIB
From OSLIBD30 and RMSBLIB.
Note! These programs have not been converted to HIGHPIN:
54 RMS – PrimeCode Upgrade Manual
RMC30C31
RMC31C40
RMSBACK
RMSSKEL
License and Privileged Program Requirements
The following programs in the RMS subsystem must be licensed in order to operate
correctly:
RMSMON RMSUBMIT RMSMAKE RMSDIST RMSACQIR RMSIDENT RMSMERGE VTIME RMSFALBK RMSSTATE RMSSCAN RMSRELSE
and optionally
CPRESS RMSNET
The licensing procedure is performed by the RMS SETUP macro. However, if you
control access to RMS using SAFEGUARD, you must license the above objects using
SAFECOM.
Program File Security
RMSMON and all servers should be secured so that the user who owns the RMS
catalog has READ and EXECUTE access to those objects. SUPER.SUPER is not required
to own any RMS files.
RMSCOM should be secured so that any users of RMS have READ and EXECUTE access
to that object.
If the external make facility is to be used in your environment, secure RMSMAKE so
that it can be executed (READ and EXECUTE access required).
Catalog Security
The RMS catalog is created by RMSMON with owner access only (i.e. “OOOO”). This
security must not be changed. Refer to Security in the Revision Management System
(RMS) RMSCOM and RMSMON Reference Manual for instructions on changing catalog
owners, if the need arises.
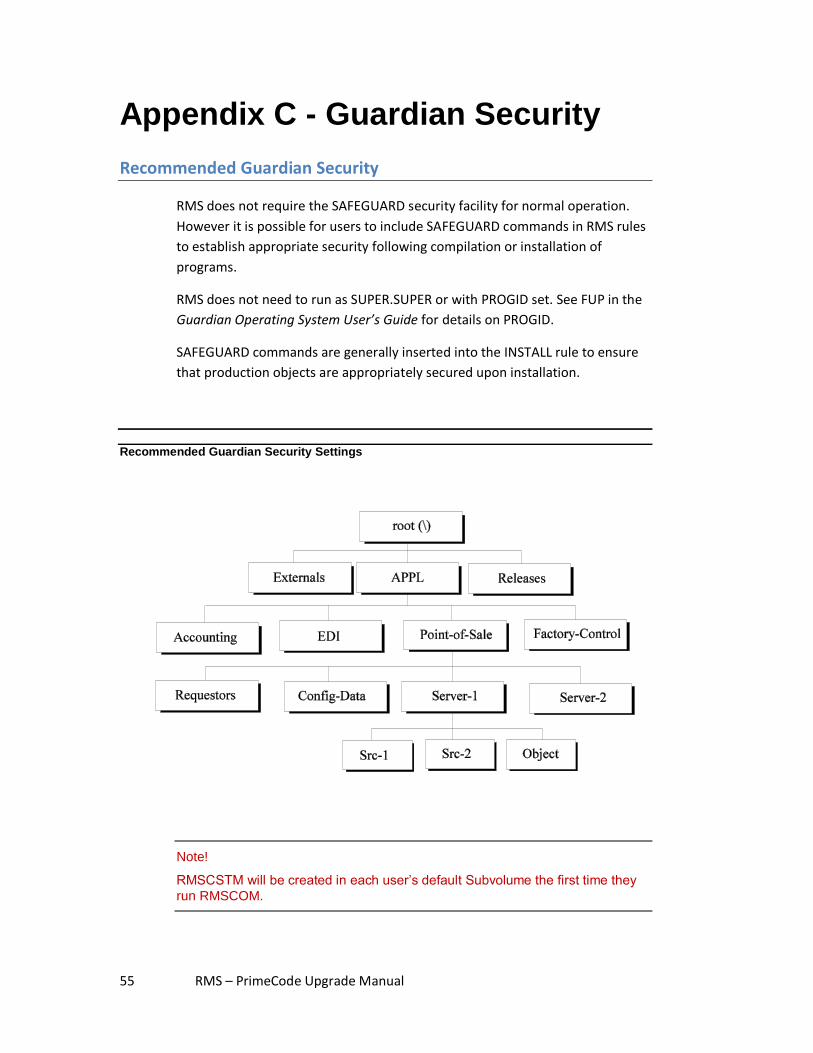
55 RMS – PrimeCode Upgrade Manual
Appendix C - Guardian Security
Recommended Guardian Security
RMS does not require the SAFEGUARD security facility for normal operation.
However it is possible for users to include SAFEGUARD commands in RMS rules
to establish appropriate security following compilation or installation of
programs.
RMS does not need to run as SUPER.SUPER or with PROGID set. See FUP in the
Guardian Operating System User’s Guide for details on PROGID.
SAFEGUARD commands are generally inserted into the INSTALL rule to ensure
that production objects are appropriately secured upon installation.
Recommended Guardian Security Settings
Note!
RMSCSTM will be created in each user’s default Subvolume the first time they
run RMSCOM.
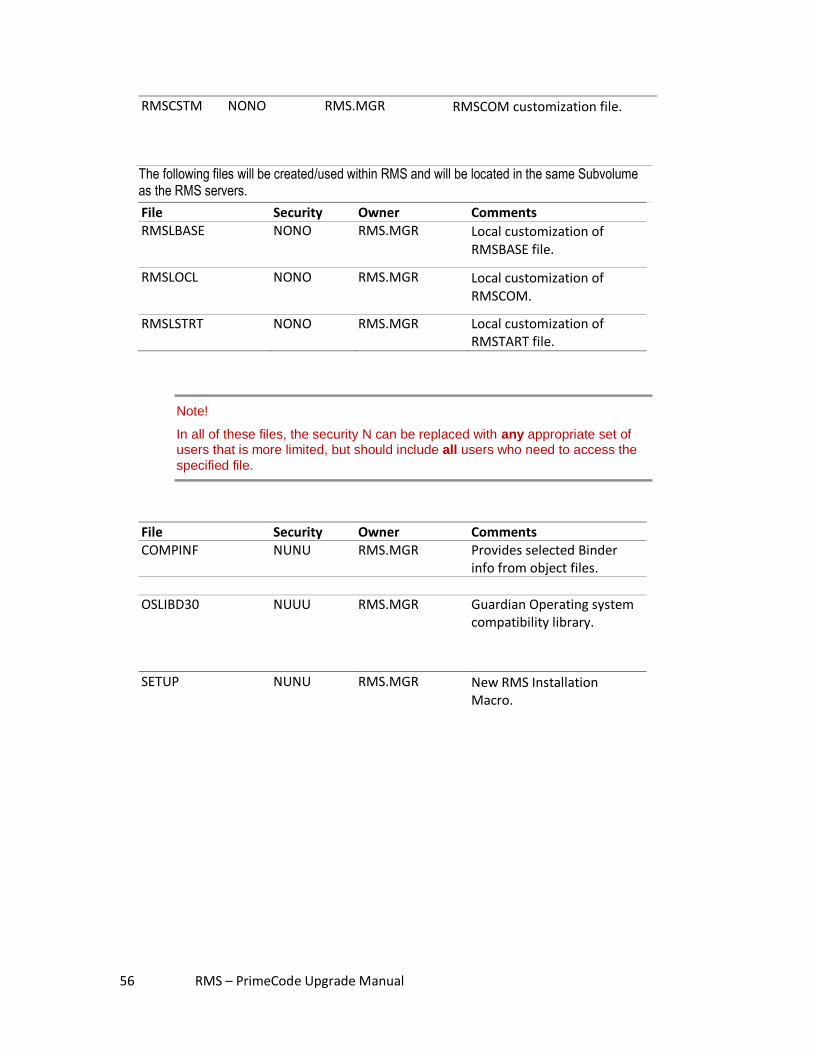
56 RMS – PrimeCode Upgrade Manual
RMSCSTM NONO RMS.MGR RMSCOM customization file.
The following files will be created/used within RMS and will be located in the same Subvolume as the RMS servers.
File Security Owner Comments RMSLBASE NONO RMS.MGR Local customization of
RMSBASE file.
RMSLOCL NONO RMS.MGR Local customization of RMSCOM.
RMSLSTRT NONO RMS.MGR Local customization of RMSTART file.
Note!
In all of these files, the security N can be replaced with any appropriate set of users that is more limited, but should include all users who need to access the
specified file.
File Security Owner Comments COMPINF NUNU RMS.MGR Provides selected Binder
info from object files.
OSLIBD30 NUUU RMS.MGR Guardian Operating system
compatibility library.
SETUP NUNU RMS.MGR New RMS Installation Macro.
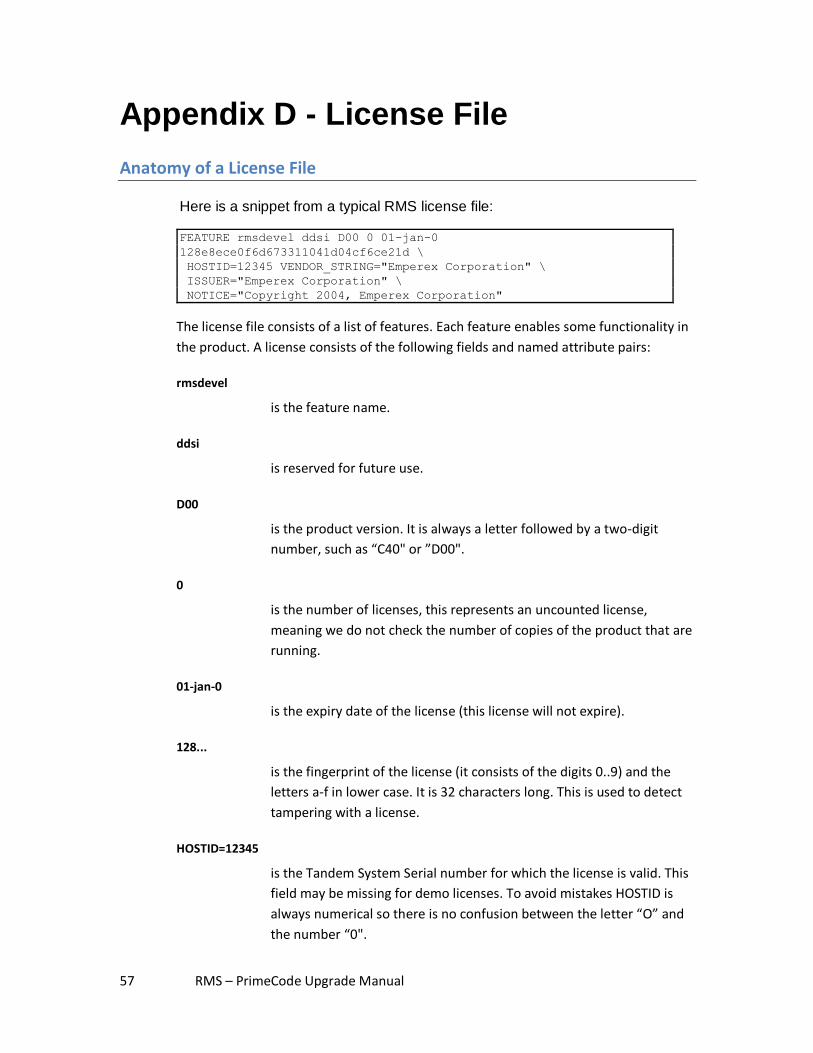
57 RMS – PrimeCode Upgrade Manual
Appendix D - License File
Anatomy of a License File
Here is a snippet from a typical RMS license file:
FEATURE rmsdevel ddsi D00 0 01-jan-0
128e8ece0f6d673311041d04cf6ce21d \
HOSTID=12345 VENDOR_STRING="Emperex Corporation" \
ISSUER="Emperex Corporation" \
NOTICE="Copyright 2004, Emperex Corporation"
The license file consists of a list of features. Each feature enables some functionality in
the product. A license consists of the following fields and named attribute pairs:
rmsdevel
is the feature name.
ddsi
is reserved for future use.
D00
is the product version. It is always a letter followed by a two-digit
number, such as “C40" or ”D00".
0
is the number of licenses, this represents an uncounted license,
meaning we do not check the number of copies of the product that are
running.
01-jan-0
is the expiry date of the license (this license will not expire).
128...
is the fingerprint of the license (it consists of the digits 0..9) and the
letters a-f in lower case. It is 32 characters long. This is used to detect
tampering with a license.
HOSTID=12345
is the Tandem System Serial number for which the license is valid. This
field may be missing for demo licenses. To avoid mistakes HOSTID is
always numerical so there is no confusion between the letter “O” and
the number “0".
58 RMS – PrimeCode Upgrade Manual
VENDOR_STRING="Emperex Corporation"
is the customer string we use for EMS messages to identify the license.
ISSUER="Emperex Corporation"
is the license issuer.
NOTICE="Copyright 2004, Emperex Corporation"
is used to copyright the license and software.
Considerations
The license file should be kept in a central location on the system and a define
=DLM_LICENSE_FILE should be added to either TACLLOCL or TACLCSTM for all users
who start Emperex applications.
Note!
If you have multiple Emperex products, set up one license file for all products. Simply copy the lines from the original license file to the main license file.
The define could also be added to the startup files for the individual applications.
A license file is distributed with a blank line between licenses for a single system. In
general the license file should be broken at these points and placed on the appropriate
system.
The license file will be updated for each major release of a product, for example C40,
D00 etc.
If the prior major release is still being run then the new license file should be
appended to the existing license file. If the prior major release is not being run then
the older release entries for the same features should be removed.
Note!
See the appropriate appendix for the product you are using.
Caution!
Remember, changing a license file in any way will invalidate the license! If you tamper
with any of the fields, the license will stop working for the field you changed.
More Considerations
Bugfixes to servers within a release won’t require a license change. This means that it
will be easier to mail or place servers on our web site for you with no risk of problems.
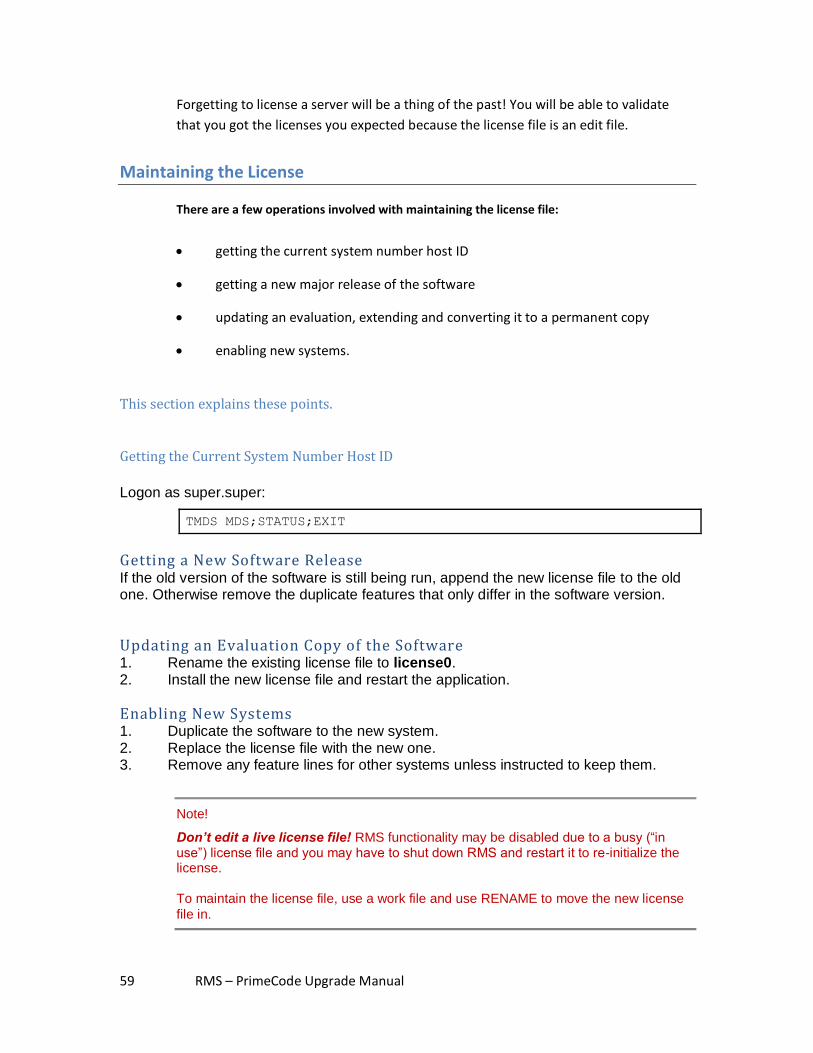
59 RMS – PrimeCode Upgrade Manual
Forgetting to license a server will be a thing of the past! You will be able to validate
that you got the licenses you expected because the license file is an edit file.
Maintaining the License
There are a few operations involved with maintaining the license file:
getting the current system number host ID
getting a new major release of the software
updating an evaluation, extending and converting it to a permanent copy
enabling new systems.
This section explains these points.
Getting the Current System Number Host ID
Logon as super.super:
TMDS MDS;STATUS;EXIT
Getting a New Software Release If the old version of the software is still being run, append the new license file to the old one. Otherwise remove the duplicate features that only differ in the software version.
Updating an Evaluation Copy of the Software 1. Rename the existing license file to license0. 2. Install the new license file and restart the application.
Enabling New Systems 1. Duplicate the software to the new system. 2. Replace the license file with the new one. 3. Remove any feature lines for other systems unless instructed to keep them.
Note!
Don’t edit a live license file! RMS functionality may be disabled due to a busy (“in use”) license file and you may have to shut down RMS and restart it to re-initialize the license. To maintain the license file, use a work file and use RENAME to move the new license
file in.

60 RMS – PrimeCode Upgrade Manual
Appendix E - Feature Setup
Sample Feature Installation
The following is an illustration of the questions you will be asked during an initial, full
installation of PrimeCode with or without the ACP package. Some explanations are
provided to help you make your choices.
Full Installation including ACP You may hit ‘Break’ at any time to abort the installation.
1. Is this a full install of PrimeCode/ACP? [Y]
If you are installing both PrimeCode and ACP, answer Y (Yes).
If you are installing PrimeCode without ACP, answer N (No).
An introduction message scrolls on your screen quite quickly.
See Appendix A for the full text.
2. Ready to Continue with the Install? [Y]
Release Notes for Apply/SCM, the ACP functionality scrolls on your screen quite
quickly.
See Appendix B for the full text.
3. Is TMF Configured And Running? [Y]
TMF is required. RMS and PrimeCode Databases must reside on an audited drive. If you answer N (No) to this question the installation will abort. If you answer Y (Yes) but TMF is not running and properly configured, PrimeCode will install but fail to function correctly.
4. Is This a Remote System (Approvals) Install of PrimeCode/ACP? [Y]
This question, over the years, has been the most misunderstood of all the installation questions. The answer to this one is rather critical to the approvals process if you have an ACP catalog and thus warrants the lengthy discussion here - our apologies.
next page.....
61 RMS – PrimeCode Upgrade Manual
Allow me to paraphrase:
Is this installation of PrimeCode to build a catalog that will use the Approval database
from another catalog on a different node?
A ‘Remote’ install of PrimeCode implies that you are installing a catalog which will
NOT host the ACP Approvals database.
If this is your first and possibly only installation the answer would be No. Answering
No ensures that the approval database is built for this catalog.
If you are installing PrimeCode on one system node only, answer [N] (No).
If this is your first of several PrimeCode installations on two or more nodes it is
advisable to answer [N] (No) and plan to use this catalog’s database for the location of
a central approval database.
You always have the option to install several catalogs and not share the approval
database. Any catalog can maintain its own approval database and this is fine so long
as you intend the catalogs always remain in isolated environments. Without
centralizing the database you cannot perform Full Node Distributions for example.
ACP functionality includes a system of Approvals and Notifications that allow you to
establish an individual(s) or a group as approver(s) who must approve certain events
before they can execute. Since approvals can pertain to events that span system
nodes, the approval database was designed to reside on one node only and shared by
other catalogs. In much of the documentation this is referred to as the ‘Central
Approvals Database’.
When you answer ‘Yes’ you designate the node you are installing to as the location for
the Central Approval Database. Each catalog you install will need and have its own
feature database but only one requires the additional files for managing the approvals.
There is no harm done (to the catalog you are installing) by responding with [N] for any
installation. It will only result in installing more files in the ACP (PrimeCode Feature)
database than may be required. The downside to answering No however is that the
installation will not prompt for the location of the approval database that was built
and is to be used for all catalogs that need approval for cross-catalog operations.
The default for this question is set to Yes assuming that following the initial installation
most subsequent installations will be remote (if not totally independent
environments).
62 RMS – PrimeCode Upgrade Manual
It is also not necessary to locate your approvals database on the first catalog you
install. A central approval database can work located on any node as long as each
catalog is configured to specify the node that is to be used for the central database.
If you answer [Y] (Yes) to this question you will also be prompted to confirm or specify
the system node on which the Approval Database was located.
\<system name> is the Central System Node Name?
4a. Is this value correct? [Y]
To accept the node from which you are currently installing answer Y (Yes). To specify another node answer N (No) and provide the system node name where the Approval Database will be located.
5. $SYSTEM.<PCCORE>.LICENSE does not exist - Re-enter License File Name
The PrimeCode installation will first assume that your license was located at $SYSTEM.RMSD00 and fail to find it. [The license file was created during the SETUP of the Core Servers and located in the Subvolume where the Core Servers were copied to <PCCORE>. See pg. .] PrimeCode Installation then asks you to confirm this.
$SYSTEM.RMSD00.LICENSE is the License File Name
Is this value correct? [Y] Unless you named your Core Server Object Subvolume <PCCORE> as “RMSD00”, answer N (No). You will next be prompted to name it. The question has caught many off guard as it does not end with a question mark (?). The contents of the [square brackets] is an example of the form of the answer expected.
Name of the PrimeCode License File [$SYSTEM.RMSD00.LICENSE]
Provide a fully qualified name to the Core Server Object Subvolume and the License file.
$<Volume>.<PCCORE>.LICENSE [Enter]
Your response will be echoed back for your confirmation before proceeding or if your
response is wrong PrimeCode will report that your license file does not exist.
next page.....
63 RMS – PrimeCode Upgrade Manual
6. Is This the First Time You Are Going To Install PrimeCode/ACP? [Y]
This question relates to the first one in the installation procedure about a full install. If
you answered Yes, you may not necessarily need to answer “Yes” now.
UPGRADES
If this is the first time you are installing ACP, answer Y. For all other times (refreshes and
upgrades) answer N.
If you answer N the approvals database will not be created on this node.
The next series of questions will prompt you for parameters with which to configure
PrimeCode for your environment. These answers will be stored in the Install
Configuration File - INSTCONF. If you have attempted the installation and completed it
at least to this point, PrimeCode will detect an existing version of INSTCONF and
display its contents.
For example:
Install Configuration File Found - Processing the File
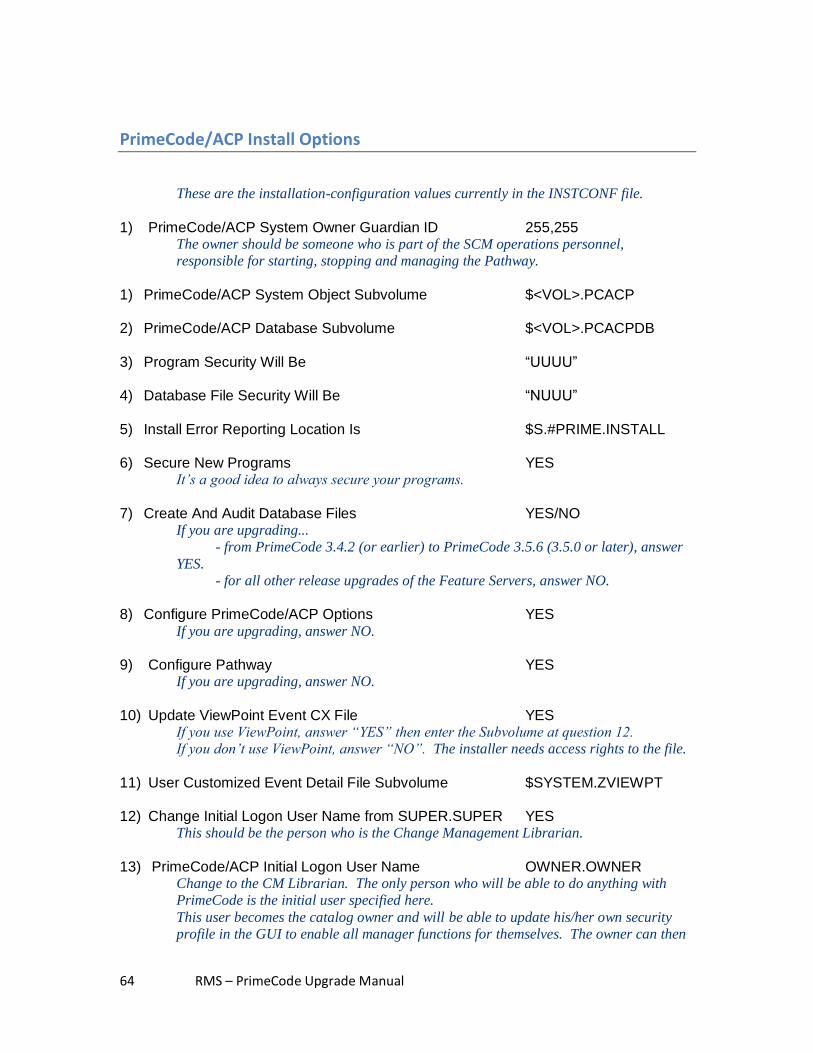
64 RMS – PrimeCode Upgrade Manual
PrimeCode/ACP Install Options
These are the installation-configuration values currently in the INSTCONF file.
1) PrimeCode/ACP System Owner Guardian ID 255,255 The owner should be someone who is part of the SCM operations personnel,
responsible for starting, stopping and managing the Pathway.
1) PrimeCode/ACP System Object Subvolume $<VOL>.PCACP 2) PrimeCode/ACP Database Subvolume $<VOL>.PCACPDB 3) Program Security Will Be “UUUU” 4) Database File Security Will Be “NUUU” 5) Install Error Reporting Location Is $S.#PRIME.INSTALL 6) Secure New Programs YES
It’s a good idea to always secure your programs.
7) Create And Audit Database Files YES/NO
If you are upgrading...
- from PrimeCode 3.4.2 (or earlier) to PrimeCode 3.5.6 (3.5.0 or later), answer
YES.
- for all other release upgrades of the Feature Servers, answer NO.
8) Configure PrimeCode/ACP Options YES
If you are upgrading, answer NO.
9) Configure Pathway YES
If you are upgrading, answer NO.
10) Update ViewPoint Event CX File YES
If you use ViewPoint, answer “YES” then enter the Subvolume at question 12.
If you don’t use ViewPoint, answer “NO”. The installer needs access rights to the file.
11) User Customized Event Detail File Subvolume $SYSTEM.ZVIEWPT 12) Change Initial Logon User Name from SUPER.SUPER YES
This should be the person who is the Change Management Librarian.
13) PrimeCode/ACP Initial Logon User Name OWNER.OWNER
Change to the CM Librarian. The only person who will be able to do anything with
PrimeCode is the initial user specified here.
This user becomes the catalog owner and will be able to update his/her own security
profile in the GUI to enable all manager functions for themselves. The owner can then
65 RMS – PrimeCode Upgrade Manual
proceed to add security profiles for all other users.
14) Accelerate Object Programs NO
Accelerating prepares the system for running programs much faster. However, it takes
a long time to do the preparation and can add considerable time to your overall
installation (60 minutes on an S70 000). If you are simply installing to fix some quick
bug fixes and doing a fast recompile, answer “NO”.
15) Acceleration CPU 1 16) Event Log Location $0
$0 is the default event log location. If you are using a custom log, enter that location
here. Are these the correct PrimeCode/ACP Install Options? [Y]
Accept these parameters or answer N (No).
Answering “NO” will prompt you to enter the option number of the parameter you
want to change.
Enter the Option Number to Change or Hit Return to Continue
Type the number of the parameter you wish to edit OR press Enter to continue.
For example, to change the; PrimeCode/ACP System Object Subvolume
2 [Enter]
Continue editing parameters and cycling through the display of INSTCONF until all
parameters are set as desired.
OR
[Enter]
The PrimeCode / ACP Configuration Options follow.
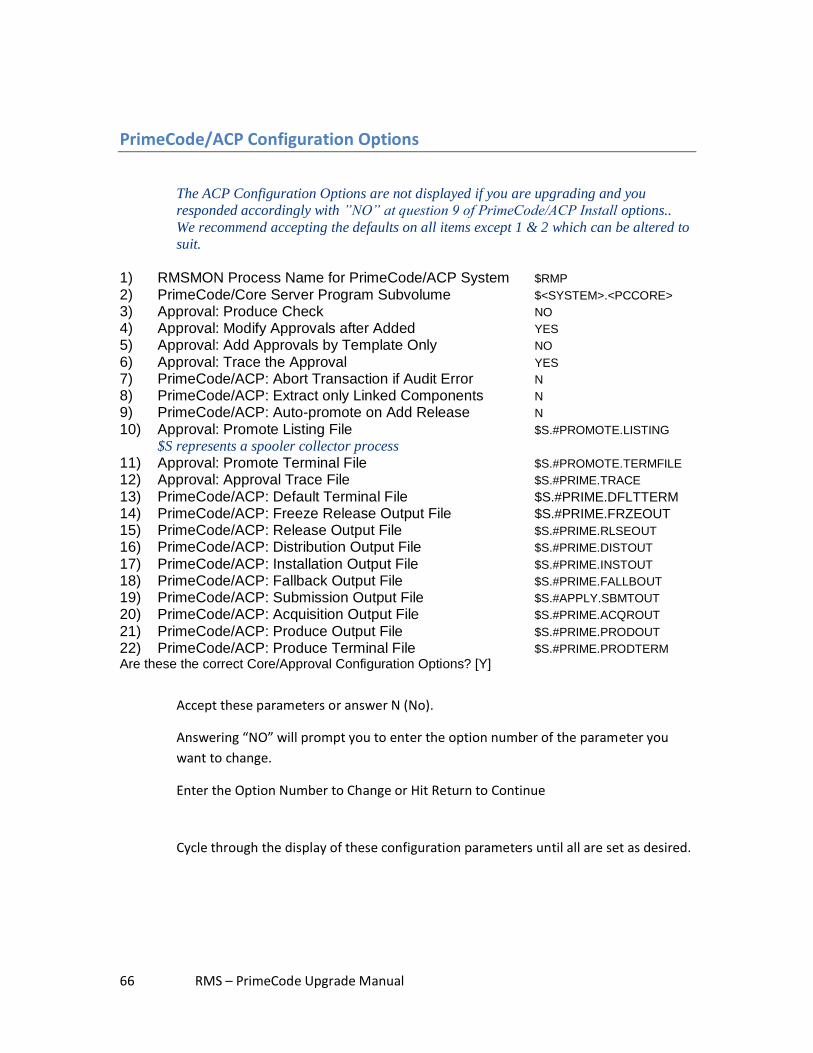
66 RMS – PrimeCode Upgrade Manual
PrimeCode/ACP Configuration Options
The ACP Configuration Options are not displayed if you are upgrading and you
responded accordingly with ”NO” at question 9 of PrimeCode/ACP Install options..
We recommend accepting the defaults on all items except 1 & 2 which can be altered to
suit.
1) RMSMON Process Name for PrimeCode/ACP System $RMP 2) PrimeCode/Core Server Program Subvolume $<SYSTEM>.<PCCORE> 3) Approval: Produce Check NO 4) Approval: Modify Approvals after Added YES 5) Approval: Add Approvals by Template Only NO 6) Approval: Trace the Approval YES 7) PrimeCode/ACP: Abort Transaction if Audit Error N 8) PrimeCode/ACP: Extract only Linked Components N 9) PrimeCode/ACP: Auto-promote on Add Release N 10) Approval: Promote Listing File $S.#PROMOTE.LISTING $S represents a spooler collector process
11) Approval: Promote Terminal File $S.#PROMOTE.TERMFILE 12) Approval: Approval Trace File $S.#PRIME.TRACE 13) PrimeCode/ACP: Default Terminal File $S.#PRIME.DFLTTERM 14) PrimeCode/ACP: Freeze Release Output File $S.#PRIME.FRZEOUT 15) PrimeCode/ACP: Release Output File $S.#PRIME.RLSEOUT 16) PrimeCode/ACP: Distribution Output File $S.#PRIME.DISTOUT 17) PrimeCode/ACP: Installation Output File $S.#PRIME.INSTOUT 18) PrimeCode/ACP: Fallback Output File $S.#PRIME.FALLBOUT 19) PrimeCode/ACP: Submission Output File $S.#APPLY.SBMTOUT 20) PrimeCode/ACP: Acquisition Output File $S.#PRIME.ACQROUT 21) PrimeCode/ACP: Produce Output File $S.#PRIME.PRODOUT 22) PrimeCode/ACP: Produce Terminal File $S.#PRIME.PRODTERM Are these the correct Core/Approval Configuration Options? [Y]
Accept these parameters or answer N (No).
Answering “NO” will prompt you to enter the option number of the parameter you
want to change.
Enter the Option Number to Change or Hit Return to Continue
Cycle through the display of these configuration parameters until all are set as desired.
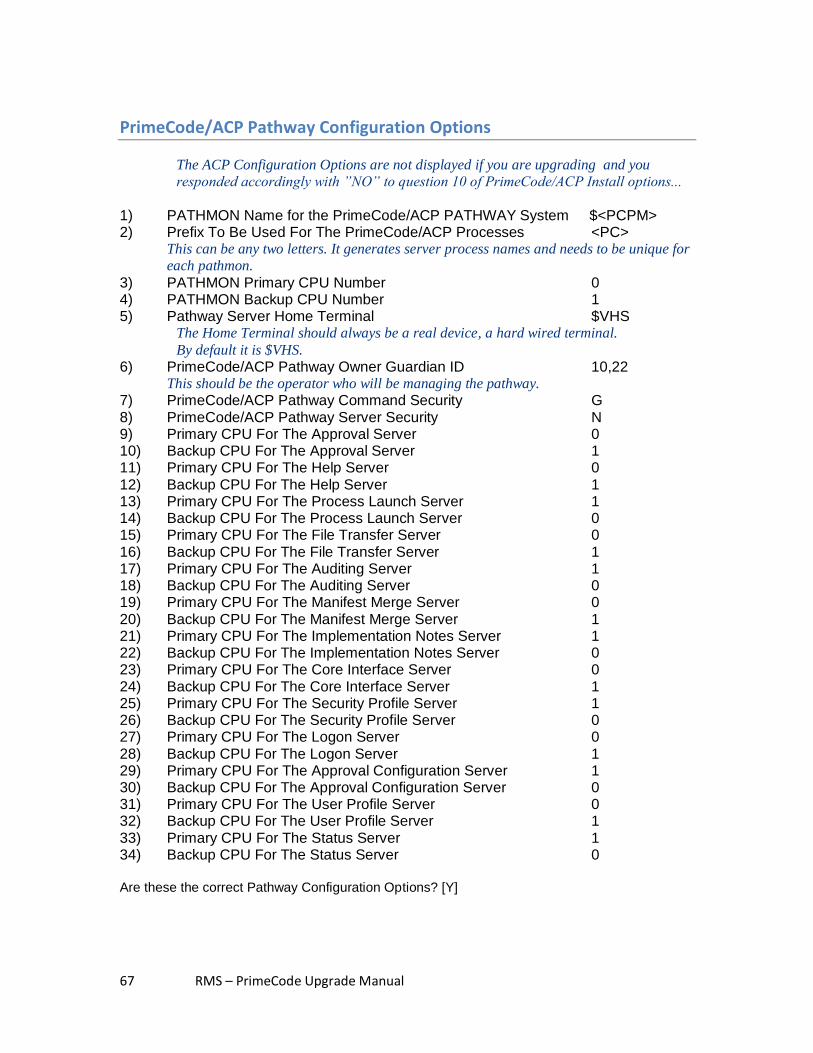
67 RMS – PrimeCode Upgrade Manual
PrimeCode/ACP Pathway Configuration Options
The ACP Configuration Options are not displayed if you are upgrading and you
responded accordingly with ”NO” to question 10 of PrimeCode/ACP Install options...
1) PATHMON Name for the PrimeCode/ACP PATHWAY System $<PCPM> 2) Prefix To Be Used For The PrimeCode/ACP Processes <PC> This can be any two letters. It generates server process names and needs to be unique for
each pathmon.
3) PATHMON Primary CPU Number 0 4) PATHMON Backup CPU Number 1 5) Pathway Server Home Terminal $VHS
The Home Terminal should always be a real device, a hard wired terminal.
By default it is $VHS.
6) PrimeCode/ACP Pathway Owner Guardian ID 10,22 This should be the operator who will be managing the pathway.
7) PrimeCode/ACP Pathway Command Security G 8) PrimeCode/ACP Pathway Server Security N 9) Primary CPU For The Approval Server 0 10) Backup CPU For The Approval Server 1 11) Primary CPU For The Help Server 0 12) Backup CPU For The Help Server 1 13) Primary CPU For The Process Launch Server 1 14) Backup CPU For The Process Launch Server 0 15) Primary CPU For The File Transfer Server 0 16) Backup CPU For The File Transfer Server 1 17) Primary CPU For The Auditing Server 1 18) Backup CPU For The Auditing Server 0 19) Primary CPU For The Manifest Merge Server 0 20) Backup CPU For The Manifest Merge Server 1 21) Primary CPU For The Implementation Notes Server 1 22) Backup CPU For The Implementation Notes Server 0 23) Primary CPU For The Core Interface Server 0 24) Backup CPU For The Core Interface Server 1 25) Primary CPU For The Security Profile Server 1 26) Backup CPU For The Security Profile Server 0 27) Primary CPU For The Logon Server 0 28) Backup CPU For The Logon Server 1 29) Primary CPU For The Approval Configuration Server 1 30) Backup CPU For The Approval Configuration Server 0 31) Primary CPU For The User Profile Server 0 32) Backup CPU For The User Profile Server 1 33) Primary CPU For The Status Server 1 34) Backup CPU For The Status Server 0 Are these the correct Pathway Configuration Options? [Y]

68 RMS – PrimeCode Upgrade Manual
Accept these parameters or answer N (No).
Answering “NO” will prompt you to enter the option number of the parameter you
want to change.
Enter the Option Number to Change or Hit Return to Continue
When you are finished establishing all of the parameters for the environment
PrimeCode Installation prompts you before continuing.
NOTE: After installation it is recommended you secure a backup copy of the
INSTCONF file in a private Subvolume. For troubleshooting or later date upgrades, you will want to be able to refer to the parameters stored in this file.
Definitions of the configuration options is now complete. Ready to Continue with the Install? [Y]
Several automated process will begin and end with confirmations on the screen. Starting Installation of PrimeCode/ACP Programs Completed Installation of PrimeCode/ACP Programs Starting the build of the PATHWAY configuration PrimeCode/ACP PATHWAY Cold Start Configuration file built in $<Volume>.<DFEATURE>.APLYCONF PrimeCode/ACP PATHWAY Cool Start Configuration file built in $<Volume>.<DFEATURE>.APLYCOOL PrimeCode/ACP PATHWAY Cold Start OBEY file built in $<Volume>.<DFEATURE>.APLYCOLD PrimeCode/ACP PATHWAY Warm Start OBEY file built in $<Volume>.<DFEATURE>.APLYWARM Completed the build of the PATHWAY configuration Starting Create/Update and Audit of the Database files Completed Create/Update and Audit of the Database files Starting Change of the PrimeCode/ACP Initial Boot ID Security Profile File Updated Successfully Completed Change of the PrimeCode/ACP Initial Boot ID Starting Update of the ViewPoint EVENTCX File Completed Update of the ViewPoint EVENTCX File Starting BINDER Update of PrimeCode/ACP Programs Completed BINDER Update of PrimeCode/ACP Programs Starting Secure of PrimeCode/ACP Programs Completed Secure of PrimeCode/ACP Programs
THE END
Return to the final steps from your instructions for Initial Installation or Upgrade
Installation to resume with the Licensing Objects step. (Step 7 of Installation or Step
12 of this Upgrade Guide)
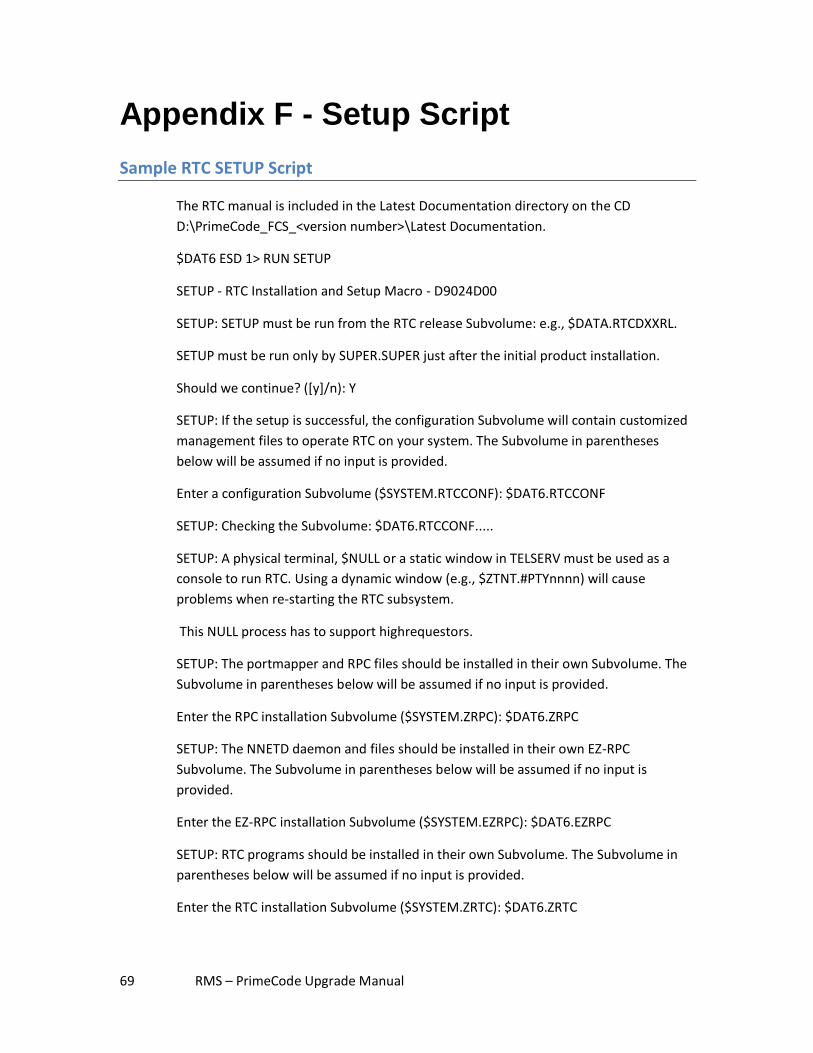
69 RMS – PrimeCode Upgrade Manual
Appendix F - Setup Script
Sample RTC SETUP Script
The RTC manual is included in the Latest Documentation directory on the CD
D:\PrimeCode_FCS_<version number>\Latest Documentation.
$DAT6 ESD 1> RUN SETUP
SETUP - RTC Installation and Setup Macro - D9024D00
SETUP: SETUP must be run from the RTC release Subvolume: e.g., $DATA.RTCDXXRL.
SETUP must be run only by SUPER.SUPER just after the initial product installation.
Should we continue? ([y]/n): Y
SETUP: If the setup is successful, the configuration Subvolume will contain customized
management files to operate RTC on your system. The Subvolume in parentheses
below will be assumed if no input is provided.
Enter a configuration Subvolume ($SYSTEM.RTCCONF): $DAT6.RTCCONF
SETUP: Checking the Subvolume: $DAT6.RTCCONF.....
SETUP: A physical terminal, $NULL or a static window in TELSERV must be used as a
console to run RTC. Using a dynamic window (e.g., $ZTNT.#PTYnnnn) will cause
problems when re-starting the RTC subsystem.
This NULL process has to support highrequestors.
SETUP: The portmapper and RPC files should be installed in their own Subvolume. The
Subvolume in parentheses below will be assumed if no input is provided.
Enter the RPC installation Subvolume ($SYSTEM.ZRPC): $DAT6.ZRPC
SETUP: The NNETD daemon and files should be installed in their own EZ-RPC
Subvolume. The Subvolume in parentheses below will be assumed if no input is
provided.
Enter the EZ-RPC installation Subvolume ($SYSTEM.EZRPC): $DAT6.EZRPC
SETUP: RTC programs should be installed in their own Subvolume. The Subvolume in
parentheses below will be assumed if no input is provided.
Enter the RTC installation Subvolume ($SYSTEM.ZRTC): $DAT6.ZRTC
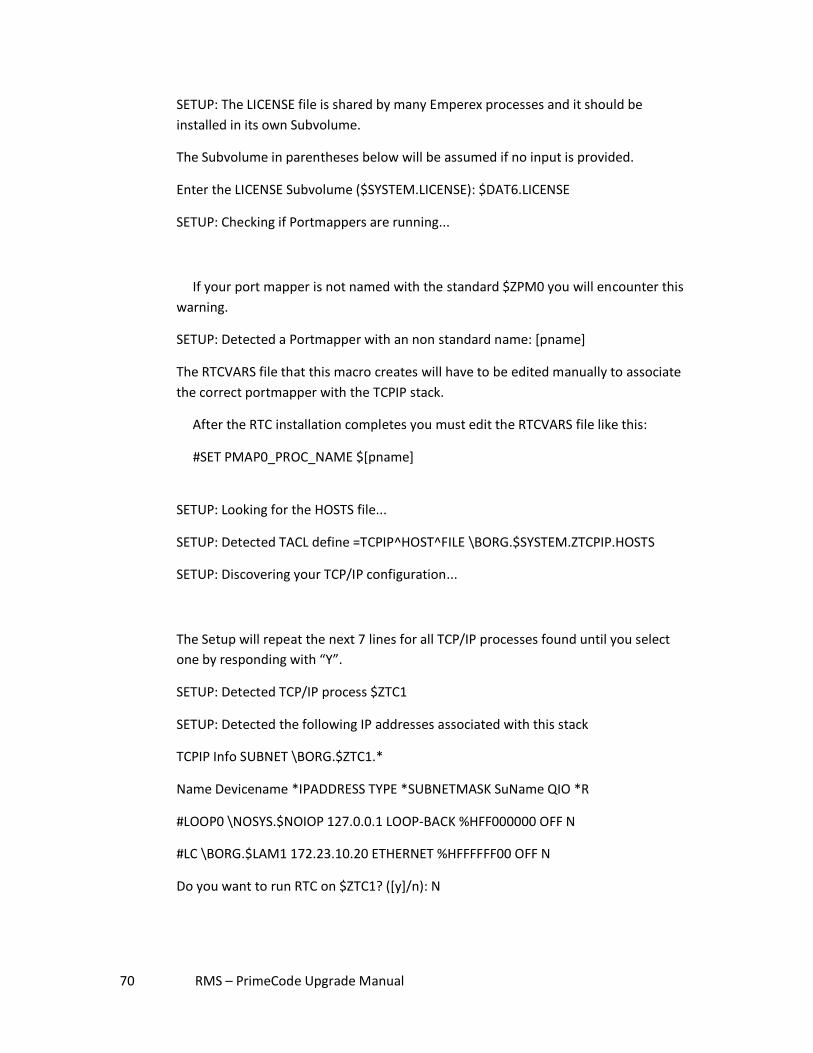
70 RMS – PrimeCode Upgrade Manual
SETUP: The LICENSE file is shared by many Emperex processes and it should be
installed in its own Subvolume.
The Subvolume in parentheses below will be assumed if no input is provided.
Enter the LICENSE Subvolume ($SYSTEM.LICENSE): $DAT6.LICENSE
SETUP: Checking if Portmappers are running...
If your port mapper is not named with the standard $ZPM0 you will encounter this
warning.
SETUP: Detected a Portmapper with an non standard name: [pname]
The RTCVARS file that this macro creates will have to be edited manually to associate
the correct portmapper with the TCPIP stack.
After the RTC installation completes you must edit the RTCVARS file like this:
#SET PMAP0_PROC_NAME $[pname]
SETUP: Looking for the HOSTS file...
SETUP: Detected TACL define =TCPIP^HOST^FILE \BORG.$SYSTEM.ZTCPIP.HOSTS
SETUP: Discovering your TCP/IP configuration...
The Setup will repeat the next 7 lines for all TCP/IP processes found until you select
one by responding with “Y”.
SETUP: Detected TCP/IP process $ZTC1
SETUP: Detected the following IP addresses associated with this stack
TCPIP Info SUBNET \BORG.$ZTC1.*
Name Devicename *IPADDRESS TYPE *SUBNETMASK SuName QIO *R
#LOOP0 \NOSYS.$NOIOP 127.0.0.1 LOOP-BACK %HFF000000 OFF N
#LC \BORG.$LAM1 172.23.10.20 ETHERNET %HFFFFFF00 OFF N
Do you want to run RTC on $ZTC1? ([y]/n): N
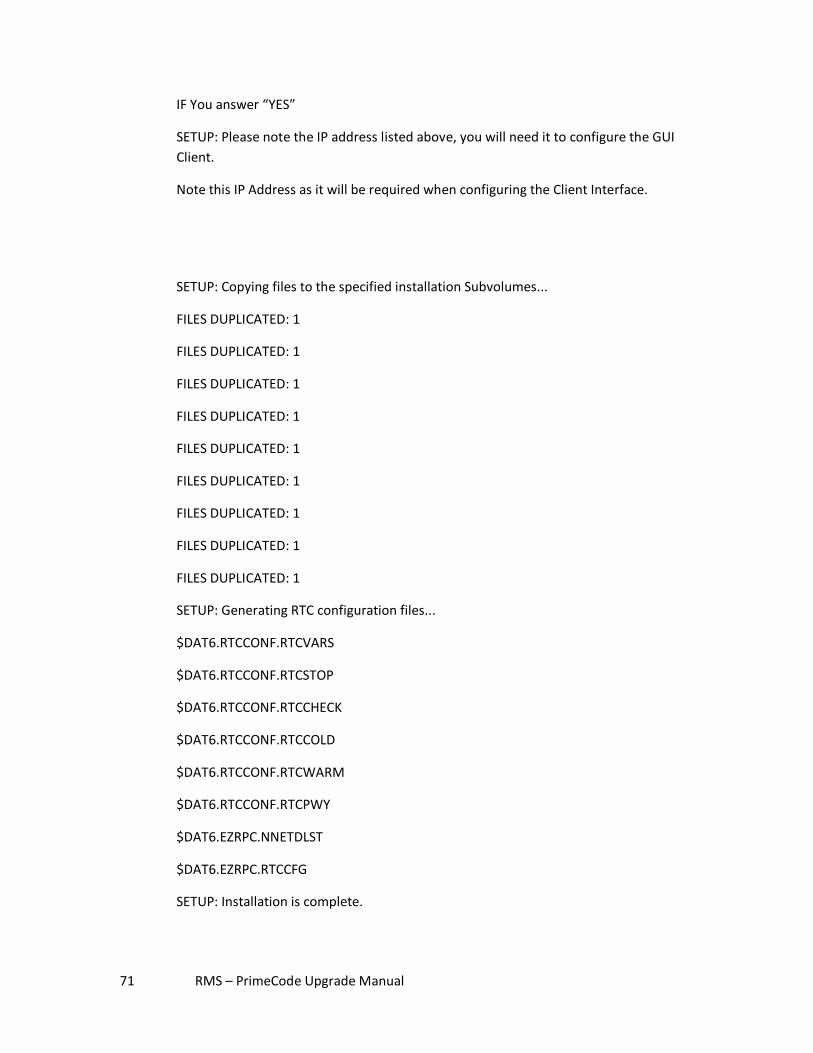
71 RMS – PrimeCode Upgrade Manual
IF You answer “YES”
SETUP: Please note the IP address listed above, you will need it to configure the GUI
Client.
Note this IP Address as it will be required when configuring the Client Interface.
SETUP: Copying files to the specified installation Subvolumes...
FILES DUPLICATED: 1
FILES DUPLICATED: 1
FILES DUPLICATED: 1
FILES DUPLICATED: 1
FILES DUPLICATED: 1
FILES DUPLICATED: 1
FILES DUPLICATED: 1
FILES DUPLICATED: 1
FILES DUPLICATED: 1
SETUP: Generating RTC configuration files...
$DAT6.RTCCONF.RTCVARS
$DAT6.RTCCONF.RTCSTOP
$DAT6.RTCCONF.RTCCHECK
$DAT6.RTCCONF.RTCCOLD
$DAT6.RTCCONF.RTCWARM
$DAT6.RTCCONF.RTCPWY
$DAT6.EZRPC.NNETDLST
$DAT6.EZRPC.RTCCFG
SETUP: Installation is complete.
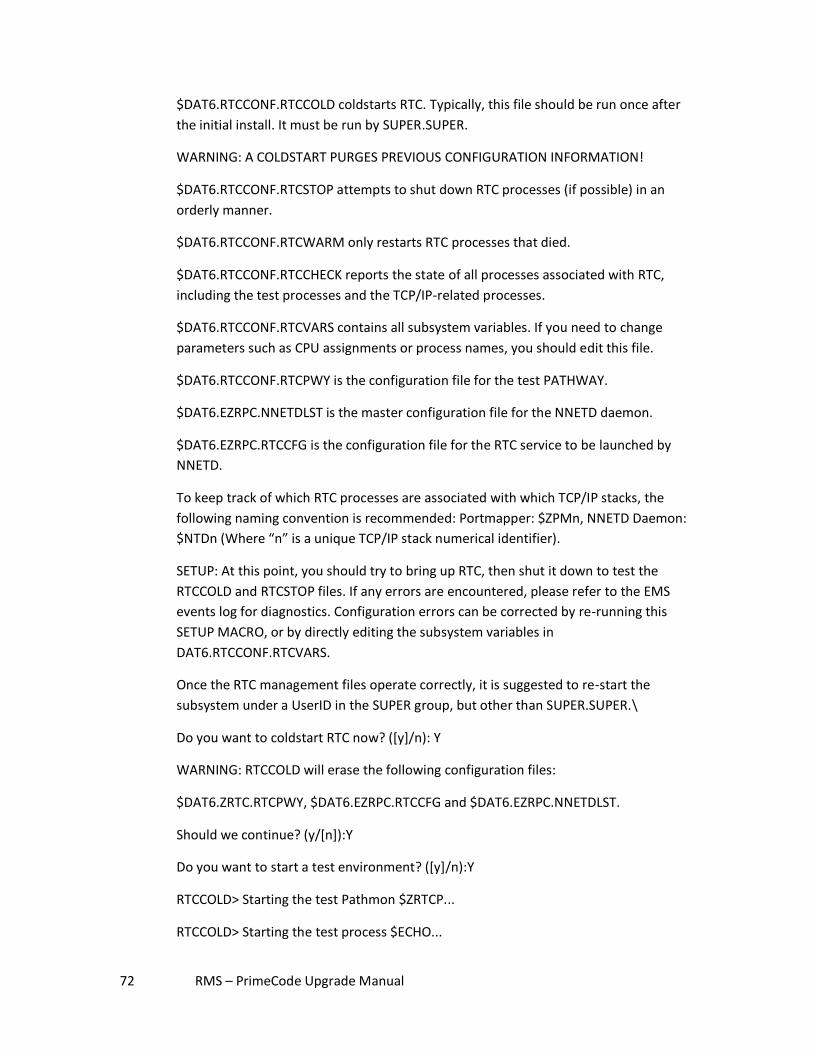
72 RMS – PrimeCode Upgrade Manual
$DAT6.RTCCONF.RTCCOLD coldstarts RTC. Typically, this file should be run once after
the initial install. It must be run by SUPER.SUPER.
WARNING: A COLDSTART PURGES PREVIOUS CONFIGURATION INFORMATION!
$DAT6.RTCCONF.RTCSTOP attempts to shut down RTC processes (if possible) in an
orderly manner.
$DAT6.RTCCONF.RTCWARM only restarts RTC processes that died.
$DAT6.RTCCONF.RTCCHECK reports the state of all processes associated with RTC,
including the test processes and the TCP/IP-related processes.
$DAT6.RTCCONF.RTCVARS contains all subsystem variables. If you need to change
parameters such as CPU assignments or process names, you should edit this file.
$DAT6.RTCCONF.RTCPWY is the configuration file for the test PATHWAY.
$DAT6.EZRPC.NNETDLST is the master configuration file for the NNETD daemon.
$DAT6.EZRPC.RTCCFG is the configuration file for the RTC service to be launched by
NNETD.
To keep track of which RTC processes are associated with which TCP/IP stacks, the
following naming convention is recommended: Portmapper: $ZPMn, NNETD Daemon:
$NTDn (Where “n” is a unique TCP/IP stack numerical identifier).
SETUP: At this point, you should try to bring up RTC, then shut it down to test the
RTCCOLD and RTCSTOP files. If any errors are encountered, please refer to the EMS
events log for diagnostics. Configuration errors can be corrected by re-running this
SETUP MACRO, or by directly editing the subsystem variables in
DAT6.RTCCONF.RTCVARS.
Once the RTC management files operate correctly, it is suggested to re-start the
subsystem under a UserID in the SUPER group, but other than SUPER.SUPER.\
Do you want to coldstart RTC now? ([y]/n): Y
WARNING: RTCCOLD will erase the following configuration files:
$DAT6.ZRTC.RTCPWY, $DAT6.EZRPC.RTCCFG and $DAT6.EZRPC.NNETDLST.
Should we continue? (y/[n]):Y
Do you want to start a test environment? ([y]/n):Y
RTCCOLD> Starting the test Pathmon $ZRTCP...
RTCCOLD> Starting the test process $ECHO...
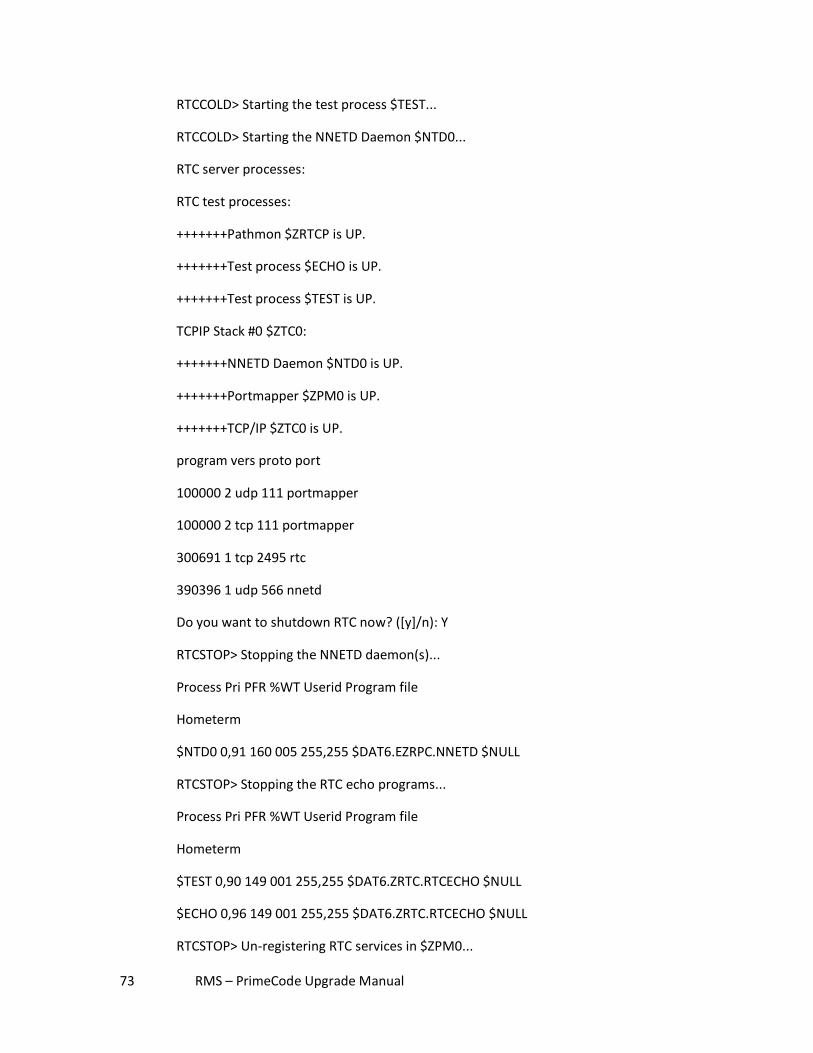
73 RMS – PrimeCode Upgrade Manual
RTCCOLD> Starting the test process $TEST...
RTCCOLD> Starting the NNETD Daemon $NTD0...
RTC server processes:
RTC test processes:
+++++++Pathmon $ZRTCP is UP.
+++++++Test process $ECHO is UP.
+++++++Test process $TEST is UP.
TCPIP Stack #0 $ZTC0:
+++++++NNETD Daemon $NTD0 is UP.
+++++++Portmapper $ZPM0 is UP.
+++++++TCP/IP $ZTC0 is UP.
program vers proto port
100000 2 udp 111 portmapper
100000 2 tcp 111 portmapper
300691 1 tcp 2495 rtc
390396 1 udp 566 nnetd
Do you want to shutdown RTC now? ([y]/n): Y
RTCSTOP> Stopping the NNETD daemon(s)...
Process Pri PFR %WT Userid Program file
Hometerm
$NTD0 0,91 160 005 255,255 $DAT6.EZRPC.NNETD $NULL
RTCSTOP> Stopping the RTC echo programs...
Process Pri PFR %WT Userid Program file
Hometerm
$TEST 0,90 149 001 255,255 $DAT6.ZRTC.RTCECHO $NULL
$ECHO 0,96 149 001 255,255 $DAT6.ZRTC.RTCECHO $NULL
RTCSTOP> Un-registering RTC services in $ZPM0...
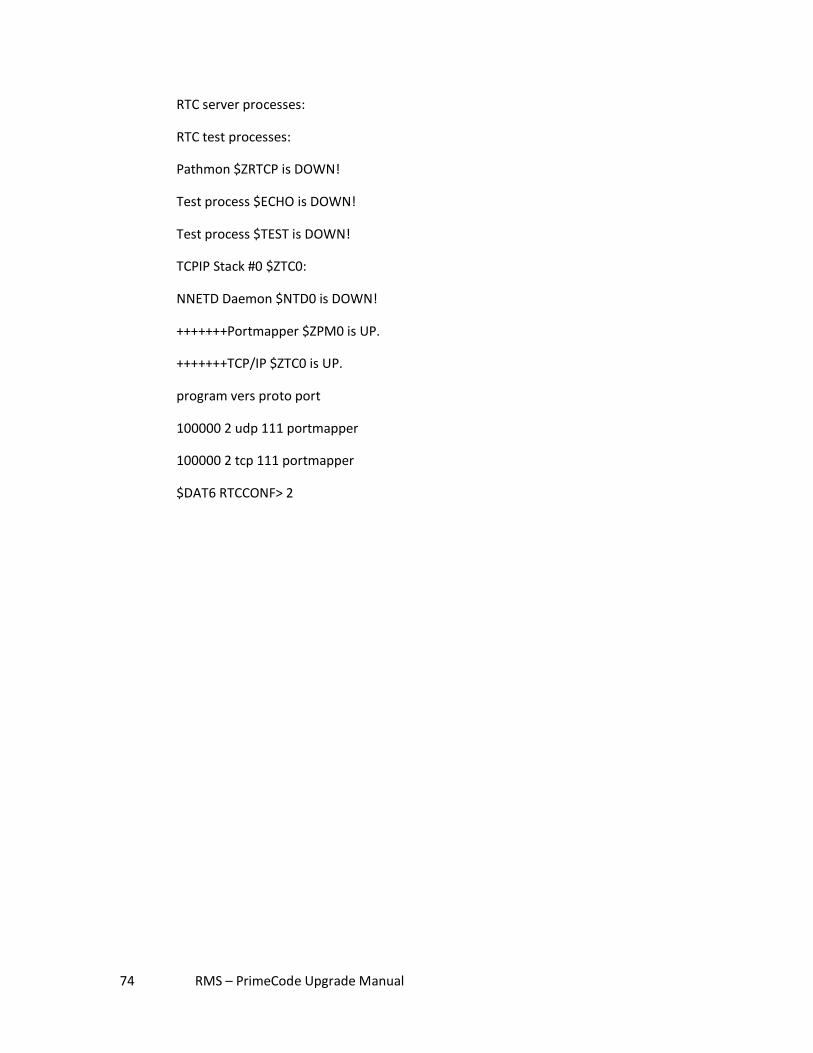
74 RMS – PrimeCode Upgrade Manual
RTC server processes:
RTC test processes:
Pathmon $ZRTCP is DOWN!
Test process $ECHO is DOWN!
Test process $TEST is DOWN!
TCPIP Stack #0 $ZTC0:
NNETD Daemon $NTD0 is DOWN!
+++++++Portmapper $ZPM0 is UP.
+++++++TCP/IP $ZTC0 is UP.
program vers proto port
100000 2 udp 111 portmapper
100000 2 tcp 111 portmapper
$DAT6 RTCCONF> 2
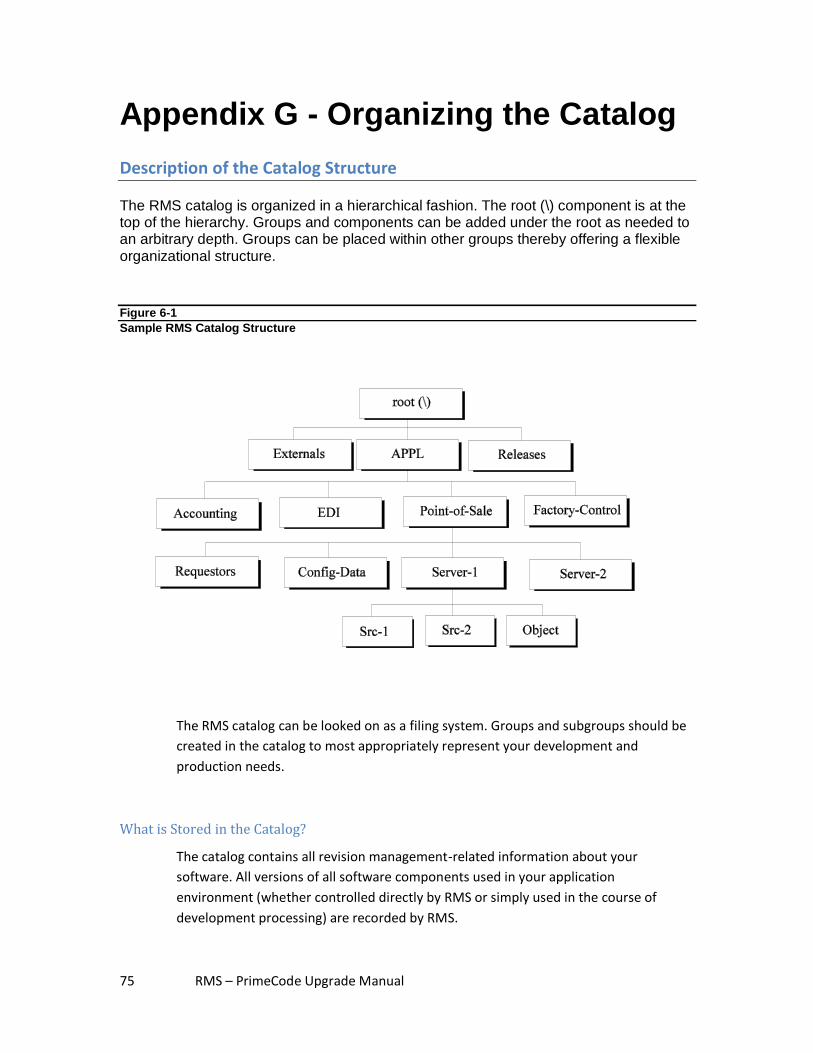
75 RMS – PrimeCode Upgrade Manual
Appendix G - Organizing the Catalog
Description of the Catalog Structure
The RMS catalog is organized in a hierarchical fashion. The root (\) component is at the top of the hierarchy. Groups and components can be added under the root as needed to an arbitrary depth. Groups can be placed within other groups thereby offering a flexible organizational structure.
Figure 6-1
Sample RMS Catalog Structure
The RMS catalog can be looked on as a filing system. Groups and subgroups should be
created in the catalog to most appropriately represent your development and
production needs.
What is Stored in the Catalog?
The catalog contains all revision management-related information about your
software. All versions of all software components used in your application
environment (whether controlled directly by RMS or simply used in the course of
development processing) are recorded by RMS.

76 RMS – PrimeCode Upgrade Manual
The catalog can contain items such as:
all program sources and objects
rules for producing objects from sources
installation and fallback instructions.
There are special groups designated for specific classes for RMS components: \RELEASES contains all releases which are added using the ADD RELEASE command. No other components should be added to this group.
\EXTERNALS contains external components which are automatically added to the RMS catalog when referenced by source components. This group has subgroups corresponding to the Subvolumes of the external component file names. You are permitted to add components to these groups as long as you adhere to this convention.
\ORPHANS contains components which were specific to a release which has been dropped. These components can be deleted when deemed appropriate. Eventually RMS will cleanup \ORPHANS as part of the CLEANUP command.
What is Not Stored in the Catalog?
The following item is not stored in the RMS catalog:
SQL catalogs and tables. Nonstop-SQL is responsible for managing its own information. RMS detects when objects are SQL licensed and takes appropriate action. It is important to remember that information should (where possible) not be replicated in both the RMS and SQL catalogs.
Inherited Attributes
The RMS catalog structure allows various attributes to be inherited from parent groups. The following are typical forms of inherited attributes: Rules and parameters which are placed at the root component are visible in the entire catalog.
Attributes placed at a lower-level group are visible only within that group.
Security attributes placed at a group level apply to all components within the group. These attributes can be overridden at lower levels.
77 RMS – PrimeCode Upgrade Manual
Security Attributes
The RMS security facility provides complementary functionality to that of the standard
Guardian and SAFEGUARD facilities. RMS controls access to the internally-controlled
components and attributes. Guardian controls access to the actual files, archives and
distributed releases.
See the Revision Management System (RMS) RMSCOM and RMSMON Reference
Manual for details.
Defining Projects and Groups
Before any work is done with an RMS catalog, you should consider how to organize it
to fit into your business needs. A recommended approach to structuring a catalog is to
have groups organized by software function.
The highest level group - root (\) should be limited to just a few groups, most of which are RMS system groups such as \RELEASES, and \LOCATIONS. Avoid placing too many high level groups under the root. Never place elementary components (e.g. source files, TCLPROGs) in the root group. \APPL is a customary location in which to place your application level groups.
High-level groups represent major divisions in your software system. Groups at this level include financial services (e.g. \APPL\FIN), systems software (e.g. \APPL\SYS or \SYS), vendor packages (e.g. \APPL\PKGa).
Medium-level groups immediately under the high level groups represent major functional divisions. If you had many locally-written DSM subsystems, they could each be placed in a group (e.g. \APPL\SYS\SUB-1).
Low-level groups represent functional divisions within a subsystem. These divisions often fall at server or requester boundaries. These groups contain elementary components which include:
source and object components
data file components
configuration template files.
Components which are shared between functional areas should be placed in a group called SHARED in the group containing the functional groups which are sharing the components. For example, if two subsystems are sharing some components, those components can be placed in the \APPL\SYS\SHARED group.
Components do not have to be in the same group to be used in a compilation.
Compilation references can be added from a source component in one group to an
78 RMS – PrimeCode Upgrade Manual
object component in another. References are also allowed across groups. The
component \EXTERNALS\SYSTEM\EXTDECS0, corresponding to
$SYSTEM.SYSTEM.EXTDECS, is frequently referenced by TAL source components which
are not in the \EXTERNALS group.
Sharing Elements between Projects and Groups
There are three basic issues involved with component sharing:
sharing between groups for compilation purposes
sharing between groups for visibility
sharing between catalogs.
The RMS compilation facility considers the RMS catalog to be essentially a filing
system. Compilation proceeds regardless of the groups in which components reside.
RMS provides the ability to link components from one group to another, thereby
allowing a component to be visible in more than one group. The LINK COMPONENT
command accomplishes this. This facility is most useful for the release management
facility. To include a component in a release, the user must link the component into
the appropriate release group.
If sharing is required by visibility within multiple groups, simply use the strategy
illustrated above relating to the shared groups (SHARED).
In the current release of RMS, components can be shared between catalogs only
through the distribute/acquire mechanisms.
79 RMS – PrimeCode Upgrade Manual
Appendix H - Installation Script
Introduction to PrimeCode from Installation Script
PrimeCode INSTALLATION This Install macro will create object and data Subvolumes, define your Change Management options, create PATHWAY configuration and startup files, and define all site specific configuration options. NOTE: There are a number of configuration options that determine how PrimeCode will function depending on your site specific Software Change Management procedures. These procedures should be determined by your Software Change Manager prior to installation. Refer to the PrimeCode manual for further information. You will be prompted to define each of the configuration options. The default for each option will be displayed and you will be asked if it is correct - if you respond yes (Y) the next default will be displayed, if you respond no (N) then you will be asked to type the value you require, your change will be displayed and you will be asked to confirm it is correct. The Installation is divided into four sections: - TMF CHECK & TYPE OF INSTALL Verifies that TMF is configured and running and the type of install to be performed - i.e. First time or update of existing system. - INSTALL OPTIONS Defines the general system/environment options for installation. - PrimeCode OPTIONS Defines the Core interface, Software Change Management options and the location of PrimeCode output files. - PATHWAY OPTIONS This section will define the PATHWAY configuration. NOTE: REFER TO THE MANUAL FOR DETAILED INFORMATION ABOUT THESE OPTIONS BEFORE CONTINUING. When you have defined all of the options, installation will be executed based on your choice of options: Install PrimeCode Programs Create PATHWAY configuration - Cold Start Configuration file - Cool Start Configuration file - Cold Start OBEY file - Warm Start OBEY file Create and Audit of the Database files Secure PrimeCode Programs License PrimeCode Programs NOTE: YOU MAY HIT ‘BREAK’ AT ANY TIME TO TERMINATE THE INSTALL.
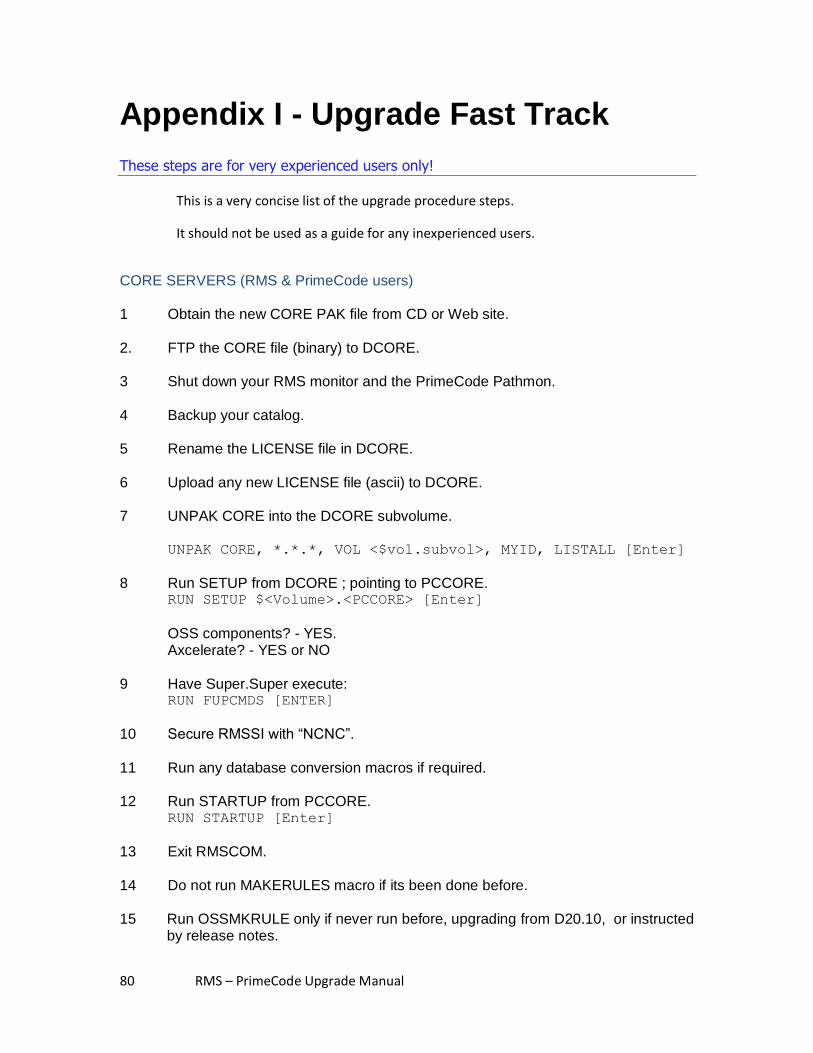
80 RMS – PrimeCode Upgrade Manual
Appendix I - Upgrade Fast Track
These steps are for very experienced users only!
This is a very concise list of the upgrade procedure steps.
It should not be used as a guide for any inexperienced users.
CORE SERVERS (RMS & PrimeCode users) 1 Obtain the new CORE PAK file from CD or Web site. 2. FTP the CORE file (binary) to DCORE. 3 Shut down your RMS monitor and the PrimeCode Pathmon. 4 Backup your catalog. 5 Rename the LICENSE file in DCORE. 6 Upload any new LICENSE file (ascii) to DCORE. 7 UNPAK CORE into the DCORE subvolume.
UNPAK CORE, *.*.*, VOL <$vol.subvol>, MYID, LISTALL [Enter]
8 Run SETUP from DCORE ; pointing to PCCORE.
RUN SETUP $<Volume>.<PCCORE> [Enter]
OSS components? - YES. Axcelerate? - YES or NO
9 Have Super.Super execute: RUN FUPCMDS [ENTER]
10 Secure RMSSI with “NCNC”. 11 Run any database conversion macros if required. 12 Run STARTUP from PCCORE.
RUN STARTUP [Enter]
13 Exit RMSCOM. 14 Do not run MAKERULES macro if its been done before. 15 Run OSSMKRULE only if never run before, upgrading from D20.10, or instructed
by release notes.
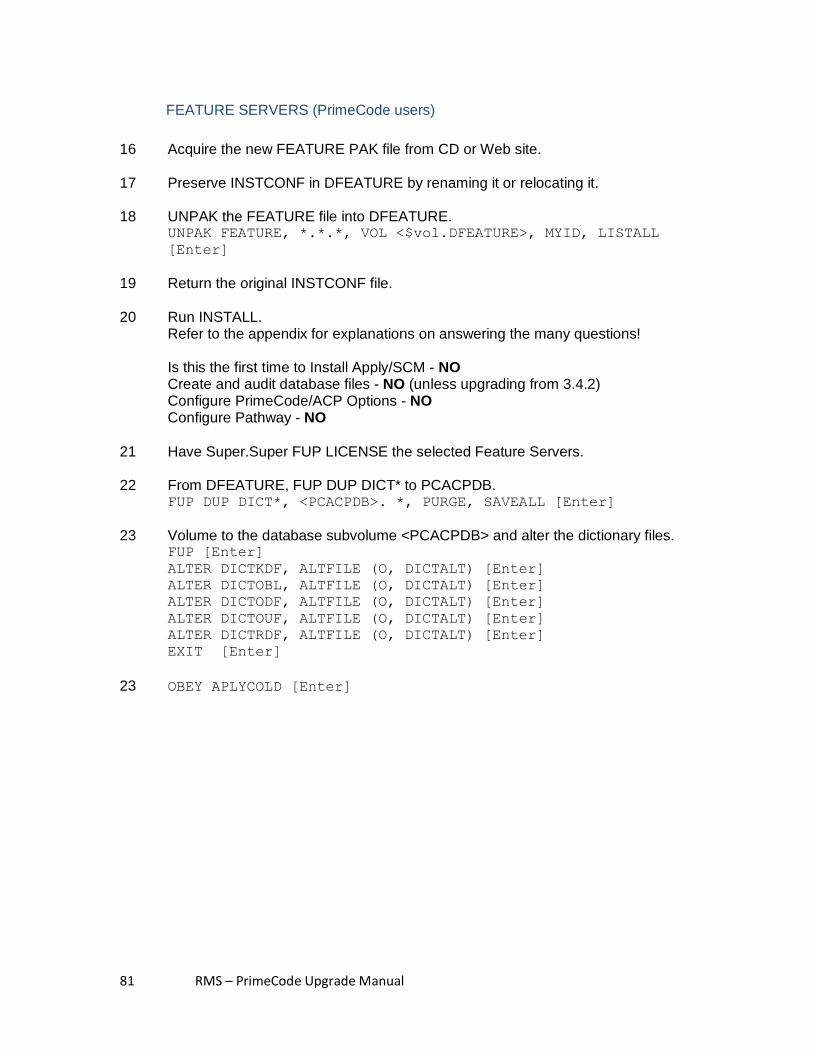
81 RMS – PrimeCode Upgrade Manual
FEATURE SERVERS (PrimeCode users)
16 Acquire the new FEATURE PAK file from CD or Web site. 17 Preserve INSTCONF in DFEATURE by renaming it or relocating it. 18 UNPAK the FEATURE file into DFEATURE.
UNPAK FEATURE, *.*.*, VOL <$vol.DFEATURE>, MYID, LISTALL
[Enter]
19 Return the original INSTCONF file. 20 Run INSTALL.
Refer to the appendix for explanations on answering the many questions! Is this the first time to Install Apply/SCM - NO Create and audit database files - NO (unless upgrading from 3.4.2) Configure PrimeCode/ACP Options - NO Configure Pathway - NO
21 Have Super.Super FUP LICENSE the selected Feature Servers. 22 From DFEATURE, FUP DUP DICT* to PCACPDB.
FUP DUP DICT*, <PCACPDB>. *, PURGE, SAVEALL [Enter]
23 Volume to the database subvolume <PCACPDB> and alter the dictionary files.
FUP [Enter]
ALTER DICTKDF, ALTFILE (O, DICTALT) [Enter]
ALTER DICTOBL, ALTFILE (O, DICTALT) [Enter]
ALTER DICTODF, ALTFILE (O, DICTALT) [Enter]
ALTER DICTOUF, ALTFILE (O, DICTALT) [Enter]
ALTER DICTRDF, ALTFILE (O, DICTALT) [Enter]
EXIT [Enter]
23 OBEY APLYCOLD [Enter]
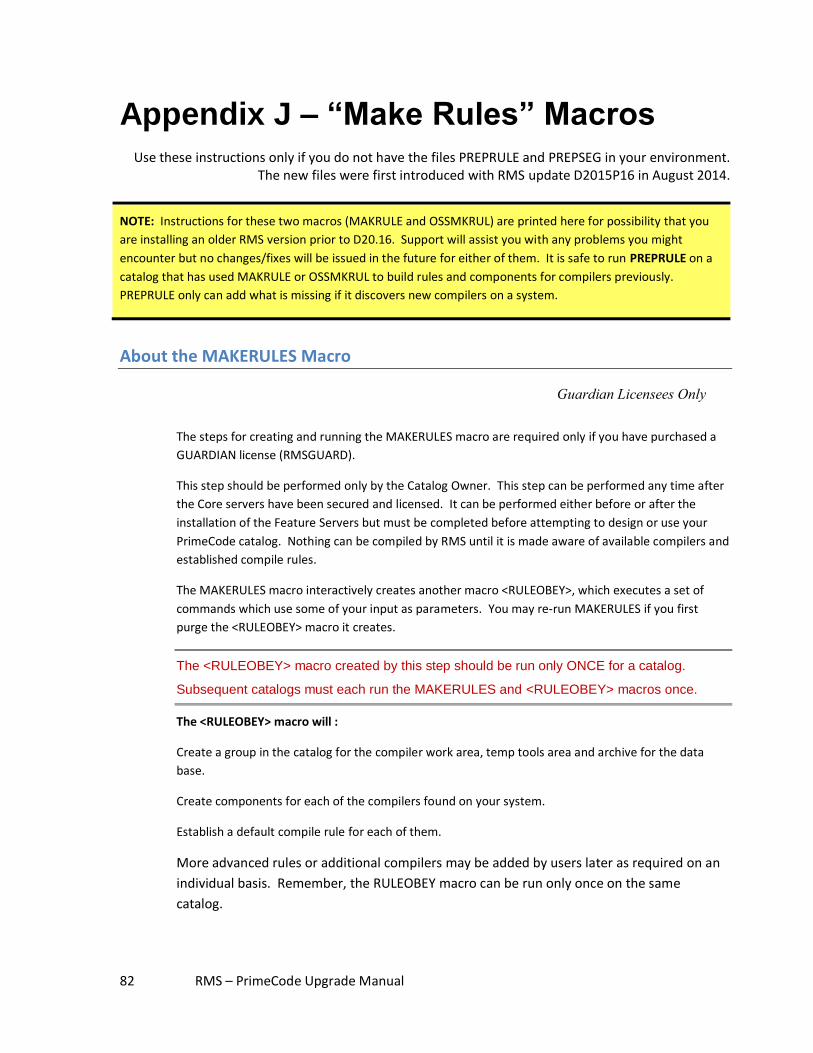
82 RMS – PrimeCode Upgrade Manual
Appendix J – “Make Rules” Macros Use these instructions only if you do not have the files PREPRULE and PREPSEG in your environment.
The new files were first introduced with RMS update D2015P16 in August 2014.
NOTE: Instructions for these two macros (MAKRULE and OSSMKRUL) are printed here for possibility that you
are installing an older RMS version prior to D20.16. Support will assist you with any problems you might
encounter but no changes/fixes will be issued in the future for either of them. It is safe to run PREPRULE on a
catalog that has used MAKRULE or OSSMKRUL to build rules and components for compilers previously.
PREPRULE only can add what is missing if it discovers new compilers on a system.
About the MAKERULES Macro
Guardian Licensees Only
The steps for creating and running the MAKERULES macro are required only if you have purchased a
GUARDIAN license (RMSGUARD).
This step should be performed only by the Catalog Owner. This step can be performed any time after
the Core servers have been secured and licensed. It can be performed either before or after the
installation of the Feature Servers but must be completed before attempting to design or use your
PrimeCode catalog. Nothing can be compiled by RMS until it is made aware of available compilers and
established compile rules.
The MAKERULES macro interactively creates another macro <RULEOBEY>, which executes a set of
commands which use some of your input as parameters. You may re-run MAKERULES if you first
purge the <RULEOBEY> macro it creates.
The <RULEOBEY> macro created by this step should be run only ONCE for a catalog.
Subsequent catalogs must each run the MAKERULES and <RULEOBEY> macros once.
The <RULEOBEY> macro will :
Create a group in the catalog for the compiler work area, temp tools area and archive for the data
base.
Create components for each of the compilers found on your system.
Establish a default compile rule for each of them.
More advanced rules or additional compilers may be added by users later as required on an
individual basis. Remember, the RULEOBEY macro can be run only once on the same
catalog.
83 RMS – PrimeCode Upgrade Manual
Checklist for MAKERULES Macro
There are two parameters required in the command which begins the creation of the
RULEOBEY macro.
Several questions follow which prompt you for further Volume.Subvolume locations for
components that are required depending on the types of compilers found on your system.
Please take some time to prepare the checklist before starting this step so you are both
confident that you are placing components where you want them and you have a record for
the future of where things were stored.
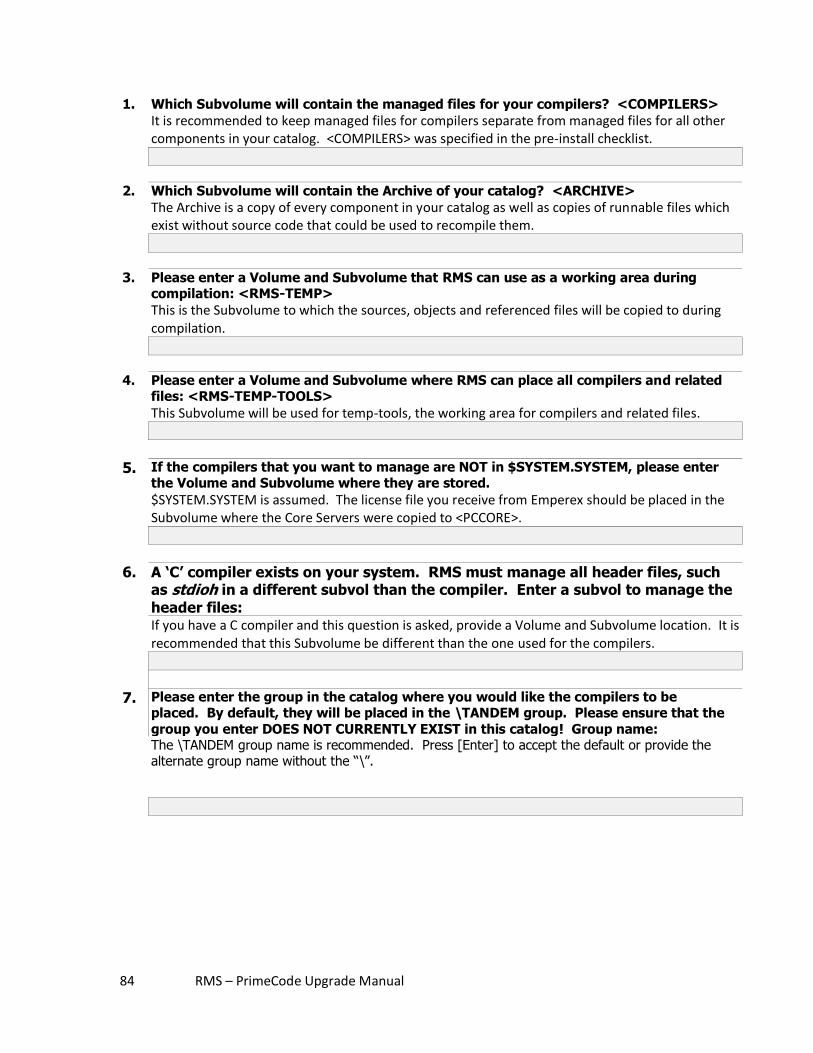
84 RMS – PrimeCode Upgrade Manual
1. Which Subvolume will contain the managed files for your compilers? <COMPILERS>
It is recommended to keep managed files for compilers separate from managed files for all other components in your catalog. <COMPILERS> was specified in the pre-install checklist.
2. Which Subvolume will contain the Archive of your catalog? <ARCHIVE>
The Archive is a copy of every component in your catalog as well as copies of runnable files which exist without source code that could be used to recompile them.
3. Please enter a Volume and Subvolume that RMS can use as a working area during compilation: <RMS-TEMP>
This is the Subvolume to which the sources, objects and referenced files will be copied to during compilation.
4. Please enter a Volume and Subvolume where RMS can place all compilers and related files: <RMS-TEMP-TOOLS>
This Subvolume will be used for temp-tools, the working area for compilers and related files.
5. If the compilers that you want to manage are NOT in $SYSTEM.SYSTEM, please enter the Volume and Subvolume where they are stored.
$SYSTEM.SYSTEM is assumed. The license file you receive from Emperex should be placed in the Subvolume where the Core Servers were copied to <PCCORE>.
6. A ‘C’ compiler exists on your system. RMS must manage all header files, such as stdioh in a different subvol than the compiler. Enter a subvol to manage the
header files: If you have a C compiler and this question is asked, provide a Volume and Subvolume location. It is
recommended that this Subvolume be different than the one used for the compilers.
7. Please enter the group in the catalog where you would like the compilers to be placed. By default, they will be placed in the \TANDEM group. Please ensure that the
group you enter DOES NOT CURRENTLY EXIST in this catalog! Group name:
7
.
The \TANDEM group name is recommended. Press [Enter] to accept the default or provide the alternate group name without the “\”.
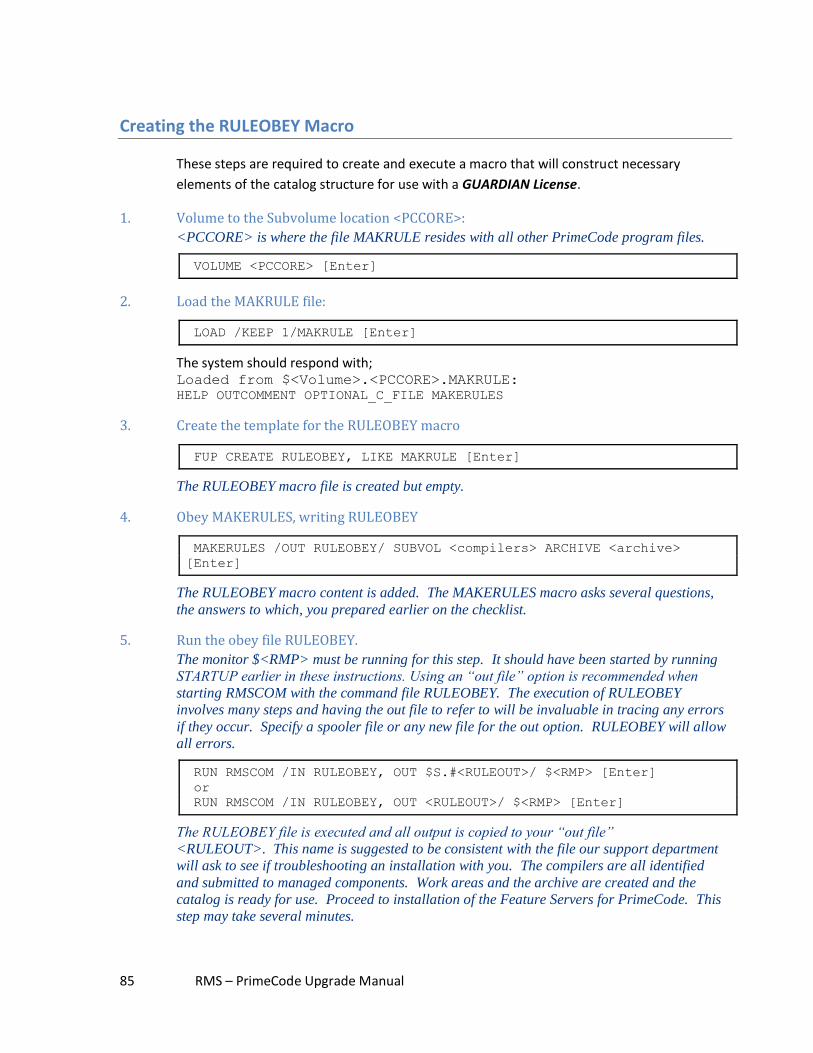
85 RMS – PrimeCode Upgrade Manual
Creating the RULEOBEY Macro
These steps are required to create and execute a macro that will construct necessary
elements of the catalog structure for use with a GUARDIAN License.
1. Volume to the Subvolume location <PCCORE>:
<PCCORE> is where the file MAKRULE resides with all other PrimeCode program files.
VOLUME <PCCORE> [Enter]
2. Load the MAKRULE file:
LOAD /KEEP 1/MAKRULE [Enter]
The system should respond with; Loaded from $<Volume>.<PCCORE>.MAKRULE:
HELP OUTCOMMENT OPTIONAL_C_FILE MAKERULES
3. Create the template for the RULEOBEY macro
FUP CREATE RULEOBEY, LIKE MAKRULE [Enter]
The RULEOBEY macro file is created but empty.
4. Obey MAKERULES, writing RULEOBEY
MAKERULES /OUT RULEOBEY/ SUBVOL <compilers> ARCHIVE <archive>
[Enter]
The RULEOBEY macro content is added. The MAKERULES macro asks several questions,
the answers to which, you prepared earlier on the checklist.
5. Run the obey file RULEOBEY.
The monitor $<RMP> must be running for this step. It should have been started by running
STARTUP earlier in these instructions. Using an “out file” option is recommended when
starting RMSCOM with the command file RULEOBEY. The execution of RULEOBEY
involves many steps and having the out file to refer to will be invaluable in tracing any errors
if they occur. Specify a spooler file or any new file for the out option. RULEOBEY will allow
all errors.
RUN RMSCOM /IN RULEOBEY, OUT $S.#<RULEOUT>/ $<RMP> [Enter]
or
RUN RMSCOM /IN RULEOBEY, OUT <RULEOUT>/ $<RMP> [Enter]
The RULEOBEY file is executed and all output is copied to your “out file”
<RULEOUT>. This name is suggested to be consistent with the file our support department
will ask to see if troubleshooting an installation with you. The compilers are all identified
and submitted to managed components. Work areas and the archive are created and the
catalog is ready for use. Proceed to installation of the Feature Servers for PrimeCode. This
step may take several minutes.
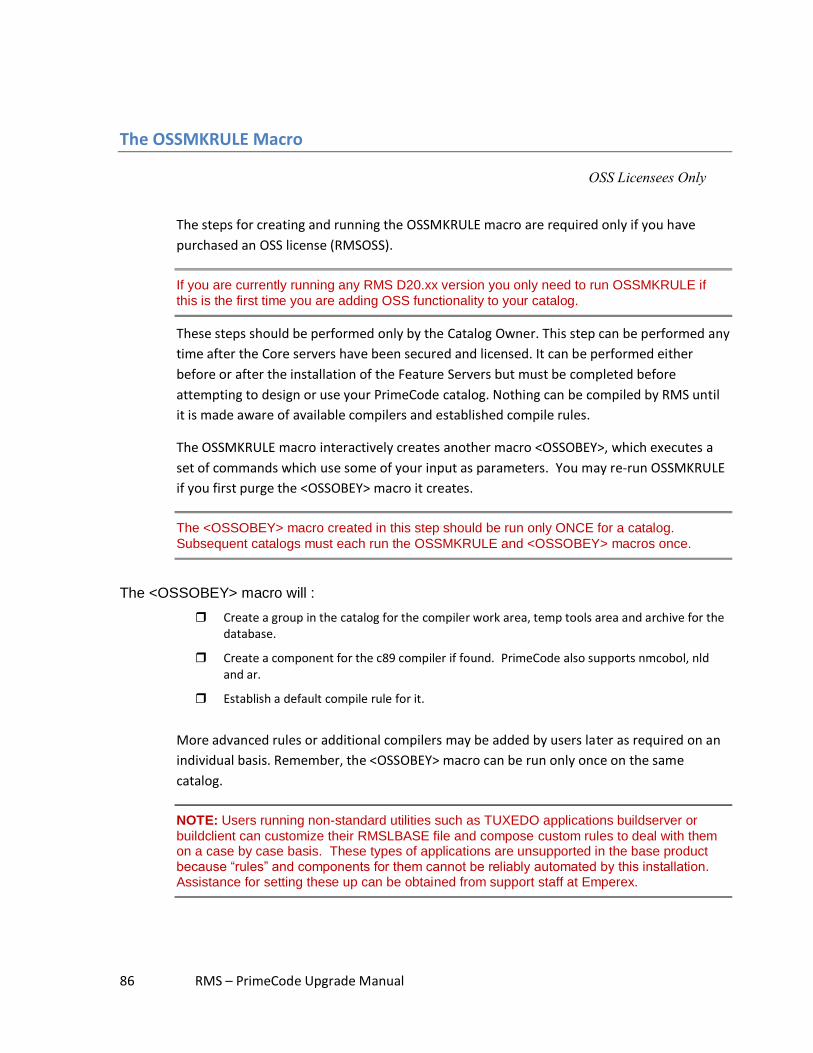
86 RMS – PrimeCode Upgrade Manual
The OSSMKRULE Macro
OSS Licensees Only
The steps for creating and running the OSSMKRULE macro are required only if you have
purchased an OSS license (RMSOSS).
If you are currently running any RMS D20.xx version you only need to run OSSMKRULE if
this is the first time you are adding OSS functionality to your catalog.
These steps should be performed only by the Catalog Owner. This step can be performed any
time after the Core servers have been secured and licensed. It can be performed either
before or after the installation of the Feature Servers but must be completed before
attempting to design or use your PrimeCode catalog. Nothing can be compiled by RMS until
it is made aware of available compilers and established compile rules.
The OSSMKRULE macro interactively creates another macro <OSSOBEY>, which executes a
set of commands which use some of your input as parameters. You may re-run OSSMKRULE
if you first purge the <OSSOBEY> macro it creates.
The <OSSOBEY> macro created in this step should be run only ONCE for a catalog.
Subsequent catalogs must each run the OSSMKRULE and <OSSOBEY> macros once.
The <OSSOBEY> macro will :
Create a group in the catalog for the compiler work area, temp tools area and archive for the database.
Create a component for the c89 compiler if found. PrimeCode also supports nmcobol, nld and ar.
Establish a default compile rule for it.
More advanced rules or additional compilers may be added by users later as required on an
individual basis. Remember, the <OSSOBEY> macro can be run only once on the same
catalog.
NOTE: Users running non-standard utilities such as TUXEDO applications buildserver or
buildclient can customize their RMSLBASE file and compose custom rules to deal with them on a case by case basis. These types of applications are unsupported in the base product because “rules” and components for them cannot be reliably automated by this installation. Assistance for setting these up can be obtained from support staff at Emperex.
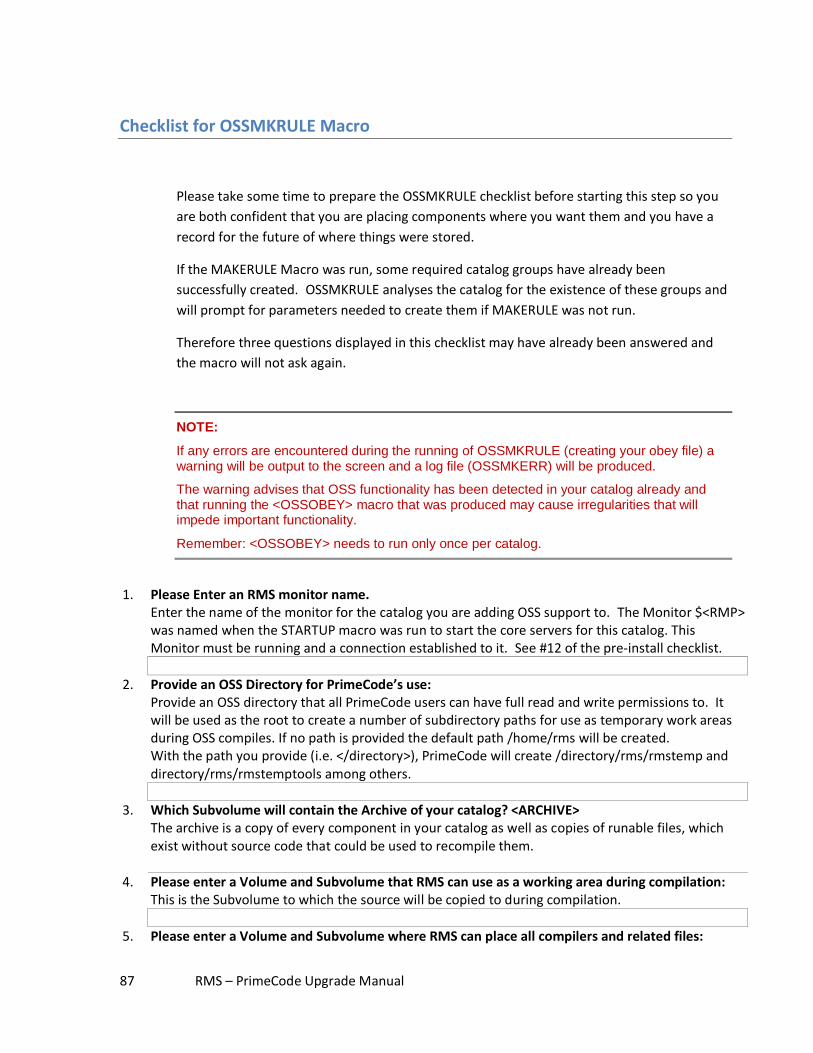
87 RMS – PrimeCode Upgrade Manual
Checklist for OSSMKRULE Macro
Please take some time to prepare the OSSMKRULE checklist before starting this step so you
are both confident that you are placing components where you want them and you have a
record for the future of where things were stored.
If the MAKERULE Macro was run, some required catalog groups have already been
successfully created. OSSMKRULE analyses the catalog for the existence of these groups and
will prompt for parameters needed to create them if MAKERULE was not run.
Therefore three questions displayed in this checklist may have already been answered and
the macro will not ask again.
NOTE:
If any errors are encountered during the running of OSSMKRULE (creating your obey file) a warning will be output to the screen and a log file (OSSMKERR) will be produced.
The warning advises that OSS functionality has been detected in your catalog already and that running the <OSSOBEY> macro that was produced may cause irregularities that will impede important functionality.
Remember: <OSSOBEY> needs to run only once per catalog.
1. Please Enter an RMS monitor name. Enter the name of the monitor for the catalog you are adding OSS support to. The Monitor $<RMP>
was named when the STARTUP macro was run to start the core servers for this catalog. This Monitor must be running and a connection established to it. See #12 of the pre-install checklist.
2. Provide an OSS Directory for PrimeCode’s use: Provide an OSS directory that all PrimeCode users can have full read and write permissions to. It
will be used as the root to create a number of subdirectory paths for use as temporary work areas during OSS compiles. If no path is provided the default path /home/rms will be created. With the path you provide (i.e. </directory>), PrimeCode will create /directory/rms/rmstemp and directory/rms/rmstemptools among others.
3. Which Subvolume will contain the Archive of your catalog? <ARCHIVE> The archive is a copy of every component in your catalog as well as copies of runable files, which
exist without source code that could be used to recompile them. 4. Please enter a Volume and Subvolume that RMS can use as a working area during compilation: This is the Subvolume to which the source will be copied to during compilation.
5. Please enter a Volume and Subvolume where RMS can place all compilers and related files:
88 RMS – PrimeCode Upgrade Manual
This Subvolume will be used for temp-tools, the working area for compilers and related files.
6. Please name the Group for Header File Components. A Catalog Group will be created for components that manage the header files and libraries
associated with OSS compilers.
7. Please name the OSS Compiler Component Group. A Catalog Group will be created to components that manage OSS Compilers.
Creating the OSSOBEY Macro
These steps are required to create and execute a macro that will construct necessary
elements of the catalog structure for use with an OSS License.
It is recommended that the Subvolume <OSSCOMP> used in the following instructions be
empty..
1. Volume to the Subvolume location <PCCORE>:
<PCCORE> is where the file OSSMKRUL resides with all other PrimeCode program files.
VOLUME <PCCORE> [Enter]
2. Create the template for the <OSSOBEY> macro
FUP CREATE <OSSOBEY>, LIKE OSSMKRUL [Enter]
The OSSOBEY macro file is created but empty.
3. Load the OSSMKRUL file:
LOAD /KEEP 1/OSSMKRUL [Enter]
The system should respond with; Loaded from $<Volume>.<PCCORE>.OSSMKRUL: .... OSSMKRULE
4. Obey OSSMKRULE, writing <OSSOBEY>
OSSMKRULE /OUT <OSSOBEY>/ SUBVOL <OSSCOMP> [Enter]
The OSSOBEY macro content is added. The OSSMKRULE macro asks several questions, the
answers to which, you prepared earlier on the checklist. If a warning message informs of the
creation of OSSMKERR (an error log) please contact Emperex Support.
This macro requires a physical location for temporary files. This being a separate macro from the one in SETUP, you will be asked one more time if this installation is on a Virtual Disk.
Is $<DISK>.<SUBVOL> a Virtual Disk sub-volume (Y/N/E)?
If you respond ‘Yes’ PrimeCode requests a physical location.
89 RMS – PrimeCode Upgrade Manual
Enter a sub-volume name on a Physical Disk.
5. Please enter an RMS Monitor name:
Provide the Monitor name for the Catalog you are adding the OSS functionality to.
6. Create an “out” file to record the <OSSOBEY> output.
Using an “out" file option is recommended when starting RMSCOM with the command file
<OSSOBEY>. The execution of <OSSOBEY> involves many steps and having the out file to
refer to will be invaluable in tracing any errors if they occur. We recommend creating the out
file in advance to ensure it is large enough to accommodate all of <OSSOBEY>’s output. A
general spooler file can be used instead with confidence but should also be checked first to
ensure it has room. Examine the splooler capacity with “spoolcom; collect”
FUP CREATE <OSSOUT>, MAXEXTENTS 200
7. Run the obey file <OSSOBEY>.
Specify a spooler file or a previously created <OSSOUT> file for the out option.
OSSOBEY will allow all errors.
RUN RMSCOM /IN OSSOBEY, OUT $S.#<OSSOUT>/ $<RMP> [Enter]
or
RUN RMSCOM /IN OSSOBEY, OUT <OSSOUT>/ $<RMP> [Enter]
The OSSOBEY file is executed and all output is copied to your “out file” <OSSOUT>. This
name is suggested to be consistent with the file our support department will ask to see if
troubleshooting an installation with you. The compilers are all identified and submitted to
managed components. Work areas and the archive are created and the catalog is ready for
use. Proceed to installation of the Feature Servers for PrimeCode. This step may take
several minutes.
If for any reason the <OSSOBEY> macro does not complete successfully please contact Emperex Support. Backing out of this catalog configuration step so that it may be repeated
must be done in a specific sequence.
90 RMS – PrimeCode Upgrade Manual
Appendix K – SPAS INSTALLATION Back
SPAS stands for Submit Processor Attribute Support.
Catalogs that will manage a BASE24 Classic application require a few additional servers to
perform Component Submits and respond to attributes used in Base24 applications.
You may have already installed SPAS during an implementation of Base24 but if your RMS catalog is being upgraded from any version prior to RMS D2015P04 to D20.16 or
later, you will require a newer version of SPAS.
This appendix includes the Instructions to download and install SPAS, and configure your
catalog to take advantage of it.
The files from the SPAS PAK file need to be placed in your RMS <PCCORE> subvolume along
with the RMS servers.
They should be added there before you run SETUP, which is the next step, Step 7, in the
installation instructions. SETUP will ensure that all servers BIND with the RMSLIB.
Download SPAS from Emperex
The SPAS utilities are available in a PAK file downloadable from our Web Site Downloads page for SPAS. (https://www.emperex.com/members/secure/downloads_spas.php)
1. Download the PAK file; SPAS from our Web site to your PC.
2. Upload SPAS to the NonStop in Binary format and rename it SPAS.
3. Into any empty subvolume, UNPAK the SPAS package.
UNPAK SPAS, *.*.*, VOL <$vol.subvol>, MYID, LISTALL
91 RMS – PrimeCode Upgrade Manual
Installing SPAS – Submit Processor Attribute Support
After acquiring the SPAS files, they must be configured as part of your RMS environment.
That is accomplished with SETUP and modifications to the STARTUP file.
1. Volume to the where SPAS was UNPAKed.
2. FUP DUP the following files to the RMS CORE Server subvolume <PCCORE>: B24TOOL , COMTOOL , MAKTOOL and CUSTMAC (with the SOURCEDATE option).
3. Return to Step 7 in the RMS Core Installation to run the SETUP macro.
SETUP may be run from a <DCORE> subvolume (during initial installations) where the CORE
PAK file was originally UNPAKed.
The SETUP command takes a parameter; The< PCCORE> subvolume and moves files from
DCORE to PCCORE.
Your SPAS files can be placed there in advance, having done step 2 above.
The Binder will report several warning messages during the Bind operation. These are
expected and are not a problem. The SETUP macro may report a “danger” message stating
that RMSLIB was not built. This message is untrue and the RMSLIB file has been built
correctly.
After returning to the installation instructions and completing Step 7 (SETUP) you will be writing the STARTUP file. A sample of a STARTUP appropriate for a catalog with SPAS is included in this appendix.
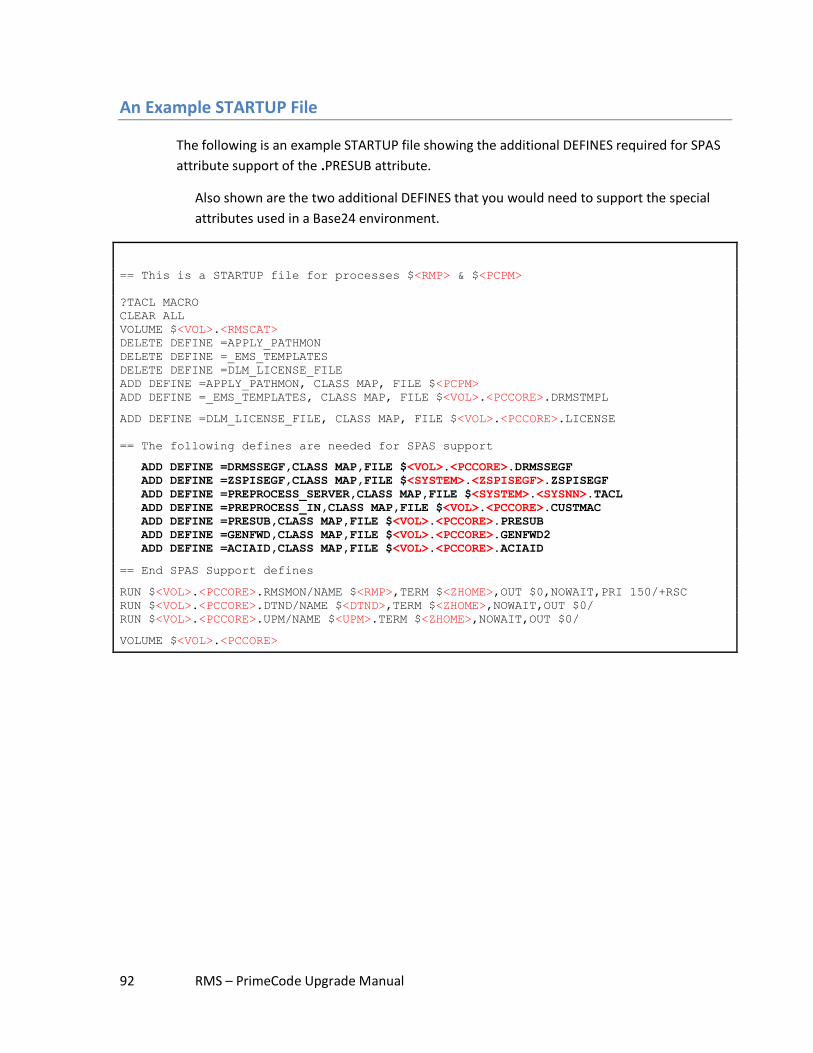
92 RMS – PrimeCode Upgrade Manual
An Example STARTUP File
The following is an example STARTUP file showing the additional DEFINES required for SPAS
attribute support of the .PRESUB attribute.
Also shown are the two additional DEFINES that you would need to support the special
attributes used in a Base24 environment.
== This is a STARTUP file for processes $<RMP> & $<PCPM>
?TACL MACRO
CLEAR ALL
VOLUME $<VOL>.<RMSCAT>
DELETE DEFINE =APPLY_PATHMON
DELETE DEFINE =_EMS_TEMPLATES
DELETE DEFINE =DLM_LICENSE_FILE
ADD DEFINE =APPLY_PATHMON, CLASS MAP, FILE $<PCPM>
ADD DEFINE =_EMS_TEMPLATES, CLASS MAP, FILE $<VOL>.<PCCORE>.DRMSTMPL
ADD DEFINE =DLM_LICENSE_FILE, CLASS MAP, FILE $<VOL>.<PCCORE>.LICENSE
== The following defines are needed for SPAS support
ADD DEFINE =DRMSSEGF,CLASS MAP,FILE $<VOL>.<PCCORE>.DRMSSEGF
ADD DEFINE =ZSPISEGF,CLASS MAP,FILE $<SYSTEM>.<ZSPISEGF>.ZSPISEGF
ADD DEFINE =PREPROCESS_SERVER,CLASS MAP,FILE $<SYSTEM>.<SYSNN>.TACL
ADD DEFINE =PREPROCESS_IN,CLASS MAP,FILE $<VOL>.<PCCORE>.CUSTMAC
ADD DEFINE =PRESUB,CLASS MAP,FILE $<VOL>.<PCCORE>.PRESUB
ADD DEFINE =GENFWD,CLASS MAP,FILE $<VOL>.<PCCORE>.GENFWD2
ADD DEFINE =ACIAID,CLASS MAP,FILE $<VOL>.<PCCORE>.ACIAID
== End SPAS Support defines
RUN $<VOL>.<PCCORE>.RMSMON/NAME $<RMP>,TERM $<ZHOME>,OUT $0,NOWAIT,PRI 150/+RSC
RUN $<VOL>.<PCCORE>.DTND/NAME $<DTND>,TERM $<ZHOME>,NOWAIT,OUT $0/
RUN $<VOL>.<PCCORE>.UPM/NAME $<UPM>.TERM $<ZHOME>,NOWAIT,OUT $0/
VOLUME $<VOL>.<PCCORE>
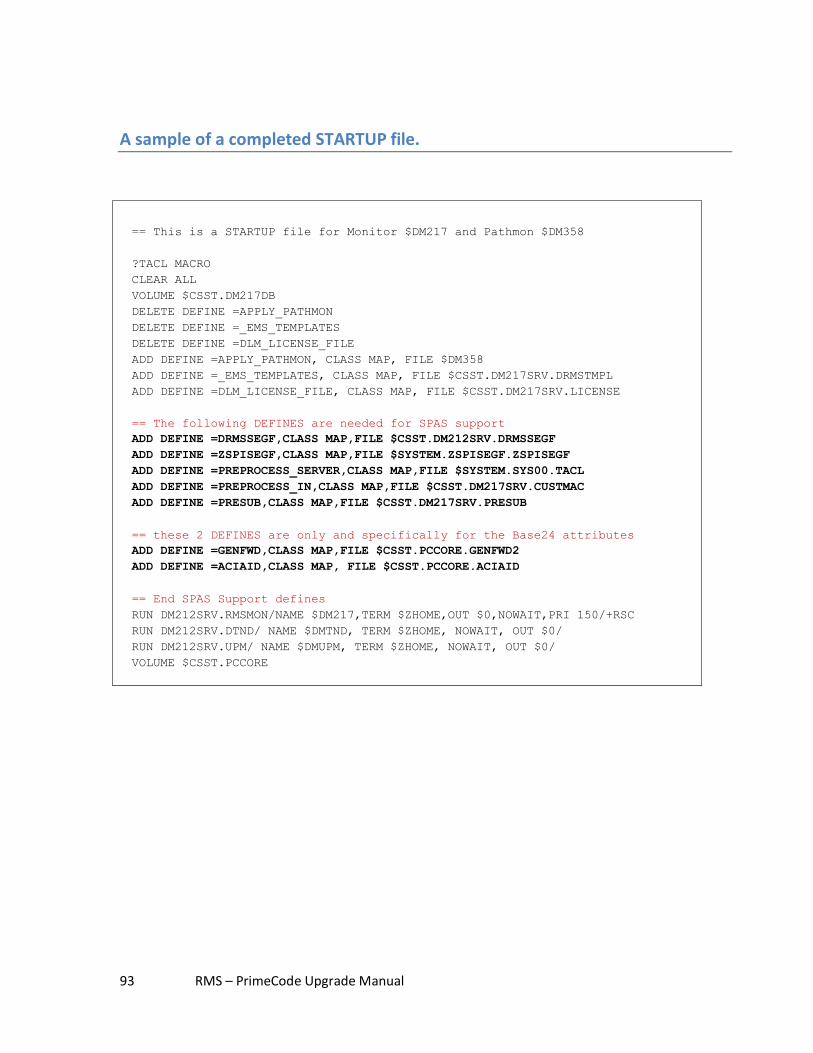
93 RMS – PrimeCode Upgrade Manual
A sample of a completed STARTUP file.
== This is a STARTUP file for Monitor $DM217 and Pathmon $DM358
?TACL MACRO
CLEAR ALL
VOLUME $CSST.DM217DB
DELETE DEFINE =APPLY_PATHMON
DELETE DEFINE =_EMS_TEMPLATES
DELETE DEFINE =DLM_LICENSE_FILE
ADD DEFINE =APPLY_PATHMON, CLASS MAP, FILE $DM358
ADD DEFINE =_EMS_TEMPLATES, CLASS MAP, FILE $CSST.DM217SRV.DRMSTMPL
ADD DEFINE =DLM_LICENSE_FILE, CLASS MAP, FILE $CSST.DM217SRV.LICENSE
== The following DEFINES are needed for SPAS support
ADD DEFINE =DRMSSEGF,CLASS MAP,FILE $CSST.DM212SRV.DRMSSEGF
ADD DEFINE =ZSPISEGF,CLASS MAP,FILE $SYSTEM.ZSPISEGF.ZSPISEGF
ADD DEFINE =PREPROCESS_SERVER,CLASS MAP,FILE $SYSTEM.SYS00.TACL
ADD DEFINE =PREPROCESS_IN,CLASS MAP,FILE $CSST.DM217SRV.CUSTMAC
ADD DEFINE =PRESUB,CLASS MAP,FILE $CSST.DM217SRV.PRESUB
== these 2 DEFINES are only and specifically for the Base24 attributes
ADD DEFINE =GENFWD,CLASS MAP,FILE $CSST.PCCORE.GENFWD2
ADD DEFINE =ACIAID,CLASS MAP, FILE $CSST.PCCORE.ACIAID
== End SPAS Support defines
RUN DM212SRV.RMSMON/NAME $DM217,TERM $ZHOME,OUT $0,NOWAIT,PRI 150/+RSC
RUN DM212SRV.DTND/ NAME $DMTND, TERM $ZHOME, NOWAIT, OUT $0/
RUN DM212SRV.UPM/ NAME $DMUPM, TERM $ZHOME, NOWAIT, OUT $0/
VOLUME $CSST.PCCORE
94 RMS – PrimeCode Upgrade Manual
Appendix L - XYGATE XUA Configuration Back
XYGATE User Authentication (XUA) is not a product from Emperex. We can provide little recommendation for how you should want it configured but we are aware of what modifications are required so that XYGATE and SAFECOM are configured compatibly for RMS and PrimeCode (Core versions D20.16 and later). Starting with the release of RMS D20.16, Emperex has taken advantage of the Non-Stop feature PRIVLOGON to enhance user authentication in our servers. WHAT YOU MUST DO:
1. Consult your Security Admin to first verify that XYGATE (XUA) is installed and running on your system.
2. If yes, the example which follows illustrates how the UAACL configuration file must be modified to indicate UserIds that may be allowed to authenticate using PRIVLOGON. It is important to include all UserIds that will have access to PrimeCode and RMS. The modifications must also list every RMS server that uses PRIVLOGON. Note: If you have more than one catalog and they are not both/all managed by the same core servers, you will need to list these same servers in the other RMS PCCORE subvolumes also.
See the next page for a Snippet from a sample UAACL file.
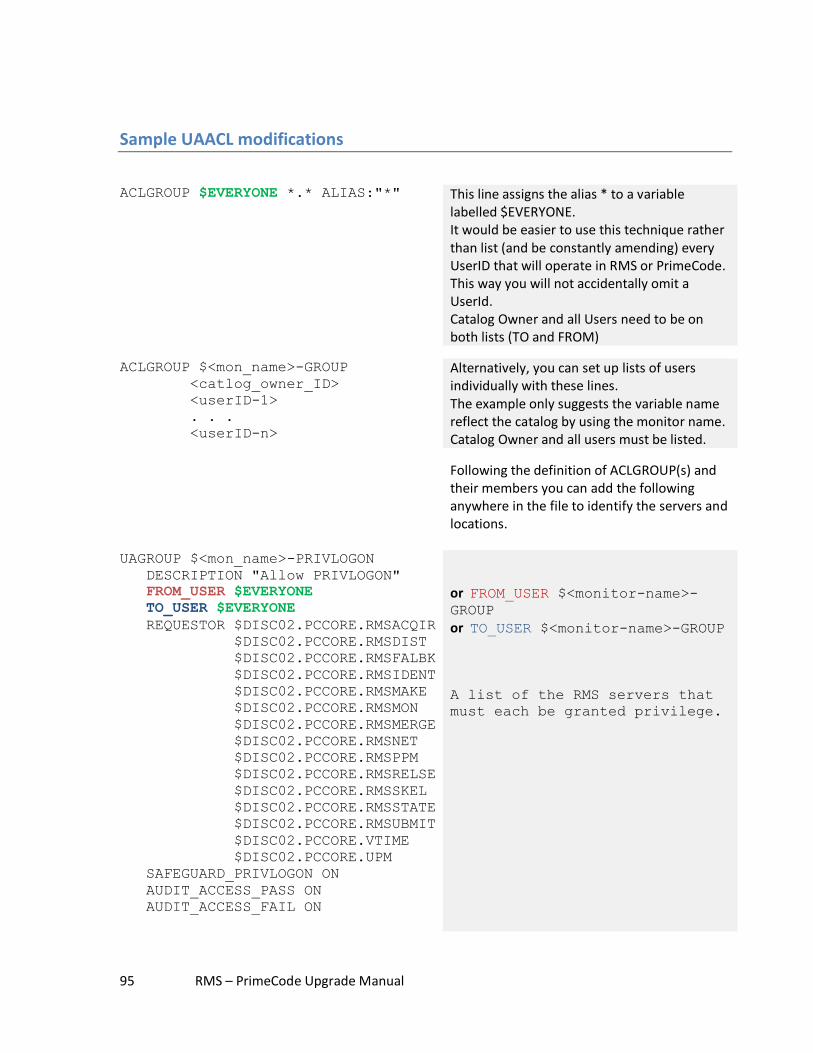
95 RMS – PrimeCode Upgrade Manual
Sample UAACL modifications
ACLGROUP $EVERYONE *.* ALIAS:"*" This line assigns the alias * to a variable
labelled $EVERYONE. It would be easier to use this technique rather than list (and be constantly amending) every UserID that will operate in RMS or PrimeCode. This way you will not accidentally omit a UserId. Catalog Owner and all Users need to be on both lists (TO and FROM)
ACLGROUP $<mon_name>-GROUP
<catlog_owner_ID>
<userID-1>
. . .
<userID-n>
Alternatively, you can set up lists of users individually with these lines. The example only suggests the variable name reflect the catalog by using the monitor name. Catalog Owner and all users must be listed.
Following the definition of ACLGROUP(s) and their members you can add the following anywhere in the file to identify the servers and locations.
UAGROUP $<mon_name>-PRIVLOGON
DESCRIPTION "Allow PRIVLOGON"
FROM_USER $EVERYONE
TO_USER $EVERYONE
REQUESTOR $DISC02.PCCORE.RMSACQIR
$DISC02.PCCORE.RMSDIST
$DISC02.PCCORE.RMSFALBK
$DISC02.PCCORE.RMSIDENT
$DISC02.PCCORE.RMSMAKE
$DISC02.PCCORE.RMSMON
$DISC02.PCCORE.RMSMERGE
$DISC02.PCCORE.RMSNET
$DISC02.PCCORE.RMSPPM
$DISC02.PCCORE.RMSRELSE
$DISC02.PCCORE.RMSSKEL
$DISC02.PCCORE.RMSSTATE
$DISC02.PCCORE.RMSUBMIT
$DISC02.PCCORE.VTIME
$DISC02.PCCORE.UPM
SAFEGUARD_PRIVLOGON ON
AUDIT_ACCESS_PASS ON
AUDIT_ACCESS_FAIL ON
or FROM_USER $<monitor-name>-GROUP or TO_USER $<monitor-name>-GROUP
A list of the RMS servers that
must each be granted privilege.