manual xml-generator-tool
TRANSCRIPT
Manual_XML-Generator_PROTRACE_Fish_v2.0.docx 2019-01-29 page 1 of 12
Manual XML-Generator-tool
Author: Benjamin Maas, METRONOM GmbH Gino Schulz, EECC GmbH
Version: 2.1
Last update: 08.11.2019
Summary:
This manual describes how to use the XML-generator-tool to upload information to the PRO TRACE system.
System requirements:
The described XML-generator-tool requires MS Excel 2007, 2010 or 2016.
It was tested on the operating systems MS Windows 7 and Windows 10.
It does not run on MS Excel 2003, 2000 or older versions.
Manual_XML-Generator_PROTRACE_Fish_v2.0.docx 2019-01-29 page 2 of 12
Contents 1. Preparatory steps for first use (one time) .................................................................................................................. 3
1.1 Align the source data (e.g. export from ERP-system)............................................................................................. 3
1.2 Add Masterdata ...................................................................................................................................................... 3
2. Steps for regular use: enter the relevant information ............................................................................................... 5
2.1 Fish .......................................................................................................................................................................... 5
2.2 Further processing .................................................................................................................................................. 6
3. Upload to the PRO TRACE DATA ENTRY-website ....................................................................................................... 7
4. Request traceability information via the PRO TRACE app .......................................................................................... 9
5. Appendix ................................................................................................................................................................... 10
5.1 GLN (Global Location Number) and GCP (Global Company Prefix): ..................................................................... 10
5.2 Example XML file .................................................................................................................................................. 11
Manual_XML-Generator_PROTRACE_Fish_v2.0.docx 2019-01-29 page 3 of 12
1. Preparatory steps for first use (one time) For each category, you need to enter a different set of attributes for traceability (Fruit & vegetables, Fish, Fish
aquaculture and Meat).
This is why there are four different versions of this XML-generator-tool, depending on the information you want to
process. If you do not have the suitable version for your products, please contact the following e-mail address:
1.1 Align the source data (e.g. export from ERP-system) If you are using an ERP system which contains all necessary traceability information, you need to generate an export
which is aligned to the table structure of the XML-generator-tool. That means the order of the columns and the value
they contain need to be equals. More details which columns are required for the XML-generator-tool can be found in
the Fish chapter. After the proper alignment, the exported values can just be copied into the “Input” sheet of the
XML-generator tool and the XML file can be generated (see chapter 2.2).
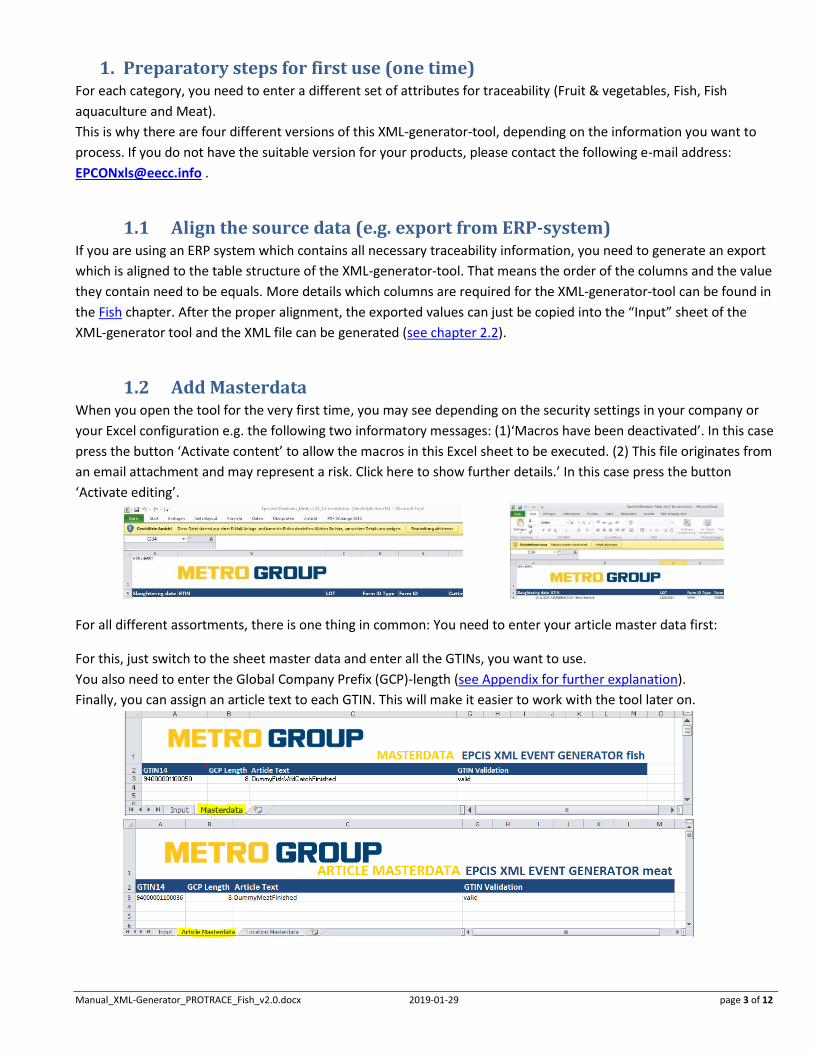
1.2 Add Masterdata When you open the tool for the very first time, you may see depending on the security settings in your company or
your Excel configuration e.g. the following two informatory messages: (1)‘Macros have been deactivated’. In this case
press the button ‘Activate content’ to allow the macros in this Excel sheet to be executed. (2) This file originates from
an email attachment and may represent a risk. Click here to show further details.’ In this case press the button
‘Activate editing’.
For all different assortments, there is one thing in common: You need to enter your article master data first:
For this, just switch to the sheet master data and enter all the GTINs, you want to use.
You also need to enter the Global Company Prefix (GCP)-length (see Appendix for further explanation).
Finally, you can assign an article text to each GTIN. This will make it easier to work with the tool later on.
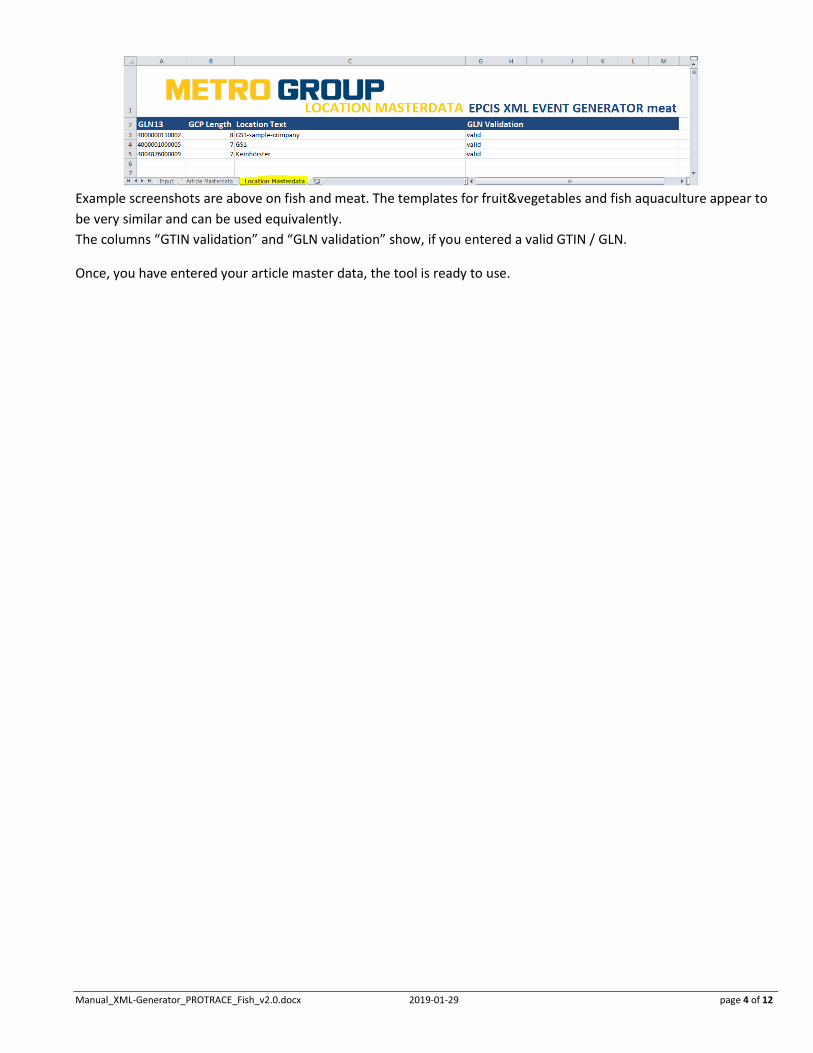
Manual_XML-Generator_PROTRACE_Fish_v2.0.docx 2019-01-29 page 4 of 12
Example screenshots are above on fish and meat. The templates for fruit&vegetables and fish aquaculture appear to
be very similar and can be used equivalently.
The columns “GTIN validation” and “GLN validation” show, if you entered a valid GTIN / GLN.
Once, you have entered your article master data, the tool is ready to use.
Manual_XML-Generator_PROTRACE_Fish_v2.0.docx 2019-01-29 page 5 of 12
2. Steps for regular use: enter the relevant information
When you had completed the master data maintenance as described in chapter 1, navigate to the “Input” tab where
you can enter information to specific lots associated with those GTINs for which you entered master data. When you
finished entering lot IDs and the related attribute information, press the button
You will be asked, where to store the generated XML-file, which you will need later on to upload it to the PRO TRACE-
system.
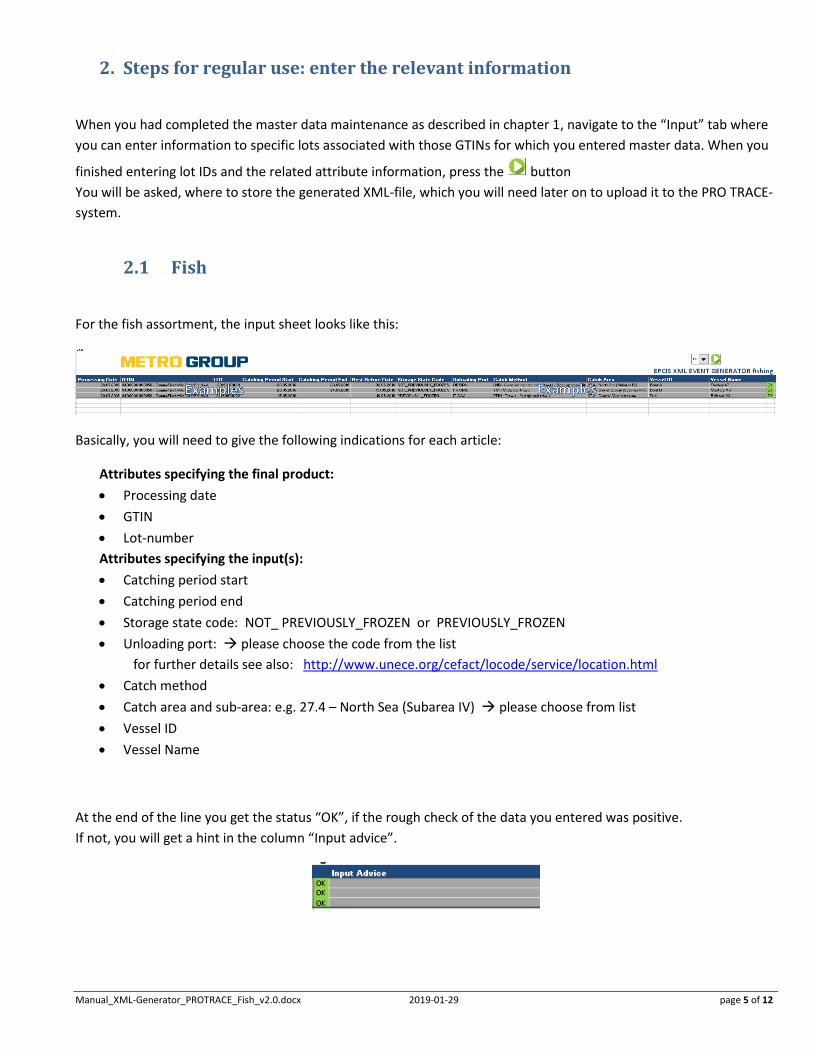
2.1 Fish
For the fish assortment, the input sheet looks like this:
Basically, you will need to give the following indications for each article:
Attributes specifying the final product:
• Processing date
• GTIN
• Lot-number
Attributes specifying the input(s):
• Catching period start
• Catching period end
• Storage state code: NOT_ PREVIOUSLY_FROZEN or PREVIOUSLY_FROZEN
• Unloading port: → please choose the code from the list
for further details see also: http://www.unece.org/cefact/locode/service/location.html
• Catch method
• Catch area and sub-area: e.g. 27.4 – North Sea (Subarea IV) → please choose from list
• Vessel ID
• Vessel Name
At the end of the line you get the status “OK”, if the rough check of the data you entered was positive.
If not, you will get a hint in the column “Input advice”.
Manual_XML-Generator_PROTRACE_Fish_v2.0.docx 2019-01-29 page 6 of 12
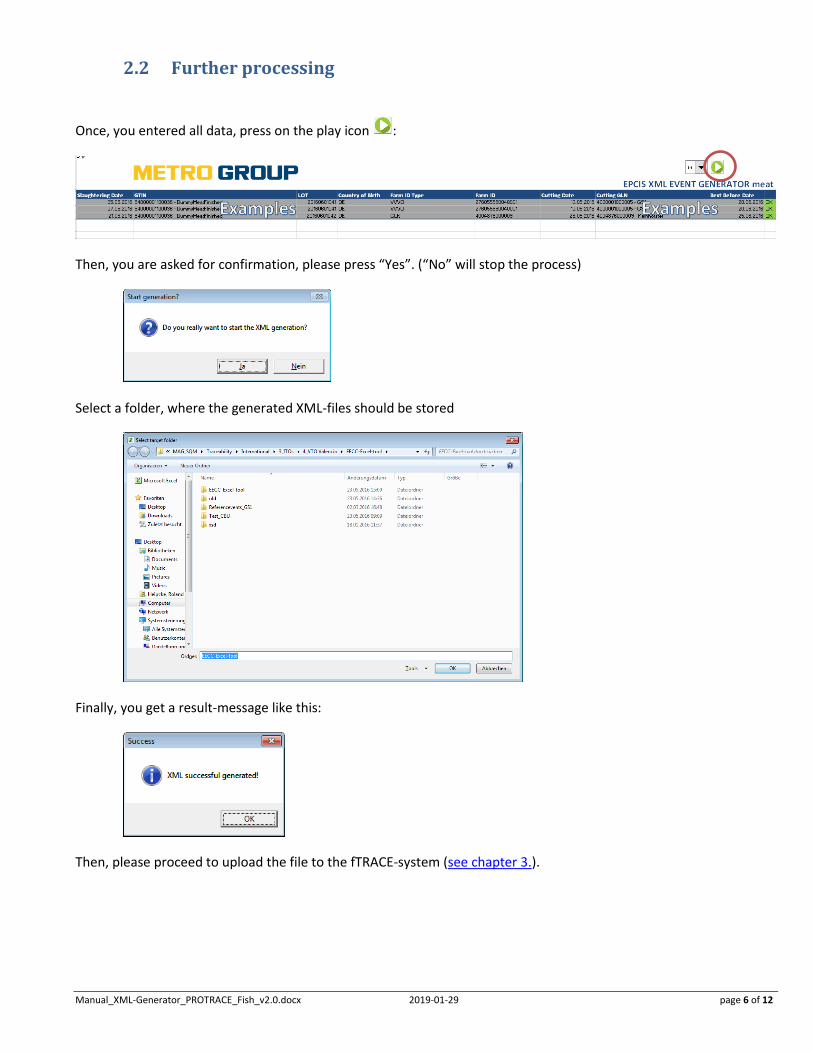
2.2 Further processing
Once, you entered all data, press on the play icon :
Then, you are asked for confirmation, please press “Yes”. (“No” will stop the process)
Select a folder, where the generated XML-files should be stored
Finally, you get a result-message like this:
Then, please proceed to upload the file to the fTRACE-system (see chapter 3.).
Manual_XML-Generator_PROTRACE_Fish_v2.0.docx 2019-01-29 page 7 of 12
3. Upload to the PRO TRACE DATA ENTRY-website
Once you generated an XML-file, you can upload it to PRO TRACE like this:
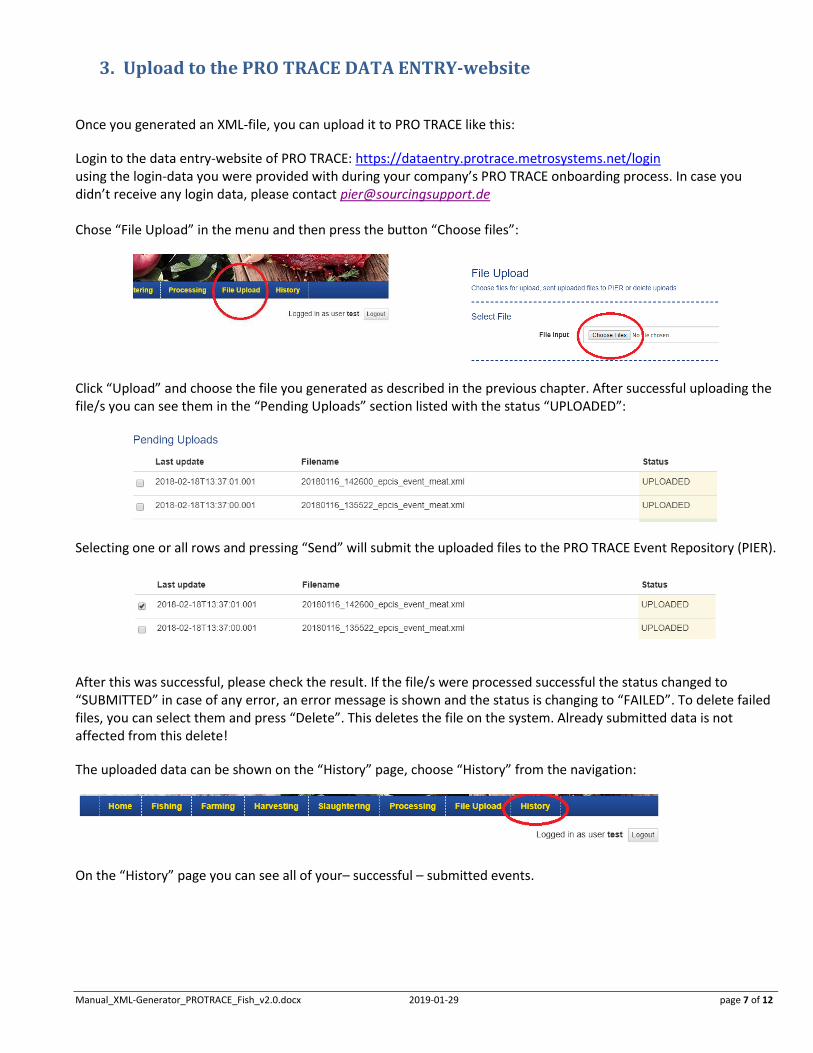
Login to the data entry-website of PRO TRACE: https://dataentry.protrace.metrosystems.net/login using the login-data you were provided with during your company’s PRO TRACE onboarding process. In case you didn’t receive any login data, please contact [email protected] Chose “File Upload” in the menu and then press the button “Choose files”:
Click “Upload” and choose the file you generated as described in the previous chapter. After successful uploading the file/s you can see them in the “Pending Uploads” section listed with the status “UPLOADED”:
Selecting one or all rows and pressing “Send” will submit the uploaded files to the PRO TRACE Event Repository (PIER).
After this was successful, please check the result. If the file/s were processed successful the status changed to “SUBMITTED” in case of any error, an error message is shown and the status is changing to “FAILED”. To delete failed files, you can select them and press “Delete”. This deletes the file on the system. Already submitted data is not affected from this delete!
The uploaded data can be shown on the “History” page, choose “History” from the navigation:
On the “History” page you can see all of your– successful – submitted events.
Manual_XML-Generator_PROTRACE_Fish_v2.0.docx 2019-01-29 page 8 of 12
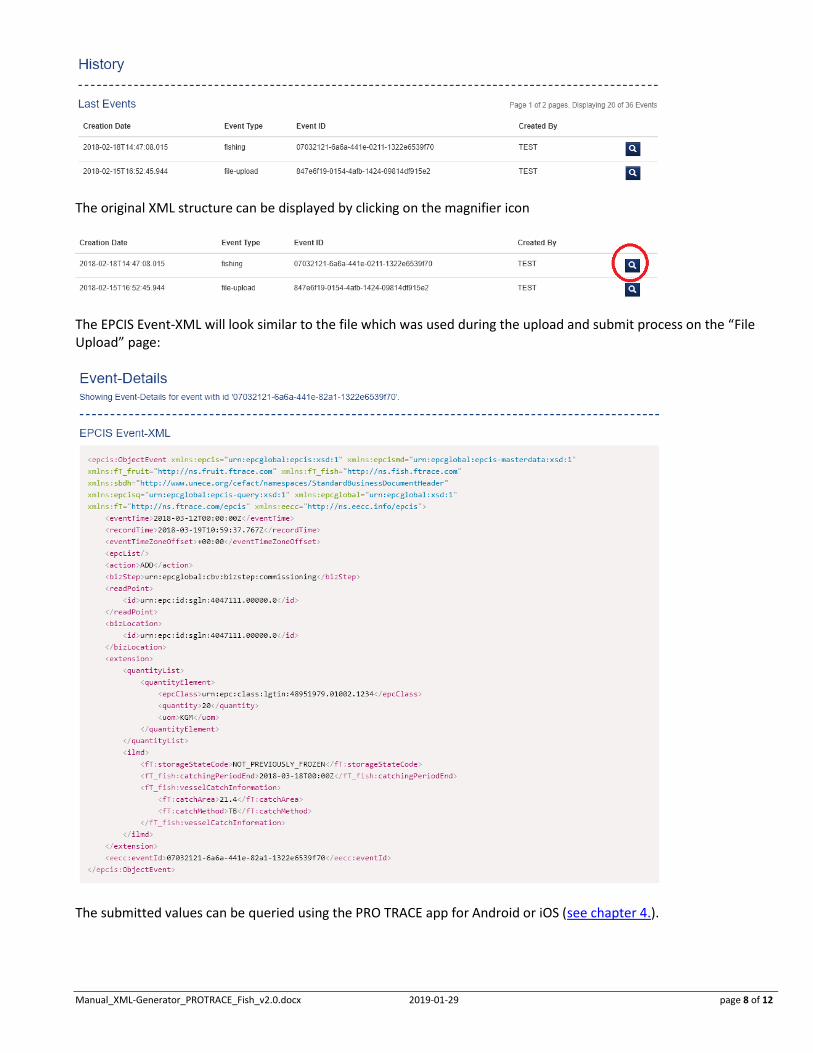
The original XML structure can be displayed by clicking on the magnifier icon
The EPCIS Event-XML will look similar to the file which was used during the upload and submit process on the “File Upload” page:
The submitted values can be queried using the PRO TRACE app for Android or iOS (see chapter 4.).
Manual_XML-Generator_PROTRACE_Fish_v2.0.docx 2019-01-29 page 9 of 12
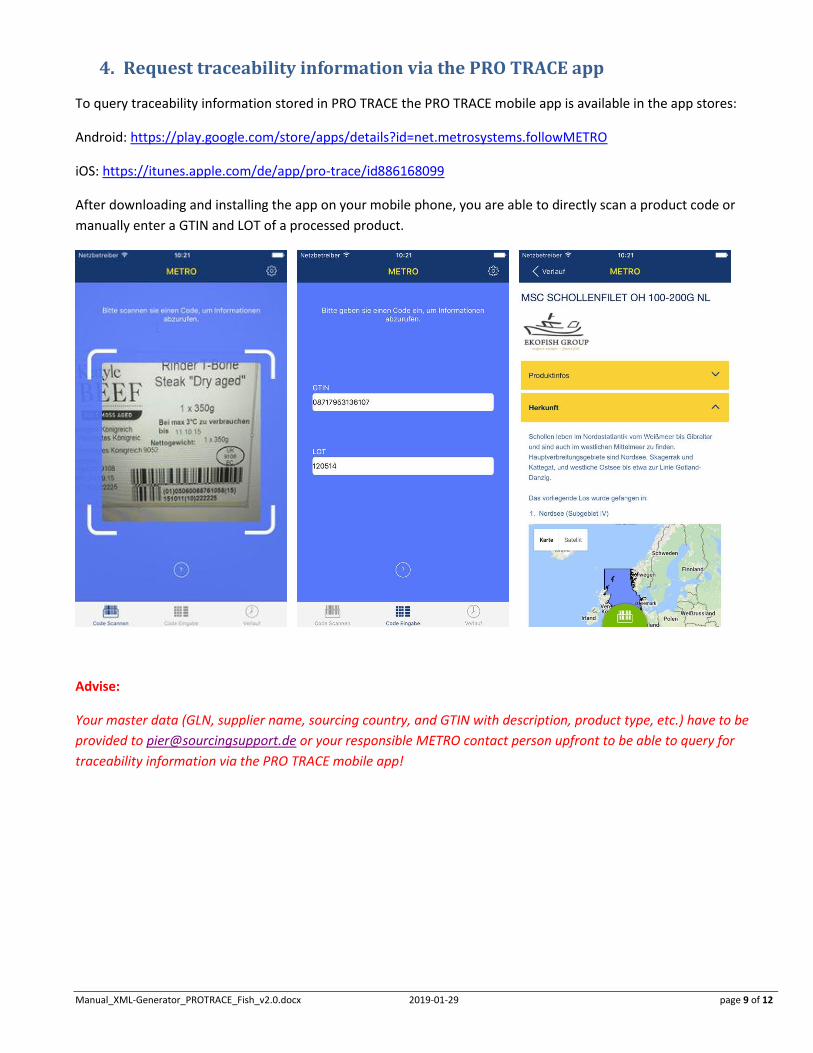
4. Request traceability information via the PRO TRACE app
To query traceability information stored in PRO TRACE the PRO TRACE mobile app is available in the app stores:
Android: https://play.google.com/store/apps/details?id=net.metrosystems.followMETRO
iOS: https://itunes.apple.com/de/app/pro-trace/id886168099
After downloading and installing the app on your mobile phone, you are able to directly scan a product code or
manually enter a GTIN and LOT of a processed product.
Advise:
Your master data (GLN, supplier name, sourcing country, and GTIN with description, product type, etc.) have to be
provided to [email protected] or your responsible METRO contact person upfront to be able to query for
traceability information via the PRO TRACE mobile app!
Manual_XML-Generator_PROTRACE_Fish_v2.0.docx 2019-01-29 page 10 of 12
5. Appendix
5.1 GLN (Global Location Number) and GCP (Global Company Prefix): With the help of the GEPIR-tool (provided online by GS1), you can find out more about a supplier for a given GTIN.
German version: http://www.gepir.de
Spanish version: http://sede.aecoc.es:8000/GEPIR/consultas/SearchByGTIN.aspx
to be found on: http://www.gs1es.org/
The output looks a little bit different and you do not get a direct feedback for the global company prefix.
International site: http://gepir.gs1.org/v32/xx/default.aspx?Lang=en-US/
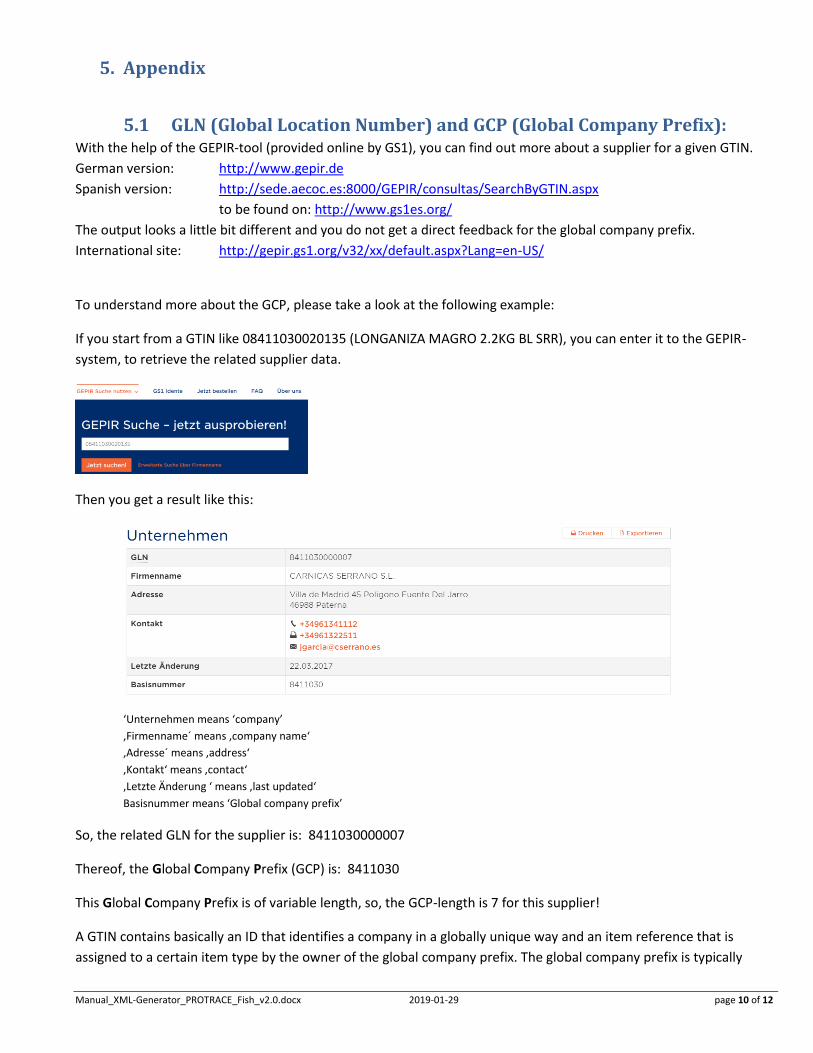
To understand more about the GCP, please take a look at the following example:
If you start from a GTIN like 08411030020135 (LONGANIZA MAGRO 2.2KG BL SRR), you can enter it to the GEPIR-
system, to retrieve the related supplier data.
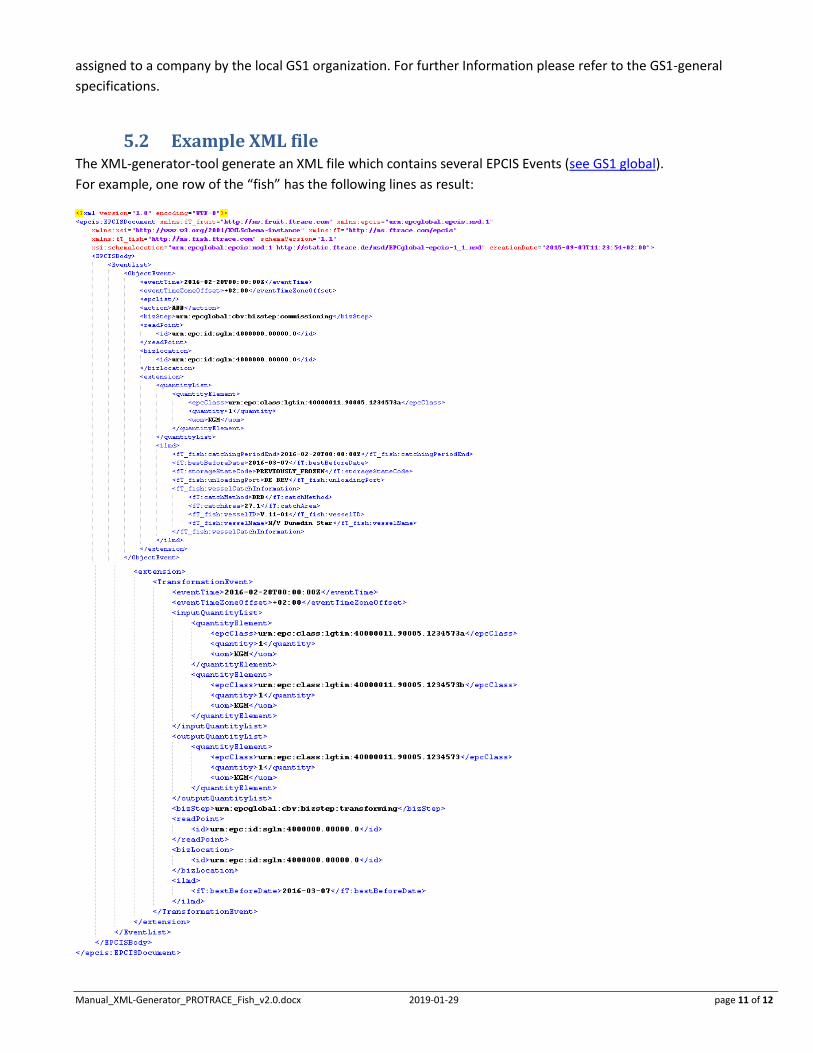
Then you get a result like this:
‘Unternehmen means ‘company’
‚Firmenname´ means ‚company name‘
‚Adresse´ means ‚address‘
‚Kontakt‘ means ‚contact‘
‚Letzte Änderung ‘ means ‚last updated‘
Basisnummer means ‘Global company prefix’
So, the related GLN for the supplier is: 8411030000007
Thereof, the Global Company Prefix (GCP) is: 8411030
This Global Company Prefix is of variable length, so, the GCP-length is 7 for this supplier!
A GTIN contains basically an ID that identifies a company in a globally unique way and an item reference that is
assigned to a certain item type by the owner of the global company prefix. The global company prefix is typically
Manual_XML-Generator_PROTRACE_Fish_v2.0.docx 2019-01-29 page 11 of 12
assigned to a company by the local GS1 organization. For further Information please refer to the GS1-general
specifications.
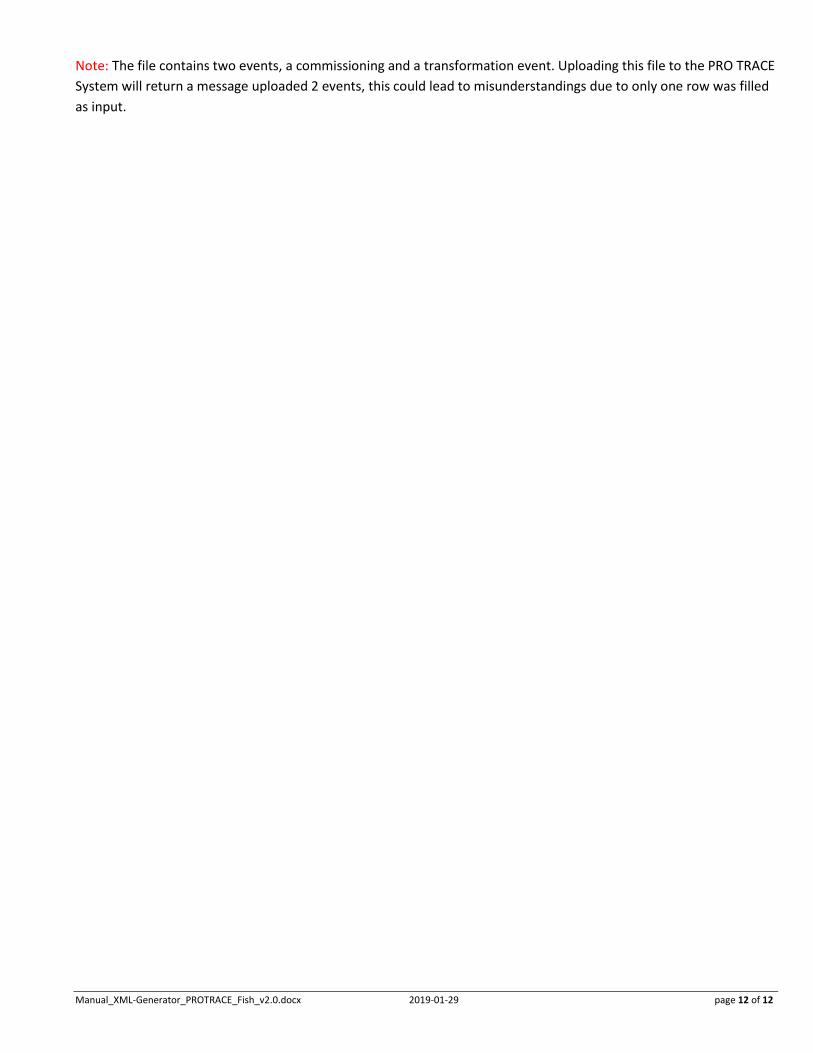
5.2 Example XML file The XML-generator-tool generate an XML file which contains several EPCIS Events (see GS1 global).
For example, one row of the “fish” has the following lines as result:
Manual_XML-Generator_PROTRACE_Fish_v2.0.docx 2019-01-29 page 12 of 12
Note: The file contains two events, a commissioning and a transformation event. Uploading this file to the PRO TRACE
System will return a message uploaded 2 events, this could lead to misunderstandings due to only one row was filled
as input.