eclipse glassfish server upgrade guide, release 5.1
TRANSCRIPT
Eclipse GlassFish Server Upgrade Guide,Release 5.1
Table of ContentsEclipse GlassFish Server . . . . . . . . . . . . . . . . . . . . . . . . . . . . . . . . . . . . . . . . . . . . . . . . . . . . . . . . . . . . . . . . . . . . . . . . 1
Preface. . . . . . . . . . . . . . . . . . . . . . . . . . . . . . . . . . . . . . . . . . . . . . . . . . . . . . . . . . . . . . . . . . . . . . . . . . . . . . . . . . . . . . . . 2
Eclipse GlassFish Server Documentation Set. . . . . . . . . . . . . . . . . . . . . . . . . . . . . . . . . . . . . . . . . . . . . . . . . . . . 2
Related Documentation. . . . . . . . . . . . . . . . . . . . . . . . . . . . . . . . . . . . . . . . . . . . . . . . . . . . . . . . . . . . . . . . . . . . . . . 4
Typographic Conventions. . . . . . . . . . . . . . . . . . . . . . . . . . . . . . . . . . . . . . . . . . . . . . . . . . . . . . . . . . . . . . . . . . . . . 5
Symbol Conventions . . . . . . . . . . . . . . . . . . . . . . . . . . . . . . . . . . . . . . . . . . . . . . . . . . . . . . . . . . . . . . . . . . . . . . . . . 5
Default Paths and File Names . . . . . . . . . . . . . . . . . . . . . . . . . . . . . . . . . . . . . . . . . . . . . . . . . . . . . . . . . . . . . . . . . 6
1 GlassFish Server Upgrade Compatibility Issues . . . . . . . . . . . . . . . . . . . . . . . . . . . . . . . . . . . . . . . . . . . . . . . . . . 8
Binary-Compatible Releases For GlassFish Server 4.0. . . . . . . . . . . . . . . . . . . . . . . . . . . . . . . . . . . . . . . . . . . . 8
New Default Installation Directory . . . . . . . . . . . . . . . . . . . . . . . . . . . . . . . . . . . . . . . . . . . . . . . . . . . . . . . . . . . . 9
Changes to Group Management Service Settings . . . . . . . . . . . . . . . . . . . . . . . . . . . . . . . . . . . . . . . . . . . . . . . . 9
Application Client Interoperability . . . . . . . . . . . . . . . . . . . . . . . . . . . . . . . . . . . . . . . . . . . . . . . . . . . . . . . . . . . 10
Node Agent Support. . . . . . . . . . . . . . . . . . . . . . . . . . . . . . . . . . . . . . . . . . . . . . . . . . . . . . . . . . . . . . . . . . . . . . . . . 11
HADB and hadbm Command Support . . . . . . . . . . . . . . . . . . . . . . . . . . . . . . . . . . . . . . . . . . . . . . . . . . . . . . . . . . 11
Command Line Interface: The asadmin Command . . . . . . . . . . . . . . . . . . . . . . . . . . . . . . . . . . . . . . . . . . . . . . 11
Applications That Use Java DB . . . . . . . . . . . . . . . . . . . . . . . . . . . . . . . . . . . . . . . . . . . . . . . . . . . . . . . . . . . . . . . 13
Applications That Use Persistence . . . . . . . . . . . . . . . . . . . . . . . . . . . . . . . . . . . . . . . . . . . . . . . . . . . . . . . . . . . . 14
HTTP Service to Network Service Changes . . . . . . . . . . . . . . . . . . . . . . . . . . . . . . . . . . . . . . . . . . . . . . . . . . . . 15
NSS Cryptographic Token Support. . . . . . . . . . . . . . . . . . . . . . . . . . . . . . . . . . . . . . . . . . . . . . . . . . . . . . . . . . . . 26
2 Upgrading an Installation of Application Server or GlassFish Server . . . . . . . . . . . . . . . . . . . . . . . . . . . . . 27
Upgrade Overview . . . . . . . . . . . . . . . . . . . . . . . . . . . . . . . . . . . . . . . . . . . . . . . . . . . . . . . . . . . . . . . . . . . . . . . . . . 27
Performing a Side-By-Side Upgrade With Upgrade Tool . . . . . . . . . . . . . . . . . . . . . . . . . . . . . . . . . . . . . . . . 34
Performing an In-Place Upgrade With the Update Center Tools . . . . . . . . . . . . . . . . . . . . . . . . . . . . . . . . . 41
Upgrading Installations That Use NSS Cryptographic Tokens . . . . . . . . . . . . . . . . . . . . . . . . . . . . . . . . . . . . 45
Upgrading Clusters and Node Agent Configurations . . . . . . . . . . . . . . . . . . . . . . . . . . . . . . . . . . . . . . . . . . . . 50
Correcting Potential Upgrade Problems . . . . . . . . . . . . . . . . . . . . . . . . . . . . . . . . . . . . . . . . . . . . . . . . . . . . . . . 55
Eclipse GlassFish ServerUpgrade Guide
Release 5.1
Contributed 2018, 2019
This guide explains how to upgrade to Eclipse GlassFish Server 5.1 from previous GlassFish Server andSun GlassFish Enterprise Server product releases. Also included in this guide are instructions forupgrading configuration data and Java EE applications from binary-compatible earlier versions of thissoftware to work with Eclipse GlassFish Server 5.1. Finally, this guide describes compatibility issuesthat affect data and applications that are to be migrated.
Note: The main thrust of the Eclipse GlassFish Server 5.1 release is to provide an application server fordevelopers to explore and begin exploiting the new and updated technologies in the Java EE 7platform. Thus, the upgrade feature of GlassFish Server was not a focus of this release. The feature isincluded in the release, but it may not function properly with some of the new features added insupport of the Java EE 7 platform.
Eclipse GlassFish Server Upgrade Guide, Release 5.1
Copyright ?? 2013, 2019 Oracle and/or its affiliates. All rights reserved.
This program and the accompanying materials are made available under the terms of the EclipsePublic License v. 2.0, which is available at http://www.eclipse.org/legal/epl-2.0.
SPDX-License-Identifier: EPL-2.0
Oracle and Java are registered trademarks of Oracle and/or its affiliates. Other names may betrademarks of their respective owners.
Intel and Intel Xeon are trademarks or registered trademarks of Intel Corporation. All SPARCtrademarks are used under license and are trademarks or registered trademarks of SPARCInternational, Inc. AMD, Opteron, the AMD logo, and the AMD Opteron logo are trademarks orregistered trademarks of Advanced Micro Devices. UNIX is a registered trademark of The Open Group.
Eclipse GlassFish Server
DRAFT Eclipse GlassFish Server Upgrade Guide, Release 5.1 1
PrefaceThis guide explains how to upgrade to GlassFish Server Open Source Edition 4.0 from previousGlassFish Server and Sun GlassFish Enterprise Server product releases. Also included in this guide areinstructions for upgrading configuration data and Java EE applications from binary-compatible earlierversions of this software to work with GlassFish Server Open Source Edition 4.0. Finally, this guidedescribes compatibility issues that affect data and applications that are to be migrated.
Note:
The main thrust of the GlassFish Server Open Source Edition 4.0 release is to provide an applicationserver for developers to explore and begin exploiting the new and updated technologies in the JavaEE 7 platform. Thus, the upgrade feature of GlassFish Server was not a focus of this release. Thefeature is included in the release, but it may not function properly with some of the new featuresadded in support of the Java EE 7 platform.
This preface contains information about and conventions for the entire GlassFish Server Open SourceEdition (GlassFish Server) documentation set.
GlassFish Server 4.0 is developed through the GlassFish project open-source community athttp://glassfish.java.net/. The GlassFish project provides a structured process for developing theGlassFish Server platform that makes the new features of the Java EE platform available faster, whilemaintaining the most important feature of Java EE: compatibility. It enables Java developers to accessthe GlassFish Server source code and to contribute to the development of the GlassFish Server. TheGlassFish project is designed to encourage communication between Oracle engineers and thecommunity.
The following topics are addressed here:
• GlassFish Server Documentation Set
• Related Documentation
• Typographic Conventions
• Symbol Conventions
• Default Paths and File Names
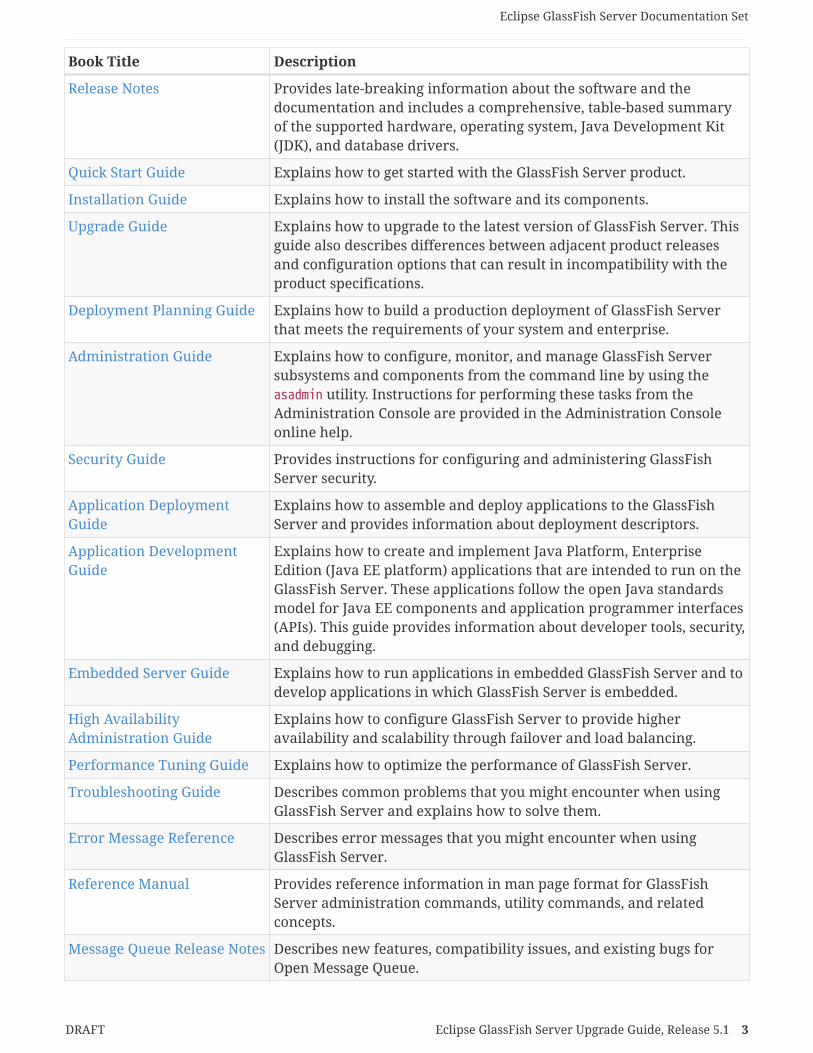
Eclipse GlassFish Server Documentation SetThe GlassFish Server documentation set describes deployment planning and system installation. For anintroduction to GlassFish Server, refer to the books in the order in which they are listed in thefollowing table.
Eclipse GlassFish Server Documentation Set
2 Eclipse GlassFish Server Upgrade Guide, Release 5.1 DRAFT
Book Title Description
Release Notes Provides late-breaking information about the software and thedocumentation and includes a comprehensive, table-based summaryof the supported hardware, operating system, Java Development Kit(JDK), and database drivers.
Quick Start Guide Explains how to get started with the GlassFish Server product.
Installation Guide Explains how to install the software and its components.
Upgrade Guide Explains how to upgrade to the latest version of GlassFish Server. Thisguide also describes differences between adjacent product releasesand configuration options that can result in incompatibility with theproduct specifications.
Deployment Planning Guide Explains how to build a production deployment of GlassFish Serverthat meets the requirements of your system and enterprise.
Administration Guide Explains how to configure, monitor, and manage GlassFish Serversubsystems and components from the command line by using theasadmin utility. Instructions for performing these tasks from theAdministration Console are provided in the Administration Consoleonline help.
Security Guide Provides instructions for configuring and administering GlassFishServer security.
Application DeploymentGuide
Explains how to assemble and deploy applications to the GlassFishServer and provides information about deployment descriptors.
Application DevelopmentGuide
Explains how to create and implement Java Platform, EnterpriseEdition (Java EE platform) applications that are intended to run on theGlassFish Server. These applications follow the open Java standardsmodel for Java EE components and application programmer interfaces(APIs). This guide provides information about developer tools, security,and debugging.
Embedded Server Guide Explains how to run applications in embedded GlassFish Server and todevelop applications in which GlassFish Server is embedded.
High AvailabilityAdministration Guide
Explains how to configure GlassFish Server to provide higheravailability and scalability through failover and load balancing.
Performance Tuning Guide Explains how to optimize the performance of GlassFish Server.
Troubleshooting Guide Describes common problems that you might encounter when usingGlassFish Server and explains how to solve them.
Error Message Reference Describes error messages that you might encounter when usingGlassFish Server.
Reference Manual Provides reference information in man page format for GlassFishServer administration commands, utility commands, and relatedconcepts.
Message Queue Release Notes Describes new features, compatibility issues, and existing bugs forOpen Message Queue.
Eclipse GlassFish Server Documentation Set
DRAFT Eclipse GlassFish Server Upgrade Guide, Release 5.1 3
Book Title Description
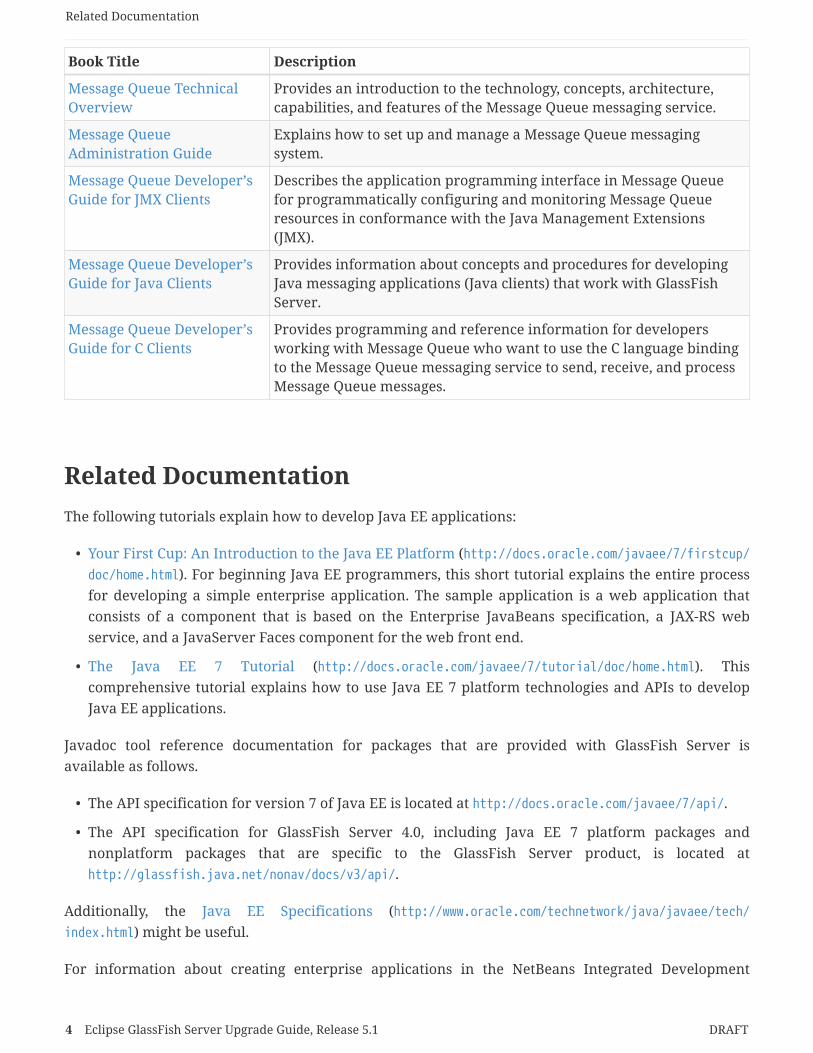
Message Queue TechnicalOverview
Provides an introduction to the technology, concepts, architecture,capabilities, and features of the Message Queue messaging service.
Message QueueAdministration Guide
Explains how to set up and manage a Message Queue messagingsystem.
Message Queue Developer’sGuide for JMX Clients
Describes the application programming interface in Message Queuefor programmatically configuring and monitoring Message Queueresources in conformance with the Java Management Extensions(JMX).
Message Queue Developer’sGuide for Java Clients
Provides information about concepts and procedures for developingJava messaging applications (Java clients) that work with GlassFishServer.
Message Queue Developer’sGuide for C Clients
Provides programming and reference information for developersworking with Message Queue who want to use the C language bindingto the Message Queue messaging service to send, receive, and processMessage Queue messages.
Related DocumentationThe following tutorials explain how to develop Java EE applications:
• Your First Cup: An Introduction to the Java EE Platform (http://docs.oracle.com/javaee/7/firstcup/doc/home.html). For beginning Java EE programmers, this short tutorial explains the entire processfor developing a simple enterprise application. The sample application is a web application thatconsists of a component that is based on the Enterprise JavaBeans specification, a JAX-RS webservice, and a JavaServer Faces component for the web front end.
• The Java EE 7 Tutorial (http://docs.oracle.com/javaee/7/tutorial/doc/home.html). Thiscomprehensive tutorial explains how to use Java EE 7 platform technologies and APIs to developJava EE applications.
Javadoc tool reference documentation for packages that are provided with GlassFish Server isavailable as follows.
• The API specification for version 7 of Java EE is located at http://docs.oracle.com/javaee/7/api/.
• The API specification for GlassFish Server 4.0, including Java EE 7 platform packages andnonplatform packages that are specific to the GlassFish Server product, is located athttp://glassfish.java.net/nonav/docs/v3/api/.
Additionally, the Java EE Specifications (http://www.oracle.com/technetwork/java/javaee/tech/index.html) might be useful.
For information about creating enterprise applications in the NetBeans Integrated Development
Related Documentation
4 Eclipse GlassFish Server Upgrade Guide, Release 5.1 DRAFT
Environment (IDE), see the NetBeans Documentation, Training & Support page(http://www.netbeans.org/kb/).
For information about the Java DB database for use with the GlassFish Server, see the Java DB productpage (http://www.oracle.com/technetwork/java/javadb/overview/index.html).
The Java EE Samples project is a collection of sample applications that demonstrate a broad range ofJava EE technologies. The Java EE Samples are bundled with the Java EE Software Development Kit(SDK) and are also available from the Java EE Samples project page (http://glassfish-samples.java.net/).
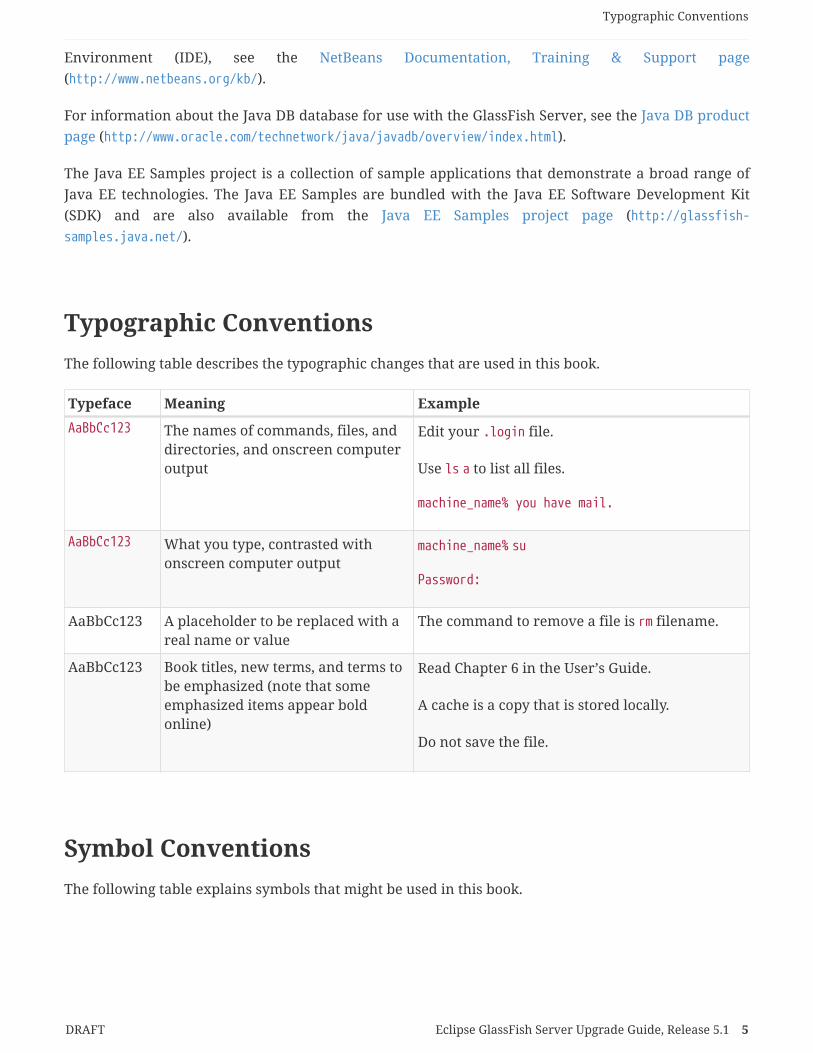
Typographic ConventionsThe following table describes the typographic changes that are used in this book.
Typeface Meaning Example
AaBbCc123 The names of commands, files, anddirectories, and onscreen computeroutput
Edit your .login file.
Use ls a to list all files.
machine_name% you have mail.
AaBbCc123 What you type, contrasted withonscreen computer output
machine_name% su
Password:
AaBbCc123 A placeholder to be replaced with areal name or value
The command to remove a file is rm filename.
AaBbCc123 Book titles, new terms, and terms tobe emphasized (note that someemphasized items appear boldonline)
Read Chapter 6 in the User’s Guide.
A cache is a copy that is stored locally.
Do not save the file.
Symbol ConventionsThe following table explains symbols that might be used in this book.
Typographic Conventions
DRAFT Eclipse GlassFish Server Upgrade Guide, Release 5.1 5

Symbol Description Example Meaning
[ ] Contains optionalarguments and commandoptions.
ls [-l] The -l option is not required.
{ | } Contains a set of choicesfor a required commandoption.
-d {y|n} The -d option requires that you useeither the y argument or the nargument.
${ } Indicates a variablereference.
${com.sun.javaRoot} References the value of thecom.sun.javaRoot variable.
- Joins simultaneousmultiple keystrokes.
Control-A Press the Control key while youpress the A key.
+ Joins consecutivemultiple keystrokes.
Ctrl+A+N Press the Control key, release it, andthen press the subsequent keys.
> Indicates menu itemselection in a graphicaluser interface.
File > New > Templates From the File menu, choose New.From the New submenu, chooseTemplates.
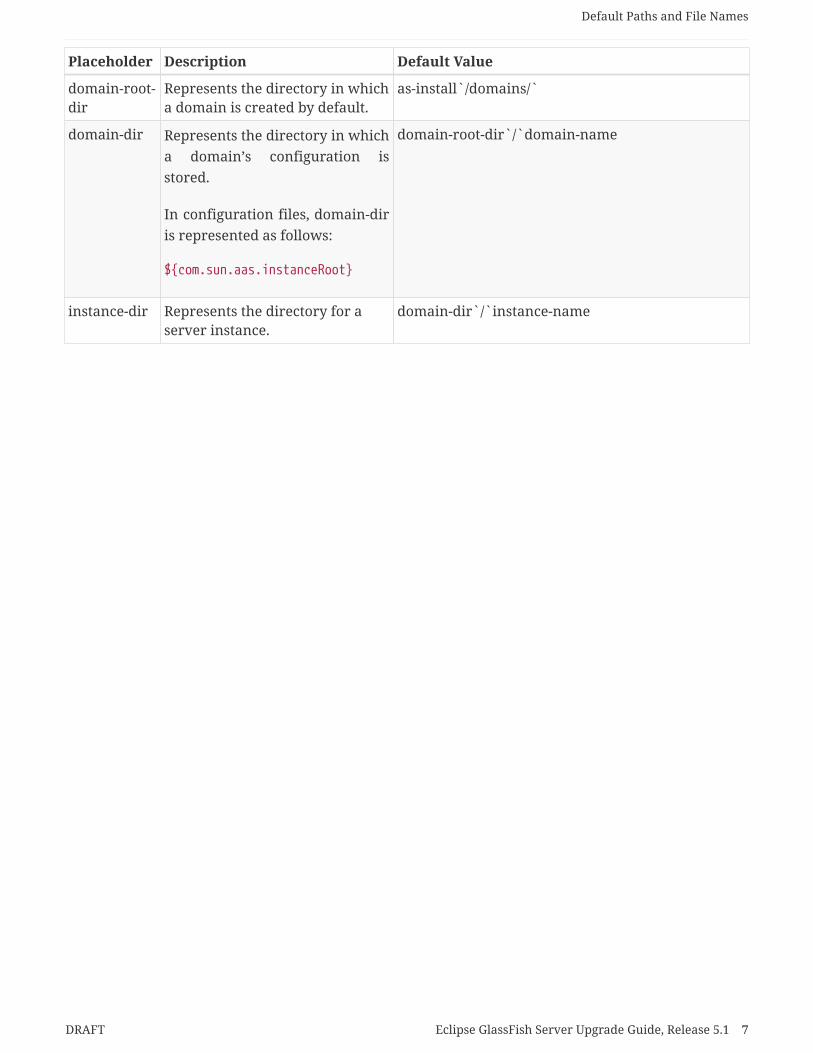
Default Paths and File NamesThe following table describes the default paths and file names that are used in this book.
Placeholder Description Default Value
as-install Represents the base installationdirectory for GlassFish Server.
In configuration files, as-install isrepresented as follows:
${com.sun.aas.installRoot}
Installations on the Oracle Solaris operating system,Linux operating system, and Mac OS operatingsystem:
user’s-home-directory`/glassfish3/glassfish`
Installations on the Windows operating system:
SystemDrive`:\glassfish3\glassfish`
as-install-parent
Represents the parent of the baseinstallation directory forGlassFish Server.
Installations on the Oracle Solaris operating system,Linux operating system, and Mac operating system:
user’s-home-directory`/glassfish3`
Installations on the Windows operating system:
SystemDrive`:\glassfish3`
Default Paths and File Names
6 Eclipse GlassFish Server Upgrade Guide, Release 5.1 DRAFT
Placeholder Description Default Value
domain-root-dir
Represents the directory in whicha domain is created by default.
as-install`/domains/`
domain-dir Represents the directory in whicha domain’s configuration isstored.
In configuration files, domain-diris represented as follows:
${com.sun.aas.instanceRoot}
domain-root-dir`/`domain-name
instance-dir Represents the directory for aserver instance.
domain-dir`/`instance-name
Default Paths and File Names
DRAFT Eclipse GlassFish Server Upgrade Guide, Release 5.1 7
1 GlassFish Server Upgrade CompatibilityIssuesThis section describes some compatibility issues between GlassFish Server 4.0 and earlier productreleases. This section also describes some compatibility issues that affect Java applications that run onearlier product releases with which Oracle GlassFish Server 4.0 is binary-compatible. When youupgrade to GlassFish Server 4.0, you must address these issues.
The following topics are addressed here:
• Binary-Compatible Releases For GlassFish Server 4.0
• New Default Installation Directory
• Changes to Group Management Service Settings
• Application Client Interoperability
• Node Agent Support
• HADB and hadbm Command Support
• Command Line Interface: The asadmin Command
• Applications That Use Java DB
• Applications That Use Persistence
• HTTP Service to Network Service Changes
• NSS Cryptographic Token Support
Binary-Compatible Releases For GlassFish Server 4.0GlassFish Server Open Source Edition 4.0 is binary-compatible with the following earlier releases ofthe software:
• Sun GlassFish Enterprise Server v2.1.1 (Enterprise and Developer Profiles)
• Sun GlassFish Enterprise Server v3
• GlassFish Server Open Source Edition 3.0.1
• GlassFish Server Open Source Edition 3.1
• GlassFish Server Open Source Edition 3.1.1
Java applications that run on these releases also work on GlassFish Server Open Source Edition 4.0except for the compatibility issues that are listed in the remainder of this chapter.
Binary-Compatible Releases For GlassFish Server 4.0
8 Eclipse GlassFish Server Upgrade Guide, Release 5.1 DRAFT
Note:
The compatibility issues that are listed in the remainder of this chapter do not affect Java applicationsthat run on Sun GlassFish Enterprise Server v3 and GlassFish Server 3.0.1. The differences betweenGlassFish Server 4.0 and the Enterprise Server v3 releases do not affect applications and data.
New Default Installation DirectoryThe default GlassFish Server 4.0 installation directories are as follows:
Solaris, Linux, and Mac OS X systems
user-home-directory/glassfish3
Windows systems
SystemDrive\glassfish3
In GlassFish Server 3.0.1 and Enterprise Server v3, the default installation root directory wasglassfishv3.
Changes to Group Management Service SettingsThe functionality of the Group Management Service (GMS) has not changed since Sun GlassFishEnterprise Server v2.1.1, but the names of GMS settings have been changed in the AdministrationConsole to make them more understandable. These changes are made automatically during theupgrade process.
Changes to settings on the Edit Group Management Service page in the Administration Console aresummarized in the following table.
Table 1-1 GMS Administration Console Settings Changes from 2.1.1 to 4.0
Old Setting Name New Setting Name
Protocol Maximum Trial Maximum Missed Heartbeats
Protocol Timeout Heartbeat Frequency
Ping Timeout Group Discovery Timeout
New Default Installation Directory
DRAFT Eclipse GlassFish Server Upgrade Guide, Release 5.1 9
Old Setting Name New Setting Name
Verified Timeout Failure Verification Wait Time
The Merge Protocol settings from Sun GlassFish Enterprise Server v2.1.1 are not supported and havebeen removed.
Application Client InteroperabilityThe Java EE 6 platform specification imposes stricter requirements than Java EE 5 did on which JARfiles can be visible to various modules within an EAR file. In particular, application clients must nothave access to EJB JAR files or other JAR files in the EAR file unless they use a Class-Path header in themanifest file, or unless references use the standard Java SE mechanisms (extensions, for example), oruse the Java EE library-directory mechanism. Deployed Java EE 5 applications that are upgraded toGlassFish Server 4.0 will have the compatibility property set to v2 and will run without change onGlassFish Server 4.0. You may, however, want to consider modifying the applications to conform toJava EE 6 requirements.
If your upgrade includes a deployed application with an application client, you will need to retrievethe client stubs using GlassFish Server 4.0 in order to run the client. Use the asadmin get-client-stubscommand.
If you try to run the application client before retrieving the client stubs, you will see the followingerror message:
Invalid or corrupt jarfile jar-file-name
If you commonly distribute application clients to remote systems from which users will run them, youmust not only retrieve the client stubs, but you must also run the package-appclient utility for GlassFishServer 4.0 to upgrade the GlassFish Server system files. This utility creates a JAR file, which you canthen expand on the remote systems.
Application clients use EJBs, web services, or other enterprise components that are in the applicationserver (on the server side). The application client and the application server must use the same versionand implementation of the RMI-IIOP protocol. GlassFish Server 4.0 does not support communicationbetween different versions of the protocol implementation. You cannot run application clients withone version of the application server runtime with a server that has a different version. Most often,this would happen if you upgraded the server but had not upgraded all the application clientinstallations. If you run the package-appclient utility, this issue will not arise.
You can use the Java Web Start support to distribute and launch the application client. If the runtimeon the server has changed since the end-user last used the application client, Java Web Startautomatically retrieves the updated runtime. Java Web Start enables you to keep the clients and
Application Client Interoperability
10 Eclipse GlassFish Server Upgrade Guide, Release 5.1 DRAFT
servers synchronized and using the same runtime.
Node Agent SupportGlassFish Server 4.0 does not support node agents. When updating from installations of earlier productversions in which node agents were configured, the cluster definitions will be migrated, but theclustered instances themselves must be manually re-created. See Upgrading Clusters and Node AgentConfigurations for more information.
HADB and hadbm Command SupportGlassFish Server 4.0 does not support HADB or the hadbm management command.
Instead of HADB, GlassFish Server 4.0 supports high availability clustering by means of in-memorysession state replication and ActiveCache for GlassFish. See "High Availability in GlassFish Server" inGlassFish Server Open Source Edition High Availability Administration Guide for more information.
Command Line Interface: The asadmin CommandThe following sections describe changes to the command line utility asadmin:
• Deprecated asadmin Subcommands
• Deprecated, Unsupported, and Obsolete Options
For more information about asadmin and its subcommands, see the GlassFish Server Open SourceEdition Reference Manual.
Deprecated asadmin Subcommands
In GlassFish Server 4.0, it is recommended that utility options of the asadmin command precede thesubcommand. Utility options are options that control the behavior of the asadmin utility, asdistinguished from subcommand options. Use of the following options after the subcommand isdeprecated.
• --host
• --port
• --user
Node Agent Support
DRAFT Eclipse GlassFish Server Upgrade Guide, Release 5.1 11
• --passwordfile
• --terse
• --secure
• --echo
• --interactive
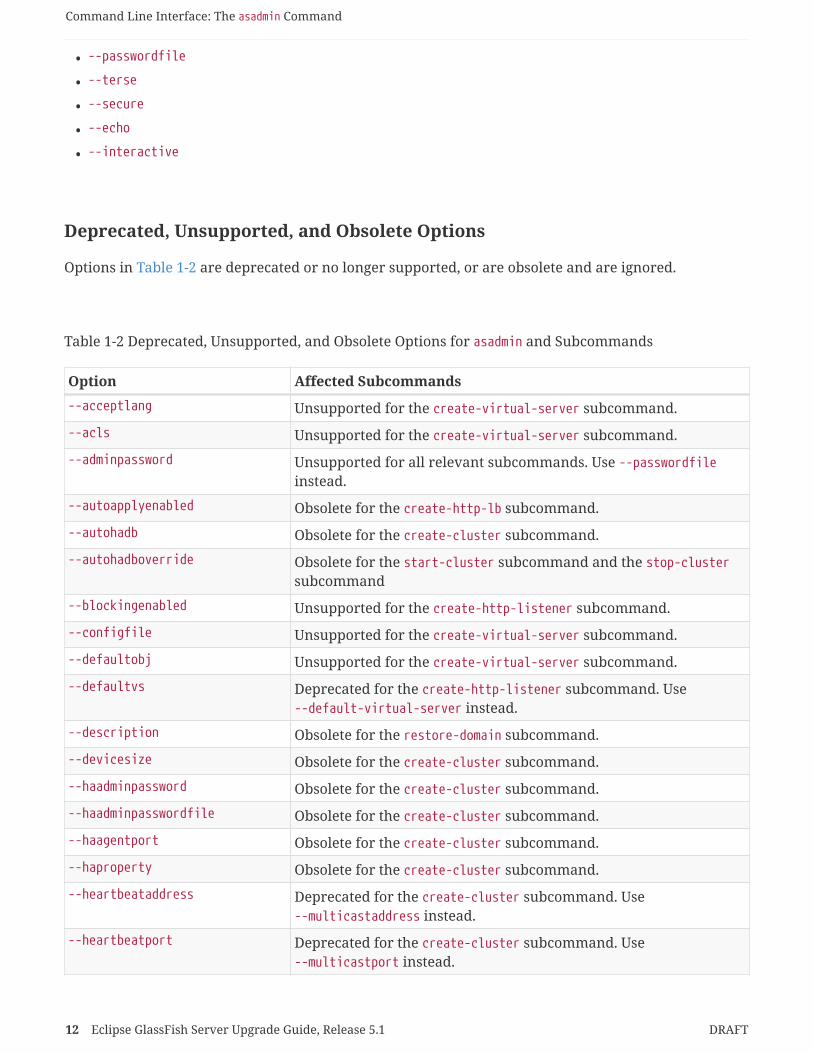
Deprecated, Unsupported, and Obsolete Options
Options in Table 1-2 are deprecated or no longer supported, or are obsolete and are ignored.
Table 1-2 Deprecated, Unsupported, and Obsolete Options for asadmin and Subcommands
Option Affected Subcommands
--acceptlang Unsupported for the create-virtual-server subcommand.
--acls Unsupported for the create-virtual-server subcommand.
--adminpassword Unsupported for all relevant subcommands. Use --passwordfileinstead.
--autoapplyenabled Obsolete for the create-http-lb subcommand.
--autohadb Obsolete for the create-cluster subcommand.
--autohadboverride Obsolete for the start-cluster subcommand and the stop-clustersubcommand
--blockingenabled Unsupported for the create-http-listener subcommand.
--configfile Unsupported for the create-virtual-server subcommand.
--defaultobj Unsupported for the create-virtual-server subcommand.
--defaultvs Deprecated for the create-http-listener subcommand. Use--default-virtual-server instead.
--description Obsolete for the restore-domain subcommand.
--devicesize Obsolete for the create-cluster subcommand.
--haadminpassword Obsolete for the create-cluster subcommand.
--haadminpasswordfile Obsolete for the create-cluster subcommand.
--haagentport Obsolete for the create-cluster subcommand.
--haproperty Obsolete for the create-cluster subcommand.
--heartbeataddress Deprecated for the create-cluster subcommand. Use--multicastaddress instead.
--heartbeatport Deprecated for the create-cluster subcommand. Use--multicastport instead.
Command Line Interface: The asadmin Command
12 Eclipse GlassFish Server Upgrade Guide, Release 5.1 DRAFT

Option Affected Subcommands
--hosts Obsolete for the create-cluster subcommand.
--ignoreDescriptorItem Replaced by the all lowercase option --ignoredescriptoritem in theset-web-context-param subcommand and the set-web-env-entrysubcommand.
--mime Unsupported for the create-virtual-server subcommand.
--password Unsupported for all remote subcommands. Use --passwordfileinstead.
--path Unsupported for the create-domain subcommand. Use --domaindirinstead.
--portbase Obsolete only for the create-cluster subcommand. This option isstill valid in other subcommands such as create-domain, create-instance, and create-local-instance.
--resourcetype Unsupported for all relevant subcommands. Use --restype instead.
--retrievefile Obsolete for the export-http-lb-config subcommand.
--setenv Obsolete for the start-instance subcommand.
--target Obsolete only for the following subcommands:
• create-connector-connection-pool
• create-resource-adapter-config
• delete-connector-connection-pool
• delete-connector-security-map
• delete-jdbc-connection-pool
• delete-resource-ref
Replaced by an operand in the list-custom-resources subcommandand the list-jndi-entries subcommand:
Applications That Use Java DBThe directory location of Java DB in GlassFish Server 4.0 has changed from its location in previousinstallations. Suppose that you have deployed applications that use Java DB databases in your previousserver installation, and you upgrade your existing installation to GlassFish Server 4.0. If you run theasadmin start-database command and successfully start Java DB, you could run into problems whiletrying to run applications that were deployed on your previous server installation.
To solve this problem, you can copy the databases directory from your previous installation to as-install`/databases`. Make sure the database is not running when you do this.
Applications That Use Java DB
DRAFT Eclipse GlassFish Server Upgrade Guide, Release 5.1 13

Alternatively, you can perform these steps:
1. Use the asadmin start-database command with the --dbhome option pointing to the databasesdirectory in the older version of Java DB. For example:
asadmin start-database --dbhome c:\glassfish\databases
1. After upgrade, start GlassFish Server 4.0.
Applications That Use PersistenceGlassFish Server 4.0 and 3.0.1, and Sun GlassFish Enterprise Server v3 use the persistence providerEclipseLink, while earlier versions used TopLink Essentials.
An application that uses the container to create an EntityManager or EntityManagerFactory and that usedToplink Essentials as its provider will work in GlassFish Server 4.0. The container creates anEntityManager if the application uses the @PersistenceContext annotation to inject an EntityManager, asin the following example:
@PersistenceContextEntityManager em;
The container creates an EntityManagerFactory if the application uses the @PersistenceUnit annotationto inject an EntityManagerFactory, as in the following example:
@PersistenceUnitEntityManagerFactory emf;
EntityManager em = emf.createEntityManager();
When the application is loaded, GlassFish Server 4.0 will translate the provider to EclipseLink and willalso translate toplink.* properties in the persistence.xml to corresponding EclipseLink properties. (Theactual persistence.xml file remains unchanged.)
Under certain circumstances, however, you may have to modify the persistence.xml file or your code:
• If your application uses Java SE code to create the EntityManagerFactory, you will need to changeyour persistence.xml file for both the provider element and for any toplink.* properties to use theEclipseLink equivalents. An application uses Java SE code if it uses thejavax.persistence.Persistence class to create the EntityManagerFactory, as in the following example:
Applications That Use Persistence
14 Eclipse GlassFish Server Upgrade Guide, Release 5.1 DRAFT
EntityManagerFactory emf = javax.persistence.Persistence.createEntityManagerFactory("Order");EntityManager em = emf.createEntityManager();
In this case, change the provider element to specify the following:
<provider>org.eclipse.persistence.jpa.PersistenceProvider</provider>
• If the application itself contains any TopLink Essentials-specific code and therefore contains caststo oracle.toplink., you must change the code to cast to org.eclipse.persistence.. You can usethe package renamer tool described on the Eclipse wiki (http://wiki.eclipse.org/EclipseLink/Examples/MigratingFromOracleTopLink#Rename_Packages) to do this. This tool is not provided withGlassFish Server 4.0, however, so you must obtain it from the EclipseLink project download site.
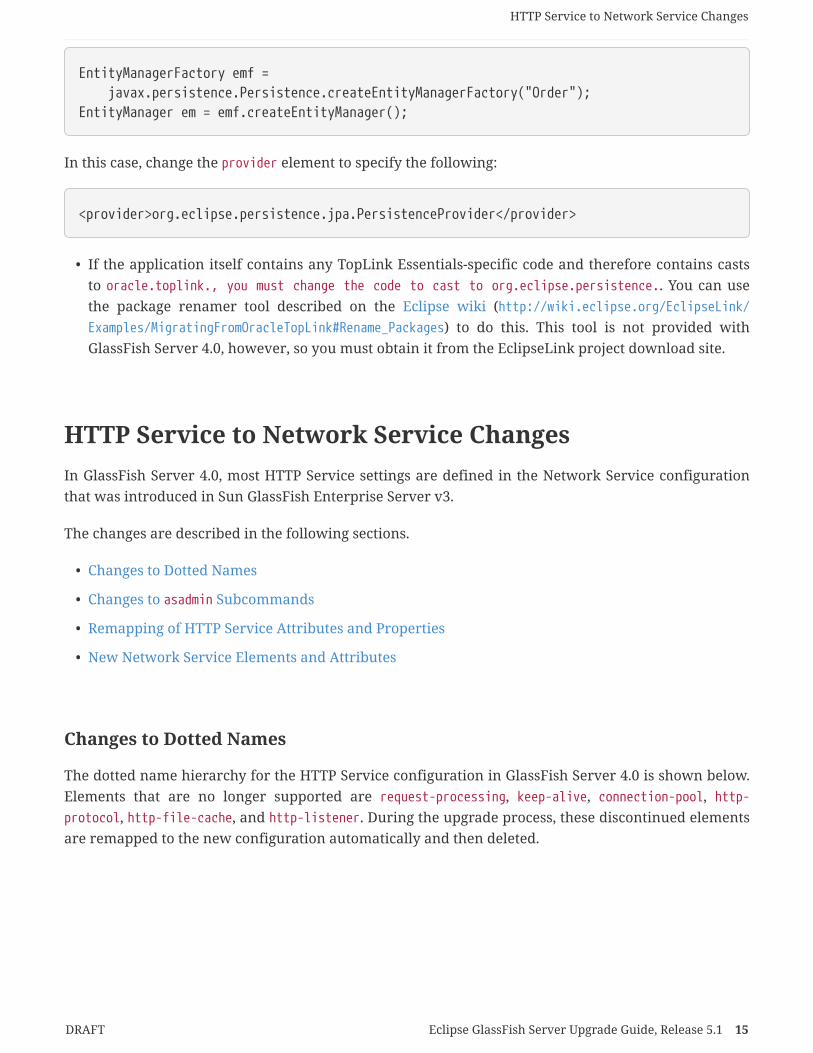
HTTP Service to Network Service ChangesIn GlassFish Server 4.0, most HTTP Service settings are defined in the Network Service configurationthat was introduced in Sun GlassFish Enterprise Server v3.
The changes are described in the following sections.
• Changes to Dotted Names
• Changes to asadmin Subcommands
• Remapping of HTTP Service Attributes and Properties
• New Network Service Elements and Attributes
Changes to Dotted Names
The dotted name hierarchy for the HTTP Service configuration in GlassFish Server 4.0 is shown below.Elements that are no longer supported are request-processing, keep-alive, connection-pool, http-protocol, http-file-cache, and http-listener. During the upgrade process, these discontinued elementsare remapped to the new configuration automatically and then deleted.
HTTP Service to Network Service Changes
DRAFT Eclipse GlassFish Server Upgrade Guide, Release 5.1 15
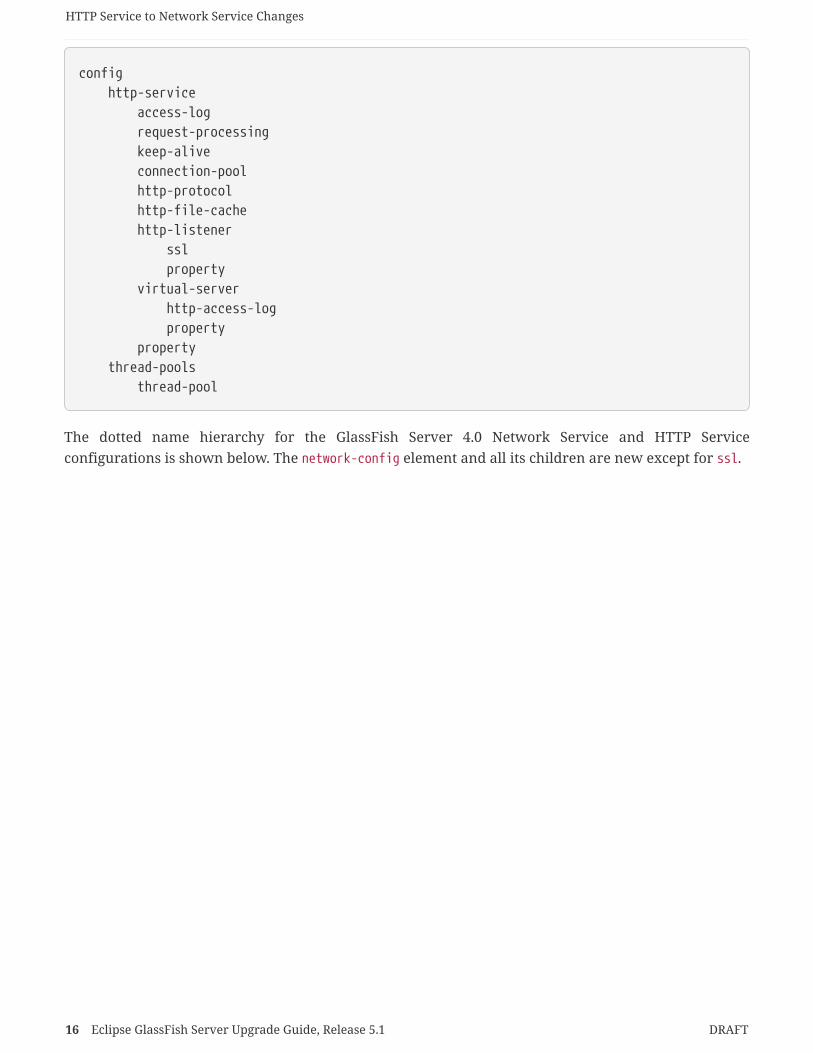
config http-service access-log request-processing keep-alive connection-pool http-protocol http-file-cache http-listener ssl property virtual-server http-access-log property property thread-pools thread-pool
The dotted name hierarchy for the GlassFish Server 4.0 Network Service and HTTP Serviceconfigurations is shown below. The network-config element and all its children are new except for ssl.
HTTP Service to Network Service Changes
16 Eclipse GlassFish Server Upgrade Guide, Release 5.1 DRAFT
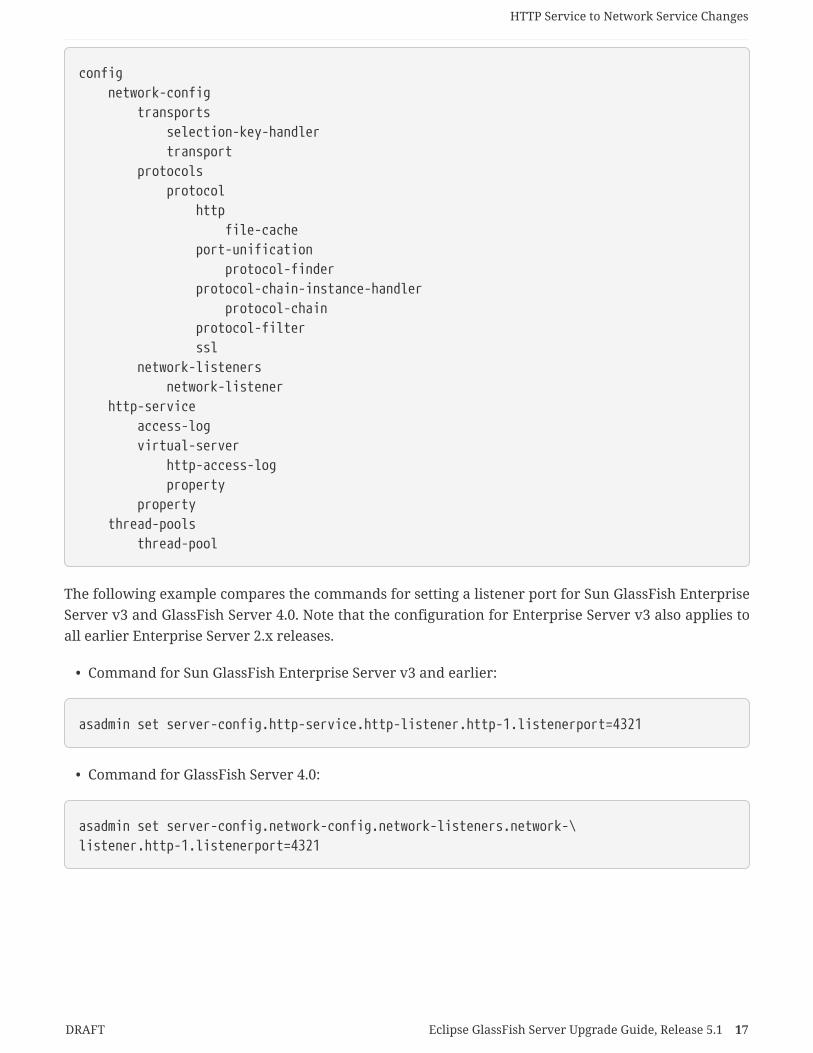
config network-config transports selection-key-handler transport protocols protocol http file-cache port-unification protocol-finder protocol-chain-instance-handler protocol-chain protocol-filter ssl network-listeners network-listener http-service access-log virtual-server http-access-log property property thread-pools thread-pool
The following example compares the commands for setting a listener port for Sun GlassFish EnterpriseServer v3 and GlassFish Server 4.0. Note that the configuration for Enterprise Server v3 also applies toall earlier Enterprise Server 2.x releases.
• Command for Sun GlassFish Enterprise Server v3 and earlier:
asadmin set server-config.http-service.http-listener.http-1.listenerport=4321
• Command for GlassFish Server 4.0:
asadmin set server-config.network-config.network-listeners.network-\listener.http-1.listenerport=4321
HTTP Service to Network Service Changes
DRAFT Eclipse GlassFish Server Upgrade Guide, Release 5.1 17
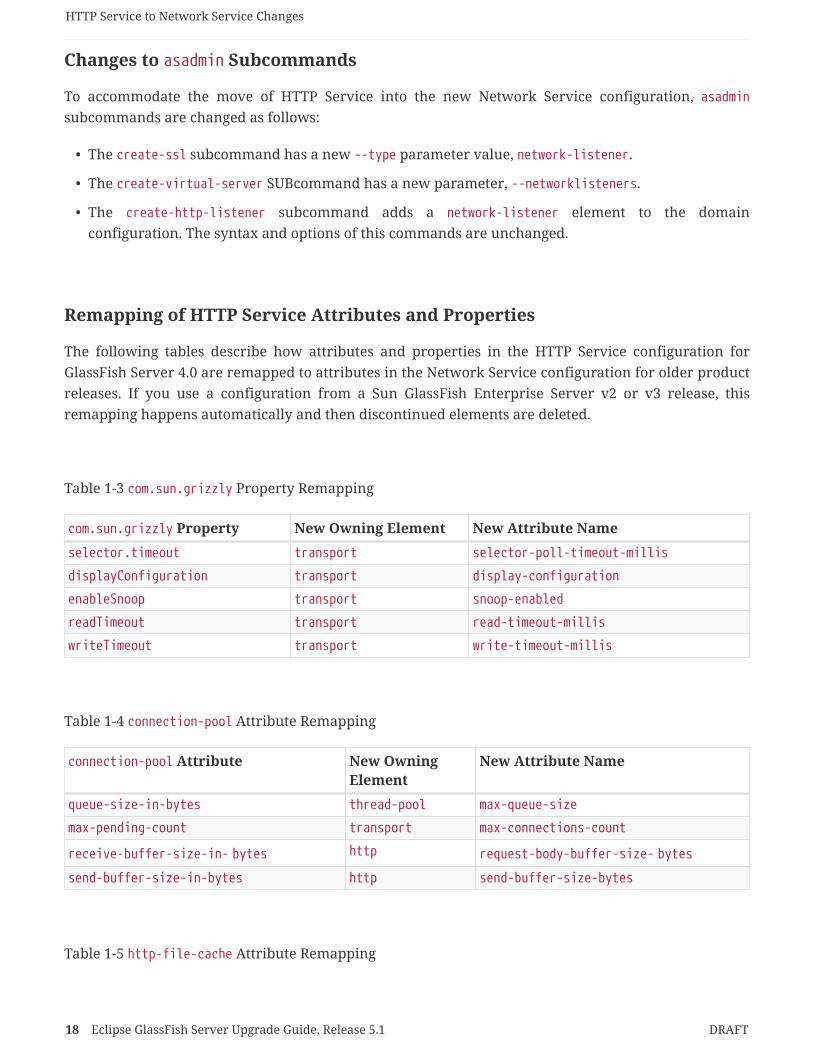
Changes to asadmin Subcommands
To accommodate the move of HTTP Service into the new Network Service configuration, asadminsubcommands are changed as follows:
• The create-ssl subcommand has a new --type parameter value, network-listener.
• The create-virtual-server SUBcommand has a new parameter, --networklisteners.
• The create-http-listener subcommand adds a network-listener element to the domainconfiguration. The syntax and options of this commands are unchanged.
Remapping of HTTP Service Attributes and Properties
The following tables describe how attributes and properties in the HTTP Service configuration forGlassFish Server 4.0 are remapped to attributes in the Network Service configuration for older productreleases. If you use a configuration from a Sun GlassFish Enterprise Server v2 or v3 release, thisremapping happens automatically and then discontinued elements are deleted.
Table 1-3 com.sun.grizzly Property Remapping
com.sun.grizzly Property New Owning Element New Attribute Name
selector.timeout transport selector-poll-timeout-millis
displayConfiguration transport display-configuration
enableSnoop transport snoop-enabled
readTimeout transport read-timeout-millis
writeTimeout transport write-timeout-millis
Table 1-4 connection-pool Attribute Remapping
connection-pool Attribute New OwningElement
New Attribute Name
queue-size-in-bytes thread-pool max-queue-size
max-pending-count transport max-connections-count
receive-buffer-size-in- bytes http request-body-buffer-size- bytes
send-buffer-size-in-bytes http send-buffer-size-bytes
Table 1-5 http-file-cache Attribute Remapping
HTTP Service to Network Service Changes
18 Eclipse GlassFish Server Upgrade Guide, Release 5.1 DRAFT
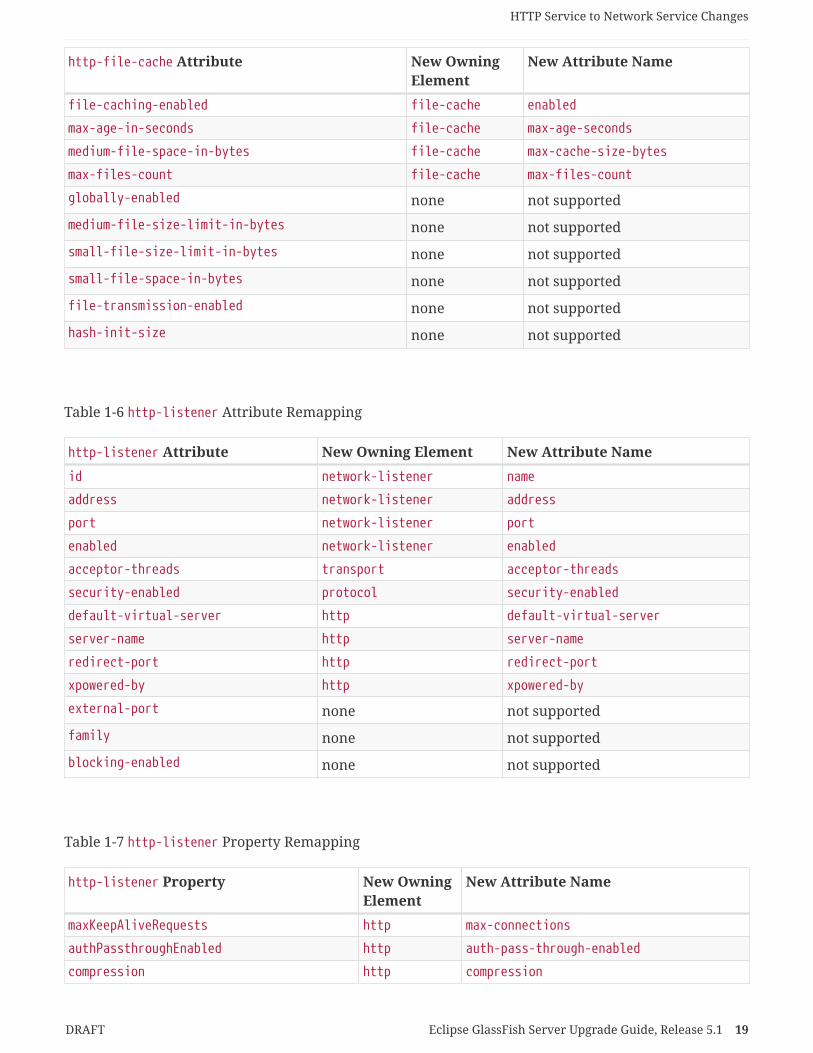
http-file-cache Attribute New OwningElement
New Attribute Name
file-caching-enabled file-cache enabled
max-age-in-seconds file-cache max-age-seconds
medium-file-space-in-bytes file-cache max-cache-size-bytes
max-files-count file-cache max-files-count
globally-enabled none not supported
medium-file-size-limit-in-bytes none not supported
small-file-size-limit-in-bytes none not supported
small-file-space-in-bytes none not supported
file-transmission-enabled none not supported
hash-init-size none not supported
Table 1-6 http-listener Attribute Remapping
http-listener Attribute New Owning Element New Attribute Name
id network-listener name
address network-listener address
port network-listener port
enabled network-listener enabled
acceptor-threads transport acceptor-threads
security-enabled protocol security-enabled
default-virtual-server http default-virtual-server
server-name http server-name
redirect-port http redirect-port
xpowered-by http xpowered-by
external-port none not supported
family none not supported
blocking-enabled none not supported
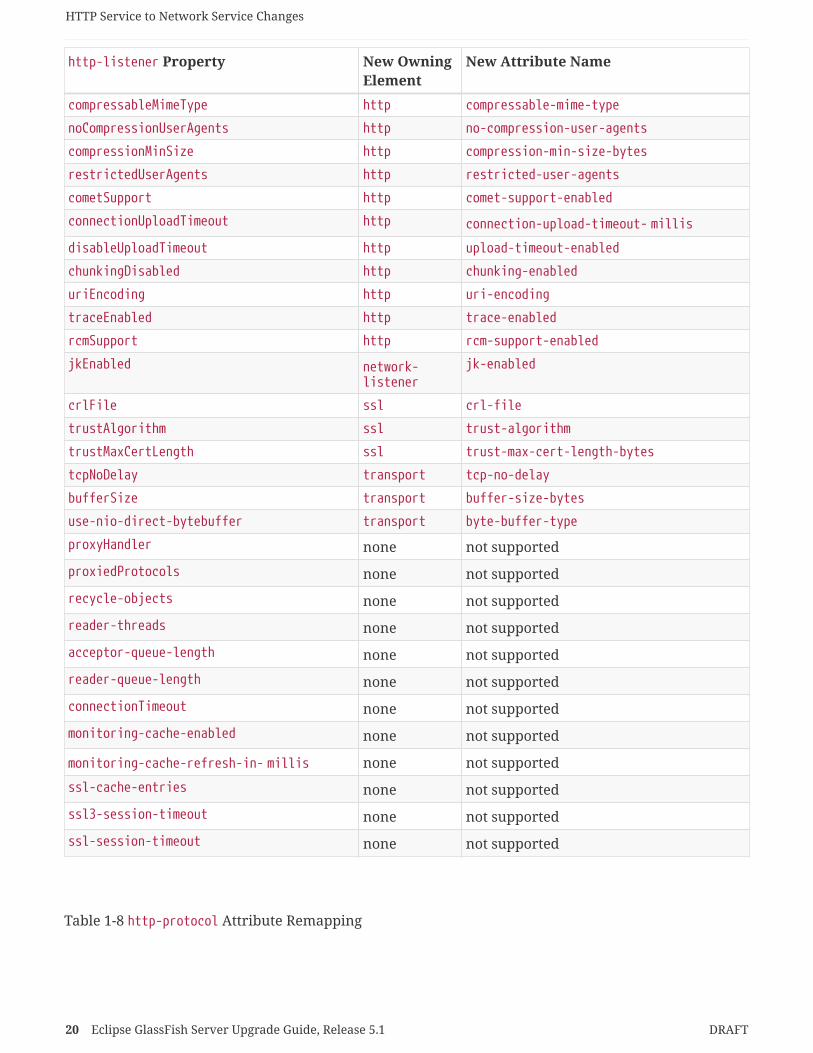
Table 1-7 http-listener Property Remapping
http-listener Property New OwningElement
New Attribute Name
maxKeepAliveRequests http max-connections
authPassthroughEnabled http auth-pass-through-enabled
compression http compression
HTTP Service to Network Service Changes
DRAFT Eclipse GlassFish Server Upgrade Guide, Release 5.1 19
http-listener Property New OwningElement
New Attribute Name
compressableMimeType http compressable-mime-type
noCompressionUserAgents http no-compression-user-agents
compressionMinSize http compression-min-size-bytes
restrictedUserAgents http restricted-user-agents
cometSupport http comet-support-enabled
connectionUploadTimeout http connection-upload-timeout- millis
disableUploadTimeout http upload-timeout-enabled
chunkingDisabled http chunking-enabled
uriEncoding http uri-encoding
traceEnabled http trace-enabled
rcmSupport http rcm-support-enabled
jkEnabled network-listener
jk-enabled
crlFile ssl crl-file
trustAlgorithm ssl trust-algorithm
trustMaxCertLength ssl trust-max-cert-length-bytes
tcpNoDelay transport tcp-no-delay
bufferSize transport buffer-size-bytes
use-nio-direct-bytebuffer transport byte-buffer-type
proxyHandler none not supported
proxiedProtocols none not supported
recycle-objects none not supported
reader-threads none not supported
acceptor-queue-length none not supported
reader-queue-length none not supported
connectionTimeout none not supported
monitoring-cache-enabled none not supported
monitoring-cache-refresh-in- millis none not supported
ssl-cache-entries none not supported
ssl3-session-timeout none not supported
ssl-session-timeout none not supported
Table 1-8 http-protocol Attribute Remapping
HTTP Service to Network Service Changes
20 Eclipse GlassFish Server Upgrade Guide, Release 5.1 DRAFT
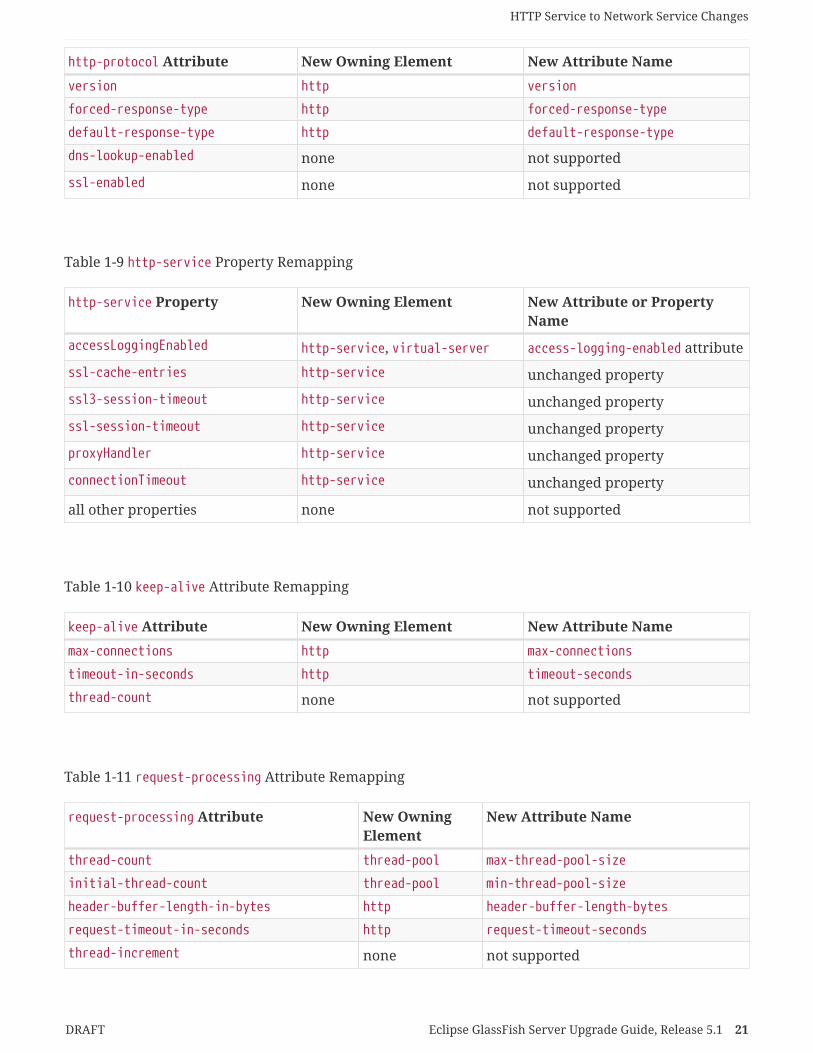
http-protocol Attribute New Owning Element New Attribute Name
version http version
forced-response-type http forced-response-type
default-response-type http default-response-type
dns-lookup-enabled none not supported
ssl-enabled none not supported
Table 1-9 http-service Property Remapping
http-service Property New Owning Element New Attribute or PropertyName
accessLoggingEnabled http-service, virtual-server access-logging-enabled attribute
ssl-cache-entries http-service unchanged property
ssl3-session-timeout http-service unchanged property
ssl-session-timeout http-service unchanged property
proxyHandler http-service unchanged property
connectionTimeout http-service unchanged property
all other properties none not supported
Table 1-10 keep-alive Attribute Remapping
keep-alive Attribute New Owning Element New Attribute Name
max-connections http max-connections
timeout-in-seconds http timeout-seconds
thread-count none not supported
Table 1-11 request-processing Attribute Remapping
request-processing Attribute New OwningElement
New Attribute Name
thread-count thread-pool max-thread-pool-size
initial-thread-count thread-pool min-thread-pool-size
header-buffer-length-in-bytes http header-buffer-length-bytes
request-timeout-in-seconds http request-timeout-seconds
thread-increment none not supported
HTTP Service to Network Service Changes
DRAFT Eclipse GlassFish Server Upgrade Guide, Release 5.1 21
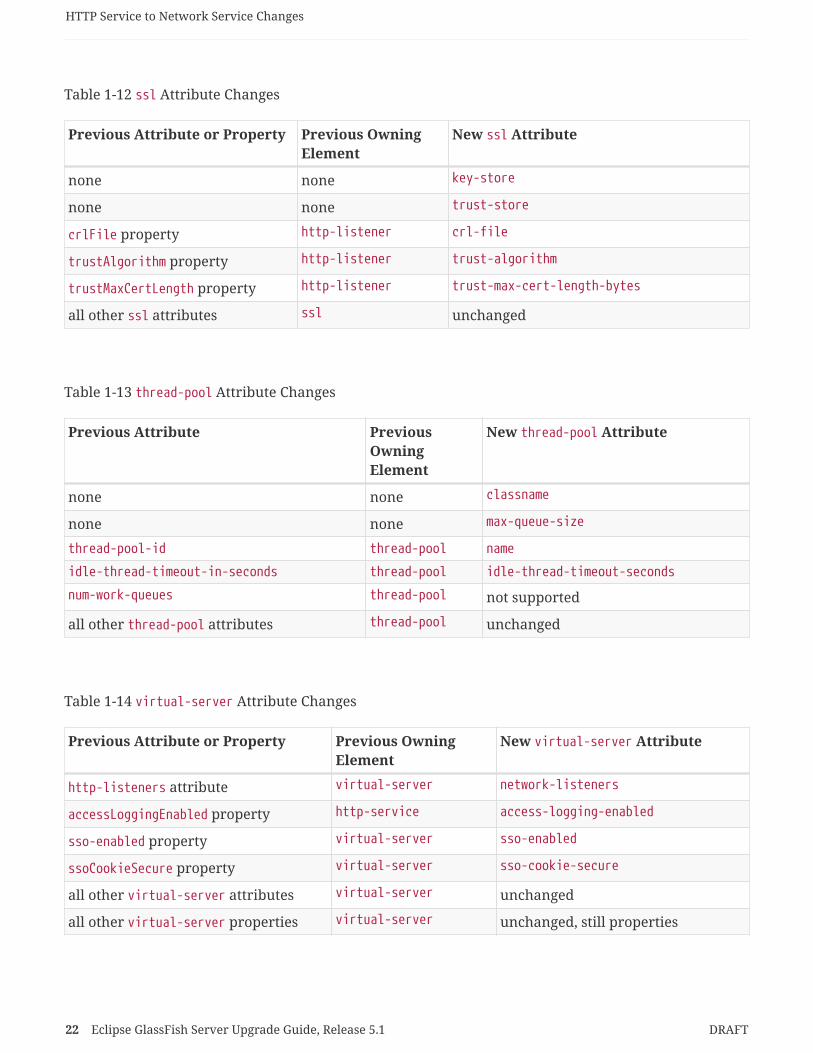
Table 1-12 ssl Attribute Changes
Previous Attribute or Property Previous OwningElement
New ssl Attribute
none none key-store
none none trust-store
crlFile property http-listener crl-file
trustAlgorithm property http-listener trust-algorithm
trustMaxCertLength property http-listener trust-max-cert-length-bytes
all other ssl attributes ssl unchanged
Table 1-13 thread-pool Attribute Changes
Previous Attribute PreviousOwningElement
New thread-pool Attribute
none none classname
none none max-queue-size
thread-pool-id thread-pool name
idle-thread-timeout-in-seconds thread-pool idle-thread-timeout-seconds
num-work-queues thread-pool not supported
all other thread-pool attributes thread-pool unchanged
Table 1-14 virtual-server Attribute Changes
Previous Attribute or Property Previous OwningElement
New virtual-server Attribute
http-listeners attribute virtual-server network-listeners
accessLoggingEnabled property http-service access-logging-enabled
sso-enabled property virtual-server sso-enabled
ssoCookieSecure property virtual-server sso-cookie-secure
all other virtual-server attributes virtual-server unchanged
all other virtual-server properties virtual-server unchanged, still properties
HTTP Service to Network Service Changes
22 Eclipse GlassFish Server Upgrade Guide, Release 5.1 DRAFT
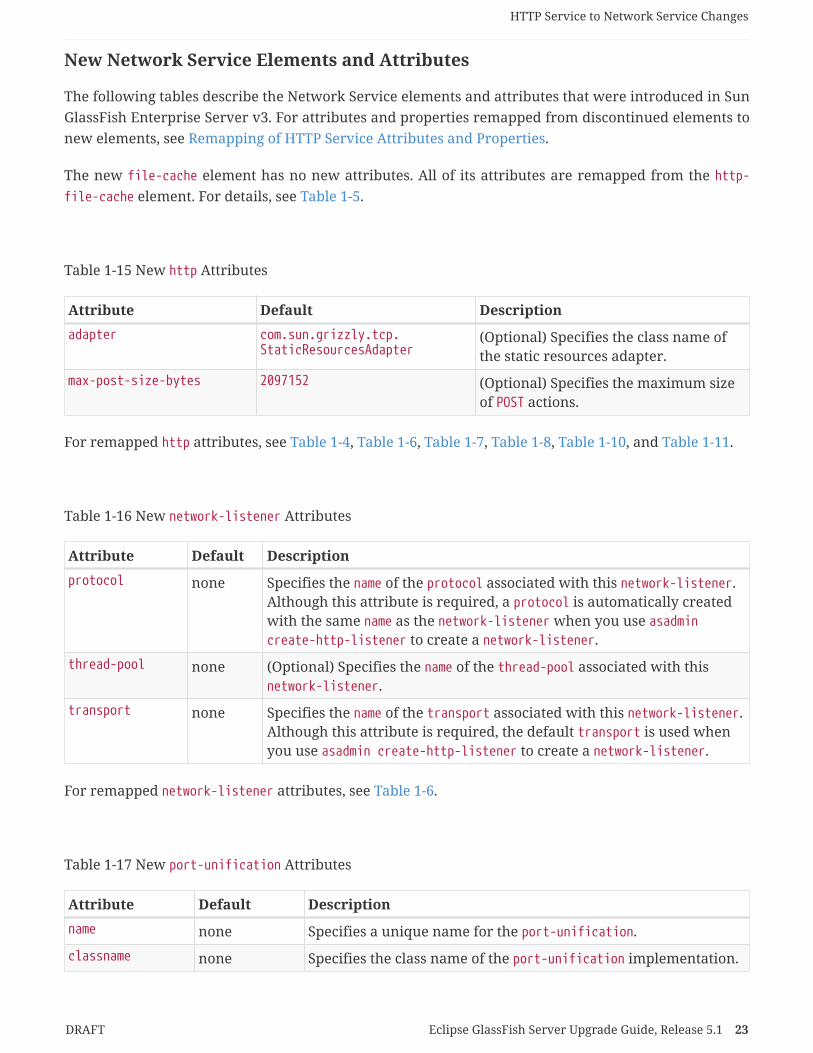
New Network Service Elements and Attributes
The following tables describe the Network Service elements and attributes that were introduced in SunGlassFish Enterprise Server v3. For attributes and properties remapped from discontinued elements tonew elements, see Remapping of HTTP Service Attributes and Properties.
The new file-cache element has no new attributes. All of its attributes are remapped from the http-file-cache element. For details, see Table 1-5.
Table 1-15 New http Attributes
Attribute Default Description
adapter com.sun.grizzly.tcp.StaticResourcesAdapter
(Optional) Specifies the class name ofthe static resources adapter.
max-post-size-bytes 2097152 (Optional) Specifies the maximum sizeof POST actions.
For remapped http attributes, see Table 1-4, Table 1-6, Table 1-7, Table 1-8, Table 1-10, and Table 1-11.
Table 1-16 New network-listener Attributes
Attribute Default Description
protocol none Specifies the name of the protocol associated with this network-listener.Although this attribute is required, a protocol is automatically createdwith the same name as the network-listener when you use asadmincreate-http-listener to create a network-listener.
thread-pool none (Optional) Specifies the name of the thread-pool associated with thisnetwork-listener.
transport none Specifies the name of the transport associated with this network-listener.Although this attribute is required, the default transport is used whenyou use asadmin create-http-listener to create a network-listener.
For remapped network-listener attributes, see Table 1-6.
Table 1-17 New port-unification Attributes
Attribute Default Description
name none Specifies a unique name for the port-unification.
classname none Specifies the class name of the port-unification implementation.
HTTP Service to Network Service Changes
DRAFT Eclipse GlassFish Server Upgrade Guide, Release 5.1 23
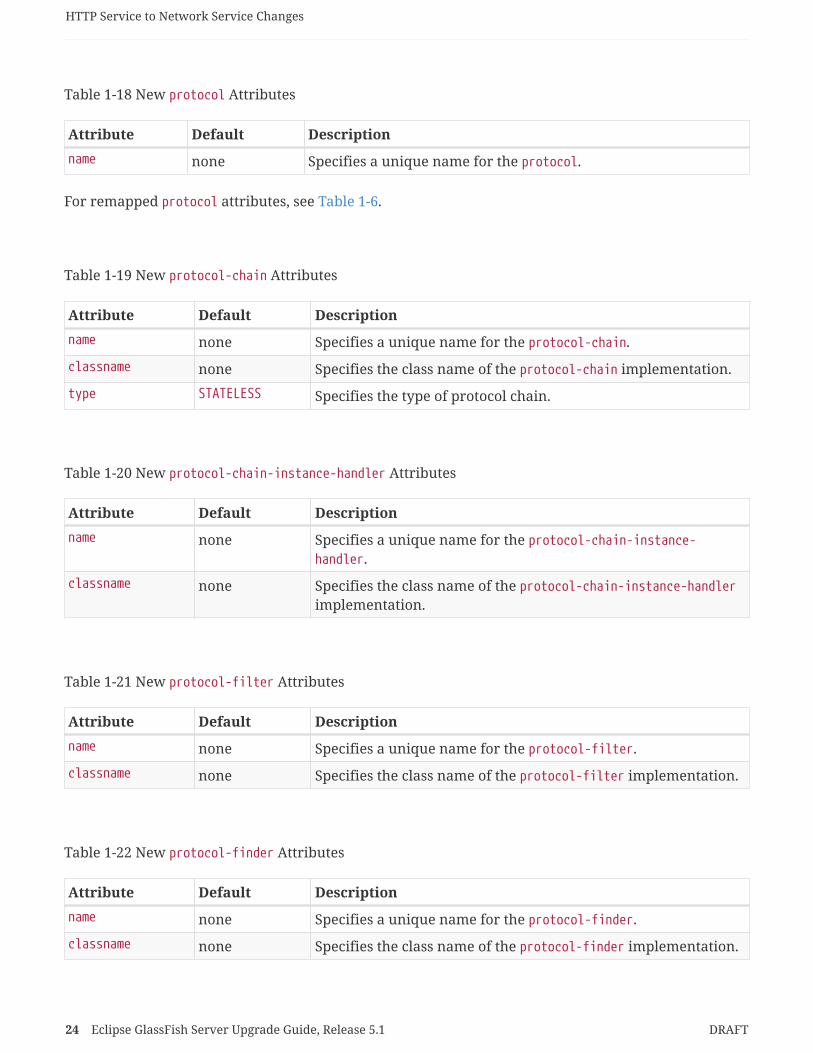
Table 1-18 New protocol Attributes
Attribute Default Description
name none Specifies a unique name for the protocol.
For remapped protocol attributes, see Table 1-6.
Table 1-19 New protocol-chain Attributes
Attribute Default Description
name none Specifies a unique name for the protocol-chain.
classname none Specifies the class name of the protocol-chain implementation.
type STATELESS Specifies the type of protocol chain.
Table 1-20 New protocol-chain-instance-handler Attributes
Attribute Default Description
name none Specifies a unique name for the protocol-chain-instance-handler.
classname none Specifies the class name of the protocol-chain-instance-handlerimplementation.
Table 1-21 New protocol-filter Attributes
Attribute Default Description
name none Specifies a unique name for the protocol-filter.
classname none Specifies the class name of the protocol-filter implementation.
Table 1-22 New protocol-finder Attributes
Attribute Default Description
name none Specifies a unique name for the protocol-finder.
classname none Specifies the class name of the protocol-finder implementation.
HTTP Service to Network Service Changes
24 Eclipse GlassFish Server Upgrade Guide, Release 5.1 DRAFT
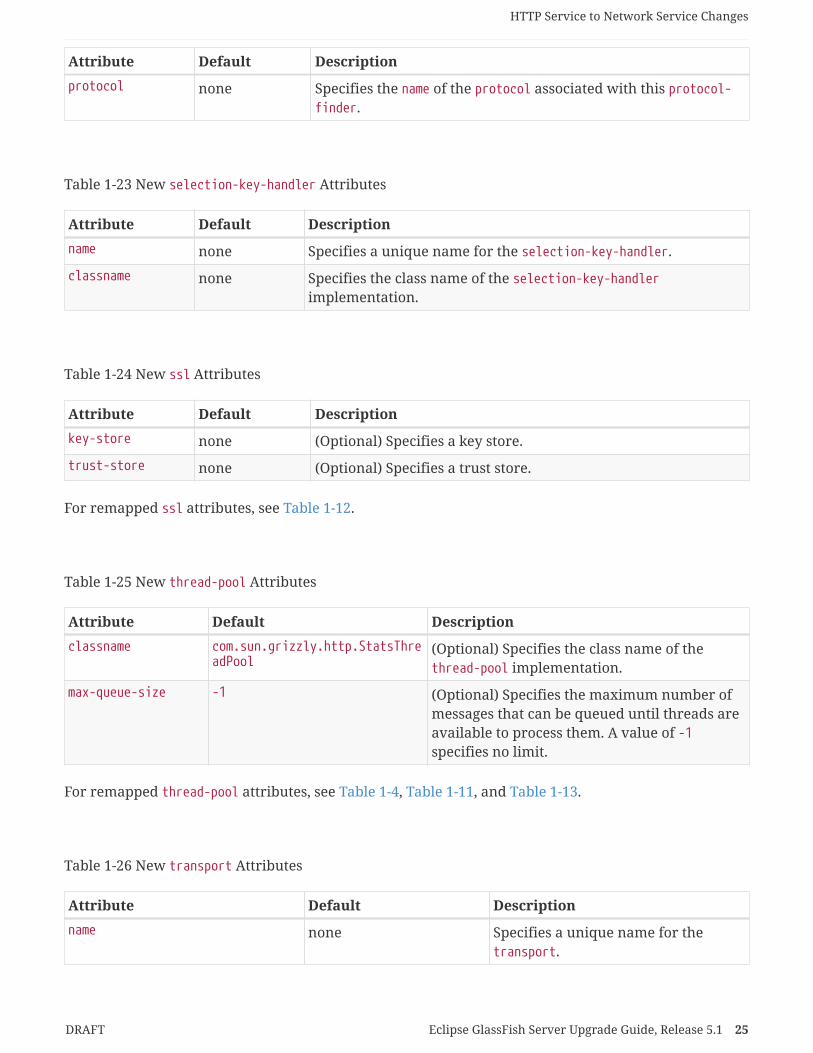
Attribute Default Description
protocol none Specifies the name of the protocol associated with this protocol-finder.
Table 1-23 New selection-key-handler Attributes
Attribute Default Description
name none Specifies a unique name for the selection-key-handler.
classname none Specifies the class name of the selection-key-handlerimplementation.
Table 1-24 New ssl Attributes
Attribute Default Description
key-store none (Optional) Specifies a key store.
trust-store none (Optional) Specifies a trust store.
For remapped ssl attributes, see Table 1-12.
Table 1-25 New thread-pool Attributes
Attribute Default Description
classname com.sun.grizzly.http.StatsThreadPool
(Optional) Specifies the class name of thethread-pool implementation.
max-queue-size -1 (Optional) Specifies the maximum number ofmessages that can be queued until threads areavailable to process them. A value of -1specifies no limit.
For remapped thread-pool attributes, see Table 1-4, Table 1-11, and Table 1-13.
Table 1-26 New transport Attributes
Attribute Default Description
name none Specifies a unique name for thetransport.
HTTP Service to Network Service Changes
DRAFT Eclipse GlassFish Server Upgrade Guide, Release 5.1 25

Attribute Default Description
classname com.sun.grizzly.TCPSelectorHandler
(Optional) Specifies the class name ofthe transport implementation.
selection-key-handler none (Optional) Specifies the name of theselection-key-handler associated withthis transport.
idle-key-timeout-seconds 30 (Optional) Specifies the idle keytimeout.
For remapped transport attributes, see Table 1-3, Table 1-4, Table 1-6, and Table 1-7.
NSS Cryptographic Token SupportGlassFish Server 4.0 does not support Network Security Services (NSS) cryptographic tokens. Whenupgrading to GlassFish Server 4.0 from Enterprise Server v2.x, additional manual configuration stepsmust be performed. These steps are explained later in this guide, in Upgrading Installations That UseNSS Cryptographic Tokens.
NSS Cryptographic Token Support
26 Eclipse GlassFish Server Upgrade Guide, Release 5.1 DRAFT
2 Upgrading an Installation of ApplicationServer or GlassFish ServerThe Upgrade Tool that is bundled with GlassFish Server 4.0 replicates the configuration of a previouslyinstalled server in the target installation. The Upgrade Tool assists in upgrading the configuration andapplications from an earlier version of the Application Server or GlassFish Server to GlassFish Server4.0.
In addition to Upgrade Tool, there are three Update Center tools that can be used to perform an in-place upgrade to GlassFish Server 4.0 from GlassFish Server 3.1.1, 3.1, 3.0.1, and Enterprise Server v3.These three Update Center tools are:
• Update Tool
• Software Update Notifier
• The pkg command-line utility
Upgrade Tool and the three Update Center tools are explained later in this chapter.
To view a list of the older versions from which you can upgrade, see Supported Releases for Upgrade toGlassFish Server 4.0.
The following topics are addressed here:
• Upgrade Overview
• Performing a Side-By-Side Upgrade With Upgrade Tool
• Performing an In-Place Upgrade With the Update Center Tools
• Upgrading Installations That Use NSS Cryptographic Tokens
• Upgrading Clusters and Node Agent Configurations
• Correcting Potential Upgrade Problems
Upgrade OverviewThe subsections that follow provide information that you will need when you perform an upgrade.
The following topics are addressed here:
• Upgrade Paths
• Upgrade Terminology
• Summary of Upgrade Tools and Procedures
Upgrade Overview
DRAFT Eclipse GlassFish Server Upgrade Guide, Release 5.1 27
• Supported Releases for Upgrade to GlassFish Server 4.0
• Upgrading From Version 8.x or Older Product Releases
• Upgrading GlassFish Server Inside a Closed Network
Upgrade Paths
There are two general paths you can use when upgrading to GlassFish Server 4.0:
Side-by-Side
A side-by-side upgrade means that the new GlassFish Server release is installed in a differentdirectory than the release from which you are upgrading.In this scenario, you perform the following steps:
1. Perform a basic installation of GlassFish Server 4.0 in a location other than the one being usedfor the older product.
2. Use Upgrade Tool to migrate the old configurations and applications to the new GlassFish Server4.0 directories.
3. Test the new GlassFish Server installation to make sure everything is working properly.
4. When you are satisfied that the new installation works properly, modify your productionenvironment to use the new installation.The side-by-side upgrade path is typically used for live production environments because itallows you to thoroughly test the new GlassFish Server installation before bringing it intoproduction.
In-Place
An in-place upgrade means that the new GlassFish Server release is installed directly over and intothe same directory as the previous product release. The existing configuration is reused in theupdated installation.In this scenario, you simply use Update Tool, the pkg utility, or the Update Notifier in your oldinstallation to overwrite the old installation with the new GlassFish Server 4.0 product.Performing an in-place upgrade is easier than performing a side-by-side upgrade, but you lose theability to switch back and forth between the old and new installations. There is also no way torevert an in-place upgrade back to the previous product version. Because of these limitations, in-place upgrades are typically only used by developers and for non-production GlassFish Serverdeployments.Note also that it is only possible to perform an in-place upgrade when upgrading from GlassFishServer 3.1.1, 3.1, 3.0.1, or v3. If you are upgrading from product versions prior to 3x, you mustperform a side-by-side upgrade.
For a more detailed overview, see Summary of Upgrade Tools and Procedures.
Upgrade Overview
28 Eclipse GlassFish Server Upgrade Guide, Release 5.1 DRAFT

Upgrade Terminology
The following are important terms related to the upgrade process.
Source Domain Directory
The directory of the server domain from which you are upgrading to the new version (for example,c:\glassfish\domains\domain1).
Target Root Domain’s Directory
The directory where domains are created on the server to which you are upgrading (for example,c:\glassfish3\glassfish\domains).
Master Password
The SSL certificate database password used in operations such as GlassFish Server startup. Thisterm refers to the master password of the installation from which you want to upgrade. You need tospecify this password if you have changed it from the default value of changeit.
Summary of Upgrade Tools and Procedures
There are several tools you can use to upgrade from an earlier GlassFish Server or Enterprise Serverinstallation to GlassFish Server 4.0. The general procedures for upgrading to GlassFish Server 4.0 varydepending on which tool you use and the product version from which you are upgrading.
The following topics are addressed here:
• Summary of Tools for Performing an Upgrade
• Summary of Procedure for Upgrading With Upgrade Tool
• Summary of Procedure for Upgrading With Update Tool
• Summary of Procedure for Upgrading With the Software Update Notifier
• Summary of Procedure for Upgrading With the pkg Utility
Summary of Tools for Performing an Upgrade
There are several tools you can use to perform an upgrade to GlassFish Server 4.0 are described below.
• Upgrade Tool
• Update Tool and the pkg Utility
• Software Update Notifier
Upgrade Overview
DRAFT Eclipse GlassFish Server Upgrade Guide, Release 5.1 29
Upgrade Tool
The GlassFish Server Upgrade Tool is tended solely for performing side-by-side upgrades from anycompatible older product version to GlassFish Server 4.0.
Upgrade Tool provides a number of features that aid in the migration of older configurations andapplications to a new GlassFish Server 4.0 installation. These features are described in more detail inUpgrade Tool Functionality.
In GlassFish Server 4.0 Upgrade Tool is installed in the as-install`/bin` directory.
Note:
Upgrade Tool is the only tool you can use when upgrading to GlassFish Server 4.0 from productversions prior to GlassFish Server 3.0.1 or Enterprise Server v3.
See Summary of Procedure for Upgrading With Upgrade Tool for an overview of the general procedurefor performing an upgrade with Upgrade Tool.
Update Tool and the pkg Utility
The GlassFish Server Update Tool is a graphical utility that is typically used for the day-to-daymaintenance of GlassFish Server components and additional features. For example, Update Tool can beused to update GlassFish Server components or install additional features such as OSGi Admin Console.
The command-line counterpart to Update Tool is the pkg utility. While the pkg utility does not provideexactly the same set of features as Update Tool, for the purposes of upgrading to GlassFish Server 4.0,the pkg utility and Update Tool feature sets are almost identical.
In addition to day-to-day maintenance tasks, Update Tool and the pkg utility can be used to perform anin-place upgrade of an entire GlassFish Server 3.0.1 or Enterprise Server v3 installation to the GlassFishServer 4.0 or later release.
In GlassFish Server 4.0 Update Tool is installed in the as-install-parent`/bin` directory.
Note:
It is not possible to use Update Tool to upgrade from GlassFish Server or Enterprise Server versionsprior to 3x. For these older versions, you must use the Upgrade Tool, described in Upgrade Tool.
See Summary of Procedure for Upgrading With Update Tool for an overview of the general procedurefor performing an upgrade with Update Tool. For more information about Update Tool in general, see"Update Tool" in GlassFish Server Open Source Edition Administration Guide.
Upgrade Overview
30 Eclipse GlassFish Server Upgrade Guide, Release 5.1 DRAFT
Software Update Notifier
The GlassFish Server Software Update Notifier is similar to Update Tool and the pkg utility in that itenables you to perform an in-place upgrade from GlassFish Server 3.1.1, 3.1, 3.0.1, or Enterprise Serverv3. As with Update Tool and the pkg utility, you cannot use the Software Update tool to upgrade fromproduct releases prior 3.0.1 and v3.
The Software Update Notifier is distributed as a configuration option during GlassFish Server 4.0, 3.0.1,and Enterprise Server v3 installation. If installed and enabled, the Software Update Notifier monitorsyour installation and pops up a notification balloon when updates or upgrades are available for yourproduct.
See Summary of Procedure for Upgrading With the Software Update Notifier for an overview of thegeneral procedure for performing an upgrade with the Software Update Notifier. For moreinformation about the Update Notifier, refer to the Update Tool online help.
Summary of Procedure for Upgrading With Upgrade Tool
The general procedure for using Upgrade Tool to perform an upgrade to GlassFish Server 4.0 from anycompatible older version of GlassFish Server or Enterprise Server comprises the following steps:
1. Download GlassFish Server 4.0 and perform a Standard Installation, as described in "To InstallGlassFish Server Using the Self-Extracting File" in GlassFish Server Open Source Edition InstallationGuide.
2. Copy any custom or third-party libraries from the older installation to their correspondinglocations in the new GlassFish Server 4.0 installation directories. Note that you should only copycustom or third-party libraries here. Do not copy an libraries from the actual domain that will beupgraded.
3. Run the asupgrade command from the new GlassFish Server 4.0 as-install`/bin` directory.
4. Start the new GlassFish Server 4.0 DAS with the asadmin start-domain subcommand.
This procedure is described in more detail in Performing a Side-By-Side Upgrade With Upgrade Tool.
Summary of Procedure for Upgrading With Update Tool
The general procedure for using Update Tool to perform an upgrade to GlassFish Server 4.0 fromGlassFish Server 3.0.1 or Enterprise Server v3 comprises the following steps:
1. Manually stop all server instances and the domain.
2. Launch Update Tool by using the as-install-parent`/bin/updatetool` command in the older product
Upgrade Overview
DRAFT Eclipse GlassFish Server Upgrade Guide, Release 5.1 31
directory.
3. In Update Tool, select and install the latest GlassFish Server product release. This updates yourserver to the 4.0 release.
4. Upgrade the domain by running the asadmin start-domain --upgrade subcommand. This performsthe upgrade and then shuts down the DAS.
5. Restart the DAS normally with the with the asadmin start-domain subcommand.
This procedure is described in more detail in To Upgrade Using the Update Tool GUI.
Summary of Procedure for Upgrading With the Software Update Notifier
The general procedure for using the Software Update Notifier to perform an upgrade to GlassFishServer 4.0 from GlassFish Server3.0.1 or Enterprise Server v3 comprises the following steps:
1. Wait for the Software Update Notifier to pop up a notification balloon informing you that updatesare available.
2. Click the balloon prompt to launch the Software Update GUI.
3. Manually stop all server instances and the domain.
4. Use the Software Update GUI to perform the upgrade. This updates your server to the 4.0 release.
5. Upgrade the domain by running the asadmin start-domain --upgrade subcommand. This performsthe upgrade and then shuts down the DAS.
6. Restart the upgraded DAS normally with the with the asadmin start-domain subcommand.
This procedure is described in more detail in To Upgrade Using the Software Update Notifier.
Summary of Procedure for Upgrading With the pkg Utility
The general procedure for using the pkg utility to perform an upgrade to GlassFish Server 4.0 fromGlassFish Server3.0.1 or Enterprise Server v3 comprises the following steps:
1. Manually stop all server instances and the domain.
2. Run the as-install-parent`/bin/pkg` command with the desired options in the older productdirectory. This updates your server to the 4.0 release.
3. Upgrade the domain by running the asadmin start-domain --upgrade subcommand. This performsthe upgrade and then shuts down the DAS.
4. Restart the upgraded DAS normally with the with the asadmin start-domain subcommand.
This procedure is described in more detail in To Upgrade From the Command Line Using the pkgUtility.
Upgrade Overview
32 Eclipse GlassFish Server Upgrade Guide, Release 5.1 DRAFT
Supported Releases for Upgrade to GlassFish Server 4.0
Upgrades to GlassFish Server 4.0 are supported from the following earlier GlassFish Server productreleases:
• Sun GlassFish Enterprise Server v2.1.1
• Sun GlassFish Enterprise Server v3
• GlassFish Server Open Source Edition 3.0.1
• GlassFish Server Open Source Edition 3.1
• GlassFish Server Open Source Edition 3.1.1
Upgrading From Version 8.x or Older Product Releases
It is not possible to upgrade to GlassFish Server 4.0 directly from Sun GlassFish Enterprise Server 8.x orolder product releases.
To upgrade from a product release that is older than any of those listed in Supported Releases forUpgrade to GlassFish Server 4.0, you must first upgrade your older product release to one of thereleases that are supported for upgrade to GlassFish Server 4.0.
For example, to upgrade from any Enterprise Server 8.x release, you first need to upgrade that olderrelease to Enterprise Server 2.1.1. That is, your upgrade path would be as follows:
Enterprise Server 8.x???Enterprise Server 2.1.1???GlassFish Server 4.0
Sun GlassFish Enterprise Server 2.1.1 is available for download from the GlassFish CommunityDownloads (http://glassfish.java.net/public/downloadsindex.html) page. Instructions for upgrading toEnterprise Server 2.1.1 are provided in Sun GlassFish Enterprise Server 2.1.1 Upgrade Guide(http://docs.oracle.com/cd/E19879-01/821-0180/index.html).
After upgrading your older Enterprise Server installation to Enterprise Server 2.1.1, you can proceednormally with the instructions in this guide to complete the upgrade to GlassFish Server 4.0.
Upgrading GlassFish Server Inside a Closed Network
For instructions on upgrading a GlassFish Server installation in an environment where Internet accessis not available, see "Extending and Updating GlassFish Server Inside a Closed Network" in GlassFishServer Open Source Edition Administration Guide.
Upgrade Overview
DRAFT Eclipse GlassFish Server Upgrade Guide, Release 5.1 33
Performing a Side-By-Side Upgrade With Upgrade ToolThis section explains how to use Upgrade Tool to perform a side-by-side upgrade to GlassFish Server4.0 from any compatible older product release.
The following topics are addressed here:
• Upgrade Tool Summary
• Upgrade Tool Functionality
• To Upgrade From the Command Line Using Upgrade Tool
• To Upgrade Using the Upgrade Tool Wizard
Upgrade Tool Summary
The Upgrade Tool upgrades your domain configurations and deployed applications. When you use theUpgrade Tool, the source server and the target server are normally installed on the same machine, butunder different install locations. Both server file systems must be accessible from the system on whichyou perform the upgrade.
To perform the upgrade, the user who runs the upgrade needs to have read permissions for the sourceand target directories and write permission for the target directory.
You can perform an upgrade using Upgrade Tool in the following ways:
• To Upgrade From the Command Line Using Upgrade Tool
• To Upgrade Using the Upgrade Tool Wizard
Upgrade Tool Functionality
The Upgrade Tool migrates the configurations and deployed applications from an earlier version ofSun Java System Application Server or Sun GlassFishEnterprise Server to the current version. Databasemigrations or conversions are not part of this upgrade process.
Briefly, the Upgrade Tool performs the following steps:
• Copies the older source domain directory to the new target domains directory.
• Calls the asadmin start-domain --upgrade command to migrate the source configurations to the newtarget GlassFish Server installation.
Performing a Side-By-Side Upgrade With Upgrade Tool
34 Eclipse GlassFish Server Upgrade Guide, Release 5.1 DRAFT
• Sends all asadmin command output to the screen and to the upgrade.log file, and sends all serveroutput to the server.log file.
Additional Upgrade Tool functions are explained in the following sections:
• Migration of Deployed Applications
• Upgrade of Clusters
• Upgrade Verification
Migration of Deployed Applications
Application archives (EAR files) and component archives (JAR, WAR, and RAR files) that are deployedin the source server do not require any modification to run on GlassFish Server Open Source Edition4.0. Components that may have incompatibilities are deployed on GlassFish Server 4.0 with thecompatibility property set to v2 and will run without change on GlassFish Server 4.0. You may,however, want to consider modifying the applications to conform to Java EE 6 requirements.
The Java EE 6 platform specification imposes stricter requirements than Java EE 5 did on which JARfiles can be visible to various modules within an EAR file. In particular, application clients must nothave access to EJB JAR files or other JAR files in the EAR file unless they use a Class-Path header in themanifest file, or unless references use the standard Java SE mechanisms (extensions, for example), oruse the Java EE library-directory mechanism. Setting the library-directory property to v2 removesthese Java EE 6 restrictions.
Applications and components that are deployed in the source server are deployed on the target serverduring the upgrade. Applications that do not deploy successfully on the target server must be deployedmanually on the target server by the user.
If a domain contains information about a deployed application and the installed applicationcomponents do not agree with the configuration information, the configuration is migratedunchanged, without any attempt to reconfigure the incorrect configurations.
Upgrade of Clusters
When upgrading from a clustered configuration, the older cluster information is retained in a newdomain.xml file in the GlassFish Server 4.0 installation directories. However, it is still necessary tomanually re-create the server instances that are contained in the clusters. This procedure is explainedin Upgrading Clusters and Node Agent Configurations.
Performing a Side-By-Side Upgrade With Upgrade Tool
DRAFT Eclipse GlassFish Server Upgrade Guide, Release 5.1 35
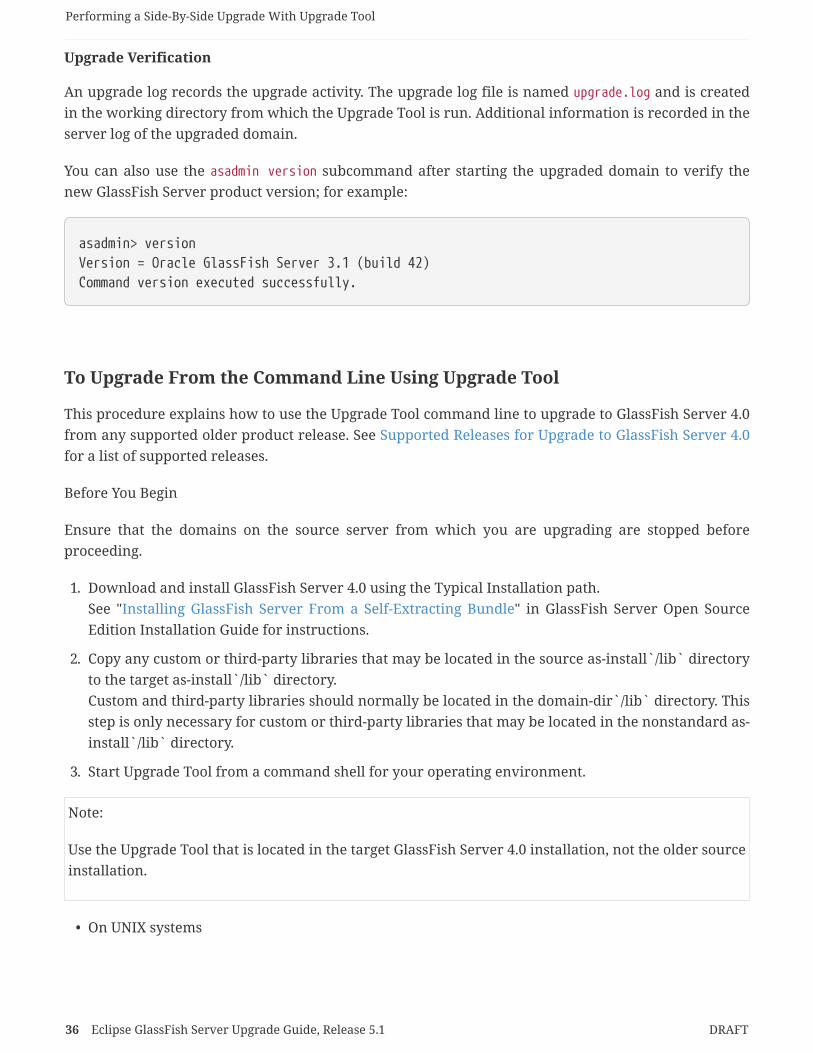
Upgrade Verification
An upgrade log records the upgrade activity. The upgrade log file is named upgrade.log and is createdin the working directory from which the Upgrade Tool is run. Additional information is recorded in theserver log of the upgraded domain.
You can also use the asadmin version subcommand after starting the upgraded domain to verify thenew GlassFish Server product version; for example:
asadmin> versionVersion = Oracle GlassFish Server 3.1 (build 42)Command version executed successfully.
To Upgrade From the Command Line Using Upgrade Tool
This procedure explains how to use the Upgrade Tool command line to upgrade to GlassFish Server 4.0from any supported older product release. See Supported Releases for Upgrade to GlassFish Server 4.0for a list of supported releases.
Before You Begin
Ensure that the domains on the source server from which you are upgrading are stopped beforeproceeding.
1. Download and install GlassFish Server 4.0 using the Typical Installation path.See "Installing GlassFish Server From a Self-Extracting Bundle" in GlassFish Server Open SourceEdition Installation Guide for instructions.
2. Copy any custom or third-party libraries that may be located in the source as-install`/lib` directoryto the target as-install`/lib` directory.Custom and third-party libraries should normally be located in the domain-dir`/lib` directory. Thisstep is only necessary for custom or third-party libraries that may be located in the nonstandard as-install`/lib` directory.
3. Start Upgrade Tool from a command shell for your operating environment.
Note:
Use the Upgrade Tool that is located in the target GlassFish Server 4.0 installation, not the older sourceinstallation.
• On UNIX systems
Performing a Side-By-Side Upgrade With Upgrade Tool
36 Eclipse GlassFish Server Upgrade Guide, Release 5.1 DRAFT
as-install/bin/asupgrade -c
• On Windows systems
as-install\bin\asupgrade.bat -c
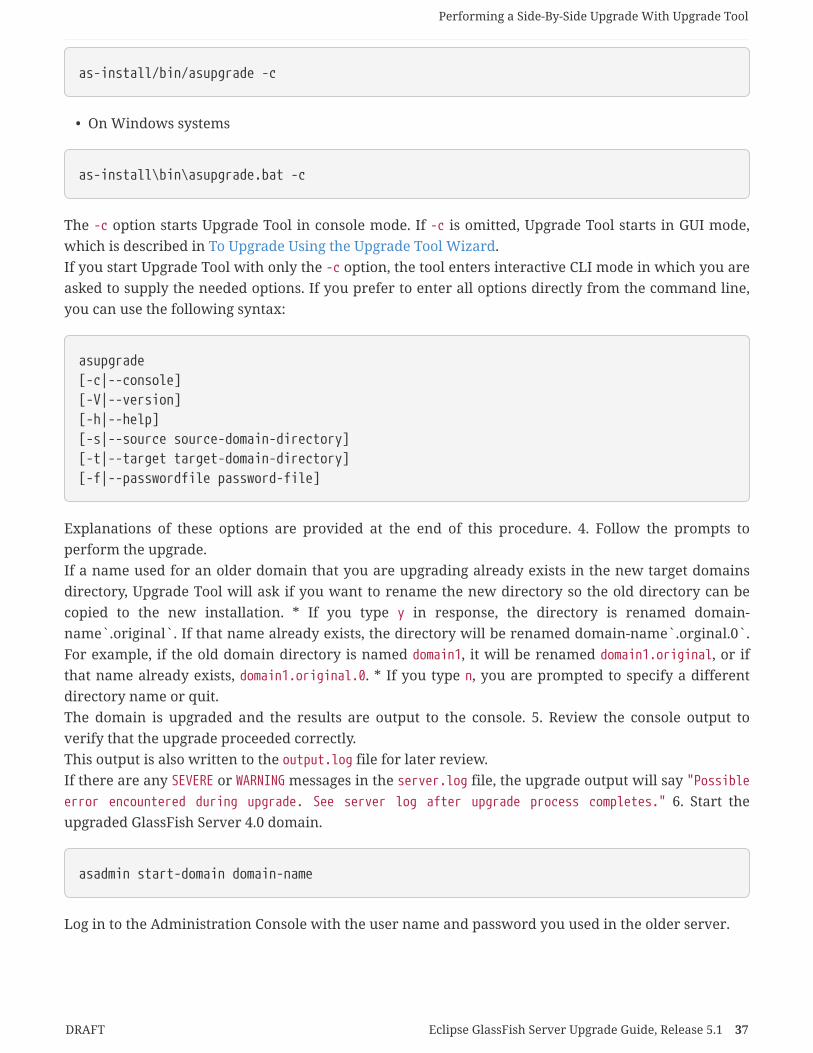
The -c option starts Upgrade Tool in console mode. If -c is omitted, Upgrade Tool starts in GUI mode,which is described in To Upgrade Using the Upgrade Tool Wizard.If you start Upgrade Tool with only the -c option, the tool enters interactive CLI mode in which you areasked to supply the needed options. If you prefer to enter all options directly from the command line,you can use the following syntax:
asupgrade[-c|--console][-V|--version][-h|--help][-s|--source source-domain-directory][-t|--target target-domain-directory][-f|--passwordfile password-file]
Explanations of these options are provided at the end of this procedure. 4. Follow the prompts toperform the upgrade.If a name used for an older domain that you are upgrading already exists in the new target domainsdirectory, Upgrade Tool will ask if you want to rename the new directory so the old directory can becopied to the new installation. * If you type y in response, the directory is renamed domain-name`.original`. If that name already exists, the directory will be renamed domain-name`.orginal.0`.For example, if the old domain directory is named domain1, it will be renamed domain1.original, or ifthat name already exists, domain1.original.0. * If you type n, you are prompted to specify a differentdirectory name or quit.The domain is upgraded and the results are output to the console. 5. Review the console output toverify that the upgrade proceeded correctly.This output is also written to the output.log file for later review.If there are any SEVERE or WARNING messages in the server.log file, the upgrade output will say "Possibleerror encountered during upgrade. See server log after upgrade process completes." 6. Start theupgraded GlassFish Server 4.0 domain.
asadmin start-domain domain-name
Log in to the Administration Console with the user name and password you used in the older server.
Performing a Side-By-Side Upgrade With Upgrade Tool
DRAFT Eclipse GlassFish Server Upgrade Guide, Release 5.1 37
Note:
GlassFish Server 4.0 does not support NSS authentication. If you are upgrading from a EnterpriseProfile configuration that uses NSS authentication, follow the procedure in Upgrading InstallationsThat Use NSS Cryptographic Tokens.
1. If you are upgrading a clustered configuration or a configuration in which node agents were used,proceed with the instructions in Upgrading Clusters and Node Agent Configurations.
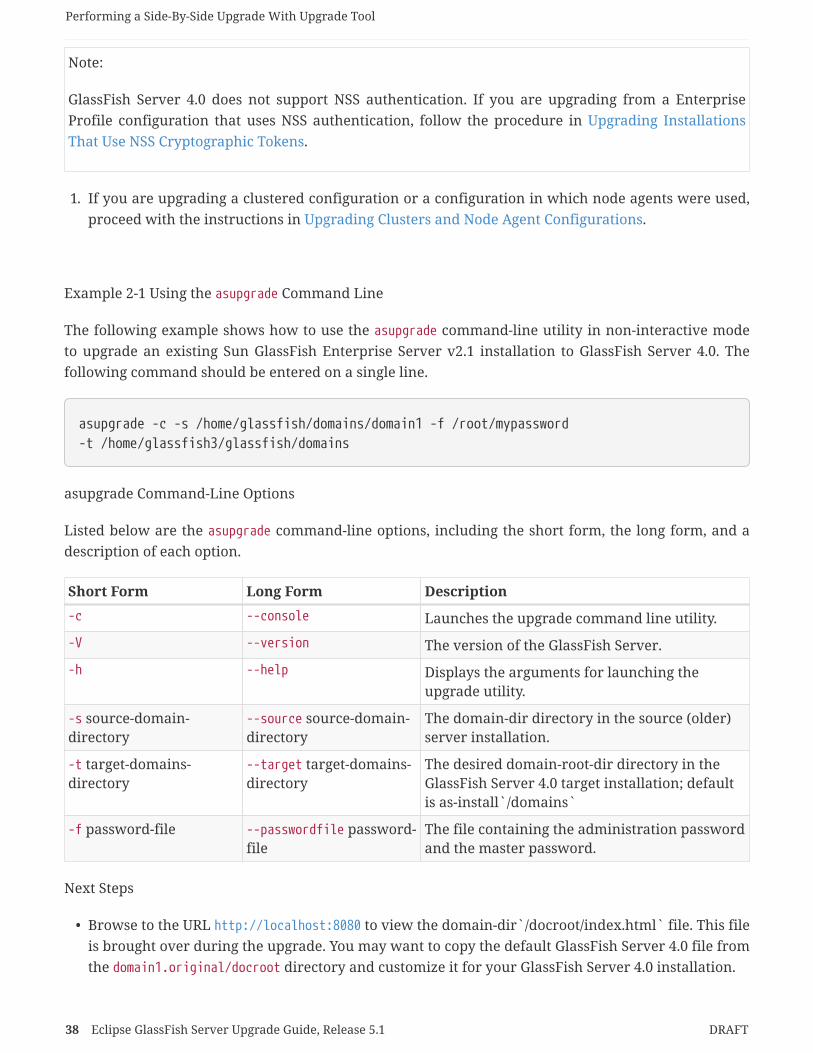
Example 2-1 Using the asupgrade Command Line
The following example shows how to use the asupgrade command-line utility in non-interactive modeto upgrade an existing Sun GlassFish Enterprise Server v2.1 installation to GlassFish Server 4.0. Thefollowing command should be entered on a single line.
asupgrade -c -s /home/glassfish/domains/domain1 -f /root/mypassword-t /home/glassfish3/glassfish/domains
asupgrade Command-Line Options
Listed below are the asupgrade command-line options, including the short form, the long form, and adescription of each option.
Short Form Long Form Description
-c --console Launches the upgrade command line utility.
-V --version The version of the GlassFish Server.
-h --help Displays the arguments for launching theupgrade utility.
-s source-domain-directory
--source source-domain-directory
The domain-dir directory in the source (older)server installation.
-t target-domains-directory
--target target-domains-directory
The desired domain-root-dir directory in theGlassFish Server 4.0 target installation; defaultis as-install`/domains`
-f password-file --passwordfile password-file
The file containing the administration passwordand the master password.
Next Steps
• Browse to the URL http://localhost:8080 to view the domain-dir`/docroot/index.html` file. This fileis brought over during the upgrade. You may want to copy the default GlassFish Server 4.0 file fromthe domain1.original/docroot directory and customize it for your GlassFish Server 4.0 installation.
Performing a Side-By-Side Upgrade With Upgrade Tool
38 Eclipse GlassFish Server Upgrade Guide, Release 5.1 DRAFT
• To register your installation of GlassFish Server from the Administration Console, select theRegistration item from the Common Tasks page. For step-by-step instructions on the registrationprocess, click the Help button on the Administration Console.
To Upgrade Using the Upgrade Tool Wizard
This procedure explains how to use the graphical Upgrade Tool Wizard to upgrade to GlassFish Server4.0 from any supported older product release. See Supported Releases for Upgrade to GlassFish Server4.0 for a list of supported releases.
Before You Begin
Ensure that the source domains from which you are upgrading are stopped before proceeding.
1. Download and install GlassFish Server 4.0 using the Typical Installation path.See "Installing GlassFish Server From a Self-Extracting Bundle" in GlassFish Server Open SourceEdition Installation Guide for instructions.
2. Copy any custom or third-party libraries that may be located in the source as-install`/lib` directoryto the target as-install`/lib` directory.Custom and third-party libraries should normally be located in the domain-dir`/lib` directory. Thisstep is only necessary for custom or third-party libraries that may be located in the nonstandard as-install`/lib` directory.
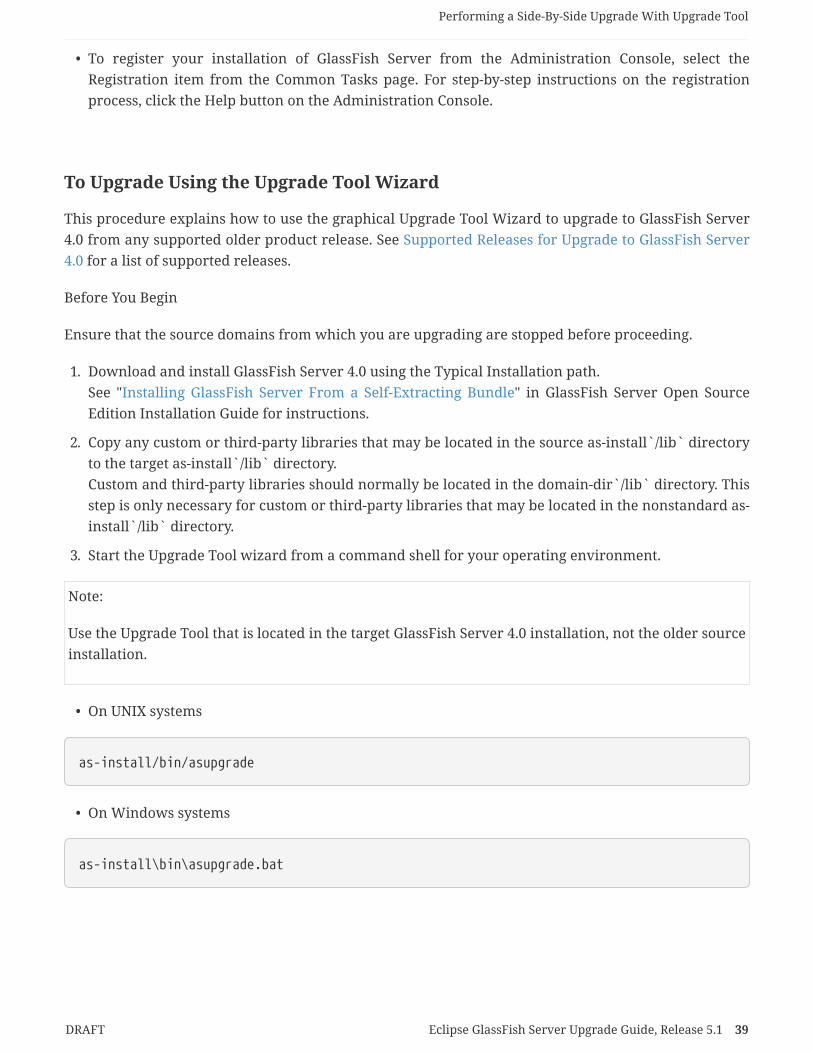
3. Start the Upgrade Tool wizard from a command shell for your operating environment.
Note:
Use the Upgrade Tool that is located in the target GlassFish Server 4.0 installation, not the older sourceinstallation.
• On UNIX systems
as-install/bin/asupgrade
• On Windows systems
as-install\bin\asupgrade.bat
Performing a Side-By-Side Upgrade With Upgrade Tool
DRAFT Eclipse GlassFish Server Upgrade Guide, Release 5.1 39
Tip:
You may find it faster to run the asupgrade command with the s source-domain-directory option,which will prefill the Source Domain Directory field in the next step.
1. In the Source Domain Directory field, type the domain directory of the existing installation fromwhich to import the configuration, or click Browse.For example, you might type c:\glassfish\domains\domain1.
2. In the Target Domains Root Directory field, type the location of the GlassFish Server 4.0 installationto which to transfer the configuration, or click Browse.The default is the full path name of the domains directory of your GlassFish Server 4.0 installation(for example, c:\glassfish3\glassfish\domains).
3. Provide the master password of the source application server.The domain will be upgraded using these credentials. If you do not specify a password here, thedefault master password is used.
Note:
GlassFish Server 4.0 does not support NSS authentication. If you are upgrading from a EnterpriseProfile configuration that uses NSS authentication, follow the procedure in Upgrading InstallationsThat Use NSS Cryptographic Tokens.
1. Click Next.If a name used for an older domain that you are upgrading already exists in the new targetdomains directory, Upgrade Tool will ask if you want to rename the new directory so the olddirectory can be copied to the new installation.
◦ If you click OK in response, the directory is renamed domain-name`.original`. If that namealready exists, the directory will be renamed domain-name`.orginal.0`. For example, if the olddomain directory is named domain1, it will be renamed domain1.original, or if that name alreadyexists, domain1.original.0.
◦ If you click No, you brought back to the main screen.The domain is upgraded and the Upgrade Results page displays the status of the upgradeoperation.
2. Review the output in the Upgrade Results page to verify that the upgrade proceeded correctly.If there are any SEVERE or WARNING messages in the server.log file, the upgrade output will say"Possible error encountered during upgrade. See server log after upgrade process completes."
3. Click Finish to exit the Upgrade Tool when the upgrade process is complete.
4. Start the upgraded GlassFish Server 4.0 domain.
asadmin start-domain domain-name
Performing a Side-By-Side Upgrade With Upgrade Tool
40 Eclipse GlassFish Server Upgrade Guide, Release 5.1 DRAFT
1. If you are upgrading a clustered configuration or a configuration in which node agents were used,proceed with the instructions in Upgrading Clusters and Node Agent Configurations.
Next Steps
• Browse to the URL http://localhost:8080 to view the domain-dir`/docroot/index.html` file. This fileis brought over during the upgrade. You may want to copy the default GlassFish Server 4.0 file fromthe domain1.original/docroot directory and customize it for your GlassFish Server 4.0 installation.
• To register your installation of GlassFish Server from the Administration Console, select theRegistration item from the Common Tasks page. For step-by-step instructions on the registrationprocess, click the Help button on the Administration Console.
Performing an In-Place Upgrade With the Update CenterToolsThis section explains how to use the three Update Center tools to perform an in-place upgrade toGlassFish Server 4.0 from GlassFish Server 3.0.1 or Enterprise Server v3. Specifically, the three toolsexplained in this section are:
• Update Tool
• Software Update Notifier
• The pkg command-line utility
Note:
GlassFish Server 3.0.1 and Enterprise Server v3 are the only product releases that can be upgraded tothe 4.0 release with the Update Center tools. If you are upgrading from any other product release, youmust use Upgrade Tool, as described in Performing a Side-By-Side Upgrade With Upgrade Tool.
The following topics are addressed here:
• Update Center Tool Procedures
• To Upgrade Using the Update Tool GUI
• To Upgrade Using the Software Update Notifier
• To Upgrade From the Command Line Using the pkg Utility
Performing an In-Place Upgrade With the Update Center Tools
DRAFT Eclipse GlassFish Server Upgrade Guide, Release 5.1 41
Update Center Tool Procedures
Unlike when using Upgrade Tool, when you use the Update Tool, the Software Update Notifier, or thepkg utility to perform a GlassFish Server 4.0 upgrade, the older source server directories areoverwritten with the new target server directories, and the existing configuration and deployedapplications are reused in the updated installation.
To perform the upgrade, the user who runs the upgrade needs to have read and writer permissions forthe server installation directories.
You can perform an upgrade using the Update Center tools in the following ways:
• To Upgrade Using the Update Tool GUI
• To Upgrade Using the Software Update Notifier
• To Upgrade From the Command Line Using the pkg Utility
To Upgrade Using the Update Tool GUI
This procedure explains how to use the graphical Update Tool to perform an in-place upgrade toGlassFish Server 4.0 from GlassFish Server 3.0.1 or Enterprise Server v3. Note that it is not possible touse this procedure with any other product releases.
1. Ensure that all domains on the source server from which you are upgrading are stopped beforeproceeding.
2. In a command shell for your operating environment, navigate to the as-install-parent`/bin`directory.
3. Use the updatetool command to start the Update Tool GUI.The Update Tool main window is displayed.
4. Click on Available Updates.
5. Select all items in the Available Updates list, and then click the Install button in the toolbar at thetop of the Update Tool main window.When the upgrade is complete, exit Update Tool.
6. Upgrade the domain by starting the DAS with the --upgrade option.
as-install/bin/asadmin start-domain --upgrade domain-name
This upgrades the domain and then shuts down the DAS. 7. Start the DAS normally.
as-install/bin/asadmin start-domain domain-name
Performing an In-Place Upgrade With the Update Center Tools
42 Eclipse GlassFish Server Upgrade Guide, Release 5.1 DRAFT
Next Steps
• Browse to the URL http://localhost:8080 to view the domain-dir`/docroot/index.html` file. This fileis brought over during the upgrade. You may want to copy the default GlassFish Server 4.0 file fromthe domain1.original/docroot directory and customize it for your GlassFish Server 4.0 installation.
• To register your installation of GlassFish Server from the Administration Console, select theRegistration item from the Common Tasks page. For step-by-step instructions on the registrationprocess, click the Help button on the Administration Console.
To Upgrade Using the Software Update Notifier
This procedure explains how to use the Software Update Notifier to perform an in-place upgrade toGlassFish Server 4.0 from GlassFish Server 3.0.1 or Enterprise Server v3. Note that it is not possible touse this procedure with any other product releases.
Before You Begin
The Software Update Notifier must be installed and enabled on the GlassFish Server or EnterpriseServer release from which you are upgrading. Software Update Notifier installation is typicallyperformed during the initial GlassFish Server or Enterprise Server installation. The Software UpdateNotifier can also be installed later using Update Tool. For more information about the Update Notifier,refer to the Update Tool online help.
1. Wait for the Software Update Notifier to pop up a notification balloon informing you that updatesare available.
2. Click the balloon prompt to open the Software Update GUI.
3. Manually stop all domains and server instances.
4. Using the Software Update GUI, select the items you want to upgrade and start the installation.Ensure that GlassFish Server 4.0 is one of the items you select for upgrade. This upgrades the serverand selected components to the latest available versions.
5. Upgrade the domain by starting the DAS with the --upgrade option.
as-install/bin/asadmin start-domain --upgrade domain-name
This upgrades the domain and then shuts down the DAS. 6. Start the DAS normally.
as-install/bin/asadmin start-domain domain-name
Next Steps
Performing an In-Place Upgrade With the Update Center Tools
DRAFT Eclipse GlassFish Server Upgrade Guide, Release 5.1 43
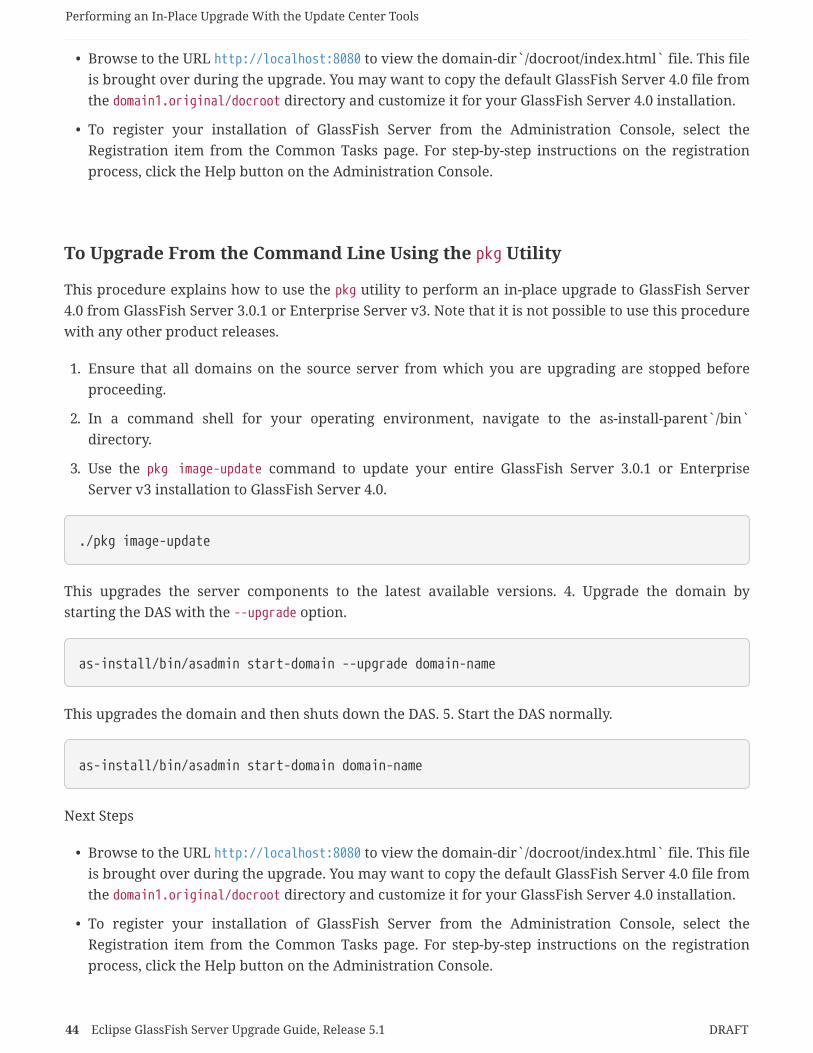
• Browse to the URL http://localhost:8080 to view the domain-dir`/docroot/index.html` file. This fileis brought over during the upgrade. You may want to copy the default GlassFish Server 4.0 file fromthe domain1.original/docroot directory and customize it for your GlassFish Server 4.0 installation.
• To register your installation of GlassFish Server from the Administration Console, select theRegistration item from the Common Tasks page. For step-by-step instructions on the registrationprocess, click the Help button on the Administration Console.
To Upgrade From the Command Line Using the pkg Utility
This procedure explains how to use the pkg utility to perform an in-place upgrade to GlassFish Server4.0 from GlassFish Server 3.0.1 or Enterprise Server v3. Note that it is not possible to use this procedurewith any other product releases.
1. Ensure that all domains on the source server from which you are upgrading are stopped beforeproceeding.
2. In a command shell for your operating environment, navigate to the as-install-parent`/bin`directory.
3. Use the pkg image-update command to update your entire GlassFish Server 3.0.1 or EnterpriseServer v3 installation to GlassFish Server 4.0.
./pkg image-update
This upgrades the server components to the latest available versions. 4. Upgrade the domain bystarting the DAS with the --upgrade option.
as-install/bin/asadmin start-domain --upgrade domain-name
This upgrades the domain and then shuts down the DAS. 5. Start the DAS normally.
as-install/bin/asadmin start-domain domain-name
Next Steps
• Browse to the URL http://localhost:8080 to view the domain-dir`/docroot/index.html` file. This fileis brought over during the upgrade. You may want to copy the default GlassFish Server 4.0 file fromthe domain1.original/docroot directory and customize it for your GlassFish Server 4.0 installation.
• To register your installation of GlassFish Server from the Administration Console, select theRegistration item from the Common Tasks page. For step-by-step instructions on the registrationprocess, click the Help button on the Administration Console.
Performing an In-Place Upgrade With the Update Center Tools
44 Eclipse GlassFish Server Upgrade Guide, Release 5.1 DRAFT
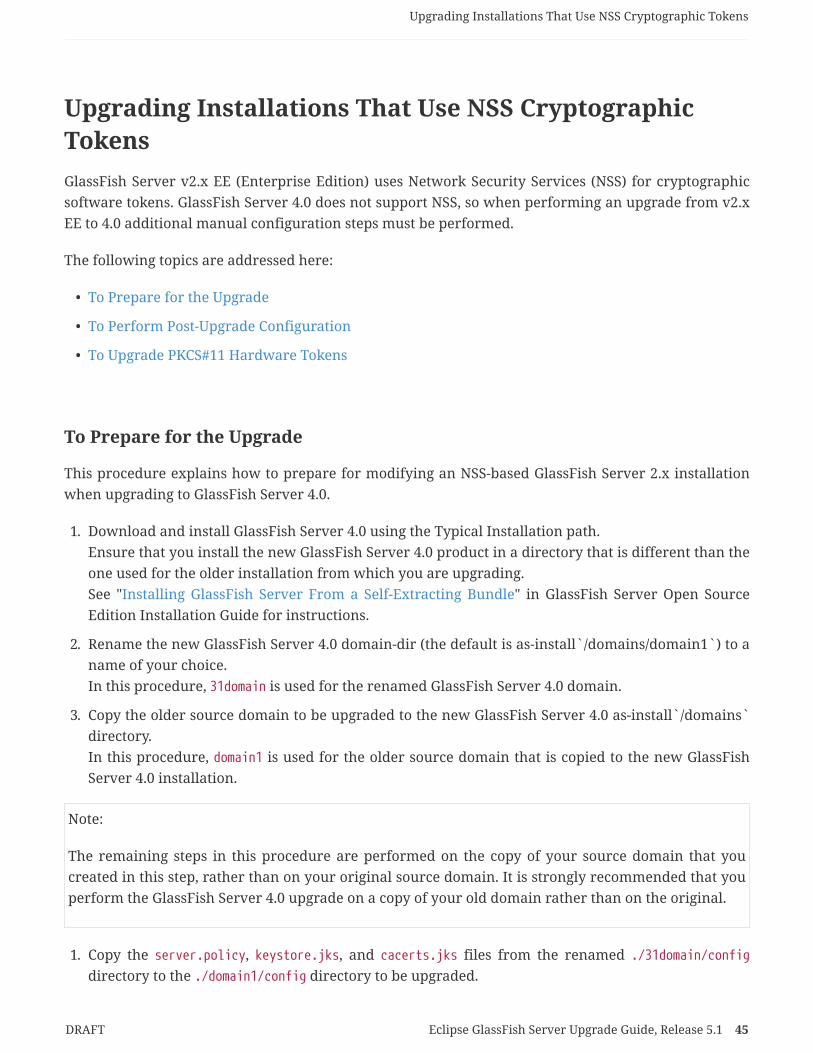
Upgrading Installations That Use NSS CryptographicTokensGlassFish Server v2.x EE (Enterprise Edition) uses Network Security Services (NSS) for cryptographicsoftware tokens. GlassFish Server 4.0 does not support NSS, so when performing an upgrade from v2.xEE to 4.0 additional manual configuration steps must be performed.
The following topics are addressed here:
• To Prepare for the Upgrade
• To Perform Post-Upgrade Configuration
• To Upgrade PKCS#11 Hardware Tokens
To Prepare for the Upgrade
This procedure explains how to prepare for modifying an NSS-based GlassFish Server 2.x installationwhen upgrading to GlassFish Server 4.0.
1. Download and install GlassFish Server 4.0 using the Typical Installation path.Ensure that you install the new GlassFish Server 4.0 product in a directory that is different than theone used for the older installation from which you are upgrading.See "Installing GlassFish Server From a Self-Extracting Bundle" in GlassFish Server Open SourceEdition Installation Guide for instructions.
2. Rename the new GlassFish Server 4.0 domain-dir (the default is as-install`/domains/domain1`) to aname of your choice.In this procedure, 31domain is used for the renamed GlassFish Server 4.0 domain.
3. Copy the older source domain to be upgraded to the new GlassFish Server 4.0 as-install`/domains`directory.In this procedure, domain1 is used for the older source domain that is copied to the new GlassFishServer 4.0 installation.
Note:
The remaining steps in this procedure are performed on the copy of your source domain that youcreated in this step, rather than on your original source domain. It is strongly recommended that youperform the GlassFish Server 4.0 upgrade on a copy of your old domain rather than on the original.
1. Copy the server.policy, keystore.jks, and cacerts.jks files from the renamed ./31domain/configdirectory to the ./domain1/config directory to be upgraded.
Upgrading Installations That Use NSS Cryptographic Tokens
DRAFT Eclipse GlassFish Server Upgrade Guide, Release 5.1 45

For example:
cp as-install/domains/31domain/config/server.policy as-install/domains/domain1/configcp as-install/domains/31domain/config/keystore.jks as-install/domains/domain1/configcp as-install/domains/31domain/config/cacerts.jks as-install/domains/domain1/config
This will overwrite the master password for ./domain1 with the password used in the ./31domain. 5.Modify the domain.xml file for ./domain1. 1. Add the following jvm-options under server-config anddefault-config:
-Djavax.net.ssl.keyStore=${com.sun.aas.instanceRoot}/config/keystore.jks-Djavax.net.ssl.trustStore=${com.sun.aas.instanceRoot}/config/cacerts.jks
1. Remove the following jvm-option under server-config and default-config:
-Dcom.sun.appserv.nss.db=${com.sun.aas.instanceRoot}/config
1. Upgrade ./domain1 by starting the DAS in the new GlassFish Server 4.0 installation with the--upgrade option.
as-install/bin/asadmin start-domain --upgrade domain1
This upgrades the domain and then shuts down the DAS. 7. Start the upgraded DAS normally.
as-install/bin/asadmin start-domain domain1
To Perform Post-Upgrade Configuration
These instructions explain the post-upgrade configuration steps that must be performed whenupgrading from an NSS-based installation to GlassFish Server 4.0.
Before You Begin
Before proceeding with this procedure, complete the procedure explained in To Prepare for theUpgrade.
1. Start the GlassFish Server 4.0 domain, if it is not already running, and open the GlassFish ServerAdmin Console in a browser window.The default URL is https://localhost:4848
Upgrading Installations That Use NSS Cryptographic Tokens
46 Eclipse GlassFish Server Upgrade Guide, Release 5.1 DRAFT
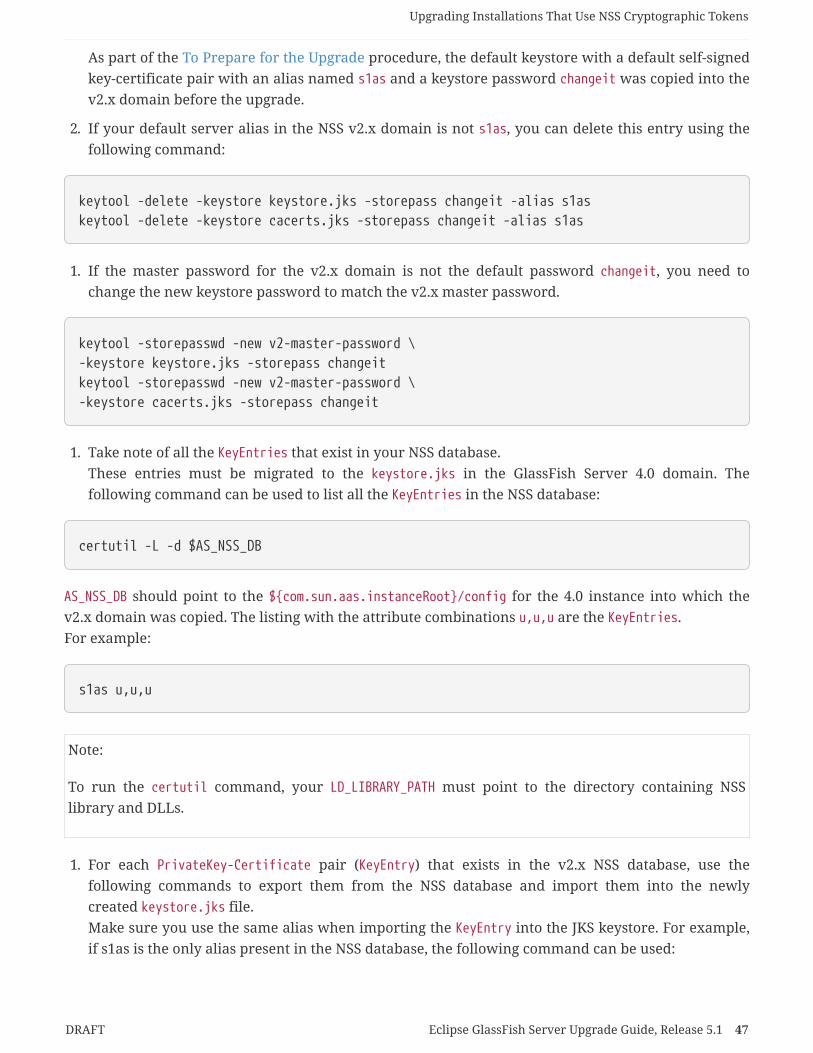
As part of the To Prepare for the Upgrade procedure, the default keystore with a default self-signedkey-certificate pair with an alias named s1as and a keystore password changeit was copied into thev2.x domain before the upgrade.
2. If your default server alias in the NSS v2.x domain is not s1as, you can delete this entry using thefollowing command:
keytool -delete -keystore keystore.jks -storepass changeit -alias s1askeytool -delete -keystore cacerts.jks -storepass changeit -alias s1as
1. If the master password for the v2.x domain is not the default password changeit, you need tochange the new keystore password to match the v2.x master password.
keytool -storepasswd -new v2-master-password \-keystore keystore.jks -storepass changeitkeytool -storepasswd -new v2-master-password \-keystore cacerts.jks -storepass changeit
1. Take note of all the KeyEntries that exist in your NSS database.These entries must be migrated to the keystore.jks in the GlassFish Server 4.0 domain. Thefollowing command can be used to list all the KeyEntries in the NSS database:
certutil -L -d $AS_NSS_DB
AS_NSS_DB should point to the ${com.sun.aas.instanceRoot}/config for the 4.0 instance into which thev2.x domain was copied. The listing with the attribute combinations u,u,u are the KeyEntries.For example:
s1as u,u,u
Note:
To run the certutil command, your LD_LIBRARY_PATH must point to the directory containing NSSlibrary and DLLs.
1. For each PrivateKey-Certificate pair (KeyEntry) that exists in the v2.x NSS database, use thefollowing commands to export them from the NSS database and import them into the newlycreated keystore.jks file.Make sure you use the same alias when importing the KeyEntry into the JKS keystore. For example,if s1as is the only alias present in the NSS database, the following command can be used:
Upgrading Installations That Use NSS Cryptographic Tokens
DRAFT Eclipse GlassFish Server Upgrade Guide, Release 5.1 47
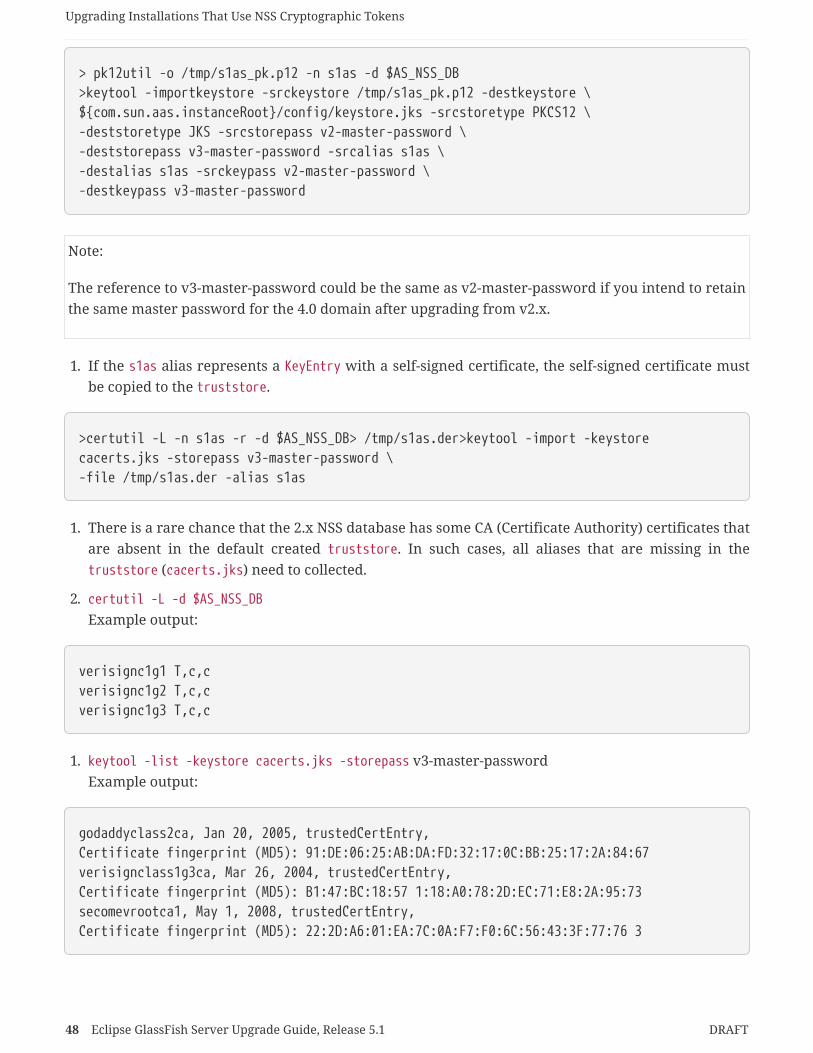
> pk12util -o /tmp/s1as_pk.p12 -n s1as -d $AS_NSS_DB>keytool -importkeystore -srckeystore /tmp/s1as_pk.p12 -destkeystore \${com.sun.aas.instanceRoot}/config/keystore.jks -srcstoretype PKCS12 \-deststoretype JKS -srcstorepass v2-master-password \-deststorepass v3-master-password -srcalias s1as \-destalias s1as -srckeypass v2-master-password \-destkeypass v3-master-password
Note:
The reference to v3-master-password could be the same as v2-master-password if you intend to retainthe same master password for the 4.0 domain after upgrading from v2.x.
1. If the s1as alias represents a KeyEntry with a self-signed certificate, the self-signed certificate mustbe copied to the truststore.
>certutil -L -n s1as -r -d $AS_NSS_DB> /tmp/s1as.der>keytool -import -keystorecacerts.jks -storepass v3-master-password \-file /tmp/s1as.der -alias s1as
1. There is a rare chance that the 2.x NSS database has some CA (Certificate Authority) certificates thatare absent in the default created truststore. In such cases, all aliases that are missing in thetruststore (cacerts.jks) need to collected.
2. certutil -L -d $AS_NSS_DB
Example output:
verisignc1g1 T,c,cverisignc1g2 T,c,cverisignc1g3 T,c,c
1. keytool -list -keystore cacerts.jks -storepass v3-master-passwordExample output:
godaddyclass2ca, Jan 20, 2005, trustedCertEntry,Certificate fingerprint (MD5): 91:DE:06:25:AB:DA:FD:32:17:0C:BB:25:17:2A:84:67verisignclass1g3ca, Mar 26, 2004, trustedCertEntry,Certificate fingerprint (MD5): B1:47:BC:18:57 1:18:A0:78:2D:EC:71:E8:2A:95:73secomevrootca1, May 1, 2008, trustedCertEntry,Certificate fingerprint (MD5): 22:2D:A6:01:EA:7C:0A:F7:F0:6C:56:43:3F:77:76 3
Upgrading Installations That Use NSS Cryptographic Tokens
48 Eclipse GlassFish Server Upgrade Guide, Release 5.1 DRAFT
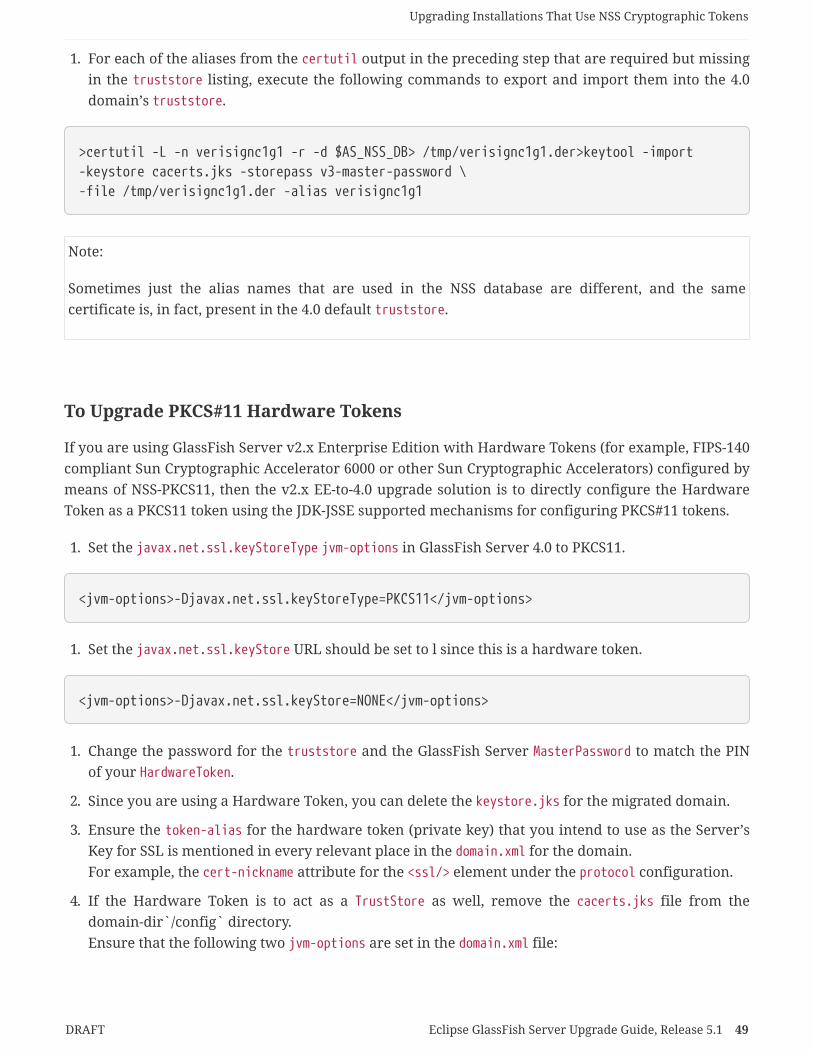
1. For each of the aliases from the certutil output in the preceding step that are required but missingin the truststore listing, execute the following commands to export and import them into the 4.0domain’s truststore.
>certutil -L -n verisignc1g1 -r -d $AS_NSS_DB> /tmp/verisignc1g1.der>keytool -import-keystore cacerts.jks -storepass v3-master-password \-file /tmp/verisignc1g1.der -alias verisignc1g1
Note:
Sometimes just the alias names that are used in the NSS database are different, and the samecertificate is, in fact, present in the 4.0 default truststore.
To Upgrade PKCS#11 Hardware Tokens
If you are using GlassFish Server v2.x Enterprise Edition with Hardware Tokens (for example, FIPS-140compliant Sun Cryptographic Accelerator 6000 or other Sun Cryptographic Accelerators) configured bymeans of NSS-PKCS11, then the v2.x EE-to-4.0 upgrade solution is to directly configure the HardwareToken as a PKCS11 token using the JDK-JSSE supported mechanisms for configuring PKCS#11 tokens.
1. Set the javax.net.ssl.keyStoreType jvm-options in GlassFish Server 4.0 to PKCS11.
<jvm-options>-Djavax.net.ssl.keyStoreType=PKCS11</jvm-options>
1. Set the javax.net.ssl.keyStore URL should be set to l since this is a hardware token.
<jvm-options>-Djavax.net.ssl.keyStore=NONE</jvm-options>
1. Change the password for the truststore and the GlassFish Server MasterPassword to match the PINof your HardwareToken.
2. Since you are using a Hardware Token, you can delete the keystore.jks for the migrated domain.
3. Ensure the token-alias for the hardware token (private key) that you intend to use as the Server’sKey for SSL is mentioned in every relevant place in the domain.xml for the domain.For example, the cert-nickname attribute for the <ssl/> element under the protocol configuration.
4. If the Hardware Token is to act as a TrustStore as well, remove the cacerts.jks file from thedomain-dir`/config` directory.Ensure that the following two jvm-options are set in the domain.xml file:
Upgrading Installations That Use NSS Cryptographic Tokens
DRAFT Eclipse GlassFish Server Upgrade Guide, Release 5.1 49
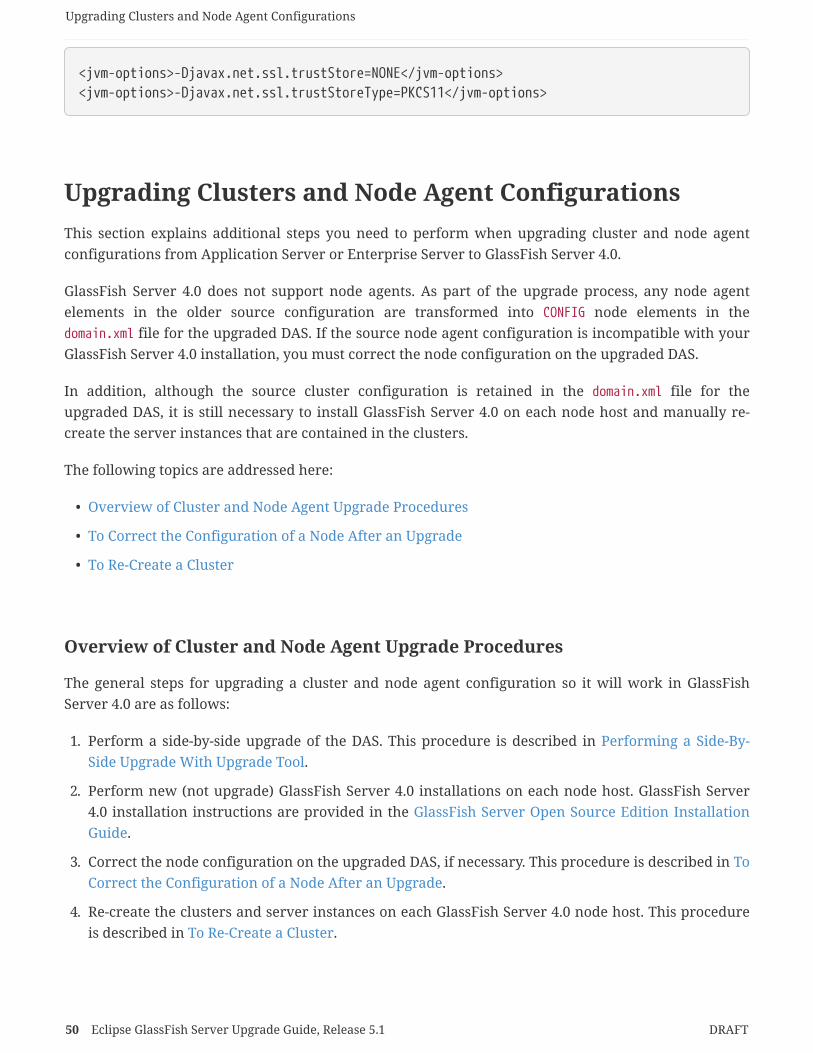
<jvm-options>-Djavax.net.ssl.trustStore=NONE</jvm-options><jvm-options>-Djavax.net.ssl.trustStoreType=PKCS11</jvm-options>
Upgrading Clusters and Node Agent ConfigurationsThis section explains additional steps you need to perform when upgrading cluster and node agentconfigurations from Application Server or Enterprise Server to GlassFish Server 4.0.
GlassFish Server 4.0 does not support node agents. As part of the upgrade process, any node agentelements in the older source configuration are transformed into CONFIG node elements in thedomain.xml file for the upgraded DAS. If the source node agent configuration is incompatible with yourGlassFish Server 4.0 installation, you must correct the node configuration on the upgraded DAS.
In addition, although the source cluster configuration is retained in the domain.xml file for theupgraded DAS, it is still necessary to install GlassFish Server 4.0 on each node host and manually re-create the server instances that are contained in the clusters.
The following topics are addressed here:
• Overview of Cluster and Node Agent Upgrade Procedures
• To Correct the Configuration of a Node After an Upgrade
• To Re-Create a Cluster
Overview of Cluster and Node Agent Upgrade Procedures
The general steps for upgrading a cluster and node agent configuration so it will work in GlassFishServer 4.0 are as follows:
1. Perform a side-by-side upgrade of the DAS. This procedure is described in Performing a Side-By-Side Upgrade With Upgrade Tool.
2. Perform new (not upgrade) GlassFish Server 4.0 installations on each node host. GlassFish Server4.0 installation instructions are provided in the GlassFish Server Open Source Edition InstallationGuide.
3. Correct the node configuration on the upgraded DAS, if necessary. This procedure is described in ToCorrect the Configuration of a Node After an Upgrade.
4. Re-create the clusters and server instances on each GlassFish Server 4.0 node host. This procedureis described in To Re-Create a Cluster.
Upgrading Clusters and Node Agent Configurations
50 Eclipse GlassFish Server Upgrade Guide, Release 5.1 DRAFT
To Correct the Configuration of a Node After an Upgrade
As part of the upgrade process, node agent elements in the DAS configuration are transformed intoGlassFish Server node elements of type CONFIG. This transformation does not affect the node agentdirectories for GlassFish Server instances. To create the equivalent directories for GlassFish Serverinstances after an upgrade, you must re-create the instances as explained in To Re-Create a Cluster.
The name of an upgraded node is the name of the node agent from which the node is transformed.
The host that the node represents is obtained from the configuration of the original node agent or, ifnot specified, is not set. If the configuration of the original node agent did not specify the name of thenode host, you must update the node to specify the host that the node represents.
Default values are applied to the remainder of the node’s configuration data.
The default values of the following items in a node’s configuration data might not meet yourrequirements for the upgraded installation of GlassFish Server:
• The parent of the base installation directory of the GlassFish Server software on the host, forexample, /export/glassfish3.The default is the parent of the default base installation directory of the GlassFish Server 4.0software on the DAS host. If the GlassFish Server software is installed under a different directoryon the node host, you must update the node’s configuration to specify the correct directory.
• The directory that will contain the GlassFish Server instances that are to reside on the node.The default is as-install`/nodes`, where as-install is the base installation directory of the GlassFishServer software on the host. If you require the instances to be contained in a different directory,you must update the node’s configuration to specify that directory.
If you are using secure shell (SSH) for centralized administration, you must also change the type of thenode to SSH to enable the node for remote communication.
For more information about GlassFish Server nodes, see "Administering GlassFish Server Nodes" inGlassFish Server Open Source Edition High Availability Administration Guide.
Before You Begin
Ensure that the following prerequisites are met:
• A side-by-side upgrade on the DAS has been performed. For more information, see Performing aSide-By-Side Upgrade With Upgrade Tool.
• If you are changing the type of the node to SSH, ensure that SSH is configured on the host where theDAS is running and on the host that the node represents. For more information, see "Setting Up SSHfor Centralized Administration" in GlassFish Server Open Source Edition High AvailabilityAdministration Guide.
• If you are upgrading from an Enterprise Profile configuration that uses NSS authentication, ensurethat the procedure in Upgrading Installations That Use NSS Cryptographic Tokens has been
Upgrading Clusters and Node Agent Configurations
DRAFT Eclipse GlassFish Server Upgrade Guide, Release 5.1 51
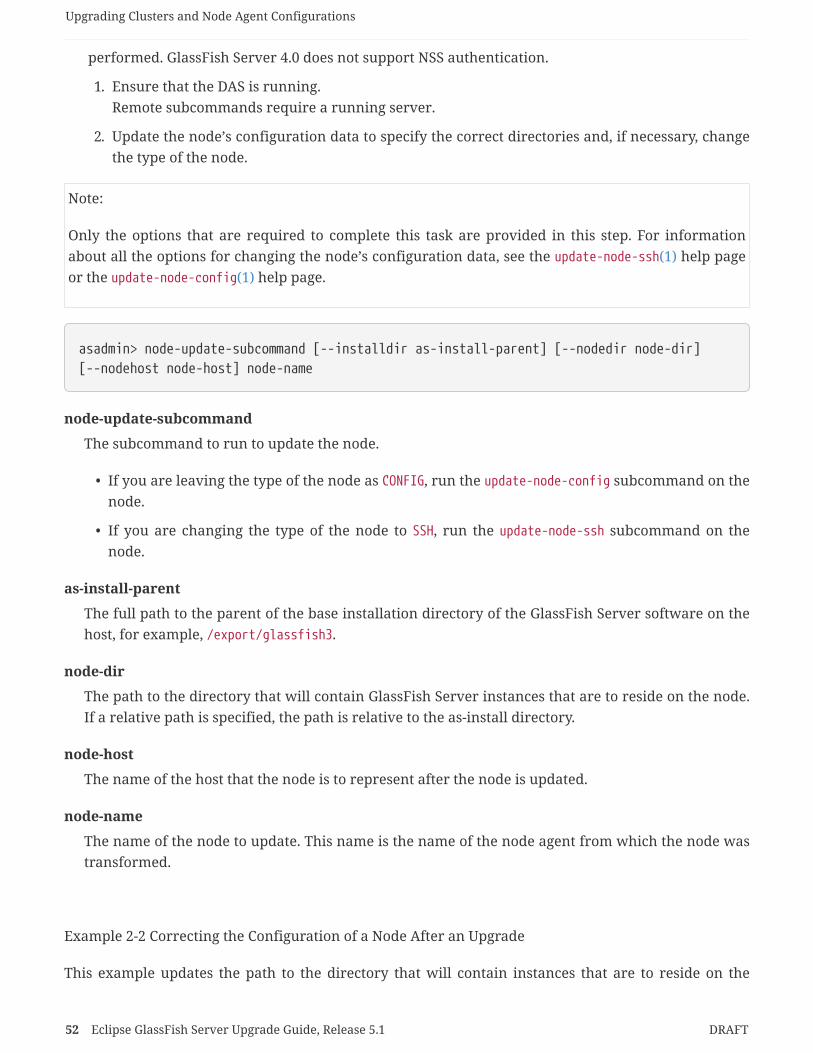
performed. GlassFish Server 4.0 does not support NSS authentication.
1. Ensure that the DAS is running.Remote subcommands require a running server.
2. Update the node’s configuration data to specify the correct directories and, if necessary, changethe type of the node.
Note:
Only the options that are required to complete this task are provided in this step. For informationabout all the options for changing the node’s configuration data, see the update-node-ssh(1) help pageor the update-node-config(1) help page.
asadmin> node-update-subcommand [--installdir as-install-parent] [--nodedir node-dir][--nodehost node-host] node-name
node-update-subcommand
The subcommand to run to update the node.
• If you are leaving the type of the node as CONFIG, run the update-node-config subcommand on thenode.
• If you are changing the type of the node to SSH, run the update-node-ssh subcommand on thenode.
as-install-parent
The full path to the parent of the base installation directory of the GlassFish Server software on thehost, for example, /export/glassfish3.
node-dir
The path to the directory that will contain GlassFish Server instances that are to reside on the node.If a relative path is specified, the path is relative to the as-install directory.
node-host
The name of the host that the node is to represent after the node is updated.
node-name
The name of the node to update. This name is the name of the node agent from which the node wastransformed.
Example 2-2 Correcting the Configuration of a Node After an Upgrade
This example updates the path to the directory that will contain instances that are to reside on the
Upgrading Clusters and Node Agent Configurations
52 Eclipse GlassFish Server Upgrade Guide, Release 5.1 DRAFT
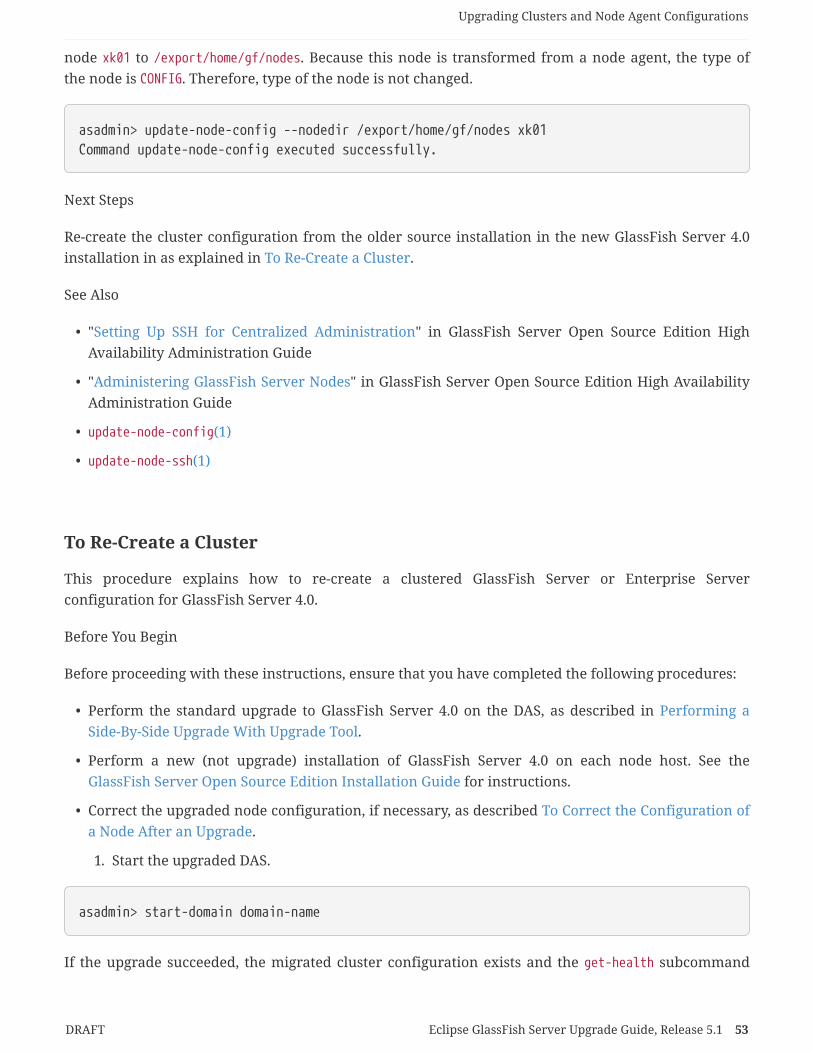
node xk01 to /export/home/gf/nodes. Because this node is transformed from a node agent, the type ofthe node is CONFIG. Therefore, type of the node is not changed.
asadmin> update-node-config --nodedir /export/home/gf/nodes xk01Command update-node-config executed successfully.
Next Steps
Re-create the cluster configuration from the older source installation in the new GlassFish Server 4.0installation in as explained in To Re-Create a Cluster.
See Also
• "Setting Up SSH for Centralized Administration" in GlassFish Server Open Source Edition HighAvailability Administration Guide
• "Administering GlassFish Server Nodes" in GlassFish Server Open Source Edition High AvailabilityAdministration Guide
• update-node-config(1)
• update-node-ssh(1)
To Re-Create a Cluster
This procedure explains how to re-create a clustered GlassFish Server or Enterprise Serverconfiguration for GlassFish Server 4.0.
Before You Begin
Before proceeding with these instructions, ensure that you have completed the following procedures:
• Perform the standard upgrade to GlassFish Server 4.0 on the DAS, as described in Performing aSide-By-Side Upgrade With Upgrade Tool.
• Perform a new (not upgrade) installation of GlassFish Server 4.0 on each node host. See theGlassFish Server Open Source Edition Installation Guide for instructions.
• Correct the upgraded node configuration, if necessary, as described To Correct the Configuration ofa Node After an Upgrade.
1. Start the upgraded DAS.
asadmin> start-domain domain-name
If the upgrade succeeded, the migrated cluster configuration exists and the get-health subcommand
Upgrading Clusters and Node Agent Configurations
DRAFT Eclipse GlassFish Server Upgrade Guide, Release 5.1 53

lists the status of the clustered instances as not running. 2. Confirm that the cluster configuration existsand contains all its instances.
asadmin> get-health cluster-name
For example, for the sample cluster1 used in this procedure:
asadmin> get-health cluster1instance1 not startedinstance2 not startedCommand get-health executed successfully.
1. Re-create the clustered server instances on each instance host.The specific commands to use depend on your configuration.
◦ If remote hosts cannot contact the DAS, export and import the instances' configuration data, asexplained in "To Resynchronize an Instance and the DAS Offline" in GlassFish Server OpenSource Edition High Availability Administration Guide.
◦ If remote hosts can contact the DAS, create each instance individually and resynchronize theinstance with the DAS, as explained in the following sections:
▪ "To Create an Instance Locally" in GlassFish Server Open Source Edition High AvailabilityAdministration Guide
▪ "To Resynchronize an Instance and the DAS Online" in GlassFish Server Open Source EditionHigh Availability Administration GuideNote that the node name matches that used for the node agent in the 2.x installation. If youget an error stating that some attributes do not match the values in the DAS configuration,follow the instructions in To Correct the Configuration of a Node After an Upgrade.
2. After creating the instances, manually copy the instance-dir`/imq` directory for each instancefrom the older source installation to the target GlassFish Server 4.0 installation.
3. If necessary, start the cluster.For example:
asadmin> start-cluster cluster1
This step may or may not be necessary, depending on the procedure you used to create the serverinstances for the cluster.
Example 2-3 Creating Two Local Instances
The following example shows how to create two local instances in a cluster.
Upgrading Clusters and Node Agent Configurations
54 Eclipse GlassFish Server Upgrade Guide, Release 5.1 DRAFT
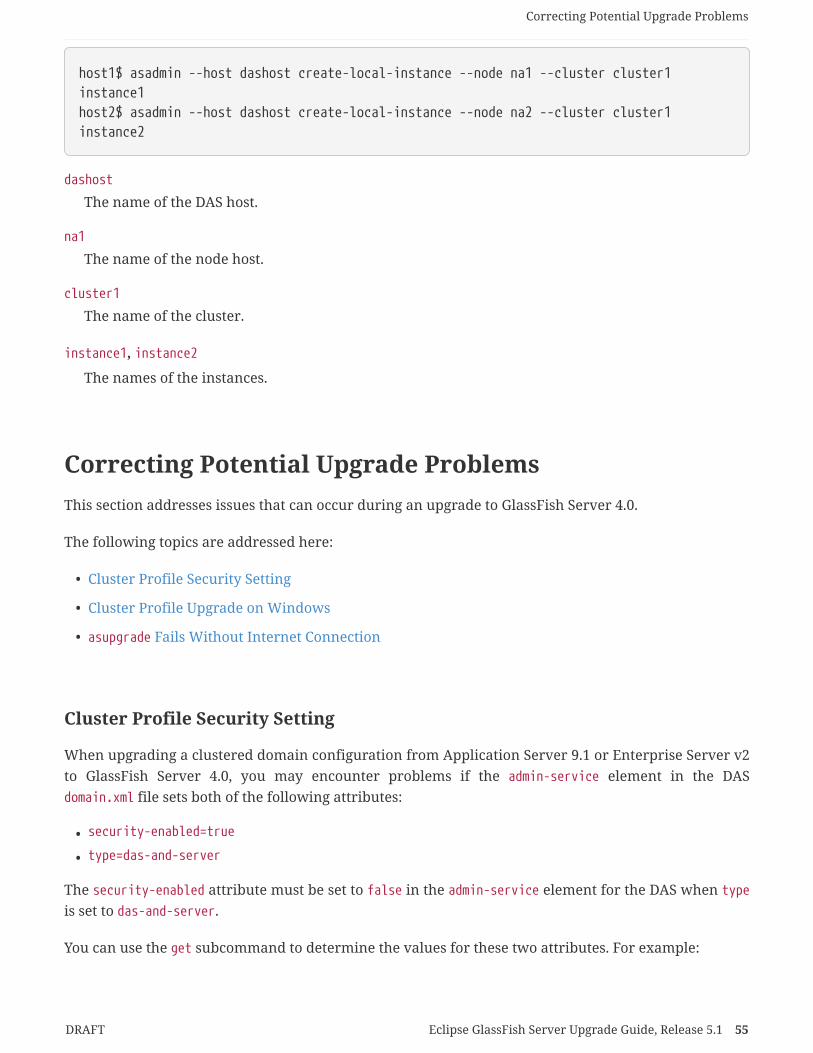
host1$ asadmin --host dashost create-local-instance --node na1 --cluster cluster1instance1host2$ asadmin --host dashost create-local-instance --node na2 --cluster cluster1instance2
dashost
The name of the DAS host.
na1
The name of the node host.
cluster1
The name of the cluster.
instance1, instance2
The names of the instances.
Correcting Potential Upgrade ProblemsThis section addresses issues that can occur during an upgrade to GlassFish Server 4.0.
The following topics are addressed here:
• Cluster Profile Security Setting
• Cluster Profile Upgrade on Windows
• asupgrade Fails Without Internet Connection
Cluster Profile Security Setting
When upgrading a clustered domain configuration from Application Server 9.1 or Enterprise Server v2to GlassFish Server 4.0, you may encounter problems if the admin-service element in the DASdomain.xml file sets both of the following attributes:
• security-enabled=true
• type=das-and-server
The security-enabled attribute must be set to false in the admin-service element for the DAS when typeis set to das-and-server.
You can use the get subcommand to determine the values for these two attributes. For example:
Correcting Potential Upgrade Problems
DRAFT Eclipse GlassFish Server Upgrade Guide, Release 5.1 55
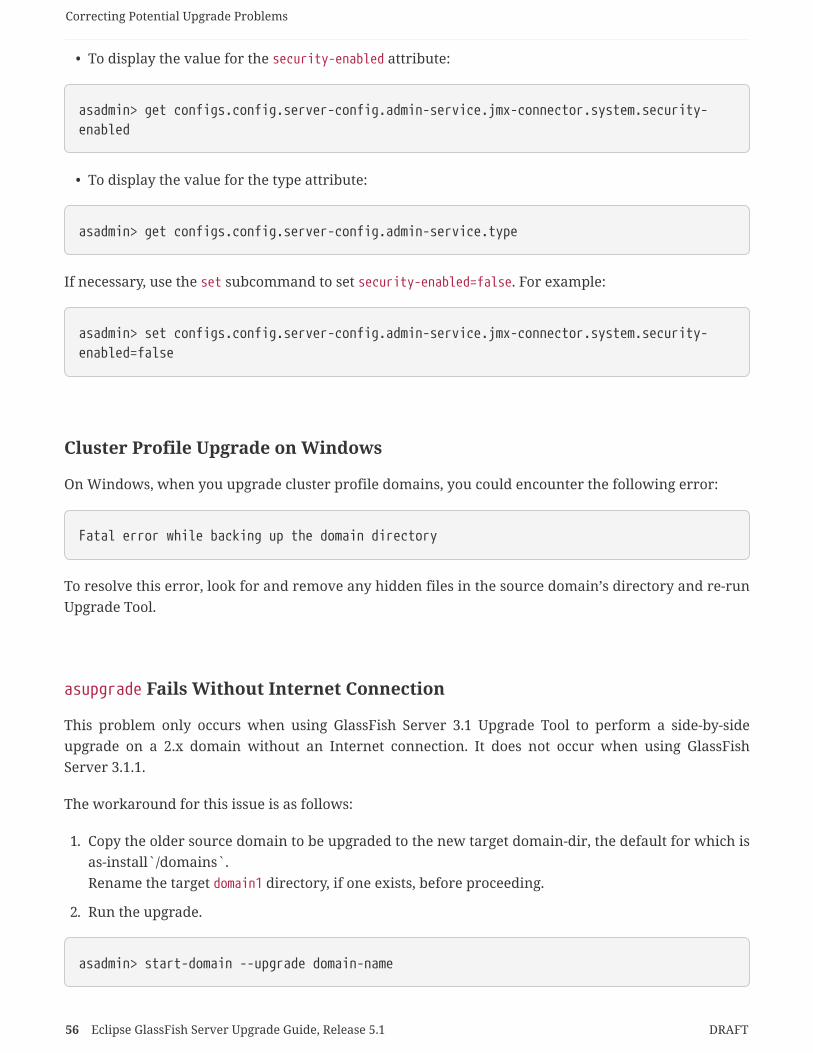
• To display the value for the security-enabled attribute:
asadmin> get configs.config.server-config.admin-service.jmx-connector.system.security-enabled
• To display the value for the type attribute:
asadmin> get configs.config.server-config.admin-service.type
If necessary, use the set subcommand to set security-enabled=false. For example:
asadmin> set configs.config.server-config.admin-service.jmx-connector.system.security-enabled=false
Cluster Profile Upgrade on Windows
On Windows, when you upgrade cluster profile domains, you could encounter the following error:
Fatal error while backing up the domain directory
To resolve this error, look for and remove any hidden files in the source domain’s directory and re-runUpgrade Tool.
asupgrade Fails Without Internet Connection
This problem only occurs when using GlassFish Server 3.1 Upgrade Tool to perform a side-by-sideupgrade on a 2.x domain without an Internet connection. It does not occur when using GlassFishServer 3.1.1.
The workaround for this issue is as follows:
1. Copy the older source domain to be upgraded to the new target domain-dir, the default for which isas-install`/domains`.Rename the target domain1 directory, if one exists, before proceeding.
2. Run the upgrade.
asadmin> start-domain --upgrade domain-name
Correcting Potential Upgrade Problems
56 Eclipse GlassFish Server Upgrade Guide, Release 5.1 DRAFT