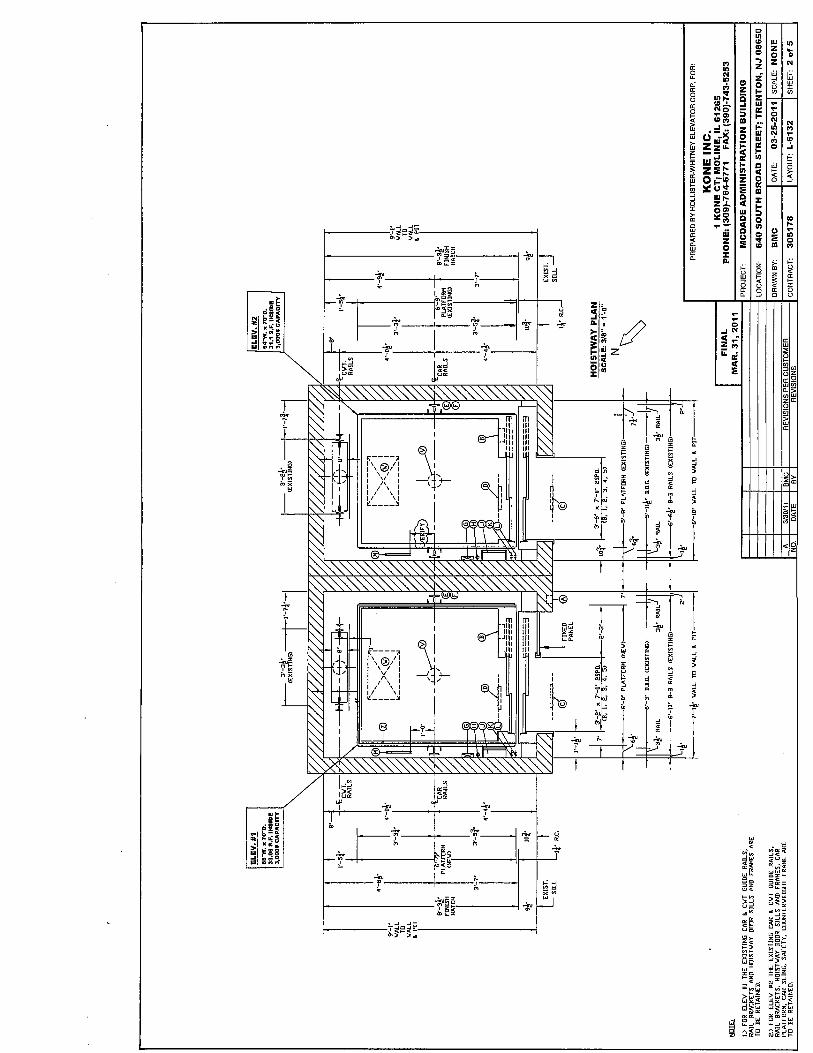
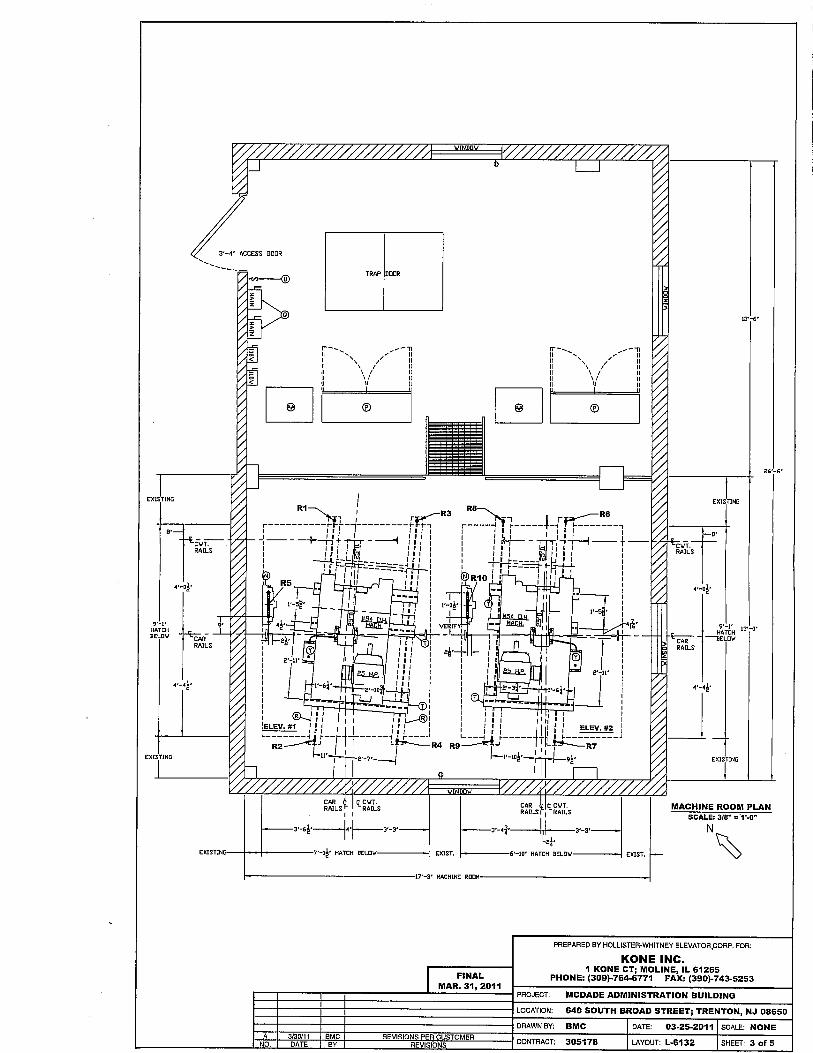
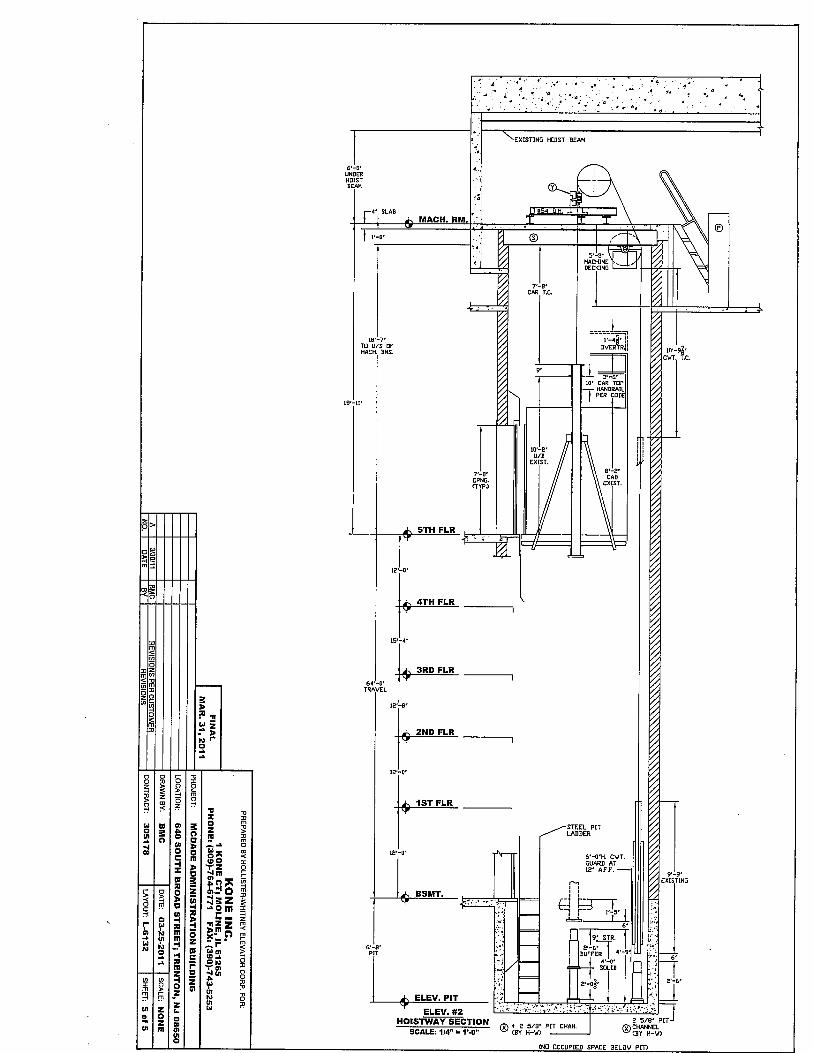
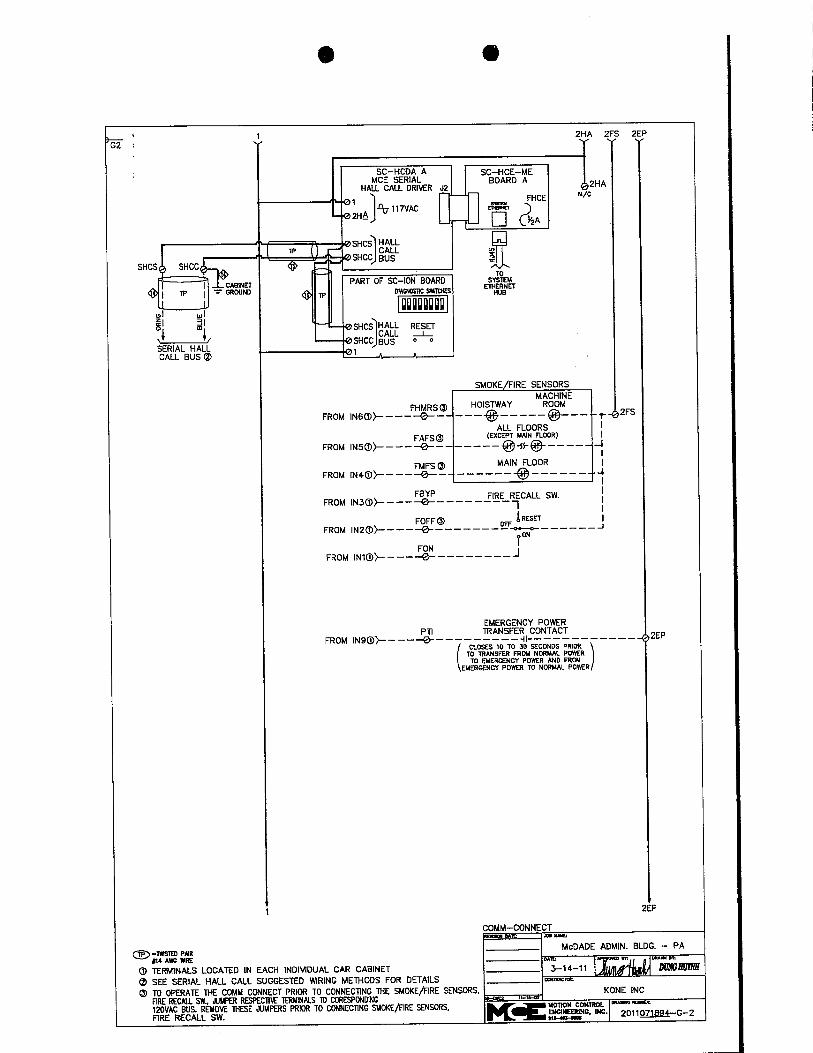
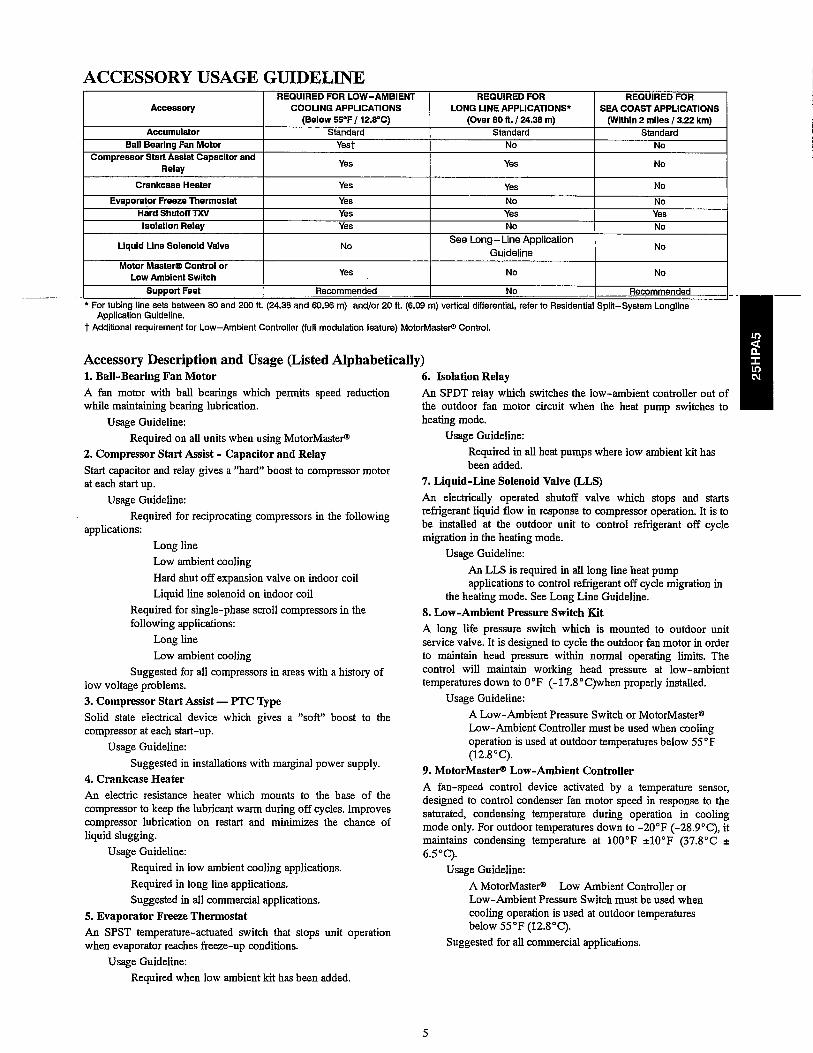
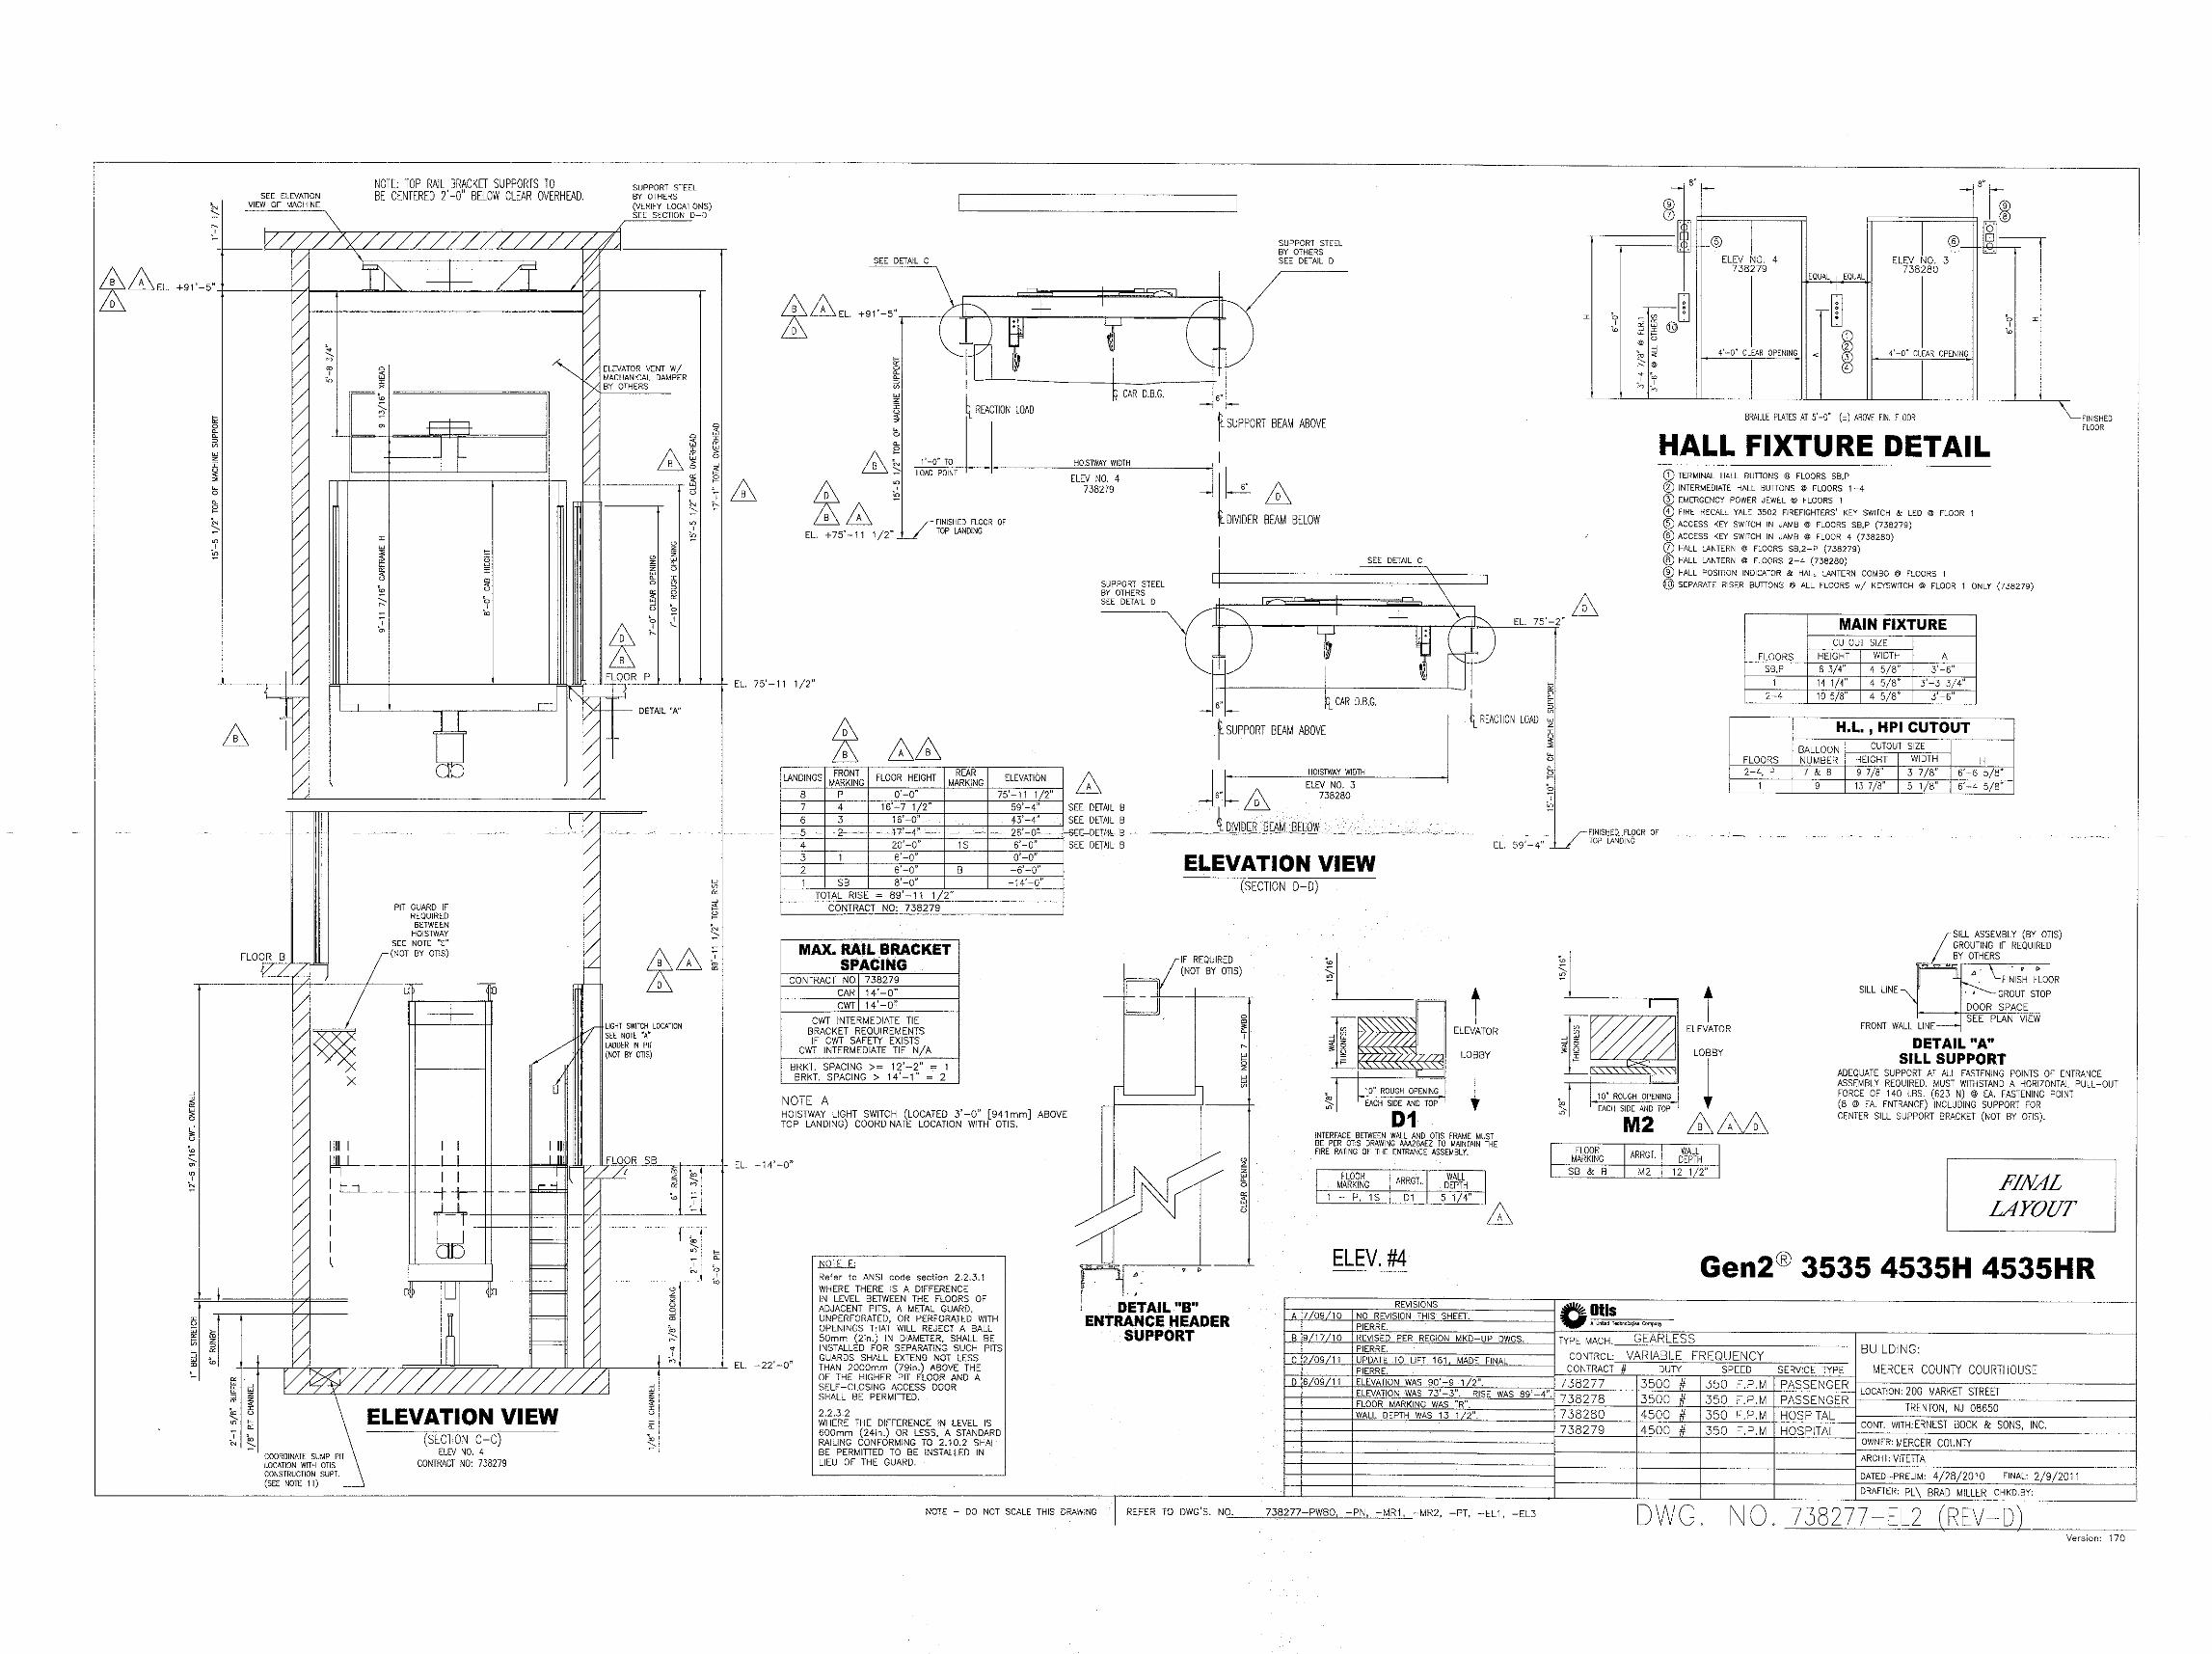
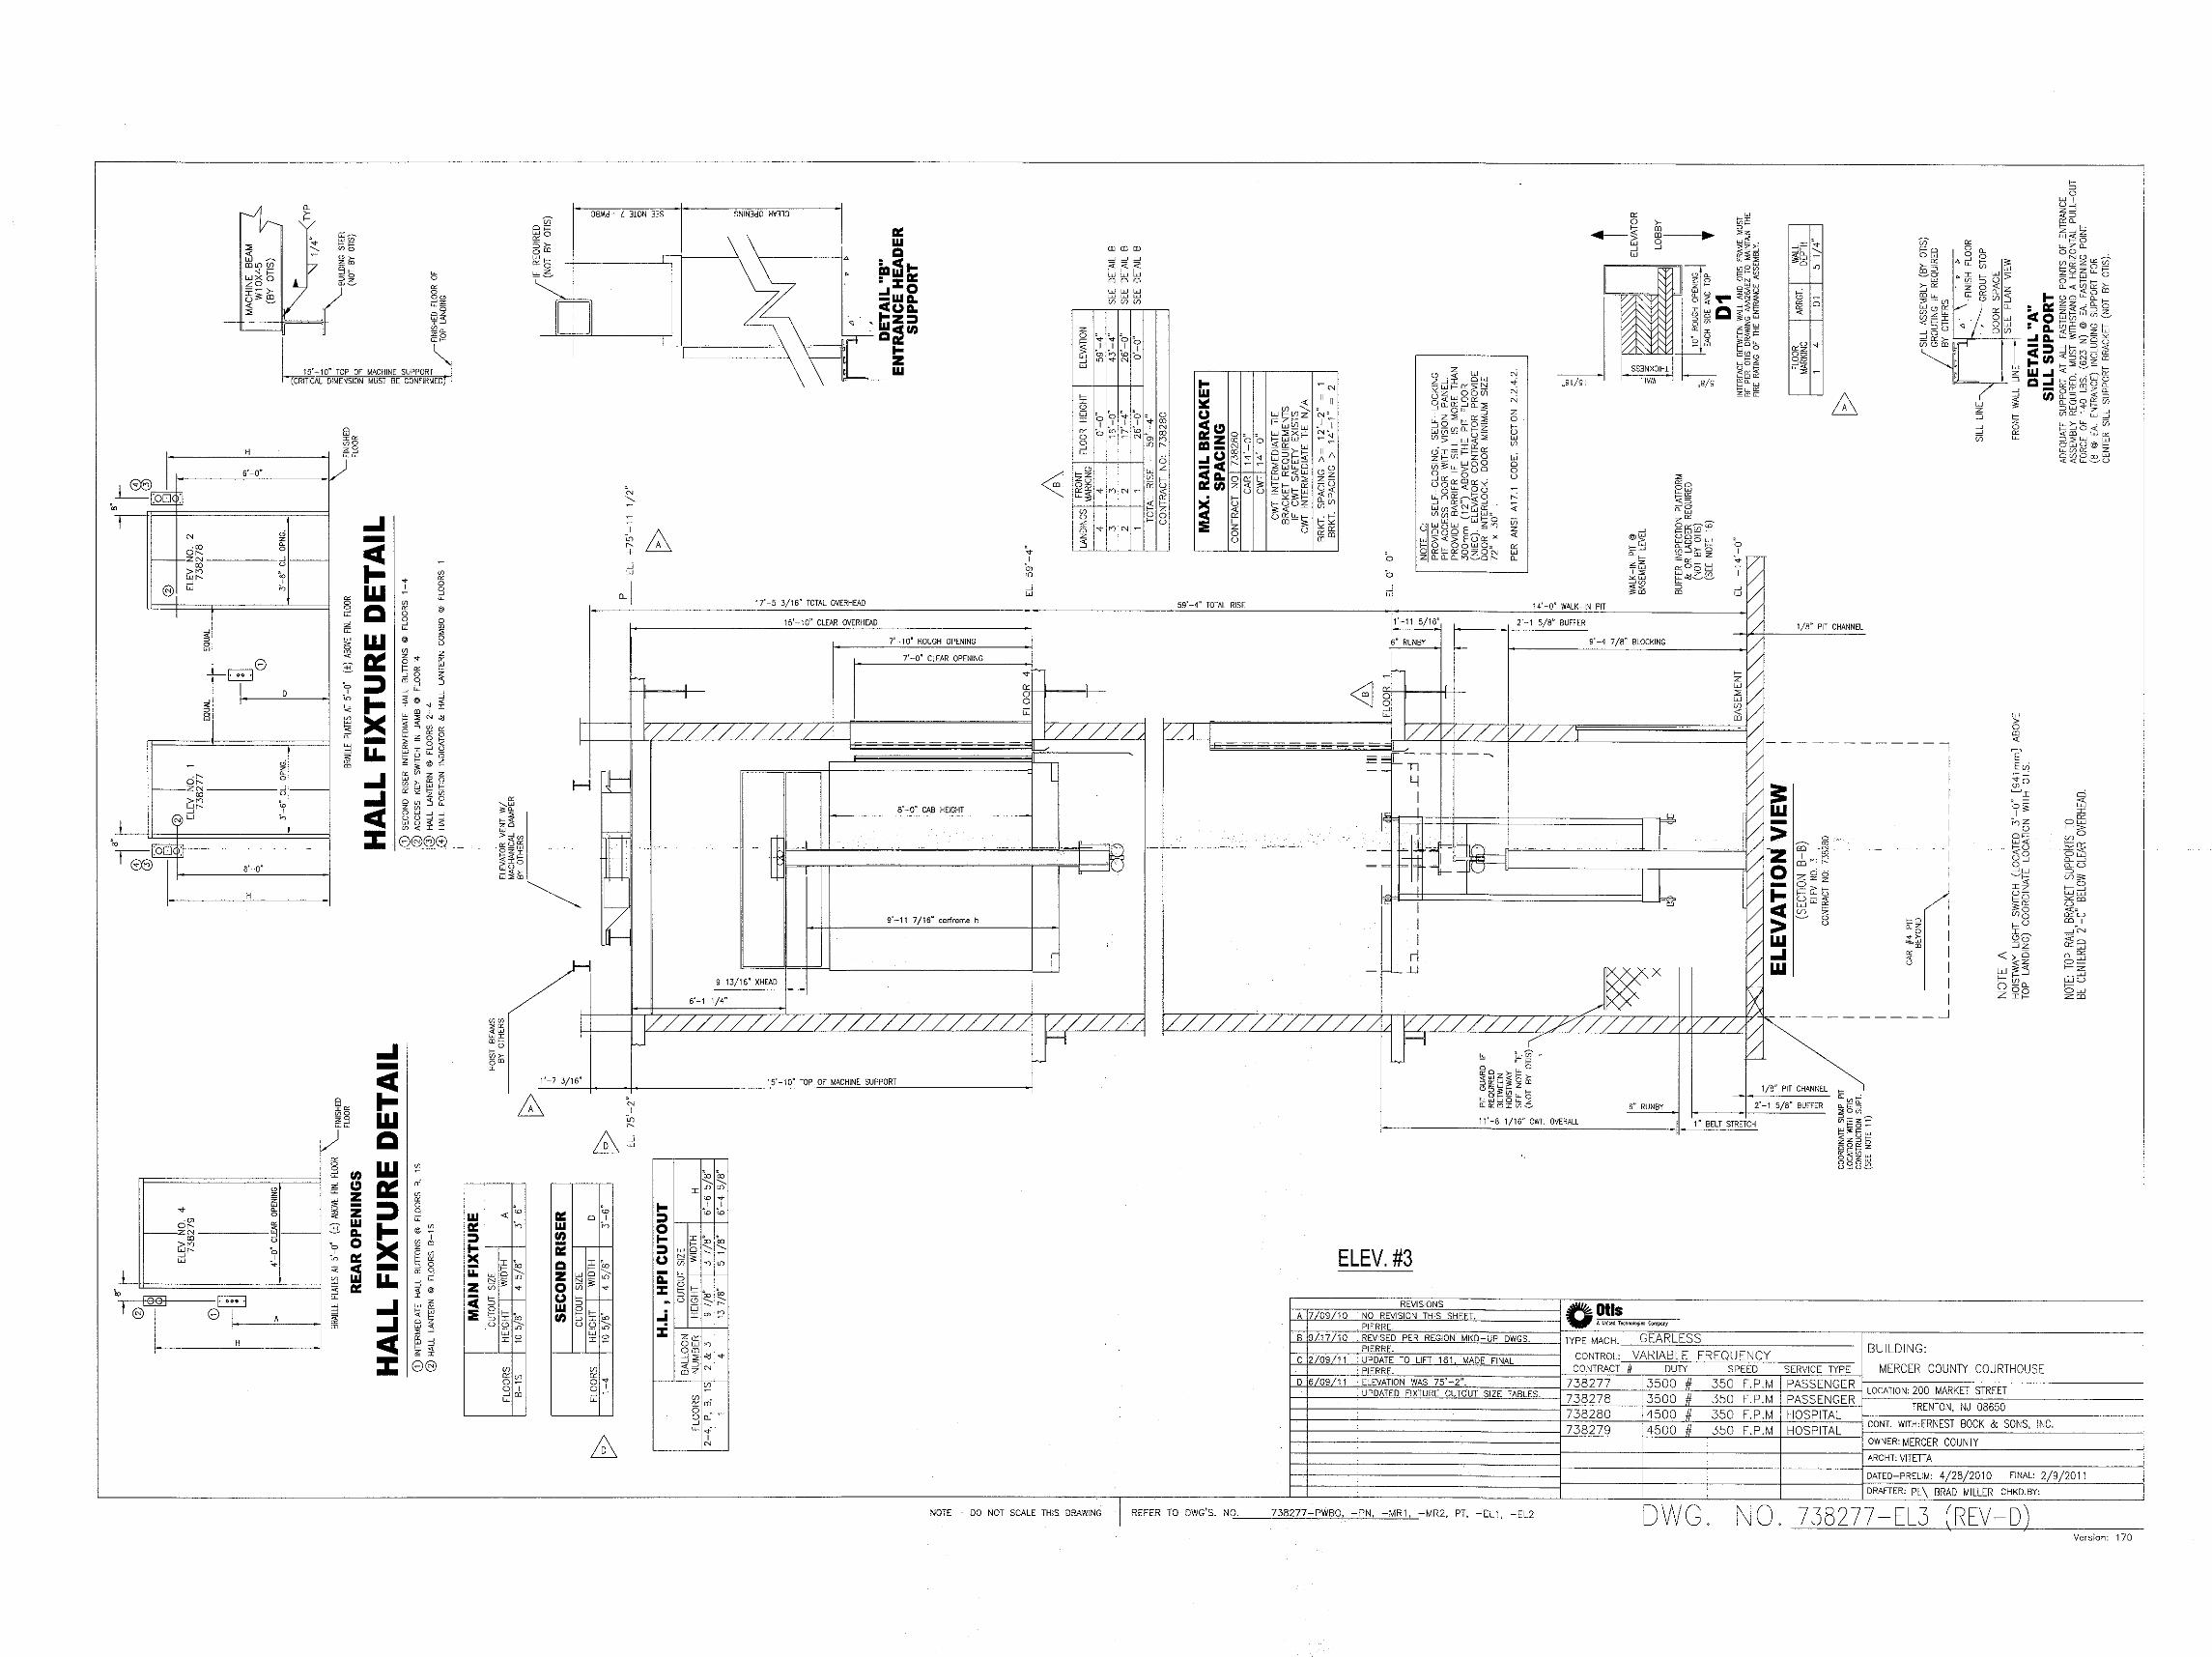
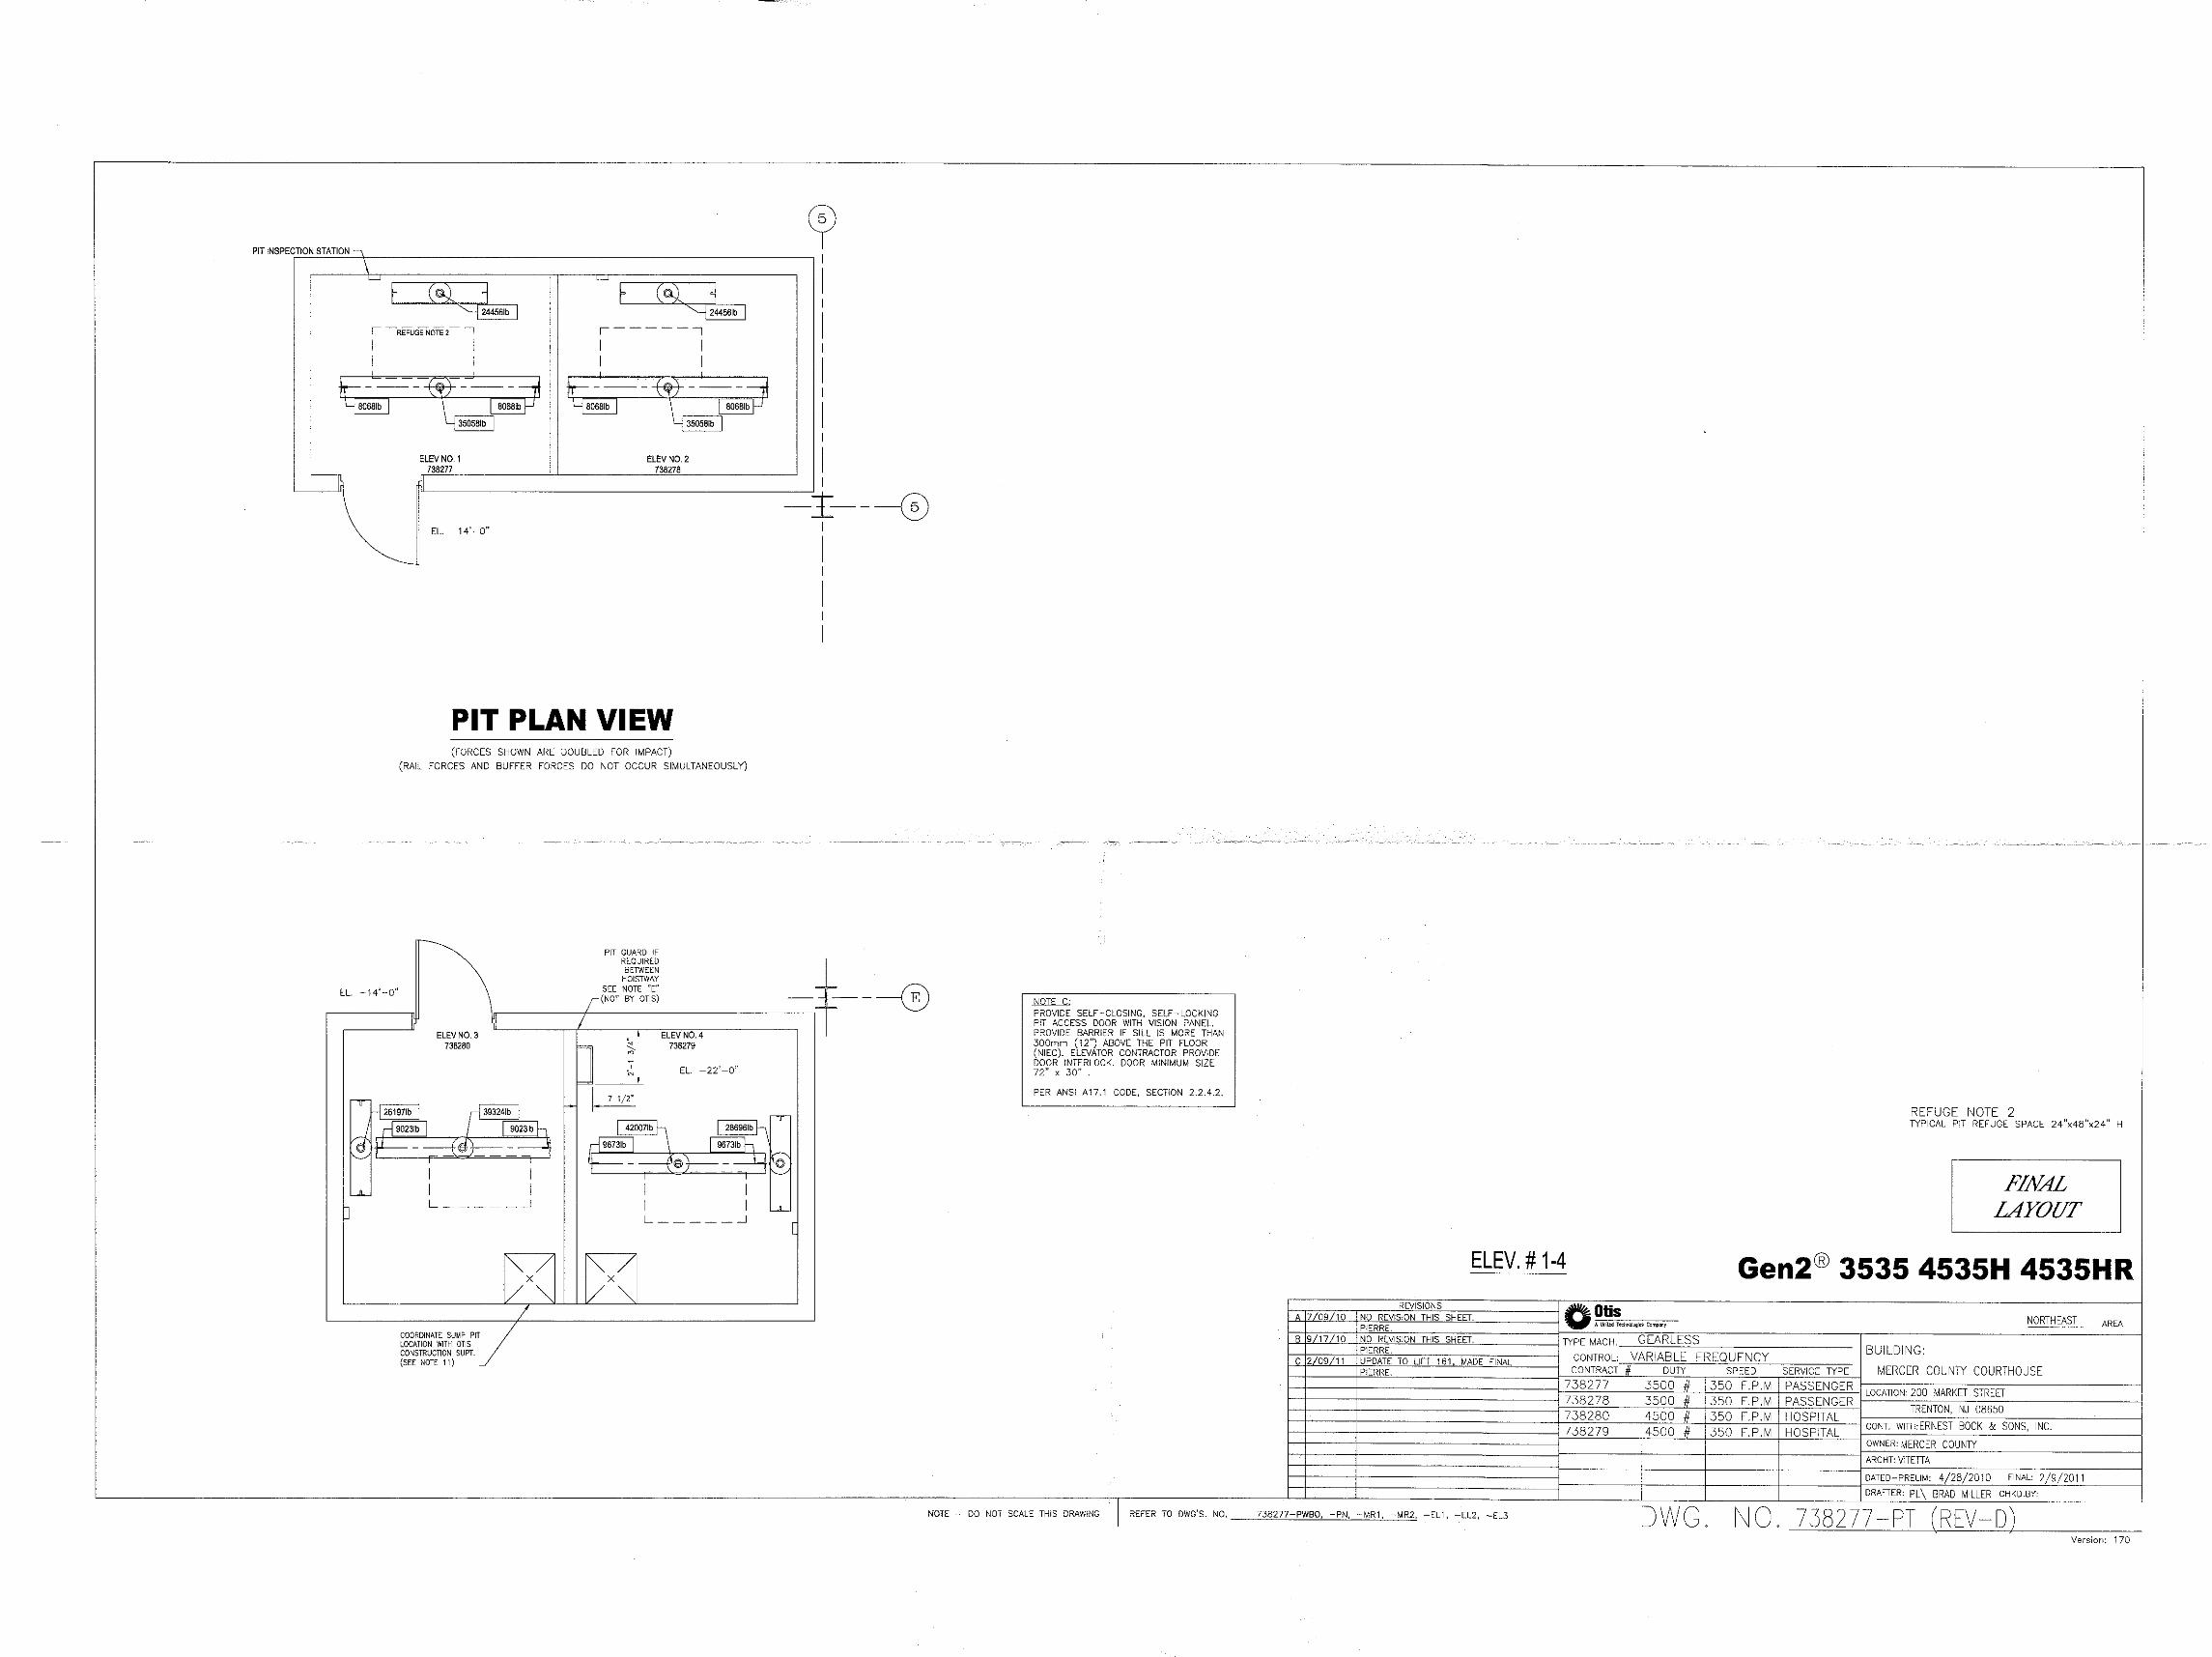
400 warren street otis elevators - bidnet
TRANSCRIPT

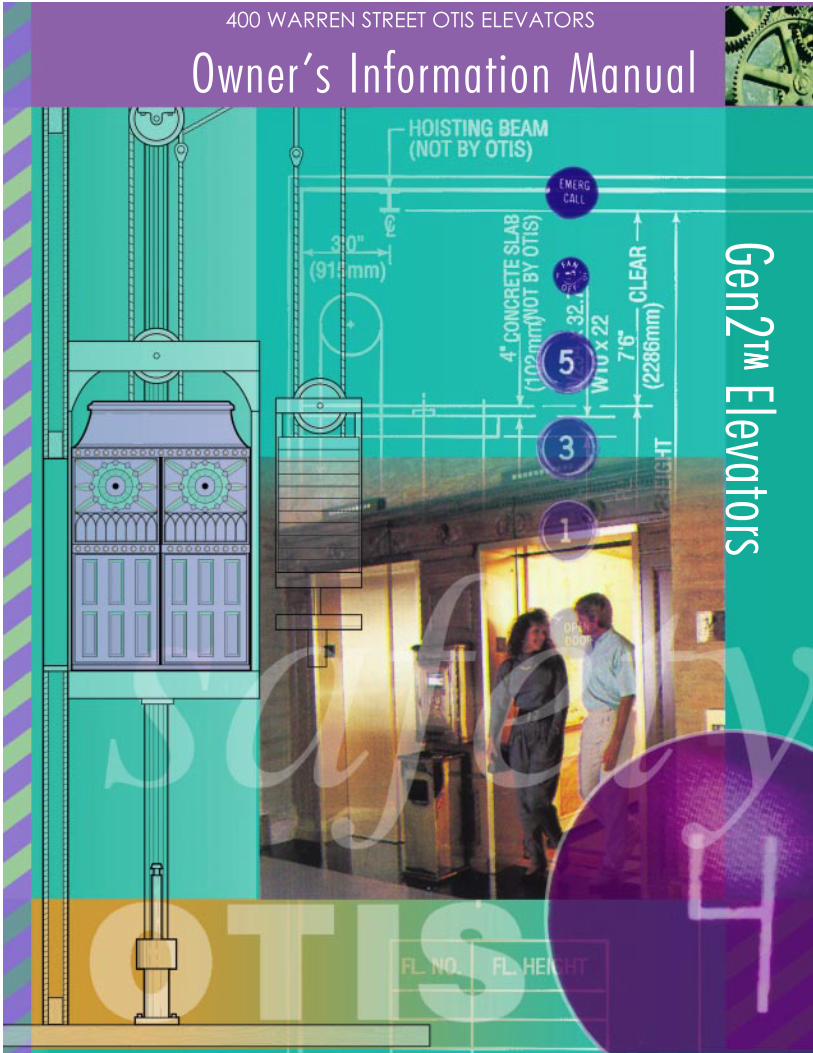
Owner ’s Information ManualGen2
TM TM TM TM TM Elevators
400 WARREN STREET OTIS ELEVATORS

MP-301G

Owner’s Information Manual
Gen2™ Elevators
Otis Elevator Company
Publisher: Technical Publications Department, Otis Elevator Company
Registered Trademarks, Registered Service marks, and Unregistered Marks are used within this publication—where applicable—to properly honor the claims of all companies.
This publication is intended for those individuals or organizations in ownership of Gen2™ elevator system and equipment manufactured and sold by Otis Elevator Company. It is expressly designed to be informative and to offer a limited understanding of the operation of these systems. It is not intended to be a guide for servicing or repairing or installing elevator equipment. Professional providers of those services should be contacted to perform any work in a safe and professional manner.
Any unauthorized reproduction, public display, or distribution of copies by any person of any portion of this publication may be a violation of Copyright Law of the United States of America and other countries and could result in the awarding of Statutory Damages of up to $250,000 (US dollars) (17USC504) for infringement, and may result in further civil and criminal penalties.
Permission to use any portion of this publication should be addressed to:
Otis Elevator Company Manager, Technical Publications Otis Service Center 212 West Newberry Road Bloomfield, CT 06002 USA
Copyright ©2004 Otis Elevator Company. All rights reserved.
Cataloging in Publications Data Part. No. MP-301G
Owner’s Information Manual Table of Contents
Chapter 4: Maintaining Your Gen2™ Elevator .................................................................................................43
Chapter 5: Otis Maintenance and Service .......................................................................................................57

i
WARNING: The use and ownership of this work is defined in the legend upon the front page hereof.
Preface
Thank you for your recent purchase of the Otis Elevator Gen2™ system. Your new Gen2 system meets the highest safety and performance standards available in the market today.
Otis has built a reputation based on quality, reliability and an OSHA-proven record of safety that’s the best in the business. We continue to pursue a policy of innovation to ensure our customers receive the highest level of service in the industry. We look forward to the opportunity to continue to serve you and your elevator needs for years to come.
The information in this binder will provide you and your staff with information about the Otis Elevator Company, the Gen2 system and its maintenance requirements.
Otis personnel have access to the latest information in support of our maintenance practices. We continuously look for ways to improve our processes; not only in support of your equipment, but in the ways we deliver information throughout our company.
To learn more about what genuine Otis maintenance can mean for you and your business, or to locate the Otis representative nearest you, please visit our website at www.otis.com.
How This Book Is Organized
This Owner’s Information Manual is divided into five chapters.
The first chapter gives a history of Otis Elevator Company.
Chapter 2 is designed to make elevator owners more aware of their responsibilities, including passenger safety, code requirements, and emergency procedures. It also explains how Otis emphasizes safety in its everyday operations.
Chapter 3 provides information about how your Gen2™ elevator operates, a description of its major components, and available features.
Chapter 4 describes the necessary maintenance needed on your new system.
Chapter 5 contains information about Otis’ service and maintenance programs.
ii Gen2™ Owner’s Information Manual
WARNING: The use and ownership of this work is defined in the legend upon the front page hereof
Use of Warnings
It is essential that you realize your Otis elevator is a complex piece of machinery and should be serviced only by a trained, authorized elevator mechanic. Tampering with the equipment is hazardous to you, to the person performing maintenance, to the passengers, and may be detrimental to the elevator itself.
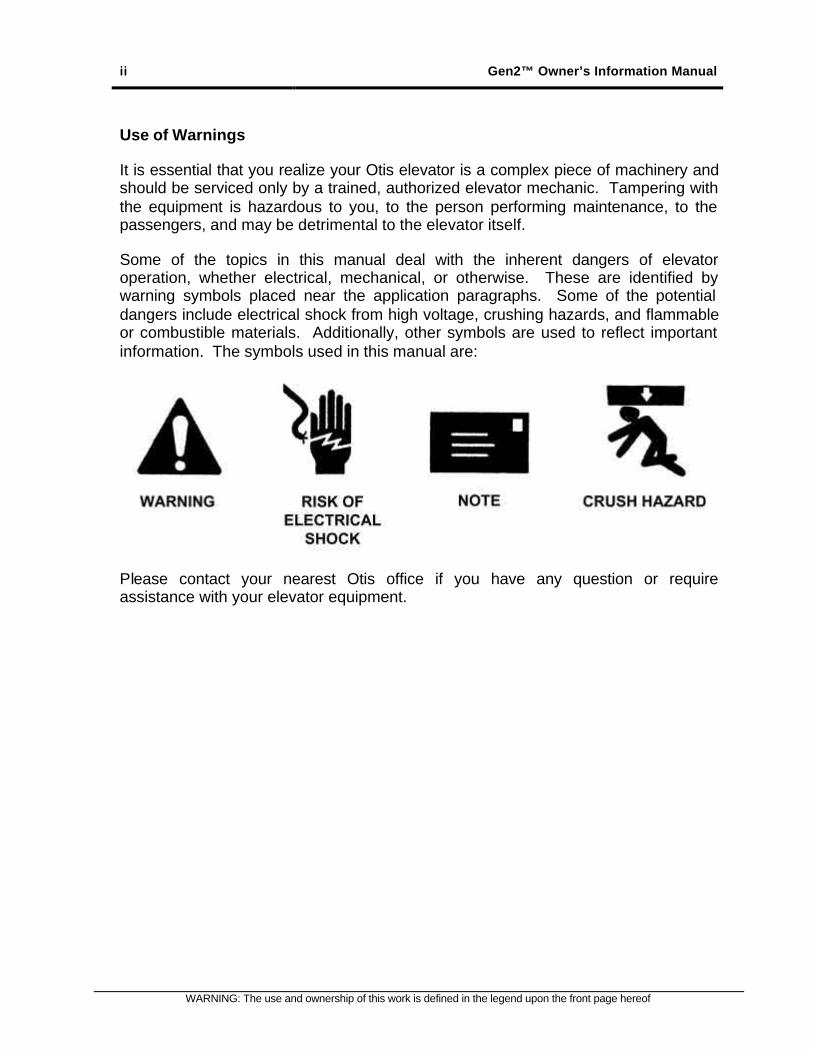
Some of the topics in this manual deal with the inherent dangers of elevator operation, whether electrical, mechanical, or otherwise. These are identified by warning symbols placed near the application paragraphs. Some of the potential dangers include electrical shock from high voltage, crushing hazards, and flammable or combustible materials. Additionally, other symbols are used to reflect important information. The symbols used in this manual are:
Please contact your nearest Otis office if you have any question or require assistance with your elevator equipment.
43
WARNING: The use and ownership of this work is defined in the legend upon the front page hereof.
Chapter 4: Maintaining Your Gen2™ Elevator
It is in your best interest as an owner to ensure your elevator system is well maintained. This will minimize the incidence, inconvenience, and cost of unexpected breakdown. This chapter should serve as a guide to understanding the maintenance recommended by the Otis Elevator Company. This chapter is not intended as a guide or instruction manual for performing elevator maintenance. Some of the routines listed may not be relevant to your particular installation, based on the specific features chosen.
Failure to use genuine Otis parts may invalidate any guarantee and may adversely affect the safety of your elevator. Refer to Otis Elevator Company for further information.
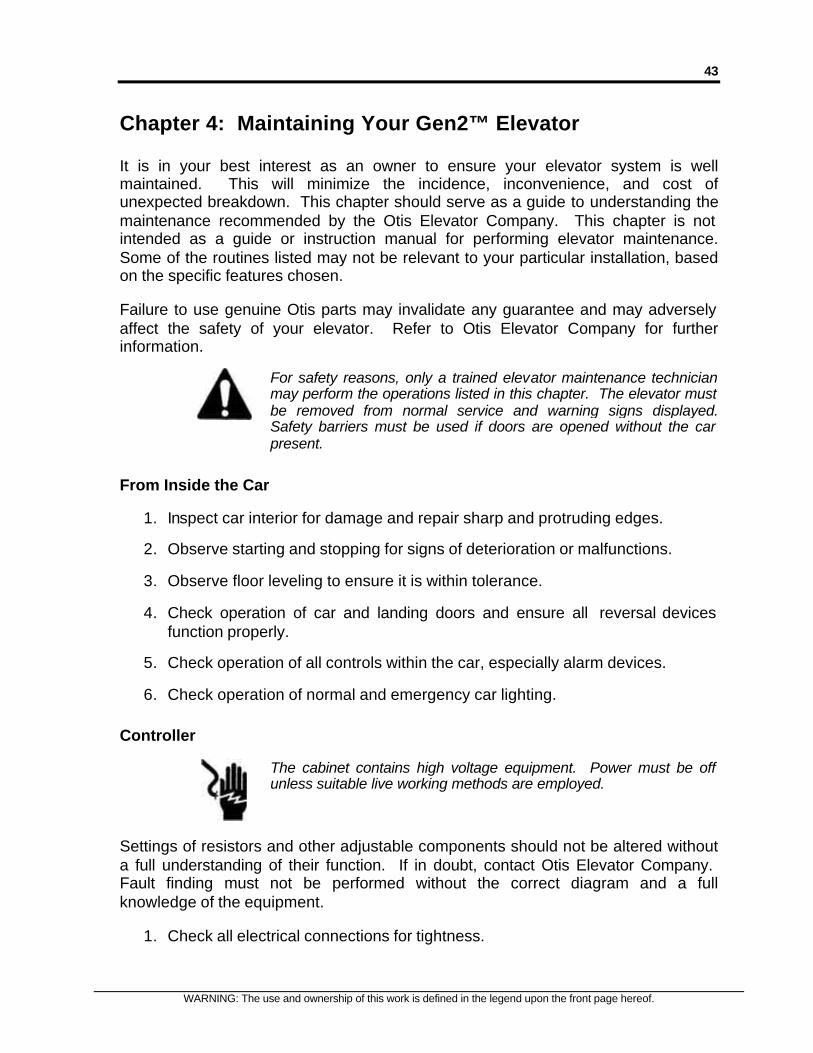
For safety reasons, only a trained elevator maintenance technician may perform the operations listed in this chapter. The elevator must be removed from normal service and warning signs displayed. Safety barriers must be used if doors are opened without the car present.
From Inside the Car
1. Inspect car interior for damage and repair sharp and protruding edges.
2. Observe starting and stopping for signs of deterioration or malfunctions.
3. Observe floor leveling to ensure it is within tolerance.
4. Check operation of car and landing doors and ensure all reversal devicesfunction properly.
5. Check operation of all controls within the car, especially alarm devices.
6. Check operation of normal and emergency car lighting.
Controller
The cabinet contains high voltage equipment. Power must be off unless suitable live working methods are employed.
Settings of resistors and other adjustable components should not be altered without a full understanding of their function. If in doubt, contact Otis Elevator Company. Fault finding must not be performed without the correct diagram and a full knowledge of the equipment.
1. Check all electrical connections for tightness.
44 Gen2™ Owner’s Information Manual
WARNING: The use and ownership of this work is defined in the legend upon the front page hereof
2. Ensure ventilation fans and grills are clean and functioning.
3. Keep all parts clean.
4. Ensure cabinet doors are locked shut after inspection.
Landing Fixtures
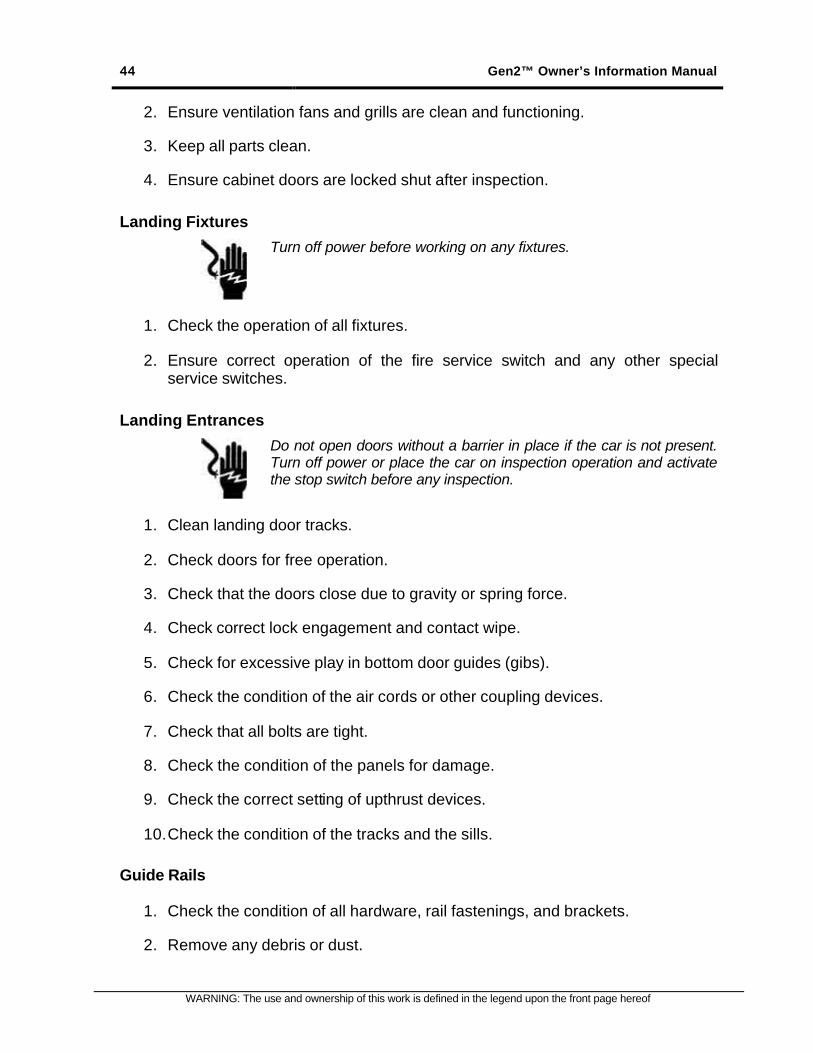
Turn off power before working on any fixtures.
1. Check the operation of all fixtures.
2. Ensure correct operation of the fire service switch and any other special service switches.
Landing Entrances
Do not open doors without a barrier in place if the car is not present. Turn off power or place the car on inspection operation and activate the stop switch before any inspection.
1. Clean landing door tracks.
2. Check doors for free operation.
3. Check that the doors close due to gravity or spring force.
4. Check correct lock engagement and contact wipe.
5. Check for excessive play in bottom door guides (gibs).
6. Check the condition of the air cords or other coupling devices.
7. Check that all bolts are tight.
8. Check the condition of the panels for damage.
9. Check the correct setting of upthrust devices.
10. Check the condition of the tracks and the sills.
Guide Rails
1. Check the condition of all hardware, rail fastenings, and brackets.
2. Remove any debris or dust.

CHAPTER 4: MAINTAINING YOUR GEN2 ELEVATOR 45
WARNING: The use and ownership of this work is defined in the legend upon the front page hereof.
Belts and Terminations
1. Inspect coated steel belts for signs of wear.
2. Check condition of all coated steel belt terminations.
3. Check and adjust lengths to maintain correct counterweight run-by.
4. Ensure that the tension on all belts is equal.
Car Entrance and Operator
Do not ride on the car top unless the cart is on inspection operation. Whenever the car is stopped, immediately activate the emergency stop switch. When working on the car doors, ensure the main power is off.
1. Clean the car door track of any debris.
2. Check the condition of all hardware.
3. Check the condition and adjustment of the door coupling mechanism.
4. Check the door gibs for excessive movement.
5. Check the upthrust rollers for recommended clearance.
6. Check electrical cables for signs of damage.
7. Check the security of all door tracks.
8. Check the clearances between door panels and returns.
9. Ensure correct operation of the door locking mechanism.
10. Check the door closing speed and force.
11. Check the operation of the door open button and all other reversal devices.
Hoistway Switches
Do not make adjustments without a full understanding of any item.
1. Clean the switches and check the arms and rollers for free movement.
2. Check the function of all terminal switches.
46 Gen2™ Owner’s Information Manual
WARNING: The use and ownership of this work is defined in the legend upon the front page hereof
3. Check the running clearance of the inductors and vanes.
Car Frame Equipment
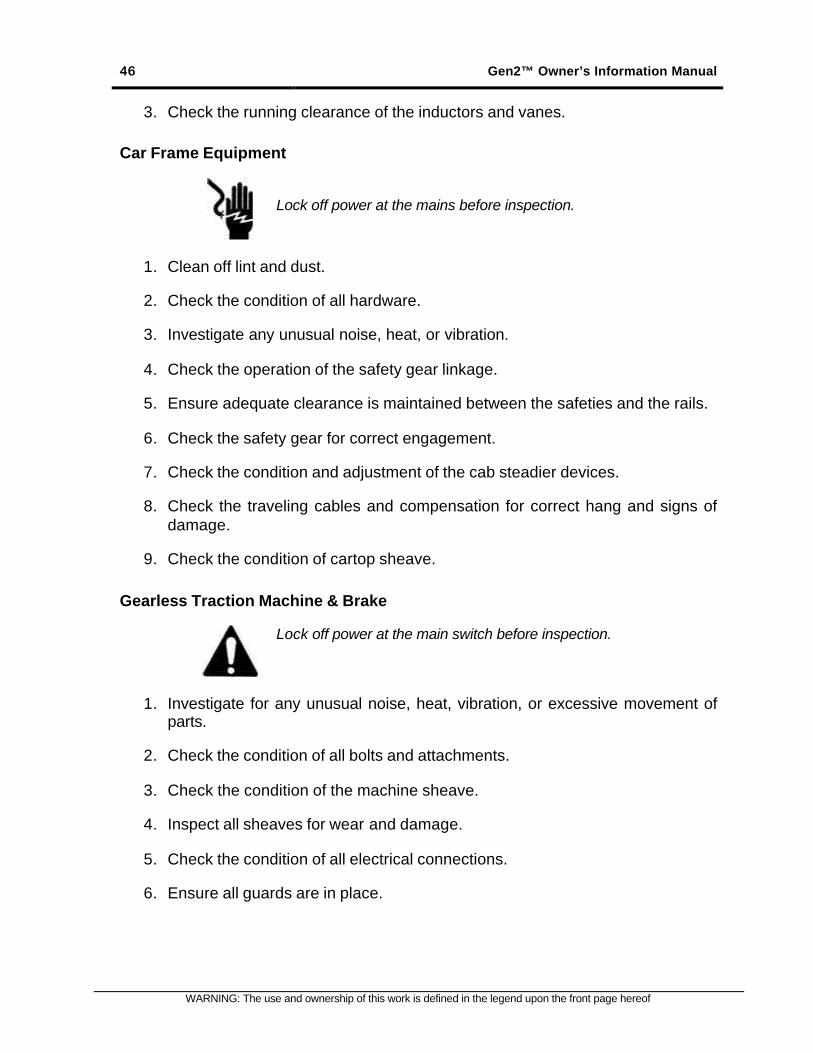
Lock off power at the mains before inspection.
1. Clean off lint and dust.
2. Check the condition of all hardware.
3. Investigate any unusual noise, heat, or vibration.
4. Check the operation of the safety gear linkage.
5. Ensure adequate clearance is maintained between the safeties and the rails.
6. Check the safety gear for correct engagement.
7. Check the condition and adjustment of the cab steadier devices.
8. Check the traveling cables and compensation for correct hang and signs ofdamage.
9. Check the condition of cartop sheave.
Gearless Traction Machine & Brake
Lock off power at the main switch before inspection.
1. Investigate for any unusual noise, heat, vibration, or excessive movement ofparts.
2. Check the condition of all bolts and attachments.
3. Check the condition of the machine sheave.
4. Inspect all sheaves for wear and damage.
5. Check the condition of all electrical connections.
6. Ensure all guards are in place.
CHAPTER 4: MAINTAINING YOUR GEN2 ELEVATOR 47
WARNING: The use and ownership of this work is defined in the legend upon the front page hereof.
Counterweight
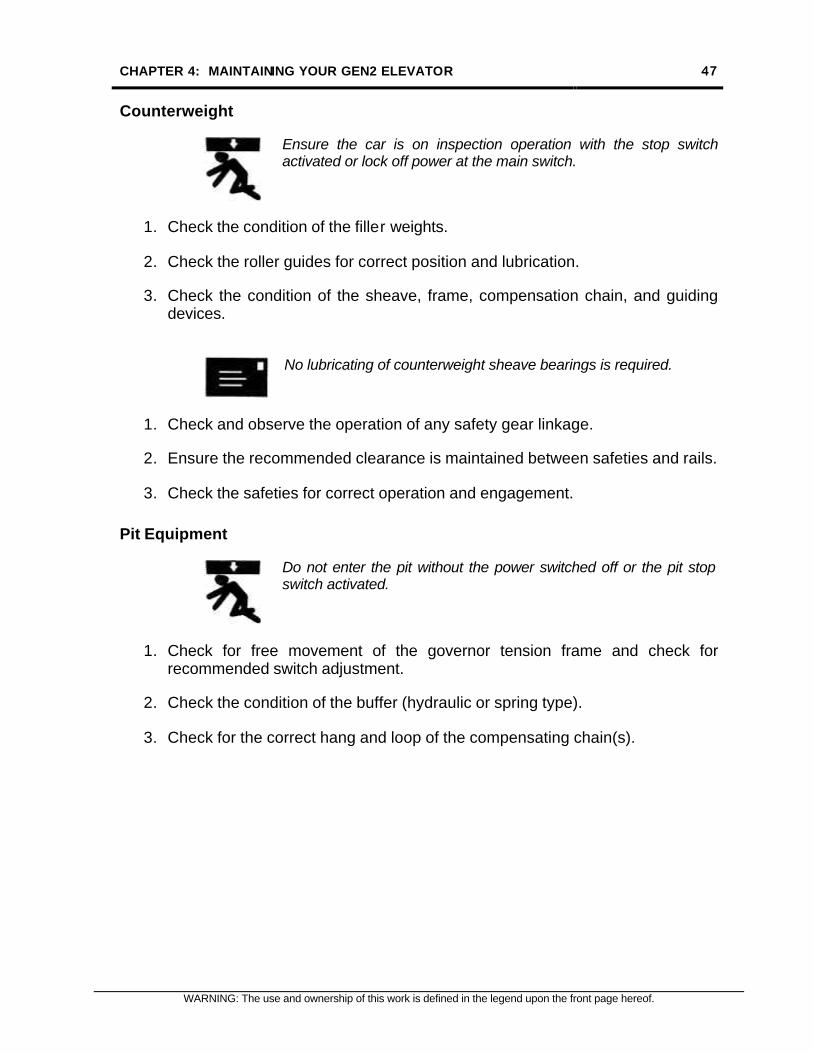
Ensure the car is on inspection operation with the stop switch activated or lock off power at the main switch.
1. Check the condition of the filler weights.
2. Check the roller guides for correct position and lubrication.
3. Check the condition of the sheave, frame, compensation chain, and guiding devices.
No lubricating of counterweight sheave bearings is required.
1. Check and observe the operation of any safety gear linkage.
2. Ensure the recommended clearance is maintained between safeties and rails.
3. Check the safeties for correct operation and engagement.
Pit Equipment
Do not enter the pit without the power switched off or the pit stop switch activated.
1. Check for free movement of the governor tension frame and check for recommended switch adjustment.
2. Check the condition of the buffer (hydraulic or spring type).
3. Check for the correct hang and loop of the compensating chain(s).
48 Gen2™ Owner’s Information Manual
WARNING: The use and ownership of this work is defined in the legend upon the front page hereof
Cleaning
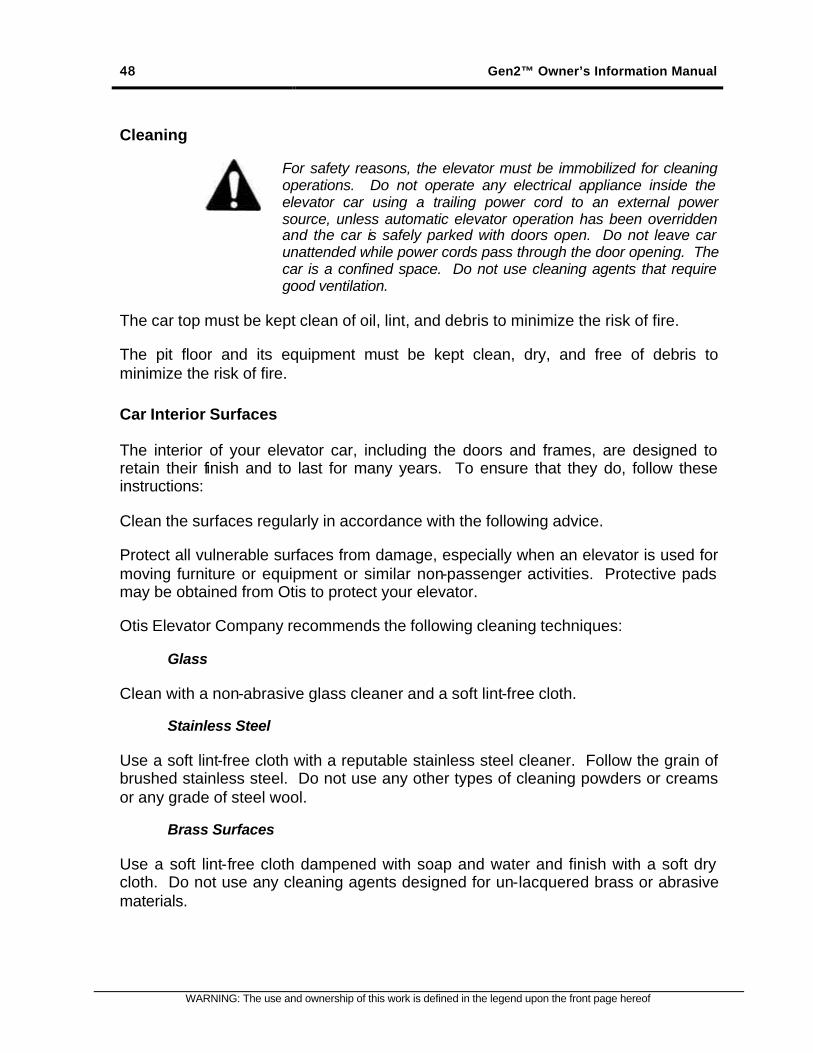
For safety reasons, the elevator must be immobilized for cleaning operations. Do not operate any electrical appliance inside the elevator car using a trailing power cord to an external power source, unless automatic elevator operation has been overridden and the car is safely parked with doors open. Do not leave car unattended while power cords pass through the door opening. The car is a confined space. Do not use cleaning agents that require good ventilation.
The car top must be kept clean of oil, lint, and debris to minimize the risk of fire.
The pit floor and its equipment must be kept clean, dry, and free of debris to minimize the risk of fire.
Car Interior Surfaces
The interior of your elevator car, including the doors and frames, are designed to retain their finish and to last for many years. To ensure that they do, follow these instructions:
Clean the surfaces regularly in accordance with the following advice.
Protect all vulnerable surfaces from damage, especially when an elevator is used for moving furniture or equipment or similar non-passenger activities. Protective pads may be obtained from Otis to protect your elevator.
Otis Elevator Company recommends the following cleaning techniques:
Glass
Clean with a non-abrasive glass cleaner and a soft lint-free cloth.
Stainless Steel
Use a soft lint-free cloth with a reputable stainless steel cleaner. Follow the grain of brushed stainless steel. Do not use any other types of cleaning powders or creams or any grade of steel wool.
Brass Surfaces
Use a soft lint-free cloth dampened with soap and water and finish with a soft dry cloth. Do not use any cleaning agents designed for un-lacquered brass or abrasive materials.
CHAPTER 4: MAINTAINING YOUR GEN2 ELEVATOR 49
WARNING: The use and ownership of this work is defined in the legend upon the front page hereof.
Laminated Surfaces
Use a soft lint-free cloth damped with soap and water. Do not use any cleaning powders, creams, or sprays.
Painted Surfaces
Use a soft lint-free cloth damped with soap and water. Do not use any cleaning powders or creams.
Landing Doors and Frames
Landing doors and frames should be cleaned in accordance with the preceding recommendations and protected against damage when necessary.
Car and Landing Door Sills
It is essential to regularly clean all debris from the car and landing door sill grooves. First immobilize the elevator (see note below) with the doors open at a convenient landing.
Then carefully brush out accumulated dirt and extract with a vacuum cleaner.
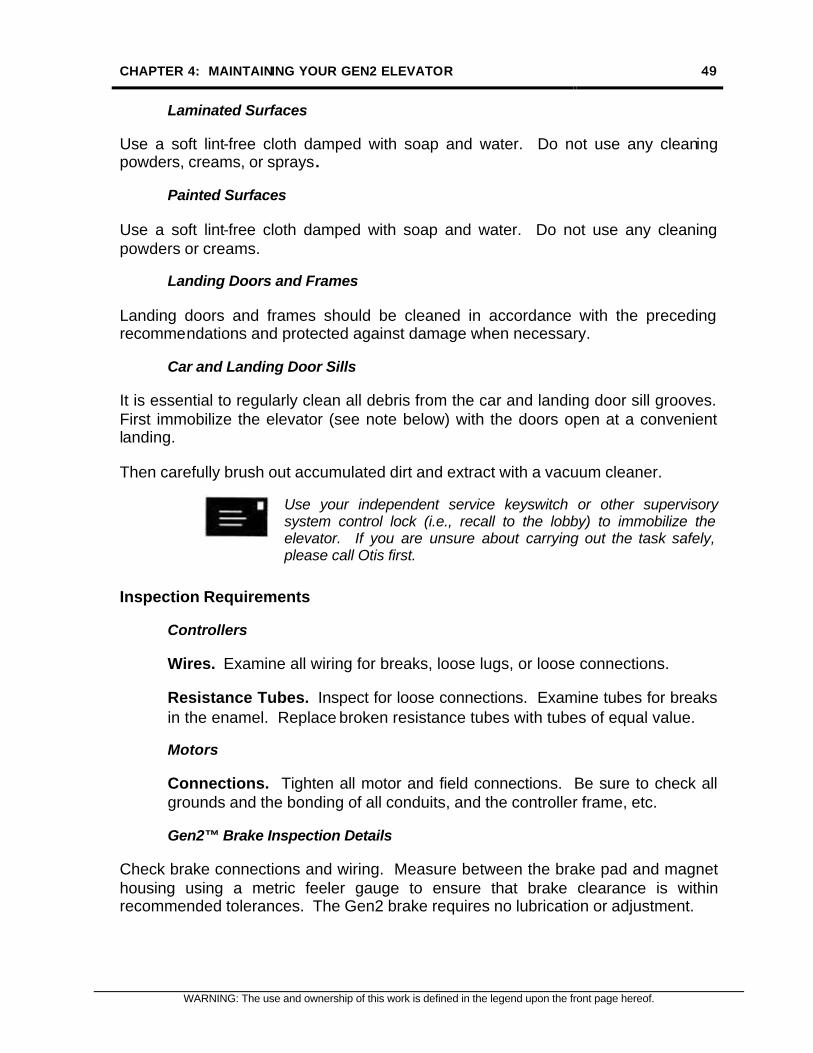
Use your independent service keyswitch or other supervisory system control lock (i.e., recall to the lobby) to immobilize the elevator. If you are unsure about carrying out the task safely, please call Otis first.
Inspection Requirements
Controllers
Wires. Examine all wiring for breaks, loose lugs, or loose connections.
Resistance Tubes. Inspect for loose connections. Examine tubes for breaks in the enamel. Replace broken resistance tubes with tubes of equal value.
Motors
Connections. Tighten all motor and field connections. Be sure to check all grounds and the bonding of all conduits, and the controller frame, etc.
Gen2™ Brake Inspection Details
Check brake connections and wiring. Measure between the brake pad and magnet housing using a metric feeler gauge to ensure that brake clearance is within recommended tolerances. The Gen2 brake requires no lubrication or adjustment.
50 Gen2™ Owner’s Information Manual
WARNING: The use and ownership of this work is defined in the legend upon the front page hereof
Governors
Check and clean dust and debris from the governor parts. Ensure that all covers are replaced after inspection. Check the wiring and connections on all solenoids and overspeed switch. No lubrication or adjustments required. Do not lubricate governor rope.
Sheaves
Check all sheaves for wear and debris. Clean if needed. Do not use any solvents, cleaners, or chemicals on sheave surfaces. Dust with a dry cloth only if needed.
Sheave bearings are sealed and do not require periodic lubrication.
Car
Flooring. Inspect for worn or loose flooring.
Emergency Exits. Check operation of top exit and switch.
Lighting and Fans. Check for cleanliness, burnt out lamps, and for lubrication. Be sure that globes are fastened.
Fixture Jewels and Lenses. Replace if any are cracked or broken. Glass used in the car should be in accordance with codes.
Car Operating Devices
Pushbuttons. Buttons should not stick and should work properly. Replace worn buttons and switches.
Indicators
Position Indicators. Position Indicators should be tested for proper operation and checked for burnt out lamps.
Car Door
Fastenings. Examine fastenings and check the door opening range. Examine for broken springs and loose connections.
Hangers. Check for worn tracks and rollers, making certain that the door cannot come out of its guides or jam at any point.
Bottom Guides (Gibs). Examine for wear, looseness, or the possibility of the guides coming out of the threshold.
CHAPTER 4: MAINTAINING YOUR GEN2 ELEVATOR 51
WARNING: The use and ownership of this work is defined in the legend upon the front page hereof.
Car
Fastenings. Check and tighten the fastenings if required.
Cab Steadier Plates. Check and tighten cab steadier plates if needed.
Roller Guides. Check the roller guides for wear, proper clearances, and adjustments.
Doors and Door Operators
Wear. Examine thoroughly the doors and door operator for wear, friction, or obstructions that may prevent proper operation.
Adjustment. Clean, align, and adjust the door operator for quiet operation and proper opening and closing speed. Test and observe operation.
Safety Operated Switch
Adjustment. Be sure that safety operated switch will function if the governor trips.
Releasing Carrier
Spring Tension. Ensure that the releasing carrier will operate properly if the governor trips. Check all setscrews, keys, levers, pins, nuts, and lock nuts.
Coated Steel Belts
Condition. Visually inspect Coated Steel Belts for wear, cuts, breaks, or damage. Do not use any lubricants, cleaners, solvents, or chemicals to clean belts. If cleaning is needed, use only a dry cloth.
Traveling Cables
Fastenings. Check the supportive device fastenings.
Condition. Examine the outside coverings for wear. Look for any abrasion from concrete or steel supports.
Hoistway Door and Operation
Adjustment. Examine each door carefully. Check for structural defects. Examine the doors to see if they can be opened without releasing the interlock. If the lock is worn or the door has sagged so that interlock does not engage properly, arrange for repairs at once. Clean, lubricate and inspect all pins, bushings, guides, etc. as needed. Be sure that bumpers are in place and in good condition.
52 Gen2™ Owner’s Information Manual
WARNING: The use and ownership of this work is defined in the legend upon the front page hereof
Hangers. Examine the hangers for proper operation, wear, upthrust adjustment, and condition of the guides (gibs) in the bottom of the doors. Checks tracks for wear and alignment, and tighten all fastenings if needed.
Interlocks. It is extremely important tha t all lock failures be repaired immediately. Check contacts and the point at which they close. Try to pull the door open with the car outside the range of the lock. Carefully check clearances and tightness of bolts and screws to avoid future shutdowns.
Conduit
Check the fastenings and ensure the conduit has not pulled out of the fittings and that the duct is securely fastened to the wall.
Counterweight
Roller Guides. Check for wear, proper clearances, and adjustment.
Filler Weight Rods and Nuts. Tighten the rods and nuts, if necessary, and check cotter pins.
Limit Switches and Cams
Rollers. Check the roller guides for wear and replace if they do not engage cams properly.
Wiring. Be sure that all wiring connections are tight.
Test Operation. See that all switches and cams are in correct alignment. Check the operation of final limits.
Rails
Check the brackets, rail fastenings, and fishplates for loose bolts. Tighten and clean when required.
Buffers and Springs
Operation. Run the car at slow speed onto the buffers, being sure that the spring returns properly. Fastenings—Check for loose nuts and bolts and tighten if needed.
Sheaves (Governor)
Bearings. Check for the bearing wear, especially those on the governor tension frames.
Fastenings. Check all fastenings and tighten as needed.
Switches. Check all contacts and switch operation.

CHAPTER 4: MAINTAINING YOUR GEN2 ELEVATOR 53
WARNING: The use and ownership of this work is defined in the legend upon the front page hereof.
Clearances
Pit of Counterweight. Check the pit and striking blocks to be sure the counterweight will land before the car strikes the overhead.
Governor Tension Frames. Check to determine whether or not the rope should be shortened.
Hall Buttons. Check for broken or sticking buttons, and ensure that all screws are in place and the plates are properly fastened. If lights are used, inspect for proper operation.
Emergency Door Opening Keys. Check the operation of keys on doors arranged for their use. Use by people unfamiliar with elevators may result in an accident if the door is opened when the car is not at that floor. Emergency keys should be stored securely in compliance with all elevator codes.
Safety Devices
Check clearance between the safeties and rails. Check all machine screws in the links and rods, and be sure that all pins, nuts, and keys are in place and tight.
Governor Test of Safety. If a recent safety test is not a matter of record, and then a standard safety test at slow speed should be performed. Be sure to check local code requirements. All equipment should be thoroughly inspected before and after conducting the test.
Traveling Cables
Check traveling cables for signs of wear and ensure the attachment points at the car and hoistway are secure.
Environmental Requirements
Lubricants, oils, and other substances or materials that pollute the environment must be returned by the maintenance company and disposed of in accordance with the appropriate regulations. If the building owner takes responsibility for the disposal, he or she must also carry it out in accordance with the all local, state and federal legal requirements.
Escape/Evacuation Procedures
Occasionally passengers may become trapped in an elevator that has stalled due to power failures or other conditions. This section briefly outlines the process for emergency evacuation of passengers from a stalled elevator.
54 Gen2™ Owner’s Information Manual
WARNING: The use and ownership of this work is defined in the legend upon the front page hereof
Manual Rescue Operation
Qualified personnel can use the Gen2 Manual Rescue Operation function to move the elevator when main power is lost, by remotely lifting the machine brake from the controller.
Manual Rescue Operation is to be used only after all other means to evacuate trapped passengers have been considered.
Basic Escape/Evacuation Rules
These rules apply in all cases and must be followed with any type of evacuation.
Never attempt an evacuation on your own. Immediately call an experienced elevator mechanic to the site to perform an evacuation. Passengers need to be removed as quickly as possible but never with the risk of injury to the passengers, building personnel, or mechanics.
A trained elevator mechanic must perform these basic rules, which include:
• Lock out and tag the main line before removing passengers from anyexit (except under normal operation). This rule applies even if therehas been a power failure.
• Do not open the doors unless someone is at the landing to assist thepassengers when they are exiting the elevator.
• Communicate with passengers. Identify yourself and reassurepassengers that they are safe and that steps are being taken to evacuatethem from the car. Ask questions:
o How many passengers are in the car?
o Are any passengers ill, injured, or do any require specialassistance?
o Are the lights on in the elevator car?
o Are the car doors open or closed?
o What were the conditions leading up to the entrapment?
o How long have passengers been trapped?
• Keep passengers informed of the steps being taken throughout theevacuation process:

CHAPTER 4: MAINTAINING YOUR GEN2 ELEVATOR 55
WARNING: The use and ownership of this work is defined in the legend upon the front page hereof.
o Instruct the passengers to stay away from front door.
o Instruct the passengers not to touch any buttons unless asked to doso.
• Return the car to normal operation (if possible).
• Ask passengers to:
o Check that the car Emergency Stop Switch is in the “RUN” position.
o Try pushing the door open button.
o Check car doors to make sure they are fully closed.
• A trained mechanic should perform a quick diagnostic check from themachine room to:
o Check for power.
o Check for blown fuses.
o Check for tripped overload.
o Check for contact(s) not making.
o Check that the safety circuit (“safety chain”) is closed.
• Restore normal operation (if possible) and ensure that passengers exitsafely.
Do not open the doors unless someone is at the landing to assist the passengers when they are exiting the elevator. If the car is more than 30 cm (1 ft.) from floor level, a ladder should be used. In many cases, an additional rescue person is needed—one person in the car and the other at the landing—to assist the passengers. Have the ladder available before opening door; passengers will not wait for the ladder once doors are opened.

56 Gen2™ Owner’s Information Manual
WARNING: The use and ownership of this work is defined in the legend upon the front page hereof
57
WARNING: The use and ownership of this work is defined in the legend upon the front page hereof.
Chapter 5: Otis Maintenance and Service
Elevator and Escalator maintenance is more than just returning and elevator to service after an elevator shutdown occurs. Since elevator systems are a significant investment, proper maintenance on this equipment is critical to extend the life of the equipment and reduce the possibility of unscheduled disruptions or shutdowns.
Otis utilizes the vast knowledge it has accumulated over the years as the world’s leader in the elevator and escalator industry to provide superior maintenance to extend elevator life. That means not only developing better, longer-lasting products, but also the technology to scrutinize their maintenance performance along with the technology to place valuable information into the hands of well-trained mechanics.
Otis Maintenance Management System (OMMS) is a dynamic program that takes into account your elevators’ maintenance needs, use and component life. Otis can tailor inspections and maintenance schedules based on your elevators’ use in advance.
OMMS procedures are performed on your equipment at predetermined intervals. Components are replaced before their normal life cycle ends and their performance deteriorates. Although we cannot guarantee that no malfunctions will occur, OMMS procedures greatly minimize shutdowns. In addition, Otis continually re-evaluates and improves these procedures. Engineering testing is constantly underway to update and improve OMMS maintenance techniques and OMMS materials.
OMMS is a system tailored specifically to your environment, equipment and needs. It’s standardized work practices and predetermined task scheduling ensure the right maintenance at the right time – today and for the extended life of your equipment. It is based not only on engineered, certified best methods, but on constant analysis of the work performed, to ensure consistent, high quality maintenance. This ultimately protects your elevator investment and ensures satisfied tenants.
The Otis Maintenance Management System is the single most advanced and effective support system available in the elevator industry.
Another Otis technological advance is Remote Elevator Monitoring (REM®). REM® uses advanced data communications and microprocessor technology to provide 24-hour, on-site elevator monitoring. Sensors located in key areas of elevator operation provide diagnostic data in an effort to discover and correct problems before a failure occurs.
Because REM® constantly monitors an elevator’s performance, it can identify imminent problems that are fixable during a routine maintenance visit. If it finds a
58 Gen2™ Owner’s Information Manual
WARNING: The use and ownership of this work is defined in the legend upon the front page hereof
major problem, REM® automatically sends a message to a customer care center and an Otis service mechanic is dispatched within minutes of the call.
REM continuously monitors your elevators 24 hours a day, 365 days a year. It reduces service interruptions and provides accurate operation information to identify and correct most problems quickly. For fast response, the REM® system makes the service calls for you. A mechanic is dispatched immediately for urgent problems and elevators are often back in service before you or your passengers know there is a problem.
Otis invests in the tools and technology necessary to make technical information easily accessible to Otis personnel. In North America, for instance, a tool such as OtisWave is a fully searchable online library of technical documents providing up-to-date information. Otis service personnel in North America now access information faster and easier using the OtisWave library. A maintenance supervisor at a work site needs only a few minutes on his laptop computer to identify a specific part, review a maintenance routine, or find replacement part numbers. The hours spent searching through thousands of pages of paper documents in the office previously are now history.
Otis continuously strives to provide exceptional service to our customers. Evidence of this commitment can be found in facilities such as OTISLINE®. OTISLINE is a 24-hour-a-day, centralized communications center that enables you to contact Otis at any time of the day or night. Customer service representatives are available at toll-free phone numbers to provide a prompt and professional response.
e*Service through Otis.com provides direct access 24 hours a day 7 days a week into your building’s service history. You can access e*Service using your existing computer and internet browser – just log-in to otis.com and register for e*Service. Knowledge about all service calls and maintenance completed on your elevators or escalators is at your fingertips. E*Service also provides access to your financial statement of account information.
Otis is driven to develop products that improve an elevator’s or escalator’s performance, safety, and reliability. Many of these products are incorporated directly into production at the factory for new elevator systems or are added to older equipment to modernize it.
Among the key elements in Otis’ overall maintenance program are its customer service centers and testing facilities. For example, the Otis Service Center (OSC) in Bloomfield, Connecticut provides maintenance, repair, and modernization services to all Otis maintenance customers throughout the U.S. and Canada. The 220,000-square-foot facility stocks, manufactures, and sources elevator and escalator parts. Printed circuit board repair and testing are also performed at OSC.
CHAPTER 5: OTIS MAINTENANCE AND SERVICE 59
WARNING: The use and ownership of this work is defined in the legend upon the front page hereof.
The Otis Test Tower and Quality Assurance Center (QAC) in Bristol, Connecticut serve as examples of Otis’ commitment to minimizing elevator/escalator downtime through continuous improvement. A combination of real-world testing and computer simulation at this facility means faster, quieter, more efficient, and reliable equipment for Otis customers. Engineers not only test products, but also perfect installation and service methods before they are implemented.
Finally, Otis offers many forms of preventative maintenance programs designed to extend the life of elevator and escalator equipment. Monitoring and maintaining equipment properly also allows for the safest, most reliable performance possible. Please contact your Otis sales or customer service representative for more information about these services.