voting systems: turningpoint technologies 2008 systems: turningpoint technologies 2008 ... a voting...
TRANSCRIPT

Page 1 of 18
Voting Systems: TurningPoint Technologies 2008 (in Microsoft PowerPoint 2007)
This guide was produced for a staff development session at Loughborough University and is made available here for the convenience of potential users of TurningPoint. It describes how “Voting Systems” may be used in lectures or tutorials. At Loughborough University we use a voting system supplied by TurningPoint Technologies. The system is embedded in PowerPoint 2007 which makes it easy to use, particularly for those reasonably familiar with PowerPoint. In this guide we present only the simplest question types. Once familiar with the basics the user will quickly master the more sophisticated question types. Contents: • Getting Started • Designating the Correct Answer • Creating Demographic Slides • Creating Picture Slides • Creating Multiple Response Slides • Using Equation Editor for ‘Mathematics questions’
Acknowledgements: This guide was produced by Assistant Learning Technologist Bob Nguyen in 2008 and updated by Amanda Bobyk, Project Assistant in 2009.

Page 2 of 18
1 - Getting Started Double click on the TurningPoint icon on your desktop, it will start up PowerPoint. A popup window will appear to confirm your selection.
Some other Security Warning windows may also appear. Please click on the button to Enable Macros
Finally, the program is loaded

Page 3 of 18
You will see that at the end of the normal PowerPoint (PP) task bar is a TurningPoint (TP) task bar. We can begin immediately. Click Insert Slide on TP. You will be presented with a large number of possible slide types:
Display TurningPoint
License Information
Open Existing Session
Insert a Question Slide
Insert Charts, Reminders, Answer Indicators and Stats
Displays Selected Input
Device
Link to TurningTalk Website
Reset Data
Save Session Data
Convert Slides to Picture
Generate Reports, Add Standards, Create Comparative Links, Organize
Conditional Branching, Update Parser Slides, Ranking Wizard, Adjust Settings, LMS Wizards
Manage Participant
Lists Help
Page 4 of 18
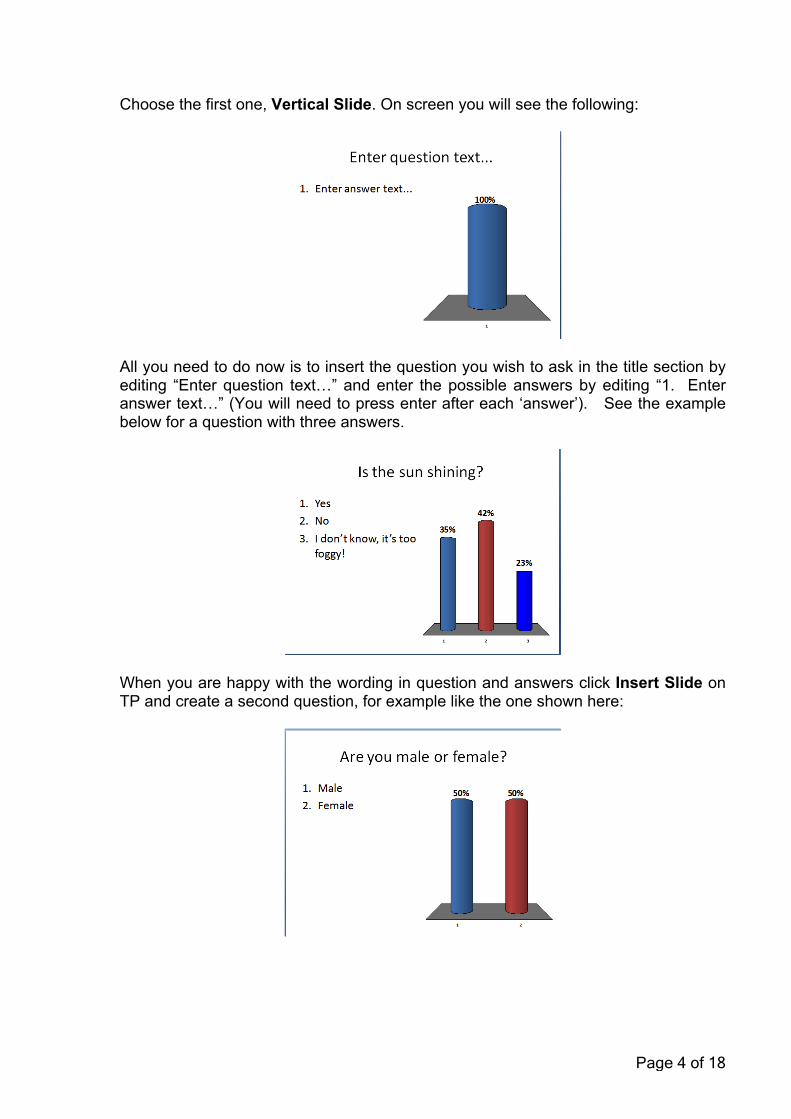
Choose the first one, Vertical Slide. On screen you will see the following:
All you need to do now is to insert the question you wish to ask in the title section by editing “Enter question text…” and enter the possible answers by editing “1. Enter answer text…” (You will need to press enter after each ‘answer’). See the example below for a question with three answers.
When you are happy with the wording in question and answers click Insert Slide on TP and create a second question, for example like the one shown here:

Page 5 of 18
When you have completed all questions you should save as normal. Once you have constructed the number of question slides you want you will want to view the slide show: First: go to Reset on TP and select All Slides (once a particular slide has been subjected to the voting process it will retain that ‘vote’ unless you reset it). Secondly: click the button on Respond Devices on TP. Choose Keyboard keys 0-9. This will allow you to test your slides before you go in front of an audience.
Before showing your slide, you may need to delete the first blank slide which was created by PP (not TP). Select this blank slide and press Delete or right click on the slide and choose Delete slide. Now click Slide show on the task bar and choose From beginning.
The first slide will present. All presented slides will have a bar at the top right.
This should show polling open in green. You now press (or vote) numeric buttons as appropriate. When you click the screen voting will close:

Page 6 of 18
The results page will also appear on screen. (If no votes are recorded, as here, the results page will not be presented). Left-click the screen again to present the next question. To end the show at any time right click on the screen and choose ‘end show’. If the chart of responses is not displayed, select Tools > Settings. Set auto-advance to false, then click done.

Page 7 of 18
2 - Designating the Correct Answer Say we wish to designate the correct answer (after voting is over of course). Highlight a question in which you wish to designate a correct answer. See next picture.
Now use the tool bar on the right-hand side of your screen. Choose which answer you wish to designate as being correct and choose correct. This will set the other values to incorrect.

Page 8 of 18
Go into Insert Object on TP. Select Correct Answer Indicator and choose one of the possibilities. See next diagram.
When this question is presented in future the correct answer will be highlighted with the object (following a left-click on screen) after voting.
Page 9 of 18
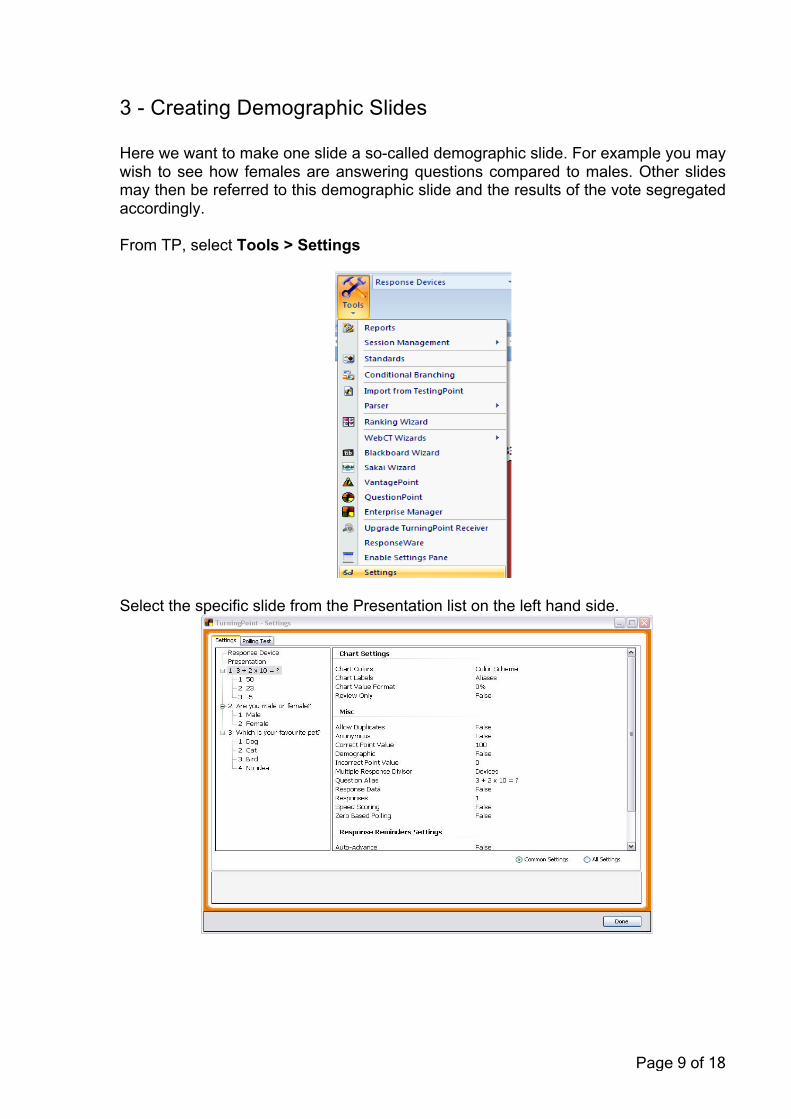
3 - Creating Demographic Slides Here we want to make one slide a so-called demographic slide. For example you may wish to see how females are answering questions compared to males. Other slides may then be referred to this demographic slide and the results of the vote segregated accordingly. From TP, select Tools > Settings
Select the specific slide from the Presentation list on the left hand side.

Page 10 of 18
On the Setting window on the right hand side, find the “Demographic” row. It will be designated false. Change this to true (click on the row then use scroll). Press DONE
Now highlight the slide you wish to compare it with. Click Insert Slide on TP. Choose Demographic Comparison.

Page 11 of 18
On the screen that comes up choose (using scroll) a demographic slide (you may have created more than one) and then select the slide you wish to link it with. Press OK. See following diagram.
A new slide will appear after the slide chosen for comparison.
In operation the vote for the demographic slide must occur first. The comparison slide is voted on as normal and the results presented as usual. A further click of the screen will segregate these results according to the ratios occurring in the demographic slide.

Page 12 of 18
4 - Creating Picture Slides Insert a slide as normal; click Insert Slide on TP and choose, for example, vertical slide. Type in your question and answer options (for the answers insert the numbers 1, 2, 3, etc.) Put in your pictures, either by inserting them or pasting them from somewhere.
Hold down CTRL and select each image in turn, in the order in which they appear as numbered multiple choice options. For example, if the options are 'Engineering' then 'Science' then ‘Social Sciences and Humanities’, you should hold down CTRL then select the ‘Faculty of engineering’ picture followed by the ‘Faculty of science’ picture and finally ‘Faculty of social sciences and humanities’ picture. The order in which you select is important as this is how TurningPoint knows which picture to assign to which numerical option. Once all the relevant pictures are selected, press the button Convert to Picture Slide on the TP toolbar.

Page 13 of 18
You should find all your words disappear and your pictures are each assigned a multiple choice option number, which is the correct one. Then you may want to rearrange the pictures to have a satisfactory picture slide.

Page 14 of 18
5 - Creating Multiple Response Slides Insert a slide as normal; click Insert Slide on TP and choose, for example, vertical slide. To allow more than one response from each handset the settings must be changed for that slide. From TP, select Tools > Settings
Choose the slide which has a multiple response and change the number of Responses to the desired amount and change Multiple Response Divisor to Devices, then click done.

Page 15 of 18

Page 16 of 18
6 - Using Equation Editor for ‘Mathematics questions’ Here we wish to make a slide with a question and/or answers which contain mathematics. Once the equations have been created, in Equation Editor for example, the technique for making the slide is the same as that for picture slides. To create the mathematics equations follow the procedure below. Insert a slide as normal; click Insert Slide on TP and choose, for example, vertical slide. Equation editor can be used to input ‘mathematics’. To open this application go to Insert on PP, choose Object.
Scroll to Microsoft Equation 3.0. Click on this and then OK. See next diagram.
Equation Editor will open. Create an equation and close equation editor. The equation will appear in the slide and can be re-sized as appropriate. Repeat this for each answer. Then follow the procedure for picture slides to create your slide in TurningPoint.

Page 17 of 18
NOTES: To a large extent your questions appear on ordinary Power Point pages and you can use all the facilities of Power Point to edit them as you desire. This document has covered the basic functionalities of the TurningPoint 2008 Voting system, designed for complete beginners. Once you have finished the basic part you may find the following links useful: TurningPoint 2008 download link: http://www.turningtechnologies.com/groupresponsesystemsupport/downloads.cfm
Page 18 of 18
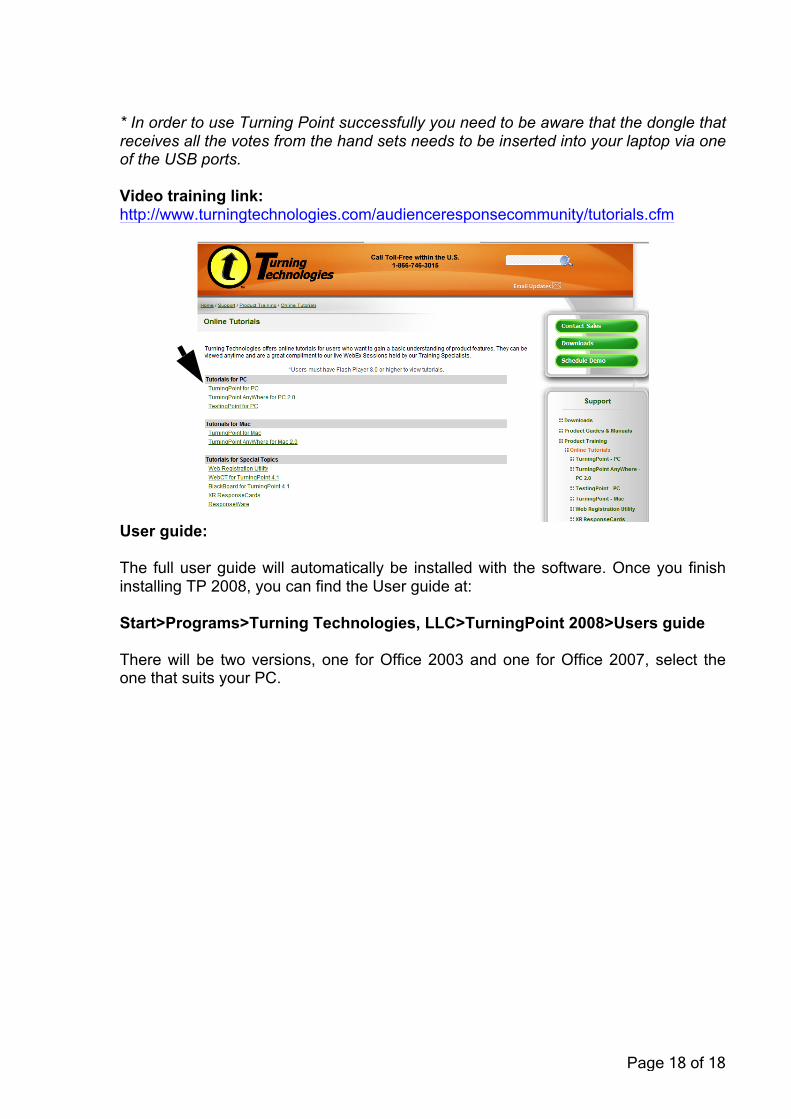
* In order to use Turning Point successfully you need to be aware that the dongle that receives all the votes from the hand sets needs to be inserted into your laptop via one of the USB ports. Video training link: http://www.turningtechnologies.com/audienceresponsecommunity/tutorials.cfm
User guide: The full user guide will automatically be installed with the software. Once you finish installing TP 2008, you can find the User guide at: Start>Programs>Turning Technologies, LLC>TurningPoint 2008>Users guide There will be two versions, one for Office 2003 and one for Office 2007, select the one that suits your PC.