lunchtime web portal
TRANSCRIPT
LunchTime Web Portal
Parents Guide to
Getting Started
Contents
Creating a New Account ................................................................................................................. 3
Logging into the LunchTime Web Portal ........................................................................................ 6
Site Logout ...................................................................................................................................... 7
Adding Students to Your Account ................................................................................................... 7
Starting a New Credit Card Transaction (No Saved Payment Source) .......................................... 10
Starting a New ACH Transaction (No Saved Payment Source) ..................................................... 17
Entering a Credit Card Transaction with a Saved Payment Source .............................................. 24
Entering an ACH Transaction with a Saved Payment Source ....................................................... 30
Modifying a Saved Credit Card ..................................................................................................... 36
Modifying a Saved ACH Account ................................................................................................... 40
Viewing Account Transactions ...................................................................................................... 45
Notification Settings ..................................................................................................................... 47
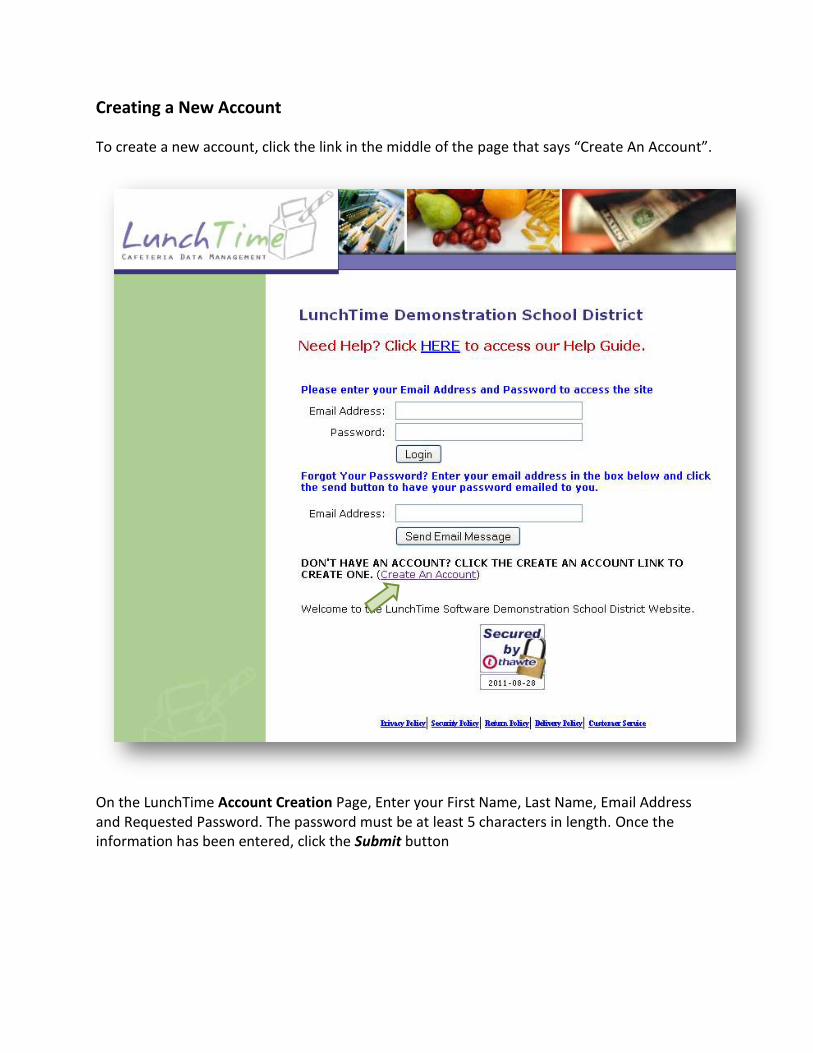
Creating a New Account
To create a new account, click the link in the middle of the page that says “Create An Account”.
On the LunchTime Account Creation Page, Enter your First Name, Last Name, Email Address and Requested Password. The password must be at least 5 characters in length. Once the information has been entered, click the Submit button


Upon successful creation of your account, you will receive an email from the site administrator and see a page indicating that your account has been successfully created.
Click the link in the middle of the page to return to the login page.
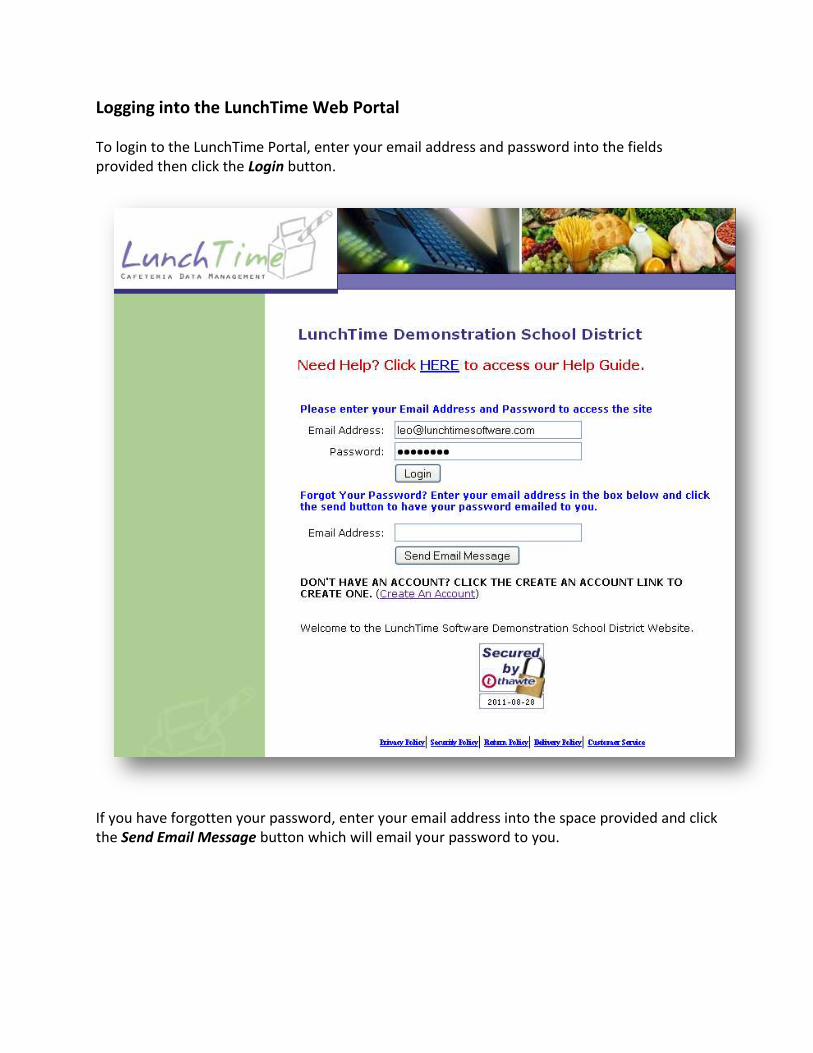
Logging into the LunchTime Web Portal
To login to the LunchTime Portal, enter your email address and password into the fields provided then click the Login button.
If you have forgotten your password, enter your email address into the space provided and click the Send Email Message button which will email your password to you.
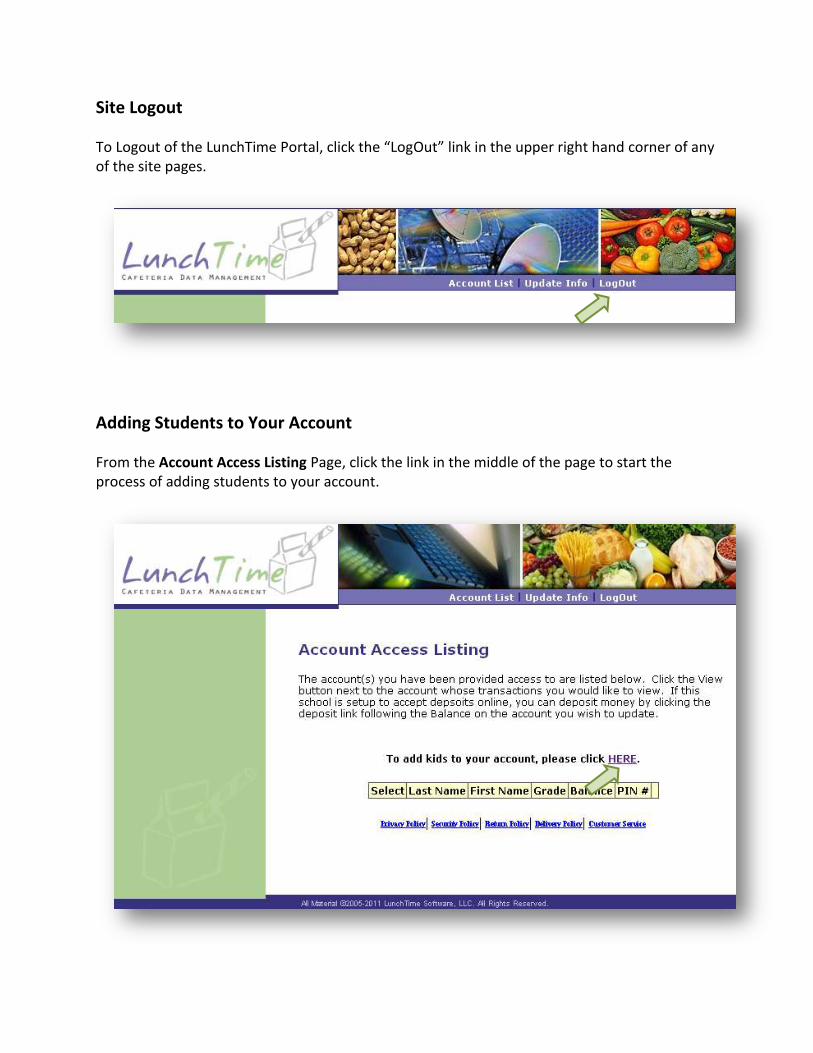
Site Logout
To Logout of the LunchTime Portal, click the “LogOut” link in the upper right hand corner of any of the site pages.
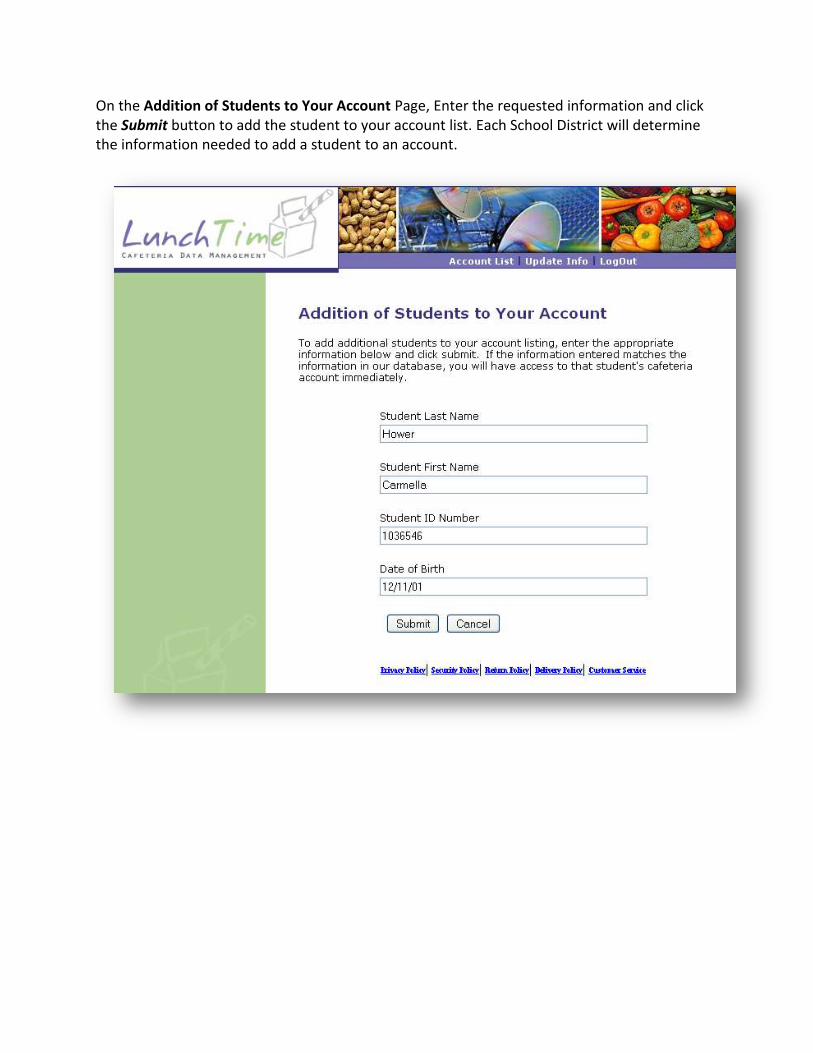
Adding Students to Your Account
From the Account Access Listing Page, click the link in the middle of the page to start the process of adding students to your account.
On the Addition of Students to Your Account Page, Enter the requested information and click the Submit button to add the student to your account list. Each School District will determine the information needed to add a student to an account.
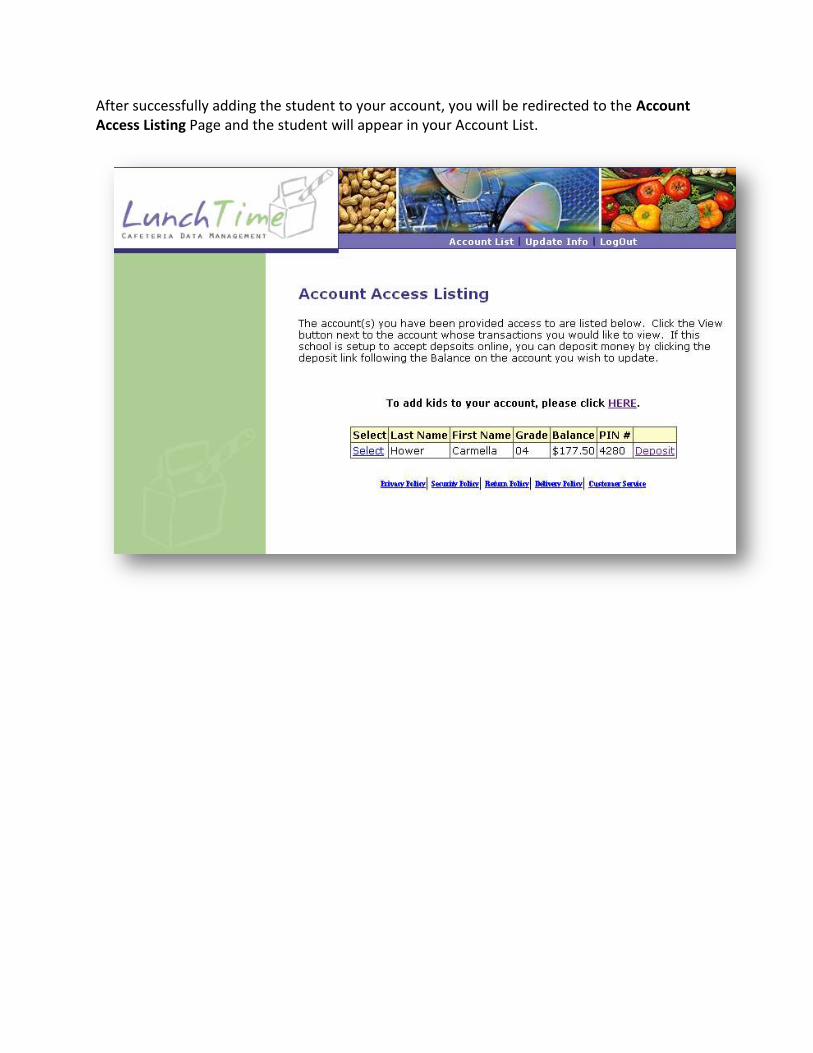
After successfully adding the student to your account, you will be redirected to the Account Access Listing Page and the student will appear in your Account List.
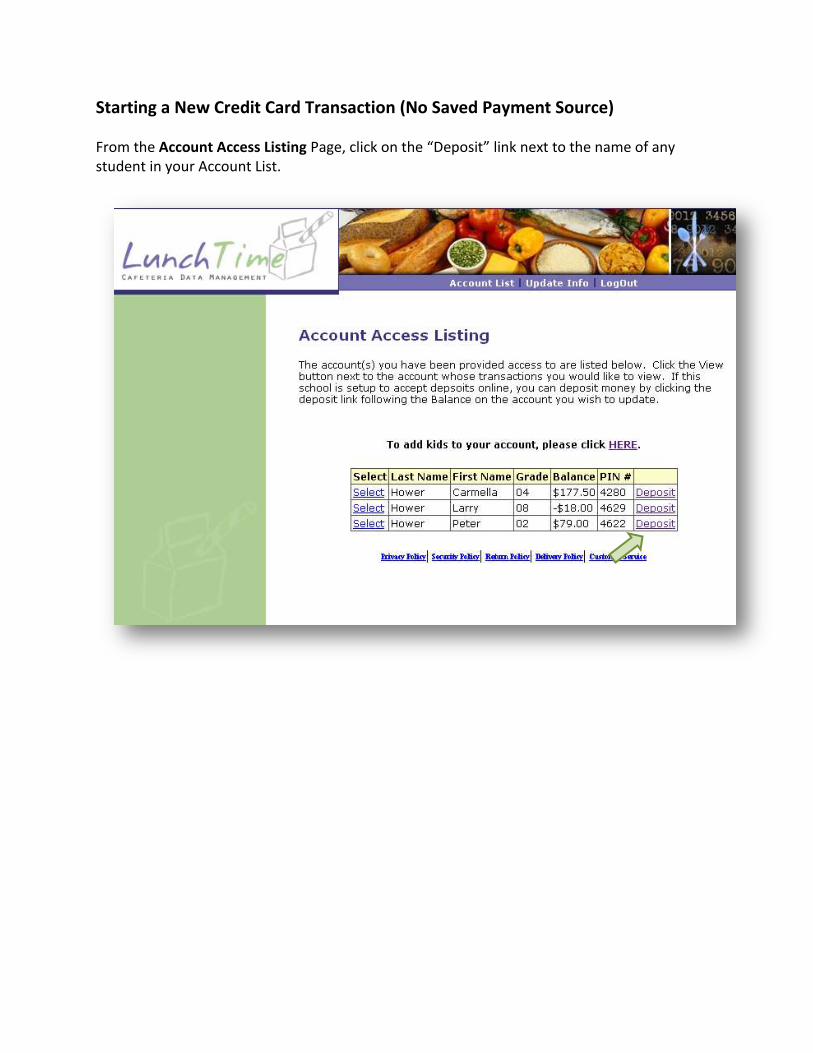
Starting a New Credit Card Transaction (No Saved Payment Source)
From the Account Access Listing Page, click on the “Deposit” link next to the name of any student in your Account List.
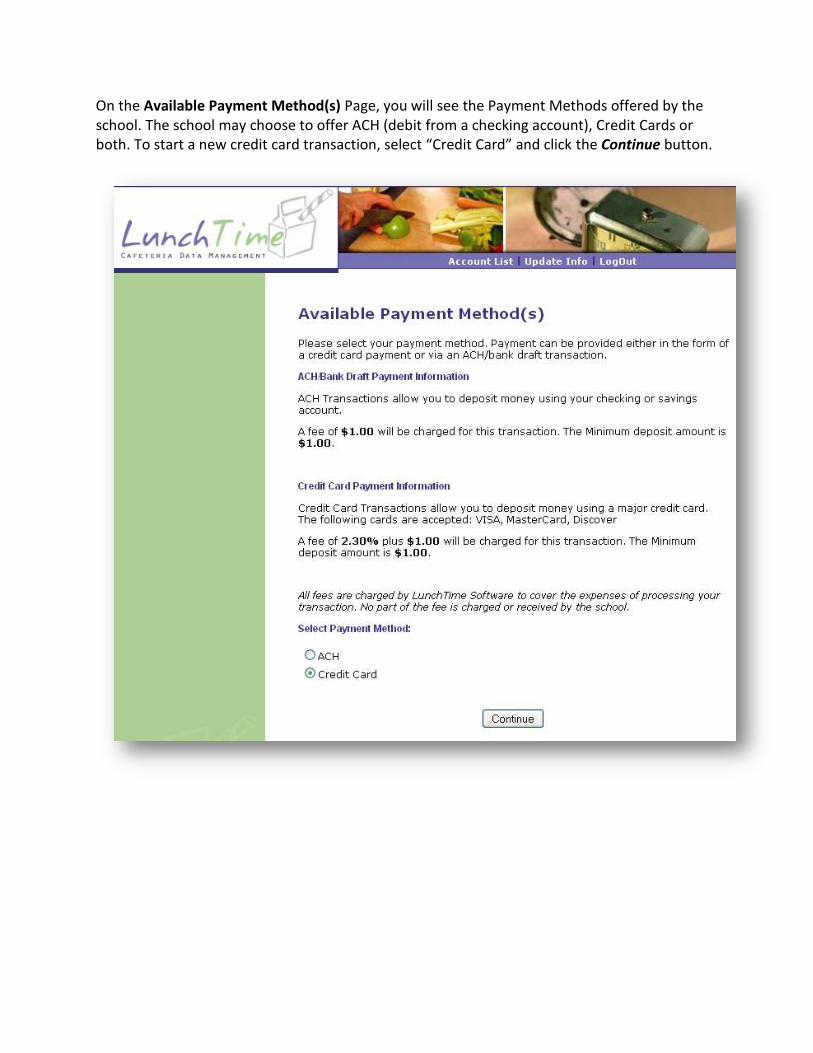
On the Available Payment Method(s) Page, you will see the Payment Methods offered by the school. The school may choose to offer ACH (debit from a checking account), Credit Cards or both. To start a new credit card transaction, select “Credit Card” and click the Continue button.

On the Enter Deposit Amounts Page, enter the amount you wish to deposit for each student in your account. You can make a deposit for multiple students with one transaction. As shown below, $22.00 will be deposited into Larry’s Account and $15.00 will be deposited into Peter’s account. Click the Continue button when you are finished entering the deposit amounts.
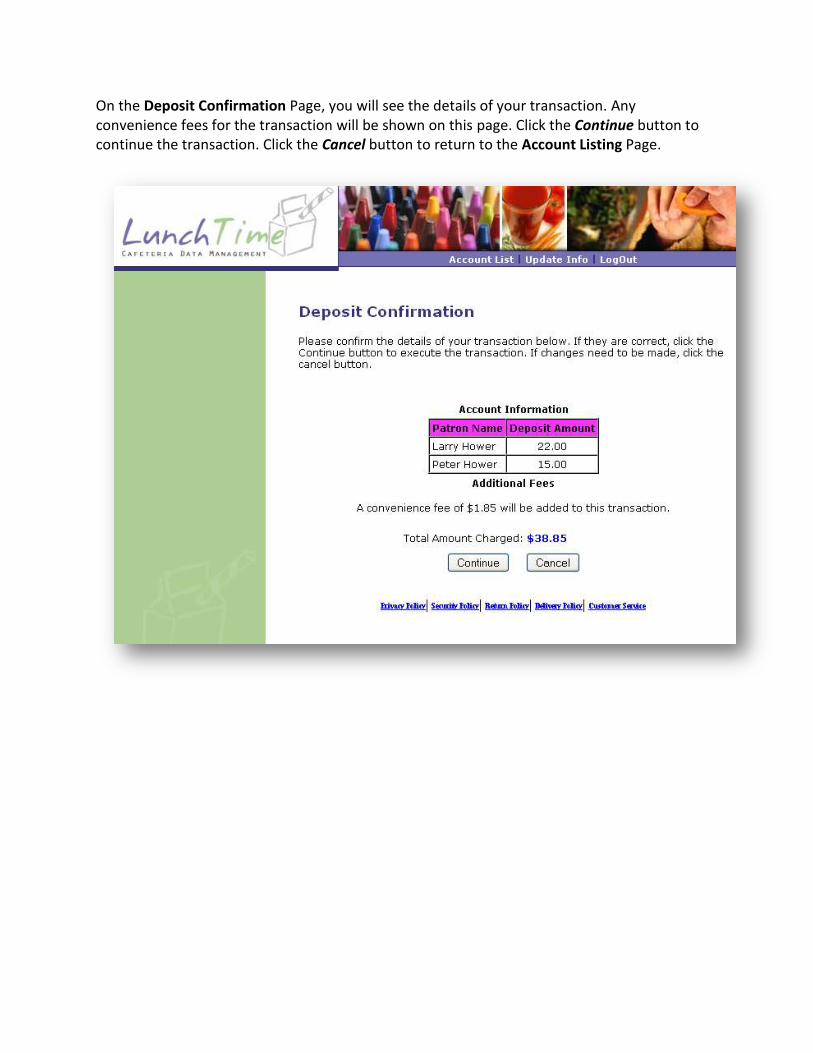
On the Deposit Confirmation Page, you will see the details of your transaction. Any convenience fees for the transaction will be shown on this page. Click the Continue button to continue the transaction. Click the Cancel button to return to the Account Listing Page.
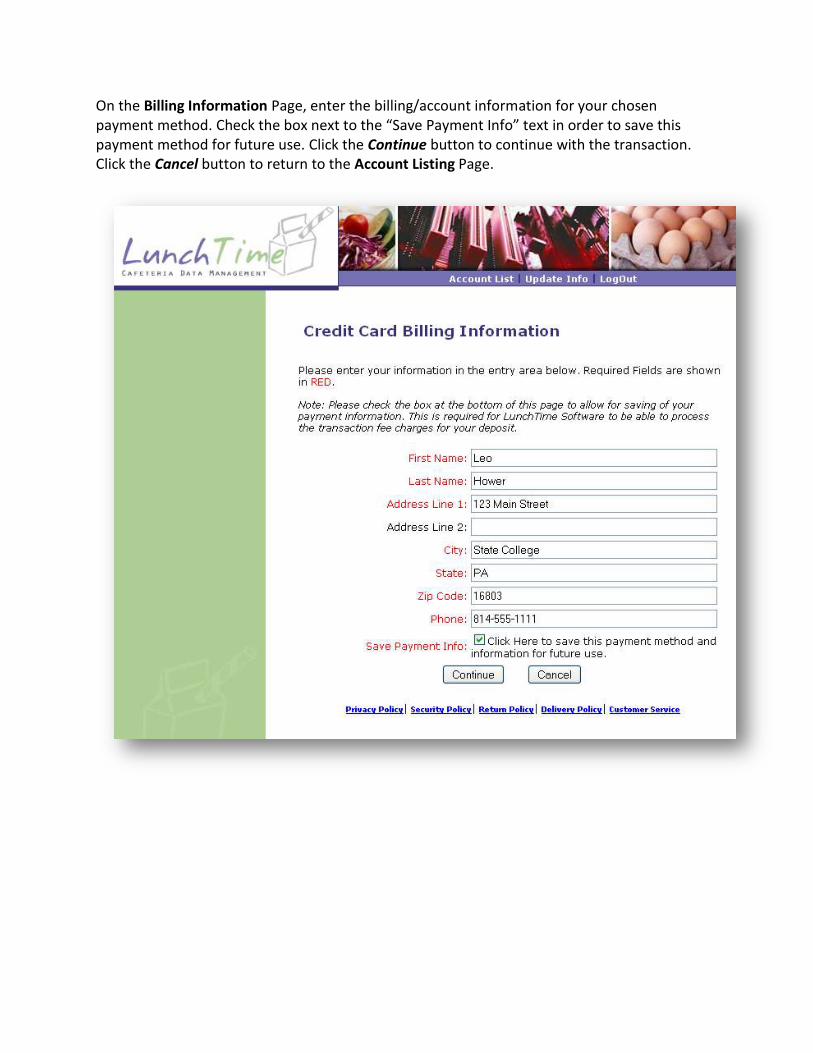
On the Billing Information Page, enter the billing/account information for your chosen payment method. Check the box next to the “Save Payment Info” text in order to save this payment method for future use. Click the Continue button to continue with the transaction. Click the Cancel button to return to the Account Listing Page.
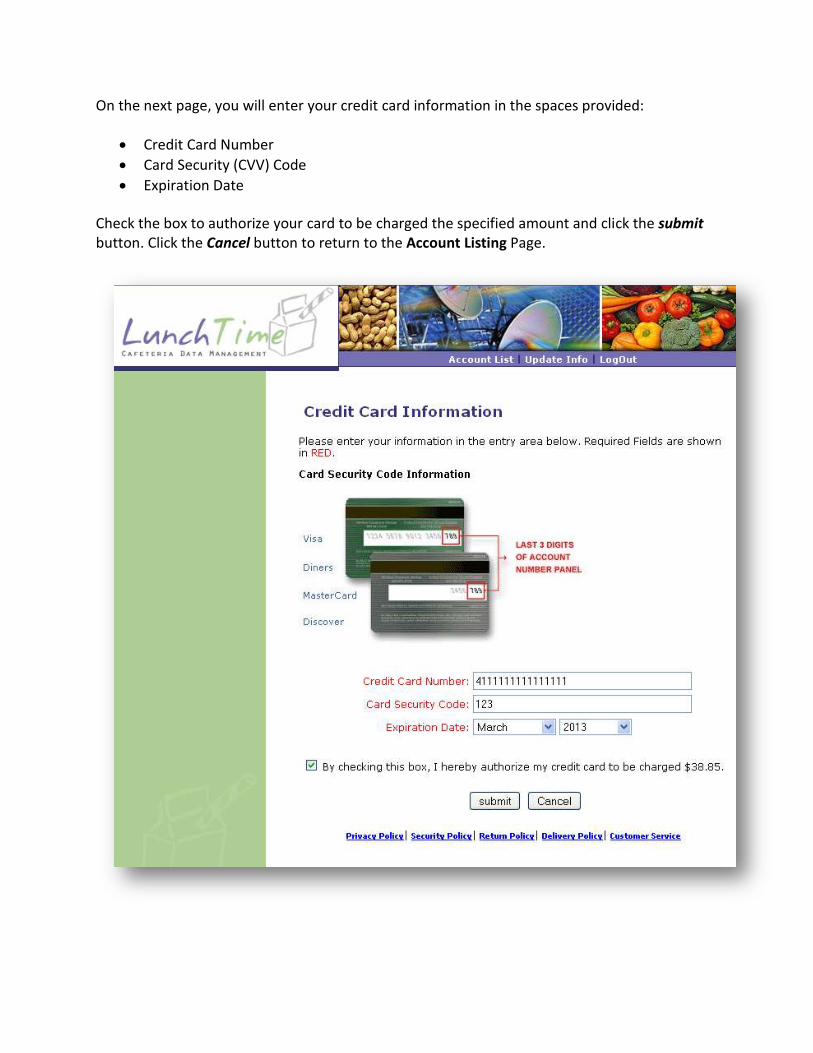
On the next page, you will enter your credit card information in the spaces provided:
Credit Card Number
Card Security (CVV) Code
Expiration Date
Check the box to authorize your card to be charged the specified amount and click the submit button. Click the Cancel button to return to the Account Listing Page.
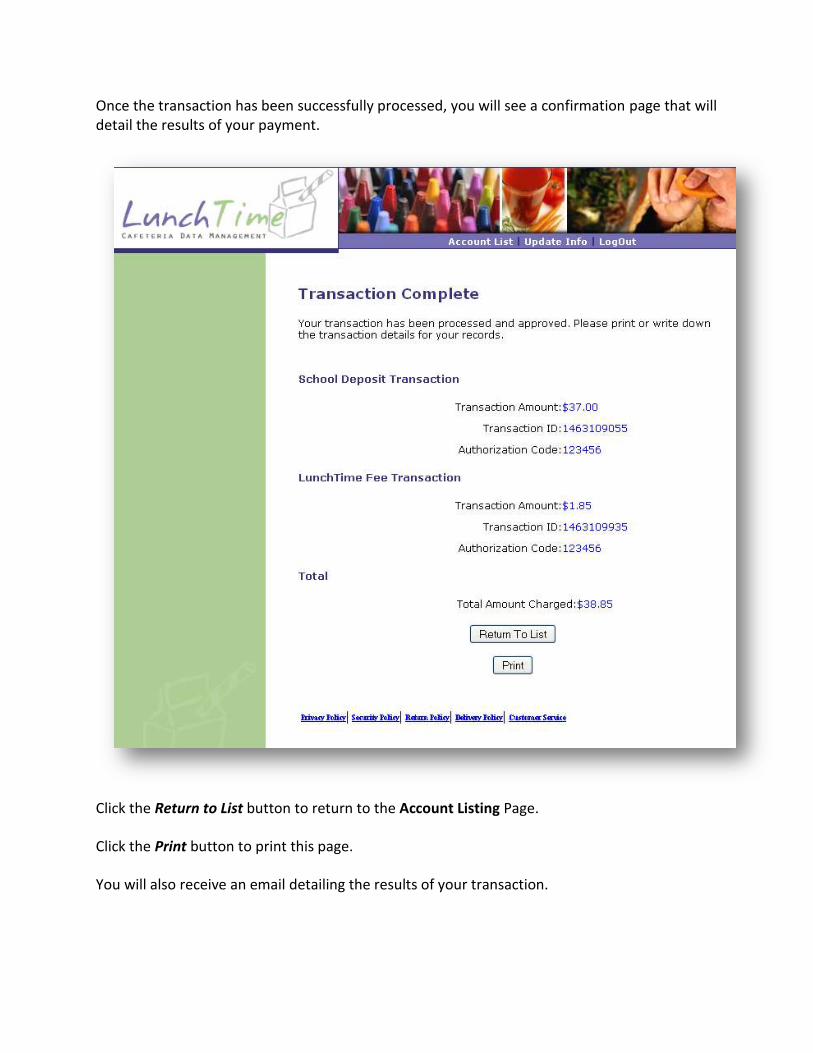
Once the transaction has been successfully processed, you will see a confirmation page that will detail the results of your payment.
Click the Return to List button to return to the Account Listing Page.
Click the Print button to print this page.
You will also receive an email detailing the results of your transaction.

Starting a New ACH Transaction (No Saved Payment Source)
From the Account Access Listing Page, click on the “Deposit” link next to the name of any student showing in your Account List.

On the Available Payment Method(s) Page, you will see the Payment Methods offered by the school. The school may choose to offer ACH, Credit Cards or both. To start a new ACH (debit from a checking account) transaction, select “ACH” and click the Continue button.

On the Enter Deposit Amounts Page, enter the amount you wish to deposit for each student in your account. You can make a deposit for multiple students with one transaction. As shown below, $22.00 will be deposited into Larry’s Account and $15.00 will be deposited into Peter’s account. Click the Continue button when you are finished entering the deposit amounts.
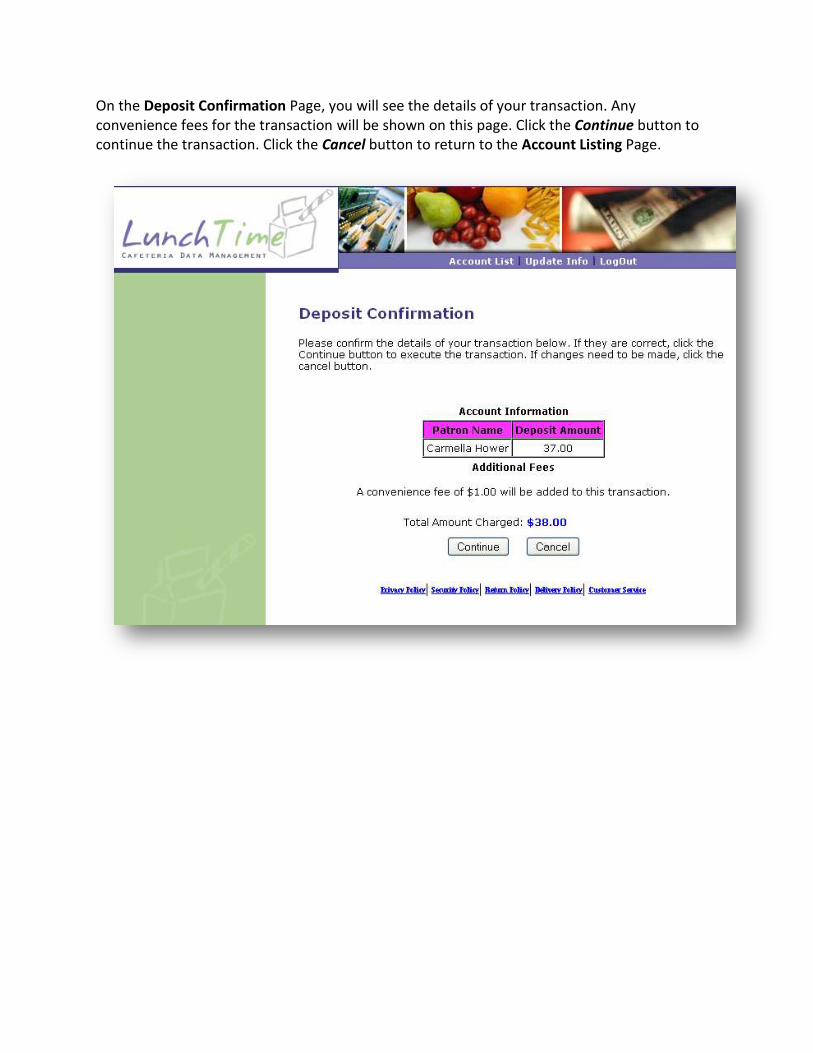
On the Deposit Confirmation Page, you will see the details of your transaction. Any convenience fees for the transaction will be shown on this page. Click the Continue button to continue the transaction. Click the Cancel button to return to the Account Listing Page.

On the Bank Account Holder Information Page, enter the billing/account information for your chosen payment method. Check the box next to the “Save Payment Info” text in order to save this payment method for future use. Click the Continue button to continue with the transaction. Click the Cancel button to return to the Account Listing Page.
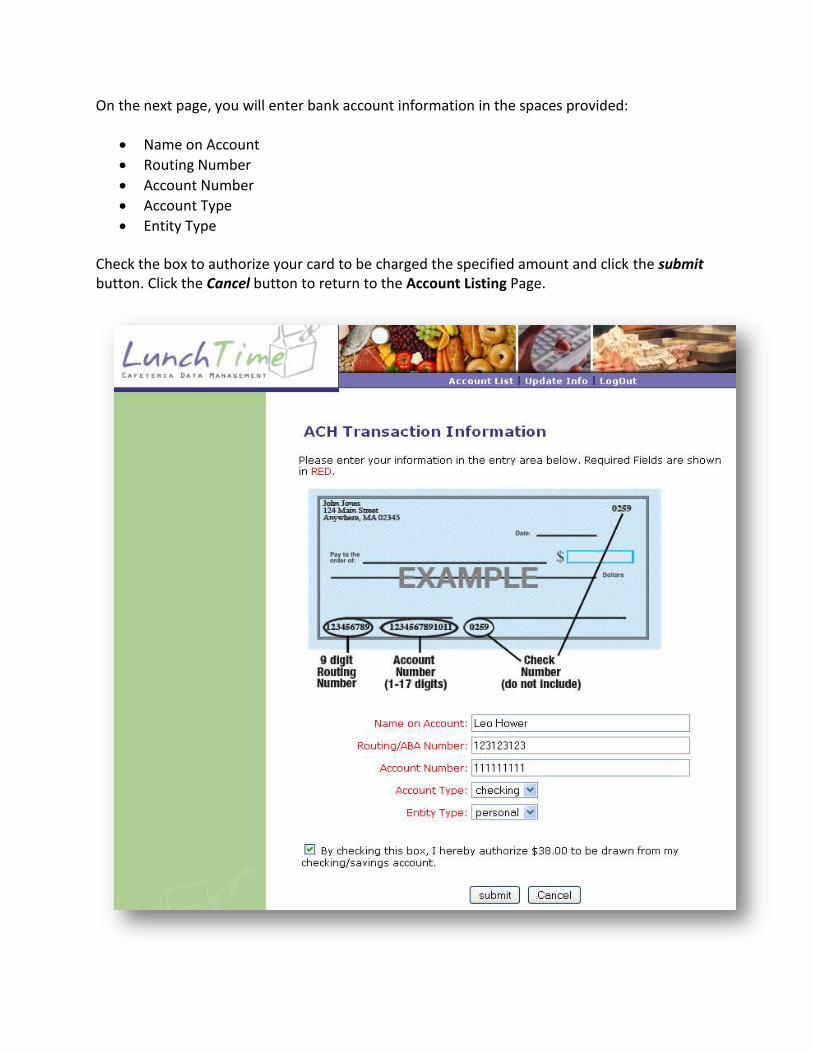
On the next page, you will enter bank account information in the spaces provided:
Name on Account
Routing Number
Account Number
Account Type
Entity Type
Check the box to authorize your card to be charged the specified amount and click the submit button. Click the Cancel button to return to the Account Listing Page.
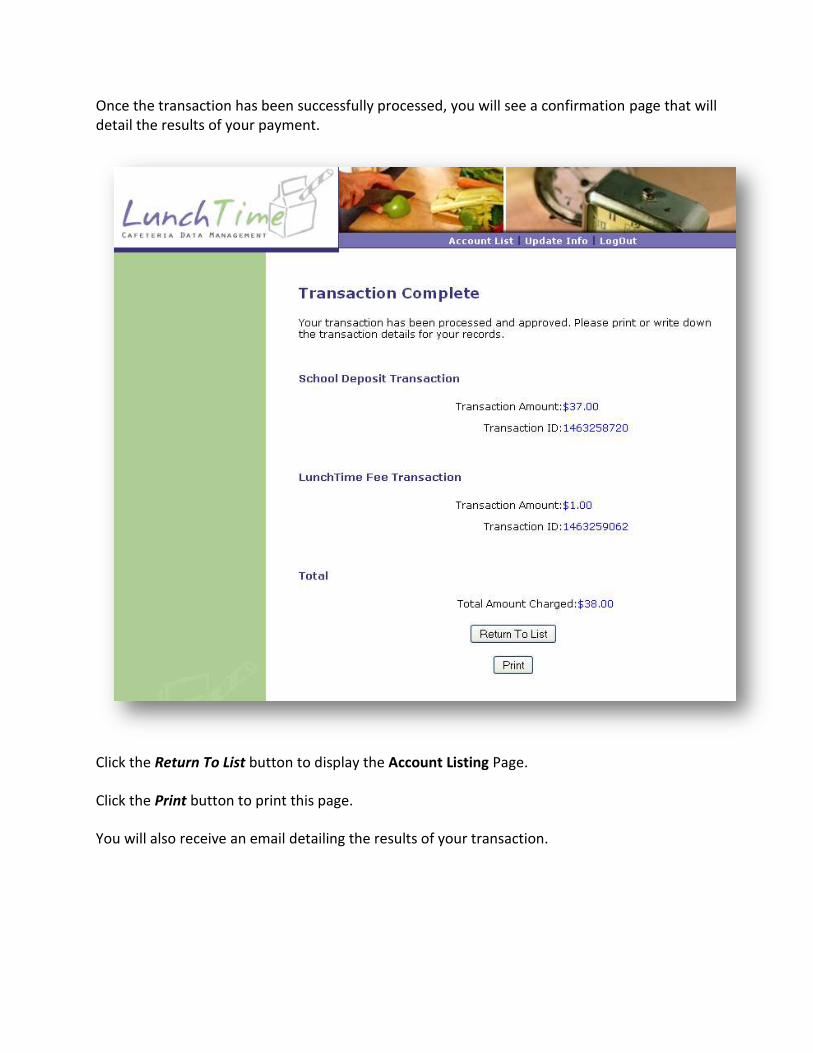
Once the transaction has been successfully processed, you will see a confirmation page that will detail the results of your payment.
Click the Return To List button to display the Account Listing Page.
Click the Print button to print this page.
You will also receive an email detailing the results of your transaction.
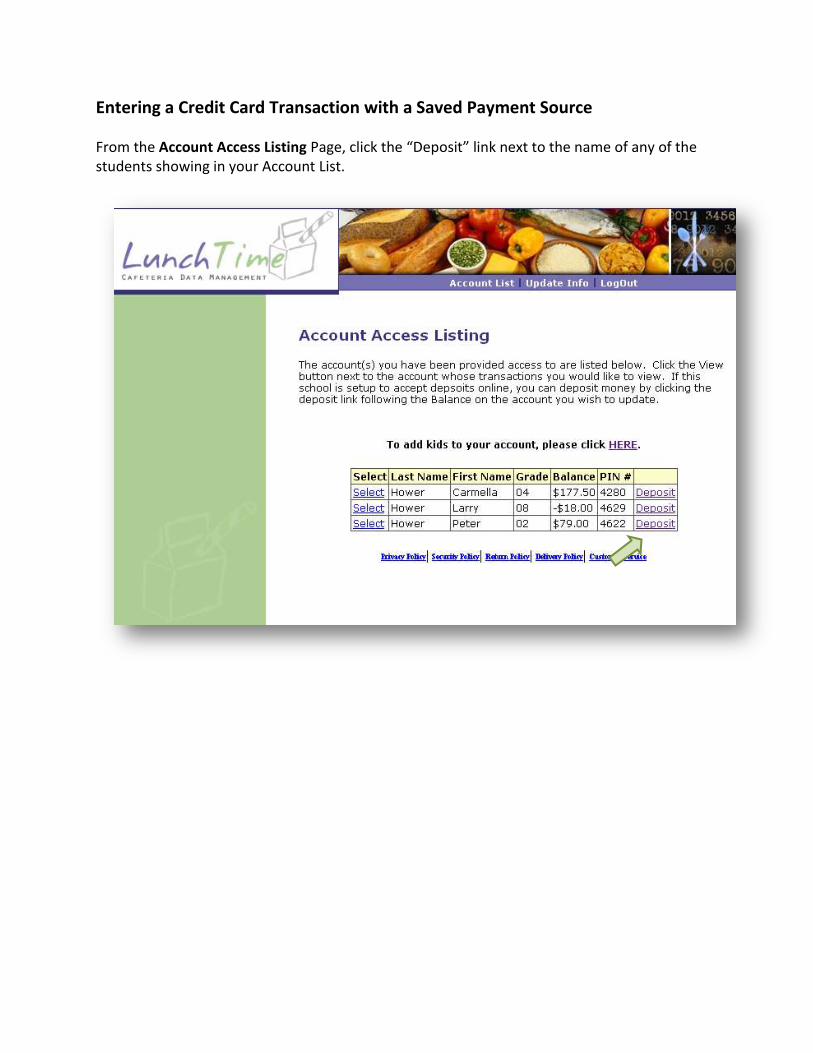
Entering a Credit Card Transaction with a Saved Payment Source
From the Account Access Listing Page, click the “Deposit” link next to the name of any of the students showing in your Account List.
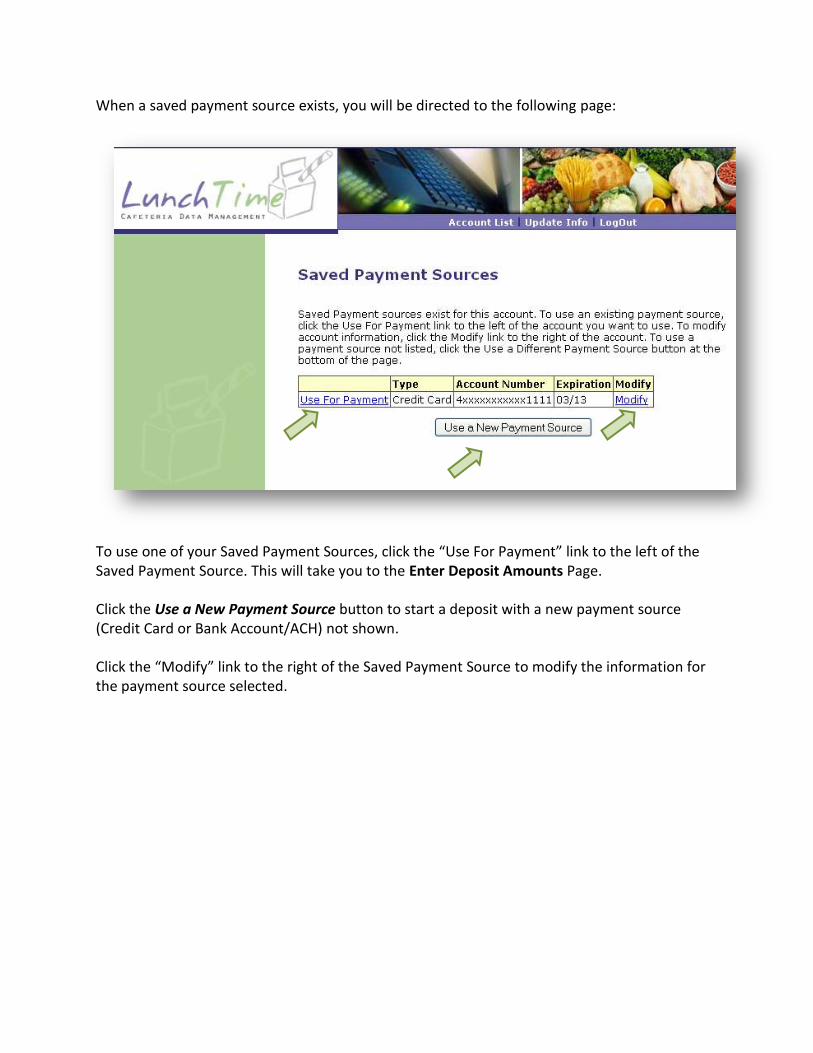
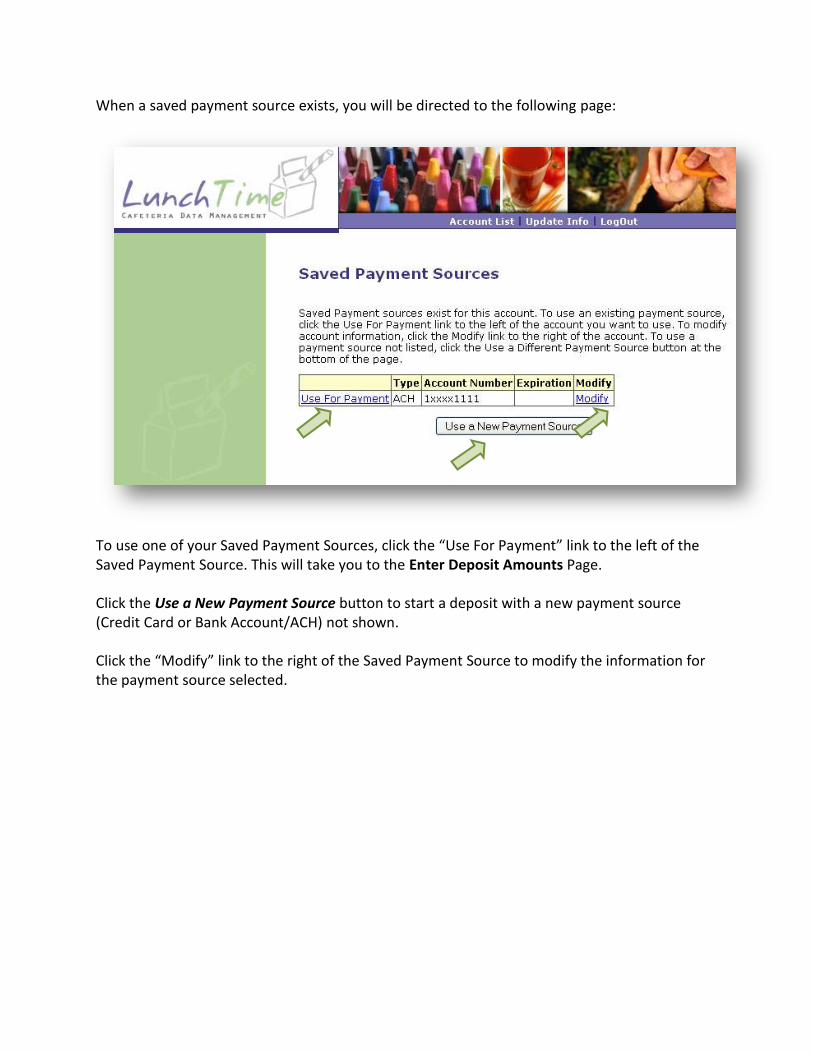
When a saved payment source exists, you will be directed to the following page:
To use one of your Saved Payment Sources, click the “Use For Payment” link to the left of the Saved Payment Source. This will take you to the Enter Deposit Amounts Page.
Click the Use a New Payment Source button to start a deposit with a new payment source (Credit Card or Bank Account/ACH) not shown.
Click the “Modify” link to the right of the Saved Payment Source to modify the information for the payment source selected.

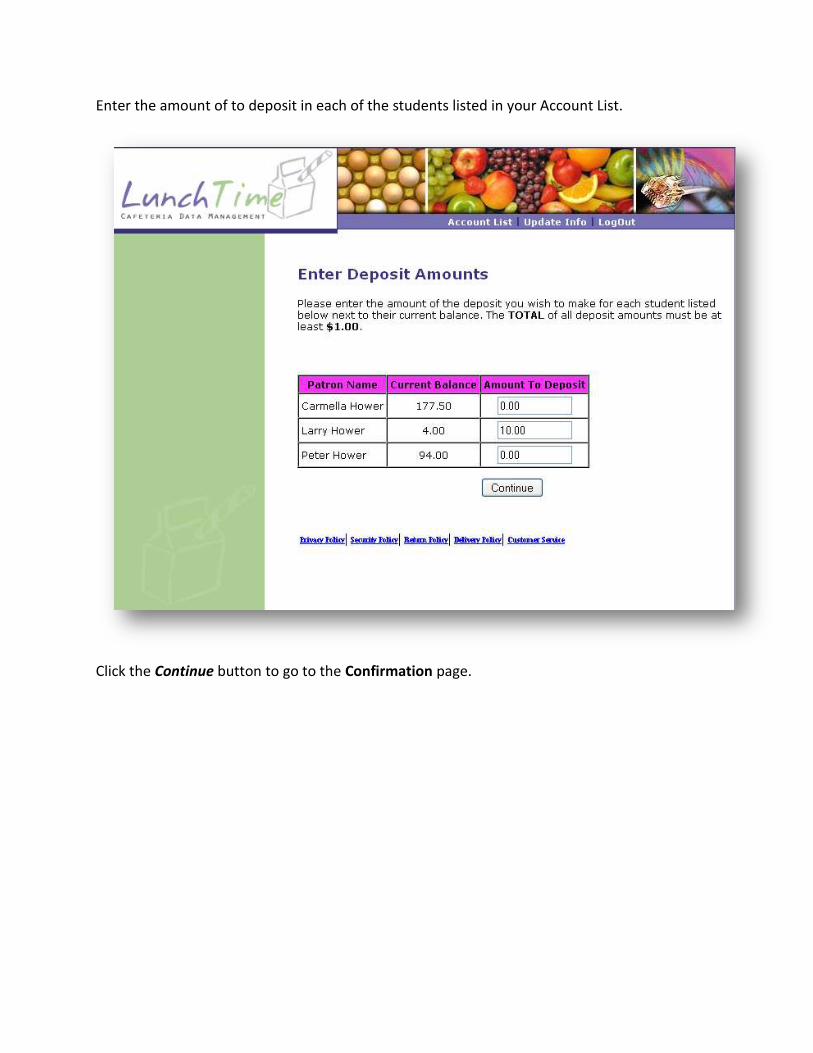
Enter the amount of to deposit in each of the students listed in your Account List.
Click the Continue button to go to the Confirmation page.

On the Deposit Confirmation Page, you will see the details of your transaction. Any convenience fees for the transaction will be shown on this page. Click the Continue button to continue the transaction. Click the Cancel button to return to the Account Listing page.
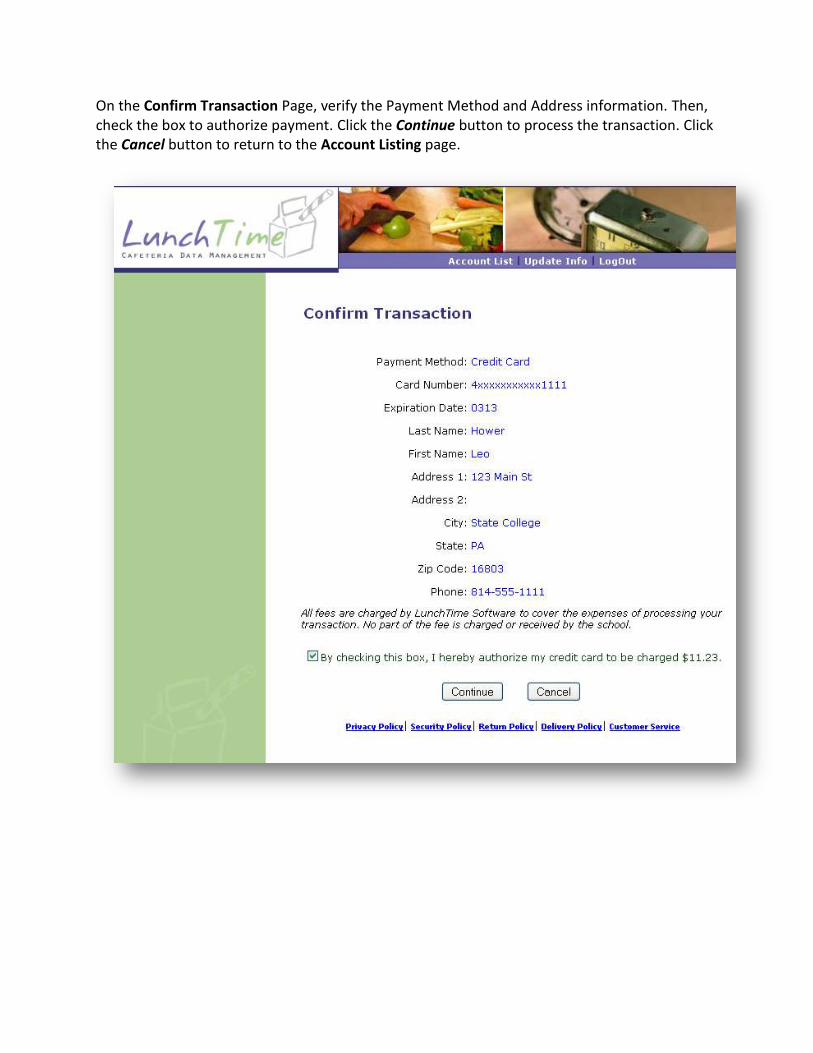
On the Confirm Transaction Page, verify the Payment Method and Address information. Then, check the box to authorize payment. Click the Continue button to process the transaction. Click the Cancel button to return to the Account Listing page.
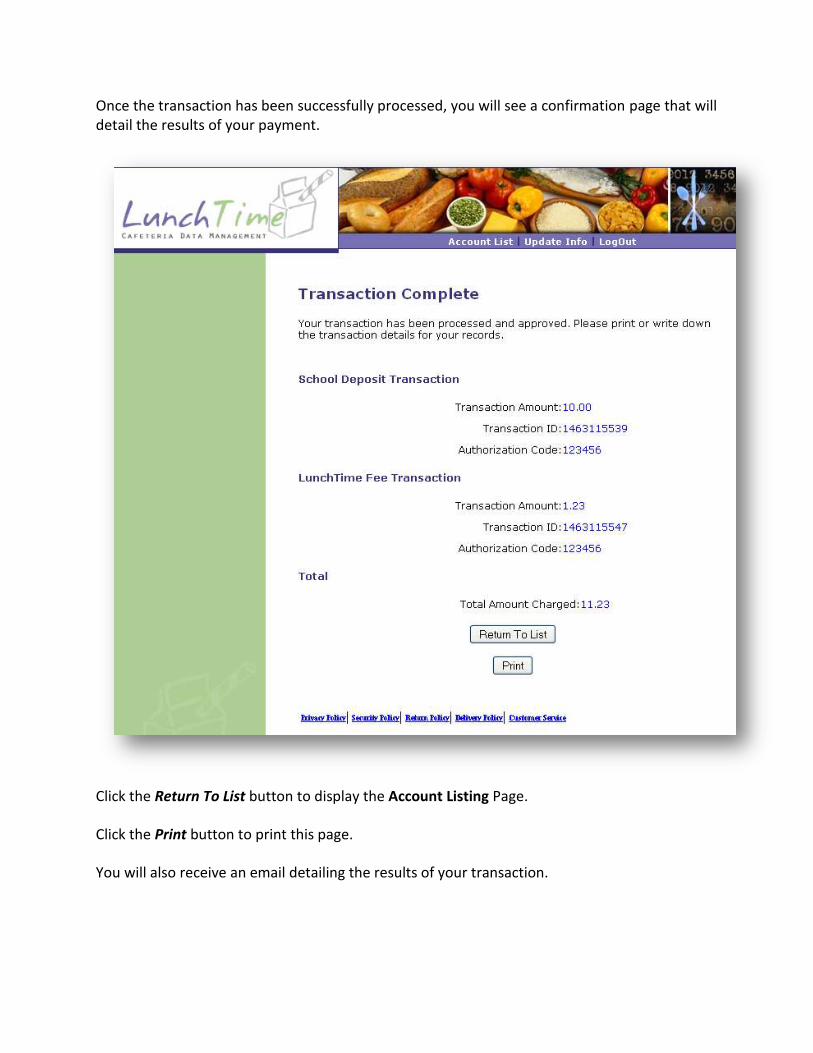
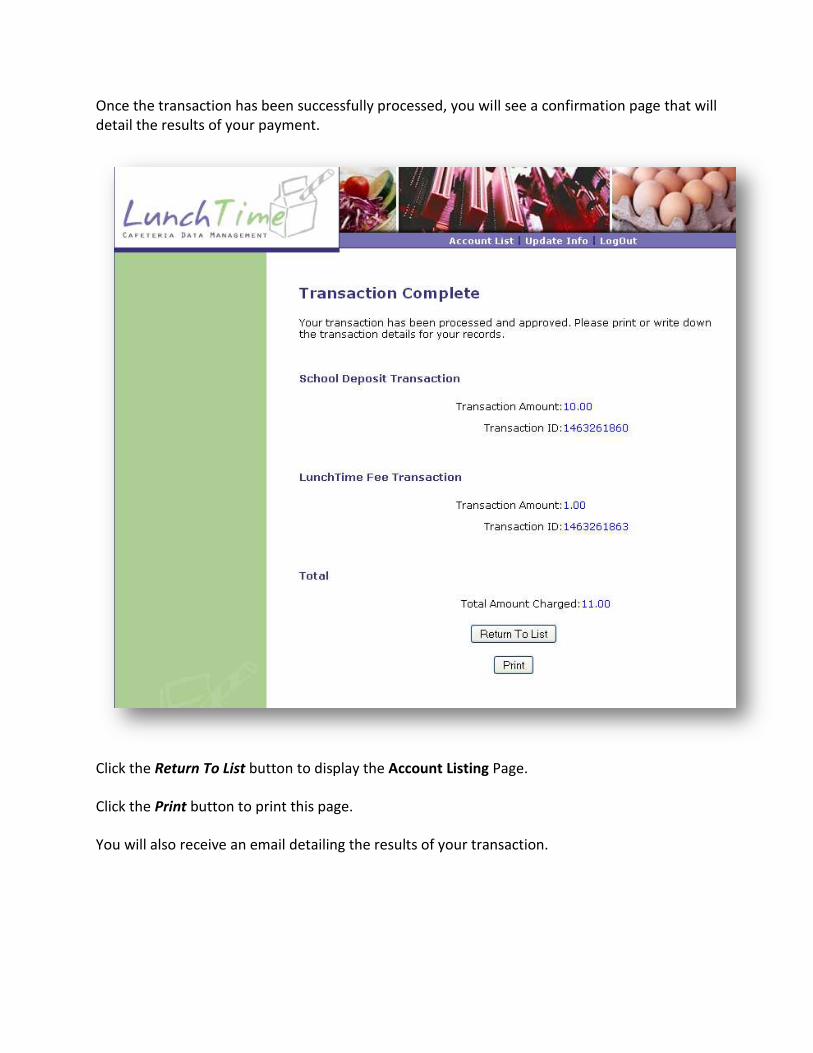
Once the transaction has been successfully processed, you will see a confirmation page that will detail the results of your payment.
Click the Return To List button to display the Account Listing Page.
Click the Print button to print this page.
You will also receive an email detailing the results of your transaction.

Entering an ACH Transaction with a Saved Payment Source
From the Account Access Listing Page, click on the “Deposit” link next to the name of any of the students showing in your Account List.
When a saved payment source exists, you will be directed to the following page:
To use one of your Saved Payment Sources, click the “Use For Payment” link to the left of the Saved Payment Source. This will take you to the Enter Deposit Amounts Page.
Click the Use a New Payment Source button to start a deposit with a new payment source (Credit Card or Bank Account/ACH) not shown.
Click the “Modify” link to the right of the Saved Payment Source to modify the information for the payment source selected.
Enter the amount of to deposit in each of the students listed in your Account List.
Click the Continue button to go to the Confirmation page.

On the Deposit Confirmation Page, you will see the details of your transaction. Any convenience fees for the transaction will be shown on this page. Click the Continue button to continue the transaction. Click the Cancel button to return to the Account Listing Page.

On the Confirm Transaction Page, verify the Payment Method and Address information. Then, check the box to authorize payment. Click the Continue button to process the transaction. Click the Cancel button to return to the Account Listing Page.
Once the transaction has been successfully processed, you will see a confirmation page that will detail the results of your payment.
Click the Return To List button to display the Account Listing Page.
Click the Print button to print this page.
You will also receive an email detailing the results of your transaction.

Modifying a Saved Credit Card
When you have saved a payment source, the “Saved Payment Sources” section will appear on the Account Listing Page. Click the Link under this heading to modify one of your saved payment sources.
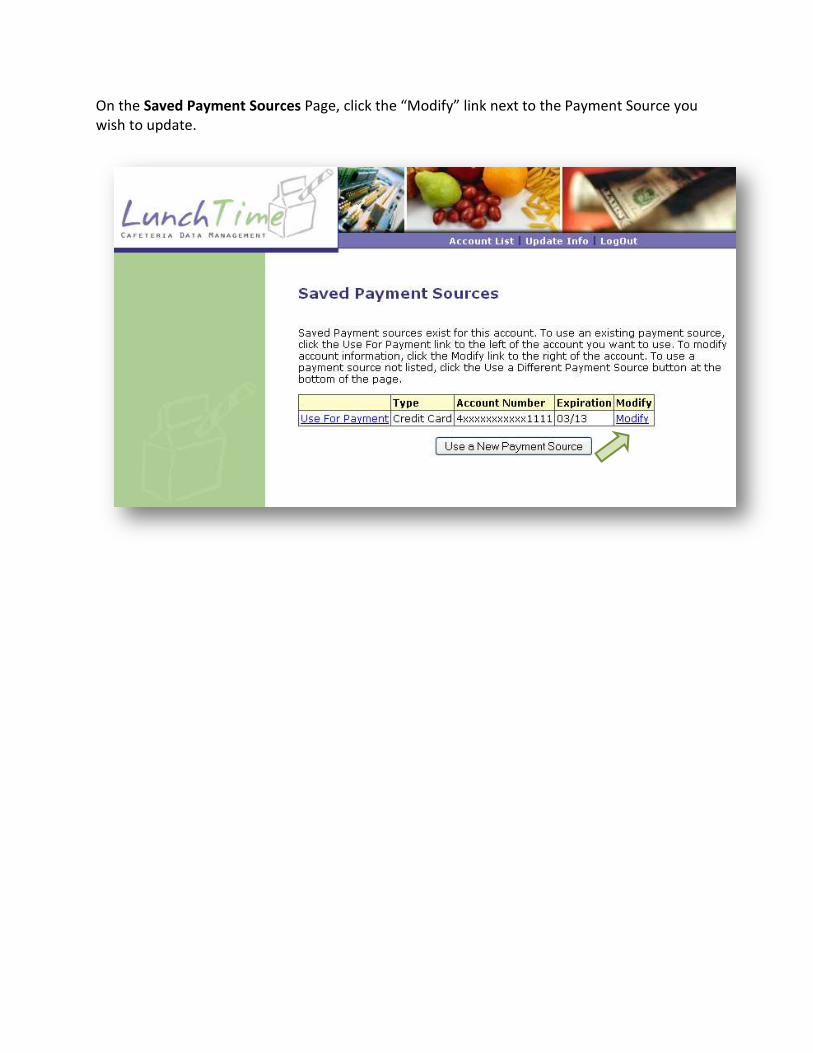
On the Saved Payment Sources Page, click the “Modify” link next to the Payment Source you wish to update.
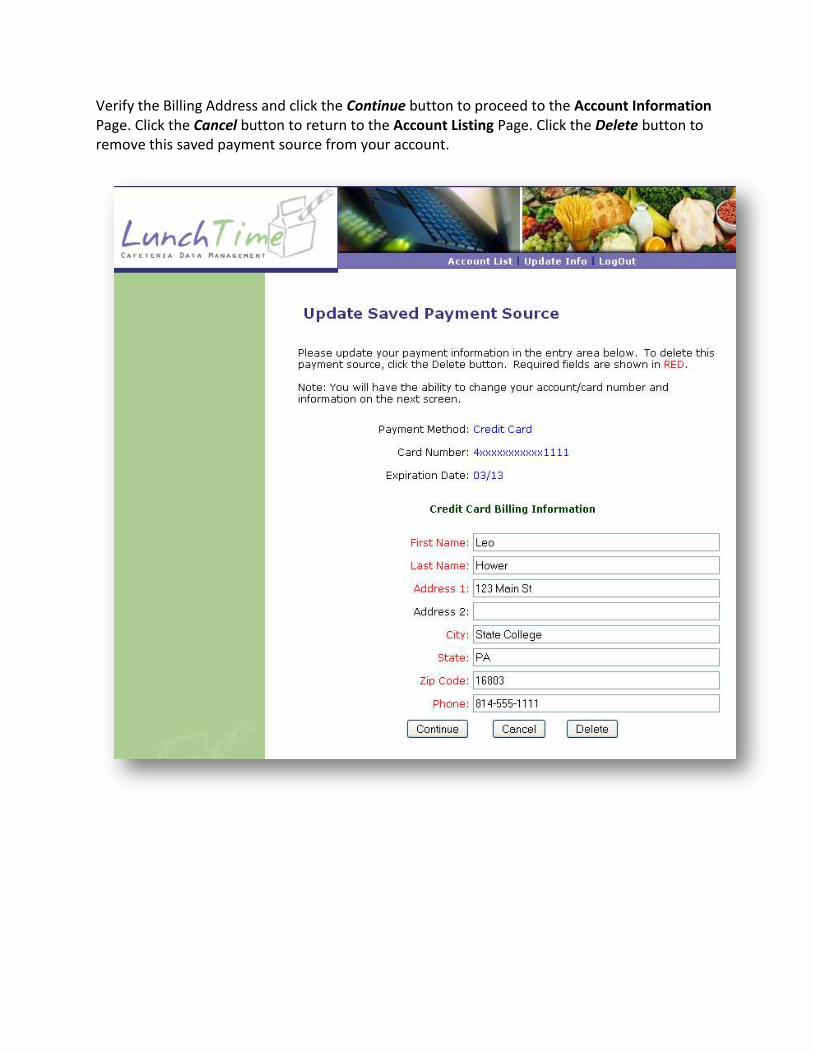
Verify the Billing Address and click the Continue button to proceed to the Account Information Page. Click the Cancel button to return to the Account Listing Page. Click the Delete button to remove this saved payment source from your account.
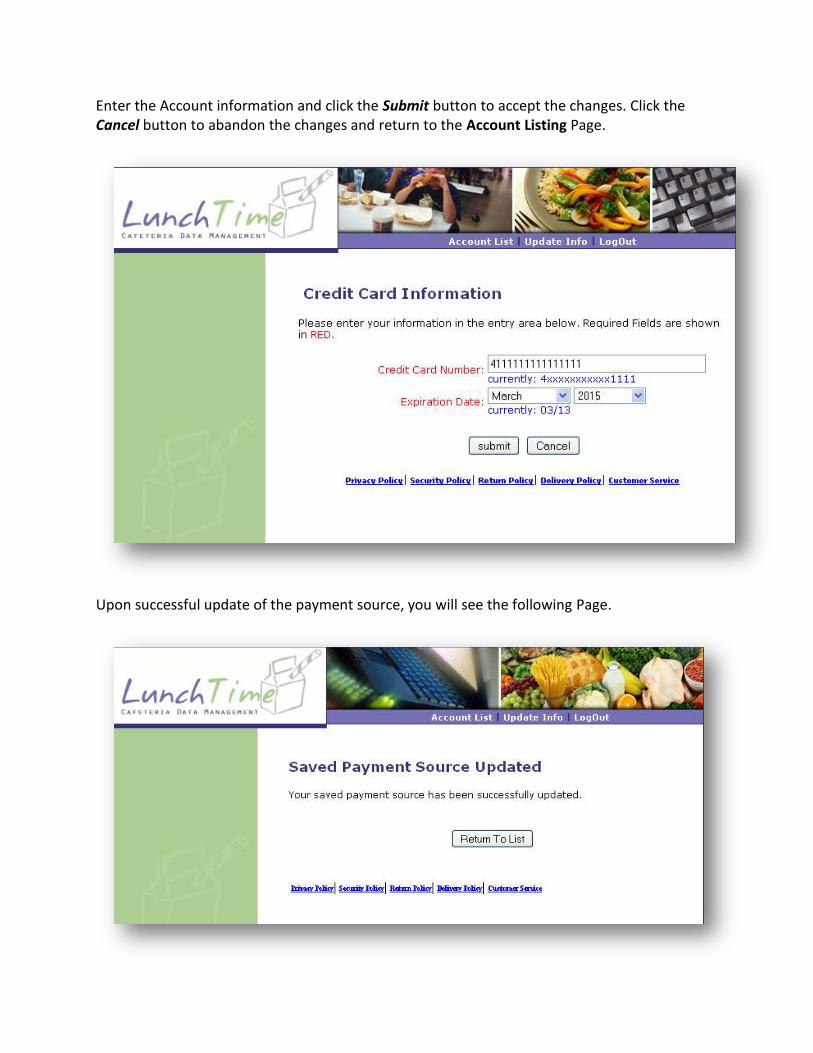
Enter the Account information and click the Submit button to accept the changes. Click the Cancel button to abandon the changes and return to the Account Listing Page.
Upon successful update of the payment source, you will see the following Page.
Modifying a Saved ACH Account
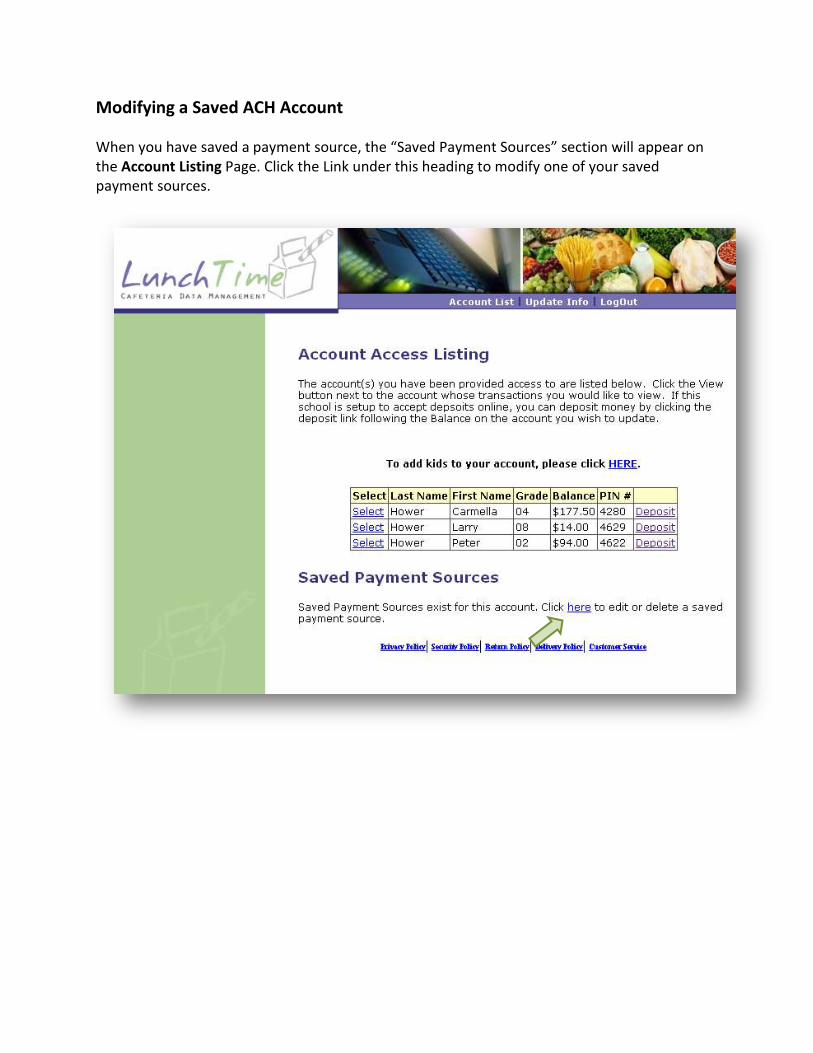
When you have saved a payment source, the “Saved Payment Sources” section will appear on the Account Listing Page. Click the Link under this heading to modify one of your saved payment sources.
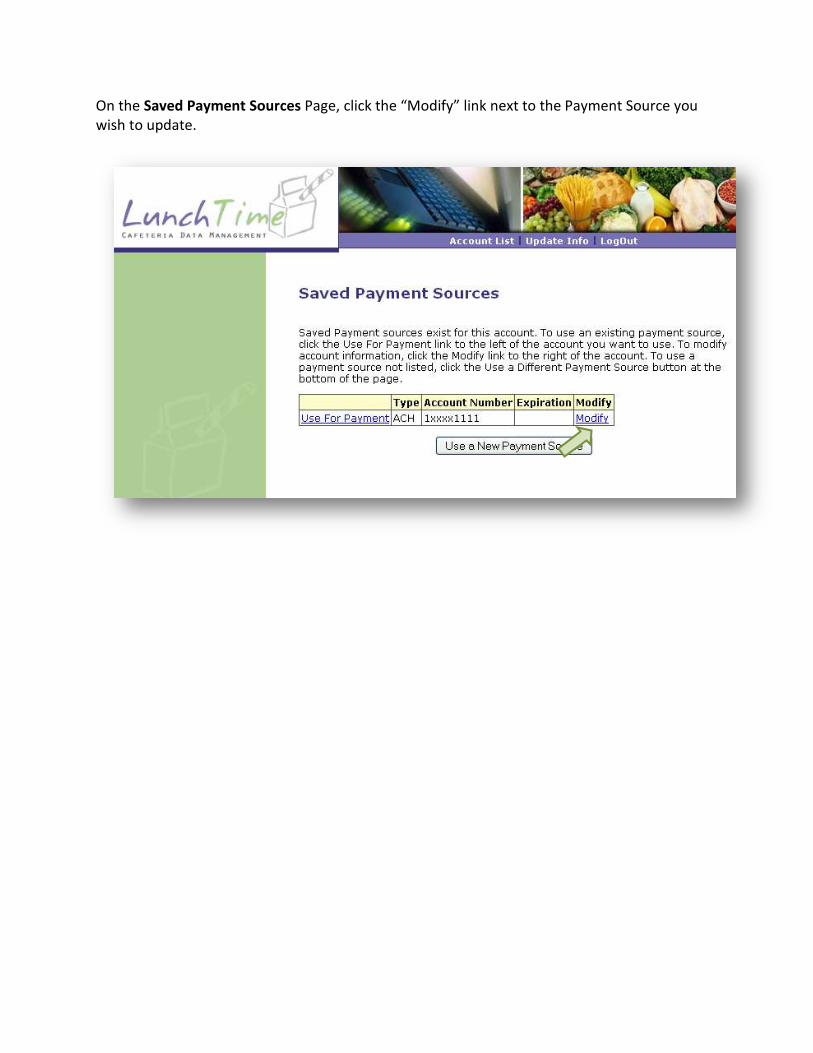
On the Saved Payment Sources Page, click the “Modify” link next to the Payment Source you wish to update.
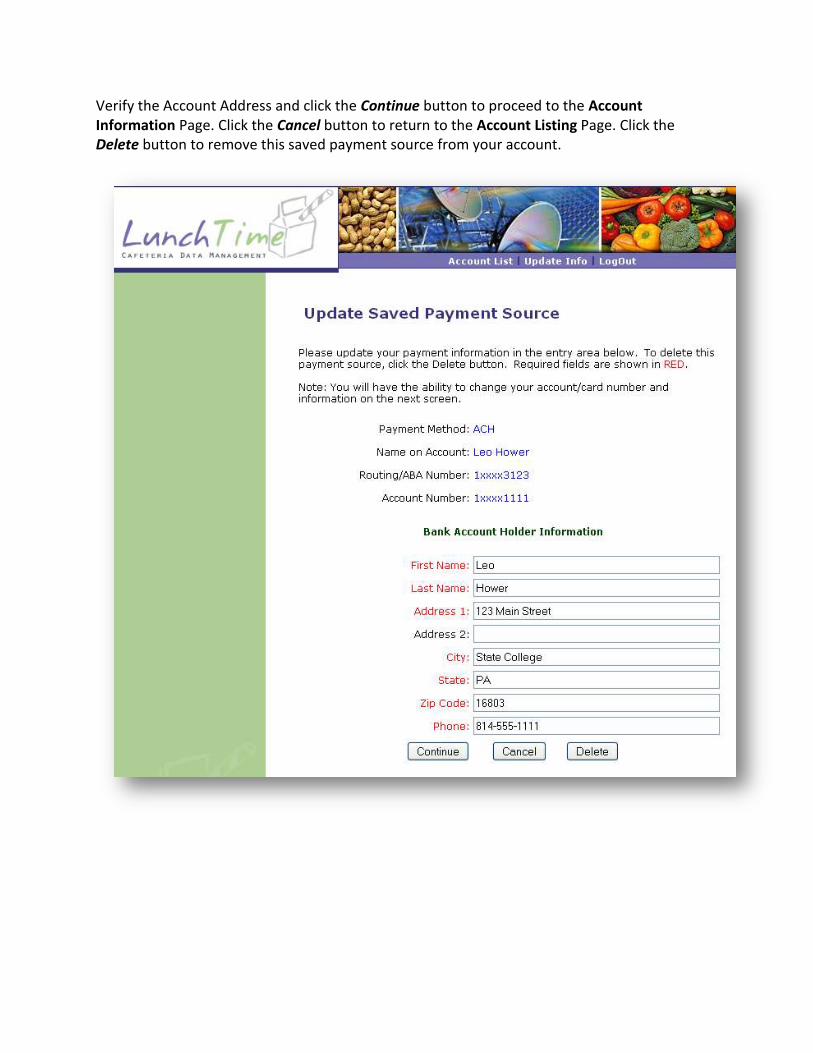
Verify the Account Address and click the Continue button to proceed to the Account Information Page. Click the Cancel button to return to the Account Listing Page. Click the Delete button to remove this saved payment source from your account.
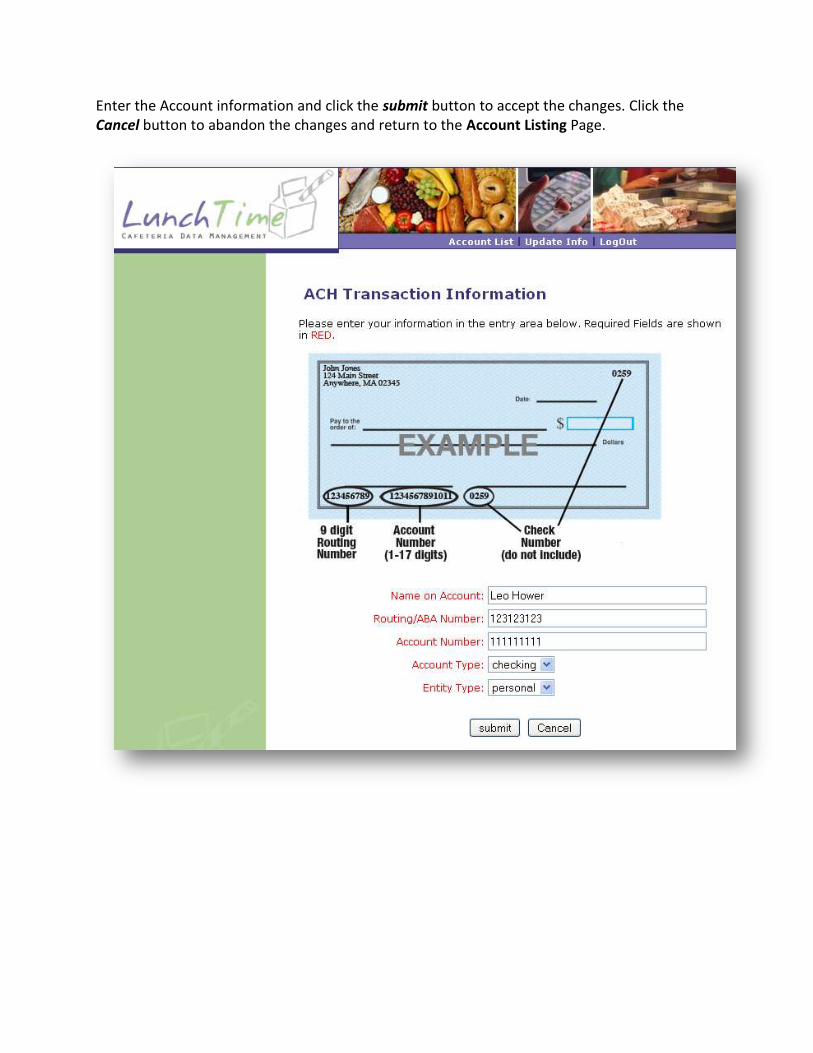
Enter the Account information and click the submit button to accept the changes. Click the Cancel button to abandon the changes and return to the Account Listing Page.

Upon successful update of the payment source, you will see the following page.
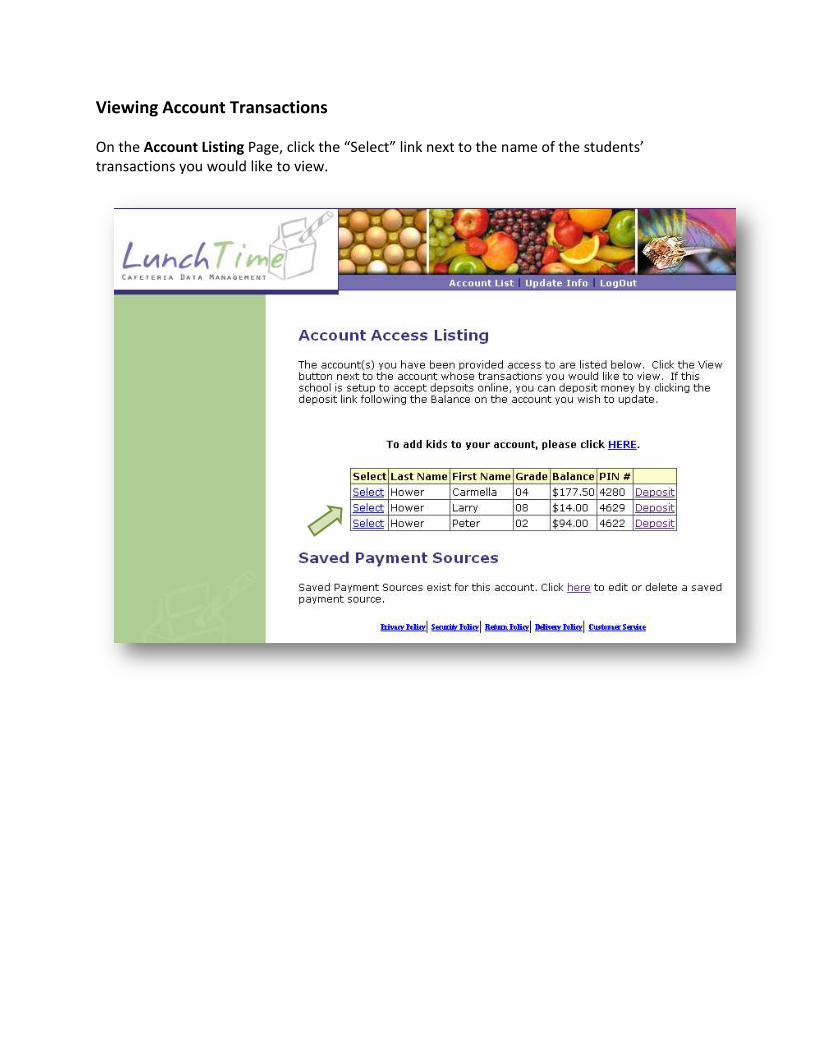
Viewing Account Transactions
On the Account Listing Page, click the “Select” link next to the name of the students’ transactions you would like to view.

The Account Transaction Viewer Page will show you all of the transactions recorded in the account of the student that was selected on the previous page.
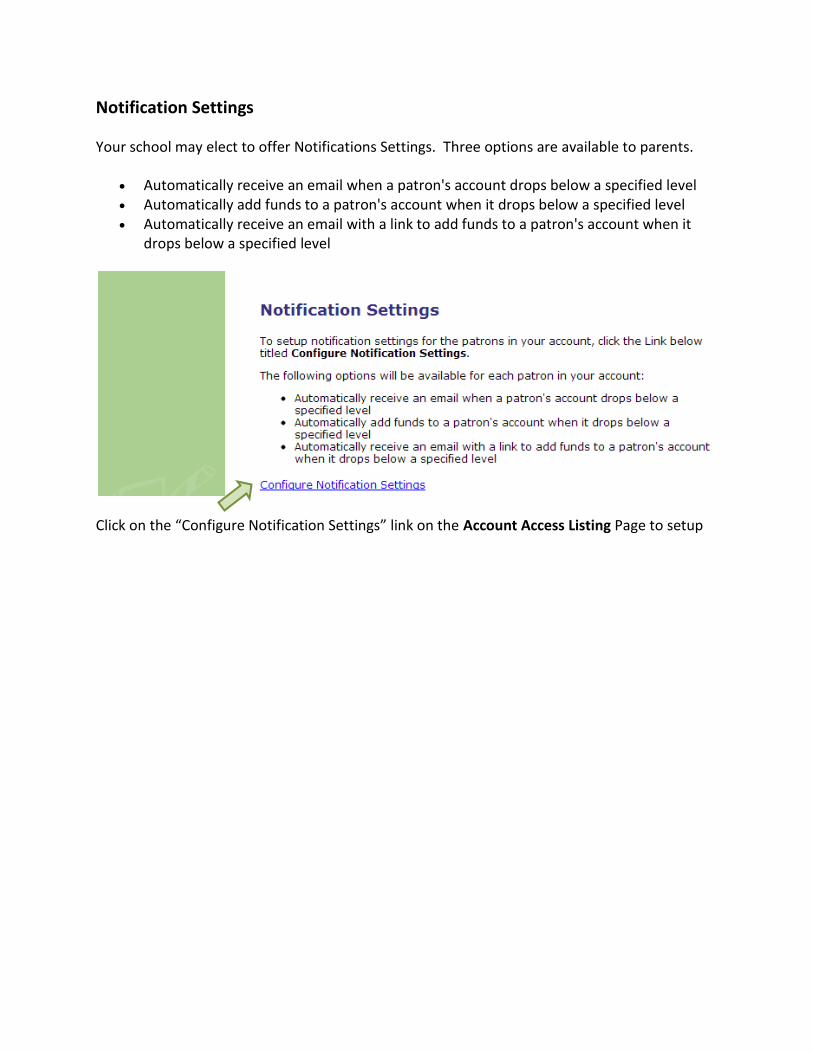
Notification Settings
Your school may elect to offer Notifications Settings. Three options are available to parents.
Automatically receive an email when a patron's account drops below a specified level Automatically add funds to a patron's account when it drops below a specified level Automatically receive an email with a link to add funds to a patron's account when it
drops below a specified level
Click on the “Configure Notification Settings” link on the Account Access Listing Page to setup
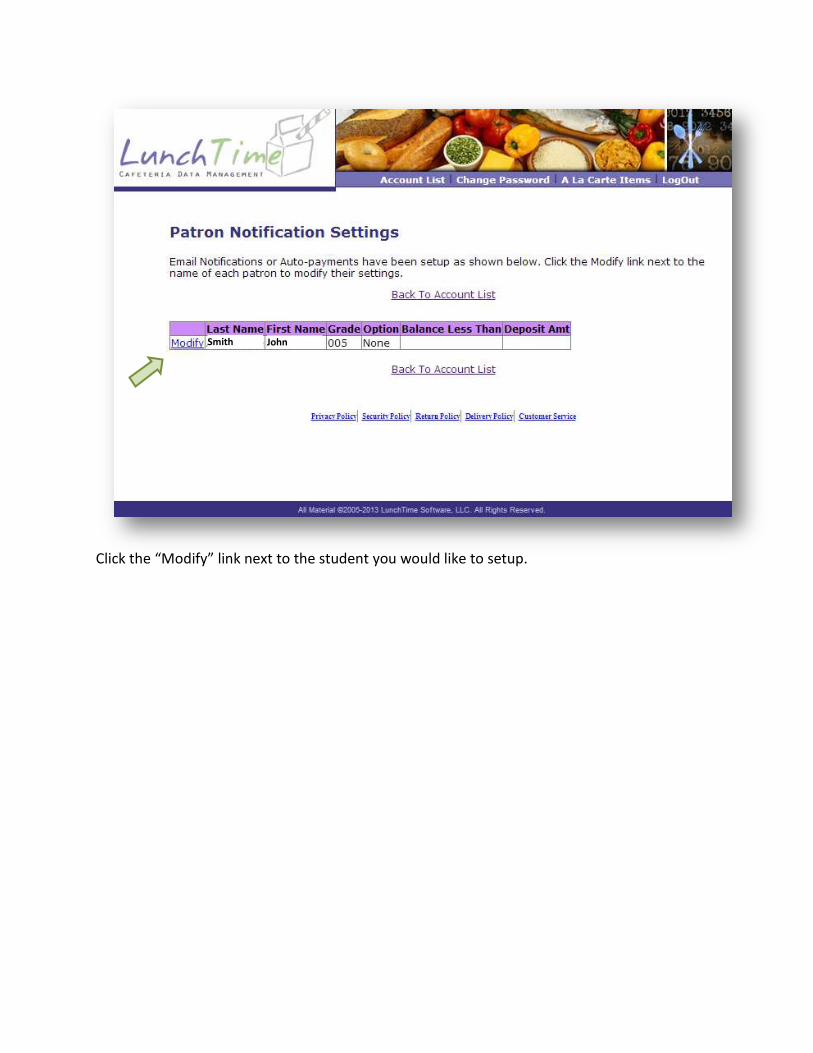
Click the “Modify” link next to the student you would like to setup.
Smith John
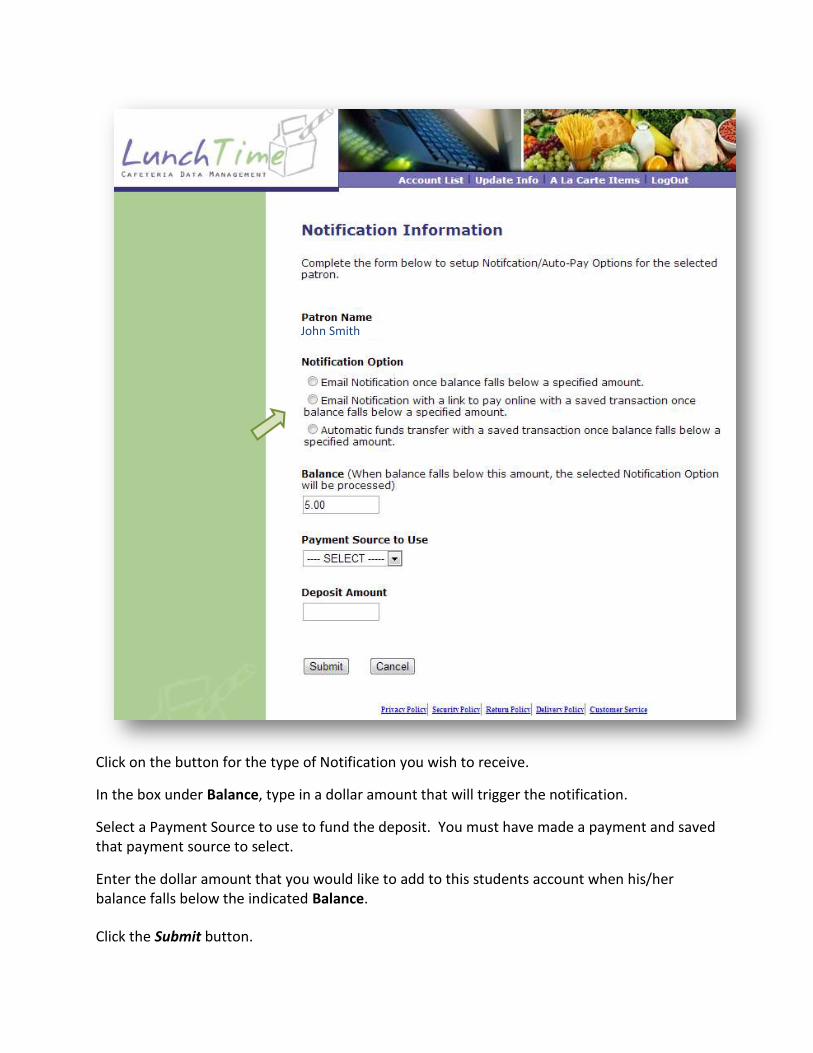
Click on the button for the type of Notification you wish to receive.
In the box under Balance, type in a dollar amount that will trigger the notification.
Select a Payment Source to use to fund the deposit. You must have made a payment and saved that payment source to select.
Enter the dollar amount that you would like to add to this students account when his/her balance falls below the indicated Balance.
Click the Submit button.
John Smith
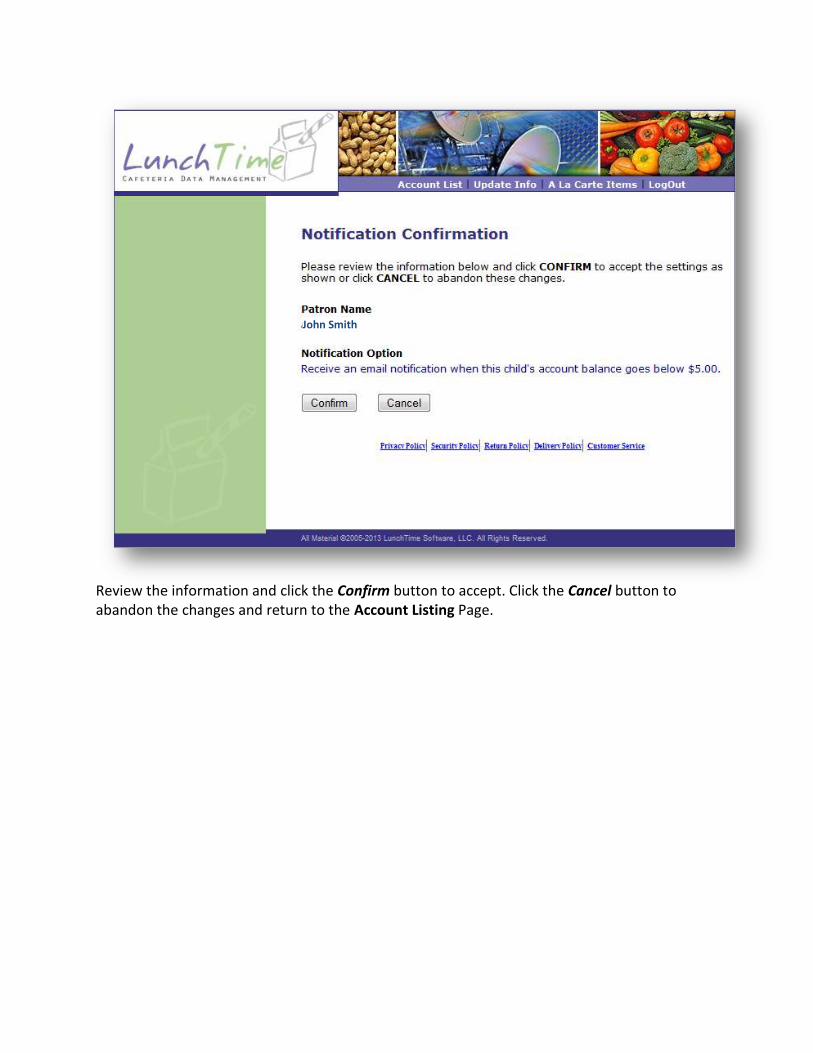
Review the information and click the Confirm button to accept. Click the Cancel button to abandon the changes and return to the Account Listing Page.
John Smith