industrial entomology and mushroom - krishi master nepal
TRANSCRIPT

0
Industrial Entomology and Mushroom Grade 10
This document is copyright protected, Reproduction, Print and Publication is strictly prohibited for commercial uses. You can use this property only for educational purpose as soft copy

1
Secondary Level
Technical and Vocational Stream
Learning Resource Material
Plant Science (Grade 10)
Industrial Entomology and Mushroom
2074
Government of Nepal
Ministry of Education
Curriculum Development Centre Sanothimi, Bhaktapur
Secondary Level
Technical and Vocational Stream
Learning Resource Material

2
Plant Science (Grade 10)
Industrial Entomology and Mushroom
2074
Government of Nepal
Ministry of Education
Curriculum Development Centre Sanothimi, Bhaktapur
Publisher: Government of Nepal
Ministry of Education
Curriculum Development Centre
Sanothimi, Bhaktapur
© Publisher
3
All rights reserved. No part of this publication may be reproduced, stored in a
retrieval system or transmitted, in any other form or by any means for
commercial purpose without the prior permission in writing of Curriculum
Development Centre.
Preface
The aim of secondary level education is to produce skilled and healthy citizens, who are familiar
with national customs and culture as well as social heritage and democratic values, and who can
contribute to the economic development of the country. The main aim of this level is to produce
skilled manpower that can provide special contribution to the country's all‐round development
and to produce conscious citizens by providing them with essential knowledge and skills for
university education. The process of developing and revising school level curricula in Nepal is
being continued in line with this objective.
This Learning Resource Material Written by Ramesh Khadka In bringing out this text book in this
form, the contribution of this Subject committee chairman Khemraj Dahal Educative Director
Krishna Prasad Kapri is highly commendable.
This Learning Resource Material book Editing by Badrinath Timalsina and Khilanath Dhamala CDC
extends sincere thanks to all those who have contributed in the development and revision of this
text book.
In this connection, in order to bring relevant changes in secondary level curricula as per the
recommendations of School Sector Development Plan (SSDP), some subjects, i. e. Plant Science,
Animal Science, Computer Engineering, Electrical Engineering and Civil Engineering have been

4
introduced under Technical and Vocational stream. According to this provision, the curricula of
these subjects have been prepared, and they are being implemented. Considering the situation
that the curricula of these subjects are not easily available at present, they have been published.
Learning Resource Material is considered as an important tool of learning. Experienced teachers
and curios students can use various learning resources and tools to achieve the competencies
targeted by the curriculum. An attempt is made to make this Learning Resource Material activity
oriented an interested as for as possible. The teachers, students and other stakeholders are
expected to make constructive comments and suggestions from all the persons concerned.
Therefore, the Curriculum Development Centre always anticipates constructive suggestions from
all the persons concerned.
Government of Nepal
Ministry of Education
Curriculum Development Centre Sanothimi, Bhaktapur
Table of Content Table of Contents
S.N. Subjects Page No.
1 Beekeeping 2 - 60
2 Sericulture 61 – 105
3 Muschroom cultivation 106 – 135

5
Unite :1 Beekeeping :
Objectives:
The main objective of the book is to provide the basic knowledge and skills that are needed for beekeeping
in the Nepal. These include the following:
➢ To identify bee species and their characteristics
➢ To identify and able to proper use of beekeeping equipment.
➢ To identify biology of bee and colony management of bee
➢ To gain technique of proper handling of bee, apiaries management, pest, disease management of
bee and harvesting and post harvest handling of bee product.
➢ To be familiar about management of forage for bee.
Learning materials :
➢ Beehive of Apis cerena and A. melifera species.
➢ Bee product and beehive equipment Course content:
1.1 Introduction :
1.1.1 Defination, general terms Kingdom
: Animal
Sub-kingdom : Invertebrata
Phylum : Arthyopoda
Order : Hymenoptera
Class : Insecta/ Hexapoda
Family : Apidae
Genus : Apis
Abdomen - the third region of the body of a bee enclosing the honey stomach, true stomach, intestine, sting,
and reproductive organs.
Absconding swarm - an entire colony of bees that abandons the hive because of disease, wax moth,
excessive heat or water, lack of resources, or other reasons.
Acarine disease - The name of the disease caused by the tracheal mite (Acarapis woodi). See Tracheal
mite.
Afterswarm - a small swarm which may leave the hive after the first or primary swarm has departed. These
afterswarms usually have less bees associated with them than the primary swarm.
American foulbrood - a brood disease of honey bees caused by the spore-forming bacterium, Paenibacillus
larvae. The spore stage of the bacterium can remain viable for many years, making is difficult to eliminate
the disease.
Apiary - colonies, hives, and other equipment assembled in one location for beekeeping operations; also
known as a bee yard.
Apiculture - the science and art of raising honey bees.
Apis mellifera - scientific name of the honey bee found in the United States.
Paenibacillus larvae - the bacterium that causes American foulbrood.
Bee blower - an engine with attached blower used to dislodge bees from combs in a honey super by creating
a high-velocity, high-volume wind.
6
Bee bread - a mixture of collected pollen and nectar or honey, deposited in the cells of a comb to be used
as food by the bees.
Bee brush - a brush or whisk broom used to gently remove bees from combs.
Bee escape - a device used to remove bees from honey supers or buildings by permitting bees to pass one
way but preventing their return.
Beehive - a box or receptacle with movable frames, used for housing a colony of bees.
Bee metamorphosis - the three stages through which a bee passes before reaching maturity: egg, larva, and
pupa. During the pupal stage, large fat reserves are used to transform both the internal and external anatomy
of the bee.
Bee space - 3/8-inch space between combs and hive parts in which bees build no comb or deposit only a
small amount of propolis. Bee spaces are used as corridors to move within the hive.
Beeswax - a complex mixture of organic compounds secreted by four pairs of special glands on the worker
bee's abdomen and used for building comb. Its melting point is from 143.6 to 147.2 degrees F.
Bee veil - a cloth or form of hat usually made of wire netting to protect the beekeeper's head and neck from
stings.
Bee venom - the poison secreted by special glands attached to the stinger of the bee.
Boardman feeder - a device for feeding bees that consists of an inverted jar with an attachment allowing
access to the hive entrance.
Bottom board - the floor of a beehive that all the other components build upon.
Brace comb - a small bit of wax built between two combs or frames to fasten them together. Brace comb
is also built between a comb and adjacent wood, or between two wooden parts such as top bars.
Braula coeca - the scientific name of a wingless fly commonly known as the bee louse.
Brood - immature bees that not yet emerged from their cells. Brood can be in the form of eggs, larvae, or
pupae of different ages.
Brood chamber - the part of the hive in which the brood is reared; may include one or more hive bodies
and the combs within.
Burr comb - a bit of wax built upon a comb or upon a wooden part in a hive but not connected to any other
part.
Capped brood - pupae whose cells have been sealed with a porous cover by mature bees to isolate them
during their nonfeeding pupal period; also called sealed brood.
Cappings - a thin layer of wax used to cover the full cells of honey. This layer of wax is sliced from the
surface of a honey-filled comb.
Castes - a term used to describe social insects of the same species and sex that differ in morphology or
behavior. In honey bees there are two castes, workers and queens. The drones are a different sex and
therefore not included.
Cell - the hexagonal compartment of comb built by honeybees.
Chilled brood - Bee larvae and pupae that have died from exposure to cold. This typically occurs in spring
when the colony is expanding rapidly and on cold nights there aren't enough bees to keep the brood warm.
7
Chunk honey - honey cut from frames and placed in jars along with liquid honey.
Clarifying - removing visible foreign material from honey or wax to increase its purity.
Clarifying Tank - any tank or holding vessel that is use to temporarily store honey while the wax and other
material separate from the honey.
Cluster - a large group of bees hanging together, one upon another.
Colony - all the worker bees, drones, queen, and developing brood living together in one hive or other
dwelling.
Comb - a mass of six-sided cells made by honey bees in which brood is reared and honey and pollen are
stored; composed of two layers united at their bases.
Comb foundation - a commercially made structure consisting of thin sheets of beeswax with the cell bases
of worker cells embossed on both sides in the same manner as they are produced naturally by honey bees.
Comb honey - honey produced and sold in the comb. It is produced either by cutting the comb from the
frame or when the comb is built in special frames which allow for its easy removal.
Creamed honey - honey which has crystallized under controlled conditions to produce a tiny crystal and a
smooth texture. Often a starter or seed is used to help control the crystallization.
Crimp-wired foundation - comb foundation which crimp wire is embedded vertically during the
manufacturing of the foundation. The wire increases the strength of the foundation.
Cross-pollination - the transfer of pollen from an anther of one plant to the stigma of a different plant of
the same species.
Crystallization - the formation of sugar crystals in honey. Syn. Granulation
Cut-comb honey - comb honey cut into various sizes, the edges drained, and the pieces wrapped or packed
individually
Decoy hive - a hive placed to attract stray swarms.
Dextrose - one of the two principal sugars found in honey; forms crystals during granulation. Also known
as glucose.
Dividing - separating a colony to form two or more colonies.
Division board feeder - a wooden or plastic compartment which is hung in a hive like a frame and contains
feed for bees.
Double screen - a wooden frame with two layers of wire screen to separate two colonies within the same
hive, one above the other. An entrance is cut on the upper side and placed to the rear of the hive for the
upper colony.
Drawn combs - cells which have been built out by honey bees from foundation in a frame.
Drifting of bees - the failure of bees to return to their own hive in an apiary containing many colonies.
Young bees tend to drift more than older bees, and bees from small colonies tend to drift into larger colonies.
Drone - the male honey bee
Drone comb - comb measuring about four cells per linear inch that is used for drone rearing and honey
storage.
8
Drone layer - an infertile or unmated laying queen or worker.
Dysentery - a condition of adult bees characterized by severe diarrhea and usually caused by starvation,
low-quality food,, confinement due to poor weather conditions, or nosema infection.
European foulbrood - an infectious disease which only affects the brood of honey bees and is caused by
the bacteria Streptococcus pluton.
Extracted honey - honey removed from the comb.
Extractor - a machine which removes honey from the cells of comb by centrifugal force.
Fermentation - the process of yeast utilizing sugar as a food, and as a byproduct, produce alcohol. Honey
typically does not have enough moisture for fermentation to occur.
Fertile queen - a queen, which has been inseminated, naturally or artificially, and can lay fertilized eggs.
Field bees - worker bees generally two to three weeks old that work to collect nectar, pollen, water, and
propolis for the colony.
Follower board - a thin board the size of a frame that can be inserting into a hive to reduce the space
available to the bees. This is done to help smaller colonies that may have trouble keeping the brood nest
warm.
Frame - a piece of equipment made of either wood or plastic designed to hold the honey comb.
Fructose - the predominant simple sugar found in honey.
Fume board - a rectangular cover the size of a super which has an absorbent material on the underside. A
chemical is placed on the material to drive the bees out of supers for honey removal.
Fumigilin-B - an antibiotic used in the prevention and suppression of nosema disease.
Glucose - see "Dextrose."
Grafting - removing a worker larva from its cell and placing it in a queen cup in order to have it reared into
a queen.
Grafting tool - a needle or probe designed for transferring larvae from worker cells to a queen cells.
Granulation - the formation of sugar crystals in honey which may cause it to turn solid.
Hive - the structure used by bees for a home.
Hive body - a wooden box which encloses the frames and is usually used as a brood chamber.
Hive stand - a structure that supports the hive.
Hive tool - a metal device used to open hives, pry frames apart, and scrape wax and propolis from the hive
parts.
Honey - a sweet viscid material produced by bees from the nectar of flowers, composed largely of a mixture
of sugars dissolved in about 17 percent water. It contains small amounts of mineral matter, vitamins,
proteins, and enzymes.
Honeydew - a sweet liquid excreted by aphids, leaflhoppers, and some scale insects that is collected by
bees, especially in the absence of a good source of nectar.
Honey house - building used for extracting honey and storing equipment.
9
Honey stomach - a specially designed organ in the abdomen of the honey bee used for carrying nectar,
honey, or water.
Increase - to add to the number of colonies, usually by dividing those on hand.
Inner cover - a lightweight cover used under a standard telescoping cover on a beehive.
Instrumental insemination - the introduction of drone spermatozoa into the genital organs of a virgin
queen by means of special instruments.
Invertase - an enzyme produced by the honey bee which helps to transform sucrose to dextrose and
levulose.
Larva (plural, larvae) - the second stage of bee metamorphosis; a white, legless, grublike insect.
Laying worker - a worker which lays infertile eggs, producing only drones, usually in colonies that are
hopelessly queenless.
Levulose - see "Fructose."
Mating flight - the flight taken by a virgin queen while she mates in the air with several drones.
Mead - honey wine.
Migratory beekeeping - the moving of colonies of bees from one locality to another during a single season
to take advantage of two or more honey flows.
Nectar - a sweet and often fragrant liquid secreted by the nectaries of plants for attracting animals. Nectar
is the raw product of honey.
Nectar flow - a time when nectar is plentiful and bees produce and store surplus honey.
Nectar guide - color marks on flowers believed to direct insects to nectar sources.
Nectaries - the glands of plants which secrete nectar, located within the flower or on other portions of the
plant (extrafloral nectaries).
Nosema - a disease of the adult honey bee caused by the protozoan Nosema apis. The microbe destroys the
gut of the bee and severe infections result in malnutrition and dysentery.
Nucleus - a hive of bees which consists of fewer frames than a typical hive and may be smaller in size. A
nucleus usually consists of two to five frames of comb and used primarily for starting new colonies or
rearing or storing queens; also called and commonly referred to a nuc.
Nurse bees - young bees, three to ten days old, which feed and take care of developing brood.
Observation hive - a hive made largely of glass or clear plastic to allow for the observation of bees at work.
Package bees - a quantity of adult bees (2 to 5 pounds), with or without a queen, contained in a screened
shipping cage with a food source.
PDB (Paradichlorobenzene) - crystals used to fumigate stored combs against wax moth.
Pheromones - chemical substances secreted from glands and used as a means of communication. Honey
bees secrete many different pheromones.
Play flight - short flight taken in front of or near the hive to acquaint young bees with their immediate
surroundings.

10
Pollen - the male reproductive cell bodies produced by anthers of flowers. It is collected and used by honey
bees as their source of protein.
Pollen basket - a flattened depression surrounded by curved hairs, located on the outer surface of a bee's
hind legs and adapted for carrying pollen to the hive.
Pollen substitute - any material such as soybean flour, powdered skim milk, brewer's yeast, or a mixture
of these used in place of pollen as a source of protein to stimulate brood rearing. Typically feed to a hive in
early spring to encourage colony expansion.
Pollen supplement - a mixture of pollen and pollen substitutes used to stimulate brood rearing typically in
early spring to encourage colony expansion.
Pollen trap - a device for removing pollen loads from the pollen baskets of incoming bees.
Pollination - the transfer of pollen from the anthers to the stigrna of flowers.
Primary swarm - the first swarm to leave the parent colony, usually with the old queen (see secondary
swarm).
Propolis - sap or resinous materials collected from trees or plants by bees and used to strengthen the comb
and to seal cracks; also called bee glue.
Pupa - the third stage in the development of the honey bee, during which it changes (pupates) from a larva
to an adult bee.
Queen - a female bee with a fully developed reproductive system, and she is larger and longer than a worker
bee.
Queen cage - a small cage in which a queen and three to five worker bees are confined for shipping and
introduction into a colony.
Queen cell - a special elongated cell in which the queen is reared. It is above an inch or more long and
hangs down from the comb in a vertical position.
Queen clipping - removing a portion of one or both front wings of a queen to prevent her from flying.
Queen excluder - metal or plastic device with spaces that permit the passage of workers but restrict the
movement of drones and queens to a specific part of the hive.
Robbing - stealing of nectar, or honey, by bees from other colonies which happens more often during a
nectar dearth.
Royal jelly - a highly nutritious glandular secretion of young bees, used to feed the queen and young brood.
Sacbrood - a viral disease which affects the larva of honey bees.
Scout bees - worker bees searching for a new source of pollen, nectar, propolis, water, or a new home for
a swarm of bees.
Secondary swarm - a smaller swarm which may occur after the primary swarm has occurred.
Skep - a beehive made of twisted straw without movable frames.
Slatted rack - a wooden rack that fits between the bottom board and hive body. Bees make better use of
the lower brood chamber with increased brood rearing. Congestion at the front entrance is reduced which
can also reduce the swarming tendency.
Slumgum - the refuse from melted comb and cappings after the wax has been rendered or removed.

11
Smoker - a device in which materials are slowly burned to produce smoke (not flames) which is used to
subdue bees. It is important to use a material that produces a cool smoke as not to harm the bees.
Solar wax melter - a glass-covered insulated box used to melt wax from combs and cappings by the heat
of the sun.
Spur embedder - a handheld device used for embedding wires into foundation with the purpose of
reinforcing the foundation.
Stinger - the modified structure of a worker honey bee used as a weapon of offense. Honey bees have a
barbed stinger which stays embedded in the recipient of sting cause the bee to later die.
Streptococcus pluton - bacteria that cause European foulbrood.
Sucrose - principal sugar found in nectar.
Super - any hive body, or smaller box, used for the storage of surplus honey which the beekeeper will
harvest. Normally it is placed over or above the brood chamber. Betterbee offers shallow, medium, and
deep supers.
Supersedure - the natural replacement of an established queen by a newly reared queen in the same hive.
Surplus honey - honey removed from the hive which exceeds that needed by bees for their own use.
Swarm - a large number of worker bees, drones, and usually the old queen that leaves the parent colony to
establish a new colony.
Swarming - the natural process of propagating a colony of honey bees.
Swarm cell - queen cells usually found on the bottom of the combs before swarming.
Terramycin - an antibiotic used to prevent American and European foulbrood.
Uncapping knife - a knife used to shave or remove the cappings from combs of sealed honey prior to
extraction. These can be heated by steam or electricity.
Uniting - combining two or more colonies to form one larger colony.
Virgin queen - a queen which is not mated.
Wax glands - glands that secrete beeswax, which are in pairs on the underside of the last four abdominal
segments.
Wax moth - larvae of the moth Golleria mellonclia, which can seriously damage brood and empty combs.
Winter cluster - a ball-like arrangement of adult bees within the hive during winter.
Worker bee - a female bee whose reproductive organs are undeveloped. The majority of the honey bees
are worker bees and they do all the work in the colony except for laying fertile eggs.
Worker comb - comb measuring about five cells to the inch, in which workers are reared and honey and
pollen are stored.
Introduction :
Beekeeping is the activity of people managing honeybees in hives in order to collect honey and other
products, pollinate crops, and/or raise bees for sale. The hives provide a favourable environment for the

12
bees as a base for foraging and gathering pollen and nectar; this helps maximize the production of hive
products and the effectiveness of pollination services. Beekeeping has the technical name ‘apiculture’, and
the place where the hives are kept is an apiary. Agriculture is the main source of livelihoods for more than
80% of the rural population in the Hindu Kush Himalayan region. Up to 90% of the farmers in the region
are small or marginal farmers – cultivating less than one hectare of land each. Honeybees are important
crop pollinators and beekeeping can help these farmers maximize pollination and increase crop production,
while providing honey and other products for consumption and sale. Few resources are needed to start
beekeeping, and basic skills can be easily learned, at the same time, the demand for bee products and
services is high, thus beekeeping has a great potential in the region.
1.1.2 Importance and scope :
Beekeeping has both direct and indirect benefits. The direct benefits are the hive products: honey,
beeswax,pollen, royal jelly, bee venom, propolis, and bee colonies. These can be consumed to improve a
family’s nutrition, sold for cash income, or used as a basis for enterprise development, for example
cosmetics based on beeswax.
The indirect benefits include pollination, which leads both to increased crop productivity and maintenance
of natural biodiversity, including sustaining the natural products used by farmers
Beekeeping also generates off-farm employment opportunities in different fields including hive carpentry,
production and sale of honeybee colonies, honey trading, renting of bees for pollination, and bee-based
micro enterprises. Beekeeping is ideally suited as a means of income generation for a wide range of people
with otherwise limited opportunities, including the poorest of the poor, women, and people from
disadvantaged groups. It usually needs only a very small start up investment, can be carried out in a small
space close to the house, and yields profits within the first year of operation.
1. It is best Natural pollinator.
2. Nutritional importance
3. Religious importance
4. Economic importance
5. Self-employment and employment
6. Honey is used as Ayurbedhic and homiopathic medicine .
7. Entertainment and Api-turism value.
8. It is a indicator of danger .
9. It is a best symbol of unity and hard work.
1.1.3 Bees and pollination
Introduction
Pollination is a process by which pollen is transferred in plants from an anther to a stigma enabling
fertilization. Pollination is a necessary step in the reproduction of flowering plants and the development of
fruit and seeds; without pollination, flowering plants would not produce seeds and could die out. Transfer
of pollen grains from the anther to the stigma of the same flower or another flower in the same plant is
called self-pollination; transfer of pollen from a flower on one plant to a flower on a different plant is called
cross pollination.Self-fertile or self compatible plants can be fertilized by pollen from anthers of a plant of
the same variety; self incompatible crops require compatible pollen from a different variety of the same
crop. Cross pollination increases genetic diversity.

13
In some cases, pollination is by wind (especially grasses and conifers) or water (aquatic plants), but more
commonly, pollination requires pollinators, such as bees,butterflies, moths, flies, beetles, hummingbirds,
and bats to carry pollen from one flower to another (. 1). Most pollinators are insects. Usually they are
trying to get food, the sticky pollen or sweet nectar at the base of petals, and accidentally rub against the
stamens and get pollen stuck on themselves (. 1). When they move to another flower to feed, some of the
pollen can rub off onto this new plant’s stigma. Pollination is a prime factor in crop productivity. Perfect
pollination leads to higher crop production with the formation of more large and perfectly formed seeds
and fruits (. 2. It increases seed viability, rates of germination, and resistance of seeds against disease and
pests. Better pollination management can increase crop yields by 35–50% or more (. 3).
Figur: : Process of cross polination

14
Bees are the Best Pollinators
Honeybees are the most efficient plant pollinators among the insects. It is estimated that one third of the
human diet comes from insect-pollinated plants, and that honeybees provide 80% of that pollination. The
main reasons for the efficiency of bees are as follows:
➢ Their hairy bodies pick up a large amount of pollen.
➢ Their morphological characteristics enable bees to work fast and visit a large number of
flowers in a short time.
➢ The honeybee population multiplies fast during the flowering period of crops and other plants
and accelerates foraging work during nectar and pollen flow so that the greatest activity is at
the time that the most pollination is needed.
I wish I had used honeybees for pollinating my vegetables seed crop
oh! What a harvest! Now I know why it is useful to use honeybees for pollination . 81:
a) Natural pollination of vegetable
b) Managed pollination of vegetable seed crop
Bee hives placed to pollinate a mustard crop
15
➢ Honeybees remember particular flowering plants for 4–5 days and keep foraging until the
end of the blooming period, which means that pollination services are provided until the end
of flowering.
➢ Honeybees can communicate the position of plants in flower to the whole colony so that large
numbers of bees visit the plants.
➢ Honeybees forage a single species of flower at one time, which means that they are effective
in transferring pollen to other plants of the same species rather than to random flowers.
➢ Domesticated bees can be kept in hives, multiplied according to need, and migrated to a
pasture area at the time when a particular crop is ready for pollination.
➢ Bees provide pollination services in different geographical areas (plains to mountains) and in
different seasons (hot summer to cool winter).
The effectiveness of honeybee pollination in particular crops is related to
➢ the number of bee colonies in the crop area,
➢ the distance of bee colonies from the targeted crop,
➢ timing and method of placing honeybee colonies,
➢ forage preferences of the honeybees,
➢ queen quality for egg laying in a colony,
➢ whether the season is favourable for bee forage, ➢ the level of stores of honey and pollen in
the colony, and ➢ pesticide poisoning.
1.1.4 varieties of bees :
Generally bees are divided into two group, that are :
1. Single bee : These types of bee are stay alone and do not collect honey.
2. Social / group bee : These types of bee are social in nature, stay in colony and collect honey.
The social / group bees are also divided into three family.
1. Bumbidae Family (Vawara pariwar) :
2. Meliponadae / stingless Family (Putka mauri) :
3. Apidae Family : Apidae family consist 5 five spices of bees. It is also called honey bee.
Honeybees are social insects and live in colonies. Their main source of nutrition is flower nectar
and pollen.
Five honeybee species are found in the Himalayas of which four are indigenous to the region (
Apis florea, Apis dorsata, Apis laboriosa, and Apis cerana) and one has been introduced(Apismellifera).
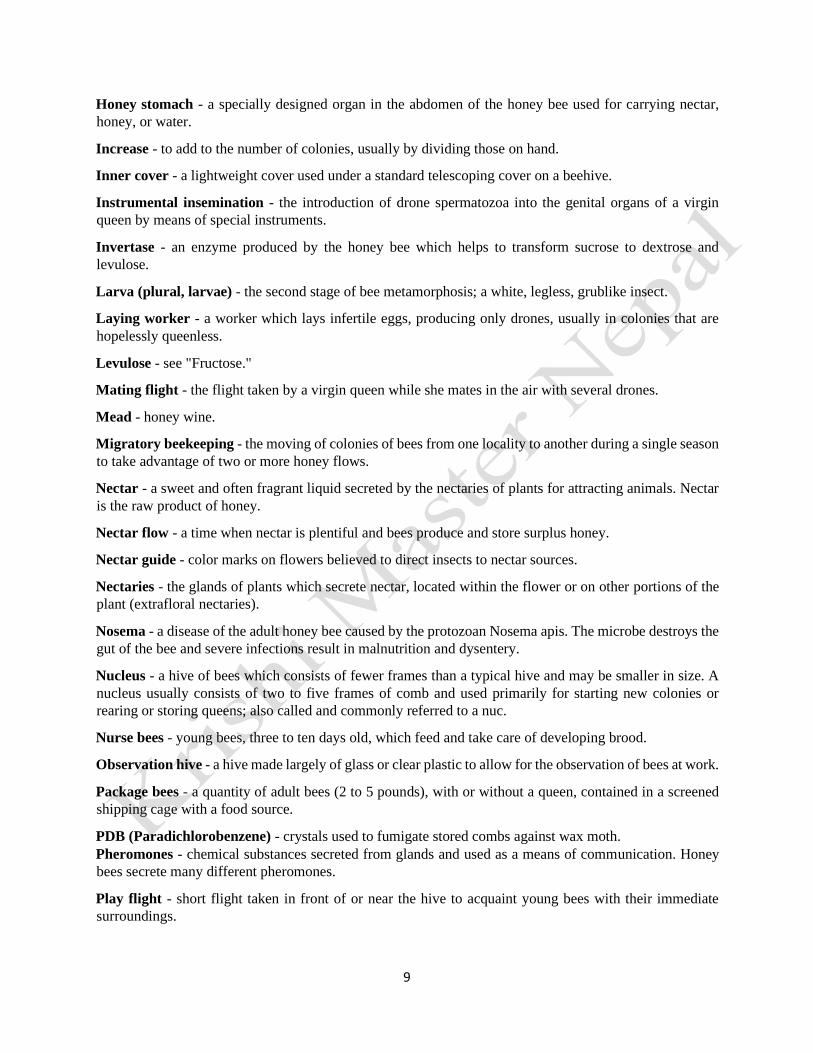
Their major characteristics and differences are summarized below 1. Little honeybee (Apis florea):
➢ The smallest of the Apisspecies Found in hills and plains at altitudes up to 1,200 masl
➢ Open nesting honeybee builds single small comb nests under small tree branches or bushes .
16
➢ Colonies migrate frequently if the nesting site and forage area is inappropriate
➢ Average honey yield is 1-3 kg per colony per year
➢ Honey regarded as having high medicinal value
➢ Efficient pollinator of crops and natural flora in the Himalayan foothills
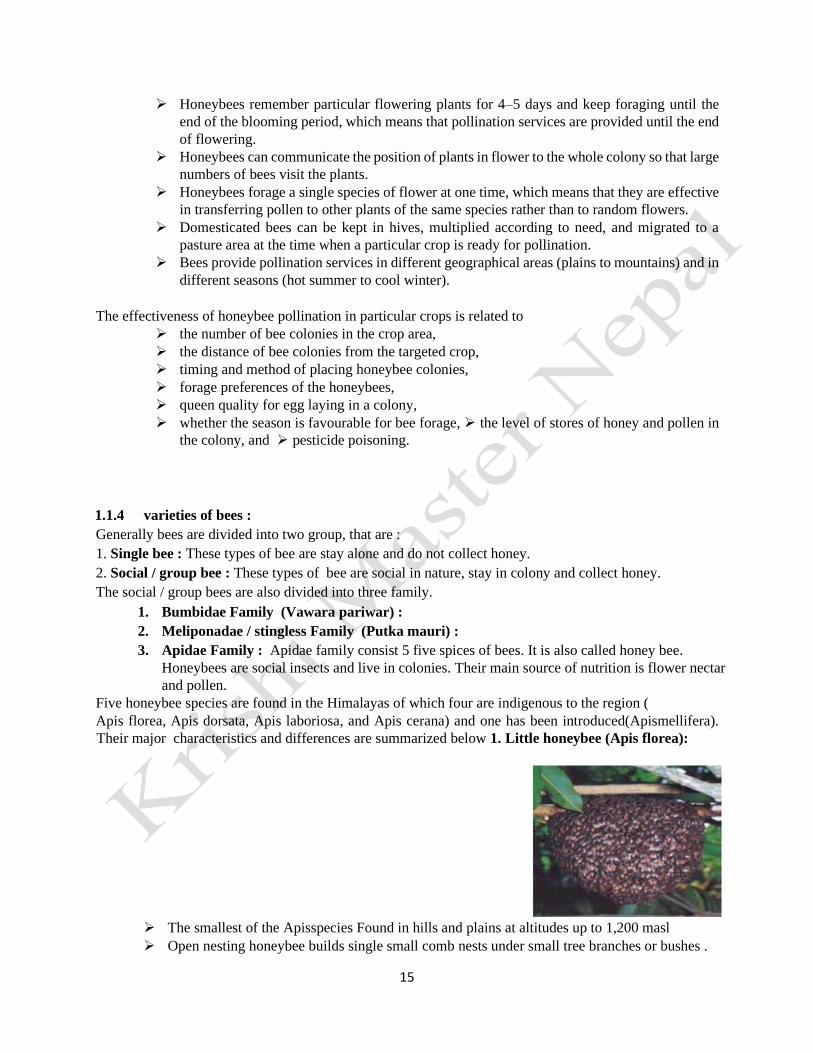
2. Giant honeybee / Rock bee (Apis dorsata )
➢ Found in hills and plains at altitudes up to 1,000 maslƒ
➢ Open nesting honeybee, prefers undisturbed nesting sites, usually on the top of tall trees, tall
buildings, or water towers
➢ Builds single large comb nests, usually with several nests at one site (. 4)ƒ
➢ Migrates to the hills in summer and to plains areas in winterƒ
➢ Highly defensive and performs mass attacks
➢ Honey production can be as high as 30–50 kg per colony per year
➢ Excellent pollinators of field crops, fruit, and natural flora
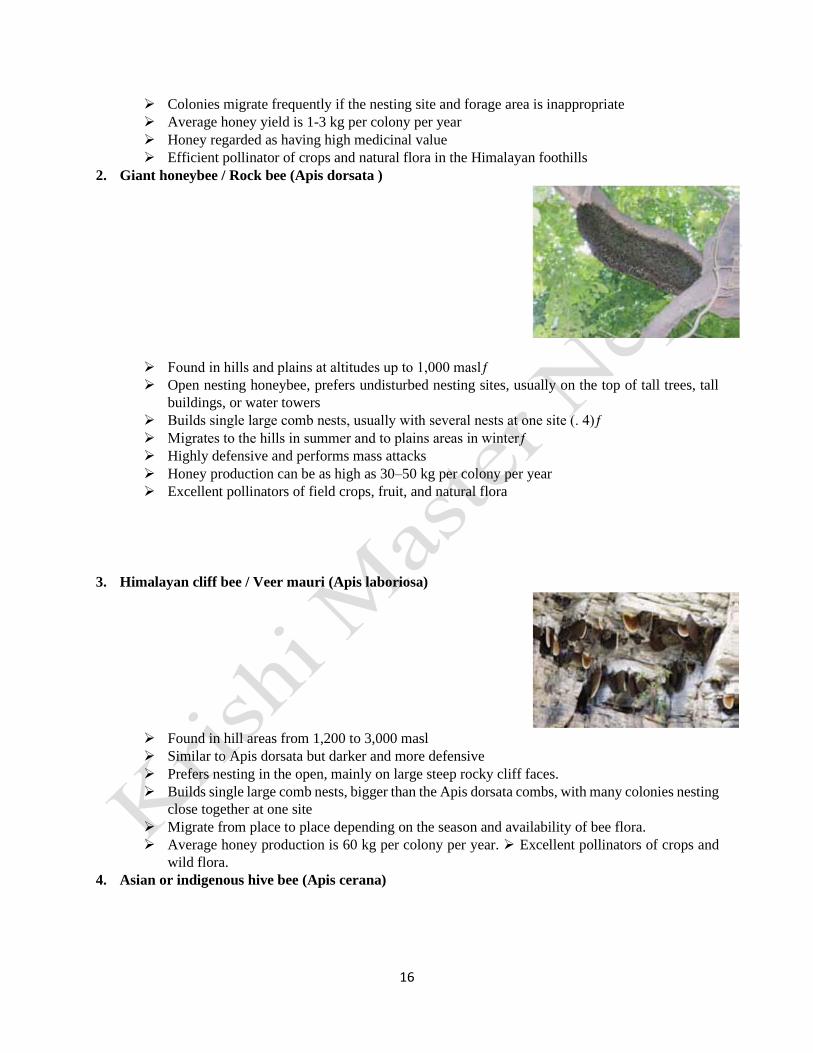
3. Himalayan cliff bee / Veer mauri (Apis laboriosa)
➢ Found in hill areas from 1,200 to 3,000 masl
➢ Similar to Apis dorsata but darker and more defensive
➢ Prefers nesting in the open, mainly on large steep rocky cliff faces.
➢ Builds single large comb nests, bigger than the Apis dorsata combs, with many colonies nesting
close together at one site
➢ Migrate from place to place depending on the season and availability of bee flora.
➢ Average honey production is 60 kg per colony per year. ➢ Excellent pollinators of crops and
wild flora.
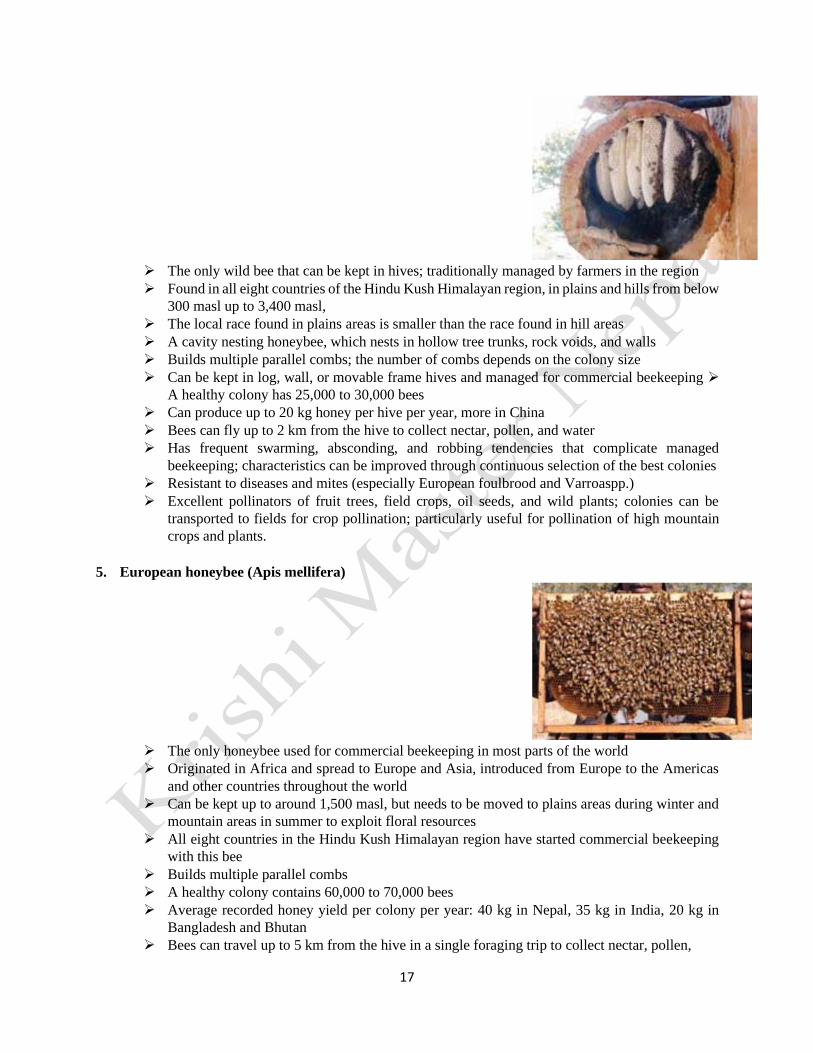
4. Asian or indigenous hive bee (Apis cerana)
17
➢ The only wild bee that can be kept in hives; traditionally managed by farmers in the region
➢ Found in all eight countries of the Hindu Kush Himalayan region, in plains and hills from below
300 masl up to 3,400 masl,
➢ The local race found in plains areas is smaller than the race found in hill areas
➢ A cavity nesting honeybee, which nests in hollow tree trunks, rock voids, and walls
➢ Builds multiple parallel combs; the number of combs depends on the colony size
➢ Can be kept in log, wall, or movable frame hives and managed for commercial beekeeping ➢
A healthy colony has 25,000 to 30,000 bees
➢ Can produce up to 20 kg honey per hive per year, more in China
➢ Bees can fly up to 2 km from the hive to collect nectar, pollen, and water
➢ Has frequent swarming, absconding, and robbing tendencies that complicate managed
beekeeping; characteristics can be improved through continuous selection of the best colonies
➢ Resistant to diseases and mites (especially European foulbrood and Varroaspp.)
➢ Excellent pollinators of fruit trees, field crops, oil seeds, and wild plants; colonies can be
transported to fields for crop pollination; particularly useful for pollination of high mountain
crops and plants.
5. European honeybee (Apis mellifera)
➢ The only honeybee used for commercial beekeeping in most parts of the world
➢ Originated in Africa and spread to Europe and Asia, introduced from Europe to the Americas
and other countries throughout the world
➢ Can be kept up to around 1,500 masl, but needs to be moved to plains areas during winter and
mountain areas in summer to exploit floral resources
➢ All eight countries in the Hindu Kush Himalayan region have started commercial beekeeping
with this bee
➢ Builds multiple parallel combs
➢ A healthy colony contains 60,000 to 70,000 bees
➢ Average recorded honey yield per colony per year: 40 kg in Nepal, 35 kg in India, 20 kg in
Bangladesh and Bhutan
➢ Bees can travel up to 5 km from the hive in a single foraging trip to collect nectar, pollen,

18
water, and propolis.
➢ Swarming and absconding tendencies quite low Susceptible to diseases and parasites (such as
brood and mites); needs special management in terms of technology, knowledge, and skills
➢ Migration of bee colonies can increase honey productivity
➢ Excellent pollinator of fruit trees, field crops, oil seeds, and other crops
1.1.5 Beekeeping in Nepal
From where did beekeeping begin in Nepal & when? The relevant data hasn't been pinpointed. However,
our Vedic records tell us that bees and honey were culturally important and had nutritional value from the
age of the Vedas (The Vedic Age). Honey was procured from the natural hives located in trees, on rock
faces, etc.
Despite the lack of utilization of honey on an entrepreneurial level, from age old eras honey was recognized
and used for its homeopathic/ ayurvedic properties as well as in the form of nutritional supplement as one
with the best thereof.
Various religious manuscripts assert that the sages (Rishi) of yore partook of the fruit kandapul along with
honey. The value and importance of the bee and honey has increased in this day and age whereby
beekeeping has become an entrepreneurial asset and many farmers have been drawn towards beekeeping
despite the fact that Nepal lags behind in meeting its needs.
initiated industrialization of beekeeping; however, beekeeping became modernized around BS 2026/ 027
through the cottage industries department. The aforementioned program was signed/ handed over to the
department of agriculture dated BS 031/ 032. Under the direction of the late king Birendra Bir Bikram
Shaha Dev, the Godavari Bee Keeping Centre was established in the year '42 BS. Following the program
run by SNV Nepal under the support of the Netherlands Government (BS 2044/ 45 – 2049/ 50), the bee
keeping program was able to develop rapidlyDuring the reign of the Rana Prime Minister Jung Bahadur &
thereafter, it has bee noted in various manuscripts that beekeeping was pursued in its natural form in the
jungles of Godavari, Nagarjun etc. Honey was even used as a beauty enhancing potion
1.2 Biology and Bee colony :
1.2.1 Life cycle :
The honey bees are social insects and live in colonies with a highly organized system of division of labour.
Many combs are found in a colony in which the members of the same family used to live. A family consist
of 30000 to 50000 members which includes a queen, 200-300 drones and workers.
The honeybee life cycle
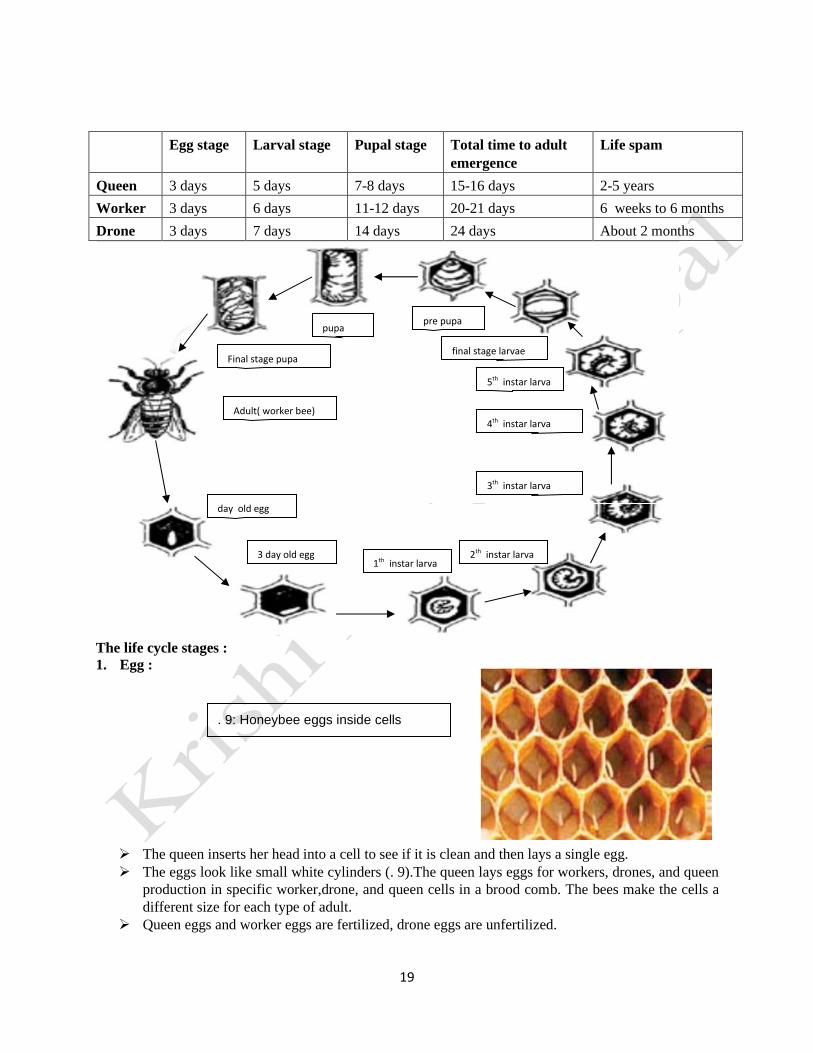
A honeybee colony has three kinds of adult: queen, worker, and drone. Each goes through the same four
developmental stages, but the time needed to complete each stage differs. The honeybee life cycle has four
stages: egg, larva, pupa, and adult. The stages are further subdivided in terms of development (. 8)The
average time taken for the different kinds of bee to complete each stage is summarized in Table and
explained in more detail below.
19
Egg stage Larval stage Pupal stage Total time to adult
emergence
Life spam
Queen 3 days 5 days 7-8 days 15-16 days 2-5 years
Worker 3 days 6 days 11-12 days 20-21 days 6 weeks to 6 months
Drone 3 days 7 days 14 days 24 days About 2 months
➢ The queen inserts her head into a cell to see if it is clean and then lays a single egg.
➢ The eggs look like small white cylinders (. 9).The queen lays eggs for workers, drones, and queen
production in specific worker,drone, and queen cells in a brood comb. The bees make the cells a
different size for each type of adult.
➢ Queen eggs and worker eggs are fertilized, drone eggs are unfertilized.
The life cycle stages :
1. Egg :
pre pupa
final stage larvae
5 th instar larva
4 th instar larva
3 th instar larva
2 th instar larva 1 th instar larva
day old egg 3
day old egg
Adult( worker bee)
Final stage pupa
pupa
. 9: Honeybee eggs inside cells

20
➢ The egg stage lasts 3 days. At the start, the egg stands vertically on the base of the cell, then slants,
and finally lies flat on the base before hatching.
2. Larva
➢ Small larvae hatch from the egg after 3 days. They are shiny white and curved, with no eyes (. 10).
➢ Queen and drone larvae grow to be larger than worker larvae.
➢ The larval period is 5 days for a queen, 6 for a worker, and 7 for a drone.
➢ The food given to the larvae differs. Queen larvae are fed royal jelly throughout the larval period;
drone and worker larvae are fed royal jelly for 3 days and bee bread (a mixture of honey and pollen)
for the remaining 3 or 4 days.
➢ The internal organs start to develop as the larvae grow. They moult several times and after the last
moult they enter the pupal stage. The larval stage last 5 to 7 days depending upon the kind of adult
they will become.
3. Pupa
➢ The pupal stage is also called the dormant stage.
➢ Worker bees seal the cells with a porous beeswax cap and the larva spins a cocoon around itself (.
11).
➢ The developing bee remains inside the cocoon without eating or moving. The pupal stage lasts for
7–8 days for a queen, 11–12 days for a worker, and 14 days for a drone
➢ During this stage, the internal organs and body appendages develop. Finally the adult bees
emerge.
4. Adult
. 11: H o n eybee pupa in s i de ce ll s
.10 : Honeybeelarva insidecells
21
➢ The adults emerge from the cocoon and bite a hole in the top of the sealed cell to come out. ➢
Immediately after emergence, the adult workers are a light colour, and then become darker.
➢ The total time taken to develop from egg to adult is 15–16 days for a queen, 20–21 days for a
worker, and 24 days for a drone (. 12). . 9:Honeybee eggs inside cells.
➢ The life span of the different types of adult bee is different. A queen lives for 2–5 years, a worker
for 6 weeks to 6 months, and a drone for an average of 2 month
The three kinds of adult honeybee
A healthy colony has three distinct types of individuals – queens, workers, and drones – each with a specific
role.
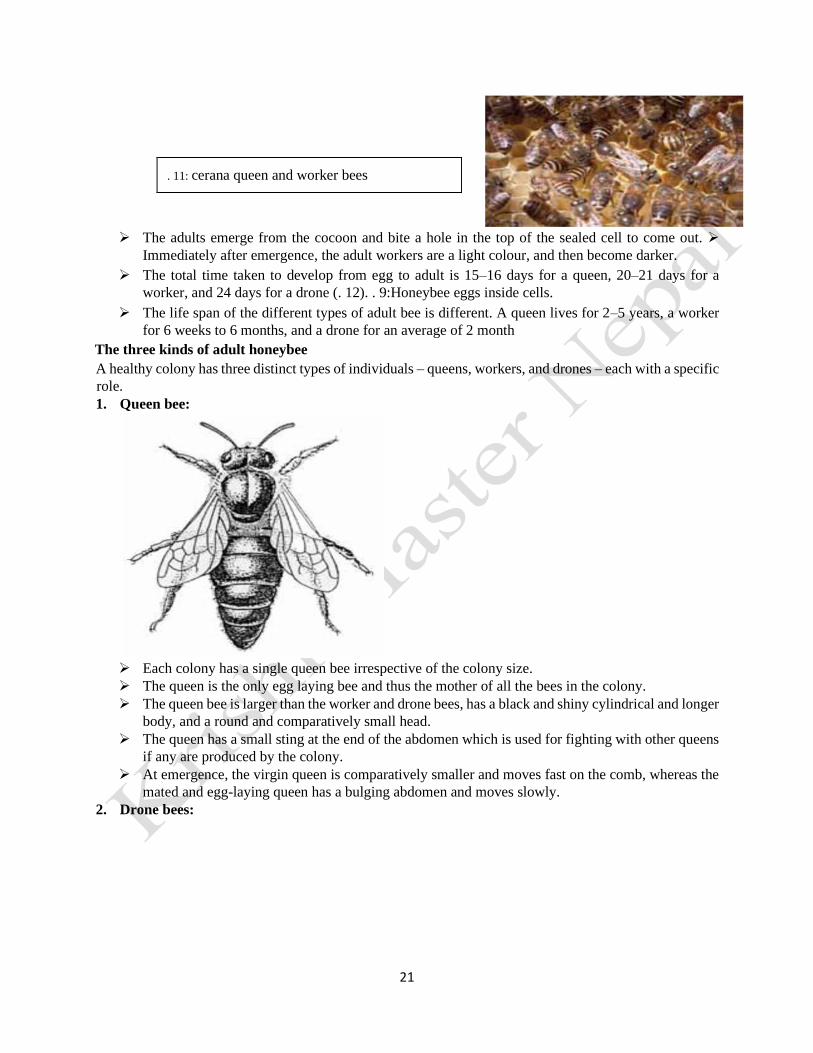
1. Queen bee:
➢ Each colony has a single queen bee irrespective of the colony size.
➢ The queen is the only egg laying bee and thus the mother of all the bees in the colony.
➢ The queen bee is larger than the worker and drone bees, has a black and shiny cylindrical and longer
body, and a round and comparatively small head.
➢ The queen has a small sting at the end of the abdomen which is used for fighting with other queens
if any are produced by the colony.
➢ At emergence, the virgin queen is comparatively smaller and moves fast on the comb, whereas the
mated and egg-laying queen has a bulging abdomen and moves slowly.
2. Drone bees:
. 11: cerana queen and worker bees
22
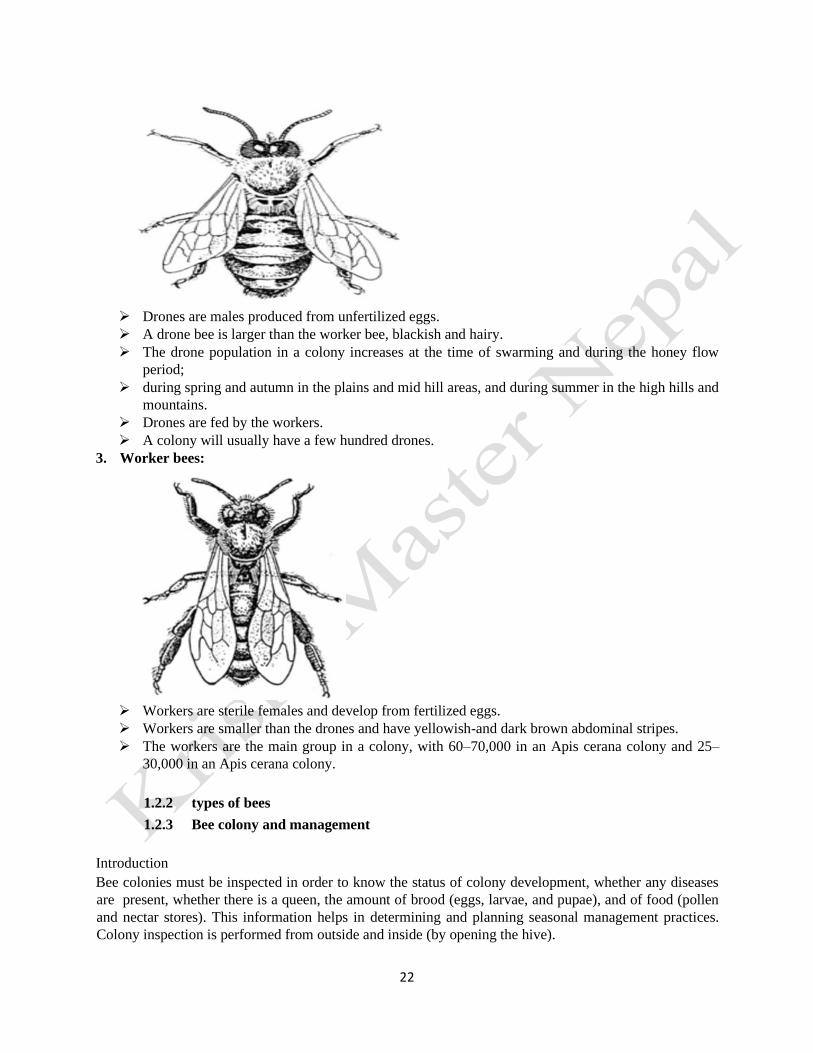
➢ Drones are males produced from unfertilized eggs.
➢ A drone bee is larger than the worker bee, blackish and hairy.
➢ The drone population in a colony increases at the time of swarming and during the honey flow
period;
➢ during spring and autumn in the plains and mid hill areas, and during summer in the high hills and
mountains.
➢ Drones are fed by the workers.
➢ A colony will usually have a few hundred drones.
3. Worker bees:
➢ Workers are sterile females and develop from fertilized eggs.
➢ Workers are smaller than the drones and have yellowish-and dark brown abdominal stripes.
➢ The workers are the main group in a colony, with 60–70,000 in an Apis cerana colony and 25–
30,000 in an Apis cerana colony.
1.2.2 types of bees
1.2.3 Bee colony and management
Introduction
Bee colonies must be inspected in order to know the status of colony development, whether any diseases
are present, whether there is a queen, the amount of brood (eggs, larvae, and pupae), and of food (pollen
and nectar stores). This information helps in determining and planning seasonal management practices.
Colony inspection is performed from outside and inside (by opening the hive).

23
Appropriate Weather and Time
The best time to inspect a colony depends on the weather and also the bees’ daytime routine.
➢ Inspection should be carried out during clear and calm weather.
➢ Inspection should not be carried out when it is hot and bright, cold, cloudy, or threatening storms
or rain.
➢ Colony inspection is easier when a large number of bees are out foraging and fewer are in the hive.
➢ The appropriate times and recommended inspection frequency at different locations are
summarized in
Appropriate time for colony inspection
Area Season Time of day Inspection frequency
Hills and mountains Winter 11:00 to 14:00 Every 3 to 4 weeks
Summer 08:00 to 10:00 and 16:00 to 18:00 Every 10 to 15 days
Foothills and plains Winter 10:00 to 14:00 Every 3 weeks
Summer 07:00 to 10:00 and 16:00 to 18:00 Every 10 days
Colony Inspection from outside
Colony inspection from outside provides an idea of the colony status without opening the hive. It can
provide the following information about a bee colony:
Health
A larger number of incoming and outgoing bees and pollen carrying foragers at the hive entrance indicates
that the colony is strong and healthy.
Potential problems
➢ Larvae, pupae, and newly-emerged bees scattered at or in front of the entrance indicates that the
colony is diseased.
➢ Bee excreta and black patches seen around the entrance indicates that the colony is abnormal or
diseased.
➢ Many dead bees with an extended proboscis scattered at or in front of the entrance indicates that
the colony has been poisoned.
➢ Bees crawling and unable to fly indicates bee disease.
➢ A large number of bees on flight, fighting with each other, and fighting to the death indicates
robbing.
➢ Clustering of bees at the hive entrance with only a few flying to forage may indicate absconding or
swarming.ƒ
➢ A large number of drones and erratic bee movement may indicate worker laying or a queenless
colony.
➢ If any signs are seen indicating possible problems, then the colony should be inspected from inside
by opening the hive and the problem solved as soon as possible
Colony Inspection from Inside
Inner inspection is carried out after the outer inspection to confirm the colony status, strengths, and any
abnormalities, and to perform any necessary management practices (. 45). The inner inspection of a colony

24
should carried out with a clear set of objectives. The necessary equipment should be gathered together
before inspection starts. Observations should include the following:
➢ Condition of the queen
➢ Colony strength – number of adult bees and amount of brood (eggs, larvae, and pupae) ➢ Food
stores (honey and pollen)
➢ Presence of pests and disease
➢ Symptoms of swarming and absconding
➢ Need to provide more frames with comb foundation or combs
➢ Cleanliness and hygiene
➢ Need to remove unnecessary, deformed, or additional combs built by the bees
A commercial beekeeper with many hives may inspect a sample to gain an idea of the general condition of
the apiary.
Preparation
➢ The following equipment and accessories should be collected together before the inspection: ➢ Bee
veil
➢ Hive tool
➢ Knife
➢ Smoker or cotton cloth roll
➢ Gloves if wanted
➢ Observation form
➢ Pen
Steps in inspection
➢ Stand beside the hive (standing in front of the hive disturbs incoming and outgoing bees).
➢ Give 2–4 puffs of light smoke from a smoker or roll of smouldering cotton cloth at the hive entrance.
➢ Lift off the outer cover and lay it upside down in front of the hive. Smoke the hive lightly through
the hole of the inner cover. Remove the inner cover and place in a slanting position next to the hive
stand. If the queen is seen while taking out the inner cover, she should be kept safely inside the
hive.
➢ If there is a super, take it off and stand it safely on the outer cover.
➢ Remove any dummy boards or frame feeders from the brood chamber and put them down outside.
➢ Inspect the brood frames carefully on both sides one after the other by holding and rotating; make
sure that the pollen, nectar, and queen and nurse bees don’t fall outside the hive.
➢ Replace the brood frames carefully after each has been inspected.
➢ Replace any dummy boards or frame feeders, and/or replace with frames with empty combs or
comb foundation.
➢ Replace the super, refit the inner cover, and cover the hive with the outer cover.
➢ Record the observations in the observation sheet while inspecting the colony. A sample observation
sheet is shown in Table 5.
Note the following
➢ The inspector should wear unscented, clean, and colourless clothes.
➢ The inspection should be carried out quickly and gently.
➢ Continue the inspection even if the bees sting, without becoming over-excited. Stings should be
removed gently.
➢ If the bees are angry and defensive, immediately close the hive by replacing the cover.
➢ Strong and healthy colonies should be inspected first followed by weak or diseased and angry
colonies.

25
➢ If the queen is seen in a brood frame while inspecting, take extra care and replace in the brood
chamber immediately.
➢ After inspecting diseased colonies, wash hands and any equipment and accessories thoroughly with
soap and water before inspecting another (healthy) colony. Otherwise wash hands and equipment
with soap and water at the end of the inspection
1.2.4 Bee product
Introduction
Income can be generated from beekeeping through the production of hive products such as beeswax, royal
jelly, pollen, propolis, bee venom, and package bees, as well as from honey. The production of these
products is described briefly below.
1. Beeswax
Worker bees have four pairs of wax glands located ventrally on the abdomen which are usually active
when they are 12–18 days old. Wax secreted from these glands flows onto wax ‘mirrors’ where it is in
contact with the air and solidifies to form wax plates. The bees remove the wax plates with the help of
their pollen rake, pass them to the mandibles, and chew and soften the wax by mixing with saliva before
using to construct combs and seal cells. Beeswax is light yellow to white. Old combs turn brownish.
Beeswax melts at 61–640C and becomes cracked and powdery if very cold.
Processing
Pure beeswax can be extracted from wild combs found by honey hunting, combs harvested from
traditional hives, old drained combs from modern hives, combs from absconded colonies, and wax
pieces collected when uncapping honeycombs to extract honey in modern beekeeping. The wax should
be kept in an airtight container or bag until processed. Pure wax is extracted as follows .
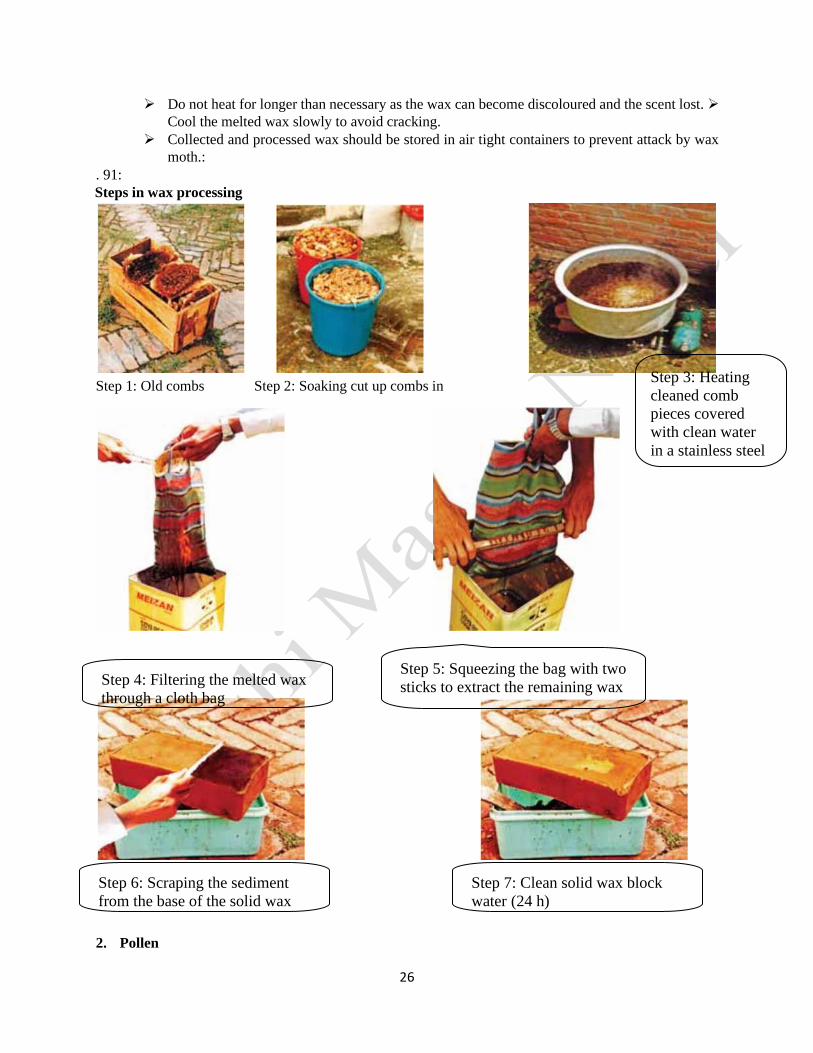
➢ Cut the combs into pieces, wash with clean water, and soak for 24 hours.
➢ Re-clean the soaked pieces with clean water.
➢ Put the cleaned comb pieces into a stainless steel pot, add water to cover, and heat gently until
the wax is completely melted.
➢ Filter the melted wax through a cloth bag or jute sacking and collect in a clean stainless steel
pot.
➢ Squeeze the cloth or jute bag with two sticks to extract all the melted wax, and throw away the
remains with the bag.
➢ Keep the wax safely in a room or at least in the shade until solidified (usually within 24 hours).
➢ Remove the solid wax block from the pot and scrape off the residue at the base of the block
with a knife. Keep the clean and dry wax block safely in a plastic bag and store in a clean dry
room. Precautionsƒ
➢ Wax is highly acidic so do not use copper, brass, or iron utensils during processing,
solidification, or storage.
➢ Use aluminium, good quality stainless steel, tin, or plastic pots to prepare the wax.
➢ Heat slowly and do not boil when melting the wax
26
➢ Do not heat for longer than necessary as the wax can become discoloured and the scent lost. ➢
Cool the melted wax slowly to avoid cracking.
➢ Collected and processed wax should be stored in air tight containers to prevent attack by wax
moth.:
. 91:
Steps in wax processing
2. Pollen
Step 1: Old combs Step 2: Soaking cut up combs in
Step 3: Heating
cleaned comb
pieces covered
with clean water
in a stainless steel
Step 5: Squeezing the bag with two
sticks to extract the remaining wax Step 4: Filtering the melted wax
throu g h a cloth ba g
Step 6: Scraping the sediment
from the base of the solid wax
Step 7: Clean solid wax block
water ( 24 h )

27
Pollen collected by bees from flower anthers is rich in protein. It is very important for brood rearing
and half of all foragers collect pollen during the brood rearing period. Pollen is collected in the morning
(around 10–11 am) when it is moist and easy to collect . A worker bee can carry 10–19 mg of pollen
per trip depending on the bee species. It is collected with the help of mouth, legs, and body hairs,is
moistened with saliva and nectar, compacted by the bee’spollen press, made into a pollen ball as it is
loaded into thepollen baskets on the hind legs, and then carried to the nest and stored in comb cells (.s
93, 94).Harvesting Honeybees collect more pollen during the pollen flow season than they need,
creating an excess that the beekeeper can harvest without affecting brood production. Pollen can be
collected by means of a pollen trap fixed at the entrance to the hive. The pollen baskets scrape on the
trap as bees enter the hive and the pollen pelletsare shaken out through a screen into a collecting tray.
Pollen shouldonly be collected in the pollen flow season. The trap should only be put in place for a
limited period (a few hours per day, repeated afterto 3 days) so that bees can also collect pollen for
brood rearing. Too regular use of a pollen trap can hamper brood rearing. The pollen trap should not be
used when a colony is being prepared for colony multiplication or brood production, or being
strengthened for honey production.Storage and useCollected pollen should be dried in the shade or
inside. Once dry, it should be packed in an airtight food grade container and stored in a cool dry place.
Pollen can be used by people as a source of protein.
3. Propolis
Propolis is a semisolid, sticky substance used by honeybees to seal cracks, crevices, and openings in the
hive as a defensive material against natural pests and excess cold; to repair combs; and to fix frames and
stop
them swinging. Propolis is mainly used by Apis mellifera colonies. It is collected from plant bark and twigs
and loaded into the pollen basket to bring to the hive.Bee propolis contains glue, wax, volatile oils, pollen,
vitamins, minerals, plant flavonoids, and volatile oils. It functions as an air freshener in the bee hive.
Propolis
.Bee with a prominent pollen load and extended proboscis. Pollen stored in comb cells.
Harvested bee pollen: Propolis can be collected from bee colonies by using a propolis trap made with steel
wire mesh put in place of the inner cover in the hive. The propolis can be scraped with a hive tool from the
trap, top bars, and crevices in the hive during the propolis flow season. It has antibiotic properties and can
be used directly as a medicine or by pharmaceutical industries in the preparation of more complex
medicines.
4. Royal Jelly
28
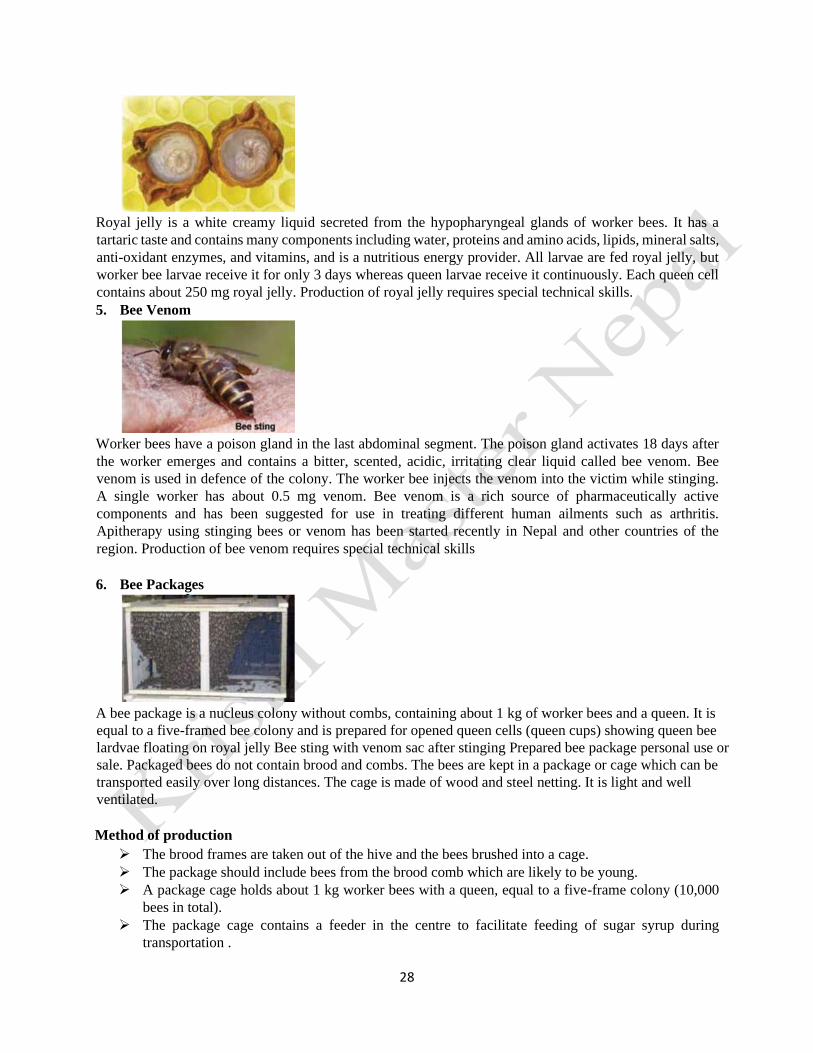
Royal jelly is a white creamy liquid secreted from the hypopharyngeal glands of worker bees. It has a
tartaric taste and contains many components including water, proteins and amino acids, lipids, mineral salts,
anti-oxidant enzymes, and vitamins, and is a nutritious energy provider. All larvae are fed royal jelly, but
worker bee larvae receive it for only 3 days whereas queen larvae receive it continuously. Each queen cell
contains about 250 mg royal jelly. Production of royal jelly requires special technical skills.
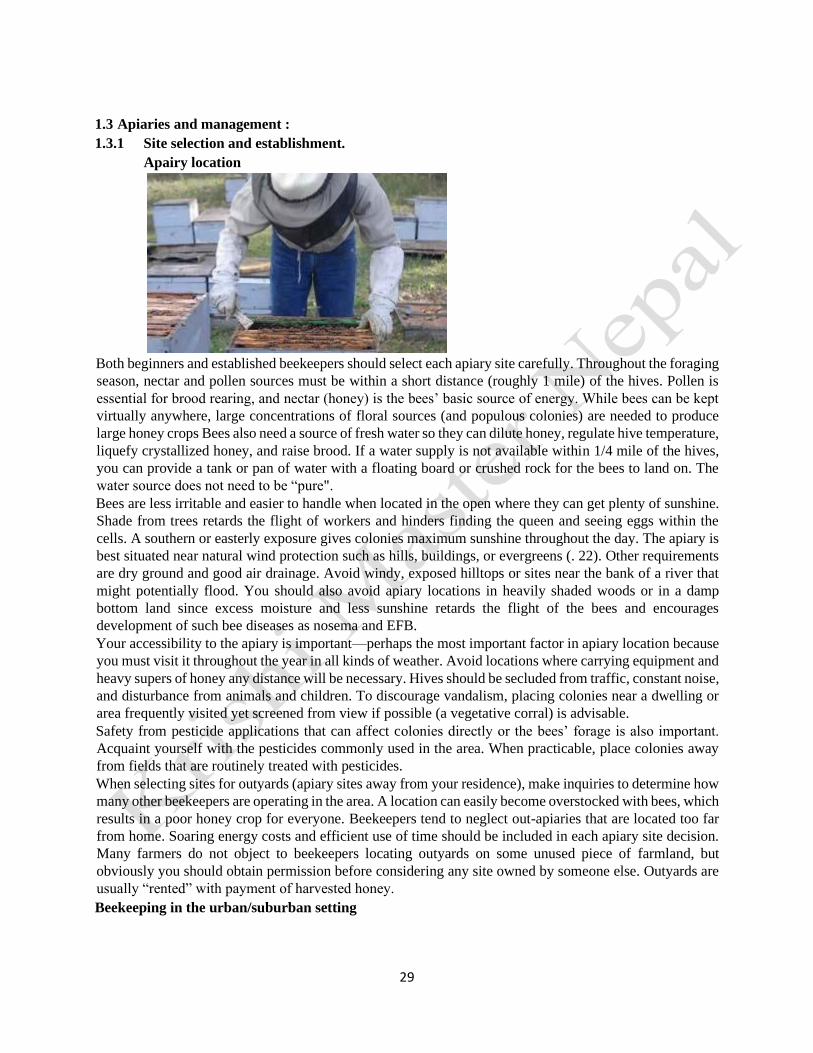
5. Bee Venom
Worker bees have a poison gland in the last abdominal segment. The poison gland activates 18 days after
the worker emerges and contains a bitter, scented, acidic, irritating clear liquid called bee venom. Bee
venom is used in defence of the colony. The worker bee injects the venom into the victim while stinging.
A single worker has about 0.5 mg venom. Bee venom is a rich source of pharmaceutically active
components and has been suggested for use in treating different human ailments such as arthritis.
Apitherapy using stinging bees or venom has been started recently in Nepal and other countries of the
region. Production of bee venom requires special technical skills
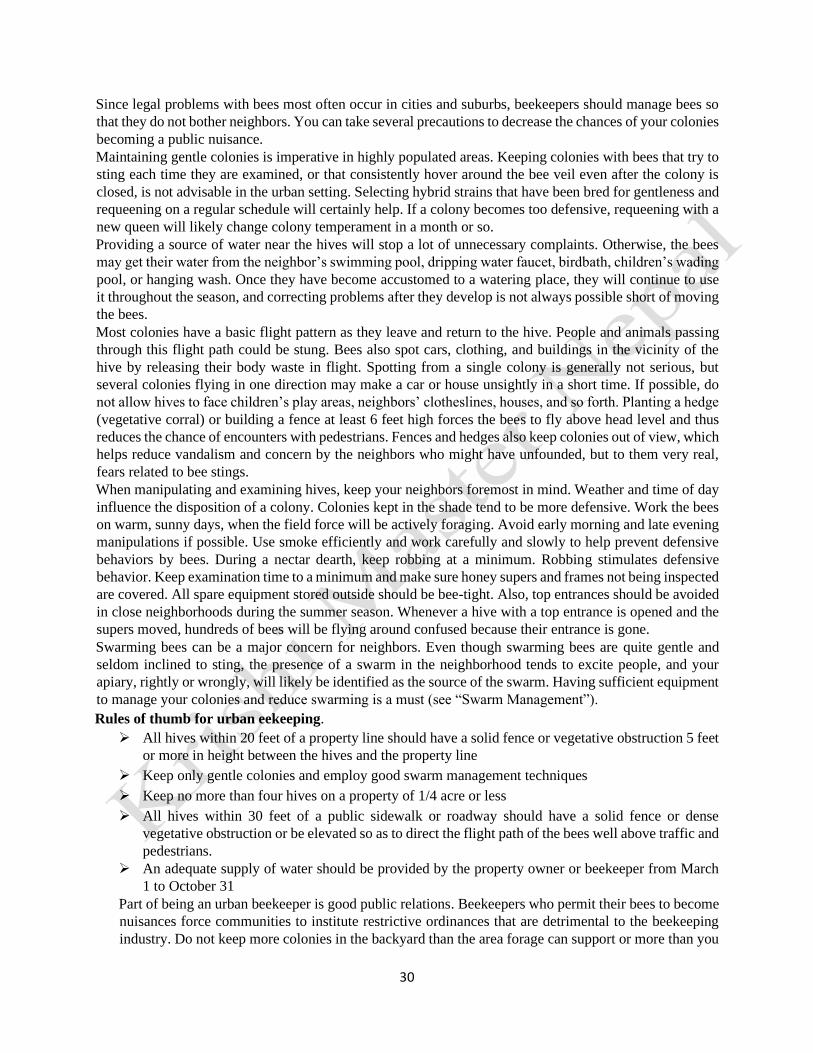
6. Bee Packages
A bee package is a nucleus colony without combs, containing about 1 kg of worker bees and a queen. It is
equal to a five-framed bee colony and is prepared for opened queen cells (queen cups) showing queen bee
lardvae floating on royal jelly Bee sting with venom sac after stinging Prepared bee package personal use or
sale. Packaged bees do not contain brood and combs. The bees are kept in a package or cage which can be
transported easily over long distances. The cage is made of wood and steel netting. It is light and well
ventilated.
Method of production
➢ The brood frames are taken out of the hive and the bees brushed into a cage.
➢ The package should include bees from the brood comb which are likely to be young.
➢ A package cage holds about 1 kg worker bees with a queen, equal to a five-frame colony (10,000
bees in total).
➢ The package cage contains a feeder in the centre to facilitate feeding of sugar syrup during
transportation .
29
1.3 Apiaries and management :
1.3.1 Site selection and establishment.
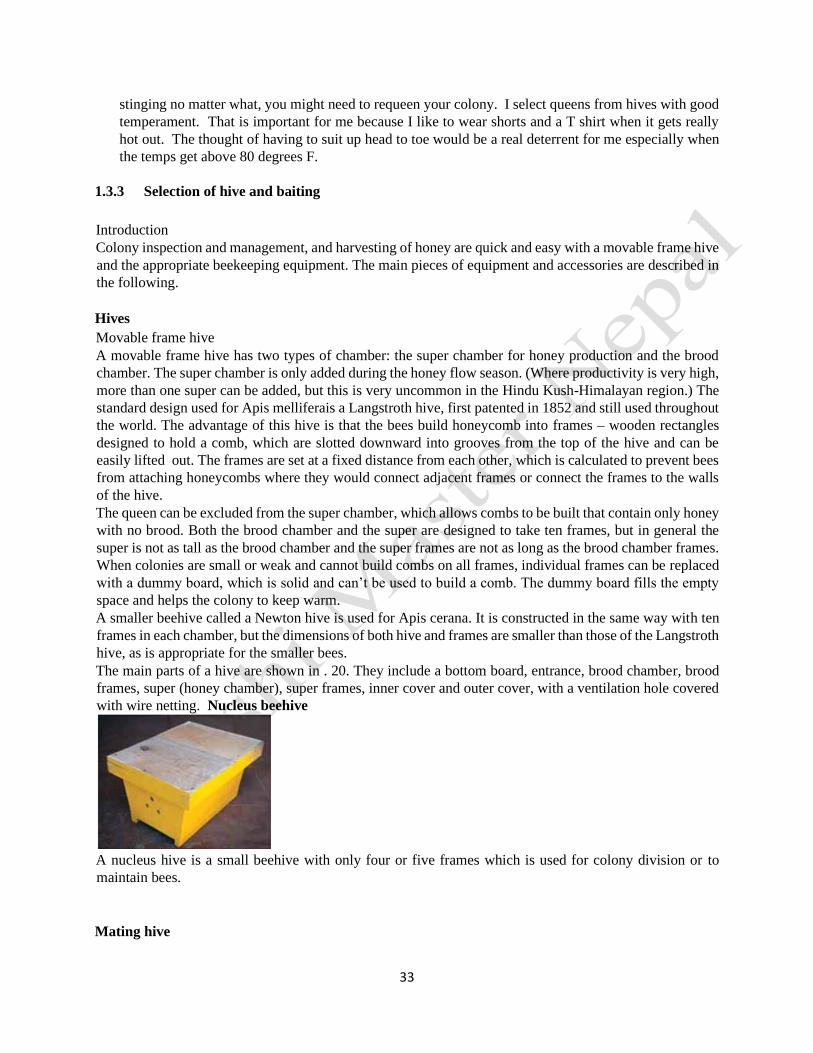
Apairy location
Both beginners and established beekeepers should select each apiary site carefully. Throughout the foraging
season, nectar and pollen sources must be within a short distance (roughly 1 mile) of the hives. Pollen is
essential for brood rearing, and nectar (honey) is the bees’ basic source of energy. While bees can be kept
virtually anywhere, large concentrations of floral sources (and populous colonies) are needed to produce
large honey crops Bees also need a source of fresh water so they can dilute honey, regulate hive temperature,
liquefy crystallized honey, and raise brood. If a water supply is not available within 1/4 mile of the hives,
you can provide a tank or pan of water with a floating board or crushed rock for the bees to land on. The
water source does not need to be “pure".
Bees are less irritable and easier to handle when located in the open where they can get plenty of sunshine.
Shade from trees retards the flight of workers and hinders finding the queen and seeing eggs within the
cells. A southern or easterly exposure gives colonies maximum sunshine throughout the day. The apiary is
best situated near natural wind protection such as hills, buildings, or evergreens (. 22). Other requirements
are dry ground and good air drainage. Avoid windy, exposed hilltops or sites near the bank of a river that
might potentially flood. You should also avoid apiary locations in heavily shaded woods or in a damp
bottom land since excess moisture and less sunshine retards the flight of the bees and encourages
development of such bee diseases as nosema and EFB.
Your accessibility to the apiary is important—perhaps the most important factor in apiary location because
you must visit it throughout the year in all kinds of weather. Avoid locations where carrying equipment and
heavy supers of honey any distance will be necessary. Hives should be secluded from traffic, constant noise,
and disturbance from animals and children. To discourage vandalism, placing colonies near a dwelling or
area frequently visited yet screened from view if possible (a vegetative corral) is advisable.
Safety from pesticide applications that can affect colonies directly or the bees’ forage is also important.
Acquaint yourself with the pesticides commonly used in the area. When practicable, place colonies away
from fields that are routinely treated with pesticides.
When selecting sites for outyards (apiary sites away from your residence), make inquiries to determine how
many other beekeepers are operating in the area. A location can easily become overstocked with bees, which
results in a poor honey crop for everyone. Beekeepers tend to neglect out-apiaries that are located too far
from home. Soaring energy costs and efficient use of time should be included in each apiary site decision.
Many farmers do not object to beekeepers locating outyards on some unused piece of farmland, but
obviously you should obtain permission before considering any site owned by someone else. Outyards are
usually “rented” with payment of harvested honey.
Beekeeping in the urban/suburban setting
30
Since legal problems with bees most often occur in cities and suburbs, beekeepers should manage bees so
that they do not bother neighbors. You can take several precautions to decrease the chances of your colonies
becoming a public nuisance.
Maintaining gentle colonies is imperative in highly populated areas. Keeping colonies with bees that try to
sting each time they are examined, or that consistently hover around the bee veil even after the colony is
closed, is not advisable in the urban setting. Selecting hybrid strains that have been bred for gentleness and
requeening on a regular schedule will certainly help. If a colony becomes too defensive, requeening with a
new queen will likely change colony temperament in a month or so.
Providing a source of water near the hives will stop a lot of unnecessary complaints. Otherwise, the bees
may get their water from the neighbor’s swimming pool, dripping water faucet, birdbath, children’s wading
pool, or hanging wash. Once they have become accustomed to a watering place, they will continue to use
it throughout the season, and correcting problems after they develop is not always possible short of moving
the bees.
Most colonies have a basic flight pattern as they leave and return to the hive. People and animals passing
through this flight path could be stung. Bees also spot cars, clothing, and buildings in the vicinity of the
hive by releasing their body waste in flight. Spotting from a single colony is generally not serious, but
several colonies flying in one direction may make a car or house unsightly in a short time. If possible, do
not allow hives to face children’s play areas, neighbors’ clotheslines, houses, and so forth. Planting a hedge
(vegetative corral) or building a fence at least 6 feet high forces the bees to fly above head level and thus
reduces the chance of encounters with pedestrians. Fences and hedges also keep colonies out of view, which
helps reduce vandalism and concern by the neighbors who might have unfounded, but to them very real,
fears related to bee stings.
When manipulating and examining hives, keep your neighbors foremost in mind. Weather and time of day
influence the disposition of a colony. Colonies kept in the shade tend to be more defensive. Work the bees
on warm, sunny days, when the field force will be actively foraging. Avoid early morning and late evening
manipulations if possible. Use smoke efficiently and work carefully and slowly to help prevent defensive
behaviors by bees. During a nectar dearth, keep robbing at a minimum. Robbing stimulates defensive
behavior. Keep examination time to a minimum and make sure honey supers and frames not being inspected
are covered. All spare equipment stored outside should be bee-tight. Also, top entrances should be avoided
in close neighborhoods during the summer season. Whenever a hive with a top entrance is opened and the
supers moved, hundreds of bees will be flying around confused because their entrance is gone.
Swarming bees can be a major concern for neighbors. Even though swarming bees are quite gentle and
seldom inclined to sting, the presence of a swarm in the neighborhood tends to excite people, and your
apiary, rightly or wrongly, will likely be identified as the source of the swarm. Having sufficient equipment
to manage your colonies and reduce swarming is a must (see “Swarm Management”).
Rules of thumb for urban eekeeping.
➢ All hives within 20 feet of a property line should have a solid fence or vegetative obstruction 5 feet
or more in height between the hives and the property line
➢ Keep only gentle colonies and employ good swarm management techniques
➢ Keep no more than four hives on a property of 1/4 acre or less
➢ All hives within 30 feet of a public sidewalk or roadway should have a solid fence or dense
vegetative obstruction or be elevated so as to direct the flight path of the bees well above traffic and
pedestrians.
➢ An adequate supply of water should be provided by the property owner or beekeeper from March
1 to October 31
Part of being an urban beekeeper is good public relations. Beekeepers who permit their bees to become
nuisances force communities to institute restrictive ordinances that are detrimental to the beekeeping
industry. Do not keep more colonies in the backyard than the area forage can support or more than you

31
have time to care for adequately. Giving the neighbors an occasional jar of honey will also sweeten
relations. Only a very small number of communities prohibit keeping bees. In most instances, violation
of an ordinance or keeping bees in a negligent manner usually means moving the bees to another
location
1.3.2 Handling of bees
How can you work up the nerve to get in to your hive? Well a basic understanding of honey bee behavior
is a perfect place to start. In general, honey bees are not aggressive by nature. It is true that there are some
Africanized bees that are downright mean, but their european cousins are not even close in the way they
behave. I found that most of my personal fears came from childhood exposure to cartoons where you’ll see
the coyote running away from a cloud of angry bees. Or perhaps you’ve had a bad experience with some
hornets or wasps while working in your yard. Again, when we compare honeybees to hornets we are talking
apples to oranges – not even close. So we need to re-program our minds to accept the fact that honeybees
are gentle for the most part and are only interested in doing their jobs. We can work with them in a
way that does not make them feel threatened in a few simple steps:
Step one: Suit up – mentally. Should you wear a bee suit? Depends. If it makes you calm, then wear it.
I’ve never worn one personally, but if you are scared and sweating bullets as you approach your bees then
suit up. The basic rule of thumb is if you are calm, and remain calm your bees will be calm too. When we
are scared we release pheromones that the bees can detect. They can smell fear. Just because they smell
fear or your cologne, does not always mean they will sting you, but they’ll smell you before they even get
a look at you. So prepare mentally to remain calm.
Step two: Approach the bee hive from the back. If you approach from the front guard bees will see
you and may fly out to greet you by flying into you. They want to see what kind of reaction you’ll
have. They may sting if they see you flail your arms and start swatting at them. That’s a dead give a
way to your bees that you are indeed a threat. If you can ignore them it is better. Better still is don’t
walk past the guard at all, just go behind the bee hive when you want to inspect.

32
Step three: Smoke. Before you use smoke listen and watch first. When you lift the cover listen to
your bees. If you hear a noticeable “buzz” getting a bit louder after a few seconds, you might need to
puff a little, and I do mean a little smoke. Don’t gas out your bees with a thick cloud of heavy smoke.
Less is more when it comes to using your smoker. I usually do not need smoke in most cases. So if
they are quietly working, you can continue to lift the cover and start working. I actually try NOT to
use smoke if at all possible – but that’s my personal style. I have found that when I use smoke, a
couple of gentle puffs blown across the top of the open hive is all that is necessary. I never blow
lots of smoke down in between the frames. Smoke is another tool for the beekeeper. It cancels out the
alarm pheromone that they may send out if they feel threatened. That’s why listening is so important
when you remove the cover. If you hear the loud BUZZ, they are spreading out the alarm pheromone
quickly throughout the colony. So lift the lid, puff a couple times and set the
cover back down for a minute. Then start over, lift the lid and listen. Odds are they will be calmer if
you set off the alarm buzz the first time you opened the cover.
Step four: Move gently and gracefully. When you take your time you can think better and relax more
and your bees will often sense your calmness and remain calm themselves. Once you train yourself to
stay calm, you’ll find you can reach into a hive no problem at all. When I lift frames, I put my fingers
down and slowly move the bees out of the way with my fingers. Once I have the grip I want on the
frame, I gently lift it. Keep in mind if you move your fingers and mush a bee, you’ll probably get stung.
In most cases I get stung when I forget to look where I’m putting my fingers. Program yourself to
remember to hold that frame no matter what. If you get a sting you want to hold the frame, not drop it.
If you drop the frame you may exchange one upset bee for hundreds of upset bees.
Step five: If you get a sting. Puff a little smoke right on the sting. This will not make if feel any better,
but it will help cover the alarm pheromone they’ve used as a marker on you. This should help prevent
additional stings to the same area.
I hope these tips will help you enjoy beekeeping even more. If you follow these suggestions, you’ll
find your trip to the bee yard to be so relaxing it becomes therapeutic, and you’ll look forward to visiting
your colonies. If for some reason you follow these tips and you have angry bees that seem to enjoy
33
stinging no matter what, you might need to requeen your colony. I select queens from hives with good
temperament. That is important for me because I like to wear shorts and a T shirt when it gets really
hot out. The thought of having to suit up head to toe would be a real deterrent for me especially when
the temps get above 80 degrees F.
1.3.3 Selection of hive and baiting
Introduction
Colony inspection and management, and harvesting of honey are quick and easy with a movable frame hive
and the appropriate beekeeping equipment. The main pieces of equipment and accessories are described in
the following.
Hives
Movable frame hive
A movable frame hive has two types of chamber: the super chamber for honey production and the brood
chamber. The super chamber is only added during the honey flow season. (Where productivity is very high,
more than one super can be added, but this is very uncommon in the Hindu Kush-Himalayan region.) The
standard design used for Apis melliferais a Langstroth hive, first patented in 1852 and still used throughout
the world. The advantage of this hive is that the bees build honeycomb into frames – wooden rectangles
designed to hold a comb, which are slotted downward into grooves from the top of the hive and can be
easily lifted out. The frames are set at a fixed distance from each other, which is calculated to prevent bees
from attaching honeycombs where they would connect adjacent frames or connect the frames to the walls
of the hive.
The queen can be excluded from the super chamber, which allows combs to be built that contain only honey
with no brood. Both the brood chamber and the super are designed to take ten frames, but in general the
super is not as tall as the brood chamber and the super frames are not as long as the brood chamber frames.
When colonies are small or weak and cannot build combs on all frames, individual frames can be replaced
with a dummy board, which is solid and can’t be used to build a comb. The dummy board fills the empty
space and helps the colony to keep warm.
A smaller beehive called a Newton hive is used for Apis cerana. It is constructed in the same way with ten
frames in each chamber, but the dimensions of both hive and frames are smaller than those of the Langstroth
hive, as is appropriate for the smaller bees.
The main parts of a hive are shown in . 20. They include a bottom board, entrance, brood chamber, brood
frames, super (honey chamber), super frames, inner cover and outer cover, with a ventilation hole covered
with wire netting. Nucleus beehive
A nucleus hive is a small beehive with only four or five frames which is used for colony division or to
maintain bees.
Mating hive

34
A mating hive is a small hive filled with nursing bees and brood frames without a queen. A matured queen
cell at a stage 1 or 2 days before emergence is put into the mating hive. After emergence, the virgin queen
is nourished by the nurse bees. She mates with drones within a few days and starts laying eggs. If the egg
laying pattern is good, she can be sold or used to replace a queen in a colony (requeening).
Hive stand with bowl
A four-legged stand is used to raise the hive and help protect it from ants. Each leg should stand in a bowl
filled with water to prevent ants entering.
Hive Accessories
Queen excluder
A queen excluder can be placed between the brood chamber and the honey chamber to prevent the queen
entering and laying in the honey chamber. The size of holes in the excluder isdesigned so that the queen
bee cannot pass through but workers can.

35
1.3.4 Colonization and stocking
1) Self-colonization
The beehive is baited and installed. The beekeeper waits until a swarm of bees comes to settle in the hive.
The coming of the swarm is not automatic, but most beehives installed and baited will be colonized. The
time required varies widely: the earliest time known is within 20 minutes after installation. Hives sited very
close to residential areas may take a long time to attract bees; hives sited near large quantities of flowering
plants will generally be colonized rapidly.
Where does the bee swarm come from?
The honeybee colony is endowed with an instinct which brings about an increase in the number of colonies
from time to time. One colony may produce two or more new colonies a year. When a colony in a nest or
hive is too populous, the old queen, accompanied by some drones and thousands of young and old workers,
flies to a distant place to begin life anew. None of these new settlers will ever return to the old nest. As the
bees leave the entrance of the old hive, they fly gyratingly into the sky with a loud hum until they cluster
on a tree branch. This cluster is referred to as a swarm of bees.
The swarm hangs there temporarily. Scouts go and find a hollow tree or any suitable place for the new
colony. This place may be a hive installed by a beekeeper. The exploratory team of scouts, if lucky, will
return with a favourable report to the swarm still waiting on the branch. The swarm will follow the scout
into the new-found home.
The first swarm to leave a hive during the season is called the prime swarm. A prime swarm is always
accompanied by the old queen and some older workers. Before leaving the old hive, they take in honey and
Top/outer cover
Ventilator
Inner cover Super frame Super/honey chamber Brood frame Brood chamber Brood board Entrance
36
other essential commodities from the old hive, so that when they settle in the new nest, they can begin to
build combs within a short time to enable the queen to lay.
After the prime swarm, any other swarm leaving the parent hive is termed a secondary swarm. It is
composed of young workers, young drones and a young queen, completely docile and showing little or no
sign of aggressivity. (They may begin to show some aggressive tendencies after six or seven weeks.) The
young bees may need the beekeeper's assistance for some time. Food can be provided in the form of sugar
syrup as a supplement to help them. They will survive if no help is provided, but the assistance provided
by the beekeeper may enable them to work faster than if they had received no help.
(2) Catching a swarm: Method I
It has already been pointed out that not all beehives in an apiary are self-colonized. In Europe, Australia,
America and some parts of northern and southern Africa (i.e. in temperate climates), the beginning or
established beekeeper who wants to set up or expand an apiary obtains colonies of bees by purchasing
package bees or buying nucleus or established hives. Since beekeeping in tropical Africa has not yet
developed to the point where queens or nucleus swarms are produced and marketed commercially, the
African beekeeper must be bold and fearless in learning how to capture and move swarms from roofs and
cavities when his beehives are not colonized voluntarily by bees. He should not wait unconcerned, hoping
that swarms may come by themselves. He must advertise himself in his locality as someone who needs
swarms, and he must be prepared to buy them from people who bring them to him. He should consider
himself lucky when he finds a swarm and must be prepared to capture it for his empty beehive. He should
never be afraid to catch a swarm. Pioneer beekeepers in Ghana catch them, sometimes wearing no protective
clothes.
Here are some hints:
1. Study the swarm. Consider what will be required for collecting it. For example, a ladder may be
needed if the bees are located high up in a tree, but not if they can be reached while standing on the ground
and are supported on a small branch that can easily be cut by a knife or a carpenter's saw. Also consider
whether a hive, a box or a bag will be required. Never keep bees in polyethylene bags. Another important
item that may be needed is a match-box to carry the queen bee separately. It should be perforated to allow
air to enter. A queen cage is an ideal apparatus if one can be obtained. No smoker is required to collect a
swarm. Smoke will only scatter the bees.
2. When bees cluster on a small branch of a tree, it can be cut down and brought home without any
problem.
3. If the bees are so high in tree branches that they cannot be reached easily, a ladder can be used to
reach them. They can then be shaken into a jute sack or any good container, but before this is done, the
queen bee should be captured and placed in the matchbox, which can then be attached to the container and
left for some time. The workers will begin to cluster around her, and the container can then be carried to
the hive site.
4. If the queen cannot be found easily, shake the bees into the container. After shaking them for some
time, watch their movements, especially those flying about. If they fly to the container, this means that the
queen bee is within. Wait a while to let most of the workers cluster around her before taking them to the
hive.

37
5. It is advisable to insert a brood comb from an old established colony into the new hive. The queen
can then be released and attached to the brood comb. Now shake the captured swarm into the hive. The old
brood comb will make the bees feel "at home" and accept the hive readily. Allow time for all the bees to
settle before dressing the hive with the remaining top-bars, and then place the top cover on the beehive.
6. Feed the swarm on sugar syrup or a mixture of 2/3 honey and 1/3 water. Stir well and pour into a
jam jar or a similar container. Turn it upside down so that the lid of the jam jar stands on the floor. Insert a
small piece of wood (the size of a match-stick) between the bottle and the lid and place it inside the hive
for the bees. Then seal off the entrance of the hive. Do not allow the bees to go out for at least 24 hours;
otherwise, bees hived in this manner will adopt the hive when the day is cool but can decide to leave if the
sun shines brightly.
7. Place a thick bundle of dry grass or dry leaves on the cover if it is metallic, in order to protect the
beehive from overheating.
8. Place the hive on a platform. Do not hang this hive, because the least mistake may result in the
whole hive tipping over and the contents being jarred. Remember to protect the bees from ants.
9. After 24 hours, the bees can be released by opening the entrance. This should be done in the evening
between 5:00 and 6:00 p.m, a time when the queen bee and the drones will never leave the hive. The bees
have accepted the hive if they are found carrying pollen into the hive. Do not disturb them.
(3) Catching a swarm: Method II
Another interesting and simple way to hive a swarm that can be reached from the ground is as follows:
Stay away until evening (between 5:00 and 6:00 p.m.). Bring a piece of white paper and a brush or quill
with you.
1. Place the beehive directly below the swarm and arrange the top-bars neatly, leaving out only one
or two.
2. Holding the paper in the left hand and the quill or brush in the right, brush off some bees from the
cluster onto the white paper, drop them into the hive, and replace the last top-bars and the top cover.
3. Acting quickly so that the bees in the hive will not rejoin the cluster in the tree, and with the help
of the white paper and brush, collect more bees from the cluster, but this time place them at the hive
entrance. The first bees in the hive will be "buzzing" their wings, and this will stimulate the incoming bees
to join them. Repeat this process until all the bees have entered the hive.
Do not fear this process; the bees are not dangerous at this time of day, nor is their sting painful. The author
of this book employs school children between the ages of five and eight to do this work. The children
become very enthusiastic and visit the bees frequently.
(4) Removing wild bees from their nest
A third method of obtaining bees for the beehive is to remove wild bees from their nest. In attempting to do
this, the beekeeper must be sure to wear protective clothes, i.e. bee suit, veil, leather gloves and boots.

38
Other things necessary to carry to the site are a good smoker, an empty beehive or a swarm catcher, a
container to carry honey, tools such as a crow-bar, hammer, saw, mallet, chisel, machete or axe, and thread
or twine (this can be plantain skin or raffia palm).
This work must be carried out late in the evening, after 6:00 p.m.
1. Fill the smoker with fuel and puff smoke through the bees' gateway into the nest for five minutes. The
bees will rush into the nest and gorge themselves full of honey, if there is enough in the hive. They will
then feel too heavy and drowsy to move.
2. Then break open the nest by using the appropriate tool. Puff some smoke at the bees whenever they show
any sign of aggressiveness.
3. Locate the honeycombs and the brood combs.
4. If possible, remove only the honeycombs first and put them in a container.
5. Wait about ten minutes. The bees will cluster around the brood combs. There is no need to smoke them
again.
6. Remove brood combs and bees together. Do not drive the bees away, but try to collect as many as possible
with the hands. They are needed to rear young bees and another queen if the old one is killed in the
operation. Place brood combs and bees in the beehive or the swarm catcher.
7. Carry the bees to a new site at least three kilometres away; otherwise, the older bees or the foragers will
return to the old nest.
8. Select the following carefully:
i) two or three brood combs fully or partly capped, possibly with some queen cells; ii) one or two brood
combs containing young larvae of different ages and possibly with eggs; iii) two combs of unripe or one of
ripe and one of unripe honey; iv) one or two combs with pollen; and v) two empty combs.
Do not take more combs than necessary. The new colony must be able to cluster around all the combs and
defend dthem against attack. Brood comb left unguarded will be chilled and go bad, creating serious
problems for the new colony.
9. Attach the combs to the top-bars and tie them securely with twine. Any oversized comb must be
trimmed in order to fit the beehive. Be sure to leave 7-mm bee spaces.
10. Now arrange the combs in the beehive in the order listed in 8 above. The purpose of the arrangement
is that all brood combs require constant high temperatures, and larvae and pupae need warmth. Honey and
pollen combs put side by side will keep the brood combs warm.
11. Shake all the bees into the hive and insert the remaining top-bars. Then cover the hive with its lid
and install it on a platform 3 km away. Syrup may be supplied if necessary.

39
12. Visit the bees the next day. Pay them a second visit on the following day and another a week later.
If the bees have started carrying pollen into the hive, this means that they are settled and should not be
disturbed. Pollen-carrying suggests that the hive contains young brood which must be fed and also a
productive queen.
1.3.5 Swarming :
During spring and summer when condition are favorable and food are available in plenty, the bees
multiply greatly with the result of comb becomes croweded and the bees being to make preparation
for swarming. At this the queen doughter cells are built at the bottom and when new queen is ready
to emerge out, the new queen and a large number of workers which have previously filled the cells
with honey, leave the nest to start a new coloney. Swarm settles in a suitable place already searched
out by the workers for building new comb.
In a parent colony the first queen doughter which emerges after swarming, kills the baby queen in
the other cell and establish herself as a queen mother. After that, they start their rotine work of
gathering nectar and pollen.
Symptoms of Swarming
➢ The number of drone cells and drones in the colony increases

40
➢ Queen cells are seen at the edges of combs
➢ Bees cluster at the hive entrance
➢ Bees hover around the hive making a piping sound
➢ There are many bees flying a short distance from the existing hive and clustering on a
nearby tree branch or similar place. Causes
➢ Genetic trait
➢ Congestion in the colony
➢ Lack of space for egg laying
➢ Lack of space for hive food storage
➢ Increase in temperature
➢ Delay in requeening
Season and Time
Swarming takes place when there is a sufficient flow of pollen and nectar. The most favourable time is
spring and autumn at lower altitudes, and, May, June, and July in the high hills.
Swarming usually takes place on a sunny day from around 9 to 10 in the morning to 3 in the afternoon. In
hot areas swarming may start earlier at around from 7 or 8 am. Swarming does not occur when it is rainy
or stormy.
Control and Management
A strong colony can be weakened by swarming, which reduces honey yield. Management practices should
aim to control swarming using the following approaches.
Prevention
➢ Inspect the colony at regular intervals.
➢ Allow sufficient space in the brood and super for brood rearing and honey storage.
➢ Add new comb foundation so that the bees can make more comb cells for eggs and collection of
nectar and pollen.ƒ
➢ Destroy unnecessary queen cells.
➢ Remove any combs with unnecessary drone cells.
➢ Enable good ventilation with full air circulation in the hive.
➢ Requeen the colony with a quality queen each year.
➢ Place a queen gate at the hive entrance if there are signals indicating the start of swarming. Divide
the colony.
Swarm capture
If a colony does swarm, it should be captured and rehoused as follows .
➢ Try to settle the flying bees by spraying dust and water.
➢ Allow the bees to cluster for a while at one place.
➢ Capture the swarm with the help of a swarm bag or basket
➢ Hang the bag with the swarm near the desired area for the new hive .
➢ Put the swarm in a new beehive .
➢ Transfer combs with nectar, pollen, and brood from the existing hive to the new hive.
➢ Provide supplementary feeding if there is a food deficit.
➢ Use a queen gate for 3 days to keep the queen in the new hive

41
1.3.6 Comb and their management
Comb Foundation and Management
Comb foundation is a sheet made of beeswax with an embossed comb pattern, which is used in modern
beekeeping to help bees build regularly-shaped combs fast. Worker bees consume a large amount of honey
and nectar when producing wax to build combs (estimates suggest 10 g of honey to make 1 g of beeswax),
and it takes a considerable amount of time. Thus comb building reduces the productivity of the colony.
Comb foundation speeds up the process by providing a wax base and a pattern that bees can use to start
from when building a new comb. It must be used in the brood chamber frames, and can also be used in
frames for the super chamber if no old combs are available for reuse. Different comb foundation is used for
Apis mellifera and Apis cerana bees; foundation for the Newton hive (Apis cerana) has a smaller cell size
and smaller sheets. Using comb foundation has a number of advantages. ➢ It helps production of straight
regular combs.
➢ It is easier for beekeepers to inspect and replace combs.
➢ Honey can be harvested with a honey extractor (which requires straight combs) to give
uncontaminated high quality honey; harvesting with an extractor is faster and doesn’t break the
combs so that they can be reused.
➢ Collection and storage of hive product is faster as the bees use the small volume of wax they excrete
more efficiently.
➢ Combs are stronger and will not be damaged during migration.
42
➢ Drone production in a hive can be minimized as the foundation does not have the larger cells needed
for drone rearing. When the bees want to rear drones, they adapt the foundation and make larger
cells.
Installing comb foundationƒ
➢ The foundation sheet should be placed in the groove of an empty frame, fixed with melted wax
from a pot or burning candle, and the wires of the frame attached to the face of the comb with drops
of melted wax or by pressing the wire into the comb foundation with a sharp heated knife or hive
tool.
➢ Foundation is mainly used in the brood chamber and in or just before the honey flow season. If
combs are needed in the super of a bee colony, it is best to use stored old combs, or to move
honeycombs from the brood chamber to the super and place new comb foundation in the brood
chamber.
➢ The frame with foundation can be placed at the centre or side of the hive according to the colony
status and season. It should be placed at the side in a strong colony and at the centre in a weak
colony. It is better not to provide foundation during the dearth season, but if needed, it should be
placed at the side. In a strong colony, old combs or foundation should be added to the super shortly
before the honey flow season. Two or more comb foundations can be supplied at the same time to
a colony in the honey flow season.
➢ Comb foundation can be cut to fit the super chamber if needed.
➢ The colony size and external temperature should be taken into consideration when adding comb
foundation.
➢ During the cold season, the comb foundation or stored old combs should be dipped in warm water
before placing in the hive.
Storing comb foundation New
foundation
➢ Prepared comb foundation sheets should be wrapped in clean newspaper, with individual sheets
separated by a piece of paper, and stored safely in a cool dry place for later use.
Old combs
➢ Wrap old drained combs still in the frame in newspaper. Store safely in a cool, dry place protected
from fungi and insects. Make sure they are free from wax moth or other pests before reusing.
➢ After opening a packet of old combs, select ones that are reusable and air them in the open for 24
hours in a safe place.
➢ Immerse the combs in clean water for a short time, drain the water from the cells on both sides, dry
in the shade, and then use
1.3.7 Pest, predators and disease
A) Pest, Predators of bees :
Introduction
Pests are any unwanted and destructive insects or other animals that attack bees and disturb colony
development. Some feed on bees or bee brood, some raid honey and pollen stores destroying brood and
combs, some suck body fluid from living bees, and some simply knock over bee hives. Outside the Hive

43
1. Wasps and hornets
Damage
Wasps and hornets look similar to bees but are larger. As well as eating dead bees, wasps may capture flying
bees and bees from the hive to feed to their larvae. They may also rob honey in the autumn. Hornets enter
the hive and capture and eat adults.
Control
Individual wasps and hornets can be killed with a fly swat (flapper). In general, however, it is better to
locate and destroy nests by fire or other means. Reducing the hive entrance size will also help guard bees
to defend better against intruding wasps.
2. Pine marten
Damage
The pine marten is a cat-sized animal with black or brown fur and a bushy tail. They open hives and feed
on honey-filled combs and adult bees. They attack bee colonies at night to avoid people and dogs.
Control
Since pine martens are afraid of people and dogs, keeping a dog around an apiary is an effective way of
scaring them away. Ensure hive safety by putting a heavy stone on the top of the hive or tie the hive with a
hive belt. Placing a scarecrow in the apiary can also be effective
3. Ant :
Damage
Ants are normally wingless, six-legged, predatory insects. They generally nest in the ground although some
nest above ground. They enter hives and feed on honey and brood; some species catch adult bees and feed
on them.
Control
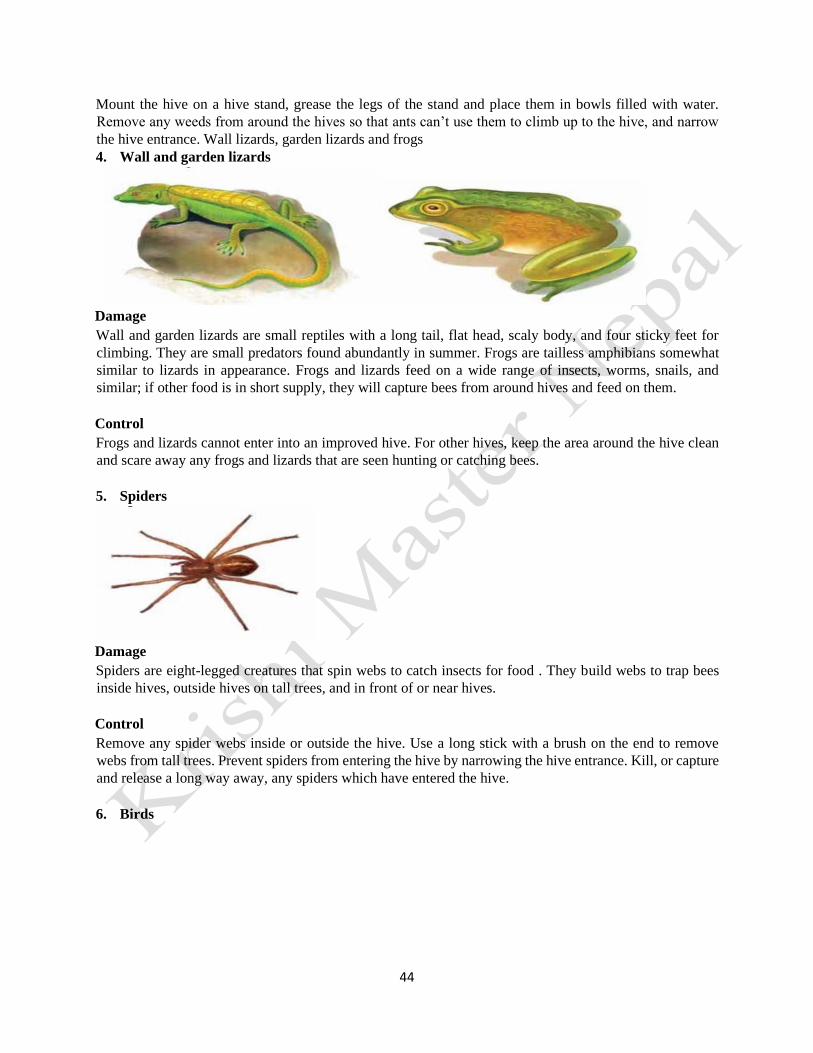
44
Mount the hive on a hive stand, grease the legs of the stand and place them in bowls filled with water.
Remove any weeds from around the hives so that ants can’t use them to climb up to the hive, and narrow
the hive entrance. Wall lizards, garden lizards and frogs
4. Wall and garden lizards
Damage
Wall and garden lizards are small reptiles with a long tail, flat head, scaly body, and four sticky feet for
climbing. They are small predators found abundantly in summer. Frogs are tailless amphibians somewhat
similar to lizards in appearance. Frogs and lizards feed on a wide range of insects, worms, snails, and
similar; if other food is in short supply, they will capture bees from around hives and feed on them.
Control
Frogs and lizards cannot enter into an improved hive. For other hives, keep the area around the hive clean
and scare away any frogs and lizards that are seen hunting or catching bees.
5. Spiders
Damage
Spiders are eight-legged creatures that spin webs to catch insects for food . They build webs to trap bees
inside hives, outside hives on tall trees, and in front of or near hives.
Control
Remove any spider webs inside or outside the hive. Use a long stick with a brush on the end to remove
webs from tall trees. Prevent spiders from entering the hive by narrowing the hive entrance. Kill, or capture
and release a long way away, any spiders which have entered the hive.
6. Birds

45
Damage
Crows and bee-eaters are particularly likely to catch and eat flying bees. When there are few insects around,
and especially on cold and cloudy days, they prey on adult bees around the hive.
Control
From an environmental point of view, it is better to scare birds away than to kill them. Use a scarecrow in
the apiary or a noise maker. Destroy nests of bee eating birds if found near the apiary.
7. Bears
Bears push over beehives and feed on combs and bees.
Control
Bears can be scared away by a watchman or dog; a scarecrow in the apiary can also help. The hives can be
protected to some extent by placing a heavy stone or wooden plank over the top cover of hive or tying the
hive with a hive belt. It is better not to establish an apiary in an area where the bear population is high.
Inside the Hive
8. Hawk moth
Damage
The hawk moth is a large moth with a wing span of 5–6 cm that makes a sound like a hawk. It enters the
hive at night and sucks honey from the combs. A single moth can suck 8–10 g of honey at a time.. 73:Spider.
74:Bee eater birds.
Control
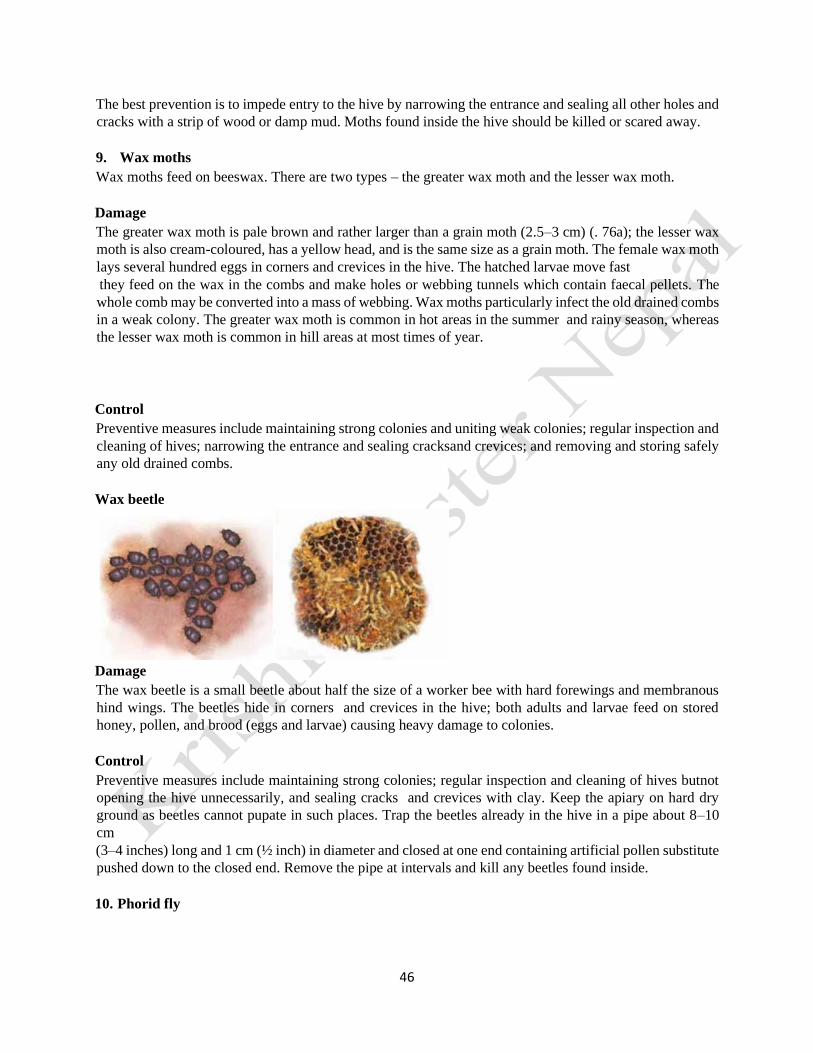
46
The best prevention is to impede entry to the hive by narrowing the entrance and sealing all other holes and
cracks with a strip of wood or damp mud. Moths found inside the hive should be killed or scared away.
9. Wax moths
Wax moths feed on beeswax. There are two types – the greater wax moth and the lesser wax moth.
Damage
The greater wax moth is pale brown and rather larger than a grain moth (2.5–3 cm) (. 76a); the lesser wax
moth is also cream-coloured, has a yellow head, and is the same size as a grain moth. The female wax moth
lays several hundred eggs in corners and crevices in the hive. The hatched larvae move fast
they feed on the wax in the combs and make holes or webbing tunnels which contain faecal pellets. The
whole comb may be converted into a mass of webbing. Wax moths particularly infect the old drained combs
in a weak colony. The greater wax moth is common in hot areas in the summer and rainy season, whereas
the lesser wax moth is common in hill areas at most times of year.
Control
Preventive measures include maintaining strong colonies and uniting weak colonies; regular inspection and
cleaning of hives; narrowing the entrance and sealing cracksand crevices; and removing and storing safely
any old drained combs.
Wax beetle
Damage
The wax beetle is a small beetle about half the size of a worker bee with hard forewings and membranous
hind wings. The beetles hide in corners and crevices in the hive; both adults and larvae feed on stored
honey, pollen, and brood (eggs and larvae) causing heavy damage to colonies.
Control
Preventive measures include maintaining strong colonies; regular inspection and cleaning of hives butnot
opening the hive unnecessarily, and sealing cracks and crevices with clay. Keep the apiary on hard dry
ground as beetles cannot pupate in such places. Trap the beetles already in the hive in a pipe about 8–10
cm
(3–4 inches) long and 1 cm (½ inch) in diameter and closed at one end containing artificial pollen substitute
pushed down to the closed end. Remove the pipe at intervals and kill any beetles found inside.
10. Phorid fly
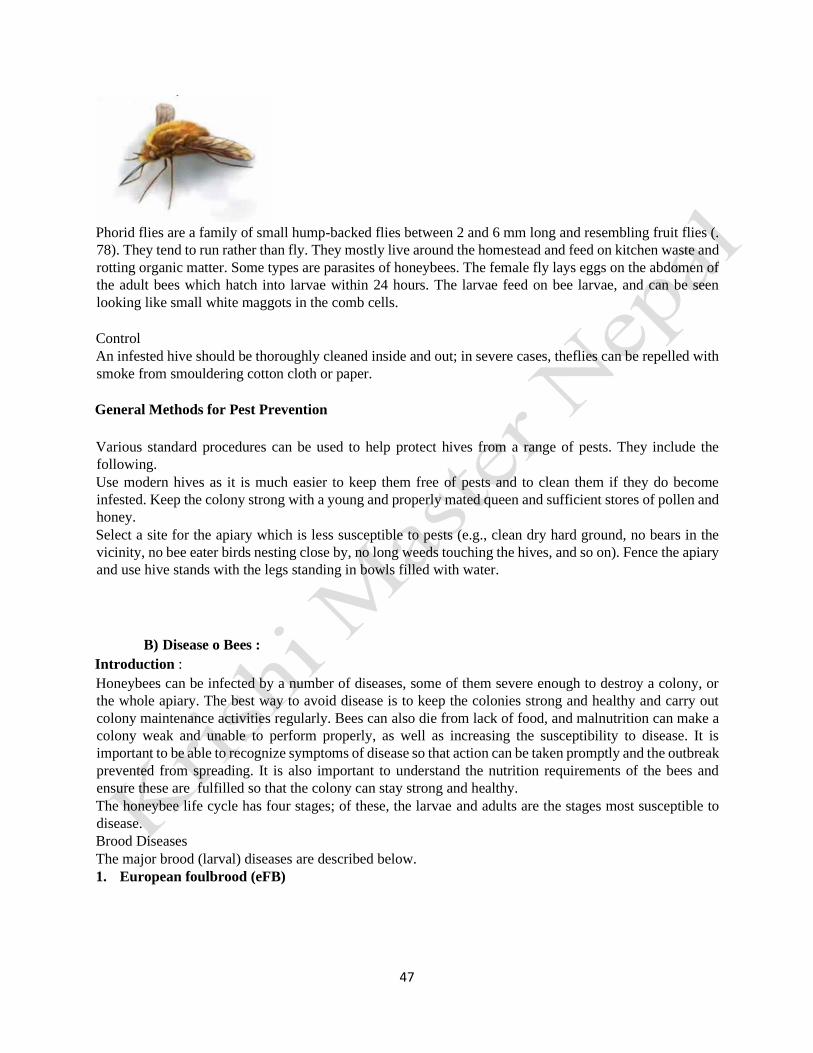
47
Phorid flies are a family of small hump-backed flies between 2 and 6 mm long and resembling fruit flies (.
78). They tend to run rather than fly. They mostly live around the homestead and feed on kitchen waste and
rotting organic matter. Some types are parasites of honeybees. The female fly lays eggs on the abdomen of
the adult bees which hatch into larvae within 24 hours. The larvae feed on bee larvae, and can be seen
looking like small white maggots in the comb cells.
Control
An infested hive should be thoroughly cleaned inside and out; in severe cases, theflies can be repelled with
smoke from smouldering cotton cloth or paper.
General Methods for Pest Prevention
Various standard procedures can be used to help protect hives from a range of pests. They include the
following.
Use modern hives as it is much easier to keep them free of pests and to clean them if they do become
infested. Keep the colony strong with a young and properly mated queen and sufficient stores of pollen and
honey.
Select a site for the apiary which is less susceptible to pests (e.g., clean dry hard ground, no bears in the
vicinity, no bee eater birds nesting close by, no long weeds touching the hives, and so on). Fence the apiary
and use hive stands with the legs standing in bowls filled with water.
B) Disease o Bees :
Introduction :
Honeybees can be infected by a number of diseases, some of them severe enough to destroy a colony, or
the whole apiary. The best way to avoid disease is to keep the colonies strong and healthy and carry out
colony maintenance activities regularly. Bees can also die from lack of food, and malnutrition can make a
colony weak and unable to perform properly, as well as increasing the susceptibility to disease. It is
important to be able to recognize symptoms of disease so that action can be taken promptly and the outbreak
prevented from spreading. It is also important to understand the nutrition requirements of the bees and
ensure these are fulfilled so that the colony can stay strong and healthy.
The honeybee life cycle has four stages; of these, the larvae and adults are the stages most susceptible to
disease.
Brood Diseases
The major brood (larval) diseases are described below.
1. European foulbrood (eFB)

48
European foulbrood (EFB) is caused by the bacterium Melissococcus plutonius
This bacterium infects the mid gut of new larvae and multiplies rapidly. Bacteria come out through the
excreta and the disease is transferred to other larvae by the adult bees nursing and cleaning the cells. Infected
larvae full of bacteria in the abdomen die and decay. Colonies become weaker and can sometimes be
destroyed by an outbreak of European foulbrood. This disease is more common in Apis mellifera colonies,
but it can also attack and damage Apis cerana bees.
Symptoms
• Weakening of colonies and decreasing population during the honey flow season
• Slow bees
• Dead larvae seen in front of the hive entrance
• Colour of larvae changed to yellowish brown
• Transparent larval tracheae
• Abnormal larval position (extended, not coiled)
• Dead larvae in open cells
• Foul smell comes from infected and decayed larvae
• No uniform brood pattern
• Dead and decayed larvae are sticky and later scaly and attached to the cell wall and cannot be
removed by the worker bees.
Control and management
Alternative types of disease management, including making the colony more resistant so the disease can be
avoided, are better than chemical control. Antibiotics have a negative impact on honey quality. The
following management practices can help to prevent infection.
• Keep the colony strong. A colony should have at least six brood combs. Any empty brood combs
abandoned by the bees, and any very old combs, should be removed from the hives.
• Ensure that there is sufficient food.
• Requeen the colony every year.
• Inspect the colony at regular intervals.
• If a colony shows signs of disease, cage the queen for 11–14 days to make the colony broodless,
and then transfer the bees to a new hive with new combs and a new queen.
• Burn the entire infested hive and combs from a diseased colony Be aware of the causes
of disease transmission
2. Thai sacbrood virus (TSBV)

49
a) larvae and pre pupae b) larvae with sack-like appearance
Thai sacbrood disease (TSB) is caused by a virus which infects the abdomen of young larvae and is then
excreted. It is a major brood disease in Apis cerana bees. The disease is transferred to other young larvae
by workers during nursing and cleaning of the hive. The disease was first identified in Apis cerana bees in
Thailand; it reached Nepal in the 1990s and destroyed more than 90% of managed Apis ceranacolonies.
Disease resistance has increased in the remaining colonies. Infected colonies become weak and abscond as
a result of disease pressure.
Symptoms and identification
• The brood pattern is abnormal.
• The infected larva is positioned abnormally in the cell, usually at the wall.
• The cap of the diseased pre pupa is sunk at the centre and sometimes perforated. It may appear
black at the centre.
• Workers make holes at the centre of the caps to remove diseased larva.
• The skin of the infected larva becomes soft and swells becoming a sac containing a light yellow to
brown
• liquid inside. If the infected larva is picked out using a forceps it looks like a sac filled with liquid.
• The larva dies in the pre-pupal condition just after capping.
• Under the cap, the colour of the dead larva changes slowly from light yellow to brown and finally
black,
• starting with the head and followed by the thorax and abdomen
Control measures
• Always keep the colony strong and make sure it has sufficient food.
• Select for disease resistant colonies.
• Identify any diseased colony and isolate from the apiary.
• Transfer the bees to a new hive and provide new comb foundation and feeding syrup.
• Cage the queen to create a broodless condition or make the colony queenless.
• Requeen with a newly-mated queen if available.
• Destroy and burn diseased combs and frames.
3. American foulbrood (AFB)
American foulbrood is a disease in Apis mellifera caused by the bacterium Paenibacillus larvae Larvae up
to 3 days old ingest the bacterial spores with food.The spores can survive high temperatures, excess cold,
and treatment with various chemicals. In several places across the world, colonies have been lost to this
disease resulting in big losses. It has not yet been observed in the Hindu Kush-Himalayan countries or
elsewhere in Asia, but the description is included because it is highly destructive. Care should be taken to
prevent import of this disease when importing honeybees from outside the region for any purpose.

50
Symptoms
➢ The infected larva changes colour.
➢ The larva dies after the cell is capped.
➢ The cap appears sunken, perforated, moist, and dark.
➢ A sticky, thread-like, brownish, semi-liquid material is seen when trying to pull diseased or recently
dead larvae or pupae out with the help of a match-stick or forceps. This is the Rapines test and is
the characteristic symptom of the disease .
➢ Finally, the dead brood turns into a scale-like structure attached to the cell.
Control
➢ The most common control measure in America and Europe is the complete destruction of the colony
by burning.
4. Pebrin / Nosema disease : It is caused by protozoa, Nosema aphis which attacks lining of stomach
causing dyentry. The spor of this pathogen are passed out with faces of the infected bee and eaten uo by
the worker bees during cleaning of the combs. The disease is particularly severe suring winter and
spring. infected bees are unable to fly more than a few meter before alighting, crawl all over the ground
in front of the hive on blade of grass. There stomach gets swollen and becomes white in colour.
Control :
Provide running water and full sun light. Keep colony packed and strong in winter and avoid winter
brood rearing. sterilizw the brood boxes and frame hive with 40% formaline fumes only after the queen
and bees have been transferred to new foundation combs.
5. Stone brood disease:
It is caused by Aspergillus flavus fungus. Infection takes place by germination of the spores in the
alimentary cannel of the larvae, However, adults may also be attacked. The larvae become stony hard
and lie in open calls
6. Chalk brood disease :
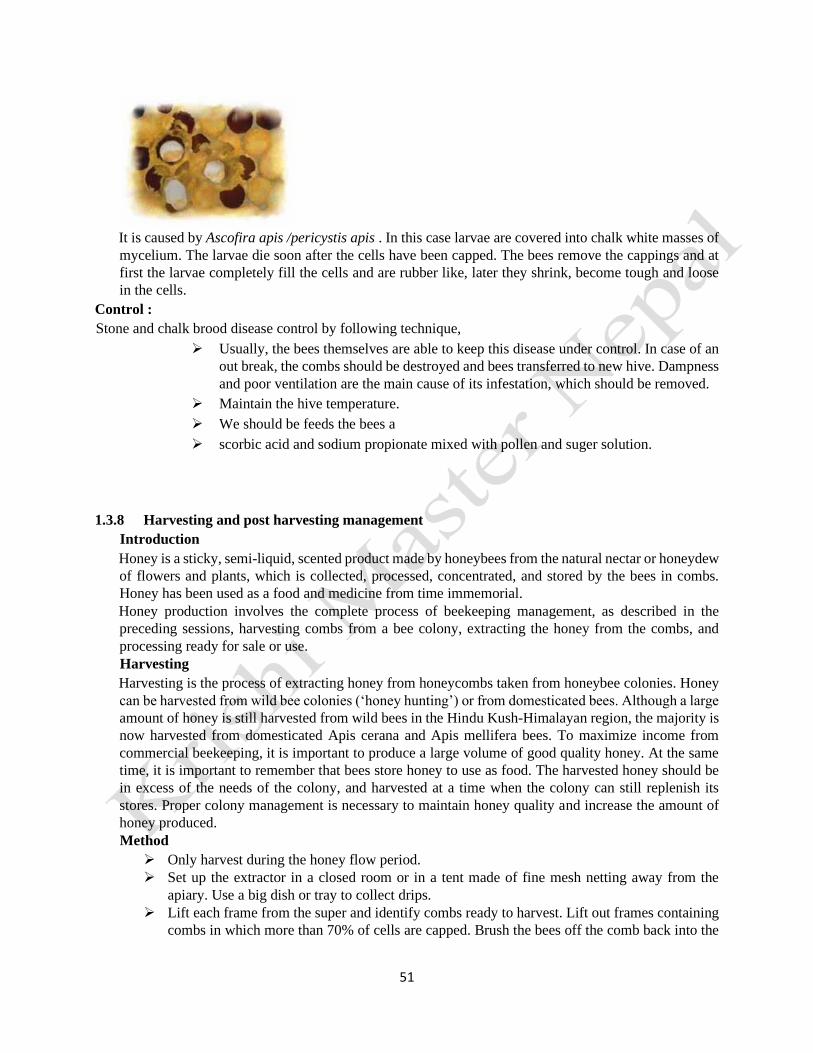
51
It is caused by Ascofira apis /pericystis apis . In this case larvae are covered into chalk white masses of
mycelium. The larvae die soon after the cells have been capped. The bees remove the cappings and at
first the larvae completely fill the cells and are rubber like, later they shrink, become tough and loose
in the cells.
Control :
Stone and chalk brood disease control by following technique,
➢ Usually, the bees themselves are able to keep this disease under control. In case of an
out break, the combs should be destroyed and bees transferred to new hive. Dampness
and poor ventilation are the main cause of its infestation, which should be removed.
➢ Maintain the hive temperature.
➢ We should be feeds the bees a
➢ scorbic acid and sodium propionate mixed with pollen and suger solution.
1.3.8 Harvesting and post harvesting management
Introduction
Honey is a sticky, semi-liquid, scented product made by honeybees from the natural nectar or honeydew
of flowers and plants, which is collected, processed, concentrated, and stored by the bees in combs.
Honey has been used as a food and medicine from time immemorial.
Honey production involves the complete process of beekeeping management, as described in the
preceding sessions, harvesting combs from a bee colony, extracting the honey from the combs, and
processing ready for sale or use.
Harvesting
Harvesting is the process of extracting honey from honeycombs taken from honeybee colonies. Honey
can be harvested from wild bee colonies (‘honey hunting’) or from domesticated bees. Although a large
amount of honey is still harvested from wild bees in the Hindu Kush-Himalayan region, the majority is
now harvested from domesticated Apis cerana and Apis mellifera bees. To maximize income from
commercial beekeeping, it is important to produce a large volume of good quality honey. At the same
time, it is important to remember that bees store honey to use as food. The harvested honey should be
in excess of the needs of the colony, and harvested at a time when the colony can still replenish its
stores. Proper colony management is necessary to maintain honey quality and increase the amount of
honey produced.
Method
➢ Only harvest during the honey flow period.
➢ Set up the extractor in a closed room or in a tent made of fine mesh netting away from the
apiary. Use a big dish or tray to collect drips.
➢ Lift each frame from the super and identify combs ready to harvest. Lift out frames containing
combs in which more than 70% of cells are capped. Brush the bees off the comb back into the

52
hive. Take as many frames as will fit in the extractor (2,4,or 8). If all frames are filled they can
all be harvested.
➢ Replace the frames taken for harvesting with old frames with cleaned comb if available.
➢ The frames in the brood chamber with honey should be left to fulfil the colony’s needs.
Although it is possible to harvest frames from the brood chamber, this is not good practice and
will weaken the colony.
➢ Take the frames to the honey extractor in a bowl or other container to prevent dripping.
➢ Remove the caps from the cells on both sides of the comb with a sharp knife; collect the caps
in a dish.
➢ Place frames in the extractor and rotate it to force the honey out of the combs. Pour the honey
collected at the base of the extractor into a stainless steel container or glass jar.
➢ Put the frames with empty combs back into the hive if no extras were available, or store for
later use.
Processing
Honey is itself a processed product. The nectar collected in the crop of forager bees is passed to house bees
and mixed with different enzymes to convert the sucrose into levulose and fructose before depositing in
comb cells. Excess water is evaporated through fanning and heating and the cells are only sealed after the
honey has ripened. In honey production, processing mainly refers to removing any wax particles, brood, or
foreign materials from the honey extracted from the combs, and on occasion treating the honey to obtain a
particular consistency. The methods used for processing can have a marked affect on honey quality. Pay
attention to the following in order to maintain quality:
➢ Processing should be carried out in a clean, dry environment.
➢ The processing area should be closed so that bees can’t enter.
➢ The utensils used in processing should be made of good quality food grade stainless steel, glass,
or plastic, and be clean and dry.
➢ The processing method may differ according to the diversity of the forage. Different methods
are used for processing unifloral and multi-floral honey, and for producing liquid, solid,
creamed, and comb honey.
➢ Honey should not be heated directly. The quality decreases markedly if heated beyond 400C.
➢ You should consult with a honey technician if you intend to heat the honey during processing.
Removing contaminants
Two main methods are used for processing honey to remove contaminants: sedimentation and heating.
Occasionally, beekeepers need to evaporate excess moisture to prevent fermentation, especially with Apis
mellifera honey. Evaporation takes place if the heating method is used to remove contaminants. If cold
sedimentation is used, warm dry air can be blown across the surface of the cleaned honey to achieve the
same effect. High moisture levels are less common if care is taken only to harvest combs in which at least
70% of the cells are capped.
You should consult with a technician before establishing a commercial honey processing plant.
Sedimentation method
The honey is filtered through a double layer of muslin cloth and then allowed to sediment for at least 48
hours in a container holding more than 100 kg of the liquid. The portion at the bottom with sediment is
removed through an outlet at the bottom of the container, and the remainder stored and used for bottling
and sale. The honey with sediment can be used to feed the bees during the dearth period. Heating method
In the heating method, honey is heated in a water bath to a temperature below 400C and then filtered
through muslin or steel mesh before cooling and storing in airtight bottles. Heating is also used to evaporate
excess moisture and improve the keeping quality.

53
Storage
The following points should be noted to ensure that honey doesn’t deteriorate during storage.
➢ Honey should be stored in food grade glass or stainless steel containers.
➢ Honey should be stored in an airtight container. It is hygroscopic and will absorb water and odours
if stored open in an atmosphere with more than 20% relative humidity. The colour and taste may
also change.
➢ Care should be taken to ensure that stored honey is free from contaminants and has not absorbed
moisture to avoid fermentation and changes in colour.
➢ The room used to store honey should be dry, clean, and closed.
➢ The ideal room temperature for storing honey is 20°C.
➢ Always label the stored containers and include details of the harvesting date, treatment, and
expected storage life.
Ensuring Production of Quality Honey
Production of large amounts of high quality honey can be achieved by paying attention to the following:
➢ Requeen the colony with a quality queen 2 months before the start of the honey flow season.
➢ Migrate the colony to an environmentally safe pasture. Pay attention to the carrying capacity of the
local pasture and exploit different sources of pasture based on market demand. Do not migrate bee
colonies to pasture areas sprayed with pesticides. If pesticide spraying is observed, pack up the
colonies and migrate them 5 km away.
➢ Adopt biological or botanical control measures instead of chemical pesticides for crop protection.
If
➢ chemical pesticides have to be used, then only use them before or after flowering. Do not use
pesticides in the apiary area.
➢ Create awareness among neighbours’ and growers of crops that they should give notice to
beekeepers
➢ if they are going to use dangerous pesticides. Confine the bees inside the hive for 2–3 days with
sugar feeding when pesticides are sprayed on crops used as bee pasture.
➢ For organic honey production, don’t use chemicals or antibiotics to control bee diseases and pests
and follow an organic certification procedure.
➢ Only harvest honey from supers, and avoid mixing wax, brood, and pollen while harvesting.
➢ Harvest honey from combs in which more than 70% of the cells are capped (. 85a) while leaving
sufficient stores to meet the requirements of the colony.
➢ Use a pollution free environment and clean and safe equipment for harvesting and processing; never
use utensils made of copper, iron, or brass like metals (. 85b).
➢ Filter extracted honey through a clean stainless steel mesh and collect in a clean stainless steel pot.
➢ Use sedimentation after filtering to ensure the honey is pure.
➢ Avoid adulteration of the processed honey to protect the chemical properties.
➢ Only store honey after proper processing and packing. Store at room temperature in a dry place to
maintain the physical quality.
➢ For longer periods, store honey in an air tight container.
1.4 Foraging and equipment
1.4.1 Protectective wear and equipment
1. Queen gate
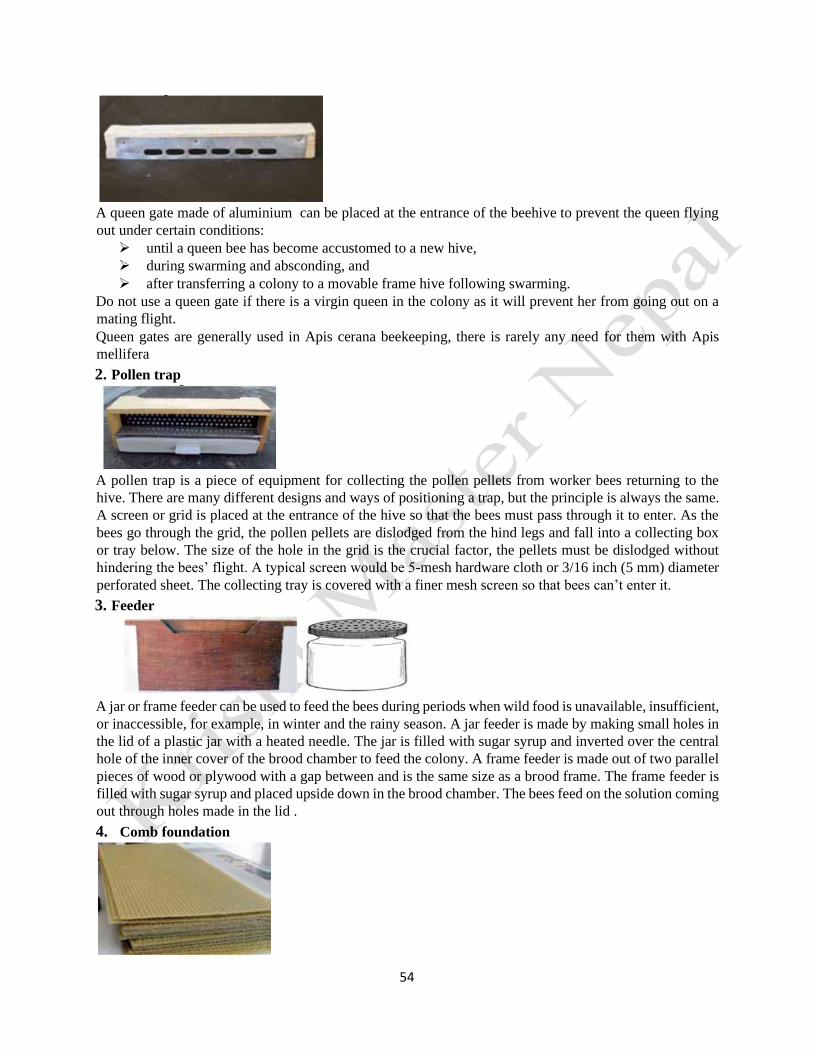
54
A queen gate made of aluminium can be placed at the entrance of the beehive to prevent the queen flying
out under certain conditions:
➢ until a queen bee has become accustomed to a new hive,
➢ during swarming and absconding, and
➢ after transferring a colony to a movable frame hive following swarming.
Do not use a queen gate if there is a virgin queen in the colony as it will prevent her from going out on a
mating flight.
Queen gates are generally used in Apis cerana beekeeping, there is rarely any need for them with Apis
mellifera
2. Pollen trap
A pollen trap is a piece of equipment for collecting the pollen pellets from worker bees returning to the
hive. There are many different designs and ways of positioning a trap, but the principle is always the same.
A screen or grid is placed at the entrance of the hive so that the bees must pass through it to enter. As the
bees go through the grid, the pollen pellets are dislodged from the hind legs and fall into a collecting box
or tray below. The size of the hole in the grid is the crucial factor, the pellets must be dislodged without
hindering the bees’ flight. A typical screen would be 5-mesh hardware cloth or 3/16 inch (5 mm) diameter
perforated sheet. The collecting tray is covered with a finer mesh screen so that bees can’t enter it.
3. Feeder
A jar or frame feeder can be used to feed the bees during periods when wild food is unavailable, insufficient,
or inaccessible, for example, in winter and the rainy season. A jar feeder is made by making small holes in
the lid of a plastic jar with a heated needle. The jar is filled with sugar syrup and inverted over the central
hole of the inner cover of the brood chamber to feed the colony. A frame feeder is made out of two parallel
pieces of wood or plywood with a gap between and is the same size as a brood frame. The frame feeder is
filled with sugar syrup and placed upside down in the brood chamber. The bees feed on the solution coming
out through holes made in the lid .
4. Comb foundation

55
Prepared comb foundation sheets made of beeswax with a raised pattern of cell outlines are used to
maximize the profit in modern beekeeping. Comb foundation for Apis mellifera is designed to fit the
Langstroth hive brood frames and can be cut to fit the super frame. Comb foundation for Apis ceranais
designed to fit the Newton hive; it is smaller and has a smaller cell size. Bees build cells on both sides of
the foundation for laying eggs or storing honey. Comb foundation saves the bees time and energy in building
new combs, which increases the honey yield. Because the bees follow a preset pattern for building, the
combs are straight and regular and easier to handle. It is only possible to use a honey extractor if the comb
is built on comb foundation.
5. Comb foundation press
A comb foundation press is made of sand and cement, cemented into a wooden frame. The upper and lower
surfaces are imprinted deeply with a comb cell pattern. Melted wax is poured onto one side and the frame
closed. The solidified sheet can be pulled off the cement base and has a raised pattern of cells on both sides.
Comb foundation can also be made using iron rollers with an imprinted cell base pattern. Plain wax sheet
is rolled between the rollers which print a cell base pattern on both the sides of the sheet. Colony Inspection
and Maintenance equipment
6. Smoker
A smoker is used to smoke the honeybees and subdue them when opening a beehive for inspection or honey
harvesting. When worker bees smell smoke they fill themselves with honey and are less able to sting, and
the smoke encourages the bees to leave the combs. Any slow burning material can be used in the smoker
such as old dry sacking, rotten wood, rags, or dried leaves. The smoker shown in . 31 has a bellows attached.
A few puffs of smoke at the entrance and the central hole of the inner cover at the top of the opened hive
are usually enough to calm the bees.
7. Bee veil

56
A bee veil is used to protect the face and head from bee stings while handling bees. The bee veil must be
fixed tightly to the shoulder at the base to prevent the bees entering inside. It can be made from any
widebrimmed hat using black net and cloth. The black net provides good visibility for inspecting the colony.
A bee veil is important for good colony management.
8. Gloves
Gloves are used to protect the hands from bee stings and to keep bees from crawling up inside the sleeves.
They should be thick enough to prevent the sting reaching the skin but thin enough for the beekeeper to feel
through. They are usually made of soft leather, and may have canvas or cotton forearm coverings and
ventilation on the forearm. Sometimes, the entire glove is made of canvas and cotton, but leather is more
sting-resistant. Gloves are useful for beginners to help them develop confidence in handling bees. But
handling frames with gloves is cumbersome and experienced beekeepers rarely use them.
9. Hive tool
A hive tool is used to pry apart the frames from the brood or super chamber and/or to separate frames glued
to each other with propolis or wax. Using the tool to pull out the frames while inspecting the colony or
during honey harvesting doesn’t disturb the bees. A hive tool is especially important for hives with Apis
mellifera as they collect propolis and use it to seal hive cracks and gaps between the frames and the hive
body.
10. Bee brushes
Two types of brushes are used in beekeeping. A soft brush is used to remove honeybees from the frame,
and a rough brush is needed for cleaning the bottom board and inner cover .
11. Wooden or bamboo swat
A fly swat is used to kill bee predators such as wasps and hornets that are trying to catch bees by flying near
the hive entrance or around the beehive.
Honey and Wax Processing equipment
12. Honey extractor

57
A honey extractor is essential in modern beekeeping it is used to extract honey without destroying the
combs. This helps to increase the honey yield as the empty combs can be reused in the super and bees do
not have to spend time building new combs. The honey quality is also better than that of honey extracted
by manual squeezing. The honey frame is taken out of the super, the wax is uncapped using a warm knife,
and the frame is put in the extractor. Usually the extractor is designed to take two or four frames. In a
tangential extractor, honey is extracted from one side of the frame, and the frame is then taken out, turned,
and replaced to extract the honey from the other side. In a reversible extractor, both sides can be extracted
without removing the frame. Stainless steel extractors give the best quality honey.Knife. A sharp long knife
is needed to uncap the sealed honey combs and to cut up old combs.
13. Honey strainer
The harvested honey may contain all sorts of impurities such as bee’s wings, legs, combs, and wax. The
honey is poured through a stainless steel strainer or cloth to remove the contaminants.
14. Wax melter
A melter is needed for melting the beeswax; it can be electrical or solar powered. This is a cheap and easy
way of melting wax which does not affect the wax quality or smell. Hot water can also be used for melting
and processing wax.
Swarming, Migration, and Bee Management Accessories
15. Queen cage
A queen cage is a small netted box used to caging a queen under certain conditions. The box looks like a
matchbox made with wood and iron net (. 41). It is used during requeening, transferring bees from one hive
to another, and capturing and/or hiving a swarm. It helps the beekeeper to find the queen and hive her easily.
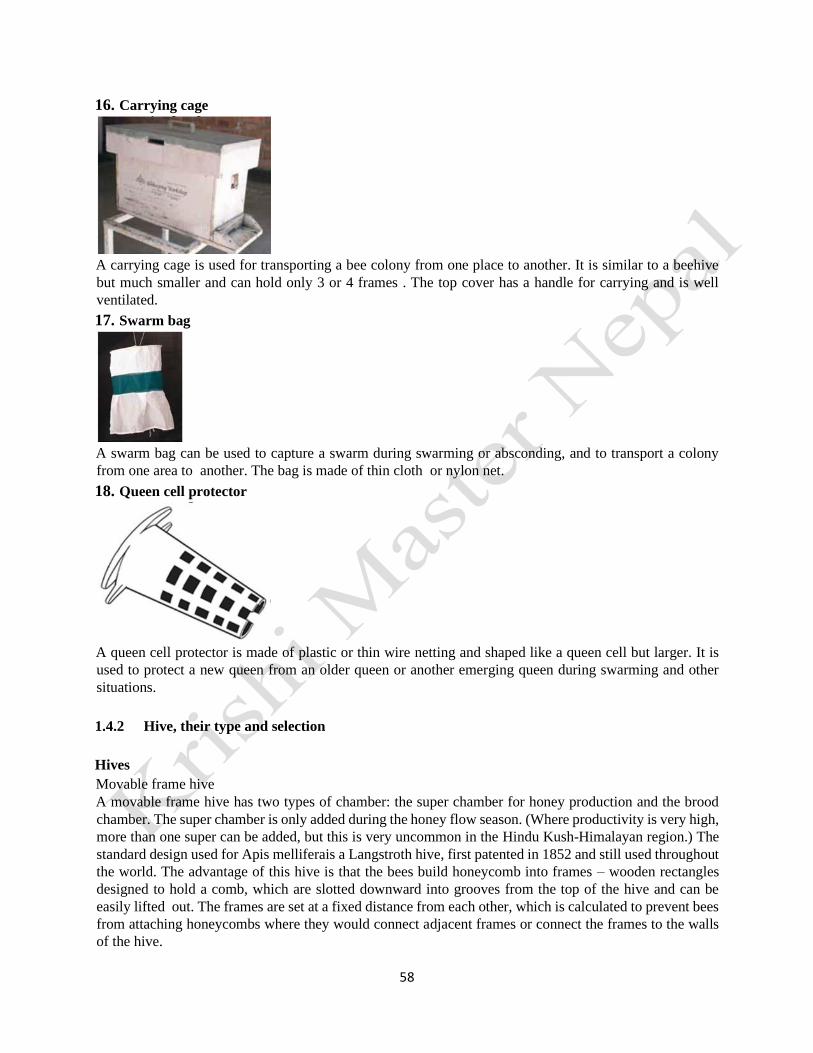
58
16. Carrying cage
A carrying cage is used for transporting a bee colony from one place to another. It is similar to a beehive
but much smaller and can hold only 3 or 4 frames . The top cover has a handle for carrying and is well
ventilated.
17. Swarm bag
A swarm bag can be used to capture a swarm during swarming or absconding, and to transport a colony
from one area to another. The bag is made of thin cloth or nylon net.
18. Queen cell protector
A queen cell protector is made of plastic or thin wire netting and shaped like a queen cell but larger. It is
used to protect a new queen from an older queen or another emerging queen during swarming and other
situations.
1.4.2 Hive, their type and selection
Hives
Movable frame hive
A movable frame hive has two types of chamber: the super chamber for honey production and the brood
chamber. The super chamber is only added during the honey flow season. (Where productivity is very high,
more than one super can be added, but this is very uncommon in the Hindu Kush-Himalayan region.) The
standard design used for Apis melliferais a Langstroth hive, first patented in 1852 and still used throughout
the world. The advantage of this hive is that the bees build honeycomb into frames – wooden rectangles
designed to hold a comb, which are slotted downward into grooves from the top of the hive and can be
easily lifted out. The frames are set at a fixed distance from each other, which is calculated to prevent bees
from attaching honeycombs where they would connect adjacent frames or connect the frames to the walls
of the hive.

59
The queen can be excluded from the super chamber, which allows combs to be built that contain only honey
with no brood. Both the brood chamber and the super are designed to take ten frames, but in general the
super is not as tall as the brood chamber and the super frames are not as long as the brood chamber frames.
When colonies are small or weak and cannot build combs on all frames, individual frames can be replaced
with a dummy board, which is solid and can’t be used to build a comb. The dummy board fills the empty
space and helps the colony to keep warm.
A smaller beehive called a Newton hive is used for Apis cerana. It is constructed in the same way with ten
frames in each chamber, but the dimensions of both hive and frames are smaller than those of the Langstroth
hive, as is appropriate for the smaller bees.
The main parts of a hive are shown in . 20. They include a bottom board, entrance, brood chamber, brood
frames, super (honey chamber), super frames, inner cover and outer cover, with a ventilation hole covered
with wire netting.
Nucleus beehive
A nucleus hive is a small beehive with only four or five frames which is used for colony division or to
maintain bees.
Mating hive
A mating hive is a small hive filled with nursing bees and brood frames without a queen. A matured queen
cell at a stage 1 or 2 days before emergence is put into the mating hive. After emergence, the virgin queen
is nourished by the nurse bees. She mates with drones within a few days and starts laying eggs. If the egg
laying pattern is good, she can be sold or used to replace a queen in a colony (requeening).
Hive stand with bowl

60
A four-legged stand is used to raise the hive and help protect it from ants. Each leg should stand in a bowl
filled with water to prevent ants entering.
1.4.3 Foraging of bees :
Introduction and Importance
Bee pasture, or forage area, is the area containing the wild and cultivated plants, bushes, and trees that are
the source of the nectar, pollen, propolis, and water needed to fulfil the daily needs of honeybees. Pasture
is a primary requisite for beekeeping. Beekeeping can only be successful where there is abundant forage as
both brood rearing and honey production require food in the form of honey and pollen. Honeybee colonies
will abscond during times of dearth if they don’t have food. The honey production potential of a colony is
effectively a measure of the food storage capacity, which depends on the availability of nectar and pollen.
Colony development is directly dependent on the year round availability of forage. When forage isn’t
available, the colony won’t increase or produce honey, and supplementary feeding must be provided simply
to maintain numbers. Identification of Bee Flora
Beekeepers need to be able to identify what bee flora are available (both wild and agricultural) before
establishing an apiary. A beekeeper has various possibilities for learning to identify which plants can serve
as bee flora in general, and which are available close to the (planned) apiary, including ➢ training and
experience,
➢ study of books, statistics, articles, published by botanists,
➢ study of a herbarium or plant collection and preserved plants,
➢ collection and identification of flowers in a lab by technicians,
➢ observation of flowers being visited by bees,
➢ study of foraging potential of the area, and
➢ laboratory analysis of the pollen contained in honey to identify the floral source
(mellisopalynology).
➢ Pasture should be far from pesticidal area and minimum wind velocity area.
Preparation and Use of a Floral Calendar
A floral calendar should be prepared to record the availability of bee flora around the year in a specific area.
The calendar describes the sources of nectar and pollen, the strength of the sources, the flowering time, and
the duration of nectar and pollen availability. It shows the availability of bee flora as well as the dearth
period, when pasture and feeding management can be carried out. Table 9 shows an example of a simple
calendar. When using the calendar to assess resources for a colony, note that Apis ceranabees can fly up to
2 km from the hive to forage, and Apis mellifera bees up to 5 km.
Bee Pasture Management
Pasture management is an important aspect of beekeeping because it can significantly increase honey and
colony production. The pasture should be developed to provide appropriate forage in line with the number
of
colonies available at that location. The maximum profit can be obtained from honey production if pasture is
available for at least 8–9 months of the year. Short-term pasture management is carried out by planting bee
flora that start flowering within a short time (1 month to 1 year) such as mustard, buckwheat, yellow
mustard, sunflower, and barseem. Long-term pasture management means systematic planting of perennial
flowering plants that start flowering after 1 to 2 years, for example Indian butter tree, bottle brush, citrus
fruit, litchi, jamun (Eugeniaspp.), and sissoo.

61
* The exact flowering time depends on the geographical and climatic conditions.
** Flowering can be rated from 15 with 1 indicating only a few plants flowering and 5 all plants in fullbloom
The flowering time and products of some of the bee flora available in Nepal:
Plant Flowering month Product Strength
FRUITS
Apple
Feb–March nectar and pollen Medium
Banana Year round nectar and pollen Medium
Blackberry May–Sept nectar and pollen Strong
Citrus Feb–March nectar and pollen Strong
Crab apple Feb–March nectar and pollen strong
Guava March–May nectar and pollen Medium
Indian butter tree Feb–March Nectar Strong
Jujube Sep–Jan nectar and pollen Medium
Litchi Feb–March nectar and pollen Strong
Papaya May–Aug nectar and pollen Medium
Peach Feb–March nectar and pollen Medium
Pear Feb–March nectar and pollen Medium
Plum Feb–March nectar and pollen Medium
Pomegranate March–April Pollen Medium
Walnut Feb–April nectar and pollen Strong
VEGETABLE Broad
mustard
leaf Feb–March nectar and pollen Strong
Cabbage April–May nectar and pollen Medium
Cauliflower April–May nectar and pollen Medium
Coriander Feb–May nectar and pollen Strong

62
Cucurbits June–Aug Pollen Strong
Radish Jan–March nectar and pollen Medium
Ornamental flowers
April flower
Feb–March nectar and pollen Medium
Borage Year round nectar Medium
California poppy Feb–April pollen Medium
Cotton August–Sept nectar Strong
Cuphea Year round nectar Low
Echium Sp. Year round nectar Low
Poppy Feb–March pollen Medium
Portulaca sp May–Sept Pollen Medium
Wild rose March–August pollen Strong
Field crop
Buckwheat
Aug–Sept nectar and pollen Strong
Jwar/sorghum May–July pollen Strong
Maize Feb–June
inner Terai)
(Terai, May–June (hills) Pollen
Rice Aug–Sep pollen Medium
OIL crop
Mustard
Sept–Nov nectar and pollen Strong
Niger, yellow mustard Feb–March nectar and pollen Strong
Sunflower March–June nectar and pollen Strong
Forest flora
Albizia sp.
March–April nectar Low
Bauhinia sp. March–April nectar and pollen Low
Blackberry March–April Nectar and pollen Strong
Bottle brush Feb–May nectar Strong
Cassia sp. April–May Nectar and pollen Medium
Crab apple Feb–March Nectar and pollen Strong

63
Jamunebhandro Dec–Feb Nectar and pollen Medium
Kadipatta Feb–March Nectar and pollen Strong
Wild cherry Oct–Nov nectar and pollen Strong
Wild jujube March–April Nectar Strong
Berseem July–Sep Nectar Strong
FORAGE
Kapu
March–June Pollen Strong
Pyauli Nectar and pollen Strong
Cynodon Aug–Sep Pollen Strong
Glossary:
Apiary - colonies, hives, and other equipment assembled in one location for beekeeping operations.
Colony - all the worker bees, drones, queen, and developing brood living together in one hive or other
dwelling
Mead - honey wine
Sacbrood - a viral disease which affects the larva of honey bees.
Scout bees - worker bees searching for a new source of pollen, nectar, propolis, water, or a new home for
a swarm of bees.
Skep - a beehive made of twisted straw without movable frames.
Slatted rack - a wooden rack that fits between the bottom board and hive body. Bees make better use of
the lower brood chamber with increased brood rearing. Congestion at the front entrance is reduced which
can also reduce the swarming tendency.
Slumgum - the refuse from melted comb and cappings after the wax has been rendered or removed.
Smoker - a device in which materials are slowly burned to produce smoke (not flames) which is used to
subdue bees. It is important to use a material that produces a cool smoke as not to harm the bees.
Solar wax melter - a glass-covered insulated box used to melt wax from combs and cappings by the heat
of the sun.
Spur embedder - a handheld device used for embedding wires into foundation with the purpose of
reinforcing the foundation.
Stinger - the modified structure of a worker honey bee used as a weapon of offense. Honey bees have a
barbed stinger which stays embedded in the recipient of sting cause the bee to later die.
Super - any hive body, or smaller box, used for the storage of surplus honey which the beekeeper will
harvest. Normally it is placed over or above the brood chamber. Betterbee offers shallow, medium, and
deep supers.

64
Supersedure - the natural replacement of an established queen by a newly reared queen in the same hive.
Swarm - a large number of worker bees, drones, and usually the old queen that leaves the parent colony to
establish a new colony.
Swarming - the natural process of propagating a colony of honey bees.
Swarm cell - queen cells usually found on the bottom of the combs before swarming.
Uncapping knife - a knife used to shave or remove the cappings from combs of sealed honey prior to
extraction. These can be heated by steam or electricity.
Uniting - combining two or more colonies to form one larger colony.
Virgin queen - a queen which is not mated.
Wax glands - glands that secrete beeswax, which are in pairs on the underside of the last four abdominal
segments.
Winter cluster - a ball-like arrangement of adult bees within the hive during winter.
1. Very short question :
• What do you mean by Apiculture ?
• What do you mean by swarming ?
• What is the feed of queen ?
• Which variety of bees are commonly cultivated ?
• Write the name of bee hive product ?
2. Short question :
• Write the common name and scientific name of bee varieties ?
• What is the symptoms of chalk brood disease of bee ?
• Write the short notes about life cycle of honey bee ?
• What is the cause of swarming ?
• Enlist the pest and predator of bee ?
3. long question :
• Briefly explain about scope and importance of beekeeping in the context of Nepal ?
• What is bee colony ? Write the techniques of bee colony management ?
• What do you mean by swarming ? What is the cause and management techniques of swarming ?
• Briefly explain about harvesting and post harvest handling of honey ?
• Write the name of pest and disease of bee with best techniques of their management ?
References
1) Beekeeping Training For Farmers In The Himalayas. ICIMOD
2) Beekeeping Book Agriculture information and communication centre.
65
Unit -2 Sericulture
1. Objectives:
❖ To know about propagation, nursery establishment and cultivation practices of mulberry details.
❖ To be familiar with silkworm and their different stages of life cycle .
❖ To be familiar about young age, late age silkworm rearing and harvesting technique of cocoon.
2. Learning Materials:
❖ Silk cocoon, Flow chart of silk rearing
3. Course content
2.1 Introduction
There are many kinds of natural silk which are commercially known and produced. Among them Mulberry
silk is the most important and contributes as much as 95% of the world production. There are other two
types of wild silkworm that produce silk in Kenya; Gonometa and Aphe. In this section we shall look at
commercial rearing of the mulberry silk butterfly and larvae – heare after called silk worms.
Silkworm Bombyx mori (L), the source for production of fabulous silk and sericulture industry, has been
domesticated more than 4000 years ago. Its adoptability to environmental conditions is different from that
of the wild insects and the rearing techniques vary to suit the requirements under different ecological
conditions. To find out more about business viability of silk production,
2.1.1 General terms and definition Sericulture:
Silk is the product of pair of salivary glands present in thoracic cavity of the larvae of especial moth. The
study of cultivation of the food plants for silk producing caterpillars, their rearing and post harvest handling
of the harvested cocoon or the silk they produce id sericulture. Sericulture thus includes cultivation of food
plants for the good quality leaves of high nutritive value. The rearing of silkworm and post harvest handling
of silk threads.
Among silk moth, mulberry silkworm (Bombyx mori) is monophagous i.e. its larvae feed only on leaves of
the mulberry tree Morus spp. In other mulberry sericulture includes moriculture, silkworm rearing and silk
thread processing.
66
Moriculture :
The study of scientific cultural practices of mulberry plants Morus spp is moriculture
2.1.2 Importance and scope
1. Silk is the queen of fiber : Which is admired by people throughout the world for its beauty, color
and comfort. Ever since the discovery of silk, it has played an important role in the history of man.
Even today, silk is universally sought by the worlds top fashion designers, Japanese use silk for
making their national dress 'kimono'.
2. Filament of mulberry silkworm is used for water absorption, dyeing, thermo-tolerance insulation
and luster. Raw silk used for parachutes, tire lining, electric insulation, artificial blood vessels and
surgical structure.
3. Silkworm pupa are used for oil extraction, protein extraction, and amino acid vitamin B2
preparation. Diseased ( muscardine ) silkworm larvae and pupae are used for medicine, phytol is
raw material found in silkworm which is used for vitamin E and K preparation.
4. Excreta of silkworm larvae are used for chlorophyll extraction and acid resistant plastic sheet
preparation. It is good source of organic matter and it can also be used as food for pig, cattle, sheep
and fish.
5. Every part of mulberry plant is economically important, silkworm larvae feed on mulberry leaves,
fruits are used for wine preparation, bark is used for high grade fiber making, tree trunk and
branches are used for fire wood and farm tool handles. Mulberry tree have some medicinal value
too. Mulberry planting cover the barren land, prevent soil erosion and provide extra green foliage
to livestock.
6. silkworm rearing utilizes waste manpower from the age of 8 to 80 years. This provides employment
opportunity for all age and generates extra income utilizing the extra time of employees as well.
There is no doubt that silkworm rearing supports rural people. fosters agricultural industry and
finally promotes national economy.
2.1.3 Silkworm in Nepal
The credit of discovery of silk thread and its properties goes to Chinese empress, si-ling some 4000 years
ago and the name silk is in her honor.
❖ Silk was kept secret for centuries and was sold weight for gold by Chinies for centures anf leakage
of the secret was punishable by death.
❖ In 555 AD Europeans sent 2 spine in the grab of Buddhist monk, they discovered the secret snd
smuggled out the silkworm larvae and cocoon in hollows of their staffs.
❖ First silk factory is established in turkey in the middle of the 6th sentury.
❖ Then late spread to Mediterran and Asian countries.
❖ French settlers started silk production in England only in 1688.
❖ In India Lefory was the first to investigate silkworms and sericulture in 1906.
❖ Japan, China, Korea, Italy, France, Russia, Brazil and India are the chief silk producing countries
at present.
❖ In Nepal attempts were made during king of Tribhuwan (1911-55).
❖ Expert of India established silkworm nursery and palnted few nursery plants at birgung.
❖ Juddha samser organized eri silkworm exhibition during 1940-45 at Kathmandu and silkworm and
silk from Jhapa was brought.
❖ Cottage industry department established its own mulberry farm at Tripureahwor but dropped out in
1956.
❖ In 1966, Entomology section of department of agriculture and research carried out preliminary
study.
67
❖ In 1974-75 Industrial entomology project was lunched and later transferred to Khopasi, now its
running Sericulture Development program.
❖ Now Nine sericulture development office are conducted in Nepal.
2.2 Mulberry cultivation
Mulberry (Morus in Latin) is the main feed plant of Bombyx mori L. It is a diploid with 28 chromosomes
and grows as a bush in tropical countries. There are over 200 species of mulberry varieties. Today mulberry
is universally distributed between 230 south and 450 north of the equator. Thus it is produced in China,
Korea, Japan, India, Russia, France, Latin, America and Africa. Mulberry is the basic food for silkworm,
and the bulk of silk goods in the world is produced from mulberry silkworms. Therefore, producing
mulberry leaves on scientific basis is essential for organizing sericulture on sound economic lines. Under
intensive cultivation practices in tropical countries, leaves of about 30 tons per hectare can be harvested per
year.
2.2.1 Sapling production and nursery management
Propagation
Mulberry can be propagated by seeds (sexual propagation) or cuttings (asexual propagation). Sexual
propagation
In sexual propagation, mature seeds are collected, washed and dried. An area under shade is dug, manure
and prepared for seedling nursery. Then viable seeds soaked in hot water for a day to soften a hard testa for
easy and successful germination are sown in rows. Seedlings are thinned when they grow to a height of 3.5
to 5 cm. They would be subject to sun light during cool hours. Transplanting is done with a distance of 22.5
cm three months after sowing. These seedlings grow for one to two years are then transplanted to field or
used for grafting.
Asexual propagation
This can be done by cutting, grafting or budding.
Selection of mother plant :
Mother plant should be true to genetic character and free from insect pest and pathogen.
Nursery bed preparation:
Soil should be well pulverized and free from insect pest and pathogen.
size for nursery bed : 10- 15 cm raised bed, 1m width and length – as required or depends upon size and
shape of land.
Manure for nursery : 40-50 kg FYM compost, 50 gm Urea and 500 gm Ammonium sulphate should be
required for (3m×1m) nursery bed.
Cutting:
cuttings are most commonly used in the asexual propagation of mulberry. Nutritious, high yielding, fast
growing, pests, diseases and drought resistant leaf cuttings should be used.
Time of cutting : October last to December end ( Kartik 15th to paush 15th )
Properly matured (6-8 month old) and thick stem with active and well-developed buds are cut from selected
varieties. Cuttings taken from parts with high carbohydrate content root more readily and profusely than
cuttings from parts rich in nitrogen. Tender portions from upper and over-mature parts at the base need to
be rejected. Cuttings of 15-20cm long, slant cut with three to four to five active buds, should be produced.
Size of direct field plant or nursery bed must be determined before cuttings are planted in slanting position
at a distance of 10-15 cm. After 8 months, cuttings are transplanted to the field depending on the type of

68
the plants to be raised. Roots of cuttings are formed either naturally or artificially. For poor rooting plants,
certain growth regulator hormones are applied to stimulate rooting. These hormones include Indole Acetic
Acetic (I.A.A.), Indole Butyric Acid (I.B.A.), Naftalin Acetic Acid (N.A.A.), and Dychlorophenoxy Acetic
Acid (D.A.A.). Chemicals like restone and seradin are also used.
Grafting:
Grafting is inserting rooted plant in to the same or allied species to bring about organic uniformity or union
between the two species and finally make them grow as one. The branch that is inserted is known as scion
and the plant in to which another plant is inserted is stock. The stock is usually an indigenous plant that is
well acclimatized to the local conditions. Selection of stock and scion is very important. Grafting, thus,
facilitates the propagation of a variety which has desirable qualities which can not be propagated by other
methods. There are three types of grafting: shoot grafting, root grafting and bud grafting.
Budding:
Budding involves removing one bud from stock and putting in to another stock. It is used only when the
material is scarce. Patch budding, t-budding and ring budding (flute) are the types of budding. In addition
to grafting and budding, air and ground layering are used to propagate mulberry plants.
2.2.2 Establishment of new mulberry garden
The field arrangement of the plants will greatly affect both yield and leaf quality. Factors such as
agroclimate, soil fertility, cultivation practice will dictate which system should be used.
2.2.2.1 site selection
Site selection of the proper site for mulberry garden is very important because any mistake made initially
in this respect may make the silkworm rearing failure. So while selecting a site for the garden one must
consider several factors, such as climate, soil, Topography, Irrigation, and labour.
Climate and soil:
It is Thrives well both under temperate as well as subtropical climatic condition. It required temperature
ranges between (15-350c) and 700 to 2000 meter above sea level. It is not affected by drought and frost. It
has no special demand on soil.
2.2.2.2 Plantation
Variety : Improve variety of mulberry are Kanwa-2, Khopasi-1, Khopasi-3 etc but in Nepal only Kanwa3
are cultivated.
Manures and fertilizer :
Terai/Plain region Irrigated : 533.1 kg Urea: 304.3kg Dap:300kg potash/ ha. and rainfed 266.5
kgUrea: 152.2kg Dap:150kg potash/ ha
Mid hill : Irrigated : 366.7 kg Urea: 173.9kg Dap:200kg potash/ ha and rainfed : 183.4 kg Urea:
86.96kg Dap:100kg potash/ ha Planting :
Mulberry sapling should be transplanted in rainy season ( Ashadh jun/july). Number of sapling needed for
one ropani area 700 plants. Planting method are depending upon the types of land, in slopy land contour
system should be applied and in plain land we should apply trench methods.
In trench method, Trench should be prepare at a distance of 40cm deep × 40 cm width and Plant to plant
distance 50cm and row to row distance 135 cm.
2.2.3 Garden management
2.2.3.1 garden management for young age silkworm rearing
Since young silkworms require specific quality leaves and such leaves are not produced from a general
garden, specific packages have been developed for producing mulberry leaves of required quality for young
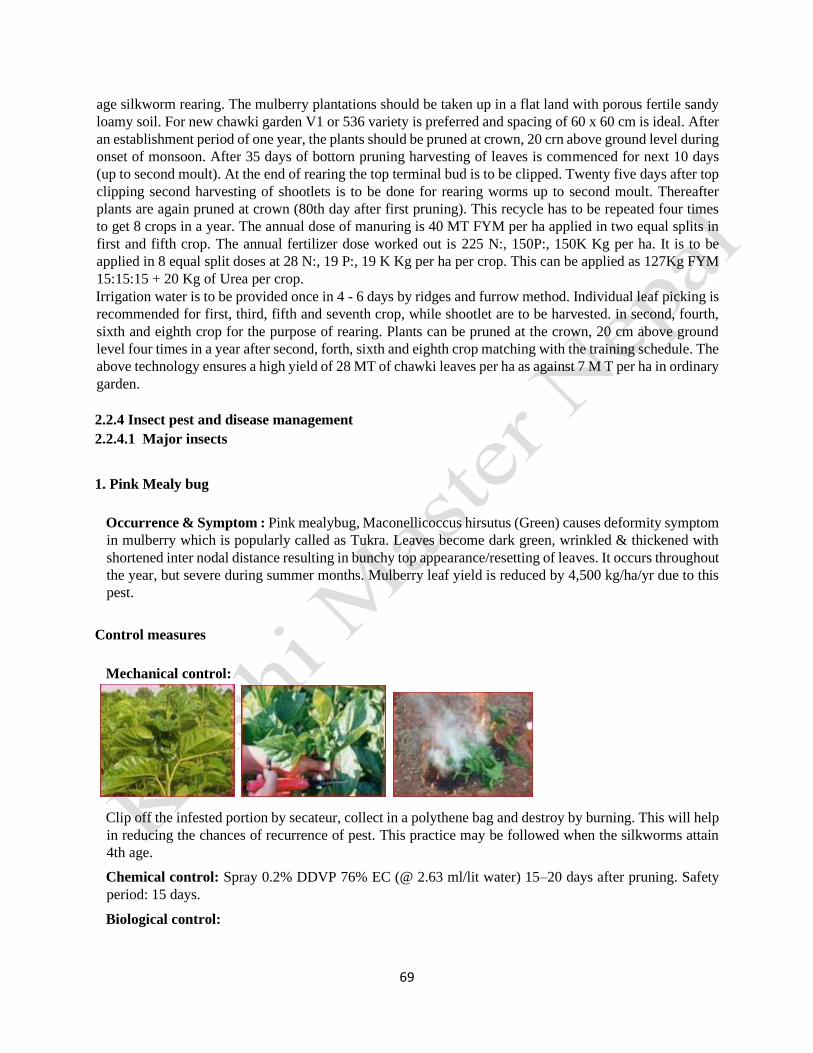
69
age silkworm rearing. The mulberry plantations should be taken up in a flat land with porous fertile sandy
loamy soil. For new chawki garden V1 or 536 variety is preferred and spacing of 60 x 60 cm is ideal. After
an establishment period of one year, the plants should be pruned at crown, 20 crn above ground level during
onset of monsoon. After 35 days of bottorn pruning harvesting of leaves is commenced for next 10 days
(up to second moult). At the end of rearing the top terminal bud is to be clipped. Twenty five days after top
clipping second harvesting of shootlets is to be done for rearing worms up to second moult. Thereafter
plants are again pruned at crown (80th day after first pruning). This recycle has to be repeated four times
to get 8 crops in a year. The annual dose of manuring is 40 MT FYM per ha applied in two equal splits in
first and fifth crop. The annual fertilizer dose worked out is 225 N:, 150P:, 150K Kg per ha. It is to be
applied in 8 equal split doses at 28 N:, 19 P:, 19 K Kg per ha per crop. This can be applied as 127Kg FYM
15:15:15 + 20 Kg of Urea per crop.
Irrigation water is to be provided once in 4 - 6 days by ridges and furrow method. Individual leaf picking is
recommended for first, third, fifth and seventh crop, while shootlet are to be harvested. in second, fourth,
sixth and eighth crop for the purpose of rearing. Plants can be pruned at the crown, 20 cm above ground
level four times in a year after second, forth, sixth and eighth crop matching with the training schedule. The
above technology ensures a high yield of 28 MT of chawki leaves per ha as against 7 M T per ha in ordinary
garden.
2.2.4 Insect pest and disease management
2.2.4.1 Major insects
1. Pink Mealy bug
Occurrence & Symptom : Pink mealybug, Maconellicoccus hirsutus (Green) causes deformity symptom
in mulberry which is popularly called as Tukra. Leaves become dark green, wrinkled & thickened with
shortened inter nodal distance resulting in bunchy top appearance/resetting of leaves. It occurs throughout
the year, but severe during summer months. Mulberry leaf yield is reduced by 4,500 kg/ha/yr due to this
pest.
Control measures
Mechanical control:
Clip off the infested portion by secateur, collect in a polythene bag and destroy by burning. This will help
in reducing the chances of recurrence of pest. This practice may be followed when the silkworms attain
4th age.
Chemical control: Spray 0.2% DDVP 76% EC (@ 2.63 ml/lit water) 15–20 days after pruning. Safety
period: 15 days.
Biological control:

70
Release predatory lady bird beetles Cryptolaemus montrouzieri @ 250 adult beetles or Scymnus coccivora
@ 500 adult beetles in two equal splits at an interval of 6 months.
Availability of predatory lady bird beetles: Pest Management Lab., CSR&TI, Mysore (ph.
No.08212903285) cost: Rs 120 per unit.
2. Papaya mealy bug
Occurrence & Symptom: The papaya mealy bug, Paracoccus marginatus is an exotic pest which infest a
variety of crops such as papaya, guava, teak, vegetables, Jatropha, and weed plants like Parthenium, Sida,
Abutilon etc. In mulberry its infestation causes malformation of affected portion, stunted growth of leaf,
presence of red/black ants, honey dew secretion, growth of sooty mould, and outright killing of the plant.
At present occurrence of papaya mealy bug is sporadic.
CLASSICAL BIOLOGICAL CONTROL OF PAPAYA MEALYBUG
• Release exotic parasitoid, Acerophagus papayae @1 vial per acre (1 vial= about 100 adult
parasitoids).
• Do not remove or destroy alternate host plants such as Parthenium, Sida, Abutilon, Jatropha etc.,
containing mummified mealybugs.
• Do not spray any insecticide for its control, which may still worsen the situation.
Note: Exotic parasitoids are available at National Bureau of Agriculturally Important Insects (NBAII),
ICAR, Bangalore [opp: CBI, Ganganagar, Bangalore; phone no. 080-23511982/98]
3. Mulberry Leaf roller

71
Occurrence & Symptom : Incidence of Leaf roller, Diaphania pulverulentalis in mulberry starts with the
onset of monsoon. It occurs from June to February but reaches peak during September – October months.
The larva binds mulberry leaf blades by silken thread, stay inside & feed. Its feacal matter can be seen
below the infested portion.
Control measures
Mechanical control: Remove the infested portion (along with the larva) by secateur, collect in a
polythene bag and destroy by burning.
Chemical control:
• Spray 0.076% DDVP (@ 1 ml/lit water) 12 to 15 days after pruning. Safety period: 7 days.
• Second spray of 0.5% commercial neem pesticide (0.03% Azadirachtin) @5ml/Lit water,10 days
after first spray. Safety period: 10 days.
Biological control : Release Trichogramma chilonis egg parasitoid @ 1 Tricho card/week (for 4 weeks).
Do not spray any insecticide after the release of trichogramma parasitoids.
(Note: Tricho cards are available on cost basis at Krishi Vigyan Kendra, Suttur, Nanjangud taluk,
Mysore dist. or Parasite Breeding Lab., Dept. of Agriculture, [Near DC Office] Mandya)
4. Bihar Hairy Caterpillar
Occurrence & Symptom : Incidence of Bihar hairy caterpillar, Spilarctia obliqua in mulberry starts with
the onset of monsoon. It occurs throughout the year and in certain pockets it appears sporadically. Young
larvae are gregariously found feeding on the underside of leaf giving an appearance of mesh and one can
make out from distance. Grown up ones are solitary, very active, spread throughout the field and feed
voraciously on the foliage.
Control measures
Mechanical/Physical control: Collect the egg masses or gregarious young caterpillars and destroy by
dipping in 0.5% soap solution or by burning.
Chemical control:
• Spray 0.076% DDVP (@ 1 ml/lit water) 12 to 15 days after pruning. Safety period: 7 days.
• Second spray of 0.5% commercial neem pesticide (0.03% Azadirachtin) @5ml/Lit water,10 days
after first spray. Safety period: 10 days.
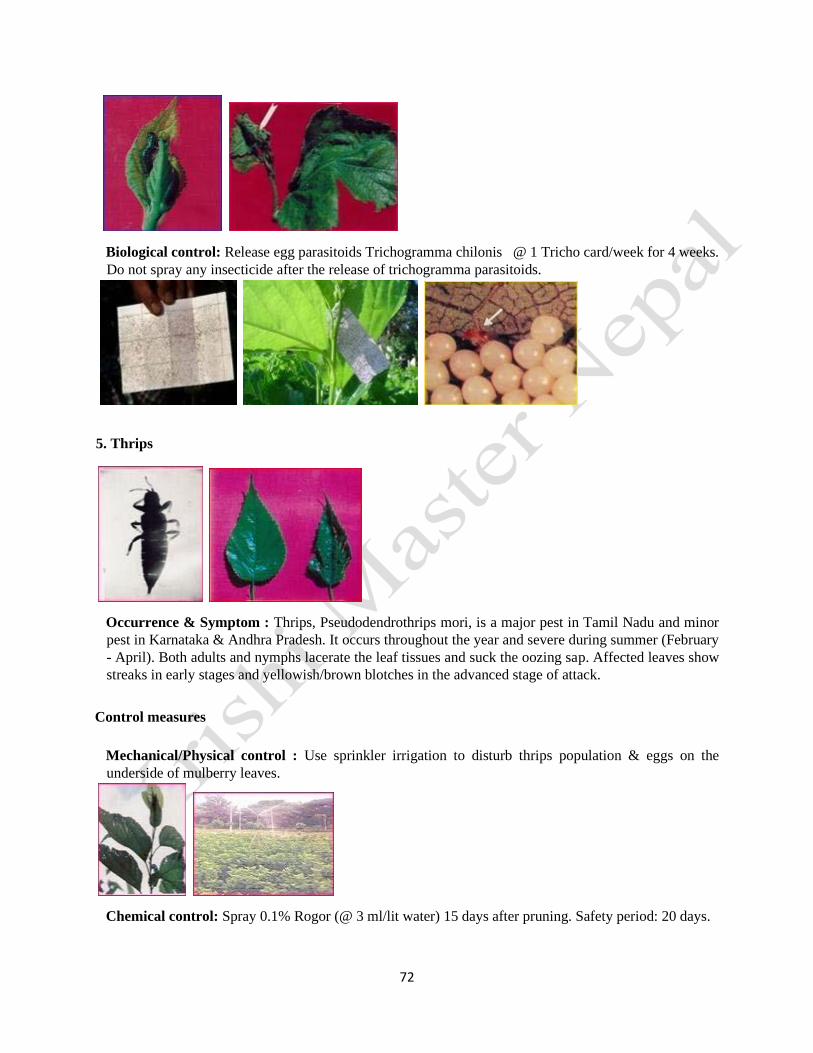
72
Biological control: Release egg parasitoids Trichogramma chilonis @ 1 Tricho card/week for 4 weeks.
Do not spray any insecticide after the release of trichogramma parasitoids.
5. Thrips
Occurrence & Symptom : Thrips, Pseudodendrothrips mori, is a major pest in Tamil Nadu and minor
pest in Karnataka & Andhra Pradesh. It occurs throughout the year and severe during summer (February
- April). Both adults and nymphs lacerate the leaf tissues and suck the oozing sap. Affected leaves show
streaks in early stages and yellowish/brown blotches in the advanced stage of attack.
Control measures
Mechanical/Physical control : Use sprinkler irrigation to disturb thrips population & eggs on the
underside of mulberry leaves.
Chemical control: Spray 0.1% Rogor (@ 3 ml/lit water) 15 days after pruning. Safety period: 20 days.
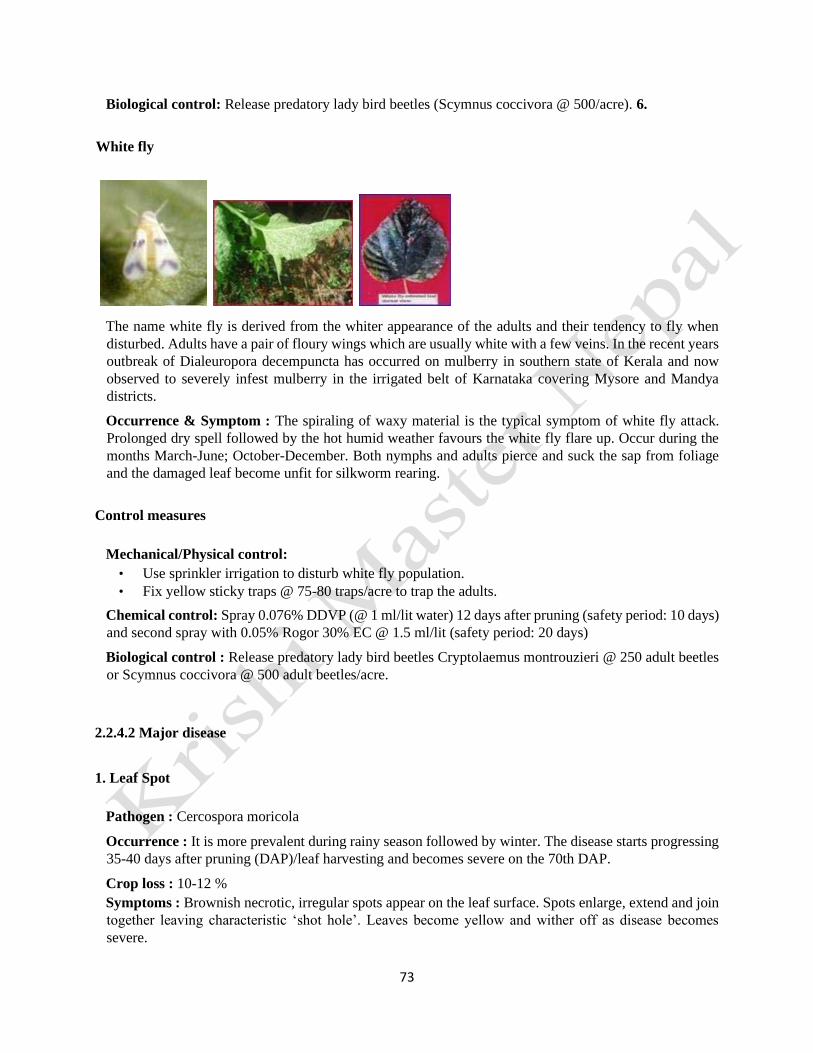
73
Biological control: Release predatory lady bird beetles (Scymnus coccivora @ 500/acre). 6.
White fly
The name white fly is derived from the whiter appearance of the adults and their tendency to fly when
disturbed. Adults have a pair of floury wings which are usually white with a few veins. In the recent years
outbreak of Dialeuropora decempuncta has occurred on mulberry in southern state of Kerala and now
observed to severely infest mulberry in the irrigated belt of Karnataka covering Mysore and Mandya
districts.
Occurrence & Symptom : The spiraling of waxy material is the typical symptom of white fly attack.
Prolonged dry spell followed by the hot humid weather favours the white fly flare up. Occur during the
months March-June; October-December. Both nymphs and adults pierce and suck the sap from foliage
and the damaged leaf become unfit for silkworm rearing.
Control measures
Mechanical/Physical control:
• Use sprinkler irrigation to disturb white fly population.
• Fix yellow sticky traps @ 75-80 traps/acre to trap the adults.
Chemical control: Spray 0.076% DDVP (@ 1 ml/lit water) 12 days after pruning (safety period: 10 days)
and second spray with 0.05% Rogor 30% EC @ 1.5 ml/lit (safety period: 20 days)
Biological control : Release predatory lady bird beetles Cryptolaemus montrouzieri @ 250 adult beetles
or Scymnus coccivora @ 500 adult beetles/acre.
2.2.4.2 Major disease
1. Leaf Spot
Pathogen : Cercospora moricola
Occurrence : It is more prevalent during rainy season followed by winter. The disease starts progressing
35-40 days after pruning (DAP)/leaf harvesting and becomes severe on the 70th DAP.
Crop loss : 10-12 %
Symptoms : Brownish necrotic, irregular spots appear on the leaf surface. Spots enlarge, extend and join
together leaving characteristic ‘shot hole’. Leaves become yellow and wither off as disease becomes
severe.

74
Leaf spot
Factors responsible for spreading of the disease:
• The disease is air borne spreading by conidia primarily through rain droplets.
• Temperature of 24-26 ºC and 70-80 % relative humidity are most congenial for the disease
development.
Control measures to be adopted:
• Spraying of 0.2 % Bavistin (Carbendazim 50% WP) solution on the leaves.
• Safe Period: 5 days.
2 Powdery Mildew
Pathogen : Phyllactinia corylea
Occurrence : Disease is prevalent during winter and rainy seasons and progresses 40th DAP/leaf harvest
becoming severe on 70th DAP.
Crop loss : 5-10%
Symptoms : White powdery patches appear on the lower surface of the leaves. The corresponding
portions on the upper surface develop chlorotic lesions. When severe, the white powdery patches turn to
brownish-black; the leaves become yellow, coarse and loose their nutritive value.
Powdery mildew
Factors responsible for spreading of the disease:
• The disease is air borne spreading by conidia primarily through wind current.

75
• Temperature of 24 - 28º C and high relative humidity (75-80 %) are responsible for infection and
disease development.
Control measures to be adopted:
• Follow wider spacing of plantation (90 cm x 90 cm) or paired row planting system [(90 +150) ×
60 cm]
• Spraying of 0.2 % Karathane (Dinocap 30% EC) / Bavistin on the lower surface of the leaves. Safe
period 5 days.
• Or spray Sulfex (80WP) 0.2%, safe period 15 days.
3. Leaf Rust
Pathogen : Cerotelium fici
Occurrence : The disease is more prevalent during winter and rainy seasons. It starts progressing 45-50
DAP becoming severe on 70th DAP. The mature leaves are more prone to the disease
Crop loss : 10-15%
Symptoms : Initially, circular pinhead sized brown eruptive lesions appear on the leaves and later leaves
become yellow and wither off.
Leaf rust
Factors responsible for spreading of the disease:
• The disease is air borne dispersing by uredospores through water droplets and wind current.
• Temperature of 22-26°C and high relative humidity above 70 % are favourable for the disease
development.
Control measures to be adopted:
• Follow wider spacing of plantation (90 cm x 90 cm) or paired row planting system [(90+150) × 60
cm]
• Avoid delayed leaf harvest
• Spraying 0.2% Kavach (Chlorothalonil 75 % WP) on the leaves Safe period: 5 days 4.
Sooty mould
Pathogen : A group of fungi
Occurrence: The disease is more prevalent during winter (August-December) season.
Crop loss: 10-15%
Symptoms : Thick black coating develops on the upper surface of the leaves.
Factors responsible for spreading of the disease:
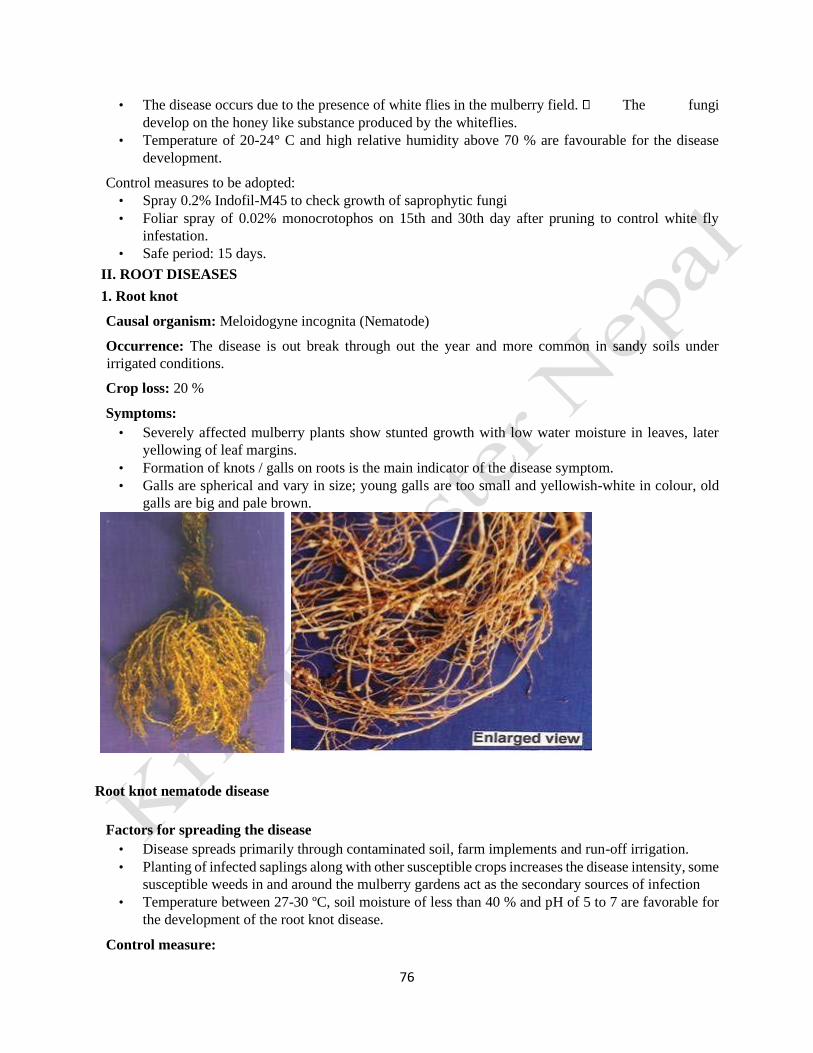
76
• The disease occurs due to the presence of white flies in the mulberry field. The fungi
develop on the honey like substance produced by the whiteflies.
• Temperature of 20-24° C and high relative humidity above 70 % are favourable for the disease
development.
Control measures to be adopted:
• Spray 0.2% Indofil-M45 to check growth of saprophytic fungi
• Foliar spray of 0.02% monocrotophos on 15th and 30th day after pruning to control white fly
infestation.
• Safe period: 15 days.
II. ROOT DISEASES
1. Root knot
Causal organism: Meloidogyne incognita (Nematode)
Occurrence: The disease is out break through out the year and more common in sandy soils under
irrigated conditions.
Crop loss: 20 %
Symptoms:
• Severely affected mulberry plants show stunted growth with low water moisture in leaves, later
yellowing of leaf margins.
• Formation of knots / galls on roots is the main indicator of the disease symptom.
• Galls are spherical and vary in size; young galls are too small and yellowish-white in colour, old
galls are big and pale brown.
Root knot nematode disease
Factors for spreading the disease
• Disease spreads primarily through contaminated soil, farm implements and run-off irrigation.
• Planting of infected saplings along with other susceptible crops increases the disease intensity, some
susceptible weeds in and around the mulberry gardens act as the secondary sources of infection
• Temperature between 27-30 ºC, soil moisture of less than 40 % and pH of 5 to 7 are favorable for
the development of the root knot disease.
Control measure:
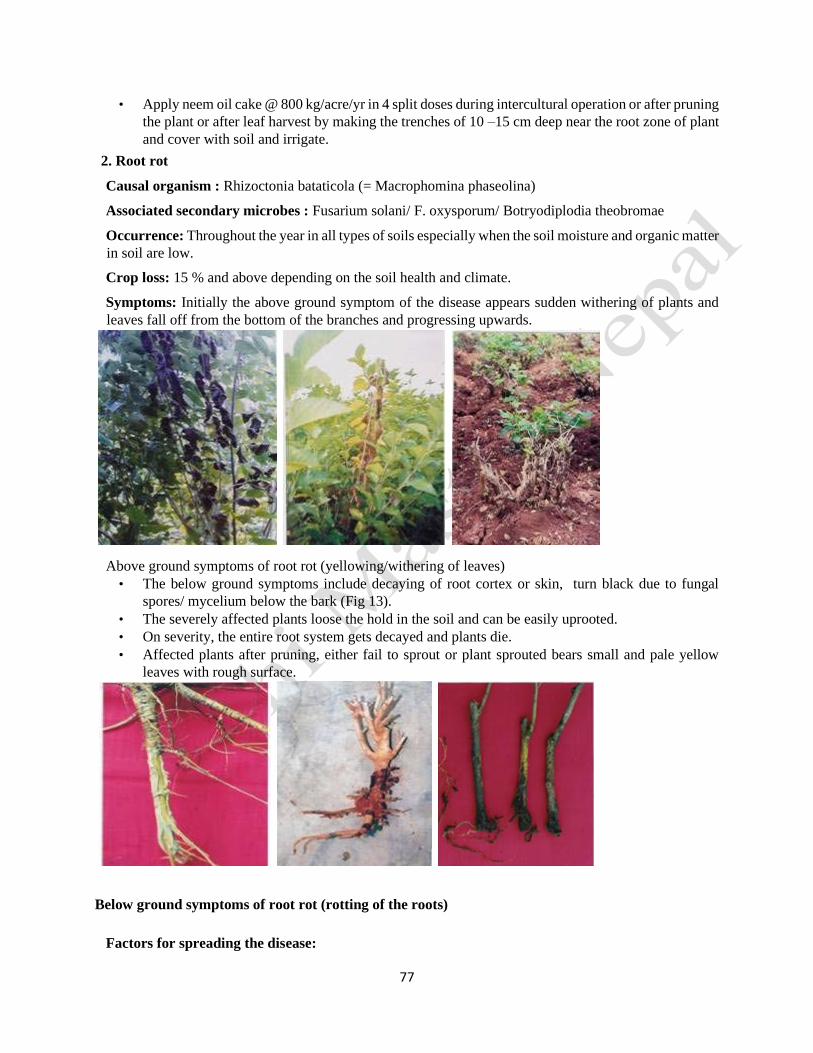
77
• Apply neem oil cake @ 800 kg/acre/yr in 4 split doses during intercultural operation or after pruning
the plant or after leaf harvest by making the trenches of 10 –15 cm deep near the root zone of plant
and cover with soil and irrigate.
2. Root rot
Causal organism : Rhizoctonia bataticola (= Macrophomina phaseolina)
Associated secondary microbes : Fusarium solani/ F. oxysporum/ Botryodiplodia theobromae
Occurrence: Throughout the year in all types of soils especially when the soil moisture and organic matter
in soil are low.
Crop loss: 15 % and above depending on the soil health and climate.
Symptoms: Initially the above ground symptom of the disease appears sudden withering of plants and
leaves fall off from the bottom of the branches and progressing upwards.
Above ground symptoms of root rot (yellowing/withering of leaves)
• The below ground symptoms include decaying of root cortex or skin, turn black due to fungal
spores/ mycelium below the bark (Fig 13).
• The severely affected plants loose the hold in the soil and can be easily uprooted.
• On severity, the entire root system gets decayed and plants die.
• Affected plants after pruning, either fail to sprout or plant sprouted bears small and pale yellow
leaves with rough surface.
Below ground symptoms of root rot (rotting of the roots)
Factors for spreading the disease:
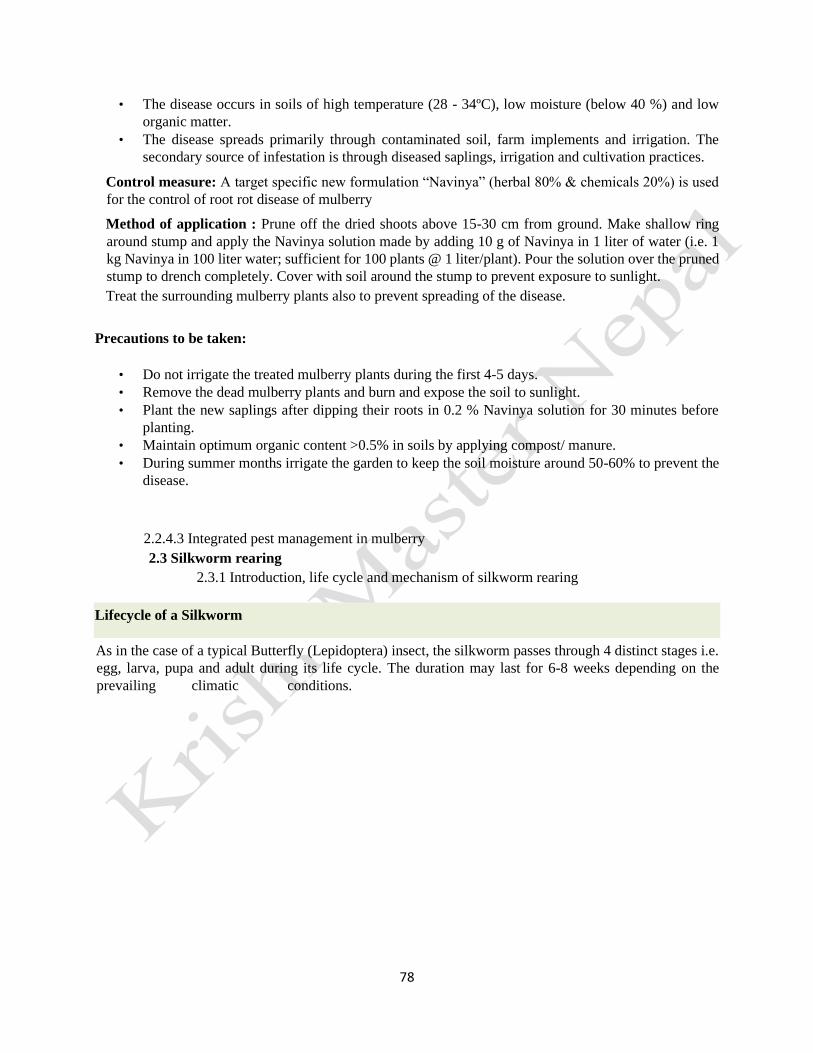
78
• The disease occurs in soils of high temperature (28 - 34ºC), low moisture (below 40 %) and low
organic matter.
• The disease spreads primarily through contaminated soil, farm implements and irrigation. The
secondary source of infestation is through diseased saplings, irrigation and cultivation practices.
Control measure: A target specific new formulation “Navinya” (herbal 80% & chemicals 20%) is used
for the control of root rot disease of mulberry
Method of application : Prune off the dried shoots above 15-30 cm from ground. Make shallow ring
around stump and apply the Navinya solution made by adding 10 g of Navinya in 1 liter of water (i.e. 1
kg Navinya in 100 liter water; sufficient for 100 plants @ 1 liter/plant). Pour the solution over the pruned
stump to drench completely. Cover with soil around the stump to prevent exposure to sunlight.
Treat the surrounding mulberry plants also to prevent spreading of the disease.
Precautions to be taken:
• Do not irrigate the treated mulberry plants during the first 4-5 days.
• Remove the dead mulberry plants and burn and expose the soil to sunlight.
• Plant the new saplings after dipping their roots in 0.2 % Navinya solution for 30 minutes before
planting.
• Maintain optimum organic content >0.5% in soils by applying compost/ manure.
• During summer months irrigate the garden to keep the soil moisture around 50-60% to prevent the
disease.
2.2.4.3 Integrated pest management in mulberry
2.3 Silkworm rearing
2.3.1 Introduction, life cycle and mechanism of silkworm rearing
Lifecycle of a Silkworm
As in the case of a typical Butterfly (Lepidoptera) insect, the silkworm passes through 4 distinct stages i.e.
egg, larva, pupa and adult during its life cycle. The duration may last for 6-8 weeks depending on the
prevailing climatic conditions.

79
The egg period for the incubated eggs may last for 11-14 days, the larval period 24-30 days, the pupal period
12-15 days and the adult stage 6-10 days. This means that a farmer who receives hatched silkworms can
rear, harvest and sell cocoons in about 5 weeks unlike majority of other enterprises that take much longer
production period.
Lifecycle of a silkworm
2.3.2 Materials management for rearing
Silkworm Rearing House and Equipment

80
SITE SELECTION - REARING HOUSE
Silkworms are reared in a specifically built house with adequate ventilation, light which should be rodent
proof.
(a) A silkworm rearing house should be build away from farm animals' housing to avoid drifting of
chemicals during spraying.
(b) Should be near the mulberry field in order to minimize the transportation distance thus cutting down
on wilting of leaf.
(c) Doors and windows should be North-South direction to avoid direct sunlight into the room which
could raise the room temperatures and thus cause leaves to dry fast.
The size of the rearing house is determined by size of mulberry orchard and amount of silkworm to be
reared. For example, a small scale farmer with
A 1/4 acre of mulberry orchard needs a rearing house of at least 7m x 5 m (25 ft x 15 ft). Such a house
can accommodate 2 cases (40,000) of silkworms.
Locally available building materials can be used such as Bamboo, off cuts, timber, stones, mud, bricks etc
to build the walls. Avoid walls made from iron sheets as it is difficult to regulate house temperatures.
However iron sheets can be used for roofing. Below is a list of houses that a farmer can choose from
depending on his financial capability.
Sketch of a rearing house

81
Floor plan of a rearing house
Side view of a timber wall rearing house Front view with a foot bath
Model rearing house (stone wall)
Silkworm Rearing Equipment

82
The minimum economic unit is 1/4 acre of Mulberry which can rear two cases of silkworm (40,000
silkworms). One requires the following equipment:
1. Rearing beds
There are different types of rearing beds. Farmers are advised to use locally available materials to keep the
production cost as low as possible. Below are some of the rearing beds that farmers can adapt.
16 trays of 2 m x 1 m stacked in deckers
Rearing beds
2. Bed cleaning nets
3. Old newspapers or brown paper
32 rearing trays of 1 m x 1 m with 6 rearing stands
to carry 6 trays each.
4. Mountages for spinning, -260 partitions and 26 rotary frames: Mountages can be made from timber,
carton, hard paper, plywood or wire.
5. Leaf picking bags
6. Chopping knives
7. Chopping boards
8. Chopping table
9. Feathers
10. Foam rubber strips
11. Ant wells
12. Knapsack sprayer

83
Silk worms are prone to infection if proper disinfection of the rearing house and rearing equipment is not
done properly. Disinfection is carried out prior to commencement of rearing as a precaution against
pathogens, which remain in the rearing house. The room or house being disinfected should be kept airtight
during disinfection and should remain closed for 15 - 20 hours after disinfection. It should be opened 24
hours prior to introduction of worms. Disinfection is done using 2% formalin solution. To achieve this,
add 1lt of formalin concentrate into 19 its of water. You require 40 lt of formalin solution to cover a room
of 5m x 7m x 3m. Before disinfection all rearing equipment should be cleaned and returned into the
rearing house. Bleaching powder is spread in a single layer around the house and foot bath to maintain
hygiene .
Warning: Protective clothing must be worn while disinfecting the house.
Temperature and Humidity
Silkworms do well in a temperature range of 23 - 28degC; with high temperatures for the younger worms
and lower temperatures for the older worms. Humidity should range from 70 - 85; high for the younger
worms and low for the older worms. Temperature and humidity can be moderated bz use of wet gunny
bags/wet newspapers hung on the walls or pouring water on cemented floors.
Optimum temperatures and humidity for rearing silkworms of different instars are as follows: Table
2. Temperature/Humidity
INSTARS TEMPERATURE
(degC) HUMIDITY (%)
1st 27 – 28 85-90
2nd 26 – 27 80-85
3rd 25 – 26 75-80
4th 24 – 25 70-75
5th 23 – 24 65-70
2.3.3 Egg management and incubation
Egg Incubation and Hatching
Silkworm rearing starts with silkworm egg incubation. For healthy development and uniform hatching; eggs
are incubated under optimum temperature 25degC and humidity 80% - 85%.
Under these conditions eggs are expected to hatch within 10 - 12 days.
13 . Secateur
14 . Jiko
Management of Silkworms
Disinfection

84
1 case of silkworm eggs moth (1 batch) Eggs form one silkworm
Newly hatched silkworms
Brushing (1st Feeding) of Silkworm Larvae
Brushing of Silkworm Larvae
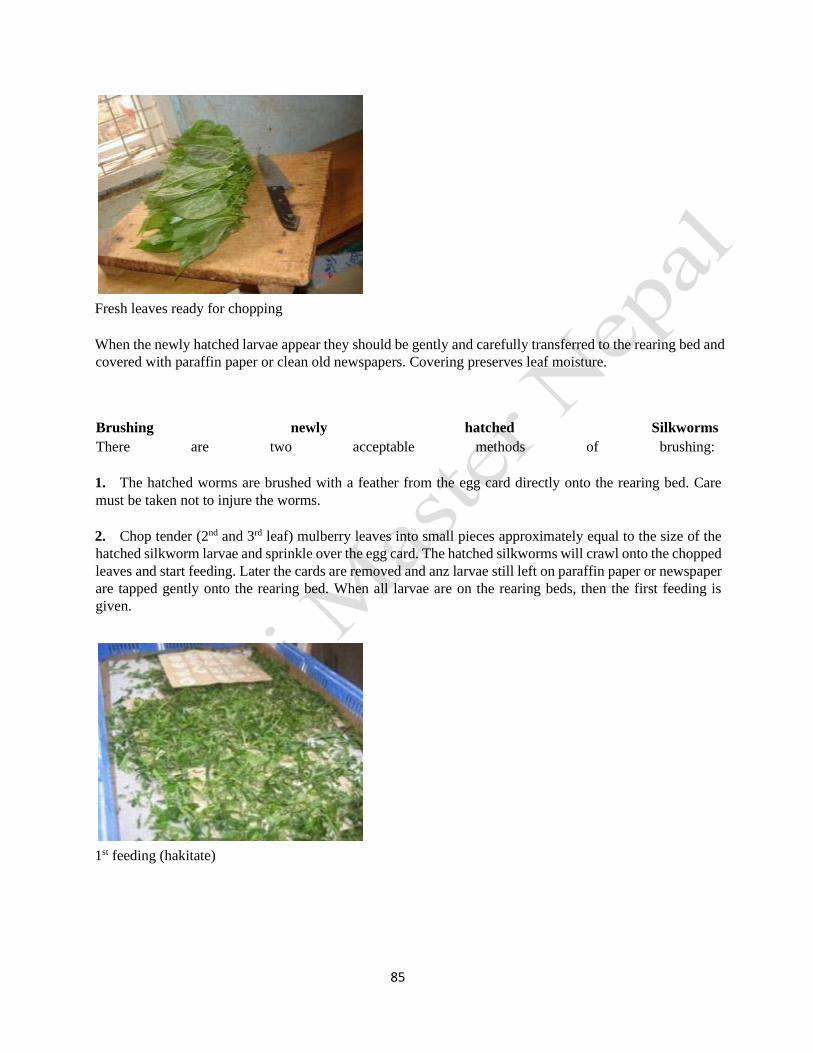
85
Fresh leaves ready for chopping
When the newly hatched larvae appear they should be gently and carefully transferred to the rearing bed and
covered with paraffin paper or clean old newspapers. Covering preserves leaf moisture.
Brushing newly hatched Silkworms
There are two acceptable methods of brushing:
1. The hatched worms are brushed with a feather from the egg card directly onto the rearing bed. Care
must be taken not to injure the worms.
2. Chop tender (2nd and 3rd leaf) mulberry leaves into small pieces approximately equal to the size of the
hatched silkworm larvae and sprinkle over the egg card. The hatched silkworms will crawl onto the chopped
leaves and start feeding. Later the cards are removed and anz larvae still left on paraffin paper or newspaper
are tapped gently onto the rearing bed. When all larvae are on the rearing beds, then the first feeding is
given.
1st feeding (hakitate)
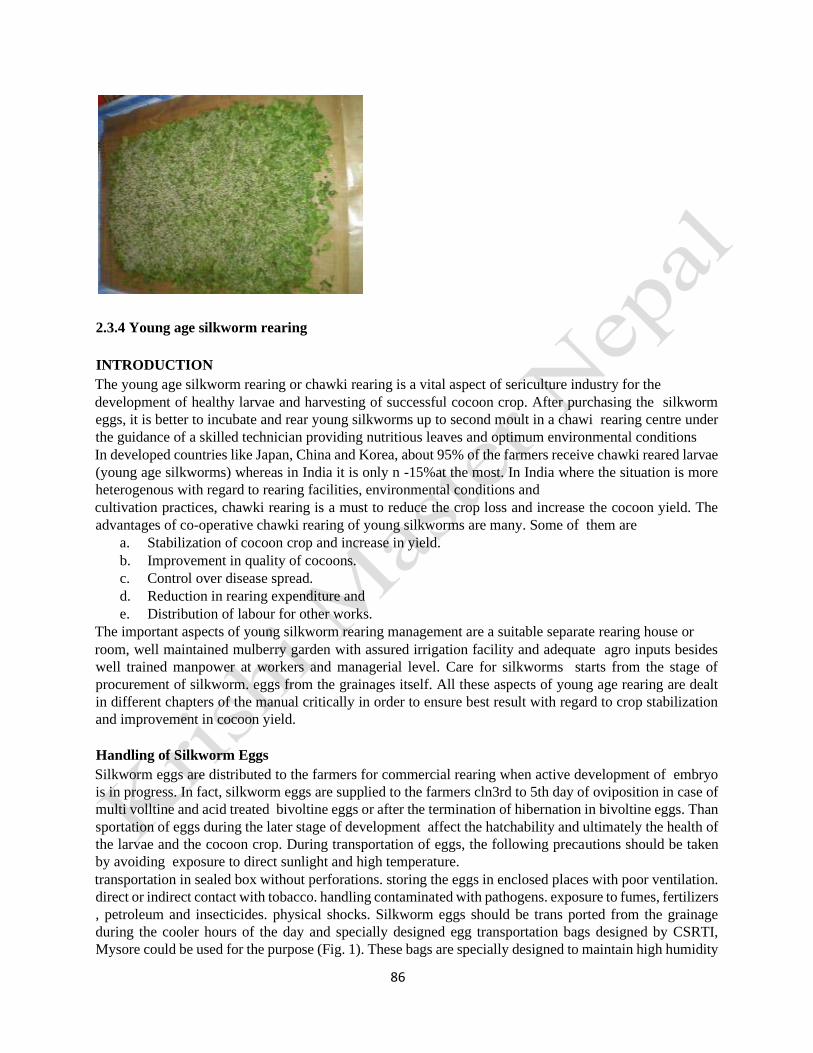
86
2.3.4 Young age silkworm rearing
INTRODUCTION
The young age silkworm rearing or chawki rearing is a vital aspect of sericulture industry for the
development of healthy larvae and harvesting of successful cocoon crop. After purchasing the silkworm
eggs, it is better to incubate and rear young silkworms up to second moult in a chawi rearing centre under
the guidance of a skilled technician providing nutritious leaves and optimum environmental conditions
In developed countries like Japan, China and Korea, about 95% of the farmers receive chawki reared larvae
(young age silkworms) whereas in India it is only n -15%at the most. In India where the situation is more
heterogenous with regard to rearing facilities, environmental conditions and
cultivation practices, chawki rearing is a must to reduce the crop loss and increase the cocoon yield. The
advantages of co-operative chawki rearing of young silkworms are many. Some of them are
a. Stabilization of cocoon crop and increase in yield.
b. Improvement in quality of cocoons.
c. Control over disease spread.
d. Reduction in rearing expenditure and
e. Distribution of labour for other works.
The important aspects of young silkworm rearing management are a suitable separate rearing house or
room, well maintained mulberry garden with assured irrigation facility and adequate agro inputs besides
well trained manpower at workers and managerial level. Care for silkworms starts from the stage of
procurement of silkworm. eggs from the grainages itself. All these aspects of young age rearing are dealt
in different chapters of the manual critically in order to ensure best result with regard to crop stabilization
and improvement in cocoon yield.
Handling of Silkworm Eggs
Silkworm eggs are distributed to the farmers for commercial rearing when active development of embryo
is in progress. In fact, silkworm eggs are supplied to the farmers cln3rd to 5th day of oviposition in case of
multi volltine and acid treated bivoltine eggs or after the termination of hibernation in bivoltine eggs. Than
sportation of eggs during the later stage of development affect the hatchability and ultimately the health of
the larvae and the cocoon crop. During transportation of eggs, the following precautions should be taken
by avoiding exposure to direct sunlight and high temperature.
transportation in sealed box without perforations. storing the eggs in enclosed places with poor ventilation.
direct or indirect contact with tobacco. handling contaminated with pathogens. exposure to fumes, fertilizers
, petroleum and insecticides. physical shocks. Silkworm eggs should be trans ported from the grainage
during the cooler hours of the day and specially designed egg transportation bags designed by CSRTI,
Mysore could be used for the purpose (Fig. 1). These bags are specially designed to maintain high humidity

87
and reduce the temperature by wetting the surface. The bag has got a capacity to transport 400 Dfls of sheet
eggs. As far as possible eggs should be incubated in the grainage and eggs should be supplied during eye
spot stage i.e., two days prior to hatching and kept in a black paper cover.
Rearing House for Chawki Rearing
It is desirable to have separate rearing house or room for young silkworms preferably with RCC roofing
and provided with good ventilation (Fig" 2). If the rearing house is too big, it is difficult to maintain
optimum temperature and humidity. Young age rearing house or room can also be used as an incubation
room for silkworm eggs. The building structure should be such that fluctuations in external environmental
conditions should not affect the inside condition and thus
the inner climate can be regulated. It would be convenient for this purpose that the house is built with thick
walls or double wall with air pocket inside or with hollow bricks. Providing false ceiling and ventilators
also help in regulating environmental conditions. Rearing house must be partitioned into several rooms in
order to make it convenient for rearing and maintaining the temperature and humidity.
A model for rearing 10,000 Dfls at a time upto second moult is given and equipment required in Annex.1.
A building of size of 85' x 33' is proposed. Instead of one big hall, three separate rooms are proposed for
the purpose of maintaining temperature and humidity. Each room in the model can accomodate seven
chawki stands with sufficient working space. 3500 Dfls can be reared upto second moult in each room.
Disinfection of Rearing House and Equipments
Before receiving the silkworm eggs, the rearing house and rearing equipments must be cleaned thoroughly
and washed in 5%o bleaching powder solution. Following this rearing equipments are
arranged inside the rearing house, doors and windows are closed airtight and Z7o formalin is sprayed using
a power sprayer. The temperature of the room should be above 25"C. To disinfect 100 sq. ft. of space with
equipments about 1500 ml of 2% formalin (81 ml of commercial formalin) is required. After spraying,
rearing house should be closed for 24 hrs. and opened only next morning. Before incubation, the rearing
room and rearing equipment must be made completely pathogen free. It is also necessary that proper
hygienic conditions are maintained insicle the rearing house during incubation and rearing.
Incubation of Silkworm Eggs
Silkworm eggs after receiving from grainages must be surface sterilized by dipping in 2% formalin solution
for about 10 minutes and dried in shade before incubation. Conditions of incubation affect the hatchability
and viability of silkworms. Incubation of eggs aim at uniform development and ensure uniform hatching.
The incubation temperature and humidity requirement are different for acid treated bivoltine eggs and
hibernated bivoltine eggs. Incubation of silkworm eggs should be done in a room having temperature of
25"C, relative humidity SAfa , air current of 0.3m per sec. and photoperiod id hrs. light (15-20 lux) per day.
In the incubation room it is desirable that the temperature and humidity are kept at optimum level to the
best of ability especially in the later period of incubation. If the humidity in the incubation room is less it
will lead to mortaiity of eggs, poor hatching and weak larvae. Incubation has profound influence on the
voltinism, larval health and on the yield and quality of cocoon crop.
During incubation, eggs should be spread in a single layer to provide uniform humidity and
temperature. Eggs incubated as above hatch in 10 -11 days after incubation has started. Two days
before hatching, the colour of the eggs changes into a lighter shade with a blue point. This is the head
pigmentation stage. The next day the egg colour changes into blue and is called as the body
pigmentation stage. These two stages are very sensitive to low humidity.
Black Boxing

88
If the eggs in the body pigmentation stage are transferred to dark room, the hatching of the eggs can be
inhibited to certain extent and the growth of embryo which are late can be accelerated. This process is called
black boxing of eggs. The uniform hatching of all the eggs can be made possible only when these eggs are
exposed to light after black boxing. Black boxing is done by covering the silkworm eggs in black paper or
black cloth. To avoid the escape of newly hatched larvae from the egg sheet, the eggs must be wrapped in
a tissue paper during the body pigmentation stage. Farmers should be given a black bag containing
pigmented eggs from the grainages instead of distributing eggs in early stages.
Postponing of Hatching If hatching of incubated eggs has to be postponed, the following measures are to be
taken.
1. One day after incubation eggs are to be kept at 5'C for postponing hatching for a period of 10
days.
2. More than two days passed after incubation started incubation should be continued till the
body pigmentation stage and afterwards they can be preserved at 5"C for a period of 3 days
without any damage to the physiology of embryo.
Brushing of Silkworm Larvae
The process of transferring of newly hatched larvae (Fig. a) from egg sheet to rearing seat is called brushing.
For this either a soft camel brush or feather is employed. On the expected day of hatching the eggs are
exposed to light at 8.00 a.m. Good hatching can be obtained by 10.00 a.m. This is the ideal time for brushing.
Delayed brushing should be avoided. If hatching is irregular, take two days brushing separately in time.
Newly hatched larvae can also be refrigerated at 10'C and 80o/c humidity and uniform brushing can be
taken up.
Brushing Methods
Brushing method depend on the type of egg production method, i.e., sheet eggs or loose eggs.
Brushing of Sheet Eggs
On the day of hatching, the egg sheets should be removed from black boxing, wrapping paper is opened
and spread uniformly in one layer on a tray with paraffin paper as seat. After one or two hours of exposure
to light when hatching is obtained, the egg sheet with tray is removed from light source and chopped
mulberry leaves of size 0.5 cm. sq. are sprinkled on the newly hatched larvae on the egg sheet. After about
30 minutes when all the larvae gather on the leaves they are transferred to the rearing seat giving suitable
spacing, and the first feeding is given to the larvae. The rearing bed is covered with another sheet of paraffin
paper to complete the operation of brushing. Avoid direct tapping of worms or direct brushing of larvae to
rearing bed. Use chop stick for spreading the rearing bed or making rearing bed.
Incubation and Brushing of Loose eggs
Loose eggs comes in egg cases of 50 Dfls and is about 20,000 eggs in each (Fig. 3). At the time of
incubation and black boxing the loose eggs are transferred into a bigger incubation case and preserved in
one layer till the day of hatching (Fig. a). Above the loose eggs a mosquito net of appropriate size is spread
and is again covered by a tissue paper. On the clay of hatching when
the eggs are exposed to light the eggs hatch and the hairy worms move out through the mosquito net and
get attached to the upper most tissue paper covering (Fig. 5)" At the time of brushing the tissue paper
covering is carefully removed and put on the rearing bed keeping the side bearing the worms up, while the
incubation case with the mosquito net is put along with (Fig. 6). When all the worms are hatched, chopped
leaves are sprinkled on the tissue paper and the mosquito net
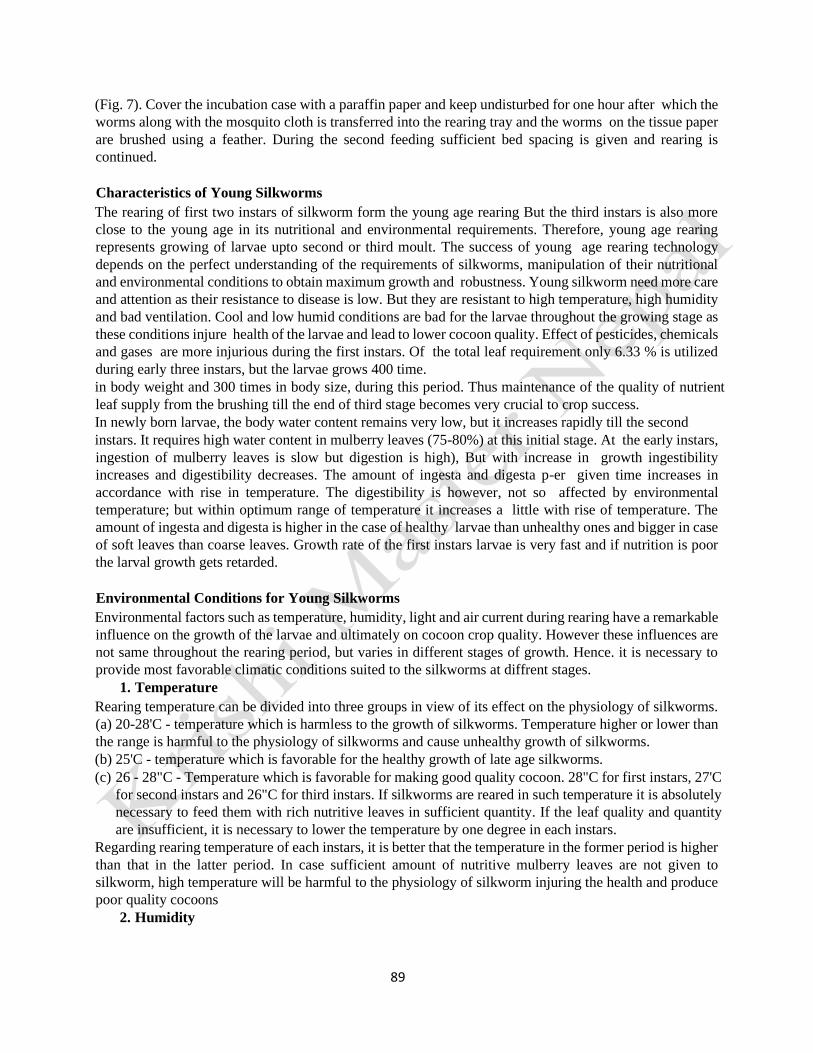
89
(Fig. 7). Cover the incubation case with a paraffin paper and keep undisturbed for one hour after which the
worms along with the mosquito cloth is transferred into the rearing tray and the worms on the tissue paper
are brushed using a feather. During the second feeding sufficient bed spacing is given and rearing is
continued.
Characteristics of Young Silkworms
The rearing of first two instars of silkworm form the young age rearing But the third instars is also more
close to the young age in its nutritional and environmental requirements. Therefore, young age rearing
represents growing of larvae upto second or third moult. The success of young age rearing technology
depends on the perfect understanding of the requirements of silkworms, manipulation of their nutritional
and environmental conditions to obtain maximum growth and robustness. Young silkworm need more care
and attention as their resistance to disease is low. But they are resistant to high temperature, high humidity
and bad ventilation. Cool and low humid conditions are bad for the larvae throughout the growing stage as
these conditions injure health of the larvae and lead to lower cocoon quality. Effect of pesticides, chemicals
and gases are more injurious during the first instars. Of the total leaf requirement only 6.33 % is utilized
during early three instars, but the larvae grows 400 time.
in body weight and 300 times in body size, during this period. Thus maintenance of the quality of nutrient
leaf supply from the brushing till the end of third stage becomes very crucial to crop success.
In newly born larvae, the body water content remains very low, but it increases rapidly till the second
instars. It requires high water content in mulberry leaves (75-80%) at this initial stage. At the early instars,
ingestion of mulberry leaves is slow but digestion is high), But with increase in growth ingestibility
increases and digestibility decreases. The amount of ingesta and digesta p-er given time increases in
accordance with rise in temperature. The digestibility is however, not so affected by environmental
temperature; but within optimum range of temperature it increases a little with rise of temperature. The
amount of ingesta and digesta is higher in the case of healthy larvae than unhealthy ones and bigger in case
of soft leaves than coarse leaves. Growth rate of the first instars larvae is very fast and if nutrition is poor
the larval growth gets retarded.
Environmental Conditions for Young Silkworms
Environmental factors such as temperature, humidity, light and air current during rearing have a remarkable
influence on the growth of the larvae and ultimately on cocoon crop quality. However these influences are
not same throughout the rearing period, but varies in different stages of growth. Hence. it is necessary to
provide most favorable climatic conditions suited to the silkworms at diffrent stages.
1. Temperature
Rearing temperature can be divided into three groups in view of its effect on the physiology of silkworms.
(a) 20-28'C - temperature which is harmless to the growth of silkworms. Temperature higher or lower than
the range is harmful to the physiology of silkworms and cause unhealthy growth of silkworms.
(b) 25'C - temperature which is favorable for the healthy growth of late age silkworms.
(c) 26 - 28"C - Temperature which is favorable for making good quality cocoon. 28"C for first instars, 27'C
for second instars and 26"C for third instars. If silkworms are reared in such temperature it is absolutely
necessary to feed them with rich nutritive leaves in sufficient quantity. If the leaf quality and quantity
are insufficient, it is necessary to lower the temperature by one degree in each instars.
Regarding rearing temperature of each instars, it is better that the temperature in the former period is higher
than that in the latter period. In case sufficient amount of nutritive mulberry leaves are not given to
silkworm, high temperature will be harmful to the physiology of silkworm injuring the health and produce
poor quality cocoons
2. Humidity

90
The effect of rearing humidity upon the growth and health of silkworm is similar to that of rearing
temperature. High humidity makes the length of the growing period of silkworms short,
accelerating the physiological activities whereas low humidity makes the length of the growing period
longer. Humidity influences the physiological functions of silkworms directly. The amount of ingestion,
digestion and metabolism increase with rise in humidity. Indirectly humidity affects the rate of drying of
mulberry leaves in the rearing bed thereby its suitability as
a feed and its consumption. Low humidity causes drying of mulberry leaves, recluces consumption, retarded
larval growth and larvae become weak and easily susceptible to diseases. Considering the overall effect
humidity range of 85% - 90% in first and second instars and 807o in third instars are ideal for young
silkworm. But if the air of the rearing room is too moist it becomes favorable for the growth of pathogenic
microbes and consequently silkworm suffer from diseases. During moulting period, low humidity of about
70o/o is preferable for the drying of the rearing bed.
3. Light
Silkworms are fond of dim light of 15-30 lux and avoid strong light and darkness. Light has little influence
on the health and survivability of silkworms, but it influences the distribution of larvae in rearing bed.
Longer photoperiod during early instars strongly affect the hibernating character in the next generation,
silkworms require a minimum period of 16 hrs. light per day.ln case of silkworms reared in such conditions
the weight of cocoons and cocoon shell become heavier than that of the larvae reared in dark condition. It
is also necessary that light is provided from upper surface of rearing bed while keeping the under surface
dark, otherwise late growing of larvae and missing number of larvae increases.
4. Air Current
Silkworm breathing through the 18 spiracles on both side of the body, supply blood with oxygen through
tracheae which are distributed throughout the body. Fresh air is required for silkworms.
In the rearing room the air is polluted with CO2 from workers and mulberry leaves, formaldehyde gas from
disinfectants and ammonia from litter . The safe limit for silkworm rearing is CO2 7-27o, formalin gas 7Vo,
SO2 0.02o/a and ammonia 0.1 Va. The young silkworms are less resistant to toxic gases. Since the
production of these gases are comparatively less during. early instars, it is less important to ventilate during
younger stages than during later instars. However, care should be taken to remove paraffin paper cover and
keep rearing bed open before each feeding to allow the movement of fresh air. It should be remembered
that high moisture in the bed helps harbouring of fungus and other pathogens.
Maintenance of Environmental Conditions
The optimum temperature and humidity required for young silkworm rearing is 26-28C and
85-90% relative humidity. If the room temperature is below the optimum level, rearing room should be
heated up by electric heater or charcoal stove especially during night time in winter season. By proper
designing of the rearing house, by providing circulation of air, rearing room can be protected from the
effects of high temperature outside.
Regulation of humidity for young age rearing is achieved by performing box rearing or paraffin paper
rearing and providing folded wet news paper around the rearing bed. However,10use of wet foam pads are
not advisable for increasing the bed humidity as they could be major source of contamination. The paraffin
paper which is used as a seat and cover can be folded on all the four sides (wrap up rearing) to prevent the
driage of mulberry leaves if temperature and humidity are maintained inside the rearing room. Rearing
humidity above 90% is not desirable for young age rearing and during such period box rearing method
and use of paraffin paper cover can be dispensed with. Requirement of Temperature and Humidity
During Early Instars
1st instars 2nd instars 3rd instrs
Temperature 28c 27c 26c

91
Humidity 85-90 % 80-85% 75-80%
Mulberry Leaves for Young Age Silkworms
Mulberry leaves are the sole food for silkworms in commercial sericulture and the quality and quantity of
the mulberry leaf fed during rearing decide the success of silkworm crop. Hence choice of mulberry leaves
suitable for healthy growth of silkworm is one of the most important factor in sericulture. Mulberry leaves
suitable as food for silkworms must contain several chemical constituents such as water (80%), protein
(27%), carbohydrate (11%), minerals and vitamins and these must have favorable physical features such as
suitable tenderness, thickness, tightness etc., in order to be eaten by silkworms.
The leaves for infant silkworms must be soft and rich in water content, protein, carbohydrate and minerals.
To attain high level of moisture in the leaf, mulberry garden should be provided with high quality of FYM
(40 tonnes) and the garden should be irrigated every 5 days from the day of pruning. Alternatively, drip
irrigation or sprinkler irrigation can be arranged every day.
Selection of Mulberry leaves for Young Age Silkworms
The top tender leaves meet these requirements. In individual leaf feeding the largest glossy leaf and 4 to 5
leaves below it contain high moisture and protein% are preferred. In case of shoot let feeding, the small
lateral branches with 5 to 6 leaves are preferred. Silkworms do not feed well on leaves withered more than
l0%. The consumption by the worms changes in accordance with the moisture content in the leaves.
Therefore, it is important to supply fresh leaves and arrest quick withering of leaves both While in storage
and in the rearing bed. Under tropical conditions leaf dries is faster. Leaves plucked in the morning are
better than those in the evening. When large quantity of leaves are required the harvested leaves should be
transported immediately to the rearing house in baskets covered with polythene sheet or wet cloth
Preservation of Mulberry Leaves
Harvested leaves shoot lets must be preserved in a clean germ free area under high humidity and low
temperature. For preservation of small quantity of leaves earthen pot buried in wet sand is ideal and also
cheaper. For large quantity of leaves, wooden chamber covered with gunny cloth and polythene sheet can
be used. The length of the period for preservation of leaves must be limited to 12 hrs and leaves should be
periodically turned to avoid fermentation and decaying of the quality. In summer sprinkling of water on the
leaves and frequent wetting of the gunny cloth covering are required. Free movement of air helps to preserve
the quality of leaves. Feeding for Young Silkworms
for mulberry leaves for young silkworm air to be harvested in the cool hours of the day and should be
preserved in cool and wet condition to prevent them from withering . Leaves should be chopped in order
that they are supplied to silkworms evenly. The size of the chopped leaves are variable according to the
form of leaves and larval stage
Instars Chopped leaves mm2 Shoot lets mm2
1st instars 6-12 12-18
2nd instars 18-30 t2-24
3rd instars 13-24 Entire
Size of the chopped leaves should be smaller in the earlier stage pre moulting stage of each instars and
larger at the voracious age of each instars The amount of mulberry leaves to be supplied to silkworms, the
frequency of feeding etc. are variable accordingly to the rearing temperature, humidity, ventilation, spacing
and form of leaves etc. In normal type of spacing at optimum temperature and humidity the amount of
mulberry leaves supplied to silkworms and frequency of feeding for 10,000 larvae are as given in Table
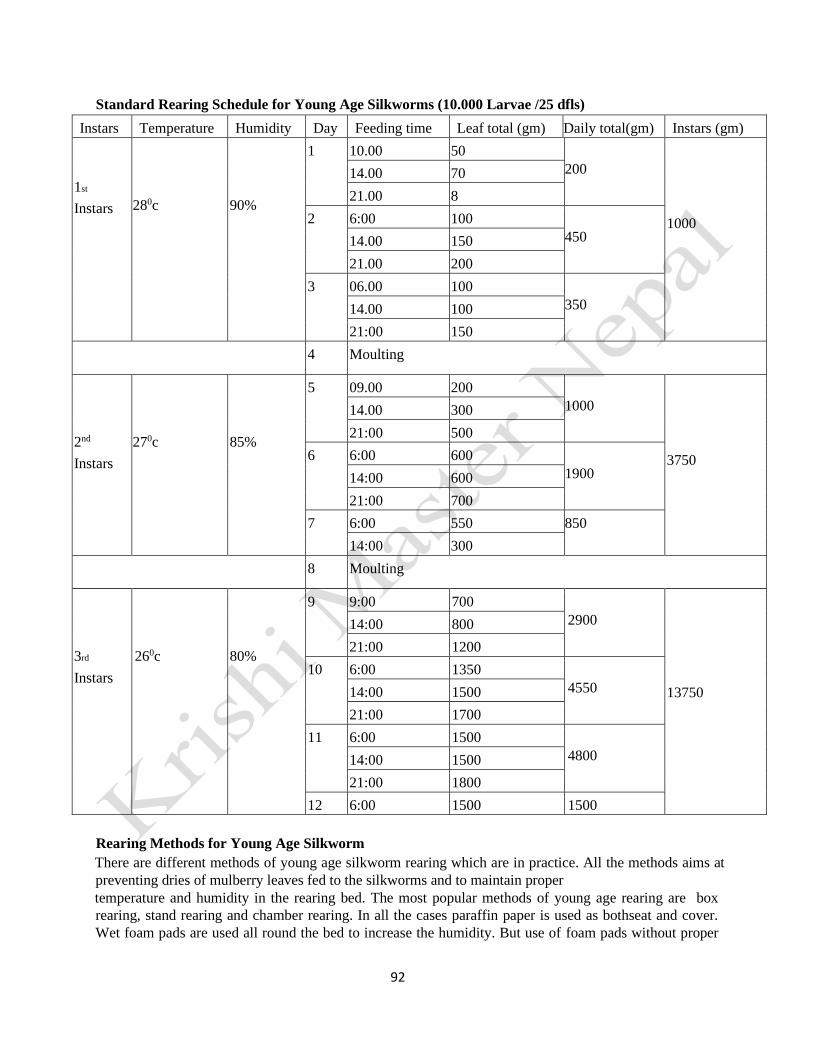
92
Standard Rearing Schedule for Young Age Silkworms (10.000 Larvae /25 dfls)
Instars Temperature Humidity Day Feeding time Leaf total (gm) Daily total(gm) Instars (gm)
1st
Instars
280c
90%
1 10.00 50
200
1000
14.00 70
21.00 8
2 6:00 100
450 14.00 150
21.00 200
3 06.00 100
350 14.00 100
21:00 150
4 Moulting
2nd
Instars
270c
85%
5 09.00 200
1000
3750
14.00 300
21:00 500
6 6:00 600
1900 14:00 600
21:00 700
7 6:00 550 850
14:00 300
8 Moulting
3rd
Instars
260c
80%
9 9:00 700
2900
13750
14:00 800
21:00 1200
10 6:00 1350
4550 14:00 1500
21:00 1700
11 6:00 1500
4800 14:00 1500
21:00 1800
12 6:00 1500 1500
Rearing Methods for Young Age Silkworm
There are different methods of young age silkworm rearing which are in practice. All the methods aims at
preventing dries of mulberry leaves fed to the silkworms and to maintain proper
temperature and humidity in the rearing bed. The most popular methods of young age rearing are box
rearing, stand rearing and chamber rearing. In all the cases paraffin paper is used as bothseat and cover.
Wet foam pads are used all round the bed to increase the humidity. But use of foam pads without proper
93
disinfection can lead to contamination and disease" Hence, instead of wet foam pads, use of wet folded old
news paper which can be disposed of after each rearing, is more ideal when humidity is below 50%. An
alternate method of rearing without using foam pads is the wrap up rearing where in all the four sides of
the rearing bed are folded with a paraffin paper. Wrap up rearing is done only during the first two instars
when the humidity is in the range of 50-70% and is possible to increase the bed humidity by 2030% At the
time of feeding, the rearing bed is kept open for 30 minutes for gaseous exchange. Wrap up rearing help in
reducing the drying of chopped mulberry leaves and to maintain the bed humidity with the moisture content
inside the leaf. Polythene sheet can also be used as a seat and cover in rearing bed in place of paraffin paper.
Polythene sheet should not be more than 400 gauge thickness and can be used several times after
disinfection. Blue polythene sheet has got a more cooling effect on the larvae compared to other colors.
1. Box Rearing
This method is practiced when temperature and humidity are lower. Wooden trays or plastic trays of 4'x 3'
or 3'x 2' and 4" depth are used. During eating period trays are arrange done above the other upto a convenient
height on a chawki rearing stand like a box. Arranging of the trays in this method can increase the rearing
bed temperature and humidity. Thirty minutes before feeding and during the moulting period paraffin paper
cover and wet old news papers are removed and the trays are arranged in a. cris-cross pattern for allowing
the rearing bed to dry. This method is ideal for chawki rearing centre as minimum space is required for
large rearing.
2. Stand Rearing
When optimum temperature and humidity are available or temperature is high in the rearing house young
age rearing is done in tray on a stand like late age rearing. Paraffin paper is used as seat and cover for young
silkworms in a tray. Stand rearing is not suited for large scale rearing as it require more space for rearing.
3. Chamber Rearing
Chamber rearing is useful when temperature and humidity are very low. Chambers are made of plywood
sheets with wooden frame of size 6'x 4'x 5' with double door and provided with heater and humidifier
inside. It is possible to maintain optimum temperature and humidity by providing thermostat and
humidistat. Rearing is done inside the chamber by piling up the trays on a chawki stand or on a small
rearing stand" Rearing is done by using paraffin paper as a seat and cover or by wrapping in paraffin paper.
Maintenance of temperature and humidity is easy inside the chamber because of the restricted area. The
chamber is also provided with ventilators on the upper and lower side through which aeration inside the
chamber is achieved. A chamber made of above size can accomodate 300 Dfls till second moult .
The paraffin paper used for covering the rearing bed should be new and of good quality without smell of
petroleum and melting point of the paraffin must be above 50'C. The cover should be taken away about 30
minutes before feeding to admit fresh air and light into the box in order that larvae can crawl on the surface
of the rearing bed. During the third instars paraffin paper is applied only on the upper surface of the rearing
bed and wet newspaper and other materials used for increasing humidity should be removed. It is desirable
to keep some space between the upper paraffin paper and the rearing bed. If polythene sheets are used as
the covering material, the space between the upper surface of the rearing bed and covering sheet must be at
least 10 cm. The area of the rearing bed has an intimate relation to the amount of mulberry leaves to be
supplied to the silkworms. Any shortage of amount of leaf supplied to the silkworms is unfavorable and at
the same time dense rearing and too much supply of leaf must be avoided.
Spacing
Optimum rearing bed area from brushing to the end of larval stage is important to attain full larval growth,
good survival and successful cocoon crop. Young age rearing are often conducted in a crowded condition.
Spacing required for 100 Dfls bivoltine silkworms (40,000 larvae)) for chawki rearing is as follows.
Space Requirement in Early Instars

94
Instar Bigin sq.ft .End sq. ft Larve sq.ft
I 4.00 18.00 2300
II 18.00 55.00 750
III 55.00 120.00 350
Frequency of Cleaning
Left over leaf and litter accumulated in the rearing bed contributes to increase in bed humidity and
temperature causing multiplication of various pathogens. Therefore, care is taken to spread out and dry the
rearing bed and also remove the litter and unfed leaf periodically. Generally, the litter cleaning is not
preferred during the first instars, as it could lead to increase in missing % of larvae. Every day before the
first feeding the rearing bed is extended to allow fresh air and dry the old leaf and litter. This makes the
larvae crawl upon the surface of the bed. Cleaning is done twice during second instars, first on the day of
resumption of feeding and the next before the worms prepare for second moult. In the third instars also two
cleaning is sufficient, first after second moult, and second before settling for third moult. Since the young
silkworms are delicate, they are not handled directly. Cleaning is done by nylon ne tof mesh size one cm. sq.
(1.00 cm2). Cleaning net is applied covering the full rearing bed just one feed before the cleaning time and
the feeding is given above the net. At the time of next feed the net along with the larvae are transferred to
another tray and fresh feed is given only after giving sufficient spacing.
Moulting Care
Silkworms settle for first moult by 3.5 days from the date of brushing if temperature (28'C)and humidity
(85-90%) are maintained correctly. When worms are preparing for moult, the quantum of feed and leaf size
are reduced. The last feeding has to be given as late as possible in order that silkworms can eat mulberry
leaves sufficiently. If the temperature in the premoulting period is high some silkworms have a tendency to
moult early without sufficient feed. If the humidity is also high the progress of the growth of the larvae
become irregular. This factor to set moult with insufficient feed is stronger in races which has high ratio of
cocoon shell to cocoon weight. The moulting period of silkworm which have set in moult in an insufficient
feed is shorter than that of the silkworms which have set in moult in a sufficient feecl. The time of setting
in moult of larvae which are reared in a moist condition is postponed than that of the larvae which are reared
in a Cry condition.
During moult paraffin paper cover is removed and rearing bed is allowed to dry through free aeration by
arranging the trays in a cris-cross pattern under box rearing. The first moult lasts for 20-24 hours. In case
the progress of the growth of the larvae is irregular, the late moulting larvae should be picked up by chop
sticks or gathered by netting up if they are more. The rearing bed in moulting period is to be dusted with
lime powder to dry the bed fast. In general, the first feeding is performed at the time when all the larvae
have exuviated. Thirty minutes prior to feeding it is good to dust bed disinfectant (RKO Vijetha) @ 60-
120g./100 Dfls in the first and second instars on newly moulted larvae. The second instars generally lasts
for 2-2.,5days. Litter cleaning of premoulting period in the second instars is to be performed some what
early in order to reduce the missing larvae All the premoulting conditions are followed as in the first moult.
Tlie second moulting period last for 20-24 hours.
2.3.5 Late age silkworm rearing
Rearing Third, fourth and fifth in star silkworms
The third, fourth and fifth instars silkworm larvae differ from earlier stage silkworms in many respects.
They are susceptible to high temperature, high humidity, and poor ventilation but can tolerate poor quality
mulberry leaf to a certain extent. Good ventilation is necessary to displace the bad air breathed out by
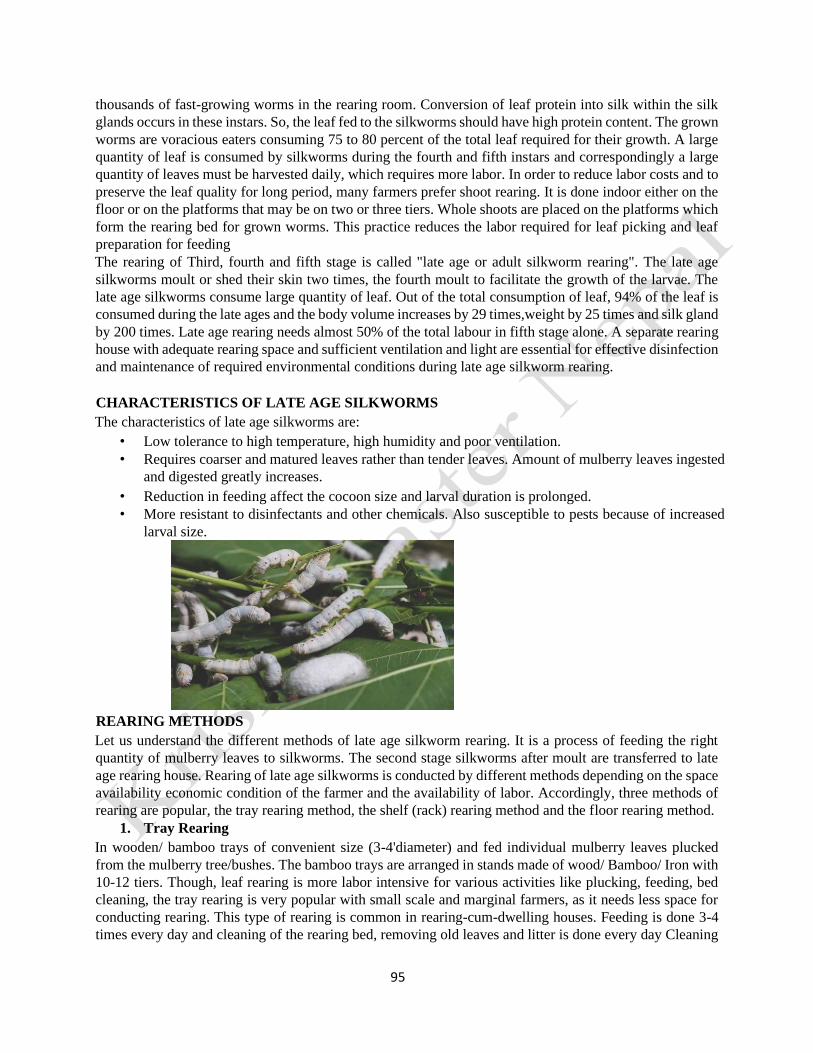
95
thousands of fast-growing worms in the rearing room. Conversion of leaf protein into silk within the silk
glands occurs in these instars. So, the leaf fed to the silkworms should have high protein content. The grown
worms are voracious eaters consuming 75 to 80 percent of the total leaf required for their growth. A large
quantity of leaf is consumed by silkworms during the fourth and fifth instars and correspondingly a large
quantity of leaves must be harvested daily, which requires more labor. In order to reduce labor costs and to
preserve the leaf quality for long period, many farmers prefer shoot rearing. It is done indoor either on the
floor or on the platforms that may be on two or three tiers. Whole shoots are placed on the platforms which
form the rearing bed for grown worms. This practice reduces the labor required for leaf picking and leaf
preparation for feeding
The rearing of Third, fourth and fifth stage is called "late age or adult silkworm rearing". The late age
silkworms moult or shed their skin two times, the fourth moult to facilitate the growth of the larvae. The
late age silkworms consume large quantity of leaf. Out of the total consumption of leaf, 94% of the leaf is
consumed during the late ages and the body volume increases by 29 times,weight by 25 times and silk gland
by 200 times. Late age rearing needs almost 50% of the total labour in fifth stage alone. A separate rearing
house with adequate rearing space and sufficient ventilation and light are essential for effective disinfection
and maintenance of required environmental conditions during late age silkworm rearing.
CHARACTERISTICS OF LATE AGE SILKWORMS
The characteristics of late age silkworms are:
• Low tolerance to high temperature, high humidity and poor ventilation.
• Requires coarser and matured leaves rather than tender leaves. Amount of mulberry leaves ingested
and digested greatly increases.
• Reduction in feeding affect the cocoon size and larval duration is prolonged.
• More resistant to disinfectants and other chemicals. Also susceptible to pests because of increased
larval size.
REARING METHODS
Let us understand the different methods of late age silkworm rearing. It is a process of feeding the right
quantity of mulberry leaves to silkworms. The second stage silkworms after moult are transferred to late
age rearing house. Rearing of late age silkworms is conducted by different methods depending on the space
availability economic condition of the farmer and the availability of labor. Accordingly, three methods of
rearing are popular, the tray rearing method, the shelf (rack) rearing method and the floor rearing method.
1. Tray Rearing
In wooden/ bamboo trays of convenient size (3-4'diameter) and fed individual mulberry leaves plucked
from the mulberry tree/bushes. The bamboo trays are arranged in stands made of wood/ Bamboo/ Iron with
10-12 tiers. Though, leaf rearing is more labor intensive for various activities like plucking, feeding, bed
cleaning, the tray rearing is very popular with small scale and marginal farmers, as it needs less space for
conducting rearing. This type of rearing is common in rearing-cum-dwelling houses. Feeding is done 3-4
times every day and cleaning of the rearing bed, removing old leaves and litter is done every day Cleaning
96
of bed is done using nylon nets of mesh size 2"× 2". Larval bed space is maintained at each instars depending
on the silkworm breed.
2. Shelf (Rack) Rearing
In this type of rearing, whole shoot or branch with mulberry leaves are used for feeding the silkworms. A
shoot rack of 5 ft width and as long as rearing house with 3-5 tiers are used for rearing silkworms. The gap
between the tiers is kept at 2 feet to facilitate easy feeding of larvae. The height of the rearing rack will be
6-7 ft. and the bottom tier will be one ft above ground level Shoot rearing racks are made of wood, iron or
bamboo and can be easily assembled by the farmer If more than 3 tier system is followed, it is difficult to
monitor the growth of silkworms, but, more larvae can be accommodated in the rearing house. While
assembling the rack, a distance of 2 ft is made between the wall and the rack and 4ft between the racks so
that sufficient work space is available to work in the rearing house.
3. Floor Rearing
This method is followed traditionally in Kashmir and some parts of China. Here, the difference is that,
rearing is conducted on the floor using mulberry shoots/ branches. Rearing bed of 5 ft width and as long as
rearing room is made on either side of the floor on old newspaper (Fig. 3.3). Before spreading the
newspaper, a thin layer of lime is dusted on the floor to prevent the attack from ants. Feeding is done as in
shoot feeding method and no cleaning of bed is practiced. Since no rearing racks are used for rearing, it is
highly economical.
ENVIRONMENTAL CONDITIONS FOR SILKWORM REARING
Now, let us understand the environmental factors influencing silkworm rearing. They are temperature,
humidity, light and air current. a)Temperature:
plays a vital role directly influencing the life process of all or ganisms. Temperature changes with season
and also within the day. Silkworms can be reared successfully within a range of 20-28°C. The optimum
temperature required for late age silkworms are 23-25°C. The larval duration increase by one day if the
temperature goes below 23°C. Similarly, when the temperature goes above 36°C, it affects the survival of
larvae and cocoonsreared at high temperature are inferior in quality
.
b)Humidity:
also plays a vital role in late age silkworm rearing. Comparatively, low humidity in the range of 65 -70 %
gives superior quality cocoons. High humidity and high temperatures are predisposing factors for infection
by various pathogens. Humidity also indirectly influences dries of leaves in rearing bed. Hence, during
feeding, high humidity is maintained and it has to be reduced during moult to facilitate easy removal of
skin. c)Air Current:
has a tremendous effect on late age silkworm rearing. The air which gets polluted in the rearing house
through various activities has to be removed. This is possible only when there is good ventilation. Better
ventilation also helps in regulation of rearing temperature and humidity The recommended air current
during late age rearing is 1.0 m/sec for 30 minutes before feeding. d)Light
has indirect effect on silkworms. Silkworms are photosensitive and prefer dim light (15-30 lux) and avoid
strong light and darkness. Light does not affect their survival rate but affects the distribution of larvae in
the rearing bed. The late age silkworms shows optimum uniform growth at a photoperiod of 16 hours of
light and 8 hours of darkness.
LEAF HARVEST, TRANSPORTATION AND PRESERVATION
Like any other animals, silkworm also like fresh mulberry leaves for feeding. Ideal time for plucking
mulberry leaves or harvesting the shoots is in the morning hours. Since large quantity of leaf is required in
fifth stage of rearing, it is necessary to plan properly the harvest and transport of leaves. Care should be
taken to collect the shoots/ leaves as per requirement and transported in shortest period. Leaves should be

97
transported in bamboo baskets covered with gunny cloth and shoots in bundles of 20 kg each. Mulberry
leaves/shoots has to be transported during cooler hours. If they are to be transported for longer than 30 min
by tractor or head load, they should be covered with wet gunny cloth to reduce moisture loss.Leaves /shoots
harvested should be preserved in a clean and disinfected room where high humidity and low temperature
are maintained. Both leaves and shoots should be preserved loosely and periodic turning of leaves is
suggested to check the fermentation and to expel the respiratory heat. Mulberry shoots should be preserved
in vertical position and covered with wet gunny cloth to prevent moisture loss.
LEAF QUALITY AND QUANTITY
Growth of silkworms is directly related to the quality and quantity of mulberry leaves fed to it. The late age
silkworms require relatively less moisture in leaves, but the leaves should be nutritious. Hence, it is essential
that great care should be taken to provide the leaves of required maturity. Leaves from 55 - 65
days old shoots are ideal. Over-mature leaves, above 70 days old and tender leaves less than 35 days old
should be avoided for late age silkworms. Maturation of mulberry leaves depend on the season. Hence, it is
advisable to delay the shoot harvest by 15-20 days to enhance the leaf maturation during winter season and
vice-versa in summer. The feeding of leaves will be slow at the beginning of instars and towards moult, but,
it will be at its peak at the middle of the instars. Larvae coming out of moult in each instar should be provided
with tender leaves for first two feedings and subsequently shifted to coarse leaves. In case of leaf plucking,
entire leaf can be fed without chopping. In shoot feeding system, there is no need of top clipping the shoots
as the entire branch is given for feeding and the larvae has the choice to select and eat the leaves. Quantitative
difference in feed influences both the larval growth and cocoon characteristics. Silkworm consumes 14 and
80 % of leaf in fourth and fifth stage, respectively. Consumption of mulberry leaves by silkworms varies
depending on the silkworm breed. The standard feed quantum for popular CSR hybrids and multi-voltine
hybrids, stage-wise is given in
Recommended Quantity of Mulberry Leaves and Bed Spacing for 100 dfls of CSR Hybrids under Leaf
Feeding and Shoot Feeding System
Instar Larva
duration
(days)
Leaf feeding system Shoot feeding system
Leaf
Quantity
(kg)
Bed Spacing (sq.ft.) Leaf
Quantity
(kg)
Bed Spacing (sq.ft.)
Start End Start End
III 3 65 65 150 138 65 150
IV 4 196 150 300 398 150 350
V 6 1120 300 600 2240 350 700
Recommended Quantity of Mulberry Leaves and Bed Spacing for 100 dfls of Multi-bi-Hybrids under
Leaf Feeding and Shoot Feeding System
Instar Larva
duration
(days)
Leaf feeding system Shoot feeding system
Leaf
Quantity
(kg)
Bed Spacing (sq.ft.) Leaf
Quantity
(kg)
Bed Spacing (sq.ft.)
Start End Start End
III 3 45 45 90 94 45 90
IV 4 140 90 180 235 90 200
V 6 800 180 360 1335 200 400

98
a) Bed Spacing:
To facilitate the growth of the larvae, sufficient leaves has to be fed. Spacing affects the health of the larvae
and also the economics of silkworm rearing. Overcrowding leads to insufficient consumption of leaves and
larvae become small and spin smaller sized cocoons. Whereas, over spacing leads to leaf wastage and higher
leaf cocoon ratio. Success of silkworm rearing depends on optimum spacing in each instars in the rearing
bed. Bed spacing has been recommended for different breeds under leaf feeding and shoot feeding system
as given in above table
b) Frequency of Feeding:
Depending on the environmental conditions, frequency of feeding is decided. Generally 2 to 3 feedings per
day in shoot feeding and 3 to 4 feedings in leaf feeding is followed at equal intervals. The quantity of feed
fixed for each instars should not be reduced. However , it is desirable to increase or decrease the frequency
in rainy and summer season without affecting the quantum of feed.
c) Rearing Bed Cleaning:
During silkworm rearing, dried old leaves and litter accumulates in the rearing bed and has to be removed.
In tray rearing, cleaning is done every day using Nylon net. Nylon net of mesh size 2"x2" is spread on the
bed and feeding is given. After two feedings, the net is lifted and the litter and old leaves below the net are
removed. In shoot feeding method, bed cleaning is mostly avoided except when humidity is very high. When
cleaning of bed is required, it is done by rope method or net method. In rope method, ropes of 8 ft length are
spread parallel to one another on the rearing bed leaving a margin of one ft on both sides. After two feedings,
(by providing the shoots across the ropes) when most of the larvae climb and reach the surface of the bed,
both the ends of the ropes are lifted to gather the shoots with larvae in the centre so as to make a bundle
which is kept at another place of the same rack. This helps in separating the old bed easily without damaging
the larvae. In net method, nets of 5' x 6' size and mesh of 2"x 2" are spread over the rearing bed and after
two feedings, the nets are lifted and the old leaves and litter at the bottom are removed.
d) Moulting Care:
In late age rearing, silkworm moults two times, the third and fourth moult for shedding the skin.
The moulting duration in fourth moult is longer about 30 hrs. When larvae show moulting symptoms,
feeding quantity should be reduced and rearing bed should be made dry. When all the worms settle for
moult, a thin layer of lime is dusted on the rearing bed which facilitates quick drying of bed and also
prevents early moulted larvae from eating the old mulberry leaves in the bed. Utmost care should be taken
when the larvae are under moult. Any mishandling of larvae or bad maintenance of environmental
conditions may lead to irregular moulting which will affect the larval health leading to bad quality cocoons.
e) Larval Protection:
In India, heavy crop losses are experienced due to various diseases and pests. Crop loss can be reduced by
proper disinfection of rearing house and rearing appliances before and after each rearing and also by
maintaining hygienic conditions throughout rearing period. Dusting of bed disinfectants on the larvae help
in preventing secondary contamination. The bed disinfectant should be dusted half an hour before resuming
feeding after each moult as per the recommendation. The bed disinfectant is taken in a thin cloth and dust
it over the silkworms after cleaning the rearing bed. Bed disinfectants should not be dusted when the larvae
are under moult or when the silkworms are eating mulberry leaves.
• After third moult - 900 g/100 dfls
• After fourth moult -1100 g/100 dfls
• Fourth day of fifth instar - 3000 g/100 dfls
In Uzi fly infested areas, a number of management strategies are required to be employed in silkworm
rearing. This includes rearing in nylon net/ wire mesh.
f) Management of Rearing in Different Seasons:
99
Seasonal variation in environmental conditions has a profound influence on silkworm rearing. To get good
quality cocoons, it is necessary to manipulate the rearing conditions and rearing methods to cope up with
the changes. During summer season, the leaf maturity will be advanced by 15 -20 days and it will be delayed
by same period in winter months. In summer, drying of leaves in rearing bed is fast, hence the feeding
quantity can be increased for morning and night feedings and it is also advisable to cover the rearing bed
with old newspaper. Similarly, during rainy season, quantity of feed can be decreased to reduce humidity
in bed. Dusting of lime on the floor and rearing bed also help to reduce the bed humidity. Feeding of wet
leaves has no adverse effect on silkworm rearing.
2.3.6 Mature worm and mounting
Maturation of Silkworms and their Behaviour:
On the sixth or seventh day of fifth instar, the silkworms show less appetite and discharge hard dark brown
colored faces which are soon replaced by soft light brown ones, which indicate that spinning stage has set
in. The skin becomes gradually transparent due to growth of silk gland which occupies almost the whole
body, when the entire gut remains emptied. Silkworm discharge liquid excreta at the time of cocooning.
Hence, it is necessary that good ventilation is provided in the mounting room to drive away moisture. When
maturation sets in, larvae crawl about looking for a place to make a cocoon by spitting out the liquid silk
through spinneret located below the mouth. Silk material is secreted and immediately fixed and hardened
when silkworm touch spinneret to any solid matter. When silkworm moves, the silk materials are drawn
out from the spinneret to the point where the spinneret touches next. A silkworm can spin silk filament
length ranging from 500 m to 1500 m depending on the breed. Preparation for transformation into pupa
inside the cocoon shell begin as soon as spinning is completed.
Mounting:
Spinning a cocoon is the final process of silkworm rearing. The process of transferring matured larvae to a
suitable frame to spin cocoon is called mounting. Building a cocoon is a necessary and indispensable
activity for metamorphosis of a larva into moth via pupal stage. It is desirable to have a separate mounting
hall with good aeration for keeping the mountages. Mounting work requires the most intensive labor during
a short period. After mounting, larva takes 48 hours for complete spinning of cocoon depending on the
environmental conditions. Hence, protection of larvae for 3-4 days after mounting has a profound influence
on quality of cocoons. Hence, in a mass rearing when 40% of the larvae show maturation, all the larvae can
be collected and mounted at the same time. The following points are to be remembered:
➢ Mounting should not be delayed when larva get matured. ➢ Mounting should be done in a place
where it can be handled easily ➢ Mounting place should be kept dry with good ventilation.
Types of Mount ages A mountage for good quality relable cocoon should have the following minimum
features:
➢ should have sufficient cocooning space between frameworks,
➢ material used for mountage should favour reelability of cocoons,
➢ material should be cheap, durable and easily available,
➢ should be convenient for the process of mounting and harvesting, and
➢ should be convenient to prevent faeces and urine coming in contact with cocoons.
The most commonly used mountage for spinning cocoons of silkworms are: a)
Bamboo chandrike
b) Plastic collapsible mountage
c) Rotary cardboard mountage
d) Bottlebrush mountage
100
e) Dried grass/straw/ twigs mountage
a) Bamboo Chandrike:
It is the most commonly used mountage in India. It is made of bamboo spirals woven on a bamboo mat with
two supporting bamboo sticks. The mat is of size 1.8 x 1.2 m (Fig. 3.4). The spirals are made of bamboo
tapes on mat base with 5-6 cm width. Small holes are made on the mat base to provide ventilation. Matured
silkworms are transferred to the chandrike @ 40-50 worms per sq ft. After mounting, the chandrike is kept
at a slanting back position of 45° to allow the urine to fall on the ground and to prevent the staining of
cocoons. During mounting, care should be taken to prevent damage to the soft skin of larvae which may
result in pupal mortality. Chandrikes are also difficult to disinfect properly.
Rotary Card Board Mountage:
These are made of pieces of cardboard assembled in a checkered pattern consisting of 13 rows and 12
sections each providing a total mounting space of 156 sections of size 4.5 x 3 x 3 cm. Each mountage is 55
cm long, 40 cm wide and 3 cm deep and can be folded completely when not in use. Ten such mountages
are fixed on a wooden rectangular frame using ten iron clamps on each of the four sides. The frame consists
of two rectangular frames of size 120 x 58 cm and 1
15 x 44 cm and is made of square wood of size 1 x 2 cm. Both the ends of the shorter axis are fixed by an
iron screw and the whole wooden frame can be hanged horizontally. It can also revolve by the horizontal
short axis. Hence, the name rotary mountage. The wooden frame can also be folded when not in use.
Each frame can hold 1,560 larvae for spinning, but only 80 % is allowed to mount, i.e., about 1,300 larvae
to provide sufficient spacing. For mounting matured larvae on this mountage, first newspapers are spread
on the floor and then the mountage is kept horizontally on the newspaper. Mature larvae are collected and
transferred to the mountage. After 4-5 hrs, when the larvae climb on the mountage, it is lifted from the
ground and suspended from the ceiling using iron hooks. Urine is collected at the bottom on gunny cloth
which can be removed. The mountage get rotated as the larvae move up and gets uniformly distributed till
it starts spinning. Disinfection of rotary mountage is done by fumigation and sun drying.
Rotary mountages are the best among all the mountages as it provides uniform spacing for all the larvae
and avoid formation of double cocoons. It provides good aeration during spinning and avoids staining of
cocoons. Occurrence of defective cocoons is minimum and the reelability is better. But, the major demerits
are its high cost and non-availability of good quality card boards.
c) Plastic Collapsible Mountage:
These are also called as Netrikes and are made of plastic mesh having 11 folds of 2.2" height and can be
placed in a wooden tray of size 2' x 3' for mounting the larvae (Fig. 3.6). It can be stored by folding.
Newspaper is spread at the bottom of the mountage for absorption of urine. Each mountage can hold 350400
larvae for spinning. After mounting, strips of paddy straw or pieces of old newspaper are put on the
mountage for providing anchorage to the spinning silkworms. Plastic collapsible mountage can also be used
for self mounting. It can be directly placed on the rearing bed when the larvae start spinning by self
mounting. These mountages possess several advantages. It is easy for handling, requires less space for
storage and help in maintaining hygienic condition. It is also easy for harvesting cocoons.
d)Bottle Brush Mountage:
Different types of bottle brush mountages are available depending on the material used, like plastic, bamboo
and coconut broomstick. Plastic bottle brush is a machine made plastic material with individual pieces.
Normally, 50 such individual pieces are joined together by an iron rod and at the end it has an iron stopper.
Each individual piece has eight branches of 1.5 cm length with two sub-branches of 9 cm length (Fig. 3.7).
These branches are equally distributed at a distance of one cm at the base and 4 cm at the end in a circular
fashion. Distance between two sub-branches is 3 cm. The circle formed by the branches and sub-branches

101
is 24 cm in diameter. Each bottle brush assembled is one meter long and can mount 350-400 larvae.
Structure of the mountage is same, but coir rope is used as support and bamboo pieces or coconut broom
sticks of 15 cm length are inserted into the coir rope at a distance of 3 cm in groups of eight. A mountage
of one meter length can hold 500 larvae for spinning. It is easy for mounting operation but the branches
become loose in due course.
e) Dried Grass/ Straw/ Mulberry Twigs Mountage:
When silkworm starts maturing, a thick layer of dried grass or straw is spread over the rearing bed. Matured
larvae crawl through the bed on the mountage and spin cocoons. For mounting 100 dfls of larvae, 80 m2
space is required. This method is simple, labour saving and is ideal for shoot rearing method. But, formation
of floss and deformed cocoons are more in this method.
ii) Mounting Methods
Mounting is one of the most laborious activities in silkworm rearing. If the mounting method is wrong, the
quality of cocoons suffers which in turn reduce the income of the farmer. There are different methods of
mounting depending on the type of mountage used and method of rearing. They are: a) Pick up method,
b) Natural mounting,
c) Netting method, and
d) Jobarai method.
a) Pick up Method:
This is a method by which the properly matured larvae are picked up by hand one by one and placed on a
mountage. By this method, silkworms can be mounted at the right time and is the most ideal method for
getting quality cocoons. But, labour requirements are very high causing economic loss. b)Natural
Mounting:
This method of mounting is also called self mounting as it makes use of the negative geotropic character of
the matured silkworms, the tendency to climb up. When about 20% of larvae get matured, mountages like
plastic collapsible mountage, bottle brush mountage and dried grass/ straw mountage are placed on the
rearing bed. By this method, labor can be saved and changing of mountage becomes convenient in relation
to the progress of maturation of larvae. At the time of keeping the mountage on the rearing bed, the upper
surface of the bed is made even by providing leaf feeding in shoot rearing method. This help in the larvae
not going inside the bed to spin cocoons. c)Netting Method:
When large number of larvae get matured at a time and difficult to pick up one by one, straw rope or reed
mats are placed on the rearing bed after feeding mulberry leaves. When sufficient number of larvae climbs
over the net, the net is lifted up with the larvae and then shaken out to a mountage.
d)Jobarai Method:
It is also called shaking of the shoots to separate matured larvae from mulberry branches. Shaking can be
done manually or by using machine. Jobarai method is ideal for shoot rearing method and can save up to
40% labor. However, this method is not suitable when there is infection.
iii) Mounting Care :
Quality of cocoons mainly depends on the type of mountage and the care taken during mounting. If
overmatured larvae are forced to spin, mortality of larvae increase and double and soiled cocoons will also
increase. The environmental conditions such as temperature, humidity, light,air current etc also plays a
major role in producing good quality cocoons. The optimum temperature required for spinning cocoons is
25-27°C. The temperature above the optimum makes the quality of cocoons poor and below increases
pupation period. In order to maintain the health of the larvae and good reelability of cocoons, the relative
humidity of mounting room must be as low as possible. Humidity of 60-70% is considered ideal. This has
to be checked by providing good ventilation. Regulation of optimum environmental condition at the time
of spinning cocoons is very important in silkworm rearing.
102
2.3.7 Cocoon harvesting and sorting
The harvest of cocoon is the final stage of the process of silkworm rearing. The time of harvesting cocoon
should be arrangement favorably, neither too early nor too late. If it is late, silkworm adults emerge out
from the pupa and damage the cocoon. On the other hand if the harvested early the soft delicate pupa are
easily ruptured stain cocoons. the proper time for harvesting of cocoons is on the seven or eight day of
spinning in case of unvoltine or bivoltine races and on the fifth or sixth day of multivoltine races. While
harvesting, loose, decaying and poor quality (small) cocoons are separated and heating them in a special
dry chamber or drying 2-3 days in the sun kills the pupae inside. these cocoon are ready for reeling.
sorting:
After the cocoons are harvested, defective cocoons need to be removed to get good price. For this purpose,
defective cocoons i.e., flimsy, double, melted, thin end, stained and pierced cocoons should be sorted out
before transacting the cocoon lot in the cocoon market. The general practice of fanners is to remove all tire
cocoons from the mountages en mass and try to market them together which increases the scope for
damaging the reeling quality of cocoons as the strained cocoons invariably affects neighboring cocoons.
Cocoons should be sofied out before transacting in cocoon market to get better price and more profit.
2.3.8 Disease and pest management
Diseases and Pests of Silkworms
Since mulberry silkworms are domesticated, they are susceptible to disease and pest attack.
Proper disinfection and strict hygiene will prevent diseases and ensure successful harvest.
Diseases
Common silkworm diseases are Grasserie, Pebrin, Flacherie and Muscardine.
1. Grasserie

103
Larvae starts to turn dark
Symptoms
• The larvae will be sluggish with swollen inter-segmental region
• The larvae will be fragile
• On piercing, milky fluid containing many polyhedral inclusion bodies oozes out from the larval body
• The diseased larvae do not settle for moult
• The larvae appear to be restless
• The dead larvae hang by hind legs head downward
• Young age larvae may get infected with grasserie if the silkworm egg surface is not disinfected
Causes
• The Pathogen comes from infected eggs laid by infected mother moths
• May exist in rearing facilites or Mulberry gardens as spores
• Comes from wild insects naturally infected with Nosema bombsycis
Control
• Disinfect silkworm rearing house, its surrounding and appliances before brushing
• Conduct additional disinfection with 0.3% lime solution. Rear young silkworms as well as late age
silkworms under strict hygienic condition
• Avoid high temperatures (28-35degC), low rearing temperatures (10-20degC) and rearing humidity
(less than 70%)
• Dust lime uniformly when larvae settle for moult
• Dust every time the larvae come out of moult
• Feed quality Mulberry leaf

104
2. Pebrine
Symptoms :
Pebrine disease is caused by a protozoan, Nosema bombysis which attacks both larvae and adults. The
disease is transmitted through egg from pebrinished mothers. The diseased mothes shrink and become
irregular while the larvae remain shorter pale and translucent, shrivel and die before pupation.
Protective measure :
Eggs from healthy mothers may be used for rearing. disinfecting of egg in 4 % formalin solution for five
minutes and then washing in water. disinfection of rearing room and equipment help to check the spread of
diseases.
3. Flacherie
Stunted silkworms Larvae upon dying
Symptoms
The diseased larvae will be:
• Stunted in growth
• Dull and lethargic
• Soft and appear flaccid
• The thoracic region may be translucent
• The larvae vomit gut juice
• The larvae on dying rot and emit a bad smell
Control
• Clean and disinfect rearing trays once again. The pathogens contaminate the rearing tray, bed and
Mulberry leaf in the bed. They survive in teh rearing tray/bed for a long time and cause the disease
if they are not disinfected effectively.
• Control humidity as per guidelines above. If the temperature and humidty is too high in the tray/bed,
the accumulation of faeces, wasted leaves and poor air circulation are suitable for the bacteria to
multiply in the larvae and rearing bed.
4. Muscardine
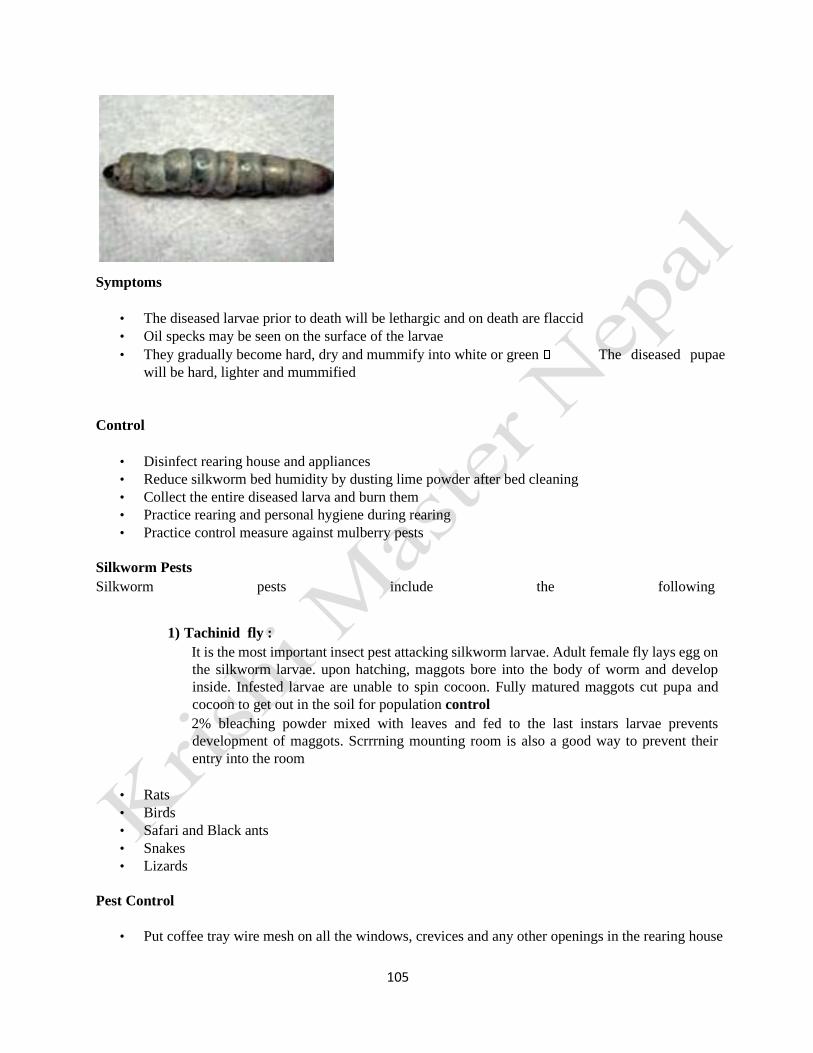
105
Symptoms
• The diseased larvae prior to death will be lethargic and on death are flaccid
• Oil specks may be seen on the surface of the larvae
• They gradually become hard, dry and mummify into white or green The diseased pupae
will be hard, lighter and mummified
Control
• Disinfect rearing house and appliances
• Reduce silkworm bed humidity by dusting lime powder after bed cleaning
• Collect the entire diseased larva and burn them
• Practice rearing and personal hygiene during rearing
• Practice control measure against mulberry pests
Silkworm Pests
Silkworm pests include the following
1) Tachinid fly :
It is the most important insect pest attacking silkworm larvae. Adult female fly lays egg on
the silkworm larvae. upon hatching, maggots bore into the body of worm and develop
inside. Infested larvae are unable to spin cocoon. Fully matured maggots cut pupa and
cocoon to get out in the soil for population control
2% bleaching powder mixed with leaves and fed to the last instars larvae prevents
development of maggots. Scrrrning mounting room is also a good way to prevent their
entry into the room
• Rats
• Birds
• Safari and Black ants
• Snakes
• Lizards
Pest Control
• Put coffee tray wire mesh on all the windows, crevices and any other openings in the rearing house
106
• Maintain cleanliness both within and outside the house
• Sprinkle one layer of bleaching powder (calcium chloride) around the rearing house
2.4 Cocoon management
2.4.1 Introduction of cocoon, cocoon quality and classification and Characteristics of cocoon.
The cocoons in a lot with maximum live pupae, minimum defective cocoons, uniforrn size and shape with
higher shell content with good relability are reffered to as quality cocoons.
Defective cocoon ?
The cocoons which can not be reeled or difficult to reel are called defective cocoons. Inadequate mounting
care, poor quality of mountages, silkworm disease, pest lead higher number of defective cocoon.
Types of defective cocoons :
1. Stained i Soiled cocoon:
Soiled I stained cocoon are formed due to the urination or staining or due to liquid coming out from dead
larvae. The reasons are high humidity and disease infestation.
2. Melted cocoons:
The main reason is late age infestation which leads to the cieath of pupae inside the cocoon and they are not
fit for reeling'
3. Thin end cocoons:
Either one end or both the ends of the cocoon shell layer becomes extremely thin and such cocoons are not
suitable for reeling. Low temperature and high humidity during rearing and low temperature and dry
conditions during spinning may lead to occurrence of, this type of cocoons'
4. Deformed cocoons :
Cocoons which are swollen or differ from the normal shape and size are called deformed cocoons which
can not be reeled. These types of cocoons are formed when larval health is poor or for irregular space in
cocooning frame.
5. Pierced cocoons:
Due to penetration UZI maggots, cocoons are pierced and are not fit for reeling.
6. Flimsy cocoons:
These cocoons are having very thin shell ( jelly type ) and are not flt for reeling. These cocoons are formed
by the-weak larvae. due to the occurrence of diseases.
7. Double cocoon:
These cocoons formed by two mature silkworm together are large in size, deformed and with thick shell
and has coarse wrinkles. They can nott be reeled to get uniform yarn' The double cocoons are also formed
due to congested space during spinning. Hereditary factors also influence the formation' of such cocoons
8. Printed / Pressed cocoons:
Some portion of cocoon adhere to the cocooning frame and leave a print on cocoon. This is due to the poor
quality of mountages, mounting of immature worms and over crowding of the worms.
2.4.3 Management steps of cocoon
Cocoon stifling and drying (Killing the pupa inside the cocoon)
Sun drying.
• Steam stifling (Basket steaming and Chamber steaming).
• Hot air drying.
Cocoon storage :
• Air space for ventilation
107
• Humidity should not exceed 70%
• Temperature should be 270c
2.4.4 Harvesting and handling of fresh cocoon
Harvesting of cocoons is done on the fifth day of spinning. Whereas seed cocoons should be harvested on
eighth day or ninth day of spinning depending upon atmospheric temperature. Harvesting should not be
done immediately after pupation. Further, harvesting should be done before the moth emerges out. Too
many days delay in harvesting will result in formation of pierced cocoons due to emergence of adult moth
or uzi maggots. Cocoons are harvested generally with hand. Simple devices are used to harvest the cocoons
from rotatory mountage.
2.4.5 Post harvest activities
Disinfection of cocooning frames :
The mountages are the chief source of contamination and pupal death if used without proper disinfection.
Most of the farmers use mountages without disinfection which leads to crop losses and increased pupal
mortality. Mountages should be cleaned and made free from floss, litter, dust and then thoroughly
disinfected for producing quality cocoons" The mountages can be disinfected by 0.3 % spraying slaked
lime or 2 oh formalin or by 2% bleaching powder . Different type of mountages including bamboo
mountages can be cleaned by buring the floss to destroy the pathogens using a flame gun. The mountages
should be used 6 to 8 hours after the disinfection. Mountages made up of plastic (collapsible mountages
and plastic bottle brush mountages) can be submerged in the disinfectant solutions for 12 hours. The card
board mountages can be pooled together on vinyl sheet after floss removal and l0 oh 18 l3e Late harvest of
cocoons will lead in reduction in weight of cocoons due to dries and reduce income.
Floss removal :
After sorting of cocoons, floss can be removed either by hand or by using rod if quantity is small. In large
scale rearing , hand operated deflossing machines or mechanised deflossing machines can be used. While
using deflossing machine small quantity of cocoons should be fed each time to avoiding damaging of
cocoons. Floss removing is advisable in hybrid cocoons to get good price. In seed cocoons deflossing is not
advisable as it leads to pupal damage.
Packing of cocoons:
After sorting of the cocoon, floss removal and screening of tile cocoons, t-he good quality cocoons are
thinly spread out till marketing. If required they are kept for a long time packed in a basket or hag. The
cocoons become hot due to respiration by living pupae and adversely affect the cocoon quality. The low
quality cocoons eliminated often carry diseases are hence should be disposed quickly. Good cocoons can
be packed in perforated gunny or plastic bags loosely and should be transported in cool hours to fetch better
price.
2.5 Silk production 2.5.1
Filature
The raw silk is unwound from cocoons and are collected into skeins in the factories known as Filature. Here
the cocoons are sorted based on their color, size, shape and texture. Then they are immersed in hot and cold
water to soften the sericin so that filament could be unwound into one continuous thread. The whole of the
seracin is not removed at this stage as it protects the delicate filament in further operations. 'Reeling' is the
process of unwinding the filament from the cocoon. Three to ten filaments are together reeled for producing
the desired diameter of raw silk thread.
108
2.5.2 Twisting
Twisting may be done in single thread. The direction of twist and twist rate is depends upon the type of yarn.
twisted bobbins should be hot set before use (heat setting/steaming).
2.5.3 Degumming
Removal of gum or sericin is called degumming. It is practiced in two methods that are
Soap and soda method.
• Enzymatic method of degumming.
2.5.4 Dying
Silk has affinity for various classes of dye stuf
• Acid dye
• metal dye
• complex dye
• Milling dye
• Reactive dye
2.5.5 Weaving
The silk weaving process differs according to kind of silk, kind of fabric to be woven, finishing method and
scale of weaving plant. Such staple fibers as spun silk, noil silk and hand-spun silk, until they are woven,
are subject to different processes compared with filament fiber such as raw silk, dupion silk and tussah silk.
Two processes for spun silk fabric are set out below.
a) Cheese yarn
warp > warping > sizing > drawing in > weft > pinning > weaving >dyeing finishing
b) Skein yarn warp (dyed) sizing winding warping drawing in weft (dyed) sizing winding >
pinning >weaving dyeing finishing
GLOSSARY
Bivoltine: Two generation in a life cycle.
Jobarai: The method of shaking the mulberry shoots to separate matured silkworms.
Moriculture: The study of scientific cultural practices of mulberry plants Morus spp is
moriculture
Moult: The process by which body skin is shed to allow growth of the body.
Mountage : A device or equipment used for spinning cocoons by silkworms.
Multi-bi hybrid: A combination of silkworm breed of multivoltine and bivoltine races.
Multivoltine: Several generation in a life cycle.
Rearing House: Place where silkworms are reared
❖ Very short question
QN 1. What is sericulture ?
QN 2. What are types of silkworm ?
QN 3 What is scientific name of silkworm?
QN 4 How many stages of silkworm lifecycle ?
QN 5 Write the meaning of moultage ?
QN 6 When initiated silk rearing in nepal ?
109
QN 7 How many days of lifespan of silkworm ?
❖ Short question
QN 1 QN 2 Draw the life cycle of silkworm ?
QN 2 Write short notes about Garden management for young age silkworm ?
QN 3 Write the any three importance of of silkworm rearing in Nepal ?
QN 4 Write any two characters of late age silkworm ?
QN 5 What types of climate are required for silkworm rearing ?
QN 6 Write the propagation methods by cutting in mulberry?
❖ Long question
QN 1 What are the botanical classification of silkworm and mulbery ? write down the
importance and scope of sericulture in Nepal ?
QN 2 Write down the different stage, life cycle of silkworm with clean sketch ?
QN 3 Detail explain about harvesting of cocoon ?
QN 4 Write short note about feeding management in silkworm ?
QN 5 Detail explain about incubation management of silkworm ? QN
7 write about mounting in silkworm ?
REFERENCES
• FAO Bulletins (1987) Manuals on Sericulture.
• Jica. Third country training Programme (2010) Bivoltine Sericulture Technology
National Sericulture Station (2008). Manual guide to Sericulture practices in Kenya.
• Dr. M. N. Narasimhanna (1988) Manual on Sericulture Egg Production. Dr. Manjeet
S. Jolly,(1987). Appropriate Sericulture Techniques
• JICA bivoltine sericulture technology development project central sericultural research and
training institute Mysore india R,K, HAJAN AKIYOSHI MUROGAH, K DATTA
110
Unite -3
Mushroom cultivation
OBJECTIVES
❖ To gain the knowledge about nutritional value and life cycle of mushroom.
❖ To familiar cultivation of different species of mushroom for income generation.
❖ To be familiar about edible species of poisonous species available in Nepal.
❖ To be aware about mushroom disease, insect pests and their causes, symptoms, and management
practices.
❖ To know how to cultivate of edible mushroom.
Learning materials:
Flowing Learning materials required for theoretical and practical purpose also
❖ Mushroom spawn, paddy straw, plastic bag, jute rope, khurpa, Metal drum, Jute sack.
❖ Mushroom spawn, composting materials
❖ Mushroom spawn, Katus tree, Uttis tree, chainshaw, spawning gun, drilling equipment etc
Course content
3.1 Introduction
Mushroom cultivation was initiated by the Division of Plant Pathology, Nepal Agricultural Research
Council (NARC) in 1974. The growing technology for white button mushroom was developed during that
early period and extended to general farmers starting in 1977. It utilized the synthetic media of paddy straw,
which is harvested twice a year in Kathmandu. Of course, a few farmers grew mushrooms before the
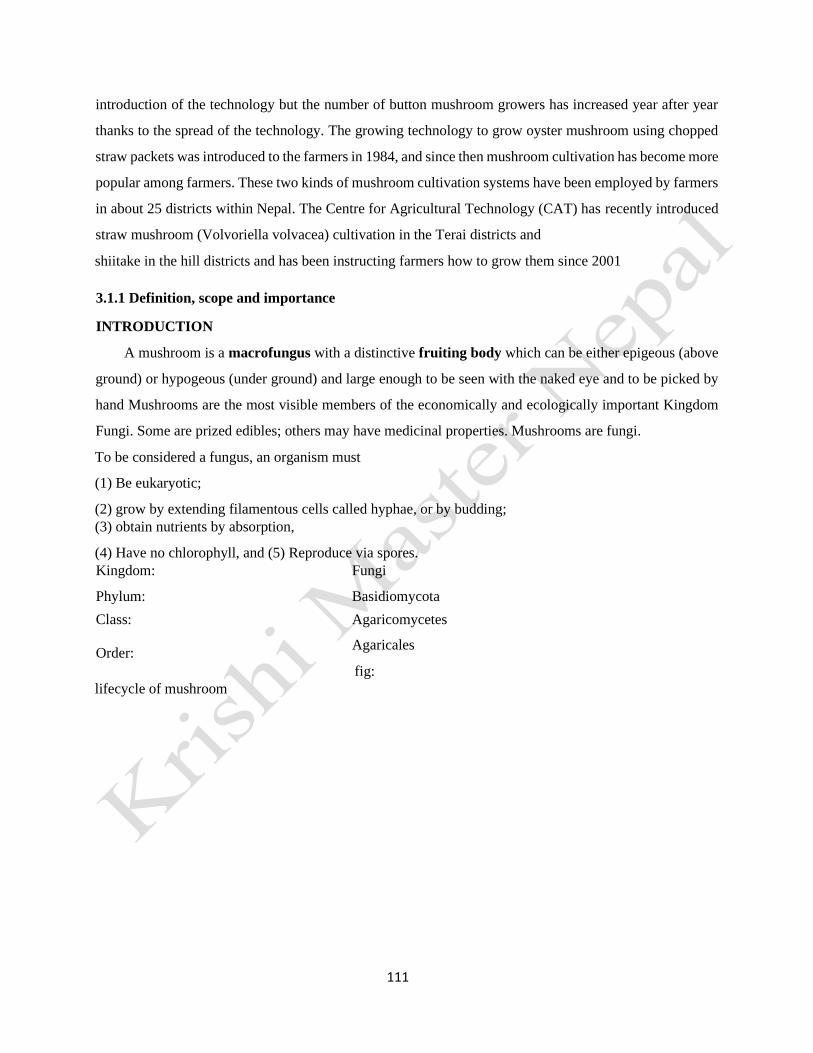
111
introduction of the technology but the number of button mushroom growers has increased year after year
thanks to the spread of the technology. The growing technology to grow oyster mushroom using chopped
straw packets was introduced to the farmers in 1984, and since then mushroom cultivation has become more
popular among farmers. These two kinds of mushroom cultivation systems have been employed by farmers
in about 25 districts within Nepal. The Centre for Agricultural Technology (CAT) has recently introduced
straw mushroom (Volvoriella volvacea) cultivation in the Terai districts and
shiitake in the hill districts and has been instructing farmers how to grow them since 2001
3.1.1 Definition, scope and importance
INTRODUCTION
A mushroom is a macrofungus with a distinctive fruiting body which can be either epigeous (above
ground) or hypogeous (under ground) and large enough to be seen with the naked eye and to be picked by
hand Mushrooms are the most visible members of the economically and ecologically important Kingdom
Fungi. Some are prized edibles; others may have medicinal properties. Mushrooms are fungi.
To be considered a fungus, an organism must
(1) Be eukaryotic;
(2) grow by extending filamentous cells called hyphae, or by budding;
(3) obtain nutrients by absorption,
(4) Have no chlorophyll, and (5) Reproduce via spores.
Kingdom: Fungi
Phylum: Basidiomycota
Class: Agaricomycetes
Order: Agaricales
fig:
lifecycle of mushroom
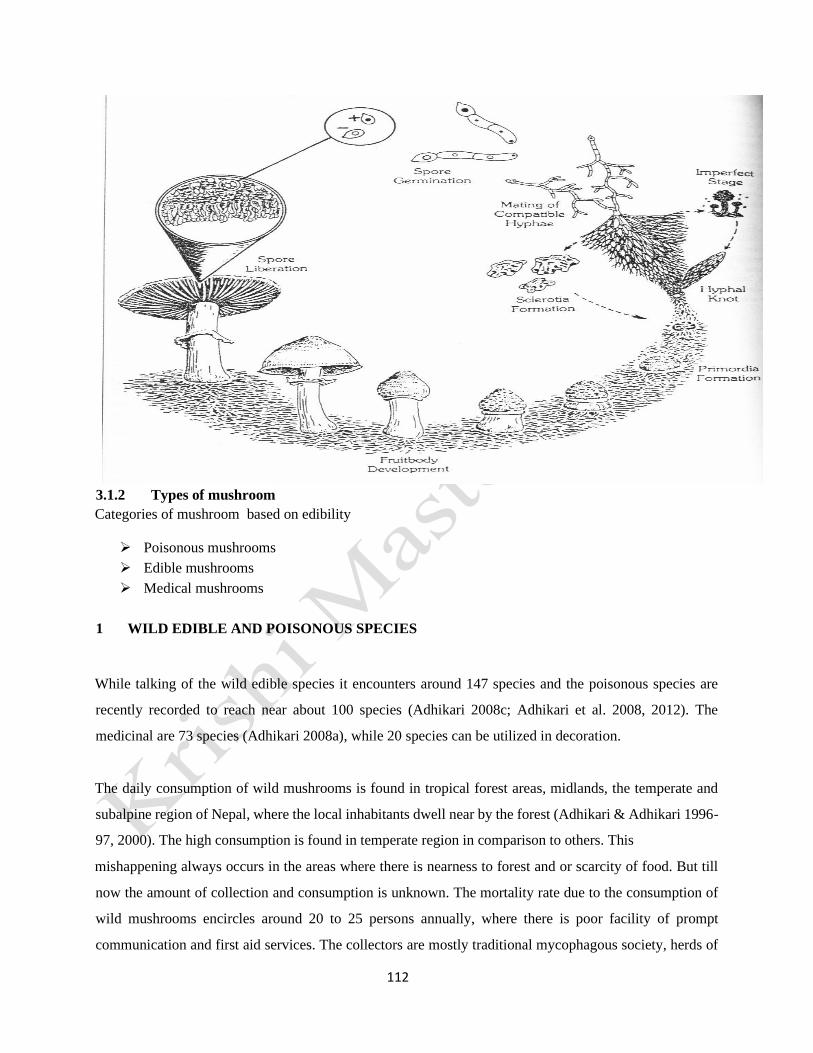
112
3.1.2 Types of mushroom
Categories of mushroom based on edibility
➢ Poisonous mushrooms
➢ Edible mushrooms
➢ Medical mushrooms
1 WILD EDIBLE AND POISONOUS SPECIES
While talking of the wild edible species it encounters around 147 species and the poisonous species are
recently recorded to reach near about 100 species (Adhikari 2008c; Adhikari et al. 2008, 2012). The
medicinal are 73 species (Adhikari 2008a), while 20 species can be utilized in decoration.
The daily consumption of wild mushrooms is found in tropical forest areas, midlands, the temperate and
subalpine region of Nepal, where the local inhabitants dwell near by the forest (Adhikari & Adhikari 1996-
97, 2000). The high consumption is found in temperate region in comparison to others. This
mishappening always occurs in the areas where there is nearness to forest and or scarcity of food. But till
now the amount of collection and consumption is unknown. The mortality rate due to the consumption of
wild mushrooms encircles around 20 to 25 persons annually, where there is poor facility of prompt
communication and first aid services. The collectors are mostly traditional mycophagous society, herds of

113
animals or wood collectors, which age between 10 to 45 years. Among them infants and old age persons
are the victims. Their necessity to earn money for livelihood and serve hand to mouth invites the fatal cases.
They are illiterate and ignorant to differentiate between edible and poisonous ones (Adhikari 2004). 2
Edible Cultivable and Wild Mushrooms:
There are about 1000 species of edible mushrooms in the world. Nepal possesses diverse
phytogeographical zones related to altitude and other factors. Thus the vegetation varies greatly from east
to west and from north to south. According to the mushroom research and survey, in 1854, there are 700
species of mushroom found in Nepal. About 10% are found in tropical area, 65% in temperate area, 16%
in alpine and 4% in himali Zones. Hooker, 1854 collected around 36 spp of fungi from western part of
Nepal. Later in 1966, Japanese teams have collected 160 spp from central and eastern Nepal. These varied
elements have enriched Nepal with economically important mycoflora. Utility values of Nepalese
mushrooms tabulated are 110 as edible, 13 as medicinal, 45 as toxic and 6 others.
Edible mushroom:
There are many edible mushroom found in Nepal. They are:
1 Agaricus bisporus ( gobre): –
It is look like white button so called white button mushroom. This type of mushroom is very famous in
Kathmandu and hilly region for two succesible harvesting and one harvesting in terai. Temperature of 2225c
is very crucial for the cultivation. At low temperature and above 30-35c the desired fungus mycelia is
suppressed. After spawning 70-75% relative humidity and at emerges of mushroom primordial 80-90%
relative humidity is essential.
2 Pleurotus Spp.: –
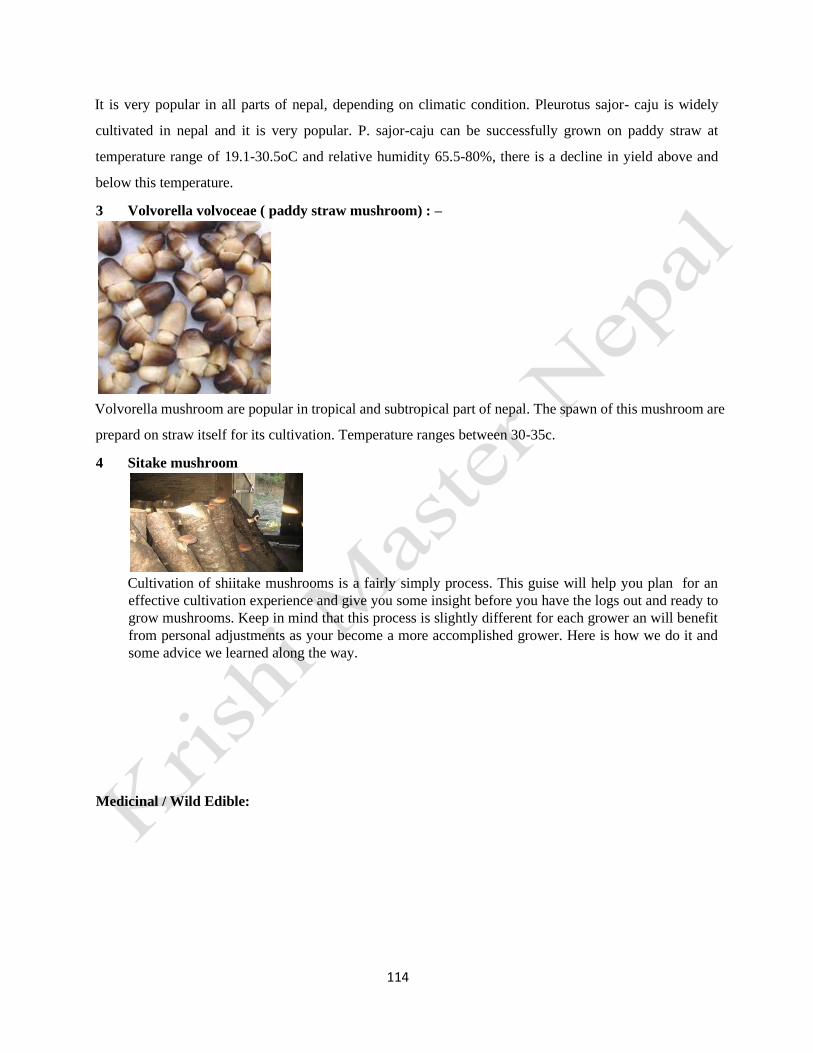
114
It is very popular in all parts of nepal, depending on climatic condition. Pleurotus sajor- caju is widely
cultivated in nepal and it is very popular. P. sajor-caju can be successfully grown on paddy straw at
temperature range of 19.1-30.5oC and relative humidity 65.5-80%, there is a decline in yield above and
below this temperature.
3 Volvorella volvoceae ( paddy straw mushroom) : –
Volvorella mushroom are popular in tropical and subtropical part of nepal. The spawn of this mushroom are
prepard on straw itself for its cultivation. Temperature ranges between 30-35c.
4 Sitake mushroom
Cultivation of shiitake mushrooms is a fairly simply process. This guise will help you plan for an
effective cultivation experience and give you some insight before you have the logs out and ready to
grow mushrooms. Keep in mind that this process is slightly different for each grower an will benefit
from personal adjustments as your become a more accomplished grower. Here is how we do it and
some advice we learned along the way.
Medicinal / Wild Edible:

115
Fig. Lycoperdon pyriforme
Lycoperdon pyriforme:It is commonly known as the pear-shaped puffball or stump puffball, is a saprobic
fungus present throughout much of the world. Emerging in autumn, this puffball is common and abundant
on decaying logs of both deciduous and coniferous wood. It is considered a
choice edible when still immature and the inner flesh is white.
The fruit body of the pear-shaped puffball measures 1.5 to 4.5 cm in width by 2 to 4.5 cm in height. They
are often pear-shaped as the name suggests, but they may also be nearly spherical. When very young they
are covered in small white spines that typically fall off before maturity. A small developing pore may be
visible at the top, while the sterile base of the mushroom is small and appears to be pinched in. Colour
ranges from nearly white to yellowish brown with the darker shades developing with age. The central pore
ruptures at late maturity to allow the wind and rain to disperse the spores. The base is attached to the wood
by means of rhizomorphs (thick, cord-like strands of mycelium).
Fig. Ganoderma lucidum
Ganoderma lucidum: Ganoderma lucidum generally occurs in two growth forms, one, found in North
America, is sessile and rather large with only a small or no stalk, while the other is smaller and has a long,
narrow stalk, and is found mainly in the tropics. However, many growth forms exist that are intermediate
to the two types, or even exhibit very unusual morphologies,[8] raising the possibility that they are separate
species. Environmental conditions also play a substantial role in the different morphological characteristics
Lingzhi can exhibit. For example, elevated carbon dioxide levels result in
stemelongation in Lingzhi. Other forms show antlers, without a cap and these may be affected by carbon
dioxide levels as well. The species can also be differentiated by their colors in which the red reishi is the
most researched kind.

116
Morels: – Morchella esculenta/angusticeps
In Nepal it is called gucchichau. Three species of morels are found in Nepal. They are: Morchellaesculenta,
M conica, M smithiana. They are found in mid-western hills of jumla and humla district. They are seen in
high organic manure, high soil moisture and in Pinusalnus forest and even in apple orchards.
Cordyceps sinensis: –
They are found in Himalayan region of Nepal. In Nepal, two species are found. After commencement of
spring season and up to rainy season, they are found in Himalayan region grassy belt. In the soil, black
fungus is seen in autumn and rainy season. The lower portion of fungus is inside the soil or remains attached
to the larva of lepidopteron. This fungus attacks the larva and in next generation, it gives fruiting structure.
So, people saying that it is six month insect and six month plant.
3.1.3 Mushroom cultivation in Nepal
OYSTER MUSHROOM
1. INTRODUCTION
Oyster mushroom (Pleurotus sp.) belonging to Class Basidiomycetes and Family Agaricaceae is popularly
known as ‘dhingri’ in India and grows naturally in the temperate and tropical forests on dead and decaying
wooden logs or sometimes on dying trunks of deciduous or coniferous woods. It may also grow on decaying
117
organic matter. The fruit bodies of this mushroom are distinctly shell or spatula shaped with different shades
of white, cream, grey, yellow, pink or light brown depending upon the species.
Origin
Cultivation of a sp. of oyster mushroom (Pleurotus ostreatus) was initiated on experimental basis in
Germany by Flack during the year 1917 on tree stumps and wood logs. Growing technology was perfected
in USA by Block, Tsao and Hau.
Oyster Mushroom Cultivation in Nepal
Oyster mushroom cultivation was introduced to Nepalese scientists in 1981. Researchon the proper
substrate and climatic conditions for oyster mushroom growing was carried out by the Division of Plant
Pathology. Growing Pleurotus sajor-caju on stump and chopped paddy straw packets was successful in
Kathmandu in 1982. The technology, which was distributed to farmers in 1984, was so simple, easy to
adopt and suitable to the climate of Kathmandu valley that farmers could adopt it quickly. The cultivation
practices, which produced quick returns, spread like wildfire. Poor farmers were willing to try mushroom
growing on a small scale in order to augment their incomes. The growing of the species P. ostreatus was
introduced later in 1998. These days farmers prefer P. ostreatus because it has higher productivity and can
be grown during the winter in Kathmandu. Thanks to this
3.2 Botanical Description
The oyster mushrooms have three distinct parts- a fleshy shell or spatula shaped cap (pileus) , a short or
long lateral or central stalk called stipe and long ridges and furrows underneath the pileus called gills or
lamellae. The gills stretch from the edge of the cap down to the stalk and bear the spores. The spores are
smooth, cylindrical and germinate very easily on any kind of mycological media within 48-96 hrs.
The mycelium of Pleurotus is pure white in colour.
Economic Importance
The economic importance of the mushroom lies primarily in its use as food for human consumption. It is
rich in Vitamin C and B complex and the protein content varies between 1.6 to 2.5 percent. It has most of the
mineral salts required by the human body. The niacin content is about ten times higher than any other
vegetables.
The folic acid present in oyster mushrooms helps to cure anemia. It is suitable for people with hypertension,
obesity and diabetes due to its low sodium : potassium ratio, starch, fat and calorific value. Alkaline ash
and high fibre content makes them suitable for consumption for those having hyperacidity and constipation.
A polycyclic aromatic compound pleurotin has been isolated from P. griseus which possess antibiotic
properties.
The spent straw can be re-cycled for growing oyster mushroom after supplementing with wheat or rice bran
@ 10-15 % and also for preparing compost of white button mushroom after suitable supplementation with

118
nitrogen rich horse or chicken manure (sun-dried before use). The spent straw can be used as cattle feed
and also for bio-gas production, The slurry can be used as manure.
PRODUCTION TECHNOLOGY
Agro-climatic Requirements
Oyster mushroom can grow at moderate temperature ranging from 20 to 300 C and humidity 55-70% for a
period of 6 to 8 months in a year. It can also be cultivated in summer months by providing the extra humidity
required for its growth. In hilly areas above 900m. (m.s.l.), the best growing season is during March/April
to September/October and in the lower regions from September/October to March/April.
Varieties Cultivated
Among all the cultivated mushrooms Pleurotus has maximum number of commercially cultivated species
suitable for round the year cultivation. All the varieties or species of oyster mushroom are edible except P.
olearius and P. nidiformis which are poisonous. Species commercially cultivated all over the world during
summer months includes P. flabelltus, P. sajor cajo, P. sapidus, P.membranaceous, P.citrinopileatus,
P.eous etc. and those produced during winter are P.ostreatus, P.florida, P.cornucopiae,
P.fossulatus, P.eryngii etc.
Cultivation Technology
The procedure for oyster mushroom cultivation can be divided into following four steps:
a) Materials required
b) Preparation or procurement of spawn
c) Substrate preparation
d) Spawning of substrate
e) Crop management
Materials required
1. Paddy straw, wheat straw, leaves of maize, millets and cotton, used citronella leaf, sugarcane
bagasse, 100 kg
2. straw cutting material ( Khurpa / chaff cutter)
3. Spawn 20 bottle
4. Plastic bag 2 kg
5. Metal drum ( straw steam sterilization )
Spawn Preparation

119
A pure culture of Pleurotus sp. is needed for inoculation on sterilized substrate. It takes 10-15 days for
mycelial growth on cereal grains. It has been reported that jowar and bajra grains are superior over wheat
grains.
Substrate Preparation
Oyster mushroom can be cultivated on a large number of agro-wastes having cellulose and lignin which
helps in more enzyme production of cellulose that is correlated with more yield. These include straw of
paddy, wheat and ragi, stalk and leaves of maize, millets and cotton, used citronella leaf, sugarcane bagasse,
saw dust, jute and cotton waste, dehulled corncobs, pea nut shells, dried grasses, sunflower stalks, used tea
leaf waste, discarded waste paper and synthetic compost of button mushrooms etc. It can also be cultivated
by using industrial wastes like paper mill sludges, coffee byproducts, tobacco waste, apple pomace etc.
The popular methods of substrate preparation are:
Steam Pasteurization;
Hot Water Treatment;
Sterile Technique (Till method);
Fermentation or Composting; and
Chemical Sterilization.
Spawning of Substrate
Freshly prepared (20-30 days old) grain spawn is best for spawning. Old spawn (3-6 months) stored at room
temperature (at 20-300 C) forms a very thick mat like structure due to mycelium aggregation and sometimes
young pinheads and fruit bodies start developing in the spawn bottle itself. The spawning should be done
in a pre-fumigated room (48hrs.with 2% formaldehyde).
Methodology :
➢ Weighing of straw.
➢ Chopped the weighted straw @ 2-5 inch long pisces.
➢ Dipping the straw in clean woter for 2 hour.
➢ Properly washed the straw.
➢ Steam treatment of straw for 30-60 minutes.
➢ When steamed straw are cool then bagging should be started ➢ Spawning should be done after
every 4-5 cm straw layer.
➢ 1cm diameter sized 5-7 hole should be given with cotton for aeration .
Crop Management
Incubation
120
Spawned bags, trays or boxes are arranged in a dark cropping room on raised platforms or shelves for
mycelium colonization of the substrate. Although mycelium can grow from 10 to 330 C, but the optimum
temperature for spawn running lies between 22 to 260 C.
Fruiting
When the mycelium has fully colonized the substrate, the fungus is ready for fruiting. Contaminated bags
with moulds may be discarded while bags with patchy mycelial growth may be left for few more days to
complete mycelial growth.
While various species require different temperature regimes all require high humidity (70-85%) during
fruiting. Frequent spraying of water is required in the cropping room depending upon the atmospheric
humidity. Fruit body produced under humid conditions (85-90%) is bigger with less dry matter while those
developed at 65-70% relative humidity are small with high dry matter.
CO2 concentration during cropping should be less than 600 ppm. or 0.6%. Sufficient ventilation has to be
provided during fruiting.
Plant Protection Measures
The crop is suspect to attacks from flies (sciarid, cecid) spring tails and mites. Timely spraying with insect
specific insecticides is needed.
The crop is prone to fungal diseases. Several competitor moulds e.g. Aspergillus sp., Cladosporium sp.
and Fusarium sp., Rhizopus sp. have been reported to occur in the substrate used for cultivation. Spraying
with Bavistin or Benomyl is a recommended control measure.
The crop is also subject to diseases like yellow blotch, brown spot and bacterial rot, control measures which
are needed include:
➢ Proper management of temperature and humidity during growing period.
➢ Regular application of chlorinated water containing 100 – 150 ppm of freely available chlorine at
an interval of 3 – 5 days
➢ Application of oxytetracycline and streptocycline.
Harvesting and Yield
The right shape for picking can be judged by the shape and size of the fruit body. The fruit bodies should
be harvested before spore release, by twisting so that the stubs are not left on the beds (straw). It is advisable
to pick all the mushrooms at one time from a cube and the next flush will appear at one time.
121
More than 500 kg. of fresh mushrooms per ton of dry wheat or straw can be obtained in case of crop produced
in 45-60 days.
POST HARVEST MANAGEMENT
Storage
Short-term Storage
Fresh mushrooms are packed in perforated polythene bags which are directly sent to the local market
situated nearby. Freshly harvested mushrooms can be stored at low temperature (0-50 C) for 1-2 weeks
without loss in quality in case it is to be sent to the distant markets.
Long-term Storage
Dried mushroom with 2-4% moisture, can be stored for 3-4 months in sealed pouches without any change
in taste. The dried produce can be rehydrated in luke warm water (40-500 C) within 20-30 mins. giving 80-
90% of original weight.
Packing and Transportation
Fresh mushrooms are packed in perforated polythene bags. Poly pouches containing crushed ice and
overwrapped in paper are put in trays/baskets which are then covered with thin polythene sheet with
sufficient perforation for proper aeration. The pre-packed pouches (250 or 500 g.) can be transported by
roadways in trucks, buses depending upon the quantity to be transported.
Marketing
Domestic marketing does not pose a problem at present because only small quantities are being traded. As
production develops, marketing promotion measures will need to be undertaken to bolster the demand.
Export potential exists and needs to be taken advantage of by organizing cooperatives of producers
linked to commercial units for processing fresh mushroom into dehydrated powder for export.
PRODUCTION TECHNOLOGY OF BOTTOM MUSHROOM
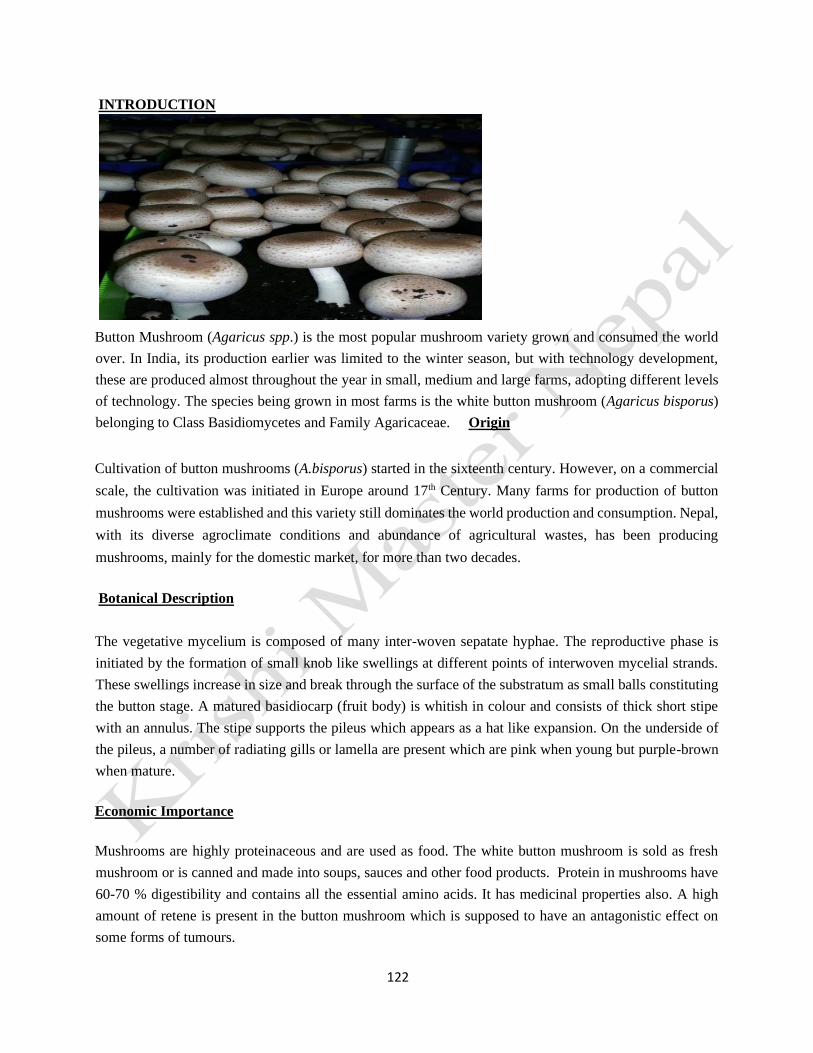
122
INTRODUCTION
Button Mushroom (Agaricus spp.) is the most popular mushroom variety grown and consumed the world
over. In India, its production earlier was limited to the winter season, but with technology development,
these are produced almost throughout the year in small, medium and large farms, adopting different levels
of technology. The species being grown in most farms is the white button mushroom (Agaricus bisporus)
belonging to Class Basidiomycetes and Family Agaricaceae. Origin
Cultivation of button mushrooms (A.bisporus) started in the sixteenth century. However, on a commercial
scale, the cultivation was initiated in Europe around 17th Century. Many farms for production of button
mushrooms were established and this variety still dominates the world production and consumption. Nepal,
with its diverse agroclimate conditions and abundance of agricultural wastes, has been producing
mushrooms, mainly for the domestic market, for more than two decades.
Botanical Description
The vegetative mycelium is composed of many inter-woven sepatate hyphae. The reproductive phase is
initiated by the formation of small knob like swellings at different points of interwoven mycelial strands.
These swellings increase in size and break through the surface of the substratum as small balls constituting
the button stage. A matured basidiocarp (fruit body) is whitish in colour and consists of thick short stipe
with an annulus. The stipe supports the pileus which appears as a hat like expansion. On the underside of
the pileus, a number of radiating gills or lamella are present which are pink when young but purple-brown
when mature.
Economic Importance
Mushrooms are highly proteinaceous and are used as food. The white button mushroom is sold as fresh
mushroom or is canned and made into soups, sauces and other food products. Protein in mushrooms have
60-70 % digestibility and contains all the essential amino acids. It has medicinal properties also. A high
amount of retene is present in the button mushroom which is supposed to have an antagonistic effect on
some forms of tumours.

123
Agro-climatic Requirements
In Nepal, button mushrooms are grown seasonally and in environment controlled cropping houses. White
button mushroom requires 20-280 C for vegetative growth (spawn run) and 12-180 C for reproductive
growth. Besides that it requires relative humidity of 80-90% and enough ventilation during cropping.
Seasonally, it is grown during the winter months in the north-west plains of India and for 8-10 months in a
year on the hills. However, with the advent of modern cultivation technology it is now possible to cultivate
this mushroom anywhere in India.
The growers can take on an average 3-4 crops of white button mushrooms in a year depending upon the
type and varieties cultivated. Factors affecting the yield of the crop both in terms of quality and quantity
are incidence of pests/pathogens and non-availability of pure quality of spawn.
5.2 Growing and Potential Belts
The major producing states are Himachal Pradesh, Uttar Pradesh, Punjab, Haryana, Maharashtra, Andhra
Pradesh, Tamil Nadu and Karnataka.
5.3 Varieties / Strains
Ooty 1 and Ooty (BM) 2 (released in 2002) are the two strains of button mushrooms released for commercial
cultivation by the scientists of Horticulture Research Station of the Tamil Nadu Agricultural University at
Vijayanagaram, Ooty. The strains which are mostly cultivated in India are S-11, TM-79 and Horst H3..
5.4 Cultivation Technology
The whole process of mushroom production can be divided into the following steps:
(i) Spawn production
(ii) Compost preparation
(iii) Spawning
(iv) Spawn running
(v) Casing
(vi) Fruiting
5.4.1 Spawn Production
Spawn is produced from fruiting culture / stocks of selected strains of mushrooms under sterile conditions.
Stock culture may be produced in the lab or may be obtained from other reputed sources. Fruiting culture
is mainly imported from various places including foreign sources which give higher yield than Indian strains

124
and the spawn is produced in the lab. The spawn should be of good quality in terms of flavour, texture and
size apart from having potential for high yield and longer shelf life.
5.4.2 Compost Preparation
The substrate on which button mushroom grows is mainly prepared from a mixture of plant wastes (cereal
straw/ sugarcane bagasse etc.), salts (urea , superphosphate / gypsum etc), supplements (rice bran/ wheat
bran) and water. In order to produce 1 kg.of mushroom, 220 g. of dry substrate materials are required. It is
recommended that each ton of compost should contain 6.6 kg. nitrogen, 2.0 kg. phosphate and 5.0 kg. of
potassium (N:P:K- 33: 10:25) which would get converted into 1.98% N, 0.62% P and 1.5% K on a dry
weight basis. The ratio of C: N in a good substrate should be 25-30 : 1 at the time of staking and 16-17 : 1
in the case of final compost.
(A) Short Method of composting
During the first phase of compost preparation, paddy straw is placed in layers and sufficient water is added
to the stack along with fertilizers, wheat bran, molasses etc. The whole thing is mixed thoroughly with the
straw and made into a stack (almost 5feet high,5 feet wide and of any length can be made with the help of
wooden boards). The stack is turned and again watered on the second day. On the fourth day the stack is
again turned for the second time by adding gypsum and watered. The third and final turning is given on the
twelveth day when the colour of the compost changes into dark brown and it starts emitting a strong smell
of ammonia.
The second phase is the pasteurization phase .The compost prepared as a result of microbe mediated
fermentation process needs to be pasteurized in order to kill undesirable microbes and competitors and to
convert ammonia into microbial protein.The whole process is carried out inside a steaming room where an
air temperature of 600 C is maintained for 4 hours. The compost finally obtained should be granular in
structure with 70% moisture content and pH 7.5. It should have a dark brown colour, sweet unobnoxious
smell and free from ammonia, insects and nematodes. After the process is complete, the substrate is cooled
down to 250 C.
(B) Long Method of composting
The long method of composting is usually practiced in areas where facilities for steam pasteurization is not
available. In this method, the first turning is given about six days after preparation of the substrate for
composting. The second turning is given on the tenth day followed by third one on the thirteenth day when
gypsum is added. The fourth, fifth and sixth turnings are given on the sixteenth, nineteenth and twenty-
second day. On the twenty-fifth day the seventh turning is given by adding 10% BHC (125 g.) and the
eighth turning is given on the twenty-eighth day after which it is checked whether there is any smell of
125
ammonia present in the compost. The compost is ready for spawning only if it doesn’t have any smell of
ammonia; otherwise a few more turnings are given at an interval of three days till there is no smell of
ammonia.
5.4.3 Spawning
The process of mixing spawn with compost is called spawning. The different methods followed for spawning
are given below:
(i) Spot Spawning: Lumps of spawn are planted in 5 cm. deep holes made in the compost at a
distance of 20-25 cm. The holes are later covered with compost.
(ii) Surface Spawning: The spawn is evenly spread in the top layer of the compost and then mixed
to a depth of 3-5 cm. The top portion is covered with a thin layer of compost.
(iii) Layer Spawning: About 3-4 layers of spawn mixed with compost are prepared which is again
covered with a thin layer of compost like in surface spawning.
The spawn is mixed through the whole mass of compost at the rate of 7.5 ml./ kg. compost or 500 to 750 g./
100 kg. compost (0.5 to 0.75%).
5.4.4 Spawn Running
After the spawning process is over, the compost is filled in polythene bags(90x90 cm., 150 gauge thick
having a capacity of 20-25 kg. per bag)/ trays(mostly wooden trays 1x1/2 m. accommodating 20-30 kg.
compost) / shelves which are either covered with a newspaper sheet or polythene. The fungal bodies grow
out from the spawn and take about two weeks (12-14 days) to colonise. The temperature maintained in
cropping room is 23 ± 20 C. Higher temperature is detrimental for growth of the spawn and any temperature
below than that specified for the purpose would result in slower spawn run. The relative humidity should
be around 90% and a higher than normal CO2 concentration would be beneficial.
5.4.5 Casing
The compost beds after complete spawn run should be covered with a layer of soil (casing) about 3-4 cm.
thick to induce fruiting. The casing material should be having high porosity, water holding capacity and the
pH should range between 7-7.5. Peat moss which is considered to be the best casing material is not available
in India, as such the mixtures like garden loam soil and sand (4:1); decomposed cowdung and loam soil
(1:1) and spent compost (2-3 years old); sand and lime are commonly used.
The casing soil before application should be either pasteurized (at 66-700 C for 7-8 hours), treated with
formaldehyde (2%), formaldehyde (2%) and bavistin (75 ppm.) or steam sterilized. The treatment needs to
be done at least 15 days before the material is used for casing. After casing is done the temperature of the
room is again maintained at 23-280 C and relative humidity of 85-90% for another 8-10 days. Low CO2
concentration is favourable for reproductive growth at this stage.
Fruiting
Under favourable environmental conditions viz. temperature (initially 23 ± 20 C for about a week and then
16 ± 20 C ), moisture (2-3 light sprays per day for moistening the casing layer), humidity( above 85%),
proper ventilation and CO2 concentration (0.08-0.15 %) the fruit body initials which appear in the form of
pin heads start growing and gradually develop into button stage.

126
Pest & Diseases
The insect pests mostly observed are nematodes, mites and springtails.
The crop is suspect to several diseases like Dry Bubble (brown spot), Wet Bubble (White Mould), Cobweb,
Green Mould, False truffle (Truffle disease), Olive green mould, Brown plaster mould and Bacterial blotch.
Professional help and extension advice will have to sought by the entrepreneur to adopt appropriate and
timely control measures against pests & diseases.
Harvesting and Yield
Harvesting is done at button stage and caps measuring 2.5 to 4 cm. across and closed are ideal for the
purpose. The first crop appears about three weeks after casing. Mushrooms need to be harvested by light
twisting without disturbing the casing soil. Once the harvesting is complete, the gaps in the beds should
be filled with fresh sterilized casing material and then watered.
About 10-14 kg. fresh mushrooms per 100 kg. fresh compost can be obtained in two months crop. Short
method used for preparation of compost under natural conditions gives more yield (15-20 kg. per 100 kg.
compost).
POST HARVEST MANAGEMENT
Packing and Storage
(A) Short Term Storage
Button mushrooms are highly perishable. Harvested mushrooms are cut at the soil line and washed in a
solution of 5g. KMS in 10L. of water for removing the soil particles as well as to induce whiteness. After
removing excess water these are packed in perforated poly bags each containing around 250-500 g. of
mushrooms. They can be stored in polythene bags at 4-50 C for a short period of 3-4 days.
The mushrooms are usually packed in unlabelled simple polythene or polypropylene for retail sale. Bulk
packaging does not exist. In developed countries, modified atmosphere packaging (MAP) and controlled
atmosphere packaging (CAP) are in vogue.
(B) Long Term Storage
White button mushrooms are not usually dried by common procedures used in case of oyster, paddy and
shitake mushrooms. Canning is the most popular method of preserving the white button mushrooms and
sizeable quantity of canned produce are exported to international markets. Besides that, freeze drying,
IQF and pickling are also practiced by some units.
Paddy straw mushroom(Volvariella volvacea),
commonly known as the straw mushroom, or the Chinese mushroom,belongs to the family Pluteaceae (Kotl.
& Pouz) of the Basidiomycetes (Singer, 1961). It is an edible mushroom of tropics and subtropics, and first
cultivated in China in 1822 (Chang, 1969). Initially this mushroom was known as “Nanhua mushroom”
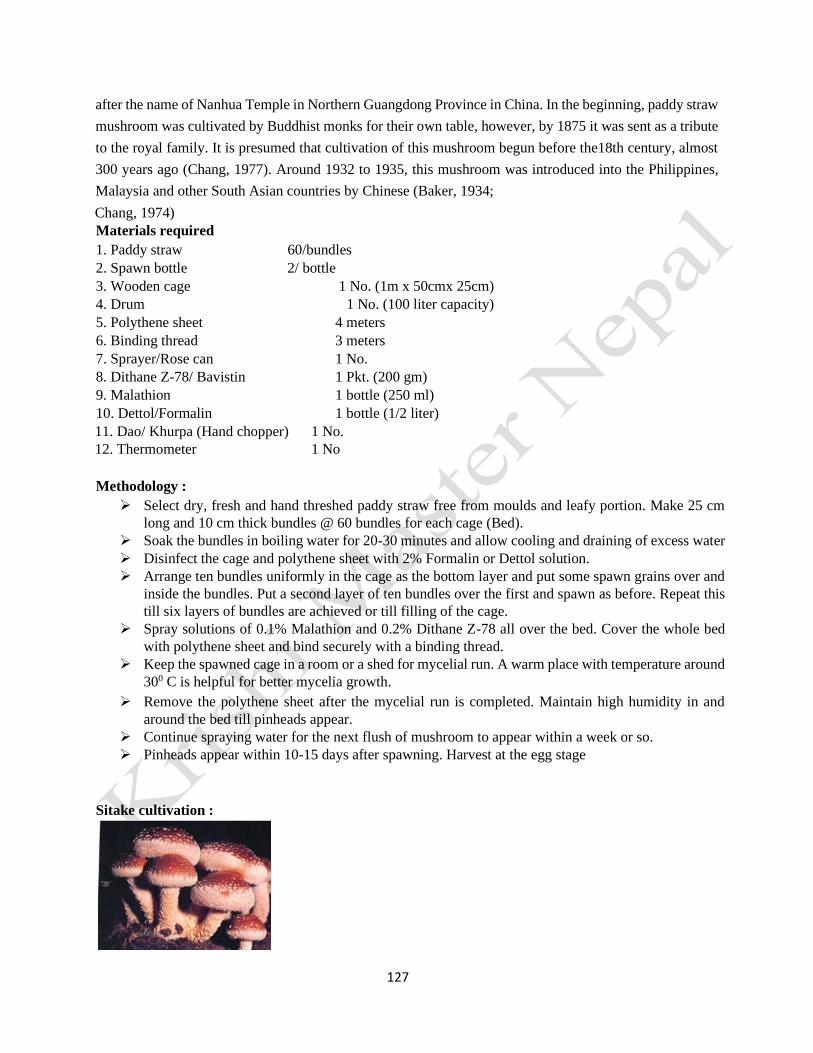
127
after the name of Nanhua Temple in Northern Guangdong Province in China. In the beginning, paddy straw
mushroom was cultivated by Buddhist monks for their own table, however, by 1875 it was sent as a tribute
to the royal family. It is presumed that cultivation of this mushroom begun before the18th century, almost
300 years ago (Chang, 1977). Around 1932 to 1935, this mushroom was introduced into the Philippines,
Malaysia and other South Asian countries by Chinese (Baker, 1934;
Chang, 1974)
Materials required
1. Paddy straw 60/bundles
2. Spawn bottle 2/ bottle
3. Wooden cage 1 No. (1m x 50cmx 25cm)
4. Drum 1 No. (100 liter capacity)
5. Polythene sheet 4 meters
6. Binding thread 3 meters
7. Sprayer/Rose can 1 No.
8. Dithane Z-78/ Bavistin 1 Pkt. (200 gm)
9. Malathion 1 bottle (250 ml)
10. Dettol/Formalin 1 bottle (1/2 liter)
11. Dao/ Khurpa (Hand chopper) 1 No.
12. Thermometer 1 No
Methodology :
➢ Select dry, fresh and hand threshed paddy straw free from moulds and leafy portion. Make 25 cm
long and 10 cm thick bundles @ 60 bundles for each cage (Bed).
➢ Soak the bundles in boiling water for 20-30 minutes and allow cooling and draining of excess water
➢ Disinfect the cage and polythene sheet with 2% Formalin or Dettol solution.
➢ Arrange ten bundles uniformly in the cage as the bottom layer and put some spawn grains over and
inside the bundles. Put a second layer of ten bundles over the first and spawn as before. Repeat this
till six layers of bundles are achieved or till filling of the cage.
➢ Spray solutions of 0.1% Malathion and 0.2% Dithane Z-78 all over the bed. Cover the whole bed
with polythene sheet and bind securely with a binding thread.
➢ Keep the spawned cage in a room or a shed for mycelial run. A warm place with temperature around
300 C is helpful for better mycelia growth.
➢ Remove the polythene sheet after the mycelial run is completed. Maintain high humidity in and
around the bed till pinheads appear.
➢ Continue spraying water for the next flush of mushroom to appear within a week or so.
➢ Pinheads appear within 10-15 days after spawning. Harvest at the egg stage
Sitake cultivation :
128
Shiitake Form: fleshy convex cap, slightly tough stalk,
Color: light to dark brown cap, creamy white gills, light brown stem
Best grown on: hardwoods like Kattus, uttis, Gurans, oak, maple, ironwood
Spawn form available: plug, grain, sawdust
Average size at harvest: 3-6 inch diameter cap, 2-4 inch stalk
Odor/flavor: robust, earthy
BACKGROUND:
The origins of Shiitake cultivation have been traced back thousands of years to Japan. People often found
these mushrooms growing on downed 'shii' trees (this is where the mushroom got its name). People would
take the mushroom- clad logs, place them next to logs without mushrooms and simply wait for the wind to
disperse the spores. Thankfully since then, alot of research in Japan and China has gone into
Shiitakegrowing techniques, and we don't have to wait for the wind anymore. In fact, Shiitake is the second
most produced mushroom in the world, following the common button mushroom. Choosing a Laying
Yard
Before you begin, think about where you are going to keep all the logs once they are inoculated with
mushroom spawn. This will become the ̳laying yard‘: the place where the logs are incubated and routine
―maintenanceǁ is performed. The logs usually remain in the laying yard for the rest of their productive
lifetime, which includes both fruiting and harvest.
Year-round shade (60-100%) and high humidity Almost nothing is more important that laying (incubating)
the logs under year round shade in order to keep the logs from drying out due to sun and wind.
Access and Relative Location
Ideally the laying yard should be assessable by a vehicle or tractor and close to your home/farm. You should
also consider its proximity to electric (necessary to inoculate the logs) and water (necessary to irrigate and
soak the logs).
Proximity to Water and Water Source
A water source is necessary for forced fruiting (shocking) as well as for maintaining a threshold moisture
level in the logs. Take into consideration how close and convenient each possible water source is. Other
important aspects
When to Cut the Tree Down
Mushroom growers who are forest owners (or have a working relationship with forest owners) should
establish a management plan for their woodlot and have training in the safe use of a chainsaw. Only living
trees should be cut down. It is important to have fresh logs for inoculation because they have a high moisture
content, little or no competing wild fungi, which are two important factors for successful mushroom
cultivation. If you are cutting your own trees, it is best done November to February
Optimal Size of Logs/Bolts
Logs are typically 4-6 inches in diameter. Larger logs can be used but they are obviously more difficult to
manage. This diameter range was chosen because it optimizes the amount of sapwood per volume of log.
The sapwood is the primary part of the log that the fungi will colonize. Length is not as pertinent as diameter
for health of the fungi, but a 3 to 4 foot long is manageable for transport and individuals to carry.

129
WHEN TO INOCULATE...
We recommend that the logs be stored between three to six weeks before being inoculated. Do not store
bolts in the sun. If a log is cut and left to sit for an extended period of time before inoculation other species
of fungi can invade the log or log can dry out.
WHAT TYPE OF SPAWN TO USE
Bolts can be inoculated with sawdust spawn or of plug spawn. There are advantages and disadvantages to
each. Plug spawn is very simple to use the only tool needed is a hammer or mallet. The drawbacks are that
plug spawn is slightly more expensive per log than sawdust spawn, and the mycelium may take a while to
migrate out from the plug spawn. Sawdust spawn is slightly cheaper than plug spawn, but it requires a
special tool, either purchased or home made, to insert the sawdust in the hole. In addition to its lower cost,
the mycelium contained in sawdust spawn moves out into the log more quickly, giving somewhat faster
production. Other than that, the methods are the same between inoculating logs with plug spawn and with
sawdust spawn.
THE INOCULATION METHOD
➢ Drill holes, 1cm diameter, 2cm deep, every 4 inches along the log. Rotate log and repeat. To create
a diamond pattern, shift the 2 inch down along the guide for every other row. Typically 1 row of
holes is drilled for every inch of log diameter.
➢ Place a plug spawn in each drilled hole and hammer it into the log. Each plug should lie just below
flush with the log surface.
Fruiting Shiitakes
In a natural production model, growers do not do anything to the mushroom logs to make them fruit. Logs
are left to fruit naturally, flushing either when there is heavy rainfall or when a temperature change
encourages fruiting. In a forced production model, growers control when logs fruit. Logs may sometimes
also fruit naturally, (in fact, heavy rain can knock produc-tion schedule way out of whack) but the majority
of harvests are induced according to a preplanned log rotation schedule. Because yields can be predicted
and kept relatively constant in this model, it has greater retail potential.
SHOCKING
Shocking, or forcing, is the process used to force mycelium into fruiting body (mushroom) production.
Soaking logs in cold water for an extended period of time is most typical means to induce fruiting. Place
the logs in the coldest water you have available. Because temperature adjustment is not practical, we
recommend a fast moving stream or tank kept out of sun. Leave the logs submerged in the water for 24-48
hours. The remove the logs from the water and stack them in an A frame conducive to the upcoming harvest.
In 3 –5 days, the log will begin pinning, or sending up the beginnings of mushrooms. These will grow and
develop into full-sized shiitake mushrooms.
130
HOW OFTEN TO SHOCK
After fruiting, logs need to be rested for 6 -8 weeks before being forced again. The more often the logs are
shocked, the shorter their lifetime is likely to be. We recommend only shocking once during first production
year, then twice during year second and third. Logs should be stacked in the laying yard so they are easily
identified in order to establish a schedule for shocking and harvesting. This plan should take into account
the number of times each log will be forced a season, when logs will be forced, how logs will move through
the laying yard, when mushrooms are needed, when the plan predicts mushrooms will be available, and
when logs will be retired at the end of their lifetime.
Stacking Logs
CRIB STACK (RICK STACK)
Crib stacks are simple and quick to make. First four to five logs are laid down on a flat surface, then four
to five logs are placed on top of them in the opposite direction; the pattern is continued for about five levels.
Crib stacks are a very space efficient way to keep logs as they make use of vertical space, compactly storing
large numbers of logs. This stacking method is excellent for the spawn run period.
HIGH A-FRAMEA high
A-frame consists of logs leaning upright on one or two sides against a supporting beam, such as a cut sapling
lashed horizontally onto two trees or a taut wire. This stacking method works well for the fruiting and
harvest stages. Logs are well aerated, mushrooms are easily visible, and picking is easy as there is maximum
access to each log. Because the log is vertical, slug damage to mushrooms may be less than when logs are
fruiting closer to the ground. Because logs stacked in A-frames take up a lot of space in a laying yard, they
are usually not left on the A-frame for any other part of the process; this is especially true for a forced
production model
WHEN AND HOW TO HARVEST
It is not the size of the mushroom that determines when it is picked, but its growth progress. Gills should
be visible and the outer edge of the mushroom should be slightly curled under, but not tightly so. If the edge
has flattened out, the mushroom is slightly over ripe, but still edible. Shiitake are usually ready 7 -10 days
after shocking; colder temperatures will slow growth and ideal conditions will make it more rapid. Using a
knife is quick, easy, and ensures a clean cut on the stem. It also does not rip or damage any bark
3.1.4 Poisonous mushroom available in Nepal
While talking of the wild edible species it encounters around 147 species and the poisonous species are
recently recorded to reach near about 100 species (Adhikari 2008c; Adhikari et al. 2008, 2012). The
medicinal are 73 species (Adhikari 2008a), while 20 species can be utilized in decoration.
The daily consumption of wild mushrooms is found in tropical forest areas, midlands, the temperate and
subalpine region of Nepal, where the local inhabitants dwell near by the forest (Adhikari & Adhikari 1996-
97, 2000). The high consumption is found in temperate region in comparison to others. This
mishappening always occurs in the areas where there is nearness to forest and or scarcity of food. But till
now the amount of collection and consumption is unknown. The mortality rate due to the consumption of
wild mushrooms encircles around 20 to 25 persons annually, where there is poor facility of prompt

131
communication and first aid services. The collectors are mostly traditional mycophagous society, herds of
animals or wood collectors, which age between 10 to 45 years. Among them infants and old age persons
are the victims. Their necessity to earn money for livelihood and serve hand to mouth invites the fatal cases.
They are illiterate and ignorant to differentiate between edible and poisonous ones (Adhikari 2004).
MUSHROOM POISONING
Mushroom poisoning refers to deleterious effects from ingestion of toxic substances present in a mushroom.
The toxins present are secondary metabolites produced in specific biochemical pathways in the fungal cell.
Mushroom poisoning usually results from ingestion of wild mushrooms due to misidentification of a toxic
mushroom as an edible species bearing very close resemblance, deliberate seeking of psychotropic
mushrooms and accidental childhood ingestions. It is also found as a result of small children, especially
toddlers in the ‘grazing’ stage ingesting mushrooms found in the lawn. “Magic” mushrooms are
intentionally taken by adolescents for their hallucinogenic effects. Majority of fatal poisoning worldwide
are attributable to the Amanita Phalloides mushroom – appropriately named “death cap”;other dangerous
species of mushrooms are Amanita verna, Amanita virosa, Gyromitra, Gallerina and Lepiotaspecies – all
of which contain amatoxin, a potent cytotoxin. Ingestion of even a portion of one mushroom of a dangerous
species may be sufficient to cause death. Major types of
mushroom poisoning are-
1. Toxin causing cellular destruction, liver and kidney damage and death
Group I- ‘Amanitin’
Group II- ‘Monomethylhydrazine’
Group III- ‘Orellanine’
2. Toxin affecting autonomous nervous system
Group IV- ‘Coprine’
Group V- ‘Muscarine’
3. Toxin affecting central nervous system
Group VI- ‘Ibotenic acid, Muscimol’
Group VII- ‘Psilocybin, psilocin’
4. Toxin causing gastrointestinal irritants
Group VIII- ‘Gastrointestinal irritants’
SOME OF THE POISONOUS MUSHROOMS OF NEPAL
1. Amanita concentrica
Classification:

132
Kingdom: Fungi
Phylum: Basidiomycota
Class: Agaricomycetes
Order: Agaricales
Family: Amanitaceae
Genus: Amanita
Species: concentrica
Characteristics:
• The convex cap is up to 80 (or more) mm wide, white to cream with its center tending to become some
what tan.
• The margin is slightly striate and usually non appendiculate, although pieces of the annulus may be left
there in some specimens.
• The volval warts on the pileus are white often pyramidal; in age their tips become brownish.
• The gills are white to yellowish white with a minutely fibrillose edge.
• The stipe is about 80 × 7 mm, slender, narrowing upward, white, covered with flocculence above which is
creamy white at first.
• The spores are (7.0-) 7.2 – 10.8 (-15.5) × (5.8-) 6.5 – 9.5 (-11.0) µm and are subglobose to broadly ellipsoid
and in amyloid.
2. Amanita muscaria (Fly mushroom, fly amanita, sacred mushroom)
Classification:
Kingdom: Fungi
Phylum: Basidiomycota
Class: Agaricomycetes
Order: Agaricales
Family: Amanitaceae
Genus: Amanita
Species: muscaria

133
Characteristics:
• Cap:5-25 cm diameter, globose at first, later becomes flattened, blood-red, red-orange, oftenfading to straw-
yelow, may be darker at center, lighter towards margin, covered with numerous whitish, polygonal,
soft warts arranged randomly or in concentric rings
• Gills:free to adnexed or just touching the stipe, white, sometimes turning lemon yellow, closed, broad
• Stipe:5-18 cm in height, 0.3-3 cm thick, equal or tapering upward from bulbose base, white to cream-
white, smooth or scaly below ring, basal bulb ovoid, clavate, whitish to dirty white
• Flesh: slightly hard but friable, white, red under cap cuticle, taste mild, nutty
• Spore: 8-13*6-9μm, subglobose to broadly ellipsoid, smooth, colourless
• Spore print: white
• Habitat: solitary or gregarious, sometimes in a circular groups known as fairy rings, usually found under
hardwoods or conifers
• Toxin: ‘Amatoxin’
3. Amanita phalloides (Death cap mushroom)
Classification:
Kingdom: Fungi
Phylum: Basidiomycota
Class: Agaricomycetes
Order: Agaricales
Family: Amanitaceae Genus:
Amanita
Species: phalloides

134
Characteristics:
• Cap:The young caps are close to hemispherical in shape but then flatten as they expand. When fully open
they are gently curved and smooth. The colour is usually yellowish green, but may sometimes be olive to
light brown. The cap is slightly sticky in wet weather but dry and shiny in dry weather.
• Gills: The gills don’t reach the stem, but come close.
• Stipe:The stem is white and from 5 to 15 centimetres long and 1 to 2 centimetres in diameter. The base of
the stem is bulbous (up to 4 centimetres in diameter) and is contained within a cup-like structure (called a
volva). Sometimes the bulbous base and the volva will be partially buried in the soil or hidden by
grasses and leaf litter. Occasionally the volva is poorly developed.
• Flesh: soft, white, moderately thick at disc, taste is mild and nuty
• Spore: 7-12*6-9μm, subglobose to broadly ellipsoid, smooth, colourless
• Spore print: white
• Habitat: gregarious on ground under trees
• Toxin: ‘Amatoxin’
4. Amanita pantherina
Classification:
Kingdom: Fungi
Phylum: Basidiomycota
Class: Agaricomycetes
Order: Agaricales
Family: Amanitaceae
Genus: Amanita
Species: pantherina
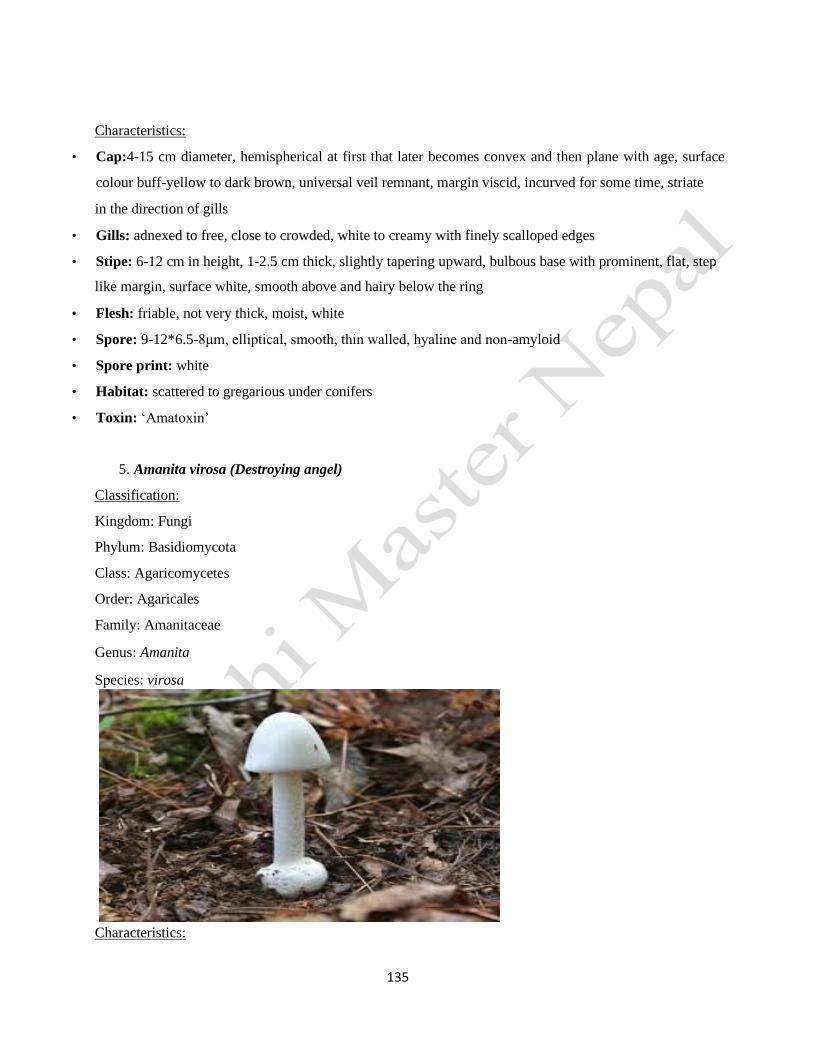
135
Characteristics:
• Cap:4-15 cm diameter, hemispherical at first that later becomes convex and then plane with age, surface
colour buff-yellow to dark brown, universal veil remnant, margin viscid, incurved for some time, striate
in the direction of gills
• Gills: adnexed to free, close to crowded, white to creamy with finely scalloped edges
• Stipe: 6-12 cm in height, 1-2.5 cm thick, slightly tapering upward, bulbous base with prominent, flat, step
like margin, surface white, smooth above and hairy below the ring
• Flesh: friable, not very thick, moist, white
• Spore: 9-12*6.5-8μm, elliptical, smooth, thin walled, hyaline and non-amyloid
• Spore print: white
• Habitat: scattered to gregarious under conifers
• Toxin: ‘Amatoxin’
5. Amanita virosa (Destroying angel)
Classification:
Kingdom: Fungi
Phylum: Basidiomycota
Class: Agaricomycetes
Order: Agaricales
Family: Amanitaceae
Genus: Amanita
Species: virosa
Characteristics:

136
• Cap: 5-10 cm in diameter, pure white and without any marginal striations. The cap is initially egg shaped.
• Gills: white, free and crowded.
• Stipe: 9-15cm tall, 0.6-2 cm diameter, and often slightly curved, volva usually buried in deep soil.
• Spores: spherical or subglobose, 7-8 μm in diameter.
• Spore print: white
• Habitat: found in edges of deciduous woodland
• Toxin: ‘Amatoxin’
6. Cortinairus gentilis
Classification:
Kingdom: Fungi
Phylum: Basidiomycota
Class: Basidomycetes
Order: Agaricales
Family: Cortinariaceae
Genus: Cortinairus
Species: gentilis
Characteristics:
• Cap:5-5 cm in diameter, conical to hemispherical at first becoming broadly bell shaped, surface smooth
to radially covered fine soft hairs, margin acute, in-curved
• Gills: attached, broad, yellowish, turning brown with age
• Stipe:5-7.5 cm in height, 3-5 cm thick, almost equal, slightly enlarge base, yellow to orange brown with
an annular zone, browning base
• Flesh: thin, yellow, taste mild.
• Spore: 7-9*5.5-7μm, broadly elliptical, slightly rounded, light brown
• Spore print: rust brown
• Habitat: solitary to few in a group, found at high altitudes
• Toxin: ‘Orellanine’
7. Galerina marginata
Classification:
Kingdom: Fungi

137
Phylum: Basidiomycota
Class: Agaricomycetes
Order: Agaricales
Family: Cortinariceae
Genus: Galerina
Species: marginata
Characteristics:
• Cap:5-2.5 cm in diameter, hemispherical when young, convex to plane later, surface moist, viscid, rusty
brown at first, fading to honey yellow towards edge, pale buff when dry
• Gill: broadly adnate, narrow, crowded, pale brown at first, later turn rusty
• Stipe: 2-7 cm in height, 2-7 mm thick, often curved, buff at apex with white powdery covering darker
towards the base
• Flesh: pale yellow-brown to pallid, thin
• Spores: 8-15*5-7.5μm, verruculose, ellipsoidal with rounded ends, almost almond shaped
• Spore print: rust brown
• Habitat: gregarious to clustered on stumps, trunks and wood of conifers
• Toxin: ‘Amatoxin’
8. Gyromitra esculenta (False morel, Brain
mushroom, Beefstake morel) Classification:
Kingdom: Fungi
Phylum: Ascomycota
Class: Ascomycetes
Order: Pezizales
Family: Discinaceae
Genus: Gyromitra
Species: esculenta
Characteristics:
• Cap: 5-19 cm tall, 5-11 cm broad, semi-globose, brain-like, inconspicuously, lobed, brittle, odour and
taste not distinctive.
• Stipe: 3-6 cm long, 1-3 cm thick, hollow, round to compressed, sometimes grooved or with basal folds.
• Spores: 8-23*9-12 μm, ellipsoidal, smooth, with two oil droplets
• Spore print: pale-yellowish

138
• Habitat: solitary, scattered to gregarious under conifers, occasionally under hardwoods
• Toxin: ‘Monomethylhydrazine’
9. Amanita verna Phylum : Basidomycota class:
Basidiomycetes order: Agaricales family: Pluteaceae Genus
: Amanita
Species: verna
Common Name : European springtime destroying Angel
Habitat
Solitary to gregarious. Found in hardwood forests. Fruiting from spring to autumn.
Description
PILEUS (cap) 3-10 cm diameter. Ovoid to hemispherical at first becoming convex to plane, sometimes with
a slightly depressed center. Surface radially fibrillose to smooth, viscid in humid weather, glossy in dry
weather and white to pale cream. Margin thin and even. Rarely some remnants of the universal veil could
be present on the pileus.Lamella (gills): free, white, close with numerous intermediate lamella. Stipe (stem):
12 cm in height, 1-1.5 cm thick. Thin, somewhat tapered towards the apex with a bulbous ovoid base.
White, with or without streaks. Striate above the annulus, smooth to finely a ppressed floccose powdery
below, but not fluffy. Stuffed when young, becoming hollow with age.
Volva: (basal sac) white turning cream with age, membranous, thin, tapering and enveloping the bulbous
base. Annulus(ring): white, membranous, fragile and often torn. Flesh: rather thin, firm and white.
Clinical
Effects&Treatment Dangerousness
Deadly poisonous
Toxin-Classification
GROUP 1 Amatoxins, delayed, cellular destruction
Toxins
Contains amatoxins and phallotoxins.
10. False Morel
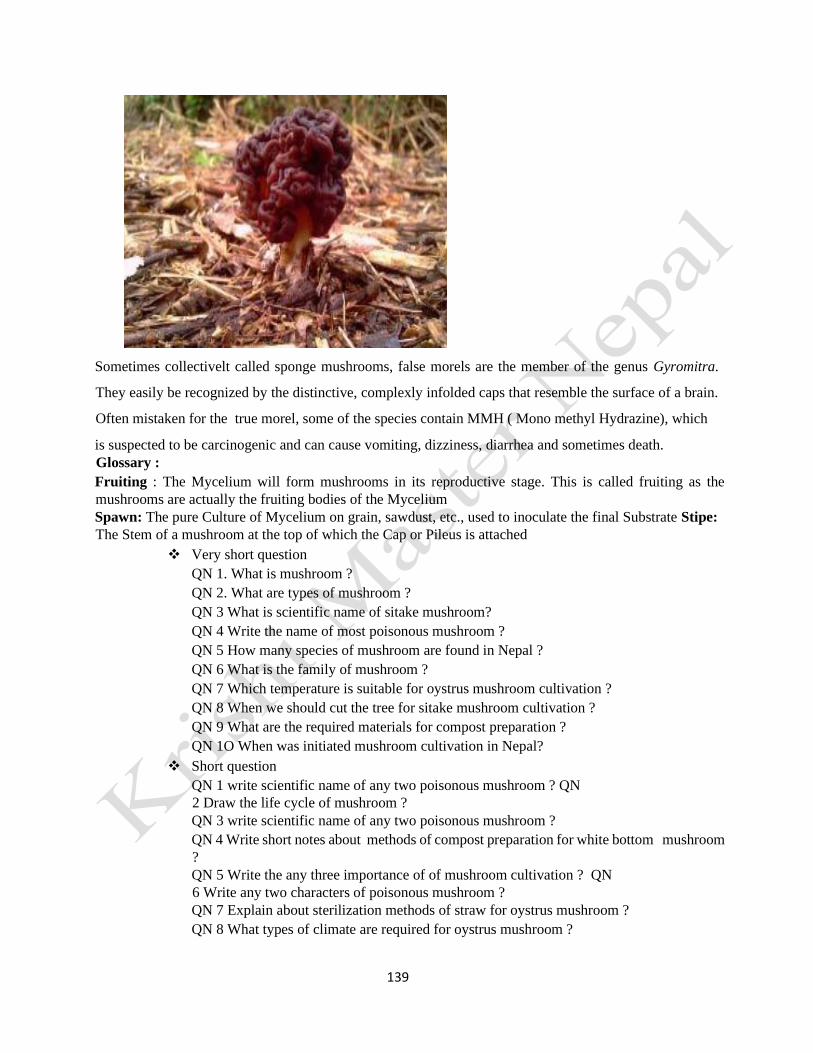
139
Sometimes collectivelt called sponge mushrooms, false morels are the member of the genus Gyromitra.
They easily be recognized by the distinctive, complexly infolded caps that resemble the surface of a brain.
Often mistaken for the true morel, some of the species contain MMH ( Mono methyl Hydrazine), which
is suspected to be carcinogenic and can cause vomiting, dizziness, diarrhea and sometimes death.
Glossary :
Fruiting : The Mycelium will form mushrooms in its reproductive stage. This is called fruiting as the
mushrooms are actually the fruiting bodies of the Mycelium
Spawn: The pure Culture of Mycelium on grain, sawdust, etc., used to inoculate the final Substrate Stipe:
The Stem of a mushroom at the top of which the Cap or Pileus is attached
❖ Very short question
QN 1. What is mushroom ?
QN 2. What are types of mushroom ?
QN 3 What is scientific name of sitake mushroom?
QN 4 Write the name of most poisonous mushroom ?
QN 5 How many species of mushroom are found in Nepal ?
QN 6 What is the family of mushroom ?
QN 7 Which temperature is suitable for oystrus mushroom cultivation ?
QN 8 When we should cut the tree for sitake mushroom cultivation ?
QN 9 What are the required materials for compost preparation ?
QN 1O When was initiated mushroom cultivation in Nepal?
❖ Short question
QN 1 write scientific name of any two poisonous mushroom ? QN
2 Draw the life cycle of mushroom ?
QN 3 write scientific name of any two poisonous mushroom ?
QN 4 Write short notes about methods of compost preparation for white bottom mushroom
?
QN 5 Write the any three importance of of mushroom cultivation ? QN
6 Write any two characters of poisonous mushroom ?
QN 7 Explain about sterilization methods of straw for oystrus mushroom ?
QN 8 What types of climate are required for oystrus mushroom ?

140
QN 9 what type of wood should be select for sitake mushroom with two examples ? QN
10 Write cultivation season for sitake and white bottom mushroom ?
❖ Long question
QN 1 What are the botanical classification of mushroom ? write down the importance and
scope of mushroom cultivation in Nepal ?
QN 2 Write down the different stage, life cycle of mushroom with clean sketch ?
QN 3 Detail explain about cultivation technique of oystrus mushroom ?
QN 4 What are the characters of poisonous mushroom ? write scientific name of any five
poisonous mushroom ?
QN 5 Detail explain about cultivation methodology of white bottom mushroom ? QN 6
How can you harvest oystrus mushroom ? Brief discussed about post harvest management
of mushroom ?
QN 7 write down the nutritive and medicinal value of mushroom ?
REFERENCES
➢ Adhikari, K.S. and M.K. Adhikari 1996-1997. Collection and consumption of wild edible
mushrooms sold in Kathmandu valley, Nepal. The Geographer’s
➢ Cultivation technology of paddy straw Mushroom (Volvariella volvacea)Technical Bulletin O.P.
Ahlawat & R.P. Tewari
➢ Mushroom Growers Handbook , Mushroom cultivation to make living in nepal, Keshari Lal.
Manandhar Centre for Agricultural Technology, Nepal
➢ National Centre for Mushroom, Chambaghat, Solan, Himachal Pradesh
➢ Plant Pathology Division, Dr. Yashwant Singh Parmar, University of Horticulture & Forestry,
Solan, Nauni Himachal Pradesh
➢ poisonous mushroom available in Nepal power point presentation santosh pathak iaas lamjung