genuis tvgo a03
TRANSCRIPT

English
1
Chapter 1: Introduction
1.1 Package Contents Upon receiving your TVGo A03, please make sure the following items are included in the USB TV Super Mini package. • TVGo A03 • Driver CD • Remote Control • Quick Guide • Video & Audio in connecter
1.2 System Requirements • IBM PC or compatible • Intel Pentium 4 2.4GB MHz CPU or better processor • Minimum 128 MB memory (256MB is better) • Minimum 100 MB hard disk space available • VGA and with DirectDraw driver supporting 16 bit color or higher • One free USB2.0 / 1.1 slot • Microsoft Windows 2000 or XP • CD-ROM drive
English
2
Chapter 2: Getting Started
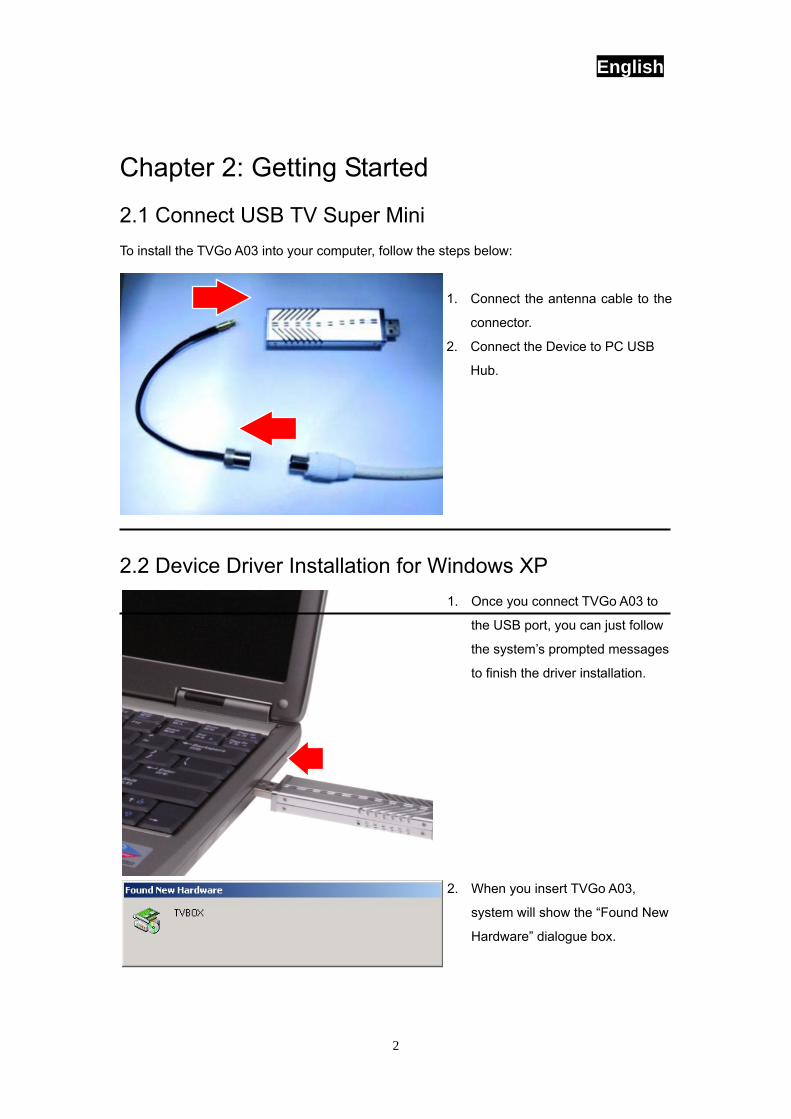
2.1 Connect USB TV Super Mini To install the TVGo A03 into your computer, follow the steps below:
1. Connect the antenna cable to the
connector.
2. Connect the Device to PC USB
Hub.
2.2 Device Driver Installation for Windows XP
1. Once you connect TVGo A03 to
the USB port, you can just follow
the system’s prompted messages
to finish the driver installation.
2. When you insert TVGo A03,
system will show the “Found New
Hardware” dialogue box.

English
3
3. Click “Next” to start installation.
4. Select “Search for a suitable
driver for my device
[recommended]” and click “Next”.
5. Select “CD-ROM driver” and click
“Next” button to search driver.

English
4
6. Click “Next” to continue the
installation.
7. Click “Finish” to complete the
driver install. Check your
driver ”TVGo A03” from Device
Manager after installation.
2.3 Install TVGo A03 utility software.
1. Click “Next” button to start installing.

English
5
2. Please read the License Agreement
and click “Next” to begin copying
files.
3. Click “Next” or choose setup folder
for installation.
4. Then click “Finish” to complete the
installation of TVGo A03 and “Start”,
“Shut Down”, “Restart” to restart
your computer.

English
6
English
7
Chapter 3: Launch the Software
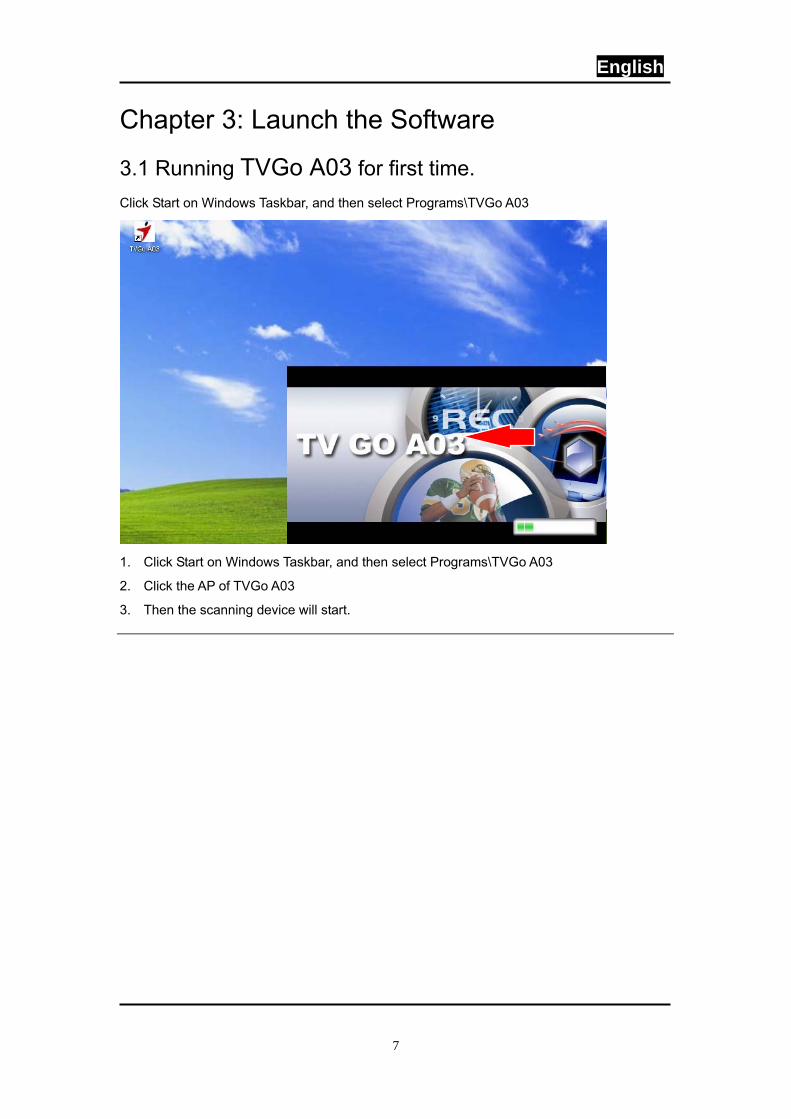
3.1 Running TVGo A03 for first time. Click Start on Windows Taskbar, and then select Programs\TVGo A03
1. Click Start on Windows Taskbar, and then select Programs\TVGo A03
2. Click the AP of TVGo A03
3. Then the scanning device will start.
English
8
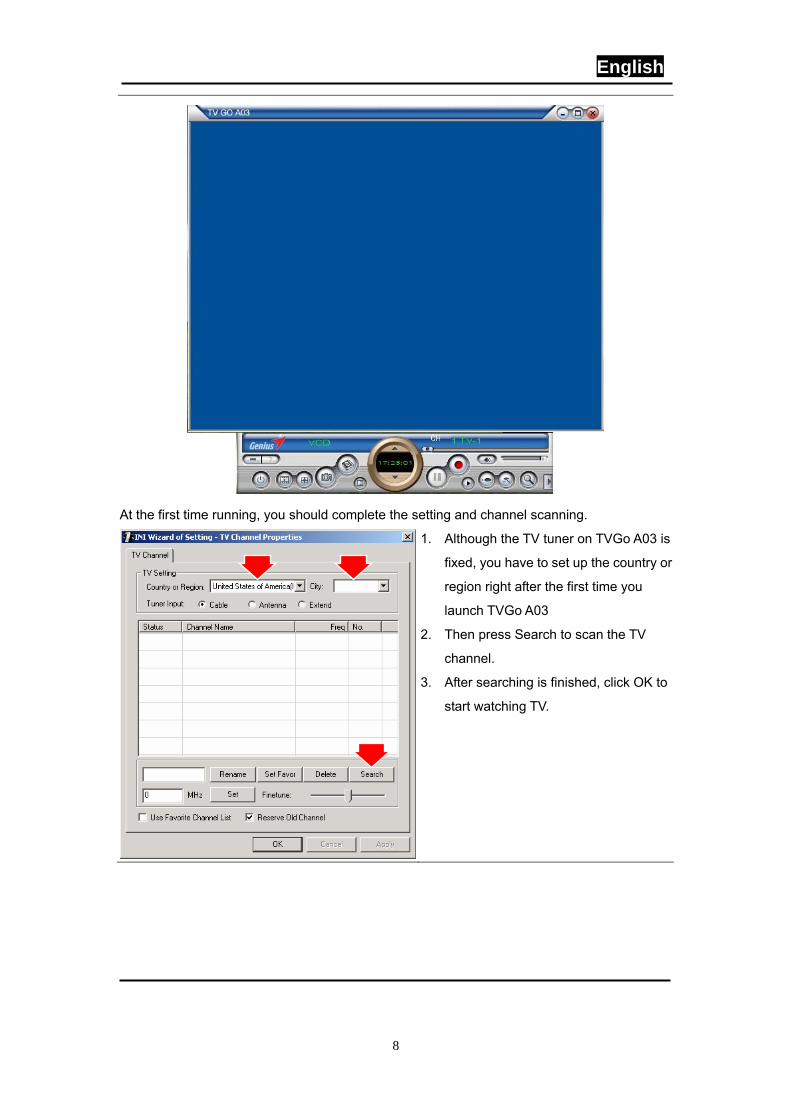
At the first time running, you should complete the setting and channel scanning.
1. Although the TV tuner on TVGo A03 is
fixed, you have to set up the country or
region right after the first time you
launch TVGo A03
2. Then press Search to scan the TV
channel.
3. After searching is finished, click OK to
start watching TV.

English
9
3.2 Watch TV or VCR
1. TV wall display: Show 4x4 TV wall on screen
2. Channel List: This is listing all available TV channel.
3. Channel control: Set channel up or down
4. Volume control: Adjust the Volume or mute.
5. Search TV channel: Click to search available TV channel.
6. Double click to full screen display.
7.
3.3 Record Video Click “Record” button to start recording
video.
You can use the control panel or setting
table to set the video format. It can be
set to the following format.
1.TV wall display
2.Channel List
3.Channel Control
6. Double click to full screen display
4.Volume Control
5.Search TV Channel
English
10
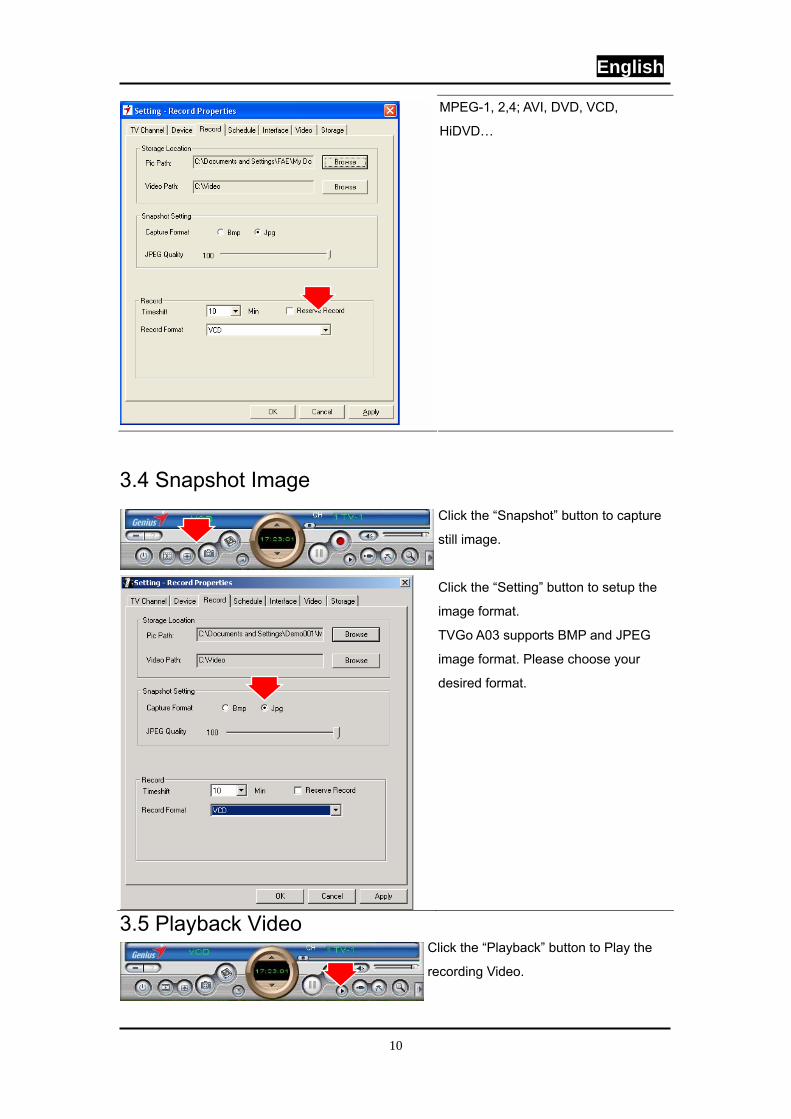
MPEG-1, 2,4; AVI, DVD, VCD,
HiDVD…
3.4 Snapshot Image Click the “Snapshot” button to capture
still image.
Click the “Setting” button to setup the
image format.
TVGo A03 supports BMP and JPEG
image format. Please choose your
desired format.
3.5 Playback Video Click the “Playback” button to Play the
recording Video.

English
11
Click “Play List” button to select video
file.
Choose the video then click “open”
button.
Exit: To exit the video playback window, press [Esc] or [ALT]+[F4] on keyboard
Minimize: To minimize the video playback window, click "MoviePlayer" in desktop taskbar to restore display
Hide Control Panel: To hide video control panel, right click video window and select "Control Panel" to restore display
Setting: Click to pop-up setting dialog, you can test the video playback; refer to "Playback Setting" page.
Browse Image: To launch image browse window and browse the snapshot or saved image in your computer, refer to "Image Browse" page
Step Backward: To reverse play video
Step Forward: To forward play video
Slow Backward: To slow reverse play video
Slow Forward: To slow forward play video file
Play/Pause: Click to play the current video file, click again to pause, click once more to continue play

English
12
Fast Backward: To fast reverse play video file
Fast Forward: To fast forward play video file
Mute: To close sound. Click again to restore.
Volume Adjust: Drag the slider to adjust volume, or use Left and Right arrow on keyboard
Stop Play: Stop playing current video file
Snapshot: Save current video as BMP or JPG image, file is default named as snapshot time and saved into C:\My Pictures folder. You also can open "Snap Setting" option in "Options" dialog, set snapshot save directory, image format, and select rename after snapshot or not, refer to "Playback Setting" page
Play List: Click to pop-up sub panel below main panel, the default list for the record file is under the record directory, from which you can select the needed item to play.
3.6 Browse Image Click the “Browse Image” to retrieve
the saved pictures.
You can use the “Browse Image”
software to control picture zoom in/out,
or rename.
The top toolbar contains many function buttons for you to easily operate:
Refresh: To renew display snapshot image in current folder.
Path Panel: Show/Hide path panel on left of window, which is for you to easily browse and select folder.
Image Panel: Show/Hide image panel on left of window, through which you can easily preview snapshot image.
Set Wallpaper: Set the current image as wallpaper for Windows desktop, click the right drop arrow and you can select the wallpaper display mode.

English
13
Skin: To set appearance of image browse window, you can select your favorite panel from the right drop box.
Zoom out: To shrink display current image
Zoom in: To magnify current image
Match Zoom: You can select the matched display mode in the right drop box. Full Size: Shows image at 100% magnification Fit Image: Magnifies image to fit screen or window Fit Width: Magnifies image to fit width of screen or window Fit Height: Magnifies image to fit height of screen or window Lock: Locks the viewer at the current magnifying level.