user guide
TRANSCRIPT

User Guide
931P
Capa_E_OI.indb 1 2009/07/28 10:11:06

Introduction
Thank you for purchasing SoftBank 931P.
● For proper handset use, read First Step Guide and User Guide (this guide).● Accessible services may vary by service area, subscription, etc.
SoftBank 931P is compatible with both 3G and GSM network technologies.
Note
● Unauthorized copying of any part of this guide is prohibited.● Guide content is subject to change without prior notice.● Efforts have been made to ensure the accuracy and clarity of this guide. Please contact SoftBank Mobile Customer
Center, General Information ( P.19-34) about unclear or missing information.
Capa_E_OI.indb 2 2009/07/28 10:11:06

i
Cont
ent
Sear
ch
Function/Service Name Search
Index P.19-27
Contents P.vi
Objective SearchObjective Search P.ii
Index P.19-27
Function SearchOverview P.iv
Contents P.vi
Using Your Handset
Function List P.19-2
Display P.1-10
Guide Organization
Contents P.vi
Section Contents Chapter Top Pages
Solving Problems
Troubleshooting P.19-10
Warranty & Service P.19-33
Getting Started
Call
12
Text Entry
Phone Book
34
Digital TV 56Camera
Entertainment 78Music Player
Managing Files 910Connectivity
Handset Security 1112Tools
Messaging 1314Internet
S! Appli 1516Osaifu-Keitai®
171819
S! GPS Navi
Settings
Appendix
Capa_E_OI.indb 1 2009/07/28 10:11:07

ii
Obj
ecti
ve S
earc
hConfirming & UsingMy Number &My Mail Address
Customizing 931P Settings
Mastering Basics
Fun Stuff
My Phone NumberConfirm your phone number on 931P in Standby without navigating menus.
My Number: P.1-30
My Mail AddressCustomized address may reduce spam.
Customizing Handset Address: P.13-3
Setting RingtonesSet Chaku-Uta Full® files as ringtones.
Ringtones: P.18-2
Downloading Tunes & TonesDownload music (Chaku-Uta Full®) files from mobile websites.
Downloading Music: P.8-3
Learning Your HandsetLearn key assignments, and navigate menus to select & execute functions.
Handset Menus: P.1-18Parts & Functions: P.1-4
Making Mobile CallsUse voice telephony or enjoy video telephony with compatible mobiles.
Voice Calls: P.2-2Video Calls: P.2-6
Watching One Seg Digital TVEnjoy One Seg digital TV. Set channels in advance to view/record shows.
Digital TV: P.5-1
Music PlayerDownload music files from websites via Music Player directly.
Music Player: P.8-1
DIGITALT V
Capa_E_OI.indb 2 2009/07/28 10:11:08

iii
Camera & Video CameraCapture still images or record videos. Use Camera even when handset is closed.
Camera: P.6-1
Sending Your Contact InfoSave mail address and other details; send to compatible devices wirelessly.
Account Details: P.4-13
Messaging Multiple Recipients
Enter multiple mail addresses/numbers to send a message to all at one time.Sending Messages: P.13-4Add/Edit/Delete Address: P.13-8
Sending Files WirelesslySend files or your own mail address saved in Account Details via Infrared/IC transmission to other compatible devices.
Infrared/IC Transmission: P.4-13
Customizing Standby DisplayAdd wallpaper, set clock size/position or set calendar to appear in Standby.
Wallpaper: P.9-7Display: P.18-3, P.18-5
Customizing User InterfaceDownload applications that mimic the interface design of previously used handsets.
Familiar Usability: P.1-24
Using Shortcuts to FunctionsAccess shortcuts to frequently used functions in Standby.
Shortcuts: P.1-22
Mastering Text Entry MethodsEnter text for Messaging functions or to add/edit Phone Book entry items.
Text Entry: P.3-1
Using Messaging ServicesSend short or long text messages. Attach image/sound files, etc. to S! Mail.
Messaging: P.13-1Graphic Mail: P.13-5
Accessing the Mobile InternetAccess Mobile Internet sites via Yahoo! Keitai to browse sites or download files.
Yahoo! Keitai: P.14-2
Playing GamesDownload and install S! Appli Games via Yahoo! Keitai.
S! Appli: P.15-1
Getting News (Japanese)Set up S! Quick News to view a variety of information contents.
S! Quick News: P.7-4
Capa_E_OI.indb 3 2009/07/28 10:11:09

iv
Ove
rvie
w931P Features
SoftBank Mobile Features
Useful Features
PC-related Functions
Horizontal Open PositionEnjoy Digital TV, Messaging, S! Appli, Camera, etc. in wide horizontal screen. Key labels are adjusted horizontally.
P.1-7
External DisplayView information and capture images on External Display when handset is closed.
P.1-23
Yahoo! KeitaiAccess Mobile Internet sites via Yahoo! Keitai to browse sites or download files.
P.14-2
Graphic MailCreate HTML messages; select font color/size, background; insert images.
P.13-5
Phone Book/ S! Addressbook Back-up
Save Phone Book entries; back uphandset entries on Server, etc.
P.4-1, P.4-10
Camera/VideoCapture still images or record videos with approx. 8.1 mega pixel camera. Set Image stabilizer/Face detection for high-quality pictures and videos.
P.6-6, P.6-8
PC Site BrowserView PC-based websites on 931P.
P.14-5
Data Back-up/ManagementTransfer data between handset and PC for back-up and editing.
P.10-11
Capa_E_OI.indb 4 2009/07/28 10:11:09

v
Simple MenuUse simplified menus limiting to only basic functions.
P.1-26
Download DictionaryDownload specialized dictionaries. Dictionary words appear in character conversion suggestions.
P.3-10
S! GPS NaviCheck your position on map, and navigate to a destination.
P.17-1
Calendar & AlarmAdd events by time/date and set Event Alarms to help manage your schedule.
P.12-2, P.12-6
S! Information Channel/Weather (Japanese)Subscribe to content and periodically receive update information. Set Weather Indicator to check weather forecast in Standby.
P.7-6
Music PlayerPlay 931P/microSD Card music files.
P.8-1
Mobile Widget (Japanese)Download and paste widgets to Standby for quick access to information and various tools.
P.7-2
microSD ModeAccess data on microSD Card from a PC by connecting handset to PC via USB cable (not included).
P.9-21
Voice RecorderRecord your voice to set as ringtone, etc.
Osaifu-Keitai®
Use handset as an electronic cash card, reward card or membership card.
P.16-1
Bluetooth®
Connect wirelessly to a Bluetooth®- compatible speaker to enjoy TV in dynamic sound.
P.10-6
Digital TVEnjoy One Seg digital TV programs and video in wide horizontal screen.
P.5-1
P.12-10
Capa_E_OI.indb 5 2009/07/28 10:11:10

vi
Contents ..............................................viPackage Contents ..............................viiiUsing This Guide ................................viiiSafety Precautions ..............................xiiHandling Precautions ...................... xviiiCopyrights and Others....................... xxiSpecific Absorption Rate (SAR) ........ xxv
1. Getting StartedUSIM Card ......................................... 1-2Parts & Functions .............................. 1-4About Battery ................................. 1-12Handset Power On/Off .................... 1-16Manner Mode ................................. 1-17Handset Menus ............................... 1-18Standby Options & Event Indicators ... 1-21Customizing User Interface ............ 1-24Private Menu .................................. 1-25Simple Menu ................................... 1-26Passwords ....................................... 1-28Multi Task ....................................... 1-29View Blind ...................................... 1-30My Number ..................................... 1-30
2. CallMaking/Answering Voice Calls ......... 2-2Making/Answering Video Calls ......... 2-6International Calls ............................ 2-9Engaged Call Functions .................. 2-12
Call Log ........................................... 2-13Answer Phone................................. 2-15Optional Services ........................... 2-17
3. Text EntryText Entry .......................................... 3-2Entering Text ..................................... 3-3Conversion Methods (Japanese) ....... 3-6Editing Text ....................................... 3-9User's Dictionary ............................ 3-10Download Dictionary ...................... 3-10
4. Phone BookOverview .......................................... 4-2Saving to Phone Book ...................... 4-3Searching/Using Phone Book ............ 4-6Managing Phone Book ..................... 4-9S! Addressbook Back-up................. 4-10Account Details .............................. 4-13Voice Dial ........................................ 4-14
5. Digital TVBasics ................................................ 5-2Initial Setup ...................................... 5-4Watching TV ...................................... 5-5TV Links (Japanese) ........................ 5-11Recording/Playing Programs .......... 5-12
6. CameraBefore Using Camera ........................ 6-2Pictures/Videos ................................. 6-6
Focus Functions (Outside Camera) ... 6-13Viewing Saved Images ................... 6-14
7. EntertainmentMobile Widget (Japanese) ................ 7-2S! Quick News (Japanese) ................ 7-4S! Information Channel/Weather (Japanese) ......................................... 7-6E-Books (Japanese) ........................... 7-8
8. Music PlayerOverview .......................................... 8-2Saving Music .................................... 8-2Using Music Player ........................... 8-5
9. Managing FilesData Folder ....................................... 9-2Opening Files .................................... 9-4Using/Editing Still Images .............. 9-12Managing Folders/Files .................. 9-14microSD Card .................................. 9-16
10. ConnectivityInfrared ........................................... 10-2IC Transmission ............................... 10-4Bluetooth® ...................................... 10-6SoftBank Utility Software (Japanese) ..................................... 10-11USB (Japanese) ............................. 10-11AV Output ..................................... 10-13
Contents
Capa_E_OI.indb 6 2009/07/28 10:11:10

vii
11. Handset SecurityChanging Phone Password ............. 11-2Security Functions .......................... 11-2Restricting Calls/Messages ............. 11-8Reset ............................................. 11-12
12. ToolsCalendar ......................................... 12-2Tasks ............................................... 12-5Alarms ............................................ 12-6Calculator ....................................... 12-8Notepad .......................................... 12-8Dictionary (Japanese) ..................... 12-9Sound Recorders ........................... 12-10Bar Code Reader ........................... 12-11
13. MessagingBasics .............................................. 13-2Sending S! Mail & SMS ................... 13-4Receiving & Viewing Messages .... 13-10Organizing/Using Messages ......... 13-15
14. InternetGetting Started .............................. 14-2Using Yahoo! Keitai ........................ 14-3Using PC Site Browser .................... 14-5Basic Operations ............................. 14-6Using Information .......................... 14-8Option Menu Items ....................... 14-13
15. S! AppliBefore Using S! Appli ..................... 15-2Using S! Appli ................................. 15-3
16. Osaifu-Keitai®
Basics .............................................. 16-2Using Osaifu-Keitai® ....................... 16-4IC Card Lock Functions ................... 16-5
17. S! GPS NaviAbout S! GPS Navi .......................... 17-2Using S! GPS Navi........................... 17-2
18. SettingsSound & Vibration .......................... 18-2Display ............................................ 18-3Manner Mode ................................. 18-7Incoming Settings........................... 18-7Date & Time .................................... 18-8Call Settings ................................... 18-9Notification Light ......................... 18-10Text Entry ...................................... 18-10Phone Book .................................. 18-11Voice Dial ...................................... 18-11Video Call ..................................... 18-12Horizontal Open Position ............. 18-13Digital TV ...................................... 18-14Mobile Widget (Japanese) ............ 18-15S! Quick News (Japanese) ............ 18-16Bluetooth® .................................... 18-17
Messaging .................................... 18-18Internet ......................................... 18-19S! Appli ......................................... 18-21Osaifu-Keitai® ............................... 18-21S! GPS Navi Settings .................... 18-22Default Settings ........................... 18-23Confirming Settings ...................... 18-24
19. AppendixFunction List ................................... 19-2Troubleshooting ............................ 19-10Software Update .......................... 19-12Quick Open Menu ......................... 19-14Key Assignments (5-touch Mode) ............................ 19-15 (2-touch Mode) ............................ 19-16 (NIKO-touch Mode) ...................... 19-17Symbol List ................................... 19-18Character Code List ...................... 19-19Weather Indicator List .................. 19-24Memory List .................................. 19-25Specifications ............................... 19-26Index ............................................. 19-27Warranty & Service ....................... 19-33Customer Service.......................... 19-34
Capa_E_OI.indb 7 2009/07/28 10:11:11

viii
Package Contents Handset (931P)
Battery (PMBAP1)
Starter GuideNote
Use SoftBank specified AC Charger (sold separately) to charge battery. ●For more information about AC Charger and accessories, please contact ●SoftBank Mobile Customer Center, General Information ( P.19-34).Optional battery is available for separate purchase. ●931P accepts microSD Card (not included). Purchase microSD Card to ●use related functions ( P.9-16).
Using This GuideScreenshots
Before reading this guide, make a note of the following:In this guide, SoftBank 931P User Guide, SoftBank 931P is abbreviated ●as 931P."microSD Card" and "microSDHC Card" are referred to as "microSD ●Card" in this guide.Handset operations and screenshots are based on defaults for handset ●color Pink ( P.18-23).Handset operations and screenshots are based on Normal Position. ●Sample screenshots, etc. are provided for reference only. Actual handset ●windows, menus, etc. may differ in appearance.Key icons use simplified labels. ●Most operation descriptions begin in Standby. ●Pressing a key for more than one second is described as "Press and ●hold."
Capa_E_OI.indb 8 2009/07/28 10:11:14

ix
Guide SymbolsPress the corresponding key to execute the function or operation indicated at the bottom of Display.Example (Normal Position):
Example(Horizontal Open Position):
❶ ❸
❺❹
❷
❶ ❸
❺❹
Multi Selector Operations (❶)
OperationsSoftkey Label*
Normal Position Horizontal Open Position
Press to select an item
Press
* Softkey labels vary by menu.
Multi Selector (❶)Use Multi Selector to select items, navigate menus, etc. In this guide, Multi Selector operations are indicated as shown below.
Softkeys (❷❸❹❺)In this guide, Softkey operations are indicated as shown below.
Example ❷❸: [Finish], [Menu][Finish] ● and [Menu] are Softkey label examples; Softkey labels vary by menu.
❷ ● differs between Normal Position and Horizontal Open Position. This guide uses for operation descriptions.
Up Up/Down
Up/Down/Left/RightDown
Left Left/Right Center
Right
Left Right
Up
Down Center
Capa_E_OI.indb 9 2009/07/28 10:11:21

x
Japanese Functions & ServicesWhen "(Japanese)" appears in a title, Japanese ability is required to use full range of the function or service.
Operation DescriptionsFollowing are examples of operation descriptions. Please note, actual ●operations may differ.
Basic OperationsOperations are expressed as shown here.Example:
A Menu Selection❶ Press in Standby to open Main Menu.
❷ Use to highlight Phone Book ; then press [Select].❸ Use to highlight Group ; then press [Select].
B Steps❶ Use to highlight a group; then press [Edit].❷ Use to highlight an item; then press [Select].❸ Set respective items.
AMenu Selection B Steps
Main Menu Phone Book Group
● appears for USIM Card Group.
1 Highlight a group, and press [Edit] Select an item Set item
Advanced OperationsFor advanced features and settings, go to pages indicated under Tip.Example:
Tip●Operations Available during a Voice Call ( P.2-12) ●Making Calls from Call Log ( P.2-14) ●Saving Entered Numbers to Phone Book ( P.4-5) Settings ●Set Handset Response when Closed during Call ( P.18-9)
Settings Refer to Chapter 18 "Settings."
Capa_E_OI.indb 10 2009/07/28 10:11:23

xi
Abbreviated DescriptionsFor advanced settings (Chapter 18), initial operations may be abbreviated or omitted.Example:
B StepsFollow these steps after Abbreviated Steps.
A Abbreviated StepsInitial steps are abbreviated.
From Main Menu Tools Calendar
Functions Available in Calendar Window ■Highlight a date > [Menu] Select an item (See below)
Item Operation/DescriptionNew Create a new entry ( P.12-2, P.12-3)Weekly display/ 1 Month
Toggle Monthly/Weekly view
Icon display Entries in category of selected icon appearSelect an icon >
C Omitted StepsInitial steps are omitted. Start operations from specified window.
Use Other Graphic Mail Settings ■In S! Mail text entry window, Select an arrange item
Capa_E_OI.indb 11 2009/07/28 10:11:23

xii
Safety PrecautionsBefore use, read these safety precautions carefully and use your handset ■properly. Keep this guide in a safe place for future reference.These safety precautions contain information intended to prevent bodily ■injury to the user and to surrounding people, as well as damage to property, and must be observed at all times.SoftBank is not liable for any damages resulting from use of this product. ■These symbols indicate exposure levels to bodily harm from failure to ■observe cautions or improper usage. Make sure to understand these symbols and precautions before reading this guide.
Danger Great risk of death or serious injury from improper use
Warning Risk of death or serious injury from improper use
Caution Risk of injury or damage to property from improper use
Symbol Explanations ■Make sure to understand these symbols and precautions before reading this guide.
Prohibited Action Avoid Moisture
Disassembly Prohibited
Always Dry Hands First
Compulsory Action Disconnect Power Source
Handset, Battery, USIM Card, Charger (sold separately) & microSD Card (not included)
Danger
Do not use or leave handset or related hardware in locations subject to high temperatures, such as near an open flame/heater, in sunlight or inside a car on an extremely hot day.Do not charge, leave, use, or be carrying handset or related hardware in a warm place or where heat collects, such as under a kotatsu (blanketed warming table) or electric blanket, next to a kairo (worn warming patch), etc.Battery may leak, overheat, explode, or ignite. Handset or related hardware may deform or malfunction. Part of the casing may also become hot and cause burns.
Do not use excessive force to attach battery or connect charger to handset. Battery or connector may be the wrong way around.Battery may leak, overheat, explode or catch fire.
Do not disassemble, modify or solder handset.May cause accidents such as fire, bodily injury, electric shock or equipment malfunction. Battery may leak, overheat, explode or catch fire. Modifying handset is a violation of Radio Law and subject to prosecution.
Do not get handset, battery and charger wet.If handset, battery or charger is left wet or battery is charged after exposure to liquids such as water or pet urine, overheating, electric shock, fire, injury or malfunction may occur. Be mindful of location when using handset, battery and charger. Handle with care.
Use specified battery, charger (sold separately) and holder (not included).Battery may leak, overheat, explode or catch fire, and charger may overheat, catch fire or cause malfunction.
viiii-xxiv_Safetyinformation_Capa_E.indd 12 2012/03/06 10:59:44

xiii
Warning
Do not place handset, battery or charger inside cooking appliances, such as microwave ovens or high-pressure containers, or on IH cooking heaters.Battery may leak, overheat, explode or catch fire, and handset and charger may overheat, emit smoke, catch fire or cause malfunction.
Do not drop, throw or otherwise subject to strong force or impacts.Battery may leak, overheat, explode, catch fire, or cause electric shock or damage to handset.
Do not allow liquids (water, pet urine, etc.) or conductive objects (pencil leads, metal pieces, necklaces, hair pins, etc.) to contact charger terminals, external port terminals or microSD Card slot.May cause fire or malfunction triggered by short-circuit.
Keep handset off and charger disconnected near propane gas, in filling stations or places where flammable gas is generated.Handset use in such areas may lead to fire. Be sure to turn off handset before using Osaifu-Keitai®-compatible devices within filling stations (When IC Card Lock is set, turn off handset after unlocking setting.).
If handset, battery or charger emits an unusual sound, smoke or odor, perform following steps:1. Unplug charger from outlet.2. Turn off handset.3. Remove battery (Take care to avoid burns or injuries.).May cause fire or electric shock.
Caution
Do not place handset, battery or charger on an unstable surface.May fall, causing injury or malfunction. Take extra precautions while vibration alert is active or during charging.
Keep handset out of the reach of young children.May result in accidental ingestion or bodily injury.
If for use by child, guardian should teach proper handling and ensure handset is used as directed.May result in bodily injury.
Battery
Danger
See battery label to confirm battery type.
Do not throw battery into fire.Battery may leak, explode or catch fire.
Do not pierce battery with a nail or other sharp object, hit it with a hammer, step on it, or subject it to strong shocks.Battery may leak, overheat, explode or catch fire.
Do not touch terminals with metallic objects or carry/store battery with conductive objects (pencil leads, metal pieces, necklaces, hair pins, etc.).Battery may leak, overheat, explode or catch fire.
Label Battery Type
Li-ion 00 Lithium-ion
Capa_E_OI.indb 13 2009/07/28 10:11:30

xiv
If battery fluid gets into eyes, do not rub; flush with clean water and see a doctor immediately.Failure to do so may cause blindness.
Warning
If battery fluid comes into contact with your skin or clothing, stop using handset immediately and rinse it off with clean water.Battery fluid is harmful to your skin.
If battery does not charge after specified time, stop charging.Battery may leak, overheat, explode or catch fire.
If battery emits an unusual odor, overheats, discolors or deforms, immediately remove battery and move it away as far as possible from any flame or fire. Take care to avoid burns or injuries.Battery may leak, overheat, explode or catch fire.
Caution
Do not dispose of battery with ordinary refuse.Place tape over the terminals to insulate battery, and take it to a SoftBank retailer or institution that handles used batteries in your area. Comply with local waste disposal regulations for recycling.
Handset
Warning
Do not use handset while driving a vehicle.Doing so may interfere with safe driving and cause an accident. Stop your vehicle to park in a safe place before using handset. Drivers using handsets while driving are subject to prosecution.
Do not aim the infrared port at eyes when using infrared communication.Doing so may affect eyes.
Do not point flash/photo light directly at someone's eyes. Do not look directly at flash/photo light while light is on.May damage eyesight or cause accidents due to momentary sight loss or surprise. Do not take pictures of infants at close range.
Turn off handset near high-precision electronic devices or devices using weak electronic signals.Handset may cause these devices to malfunction.*Electronic devices that may be affected: Hearing aids, implantable cardiac pacemakers, implantable cardioverter defibrillators, other medical electronic devices, fire alarms, automatic doors and other automatically controlled devices.
Turn off handset aboard aircraft.Handset signal may interfere with aircraft operation.When in-flight handset use is permitted, follow airline instructions for proper use.
If you have a weak heart, take extra precautions when setting functions such as Vibration or Ringer Volume for incoming transmissions.May affect heart.
Capa_E_OI.indb 14 2009/07/28 10:11:30

xv
In a thunderstorm, immediately turn off handset and seek shelter.There is a risk of being struck by lightning and suffering electric shock.
Caution
If handset affects car electronics, stop use.Handset use may affect electronics in some models. In this case, stop use; could impede safe driving.
Do not place a magnetic card near or in handset.The stored magnetic data in cash cards, credit cards, telephone cards and floppy disks, etc. may be erased.
Do not swing handset by its strap, etc.Handset may strike you or others, or strap may be broken resulting in injury or damage to handset or other property.
Do not place your ear too close to the speaker while ringer sounds or sound files play.May impair hearing.
Do not use One-push Open button to open handset near your or another person's face.Handset may cause accident and injury.
Do not use handset if catch (for Horizontal Open Position) remains protruding.May cause injury.
Handset may become hot while used in a hot environment.Avoid prolonged skin contact that may result in burns.
Avoid closing handset on fingers or objects when opening it.May result in injury or damage to display.
Watch TV with adequate lighting and distance from Display.May damage eyesight.
Do not turn up the volume unnecessarily high when using earphones.Using earphones with volume turned up for an extended period may impair hearing or injure ears.
If skin abnormality occurs, immediately stop use and seek medical treatment.Handset contains metals. Handset use may cause itching, rashes, eczema or other symptoms depending on the user's physical condition.
Parts Materials/Surface Finish
Outer case
Internal Display side, External Display side, Battery side, Keypad side, Battery cover
ABS resin/ Acrylic UV cured coating
External Display periphery
PC+ABS resin/ Acrylic UV cured coating
Side Keys, MULTI KeyABS resin/ Acrylic UV cured coating
Ornamental parts of External DisplayABS resin/Evaporated tin, Acrylic UV cured coating
Internal Display panel, External Display panel, Outside Camera lens
Acrylic resin/Hard coating
Outside Camera panel PET resin
KeypadAcrylic urethane resin (Panel: PET resin)
Capa_E_OI.indb 15 2009/07/28 10:11:31

xvi
Parts Materials/Surface Finish
Shutter KeyPC resin/ Evaporated aluminum/ Acrylic UV cured coating
One-push Open ButtonPC resin/ Acrylic UV cured coating
Metal part of One-push Open Button Aluminium/Alumite treatmentExternal Port cover, microSD Card Slot cover
PC resin, Elastomer resin/ Acrylic UV cured coating
Hinge on Display sidePA resin/ Acrylic UV cured coating
Hook for Horizontal Open PositionStainless steel/ Chrome plating on nickel plating
Charging TerminalsPhosphor bronze/ Gold plating on nickel plating
Stop pads, Screw caps on keypad side Acrylic urethane resin
Horizontal Open Lever Polyacetal resinCharging Indicator/Notification Light, Infrared Port
Acrylic resin
Screws (Battery compartment)Aluminium killed steel/ Nickel plating
Battery compartmentGlass fiber reinforced epoxy board (label: PET resin)
Battery compartment (Sides)PC+ASA resin/Nickel plating on copper plating
Battery terminals
Resin part PPS resin
Metal partBeryllium copper/ Gold plating on nickel plating
Parts Materials/Surface Finish
BatteryBattery PC resin (label: PET resin)
TerminalsGlass fiber reinforced epoxy board/Gold plating on nickel plating
Charger (sold separately)
Warning
Do not cover or wrap charger during charging.May cause overheating, fire or malfunction.
Always use the specified power supply/voltage.Using incorrect voltage may cause fire or malfunction. AC Charger: AC100V-240V (household AC outlet only) In-Car Charger: DC12V, 24V (vehicles with a negative earth only)
Use In-Car Charger in vehicles with a negative (-) earth. Do not use In-Car Charger if vehicle has a positive (+) earth.May cause fire.
Do not use charger in thunderstorms.There is a risk of suffering electric shock.
Do not handle charger with wet hands.May cause electric shock or malfunction.
If In-Car Charger fuse blows, always replace it with specified fuse.Using the incorrect fuse may cause fire or malfunction. Refer to the respective manuals for information on the correct fuse specifications.
If dust accumulates on plug, unplug charger and wipe with a dry cloth.May cause fire.
Capa_E_OI.indb 16 2009/07/28 10:11:31

xvii
When plugging charger into outlet, keep conductive materials (pencil lead, metal parts, necklaces, hair pins, etc.) away from Desktop Holder terminals or charger plug/terminals and plug charger firmly into outlet.May cause electric shock, short-circuit or fire.
Unplug AC Charger during periods of disuse.May cause electric shock, fire or malfunction.
If liquid such as water or pet urine get into charger, unplug it immediately.May cause electric shock, smoke emission or fire.
Caution
Pull charger (not cord) to unplug charger.Pulling on the cord may damage the cord and cause electric shock or fire.
Always unplug charger before cleaning it.May result in electric shock.
Near Electronic Medical Equipment
Warning
This section is based on "Guidelines on the Use of Radio Communications Equipment such as Cellular Telephones and Safeguards for Electronic Medical Equipment" (Electromagnetic Compatibility Conference, April 1997) and "Report of Investigation of the Effects of Radio Waves on Medical Equipment, etc." (Association of Radio Industries and Businesses, March 2001).
If you use an implantable cardiac pacemaker or cardioverter defibrillator, keep handset more than 22 cm away from the implant at all times.Handset radio waves may affect implantable cardiac pacemaker or cardioverter defibrillator operations.
Persons using electronic medical equipment outside medical facilities should consult the vendor about possible radio wave effects.Handset radio waves may affect electronic medical equipment operations.
Observe the following in medical facilities. Handset radio waves may affect electronic medical equipment.
Do not take handset into operating rooms, Intensive Care Units or Coronary Care Units.Turn off handset inside hospital wards. Turn off handset even outside hospital wards (in hospital lobbies, etc.); electronic medical equipment may be in use nearby.Where a medical facility has specific instructions prohibiting the carrying and use of mobile phones, observe those instructions strictly.
Turn off handset in crowded places such as rush hour trains; implantable cardiac pacemakers or cardioverter defibrillators may be in use nearby.Handset radio waves may affect implantable cardiac pacemaker or cardioverter defibrillator operations.
Capa_E_OI.indb 17 2009/07/28 10:11:31

xviii
Handling Precautions
General NotesSoftBank is not liable for damages from accidental loss/ ●alteration/repair of handset/microSD Card information (Phone Book entries, image/sound files, etc.). Back-up important information.Handset transmissions may be disrupted inside buildings, ●tunnels or underground, or when moving into/out of such places.Use handset without disturbing others. ●Handsets are radios as stipulated by the Radio Law. Under the ●Radio Law, handsets must be submitted for inspection upon request.Handset use near landlines, TVs or radios may cause ●interference.Read microSD Card manual beforehand for proper use. ●Beware of eavesdropping. ●Digital signals reduce interception, however transmissions may be overheard. Deliberate/accidental interception of communications constitutes eavesdropping. "eavesdropping" means radio communication is received by another receiver deliberately or accidentally.Be cautious of unsafe websites. Take extra precautions ●especially when posting personal information on websites.
Electromagnetic Waves
For body worn operation, this mobile phone has been tested ●and meets RF exposure guidelines when used with an accessory containing no metal and positioning the handset a minimum 15 mm from the body. Use of other accessories may not ensure compliance with RF exposure guidelines.
FCC Notice
This device complies with part 15 of the FCC Rules. Operation ●is subject to the following two conditions:
(1) This device may not cause harmful interference, and (2) this device must accept any interference received, including interference that may cause undesired operation.Changes or modifications not expressly approved by the ●manufacturer responsible for compliance could void the user's authority to operate the equipment.
Capa_E_OI.indb 18 2009/07/28 10:11:32

xix
FCC RF Exposure InformationYour handset is a radio transmitter and receiver. It is designed and manufactured not to exceed the emission limits for exposure to radio frequency (RF) energy set by the Federal Communications Commission of the U.S. Government. The guidelines are based on standards that were developed by independent scientific organization through periodic and thorough evaluation of scientific studies. The standards include a substantial safety margin designed to assure the safety of all persons, regardless of age and health.The exposure standard for wireless handsets employs a unit of measurement known as the Specific Absorption Rate, or SAR. The SAR limit set by the FCC is 1.6 W/kg. The tests are performed in positions and locations (e.g. at the ear and worn on the body) as required by the FCC for each model.The highest SAR value for this model handset as reported to the FCC when tested for use at the ear is 0.788 W/kg, and when worn on the body in a holder or carry case, is 0.335 W/kg.Body-worn Operation; This device was tested for typical body-worn operations with the back of the handset kept 1.5 cm from the body. To maintain compliance with FCC RF exposure requirements, use accessories that maintain a 1.5 cm separation distance between the user's body and the back of the handset. The use of beltclips, holsters and similar accessories should not contain metallic components in its assembly.The use of accessories that do not satisfy these requirements may not comply with FCC RF exposure requirements, and should be avoided. The FCC has granted an Equipment Authorization for this model handset with all reported SAR levels evaluated as in compliance with the FCC RF emission guidelines. SAR information on this model handset is on file with the FCC and can be found under the Display Grant section of http://www.fcc.gov/oet/ea/ after searching on FCC ID UCE209017A.Additional information on Specific Absorption Rates (SAR) can be found on the Cellular Telecommunications & Internet Association (CTIA) website at http://www.phonefacts.net.
European RF Exposure InformationYour mobile device is a radio transmitter and receiver. It is designed not to exceed the limits for exposure to radio waves recommended by international guidelines. These guidelines were developed by the independent scientific organization ICNIRP and include safety margins designed to assure the protection of all persons, regardless of age and health.The guidelines use a unit of measurement known as the Specific Absorption Rate, or SAR. The SAR limit for mobile devices is 2 W/kg and the highest SAR value for this device when tested at the ear was 0.820 W/kg*. As mobile devices offer a range of functions, they can be used in other positions, such as on the body as described in this user guide**. In this case, the highest tested SAR value is 0.397 W/kg. As SAR is measured utilizing the devices highest transmitting power the actual SAR of this device while operating is typically below that indicated above. This is due to automatic changes to the power level of the device to ensure it only uses the minimum level required to reach the network.The World Health Organization has stated that present scientific information does not indicate the need for any special precautions for the use of mobile devices. They note that if you want to reduce your exposure then you can do so by limiting the length of calls or using a hands-free device to keep the mobile phone away from the head and body.*The tests are carried out in accordance with international guidelines for testing.** Please see Electromagnetic Waves on page xviii for important notes regarding body worn operation.
Capa_E_OI.indb 19 2009/07/28 10:11:32

xx
Declaration of Conformity
We, Panasonic Mobile Communications Development of Europe Ltd., declare that SoftBank 931P conforms with the essential and other relevant requirements of the directive 1999/5/EC.A declaration of conformity to this effect can be found at http://panasonic.net/pmc/support/index.html
This product is only intended for sale in Japan. ●Compliance to the European RTTE directive applies to: SoftBank ●931P handset, Battery (PMBAP1) and AC Charger (SoftBank ZTDAA1).
Handset Care
931P is not waterproof. Avoid exposure to liquids and high ●humidity.
Do not expose handset to precipitation. Air conditioned air may cause condensation, resulting in corrosion. Do not put handset in damp places like bathrooms. On the beach, keep handset away from sun and surf. Perspiration in handset may cause malfunction.
If handset is left with no battery or an exhausted one, data ●may be altered/lost. SoftBank is not liable for any resulting damages.Use handset within temperatures of 5°C to 35°C and humidity ●35% to 85%. Avoid extreme temperatures/direct sunlight.Handset may become warm during use or charging. This is not ●malfunction.Exposing lens to direct sunlight may damage color filter and ●affect image color.
Soiled terminals may cause poor connection. If the terminals ●are dirty, use a dry cloth or cotton swab to wipe them clean.Clean handset with dry, soft cloth. Using alcohol, thinner, etc. ●may damage it.Avoid forceful rubbing or scratching handset displays. ●Do not subject handset to excessive force. ●
Do not sit down with handset in a back pocket. Do not place heavy objects on a bag with handset inside.
Do not remove nameplate from handset; doing so invalidates ●warranty.Always turn off handset before removing battery. If battery is ●removed while saving or sending mail, data may be altered or lost.LCD is manufactured with high precision technology, however, ●some pixels may appear darker/brighter.Connect only specified products to External Port. ●While walking, moderate headphone volume to make sounds ●around you audible and help avoid accidents.When holding handset in use, do not cover Speaker. ●
Capa_E_OI.indb 20 2009/07/28 10:11:33

xxi
Function Usage LimitsThese functions are disabled after handset replacement/upgrade or service cancellation: Camera; Digital TV; Music Player; S! Appli; Lifestyle-Appli.After a period of disuse, these functions may become unusable.
Mobile Camera
Be sure to observe proper etiquette when using the camera. ●Do not expose the camera lens to direct sunlight. Concentrated ●sunlight through the lens may cause the handset to malfunction.Be sure to try taking and previewing pictures before using the ●camera on important occasions like wedding ceremonies.Do not commercially use or transfer pictures taken with the ●camera without the permission of the copyright holder (photographer), except for personal use.Do not use the camera in locations where taking photos and ●recording videos are prohibited.
Copyrights and Others
Right of PortraitPortrait right is the right of an individual to refuse to be photographed by others and protects from the unauthorized publication or use of an individual's photograph by others. Right of personality is a portrait right applicable to all citizens and right of publicity is a portrait right (property right) designed to protect celebrities' interests. Be careful when taking pictures with the handset camera. Photographing, publicizing and distributing photographs of citizens and celebrities without permission are illegal.
CopyrightsSounds, images, computer programs, databases, other copyrighted materials, their respective works and copyright holders are protected by copyright laws. Duplicated materials are limited to private use only. If duplications (including conversion of data types), modifications, transfer of duplicates or distribution on networks are made without permission of copyright holders, this constitutes "Literary Piracy" and "Infringement of Copyright Holder Rights" and a criminal action for reparations and criminal punishment may be filed. If duplicates are made using handset, please observe the copyright laws. Materials captured with handset camera are also subject to the above.
Capa_E_OI.indb 21 2009/07/28 10:11:33

xxii
Java and all Java-based trademarks and logos are trademarks or registered trademarks of Sun Microsystems, Inc. in the U.S. and other countries.
Aplix, microJBlend and JBlend, and all Aplix-or JBlend-related trademarks and logos are trademarks or registered trademarks of Aplix Corporation in the U.S., Japan and other countries.
OKAO Vision is used for multiple face detection to improve camera AF.OKAO is a registered trademark or trademark of OMRON Corporation in JAPAN and other countries.BookSurfing® is a registered trademark of CELSYS Inc., VoyagerJapan, Inc. and INFOCITY Inc.QR Code is a registered trademark of DENSO WAVE INCORPORATED.
microSDHC Logo is a trademark.
Chaku-Uta® and Chaku-Uta Full® are registered trademarks ofSony Music Entertainment (Japan) Inc.
This product is licensed under the MPEG-4 patent portfolio license, AVC patent portfolio license and VC-1 patent portfolio license for the personal and non-commercial use of a consumer to(i) encode video in compliance with the MPEG-4 Visual Standard, AVC Standard and VC-1 Standard ("MPEG-4/AVC/VC-1 Video") and/or(ii) decode MPEG-4/AVC/VC-1 Video that was encoded by a consumer engaged in a personal and non-commercial activity and/or was obtained from a licensed video provider licensed to provide MPEG-4/AVC/VC-1 video.No license is granted or implied for any other use. Additional information may be obtained from MPEG LA, L.L.C. See http://www.mpegla.com.MPEG Layer-3 audio coding technology licensed from Fraunhofer IIS and Thomson.This product is protected by certain intellectual property rights of Microsoft Corporation and third parties. Use or distribution of such technology outside of this products is prohibited without a license from Microsoft or an authorized Microsoft subsidiary and third parties.Windows Media®, Microsoft®, Windows® and Windows Vista® are trademarks or registered trademarks of Microsoft Corporation in the United States and other countries.The abbreviations used for respective operating systems (Japanese version) in this guide are as shown below:Windows Vista® is the abbreviation of Windows Vista® (Home Basic, Home Premium, Business, Enterprise, and Ultimate). Windows® XP is the abbreviation of Microsoft® Windows® XP Professional operating system or Microsoft® Windows® XP Home Edition operating system.Microsoft Windows operating system is abbreviated as "Windows" in this guide.
Capa_E_OI.indb 22 2009/07/28 10:11:34

xxiii
Powered by MascotCapsule®
MascotCapsule® is a registered trademark of HI CORPORATION© 2009 HI CORPORATION. All Rights Reserved.The image stabilization technology utilized is PhotoSolid, a product of Morpho, Inc.PhotoSolid is the registered trademark of Morpho, Inc. in Japan and other countries.FeliCa is a contactless IC card technology developed by Sony Corporation.FeliCa is a registered trademark of Sony Corporation.
is a registered trademark of FeliCa Networks, Inc."Osaifu-Keitai" is a registered trademark of NTT DoCoMo, Inc. in Japan.
This product contains NetFront Mobile Client Suite of ACCESS CO., LTD.ACCESS and NetFront are trademarks or registered trademarks of ACCESS CO., LTD. in the United States, Japan and other countries.©2008 ACCESS CO., LTD. All rights reserved.This software is based in part on the work of the Independent JPEG Group.This product contains Browser module under licence from ACCESS CO., LTD. and NTT DoCoMo, Inc.IrFront is a trademark or registered trademark of ACCESS CO., LTD.in Japan and other countries.The IrDA Feature Trademark is owned by the Infrared DataAssociation and used under license therefrom.
This product is protected by certain intellectual property rights of Microsoft Corporation. Use or distribution of such technology outside of this product is prohibited without a license from Microsoft or an authorized Microsoft subsidiary.Content providers are using the digital rights management technology for Windows Media contained in this device ("WM-DRM") to protect the integrity of their content ("Secure Content") so that their intellectual property, including copyright, in such content is not misappropriated. This device uses WM-DRM Software to play Secure Content ("WM-DRM Software"). If the security of the WM-DRM Software in this device has been compromised, owners of Secure Content ("Secure Content Owners") may request that Microsoft revoke the WM-DRM Software's right to acquire new licenses to copy, display and/or play Secure Content. Revocation does not alter the WM-DRM Software's ability to play unprotected content. A list of Revoked WM-DRM Software is sent to your device whenever you download a license for Secure Content from the Internet or from a PC. Microsoft may, in conjunction with such license, also download revocation lists onto your device on behalf of Secure Content Owners.This product contains software licensed complying with GNU General Public License (GPL), GNU Lesser General Public License (LGPL), etc.For more details, see the bundled "GPL/LGPL 等適用ソフトウェアのライセンスについて" leaflet.
Bluetooth® is a registered trademark of the Bluetooth SIG, Inc.
The Bluetooth word mark and logos are owned by the Bluetooth SIG, Inc. and any use of such marks by Panasonic Mobile Communications Co., Ltd. is under license.Other trademarks and trade names are those of their respective owners.This product is loaded with Bluetooth™ Stack for Embedded Systems Spec 2.0 by Toshiba Corp.
Capa_E_OI.indb 23 2009/07/28 10:11:36

xxiv
This product contains Adobe® Flash® Lite™ Player under license from Adobe Systems Incorporated.Copyright© 1996-2008 Adobe Macromedia Software LLC. All rights reserved.Adobe, Flash and Flash Lite are either registered trademarks or trademarks of Adobe Systems Incorporated in the United States and/or other countries.
"SOFTBANK," SOFTBANK's equivalent in Japanese, and the SOFTBANK logo are trademarks or registered trademarks of SOFTBANK CORP. in Japan and in other countries.S! Mail, Navi Appli, S! Appli, MOBILE WIDGET, Graphic Mail are trademarks or registered trademarks of SOFTBANK MOBILE Corp.Yahoo! and the "Yahoo!" or "Y!" logos are trademarks and/or registered trademarks of Yahoo! Inc. in the US.This product is manufactured or sold under license from InterDigital Technology Corporation.
The frequency band used for the Bluetooth® function of 931P is shared with other industrial, scientific or medical equipment (microwave ovens, etc.), and used at premises radio stations, amateur radio station, etc. (hereinafter "other radio stations").1 Before using the Bluetooth® function, visually check that there
are no other radio stations sharing the same frequency band nearby.
2 Should interference occur between 931P and other radio stations, move to another place or stop the Bluetooth® function (stop the transmission) immediately.
3 For additional information and support, contact us at the following number.
SoftBank Mobile Customer Center;From a SoftBank handset, call toll free at 157 for GeneralInformation.From landlines, see P.19-34 "Customer Service".
This radio equipment operates in the 2.4 GHz band using the FH-SS modulation, and its maximum communication distance is 10m.
Other company and product names mentioned herein are trademarks or registered trademarks of their respective owners.The software contained in 931P is copyrighted material;copyright, moral right and other related rights are protected by copyright laws. Do not copy, modify, alter, disassemble, decompile or reverse-engineer the software, and do not separate it from hardware in whole or part."One-push Open™" is a trademark of Panasonic Corporation.
Capa_E_OI.indb 24 2009/07/28 10:11:37

xxv
Specific Absorption Rate (SAR)931P meets the government's requirements for exposure to radio waves.These requirements are based on scientific basis to assure that radio waves emitted from mobile phones and other handheld wireless devices do not affect human health. They require that the Specific Absorption Rate (SAR), which is the unit of measurement for the amount of radiofrequency absorbed by the head, shall not exceed 2 W/kg*. This limit includes a substantial safety margin designed to assure the safety of all persons, regardless of age or health, and meets the international standard set by International Commission on Non-Ionizing Radiation Protection (ICNIRP) in cooperation with World Health Organization (WHO).All mobile phones, prior to product launch, must be certified as compliant with government requirements as stipulated by the Radio Law. 931P has been granted Technical Regulations Conformity Certification by TELECOM ENGINEERING CENTER. Its highest SAR value is 0.920 W/kg. This value was obtained by TELECOM ENGINEERING CENTER as part of the certification process. SAR tests were conducted with handset transmitting at its highest certified power level in accordance with testing methods set by the government. While there may be differences between the SAR levels for various handsets, they all meet the governmental requirements for safe exposure. The actual SAR level of the handset while operating can be well below the highest value. This is because the handset is designed to operate at multiple power levels so as to use only the power required to reach the Network.Additional information on SAR can be obtained on the following Websites:Ministry of Internal Affairs and Communicationshttp://www.tele.soumu.go.jp/e/sys/ele/index.htmAssociation of Radio Industries and Businesses (ARIB)http://www.arib-emf.org/index02.html (Japanese only)
* Requirements are stipulated in Radio Law (Ordinance Regulating Radio Equipment, Article 14-2).
Capa_E_OI.indb 25 2009/07/28 10:11:37

xxvi
Capa_E_OI.indb 26 2009/07/28 10:11:37

1
1-1
Getting StartedUSIM Card ............................................................. 1-2
About USIM Card .......................................................................1-2USIM Card Installation ................................................................1-3USIM PINs ..................................................................................1-3
Parts & Functions .................................................. 1-4Handset .....................................................................................1-4Display Positions .........................................................................1-7Key Operations in Standby ..........................................................1-8Display .....................................................................................1-10
About Battery ..................................................... 1-12Before Charging .......................................................................1-12Battery Installation ...................................................................1-14Charging Battery ......................................................................1-15
Handset Power On/Off ........................................ 1-16Manner Mode ..................................................... 1-17
Minding Mobile Manners ..........................................................1-17Manner-related Features ...........................................................1-17Activating Manner Mode ..........................................................1-17Activating Emission OFF Mode ..................................................1-18Activating Driving Mode ...........................................................1-18
Handset Menus ................................................... 1-18Main Menu ..............................................................................1-18Menu Numbers ........................................................................1-19Accessing Functions/Info from Standby .....................................1-20Horizontal Open Menu .............................................................1-21
Standby Options & Event Indicators .................. 1-21Event Indicators ........................................................................1-21Mobile Widget (Japanese) .........................................................1-22S! Quick News (Japanese) .........................................................1-22S! Information Channel/Weather (Japanese) ..............................1-22Shortcuts ..................................................................................1-22External Display ........................................................................1-23
Customizing User Interface ................................ 1-24Customized Screen/Familiar Usability ........................................1-24Changing Display Font ..............................................................1-25
Private Menu ...................................................... 1-25Opening Private Menu ..............................................................1-25Customizing Private Menu .......................................................1-26Adding Shortcuts ......................................................................1-26
Simple Menu ....................................................... 1-26Activating Simple Menu ............................................................1-27Simple Menu ............................................................................1-27
Passwords ........................................................... 1-28Phone Password .......................................................................1-28Center Access Code ..................................................................1-28Security Code ...........................................................................1-28
Multi Task ........................................................... 1-29Activating Another Function ......................................................1-29Ending Current Functions ..........................................................1-29
View Blind .......................................................... 1-30My Number ......................................................... 1-30
Capa_E_OI.indb 1 2009/07/28 10:11:37

1
Getting Started
1-2
USIM CardAbout USIM Card
Universal Subscriber Identity Module (USIM) Card is an IC card containing customer and authentication information, including handset number, and limited Phone Book entry and SMS message storage. USIM must be inserted to use 931P or Network services (calling, messaging, Internet, etc.). Turn handset off before inserting/removing USIM Card.
Insert USIM Card into other compatible SoftBank handset to use ●information saved on USIM Card.Use SoftBank specified USIM Card only; non-specified USIM Cards may ●not function properly.Do not insert USIM Card into other IC card devices. SoftBank is not liable ●for any resulting damages.Keep IC portion clean. ●Do not damage, carelessly touch or short-circuit IC chip; doing so may ●result in loss of data or malfunction.Remove dust/debris with a soft, dry cloth. ●Do not place labels, etc. on USIM Card; may cause failure. ●If handset is dropped/subjected to shock, handset may return to Standby. ●This is not a malfunction. If USIM not inserted After power-off Insert USIM appears, re-insert USIM Card properly then restart handset.
USIM CardIC
ImportantUSIM Card is the property of SoftBank. ●Return USIM Card to SoftBank upon service cancellation. ●USIM Card will be reissued for a fee if lost or damaged. ●If USIM Card/handset with USIM Card inserted is lost or stolen, ●contact SoftBank Mobile Customer Center or Global Call Center ( P.19-34).Back up USIM Card files. SoftBank is not liable for lost files. ●USIM Card specifications/performance may change without prior ●notice.Pre-installed S! Appli may be unusable while a different or replacement ●USIM Card is inserted into handset.Returned USIM Cards are recycled. ●
NoteSome downloaded files may be inaccessible after upgrades/repairs, ●USIM Card/handset replacement.
Capa_E_OI.indb 2 2009/07/28 10:11:39

1G
etting Started
1-3
USIM Card Installation
Remove battery ( ● P.1-14) then follow steps below.
Inserting
1 With IC chip down, insert USIM Card
Removing
1 Slide out USIM Card gently
NoteDo not force USIM Card into or out of handset; may damage handset/ ●USIM Card.Be careful not to lose the removed USIM Card. ●Avoid touching USIM Card terminals or IC chip; doing so may hinder ●performance/USIM Card recognition.
Notch
USIM PINs
There are two USIM Card security codes: PIN & PIN2PIN and PIN2 are set to ● 9999 by default. ● PIN/PIN2 can be changed ( P.11-2).
PIN 4 to 8-digit code used to prevent unauthorized handset use.When ● PIN Authentication is ON ( P.11-2), PIN entry is required each time handset is turned on (with USIM Card inserted).
PIN2 Required to clear call times/costs or set maximum cost ( P.18-9).
PIN Lock & Cancellation (PUK/PUK2)PIN Lock or PIN2 Lock is activated if PIN or PIN2 is incorrectly entered three times. Cancel PIN Lock or PIN2 Lock by entering the PIN Unblocking Key (PUK/PUK2) ( P.11-3).
For information on PUK/PUK2, contact SoftBank Mobile Customer ●Center, General Information ( P.19-34).
NoteIf PUK/PUK2 is incorrectly entered ten times, USIM Card is locked and ●handset is disabled. Write down PUK/PUK2.For procedures required to unlock USIM Card, contact SoftBank Mobile ●Customer Center, General Information ( P.19-34).
Capa_E_OI.indb 3 2009/07/28 10:11:40

1
Getting Started
1-4
Parts & FunctionsHandset
Key labels differ between Normal Position and Horizontal Open Position. Key icons in this guide use labels in Normal Position. ●
ノーマルスタイル
❷
❸
❹❺❻❼
❽
❾
❶
1712❺14❻❼ 16❽ 1820❾
❶ 1110❷❸
1513❹
12
131415
16
18
20
17
1110
19
Normal Position Horizontal Open Position Using Earphone/Microphone or Video Output CableConnect following accessories (A) and (B) to External Port.(A) Earphone/microphone or video output cable(B) Stereo Earphone Conversion Cable<Operation>① Connect flat plug (A) to flat terminal (B)② Connect plug (B) to External Port
Do not press answer button on earphone/ ●microphone when connecting. Doing so may cause earphone/microphone to malfunction. In that case, pull out earphone/microphone, and connect again.
External Port②
①
(B)
(A)
Capa_E_OI.indb 4 2009/07/28 10:11:42

1G
etting Started
1-5
❶ Light SensorDetects ambient light・
❷ Earpiece❸ Internal Display❹ Mail Key (Normal Position)
Open Messaging menu・ Execute Upper Left Softkey function (・ P.ix)
S! Appli Key (Horizontal Open Position)Open S! Appli List・ Execute Upper Left Softkey function (・ P.ix)
❺ TV KeyActivate TV・ Execute Lower Left Softkey function (・ P.ix)
❻ Clear/Memo KeyDelete characters・ Cancel menus・ Use Answer Phone・
❼ Send KeyInitiate or answer calls・ Toggle upper/lower case in text entry ・ windowsUse Voice Dial・
❽ /Symbol/Driving Mode KeyEnter "・ "Access pictographs in text entry windows・ Toggle Driving Mode・
❾ External PortConnect AC Charger (sold separately), ・ Stereo Earphone Conversion Cable or other accessories here
10 Infrared PortTransfer data via Infrared・
11 Inside CameraUse during Video Calls・ Capture a self-portrait・
12 Multi SelectorScroll up/down/left/right to navigate menus・ and text ( P.ix)
・ Select S! Quick News/widgets・ Open Phone Book; set Auto Focus Lock・ Open Incoming Call Logs・ Open Redial logs
13 Yahoo! Keitai KeyOpen Yahoo! Keitai Main Menu・ Execute Upper Right Softkey function (・ P.ix)
14 Camera KeyActivate Camera/Video Camera・ Execute Lower Right Softkey function (・ P.ix)
15 End/Escape & Power KeyPower on/off (・ P.1-16)End calls・ Return to Standby・
16 – KeypadEnter phone number/text・
17 #/Symbol/Manner KeyEnter "#"・ Access symbols in text entry windows・ Toggle Manner Mode・
18 Widget KeyView list of available widgets・ Activate Music Player・
19 Horizontal Open Position Hook20 Microphone
Capa_E_OI.indb 5 2009/07/28 10:11:58

1
Getting Started
1-6
21
23
25
24
28
2726 31
30
33
34
32
38
35
3637
29
22
21 Antenna22 Notification Light/Charging Indicator
Flashes for incoming transmissions・ Lights in red for charging・
23 External Display ( P.1-23)24 Hinge25 Outside Camera26 Flash/Photo light
Lights/flashes during Camera use・ Use when shooting in dark places・
27 LogoPlace Logo over a reader/writer when using ・ Osaifu-Keitai® ( P.16-4)
28 Battery CoverDo not remove sticker from back of Battery ●Cover; IC Card may become unreadable/unwritable.
29 Charging Terminals30 Strap Eyelet31 Speaker32 One-push Open Button ( P.1-7)33 Horizontal Open Lever ( P.1-7)34 microSD Card Slot
Insert microSD Card here (・ P.9-17)35 (MULTI) MULTI Key
Open TASK MENU/Pictures Folder・ 36 Upper Side Key
Increase earpiece/TV volume・ [Closed Position]
Turn on illumination・
37 Lower Side KeyDecrease earpiece/TV volume・
[Closed Position]Set/cancel Manner Mode・ Check missed calls/new messages・
38 Shutter KeyActivate Camera/capture images・
[Closed Position]Show missed calls/new messages on ・ External Display
Capa_E_OI.indb 6 2009/07/28 10:12:06

1G
etting Started
1-7
Display Positions
Normal Position
Press One-push Open Button to open handset.
Fold handset by hand to close. When handset does not close, open it all ●the way once, then close.Customize handset to answer/end calls, etc. by opening/closing handset ●( P.18-7, P.18-9).Be careful not to drop handset when opening handset by One-push ●Open Button.
One-push Open Button
Portrait View
Horizontal Open Position
1 Slide and hold Horizontal Open Lever
2 Flip open (as indicated by arrow)Watch TV programs or use Messaging, S! Appli, Camera, etc. in Horizontal Open Position (Landscape View).
Hinge should be intact ● Ⓐ. If hinge is detached, close handset and try again. Do not lift hinge portion Ⓑ when opening handset.
NoteIf One-push Open Button is pressed in Horizontal Open Position, ●handset opens in Normal Position after it is closed.Before switching positions, be sure to completely close handset. Do not ●operate Horizontal Open Lever when handset is not fully closed; otherwise malfunction or damage may result.
Ⓑ
Ⓐ
Horizontal Open Lever
Landscape View
1
2
Capa_E_OI.indb 7 2009/07/28 10:12:08

1
Getting Started
1-8
Key Operations ■Key operations in Horizontal Open ●Position may differ from Normal Position.Keys assigned for games have different ●color/design labels.Multi Selector ( ● ) operations are described as pictured.
Settings Linked with Display Position ■Open handset in Horizontal Open Position to show Horizontal Open ●Menu while handset is in Standby ( P.1-21). Also, activate Digital TV or Camera automatically ( P.18-13).
NoteSwitching Normal Position to Horizontal Open Position may end active ●screen.
Key Operations in Standby
Press (less than one second) or press and hold (more than one second) a key in Standby to execute operation according to handset position.
Key Operations Normal Position (Portrait View)
Horizontal Open Position (Landscape View)
Short Press Initiate a call —Long Press Voice dial —Short Press Show/hide widgetsLong Press (2 + sec)
Turn off power
Short Press Open Main MenuOpen Horizontal Open Menu
Long Press Activate/cancel KeyguardShort Press Play Answer Phone —
Long PressActivate/cancel Answer Phone
—
Short Press Activate CameraLong Press Activate Video CameraShort Press Activate Digital TVLong Press Activate/cancel IC Card LockShort Press Open Messaging Menu
—Long Press
Open S! Mail Composition window
Short Press —Open S! Appli List
Long Press —
Capa_E_OI.indb 8 2009/07/28 10:12:11

1G
etting Started
1-9
Key Operations Normal Position (Portrait View)
Horizontal Open Position (Landscape View)
Short Press Access Yahoo! KeitaiLong Press Open Yahoo! Keitai MenuShort Press Open Widget ListLong Press Activate Music Player
Short Press
Select Event Indicator, Shortcut, widget, Status Indicator, S! Quick News ticker
Select Event Indicator/widget
Long Press —
Short PressOpen Phone Book search window
—
Long PressOpen Phone Book entry window
—
Short Press Open Incoming Call Logs —
Long PressOpen Received address logs
—
Short Press Open Redial logs —Long Press Open Sent address logs —Short Press Enter "1" —Long Press Open Phone Book page "あ" —Short Press Enter "2" —Long Press Open Phone Book page "か" —Short Press Enter "3" —Long Press Open Phone Book page "さ" —Short Press Enter "4" —Long Press Open Phone Book page "た" —
Key Operations Normal Position (Portrait View)
Horizontal Open Position (Landscape View)
Short Press Enter "5" —Long Press Open Phone Book page "な" Turn on/off Back LightShort Press Enter "6" —Long Press Open Phone Book page "は" —Short Press Enter "7" —Long Press Open Phone Book page "ま" —Short Press Enter "8" —Long Press Open Phone Book page "や" Activate/cancel View BlindShort Press Enter "9" —Long Press Open Phone Book page "ら" —Short Press Enter "0" —Long Press Open Phone Book page "わ" —Short Press Enter " " —Long Press Activate/Cancel Driving ModeShort Press Enter "#" —Long Press Activate/Cancel Manner ModeShort Press
Increase earpiece volume—
Long Press —Short Press
Decrease earpiece volume—
Long Press —Short Press —Long Press Activate Camera
(MULTI)Short Press Activate TASK MENULong Press Open Pictures folder
Capa_E_OI.indb 9 2009/07/28 10:12:15

1
Getting Started
1-10
Display
The above Display is an example common to ●Internal and External Displays.15 ● - 25 are Status Indicators. Access functions from respective indicators ( P.1-20).
●❶ Signal Strength
Strong Moderate Weak Low
Emission OFF Mode Active
Out-of-Range
Display Indicators
❶❷❸❹❺❻❼❽❾1011121314
1516171819202122
2425
26
23
●❷ Packet Transmission in Progress (PC)
Dial-up Connection Established on PC
3G/GSM Packet Transmission Enabled
3G/GSM Packet Transmitting
Operator (set for Select Operator) Out-of-Range
/ 3G/GSM Packet Transmission Available*
/ 3G/GSM Packet Transmission Unavailable* * Available only while abroad
●❸ Secure Content
S! Addressbook Back-up Synchronizing
Auto Sync Settings Active
●❹ PC Site Browser Active
Infrared Transmission
IC Transmission
USB Cable Connected
Keyguard Active
●❺ Software Update (Notification/Updating/Result)
Voice Mail
(Blue) Bluetooth® Device Connected
(Black) Bluetooth® Power Save Mode
●❻ microSD Card
Inserted
Reading/Writing Data
Write-protected
Unsupported
Unusable
USB Cable (Not Included) Connected
microSD Mode
MTP Mode
During Call
During Video Call
During Voice Call
●❼ Positioning
New S! Quick News Information
New S! Information Channel info
●❽ Unsent Message
Unread Message
Incoming Mail Memory Full (Handset)
Capa_E_OI.indb 10 2009/07/28 10:12:22

1G
etting Started
1-11
●11 S! Appli
Paused
Active
Auto Start Request Received
Start Request Received while Paused
Start Request Received while Active
●12 One Function Active
Multiple Functions Active
Digital TV Active
Recording TV Program
During Timer Recording
TV Recording Paused
Music Playback
Music Paused
●13 Time
●14 Battery Level
(Red)
●15 (Red) Alarm Set (Today)
(Blue) Alarm Set (After Today)
●16 Vibration Active (Incoming Call)
Vibration Active (Incoming Message)
Vibration Active (Incoming Call/Message)
●17 Incoming Call Ringtone Disabled
Incoming Message Ringtone Disabled
Incoming Call/Message Ringtone Disabled
●18 Driving Mode
●19 microSD Mode set for USB Mode
MTP Mode set for USB Mode
●20 Side Key Disabled when Handset Closed
●21 Timer Lock at Close Active
●22 Call Charge Reached Upper Limit
●23 Back Light OFF
View Blind ON
Back Light OFF; View Blind ON
●24 ~ Answer Phone Active (Number of Answer Phone Messages (Voice Calls))
●25 ~ Answer Phone Active (Number of Answer Phone Messages (Video Calls))
●26 Weather Indicator ( P.7-7)
NoteTo show icon description: ● Main Menu
Settings Display Settings Describe Icons to highlight an
icon
●❾ Security
Privacy Key Lock Active
Personal Data Lock Active
Key Pad Dial Lock Active
IC Card Lock Active
Secret Mode and Secret Data Only Active
Key Pad Dial Lock, Secret Mode and Secret Data Only Active
Key Pad Dial Lock and Personal Data Lock Active
Secret Mode, Secret Data Only and IC Card Lock Active
Privacy Key Lock and IC Card Lock Active
Personal Data Lock and IC Card Lock Active
Key Pad Dial Lock and IC Card Lock Active
Key Pad Dial Lock, Secret Mode, Secret Data Only and IC Card Lock Active
Key Pad Dial Lock, Personal Data Lock and IC Card Lock Active
●10 Manner Mode Active
Manner Mode (set in User Mode)
Remote Monitoring Active
Capa_E_OI.indb 11 2009/07/28 10:12:30

1
Getting Started
1-12
About BatteryBefore Charging
Charge battery before use or after a period of disuse (AC Charger sold separately).
Charging Time & Operating Time Estimates
3G GSM
Charging Time 130 minutes*
Standby Time 650 hours* 390 hours*
Talk TimeVoice Call 220 minutes* 240 minutes*
Video Call 130 minutes* –
* Approximate value3G Mode/GSM Mode: ● P.2-11Charging time is an average measured within temperatures of 5°C to ●35°C.Talk Time is an average measured with a new, fully charged battery, with ●stable signals.Standby Time is an average measured with a new, fully charged battery, ●with handset closed without calls or operations, in Standby with stable signals.Talk Time and Standby Time may vary by environment (battery status, ●temperature, etc.).
About Battery
Clean handset, battery & charger with dry cotton swab. ●Replace battery if operating time shortens noticeably. ●Charge battery at least once every six months. ●Use a case when carrying battery separately. ●Battery may swell as service life nears end; this is not a problem. ●
Charging
Battery must be installed to charge it. ●It may take longer for charging when handset is on. ●Move charger away from TV/radio if interference occurs. ●
Capa_E_OI.indb 12 2009/07/28 10:12:31

1G
etting Started
1-13
Battery Time
Using handset in poor conditions may shorten battery time. ●Extreme temperatures・ Impaired handset, battery or Charging Terminals・ Signal is weak/handset is out-of-range・ Handset is left mid-operation (not in Standby)・ Viewing TV, playing music or using S! Appli, etc.・
Extending battery time ●Example:
Turn Back Light Time ・ OFF and Power Saver Mode ON ( P.18-5)Select ・ OFF for Key Tone ( P.18-2)
When Battery Runs Out
Unless a Call is in Progress ●A message appears and warning tone sounds for 10 seconds. Handset power turns off automatically after one minute; press any key except to cancel warning tone manually. Charge or replace battery.
If Manner Mode is active, nothing sounds.・ When handset is closed, press ・ (MULTI) to cancel warning tone.
During a Call ●A message appears and warning tone sounds via Earpiece or Speaker. After 20 seconds, call ends and handset shuts down in one minute. Charge or replace battery.
Battery Strength Indicator
Battery Strength indicator changes as remaining usage time decreases. ●Charge or replace battery when battery level is low ( P.1-10, 1-11) or a message appears on Display.
NoteAlternatively, check battery level from ● Main Menu Settings
Phone Settings Battery Battery Level
Low battery warning messageappears. Charge or replacebattery immediately.Operating
Voltage
Battery Voltage
Remaining Strength (at 25°C) Operating Time
Approx. 70% Approx.20% Approx.10%
Level 3 Level 2 Level 1 Level 0Red
Capa_E_OI.indb 13 2009/07/28 10:12:33

1
Getting Started
1-14
Battery Installation
Always turn off handset power before removing battery. ●
1 Press and slide to remove cover
2 Insert BatteryAlign battery contacts with handset pins.
Remove BatteryLift battery out as shown.
3 Replace battery coverCover should click into place.
Note ● Lithium-ion batteries are valuable and recyclable resources.
Recycle used lithium-ion battery at a shop displaying ・ the symbol shown to the right.To avoid fire or electric shock, do not: ・ - Short-circuit battery - Disassemble battery
Capa_E_OI.indb 14 2009/07/28 10:12:36

1G
etting Started
1-15
Charging Battery
Use only specified AC Charger (sold separately).
Charging Time: Approximately 130 minutes
Port Cover
AC Outlet
ChargerBlades
2
3
Arrows up
1
Charging Indicator
Release Tabs
AC Charger
Charger Connector
External Port
1 Connect AC Charger to handsetInsert Charger Connector (printed side up) into External Port.
2 Plug AC Charger into AC OutletExtend Charger Blades.Charging Indicator illuminates and charging starts.When charging is complete, Charging Indicator goes out.
When Charging Indicator flashes, remove AC Charger and battery ●from handset then attach them again.Charge Sound ● is heard when charging starts/ends. When handset is turned off or in Manner Mode, nothing sounds.
3 When charging is complete, unplug AC Charger, then disconnect handsetSqueeze Release Tabs to remove Charger Connector, and replace Port Cover.
NoteFor details, read AC Charger instructions. ●Alternatively, charge battery by using Desktop Holder (not included). ●
Tip●Charging Start/End Tone Off ( P.18-2)
Capa_E_OI.indb 15 2009/07/28 10:12:37

1
Getting Started
1-16
Handset Power On/Off1 Press and hold
Start-up window appears and handset enters Standby.
Enter PIN if PIN Authentication is ON ●( P.11-2).
2 Press for 2+ secondsHandset shuts down.
Do not turn on handset immediately ●after turning off. Wait a few seconds.
The First Time Handset Powers Up, and Setup Window Appears...Select YES , and set the following:(Each item can be set separately.)
Set date and time* (Date & Time: ● P.18-8) Set Phone Password ●Enter 9999, and enter new Phone Password (4-8 digits) ( P.1-28). Set Key Tone ●Select ON or OFF ( P.18-2). Set font size ●Set Display font size all at once ( P.18-6).
* May be automatically set
Standby
NoteIf ● USIM not inserted After power-off Insert USIM appears, clean and properly re-insert USIM Card then restart handset.After a period of inactivity, Display turns off. ●
Retrieving Network Information
When , or is pressed for the first time in Standby, handset initiates Network Information retrieval; to retrieve it.
Update Network Information to use messaging, Internet, etc. ●Update Network Information manually: ● Main Menu Settings
Connectivity Retrieve NW Info YES
TipSettings ●Change Wallpaper ●Add Calendar to Wallpaper
●Change Wallpaper Randomly ●Change Start-up Window ( P.18-3)
Capa_E_OI.indb 16 2009/07/28 10:12:38

1G
etting Started
1-17
Manner ModeMinding Mobile Manners
Please use your handset responsibly. Use these basic tips as a guide. Inappropriate handset use can be both dangerous and bothersome. Please take care not to disturb others when using your handset. Adjust handset use according to your surroundings.
Turn it off in theaters, museums and other places where silence is the ●norm.Refrain from use in restaurants, lobbies, elevators, etc. ●Observe signs and instructions regarding handset use aboard trains, etc. ●Refrain from use that interrupts the flow of pedestrian or vehicle traffic. ●
Manner-related Features
Manner Mode ( Right)
Press Manner key to mute handset tones and activate vibration for incoming transmissions.
Vibration Mode ( P.18-2)
Activate in public places, meetings, etc. for silent call/message alerts.
Ringer Volume ( P.18-2)
Mute call/message tones.
Emission OFF Mode ( P.1-18)
Suspend all handset transmissions.
Answer Phone ( P.2-15)
Use to handle incoming calls when inappropriate/unsafe to answer.
Driving Mode ( P.1-18)
While driving, send a voice message informing the caller that you cannot answer the call (Handset does not ring.).
Activating Manner Mode
Press one key to mute handset tones and activate vibration for incoming transmissions.
Manner Mode settings can be changed ( ● P.18-7).When Manner Mode is active, ● appears.
1 In Standby, press and hold To cancel: Press and hold ● againTo activate/cancel while handset is closed: ●Press and hold
NoteShutter click and incoming tone via Earphone ( ● Level 1 ) sound even in Manner Mode.When Music Player or Digital TV activates in Manner Mode, ●confirmation appears asking whether to cancel Manner Mode.When ● Prefer manner mode is OFF ( P.12-7), Alarm sounds even if Manner Mode is active.
TipSettings ●Set Manner Mode Type ( P.18-7)
Capa_E_OI.indb 17 2009/07/28 10:12:39

1
Getting Started
1-18
Activating Emission OFF Mode
Temporarily suspend all handset transmissions; when active, all calls/messages and incoming information are blocked.
When Emission OFF Mode is active, ● appears.
Main Menu Settings Call Settings Emission OFF Mode
1 YESTo cancel: Follow the same steps. ●
NoteEmission OFF Mode disables Bluetooth ● ®/Infrared/IC transmissions. Bluetooth® handsfree devices cannot be used either.
Activating Driving Mode
Handset does not ring for incoming calls. Voice guidance informs the caller you are unavailable and Answer Phone activates.
When Driving Mode is active, ● appears.
1 In Standby, press and hold To cancel: Press and hold ● again
NoteWhen Answer Phone memory is full, incoming calls are rejected. ●Check ringtone when earphone/microphone is connected. ●
Handset MenusMain Menu
1 In Standby, Main Menu appears.
To change Main Menu theme: ●[Set Menu] Select a pattern
2 to highlight an icon Selected function menu appears.
To return to Standby: ●
NoteStandby window returns after 15 seconds of inactivity in Main Menu. ●
Main MenuStandby
Capa_E_OI.indb 18 2009/07/28 10:12:40

1G
etting Started
1-19
Main Menu Icons
Messaging
Create new/view received messages
Yahoo! Keitai
Enjoy Mobile Net & PC Site browsing…
S! Appli
Download, set and use S! Appli
Osaifu-Keitai
Use Osaifu-Keitai®
Camera
Capture images or record videos
Entertainment
Use Mobile Widget or S! Quick News
Tools
Set Alarm or save Calendar entries…
Data Folder
Open files saved on 931P/microSD Card
Music Player
Use Music Player
TV
View TV or record/timer-record programs
Phone Book
Save entries to call or send messages…
Settings
Adjust/customize handset settings
TipSettings ●Change Display Color Scheme ( P.18-3) ●Change Main
Menu Icons ●Change Main Menu Background ( P.18-4)
Menu Numbers
Use keypad to select functions or menu items.
Unnumbered Menu Items
When numbers do not appear, select items as shown.
Main Menu ■ to select Settings from Main Menu
1 2 3
4 5 6
7 8 9
0 #
Example: Menu Icons set to Pinky dream
Capa_E_OI.indb 19 2009/07/28 10:12:43

1
Getting Started
1-20
When Menu Icons is Set to Standard or CustomizeMenus cannot be selected from Main Menu by keypad.Open menu items by entering specific number in Main Menu (Quick Open Menu: P.19-14).
Top Menu Opened from Main Menu ■ to select Display Settings
Numbered Menu Items
Press key corresponding to menu number to select a menu.In Display Settings (from Settings Top Menu), to select Menu Icons
1234567890
Example: Settings Top Menu
Accessing Functions/Info from Standby
Select indicators/ticker in Standby to access functions and information.
Available Items ■Event Indicator ( ● P.1-21) ●Mobile Widget ( P.7-2)S! Quick News ( ● P.7-4) ●S! Information Channel/Weather ( P.7-6)Shortcuts ( ● P.1-22) ●Status Indicators ( P.1-10)
1 In Standby, Pointer ( ) appears.
Press ● or to return to Standby (Pointer disappears).
2 Use to move pointer ( ) to an indicator, icon or ticker
[Select]Indicator, icon or ticker is selected. Function name appears.
Press and hold ● to move pointer ( ) continuouslyTo cancel selection: ● or
3 [Select]Function or information appears.
When Widgets Do Not AppearPointer ( ) does not appear. After Step 1, use to highlight an item
[Select] to show function or information To show/hide widgets: ●
Capa_E_OI.indb 20 2009/07/28 10:12:45

1G
etting Started
1-21
Using Pointer ( ■ ) In Standby, > [Menu] Select an item (See below)
Item Operation/Descriptionto widgets list
Open Widget List
Yahoo!JAPAN Login
Open Yahoo! JAPAN log in window
Stand-by Display
Change Standby wallpaperSelect a folder > Select an image
Mobile Widget?
View Mobile Widget overview (Japanese)
Horizontal Open Menu
In Horizontal Open Position, press in Standby to access Horizontal Open Menu. From Horizontal Open Menu, access functions available in Horizontal Open Position.
Default Horizontal Open Menu varies by handset color ( ● P.18-23).Press ● to go from Horizontal Open Menu to Standby.Set handset to open to Horizontal Open Menu, Digital TV or Camera for ●Horizontal Open Position (Horizontal View: P.18-13).Some operations and menu items in Horizontal Open Menu differ from ●those that appear in this guide.
Standby Options & Event IndicatorsCheck various indicators and information in Standby.
To access functions/information from indicators: ● P.1-20
Event Indicators
Event Indicators appear for missed calls, messages, etc.
Events ■Missed Calls Missed calls ( P.2-13)
New Messages New messages ( P.13-10)
Answer Phone Recorded caller messages ( P.2-16)
Voice Mail New Voice Mail ( P.2-19)
Missed Call Notification
If Missed Call Notification is active, indicator appears for calls missed while handset is off, out-of-range, engaged, etc. ( P.2-19)
S! Information Channel Info S! Information Channel (received/failed updates) ( P.7-6)
Weather Info Weather Indicator (received/failed updates) ( P.7-7)
Other Information ■Missed alarm ( ● P.12-6) ●S! Appli startup notice ( P.15-3)USB Mode setting ( ● P.10-11) ●Missed location information requestAuto location information notice ( ● P.17-3) ●Timer ( P.5-14)Content Key ( ● P.9-5) ●Software Update result ( P.19-13)
Capa_E_OI.indb 21 2009/07/28 10:12:47

1
Getting Started
1-22
Mobile Widget (Japanese)
Paste various widgets to Standby to access information or tools from Standby.
Mobile Widget: ● P.7-2To show/hide widgets: ●
S! Quick News (Japanese)
By default, S! Quick News appears at bottom of Display.
S! Quick News: ● P.7-4Show/hide S! Quick News: ● P.18-16
S! Information Channel/Weather (Japanese)
Subscribe to content and periodically receive updates. Set Weather Indicator to appear on Standby.
S! Information Channel/Weather: ● P.7-6
Shortcuts
Access frequently used functions from Standby. ● Following shortcuts are set by default (Services available only in Japanese): S-1 battle, Content Value Package and Simple Select Video
Adding Shortcuts
Some functions are not available for shortcuts. ●
1 Open a function, [Menu] Add shortcut icon YES
Editing/Deleting Shortcuts
1 In Standby, to move pointer Highlight a shortcut
2 [Menu] Select an item (See below)
Item Operation/DescriptionEdit title Edit title >Sort Select an item > Select a target [Finish]
YESDelete this YES >Delete all YES >
Shortcuts
Capa_E_OI.indb 22 2009/07/28 10:12:49

1G
etting Started
1-23
External Display
Use External Display to view Standby information when handset is closed.
External Display turns off 15 seconds after ●handset is closed. Press any side key to turn it back on.Close handset while playing recorded videos, ●music, or recorded programs. Playback image/information appears on External Display.TV is unavailable on External Display. ●
Key Operations in Standby ■
Key Operation Description
Short Press Turn on illuminationLong Press —Short Press Activate Info Notice Setting ( P.18-8)Long Press Set/Cancel Manner Mode
Short Press
Show new message/missed call details (If both available, only missed call details appear.)
In missed call logs, press ● / to view previous/next logsIn Received Message window, press ● / to scroll screen or press and hold / to view previous/next messages.To return to Standby: ● (MULTI)
Long Press Activate Camera ( P.6-6)
NoteWidgets and shortcuts do not appear in External Display. ●When YES/NO selection window appears in External Display, operations ●are disabled if handset is closed.
TipSettings ●External Display ( P.18-5)
Capa_E_OI.indb 23 2009/07/28 10:12:50

1
Getting Started
1-24
Customizing User InterfaceCustomized Screen/Familiar Usability
Customized Screen
Download and set Customized Screen to personalize user interface, ringtone, etc., to a selected theme.
Familiar Usability
Download Familiar Usability applications that mimic the interface design of other handsets.
Downloading Customized Screen/Familiar Usability
Download characters or applications from websites.
Main Menu Data Folder Customized Screen
1 Customized Screen or Familiar Usability YESWebsite providing characters or applications appears.Follow onscreen instructions.
To manage Customized Screen applications in Data Folder: ●P.9-11
Setting Customized Screen/Familiar Usability
1 In Standby,
2 [Customize] Customized Screen or Familiar Usability
3 Highlight a theme [Set]To toggle thumbnail and list: ● [Change]
4 YES
NoteCustomized Screen or Familiar Usability cannot be set when battery is ●low.Other functions are not available while switching. For some seconds ●after switching is complete, all calls/messages may be blocked.Familiar Usability does not completely remake handset. ●Alternatively, ● Main Menu Settings Customized Screen To cancel, select Release Settings .When Simple menu is active, Customized Screen and Familiar Usability ●settings are not reflected. To reflect settings, cancel Simple menu.
Capa_E_OI.indb 24 2009/07/28 10:12:50

1G
etting Started
1-25
Changing Display Font
Change Display font. Fonts can also be downloaded.
Downloading Fonts
Main Menu Settings Display Settings Font
1 Download Font YESFollow onscreen instructions.
For details on Font folder (Data Folder): ● P.9-11
NoteWhile Personal Data Lock is set, fonts cannot be downloaded. ●
Changing Font
Main Menu Settings Display Settings Font
1 Select a folder Highlight a font [Set]
Private MenuSave frequently used functions in Private Menu.
Up to 12 items can be saved. ●Change preset functions as needed. ●
Opening Private Menu
1 In Standby, [Private]Private Menu appears.
To return to Main Menu: ● [Normal]
2 Select a menu
Change Private Menu Background ■After Step1, > [Set] [Menu] Change BG image Select a folder Select an image
Private Menu Window
Capa_E_OI.indb 25 2009/07/28 10:12:51

1
Getting Started
1-26
Customizing Private Menu
1 In Standby, [Private] [Set]
2 Highlight a target [Menu] Add to menu
3 Select an item
Cancel Functions ■In Step 2, (highlight a function > ) [Menu]
Release this or Release all YES
Reset Private Menu ■In Step 2, > [Menu] Reset menu YES
Adding Shortcuts
1 In Standby, [Private] [Set]
2 [Menu] Add shortcut icon YES
NoteAlternatively, open Private Menu setting window from ●Main Menu Settings Display Settings Private Menu
Private Menu Setting Window
Simple MenuActivate Simple menu to limit menu options to basic ones.
Handset is limited to basic operations ( ● P.1-27).
Normal Mode Window
Simple Menu Window
Capa_E_OI.indb 26 2009/07/28 10:12:52

1G
etting Started
1-27
Activating Simple Menu
1 In Standby, [Simple] YES
2 YES or NOSelect ● YES to set all items in Font Size ( P.18-6) to Large .To open Simple menu: ● in Standby.
Cancel Simple Menu ■In Standby, > [Normal] YES
NoteTurning off the power does not cancel Simple menu. ●Widgets (in Standby) and S! Quick News do not appear in Simple ●menu. Customized Screen or Familiar Usability setting is canceled.
Simple Menu
Simple Menu PageVoice Call
Outgoing Log 2-13Incoming Log 2-13Phone Book 4-6Create New Phone Book
4-3
Answer Phone 2-15Account Details 1-30
MessagingIncoming Mail 13-15Create New 13-4Retrieve New 13-15Drafts 13-15Sent Messages 13-15Create New SMS 13-7
Yahoo! KeitaiYahoo! Keitai 14-2Bookmarks 14-8Saved Pages 14-8Enter URL 14-4
CameraTake Pictures 6-6See Pictures 6-14Shoot Videos 6-8Watch Videos 6-14
Simple Menu PageTV
Watch TV 5-5Timer Recording 5-14Channel Setting 5-4
ToolsData Folder 9-2Alarms 12-6Calendar 12-2Calculator 12-8Notepad 12-8Receive via Infrared 10-3
Settings
Ringtones/Volume1-1718-2
Screen/Fonts18-3
to18-6
Call Time & Cost 18-9Date & Time 18-8
Security11-216-5
19-12
Call Settings2-17
to2-21
Capa_E_OI.indb 27 2009/07/28 10:12:52

1
Getting Started
1-28
PasswordsPhone Password, Center Access Code and Security Code are needed for handset use.
Phone Password
<Default> 9999
4 to 8-digit number required to use/change some handset functions.
Enter number within 15 seconds. ●_ appears for each digit entered. ●Phone Password can be changed on handset ( ● P.11-2).
Center Access Code
4-digit number specified at initial subscription; required to access Voice Mail via landlines or subscribe to fee-based information.
Do not attempt to change Center Access Code. For details, contact ●SoftBank Mobile Customer Center, General Information ( P.19-34).
Security Code
4-digit number specified at initial subscription, required to restrict handset services ( P.2-20).
Enter number within 15 seconds. ●If entered incorrectly three times, Security Code settings lock; Security ●Code & Center Access Code must be changed. Reach SoftBank Mobile Customer Center, General Information ( P.19-34) for details.Security Code can be changed on handset ( ● P.2-21).
NoteWrite down Phone Password, Center Access Code and Security Code. ●Do not reveal Phone Password, Center Access Code and Security Code. SoftBank is not liable for misuse or damages.For details, contact SoftBank Mobile Customer Center, General ●Information ( P.19-34).
Capa_E_OI.indb 28 2009/07/28 10:12:53

1G
etting Started
1-29
Multi TaskActivate up to three functions from four different groups at the same time.
Group Function●❶ Messaging Group Messaging
●❷ Yahoo! Keitai/ S! Appli Group
Yahoo! Keitai/S! Appli/Entertainment (except for Mobile Widget)/Osaifu-Keitai (Lifestyle-Appli)
●❸ Tools Group Music Player*/Camera/Tools/Data Folder/TV/Phone Book/Entertainment (Mobile Widget)
●❹ Settings Group Settings/Osaifu-Keitai (IC Card Settings)
* Functions other than Tools Group may be included.[ ● ▼] appears above the icons of an active group. ● appears for single function in use; for multiple functions in use.
Tip●Other Functions while Watching TV ( P.5-8)●Using Other Functions while Listening to Music (Play Background) ( P.8-7)
❶
❸
❷
❹
Activating Another Function
Activate another function from a different group. Multi Task is unavailable when Simple menu is active.
1 (MULTI) Open Menu Select a function
NoteIf another function is selected from same group, confirmation appears. ●Select YES to cancel current function and start a new function.
Ending Current Functions
1
End All Active Functions ■ > (MULTI) [ ] YES
TASK MENU Window
Capa_E_OI.indb 29 2009/07/28 10:12:54

1
Getting Started
1-30
View BlindActivate View Blind to protect Display from prying eyes.
Main Menu Settings Display Settings View Blind
1 ON
2 Select a levelSet level 1-3 (Level 3 is the highest level). ●
NoteAlternatively, press and hold ● to activate/cancel. Previously selected level takes priority.View Blind cannot be activated: While in Standby (Normal Position ●only); while S! Appli is active; while Privacy Key Lock is active; during All Reset
My NumberConfirm handset phone number in Account Details ( P.4-13). Also confirm data saved in Account Details: name, mail address, etc.
1 In Standby, Account Details appears.
Capa_E_OI.indb 30 2009/07/28 10:12:55

2
2-1
CallMaking/Answering Voice Calls ............................. 2-2
Making Voice Calls .....................................................................2-2Outgoing Call Functions .............................................................2-3Emergency Calls (110, 119, 118) ................................................2-4Answering Voice Calls .................................................................2-5Incoming Call Functions ..............................................................2-5Making Voice Clear (Shikkari Talk) ...............................................2-5
Making/Answering Video Calls ............................. 2-6Note ..........................................................................................2-6Video Call Window .....................................................................2-6Making Video Calls .....................................................................2-7Answering Video Calls ................................................................2-8Remote Monitoring ....................................................................2-8
International Calls ................................................ 2-9Calling Abroad from Japan ..........................................................2-9Calling while Abroad ................................................................2-10Global Roaming Settings ..........................................................2-10
Engaged Call Functions ...................................... 2-12Operations Available during a Voice Call ...................................2-12Operations Available during a Video Call ...................................2-12
Call Log ............................................................... 2-13Viewing Call Logs .....................................................................2-14Making Calls from Call Log .......................................................2-14Functions Available from Call Log .............................................2-15
Answer Phone..................................................... 2-15Activating/Canceling Answer Phone ..........................................2-15Playing Messages .....................................................................2-16Answer Phone Functions ..........................................................2-16
Optional Services ............................................... 2-17Overview ..................................................................................2-17Call Forwarding ........................................................................2-17Voice Mail ................................................................................2-18Call Waiting..............................................................................2-20Call Barring ..............................................................................2-20Caller ID ...................................................................................2-21
Capa_E_OI.indb 1 2009/07/28 10:12:55

Call
2
2-2
Making/Answering Voice CallsMaking Voice Calls
Before CallingConfirm signal strength ( ● P.1-10)If any of these indicators appear: ●
Calls cannot be made ( P.1-10, P.1-11, P.19-12)
1 Enter a phone number ● Include area code for all numbers.
2 Confirm the number, then To adjust volume: ● or
3 to end callCall Time appears.
Correcting MisentriesUse to place cursor at digit to delete, then .Press and hold to delete the digit and all digits to the right of cursor.
NoteDo not cover antenna area ( ● P.1-6) with hand or sticker; may weaken signal strength and cause calls/transmissions to be unavailable.Calls cannot be made in Horizontal Open Position except when ●earphone/microphone is connected.
Tip●Operations Available during a Voice Call ( P.2-12) ●Making Calls from Call Log ( P.2-14) ●Saving Entered Numbers to Phone Book ( P.4-5) ●Making Calls from Phone Book ( P.4-6)Settings ●Call Time & Call Cost ●Set Handset Response when Closed
during Call ( P.18-9)
Capa_E_OI.indb 2 2009/07/28 10:13:01

Call
2
2-3
Outgoing Call Functions
Showing/Hiding Caller ID
Enter number > [Menu] Notify caller ID OFF or ONTo cancel setting: ● [Menu] Notify caller ID Cancel prefixSetting Caller ID on/off (Caller ID: ● P.2-21)
Adding Prefix to Phone Number
Save Prefix ■Main Menu > Settings Call Settings Prefix
Highlight <Not Recorded> [Edit] Enter a name Enter a prefix number
Up to seven entries can be saved. ●To check entries: Select a saved prefix. ●To delete entries: Highlight a prefix ● [Menu] Delete this or Delete all ( For Delete all , enter Phone Password) YES
Make Calls Using Prefix ■Enter a number > [Menu] Prefix numbers Select an entry Voice Calls: / Video Calls: [V. Call]Alternatively, in detail window of Phone Book, Redial, Outgoing Call Logs ●or Incoming Call Logs, [Menu] Prefix numbers Select an entry Voice Calls: / Video Calls: [V. Call]
Example: Save "186" and "184" as prefixes, and add them to phone numbers to show/hide your caller ID when making calls.
Sending Touch-tone Signals
Send touch-tone signals for services such as reserving tickets, checking bank balance, etc. Save number strings to be sent as a touch-tone signal. Use P (pause) to separate numbers when saving.
Save Pause Dial ■Main Menu > Settings Phone Settings Pause Dial
[Edit] Enter a number stringTo enter a pause (p): Press and hold ●To delete: In Pause Dial window, ● [Menu] Delete YES
Send Pause Dial ■Main Menu > Settings Phone Settings Pause Dial
[Send] Enter a phone number Once line is connected, press [Send]Number string is sent each time ● [Send] is pressed.To send all number strings at one time: Once line is connected, press and ●hold Send at one time
Capa_E_OI.indb 3 2009/07/28 10:13:03

Call
2
2-4
Emergency Calls (110, 119, 118)
Call 110 (Police), 119 (Fire & Ambulance) or 118 (Coast Guard) even when some handset restrictions are active.
Calls Cannot be Made in Following Cases:When ● Set Max Cost Limit is ON and charge limit is reachedIn PIN/PIN2, PUK/PUK2 entry window ●
Emergency Positioning RequestWhen an emergency call is made from a mobile phone, location is reported to first response agencies such as the police.
Location information may be inaccurate due to location or signal ●conditions. Describe location or nearby landmarks.Base Station Positioning System is accurate within 100 meters to 10 ●kilometers. Location information from distant base stations may be inaccurate.Function available where first response agencies have completed ●system installation.Dialing 184 before 110, 119 or 118, cancels location report. ●However, first responders may obtain location information for immediate and serious threats to life.Not available for international roaming. ●Requires no separate subscription or transmission fees. ●
Capa_E_OI.indb 4 2009/07/28 10:13:03

Call
2
2-5
Answering Voice Calls
When a Call Arrives…931P rings; Notification Light flashes.
If Caller ID is sent, number appears in Internal Display and External Display; if saved in Phone Book, caller's name appears.When an International call arrives, appears at upper left of caller's phone number.
1 to talk ● To adjust volume: or
2 to end callCall Time appears.
Adjust Ringer Volume ■While 931P is ringing, >Volume adjustment is disabled in following cases: ●
During Manner Mode (・ P.1-17)While ・ Ringer Volume is set to Escalating Tone ( P.18-2)
NoteWhen Caller ID is not sent, ● Withheld appears.Calls cannot be received in Horizontal Open Position except when ●earphone/microphone is connected.
Tip●Operations Available during a Voice Call ( P.2-12)●Rejecting Unknown Callers ●Rejecting Calls without Caller ID ( P.11-11)Settings ●Change Answer Setting ●Answer Calls by Opening Handset
( P.18-7)
Incoming Call Functions
Following operations are available for incoming calls.
Place Calls on Hold
>
Answer Phone > /
Call Rejection > [Menu] Call RejectionRejecting Unknown Callers/Rejecting Calls without ●Caller ID ( P.11-11)
Call Forwarding
> [Menu] Call ForwardingActivate Call Forwarding ( ● P.2-17) beforehand to forward incoming calls to a preset number. If Call Forwarding is not active, call is rejected.
Making Voice Clear (Shikkari Talk)
<Default> ON
Make other party's voice clear according to surrounding noise.
Main Menu Settings Call Settings Shikkari Talk
1 ON or OFF
Capa_E_OI.indb 5 2009/07/28 10:13:05

Call
2
2-6
Making/Answering Video CallsExchange video/sound with video call-compatible mobiles.
Send Alternative Picture (still image) or video Image via Outside Camera. ●
Tip●Remote Monitoring ( P.2-8)
Note
Only available within 3G network coverage. ●931P is 3G-324M compliant; calls connected via different systems may ●be disconnected (charges apply).Increasing Speaker volume may cause interference. Decrease volume or ●use earphone.Handset may become warm during Video Call. This is not malfunction. ●When incoming/outgoing sound or image fails, try calling again. ●
Video Call Window
Example: Outgoing Video Call by Default
Image display changes depending on settings. ●
Call Time
Video Call Indicator
Incoming Image
Outgoing Image (Video Image/Alternative Image)
Indicators
: Incoming/Outgoing Sound OK
(Gray): Incoming/Outgoing Sound NG
: Incoming/Outgoing Image OK
(Gray): Incoming/Outgoing Image NG
: Video ON
: Alternative Image ON
: Speaker ON
: AV output
: During Bluetooth® handsfree call
: Portrait
: Close-up
: Landscape
: Night mode
Capa_E_OI.indb 6 2009/07/28 10:13:07

Call
2
2-7
Making Video Calls
Before CallingConfirm signal strength ( ● P.1-10)If any of these indicators appear: ●
Video Calls cannot be made ( P.1-10, P.1-11, P.19-12)
1 Enter a phone number
2 Confirm the number, then [V. Call]When answered, outgoing and incoming images appear; other party's voice sounds via Speaker.
● To adjust volume: or
3 to end call
NoteOther party's voice sounds via Earpiece in Manner Mode; activate ●Speaker ( P.2-12).
Tip●Outgoing Call Functions ( P.2-3)●Operations Available during a Video Call ( P.2-12)●Making Calls from Call Log ( P.2-14) ●Other Ways to Add New Entries ( P.4-5) ●Making Calls from Phone Book ( P.4-6)Settings ●Change Outgoing Image ●Switch to Voice Call when Video
Call Fails ( P.18-12)
Capa_E_OI.indb 7 2009/07/28 10:13:09

Call
2
2-8
Answering Video Calls
When a Video Call Arrives…931P rings; Notification Light flashes.
If Caller ID is sent, number appears in Internal Display and External Display; if saved in Phone Book, caller's name appears.When an International call arrives, appears at upper left of caller's phone number.
1 Inside Camera Image is sent.
To send Alternative Image: ●[Subst.]
2 to end call
NoteOther party's voice sounds via Earpiece in Manner Mode; activate ●Speaker ( P.2-12).
Tip●Adjust Ringer Volume ●Incoming Call Functions ( P.2-5) ●Operations Available during a Video Call ( P.2-12)
Remote Monitoring
Use 931P as a monitoring camera to observe a remote place from a phone with 3G-324M compliant Video Call functions. Remote Monitoring starts when 931P receives a Video Call from preset phone number.
Saving Numbers to Activate Remote Monitoring
Main Menu Settings Video Call Remote Monitoring
1 Enter Phone Password Other ID
2 <Not Recorded> Enter a phone number
3 Ring Tone Duration Enter time (sec)
4 Setting ONSetting cannot be set to ● ON in Manner Mode.
Capa_E_OI.indb 8 2009/07/28 10:13:10

Call
2
2-9
Select Numbers from Phone Book/Call Log ■In Step 2, highlight > <Not Recorded> [Menu] Refer to
Select an item Select a number
Delete Numbers ■After Step 1, (highlight a number > ) [Menu] Delete this or Delete all YES
Using Remote Monitoring
1 Make a Video Call to 931P from a preset phone numberAfter ring time elapses, Remote Monitoring starts.
A Video Call starts if 931P answers before auto answer activates. ●
2 To quit Remote Monitoring, (caller or recipient side)
International CallsCalling Abroad from Japan
Application not required. For details, go to: ●http://mb.softbank.jp/en/global_services/call/
1 Enter a phone number
2 [Menu] Int'l dial assistCountry/region code list appears.
3 Select a country/region
4 Voice Calls
Video Calls[V. Call]
Enter Country/Region Code Directly ■ > Press and hold to display + (IDD Prefix) Enter a country/region code Enter a number (omit first 0)
Voice Calls: / Video Calls: [V. Call]Do not omit leading ● 0 to call Italy (country code: 39).
Capa_E_OI.indb 9 2009/07/28 10:13:11

Call
2
2-10
Calling while Abroad
May require application to ● Global Roaming Service. Download and take Global Roaming Guide when traveling abroad. For details, go to: http://mb.softbank.jp/en/global_services/global_roaming
Example: Calling Japan from Another Country/RegionAuto Assist ● ( Right) is set to ON and Japan by default.Only number starting with ● 0 is valid.
1 Voice CallsEnter a phone number
Video CallsEnter a phone number [V. Call]
2 DialFirst 0 is replaced by +81.
To call a number just as saved in Phone Book: ● Dial with orig.No .
Calling Other Countries/Regions Using Country/Region CodeFollow the same steps as calling abroad from Japan ( P.2-9).
Calling within the Same Country/RegionFollow the same steps as making a Voice Call/Video Call within Japan ( P.2-2, P.2-7).
Global Roaming Settings
From Main Menu Settings International Call
■ International Call SettingsInt'l Dial Assist > Select an item (See below)
Item Operation/DescriptionAuto Assist Replace IDD Prefix with +
ON > or OFF ( For ON , select a country/region)Country/ Area Code
Save up to 27 country/region codesHighlight > <Not Recorded> [Edit] Enter a country/region name Enter a country/region codeTo view an entry: Select a saved country/region name ●To delete: Highlight a country/region name ●
[Menu] Delete this or Delete all ( For Delete all , enter Phone Password) YES
IDD Prefix Edit IDD Prefix. IDD Prefix is set to 0046010 by default > [Menu] Edit Edit IDD Prefix
Capa_E_OI.indb 10 2009/07/28 10:13:12

Call
2
2-11
Network Mode ■<Default> Automatically
Select Network > Select an item (See below)
Item Operation/DescriptionAutomatically 3G/GSM service area in Japan or abroad.
931P selects 3G network in Japan or an available network automatically using area (network condition) abroad.
Manually Select an item >3G/GSM・ : 3G/GSM service area in Japan or abroad. 931P selects an available network using area (network condition).3G・ : 3G service area in Japan or abroadGSM・ : GSM service area abroad. Unavailable in Japan
Automatically ● is recommended.
Select Operator ■<Default> Auto
Select Operator > Select an item (See below)
Item Operation/DescriptionAuto Select an operator automatically
Manual Select an operator manuallySelect an operator >Operators with ● X are not available.To show operator list: ● [Update]
Network Re-search
Search available networksWhen ● Auto is set, 931P selects an available operator automatically. When Manual is set, operator list appears.
Operator Priority for Automatic Search ■PLMN Setting > [Menu] Select an item (See below)
Item Operation/DescriptionAdd your network
Save currently connected operator > [Finish] YES
Add from list Select an operator > [Set] Select a network type [Finish] YESTo search operators by country/region: ● [Search] Select a country/region (To search again in country/region list: [Search] Enter a country/region name)
Direct input Save unlisted operators by entering country/region code and operator code
Enter country/region code (3 digits) and operator code >(2 to 3 digits) Select a network type
[Finish] YESChange priority
Select a priority > [Finish] YES
Delete this/Delete all
YES > [Finish] YES
View ■ Operator Name in Standby<Default> OFF
Operator Name > ON or OFFWhen ● ON is set, Clock Position is set to Pattern 1 even when Pattern 2 - Pattern 12 is set ( P.18-4).
Capa_E_OI.indb 11 2009/07/28 10:13:12

Call
2
2-12
Engaged Call FunctionsOperations Available during a Voice Call
Adjust Volume > / Adjust volume within two seconds. ●Adjusted volume is retained even after calls end or ●handset is turned off.
Place Call on Hold
> [Hold]To resume call: ● 2
Speaker ON/OFF 1
Toggle Speaker or Earpiece >
Record Conversation
Record for about three minutes per callPress and hold > or [Rec]To end recording: ● [Stop], or press and hold
To play back recorded data: ● P.2-16Toggle Manner Mode
Press and hold >
Toggle Handset/Bluetooth®
Toggle handset or Bluetooth® devicePress and hold > 2
1 Normal Position only2 Function may not be available or call may be placed on hold in Horizontal
Open Position.
Operations Available during a Video Call
Adjust Volume > / Adjust volume within two seconds. ●Adjusted volume is retained even after calls end or ●handset is turned off.
Place Call on Hold
> [Hold]To resume call: ● 2
To send Alternative Image: ● [Subst.] Speaker ON/OFF 1
Toggle Speaker or Earpiece >
Record Conversation
Record up to five calls for about 20 seconds eachPress and hold >To end recording: ● [Stop] or press and hold To play back recorded data: ● P.2-16
Inside Camera/Outside Camera
> [In cam/Out cam]
Camera/Alternative Image
Toggle Camera Image and Alternative Image > [Image/Subst.]
Incoming/Outgoing Image
Toggle Incoming Image and Outgoing Image > [Change]
Zoom > (zoom in) or (zoom out)
Toggle Manner Mode
Press and hold >
Capa_E_OI.indb 12 2009/07/28 10:13:15

Call
2
2-13
Toggle Handset/ Bluetooth®
Toggle handset or Bluetooth® device > [Menu] Talk on BT/Phone Bluetooth or Phone
BacklightSetting
> [Menu] Back light Constant light or 15 seconds light
Video CallSetting
> [Menu] V. Call settings Follow the steps for selected item ( P.18-12)
LCD AI Activate/deactivate auto image compensation > [Menu] LCD AI ON or OFF
Account Details
> [Menu] Account details
Key Guide > [Menu] Key guide1 Normal Position only2 Function may not be available or call may be placed on hold in Horizontal
Open Position.
Call LogIncoming and outgoing call records appear here. Use these records to call back.
Redial Up to 30 outgoing call records (Voice and Video) are saved. Older records of same number are deleted.
Outgoing Call Logs
Up to 30 outgoing call records (Voice and Video) and up to 30 outgoing transmission records (64K data and packet transmission) are saved. Older records of same number are also retained.
Incoming Call Logs
Up to 30 incoming call records (Voice and Video) and up to 30 incoming transmission records (64K data transmission) are saved. Older records of same number are also retained.
Indicators for Redial/Outgoing Call Logs/Incoming Call Logs
Dialed/received Voice Calls* Missed Voice Calls Dialed/received Video Calls* Missed Video Calls New messages recorded
on Answer Phone Dialed/received
international Voice Calls* Missed international Voice
Calls Dialed/received
international Video Calls* Missed international Video
Calls* Calls received while handset
is off, out-of-range, engaged, etc. ( P.2-19)
Received Remote Monitoring calls
Dialed calls of 64K data transmission
Received calls of 64K data transmission
* Missed calls of 64K data transmission
Dialed calls of packet transmission
Received calls of 64K data/packet transmission when no external device is connected
* Unchecked calls are highlighted.
Capa_E_OI.indb 13 2009/07/28 10:13:18

Call
2
2-14
Viewing Call Logs
1 Redial
Outgoing Call Logs Phone Book Call Log
Outgoing Call Logs
Incoming Call Logs
Records appear.
View Missed Calls ■Main Menu > Phone Book Call Log Incoming Call Logs
Missed CallsUnknown Calls ● appears in Call Log for unchecked calls.
NoteNewest record appears at top of list. Names appear if saved in Phone ●Book.Call Log records remain even if 931P is turned off. ●When the maximum number of records are saved, oldest is deleted first. ●Incoming Call Logs can also be opened from ● Main Menu
Phone Book Call Log Incoming Call Logs All CallsMissed Calls records can be viewed with handset closed ( ● P.1-23).
Redial
Making Calls from Call Log
1 Open Call Logs ( Left)
2 Voice CallsHighlight a phone number or name
Video CallsHighlight a phone number or name [V. Call]
International CallsSelect a phone number or name [Menu] Int'l dial assist Select a country/region
/ [V. Call]
Capa_E_OI.indb 14 2009/07/28 10:13:19

Call
2
2-15
Functions Available from Call Log
Highlight a call record and press [Menu].Available functions vary by selected log/record. ●
Item Operation/DescriptionNotify caller ID Notify or withhold your Caller ID ( P.2-3)Prefix numbers
Add a prefix to phone number before dialingSelect an entry >
Int’l dial assist
Add international dialing prefixSelect a country/region >
Character size Toggle font sizeAdd to Phone Book
Save number to Phone Book ( P.4-5)
Ring time 1 Show ring time (missed calls)Add shortcut icon
Create a shortcut ( P.1-22)
Compose S! Mail
Create S! Mail( From Step 4 on P.13-4)
Compose SMS 2
Create SMS( From Step 4 on P.13-7)
Received address/ Sent address
Show Received/Sent address log
Delete this/ Delete selected/Delete all
Delete record(s) in selected list >
1 Available only for Incoming Call Logs2 Message can be sent to SoftBank handsets only
Answer PhoneRecord up to five voice messages for Voice Calls or up to two for Video Calls (up to 20 seconds per message) on 931P.
When Answer Phone is active, ● – (Voice Call) or – (Video
Call) appears in Standby.Unavailable when: handset is off or in Emission OFF Mode; ● appears. Use Voice Mail ( P.2-18).
Activating/Canceling Answer Phone
<Default> OFF
1 Press and hold To cancel: Press and hold ● again
Redirect a Call to Answer Phone ■ > [Ans. Ph] or
NoteAlternatively, activate/cancel from ● Main Menu Tools
Sound Recorders Answer Phone Setting ON or OFFWhen full, new messages cannot be recorded even if Answer Phone is ●activated. Delete old messages.While Manner Mode (set for User Mode) is active, Answer Phone ●setting for User Mode ( P.18-7) is prioritized.
Capa_E_OI.indb 15 2009/07/28 10:13:20

Call
2
2-16
Playing Messages
When a new message is recorded,Event Indicator appears ( P.1-21) in Standby.
1 Select indicator
2 Select a messagePlayback starts.After playback ends, indicator disappears.
NoteAlternatively, press ● in Standby (for Voice Call messages) or Main Menu Tools Sound Recorders Voice Call Data or Video Call Data Select a recording
Play Recorded Caller's Voice/Video ■Main Menu > Tools Sound Recorders Voice Call Data or Video Call Data Call Data
Answer Phone Functions
From Main Menu Tools Sound Recorders
Select Outgoing Message/ ■ Set Ring TimeAnswer Phone Setting > ON Select a message Enter ring timeWhen Answer Phone and Optional Service (Voice Mail or Call Forwarding) ●are both active, function with shorter ring time takes priority. For example, if Answer Phone ring time is 18 seconds and Optional Service is 20 seconds, Answer Phone responds first (Priority may change due to signal conditions.).
Delete Recorded Call Data ■Voice Call Data > or Video Call Data (Highlight an item)
[Menu] Erase this , Erase rec. msg. , Erase Call Data* or Erase all YES
* Video Call Data only
Capa_E_OI.indb 16 2009/07/28 10:13:22

Call
2
2-17
Optional ServicesOverview
For details, visit SOFTBANK MOBILE Corp. Website ●(http://www.softbank.jp).
Call Forwarding( Right)
Forward unanswerable calls to a preset number when handset is off, out-of-range, etc.
Voice Mail( P.2-18)
Unanswered calls are forwarded to Voice Mail Center as set or when handset is off, out-of-range, engaged, etc.
Missed Call Notification ( ● P.2-19)Call Waiting*( P.2-20)
Place the current call on hold and answer a second, or alternate between calls.
Call Barring ( P.2-20)
Restrict calls by condition.While Call Forwarding or Voice Mail Service ●is active, Bar All Outgoing and Bar All Incoming are not available (Call Forwarding or Voice Mail Service is prioritized.).
Caller ID ( P.2-21)
Show or hide your number when calling.
* Separate subscription required.
Call Forwarding
Call Forwarding and Voice Mail cannot be set simultaneously. ●When forwarding Video Calls, set a destination phone that supports ●3G-324M standard video calls. If not, Video Calls are not forwarded.
Activating Call Forwarding
Main Menu Settings Call Settings Voice Mail/Call Fwding Call Forwarding ON
1 Select a type
2 Enter a destination phone number ● to select number from Phone Book.
3 Select an item (See below)
Item Operation/DescriptionRinger ON Forward missed calls
Select a ring time > YESRinger OFF Forward all calls without ringing/vibrating
YES >
Check Call Forwarding Status ■ >Main Menu Settings Call Settings Voice Mail/Call Fwding
Get Status
Capa_E_OI.indb 17 2009/07/28 10:13:22
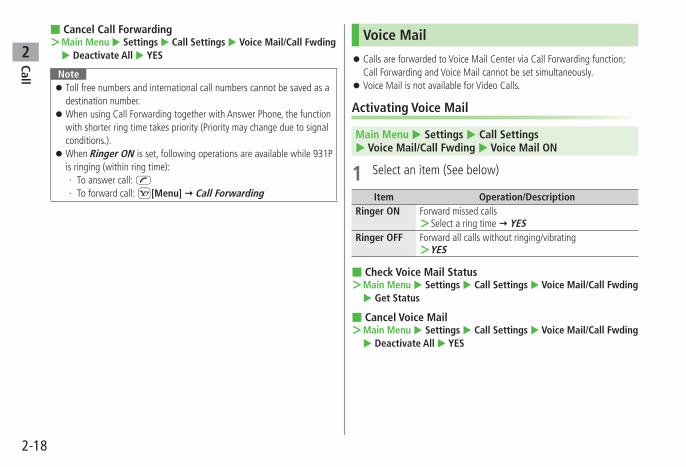
Call
2
2-18
Cancel Call Forwarding ■ >Main Menu Settings Call Settings Voice Mail/Call Fwding
Deactivate All YES
NoteToll free numbers and international call numbers cannot be saved as a ●destination number.When using Call Forwarding together with Answer Phone, the function ●with shorter ring time takes priority (Priority may change due to signal conditions.).When ● Ringer ON is set, following operations are available while 931P is ringing (within ring time):
To answer call: ・ To forward call: ・ [Menu] Call Forwarding
Voice Mail
Calls are forwarded to Voice Mail Center via Call Forwarding function; ●Call Forwarding and Voice Mail cannot be set simultaneously.Voice Mail is not available for Video Calls. ●
Activating Voice Mail
Main Menu Settings Call Settings Voice Mail/Call Fwding Voice Mail ON
1 Select an item (See below)
Item Operation/DescriptionRinger ON Forward missed calls
Select a ring time > YESRinger OFF Forward all calls without ringing/vibrating
YES >
Check Voice Mail Status ■Main Menu > Settings Call Settings Voice Mail/Call Fwding
Get Status
Cancel Voice Mail ■Main Menu > Settings Call Settings Voice Mail/Call Fwding
Deactivate All YES
Capa_E_OI.indb 18 2009/07/28 10:13:22

Call
2
2-19
NoteWhen using Voice Mail together with Answer Phone, the function with ●shorter ring time takes priority (Priority may change due to signal conditions.).When ● Ringer ON is set, following operations are available while 931P is ringing (within ring time):
To answer call: ・ To forward call: ・ [Menu] Call Forwarding
Checking Voice Mail Messages
Event Indicator ( P.1-21) and appear in Standby when new messages are recorded.
1 Select indicator YESFollow voice guidance. ●
Indicator and disappear after messages are checked.
View Details ■View callers' phone numbers and date/time Voice Mail messages were left before playing messages.
Activate ● Missed Call Notification beforehand. > Voice Mail Notif. [ ]
Delete ■ Indicator >Main Menu Settings Call Settings Voice Mail/Call Fwding
Delete Voice Mail Icon YES
NoteAlternatively, follow these steps to check Voice Mail: ●Main Menu Settings Call Settings
Voice Mail/Call Fwding Listen to Voice Mail YES
Missed Call Notification
When Missed Call Notification function is active, Event Indicator appears for calls missed while 931P was off, out-of range, engaged etc.
Available only when Voice Mail is active. ●
Main Menu Settings Call Settings Missed Call Notifi.
1 YES931P connects to the Network.
Follow voice guidance. ●
When Calls are Received while Missed Call Notification is Active…Event Indicator appears for missed calls when 931P is turned on or comes into range. Select indicator to view Missed Calls.
Voice mail ● indicator appears when Voice Mail messages are recorded ( Left).
Capa_E_OI.indb 19 2009/07/28 10:13:25

Call
2
2-20
Call Waiting
Activating/Canceling Call Waiting
Main Menu Settings Call Settings Call Waiting
1 Activate or Deactivate YESCurrent status appears.
Check Call Waiting Status ■Main Menu > Settings Call Settings Call Waiting
Get Status
Answering Second Call
1 When tone sounds, ● to alternate between calls. ● to disconnect active call.When the party hangs up, active call ends. ● ● to re-engage the party on hold.When a second call comes in while first call is on hold, hold status ●is canceled and first call resumes.
Reject Second Call ■When tone sounds, > [Menu] Call Rejection
NoteWhen Voice Mail or Call Forwarding is set to ● Ringer ON while Call Waiting is active, unanswered calls are transferred to Voice Mail Center or the forwarding number.When Voice Mail or Call Forwarding is set to ● Ringer OFF , Call Waiting is disabled.
Call Barring
Security Code is required ( ● P.1-28).
Activating/Deactivating Call Barring
Main Menu Settings Call Settings Call Barring
1 Select an item (See below)
Item Operation/DescriptionBar All Outgoing
Restrict all non-emergency calls
Bar All Int'l Allow only domestic callsBar Int'l Restrict all international calls except to JapanBar All Incoming
Reject all calls
Bar All Roaming
Reject calls when outside Japan
2 Activate or Deactivate YES
3 Enter Security Code
Capa_E_OI.indb 20 2009/07/28 10:13:25

Call
2
2-21
Check Call Barring Status ■After Step 1, > Get Status
Cancel All Call Barring ■In Step 1, > Cancel All Barring Enter Security Code
Change ■ Security CodeIn Step 1, > Set Security Code Enter current Security Code Enter new Security Code Reenter Security Code
NoteEmergency numbers (110, 119, 118) are dialable even while Call ●Barring for outgoing calls is active.If call is attempted when Call Barring is active, warning message ●appears. It may take longer to appear in some areas. Check Call Barring settings if the message does not appear.
Caller ID
<Default> Network Set
Main Menu Settings Call Settings Show My Number Activate
1 ON , OFF or Network SetNetwork Set ● Caller ID setting varies by subscription.
Check Caller ID Status ■Main Menu > Settings Call Settings Show My Number
Check Setting
NoteAlternatively, enter these numbers/symbols before the phone number to ●show or hide Caller ID: Show: or Hide: or
Capa_E_OI.indb 21 2009/07/28 10:13:27

Call
2
2-22
Capa_E_OI.indb 22 2009/07/28 10:13:27

3
3-1
Text EntryText Entry .............................................................. 3-2Entering Text ......................................................... 3-3
Entering Characters ....................................................................3-3Pictographs & Symbols ...............................................................3-4Templates ...................................................................................3-5Additional Features.....................................................................3-5
Conversion Methods (Japanese) ........................... 3-6Predictive Conversion .................................................................3-6Converting Hiragana to Katakana/Alphanumerics ........................3-7Conversion .................................................................................3-8
Editing Text ........................................................... 3-9Deleting & Replacing ..................................................................3-9Copy/Cut/Paste ...........................................................................3-9
User's Dictionary ................................................ 3-10Saving User's Dictionary Entries ................................................3-10
Download Dictionary .......................................... 3-10Activating Downloaded Dictionaries ..........................................3-10
Capa_E_OI.indb 1 2009/07/28 10:13:28

Text Entry
3
3-2
Text EntryEnter alphanumerics, hiragana, kanji, katakana, symbols and pictographs.
Three types of character input methods are available: Mode 1 (5-touch), ●Mode 2 (2-touch), Mode 3 (NIKO-touch) In this guide, examples are described in Mode 1 (5-touch).
Mode 2 (2-touch)/Mode 3 (NIKO-touch)Press two numeric keys to enter a character.
List of Key Assignments ( ● P.19-15 to 17)
■ HelpHelp describes text entry operations.
In text entry window, > [Menu] Help Select an item
●❶ Character Input Methods Operations: Mode 2 (2-touch): Mode 3 (NIKO-touch)No icon appears for Mode 1 (5-touch). ●
Press and hold [Mode]
●❷ Input Modes* Operationsabc: Alphanumerics123: Numbers漢: Kanji (hiragana)カナ: Katakana
[Mode]
●❸ Double-byte/Single-byte* Operations1/1: Double-byte1/2: Single-byte
[Menu] 2bytes character (1byte character )
●❹ Remaining/Maximum Bytes in Message
* Operations in Mode 3 (NIKO-touch): P.19-17
❶❷❸ ❹
Capa_E_OI.indb 2 2009/07/28 10:13:30

Text Entry
3
3-3
Entering TextEntering Characters
Example: Enter 鈴木
1 In alphanumerics mode, twice to switch to kanji (hiragana) modeす: three timesず: * three times き: twice* When the next character is on the same key, press first to move cursor.
2 to enter Predictive Candidates List
To change word before converting, press ●.
There are four types of word suggestion ●lists: Predictive Candidates , Conversion Candidates , Context Forecast and abc/123/Kana Candidates ( P.3-6)
3 to select 鈴木
Other Input Functions ■Enter katakana/alphanumerics
Press [Mode] several times to select an input mode Enter characters
Enter small kana (っ, ッ, etc.)
Enter a character to convert to
small characterAlternatively, press a key repeatedly ●to enter an assigned small kana.
Enter upper case characters
Enter a character ● Alternatively, press a key repeatedly to enter an assigned upper case character.
Add o゙r ゜
Enter a character to add o゙r ゚ for o゙r twice for ゜
● In single-byte katakana mode, a゙nd ゚are entered as a single-byte character.
Insert line break Press [Line FD] to insert line breaks in text
Insert space at end of text
Insert space within text
Press repeatedly until single-byte space appears*, or [Menu] Pictograms/symbols Space to enter a space (Double-byte (single-byte) space is entered in 2 bytes (1 byte) input mode.)
Toggle characters in reverse order
[Rev]Example: From c, press to toggle as follows: c b a 2…
Move cursor to beginning/end of sentence
[Menu] Jump To beginning or To end
Undo [Undo]
* Space cannot be entered within text in number mode by following the steps above. Use symbol list.
Capa_E_OI.indb 3 2009/07/28 10:13:37

Text Entry
3
3-4
Pictographs & Symbols
Pictographs do not appear in messages sent to incompatible SoftBank ●handsets or e-mail.
1 PictographsIn kanji (hiragana)/katakana/alphanumerics mode, SoftBank pictograph list appears.
SymbolsPress and hold Single-byte symbol list appears.
2 to select a pictograph or symbolSymbol List: ● P.19-18
NoteAlternatively, follow the steps to access pictograph or symbol: ●
[Menu] Pictograms/symbolsList Log may appear first. ●
Entering Cross-carrier PictographsPress or to toggle lists (Universal pictograph list, Log, Full pictograph list and My Pictograms).
Functions Available in Pictograph/Symbol List ■Enter same pictograph or symbol again [Cont.]
Toggle pictograph/symbol list [Pict./Symbol]
Jump to previous/next page /
Toggle full screen/standard screenToggle double/single-byte symbol and log [symbol list only]
[1byte/2bytes/Log] ● to toggle in reverse
Toggle pictograph lists [pictograph list only]
[Univrsl. 1/Full/My Pict. 2/ NxtMyPic 2/Log]
● to toggle in reverse
Close list1 In S! Mail Subject/Text/Signature field or Subject field for Auto-sort Setting
only2 In S! Mail Text field only
Capa_E_OI.indb 4 2009/07/28 10:13:40

Text Entry
3
3-5
Templates
Insert templates (greetings, URLs, emoticons) or edit preinstalled templates.
Inserting Templates
1 In text entry window, press and hold Not available in number mode. ●
2 Select a category Select a template
NoteAlternatively, in a text entry window, ● [Menu] Input assistance
Templates to enter a template
Editing Templates
Main Menu Tools Templates/Users Dic. Templates
1 Select a category
2 Highlight a template [Edit] Edit template
Reset Edited Templates ■After Step 1, (highlight a template > ) [Menu] Reset this or Reset all ( For Reset all , enter Phone Password) YES
Manage Template Folders ■In Step 1, highlight a category > [Menu] Edit folder name Edit folder nameTo reset folder name, ● [Menu] Reset name YES
Additional Features
1 In text entry window, [Menu] Input assistance
2 Select an item (See below)
Item Operation/DescriptionKuten Code Enter a character code ( P.19-19)
Enter a character code (4 digits) >Input date/time
Select a style to enter date/timeSelect a display style > Enter date/time
Quote phone book
Quote Phone Book entry detailSelect an entry > Check item(s) to quote
[Finish]Quote accnt detls
Quote Account DetailsEnter Phone Password > Check item(s) to quote
[Finish]Bar code reader
Activate Bar Code Reader to insert scanned result ( P.12-11)
Capa_E_OI.indb 5 2009/07/28 10:13:40

Text Entry
3
3-6
Conversion Methods (Japanese)Predictive Conversion
The following suggestion lists appear while entering text orafter a word is fixed.
While Entering Text
Predictive Candidates
Lists likely conversions (Predictive Candidates) and matching conversions (Conversion Candidates)Predictive Candidates わ 私, わたし, etc.Conversion Candidates わ 和, 輪, etc.
Conversion Candidates
Suggests matching conversionsExample: わ 和, 輪, etc.
abc/123/ Kana Candidates
Lists alphanumerics/katakana assigned to key ( P.3-7)
After a Word is Fixed
Context Forecast
Suggests words likely to followExample: 私 is fixed です, の, は, etc.
Predictions change with each letter entered. ●Press ● [Pred.]/[Conv.] to toggle Predictive Candidates List and Conversion Candidates List.
Note931P learns entered characters and suggests them for future ●conversions ( P.3-8).
Example: Enter 私の鼻
1 In kanji (hiragana) mode, わ is entered and Predictive Candidates List appears.
2 to move to Predictive Candidates List to select 私私 is entered and Context Forecast List appears.
3 to move to Context Forecast List to select のの is entered and Context Forecast List appears.
4 はな is entered and Predictive Candidates List appears.
5 [Conv.]Conversion Candidates List appears.
Capa_E_OI.indb 6 2009/07/28 10:13:43

Text Entry
3
3-7
6 to move to Conversion Candidates List to select 鼻
If the Word is Not ListedPress to return to hiragana, and segment hiragana to convert separately.Example: Segment はるか into はる and か, then convert to 春香① Move cursor to る, then convert はる to 春 ② Convert か to 香
Using Previously Entered WordsEnter the first one or two hiragana to access previously enteredwords in the list.
Converting Hiragana to Katakana/Alphanumerics
Enter katakana and alphanumerics in kanji (hiragana) mode. Date and time can be entered quickly.
Example 1: Enter OKStep 1 2 3 4
Key(3 times) (twice)
[a1Kana]
Display ふ ふに abc/123/Kana Candidates OK
Press ● after highlighting OK.
Example 2: Enter 10:30 or 10/30Step 1 2 3Key [a1Kana]
Display あわさわ abc/123/Kana Candidates
10:30or
10/30Press ● after highlighting 10:30 or 10/30.
Capa_E_OI.indb 7 2009/07/28 10:13:44

Text Entry
3
3-8
Conversion
Viewing Learned Words
1 In text entry window, [Menu] Text entry setting Learned words
2 Select a row Select a log
Delete Learned Words ■In Step 2, (highlight a log > ) [Menu] Delete this or Delete all ( For Delete all , enter Phone Password) YES
TipSettings ●Set Learning Feature Off for Secret Mode/Secret Data Only
●Delete All Learned Words ( P.18-10)
Activating/Canceling Prediction List
<Default> ON
1 In text entry window, [Menu] Text entry setting
2 Select an item (See below)
Item Operation/DescriptionPredict Activate/cancel Predictive Candidates and Context
Forecast lists.Candidate display
Activate/cancel Context Forecast list.
2/NIKO-touch guide
Activate/cancel Conversion Candidates guidance for 2/NIKO-touch input method.
3 ON or OFF
Fixing Entered Characters Automatically
<Default> OFF
Fix character in Mode 1 (5-touch) automatically after specified time elapses.
1 In text entry window, [Menu] Text entry setting
2 Character set time Select a speed
Capa_E_OI.indb 8 2009/07/28 10:13:45

Text Entry
3
3-9
Editing TextDeleting & Replacing
1 Delete Characters within LinesPlace cursor before a character A character after cursor is deleted.
Press and hold ● to delete all characters after cursor.
Delete Characters from the End of TextPlace cursor at the end of text A character before cursor is deleted.
Press and hold ● to delete all characters before cursor.
2 Enter another character
Copy/Cut/Paste
Copy/cut text (up to 5000 double-byte/10000 single-byte) and paste to another place.
1 In text entry window, [Menu] Copy or Cut
2 Select Text to Copy/CutPlace cursor before (or after) text to select
[Start] Place cursor after (or before) text [End]
Select All[All] [End]
3 Place cursor at target location [Menu] Paste
Capa_E_OI.indb 9 2009/07/28 10:13:45

Text Entry
3
3-10
User's DictionarySave frequently used words/phrases (up to 100 entries). Saved words/phrases appear among word suggestions.
Saving User's Dictionary Entries
1 In text entry window, [Menu] Text entry setting User's Dictionary
2 <New>
3 Enter a word Enter reading
Edit User's Dictionary Entries ■After Step 1, highlight a word > [Edit] Edit word Edit reading
Delete User's Dictionary Entries ■After Step 1, > [Menu] Delete Delete this or Delete all ( For Delete all , enter Phone Password) YES
NoteAlternatively, ● Main Menu Tools Templates/Users Dic.
User's Dictionary
Download DictionaryDownload dictionaries from P-egg, a download site for 931P users (see below). Activate downloaded dictionaries to add character conversions to conversion suggestions (Japanese).
P-egg (as of May 2009) ●Yahoo! Keitai top page メニューリスト 辞書・ツール ケータイメーカー P-egg
Activating Downloaded Dictionaries
Main Menu Tools Templates/Users Dic. Download Dictionary
1 Select a dictionary★ appears next to active dictionary.
To cancel: follow the same step ●
Change Title ■In Step 1, highlight a dictionary > [Menu] Edit title Edit
View Details ■In Step 1, highlight a dictionary > [Menu] Dictionary info
Delete Dictionaries ■In Step 1, (highlight a dictionary) > [Menu] Delete this or Delete all ( For Delete all , enter Phone Password) YES
Capa_E_OI.indb 10 2009/07/28 10:13:45

4
4-1
Phone BookOverview .............................................................. 4-2Saving to Phone Book .......................................... 4-3
Phone Book Entry Items ..............................................................4-3Create New Entry .......................................................................4-3Other Ways to Add New Entries ..................................................4-5Setting Groups ...........................................................................4-6
Searching/Using Phone Book ................................ 4-6Making Calls from Phone Book ...................................................4-6Using Phone Book ......................................................................4-7
Managing Phone Book ......................................... 4-9Editing Phone Book Entries .........................................................4-9Deleting Phone Book Entries .......................................................4-9Copying/Deleting Phone Book Data ............................................4-9Phone Book Memory Status ......................................................4-10
S! Addressbook Back-up..................................... 4-10Manual Synchronization ...........................................................4-11Auto Synchronization ................................................................4-12Viewing Sync Log .....................................................................4-12
Account Details .................................................. 4-13Editing Account Details .............................................................4-13Account Details Functions .........................................................4-13
Voice Dial ............................................................ 4-14Adding Entries to Voice Dial ......................................................4-14Searching Entries by Voice Dial ..................................................4-14
Capa_E_OI.indb 1 2009/07/28 10:13:46

4-2
Phone Book
4
OverviewSave frequently used phone numbers and mail addresses to Phone Book.
NoteBack-up Important Information ● Keep a separate copy of Phone Book entry information. When battery is exhausted or removed for extended periods, entries may be lost. Handset damage may also affect data recovery. SoftBank is not liable for damages from lost/altered entries.
Supplement phone numbers and mail addresses with birthday, street address, an image or notes.
Set tones/image for each entry. Sort entries into Groups.
Tip●Phone Book Memory Status ( P.4-10)●Backing up to microSD Card ( P.9-19)
Capa_E_OI.indb 2 2009/07/28 10:13:47

Phone Book
4
4-3Next Page
Saving to Phone BookPhone Book Entry Items
Save up to 1000 entries in Phone Book. Save phone numbers or mail addresses etc. in USIM Card Phone Book.
Up to 50 entries can be saved to USIM Card Phone Book. ●Phone Book Entry Items 931P USIM CardBasic item
Name (Reading) ○ ○Group 19 10Phone number 4 2Mail address 3 1Address ○ ̶Location information ○ ̶Birthday ○ ̶Memo ○ ̶Image 100 ̶Memory number 000 - 999 ̶Incom
ing Settings
Ringtone
○ ̶
VibratorNotification LightScreenMsg RingtoneMsg VibratorMsg Notif. LightAnswer message
○: Can be saved ̶: Cannot be saved Phone Book entries in USIM Card can also be used in another SoftBank ●handset.
Create New Entry
Save new entries to 931P or USIM Card Phone Book. When saving to USIM Card Phone Book, set ● Save Settings to USIM or Ask Every Time beforehand ( P.18-11).
1 Press and hold
2 Enter Last name Enter First name
For 931P Phone Book, ● to switch Basic item and Incoming Settings tabs.
931P Phone Book
Capa_E_OI.indb 3 2009/07/28 10:13:48

Phone Book
4
4-4
3 Select an item (See below)
Item Operation/DescriptionName(First/Last)
Save first and last names separately. For USIM Card, enter both names together
Enter name >Reading(First/Last)
Save first and last name readings separately. For USIM Card, enter both readings together
Enter reading >Group Select a group >Phone number
Enter phone number ( > For 931P, select an icon)
Mail address Enter mail address ( > For 931P, select an icon)Save only phone number if mail address is "phone ●[email protected]".
Address Enter zip code > Enter addressLocation information
Identify handset location and save information. Also, save location record selected from location logs
Select an item > ・ By position loc. YES Check information
[Set] (To show information while positioning: When [Use] appears at lower right of display, press [OK]. To retry positioning: [Retry]) ・ From loc. history Select a location record to save
Birthday Enter birthday >Memo Enter memo >
Item Operation/DescriptionImage Save a still image to appear for incoming calls
Select an item >Select image・ Select a folder Select a file ・ Shoot image Frame subject
[Record]/ / [Save]/ /Saved still image appears for an incoming call only when ●Phone Book Image ( P.18-7) is ON. If there is an image saved for Screen , the image preferentially appears.
Memory number
Enter memory number >
Ring tone Ring Tones > Select a type Select a folder Select a ringtone
Vibrator Select vibrator > Select a patternNotification Light
Select illumination > Select a pattern
Screen* SEL picture > Select a screen type Select a folder Select an image
Still image saved for ● Screen appears for an incoming call whether Phone Book Image is ON or OFF . Phone Book Image setting applies only when still image is saved for Image .
Msg Ringtone Ring Tones > Select a type Select a folder Select a ringtone
Msg Vibrator Select vibrator > Select a patternMsg Notif. Light
Select illumination > Select a pattern
Answer message
Select answer message > Select a message
* To cancel: Select RLS picture
Capa_E_OI.indb 4 2009/07/28 10:13:51

Phone Book
4
4-5
4 [Finish]
Other Ways to Add New Entries
Save currently displayed phone numbers, mail addresses, still images or location information to Phone Book.Example: Saving Numbers from Incoming Call Logs
1 Highlight a record [Menu] Add to Phone Book
2 New EntryNew Enter details ( From Step 3 on P.4-4)
Add to Existing EntryAdd Select entry Enter other details ( Step 3 on P.4-4)
When saving to USIM Card, ● Overwrite appears instead of Add .
3 When complete, [Finish] YES
NotePress ● [Menu] from a function. If Add to Phone Book appears, the information is savable to Phone Book. From a text message window, select Add Address to save entries; from still image list/still image, select Set display Phone Book to save entries.When adding still images or location information, entries are saved to ●handset regardless of Save Settings.When saving new entries in Secret Mode or Secret Data Only, entries ●are saved to handset regardless of Save Settings.
Capa_E_OI.indb 5 2009/07/28 10:13:52

Phone Book
4
4-6
Setting Groups
Sort entries by Group. Custom set ringtones/vibrators/notifications per group.
Main Menu Phone Book Group
● appears for USIM Card Group.
1 Highlight a group [Edit] Select an item Set item
Enter group name for " ● Group name."For other item operations: ● P.4-4 Custom settings unavailable for USIM Card Groups.
2 When complete, [Finish]
Check Settings ■Select a group entry, or > [Menu] Check settingSettings cannot be checked in USIM Card Group Phone Book. ●
Reset Group Setting ■Highlight a group > [Menu] Reset group YES
Searching/Using Phone BookMaking Calls from Phone Book
<Default> A-KA-SA-TA-NA
1
2 Search Phone Book (See below)To change search method: ● Select a search method (See below)
Search Method Operation/DescriptionA-KA-SA-TA-NA
Search entries by katakana syllabary. Names saved in Roman characters are saved under the 英 tab.
Reading Enter partial reading >
Group Select a group >Memory Number*
Enter memory (entry) number to search for an entryEnter a memory number >
Name Enter partial name >
Phone Number
Enter partial phone number >
Mail Address Enter partial mail address >
2-touch Dial* Show entries with memory (entry) numbers 000 - 009
* 931P Phone Book only
3 Select an entry
4
Capa_E_OI.indb 6 2009/07/28 10:13:53

Phone Book
4
4-7
5 Voice CallsHighlight a phone number
Video CallsHighlight a phone number [V. Call]
NoteTo scroll through entries, enter nothing and press ● (not available in Group or 2-touch Dial ).If no matches are found in ● Reading or Memory Number method, entries closest to condition appear.Once a method is selected, same method retains. ●
Additional Search/Dialing Methods ■Open Tab Assigned to Key from Standby
Press and hold – Open search window assigned to key.
Enter Partial Number from Standby or during Call
Enter partial number
By Memory Number Enter a memory numberBy Single-digit Memory Number (2-touch Dial)
Enter last digit ( – ) of memory number 000-009 Voice Call: /Video Call: [V. Call]
Using Phone Book
Use Phone Book Entries ■ > Highlight an entry [Menu] Select an item (See below)
Item Operation/DescriptionNew Add a new entry ( From Step 2 on P.4-3)Sort Change display order
Select an order >Available only when search method ( ● P.4-6) is Name , Phone Number or Mail Address .
Send Ir data* ( P.10-3)IC transmission*
( P.10-5)
Send to Bluetooth*
( P.10-9)
Copy to microSD*
Copy an entry to microSD CardYES >To display copied data: ● P.9-18
Delete phone book
Select an item > Follow steps for selected option ( P.4-9)
Character size
Switch character size to large/standard
Set secret mode/Release secret*
Set/cancel Secret Mode for selected entryEntries saved as secret data appear only when ●Secret Mode or Secret Data Only is active ( P.11-9).
* Not available in USIM Card Phone Book
Capa_E_OI.indb 7 2009/07/28 10:13:55

Phone Book
4
4-8
Use Entry Details ■ > Select an entry [Menu] Select an item (See below)
Item Operation/DescriptionNotify caller ID
Show/hide caller ID ( P.2-3)
Prefix numbers
Make a call using a prefix number ( P.2-3)
Int'l dial assist
Set International dial assist ( P.2-10)
Restrictions* Activate restrictions on specified entry ( P.11-10)Edit Phone Book
Edit entry ( From Step 3 on P.4-4)
Delete phone book
Phone number > or Delete this YESItem names vary by selected item: ●Mail address /Address /Location info /Birthday /Memo /Image
Add shortcut icon
Create a shortcut ( P.1-22)
Compose S! Mail
Create a message to mail address of selected entry( From Step 4 on P.13-4)
Compose SMS
Create an SMS message to phone number of selected entry ( From Step 4 on P.13-7)
Message can be sent to SoftBank handsets only. ●Send Ir data* ( P.10-3)IC transmission*
( P.10-5)
Send to Bluetooth*
( P.10-9)
Item Operation/DescriptionCopy to microSD*
Copy an entry to microSD CardYES >To display copied data: ● P.9-18
Copy names Copy a nameCopy phone numbers
Copy an itemItem names vary by selected item. ●Copy mail add. /Copy address /Copy location info /Copy birthday /Copy memo
Character size
Switch character size to large/standard
Set secret mode/Release secret*
Set/cancel Secret Mode for selected entryEntries saved as secret data appear only when ●Secret Mode or Secret Data Only is active ( P.11-9).
Copy to USIM/Copy from USIM
Copy an entry to USIM CardYES >
* Not available in USIM Card Phone Book
NoteInsert entry details to a message ( ● P.3-5).
Capa_E_OI.indb 8 2009/07/28 10:13:56

Phone Book
4
4-9
Managing Phone BookEditing Phone Book Entries
1 Select an entry [Edit]
2 Edit ( From Step 3 on P.4-4) YES
Deleting Phone Book Entries
1 Highlight an entry [Menu] Delete phone book
2 Select an item (See below)
Item Operation/DescriptionDelete this YES >Delete select Check entries to delete > [Finish] YES
● [Menu] Select all in tab*, Select all, Release all in tab* or Release all to check/uncheck all entries at a time
Delete all in tab*
YES >
Delete all Delete all entries (931P/USIM Card Phone Book) including Secret Mode entries
Enter Phone Password > YES YES
* Available in A-KA-SA-TA-NA , Reading , Group and Memory Number search methods ( P.4-6)
Copying/Deleting Phone Book Data
Main Menu Phone Book Memory Manager
1 Enter Phone Password
2 Select an item (See below)
Item Operation/DescriptionCopy Copy data between 931P/USIM Card Phone Book
Copy to USIM > or Copy from USIMDelete Delete data in 931P/USIM Card Phone Book
Phone > or USIM
3 Phone Book Select an entry** To clear, repeat operation.
4 [Finish] YES
Capa_E_OI.indb 9 2009/07/28 10:13:56

Phone Book
4
4-10
Phone Book Memory Status
Main Menu Phone Book Memory Status
View 931P/USIM Card Phone Book memory status.
S! Addressbook Back-upBack up Phone Book entries to S! Addressbook (network server); synchronize 931P Phone Book with S! Addressbook; restore Phone Book after accidental loss/alteration.
Separate subscription is required for this service. ●
Notes
Fully charge battery beforehand ( ● appears).Transmission fees apply to synchronization, backup and restoration. ●Restoration cancels these Phone Book settings: Ringtone, Vibrator, ●Notification Light, Picture, Answer message.Subscription to the service activates Auto Sync Settings during network ●information retrieval to back up edited Phone Book entries. Note that initiating network information retrieval activates Auto Sync Settings even when Auto Sync Settings are OFF . When contract is terminated, check if Auto Sync Settings are OFF ( P.4-12). S! Addressbook is deleted upon contract termination. ●Addresses saved in Address field on 931P Phone Book are ●saved to building name field in S! Addressbook.When number of characters saved in S! Addressbook exceeds ●maximum number of characters savable on 931P Phone Book, excess characters do not appear on 931P Phone Book.
Capa_E_OI.indb 10 2009/07/28 10:13:57

Phone Book
4
4-11
Synchronization/Back-up/RestorationBe careful of back-up/restoration timing or selecting a synchronization ●direction.When no 931P Phone Book entries exist, selecting ● Synchronize , Sync from Phone or Backup to Server deletes S! Addressbook.When no S! Addressbook entries exist, selecting ● Synchronize , Sync from Server or Restore from Server deletes all 931P Phone Book entries.
Capacity DisparitiesWhen the number of savable items varies between 931P Phone Book ●and S! Addressbook, synchronization reflects lower limit.
Transfer to New HandsetsS! Addressbook Back-up-compatible 3G Handsets: Data remains. ●Other 3G Handsets: Service subscription and data remains, but data is ●not accessible via handset (accessible via PCs).V3/V4/V5/V6/V8 Series: Service subscription is terminated and data is ●deleted.
Manual Synchronization
Main Menu Phone Book S! Addressbook BkUp Start Sync
1 YES Enter Phone Password
2 Select an item (See below)
Item Operation/DescriptionSynchronize Synchronize 931P Phone Book with S! AddressbookSync from Phone
Send edited data to S! Addressbook
Sync from Server
Receive edited data from S! Addressbook
Backup to Server
Back up 931P Phone Book to S! Addressbook
Restore from Server
Restore S! Addressbook to 931P Phone Book
3 YES OK
Capa_E_OI.indb 11 2009/07/28 10:13:57

Phone Book
4
4-12
Auto Synchronization
Main Menu Phone Book S! Addressbook BkUp Auto Sync Settings ON/OFF
1 Enter Phone Password ONTo cancel, select ● OFF
2 Select an item (See below)
Item Operation/DescriptionEvery week Synchronize weekly at specified time of the day
Select a day > Set start time Select a sync typeEvery month Synchronize monthly at specified time of the date
Enter a date > Set start time Select a sync typeAfter Editing PB
Synchronize ten minutes after entries are editedSelect a sync type >
3 YES
View Auto Sync Settings ■Main Menu > Phone Book S! Addressbook BkUp
Auto Sync Settings Confirm Settings
Viewing Sync Log
View synchronization/back-up/restoration logs.
Main Menu Phone Book S! Addressbook BkUp Sync Log
1 Select a log
Delete Sync Log ■In Step 1, (highlight a log > ) [Menu] Delete this or Delete all ( For Delete all , enter Phone Password) YES
Capa_E_OI.indb 12 2009/07/28 10:13:57

Phone Book
4
4-13
Account DetailsSave phone number, mail address, street address, etc. in Account Details.
Editing Account Details
1
2 [Edit]
3 Enter Phone Password Edit [Finish]Your subscribing phone number cannot be edited or deleted. ●
Account Details Functions
In Account Details, press [Menu] for following operations.
Item Operation/DescriptionEdit* Edit Account Details ( From Step 3 above)Character size
Switch character size to large/standard
Display all data*
View all saved items such as phone numbers and mail addresses
Copy names Copy a nameCopy phone numbers
Copy an itemItem names vary by selected item. ●Copy mail add. /Copy address /Copy birthday /Copy notepad
Item Operation/DescriptionSend Ir data Send details via Infrared ( P.10-3)
Alternatively, while Account Details is open, press ●[Ir].
IC transmission
Send details via IC transmission ( P.10-5)Alternatively, while Account Details is open, press ●
[ICtrans].Copy to microSD
Copy details to microSD CardYES >To display copied data: ● P.9-18Account Details is saved as a Phone Book entry. ●
Erase phone number*
Select an item > YESDelete items saved in Account Details ●Item names vary by selected item. ●Erase mail add. /Erase address /Erase birthday /Erase memorandums /Delete image
Reset* Reset all Account Details except your subscribing phone number
YES >* Enter Phone Password if required.
NoteQuote a content from Account Details to a message ( ● P.3-5).
Capa_E_OI.indb 13 2009/07/28 10:13:58

Phone Book
4
4-14
Voice DialMake a call by saying a voice dial name.
NoteKeep microphone about 10 cm away from your mouth, and pronounce ●a Voice Dial name clearly. If microphone is too distant, your voice may not be recognized.Avoid making sounds unrelated to Voice Dial names (clearing your ●throat, clicking your tongue, heavy breathing, etc.).Say Voice Dial names in quiet places. ●Avoid pressing or brushing keys, or covering microphone with fingers ●when pronouncing a Voice Dial name.
Adding Entries to Voice Dial
Main Menu Phone Book Settings Voice Dial
1 <New> Select a Phone Book entryEntries with ★ are already saved in Voice Dial list.
2 Enter a Voice Dial nameOnly katakana entry is available for Voice Dial names. ●
Edit Voice Dial Names ■In Step 1, highlight a Voice Dial name > [Edit] Edit name YES
Delete Voice Dial Entries ■In Step 1, (highlight a Voice Dial name > ) [Menu] Delete this or Delete all YES
Searching Entries by Voice Dial
1 Press and hold Say a Voice Dial nameSay the name within four seconds after voice recognition tone sounds.Once Voice Dial is recognized, result appears.
2 [Detail] to show phone number
3 Voice CallsHighlight phone number
Video CallsHighlight phone number [V. Call]
TipSettings ●Activate Voice Dial Automatically ●Activate Voice Dial via
Earphone or Bluetooth® Device ( P.18-11)
Capa_E_OI.indb 14 2009/07/28 10:13:59

5
5-1
Digital TVBasics .................................................................... 5-2Initial Setup .......................................................... 5-4
Channel Settings ........................................................................5-4
Watching TV .......................................................... 5-5Indicators ...................................................................................5-6Operations while Viewing TV.......................................................5-7Program List (Japanese) ..............................................................5-7Data Broadcast (Japanese) ..........................................................5-7Functions while Viewing TV.........................................................5-8
TV Links (Japanese) ............................................ 5-11Saving TV Links ........................................................................5-11Opening TV Links ......................................................................5-11Functions Available in TV Link List .............................................5-11
Recording/Playing Programs .............................. 5-12Recording Current Program.......................................................5-12Capturing Screenshots ..............................................................5-12Playing Recorded Programs.......................................................5-13Viewing Captured Screenshots ..................................................5-14Timer........................................................................................5-14
Capa_E_OI.indb 1 2009/07/28 10:13:59

Digital TV
5-2
5
Basics931P supports One Seg terrestrial digital TV broadcasting.
One SegOne Seg is a digital TV broadcasting service for mobile phones. For more information, visit The Association for Promotion of Digital Broadcasting Website:[PC] http://www.dpa.or.jp/[Handset] http://www.dpa.or.jp/1seg/k/(Japanese only)
Features
Watch TV Programs ( P.5-5)
Watch One Seg Digital TV on handset.
View Data Broadcast ( P.5-7)
Access a variety of program-related information.
Record TV Programs ( P.5-12)
Record program/capture still image while watching the program.
Set Timer ( P.5-14)
Use Timer to view/record programs. You can easily set Timer by using Program List ( P.5-7).
Mobile W-SpeedFrame rate of Digital TV images are automatically enhanced. Enjoy smooth image flow ( P.18-14).
Mobile W-Speed is set to ● ON by default.When this function is set to ● ON , full effect of Image Quality may not be achieved.Depending on broadcasting condition, full effect of this function may ●not be achieved.Disabled during ECO Mode ( ● P.18-14) or AV output ( P.10-13).Disabled for playing back videos recorded with Mobile W-Speed set to ●ON .
Precautions
Digital TV is available only in Japan. ●Incoming calls/messages may affect TV image or audio quality while TV is ●activated.Digital TV may be disabled if USIM Card is not installed or SoftBank ●subscription is terminated.SoftBank is not liable for damages from accidental loss/alteration of ●handset/microSD Card information. Data saved to handset (TV Links, Channel List, etc.) cannot be restored after repairs or handset replacement. Back up important information.
Capa_E_OI.indb 2 2009/07/28 10:14:00

Digital TV
5-3
5
Signal Reception AreasTV signal reception may be poor in the following conditions:
Too far from or close to broadcasting stations. ●Mountain areas or near tall buildings. ●In moving vehicles, underground, in tunnels, etc. ●Near high-voltage wires, neon lights, wireless base stations, railroad ●tracks or highways.Areas with numerous signal obstructions or areas where signal ●reception is blocked.
When Battery is Running OutWarning tone sounds and warning message appears if Digital TV is ●activated with low battery.When battery runs low while programs are on or being recorded, ●handset operates as follows:
While Viewing ・ Warning tone sounds, and confirmation appears.While Recording ・ Response differs depending on Rec. When Low Battery ( P.18-14) setting.Continue Recording ... Warning tone does not sound and confirmation does not appear.Stop Recording ...Warning tone sounds and confirmation appears.
Watching TV while charging may shorten battery life. ●If recording ends due to low battery, recorded portion is automatically ●saved.
Incoming TransmissionsTV pauses for incoming calls. Resume TV after call ends.
Incoming calls do not interfere with recording. ●
Tip ●Use Other Functions while Viewing TV ( P.5-8)
Capa_E_OI.indb 3 2009/07/28 10:14:00

Digital TV
5-4
5
Initial SetupSet channels for your area.
Up to ten Channel Lists can be saved. ●
Main Menu TV Channel Setting Select Area
1 Select a region Select a prefecture
2 YES
NoteIf manual setup fails, try automatic channel setup ( ● Below).931P detects a change in reception area after moving to a different ●area. Set Channel List for that area.
Channel Settings
Automatic Channel Setup
Main Menu TV Channel Setting Automatic
1 YES
2 After channel search, YES Enter titleIf title is not entered, date (year/month/day/hour/minute) is ●automatically saved as title.
Using Channel List
From Main Menu TV Channel List
Set Channels ■Select a Channel List >Channel List is set, and available channels appear. ●Select a channel to access the station. ●
Delete Channel List ■Highlight a Channel List > [Menu] Delete YESSelected Channel List cannot be deleted. ●
Delete Channels from Channel List ■Highlight a Channel List > [Detail] Highlight a channel
[Menu] Delete YESChannels in selected Channel List cannot be deleted. ●
Edit Title ■Highlight a Channel List > [Menu] Edit title Edit
Reassign a Remote Control Number (Keypad) to a ■ChannelHighlight a Channel List > [Detail] [Menu] Remote control # Select a channel Select a new remote control number [Finish] YES
Capa_E_OI.indb 4 2009/07/28 10:14:01

Digital TV
5-5
5
Watching TVSet channels beforehand ( ● P.5-4).Horizontal Open Position ( ● P.1-7, P.1-8)
1
2 Select a channel
Direct ChannelAccess
– (Channel 10)(Channel 11)(Channel 12)
Previous/Next ChannelChannel Search Press and hold
To stop: ● [Cancel] /
3 To end TV, End TVTo play TV sound in the background: ● Change to BGM
Viewer
NoteAlternatively, ● Main Menu TV Watch TVClosing handset while viewing TV shows still image in External Display ●(not video image and data broadcasting). When TV Sound While Closed is ON , sound is heard but operations except volume adjustment are unavailable.
Tip●Display Digital TV Images on a TV ( P.10-13) ●Use Bluetooth® Device for Wireless Playback ( P.10-10)
Capa_E_OI.indb 5 2009/07/28 10:14:05

5-6
Digital TV
5
Indicators
❶
❷
❸
1112
❺❻❼ ❽ ❾10
13
❹
❶
12
11
14
❾10 Guide Display❷ ❼ ❽❺❻
Item Description●❶ Image –●❷ Captions –●❸ Data Broadcast ( P.5-7)●❹ Data Broadcast Mode Data Broadcast Mode off
Data Broadcast Mode on●❺ Off timer ( P.5-10)●❻ ECO Mode ( P.18-14)●❼ Channel ( P.5-4)
When multiple programs are available ●in the same broadcasting station, "service number/total numbers" appears.
●❽ Signal Strength Level
Strong←――→Weak Out of range
●❾ Receiving Captions –●10 Volume –●11 Program Title –●12 Recorder Status
Recording Timer Set
●13 Display/Caption Display: ON/OFF/LargeCaption: ON/OFF
●14 Indicator/Caption Indicators: ON/OFFCaption: Upper position/Lower position/OFF
Capa_E_OI.indb 6 2009/07/28 10:14:07

Digital TV
5-7
5
Operations while Viewing TV
Volume 1/Mute/Cancel Mute 1
Program List [EPG]
Program Info Press and hold To return to Viewer: ●
Program Title Alternatively, in Landscape View (Normal ●Open Position), press , ( in Horizontal Open Position)
Display/Caption View 2
While Program Title appears: ● Each key press toggles display and caption views.
Indicator/ Caption View 3
While Program Title appears: Each key press toggles indicators (icons) on/ ●off and caption view (in Landscape View).
Display View
Each key press toggles display direction ●(Broadcast Mode off).Each key press toggles full/normal display ●(Broadcast Mode on).Not available in Horizontal Open Position ●
Record Programs 1[Record] ( P.5-12)
To stop: ● [Stop]
Capture Still Images 1 Press and hold ( P.5-12)
Data Broadcast Mode On/Off 2 [TV/data]
1 Available when Data Broadcast Mode is off2 Available only in Portrait View3 Available only in Landscape View
Program List (Japanese)
Check program schedules and set timer to view/record TV programs.
Main Menu TV Program List
Confirmation appears when using Program List for first time. Follow ●onscreen instructions.See Program List Help menu for usage information. ●
Data Broadcast (Japanese)
Access a variety of program-related information such as still images and videos.
Data Broadcast is not available in Landscape View. Press ● to switch to Portrait View.
1 Activate TV (Data Broadcast Mode off) [TV/data]
appears. ● to select informationTo deactivate Data Broadcast Mode: ● [TV/data]
NoteViewing Data Broadcast information requires no fees: however, ●accessing websites will incur connection fees.
Capa_E_OI.indb 7 2009/07/28 10:14:10

Digital TV
5-8
5
Functions while Viewing TV
Sound Settings ■While TV is active, > [Menu] Settings Sound Sound Effect Select an item (See below)
Item Operation/DescriptionAuto Volume Automatically increase to optimum volume
ON > or OFFRemaster Adjust sound quality to reproduce original sound
ON > or OFFListening Adjust to natural sound when using earphone or
Bluetooth® deviceSelect an item >
Surround・ : Reproduce natural and stereophonic soundNatur 1・ or Natur 2 : Complement sound specific to earphone to reproduce natural soundOFF・ : Turn off Listening setting
Equalizer Change sound quality when using earphone or Bluetooth® device
Select an item >Normal・ : Reproduce normal soundH. BASS1・ : Enhance low-pitched soundH. BASS2・ : Enhance low-pitched sound even moreVoice・ : Make voice clearTrain・ : Minimize sound leakage
Other Functions ■While TV is active, follow the steps below. >
Item Operation/DescriptionAccess Internet via Yahoo! Keitai
Press and hold >To return to viewer: While Yahoo! Keitai is active, press ●and hold
Access Internet via PC Site Browser
> (MULTI) Open Menu Yahoo! Keitai PC Site BrowserFollow onscreen instructions ●
Make a Voice Call/Video Call
> (MULTI) Stand-by display Enter a number (For Video Call, [V. Call])
Interrupt TV during call. After call, TV resumes. ●Recording will not be interrupted. ●
Use Messaging
> (MULTI) Stand-by display
Capa_E_OI.indb 8 2009/07/28 10:14:11

Digital TV
5-9
5
Functions Available while Viewing TV ■While TV is active, > [Menu] Select an item (See below)
Item Operation/DescriptionProgram info View current program informationProgram list View Program ListDisp.Ch./operation 1
Select an item >Channel info・ : View channel details. Select a channel to watch that StationChannel List・ : View Channel List ( P.5-4)Channel Setting・ : Set channels for your area ( P.5-4)Add to ch. list・ : Add current station to Channel List. Assign current station to lowest available number key.Tune service・ : Select a program when multiple programs are available from the same broadcasting company
Item Operation/DescriptionData Broadcasting 1
Select an item >Back to data BC・ : End Data Broadcast site and return to Data Broadcast windowReload contents・ : Reload page (Data Broadcast link)Certificate・ : View owner, author, validity period and serial number of certificate used in SSL communicationImages・ 2: Show/hide images on Data Broadcast sitesSound Effect・ 2: Turn on/off sounds from Data Broadcast/sitesReset Settings・ 2: Show confirmation on Data Broadcast
TV link list 1 Show TV Link detailsCompose S! Mail
Create S! Mail while listening to sound ( From Step 2 on P.13-4)
Next Page
Capa_E_OI.indb 9 2009/07/28 10:14:12

Digital TV
5-10
5
Item Operation/DescriptionSettings Select an item >
Display/operation・ Switch display 1: Switch view (switch image size/image off)Display/operation・ Switch TV/data BC 1: In Portrait View, toggle Data Broadcast Mode on/off ( P.5-7)Display/operation・ Icons 2: Set Guide Display in Landscape ViewDisplay/operation・ AV output : View a Digital TV image on a TV set or other devices ( P.10-13)Video・ Brightness : Set Back Light brightnessVideo・ Mobile W-Speed 2: Enhance frame rate of TV images automaticallyVideo・ Image Quality 2: Select an image qualityVideo・ LCD AI : Activate image compensation according to Back LightSound・ Sound Effect 2 ( P.5-8)Sound・ Main/sub sound : Set main/sub soundSound・ Switch audio data : Available only when multiple audio data are supportedSound・ TV Sound W/ Closed 2: Set whether to keep speaker on when closing 931P while viewing TVECO Mode・ 2: Set power saving mode ( P.18-14)Off timer・ : When set time passes, confirmation appears asking whether to end viewing/recording TV
Item Operation/DescriptionKey guide View key operation guide while watching TV
1 Available only in Portrait View2 Available from User Settings even while TV is not active ( P.18-14).
Capa_E_OI.indb 10 2009/07/28 10:14:12

Digital TV
5-11
5
TV Links (Japanese)Saving TV Links
Following function is not available in Landscape View. ●
1 Switch Data Broadcast Mode on Select a link
2 YESFollow onscreen instructions to save link.
Opening TV Links
Main Menu TV TV Link
1 Select a TV LinkConfirmation appears when Internet access is required. Select ● YES to proceed.If TV Link is expired, confirmation appears asking whether to delete ●link.
Functions Available in TV Link List
Main Menu TV TV Link
1 [Menu] Select an item (See below)
Item Operation/DescriptionDisplay detail Show TV Link title, URL, summary, content type, expiration
dateNo. of TVlink Show number of saved TV LinksDelete Select an item >
Delete this・ YESDelete selected・ Check TV link(s) to delete
[Finish] YESDelete all・ Enter Phone Password YES
Capa_E_OI.indb 11 2009/07/28 10:14:12

Digital TV
5-12
5
Recording/Playing ProgramsRecording Current Program
Save programs as videos or still images. Recordings are saved to microSD Card.
microSD Card: ● P.9-16Save up to 2GB of data at a time. ●
Recording Time (total)* Approx. 640 minutes
Savable Files 99 files
* Average recordable time per 2GB of dataRecording is unavailable when signal strength drops to ● .
1 Activate TV (Data Broadcast Mode off) [Record] appears, and recording starts.
2 [Stop] to stop recordingProgram is saved to microSD Card.
NoteIn the following cases, recording ends and recorded portion is ●automatically saved:
File size is over 2GB・ microSD Card memory is full・
Recorded files are not saved to handset. ●Do not remove microSD Card while recording. ●Recording continues even if signal strength level is ● ; however, images and audio are not saved.Data Broadcast information cannot be recorded. ●Recording is disabled during AV output. ●
Capturing Screenshots
Captured screenshots are saved to handset.This feature is unavailable when signal strength is ● or Data Broadcast Mode is on.
1 Activate TV (Data Broadcast Mode off) press and hold
NoteCaptions cannot be captured. ●Capturing is disabled during AV output. ●
Capa_E_OI.indb 12 2009/07/28 10:14:13

Digital TV
5-13
5
Playing Recorded Programs
Main Menu Data Folder TV Video
1 Select a filePlayback starts.
2 to stop playback
NoteClosing handset while watching TV shows landscape view in External ●Display.
Example: Video Folder
Playback Operations
Volume /
Mute/Cancel Mute [ / ]
Fast Forward (Press once: 10x; Press twice: 30x)
Fast Rewind (Press once: 10x; Press twice: 30x)
Pause/Resume [ / ]
Play Frame by Frame
Pause playback [Frame]Play back frame by frame. ●
Skip Rewind 1 Press and hold /Skip Forward 2 Press and hold /
Toggle Playback Speed
[ / / / (Summary View)]
Summary View adjusts playback speed ●according to audio.
View Title In Landscape View, indicator/caption setting ●display appears.
Toggle CaptionDisplay title
In Landscape View, each key press toggles ●indicators (icons) and captions on/off.
Portrait/Landscape View 3 4 Each key press switches view. ●
1 Unavailable if file is under 10 seconds long2 Unavailable if file is under 30 seconds long3 Close handset to return to Portrait View.4 Disabled in Horizontal Open Position
Capa_E_OI.indb 13 2009/07/28 10:14:16

Digital TV
5-14
5
Viewing Captured Screenshots
Main Menu Data Folder TV Image
1 Select an image
Timer
Set up to 100 timer entries to watch or record programs. ●
Main Menu TV
1 Timer Watching or Timer Recording
2 [New] Select an item (See below)
Item Operation/DescriptionStart date setting
Set date and time to start and end viewing/recording a program
Select an item >Enter date・ Enter a date and timeChoose date・ Select a date Enter date and time
End date setting 1
Channel Select a channel >Edit title Enter a program name >Repeat Select a repetition > For Select day , select a day (days)
[Finish]Alarm (Alarm notice) 2
ON > or ON/Set time For ON/Set time , select an alarm time
Item Operation/DescriptionAlarm tone 2 Select an alarm type > Select a folder Select an
alarmAlarms (Alarm on/off) 1
ON > or OFF
Alarms (Alarm volume)
> to adjust volumeFor ● Timer Recording , Escalating Tone cannot be set.
Activate TV w/ alarm 2
ON > or OFFWhen ● ON is set, Digital TV activates from alarm notification window.
Priority 1 Set handset response when Timer Recording startsRecording > or OperationWhen ● Recording is set, active function suspends/ends, and recording starts.When ● Operation is set, confirmation appears. To suspend/end active function, select YES and to start recording.
1 Timer Recording only2 Timer Watching only
3 [Finish] For Timer Recording , select YES or YES (confirm once)
Capa_E_OI.indb 14 2009/07/28 10:14:16

Digital TV
5-15
5
NoteSelect timer entries to check details; ● [Edit] to edit details.Timer Recording does not start if Internet and two other functions are ●active simultaneously.Alarm does not sound for Timer Watching/Timer Recording in following ●functions. For Timer Recording, complete followings (in parentheses) one minute before timer starts; otherwise, recording does not start.
While handset is off (Turn on handset)・ While Privacy Key Lock is active (Cancel lock)・ While Personal Data Lock is active (Cancel/change lock)・ During data transfer (Complete transfer)・ During Infrared transmission, IC transmission or Bluetooth・ ® transmission (Complete transmission)During software update (Complete update)・
Other Timer Operations
Main Menu TV
1 Timer Watching or Timer Recording
2 [Menu] Select an item (See below)
Item Operation/DescriptionNew Set a timer entry to watch/record a program ( P.5-14)Edit Edit entry details ( P.5-14)Sort Sort timer entries
Select an order >Delete this YES >Delete past Timer entries with start/end time set prior to current date/
time are deletedYES >
Delete selected
Check timer entries to delete > [Finish] YES
Delete all Enter Phone Password > YESMemory Status*
Show memory status
* Timer Recording only
Checking Timer Recording Results
Main Menu TV
1 Recording Result Select a resultDetails appear. ●
Capa_E_OI.indb 15 2009/07/28 10:14:17

5-16
Digital TV
5
Capa_E_OI.indb 16 2009/07/28 10:14:17

6
6-1
CameraBefore Using Camera ............................................ 6-2
Image File Formats .....................................................................6-2Notes .........................................................................................6-2Inside & Outside Camera ............................................................6-3Camera Display Indicators ...........................................................6-4
Pictures/Videos ..................................................... 6-6Capturing Still Images (Camera Mode) ........................................6-6Recording Videos (Video Camera Mode) ......................................6-8Functions Available while Shooting .............................................6-8
Focus Functions (Outside Camera) ..................... 6-13Changing Focus Settings ...........................................................6-13Auto Focus Lock .......................................................................6-13
Viewing Saved Images ....................................... 6-14
Capa_E_OI.indb 1 2009/07/28 10:14:17

Camera
6-2
6
Before Using Camera931P features approximately 8.1 Mega Pixel CMOS Auto-focus Camera capable of capturing still images and videos.
Image File Formats
Still images/videos are saved to Data Folder.
Image Type File Format Save LocationStill images JPEG (.jpg) Camera folder in Pictures folder
VideosMPEG-4 (.3gp), ASF (.asf)
Camera folder in Videos folder
To save to microSD Card (Storage setting: ● P.6-11)
Notes
Remove dust/debris from lens cover with a soft cloth. ●Handset movement may blur images especially in dark places; hold ●handset firmly.Capturing/saving images immediately after handset has been left in a ●hot place may affect image quality.Exposing lens to direct sunlight may affect image quality. ●While Camera is active, Photo light illuminates/flashes. When Inside ●Camera is used, Notification Light/Charging Indicator flashes. Illuminating/flashing cannot be turned off.
Shutter ClickShutter click sounds at fixed volume even in Manner Mode.
To change shutter click sound: ● P.6-11
Capa_E_OI.indb 2 2009/07/28 10:14:17

Camera
6-3
6
Inside & Outside Camera
Use Inside or Outside Camera. Still images can also be captured with handset closed ( P.6-7). With Outside Camera, auto focus ( P.6-13) and image stabilizer ( P.6-11) are available.Change settings by using either function menus or key operations.
Inside Camera
Outside Camera
Flash/Photo light
NoteCamera is not available when battery is low. ●Incoming calls, Alarm and low battery cancel Camera. Captured images/ ●recorded videos are retained. Save data when Camera restarts.When left in Viewfinder for three minutes, Camera is canceled and ●previous window returns.
Capa_E_OI.indb 3 2009/07/28 10:14:18

6-4
Camera
6
Camera Display Indicators
Images shown below are for reference only. ●
■ Picture Viewfinder ■ Video Viewfinder
❶ ❺
❻
❾
10
1112 13 15
❸❹
14 16 1718
❼
❽
❷
10
11 12 13 15
❾
14
❻
16
❼
❽❺
17
18❸❹❷❶
❽❾
12 141516 17
❷❸ ❺
18
19 20 21
22
10
❻
11
❶
❼
14 15 16 1712
❸ ❺
❾
❷❶
❼
10
11
❽2018 21
22
19 ❻
Capa_E_OI.indb 4 2009/07/28 10:14:20

6-5
Camera
6
Item Description Operation❶ Photo mode ( P.6-10) Intelligent Auto Normal Scene My original set.
For Scene/My original set., indicators may vary depending on setting. ●Press and hold [ ]
Select a mode
( For Scene/My original set., select an item)❷ CHG Camera-mode Camera mode Video Camera mode / / Action mode (Auto/
Auto bracket/Manual) (Cont. shooting set.: P.6-8)[Video/Cont./Camera]
Toggle Action mode ( ● P.6-11)❸ Storage setting Phone microSD Card❹ No. of frames Show number of remaining frames —❺ Img. stabilizer Correct camera shake ( P.6-11)❻ Flash setting (Still image) Auto Forced ON Always light ON Forced OFF
Photo light setting (Action/Video) ON OFF❼ Key Guidance Show key operation guidance —❽ Top indicator Indicate vertical direction —❾ Focus Guide Adjust focus automatically —10 Zoom bar Indicate zoom level ( P.6-9) zoom in/ zoom out
Long press: continuous zoom ●11 Image size* Show image size ( P.6-9)
Select a size
12 Image quality* Normal Fine Super fine
Select a mode13 High sensitiv.* ON OFF
Select ON/OFF
14 Brightness* Adjust brightness (Level -3 to +3)
Select a level15 White balance* Auto Fine Cloudy Light bulb Fluorescent light
Select a mode
16 Scene* Portrait
Sports
Food
Scenery
Night mode Backlight
Character
Snow
Sunset Pet
Select a scene
17 Focus* ( P.6-13) Face Detection Auto Close-up Landscape
Select a mode18 Auto timer ( P.6-8)
Toggle ON/OFF
19 Memory capacity bar Indicate memory status (appears in red when memory is full) —20 File size setting Mail restrict'n(S) Long time ( P.6-11)21 Movie type set Record video with/without audio ( P.6-11)22 Recordable time Indicate recordable time —
* Alternatively, [ ]
to highlight an item
to select a setting
Capa_E_OI.indb 5 2009/07/28 10:14:33

Camera
6-6
6
Pictures/VideosConfirm battery strength ( ● P.1-11) and memory ( P.6-11) before recording. When battery is low, video cannot be recorded.Captured images and videos are automatically saved to Data Folder. To ●select save location each time, turn Auto save set to OFF ( P.6-11).
NoteWhen using Inside Camera, mirror image appears on Viewfinder. ●Captured images appear correctly.For activating Camera/capturing images by ● , press firmly.
Capturing Still Images (Camera Mode)
1 Press or press and hold to activate Camera
2 Frame subjectTo toggle Inside/Outside Camera: ●
3 [Record], or to capture the imageShutter click sounds at fixed volume. Image is automatically saved.
When ● Focus is set to Auto or Face Detection , Outside Camera automatically focuses on subject before capturing image.
Picture Viewfinder
4 to exitReturn to Standby.
Capturing Self-portraits with Outside Camera
In Horizontal Open Position, use External Display to frame self-portraits.
1 In Picture Viewfinder (Horizontal Open Position),
Viewfinder switches to External Display.
2 Frame subject Captured image is saved to Data Folder, and Viewfinder returns to Internal Display.
Press ● halfway to lock focus (Auto Focus Lock: P.6-13)
Functions Available in External ViewfinderZoom in and out: ● (Press and hold for continuous zoom)Toggle flash on/off: ●Toggle Camera (Inside/Outside): ●
Press keys other than above to switch to Internal Display
Capa_E_OI.indb 6 2009/07/28 10:14:37

Camera
6-7
6
Capturing Still Images with Handset Closed
While handset is closed, use External Display as Viewfinder.
1 With handset closed, press and hold Camera activates.
2 Frame subject Image is automatically saved.
Press ● halfway to lock focus (Auto Focus Lock: P.6-13)
3 Press and hold (MULTI) to exit
Functions Available in External ViewfinderZoom in or out: ● (Press and hold for continuous zoom)Toggle flash on/off: ● (MULTI)
NoteIf message appears on External Display upon activating Camera, open ●and close handset to re-activate Camera.When Picture Viewfinder is active on Internal Display, closing handset ●may capture still image on External Viewfinder.
Continuous Shooting
Capture a succession of up to 20 still images automatically with a single press.
1 In Picture Viewfinder, [Video] [Cont.] appears (Indicators vary by Action mode).To set Continuous Shooting: ● P.6-11
2 Frame subject [Record], or Images are automatically saved.
When ● Focus is set to Auto , Outside Camera automatically focuses on subject before capturing image.To stop shooting halfway: ●
Capa_E_OI.indb 7 2009/07/28 10:14:39

Camera
6-8
6
Recording Videos (Video Camera Mode)
1 Press and hold to activate Video Camera
2 Frame subjectTo toggle Inside/Outside Camera: ●
3 [Record], or to start recordingTone sounds.
When ● Focus is set to Auto , Outside Camera automatically focuses on subject before recording begins. During recording, auto focus functions regardless of Focus setting.
4 [Stop], or to end recordingTone sounds. Video is automatically saved.
Recording stops automatically at maximum recording time. ●
5 to exitReturn to Standby.
NoteAlternatively, ●
[Video] to activate Video Camera
Video Viewfinder
Functions Available while Shooting
From Camera mode: Action mode: [Video] [Cont.]Video camera mode: Press and hold
■ Auto Timer > [Menu] Auto timer ON Enter time (seconds)
[Record], or ( For video, [Stop], or )Auto timer tone sounds. After set period of time, shutter is released and ●recording starts.When Auto timer is active, ● [Quit] or to return to Viewfinder without canceling Auto timer.Auto timer is not available when ● Cont. shooting set. is set to Manual .
■ Zoom >
(zoom in) or
(zoom out) to adjust zoom [Record],
or Press and hold ● for continuous zoom.Zoom is available during video recording. ●Zoom is disabled when ● Image size is set as follows:
Inside Camera:・ VGA, HVGA Wide or QVGA (individual mode)Zoom may change image quality. ●
Capa_E_OI.indb 8 2009/07/28 10:14:41

Camera
6-9
6
Maximum zoom levels for individual image size are as follows. ●Maximum zoom levels in Horizontal Open Position are indicated in ( ) if different from those in Normal Position.
Camera mode Size Zoom level Max. level (approx.)Outside CameraCamera (High sensitiv.: OFF)
8M 21 levels 2.6 times 6M Wide 21 levels 2.6 times 5M 21 levels 2.6 times 3M 21 levels 2.6 times 2M Wide 21 levels 2.6 times 2M 21 levels 2.6 times Stand-by 21 levels 2.6 times VGA 21 levels 2.6 times QVGA 31 levels 5.1 times QCIF 31 levels 8.5 times Sub-QCIF 31 levels 12.8 times
Camera (High sensitiv.: ON)
2M 21 levels 2.6 times Stand-by 21 levels 2.6 times VGA 21 levels 2.6 times QVGA 31 levels 5.1 times QCIF 31 levels 8.5 times Sub-QCIF 31 levels 12.8 times
Continuous shooting
VGA 21 levels 2.6 times QVGA 31 levels 5.1 times QCIF 31 levels 8.5 times Sub-QCIF 31 levels 12.8 times
Camera mode Size Zoom level Max. level (approx.)Video camera (Img. stabilizer: Auto)
VGA 21 levels 1.9 times HVGA Wide 21 levels 1.9 times QVGA 31 levels 2.9 (3.8) times QCIF 31 levels 5.2 (6.4) times Sub-QCIF 31 levels 7.2 (9.6) times
Video camera (Img. stabilizer: OFF)
VGA 21 levels 2.6 times HVGA Wide 21 levels 2.6 times QVGA 31 levels 3.8 (5.1) times QCIF 31 levels 7.0 (8.5) times Sub-QCIF 31 levels 9.6 (12.8) times
Inside CameraCamera/Continuous shooting
VGA 1 level 1.0 time QVGA 1 level 1.0 time QCIF 6 levels 1.6 times Sub-QCIF 21 levels 2.1 times
Video camera VGA 1 level 1.0 time HVGA Wide 1 level 1.0 time QVGA 1 level 1.0 time QCIF 6 levels 1.9 (1.6) times Sub-QCIF 21 levels 2.8 (2.1) times
Capa_E_OI.indb 9 2009/07/28 10:14:48

Camera
6-10
6
Use ■ Flash/Photo LightSelect a Flash/Photo Light setting for Outside Camera.
In Picture Viewfinder, > [Menu] Flash setting Select an item (See below)
Item Operation/DescriptionAuto Flash goes off automatically in low-light situations.Forced ON Flash always goes off when capturing images.Always light ON
Photo Light illuminates.
Forced OFF Flash/Photo Light is disabled.
> In Continuous Shooting/Video Viewfinder, [Menu] Photo light set. ON or OFF
Flash/Photo light is not available when battery is low. ●When Camera is ended or changed to Inside Camera while a setting ●other than Forced OFF is set, Flash setting is changed to Auto next time Camera activates or Outside Camera is used. When Forced OFF is set, setting remains.Even if ● Forced OFF (Flash setting) or OFF (Photo light set.) is set, Photo light illuminates or flashes when Camera is active or during shooting.When Photo mode is set to ● Intelligent Auto , Forced ON cannot be set.When using flash, maintain an appropriate distance from subject of 40 ●to 100 cm.When image is captured at close range, image may turn white as a result ●of poor exposure.
Set Photo Mode According to Scene ■ > [Menu] Photo mode Select an item (See below)
Item Operation/DescriptionIntelligent Auto
Automatically switch Photo mode according to occasion (in Camera mode)
Indicator is animated when mode changes (Example: ● Close-up).
Mode does not change after Auto Focus Lock. Cancel ●Auto Focus Lock.
Normal Capture an image in normal modeScene Adjust brightness and color tone according to scene
Select an item >My original set.
( P.6-12)
Functions Available in Viewfinder ■Change settings before initiating image capture. Some functions are ●changeable with simple key operations ( P.6-5).Some operations are not available depending on Photo mode, image size ●or Photo mode. > [Menu] Select an item (See below)
Item Operation/DescriptionInside camera/Outside camera
Switch Inside/Outside Camera
CHG camera-mode
Camera mode > , Video camera mode , Action mode or Bar code reader
Folder jump Open storage folderPhoto mode ( Above)
Capa_E_OI.indb 10 2009/07/28 10:14:49

Camera
6-11
6
Item Operation/DescriptionImage size Select a size >File size setting
Select Mail restrict'n(S) for S! Mail attachments or Long time for long-time recording
Image quality Select an item >In Video camera mode, this function is available only ●when File size setting is set to Long time .
Camera settings
Select an item >Brightness・ ・ White balance : Adjust color tone
Color mode set・ : Select a color modeFocus・ : P.6-13Img. stabilizer・ : Minimize camera shake automaticallyShoot with frame・ : Add frame to image・ Shutter sound : Select a shutter click sound
Flicker correction・ : Minimize flicker while shooting near fluorescent light
Storage setting
Select an item >Store in・ Phone or microSD・ Auto save set ON or OFF
High sensitiv. ON > or OFFFlash setting/Photo light set.
Set whether to use Flash/Photo light ( P.6-10)
Auto timer ( P.6-8)
Item Operation/DescriptionCont. shooting set.
Select an item >Action mode・ : Manual captures one picture at a time. Auto bracket captures nine different still images automatically.Shot interval・ : Select an interval when Action mode is set to Auto .Shot number・ : Set number of images to be captured when Action mode is set to Auto or Manual . Details are as follows: VGA (480×640): 4 QVGA (240×320): 5 to 10 QCIF (144×176): 5 to 20 Sub-QCIF (96×128): 5 to 20
Movie type set
Normal > or Video
Display size Select Viewfinder sizeActual size > or Fit in display
Attach S!Mail mode
YES > or NOImage size, File size setting and Image quality are set ●as follows (respectively): QCIF , Mail restrict'n(S) , Normal
Icon Show/hide display indicatorsON > or OFF
Memory Status
View memory information
Capa_E_OI.indb 11 2009/07/28 10:14:49

Camera
6-12
6
Save as ■ Original SettingPress and hold > Photo mode MyOriginal Follow the steps (See below)
Item Operation/DescriptionSave setting Highlight a setting > [Save] ( YES ) Edit title Open setting Select a setting >Edit title Highlight a setting > [Edit] Edit titleView detail Highlight a setting > [Detail]Delete setting Highlight a setting > [Delete] YES
Functions Available after Shooting ■Available only when ● Auto save set ( P.6-11) is OFFSome operations are not available depending on camera mode or image ●size. > [Menu] Select an item (See below)
Item Operation/DescriptionPlay Play back recorded videoSave Save still image/videoStore all/animat'n
Save > or Mirror save <New>
Mirror save Save mirror imageAttach to S! Mail
Send file via S! MailCreate a message ( > From Step 2 on P.13-4)
Set display Set as wallpaper, Phone Book image, etc.Select an item >
Change frame*
Select a frame > [Set] [Save]
Store in Phone > or microSDMirror display/Normal display
Switch Mirror/Normal display
Display size Set image size in ViewfinderActual size > or Fit in display
Icon Show/hide display indicatorsON > or OFF
Cancel Discard image to return to Viewfinder
* Available only when shooting with frame
Capa_E_OI.indb 12 2009/07/28 10:14:50

Camera
6-13
6
Focus Functions (Outside Camera)Changing Focus Settings
<Default> Camera mode: Face Detection Video camera/Action mode: AutoSelect a focus setting according to occasion. Focus on Individual scenes automatically.
Face Detection (Camera mode only): For portraits ●Auto: Auto detection ●Close-up: For nearby objects ●Landscape: For distant landscapes ●
1 In Picture/Video Viewfinder,
2 to select a setting
Face DetectionDetect up to five faces within 2.5 meters. ●Show yellow Focus Guide when a face is detected. ●Automatically focus on one face when more than one is detected ●(Focus guide turns yellow once focus is on the face.).Faces may not be detected in following conditions: ●
Face is tilted.・ A part of face is covered by glasses, hat, mask or shadow.・ Face is too small, big or dark for screen.・ Face is at edge of screen.・
Shoot with Auto focus if detection fails. ●
Auto Focus Lock
Bring focus on subject at center of display automatically. Lock focus on subject, and recompose your picture.
1 In Picture/Video Viewfinder, , or halfway① When in focus, handset sounds.② Focus Guide turns green, and focus is locked.
When out of focus, Focus Guide turns red. ●To cancel focus locked by ● or : To cancel focus locked by ● : Release finger from
2 Determine composition
3 Capture image in selected camera mode (Camera mode: P.6-6/Action mode: P.6-7/Video camera mode: P.6-8)In Step 1, press ● halfway to lock focus, then press firmly to shoot.
Capa_E_OI.indb 13 2009/07/28 10:14:54

Camera
6-14
6
Viewing Saved ImagesMain Menu Camera
1 Open PicturesPictures
Open VideosVideos
2 Select a folder
3 Select a file
Open Pictures Saved on microSD Card ■After selecting > Pictures in Step 1, [microSD] Select a folder
Open Videos Saved on microSD Card ■After selecting > Videos in Step 1, [microSD] Select a folder
Check Still Images in Picture Viewfinder ■In Picture Viewfinder, > [Folder]To return to Picture Viewfinder: ●
Tip ●Editing Still Images ( P.9-12)
Example: Pictures
Capa_E_OI.indb 14 2009/07/28 10:14:54

7
7-1
EntertainmentMobile Widget (Japanese) .................................... 7-2
Pasting Widgets to Standby ........................................................7-2Using Widgets ............................................................................7-2Downloading Widgets ................................................................7-3Arranging Widgets in Standby .....................................................7-3
S! Quick News (Japanese) .................................... 7-4Registering S! Quick News Items ................................................7-4Opening New Information ..........................................................7-4
S! Information Channel/Weather (Japanese) ........ 7-6Registering/Canceling .................................................................7-6Using S! Information Channel .....................................................7-6Using Weather Indicator .............................................................7-7Option Menu Items .....................................................................7-8
E-Books (Japanese) ............................................... 7-8
Capa_E_OI.indb 1 2009/07/28 10:14:54

Entertainment
7-2
7
Mobile Widget (Japanese)Paste widgets to Standby to access information or tools from Standby.
Network WidgetSome widgets may periodically connect to network, incurring packet transmission fees.
During transmission, other functions (e.g. Video Calls) may be disabled. ●
View Mobile Widget Overview ■Main Menu > Entertainment Mobile Widget Information
Show/Hide Widget ■Main Menu > Entertainment Mobile Widget InformationIn Standby, >
Pasting Widgets to Standby
Paste up to five widgets per sheet. Select from four sheets and organize sheets by theme.
1 Widget List appears.
2 Select a widget [Menu] Paste on Stand-by Select a sheet
3 to move to target location
Toggle Sheets ■In Standby, > [Back] or [Forward]
NoteAlternatively, ● Main Menu Entertainment Mobile Widget
Widget Contents or Main Menu Data Folder Widget to select widgetsWhen saving widgets from microSD to Standby, do not remove microSD ●Card.
Using Widgets
Selecting Widgets in Standby
1 In Standby, Pointer ( ) appears.
To disable pointer: ● or
2 to move pointer Select a widgetFollow onscreen instructions.
Capa_E_OI.indb 2 2009/07/28 10:14:59

Entertainment
7-3
7
Selecting Widgets from Widget List
1 Widget List appears.
2 Select a widget
Move Widgets in List ■ > Highlight a widget [Move] to determine a target location [OK]
TipSettings ●Mobile Widget ( P.18-15)
Downloading Widgets
Main Menu Entertainment Mobile Widget Widget Contents
1 Download Widget YES931P connects to the Network, and download site appears.Follow onscreen instructions.
Widget List
Installing WidgetsSome widgets may require you install them manually; follow steps below:
In download completion window, > [Menu] InstallOnce installation is completed, widgets appear in Widget List. Widget ●folder in Data Folder includes widgets that are not yet installed.
NoteAlternatively, ● Main Menu Data Folder Widget
Download Widget YES to download
Arranging Widgets in Standby
1 In Standby, to move pointer Highlight a widget [Operate]
2 Select an item (See below)
Item Operation/DescriptionMove > to move to a target location
Delete frm Standby
YES >
Forward Move overlapping widget to foreground
Rear Move overlapping widget to backgroundReload Update widget
Capa_E_OI.indb 3 2009/07/28 10:15:01

Entertainment
7-4
7
S! Quick News (Japanese)Add news headlines, weather forecasts, etc. via S! Quick News List to scroll across Standby Window.
Registering or viewing S! Quick News incurs transmission fees. No fees ●apply for viewing ticker information. For more information, visit SOFTBANK MOBILE Corp. Website (http://www.softbank.jp).
Registering S! Quick News Items
Register one ● Quick news, up to four General news and one Special news.
Main Menu Entertainment S! Quick News S! Quick News List
1 Add News YESYahoo! Keitai connects and contents list appears.
2 Select an itemFollow onscreen instructions.
Opening New Information
Viewing New Information in Standby
When new information is received, appears in Standby.
1 In Standby, to move pointer Select ticker
2 [Select]Content list appears.
3 Select informationDetails appear.
TipSettings ●Turn Back Light Off after All S! Quick News Viewed ( P.18-6)
●Show Only Unread Items in Standby ●Change Marquee Speed ●Hide S! Quick News ●Show Image Data ( P.18-16)
Capa_E_OI.indb 4 2009/07/28 10:15:01

Entertainment
7-5
7
Opening S! Quick News List
Main Menu Entertainment S! Quick News S! Quick News List
1 Select an itemContent list appears.
2 Select informationDetailed information appears.
3 To connect to the Network, select a title YES
Update Manually ■In Step1, > [Menu] Update or All Update YES
View Summary ■In Step 1, highlight information > [Menu] Summary Display
Icons
Unread Quick news
Read Quick news
Auto Refresh disabled
Unread General news
Read General news
Unread Special news
Read Special news
Delete Registered Items ■In Step 1, (highlight information > ) [Menu] Delete or All Delete YES ( For All Delete , enter Phone Password)
NoteAlternatively, ● Main Menu Entertainment S! Quick News
Settings Del S! Quick News List YES to delete all information
TipSettings ●Automatically Update S! Quick News List
●Delete S! Quick News Information ( P.18-16)
Capa_E_OI.indb 5 2009/07/28 10:15:03

Entertainment
7-6
7
S! Information Channel/Weather (Japanese)Subscribe to content and periodically receive updates. Set Weather Indicator to appear on Standby.
Transmission fees apply for updates. ●
Registering/Canceling
Main Menu Entertainment S! Info Ch./Weather
1 Register/Cancel YES931P connects to the Network.Follow onscreen instructions.
Using S! Information Channel
Up to seven updates are saved. ●
Viewing New Information
When information arrives, and Event Indicator appear in Standby.
1 In Standby, to move pointer Select Event Indicator
2 [Select]Follow onscreen instructions.
Option Menu Items ( ● P.7-8)
Manually Retrieve Information ■Select Event Indicator "Failed to download"
Alternatively, ● Main Menu Entertainment S! Info Ch./Weather Get Latest Contents YES
Delete Information ■Main Menu > Entertainment S! Info Ch./Weather
Highlight What's New? [Menu] Delete YES
NoteAlternatively, ● Main Menu Entertainment
S! Info Ch./Weather What's New? to retrieve informationIf there is unread information in both S! Quick News and S! Information ●Channel, does not appear. Only Event Indicator appears.
Viewing Previously Received Information
Main Menu Entertainment S! Info Ch./Weather
1 History Select a date for unread news and for read news appear.
Delete History ■Main Menu > Entertainment S! Info Ch./Weather History
(Highlight a History) [Menu] Delete or Delete all YES ( For Delete all, enter Phone Password)
Capa_E_OI.indb 6 2009/07/28 10:15:04

Entertainment
7-7
7
Using Weather Indicator
Weather Indicator for current forecast area appears in Standby.
Viewing New Information
Event Indicator and Weather Indicator appear for weather updates.
1 In Standby, to move pointer Select Event Indicator or Weather Indicator
2 [Select]Information appears.Follow onscreen instructions.
Option Menu Items ( ● P.7-8)
Weather IndicatorIndicators are updated periodically.Example: Clear, Rain later thunderstorm,
Cloudy with occasional snow, etc.See Weather Indicator List ( ● P.19-24) for a complete list of indicators.
Manually Update Weather Indicator ■Select Event Indicator "Failed to download"
Alternatively, ● Main Menu Entertainment S! Info Ch./Weather Weather Indicator Manual Update YES
Hide Event Indicator ■Main Menu > Entertainment S! Info Ch./Weather
Weather Indicator Missed Event Settings OFF
NoteAlternatively, view forecast details from ● Main Menu
Entertainment S! Info Ch./Weather Weather Indicator Weather
Hiding Weather Indicator
Main Menu Entertainment S! Info Ch./Weather Weather Indicator Display Settings
1 OFFWhen Display Settings is set to ● OFF , update is also deactivated.
Capa_E_OI.indb 7 2009/07/28 10:15:05

Entertainment
7-8
7
Option Menu Items
While viewing a content, press [Menu] for these options.
Item Operation/DescriptionForward Go to next pageText Copy Copy page textSelect File View, play or save file to Data Folder (From Step 2 in
Downloading Image/Sound Files: P.14-11)Jump in this page
Jump to top/end of page
Yahoo! Keitai View top menuFont Size Change character size* or character conversion methodExit viewing this
Exit content
* Linked with Font Size setting in Internet option menu.
E-Books (Japanese)Use BookSurfing® to acquire/view e-books, comics, photo books, etc. or e-Book Viewer to view XMDF files on 931P.
BookSurfing ● ® and e-Book Viewer are S! Appli.Download Content Keys ( ● P.9-5) to read CCF/XMDF files.Some copy protected files have extensions different from the ones below. ●
Application File FormatBookSurfing® CCF (.ccf)e-Book Viewer XMDF (.zbf, .zbk, .zbs)
Some PC content may not be viewable via e-Book Viewer. ●
Main Menu Entertainment
1 BookSurfing or e-Book ViewerSee application Help menu for usage information. ●
NoteLaunch BookSurfing ● ®/e-Book Viewer via S! Appli, or select a file from Books in Data Folder.
Capa_E_OI.indb 8 2009/07/28 10:15:05

8
8-1
Music PlayerOverview .............................................................. 8-2Saving Music ........................................................ 8-2
Downloading Chaku-Uta Full® ....................................................8-3Saving Music Files by Using SD Audio .........................................8-3Transferring WMA Files ...............................................................8-4
Using Music Player ............................................... 8-5Playback Window Indicators .......................................................8-5Playing Music .............................................................................8-6Playback Window Operations ......................................................8-7Functions while Playing Files .......................................................8-8Chaku-Uta Full®/WMA List ..........................................................8-9Using Play List ..........................................................................8-10Play List ...................................................................................8-11
Capa_E_OI.indb 1 2009/07/28 10:15:06

Music Player
8-2
8
OverviewPlay music saved on 931P/microSD Card.
Play List: ● P.8-10
Notes
Files may not play due to file support issues or microSD Card status, etc. ●When battery is low, Music Player cannot play files. ●When battery is low during playback, confirmation appears. ●Playback pauses for incoming calls or Alarm. Playback resumes after calls ●are received or Alarm sounds.
Music IlluminationNotification Light illuminates when playback starts. When playback ●starts during charging, Music Illumination lights before Charging Indicator.To turn off light, set ● Music to OFF in Notification Light setting ( P.18-10).
NoteUse earphone when listening to music. ●
Tip●Use Bluetooth® Device for Wireless Playback ( P.10-10)
Saving MusicSave Music to play on Music Player.
Download Chaku-Uta Full® ( P.8-3)
Open site link to download and save songsSupported file format: SMC, MPEG-4(MPEG-4 AAC, MPEG-4 AAC+ (HE-AAC), Enhanced aacPlus)
Save Music via SD Audio ( P.8-3)
Save music CD songs via PC to microSD Card in AAC formatSupported file formats: MPEG-2 AAC, MPEG-2 AAC+SBR
Save WMA files ( P.8-4)
Save Windows Media® Audio (WMA) files in PC to microSD Card via Windows Media® PlayerSupported file formats: WMA
Some files may not play even if format is supported. ●Copy protected files do not play after license expiry (Content Key: ● P.9-5).
Copy Protected FilesCopy protected files may not play, be saved or forwarded.To play a copy protected file, obtain Content Key ( P.9-5).Confirm file expiry date or usage limitations (Music info: P.8-8).
Capa_E_OI.indb 2 2009/07/28 10:15:06

Music Player
8-3
8
Saving Music Files on PCsWhen saving music files for use with 931P, observe the following guidelines:
Copyrighted Works ●Do not infringe on third party/intellectual property rights.・ Music files are limited to private use.・
Obtain software to convert file format. ●Refer to websites providing software.・ Performance of some software types is not guaranteed.・
Downloading Chaku-Uta Full®
Access websites directly from Music Player to download Chaku-Uta Full® files.
View details (price, expiry date, etc.) on source website. ●
Main Menu Music Player Data Manager Main Folder Download Music
1 YES931P connects to the Network and Download site appears.
Follow onscreen instructions to download files. ●
NoteAlternatively, follow these steps to access Download site: ●Main Menu Data Folder Music Main Folder
Download Music YES
Saving Music Files by Using SD Audio
NoteSaving music files requires following: ●
931P・ microSD Card (commercial item)・ USB cable (not included)・ PC (Windows・ ® XP, Windows Vista®)Software for PC (commercial item) ・ Panasonic brand "SD-Jukebox" is recommended. Purchase SD-Jukebox from website below: http://club.panasonic.jp/mall/sense/ (Japanese only)Music CD to save・
Main Menu Settings Connectivity USB Mode microSD Mode
1 Connect 931P to a PC via USB cable
2 Activate SD-Jukebox on PC
3 Set a music CD on PC
4 Save music files to micro SD CardSee SD-Jukebox manual for usage information. ●After saving, release USB cable from 931P. ●
Capa_E_OI.indb 3 2009/07/28 10:15:07

Music Player
8-4
8
Transferring WMA Files
Transfer WMA files from PC to microSD Card via Windows Media® Player. Up to 600 files can be saved per microSD Card.
Use PC with Windows Media ● ® Player installed.When using Windows Media ● ® Player 10 (10.00.00.3802 or later)/11 on Windows® XP, use Windows® XP Service Pack 2 or later.When using Windows Vista ● ®, use Windows Media® Player 11.Insert microSD Card into 931P before preparing USB cable (Transferring ●Data via USB Cable: P.10-12)
Main Menu Settings Connectivity USB Mode MTP Mode
1 Connect 931P to a PC via USB cableFollow Windows Media® Player operations to transfer WMA files from PC to microSD Card.
Refer to Windows Media ● ® Player Help for operations.Terminate all software applications before disconnecting USB cable. ●
NoteDo not remove microSD Card while transferring files to microSD Card. ●Files may be damaged.WMA files overwrite existing files with same name in handset when ●copied from PC. To check file names, refer to Windows Media® Player Help.931P may not recognize WMA files saved to a microSD on a different ●handset. Handset may not recognize WMA files from PCs if USB Mode is set to MTP Mode . Delete WMAudio and WMSystem folders in My Items (MY FOLDER) on microSD, or format microSD Card ( P.9-18) via PC. Formatting microSD deletes all saved files.To play WMA files on handset, save files to WMFile ( ● P.9-20) on microSD Card and play the files from PC Movies folder in Data Folder.
Capa_E_OI.indb 4 2009/07/28 10:15:07

8-5
Music Player
8
Using Music PlayerPlayback Window Indicators
❶❷❸
❹
❻❼ ❽ ❾ 10 11
12
❺
1413
Item Description❶ File Number/Total Number —❷ Title —❸ Artist —❹ Status —❺ Elapsed Time/Total Time —❻ Play Mode Indicators
Play only one
Repeat one
Repeat all Random
Random play&repeat DEMO
❼ Equalizer Setting Normal
H.BASS1
H.BASS2 Train
❽ Stereo/Monaural Stereo
Monaural
❾ Listening Setting Surround-sound Natur 1 Natur 2
10 Remaster Setting ON —11 Bluetooth® Device
Connected—
12 Volume —13 Lyric —14 URL —
Capa_E_OI.indb 5 2009/07/28 10:15:09

Music Player
8-6
8
Playing Music
1 Press and hold Player Menu window appears.
Last playback window appears. ●To open Player menu: twice.
2 Select a category (See below)
Item Operation/DescriptionAll Tracks Select files from 931P & microSD Card
Artist Select files from Artist folder
Album Select files from Album folder
Genre Select files from Genre folder
Play List Select group of files saved to Play List
★ ● appears for currently/previously played Play List.
3 Select a fileSelected file plays.★ ● appears for currently/previously played file.Playback Window Operations: ● P.8-7To end playback, ● [ ]
Player Menu Window
NoteAlternatively, follow these steps to play back music files: ●Main Menu Music Player Playermp4/3gp files in Ring Songs&Tones folder can also be played in Music ●Player.When playing back files with handset closed, missed calls or new ●messages cannot be checked by even if Info Notice Setting ( P.18-7) is ON .
Changing Play Mode
1 Press and hold Player Menu window appears.
Last playback window appears. To open Player menu: ● twice.
2 [Menu] Play mode setting
3 Select an item (See below)
Item Operation/DescriptionNormal Play all files in selected category/Play List
Play only one Play selected file
Repeat one Repeat selected file
Repeat all Repeat all files in selected category/Play List
Random Play selected category/Play List files randomly
Random play&repeat
Repeat selected category/Play List files randomly
Capa_E_OI.indb 6 2009/07/28 10:15:12

Music Player
8-7
8
Using Other Functions while Listening to Music (Play Background)
Use Phone Book, Messaging, Internet, etc. while listening to music.
1 While playing file, [BGM]
2 To end, in Standby End player
NoteSome functions cannot operate simultaneously. ●Volume or play mode change is not available during Play Background. ●
Playing Chaku-Uta Full®/WMA Files as Demo
Main Menu Music Player Data Manager
1 Select an item (See below)
Item Operation/DescriptionMain Folder View Chaku-Uta Full® list
Select a folder >To view file list in handset/microSD Card: ●
[Phone/microSD] WMA View WMA list
● [Change] to toggle display view in Chaku-Uta Full® and WMA list.
2 Select a Chaku-Uta Full® or WMA fileDemonstration playback starts.
Playback Window Operations
Adjust Volume or
Play Previous*
or press and hold When playback time is over ●three seconds, previous file plays from beginning.
Play Next* or press and hold
Rewind Press and hold
Forward Press and hold
Pause/Resume [ / ]
Stop [ ]
View Next Jacket/Lyric
View Previous Jacket/Lyric
Switch Jacket/Lyric Display
Switch Playlist/Playback Window*
[List/Player]
Play Background* [BGM]
Switch Remaster ( P.8-8)
Switch Listening ( P.8-8)
Switch Equalizer ( P.8-8)
* Not available for playback as a demo
Capa_E_OI.indb 7 2009/07/28 10:15:19

Music Player
8-8
8
Functions while Playing Files
Set Sound Effect ■While playing file, > [Menu] Sound effect Select an item (See below)
Item Operation/DescriptionRemaster Complement sound from earphone or Bluetooth® device
to bring close to original soundON > or OFF
Listening Add listening effect to sound from earphone or Bluetooth® device
Select an item >Surround-sound・ : Reproduce natural and stereophonic soundNatur 1 or Natur 2・ : Complement sound specific to earphone to reproduce natural soundOFF・ : Turn off Listening setting
Equalizer Change quality of sound from earphone or Bluetooth® device
Select an item >Normal・ : Reproduce normal soundH. BASS1・ : Enhance low-pitched sound H. BASS2・ : Enhance low-pitched sound even moreTrain・ : Minimize sound leakage
Functions Available in Playback Window ■While playing file, > [Menu] Select an item (See below)
Item Operation/DescriptionPlayer menu Show Player menu
Play mode setting
Change play mode ( P.8-6)
Sound effect ( Left)
Music info Show song title, artist and playback time
Connect to Website
Open site linkYES >
Display Image Show jacket
Display lyric Show lyric
Previous image/Previous lyric
Show previous jacket or lyric
Next image/Next lyric
Show next jacket or lyric
Capa_E_OI.indb 8 2009/07/28 10:15:19

Music Player
8-9
8
Chaku-Uta Full®/WMA List
From Main Menu Music Player Data Manager
Confirm Memory Status ■ > [Menu] Memory Status
Functions Available in Chaku-Uta Full ■ ® Folder ListMain Folder > Highlight a folder [Menu] Select an item (See below)
Item Operation/DescriptionAdd folder Enter folder name >Edit folder name
Enter folder name >
Delete folder Enter Phone Password > YESMemory Status
Confirm memory status/total files >
Functions Available in Chaku-Uta Full ■ ®/WMA File ListMain Folder > or WMA ( Select a folder) Highlight a file
[Menu] Select an item (See below)
Item Operation/DescriptionSet as ring tone (Fullsong ring tone) 1
Set Chaku-Uta Full® as ringtoneFullsong ring tone > Select an item
Set as ring tone (Point ring tone) 1
Set a segment of Chaku-Uta Full® as ringtonePoint ring tone > Select a segment Select an itemTo confirm segment: ● [Play]
Music info Show song title, artist and playback time
Move 1 Select a storage >
Item Operation/DescriptionMove to microSD 1
Move a Chaku-Uta Full® to microSD Card
Add folder 1 Enter folder name >Multiple-choice 1
Select multiple Chaku-Uta Full® filesCheck Chaku-Uta Full > ® files [Menu] Delete , Move or Send Ir data Operate selected item
Connect to Website 1
Open site linkYES >
Display image Show jacket
Memory Status
Memory status/total number of files appears
DEL all licenses 2
Delete all WMA licensesEnter Phone Password > YES
Delete this YES >Delete all Delete all files in folder
Enter Phone Password > YESAttach to S! Mail 1
Send a file via S! Mail ( From Step 2 on P.13-4)
Send Ir data 1 ( P.10-3)
IC transmission 1
( P.10-5)
Take contents key 1
( P.9-5)
1 Chaku-Uta Full® files only2 WMA files only
Capa_E_OI.indb 9 2009/07/28 10:15:20

Music Player
8-10
8
Using Play List
Use Play List to organize Data Folder music files. Select Music folder files to create Play List links to each file in its original folder.
Creating New Play Lists
Save up to 30 Play Lists with up to 100 songs per list. ●Music files saved on microSD Card are also savable. ●
1 Press and hold Player menu appears.
Last playback window appears. To open Player menu: ● twice
2 Play List [Menu] Create play list Select a category and show file list Check files to save to Play List
[Finish]
3 Enter a Play List name
Play List Window
NoteCreate WMA Play Lists (using Windows Media ● ® Player) or SD Audio Play Lists (using SD-Juke Box) on PC. Maximum number of Play Lists to create and songs to save is as follows: WMA Play Lists: 100 Play Lists; 250 songs per list SD Audio Play Lists: 99 Play Lists; 99 songs per list
Playing Songs from Play List
1 Press and hold Player menu appears.
Last playback window appears. To open Player menu: ● twice
2 Play List Select a Play ListTo play back selected Play List from the ●beginning: [Play]
3 Select a fileSelected file plays back.
Notemp4/3gp files in Ring Songs&Tones folder can also be added to Play ●List.
Play List Contents Window
Capa_E_OI.indb 10 2009/07/28 10:15:21

Music Player
8-11
8
Play List
Press and hold Play List
Functions Available in Play List Window ■(Highlight a Play List) > [Menu] Select an item (See below)
Item Operation/DescriptionPlayer menu Open Player menu
Play mode setting
Change play mode ( P.8-6)
Create play list
Create a new Play List ( P.8-10)
Copy play list Copy Play ListEnter a Play List name >
Edit pl. list name
Edit Play List nameEdit Play List name >
Add Add files to Play ListSelect a category, and open a Play List > Check files to add [Finish]
Delete play list
Select an item > Operate selected item
Functions Available in Play List Contents Window ■Select a Play List > (Highlight a file) [Menu] Select an item (See below)
Item Operation/DescriptionPlayer menu Open Player menu
Play mode setting
Change play mode ( P.8-6)
Music info Show song title, artist and playback time
Item Operation/DescriptionAdd Add files to Play List
Select a category, and show contents window > Check files to add [Finish]
DEL from play list
Delete files from Play ListSelect an item > Operate selected item
Order to play Select a file from Play List to change playing order > to change order [Select]
Repeat steps above to change order ● [Set]Add to play list
Add files to another Play ListAdd one > or Add some ( For Add some , check files [Finish]) Select a Play List
Display image Show jacket
Capa_E_OI.indb 11 2009/07/28 10:15:21

8-12
Music Player
8
Capa_E_OI.indb 12 2009/07/28 10:15:21

9
9-1
Managing FilesData Folder ........................................................... 9-2
Data Folder Structure ..................................................................9-2
Opening Files ........................................................ 9-4Viewing & Playing Files ...............................................................9-4File Display/Playback Functions ...................................................9-6Options ......................................................................................9-7
Using/Editing Still Images .................................. 9-12Editing Still Images ...................................................................9-12Creating Animations .................................................................9-13Saving Still Images to Phone Book ............................................9-14
Managing Folders/Files ...................................... 9-14Managing Folders .....................................................................9-14Using Play List ..........................................................................9-15
microSD Card ...................................................... 9-16microSD Card Installation .........................................................9-17Format microSD Card ................................................................9-18Viewing microSD Card Files ......................................................9-18Handset Data Backup ...............................................................9-19PC File Transfers .......................................................................9-20microSD Card Functions ............................................................9-21
Capa_E_OI.indb 1 2009/07/28 10:15:21

9-2
Managing Files
9
Data FolderSave, play and manage files downloaded from Internet, etc.
Save still images/videos captured by Camera, downloaded data or data copied/moved from SoftBank handset to microSD Card. ●
Data Folder Structure
Folder Function/Saved Data File Format 1
Pictures 2 Download Pictures Connect to download site JPEG, GIF (.gif including Interlaced GIF), GIF Pictogram Package File (.gpk), SWF (.swf Flash Animation), PNG (.png including Interlaced PNG)
Main Folder Downloaded still images, etc.Camera Still images captured by Camera, etc.My Pictograms
Download My Pict. Connect to download siteお気に入り Downloaded pictograms, etc.顔文字, 装飾, etc. Preinstalled pictograms
Mail Art Mail Art (download) Connect to download sitePre-installed Preinstalled still imagesOriginal Animation Display still images continuously
Ring Songs&Tones 2
DL Ring Songs&Tones Connect to download site SMF, SP-MIDI, AMR, SMAF and MPEG-4 formatted files (.mid, .midi, .amr, .mmf, .3gp, .mp4)
Main Folder Downloaded ring songs/tones, etc.Pre-installed Preinstalled ring songs/tonesVoice Announce Data recorded by Voice AnnouncePlay List Play back Play List
S! Appli 2 Download S! Appli Connect to download site –Widget 2 Download Widget Connect to download site WGT (.wgt), SWGT (.swgt)Music Main Folder 2 Download Music Connect to download site MP4, SMC, WMA (.3gp, .mp4,
.smc, .wma)Music SearchInitial Folder Downloaded Chaku-Uta Full®
WMA 3 WMA Files transferred from PC
Capa_E_OI.indb 2 2009/07/28 10:15:22

9-3
Managing Files
9
Folder Function/Saved Data File Format 1
Videos 2 Download Videos Connect to download site MP4 (including .mp4, .3gp, SDV), ASF (.asf)Main Folder Downloaded video files, etc.
Camera Video files recorded by CameraPre-installed Preinstalled video filesPlay List Play back Play ListPosition Memory Play back video files from saved resume position
PC Movies microSD 3 PC movies saved using PC WMA (.wma), WMV (.wmv), ASF (.asf)Position Memory Play back PC movies from saved resume position
Play History Playback records of PC moviesTV Image Still images recorded by Digital TV JPEG (.jpg)
Video 3 Copy-protected video files (One-Seg compatible) TOD (.tod), MOI (.moi), MAI (.mai), PGI (.pgi)Position Memory Play back video files from saved resume position
Lifestyle-Appli Download Connect to download site (Osaifu-Keitai®: P.16-2) –Books 2 Download Books Connect to download site CCF (.ccf), XMDF (.zbf, .zbk,
.zbs)Customized Screen 2
Customized Screen Connect to download site CUSR (.xcsf)Familiar Usability UIE (.uie)
Templates Download Templates Connect to download site –Font Download Font Connect to download site MTF (.mtf)
Main Folder Downloaded fontsPre-installed Pre-installed fonts
Other Documents 2
Main Folder Incompatible files attached to mail 4 –
1 Some copy protected files have extensions different from above.2 When microSD Card is installed, press [microSD] in Folder list to view data saved in microSD Card.3 Available only when microSD Card is installed.4 Some attachment files cannot be saved in Other Documents.
Capa_E_OI.indb 3 2009/07/28 10:15:23

Managing Files
9-4
9
Using Copy Protected Files
Playing/forwarding/saving may be restricted and Content Key ( P.9-5) may be required for usage. See file information to confirm restrictions such as expiry term or usage limitation (Respective file information in "Options": P.9-7).
● or (Silver) appears for copy protected files requiring Content Keys. files are inaccessible.
Files downloaded on 931P cannot be used on PCs. ●Network setting may be required for usage. ●File usage may require insertion of USIM Card in use at time of ●download.931P holds up to 1000 Content Keys. Multiple Keys may be required to ●use a file. Expired Keys are deleted automatically.Interrupted playback (by incoming calls or Alarm) of copy protected WMA ●files with limited usage in Data Folder is also counted as one usage.
Opening FilesViewing & Playing Files
Main Menu Data Folder
1 Select a folderIn Folder List, press ● to toggle handset folder and microSD Card folder.
2 Select a folder Select a fileFile appears/plays.
To toggle file list view: ● [Change]
When Shortcut to a Download Site is SelectedHandset connects to a download site on Internet.
Operations while Playing Back Ring Songs&Tones ■Stop [Stop]
Volume /
Attach files (during playback) to S! Mail [ ]
Pictures Folder
Still Image List Window
Capa_E_OI.indb 4 2009/07/28 10:15:27

Managing Files
9-5
9
Videos/PC Movies Playback Operation ■Some operations are not available depending on files. ●
Adjust Volume or
Play Previous Starts from beginning when playback time is ●over three seconds.
Play Next
Rewind 1 Press and hold
Forward 1 Press and hold
Select Position 2 repeatedly
Change Speed [ / 1/ ]
Mute/Resume [ / ]
Pause/Resume [ / ]
Play Frame by Frame 1
While pausing, [Frame]Play back frame by frame ●
Switch Portrait/Landscape View (Full Screen)Remaster ( P.8-8)
Listening ( P.8-8)
Equalizer ( P.8-8)1 Videos only2 PC Movies only
only Tip ●File Display/Playback Functions ( P.9-6)
Content Key
If Content Key is expired, a message appears when the file is opened. To obtain a new Key, select YES. 931P connects to Content Key site.
Copy Protected Files: ● P.9-4 ● or (Silver) appears for files requiring Content Keys. files are inaccessible. appears on images in Thumbnail view of expired files (Original icon appears for Books folder.).
NoteAlternatively, obtain Content Key as follows: Highlight a file ●
[Menu] Take contents keyDepending on contents, some Content Keys may not be obtained from ●websites even when warning for expired contents appears.When 1000 Content Keys have been saved, a message appears. Delete ●old Keys; otherwise downloads may fail (Connection fees apply).
Capa_E_OI.indb 5 2009/07/28 10:15:32

Managing Files
9-6
9
File Display/Playback Functions
Enlarge Still Images ■Main Menu > Data Folder Pictures Select a folder Select a file [Menu] Display size Fit in display
Play Back from a Resume Position ■Resume playback (videos/PC Movies) from a saved position.
Main Menu > Data Folder Videos or PC Movies Position Memory Select an item
Save a resume position: ● RightMarker to resume ● is a resume position automatically saved when a call comes in, alarm goes off, battery runs low, or playback is terminated.
Functions Available in Video/PC Movie Playback Window ■Some operations are not available depending on files. ●While playback is paused, > [Menu] Select an item (See below)
Item Operation/DescriptionNormal play 1 Play at normal speed
Slow 1 Play at slow speed
Quick View (1.25x) 1
Play 1.25 times faster than normal
Quick View(2x) 1
Play at double speed
Fast 2 Forward
Rewind 2 Rewind
Stop Return to Videos/PC Movies List window
Position to play
Start playback from specified point > to highlight a play point [Set]
Connect to Website 1
Open site linkYES >
Item Operation/DescriptionSound effect Remaster , Listening or Equalizer ( P.8-8)
Contents info 2
Show title, file name, etc.
Position memory
Save resume positionSelect a resume position >To play back from a saved position: ● Left
Attach to S! Mail 1
Send file via S! Mail( From Step 2 on P.13-4)
Register (Ringtones) 1
Set as ringtoneRingtones > Select a type★ ● appears for item set as ringtone.
Register (Stand-by Display/Start-up Window) 1
Save a file as Standby Display or Start-up WindowSelect an item > YES
Video info 1 Show title, file name, etc.Send Ir data 1 Send file via Infrared ( P.10-3)IC transmission 1
Send file via IC transmission ( P.10-5)
Add shortcut icon 1
Create a shortcut ( P.1-22)
Description 2 Show file informationThe words view > or Description view
Copy URL 2 Copy URLDisplay size Select a display size
Actual size > or Fit in displayChange to full 1
Switch to Landscape View. Full screen playback starts.To toggle views: ●
1 Video files only2 PC movies only
Capa_E_OI.indb 6 2009/07/28 10:15:32

Managing Files
9-7
9
Options
Copy Protected FilesWhen set as wallpaper or ringtone, settings may return to defaults if ●license has expired or different USIM Card is inserted.Limited use files cannot be set as wallpaper or ringtone. ●
Highlight a file in Data Folder [Menu] for the following operations.Some functions may not be available depending on files. ●
Pictures ■Item Operation/Description
Edit picture Edit files ( P.9-12)Display picture Open filesSet display* Set as wallpaper, Phone Book image, Menu Icons, etc.
Select an item >★ ● appears for item.
Picture info Show file name, file size, etc.Attach to S! Mail
Send files via S! Mail ( From Step 2 on P.13-4)
Graphic mail Add selected files to Graphic Mail ( P.13-9) Send Ir data Send files via Infrared ( P.10-3)IC transmission Send files via IC transmission ( P.10-5)Add shortcut icon
Create shortcuts ( P.1-22)
Copy to microSD
Copy files to microSD Card
Move to microSD
Move files to microSD Card
Positioning Set where to paste files in StandbySelect a position >
Item Operation/DescriptionEdit file name Edit file namesMove Move files to other foldersSlideshow Show files in a folder continuously. Select display speed
Normal > or SlowDelete this Delete a file
YES >Delete all Delete all files
Enter Phone Password > YESMultiple-choice
Select multiple files to useCheck files to use > [Menu] Select an item
Memory Status
Show memory information
Sort Change display order of filesSelect an order >
Pictures/ File names
Toggle list viewAlternatively, ● [Change] to toggle
Take contents key
Connect to site for Content Key
* Before setting a file as Video Call related item (except for Incoming/Outgoing Video Calls), set Select Images to Original (Change Outgoing Image: P.18-12). To set a file as Menu Icon related item, set Menu Icons to Customize ( P.18-4).If incoming calls arrive or handset is turned off while My Pictograms ●package file (.gpk) is being uncompressed, some pictograms in package file may not open. Retry uncompressing.
Capa_E_OI.indb 7 2009/07/28 10:15:33

Managing Files
9-8
9
Tip ●Enlarge Still Images ( P.9-6)●Editing Still Images ( P.9-12)●Creating Animations ( P.9-13)●Saving Still Images to Phone Book ( P.9-14)
Ring Songs&Tones ■Item Operation/Description
Edit file name Edit file namesPlay melody Play back filesSet as ring tone
Set as > ringtone★ ● appears for item.
Add shortcut icon
Create shortcuts ( P.1-22)
Attach to S! Mail
Send files via S! Mail ( From Step 2 on P.13-4)
Send Ir data Send files via Infrared ( P.10-3)IC transmission
Send files via IC transmission ( P.10-5)
Copy to microSD
Copy files to microSD Card
Song·Tone info
Show titles, file names, etc.
Memory Status
Show memory information
Delete Select a type >Delete this・ YESDelete select・ Check files to delete
[Finish] YESDelete all・ Enter Phone Password YES
Item Operation/DescriptionSort Change display order of files
Select an order >Move Move files to other foldersMove to microSD
Move files to microSD Card
Take contents key
Connect to site for Content Key
Widget ■Item Operation/Description
Paste on Stand-by
( P.7-2)
Widget Information
Show file names, sizes, etc.
Attach to S! Mail
Send files via S! Mail ( From Step 2 on P.13-4)
Send Ir data Send files via Infrared ( P.10-3)IC transmission
Send files via IC transmission ( P.10-5)
Move to microSD
Move files to microSD Card
Delete this Delete a fileYES >
Delete all Delete all filesEnter Phone Password > YES
Multiple-choice
Select multiple files to useCheck files to use > [Menu] Select an item
Capa_E_OI.indb 8 2009/07/28 10:15:34

Managing Files
9-9
9
S! Appli/Lifestyle-Appli ■Item Operation/Description
Start Activate S! Appli or Lifestyle-AppliSecurity level Set security level ( P.15-4)S! Appli info Show file names, file sizes, etc.Add shortcut icon
Create shortcuts ( P.1-22)
Move to microSD
Move files to microSD Card (Lifestyle-Appli cannot be moved)
Delete Delete filesYES >
Music ■See "Functions Available in Chaku-Uta Full ● ®/WMA File List" ( P.8-9)
Videos ■Item Operation/Description
Register Set as ringtones, Standby Display or Start-up displayVideo info Show titles, file names, etc.Attach to S! Mail
Send files via S! Mail ( From Step 2 on P.13-4)
Send Ir data Send files via Infrared ( P.10-3)IC transmission Send files via IC transmission ( P.10-5)Copy to microSD
Copy files to microSD Card
Move to microSD
Move files to microSD Card
Move Move files to other foldersAdd shortcut icon
Create shortcuts ( P.1-22)
Edit file name Edit file namesDelete this Delete a file
YES >Delete all Delete all files
Enter Phone Password > YESMultiple-choice
Select multiple files to useCheck files to use > [Menu] Select an item
Memory Status
Show memory information
Sort Change display order of filesSelect an order >
Listing Change list view ● [Change] to toggle views
Take contents key
Connect to site for Content Key
Capa_E_OI.indb 9 2009/07/28 10:15:34

Managing Files
9-10
9
PC Movies ■Item Operation/Description
Contents info Show titles, file names, etc.Move Move files to other foldersCopy Copy files to other foldersMultiple-choice
Select multiple files to useCheck files to use > [Menu] Select an item
Comment view
Show descriptions
Memory Status Show memory informationDelete this Delete a file
YES >Delete all Delete all files
Enter Phone Password > YES
TV ■See Pictures folder for still images. ●
Item Operation/DescriptionEdit title Enter titles >Video info Show titles, channel names, etc.Add shortcut icon
Create shortcuts ( P.1-22)
Delete Select an item >Delete this・ YESDelete selected・ Check files to delete
[Finish] YESDelete all・ Enter Phone Password YES
Memory Status Show memory informationListing Change list view
● [Change] to toggle views
Books ■Item Operation/Description
Play Play back filesConnect to Website
Open site link
Book info Show file names, file sizes, etc.Copy to microSD Copy files to microSD CardMove to microSD Move files to microSD CardAdd folder Add foldersEdit file name Edit file namesMove Move files to other foldersTake contents key
Connect to site for Content Key
Delete Delete filesYES >
Capa_E_OI.indb 10 2009/07/28 10:15:34

Managing Files
9-11
9
Customized Screen ■Item Operation/Description
Preview Preview filesCollective Setting
Set Customized Screen all at once
File info Show titles, file names, etc.Copy to microSD Copy files to microSD CardMove to microSD Move files to microSD CardEdit file name Edit file namesDelete this Delete a file
YES >Delete all Delete all files
Enter Phone Password > YESMultiple-choice
Select multiple files to useCheck files to use > [Menu] Select an item
Memory Status
Show memory information
Sort Change display order of filesSelect an order >
Listing Change list view ● [Change] to toggle views
Take contents key
Connect to site for Content Key
Connect to Website
Open site link
Templates ■Item Operation/Description
Compose S! Mail
Send files via S! Mail ( P.13-5)
Edit title Edit titles
Template Info Show title and file size
Delete this YES >Delete selected
Check files to delete > [Finish] YES
Delete All Enter Phone Password > YES
Font ■Item Operation/Description
Set Apply selected font
File info Show file names, file sizes, etc.
Edit title Edit titles
Delete this Delete a fileYES >
Delete all Delete all filesEnter Phone Password > YES
Multiple-choice
Select multiple files to useCheck files to use > [Menu] Select an item
Memory Status
Show memory information
Sort Change display order of filesSelect an order >
Listing Change list view ● [Change] to toggle views
Capa_E_OI.indb 11 2009/07/28 10:15:35

Managing Files
9-12
9
Other Documents ■Item Operation/Description
File info Show file names, file sizes, etc.
Attach to S! Mail
Send files via S! Mail ( From Step 2 on P.13-4)
Copy to microSD
Copy files to microSD Card
Edit file name Edit file names
Move Move files to other folders
Delete this Delete a fileYES >
Delete all Delete all filesEnter Phone Password > YES
Multiple-choice
Select multiple files to useCheck files to use > [Menu] Select an item
Memory Status
Show memory information
Sort Change display order of filesSelect an order >
NoteTitles of mp4/3gp Ring Songs&Tones files and Videos/Music/Customized ●Screen files appear in respective lists. Files without titles appear with file names (created when files are saved to handset). Titles cannot be changed; edited file names may not appear in lists.
Using/Editing Still ImagesEditing Still Images
Edit features are not available for all file types. ●
Main Menu Data Folder Pictures
1 Select a folder Select a file [Menu] Edit picture
2 [Menu] Select an item (See below)
Item Operation/DescriptionMarker stamp Select a stamp > to move stamp [Put]
Following options are available when positioning a ●stamp:
To rotate or scale up/down: ・ [Menu] Select an itemTo start over: ・ [Cancel]
To add: ● [Add]Frame Select a frame >
To rotate 180 degrees: ・ [Menu] 180° rotationTo change frame: ・ To return to frame list: ・ [Cancel]
Character stamp
Enter text > to move text [Put]To change content/color/font/size: When positioning ●stamp, [Menu] Operate selected itemTo start over: ● [Cancel] after positioning
Capa_E_OI.indb 12 2009/07/28 10:15:36

Managing Files
9-13
9
Item Operation/DescriptionFit in screen Change image size to Standby (480 x 854)
YES >Change size Select a size >
To start over: ● [Cancel]Trim away Specify a size > to specify area [Set]
To start over: After specifying area, ● [Cancel]Retouch Select an item >
To start over: ● [Cancel]Rotate 90° to right > , 90° to left or 180°
To start over: ● [Cancel]Brightness > to adjust brightness
Attach to S! Mail*
Create S! Mail with edited still images > [Set] Create S! Mail ( From Step 2 on P.13-4)Edited files are automatically saved. ●Alternatively, ● [ ] to attach pictures to S! Mail
Save* Overwrite/rename to save edited files
* Available after other editing operations.
3 [Set] [Save]
4 YES (Overwrite) or NO (Save as)
Creating Animations
Saving Original Animation
Main Menu Data Folder Pictures Original Animation
1 <New> <1st> - <20th>
2 Select a folder Select a fileRepeat Step 2. ●
3 [Finish]
Functions Available in Original Animation List
In Original Animation list, press [Menu] for following operations.
Item Operation/DescriptionEdit title Enter title >Org. animation Add more files to an Original Animation ( Above)Display picture
Play back an Original AnimationAlternatively, select an Original Animation from list to ●play back.
Set display Set an Original Animation as Standby display, etc.Select item to set Original Animation as >
Picture info View item set for Set displayRelease animation
Cancel a saved Original AnimationYES >
Capa_E_OI.indb 13 2009/07/28 10:15:36

Managing Files
9-14
9
Saving Still Images to Phone Book
Savable sizes: ● ・ Standby (480 x 854) or smaller in JPEG or GIF format (up to 300 Kbytes)VGA (640 x 480) or smaller in PNG format・
Save images to up to 100 Phone Book entries. ●Still images cannot be saved to USIM Card Phone Book entries. ●
Main Menu Data Folder Pictures
1 Select a folder Select a file [Menu] Set display Phone Book
2 New EntryNew Enter details ( From Step 3 on P.4-4)
[Finish]
Add to Existing EntryAdd Select entry [Finish] YES
Managing Folders/FilesManaging Folders
The following operations are available in Pictures, Music, Books, Videos, Ring Songs&Tones and Other Documents.
Main Menu Data Folder
1 Select a folder [Menu] Select an item (See below)Item Operation/Description
Add folder Create user folders
Edit folder name
Edit user folder names
Delete folder Delete a user folderEnter Phone Password > YES YES
Folder security 1
Hide files in folder unless Phone Password is enteredEnter Phone Password > YES appears for folder.To cancel: Repeat the step ●
Delete all image 2
Enter Phone Password > YES YES
Edit Play List 3
Edit Play Lists
Release Play List 3
Cancel edited Play ListsYES >
Capa_E_OI.indb 14 2009/07/28 10:15:37

Managing Files
9-15
9
Item Operation/DescriptionSelect storage 4
Specify folders on microSD Card to save files toYES >Folders cannot be specified when saving Books files. ●
Memory Status 5
View memory capacity/number of saved files
1 Pictures/Videos folders only2 Pictures folder only3 Play List folder in Ring Songs&Tones folder only4 microSD Card only5 Music folder only
Using Play List
Use Play List to organize Data Folder Ring Songs&Tones/Videos files.Select Ring Songs&Tones, Music or Videos folder files to create Play List links to each file in its original folder.
Creating Ring Songs&Tones Play Lists
Main Menu Data Folder Ring Songs&Tones
1 Highlight Play List [Menu] Edit Play List
2 Select a number Select a folder Select a fileRepeat Step 2. ●
3 [Finish]
Play Back Play List ■Main Menu > Data Folder Ring Songs&Tones Play ListFiles are played back in the saved order. ●
Delete a File ■After Step 1, select a file > Release this
Delete All Files ■In Step 1, > [Menu] Release Play List YES
Notemp4/3gp files cannot be added to Play List except in Music Player Play ●List.
Capa_E_OI.indb 15 2009/07/28 10:15:37

Managing Files
9-16
9
Creating Video Play Lists
Main Menu Data Folder Videos Play List
1 Select a Play List
2 Select a number Select a folder Select a fileRepeat Step 2. ●
3 [Finish]
Play Back Play Lists ■Main Menu > Data Folder Videos Play List Highlight a Play List [Play]Files are played back in the saved order. ●
Delete a File ■After Step 1, (highlight a file > ) [Menu] Delete this or DEL all from list YES
Change Order ■After Step 1, > [Menu] Oder to play Select a file Select a target [Finish] [Finish]
microSD Card931P is compatible with up to 2 GB commercial microSD Cards and up ●to 16 GB commercial microSDHC Cards (as of May 2009). For information on memory card compatibility, visit the website below (Japanese). Note that microSD Cards not listed on the website may not function properly.
From Yahoo! Keitai ・ P-egg (as of May 2009) Yahoo! Keitai top page メニューリスト 辞書・ツール→ ケータイメーカー P-eggFrom PC ・ http://panasonic.jp/mobile/ Not all operations are guaranteed by the microSD/microSDHC Cards listed.
Format new microSD/microSDHC Cards for use with 931P ( ● P.9-18).
NoteSoftBank is not liable for damages from accidental loss/alteration of ●microSD Card information. Keep a copy of Phone Book entries, etc. in a separate place.microSD Card has no write protect feature; there is a risk of accidental ●erasure/overwriting of files.
Capa_E_OI.indb 16 2009/07/28 10:15:37

Managing Files
9-17
9
microSD Card Installation
Turn off handset before inserting/removing microSD Card. ●
Inserting
1 Open cover. Insert microSD Card until it clicks
2 Close cover
microSD Card CheckWhen microSD Card is installed correctly, appears. If appears, microSD Card cannot be used. Remove microSD Card from handset, and re-insert it. If does not disappear, execute Check microSD ( P.9-21) or format microSD Card ( P.9-18). (Display Indicator: P.1-10)
Removing
1 Push microSD Card inmicroSD Card pops out with a light ●push.
2 Remove microSD Card and close coverTo close cover: ● Left
NoteDo not turn off handset or remove battery/microSD Card while ● flashes. microSD Card may be damaged or files lost.microSD Card may pop out when inserting/removing it. ●
Capa_E_OI.indb 17 2009/07/28 10:15:40

Managing Files
9-18
9
Format microSD Card
Formatting microSD Card deletes all saved files/data. ●
Main Menu Tools microSD Backup
1 [Menu] microSD format
2 Enter Phone Password YES
NoteDo not turn handset power off or remove microSD Card or battery while ●formatting; may damage handset or microSD Card.microSD Cards formatted on other devices may not be used. Format ●microSD Card on 931P before use.931P cannot format incompatible microSD Cards. ●If format fails, turn power off and remove microSD Card from 931P. ●Reinsert microSD Card and format it again.
Viewing microSD Card Files
View Phone Book entries, Calendar events, Tasks, mail messages, Notepads and Bookmarks backed up on microSD Card.
Main Menu Tools microSD Backup
1 Select a category
2 Select a fileBackup date appears as file name.
3 Select a data
NoteIf messages on microSD Card do not appear correctly, copy messages to ●handset ( P.9-19) and execute Charset Conversion ( P.13-22).
Category List
File List
Detailed Data
Data List
Capa_E_OI.indb 18 2009/07/28 10:15:42

Managing Files
9-19
9
Handset Data Backup
Back up handset data (Phone Book, Calendar, Tasks, Messages, Notepad, Bookmarks, Content Keys) to microSD Card; restore handset data after accidental loss/alteration.
Back up Content Key: ● P.9-22
Backing up to microSD Card
Main Menu Tools microSD Backup
1 Highlight a category [Menu] Copy to microSD ( For Bookmarks , select an item)
2 Enter Phone Password YESAll files of selected category are backed up to microSD Card.
One File Backup ■Open a file > [Menu] Copy to microSD YES
Restoring from microSD Card
Main Menu Tools microSD Backup
1 Select a category
2 Restore One ItemSelect a file Highlight an item [Menu] Add to phone
Restore One FileHighlight a file [Menu] Add to phone or Overwrite to phone Enter Phone Password
Restore All Files[Menu] Add all to phone or
Overwr. all to ph. Enter Phone Password
3 YES
NoteNote that ● Overwrite to phone or Overwr. all to ph. erases all files of same category on handset.Files of 10 MB or larger cannot be moved/copied from microSD Card to ●handset.Data backed up in other SoftBank handsets may not be restored in ●931P depending on type and size.
Tip ●Delete Items from microSD Card ●View microSD Card Memory Capacity ( P.9-21)
Capa_E_OI.indb 19 2009/07/28 10:15:42

Managing Files
9-20
9
PC File Transfers
Folder Structure
Files moved or copied from 931P to microSD Card are managed as shown below:
Save files in folders by file type. ●
DCIMStill images saved to microSD Card ●
PRIVATEMYFOLDER
UtilityCalendar Calendar.BCK Calendar Backup files
Contacts Contacts.BCK Phone Book Backup files
Rights Content Key Backup files
Tasks Tasks.BCK Tasks Backup files
Memo Memo.BCK Notepad Backup files
MailDrafts Drafts.BCK Drafts Backup files
Inbox Inbox.BCK Incoming Mail Backup files
Outbox Outbox.BCK Unsent Messages Backup filesSent Messages
Sent Messages.BCK
Sent Messages Backup files
My ItemsBook E-comics
Bookmarks Bookmarks.BCK Bookmarks Backup files
Custom Screens Familiar Usability applications
Flash(R) Flash® files
Games and More S! Appli
Music Sound files with .3gp, .mp4, .smc
Other Documents Other files
Pictograms My Pictograms
PicturesStill images moved/copied from handset to Main Folder in microSD Card
Sounds & Ringtones
Sound files of:up to 10 MB with .3gp, .mp4, up to 300 KB with .mid, .midi, .amr
VideosVideos moved/copied from handset to Main Folder in microSD Card
Widget Widget contents
WMFile*PC Movies saved from PC to microSD Card
SD_VIDEOVideos saved to microSD Card ●
Some copy protected files have extensions different from above. ●When moving/copying videos from microSD Card to handset, file format ●or file size may change.
* If WMFile does not appear in My Items (MYFOLDER), create and save a folder titled WMFile.
Capa_E_OI.indb 20 2009/07/28 10:15:42

Managing Files
9-21
9
Using Data on microSD Card
With a microSD Card inserted, connect handset with a PC via USB cable (not included) to read/write data from/onto microSD Card. Following equipment is required:
Connector Cable: USB cable ●PC: PC with USB port (Universal Serial Bus Specification Rev 1.1 ●compliant)Compatible Operating Systems: Windows ● ® XP, Windows Vista® (Japanese version in each)
Main Menu Settings Connectivity USB Mode microSD Mode
1 Connect handset to PC via USB cable while 931P is onPC recognizes microSD Card. ● ● appears in Standby (handset).
NoteEven if incoming call arrives, reading/writing data continues during ●calls. After calls, check indicators on PC to see if reading/writing is complete.File names saved in microSD Card may not properly appear if changed ●on PC.
microSD Card Functions
Restore microSD Card items (Check microSD) ■Main Menu > Tools microSD Backup [Menu]
Check microSD YESDo not turn handset power off or remove microSD Card or battery while ●formatting; may damage handset or microSD Card.It may take 30 seconds or longer to complete Check microSD depending ●on data volume on microSD Card.931P cannot check incompatible or unformatted microSD Cards. ●931P may delete files and folders that fail to be restored. ●
Delete Items from microSD Card ■Main Menu > Tools microSD Backup Select a category
(Highlight a file ) [Menu] Delete this or Delete all ( For Delete all, enter Phone Password) YESContent Key cannot be deleted. ●
View microSD Card Memory Capacity ■Main Menu > Tools microSD Backup [Menu]
microSD info
Capa_E_OI.indb 21 2009/07/28 10:15:43

Managing Files
9-22
9
Back Up Content key ■Copy Content Keys to microSD Card from handset or to handset from microSD Card.
Main Menu > Settings Security Content Key Copy to microSD or Copy from microSD Enter Phone
PasswordContent Keys with expiration dates or usage limits cannot be backed up. ●USIM Card inserted when Content Keys were moved to microSD Card ●must be inserted to move Content Keys from microSD Card.Some applications are made for use on specific models. Some models ●move Content Keys to microSD Card instead of backing up. Contact SoftBank Mobile Customer Center, General Information for more information. Content Keys are backed up after the previous back up file is deleted. To ●back up another key and keep existing keys, move existing keys to handset first and back up a new key.
Capa_E_OI.indb 22 2009/07/28 10:15:43

10
10-1
ConnectivityInfrared ............................................................... 10-2
Before Using Infrared ................................................................10-2One/Multiple File Transfer .........................................................10-3All File Transfers........................................................................10-3
IC Transmission ................................................... 10-4One File Transfer .......................................................................10-5All File Transfers........................................................................10-5
Bluetooth® .......................................................... 10-6Before Using Bluetooth® ...........................................................10-6Using Bluetooth® ......................................................................10-7Suspending Bluetooth® Functions .............................................10-8Placing Bluetooth® Devices on Standby for Connection ..............10-9Sending/Receiving Phone Book .................................................10-9Bluetooth® Functions ..............................................................10-10
SoftBank Utility Software (Japanese) ............... 10-11USB (Japanese) ................................................. 10-11
Setting USB Mode ..................................................................10-11Transferring Data via USB Cable ..............................................10-11Data Communication via USB Cable........................................10-12
AV Output ......................................................... 10-13Connecting Handset to TV ......................................................10-13
Capa_E_OI.indb 1 2009/07/28 10:15:43

Connectivity
10-2
10
InfraredBefore Using Infrared
Transfer Phone Book/Calendar events, messages, bookmarksand Data Folder files wirelessly between 931P and compatible devices, including PCs and other mobiles.
931P infrared function is based on IrMC1.1, however, some IrMC1.1- ●based device transmissions may not be transmitted/received within specification.Debris may inhibit infrared transfers; clean infrared ports with a soft cloth ●beforehand.Direct sunlight/fluorescent light may inhibit transfers. ●Align infrared ports within 20 cm of one another and make sure no ●objects are placed between them. Do not move the devices until transfer is complete.
Within 20 cm
Infrared Port
Transferable Files
ConditionTransferable file One file All files
Phone Book (Account Details) ○ Up to 1000Calendar events 1 ○ Up to 1000Tasks ○ Up to 100Received message ○ Up to 3000Sent message ○ Up to 1000Drafts ○ Up to 10Notepad ○ Up to 20Ring Songs&Tones ○ ̶Still image 2 3 ○ ̶Video 3 ○ ̶Bookmark (Yahoo! Keitai, PC Site Browser) ○ Up to 100 each
Widget 3 ○ ̶○: Transferable ̶: Not transferable1 Saved Holidays/Memorial days not transferable2 Including Flash® files3 Multiple files transferable
NoteFollowing files cannot transfer: ●
Files prohibited for transfers from 931P・ Phone Book entries and SMS on USIM Card・
If memory becomes full, remaining entries are truncated (Memory List: ●P.19-25).
Capa_E_OI.indb 2 2009/07/28 10:15:46

Connectivity
10-3
10
One/Multiple File Transfer
Transferable Files: ● P.10-2
Sending
1 Highlight a file, and follow the steps below
Files to Send Operation/DescriptionPhone Book > [Menu] Send Ir data Send phonebookAccount Details
> [Ir]
Messages > [Menu] Send Ir data Send ThisBookmarks > [Menu] Send to ExtrnlDvcs Send Ir data
Send ThisStill Images/ Videos/Widgets
> [Menu] Send Ir dataTo send multiple files: ● [Menu] Multiple-choice Select files to send [Menu]
Send Ir data Other Files > [Menu] Send Ir data
2 YES
Receiving
Main Menu Tools Receive via Infrared Receive
1 When a file is received, YESSend files from sender side within 30 seconds.
To receive subsequent files, select ● YES .
All File Transfers
PrecautionReceiving all files overwrites all saved files including secret/protected ●files. Files saved in Secret Mode are also deleted.Sending all Phone Book entries sends Account Details as well. ●User-edited information is overwritten (handset number remains).
Session NumberSession number (4 digits) is required for all file transfers via Infrared and IC transmission. Sender and recipient must enter same Session number to complete transfers.
Sending
1 Highlight a file, and follow the steps below
Files to Send Operation/DescriptionPhone Book [Menu] Send Ir data Send all phonebookMessages [Menu] Send Ir data Send AllBookmarks [Menu] Send to ExtrnlDvcs Send Ir data
Send AllOther Files [Menu] Send all Ir data
2 Enter Phone Password Enter Session number YESRecipient must enter the same Session number to start transfers.
Capa_E_OI.indb 3 2009/07/28 10:15:47

Connectivity
10-4
10
Receiving
Main Menu Tools Receive via Infrared Receive All
1 Enter Phone Password Enter same Session number as sender's YES YESSaved files are deleted, and transfer starts.
IC TransmissionExchange files with another IC compatible handset using reader/writer function.
Type of files and transfer conditions are same as those for infrared file ●transfer ( P.10-2). Multiple file transfer is not available.IC transmission is not available when ● IC Card Lock ( P.16-5) is activated.When receiving dada, end all active functions. ●If there is difficulty in file transfer, move a ● logo close to or away from the other logo or move each side up, down, left, or right.Data cannot be sent during charging battery. ●
Align logos of both handsets
Capa_E_OI.indb 4 2009/07/28 10:15:48

Connectivity
10-5
10
One File Transfer
Before Receiving a FileReceive IC Datum ● is set to ON by default. When Receive IC Datum is OFF , One File Transfer is unavailable.To set ● Receive IC Datum on:
Main Menu Osaifu-Keitai IC Card Settings Receive IC Datum ON
Sending
1 Highlight a file, and follow the steps below
Files to Send Operation/DescriptionPhone Book > [Menu] IC transmission Send phonebookAccount Details
> [ICtrans]
Messages > [Menu] IC Transmission Send ThisBookmarks > [Menu] Send to ExtrnlDvcs
IC transmission Send ThisOther Files > [Menu] IC transmission
2 YES
Receiving
1 Align logo on sender side with 931P (recipient) YES
All File Transfers
Precautions/Session number ( ● P.10-3)
Sending
1 Highlight a file, and follow the steps below
Files to Send Operation/DescriptionPhone Book > [Menu] IC transmission
Send all phonebookMessages > [Menu] IC Transmission Send AllBookmarks > [Menu] Send to ExtrnlDvcs
IC transmission Send AllOther Files > [Menu] AllIC transmission
2 Enter Phone Password Enter Session number YESRecipient must enter the same Session number to start transfers.
Receiving
1 Align logo on sender side with 931P (recipient)
2 YES Enter Phone Password Enter same Session number as sender'sSaved files are deleted. Transfer starts.
Capa_E_OI.indb 5 2009/07/28 10:15:49

Connectivity
10-6
10
Bluetooth®
Connect handset to Bluetooth® devices to use functions below.
Function Device DescriptionHandsfree Calls( P.10-10)
Headsets Handsfree devices
Talk handsfree on handset
Wireless Playback ( P.10-10)
Audio devices
Play back sounds (Digital TV/Video) or music (Music Player) wirelessly from external speaker
Internet Connection( P.10-10)
PCConnect wirelessly to Internet using handset as external modem
Sending/Receiving Phone Book( P.10-9)
PC Handsets
Send/receive Phone Book entries wirelessly
TipSettings ●Stop Ringtone Output to Headset/Handsfree Device
●Continue Calls on Handset when Bluetooth® is Disconnected from Headset/Handsfree Device ●Always Make Calls from 931P even when Headset is Connected ●Always Use Handsfree Device to Make/Receive Calls ( P.18-17)
Before Using Bluetooth®
Bluetooth® Specifications
Version Bluetooth® specification Ver.2.0+EDR
Supported Profiles 1
HSP (Headset Profile)HFP (Hands-Free Profile)A2DP: Advanced Audio Distribution ProfileAVRCP: Audio Video Remote Control ProfileDUNP: Dial-up Networking ProfileOPP (Object Push Profile)
Output Bluetooth® Power Class2Frequency Bands 2 2.4GHz (2.402GHz-2.480GHz)Communication Distance 3 Approximately ten meters
1 Bluetooth® connections are available with compatible devices supporting the same profile.
2 Bluetooth® operates in the 2.4 GHz unlicensed frequency band.Depending on other devices in use in the spectrum, Bluetooth® connection may slow down/terminate, or range may decrease.
3 Affected by distance between devices, obstructions, signal conditions, handset status, etc.
Capa_E_OI.indb 6 2009/07/28 10:15:50

Connectivity
10-7
10
Notes
931P may not be able to establish a Bluetooth ● ® connection with some Bluetooth® devices. Establish connections with certified Bluetooth ● ® devices that meet the specification standards developed by Bluetooth® SIG. Due to the unique characteristics/specifications of a certified Bluetooth ● ® device, connections or transfers may fail; procedures, displayed results or operations may vary from those described in the manual. When data transfer is interrupted, it may take some time for process to ●complete. Noise may interfere with wireless or handsfree conversations depending ●on the status of connected devices or signal conditions. For details about headset/handsfree devices, see the device manuals. ●
Using Bluetooth®
Pair Bluetooth® devices with 931P beforehand to establish connections for different Bluetooth® functions.
Searching & Pairing Devices
Search other Bluetooth® devices. Paired devices appear in Search&Paired Device list.
Bluetooth ● ® Passkey is not necessary for paired devices.Search up to 20 Bluetooth ● ® devices at one time; pair with up to ten Bluetooth® devices.Place Bluetooth ● ® devices on standby for connection.
Main Menu Tools Bluetooth Search&Paired Device
1 YES*Device search starts and names of found devices appear.
To search again: ● [Search]* If there are already paired devices in list, select a device Select a
function
2 Select a device YES Enter Phone Password
3 Select text entry field Enter Bluetooth® Passkey
4 Select a Bluetooth® function
Next Page
Capa_E_OI.indb 7 2009/07/28 10:15:51

Connectivity
10-8
10
931P connects to Bluetooth® device. When complete, flashes in blue. After no Bluetooth® connection is made for a certain time,
appears in black and Power saver mode starts.When Bluetooth ● ® device can connect to multiple services, confirmation appears asking whether to connect to another service.While connected, ● (Blue) appears. While in Standby, (Gray) appears.When ● Dial-up is selected, 931P stands by for connection requests from other Bluetooth® devices.Dial-up ● can be selected regardless of profile types.
Bluetooth® PasskeyBluetooth® Passkey (1 to 16 digits) is required to connect Bluetooth® devices; sender and recipient must input the same code to complete file transfers.
Bluetooth ● ® Passkey is not necessary for paired devices.
Search&Paired Device List ■❶ Device Type
Indicators appear for different types of devices.
❷ Device Name Device names appear. When no names are found, Bluetooth® addresses appear.
❸ Connection Status : Connected : Not connected : Not found : Not paired
Search&Paired Device
❷
❺
❸❹
❶
❹ Protection Indicator appears when registered contents are protected.
❺ Profile Status Indicators appear to show profile status.
Icon Letter Color Background Color Frame Color StatusBlue Gray – Not connected (Not paired)Blue Gray Blue Not connected (Paired)
White Green – ConnectedGreen White Green Standby for connectionWhite Light green – Preferred deviceGray Gray – Not supported
TipSettings ●Set Duration to Search for Bluetooth® Devices ( P.18-17)
Suspending Bluetooth® Functions
Suspend all Bluetooth® functions connected or on standby for connection, and disable Bluetooth®.
Main Menu Tools Bluetooth
1 Bluetooth OFF YESTo return to standby for previously connected function: ●Bluetooth ON
Capa_E_OI.indb 8 2009/07/28 10:15:54

Connectivity
10-9
10
Placing Bluetooth® Devices on Standby for Connection
Main Menu Tools Bluetooth Accept Registered
1 Check functions to be on standby for connection [Finish]
To uncheck, select functions to remove check marks. ●
Sending/Receiving Phone Book
Sending
1 Open Phone Book [Menu] Send to Bluetooth
2 One File TransferSend phonebook Select a recipient device
All File TransferSend all phonebook Select a recipient device Enter Phone Password
3 YES
Receiving
Main Menu Tools Bluetooth Receive via Bluetooth
1 One File TransferReceive YES
All File TransferReceive All Enter Phone Password YES YES
If memory becomes full, remaining entries are truncated (Memory ●List: P.19-25).
TipSettings ●Set Authentication/Encryption to Send Phone Book Entries
●Enter Password when Sending All Phone Book Entries ( P.18-17)
Capa_E_OI.indb 9 2009/07/28 10:15:54

Connectivity
10-10
10
Bluetooth® Functions
From Main Menu Tools Bluetooth
Functions Available in Search&Paired Device Window ■Search&Paired Device > [Menu] Select an item (See below)
Item Operation/DescriptionRegister devices
Enter Phone Password > Pair devices ( From Step 3 on P.10-7)
Preferred device
Set a preferred Bluetooth® device for incoming callsAvailable only for headset function compatible ●Bluetooth® devices.To cancel, perform same operation. ●
Protect/release
Protect/cancel devices. Protection prevents devices from being deleted or overwritten
Change device name
Enter a device name >
Delete YES >Description Show device name, Bluetooth® address, device class and
supported profileAdd shortcut icon
Create shortcuts ( P.1-22)
Make/Receive Calls via Bluetooth ■ ®
Search&Paired Device > Select a device Headset or Hands-free YES Make/receive a call using Bluetooth® device
Use Bluetooth ■ ® Device for Wireless PlaybackSearch&Paired Device > Select a device Audio Watch Digital TV or play back videos or musicDigital TV/Video sounds are played only by A2DP profile compatible ●Bluetooth® devices compliant with SCMS-T copyright protection standard.
Connect to Internet Using Bluetooth ■ ® DeviceSearch&Paired Device > Select a device Dial-up931P waits for dial-up connection. ●Refer to a manual for Bluetooth ● ® device for details. Download utility software (931P) "Modem Wizard" from website below to PC and install software. http://panasonic.jp/mobile/support/download/931p/index.htmlTo establish a dial-up connection, see Help on "Modem Wizard." ●Connecting handset to a PC or PDA for Internet access may incur high ●packet transmission charges.
Place Bluetooth ■ ® Device on Standby for Dial-upDialup Rgstry Standby > Enter Phone Password YES Select Bluetooth® Passkey text box Enter Bluetooth® Passkey
Capa_E_OI.indb 10 2009/07/28 10:15:54

Connectivity
10-11
10
SoftBank Utility Software (Japanese)Phone Book, Calendar, Tasks, messages, Bookmarks, Notepads and Data Folder can be transferred to a PC, edited or managed by using SoftBank Utility Software.
For details on and downloading SoftBank Utility Software, visit ●http://mb.softbank.jp/r/utilitysoft/cd/ (Japanese)
NoteUSB cable (not included) is necessary for using SoftBank Utility ●Software.S! Appli, PC Movies, TV, Lifestyle-Appli, Books, Customized Screen, ●Templates and Other Documents cannot be backed up.Copy protected files may not be backed up. ●Set ● USB Mode to Communication Mode ( Right).
USB (Japanese)Connect 931P to a PC via USB cable (not included) specified by SoftBank for data transfer or data communication.
Setting USB Mode
<Default> Communication Mode
Main Menu Settings Connectivity USB Mode
1 Select an item (See below)
Item Operation/DescriptionCommunication Mode
Packet transmission, 64K data transmission, data transfer and calls with USB handsfree compatible devices are available ( Left)
microSD Mode
Read/write data on microSD Card ( P.9-21)
MTP Mode Transfer/delete music data via Windows Media® Player on PC ( P.8-4)
Transferring Data via USB Cable
Transfer data using SoftBank Utility Software ( ● Left).Transferring data in microSD Mode ( ● P.9-21)
Capa_E_OI.indb 11 2009/07/28 10:15:54

Connectivity
10-12
10
Data Communication via USB Cable
Use 931P as a modem for Internet access by connecting 931P with a PC.
Download utility software from URL below and install on PC. ●http://panasonic.jp/mobile/support/download/931p/index.html
1 Install "USBドライバ (USB Driver)" and "Modem Wizard" from Utility Software (931P) to a PC
2 Set 931P to Communication Mode ( P.10-11), and connect 931P to PC via USB cable
Power up 931P before connecting to PC via USB cable. ●
3 Start up "Modem Wizard", and operate communication setup
"Modem Wizard" enables you to set up APN and dial-up easily. ●For setup/starting procedures, see "Modem Wizard" Help.
NoteConnecting handset to a PC or PDA for Internet access may incur high ●packet transmission fees.
Capa_E_OI.indb 12 2009/07/28 10:15:55

Connectivity
10-13
10
AV OutputView the following on a TV set or other devices using a SoftBank-specified video output cable (not included): Video Call images, Digital TV images, still images/videos saved on 931P.
View AV-output-compatible S! Appli on TV. ●
Connecting Handset to TV
To use video output cable (not included), Stereo Earphone Conversion ●Cable (not included) is required.
1 Open External Port Cover
2 Connect video output cable to handset using conversion cable
To connect video output cable to conversion cable: ● P.1-4
External Port
Yellow
White
Red
Video output cable
Video ◎
Audio L ◎
Audio R ◎
3 Connect video output cable to video/audio input terminal on TV set
4 Open an image file on 931PTo toggle display size: ●
NoteSome images cannot be displayed on TV. ●Display size setting is not available for some TV sets. ●
Capa_E_OI.indb 13 2009/07/28 10:15:55

10-14
Connectivity
10
Capa_E_OI.indb 14 2009/07/28 10:15:55

11
11-1
Handset SecurityChanging Phone Password ................................. 11-2Security Functions .............................................. 11-2
USIM PINs ................................................................................11-2Keyguard ..................................................................................11-3Privacy Key Lock .......................................................................11-4Personal Data Lock ...................................................................11-4Secure Remote Lock .................................................................11-6Key Pad Dial Lock .....................................................................11-7Side-keys Guard .......................................................................11-8Additional Lock Functions .........................................................11-8
Restricting Calls/Messages ................................. 11-8Hiding Call Logs and Sent/Received Address List........................11-8Secret Mode/Secret Data Only ...................................................11-9Setting Secret Mail ...................................................................11-9Mail Security ..........................................................................11-10Call Restrictions ......................................................................11-10Delaying Ringtone ..................................................................11-11Rejecting Unknown Callers .....................................................11-11Rejecting Calls without Caller ID .............................................11-11
Reset ................................................................. 11-12Reset Settings ........................................................................11-12All Reset ................................................................................11-12
Capa_E_OI.indb 1 2009/07/28 10:15:56

11-2
Handset Security
11
Changing Phone Password<Default> 9999
Change Phone Password as required.For Phone Password details: ● P.1-28
Main Menu Settings Security Change Phone Password
1 Enter current 4-8-digit Phone Password
2 Enter new 4-8-digit Phone Password YES
Security FunctionsUSIM PINs
For more information about PINs: ● P.1-3
NoteEmergency numbers (110, 119, 118) are not dialable in PIN/PIN2, ●PUK/PUK2 entry window.
PIN Authentication
Activate to require PIN entry each time handset is turned on.
Main Menu Settings Security PIN Authentication
1 Enter Phone Password PIN Authentication
2 ONTo deactivate PIN Authentication: ● OFF
3 Enter PIN
Changing PIN/PIN2
Set ● PIN Authentication to ON before changing PIN ( Above).
Main Menu Settings Security PIN Authentication
1 Enter Phone Password Change PIN or Change PIN2
2 Enter current PIN/PIN2
3 Enter new PIN/PIN2
4 Reenter new PIN/PIN2
Capa_E_OI.indb 2 2009/07/28 10:15:56

Handset Security
11-3
11
PIN Lock & Cancellation (PUK/PUK2)
PIN Lock or PIN2 Lock is activated if PIN or PIN2 is incorrectly entered three times. Cancel PIN Lock or PIN2 Lock by entering PIN Unblocking Key (PUK/PUK2).
For information about PUK/PUK2, contact SoftBank Mobile Customer ●Center, General Information ( P.19-34).
1 In PIN lock mode, enter PUK/PUK2
2 Enter new PIN/PIN2
3 Reenter new PIN/PIN2
NoteIf PUK/PUK2 is incorrectly entered ten times, USIM Card is locked and ●handset is disabled (Even turning off power is counted as one incorrect entry.). Write down PUK/PUK2.For procedures required to unlock USIM Card, contact SoftBank Mobile ●Customer Center, General Information ( P.19-34).
Keyguard
Lock handset keys to prevent accidental operation except when turning power on/off or answering incoming calls.
1 In Standby, press and hold When Keyguard is set, appears.
To cancel Keyguard, repeat operation. ●
While Keyguard is ActiveEmergency numbers (110, 119, 118) are dialable even when Keyguard ●is active. Entered numbers do not appear on Display. Once numbers are dialed, Keyguard is canceled.Press ● to disable Calendar event tone or Alarm.Keyguard can be canceled even during a call. ●
NoteTurning off power cannot cancel Keyguard. ●
Capa_E_OI.indb 3 2009/07/28 10:15:57

11-4
Handset Security
11
Privacy Key Lock
<Default> OFF
Set Privacy Key Lock to require Phone Password for using 931P except for turning handset on/off and answering calls.
Main Menu Settings Security Privacy Key Lock
1 Enter Phone PasswordWhen Privacy Key Lock is set, appears in Standby.
To cancel Privacy Key Lock, enter Phone Password in Standby. If ●Phone Password is incorrectly entered five times, 931P turns off.
While Privacy Key Lock is ActiveEmergency numbers (110, 119, 118) are dialable even when Privacy ●Key Lock is active.Only phone numbers appear on Display for incoming calls. ●Calls cannot be received by Bluetooth ● ® headsets or handsfree devices.Message ringtones or Alarm tones are disabled. ●Calendar event tone or Alarm is disabled. ●S! Quick News and some indicators on Internal Display do not appear. ●They appear after Privacy Key Lock is canceled.
NoteTurning off power cannot cancel Privacy Key Lock. ●
Personal Data Lock
Set Personal Data Lock to prevent others from reading or tampering with your personal information in Phone Book or Data Folder. Activate to require Phone Password for accessing personal data.
Locked Functions/Data ■Messaging・ S! Appli・ Phone Book search/saving/setting・ Memory Manager/ Memory Status ・ (Phone Book)Account Details・ Restrictions (Phone Book)・ Notepad・ Calendar・ Tasks・ Shortcuts・ Event Indicators・ Camera/Video Camera・ Lifestyle Appli・ microSD Backup・ Answer Phone・ Voice Recorder・ Customized Screen・ Voice Announce・ Software Update・
Yahoo! Keitai viewing/setting・ PC Site Browser viewing/setting・ Bookmarks/ Saved Pages・ BookSurfing・ ®
e-Book Viewer・ Mobile Widget・ S! Quick News・ S! Information Channel/Weather・ Content Key obtaining/backup・ Voice Dial・ S! GPS Navi・ Data Folder*・ Music Player・ Digital TV・ Bar Code Reader・ Receive via Infrared・ IC Data transmission・ Alarm・ Reset Settings・ All Reset・
* Font setting is available.
Capa_E_OI.indb 4 2009/07/28 10:15:58

Handset Security
11-5
11
Activating/Canceling Personal Data Lock
<Default> Deactivate
Main Menu Settings Security Personal Data Lock
1 Enter Phone Password Activate/DeactivateWhile Personal Data Lock is set, appears in Standby.
To cancel Personal Data Lock, repeat operation. If Timer Lock at ●Close is set, password entry is requested when 931P is opened.
Canceling Personal Data Lock TemporarilyWhen Phone Password is entered, disappears and disabled functions become temporarily available.
Once handset returns to Standby while no functions are active, ●Personal Data Lock is active again.Some functions remain unavailable. Deactivate Personal Data Lock to ●use the following:
Receiving IC data ・ ・Reject unknown
NoteWhile Personal Data Lock is set, some indicators do not appear in ●Standby. They appear after lock is canceled.Turning off power does not cancel Personal Data Lock. ●
Customizing Personal Data Lock
Enable/disable Alarm, incoming message notification, etc. while Personal Data Lock is active.
Main Menu Settings Security Personal Data Lock
1 Enter Phone Password Customize Select an item (See below)
Item Operation/DescriptionAlarm Tone Enable/disable Alarms (Calendar, TV timer, or other alerts)
or TV Timer Recording.Select an item > Accept (Enable) or Not Accept (Disable)
Incoming Call Act
Show/hide Event Indicator (incoming messages) or Phone Book entry information (incoming calls).
Select an item >Incoming Message・ Accept (Show indicator) or Not Accept (Hide indicator)Phone Book Available・ Accept (Show Phone Book Entry information) or Not Accept (Hide information)
Display/Tone Enable/disable Display settings, ringtones or indicators.Select an item >
Internal Display・ Accept (Enable Display Settings) or Not Accept (Disable)Ring Tones・ Accept (Enable Sound Settings) or Not Accept (Disable)S! Quick News・ Accept (Show information) or Not Accept (Hide information)S! Info Ch./Weather・ Accept (Show indicators) or Not Accept (Hide indicators)Widget Contents・ Accept (Show widgets) or Not Accept (Hide widgets)
Capa_E_OI.indb 5 2009/07/28 10:15:58

11-6
Handset Security
11
Activating Personal Data Lock when Closing Handset
<Default> Deactivate
Set Timer Lock at Close to automatically activate Personal Data Lock when specified time has elapsed after 931P is closed.
Main Menu Settings Security Timer Lock at Close
1 Enter Phone Password
2 Personal Data Lock Select a timeConfirmation appears asking whether to activate Lock OFF at Open.When Timer Lock at Close is set, appears.
When ● OFF is selected, setting is canceled.
Opening Personal Data Lock OFF Window when Opening Handset
<Default> OFF
Main Menu Settings Security Lock OFF at Open
1 Enter Phone Password
2 Personal Data Lock ON
NoteWhen Timer Lock at Close and Lock OFF at Open are both active, ●canceling Personal Data Lock when opening handset temporarily cancels lock. However, lock activates again when specified time elapses after closing 931P.
Secure Remote Lock
If handset is lost or stolen, remotely lock handset from a PC or mobile. If Secure Remote Lock is active, all operations are unavailable except to turn handset on.
For service details and user agreement/registration, visit SOFTBANK ●MOBILE Corp. Website (http://www.softbank.jp) or My SoftBank.
Accessing My SoftBank from Handset (Japanese)
For service details, visit SOFTBANK MOBILE Corp. Website.
Main Menu Yahoo! Keitai Yahoo! Keitai メニューリスト My SoftBank English
Follow onscreen instructions. ●
NoteEmergency numbers (110, 119, 118) are dialable even while Secure ●Remote Lock is set.
Capa_E_OI.indb 6 2009/07/28 10:15:59

Handset Security
11-7
11
Showing Messages during Secure Remote Lock
<Default> OFF
Set Display message to appear when Secure Remote Lock is active.
Use preset message or create a message. ●
Main Menu Settings Security Lock Message
1 Enter Phone Password
2 Display Setting ON
Save Lock Messages ■After Step 1, > Message Enter a message
Key Pad Dial Lock
<Default> Deactivate
Allow dialing only from Phone Book entries and lock dialing with keypad. Unauthorized use of 931P can be prevented.
Unavailable Operations ■Dialing with keypad・ Phone Book (saving, editing, deleting, copying from microSD Card, and ・ sending/receiving via Infrared, IC transmission and Bluetooth®)Sending SMS to unknown numbers・ Sending S! Mail・
Available Operations ■ ・ Dialing from Phone Book or Voice Dial ・ Dialing from Redial, Outgoing Call Logs, Incoming Call Logs, Sent address, or Received address (only phone numbers saved in Phone Book)
Main Menu Settings Security Key Pad Dial Lock
1 Enter Phone PasswordWhile Key Pad Dial Lock is set, appears in Standby.
To cancel Key Pad Dial Lock, repeat operation. ●
NoteEmergency numbers (110, 119, 118) are dialable even while Key Pad ●Dial Lock is set.

11-8
Handset Security
11
Side-keys Guard
<Default> OFF
Set Side-keys Guard to disable side key operations while 931P is closed.
Main Menu Settings Phone Settings Side-keys Guard
1 ONWhile Side-keys Guard is set, appears in Standby.
To set Side-keys Guard to ● OFF , repeat operation.
NoteWhen ● Menu Icons is set to Standard or Customize , press in Standby Press and hold to toggle ON /OFF .
Additional Lock Functions
IC Card Lock ■Deactivate Osaifu-Keitai® functions ( P.16-5).
Remote Lock ■Deactivate Osaifu-Keitai® functions remotely ( P.16-5).
Restricting Calls/MessagesHiding Call Logs and Sent/Received Address List
<Default> ON
Main Menu Settings Incoming Settings Call Logs
1 Enter Phone Password
2 Select an item (See below)
Item Operation/DescriptionIncoming Show/hide Incoming Call Logs/Received address listOutgoing Show/hide Redial/Outgoing Call Logs/Sent address list
3 OFF
NoteWhile Incoming Call Logs is OFF, Answer Phone (Voice Calls) does not ●play. Selecting Missed Call indicator does not show Incoming Call Logs.
Capa_E_OI.indb 8 2009/07/28 10:16:00

Handset Security
11-9
11
Secret Mode/Secret Data Only
<Default> Deactivate
Phone Book entries and calendar events saved as secret data appear only when 931P is in Secret Mode/Secret Data Only.
Set Phone Book or Calendar events as secret data (Phone Book: ● P.4-7, 4-8 / Calendar events: P.12-5)
Main Menu Settings Security
1 Select an item (See below)
Item Operation/DescriptionSecret Mode View all data including secret dataSecret Data Only
View only secret data
2 Enter Phone PasswordFor Secret Data Only, number of saved secret data appears.When Secret Mode/Secret Data Only is set, appears (For Secret Data Only, indicator flashes.).
Cancel Secret Mode/Secret Data Only ■In Standby, > or follow Step 1 above
Cancel Secret Mode/Secret Setting ■In Phone Book/Calendar event window, > [Menu] Release secret
NoteSelect whether to save data edited/saved in Secret Mode as secret data. ●Data saved/edited in Secret Data Only are saved as secret data.
only TipSettings ●Set Learning Feature Off for Secret Mode/Secret Data Only
( P.18-10)
Setting Secret Mail
<Default> ON
Set messages from secret Phone Book entries to appear only when handset is set to Secret Mode or Secret Data Only.
1 Settings
2 Universal Settings Secret Mail Display
3 Enter Phone Password
4 OFF
NoteWhen both Spam Filter and Secret Mail Display are set, messages from ●Phone Book entries saved as secret mode are sorted into Spam Folder (Safe List: P.13-17).
Capa_E_OI.indb 9 2009/07/28 10:16:01

11-10
Handset Security
11
Mail Security
Set handset to require Phone Password for opening mail boxes or operating Server Mail.
1 Settings
2 Universal Settings Mail Security
3 Enter Phone Password Select items* [Finish]* To cancel: press again.
appears for set mail boxes and menus.
Set/Cancel Mail Security by Incoming Mail Folder ■ > Incoming Mail Highlight a folder [Menu] Mail Security Enter Phone Password ● appears for set mail boxes and menus.
Call Restrictions
Reject/accept/forward calls from specified phone numbers, or restrict calling unspecified phone numbers.
1 Search Phone Book
2 Select an entry [Menu] Restrictions
3 Enter Phone Password
4 Select an item (See below)
Item Operation/DescriptionRestrict Dialing
Allow calls only to specified numbers
Call Rejection Reject specified numbers
Call Acceptance
Accept from specified numbers only
Call Forwarding
Automatically forward specified numbersSet destination numbers (Call Forwarding: ● P.2-17)
To cancel, repeat operation. ●
View/Cancel Phone Book Restrictions ■ >Main Menu Phone Book Restrictions Enter Phone Password
Select an item* Select a Phone Book entry Select a number YES
* ★ appears for set item.Highlight an item, ● [Menu] Release Settings YES to cancel restriction on all specified numbers.
Capa_E_OI.indb 10 2009/07/28 10:16:03

Handset Security
11-11
11
NoteMissed call indicator appears in Standby for calls from rejected ●numbers.
Delaying Ringtone
<Default> OFF
Delay ringtone/vibration for Voice/Video Calls from unknown numbers.
Main Menu Settings Incoming Settings Ring Time Settings Ring Starting Time
1 ON Enter start time
Hide Missed Call Records (Disconnected during Ringtone ■Delay)Main Menu > Settings Incoming Settings
Ring Time Settings Missed Calls Display Not Display
Rejecting Unknown Callers
<Default> Accept
Main Menu Settings Security Reject Unknown
1 Enter Phone Password Reject
Rejecting Calls without Caller ID
<Default> Accept
Reject calls without Caller ID or from pay phones.
Main Menu Settings Security Call Setting w/o ID
1 Enter Phone Password
2 Select an item Reject
Capa_E_OI.indb 11 2009/07/28 10:16:03

11-12
Handset Security
11
ResetReset Settings
Cancel custom settings and return handset functions to their default settings.
Main Menu Settings Security Reset Settings
1 Enter Phone Password YES
NoteSome default settings may not be restored. ●Reset Settings cancels Navi Appli settings in S! GPS Navi. Set a ●Navi Appli to activate from Select Navi Appli ( P.18-22).
All Reset
Cancel custom settings and return handset functions to their default settings; clear all Phone Book/Data Folder entries etc.
Main Menu Settings Security All Reset
1 Enter Phone Password YES YES931P automatically turns off and restarts.
NoteFully charge battery ( ● ) beforehand.Phone Password is reset to default. ●USIM Card/microSD Card files are not affected. ●Data transmission settings (set via PC) are not affected. ●Non-restorable items when deleted by All Reset: ●
Customized settings, Call Logs, downloaded S! Appli, etc.・
Capa_E_OI.indb 12 2009/07/28 10:16:03

12
12-1
ToolsCalendar ............................................................. 12-2
Opening Calendar ....................................................................12-2Creating Calendar Events .........................................................12-2Saving Holidays/Memorial Days ................................................12-3Viewing/Editing Calendar Event Details .....................................12-4Calendar Functions ...................................................................12-4
Tasks ................................................................... 12-5Saving a Task ............................................................................12-5Using Tasks ..............................................................................12-6
Alarms ................................................................ 12-6Alarm Tone ...............................................................................12-6Setting Alarm ...........................................................................12-7
Calculator ........................................................... 12-8Notepad .............................................................. 12-8
Saving a Note ...........................................................................12-8Notepad Functions ...................................................................12-9
Dictionary (Japanese) ......................................... 12-9Sound Recorders ............................................... 12-10
Voice Recorder .......................................................................12-10Voice Announce ......................................................................12-10
Bar Code Reader ............................................... 12-11Scanning Barcodes .................................................................12-11Viewing/Editing Scanned Data ................................................12-12Using Scanned Data ...............................................................12-12
Capa_E_OI.indb 1 2009/07/28 10:16:03

Tools
12-2
12
CalendarView by day, week or month; set Alarms for events.
Opening Calendar
Main Menu Tools Calendar
Current month appears.When a date with Calendar events is selected, number of AM and PM ●events and up to three contents appear. ● [Prev.] or [Next] to show previous/next month calendar.To switch Monthly/Weekly view: ● P.12-4
Monthly View
Creating Calendar Events
Save up to 1000 entries.
Main Menu Tools Calendar
1 to highlight a date [New] Schedule
2 Select an item (See below)
Item Operation/DescriptionSelect icon/ Edit summary
Select an icon > Edit subject
Whole day setting
OFF > or ONWhen ● ON is set, Alarm goes off at 0:00 a.m.
Date (from) Enter start date and time >Date (to) Enter end date and time >Repeat Select a repetition > (For Select day , check days
[Finish])Alarm Select an Alarm type ( > For ON/Set time , enter time)
Alarm Tone: ● P.12-6Alarm tone Select an Alarm tone type > Select a folder Select
an Alarm toneContents Enter event description >
Capa_E_OI.indb 2 2009/07/28 10:16:06

Tools
12-3
12
3 [Finish]
NoteCalendar events between 00:00 on 2000/01/01 and 23:59 on ●2037/12/31 can be saved on 931P.Alarm tone does not sound when Privacy Key Lock or Personal Data ●Lock is set. However, settings can be changed even while Personal Data Lock is set ( P.11-5).
Calendar Event IndicatorsFollowing indicators appear in Calendar Window.
(Blue): Morning event (Orange): Afternoon event
_ (Underscore): Event that lasts for two days or longer
Following indicators appear on Display. ● : Alarm : Monthly : Daily : Yearly : Weekly
Saving Holidays/Memorial Days
Save up to 100 entries (one entry a day) each for Holidays or Memorial days.
Main Menu Tools Calendar
1 Highlight a date [New] Holidays or Memorial days
2 Select an item (See below)
Item Operation/DescriptionDate setting Enter a date >Repeat Select a repetition type >
1 time ● does not repeat Holidays/Memorial days events.
Edit holiday/anniversary
Enter description >
3 [Finish]
IndicatorsHolidays appear in red.Memorial days are marked with a red circle.
Following indicators appear in Calendar/Calendar Event List Window: ● : Holidays : Memorial days : Yearly repeat
Capa_E_OI.indb 3 2009/07/28 10:16:08

Tools
12-4
12
Viewing/Editing Calendar Event Details
Main Menu Tools Calendar
1 to select a date
2 Select an eventTo edit: ● [Edit] Edit selected item (Schedule: From Step 2 on P.12-2/Holiday, Anniversary: From Step 2 on P.12-3)
Calendar Functions
From Main Menu Tools Calendar
Functions Available in Calendar Window ■Highlight a date > [Menu] Select an item (See below)
Item Operation/DescriptionNew Create a new entry ( P.12-2, P.12-3)
Calendar Event List
Calendar Event Details
Item Operation/DescriptionWeekly display/ 1 Month
Toggle Monthly/Weekly view
Icon display Entries in category of selected icon appearSelect an icon >
No. of schedules
Display number of saved Schedule, Holiday or Anniversary entries
Add shortcut icon
Create a shortcut ( P.1-22)
Send all Ir data
( P.10-3)
AllIC transmission
( P.10-5)
Delete past Delete past entries/items, prior to highlighted dateSelect a category to delete > YES
Delete all Enter Phone Password > Select an item YESReset holidays
Restore deleted HolidaysYES >
Functions Available in Calendar Events List/Details ■Select a date ( > Select a Schedule, Holiday or Anniversary)
[Menu] Select an item (See below)
Item Operation/DescriptionNew Create a new entry ( P.12-2, P.12-3)Edit Edit selected item ( Left)Copy Copy an entry to another day
Enter date and time to copy an entry to >Calendar display
Switch from Icon display to Calendar display
Capa_E_OI.indb 4 2009/07/28 10:16:10

Tools
12-5
12
Item Operation/DescriptionIcon display Entries in category of selected icon appear
Select an icon >Set secret mode/Release secret
Activate/deactivate Secret ModeYES > ( For Set secret mode , enter Phone Password)Secret entries appear only in ● Secret Mode or Secret Data Only ( P.11-9).
Compose S! Mail
Create S! Mail by copying event date and content to message text ( From Step 2 on P.13-4)
Send Ir data ( P.10-3)Send all Ir data
( P.10-3)
IC transmission
( P.10-5)
AllIC transmission
( P.10-5)
Copy to microSD
Copy an entry to microSD CardYES >To display data on microSD Card: ● P.9-18
Delete this YES >Delete past Delete past entries/items, prior to highlighted date
Select a category to delete > YESDelete select Check entries to delete > [Finish] YES
TasksMake quick notes of task to manage in Task list.
Saving a Task
Main Menu Tools Tasks
1 [New] Select an item (See below)To check saved Tasks, select a Task. To edit, press ● [Edit] in detail window.
Item Operation/DescriptionEdit Tasks Enter content >Due date Select how to enter due date > Enter due date
Select ● No date to enter none.Priority Select a priority level >Category Select a category >Alarm Select an Alarm type ( > For ON/Set time , enter time)
Alarm Tone: ● P.12-6Alarm tone Select an Alarm tone type > Select a folder
Select an Alarm tone
2 [Finish]When content is not entered, Tasks cannot be saved. ●
NoteAlarm tone does not sound when Privacy Key Lock or Personal Data ●Lock is set. However, settings can be changed even while Personal Data Lock is set ( P.11-5).
Capa_E_OI.indb 5 2009/07/28 10:16:11

Tools
12-6
12
Using Tasks
In Tasks window, press [Menu] for following operations.
Item Operation/DescriptionNew Create a new entry ( P.12-5)Edit Edit an entry ( P.12-5)Change status
Change status indicator shown in Tasks listSelect a status ( > For Completion , select an item Enter Completion date)Overdue status indicator turns red. ●
Show by category
Select a category >
Sort/Filter Sort list by due date, entry order, status, etc.Select a condition >
Add shortcut icon
Create a shortcut ( P.1-22)
Send Ir data ( P.10-3)Send all Ir data
( P.10-3)
IC transmission ( P.10-5)AllIC transmission
( P.10-5)
Copy to microSD
Copy a Task to microSD CardYES >To display data on microSD Card: ● P.9-18
Delete this YES >Delete select Check entries > [Finish] YESDelete completed
Delete an entry in Completion statusYES >
Delete all Enter Phone Password > YES
AlarmsAlarm Tone
When scheduled time arrives, alarm tone sounds and Notification Light illuminates.
For Calendar events and Tasks, alarm message and animation ●corresponding to selected icon appear on Display.
To Stop Alarm Tone for Calendar Events, Tasks or AlarmPress any key.
Missed Alarm"Missed Alarm" Event Indicator appears in Standby for alarms missed during Privacy Key Lock, Personal Data Lock or Infrared transmission once locks are canceled or transmission ends. Select indicator to view content.
NoteWhen one or more Alarms are set to the same time, alarm sounds in ●the order of : "Alarm" "Timer Recording" "Tasks" "Calendar"
"Timer Watching" For Tasks, "Missed Alarm" indicator appears.
Capa_E_OI.indb 6 2009/07/28 10:16:11

Tools
12-7
12
Setting Alarm
Set up to 12 alarms. Alarm tone sounds at the specified time once, everyday or weekly as set.
Main Menu Tools Alarms
1 Highlight an Alarm [Edit]
2 Select an item (See below)
Item Operation/DescriptionAlarm (Alarm on/off)
Activate or cancel AlarmON > or OFF
Time setting Set Alarm time >Repeat Select a repetition > ( For Select day , check days
[Finish])Alarm tone Select an Alarm tone type > Select a folder
Select an Alarm toneAlarms (Alarm volume)
> to set Alarm tone volume
Snooze setting
ON > or OFF ( For OFF , enter time)When Snooze is set to ● ON , Alarm tone sounds for 60 seconds, repeating up to six times at five minute intervals.
Prefer manner mode
ON > or OFFSet Manner Mode or Alarm priority. ●
3 [Finish] appears.
Cancel & Reactivate Alarm ■In Alarms list, press > [Menu] Select set this or Release this YESCancel or reactivate an alarm entry as required. ●Highlight an entry ● to reactivate/cancel Alarm.
Cancel Snooze ■Press any key >
NoteCopy protected files may not be set as Alarm tone. ●Alarm tone does not sound when Privacy Key Lock or Personal Data ●Lock is set. However, settings can be changed even while Personal Data Lock is set ( P.11-5).
Alarm IndicatorsFollowing indicators appear: ●
: Repeats daily : Repeats weekly
Capa_E_OI.indb 7 2009/07/28 10:16:13

Tools
12-8
12
CalculatorMain Menu Tools Calculator
Operation Assigned key
Number (0 - 9) -
+
–
x
÷
=
Decimal point
%
Clear
Example:-17+28.5=11.5
NotepadSave up to 20 notes.
Saving a Note
Main Menu Tools Notepad
1 <Not Recorded>Select a saved note to view content. ●
[Edit] to edit.
2 Enter textUp to 256 double-byte or 512 single-byte ●characters can be entered.
Notepads Window
Capa_E_OI.indb 8 2009/07/28 10:16:19

Tools
12-9
12
Notepad Functions
In Notepad list window, press [Menu] for following operations.
Item Operation/DescriptionEdit Edit a saved noteCompose S! Mail
Create S! Mail by copying content to message text ( From Step 2 on P.13-4)
Edit schedule Copy a note to Schedule to create a Calendar eventSchedule > Save a new note ( From Step 2 on P.12-2)
Add shortcut icon
Create a shortcut ( P.1-22)
Send Ir data ( P.10-3)Send all Ir data
( P.10-3)
IC transmission
( P.10-5)
AllIC transmission
( P.10-5)
Copy to microSD
Copy a note to microSD CardYES >To display data on microSD Card: ● P.9-18
Notepad Info Display entry date, latest modified date and category of note
Category Select a category >When no category applies, select ● None .
Delete this YES >Delete selected
Check notes > [Finish] YES
Delete all Enter Phone Password > YES
Dictionary (Japanese)Use ケータイTOOL<辞書> to access dictionaries (学研 辞スパ英和・和英辞書 and 学研 国語辞書).ケータイTOOL<辞書> ● is an S! Appli.
Main Menu Tools Dictionary
1 Read 免責 (disclaimer) OKケータイTOOL<辞書> activates.
To disable ● 免責 : Uncheck アプリ起動時に常に表示する。 (Always show disclaimer when accessing dictionaries)
2 Enter a wordSearch results appear.
To scroll pages: ● /To switch dictionaries: ● /To search again: ● [再検索]
3 Select a wordDetails appear.
4 To end, Stopped
Note While Dictionary application is active, press ● [メニュー] for useful functions.
Capa_E_OI.indb 9 2009/07/28 10:16:20

Tools
12-10
12
Sound RecordersVoice Recorder
Set recorded sounds for ringtones.Record for about 60 seconds each. ●
Main Menu Tools Sound Recorders Voice Recorder
1 YES
2 [Stop]/ / ( OK ) to stop recordingRecorded sounds are saved in Ring Songs&Tones folder.
Voice Announce
Set recorded sound for on hold tone/holding tone, Alarm, Calendar event alarm, Tasks alarm, ringtones, Answer Phone message, Timer Watching (Digital TV), Ring Songs&Tones Play List.
Record only one item for about 15 seconds. ●Select ● Voice Announce in individual window to set Voice Announce as specific tone.
Main Menu Tools Sound Recorders Voice Announce
1 RecordRecording starts.Tone beeps five seconds before recording ends.
2 [Stop] to end recordingTone beeps twice and previous screen returns.
To play back: ● PlayTo delete: ● Erase YES
Capa_E_OI.indb 10 2009/07/28 10:16:20

Tools
12-11
12
Bar Code ReaderScan barcodes (JAN) or QR Codes with built-in camera. Access websites, send messages, etc. from QR Codes.
JAN CodesJAN Code is a one-dimensional bar code denoting numerals with bars and spaces of different widths.
QR CodesQR Code is a two-dimensional bar code containing information.
Scanning Barcodes
Up to five items can be saved. For split data, scan up to 16 divided QR Codes.
Main Menu Tools Bar Code Reader Scan Barcodes
1 Frame barcode in the center of DisplayTo adjust Display brightness: ● [Menu] Brightness Adjust to -3 (dark) - +3 (light)To zoom: ●To use Focus Lock: ●
2 [Start]Scanning starts, and scanned results appear when completed.
For split data, ● OK Repeat Step 1 and 2To use scanned data: ● Step 2 on P.12-12
3 [Menu] Save result OK
Note 931P cannot read barcodes or two-dimensional codes other than JAN/ ●QR Codes.Some barcodes cannot be read depending on code type or size. ●Barcode recognition may be slow. Hold handset steady while scanning. ● Barcodes may not be correctly read owing to scratch, dirt, damage, ●quality of printed material, light reflection, or QR code version.
Example: Scanned Results
Window (QR Code: Left)
Capa_E_OI.indb 11 2009/07/28 10:16:22

Tools
12-12
12
Viewing/Editing Scanned Data
Main Menu Tools Bar Code Reader Saved Data List
1 ViewSelect an item
Edit TitleHighlight an item [Menu] Edit title Edit
Delete Saved Data ■In Step 1, (highlight an item > ) [Menu] Delete Delete this or Delete all ( For Delete all , enter Phone Password) YES
Using Scanned Data
Main Menu Tools Bar Code Reader Saved Data List
1 Select an item
2 [Menu] Select an item (See below)
Item Operation/DescriptionSave result Save scanned resultsDisplay list Display Saved Data ListInternet Connect to URL
Yahoo! Keitai > or PC Site Browser YESAlternatively, select URL to connect to Internet. ●
Compose S! Mail
Create S! Mail to selected address ( From Step 4 on P.13-4)
Alternatively, select address to create S! Mail. ●Dialing Call selected phone number
Select a dialing method > DialAlternatively, select phone number to dial. ●
Add to Phone Book
Save scanned results to Phone Book ( From Step 2 on P. 4-5)
Add bookmark
Save URL to BookmarkYES > [OK]
Copy Copy selected characters to another place ( From Step 2 on P.3-9)
Capa_E_OI.indb 12 2009/07/28 10:16:22

13
13-1
Basics .................................................................. 13-2Available Entry Items & Character Entry Limits ...........................13-2Messaging Folders & Memory Status .........................................13-3Customizing Handset Address ...................................................13-3
Sending S! Mail & SMS ....................................... 13-4Sending S! Mail ........................................................................13-4Sending SMS Messages ............................................................13-7Creating Messages ...................................................................13-8Graphic Mail Functions .............................................................13-9Sending Messages ..................................................................13-10
Receiving & Viewing Messages ........................ 13-10Opening New Messages .........................................................13-10Window Description ...............................................................13-11Retrieving Complete S! Mail ...................................................13-12Opening & Saving Attachments ...............................................13-13Showing Sent/Received Mail Address ......................................13-13Using Server Mail ...................................................................13-14Retrieving/Viewing Messages..................................................13-15
Organizing/Using Messages ............................. 13-15Checking Messages in Messaging Folders ...............................13-15Auto-sort ...............................................................................13-16Filter Spam .............................................................................13-17Replying to Messages .............................................................13-18Using Mail Groups ..................................................................13-18Sent/Received Address ............................................................13-19Organizing Messages..............................................................13-20Using Messages .....................................................................13-22
Messaging
Capa_E_OI.indb 1 2009/07/28 10:16:23

Messaging
13-2
13
BasicsSend messages via S! Mail or SMS.
S! Mail[Separate subscription required]
Exchange text messages with SoftBank or e-mail compatible handsets, PCs, etc.; attach image or sound files etc.
931P is compatible with Graphic Mail ●( P.13-5)
SMS Exchange short text messages with SoftBank handsets.
For more information, visit SOFTBANK MOBILE Corp. Website ●(http://www.softbank.jp).
NoteMessaging functions are also available in Horizontal Open Position. ●Switching Normal Position to Horizontal Open Position may end active screen.
Available Entry Items & Character Entry Limits
Item S! Mail SMS
Address
E-mailaddress ○
Up to 246 single-byte alphanumerics/ Up to 20 recipients
– –
Phone number 1 ○ ○
Up to 21 single-byte alphanumerics/Up to 1 recipient
Subject ○
Up to 256 double-byte/ Up to 512 single-byte alphanumerics
– –
Text ○ 30 KB ○Up to 70 double-/single-byte alphanumerics 2
Attachment ○ 3 – –1 SoftBank handset numbers only2 When text entry mode is set to English (160char.) ( P.18-19), up to
160 single-byte alphanumerics can be entered.3 Up to 300 KB including subject, message text and attachment can be
sent.
NoteS! Mail text character limit differs by attachment size. ●When number of entered characters exceeds limit in SMS, S! Mail ●conversion option message appears.S! Mail cannot be converted to SMS. ●
Capa_E_OI.indb 2 2009/07/28 10:16:24

Messaging
13-3
13
Messaging Folders & Memory Status
Messages are organized in folders by message type.
* Set Auto-sort to sort received messages to specified folders or Spam Folder automatically ( P.13-16, P.13-17).
Deleting Messages AutomaticallyWhen memory for messaging folders is low, old messages are automatically deleted one by one. Protect important messages from unintentional deletion ( P.13-21), or set message deletion settings to OFF ( P.18-18). Messages in Drafts and SMS on USIM Card are not deleted automatically.
When Messaging Memory is Full (Received Full) appears in Standby and no more new incoming
messages are received. Delete old messages in Incoming Mail folder ( P.13-21). Retrieve new messages ( P.13-15) after deleting some S! Mail.
Create Messages
Receive Messages
Save as Drafts
Send Messages
Complete/Not complete Sent/Unsent
Drafts
Messaging Folders
Incoming Mail
Received
Spam Folder
ユーザーフォルダ 1-3*
View Memory Status ■ > Memory Status
Tip ●Mail Security ( P.11-10)
Customizing Handset Address
Change your handset mail address (alphanumerics before @) to reduce the risk of receiving spam. Default account name is random alphanumerics.
For details, visit SOFTBANK MOBILE Corp. Website ●(http://www.softbank.jp).Handset mail address cannot be changed in Emission OFF Mode. ●For operations while using Internet: ● P.14-6
1 Settings Custom Mail Address931P connects to the Network.Follow onscreen instructions.
abc123-xyz @ softbank.ne.jp
Customize here
DomainName
AccountName
Capa_E_OI.indb 3 2009/07/28 10:16:26

Messaging
13-4
13
Sending S! Mail & SMSSending S! Mail
Example: Select a Phone Book entry to send S! Mail.
1 Press and hold
2 Select Address field Phone Book
3 Select a Phone Book entry Select a SoftBank handset number or mail address
Press ● to toggle tabs if both mail addresses and phone numbers are saved.
Composition Window
Address fieldSubject fieldAttachment fieldText field
4 Select Subject field Enter subject
5 Select Text field
6 Enter text
7 [Send]
Tip ●Addresses ●Functions Available while Creating Messages ( P.13-8) ●Sending Options ( P.13-9) ●Sending Messages ( P.13-10)Settings ●Confirm Message Delivery ( P.18-18)
Text Entry Window
Capa_E_OI.indb 4 2009/07/28 10:16:29

Messaging
13-5
13
Next Page
Adding Attachments
1 After Step 6 on P.13-4, select Attachment field
2 Select a folder in Data Folder Select a file
3 [Send]
Attach Captured Pictures/Videos ■After Step1, > Activate Camera Photo mode or Video mode Frame subject [Record], or ( For video, [Stop],
or ) [Save], or
NoteSome files can not be attached depending on the file format or size. ●Some copy protected files can not be sent. ●Ring Songs&Tones, Music and Videos files cannot be attached directly ●from microSD Card. Move files to handset before attaching to messages.
Tip●Attachments ( P.13-8)
Graphic Mail
Create HTML messages; select font color/size, background color, or insert images, etc.Example: Use various Templates to create Graphic Mail.
Change font size ●Scroll text ●
1 After Step 4 on P.13-4, press [Menu] Load Template Select a template
To view template: Highlight template ● [View]
2 Select Text field Delete "ココに文字をいれてネ"
3 Font SizeAlternatively, ● [Menu] Set Graphic Mail to open Graphic Palette
Graphic Palette
Capa_E_OI.indb 5 2009/07/28 10:16:32

Messaging
13-6
13
4 Select a font size Enter text
5 Select area
6 Place cursor before a sentence to scroll [Start] Move cursor to end of sentence
[End]
7 Set Scrolling [Exit]
8 to preview Alternatively, ● [Menu] Preview to view text field
9 [Send]
Reset Operations ■To cancel previous operation: Close Graphic Palette > [Menu] UndoTo reset all Graphic Mail operations: > Graphic all reset YES YES
Using My Pictograms
1 After Step 5 on P.13-4, in text entry window, [My Pict.]
My Pictogram list appears.Previously used pictogram list appears first. ●Functions in pictogram list ( ● P.3-4)
2 Select a My PictogramMy Pictogram is entered.
3 Enter text [Send]
Use My Pictograms from Graphic Palette ■In text entry window, > My Pictograms [My Pict.] Select a My Pictogram [Exit]
Use My Pictograms Saved in microSD ■In text entry window, > Insert files File Select Pictures
[microSD] My Pictograms Select a folder Select a My Pictogram
Tip ●Use Other Graphic Mail Settings ( P.13-9) ●Download Templates via Internet ( P.13-10)
Capa_E_OI.indb 6 2009/07/28 10:16:35

Messaging
13-7
13
Sending SMS Messages
Example: Select a Phone Book entry to send SMS.
1 Create New SMS
2 Select Address field Phone Book
3 Select a Phone Book entry Select a SoftBank handset number
Address field
Text field
Composition Window
4 Select Text field
5 Enter textWhen number of entered character ●exceeds limit, S! Mail conversion option message appears.
6 [Send]
Manual Mail Conversion ■In SMS Composition window, > [Menu] Change mail type
NoteWhen a single-byte text message including | { } [ ] ● ̃ ^ is sent or a draft including such text is edited, some characters may be cut out of text field.
Tip ●Addresses ●Functions Available while Creating Messages ( P.13-8)Settings ●Confirm Message Delivery ( P.18-18) ●Change SMS Center
Number ●Set Input Character to English ( P.18-19)
Text Entry Window
Capa_E_OI.indb 7 2009/07/28 10:16:37

Messaging
13-8
13
Creating Messages
Addresses
From S! Mail: Press and hold Select Address fieldSMS: Create New SMS Select Address field
Enter Address Directly ■S! Mail: > Address Input or Phone Number Input Enter a mail address/SoftBank handset numberSMS: > Direct Entry Enter a SoftBank handset number
Select Address from Sent Address/Received Address Logs ■Sent Address > or Received Address Select a log
Select S! Mail Address from Mail Group ■Mail Group > Select a Mail Group
■ Add/Edit/Delete AddressFollow the steps (See below) >
Item Operation/DescriptionAdd recipients*
<Not entered> > Select an address selection method Select an address or enter directly
Edit Select an address > Edit (For SMS: Direct Entry ) Edit address
Delete* Highlight an address > [Menu] Delete receiver YES
* S! Mail only
Change To/Cc/Bcc (S! Mail only) ■Highlight an address > [Menu] Destination types Select a type
Attachments
From After attaching a file, select Attachment field
Open/Play Attached Files ■Select a file >
■ Add Attachments > [Menu] Add Attached Files ( Select a folder Select a file)*
[Finish]* To capture still images or videos: Activate Camera Photo mode or
Video mode Frame subject [Record], or ( For video, [Stop], or ) [Save], or
■ Delete AttachmentsHighlight a file > [Menu] Del Attached Files YES
Other Functions
Functions Available while Creating Messages ■S! Mail: Press and hold > [Menu] Select an item (See below) > SMS: Create New SMS [Menu] Select an item (See below)
Item Operation/DescriptionSend Send messagePreview Preview message while creatingSave as Drafts
Save message to Drafts box without sending
Attached files 1 View attached file listLoad Template 1
Select a template >
Save Template 1
Save edited templateYES >
Capa_E_OI.indb 8 2009/07/28 10:16:37

Messaging
13-9
13
Item Operation/DescriptionAdd Signature 1
Add signatureCreate and save signature beforehand ( ● Below).
Send Settings: Priority 1
Notify recipient of message priority levelSelect a level >
Send Settings: Confirm Delivery 1
Check whether S! Mail is sent to recipientON >
Send Settings: Set Reply Address 1
Set reply-to addressON >Specify reply-to address beforehand ( ● Below).
Confirm Delivery 2
Check whether SMS is sent to recipientON >
Input character 2
Select character input modeJapanese > or English
Change mail type 2
Switch SMS to S! Mail while creating
1 S! Mail only2 SMS only
Sending Options
From Settings S! Mail Settings Sending Options
Set Reply-to Address ■Set Reply-To > ON Select reply-to address entry field Select a reply-to address or enter directly [Finish]
Set Signature ■Set Signature > Select an item ( ON or ON When New Select signature entry field Enter signature [Finish])
Graphic Mail Functions
Use Other Graphic Mail Settings ■In S! Mail text entry window, > Select an arrange item (See below)
Item Operation/DescriptionInsert files: File Select
Insert still images, Flash® or music filesSend inserted music files as BGM
Select a folder > Select a fileInsert files: Camera
Activate camera to insert picturesCapture a sill image >
Insert files: Delete BGM
Delete inserted music fileYES >
Font Color Change font color >Background color
Change background color >
Insert Lines Insert separator lineMy Pictograms
Insert My Pictograms ( P.13-6)
Graphic all reset
Cancel all Graphic Mail SettingsYES > YES
Select area Specify text to be arrangedPlace cursor before text > [Start] Specify area [End] Select other items Follow the steps for selected itemsTo cancel selection: ● [End]
Font Size Change font size >Select Blinking
Flash text
Set Scrolling Scroll textSet Swinging Swing text
Next Page
Capa_E_OI.indb 9 2009/07/28 10:16:38

Messaging
13-10
13
Item Operation/DescriptionAlignment Select a type >
One file of BGM or Flash ● ®, and up to 40 types of My Pictograms or images can be inserted per Graphic Mail.To delete inserted images, lines, My Pictograms, etc.: Close Graphic ●Palette Move cursor before images, etc. Ring Songs&Tones or Music files cannot be inserted directly from ●microSD Card. Move files to handset beforehand.
■ Download Templates via Internet > Templates Download Templates YES931P connects to Internet, and a website appears. Follow onscreen ●instructions.
Sending Messages
From S! Mail: Press and hold [Menu]SMS: Create New SMS [Menu]
Confirm Delivery ■(For S! Mail, > Send Settings ) Confirm Delivery ONConfirm Message Delivery ( ● P.18-18)
Save to Drafts ■Save as Drafts >Messages are saved to ● Drafts ( P.13-15).
Receiving & Viewing MessagesOpening New Messages
When a new message is received, and Event Indicator appear in
Standby.By default, the complete message and any ●attachments are automatically downloaded. This setting also applies while abroad. Transmission fees are incurred; adjust to use (To change auto download settings:
P.18-19).
1 Select indicatorLatest message appears.
● to show previous/next message.
Message Window
Capa_E_OI.indb 10 2009/07/28 10:16:39

Messaging
13-11
13
Note931P may connect to the Network via URL link in message text. ●Data-intensive web pages may incur high charges.Depending on situations, Message tone may not sound and Notification ●Light may not flash.
flashes for new messages instead.Event Indicator disappears even when an unread message other than ●latest message is selected.View latest message with handset closed ( ● P.1-23).
Tip●Retrieving/Viewing Messages ( P.13-15) ●Setting Secret Mail ( P.11-9)Settings ●Change Ringtone ●Change Ringer Volume ●Set Message
Ringtone Duration ●Set Vibration Alert ( P.18-2) ●Adjust Notification Light Color Tone for Incoming Call/Message ( P.18-10)
Window Description
Messaging Folder Contents ■
Received Date & Time 1, Sender 2 and S! Mail Subject (For SMS, Message Text)
● For Sent/Unsent box, following appear: 1 Sent date/time 2 Recipient
Example: Received Folder in Incoming Mail
Message Type/Status
Unread/Read S! Mail
Unread/Read S! Mail Notice
Unread/Read SMS
Unread/Read USIM Card SMS
Server Mail
Attachments
(Silver) Protected
Forwarded Message
Replied Message
Sending failed (Sent/Unsent Message)
Delivery Report received (Sent/Unsent Message)
High Priority
Low Priority
Message Type Message Status
/
/
/
/
Capa_E_OI.indb 11 2009/07/28 10:16:42

Messaging
13-12
13
Message Contents ■
For a sent message, the following appear: ●1 Sent date/time 2 Recipient 3 Number/all sent messages
NoteStatus indicators for forwarded/replied SMS messages (saved in USIM ●Card) do not appear.After retrieving complete messages, S! Mail Notice icons with ●
(Forwarded) or (Replied) change to / (S! Mail).Messages remain protected after complete messages are retrieved via ●protected S! Mail Notices.If messages on microSD Card do not appear correctly, copy messages to ●handset ( P.9-19) and execute Charset Conversion ( P.13-22).
Tip ●Functions Available for Received/Sent/Draft Message List ( P.13-20) ●Functions Available in Received/Sent Message Window ( P.13-22)Settings ●Change Font Size ( P.18-18)
Sender 2Subject
Number of Attachments
Message Text
The number of files (images, sounds, videos, text, etc.) appears.
Example: Received Message
Received Date/Time 1 Number/All Received Messages 3
Retrieving Complete S! Mail
During Video Calls or outgoing mail, complete S! Mail is not downloaded. When notification arrives, retrieve complete message. Note: Depending on download setting, complete message is not downloaded.
1 At the end of message text, highlight Continue
Retrieve from Message List ■In received message list, > [Menu] Retrieve This one
Retrieve Multiple Messages ■In received message list, > [Menu] Retrieve Selected Repeat: Select a message* [Finish] YES
* To cancel selection, press again.
Capa_E_OI.indb 12 2009/07/28 10:16:44

Messaging
13-13
13
Opening & Saving Attachments
1 In Message window, [Menu] Attached files
2 Select a file
3 To save the file, highlight the file [Save] YES
4 Select a folder
NoteWhen messages are opened, attached image files appear/play ●automatically. ● (Silver) appears with file requiring a Content Key. If Content Key has expired, warning appears when opening a file. Acquire new Content Key ( P.9-5).Incompatible files are saved to Other Documents in Data Folder. Some ●files may not be saved to 931P.
File Formats Supported by Auto PlaybackImage files (JPEG, GIF, PNG) ●Music files (SMAF, AMR, SMF, SP-MIDI) ●
TipSettings ●Play Attached Music Files Automatically ( P.18-19)
Showing Sent/Received Mail Address
1 Sent AddressPress and hold
Received AddressPress and hold
: SMS (successfully sent) : S! Mail (successfully sent)
To show Redial/Incoming Call Logs: ● [Change]
2 Select a log to showTo send S! Mail/SMS to addresses shown: ● Mail composition operation (S! Mail: From Step 4 on P.13-4 or SMS: From Step 4 on P.13-7)To save to Phone Book: ● [Store] Operation for saving to Phone Book ( From Step 2 on P.4-5)
Tip ●Sent/Received Address ( P.13-19)
Capa_E_OI.indb 13 2009/07/28 10:16:46

Messaging
13-14
13
Using Server Mail
Retrieve mail list stored at the Center to view Server Mail.
Viewing Server Mail
1 Server Mail
2 Retrieve Mail List YES
Update Server Mail List ■After Step1, > Retrieve Mail List [Update] YES
Retrieving Server Mail
1 Server Mail Retrieve Mail ListIf no Server Mail is in the list, ● YES Back
2 Retrieve a New MessageSelect S! Mail
Retrieve Multiple Messages[Menu] Retrieve Retrieve Selected
Select S! Mail* [Finish] YES* To clear, repeat same operation.
Retrieve All Messages ■ > Server Mail Retrieve All
Tip●Mail Security ( P.11-10) ●Server Mail Functions ( P.13-15)
Capa_E_OI.indb 14 2009/07/28 10:16:46

Messaging
13-15
13
Retrieving/Viewing Messages
Manually Retrieving New Messages
Retrieve S! Mail messages saved on Server while handset is off/out-of-range. > Retrieve New
Server Mail functions
From Server Mail
Delete One/Selected Server Mail ■ >Retrieve Mail List Highlight a message [Menu] Del Server Mail Delete This or Delete Selected ( For Delete This , select messages* [Finish]) YES
* To clear, repeat same operation.
Delete All Server Mail ■Delete All > Enter Phone Password YES
Forward Server Mail ■Retrieve Mail List > Highlight a message [Menu] Fwd Server Mail Compose S! Mail [Send]
Sort Server Mail ■Retrieve Mail List > [Menu] Sort Select a condition
View Server Mail Information ■Retrieve Mail List > Highlight a message [Menu] Mail Information
View Server Mail Memory ■Server Mail Memory >
Organizing/Using MessagesChecking Messages in Messaging Folders
1 Incoming Mail , Drafts , Sent/UnsentIn Incoming Mail folder, select a folder then message. ●Messaging Folders: ● P.13-3
2 Select a messageIn Received/Sent Message window, toggle ● to view previous/next messages.
Tip ●Functions Available in Incoming Mail Box ●Functions Available for Received/Sent/Draft Message List ( P.13-20)
Capa_E_OI.indb 15 2009/07/28 10:16:47

Messaging
13-16
13
Auto-sort
Previously received messages are not sorted. ●Incoming messages are sorted by subject if both address and subject ●match sort condition applied to specific folder. Messages with no subject are sorted by address.Either address or mail subject can be specified per folder. ●
1 Incoming Mail
2 Highlight ユーザーフォルダ 1-3 [Menu]
Auto-sort Setting
3 [Menu] Select an item (See below)
Item Operation/Description
Add Address Sort received messages by sender’s addressSelect an address selection method > Select/enter an addressSave up to 10 addresses per folder. ●
Add Subject Sort received messages by mail subjectEnter a subject >Save one subject per folder. ●SMS cannot be sorted by mail subject. ●
Add Group Sort received messages by Group in Phone BookSelect a group >Save up to 10 groups per folder. ●
Add Mail group
Sort received messages by Mail GroupSelect a Mail Group >Save up to 10 Mail Groups per folder. ●
Edit Sort Conditions ■After Step 2, highlight an item > [Edit] Edit address, subject or mail group
Change Auto-sort List View ■Switch Name view or Address view for Auto-sort.
After Step 2, > [Menu] Display the List Name or Address
Capa_E_OI.indb 16 2009/07/28 10:16:48

Messaging
13-17
13
Delete Auto-sort Settings ■After Step 2, (highlight an item > ) [Menu] Delete or Delete All ( For Delete All , enter Phone Password) YES
Filter Spam
Sort messages from unidentifiable handsets into Spam Folder without incoming notification.
NoteSome messages from addresses saved in Phone Book as secret data ●may be sorted into Spam Folder. Be careful when deleting messages from Spam Folder.
Setting Spam Folder
<Default> OFF
1 Settings Universal Settings Anti-Spam Measures
2 Spam Filter Enter Phone Password
3 ON YES
Safe List
Specify up to 20 addresses and domains (for example, @softbank.ne.jp) ●to receive messages from without sorting into Spam Folder.
1 Settings Universal Settings Anti-Spam Measures Safe List
2 Add Addresses[Menu] Add Address Received Address
or Direct Entry Select or enter an address
Add Domains[Menu] Add Domain Enter a domain
(character string after @)
3 [Finish]
Edit Saved Addresses ■After Step 1, highlight an address > [Edit] Edit address
Delete Addresses ■After Step 1, (highlight an address > ) [Menu] Delete or Delete All ( For Delete All , enter Phone Password) YES
Tip ●Report Spam ( P.13-23)
Capa_E_OI.indb 17 2009/07/28 10:16:48

Messaging
13-18
13
Replying to Messages
1 In Message window, [Reply]Re ● : appears before Subject when replying to S! Mail. Received message text is quoted.
2 Complete message [Send]
Reply without Quoting/Replying to All ■In Step 1, > [Menu] Reply Reply to Sender or Reply to All
Compose S! Mail or Compose SMSSelectable items differ by mail type. ●
NoteAlternatively, reply from Message List window without opening ●messages ( P.13-20)
Tip ●Change Message Quote Setting when Replying ( P.18-18)
Using Mail Groups
Save mail addresses by group. Messages can be sent to specified group of recipients.
Save up to 20 recipients per group. ●Create up to 20 groups. ●
Creating Mail Groups
Main Menu Phone Book Settings Mail Group
1 Select a group to save
2 Enter Mail Address DirectlyHighlight <Not stored>
[Edit] Enter mail address
Select Mail Address from Phone Book or Sent/Received Address LogsHighlight <Not stored>
[Menu] Look-up address Select an item Select an entryRepeat Step 2 to save mail addresses. ●
Mail Group List
Capa_E_OI.indb 18 2009/07/28 10:16:51

Messaging
13-19
13
Change Group Names ■In Step 1, highlight a mail group > [Menu] Edit group name Edit name
Reset Group Names ■In Step 1, highlight a mail group > [Menu] Reset group name YES
Edit Mail Addresses ■After Step 1, highlight a mail address > [Edit] Edit
Delete Saved Mail Addresses ■ >After Step 1, (highlight a mail address ) [Menu] Delete this or Delete all ( For Delete all , enter Phone Password) YES
Sending a Message to All Group Members
Main Menu Phone Book Settings Mail Group
1 Highlight a group [ ]
2 Compose a message ( From Step 4 on P.13-4)
Sent/Received Address
Sent address logs: Press and hold > Highlight an address [Menu] Select an item (See below)
Received address logs: Press and hold > Highlight an address [Menu] Select an item (See below)
Item Operation/DescriptionCharacter size
Toggle character size
Add to Phone Book
Save selected mail address/number to Phone Book ( From Step 2 on P.4-5)
Add shortcut icon
Create a shortcut ( P.1-22) Select a shortcut in Standby to open composition window with selected mail address/number in Address field
Compose S! Mail
Create S! Mail to selected address/phone number ( From Step 4 on P.13-4)
Compose SMS
Create SMS to selected phone number ( From Step 4 on P.13-7)
Dialing Select a dialing method > DialDialed calls 1 Show Redial logsReceived calls 2
Show Incoming Call Logs
Delete this YES >Delete selected
Check logs to be deleted > [Finish] YES
Delete all Enter Phone Password > YES1 Sent address logs only2 Received address logs only
Capa_E_OI.indb 19 2009/07/28 10:16:52

Messaging
13-20
13
Organizing Messages
Functions Available in Incoming Mail Box ■ > Incoming Mail (Highlight a folder) [Menu] Select an item (See below)
Item Operation/DescriptionAdd folder Enter folder name >Edit folder name*
Edit folder name >
Auto-sort Setting*
Sort received messages (Auto-sort: > From Step 3 on P.13-16)
Re-sort in This
Re-sort messages in selected folderYES >
Sort in All Re-sort messages in all foldersYES >
Mail Security Set to require Phone Password for opening a folderEnter Phone Password >To cancel: repeat the step ●
Delete folder* Enter Phone Password > YES
* ユーザーフォルダ only
Functions Available for Received/Sent/Draft Message List ■ > Incoming Mail , Drafts or Sent/Unsent ( For Incoming Mail , select a folder) Highlight a message [Menu] Select an item (See below)
Item Operation/DescriptionEdit 1 2 Edit message to send
(S! Mail: From Step 2 on P.13-4/SMS: From Step 2 on P.13-7)Send 2 Send Drafts
Item Operation/DescriptionRetrieve 3 Retrieve complete S! Mail
This one > or Selected ( For Selected , select multiple messages* [Finish] YES )
* To cancel: press again
Reply 3 Reply without quoting messageReply to Sender > or Reply to All Compose S! Mail or Compose SMS Compose a message (S! Mail:
From Step 4 on P.13-4/SMS: From Step 4 on P.13-7)Selectable items differ by mail type. ●
Reply with Quote 3
Quote received message to replyReply to Sender > or Reply to All Compose S! Mail or Compose SMS Compose a message (S! Mail: From Step 4 on P.13-4/SMS:
From Step 4 on P.13-7)Selectable items differ by mail type. ●
Forward 3 Forward > /Fwd Server Mail Select Address field Select an item Select/enter an address [Send]Forward Server Mail ( ● P.13-15)When forwarding S! Mail, ● Fw: appears before Subject. Dotted line appears in the first line of Text field.Attachments are also forwarded (Messages with copy ●protected attachments may not be forwardable.).
Dial Select an item > Make a call/compose a message/add to Phone Book
Add Address 1 3
Save addresses to Phone BookSelect phone number or mail address > YES ( From Step 2 on P.4-5)
Capa_E_OI.indb 20 2009/07/28 10:16:52

Messaging
13-21
13
Item Operation/DescriptionProtect/Unprotect 1 3
Protect received/sent messagesThis one > or Selected ( For Selected , select multiple messages* [Finish])
* To cancel: press againTo unprotect, repeat the step. ●
Unread/ Read 3
Switch status to Unread/Read
Move 3 Move messages to specific foldersMove This > or Move Selected ( For Move Selected , select multiple messages* [Finish] YES ) Select a folder
* To cancel: press again
Delete Select an item > Operate selected itemIf messages are received while selecting multiple ●messages, message deletion may fail.
ConfirmDelivery 1
View Delivery report
Send Ir data ( P.10-3)IC Transmission
( P.10-5)
Copy to microSD
Copy messages to microSD CardYES >
Copy to USIM/Copy to Phone 3
Copy SMS to USIM Card/handsetYES >
Move to USIM/Move to Phone 3
Move SMS to USIM Card/handsetYES >
Sort Change display orderSelect a display order >
Item Operation/DescriptionMail Information
View detailed information (Subject, From, To, etc.)
Mail history 1 3 Show up to 1000 sent/received mail recordsSelect a sender/recipient address > ● or appears.Select a record to show Message Window. ● to return to previous window.
1 Sent messages only2 Drafts only3 Received messages only
Capa_E_OI.indb 21 2009/07/28 10:16:53

Messaging
13-22
13
Using Messages
Functions Available in Received/Sent Message Window ■In Message Window, > [Menu] Select an item (See below)
Item Operation/DescriptionRetrieve 1 Retrieve complete S! MailEdit 2 Edit message to send
(S! Mail: From Step 2 on P.13-4/SMS: From Step 2 on P.13-7)
Reply 1 Reply without quoting messageReply to Sender > or Reply to All Compose S! Mail or Compose SMS Compose a message (S! Mail:
From Step 4 on P.13-4/SMS: From Step 4 on P.13-7)Selectable items differ by mail type. ●
Reply with Quote 1
Quote received message to replyReply to Sender > or Reply to All Compose a message (S! Mail: From Step 4 on P.13-4/SMS:
From Step 4 on P.13-7)Selectable items differ by mail type. ●
Forward 1 Forward > or Fwd Server MailForward Server Mail ( ● P.13-15)
Dial Select an item > Make a call/compose a message/add to Phone Book
Add Address Save addresses to Phone BookSelect phone number or mail address > YES
( From Step 2 on P.4-5)Add to Phone Book
Save highlighted phone number/mail address to Phone Book
YES >( From Step 2 on P.4-5)
Item Operation/DescriptionAttached files Show attached filesSave Templates
Save templatesYES >
Add Shortcut Icon
Create a shortcut ( P.1-22) Select a shortcut in Standby to open composition window with selected mail address/number in Address field
Font Size Select a size >Scroll Unit Change scroll unit
Half Screen > or Whole ScreenCharset Conversion 1
Convert characters when not properly shownSelect an item >
Delete Select an item > Operate selected itemConfirm Delivery 2
View Delivery report
Mail Information
View detailed information (Subject, From, To, etc.)
Send Ir data ( P.10-3)IC Transmission
( P.10-5)
Copy to microSD
Copy messages to microSD CardYES >
Copy to USIM or Copy to Phone 1
Copy SMS to USIM Card/handsetYES >
Move to USIM or Move to Phone 1
Move SMS to USIM Card/handsetYES >
Capa_E_OI.indb 22 2009/07/28 10:16:53

Messaging
13-23
13
Item Operation/DescriptionReport Spam 1 Report received mail as Spam Mail
> [Send]Change destination to report to ( ● P.18-18).
Mail history Show up to 1000 sent/received mail recordsSelect a sender/recipient address > ● or appears.Select a record to show Message Window. ● to return to previous window.
1 Received Message Window only2 Sent Message Window only
Capa_E_OI.indb 23 2009/07/28 10:16:54

13-24
Messaging
13
Capa_E_OI.indb 24 2009/07/28 10:16:54

14
14-1
InternetGetting Started .................................................. 14-2Using Yahoo! Keitai ............................................ 14-3
Opening Yahoo! Keitai Main Menu ...........................................14-3Entering URL ............................................................................14-4Using Access Histories ..............................................................14-4Exiting Mobile Internet .............................................................14-4
Using PC Site Browser ........................................ 14-5Opening Menu .........................................................................14-5Entering URL ............................................................................14-5Using Access Histories ..............................................................14-5Exiting Internet .........................................................................14-5
Basic Operations ................................................. 14-6Using Cursor ............................................................................14-6Text Entry & Item Selection .......................................................14-7
Using Information .............................................. 14-8Bookmarks & Saved Pages ........................................................14-8Managing Bookmarks & Saved Pages .......................................14-9Bookmarks/Saved Pages Functions ..........................................14-10Downloading Image/Sound Files .............................................14-11Using Number, Address or URL ................................................14-11Streaming ..............................................................................14-12
Option Menu Items ........................................... 14-13
Capa_E_OI.indb 1 2009/07/28 10:16:54

Internet
14-2
14
Getting StartedAccess Yahoo! Keitai Mobile Internet and PC sites."Yahoo! Keitai" is both a SoftBank Mobile Internet service and the SoftBank Mobile Internet portal. View PC Internet websites via PC Site Browser.
Internet
Yahoo! KeitaiView Mobile Internet Websites ( ● P.14-3)
Download image/sound files, etc. ( ● P.14-11)
Movies/Music Streaming ( ● P.14-12)
Register S! Quick News ( ● P.7-4)
PC SitesView PC Sites ( ● P.14-5)
Download still images ( ● P.14-11)
NoteSeparate subscription is required for Network access. ●For more information, visit SOFTBANK MOBILE Corp. Website ●(http://www.softbank.jp).Video Calls cannot be received while connecting to the Network. ●
Cache Memory
Retrieved information is temporarily saved in Cache Memory. When full, oldest is deleted first.
Previously viewed pages may load from Cache Memory. To view the ●latest, update information ( P.14-13).Cached items with expiry dates are deleted upon expiry. ●Information remains even after handset is disconnected from the ●Network or handset power is turned off.
TipSettings ●Clear Cache ●Delete Cookies ( P.18-20)
●Initialize Browser ( P.18-21)
Capa_E_OI.indb 2 2009/07/28 10:16:55

Internet
14-3
14
SSL/TLS
SSL (Secure Sockets Layer) and TLS (Transport Layer Security) are encryption protocols for secure Internet transmissions of important/sensitive information such as credit card numbers.Server certificates are saved on 931P ( P.18-21).
NotesWhen a security notice appears, subscribers must decide for themselves whether or not to open the page. SOFTBANK MOBILE Corp., VeriSign Japan K.K., Cybertrust Japan Co., Ltd., Entrust Japan Co.,Ltd., GlobalSign K.K., RSA Security Inc. and SECOM Trust Systems Co., Ltd. cannot be held liable for any damages associated with the use of SSL and TLS.
TipSettings ●Security Settings ( P.18-20)
Using Yahoo! KeitaiOpening Yahoo! Keitai Main Menu
Select Yahoo! Keitai Main Menu items to access websites.
Main Menu Yahoo! Keitai
1 Yahoo! Keitai931P connects to the Network.
2 Select a menu itemRepeat Step 2 as required. ●Basic Operations: ● P.14-6
NoteShortcut: In Standby, press ●
Capa_E_OI.indb 3 2009/07/28 10:16:56

Internet
14-4
14
Entering URL
Enter URLs (addresses beginning with "http://" or "https://") directly to access websites, or open previously viewed pages using URL histories.
Up to 20 URL histories are stored. ●
Main Menu Yahoo! Keitai Enter URL
1 Enter URL DirectlyDirect Entry Enter URL
Use URL HistoryURL History List Select a URL
Delete URL Histories ■In Step1, > URL History List (Highlight a URL ) [Menu] Delete or Delete All YES
URL History List Window
Using Access Histories
Open previously viewed pages using access histories.Up to 100 access histories are stored (The number of savable histories ●varies depending on data amount.).
Main Menu Yahoo! Keitai History
1 Select a history
Delete Access Histories ■In Step 1, (highlight a history > ) [Menu] Delete or Delete All YES ( For Delete All , enter Phone Password)
Show Access History URLs ■In Step 1, highlight a history > [Menu] Display URL
Exiting Mobile Internet
1 YES
NoteClosing handset does not affect active browser. ●
History Window
Capa_E_OI.indb 4 2009/07/28 10:16:57

Internet
14-5
14
Using PC Site BrowserOpening Menu
View PC websites using PC Site Browser.When PC Site Browser opens, ● appears.Some pages may not be viewable. ●Viewing PC websites may incur high charges. ●
Main Menu Yahoo! Keitai PC Site Browser
1 HomepageConfirmation appears. Select NO .
To show confirmation each time: ● YES
2 Select a menu itemRepeat Step 2 as required.
NoteAlternatively, press ● in Yahoo! Keitai Menu to switch to PC Site Browser Menu. To return to Yahoo! Keitai Menu, press again.
TipSettings ●Hide Warning Messages when Activating PC Site Browser or
Switching to Yahoo! Keitai ( P.18-19)
Entering URL
Follow same operation accessed from Yahoo! Keitai ( P.14-4).
Up to 20 ● URL histories are stored.
Main Menu Yahoo! Keitai PC Site Browser Enter URL
Follow Step 1 of same operation accessed from Yahoo! Keitai ●( P.14-4).
Using Access Histories
Follow same operation accessed from Yahoo! Keitai ( P.14-4).
Up to 100 access histories are stored (The number of savable histories ●varies depending on data amount.).
Main Menu Yahoo! Keitai PC Site Browser History
Follow Step 1 of same operation accessed from Yahoo! Keitai ●( P.14-4).
Exiting Internet
1 YES
NoteClosing handset does not affect active browser. ●
Capa_E_OI.indb 5 2009/07/28 10:16:58

Internet
14-6
14
Basic OperationsUsing Cursor
Move Cursor
Use cursor to select underlined menu items. to move right to move left to move to previous line to move to next line
Scroll Pages
Scroll bar appears on right side or at bottom of Display when page content continues beyond view.
scroll up/down scroll left/right scroll page up by a screenful scroll page down by a screenful
Move to previous page/ next page
Previously viewed pages are temporarily saved in Cache Memory ( P.14-2).
[Back]: Return to previous page[Menu] Forward : View next page
Some web pages may not appear after ●performing the steps above.
When Authentication is RequiredSome pages require user authentication for access.If required, enter user ID or password.
NoteWhile page is open, press and hold ● to switch to TV.
TipSettings ●Font Size ●Scroll Unit ●Images Off ●Sound Off ( P.18-19)
●Delete User ID or Password Entered when Authentication is Required ( P.18-20)
Capa_E_OI.indb 6 2009/07/28 10:17:02

Internet
14-7
14
Text Entry & Item Selection
Enter text or select items to send information.
Actual web pages may differ in appearance. ●
Text Entry Field
Check Box
Radio Button
Menu List
Command Button
Text Entry Field Highlight field Enter text
Menu List
Highlight field Menu list appears.Highlight an item Selected items are highlighted.
Radio Button Highlight When selected, appears.
Check Box Highlight When selected, appears.
Command Button Highlight the button Corresponding command is executed.
Capa_E_OI.indb 7 2009/07/28 10:17:05

Internet
14-8
14
Using InformationBookmarks & Saved Pages
Bookmark websites or save page content to Saved Pages.Some copy protected materials cannot be saved. ●
Bookmarks Save links to websites. 931P connects to the Network to open the link.
Saved Pages Save page content. 931P opens saved pages without connecting to the Network.
Saving Web Pages
1 Open a web page [Menu] Bookmarks or Saved Pages Add
2 Select title Edit title
3 OK OKSaved Bookmarks/Saved Pages are saved to Bookmarks List/Saved ●Pages List ( Right)
Open Bookmarks/Saved Pages in Web Page ■Open a web page > [Menu] Bookmarks or Saved Pages View List
Viewing Bookmarks & Saved Pages
Main Menu Yahoo! Keitai ( PC Site Browser)
1 Bookmarks or Saved Pages Select an itemExample: Yahoo! Keitai Browser
NoteCreate folders in Bookmarks/Saved Pages List to organize Bookmarks/ ●Saved Pages ( P.14-9).
Tip●Send Bookmarks via Infrared ( P.10-3) ●Send Bookmarks via IC Transmission ( P.10-5) ●Add Bookmark Shortcuts to Standby ●Save URLs to Bookmarks ●Send Bookmark URLs ( P.14-10)
Saved Pages List WindowBookmarks List Window
Capa_E_OI.indb 8 2009/07/28 10:17:06

Internet
14-9
14
Managing Bookmarks & Saved Pages
Follow the steps below to open Bookmarks or Saved Pages list:
Yahoo! Keitai ■
Main Menu Yahoo! Keitai Bookmarks or Saved Pages
PC Site Browser ■
Main Menu Yahoo! Keitai PC Site Browser Bookmarks or Saved Pages
NoteWhen a different USIM Card is inserted, Saved Pages do not appear or ●title name cannot be changed.
Creating New Bookmarks/Saved Pages Folders
Folders cannot be created within existing folders. ●
1 BookmarksIn Bookmarks list window, [Menu] Create New Folders Enter title
Saved PagesIn Saved Pages list window, [Menu] New Folder Enter title
Move Bookmarks/Saved Pages to Folder ■① Before moving to folders, set Sort to Saved/Moved Order
( P.14-10)② In Bookmarks/Saved Pages list window ( P.14-8), highlight a
bookmark/saved page [Menu] Move to Select a folder Select a destination
Edit Folder Title ■In Bookmarks/Saved Pages list window ( > P.14-8), highlight a folder
[Menu] Edit Edit folder title
Editing Bookmark Titles/URLs
1 In Bookmarks list window, highlight a bookmark [Menu] Edit
2 Edit title/URL
Renaming Saved Pages
1 In Saved Pages list window, highlight a saved page [Menu] Edit
2 Edit title
Tip ●Delete Bookmarks/Saved Pages/Folders ●Display Bookmark/Saved Page URLs ●Change Bookmarks/Saved Pages/Folders Display Order ●Sort Bookmarks/Saved Pages/Folders ( P.14-10)
Capa_E_OI.indb 9 2009/07/28 10:17:07

Internet
14-10
14
Bookmarks/Saved Pages Functions
From Main Menu Yahoo! Keitai ( PC Site Browser) Bookmarks or Saved Pages
Add Bookmark Shortcuts to Standby ■Highlight a bookmark > [Menu] Add shortcut icon YES
Save URLs to Bookmarks ■ > [Menu] Create New Bookmarks Enter a title/URL OK
Delete Bookmarks/Saved Pages/Folders ■Follow the steps below >
Item Operation/DescriptionDelete Highlight a bookmark, saved page or folder >
[Menu] Delete YESDelete Selected Items
Select items to delete > [Menu] Delete selected Check items to delete [Delete] YES
Delete All > [Menu] Delete All YES Enter Phone Password
Display Bookmark/Saved Page URLs ■Highlight a bookmark/saved page > [Menu] Display URL
Change Bookmarks/Saved Pages/Folders Display Order ■Highlight a bookmark/saved page/folder > [Menu] Move to
to select a positionBefore changing order, set ● Sort ( Right) to Saved/Moved Order .
Sort Bookmarks/Saved Pages/Folders ■ > [Menu] Sort Select a condition
Send Bookmark URLs ■ Highlight a bookmark > [Menu] Send URL S! Mail or SMS Create a message (S! Mail: From Step 2 on P.13-4/SMS:
From Step 2 on P.13-7)
Capa_E_OI.indb 10 2009/07/28 10:17:07

Internet
14-11
14
Downloading Image/Sound Files
Save images, sounds, etc. to Data Folder or microSD Card.For PC Site Browser, only still images can be saved. ●
1 Open a web page [Menu] Select File
2 Select a file
3 Save YESAvailable menu items vary by saved content.
Save location is determined by ● Save Settings ( P.18-20). However, save location may change depending on situations. Check confirmation when download is complete.Confirmation appears when downloading images or sound files. ●Select YES for image/sound setting.
NoteDo not remove/install microSD Card while saving files to it. ●Do not turn 931P power off while downloading or saving files. ●Files may be damaged.Some copy protected files may not be saved. ●Videos selected from web pages play while being downloaded. ●
Using Number, Address or URL
Use linked numbers, addresses or URLs to make calls, send messages, access websites, or save directly to Phone Book.
1 Open a web page containing phone numbers, mail addresses or URLs
2 Phone NumberSelect a phone number Select an item (See below)Item Operation/Description
Voice call Make a Voice CallVideo call Make a Video CallSelect image Select outgoing imageAdd to Phone Book
Save a number to Phone Book ( From Step 2 on P.4-5)
E-mail AddressSelect an address Select an item (See below)Item Operation/Description
Compose S! Mail
Create S! Mail ( From Step 4 on P.13-4)
Compose SMS Create SMS ( From Step 4 on P.13-7)Add to Phone Book
Save mail address to Phone Book ( From Step 2 on P.4-5)
URLSelect URL931P connects to the Network.
Capa_E_OI.indb 11 2009/07/28 10:17:07

Internet
14-12
14
Streaming
Enjoy video/sound clips while they download.Supported by compatible files on Yahoo! Keitai sites only. ●Streaming files cannot be saved. ●
Main Menu Yahoo! Keitai Yahoo! Keitai
1 Open a web page Select a file Streaming starts.
2 or to exit
Engaged Streaming Operations ■Mute/Release Mute [ / ]Pause/Resume* [ / ]Volume /Set Playback Position*
to start playback from specified point
Toggle Display Position Toggle Portrait/Landscape view. ●
* Not available during playback for live events such as live sports programs.
NoteStreaming requires a continuous Network connection. Network remains ●connected even during a pause (Transmission fees apply).Paused streams may stop after three minutes of inactivity. ●When roaming abroad, streaming may be unavailable or not be ●performed properly.
Incoming Voice Calls while StreamingIncoming call pauses an active stream.
Video Calls cannot be received while streaming. ●
Capa_E_OI.indb 12 2009/07/28 10:17:09

Internet
14-13
14
Option Menu ItemsIn Yahoo! Keitai, press [Menu] for following operations.
Some functions may not be available depending on web pages. ●Item Operation/Description
Forward Go to next page ( P.14-6)Bookmarks View Bookmarks list, add bookmarks, or add bookmark
shortcuts to StandbySaved Pages View Saved Pages list or save page content to Saved
PagesText Copy Copy page textReload Page Refresh page informationEnter URL Enter URL directly or use URL History to access pagesSelect File View, play or save file to Data Folder (Downloading
Image/Sound Files: From Step 2 on P.14-11)
Item Operation/DescriptionHandy Functions
Switch PC Browser 1/Switch Browser 2: Toggle Yahoo! Keitai/PC siteInternet Search : Search text in InternetSearch In Page : Search text within pageJump in this page : Jump to top/end of pageSend URL : Send URL via S! Mail/SMSHistory : Open previously viewed pagesExpand/Shrink 2: Zoom page in/outSet Display Range 2: Specify displayed area of pageFlash(R) Menu : Playback/pause Flash® filesProperties : View page details or server certificates for secure pages
Yahoo! Keitai 1/Home Page 2
View top menu
Settings Font Size : Change character sizeEncoding : Change encoding typePointer : Set Pointer 2
Switch screen 2 Toggle between Small Screen and PC ScreenExit Browser Exit Browser
1 Yahoo! Keitai only2 PC Site Browser only
Capa_E_OI.indb 13 2009/07/28 10:17:10

14-14
Internet
14
Capa_E_OI.indb 14 2009/07/28 10:17:10

15
15-1
S! AppliBefore Using S! Appli ......................................... 15-2
Downloading S! Appli ...............................................................15-2
Using S! Appli ..................................................... 15-3Activating S! Appli ....................................................................15-3Terminate/Suspend & Resume ...................................................15-3Using S! Appli Startup History ...................................................15-3Managing Applications .............................................................15-4
Capa_E_OI.indb 1 2009/07/28 10:17:10

S! Appli
15-2
15
Before Using S! AppliS! Appli are Java™-based applications designed to run on SoftBank handsets. Download games and other real-time applications for use on 931P.
Separate subscription required to use downloaded applications (not ●required for pre-installed S! Appli).For usage on pre-installed applications, see Help menu for each S! Appli. ●
NoteFor more information, visit SOFTBANK MOBILE Corp. Website ●(http://www.softbank.jp).
Network S! AppliNetwork S! Appli requires Network connection.
Connection fees apply. ●
■ License InformationMain Menu > S! Appli Information
Downloading S! Appli
Download up to 100 S! Appli files to 931P/microSD Card.End suspended S! Appli if any. However, S! Appli may not be ended ●during calls.
Main Menu S! Appli S! Appli List
1 Download S! Appli YES931P connects to the Network, and download site appears.
2 Select an S! AppliProperties appear.
3 Follow onscreen instructions
4 Select a save locationDownloaded S! Appli is saved to Data Folder automatically.
Download may take some time. ●
5 YES to activateDownloaded S! Appli starts.
To exit: ● NO
■ Download Lifestyle-AppliMain Menu > (S! Appli ) Osaifu-Keitai Lifestyle-Appli
Download YES Select a Lifestyle-AppliLifestyle-Appli: ● P.16-2
Capa_E_OI.indb 2 2009/07/28 10:17:10

S! Appli
15-3
15
Using S! AppliActivating S! Appli
Main Menu S! Appli S! Appli List
1 Select an S! AppliApplication starts and appears.
See application Help menu for usage information. ●Confirmation appears when selecting Network S! Appli. ●For a microSD Card S! Appli, press ● [microSD] before Step 1.
NoteActivate an S! Appli; ● Main Menu Data Folder S! Appli Select an S! AppliApplications with ● in S! Appli List are intended for Landscape View.Incoming transmissions pause S! Appli. ●If handset is closed while S! Appli is active, S! Appli pauses. ●AV output compatible applications may be viewed on a TV set ●( P.10-13).
TipSettings ●Volume ●Backlight On/Off ●Deactivate Vibration
●Sync microSD Card with S! Appli List ( P.18-21)
Terminate/Suspend & Resume
Terminating/Pausing S! Appli
1 While running an S! Appli,
2 Suspended or Stopped appears for a suspended application.
Resuming/Terminating Paused S! Appli
Main Menu S! Appli S! Appli List
1 Replayed or StoppedResumed application starts from paused point.
Using S! Appli Startup History
Main Menu S! Appli S! Appli History
1 Highlight a record [Menu] Start, S! Appli info or Delete
Capa_E_OI.indb 3 2009/07/28 10:17:13

S! Appli
15-4
15
Managing Applications
Moving S! Appli between 931P and microSD Card
Main Menu S! Appli S! Appli List
1 Highlight an S! Appli [Menu] Move to microSD or Move to phone
Some S! Appli may not be moved to microSD Card. ●
Deleting S! Appli
Main Menu S! Appli S! Appli List
1 Highlight an S! Appli [Menu] Delete YES
Some pre-installed S! Appli may not be deleted. ●
Viewing S! Appli Properties
Main Menu S! Appli S! Appli List
1 Highlight an S! Appli [Menu] S! Appli info
Setting Security Level while Running S! Appli
Security Level cannot be set for some applications. ●
Main Menu S! Appli S! Appli List
1 Highlight an S! Appli [Menu] Security level
2 Select an item (See below)
Item Operation/DescriptionNetwork Access Connect to the NetworkAuto Invocation Activate S! AppliMultimedia Recording Record multimedia dataData Reading Access Read Phone Book, Calendar events, etc.Data Rewrtng Accss Write/delete Phone Book, Calendar
events, etc.Location Access Retrieve Location information
3 Always Allowed , Ask First Time*, Ask Every Time or Not Allowed * Confirmation appears the first time application is activated.
Reset Security Level Settings ■Reset security level settings to default or condition when downloading.
In Step 2, > Reset Sec. Setting YES
Capa_E_OI.indb 4 2009/07/28 10:17:13

16
16-1
Osaifu-Keitai®
Basics .................................................................. 16-2Downloading Lifestyle-Appli .....................................................16-3Activating Lifestyle-Appli ..........................................................16-3
Using Osaifu-Keitai® ........................................... 16-4Reader/Writer Transactions .......................................................16-4
IC Card Lock Functions ....................................... 16-5Activating IC Card Lock ............................................................16-5Remote Lock ............................................................................16-5
Capa_E_OI.indb 1 2009/07/28 10:17:13

Osaifu-Keitai ®
16-2
16
Basics"Osaifu-Keitai®" is a range of IC Card-based services used by Osaifu-Keitai® compatible handsets. Make purchases using e-money or e-ticketing. Hold handset up to a reader/writer to pay for your purchase.
Osaifu-Keitai ■ ® Terms
Osaifu-Keitai®
A contactless IC Card technology to read/write data by holding an IC card up to a reader/writer
IC Card An IC chip embedded in Osaifu-Keitai®-compatible handsets
Lifestyle-Appli
Applications to use Osaifu-Keitai®. Some applications are preinstalled.
Precautions
Data saved in IC Card vary by service content and usage history. ●Procedures to delete IC Card data vary by Lifestyle-Appli. Contact Osaifu-Keitai® service providers for details.SoftBank is not liable for damages from accidental loss or alteration of IC ●Card data or settings.IC Card data can be misused if your Osaifu-Keitai ● ® compatible handset is lost or stolen. SoftBank is not liable for any resulting damages.Downloading Lifestyle-Appli and using applications may incur high ●packet transmission charges.Do not remove sticker from back of battery cover. Do not remove battery ●cover. Doing so may disable Osaifu-Keitai®.
Capa_E_OI.indb 2 2009/07/28 10:17:13

Osaifu-Keitai ®
16-3
16
Getting Started
Download Lifestyle-Appli via Internet website.
Activate Lifestyle-Appli to complete registration or customize settings.
Make deposit into account, check payment records or balance, etc. ●
NoteKeep a copy of service passwords/customer service contact, etc. in a ●separate place.
Downloading Lifestyle-Appli
Registration/Settings
Downloading Lifestyle-Appli
Main Menu Osaifu-Keitai Lifestyle-Appli
1 Download YES
2 Select a Lifestyle-AppliLifestyle-Appli is saved to Data Folder. ●
Activating Lifestyle-Appli
Lifestyle-Appli cannot be activated during a call or while another ●S! Appli is active.
Main Menu Osaifu-Keitai Lifestyle-Appli
1 Select a Lifestyle-Appli
2 To exit, Stopped
NoteAlternatively, ● Main Menu S! Appli Osaifu-Keitai
Lifestyle-Appli or Main Menu Data Folder Lifestyle-Appli
Capa_E_OI.indb 3 2009/07/28 10:17:14

Osaifu-Keitai ®
16-4
16
Using Osaifu-Keitai®
Reader/Writer Transactions
Complete registration/settings and charge your account beforehand. ●There is no need to activate a Lifestyle-Appli during transaction. ●
1 Hold logo up to reader/writer ●When IC Card Notification Light is ON , Notification Light illuminates ( P.18-10).Hold handset parallel to reader/writer. ●Try moving handset around if recognition is slow.Check scan result on reader/writer display. ●Osaifu-Keitai ● ® can be used during a call or Internet transmission (May require extra time.).
logo
NoteData may be unreadable if a metal object, etc. is between ● logo and reader/writer.Even though Osaifu-Keitai ● ® is available while handset is off, Lifestyle-Appli does not activate. However, if battery is left uncharged after warning tone sounds, Osaifu-Keitai® may become disabled. Charge battery beforehand.When handset is held up to reader/writer, handset may show a message ●or vibrate depending on service. S! Appli, Messaging or Internet may also activate automatically. To avoid such cases, set the functions not to activate during transactions ( P.18-21).
TipSettings ●Disable Handset Response to Commands from Reader/Writer
( P.18-21)
Capa_E_OI.indb 4 2009/07/28 10:17:16

Osaifu-Keitai ®
16-5
16
IC Card Lock FunctionsActivating IC Card Lock
<Default> OFF
1 Press and hold Enter Phone Password appears in Standby.Repeat the step as required to unlock. ●
NoteAlternatively, ● Main Menu Osaifu-Keitai IC Card Settings
IC Card Lock or Main Menu Settings Security IC Card Lock
Remote Lock
<Default> OFF
Saving Numbers to Activate Remote Lock
Save up to three phone numbers to enable Remote Lock. ●
Main Menu Osaifu-Keitai IC Card Settings Remote Lock
1 Enter Phone Password ON Numbers to Permit
2 <Not Recorded> Enter phone numbersTo save numbers from Phone Book/Incoming Call Logs or to use a ●payphone number: [Menu] Refer to or Payphone
3 [Return] [Set]
Capa_E_OI.indb 5 2009/07/28 10:17:19

Osaifu-Keitai ®
16-6
16
Number of Calls to Activate Remote Lock
<Default> Three times
Specify the number of incoming calls for activating IC Card Lock. ●
Main Menu Osaifu-Keitai IC Card Settings Remote Lock
1 Enter Phone Password ON
2 # of Incoming Call Enter a number (03-10) [Set]
Activating Remote Lock
1 Call 931P from one of the specified numbers (Send Caller ID)
2 Hang up after 931P receives the call
3 Repeat Steps 1-2 until specified number of incoming calls is reached (within three minutes)
After specified number of incoming calls, IC Card Lock is set and a ●message informs you IC Card Lock is activated.
NoteWhen setting IC Card Lock, call 931P from the same specified phone ●number. Incoming calls from different phone numbers cannot be counted. Specified incoming calls may not be counted when Call Forwarding is ●active.Remote Lock is not available when ring time for Answer Phone is set to ●0 or Driving Mode is active.
Capa_E_OI.indb 6 2009/07/28 10:17:19

17-1
17
S! GPS NaviAbout S! GPS Navi .............................................. 17-2Using S! GPS Navi............................................... 17-2
Checking Your Current Position .................................................17-2Activating Navi Appli ................................................................17-3Using Location Navi (Japanese) .................................................17-3Using Location Log ...................................................................17-3
Capa_E_OI.indb 1 2009/07/28 10:17:19

17-2
S! GPS N
avi
17
About S! GPS NaviS! GPS Navi provides location information by communicating with base stations and by GPS satellite. Check your position on map, area information or route to your destination using a Navi Appli.
NoteLocation information may be inaccurate due to location or signal ●conditions.SoftBank is not liable for any resulting damages. ●Position cannot be determined while Positioning Lock is active ●( P.18-22).For more information, visit SOFTBANK MOBILE Corp. Website ●(http://www.softbank.jp).
Using S! GPS NaviChecking Your Current Position
Activate Navi Appli to check your position.
Main Menu Tools S! GPS Navi
1 Current Location YESPositioning starts.
To check your current position during positioning: When ● [Use] appears at lower right, OK
2 When positioning is complete, [Map] YES931P connects to the Network and web page opens.
To reposition: ● [Retry]
Save to Phone Book ■Save obtained location information to Phone Book.
Positioning is complete > [Menu] Add to Phone Book YES Follow the steps for saving to Phone Book ( From Step 2 on P.4-5)
Indicating Positioning Accuracy LevelAccuracy Level ... Fairly accurateAccuracy Level ... Relatively accurateAccuracy Level ... No accurate location information retrieved
Retrieve location information again.
Capa_E_OI.indb 2 2009/07/28 10:17:22

17-3
S! GPS N
avi
17
Activating Navi Appli
Search for current area information or route to your destination.
End all applications including suspended applications. ●
Main Menu Tools S! GPS Navi Navi Appli
Using Location Navi (Japanese)
Use Location Navi to locate a person via a SoftBank 3G handset or PC. For more information, visit SOFTBANK MOBILE Corp. Website (http://www.softbank.jp).
Main Menu Tools S! GPS Navi Location Navi
NoteEvent Indicator appears when location information is automatically ●provided or location information request is rejected. Select indicator to show location log.
Using Location Log
Up to 50 latest location info are saved. Delete as required.
Main Menu Tools S! GPS Navi Location Logs
1 Show DetailsSelect a record to view details
● appears if positioning fails.
Delete a RecordHighlight a record [Menu] Delete Delete this YES
Delete All[Menu] Delete Delete all
Enter Phone Password YESNote
When 50 records are saved, oldest is deleted first. ●When positioning is requested while viewing a record, a message ●appears and log window returns.
TipSettings ●S! GPS Navi Settings ( P.18-22)
Capa_E_OI.indb 3 2009/07/28 10:17:23

17-4
S! GPS N
avi
17
Capa_E_OI.indb 4 2009/07/28 10:17:23

18-1
18
SettingsSound & Vibration .............................................. 18-2
Ringtones .................................................................................18-2Charge Sound/Key Tone ............................................................18-2
Display ................................................................ 18-3Display Settings ........................................................................18-3Main Menu ..............................................................................18-4Clock .......................................................................................18-4Back Light ................................................................................18-5External Display ........................................................................18-5Font .........................................................................................18-6
Manner Mode ..................................................... 18-7Incoming Settings............................................... 18-7Date & Time ........................................................ 18-8Call Settings ....................................................... 18-9
Call Time & Call Cost ................................................................18-9Making & Receiving Calls .........................................................18-9
Notification Light ............................................. 18-10Text Entry .......................................................... 18-10Phone Book ...................................................... 18-11Voice Dial .......................................................... 18-11Video Call ......................................................... 18-12
Function Menus ......................................................................18-12Engaged Video Call Settings ...................................................18-12
Horizontal Open Position ................................. 18-13Horizontal Open Menu/Wallpaper ...........................................18-13Standby Clock ........................................................................18-13
Digital TV .......................................................... 18-14Mobile Widget (Japanese) ................................ 18-15S! Quick News (Japanese) ................................ 18-16
Display Settings ......................................................................18-16Auto Update/Deleting Information ..........................................18-16
Bluetooth® ........................................................ 18-17Messaging ........................................................ 18-18
Universal Settings ...................................................................18-18S! Mail Settings ......................................................................18-19SMS Settings ..........................................................................18-19
Internet ............................................................. 18-19Browser Display Settings .........................................................18-19Memory Manager & Reset ......................................................18-20Security Settings .....................................................................18-20Reset......................................................................................18-21
S! Appli ............................................................. 18-21Osaifu-Keitai® ................................................... 18-21S! GPS Navi Settings ........................................ 18-22Default Settings ............................................... 18-23Confirming Settings ......................................... 18-24
Capa_E_OI.indb 1 2009/07/28 10:17:23

18-2
Settings
18
Settings Sound & VibrationRingtones
From Main Menu Settings
Setting/Operation DefaultChange ■ RingtoneSound Settings > Ring Tones Select an item Select Ring Tone Select a type Select a folder
Select a tone
Phone/Video Call: Pattern 1Message: Tone3
Change ■ Ringer VolumeSound Settings > Ringer Volume Select a type
to adjust volumeLevel 4
Disable 3D Sound Effect (Ringtone/Melody) ■Sound Settings > Stereo/3D Sound OFF
ON
Set Ringtone Sound Output for Earphone ■ *Sound Settings > Earphone Earphone
Earphone + Speaker
Set Message ■ Ringtone DurationSound Settings > Message Ring Tones ON or OFF ( For ON , enter ring time)
ON (Ring time: 05 sec)
Set ■ Vibration AlertIncoming Settings > Vibrator Select an item
Select a vibration patternOFF
* When earphone is connected and Sound Settings is set to Earphone , ringtone sounds through earphone and speaker for incoming calls/messages or alarms after about 20 seconds. Other sounds (e.g. Demo playback) are heard only from earphone.
Pre-installed Ringtones ■Title Composer
Pinwheel Original
SINFONIA NR 101 THE CLOCK HOB I 101
HAYDN FRANZ JOSEPH
JE TE VEUX SATIE ERIK ALFREDI LE
DANSE DES MIRLITONS // CASSE NOISETTE OP 71A /ORI
CHAJKOVSKIJ PETR ILICH
HEIGH HO // SNOW WHITE AND THE SEVEN DWARFS /INST
CHURCHILL FRANK E
DANCE OF THE KNIGHTS OP 64 NO 13
PROKOFEV SERGEJ S
WALTZ/COPPELIA BALLET SUITE DELIBES LEO CLEMENT PHILIBERT
PETER AND THE WOLF OP 67 PROKOFEV SERGEJ S
Names of composers given above conform to JASRAC Website. Parts of titles may not appear due to Display size.
Charge Sound/Key Tone
From Main Menu Settings
Setting/Operation DefaultSet Key Tone ■Sound Settings > Key Tone ON or OFF
OFF
Charging Start/End Tone Off ■Phone Settings > Battery Charge Sound OFF
ON
Capa_E_OI.indb 2 2009/07/28 10:17:24

18-3
Settings
18
Settings DisplayDisplay Settings
Horizontal Open Menu/Wallpaper (Horizontal Open Position) ( ● P.18-13)
From Main Menu Settings Display Settings
Setting/Operation DefaultChange ■ Wallpaper >Internal Display Stand-by Display Select an item Select a folder Select an image
( P.18-23)
Add Calendar to Wallpaper ■Internal Display > Stand-by Display Calendar Select a view format BG Image ON or BG Image OFF ( For BG Image ON , select a folder select an image)
–
Change Wallpaper Randomly ■Internal Display > Stand-by Display Random Display Select a folder Every Hour or Every Day
–
Change Outgoing Call/Message Image ■Internal Display > Select an outgoing type Select a folder Select an image
( P.18-23)
Change Incoming Call/Message Image ■Internal Display > Select an incoming type Select Calling Disp. 1 Select an image type Select a folder Select an image
( P.18-23)
Change Battery/Antenna Indicator ■Internal Display > Battery Icon or Antenna Icon
Select a patternPattern 1
Change Start-up Window ■Internal Display > Start-up OFF , Message, Pictures or Videos 2
–
Change Display ■ Color SchemeColor > Select a color
( P.18-23)
Set Interface ■ Language言語設定 > English
日本語
Show New Call/Message when Handset Opens ■ >Open for New ON
OFF
1 ● Setting applies to messages retrieved manually (Incoming Options ( P.18-19) set to Manual Retrieval ) or when Server Mail is retrieved (Retrieve New window cannot be changed).
2 ● For Pictures or Videos : Select a folder Select an image ● For Message : Enter text
Capa_E_OI.indb 3 2009/07/28 10:17:25

18-4
Settings
18
Main Menu
From Main Menu Settings Display Settings Menu Icons
Setting/Operation DefaultChange Main Menu Theme ■Select a pattern >
( P.18-23)
Change Main Menu Icons ■Customize > Select a menu Select a folder Select an image
–
Change Main Menu Background ■Customize > Background Image Select a folder Select an image
–
Clock
Standby Clock (Horizontal Open Position) ( ● P.18-13)External Display Clock ( ● P.18-5)
From Main Menu Settings Display Settings Internal Display Clock
Setting/Operation DefaultChange Standby Clock Pattern ■ 1
Stand-by Clock > [Pattern] Select a pattern [Set]
( P.18-23)
Change Standby Clock Position ■ 1 2
Stand-by Clock > [Position] Select a position [Set]
Pattern 1
Change Standby Clock Size ■ 1
Stand-by Clock > [Size] Large [Set]Small
Change Standby Clock at Upper Right (lower ■right in Landscape View)Icon Clock > Select a pattern
( P.18-23)
1 Highlight Stand-by Clock [Play] to view Standby Clock.2 Even if clock position is set to Pattern 2 - Pattern 12 , clock appears in
Pattern 1 when:Calendar, World Clock or Operator Name is set to appear in Standby ●Time zone is set to other than GMT+9 ●Privacy Key Lock is active ●
Capa_E_OI.indb 4 2009/07/28 10:17:27

18-5
Settings
18
Back Light
From Main Menu Settings Display Settings
Setting/Operation DefaultTurn Back Light On/Off; Set Power Saver Mode ■ 1
Back Light Time > Lighting ON or OFF Select ON (Power Saver Mode) or OFF (Constant Light) ( For ON , Enter Light time)
ON+Saver
Illuminate Back Light while Charging ■Back Light Time > Charging Constant Light
Standard 2
Limit Back Light to Display Only ■Back Light Time > Area LCD
LCD + Keys
Adjust Brightness ■ >Back Light Time Brightness Select a brightness level
Auto 3
Set Back Light to Turn On Softly ■Back Light Time > Soft Light ON
OFF
Disable Auto Image Compensation ■LCD AI > OFF
ON
1 During operation (except when in Standby or S! Appli is active), press and hold to toggle ON /OFF .
2 When set to Standard , Back Light illuminates with the same setting as Lighting setting.
3 When set to Auto , Back Light is automatically adjusted according to ambient light.
External Display
From Main Menu Settings Display Settings External Display
Setting/Operation DefaultTurn Off External Display ■OFF >
ON
Adjust ■ BrightnessON > Brightness Select a brightness level
Level 3
Change ■ WallpaperON > Stand-by Display Select an item Select a folder Select an image
( P.18-23)
Add Calendar to Wallpaper ■ON > Stand-by Display Calendar BG Image ON or BG Image OFF ( For BG Image ON , select a folder Select an image)
–
Change Stand-by ■ Clock Display 1
ON > Clock Stand-by Clock [Pattern] Select a clock pattern [Set]
( P.18-23)
Change Stand-by Clock Position ■ 1 2
ON > Clock Stand-by Clock [Position] Select a pattern [Set]
Pattern 10
Change Stand-by Clock Size ■ 1
ON > Clock Stand-by Clock [Size] Small [Set]
Large
Capa_E_OI.indb 5 2009/07/28 10:17:28

18-6
Settings
18
Change Icon Clock Pattern ■ON > Clock Icon Clock Select a pattern
( P.18-23)
Set Caller ID Off ■ON > Incoming Calls OFF
ON
Forbid Opening New Message by Pressing ■ON > Message OFF
ON (Open)
Turn Back Light Off after All S! Quick News ■ViewedON > S! Quick News All ON
OFF (Turn off in 15 seconds)
Turn Back Light Off while Playing Videos ■ON > Movie Display Time Display Always
15 seconds
1 Highlight Stand-by Clock [Play] to view Standby Clock.2 Even if clock position is set to Pattern 2 - Pattern 12 , clock appears in
Pattern 1 when:Calendar, World Clock or Operator Name is set to appear in Standby ●Time zone is set to other than GMT+9 ●Privacy Key Lock is active ●
Font
From Main Menu Settings Display Settings
Setting/Operation DefaultChange Font Size by Function ■Font Size > Select an item Select a size
Standard
■ Set Menu Font Sizes CollectivelyFont Size > Collective Setting Large or Small *
Standard
Change Font Style (Incoming/Outgoing Call Window) ■Disp. Call/Recv # > Pattern 2
Pattern 1
* When set to Small , font size for Phone Book and Incoming/Outgoing Call Logs is set to Standard .
Capa_E_OI.indb 6 2009/07/28 10:17:29

18-7
Settings
18
Settings Manner ModeFrom Main Menu Settings Incoming Settings
Manner Mode Type
Setting/Operation DefaultSet Manner Mode Type ■Manner Mode, Super Silent > or User Mode ( For User Mode , set individual items [Finish])
Manner Mode
Default Settings by Mode ■Manner Mode Super Silent Driving Mode User ModeAnswer Phone
Value set for Answer Phone
Value set for Answer Phone
ON OFF
VibratorON ON OFF ON
In. CallsSilent Silent Silent Silent
Msg Ring T.Silent Silent Silent Silent
AlarmSilent Silent Silent Silent
Rec. Check ToneON OFF ON ON
Key ToneOFF OFF * OFF
Mic Sensitiv.Up Up Up Up
LVA Tone (Low battery alarm)OFF OFF OFF OFF
* Based on Key Tone setting ( P.18-2)
Settings Incoming SettingsFrom Main Menu Settings Incoming Settings
Setting/Operation DefaultChange Answer Setting ■ ( P.18-8)Answer Setting > Quick Silent or OFF
Any Key Answer
Answer Calls by Opening Handset ■ >Open-to-Ans. Call Phone or Video Call Answer
Keep Ringing
Hide Caller Image Saved in Phone Book ■Phone Book Image > OFF
ON
Set ■ Response ( P.18-8) for Missed Call/New Message NotificationInfo Notice Setting > ON or OFF
ON
Activate Auto Answer with Earphone ■ >Auto Answer ON Enter ring time
OFF
Set Call Waiting Response ■In-call Management > Call Forwarding or Call Rejection
Answer
Capa_E_OI.indb 7 2009/07/28 10:17:29

18-8
Settings
18
Answer Setting Key Operations ■Any Key Answer
To answer a call, press any of the following keys:Voice Call: , ,
- , , , , ,
, , , , Video Call: , ,
Quick Silent To cancel ringtone/vibration, press any of the following keys:Voice Call:
- , , , , , , ,
, , Video Call:
- , , , , , , , ,
OFF To answer a call, press any of the following keys:Voice Call: , Video Call: , ,
When [Voice Mail] is assigned to ● indicated at the bottom of Display, press to start voice or video recording.
Info Notice Setting Response ■ON No Missed Calls/No Received Messages: Triple-beep
soundsMissed Calls/Received Messages: Double-beep sounds twice
ボイス (Voice)*
No Missed Calls/No Received Messages: Triple-beep soundsMissed Calls: Double-beep sounds; voice message announces that you have a missed callReceived Messages: Double-beep sounds; voice message announces that you have a new message
When Vibrator is set for Incoming Settings, vibration activates with beeps. ●In Manner Mode, only vibration activates.Set ● Side-keys Guard to OFF beforehand ( P.11-8).
* Japanese only
Settings Date & TimeFrom Main Menu Settings Date & Time
Setting/Operation DefaultChange Date and Time ■Date & Time > Enter year, date, time and time zone
–
Display World Clock ■ >World Clock ON to select an area
OFF
Activate Daylight Savings Time ■Daylight Savings > ON
OFF
Deactivate Alarm while Operating Other ■FunctionsAlarm Tone > Operation Preferred
Alarm Preferred
Deactivate Automatic Time Correction via ■Yahoo! Keitai >Time Correction OFF
ON
Capa_E_OI.indb 8 2009/07/28 10:17:34

18-9
Settings
18
Settings Call SettingsCall Time & Call Cost
From Main Menu Settings Call Settings
Setting/Operation DefaultDisplay ■ Call Time/Cost 1
Call Time/Cost >–
Reset ■ Total Call Charge/TimeReset > Enter Phone Password Reset Total Duration or Reset Total Cost YES ( For Reset Total Cost , enter PIN2)
–
Set ■ Charge Limit 2
Set Max Cost Limit > ON Enter charge limit Enter PIN2
OFF
1 May not be available depending on subscription status. In that case, Set Max Cost Limit is not available.
2 When set to ON , incoming/outgoing calls including emergency number calls are not dialable if charge limit is reached.
Making & Receiving Calls
From Main Menu Settings
Setting/Operation DefaultChange Earpiece Volume ■Call Settings > Volume to adjust volume
Level 4
Set Handset Response when Closed during Call ■Call Settings > Closing Clamshell No Tone or Hold Call *
End the Call
Set Hold Tone ■Call Settings > Hold Tones On-hold Tone or Holding Tone Select a tone
On-hold Tone: On-hold Tone 1Holding Tone: JESU JOY OF MAN's
Turn Off Noise Reduction ■Call Settings > Noise Reduction OFF
ON
Sound Alarm before Connection is ■DisconnectedCall Settings > Quality Alarm OFF or Low Tone
High Tone
Sound Alarm until Line is Reconnected ■Call Settings > Reconnect Signal OFF or Low Tone
High Tone
Call Service Numbers ■(Service not available at present)Call Settings > Service Numbers Select a service number
–
Specify Phone Book Entry to Call with Earphone ■Phone Settings > Headset Switch to Call Voice Call Search Phone Book Select an entry
OFF
* When Hold Call is selected: Speaker ON (Hold tone sounds from speaker)/Speaker OFF (Hold tone does not sound from speaker)
Capa_E_OI.indb 9 2009/07/28 10:17:35

18-10
Settings
18
Settings Notification LightFrom Main Menu Settings Notification Light
Setting/Operation DefaultSet Notification Light by Incoming Type ■(Voice/Video Calls or Messages)Incoming > Select Color Select a type
to select a color
( P.18-23)
Change Notification Light Color Name for ■Incoming Call/MessageIncoming > Color Edit Color Name Select a color Edit color name
–
Adjust Notification Light Color Tone for ■Incoming Call/MessageIncoming > Color Adjust Color Tone Select a color Adjust color tone
–
Set Notification Light for Missed Calls/New ■MessagesMissed Call/Unread > OFF When Checked or OFF
OFF after 24hours
Set Notification Light for Other Functions ■Select a function > ON or OFF, or to select a color
–
View Notification Light Status ■ *Confirm Status >
–
* View Notification Light settings for incoming calls/messages, engaged calls or upper Side Key commands.
Settings Text EntryFrom Main Menu Settings Phone Settings
Text Entry Method
Setting/Operation DefaultSet Input Mode ■Input Mode > Check input mode(s) to use
[Finish] Select a input mode to prioritize
Input mode: All Prioritized mode: Mode 1 (5-touch)
Hide Predictive Candidates/Context Forecast ■ListPredict > OFF
ON
Set Learning Feature Off for Secret Mode/ ■Secret Data OnlyLearn in Secret Mode > Enter Phone Password OFF
ON
Delete All Learned Words ■Reset Learned Words > Enter Phone Password YES
–
Capa_E_OI.indb 10 2009/07/28 10:17:35

18-11
Settings
18
Settings Phone BookFrom Main Menu Phone Book Settings
Setting/Operation DefaultChange ■ Save Location for New EntrySave Settings > USIM or Ask Every Time
Phone
Change Phone Book Search Method ■Search Method > Select a method
A-KA-SA-TA-NA
Change Font Size ■Font Size > Phone Book or Call Log Large
Standard
Forbid Forwarding Phone Book Entry Images ■Forwarding Image > OFF
ON*
* If ON is selected, images can be forwarded via Infrared, IC transmission or Bluetooth®.
Settings Voice DialFrom Main Menu Settings Phone Settings
Voice Settings
Setting/Operation DefaultActivate Voice Dial Automatically ■Auto Voice Dial > ON
OFF
Activate Voice Dial via Earphone or Bluetooth ■ ® DeviceVoice Earphone Dial > ON
OFF
Capa_E_OI.indb 11 2009/07/28 10:17:36

18-12
Settings
18
Settings Video CallFunction Menus
From Main Menu Settings Video Call
Setting/Operation DefaultChange Incoming Image Quality ■Incoming Video Qlty > Quality Prioritized or Motion Prioritized
Standard
Change Outgoing Image ■Select Images > Select a category Highlight Original [Menu] Change setting Select a folder Select a file [Play] to view image
Pre-installed
Switch Earpiece On ■Loud Speaker > OFF
ON
Switch to Voice Call when Video Call Fails ■Voice Call Auto Redial > ON
OFF
Monitor Room Remotely ■Remote Monitoring > ( P.2-8)
–
Engaged Video Call Settings
From During a Video Call, [Menu] V. Call settings
Setting/Operation DefaultChange Incoming Image Quality ■IncomingVideo Qlty > Qlty Prioritized or Motion Prioritized
Standard
Change Brightness ■Brightness > Select a brightness level
0
Adjust Color Tone to Lighting Conditions ■White balance > Select an environment
Automatic
Change Color Tone ■Color mode set > Select a color tone
Normal
■ Enhance Image Quality in Low Light ConditionsNight mode > ON
OFF
Set Focus ■ *Focus > Select a focus type
Landscape
* Outside Camera only
Capa_E_OI.indb 12 2009/07/28 10:17:36

18-13
Settings
18
Settings Horizontal Open PositionHorizontal Open Menu/Wallpaper
From Main Menu Settings
Setting/Operation DefaultSet Which Operation to Start when Opening ■Handset to Horizontal Open PositionPhone Settings > Horizontal View TV , Camera or Horizontal Open Menu
OFF
Change Menu Theme in Horizontal Open ■PositionDisplay Settings > Hor. Open Menu Select a pattern
( P.18-23)
Change Wallpaper in Standby ■Display Settings > Internal Display Stand-by Display Wide Select a folder Select an image
( P.18-23)
Add Calendar to ■ Wallpaper in StandbyDisplay Settings > Internal Display Stand-by Display Wide Calendar BG Image ON or BG Image OFF ( For BG Image ON , select a folder Select an image)
–
Change Wallpaper Randomly ■Display Settings > Internal Display Stand-by Display Wide Random Display Select a folder Every Hour or Every Day
–
Standby Clock
From Main Menu Settings Display Settings Internal Display Clock Stand-by Clock Wide
Setting/Operation DefaultChange Standby ■ Clock Display 1
> [Pattern] Select a pattern [Set]( P.18-23)
Change Standby Clock Position ■ 1 2
> [Position] Select a pattern [Set]Pattern 3
Change Standby Clock Size ■ 1
> [Size] Small [Set]Large
1 Highlight Stand-by Clock Wide [Play] to view clock.2 Even if clock position is set to Pattern 2 - Pattern 7 , clock appears in
Pattern 1 when:Calendar, World Clock or Operator Name is set to appear in Standby・ Time zone is set to other than GMT+9・ Privacy Key Lock is active・
Capa_E_OI.indb 13 2009/07/28 10:17:37

18-14
Settings
18
Settings Digital TVFrom Main Menu TV User Settings
Setting/Operation DefaultHide Caption ■Display > Caption OFF
ON
Change Caption Position in Landscape View ■Display > Caption Posit. In W-scr Upper
Lower
Hide Guide in Landscape View ■Display > Icons OFF
ON
Forbid Enhancing Frame Rate Automatically ■Video > Mobile W-Speed OFF
ON
Change Image Quality ■Video > Image Quality Select an item
Dynamic
Set Back Light Duration while Watching TV ■Display Light > Lighting Duration Enter duration (min.)
Constant Light
Deactivate Auto Volume ■Sound > Sound Effect Auto Volume OFF
ON
Remaster Sounds from Earphone or Bluetooth ■ ® DeviceSound > Sound Effect Remaster 1 ON
OFF
Add Listening Effect to Sound from Earphone ■or Bluetooth® DeviceSound > Sound Effect Listening 1 Select an item
OFF
Change Quality of Sound from Earphone or ■Bluetooth® DeviceSound > Sound Effect Equalizer 1 Select an item
Normal
Turn Off Speaker by Closing 931P while ■Watching TVSound > TV Sound While Closed OFF
ON
End Recording when Battery Runs Low ■Recording > Rec. When Low Battery Stop Recording
Continue Recording
Start Recording TV Automatically when a Call ■Comes in while Watching TVRecording > Rec. Program When Call ON
OFF
Hide Images on Data Broadcast Sites ■Data Broadcasting > Images OFF
ON
Turn Off Sounds from Data Broadcast/Sites ■Data Broadcasting > Sound Effect OFF
ON
Show Confirmation on Data Broadcast ■Data Broadcasting > Reset Settings YES
–
Set Power Saving Mode ■ 2
ECO Mode > YESOFF
Reset Channel List ■Reset Channel Setting > Enter Phone Password YES
–
Delete Information in Broadcasting Storage ■AreaReset Storage Area > (Highlight an affiliated channel ) [Menu] Delete this or Delete all ( For Delete all , enter Phone Password) YES
–
Capa_E_OI.indb 14 2009/07/28 10:17:37

18-15
Settings
18
Reset ■ TV SettingsReset TV Settings > Enter Phone Password YES
–
Check TV Settings ■Check TV Settings >
–
1 Remaster/Listening/Equalizer Settings: P.5-82 To cancel ECO Mode, perform same operation. When ECO Mode is set,
following settings automatically activate and cannot be changed. When canceled, original settings return. Mobile W-Speed : OFF Image Quality : Normal Remaster : OFF Listening : OFF Equalizer : Normal
Settings Mobile Widget (Japanese)From Main Menu Entertainment Mobile Widget
Settings
Setting/Operation DefaultDeactivate Auto Update ■Auto Refresh > OFF
ON (Activate)
Activate Auto Roaming Abroad ■Auto Roaming > ON
OFF (Deactivate)
Hide Confirmation when Roaming Abroad ■Roaming Notification > OFF
ON (Show)
Forbid Sending/Receiving Cookies ■Cookies > OFF
ON (Send/Receive)
■Delete CookiesDelete Cookies > YES
–
Capa_E_OI.indb 15 2009/07/28 10:17:37

18-16
Settings
18
Settings S! Quick News (Japanese)Display Settings
From Main Menu Settings Display Settings Internal Display S! Quick News Settings
Setting/Operation DefaultShow Only Unread Items in Standby ■Unread/Read Setting > Unread
Unread + Read
Change Marquee Speed ■Marquee Speed > Fast or Slow
Normal
Hide S! Quick News ■Display Always > OFF
ON (Show)
Show Image Data ■Image Display > ON
OFF (Hide)
Auto Update/Deleting Information
From Main Menu Entertainment S! Quick News Settings
Setting/Operation DefaultAutomatically Update Quick News in S! Quick ■News List 1 2
Auto Refresh > S! Quick News Set update frequency
OFF (Not update automatically)
Automatically Update General News (Once a ■day) 1 2
Auto Refresh > General ON
OFF (Not update automatically)
Automatically Update Special News (Every four ■hours) 1 2
Auto Refresh > Special ON
OFF (Not update automatically)
Delete S! Quick News Information ■Del S! Quick News List > YES Enter Phone Password
–
1 If calls are in progress at update time, auto update does not occur until next update.
2 Video Calls are rejected during auto update.
Capa_E_OI.indb 16 2009/07/28 10:17:37

18-17
Settings
18
Settings Bluetooth®
From Main Menu Tools Bluetooth My Devices Settings
Setting/Operation DefaultSet Authentication/Encryption to Send Phone ■Book EntriesSet Authentications > ON ON
OFF/OFF
Enter Password when Sending All Phone Book ■EntriesSession Number Setting > ON
OFF
Set Duration to Search for Bluetooth ■ ® DevicesTime-out to Search > Enter duration (sec.)
05 sec
Stop Ringtone Output to Headset/Handsfree ■DeviceForward Ring Tone > OFF
ON
Continue Calls on Handset when Bluetooth ■ ® is Disconnected from Headset/Handsfree DeviceDisconnection Settings > Continue on the Phone
End the Call
Always Make Calls from 931P even when ■Headset Device is ConnectedDial from Headset > Deactivate
Activate
Always Use Handsfree Device to Make/Receive ■CallsHandsfree Setting > Handsfree Mode
Private Mode 1
View Bluetooth ■ ® PropertiesDevice Properties > 2
–
1 In Private Mode , device that makes/answers call takes priority.2 Device name, address, class and supported services appear.
To change device name: [Edit]
Capa_E_OI.indb 17 2009/07/28 10:17:37

18-18
Settings
18
Settings MessagingUniversal Settings
From Main Menu Messaging Settings Universal Settings
Setting/Operation DefaultChange Font Size ■ *Font Size > Small or Large
Normal
Set Scroll Unit in Text Entry/Preview Window ■Scroll Unit > Half Screen or Whole Screen
Single Line
Change Message Quote Setting when Replying ■Quote Message > ON (S! Mail/SMS) or OFF
ON (S! Mail)
Confirm Message Delivery (Available when ■messaging to SoftBank handset numbers)Delivery Report > ON
OFF (Not confirm)
Change Anti-Spam Measures Setting ■Anti-Spam Measures > Report Spam
[Edit] Edit recipient address [Finish] YES
Reset Anti-Spam Measures Setting ■Anti-Spam Measures > Report Spam
[Menu] Reset Address [Finish] YES
–
Set Auto Delete Off (For Sent/Unsent) ■Auto Sent Msg Del > OFF
ON
Set Auto Delete Off (For Incoming Mail) ■Auto Received Msg Del > ON (Read Msg Only) or OFF
ON (All Msg)
* Character size in SMS or S! Mail subject field does not change. Check preview to see actual size.
Capa_E_OI.indb 18 2009/07/28 10:17:38

18-19
Settings
18
S! Mail Settings
From Main Menu Messaging Settings S! Mail Settings Incoming Options
Setting/Operation DefaultSet S! Mail Download Condition (within Japan) ■Home Auto Setting > Download by Numbers or Manual Retrieval
Auto Download All
Retrieve S! Mail Manually while Abroad ■Roaming Auto Setting > Manual Retrieval
Auto Download
Play Attached Music Files Automatically ■ *Auto Sound Play > ON
OFF (Not play back)
* When multiple sound files are attached, the first file plays.
SMS Settings
From Main Menu Messaging Settings SMS Settings
Setting/Operation DefaultChange SMS Center Number ■ *Message Center > Enter SMS Center number
–
■ Set Input Character to EnglishSet Input Character > English (160char.)
Japanese(70char.)
* Changing Message Center number may disable SMS.
Settings InternetBrowser Display Settings
Yahoo! Keitai
From Main Menu Yahoo! Keitai Set Yahoo! Keitai
PC Site Browser
From Main Menu Yahoo! Keitai PC Site Browser Set PC Site Browser
Setting/Operation DefaultFont Size ■Font Size > Large or Small
Normal
Scroll Unit ■ >Scroll Unit Whole Screen or Half Screen
Single Line
Images Off ■Downloads > Display Image OFF
ON
Sound Off ■Downloads > Play Sounds OFF
ON
Hide ■ Warning Messages when Activating PC Site Browser or Switching to Yahoo! Keitai*Warning Messages > PC Site Browser (when activating) or Yahoo! Keitai (when switching) OFF
ON
* PC Site Browser only
Capa_E_OI.indb 19 2009/07/28 10:17:38

18-20
Settings
18
Memory Manager & Reset
Yahoo! Keitai
From Main Menu Yahoo! Keitai Set Yahoo! Keitai
PC Site Browser
From Main Menu Yahoo! Keitai PC Site Browser Set PC Site Browser
Setting/Operation DefaultClear Cache ■ >Memory Manager Clear Cache YES
–
■Delete CookiesMemory Manager > Delete Cookies YES
–
Delete User ID or Password Entered when ■Authentication is RequiredMemory Manager > Delete Certificates YES
–
Set Data Storage Location to microSD Card ■ *Save Settings > microSD
Phone
* Yahoo! Keitai Browser only
Security Settings
Yahoo! Keitai
From Main Menu Yahoo! Keitai Set Yahoo! Keitai Security
PC Site Browser
From Main Menu Yahoo! Keitai PC Site Browser Set PC Site Browser Security
Setting/Operation DefaultSet Auto Send Off for Manufacturer's Number ■(for Authentication) >Manufacture Number OFF (Not send)
ON (Send)
Forbid Sending ■ Referer InformationSend Referer > OFF
ON (Send)
Select whether or Not to Allow Cookies to Be ■Stored on 931PCookies > OFF or Ask Every Time
ON (Save)
Select whether or Not to Run Scripts in Yahoo! ■Keitai 1
>Script ON, OFF or Ask Every Time
Ask before Connect
Select whether or Not to Run Scripts in PC Site ■Browser 2
Script > Ask before Connect, OFF or Ask Every Time
ON (Run)
Capa_E_OI.indb 20 2009/07/28 10:17:38

18-21
Settings
18
View Server Certificates Issued by Certificate ■AuthoritiesRoot Certificates > Select an item
–
■ Select whether or Not to Retain Authentication InformationCertificate Retention > Always Keep or Not Keep
Keep While Browsing
Hide Confirmation when Connecting to Secure ■SiteSecure Prompt > OFF
ON
1 Yahoo! Keitai Browser only2 PC Site Browser only
Reset
Yahoo! Keitai
From Main Menu Yahoo! Keitai Reset
PC Site Browser
From Main Menu Yahoo! Keitai PC Site Browser Reset
Setting/Operation DefaultReset ■ Browser SettingsRestore Defaults > YES Enter Phone Password
–
■ Initialize BrowserInitialized Browser > YES Enter Phone Password
–
Settings S! AppliFrom Main Menu S! Appli S! Appli Settings
Setting/Operation Default ■ VolumeVolume > to adjust volume
Level 4
■ Backlight On/OffDisplay Backlight > Always ON or Always OFF
Follow General Setting
Deactivate ■ VibrationVibration > OFF
ON
Sync ■ microSD Card with S! Appli List*Synchronize microSD >
–
* Update S! Appli List on microSD Card after using microSD Card in another handset or PC.
Settings Osaifu-Keitai®
From Main Menu Osaifu-Keitai IC Card Settings
Setting/Operation DefaultView IC Card Status ■IC Card Status >
–
Disable Handset Response to Commands from ■Reader/WriterInterface Settings > Enter Phone Password Select an item OFF
All ON
Capa_E_OI.indb 21 2009/07/28 10:17:38

18-22
Settings
18
Settings S! GPS Navi SettingsFrom Main Menu Tools S! GPS Navi NAVI Settings
Setting/Operation DefaultSelect Navi Appli to Activate ■Select Navi Appli > Select a Navi Appli
–
Save Current Map URL ■Map URL Settings > Highlight <Not Recorded>
[Edit] URL Name Enter a name Map URL Enter a URL ("http://" or "https://")
[Finish]
–
Select Map URL ■Map URL Settings > Select a name
NAVITIME
Edit/Delete Map URL ■ *Map URL Settings > Highlight a name
[Menu] Edit or Delete–
Activate to Lock Positioning Function ■Positioning Lock > Enter Phone Password ON
OFF
Hide Confirmation when Sending Location ■InformationSend Location Info > Enter Phone Password Send without Check (Send location information without showing confirmation)
Send with Check (Show confirmation every time)
Hide Notification of Incoming Location ■Provision RequestNotification Setting > Enter Phone Password OFF
ON
Set Positioning Ringtone/Vibrator/Ringtone ■DurationRecv Location Request > Ringtone , Vibration Alert or Ringtone Duration Set individual item
Ringtone: Pattern 2 Vibrator Alert: Pattern 1 Ringtone Duration: 05 seconds
* Pre-installed NAVITIME cannot be edited or deleted.
Capa_E_OI.indb 22 2009/07/28 10:17:39

18-23
Settings
18
Default SettingsDefault settings vary by handset color as below.
For operations, refer to respective setting sections. ●Setting Black White Pink
Notification Light ( P.18-10)
IncomingVoice Call A-Signal B-Signal C-SignalVideo Call A-Signal B-Signal C-SignalMessage A-Rhythm B-Rhythm C-Rhythm
Side Key (Upper Side Key) A-HOTARU B-HOTARU C-HOTARUDisplay Settings ( P.18-3 to 6, P.18-13)
Stand-by Display Night View 1* White Room 1* Window in Dream 1*Stand-by Display Wide Night View 2* White Room 2* Window in Dream 2*External Stand-by Display Night View 3* White Room 3* Window in Dream 3*Stand-by Clock Pattern Pattern 4 Pattern 1 Pattern 4Icon Clock (Internal/External Display) Pattern 4 Pattern 1 Pattern 4Outgoing Image (Call/Message) Pattern 1 Pattern 2 Pattern 3Incoming Image (Call/Message) Pattern 1 Pattern 2 Pattern 3Menu Icons Midnight road White cube Pinky dreamHorizontal Open Menu Pattern 1 Pattern 1 Pattern 2Color Scheme Black White Pink
* Background color and design change. Unavailable when Calendar appears in Standby
Capa_E_OI.indb 23 2009/07/28 10:17:39

18-24
Settings
18
Confirming SettingsMain Menu Setting Phone Settings
Confirm Settings
Confirmable Settings ■Back Light Time・ View Blind・ Volume・ Shikkari Talk・ Noise Reduction・ Select Network・ Horizontal View・
★ ● appears for items changed from default settings.
Capa_E_OI.indb 24 2009/07/28 10:17:39
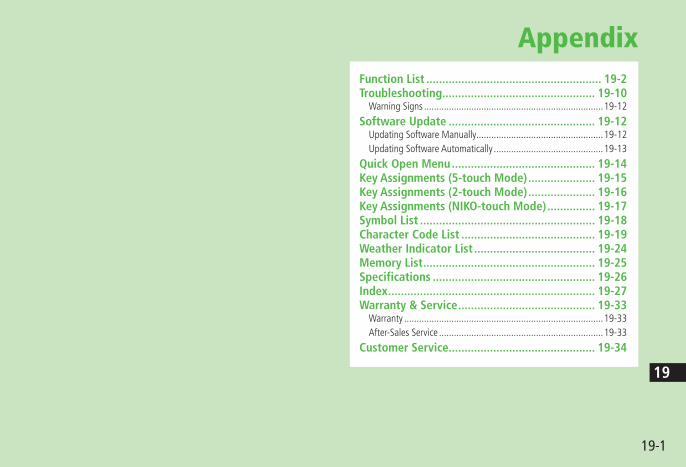
19-1
19
AppendixFunction List ....................................................... 19-2Troubleshooting ................................................ 19-10
Warning Signs ........................................................................19-12
Software Update .............................................. 19-12Updating Software Manually ...................................................19-12Updating Software Automatically ............................................19-13
Quick Open Menu ............................................. 19-14Key Assignments (5-touch Mode) ..................... 19-15Key Assignments (2-touch Mode) ..................... 19-16Key Assignments (NIKO-touch Mode) ............... 19-17Symbol List ....................................................... 19-18Character Code List .......................................... 19-19Weather Indicator List ...................................... 19-24Memory List ...................................................... 19-25Specifications ................................................... 19-26Index ................................................................. 19-27Warranty & Service ........................................... 19-33
Warranty ................................................................................19-33After-Sales Service ..................................................................19-33
Customer Service.............................................. 19-34
Capa_E_OI.indb 1 2009/07/28 10:17:39
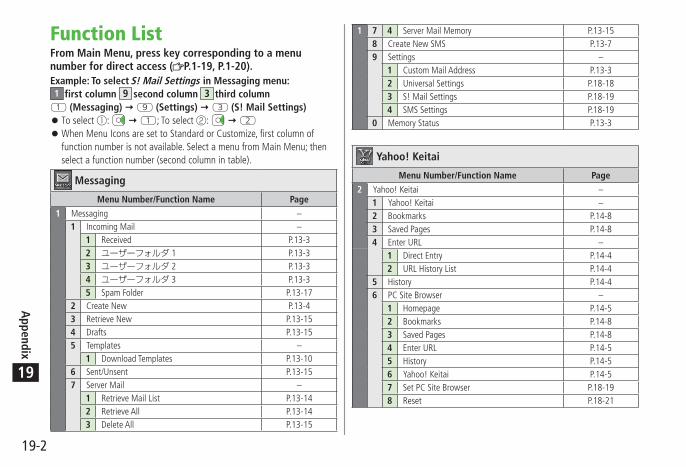
Appendix
19-2
19
Function ListFrom Main Menu, press key corresponding to a menu number for direct access ( P.1-19, P.1-20).Example: To select S! Mail Settings in Messaging menu: 1 first column 9 second column 3 third column
(Messaging) (Settings) (S! Mail Settings)To select ● ①: ; To select ②: When Menu Icons are set to Standard or Customize, first column of ●function number is not available. Select a menu from Main Menu; then select a function number (second column in table).
Messaging
Menu Number/Function Name Page
1 Messaging –1 Incoming Mail –
1 Received P.13-32 ユーザーフォルダ 1 P.13-33 ユーザーフォルダ 2 P.13-34 ユーザーフォルダ 3 P.13-35 Spam Folder P.13-17
2 Create New P.13-43 Retrieve New P.13-154 Drafts P.13-155 Templates –
1 Download Templates P.13-106 Sent/Unsent P.13-157 Server Mail –
1 Retrieve Mail List P.13-142 Retrieve All P.13-143 Delete All P.13-15
1 7 4 Server Mail Memory P.13-158 Create New SMS P.13-79 Settings –
1 Custom Mail Address P.13-32 Universal Settings P.18-183 S! Mail Settings P.18-194 SMS Settings P.18-19
0 Memory Status P.13-3
Yahoo! Keitai
Menu Number/Function Name Page
2 Yahoo! Keitai –1 Yahoo! Keitai –2 Bookmarks P.14-83 Saved Pages P.14-84 Enter URL –
1 Direct Entry P.14-42 URL History List P.14-4
5 History P.14-46 PC Site Browser –
1 Homepage P.14-52 Bookmarks P.14-83 Saved Pages P.14-84 Enter URL P.14-55 History P.14-56 Yahoo! Keitai P.14-57 Set PC Site Browser P.18-198 Reset P.18-21
Capa_E_OI.indb 2 2009/07/28 10:17:42

Appendix
19-3
19
2 7 Set Yahoo! Keitai –1 Font Size P.18-192 Scroll Unit P.18-193 Downloads P.18-194 Memory Manager P.18-205 Security P.18-206 Save Settings P.18-20
8 Reset –1 Restore Defaults P.18-212 Initialized Browser P.18-21
S! Appli
Menu Number/Function Name Page
3 S! Appli –1 S! Appli List –
1 Download S! Appli P.15-22 Osaifu-Keitai –
1 Lifestyle-Appli P.16-32 IC Card Settings P.16-5
3 S! Appli Settings –1 Volume P.18-212 Display Backlight P.18-213 Vibration P.18-214 Synchronize microSD P.18-21
4 S! Appli History P.15-35 Information P.15-2
Osaifu-Keitai
Menu Number/Function Name Page
4 Osaifu-Keitai –1 Lifestyle-Appli P.16-32 IC Card Settings P.16-5
Camera
Menu Number/Function Name Page
5 Camera –1 Camera P.6-62 Video Camera P.6-83 Pictures P.6-144 Videos P.6-14
Entertainment
Menu Number/Function Name Page
6 Entertainment –1 Mobile Widget –
1 Widget Contents P.7-32 Settings P.18-153 Information P.7-2
2 S! Quick News –1 S! Quick News List P.7-42 Settings P.18-16
Next Page
Capa_E_OI.indb 3 2009/07/28 10:17:43

Appendix
19-4
19
6 3 S! Info Ch./Weather –1 What's New? P.7-62 History P.7-63 Register/Cancel P.7-64 Get Latest Contents P.7-65 Weather Indicator P.7-7
4 BookSurfing P.7-85 e-Book Viewer P.7-8
Tools
Menu Number/Function Name Page
7 Tools –1 Alarms P.12-62 Calendar P.12-23 Calculator P.12-84 Notepad P.12-85 Tasks P.12-56 Dictionary P.12-97 Sound Recorders –
1 Voice Call Data P.2-162 Video Call Data P.2-163 Answer Phone Setting P.2-154 Voice Recorder P.12-105 Voice Announce P.12-10
8 Bar Code Reader –1 Scan Barcodes P.12-112 Saved Data List P.12-12
7 9 S! GPS Navi –1 Navi Appli P.17-32 Current Location P.17-23 Location Navi P.17-34 Location Logs P.17-35 NAVI Settings P.18-22
0 Bluetooth –1 Search&Paired Device P.10-72 Bluetooth OFF/Bluetooth ON P.10-83 Accept Registered P.10-94 Dialup Rgstry Standby P.10-105 Receive via Bluetooth P.10-96 My Devices Settings P.18-17
① Receive via Infrared –1 Receive P.10-32 Receive All P.10-4
② microSD Backup –1 Phone Book P.9-182 Calendar P.9-183 Tasks P.9-184 Incoming Mail P.9-185 Sent Messages P.9-186 Unsent Messages P.9-187 Drafts P.9-188 Memo Pad P.9-189 Bookmarks P.9-18
③ Templates/Users Dic. –1 Templates P.3-52 User's Dictionary P.3-103 Download Dictionary P.3-10
Capa_E_OI.indb 4 2009/07/28 10:17:44

Appendix
19-5
19
Data Folder
Menu Number/Function Name Page
8 Data Folder –1 Pictures –
1 Download Pictures P.9-22 Main Folder P.9-23 Camera P.9-24 My Pictograms P.9-25 Mail Art P.9-26 Pre-installed P.9-27 Original Animation P.9-13
2 Ring Songs&Tones –1 DL Ring Songs&Tones P.9-22 Main Folder P.9-23 Pre-installed P.9-24 Voice Announce P.9-25 Play List P.9-2
3 S! Appli –1 Download S! Appli P.15-2
4 Widget –1 Download Widget P.7-3
5 Music –1 Main Folder P.9-22 WMA P.9-2
8 6 Videos –1 Download Videos P.9-32 Main Folder P.9-33 Camera P.9-34 Pre-installed P.9-35 Play List P.9-36 Position Memory P.9-6
7 PC Movies –1 microSD P.9-32 Position Memory P.9-63 Play History P.9-3
8 TV –1 Image P.5-142 Video P.5-133 Position Memory P.9-3
9 Lifestyle-Appli –1 Download P.16-3
0 Books –1 Download Books P.9-3
① Customized Screen –1 Customized Screen P.1-242 Familiar Usability P.1-24
② Templates –1 Download Templates P.13-10
③ Font –1 Download Font P.9-32 Main Folder P.9-33 Pre-installed P.9-3
④ Other Documents –1 Main Folder P.9-3
Capa_E_OI.indb 5 2009/07/28 10:17:44

Appendix
19-6
19
Music Player
Menu Number/Function Name Page
9 Music Player –1 Player –
1 All Tracks P.8-62 Artist P.8-63 Album P.8-64 Genre P.8-65 Play List P.8-6
2 Data Manager –1 Main Folder P.8-72 WMA P.8-7
TV
Menu Number/Function Name Page
TV –1 Watch TV P.5-52 Program List P.5-73 Timer Watching P.5-144 Timer Recording P.5-145 Recording Result P.5-156 TV Link P.5-117 Channel List P.5-48 Channel Setting –
1 Select Area P.5-42 Automatic P.5-4
9 User Settings –1 Display P.18-142 Video P.18-143 Display Light P.18-144 Sound P.18-145 Recording P.18-146 Data Broadcasting P.18-147 ECO Mode P.18-148 Reset Channel Setting P.18-149 Reset Storage Area P.18-140 Reset TV Settings P.18-15
Check TV Settings P.18-15
Capa_E_OI.indb 6 2009/07/28 10:17:46

Appendix
19-7
19
Next Page
Phone Book
Menu Number/Function Name Page
Phone Book –1 Phone Book P.4-22 Create New Entry P.4-33 Call Log –
1 Outgoing Call Logs P.2-142 Incoming Call Logs P.2-14
4 Group P.4-65 Account Details P.1-30, P.4-136 S! Addressbook BkUp –
1 Start Sync P.4-112 Auto Sync Settings P.4-123 Sync Log P.4-12
7 Memory Manager P.4-98 Restrictions P.11-109 Settings –
1 Save Settings P.18-112 Search Method P.18-113 Font Size P.18-114 Voice Dial P.4-145 Mail Group P.13-186 Forwarding Image P.18-11
0 Memory Status P.4-10
Number in first column is not available for Phone Book. ●
Settings
Menu Number/Function Name Page
# Settings –1 Sound Settings –
1 Ring Tones P.18-22 Ringer Volume P.18-23 Key Tone P.18-24 Stereo/3D Sound P.18-25 Earphone P.18-26 Message Ring Tones P.18-2
2 Display Settings –1 Internal Display P.18-32 External Display P.18-53 Font Size P.18-64 Font P.1-255 Menu Icons P.18-46 Hor. Open Menu P.18-137 Back Light Time P.18-58 View Blind P.1-309 Color P.18-30 Private Menu P.1-26言語設定 P.18-3
# Open For New P.18-3① LCD AI P.18-5② Disp. Call/Recv # P.18-6③ Describe Icons P.1-11
3 Customized Screen –1 Customized Screen P.1-242 Familiar Usability P.1-243 Release Settings P.1-24
Capa_E_OI.indb 7 2009/07/28 10:17:46

Appendix
19-8
19
# 4 Incoming Settings –1 Vibrator P.18-22 Manner Mode Type P.18-73 Answer Setting P.18-74 Open-to-Ans. Call P.18-75 Call Logs P.11-86 Phone Book Image P.18-77 Ring Time Settings P.11-118 Info Notice Setting P.18-79 Auto Answer P.18-70 In-call Management P.18-7
5 Phone Settings –1 Horizontal View P.18-132 Side-keys Guard P.11-83 Text Entry Method P.18-104 Battery P.18-25 Pause Dial P.2-36 Headset Switch to Call P.18-97 Voice Settings P.18-118 Confirm Settings P.18-249 Software Update P.19-12
6 Date & Time –1 Date & Time P.18-82 World Clock P.18-83 Daylight Savings P.18-84 Alarm Tone P.18-85 Time Correction P.18-8
# 7 Security –1 Privacy Key Lock P.11-42 Personal Data Lock P.11-43 IC Card Lock P.16-54 Secret Mode P.11-95 Secret Data Only P.11-96 Key Pad Dial Lock P.11-77 Reject Unknown P.11-118 Call Setting w/o ID P.11-119 All Reset P.11-120 Reset Settings P.11-12
PIN Authentication P.11-2# Change Phone Password P.11-2① Timer Lock at Close P.11-6② Lock OFF at Open P.11-6③ Content Key P.9-22④ Lock Message P.11-7
8 Call Settings –1 Call Time/Cost P.18-92 Reset P.18-93 Set Max Cost Limit P.18-94 Voice Mail/Call Fwding P.2-17, P.2-185 Call Waiting P.2-206 Call Barring P.2-207 Missed Call Notifi. P.2-198 Prefix P.2-39 Volume P.18-90 Shikkari Talk P.2-5
Closing Clamshell P.18-9# Hold Tones P.18-9
Capa_E_OI.indb 8 2009/07/28 10:17:47

Appendix
19-9
19
# 8 ① Noise Reduction P.18-9② Quality Alarm P.18-9③ Reconnect Signal P.18-9④ Emission OFF Mode P.1-18⑤ Show My Number P.2-21⑥ Service Numbers P.18-9
9 Video Call –1 Incoming Video Qlty P.18-122 Select Images P.18-123 Loud Speaker P.18-124 Voice Call Auto Redial P.18-125 Remote Monitoring P.2-8
0 International Call –1 Int'l Dial Assist P.2-102 Select Operator P.2-113 PLMN Setting P.2-114 Operator Name P.2-115 Select Network P.2-11
① Connectivity –1 USB Mode P.10-112 Retrieve NW Info P.1-16
② Notification Light –1 Incoming P.4-4, P.18-102 Online P.18-103 Missed Call/Unread P.18-104 Clamshell Close P.18-105 Music P.18-106 Bluetooth P.18-107 IC Card P.18-108 Side Key P.18-109 Confirm Status P.18-10
Capa_E_OI.indb 9 2009/07/28 10:17:47

Appendix
19-10
19
TroubleshootingHandset does not turn on
Was ・ pressed for more than one second?Is battery level sufficient?・ Is battery inserted properly? (・ P.1-14)
Handset functions do not work after turning power onDoes PIN Entry window appear? ・ PIN Authentication is ON . Enter PIN ( P.11-2).
USIM not inserted After power-off Insert USIM or Inserted USIM isunavailable to this mobile phone Please insert valid one appearswhen handset is turned on or operations attempted
Is USIM Card inserted correctly? (・ P.1-3)Is SoftBank specified USIM Card inserted? (・ P.1-2).USIM Card IC chip may be dirty. ・ Wipe with a clean cloth, then insert USIM Card correctly.
Keypad does not respondDoes ・ or appear in Standby? Keyguard ( P.11-3) or Privacy Key Lock is active ( P.11-4). Cancel it.
Side Keys do not work while handset is closedDoes ・ appear? Side-keys Guard ( P.11-8) is ON . Set to OFF .
Outgoing calls or Video Calls will not connect or message and Internet connections are unavailable
Does ・ appear? Is handset out-of-range or in a location where signal is weak? Move to a location where signal is strong.Are you using handset overseas? ・ Set international settings (e.g. Select Operator) to use abroad ( P.2-10).Does ・ appear? Personal Data Lock is set ( P.11-4). Deactivate Personal Data Lock.
Outgoing calls or Video Calls will not connectIs area code entered?・ Is restricting outgoing calls in Call Barring? (・ P.2-20)Does ・ appear in Standby? Total cost has reached upper limit. Set Max Cost Limit to OFF or execute Reset ( P.18-9).
Outgoing calls will not connect or busy signal soundsDid you enter area code?・ Is restricting outgoing calls in Call Barring? (・ P.2-20)
Call is interrupted or disconnectedDoes ・ appear? Is handset out-of-range or in a location where signal is weak? Move to a location where signal is strong.
"Cannot start any more functions" appears when a menu is opened.
Maximum number of functions are active at the same time. Cancel ・ current function and try again ( P.1-29).
Capa_E_OI.indb 10 2009/07/28 10:17:49

Appendix
19-11
19
Calls cannot be made via a Phone Book entryEntry may be saved as Secret. ・ Set Secret Mode or Secret Data Only ON ( P.11-9).Does ・ appear? Personal Data Lock is set ( P.11-4). Deactivate Personal Data Lock.
Digital TV does not workIs handset out of terrestrial Digital TV broadcasting service area or in a ・ location where airwaves are weak? Move to a location where airwaves are strong ( P.5-3).
Customized Screen setting cannot be canceledEnter "6368##" in Standby ・ Release Settings Customized Screen cannot be canceled in Standby while Simple menu is active. Deactivate Simple menu in Standby.
Osaifu-Keitai® does not workDoes ・ appear? Deactivate IC Card Lock ( P.16-5).
Display clock is resetReplacing battery does not reset Display clock; however, if battery is ・ removed for long periods, the clock may be reset. Set Date & Time ( P.18-8) or Retrieve NW Info ( P.1-16) again.
Battery Operating Time is greatly reducedBattery Operating Time may be reduced by environmental factors such ・ as temperature, charging conditions or signal strength, as well as by operations or settings. See "Charging Time & Operating Time Estimates" ( P.1-12) and "Battery Time" ( P.1-13).
Cannot charge batteryIs AC Charger (sold separately) firmly connected to handset or Desktop ・ Holder (not included)? ( P.1-15)Is AC Charger securely plugged into an outlet?・ Is battery installed in handset correctly? (・ P.1-14)Is handset correctly mounted in Desktop Holder?・ Make sure handset, battery, Desktop Holder and AC Charging terminals ・ are clean.Battery may not charge beyond +5°C and +35°C.・ Battery may need to be replaced.・
Handset/accessories feel warmAC Charger/Desktop Holder may warm during charging. ・ Handset may warm during long use. This is normal if you can hold it comfortably. Low temperature burns may occur if handset is held against skin for long periods.
NoteIf you did not find the remedy to your problem here, please contact ●SoftBank Mobile Customer Center ( P.19-34).
Capa_E_OI.indb 11 2009/07/28 10:17:49

Appendix
19-12
19
Warning Signs
Problem Causes and Remedies
appears Handset is out-of-range.Move to a location where signal is strong.
appearsSide-keys Guard is ON ( P.11-8).To activate Side Keys while handset is closed, set Side-keys Guard OFF .
or appears
Keyguard ( P.11-3) or Privacy Key Lock ( P.11-4) is active. Cancel it to use handset. Answer calls even if Keyguard or Privacy Key Lock is active.
Low battery message appears and battery alarm tone sounds
Battery is low.Charge ( P.1-15) or replace battery ( P.1-14).
Software UpdateCheck for handset software updates and download as required. Choose to begin update or schedule update.
Connection fees do not apply to updates (including checking for updates, ●downloading and rewriting).Fully charge battery beforehand. Even if ● appears, low battery message may appear. In this case, charge battery until Charging Indicator goes out.Select a place where signal is strong and stable. ●Do not remove battery during the update. Update will fail. ●Other functions are not available during Software Update. ●The update may take some time. ●
Updating Software Manually
Main Menu Settings Phone Settings Software Update Software Update
1 [YES] Follow onscreen instructionsAfter download is complete, handset automatically turns off and restarts before Software Update begins.After Software Update is complete, handset automatically turns off and restarts before information appears for successful update (This process takes approximately 60 seconds.).
Capa_E_OI.indb 12 2009/07/28 10:17:53

Appendix
19-13
19
Updating Software Automatically
Main Menu Settings Phone Settings Software Update Regular Updates
1 YES Follow onscreen instructionsSelect ● YES to activate Internet. Follow onscreen instructions to perform Regular Updates. For more information, visit SOFTBANK MOBILE Corp. Website (http://www.softbank.jp).
Update ResultsWhen Event Indicator appears, Update
When ● Update indicator does not appear, Main Menu Settings
Phone Settings Software Update Update Results
Scheduled UpdateFollow onscreen instructions for setup.Confirmation appears at scheduled update time. Press or wait ten seconds for update to start.
Software Update will not start while ●handset is in use. Continuing handset usage for ten minutes or more cancels Scheduled Update.
NoteIf handset does not power on after Software Update, remove then ●re-insert battery and try again. If handset still does not power on, contact SoftBank Mobile Customer Center, Customer Assistance ( P.19-34).Software Update failure may disable handset. Contact SoftBank Mobile ●Customer Center, Customer Assistance ( P.19-34).Software Update does not affect Phone Book entries, files saved in Data ●Folder or other content, but it is recommended that you create a backup of any important information and data (note that some files cannot be copied).SoftBank is not liable for damages resulting from loss of data, ●information, etc.Alarm tone does not sound during update. ●For more information, visit SOFTBANK MOBILE Corp. Website ●(http://www.softbank.jp).
Capa_E_OI.indb 13 2009/07/28 10:17:57

19-14
Appendix
19
Menu #
External Display 93
Font Settings 66
Menu Icons 57
Back Light Time 70
Color Theme 86
Private Menu Settings 52
Language 15
Describe Icons 36
Vibrator 54
Manner Mode Type 20
Answer Setting 58
Ring Time Settings 90
Info Notice Setting 65
Auto Answer 94
Text Entry Method 35
Date & Time 31
Secret Mode 40
Secret Data Only 41
Call Setting w/o ID 10
Reset Settings 23
Change Phone Password 29
Call Time/Cost 61
Reset Total Duration/Cost 60
Closing Clamshell 18
Menu #
Noise Reduction 76
Quality Alarm 75
Reconnect Signal 77
Show My Number 17
Notification Light 89
Quick Open MenuWhen Menu Icons is set to Standard or Customize ( P.18-4), press menu numbers in Main Menu to open the following functions.Example: To open Notepad:In Standby,
Menu #
Alarm 44
Calendar 45
Calculator 85
Notepad 42
Tasks 95
Sound Recorders 55
Receive via Infrared 79
Templates/Users Dictionary 38
Pictures folder 46
Ring Songs&Tones folder 16
Phone Book Settings 26
Ring Tones 13
Ringer Volume 50
Key Tone 30
Stereo/3D Sound 64
Earphone/Speaker Settings 51
Message Ring Tones 68
Internal Display 56
Capa_E_OI.indb 14 2009/07/28 10:17:59

19-15
Appendix
19
Key Assignments (5-touch Mode)Display
Key漢 カナ abc 123
あいうえおぁぃぅぇぉ アイウエオァィゥェォ1 ./ @ -:̃ 1 ~ 2_1 1かきくけこ カキクケコ2 abcABC 2 2さしすせそ サシスセソ3 defDEF 3 3たちつてとっ タチツテトッ4 ghiGHI 4 4なにぬねの ナニヌネノ5 jklJKL 5 5はひふへほ ハヒフヘホ6 mnoMNO 6 6まみむめも マミムメモ7 pqrsPQRS 7 7やゆよゃゅょ ヤユヨャュョ8 tuvTUV 8 8らりるれろ ラリルレロ9 wxyzWXYZ 9 9わをんゎー ワヲンヮ 2ー0 0 0゛゚ 3 ゛゚ 3 Pictograms
*[Press and hold] Templates
、。?!・□(Space)
、。?!・□(Space)
,.?!’- &()¥□(Space) #
[Press and hold] Symbols 4
1 Appears when entering single-byte character.2 Appears when entering double-byte character.3 Added to highlighted character. Press to display pictographs after determining character.4 In number mode, symbol list may not be displayed.
While entering character, press ● to toggle characters at cursor in reverse order.After entering hiragana, katakana or alphanumerics, press ● to toggle upper/lower case.In number mode, press and hold ● to enter "+" (not available in S! Mail text field).In alphanumerics mode, characters entered after an upper-case character appear in order of: upper case ● lower case.
Capa_E_OI.indb 15 2009/07/28 10:18:03

19-16
Appendix
19
Key Assignments (2-touch Mode)Kanji (Hiragana) Mode<Upper Case Mode>
Second digit1 2 3 4 5 6 7 8 9 0
Firs
t dig
it
1 あ い う え お A B C D E2 か き く け こ F G H I J3 さ し す せ そ K L M N O4 た ち つ て と P Q R S T5 な に ぬ ね の U V W X Y6 は ひ ふ へ ほ Z ? ! ー /7 ま み む め も ¥ &8 や ( ゆ ) よ * # ■9 ら り る れ ろ 1 2 3 4 50 わ を ん ゛ ゜ 6 7 8 9 0
Second digit1 2 3 4 5 6 7 8 9 0
Firs
t dig
it
1 ぁ ぃ ぅ ぇ ぉ a b c d e2 f g h i j3 k l m n o4 っ p q r s t5 u v w x y6 z78 ゃ ゅ ょ ■90 ゎ 、 。
Second digit1 2 3 4 5 6 7 8 9 0
Firs
t dig
it
1 ア イ ウ エ オ A B C D E2 カ キ ク ケ コ F G H I J3 サ シ ス セ ソ K L M N O4 タ チ ツ テ ト P Q R S T5 ナ ニ ヌ ネ ノ U V W X Y6 ハ ヒ フ ヘ ホ Z ? ! ー /7 マ ミ ム メ モ ¥ &8 ヤ ( ユ ) ヨ * # ■9 ラ リ ル レ ロ 1 2 3 4 50 ワ ヲ ン ゙ ゚ 6 7 8 9 0
Second digit1 2 3 4 5 6 7 8 9 0
Firs
t dig
it
1 ァ ィ ゥ ェ ォ a b c d e2 f g h i j3 k l m n o4 ッ p q r s t5 u v w x y6 z78 ャ ュ ョ ■90 ヮ 1 , .
Second digit1 2 3 4 5 6 7 8 9 0
Firs
t dig
it
1 " $ % ' + a b c d e2 , . : ; < f g h i j3 = > @ [ ] k l m n o4 ^ _ ‘ 1 ` 2 { | p q r s t5 } ~ 1 ̃ 2 u v w x y6 z ? ! ー /7 ¥ &8 ( ) * #9 1 2 3 4 50 6 7 8 9 0
<Lower Case Mode>
Katakana Mode<Upper Case Mode>
<Lower Case Mode>
Alphanumerics Mode
■ Toggle upper/lower case1 Appears when entering double-byte character.2 Appears when entering single-byte character.
NoteA space is entered by pressing key corresponding ●to a blank where no character is assigned.In kanji (hiragana) or katakana mode, " ● "゙ or " "゚ is entered by pressing after entering characters. Press once for " "゙, twice for " "゚.In number mode, press and hold ● to enter "+" (not available in S! Mail text field).
Capa_E_OI.indb 16 2009/07/28 10:18:04

19-17
Appendix
19
Key Assignments (NIKO-touch Mode)Kanji (Hiragana) Mode
Second digit1 2 3 4 5 6 7 8 9 0
Firs
t dig
it
1 あ い う え お . - @ _ 12 か き く け こ a b c 23 さ し す せ そ d e f 34 た ち つ て と っ g h i 45 な に ぬ ね の j k l 56 は ひ ふ へ ほ m n o 67 ま み む め も p q r s 78 や ゆ よ ゃ ゅ ょ t u v 89 ら り る れ ろ w x y z 90 わ を ん 、 。 ー ・ ! ? 0
Second digit1 2 3 4 5 6 7 8 9 0
Firs
t dig
it
1 ア イ ウ エ オ . - @ _ 12 カ キ ク ケ コ a b c 23 サ シ ス セ ソ d e f 34 タ チ ツ テ ト ッ g h i 45 ナ ニ ヌ ネ ノ j k l 56 ハ ヒ フ ヘ ホ m n o 67 マ ミ ム メ モ p q r s 78 ヤ ユ ヨ ャ ュ ョ t u v 89 ラ リ ル レ ロ w x y z 90 ワ ヲ ン 、 。 - ・ ! ? 0
Katakana ModeNote
Press ● [Mode] to toggle kanji (hiragana) and single-byte number modes.To switch to katakana mode: In kanji (hiragana) ●mode, [Menu] 1 byte characterTo toggle lower/upper case: Enter a character ●
A space is entered by pressing key corresponding ●to a blank where no character is assigned.Press ● once for " "゙, twice for " "゚. In kanji (hiragana) mode, enter characters before pressing
.In number mode, press and hold ● to enter "+" (not available in S! Mail text field).
Capa_E_OI.indb 17 2009/07/28 10:18:05

19-18
Appendix
19
Symbol List
&
Double-byte Symbol List
Single-byte Symbol List
To enter a space: ● P. 3-3
Capa_E_OI.indb 18 2009/07/28 10:18:06

19-19
Appendix
19
Character Code List
Capa_E_OI.indb 19 2009/07/28 10:18:08

19-20
Appendix
19
Capa_E_OI.indb 20 2009/07/28 10:18:11

19-21
Appendix
19
Capa_E_OI.indb 21 2009/07/28 10:18:13

19-22
Appendix
19
Capa_E_OI.indb 22 2009/07/28 10:18:16

Appendix
19-23
19
Capa_E_OI.indb 23 2009/07/28 10:18:20

19-24
Appendix
19
Weather Indicator ListIndicators and categories are subject to change ●without prior notice.
Weather
Clear (day)
Clear (night)
Cloudy
Rain
Snow
Thunderstorm –
Precipitation 0%-100%
Later
Occasionally
Pollen Level
Low
Moderate
High
Very High
Cherry Blossom
Blossoms Opening
Near Full Bloom
Peak Bloom
Past Peak
Fall Foliage
No Color
Moderate Color
Peak Color
Past Peak
UV Level
Low
Moderate
High
Very High
Typhoon
Formed
Approaching
Severe
Other Information
Heavy Rain
Strong Winds
Notifications
Capa_E_OI.indb 24 2009/07/28 10:18:29

Appendix
19-25
19
Memory ListData Folder Up to 3500 items (Up to 300 MB)
(One S! Appli corresponds up to 6 MB.)
Shared with S! Appli List ●Calendar Events Up to 1000 items
Phone Book Up to 1000 items
Messaging (SMS and S! Mail combined)
Incoming Mail Up to 3000 itemsSent/Unsent Up to 1000 items
Drafts Up to 10 items
Yahoo!Keitai
Saved Pages
[Yahoo! Keitai]Up to 20 items/750KB[PC Site Browser]Up to 20 items/1150KB
Bookmarks
[Yahoo! Keitai]Up to 100 items[PC Site Browser]Up to 100 items
URL History
[Yahoo! Keitai]URL Entry: Up to 20 itemsURL Access: Up to 100 items*[PC Site Browser]URL Entry: Up to 20 itemsURL Access: Up to 100 items*
Cache
[Yahoo! Keitai]750KB[PC Site Browser]1150KB
* The number of savable items varies depending on URL length.
Capa_E_OI.indb 25 2009/07/28 10:18:29

Appendix
19-26
19
Specifications931P
Weight (including battery) 128 g*Dimensions (closed) 50 x 108 x 18.5 mm*
Standby Time (closed)
3G 650 hours*GSM 390 hours*
Talk Time3G 220 minutes*Video Call 130 minutes*GSM 240 minutes*
TV Reception Time
Normal Mode 3.7 hours*ECO Mode 6.3 hours*
Charging TimeAC Charger 130 minutes*In-Car Charger 130 minutes*
Maximum Output
3G 0.25 WGSM 2.0 W
* Approximate valueValues above were calculated with battery installed. ●Talk Time is an average measured with a new, fully charged battery, with ●stable signals.Standby Time is an average measured with a new, fully charged battery, ●with handset closed without calls or operations, in Standby with stable signals.TV-Reception Time is an average measured using earphone/microphone, ●with stable signals.Talk Time and Standby Time may vary by environment (battery status, ●temperature, etc.).Talk Time and Standby Time may decrease when an S! Appli is active. ●
Battery
Voltage 3.7 VBattery Type Lithium-ionCapacity 800 mAhDimensions 45 x 4.5 x 37 mm*
* Approximate valueSpecifications subject to change without notice. ●
Capa_E_OI.indb 26 2009/07/28 10:18:29

19-27
Appendix
19
Index
Numerics
3G ......................................................... 2-11
B
Back LightDisplay .............................................. 18-5S! Appli ........................................... 18-21Video Calls ....................................... 2-13
BackupmicroSD Card .................................... 9-19S! Address Back-up .......................... 4-10
Bar Code Reader ................................. 12-11Basic Operations
Handset ..................................................xInternet ............................................ 14-6
Battery .................................................. 1-12Battery Level ............................... 1-11, 1-13Bluetooth® ............................................ 10-6Bluetooth® Passkey ............................... 10-8Bookmarks ............................................ 14-8Books folder ........................................... 9-3BookSurfing® .......................................... 7-8Brightness
Back Light ......................................... 18-5Camera ............................................... 6-5External Display ............................... 18-5Video Calls ..................................... 18-12
Browser (Initializing) .......................... 18-21
A
AC Charger ........................................... 1-15Access History
PC Site Browser ................................ 14-5Yahoo! Keitai .................................... 14-4
Account Details ........................... 1-30, 4-13Address (Adding/editing/deleting) ....... 13-8After-Sales Service ............................. 19-33Alarms .................................................. 12-6All Reset ............................................. 11-12Alternative Image................................... 2-6Answer Phone....................................... 2-15Answering Calls
Video Calls ......................................... 2-8Voice Calls .......................................... 2-5
AttachmentsAdding .............................................. 13-8Deleting ............................................ 13-8Opening/saving .............................. 13-13
Auto Answer ......................................... 18-7Auto Focus Lock ................................... 6-13Auto Save (Camera) .............................. 6-11Auto timer .............................................. 6-8Auto-sort ............................................ 13-16AV Output ........................................... 10-13
Capa_E_OI.indb 27 2009/07/28 10:18:29

19-28
Appendix
19
C
Cache Memory ...................................... 14-2Calculator ............................................. 12-8Calendar ............................................... 12-2Calendar Events .................................... 12-2Call Barring ........................................... 2-20Call Cost ............................................... 18-9Call Forwarding .................................... 2-17Call Log ................................................. 2-14Call Operations ..................................... 2-12Call Rejection
Calls without Caller ID ................... 11-11Unknown Callers ............................ 11-11
Call Restrictions.................................. 11-10Call Settings ......................................... 18-9Call Time ............................................... 18-9Call Waiting .......................................... 2-20Caller ID ......................................... 2-3, 2-21Camera [Section Contents] ..................... 6-1Center Access Code .............................. 1-28Channel Setting ...................................... 5-4Character Code (Kuten Code)
Character Code List ........................ 19-19Input Options ..................................... 3-5
Charge Limit ......................................... 18-9Charging Time ...................................... 1-12Clock Display
External Display ............................... 18-5Horizontal Open Position ............... 18-13Internal Display ................................ 18-4
Closing Clamshell ................................. 18-9
Color Scheme........................................ 18-3Confirming Settings ........................... 18-24Content Key ............................................ 9-5Context Forecast .................................... 3-6Continuous Shooting .............................. 6-7Conversion Candidates ........................... 3-6Conversion Methods............................... 3-6Cookies Setting/Deleting
Internet .......................................... 18-20Mobile Widget ................................ 18-15
Copy Protected Files ............................... 9-4Country/Region Code ........................... 2-10Customer Service................................ 19-34Customized Screen ............................... 1-24
D
Data Folder ............................................. 9-2Date & Time Settings ............................ 18-8Deleting
Calendar events ............................... 12-5Messages ........................................ 13-21Phone Book ........................................ 4-9S! Appli ............................................. 15-4
Delivery Report .................................... 13-9Dictionary ............................................. 12-9Digital TV [Section Contents] ................. 5-1Digital TV Settings .............................. 18-14Display .................................................. 1-10Display Indicators ................................. 1-10Display Settings .................................... 18-3
DownloadCustomized Screen ........................... 1-24Familiar Usability .............................. 1-24Fonts ................................................. 1-25From web pages ............................. 14-11Lifestyle-Appli ......................... 15-2, 16-3Music .................................................. 8-3S! Appli ............................................. 15-2Templates ....................................... 13-10Widgets .............................................. 7-3
Download Dictionary ............................ 3-10Drafts .................................................. 13-15Driving Mode ............................... 1-18, 18-7
E
e-Book Viewer ........................................ 7-8Earpiece Volume
Video Calls ......................................... 2-7Voice Calls .......................................... 2-5
Emergency Calls (110, 119, 118) ............ 2-4Emergency Positioning Request ............. 2-4Emission OFF Mode .............................. 1-18Event Indicators.................................... 1-21External Display........................... 1-10, 1-23
Capa_E_OI.indb 28 2009/07/28 10:18:29

19-29
Appendix
19
F
Familiar Usability .................................. 1-24Flash setting .................................. 6-5, 6-10Focus Setting ........................................ 6-13Folder/files ............................................ 9-14Font Settings ........................................ 1-25Font Size ............................................... 18-6Function List ......................................... 19-2
G
Global Roaming Service ....................... 2-10Graphic Mail ......................................... 13-5Group Settings (Phone Book) ................. 4-6GSM ...................................................... 2-11
H
HandsetMenus ............................................... 1-18Parts & Functions ............................... 1-4Power On/Off .................................... 1-16
Handset Security [Section Contents] .... 11-1Help (Text Entry) ..................................... 3-2Hide Call Logs/Address List .................. 11-8Hold
Video Calls ....................................... 2-12Voice Calls ........................................ 2-12
Horizontal View .................................. 18-13HTML messages .................................... 13-5
I
IC Card Lock .......................................... 16-5IC Transmission ..................................... 10-4IDD Prefix ............................................... 2-9Image quality (Camera) .......................... 6-5Image size (Camera) ............................... 6-5Incoming Call Logs ............................... 2-13Incoming Options (S! Mail)................. 18-19Infrared ................................................. 10-2Input Character Settings (SMS) .......... 18-19Inside Camera ......................................... 6-3Intelligent Auto ............................. 6-5, 6-10Internal Display ........................... 1-10, 18-3International Call
From abroad ..................................... 2-10From Japan ......................................... 2-9
International Setting ............................ 2-10
Internet [Section Contents] .................. 14-1
K
Key AssignmentsMode 1 (5-touch) ............................ 19-15Mode 2 (2-touch) ............................ 19-16Mode 3 (NIKO-touch) ...................... 19-17
Key Pad Dial Lock ................................. 11-7Key Tone ............................................... 18-2Keyguard .............................................. 11-3Kuten Code (Character Code) ............. 19-19
L
Language .............................................. 18-3License Information (S! Appli) .............. 15-2Lifestyle-Appli ...................................... 16-3Lock Message ....................................... 11-7Lock OFF at Open ................................. 11-6
Capa_E_OI.indb 29 2009/07/28 10:18:30

19-30
Appendix
19
M
Mail Group .......................................... 13-18Mail Security....................................... 11-10Main Menu ........................................... 1-18Making Calls
International Calls ..................... 2-9, 2-10Video Calls ......................................... 2-7Voice Calls .......................................... 2-2
Manner Mode ..................... 1-17, 2-12, 18-7Manufacture Number ......................... 18-20Memory List ........................................ 19-25Memory Manager (Internet) ............... 18-20Menu Icons ........................................... 18-4Menu Numbers ..................................... 1-19Messaging [Section Contents] .............. 13-1microSD Card ........................................ 9-16
Backup .............................................. 9-19Check ................................................ 9-21Formatting ........................................ 9-18Synchronizing ................................. 18-21
Missed Call Notification ....................... 2-19Mobile Widget ........................................ 7-2Mobile W-Speed ..................................... 5-2MULTI Key ...................................... 1-6, 1-29Multi Selector ............................................ixMusic folder............................................ 9-2Music Player [Section Contents] ............. 8-1My original set............................... 6-5, 6-12My Pictograms ............................... 9-2, 13-6
N
Network Information ........................... 1-16Network S! Appli .................................. 15-2New Messages
Receiving ........................................ 13-15Viewing .......................................... 13-10
Night modeCamera ............................................... 6-5Video Calls ..................................... 18-12
Normal Mode (Simple Menu) ............... 1-26Notepad ................................................ 12-8Notification Light Settings ................. 18-10
O
One-push Open Button ........................... 1-7Open For New ....................................... 18-3Open-to-Ans. Call.................................. 18-7Operator Names ................................... 2-11Optional Services ................................. 2-17Original Animation ............................... 9-13Osaifu-Keitai® [Section Contents] ......... 16-1Other Documents folder ......................... 9-3Outgoing Call Logs ............................... 2-13Outside Camera ...................................... 6-3
P
Passwords ............................................. 1-28
Passwords (Changing)Center Access Code .......................... 1-28Phone Password ............................... 11-2Security Code ................................... 2-21
PC Site Browser .................................... 14-2Access ............................................... 14-5Display Settings ............................. 18-19Memory Manager & Settings ......... 18-20Security Settings ............................ 18-20
Personal Data Lock ............................... 11-4Phone Book [Section Contents] .............. 4-1Phone Password ................................... 1-28
Changing .......................................... 11-2Photo light setting ........................ 6-5, 6-10Photo mode ............................................ 6-5Pictographs ............................................. 3-4Pictures (Still Images)
Capturing ........................................... 6-6Editing .............................................. 9-12
Pictures folder ........................................ 9-2PIN/PIN2 ................................................. 1-3
Changing .......................................... 11-2PIN Authentication ........................... 11-2PIN Lock & Cancellation (PUK) ......... 11-3
Play Background ..................................... 8-7Play List ................................................ 8-10Play mode setting................................... 8-6Predictive Candidates............................. 3-6Privacy Key Lock ................................... 11-4Private Menu ........................................ 1-25PUK/PUK2 ...................................... 1-3, 11-3
Capa_E_OI.indb 30 2009/07/28 10:18:30

19-31
Appendix
19
Q
QR Code .............................................. 12-11Quality (Camera)..................................... 6-5Quick Open Menu ............................... 19-14
R
Recipients (Adding/editing/deleting) ... 13-8Referer Information ............................ 18-20Remote Lock ......................................... 16-5Remote Monitoring ................................ 2-8Reset
All Reset ......................................... 11-12Browser Settings ............................ 18-21Settings .......................................... 11-12Total Call Charge/Time ..................... 18-9TV Settings ..................................... 18-15
Ring Songs&Tones folder ....................... 9-2Ring Time (Answer Phone).................... 2-16Ring Time Settings .............................. 11-11Ringer Volume ...................................... 18-2Ringtone ........................................ 9-8, 18-2Ringtone Duration (Message) ............... 18-2Root Certificates ................................ 18-21
S
S! Addressbook Back-up....................... 4-10S! Appli [Section Contents] .................. 15-1S! GPS Navi [Section Contents] ............ 17-1S! Information Channel .......................... 7-6
S! Mail .................................................. 13-2Creating/sending .............................. 13-4Mail Notice ..................................... 13-11Settings .......................................... 18-19Universal Settings .......................... 18-18
S! Quick News ........................................ 7-4Settings .......................................... 18-16
SaveAlarms .............................................. 12-7Calendar Events ............................... 12-2Camera ............................................. 6-11Notepad ........................................... 12-8Phone Book ............................. 4-3, 18-11S! Information Channel ...................... 7-6S! Quick News .................................... 7-4Shortcut ............................................ 1-22User's Dictionary .............................. 3-10
Saved Pages .......................................... 14-8Script .................................................. 18-20Scroll Unit ........................................... 18-19SD Audio ................................................. 8-2Secret Data Only ................................... 11-9Secret Mail Setting ............................... 11-9Secret Mode ......................................... 11-9Secure Remote Lock ............................. 11-6Security
Data Folder ....................................... 9-14Internet .......................................... 18-20S! Appli ............................................. 15-4
Security Code ....................................... 1-28Security Functions ................................ 11-2Server Mail ......................................... 13-14
Settings [Section Contents] .................. 18-1Shikkari Talk ........................................... 2-5Shortcuts .............................................. 1-22Shutter sound ....................................... 6-11Side-keys Guard ................................... 11-8Signal Strength ..................................... 1-10Simple Menu ......................................... 1-26SMS ....................................................... 13-2
Creating/sending .............................. 13-7Settings .......................................... 18-19Universal Settings .......................... 18-18
Snooze .................................................. 12-7SoftBank Utility Software .................. 10-11Softkeys .....................................................ixSoftware Update ................................ 19-12Sort (Messages) .................................. 13-21Spam Filter ......................................... 13-17Speaker ON/OFF ................................... 2-12SSL ........................................................ 14-3Status Indicators .................................. 1-10Still Images (Picture)
Capturing ........................................... 6-6Editing .............................................. 9-12
Streaming ........................................... 14-12Symbols .................................................. 3-4
Symbol List ..................................... 19-18
Capa_E_OI.indb 31 2009/07/28 10:18:30

19-32
Appendix
19
T
Tasks ..................................................... 12-5Templates (Graphic Mail)...................... 13-5Text Entry [Section Contents] ................. 3-1Time Correction .................................... 18-8Timer Lock at Close .............................. 11-6TLS ........................................................ 14-3Trimming (Editing Still Images) ............ 9-13
U
URL HistoryPC Site Browser ................................ 14-5Yahoo! Keitai .................................... 14-4
USB ..................................................... 10-11User Mode (Manner Mode) .................. 18-7User's Dictionary .................................. 3-10USIM Card ............................................... 1-2USIM Card Phone Book .......................... 4-3USIM PINs ............................................... 1-3
V
VibratorIncoming alert .................................. 18-2S! Appli ........................................... 18-21
Videos (Recording) ................................. 6-8Videos folder .......................................... 9-3View Blind ............................................ 1-30Viewfinder
Camera ............................................... 6-4Video Camera ..................................... 6-4
Voice Announce .................................. 12-10Voice Dial .............................................. 4-14Voice Mail ............................................. 2-18Voice Recorder.................................... 12-10Volume
Ringtone ........................................... 18-2S! Appli ........................................... 18-21Video Calls ......................................... 2-7Voice Calls .......................................... 2-5
W
WallpaperExternal Display ............................... 18-5Horizontal Open Position ............... 18-13Internal Display ................................ 18-3
Warning Messages (PC Site Browser) ... 18-19Warranty ............................................. 19-33Weather Indicator ................................... 7-7White balance ................................ 6-5, 6-11Widgets .................................................. 7-2WMA Files ............................................... 8-2World Clock .......................................... 18-8
Y
Yahoo! Keitai ........................................ 14-2Access ............................................... 14-3Display Settings ............................. 18-19Memory Manager & Settings ......... 18-20Security Settings ............................ 18-20
Z
Zoom....................................................... 6-8
Capa_E_OI.indb 32 2009/07/28 10:18:31

Appendix
19-33
19
Warranty & ServiceWarranty
Warranty is provided when you purchase a 931P.Check name of distributor and date of purchase. ●Read through contents and keep in a safe place. ●The warranty term is described in the warranty. ●
SoftBank is not liable for any damage resulting from use of this product.
After-Sales Service
See "Troubleshooting" ( P.19-10) before contacting SoftBank for service or repairs. If you cannot find solutions or solve problems, contact SoftBank Mobile Customer Center, Customer Assistance ( P.19-34) in your subscription area and provide a detailed description of the problem.
Repairs within warranty are performed under terms and conditions ●described.Out of warranty, any repairs are performed upon request at subscriber’s ●expense.
Capa_E_OI.indb 33 2009/07/28 10:18:31

19-34
Appendix
19
Customer ServiceIf you have questions about SoftBank handsets or services, please call General Information.For repairs, please call Customer Assistance.Check phone number before you dial.
Call these numbers toll free from landlines.
Subscription Area Service Center Toll Free Number
Hokkaido, Aomori, Akita, Iwate, Yamagata, Miyagi,Fukushima, Niigata, Tokyo, Kanagawa, Chiba, Saitama,Ibaraki, Tochigi, Gunma, Yamanashi, Nagano, Toyama,Ishikawa, Fukui
General Information 0088-240-157
Customer Assistance 0088-240-113
Aichi, Gifu, Mie, ShizuokaGeneral Information 0088-241-157
Customer Assistance 0088-241-113
Osaka, Hyogo, Kyoto, Nara, Shiga, WakayamaGeneral Information 0088-242-157
Customer Assistance 0088-242-113
Hiroshima, Okayama, Yamaguchi, Tottori, Shimane,Tokushima, Kagawa, Ehime, Kochi, Fukuoka, Saga, Nagasaki,Oita, Kumamoto, Miyazaki, Kagoshima, Okinawa
General Information 0088-250-157
Customer Assistance 0088-250-113
SoftBank Mobile Customer Center
From a SoftBank handset, dial toll free at157 for General Information or
113 for Customer Assistance
SoftBank Mobile Global Call Center
From outside Japan, dial +81-3-5351-3491(Please take care to dial the correct number. International
charges will apply to this call.)
Capa_E_OI.indb 34 2009/07/28 10:18:31

Please help the mobile industry maintain high environmental standards. Recycle your oldhandsets, batteries and charger units (all manufacturers and brands). Before you recycle, please remember these important points:◦Handsets, batteries and chargers submitted for recycling cannot be returned.◦Always erase all data recorded on old handsets (Phone Book entries, call records, mail, etc.) before recycling.
SoftBank 931P User Guide
March 2012, Third Edition
SOFTBANK MOBILE Corp.
For additional information, please visit a SoftBank shop.
Model: SoftBank 931PManufacturer: Panasonic Mobile Communications Co., Ltd.
S0609-0
H3_Capa_E.indd 3 2012/03/06 11:00:27