python gui programming with tkinter
TRANSCRIPT

Python GUI Programming with TkinterSecond Edition
Design and build functional and user-friendly GUI applications
Alan D. Moore
BIRMINGHAM—MUMBAI
Python GUI Programming with TkinterSecond Edition
Copyright © 2021 Packt Publishing
All rights reserved. No part of this book may be reproduced, stored in a retrieval system, or transmitted in any form or by any means, without the prior written permission of the publisher, except in the case of brief quotations embedded in critical articles or reviews.
Every effort has been made in the preparation of this book to ensure the accuracy of the information presented. However, the information contained in this book is sold without warranty, either express or implied. Neither the author, nor Packt Publishing or its dealers and distributors, will be held liable for any damages caused or alleged to have been caused directly or indirectly by this book.
Packt Publishing has endeavored to provide trademark information about all of the companies and products mentioned in this book by the appropriate use of capitals. However, Packt Publishing cannot guarantee the accuracy of this information.
Producer: Tushar Gupta Acquisition Editor – Peer Reviews: Suresh Jain Project Editor: Namrata Katare Content Development Editor: Lucy Wan Copy Editor: Sa�s Editing Technical Editor: Karan Sonawane Proofreader: Sa�s Editing Indexer: Subalakshmi Govindhan Presentation Designer: Ganesh Bhadwalkar
First published: May 2018 Second edition: October 2021
Production reference: 1261021
Published by Packt Publishing Ltd. Livery Place 35 Livery Street Birmingham B3 2PB, UK.
ISBN 978-1-80181-592-5
www.packt.com

Contributors
About the authorAlan D. Moore has been coding in Python since 2005. He lives in Franklin, Tennessee, where he develops database apps for the local government. His technical interests include Python, JavaScript, Linux, and analog electronics. In his free time, he publishes coding videos on the YouTube channel Alan D Moore Codes, makes music, builds guitar effects, volunteers at his church and scout troop, and helps his wife raise their �ve children.
Profound thanks to Lucy and Alejandro, without whom this book would be riddled with errors; to Cara and the kids for their support and encouragement; and to the Python and Tcl/Tk communities for providing such great software. God bless you all!
About the reviewerAlejandro Rodas de Paz is a computer engineer from Seville, Spain. He has developed several professional and academic Python projects, from arti�cialintelligence algorithms to DevOps scripting.
Prior to this publication, Alejandro wrote the Packt titles Python Game Development by Example and Tkinter GUI Application Development Cookbook. He also collaborated as a technical reviewer on the book Tkinter GUI Application Development Hotshot.
I would like to thank and dedicate this work to my sister Belen, whose next year will be the beginning of a long and joyful journey. Wish you all the best on this next chapter of life.
[ v ]
Table of ContentsPreface xviiChapter 1: Introduction to Tkinter 1
Introducing Tkinter and Tk 2Choosing Tkinter 2Installing Tkinter 3
Installing Python 3.9 on Windows 3Installing Python 3 on macOS 4Installing Python 3 and Tkinter on Linux 4
Introducing IDLE 4Using the shell mode of IDLE 5Using the editor mode of IDLE 5IDLE as a Tkinter example 6
Creating a Tkinter Hello World 7An overview of basic Tkinter 9
Building a GUI with Tkinter widgets 10Arranging our widgets with geometry managers 14Making the form actually do something 19Handling data with Tkinter control variables 21
Using control variables in a callback function 26The importance of control variables 28
Summary 28Chapter 2: Designing GUI Applications 29
Analyzing a problem at ABQ AgriLabs 29Assessing the problem 30Gathering information about the problem 30
Interviewing the interested parties 31Analyzing what we've found out 33
Information from the data originators 34
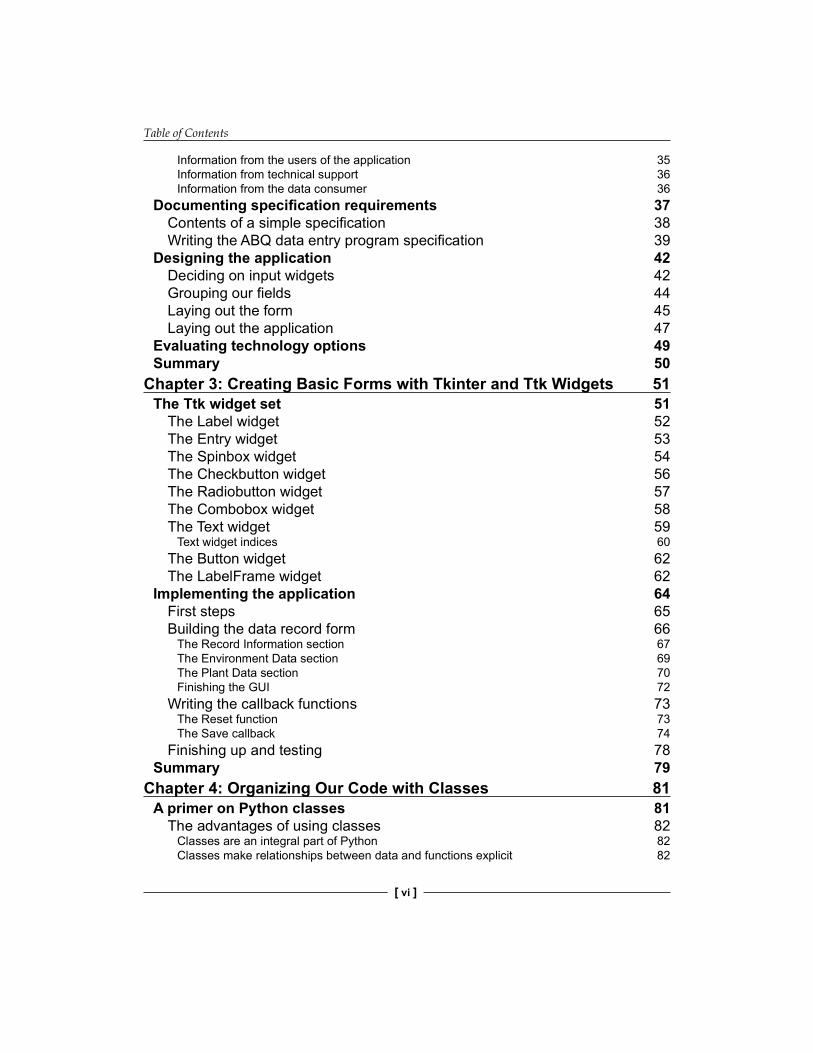
Table of Contents
[ vi ]
Information from the users of the application 35Information from technical support 36Information from the data consumer 36
Documenting speci cation requirements 37Contents of a simple speci cation 38Writing the ABQ data entry program speci cation 39
Designing the application 42Deciding on input widgets 42Grouping our elds 44Laying out the form 45Laying out the application 47
Evaluating technology options 49Summary 50
Chapter 3: Creating Basic Forms with Tkinter and Ttk Widgets 51The Ttk widget set 51
The Label widget 52The Entry widget 53The Spinbox widget 54The Checkbutton widget 56The Radiobutton widget 57The Combobox widget 58The Text widget 59
Text widget indices 60The Button widget 62The LabelFrame widget 62
Implementing the application 64First steps 65Building the data record form 66
The Record Information section 67The Environment Data section 69The Plant Data section 70Finishing the GUI 72
Writing the callback functions 73The Reset function 73The Save callback 74
Finishing up and testing 78Summary 79
Chapter 4: Organizing Our Code with Classes 81A primer on Python classes 81
The advantages of using classes 82Classes are an integral part of Python 82Classes make relationships between data and functions explicit 82
Table of Contents
[ vii ]
Classes help create reusable code 83Syntax of class creation 83
Attributes and methods 83Magic attributes and methods 86Public, private, and protected members 88
Inheritance and subclasses 90Using classes with Tkinter 91
Improving Tkinter classes 91Creating compound widgets 93Building encapsulated components 95
Subclassing Tk 97Rewriting our application using classes 100
Adding a StringVar to the Text widget 100Passing in a variable 101Synchronizing the widget to the variable 101Synchronizing the variable to the widget 102
Creating a more advanced LabelInput() 103Creating a form class 106Creating an application class 112
Summary 114Chapter 5: Reducing User Error with Validation and Automation 117Validating user input 117
Strategies to prevent data errors 118Validation in Tkinter 119
The validate argument 120The validatecommand argument 120The invalidcommand argument 122
Creating validated widget classes 123Creating a Date eld 125
Implementing validated widgets in our GUI 129Introducing the power of multiple inheritance 129Building a validating mixin class 132Building validating input widgets with ValidatedMixin 136
Requiring data 136Creating a Date widget 137A better Combobox widget 138A range-limited Spinbox widget 140Validating Radiobutton widgets 144
Updating our form with validated widgets 146Implementing validation interaction between form widgets 149
Dynamically updating the Spinbox range 149Dynamic disabling of elds 154
Displaying errors 156Preventing form submission on error 157
Table of Contents
[ viii ]
Automating input 159Date automation 160Automating Plot, Lab, Time, and Technician 161
Summary 162Chapter 6: Planning for the Expansion of Our Application 163
Separating concerns 164The MVC pattern 164
What is a model? 165What is a view? 165What is a controller? 166
Why complicate our design? 166Structuring our application directory 167
Basic directory structure 167The abq_data_entry.py le 168The README.rst le 169Populating the docs folder 170Making a Python package 170
Splitting our application into multiple les 172Creating the models module 172Moving the widgets 179Moving the views 180
Removing redundancy in our view logic 181Using custom events to remove tight coupling 185
Creating the application le 186Running the application 188
Using version control software 189A super-quick guide to using Git 189Initializing and con guring a Git repository 190Adding and committing code 190Viewing and using our commits 191
Summary 192Chapter 7: Creating Menus with Menu and Tkinter Dialogs 193
Solving problems in our application 194Planning solutions to the issues 194
Implementing Tkinter dialogs 196Error dialogs with the Tkinter messagebox 196Showing error dialogs in ABQ Data Entry 199Using ledialog 201Using simpledialog and creating a custom dialog 204
Creating a Login dialog using simpledialog 205Incorporating the LoginDialog in our class 208
Designing the application menu 211The Tkinter Menu widget 211
Table of Contents
[ ix ]
Using Checkbutton and Radiobutton items 213Implementing the ABQ application menu 215
Adding a Help menu 216Adding a File menu 217Adding a settings menu 220Finishing the menu 222
Persisting settings 223Building a model for settings persistence 224Using the settings model in our application 228
Summary 230Chapter 8: Navigating Records with Treeview and Notebook 231Implementing read and update in the model 231
Adding read and update to the CSVModel class 232Implementing get_all_records() 233Implementing get_record() 235Adding update capability to save_record() 236
The Ttk Treeview 237Anatomy of a Treeview 238Building a le browser 239Creating and con guring a Treeview 240Populating a Treeview with data 242Sorting Treeview records 244Using Treeview virtual events 247
Implementing a record list with Treeview 248Creating the RecordList class 249Con guring a Treeview widget 250Adding a scrollbar for the Treeview 252Populating the Treeview 253
Adding the record list to the application 254Modifying the record form for read and update 255
Adding a current record property 255Adding a label to show what is being edited 255Adding a load_record() method 256
Updating the application layout 257The Ttk Notebook widget 259Adding a notebook to our application 261
Adding and updating application callbacks 262The _show_recordlist() method 263The _populate_recordlist() method 264The _new_record() method 265The _open_record() method 266The _on_save() method 267
Main menu changes 267Testing our program 268
Summary 269
Table of Contents
[ x ]
Chapter 9: Improving the Look with Styles and Themes 271Working with images in Tkinter 272
Tkinter PhotoImage 272PhotoImage and variable scope 273
Using Pillow for extended image support 274Adding the company logo to ABQ Data Entry 277
Dealing with the image path problem 278Setting a window icon 281Adding icons to buttons and menus 282
Using BitmapImage 286Styling Tkinter widgets 287
Widget color properties 287Using widget properties on the MainMenu 288
Styling widget content with tags 291Styling our record list with tags 294
Working with fonts in Tkinter 297Con guring Tkinter fonts 297Con guring fonts with strings and tuples 298The font module 299
Giving users font options in ABQ Data Entry 302Styling Ttk widgets 305
TTk styling breakdown 306Exploring a Ttk widget 307Using themes 312
Adding some color to ABQ Data Entry 313Adding styles to individual form widgets 316Fixing the error colors 318Styling input widgets on error 319
Setting themes 321Building a theme selector 321
Summary 325Chapter 10: Maintaining Cross-Platform Compatibility 327Writing cross-platform Python 327Filenames and le paths across platforms 328
Path separators and drives 328Case sensitivity 331Symbolic links 332Path variables 333
Inconsistent library and feature support 334Python's platform-limited libraries 334Checking low-level function compatibility 335The dangers of the subprocess module 336
Text le encodings and formats 336Graphical and console modes 337
Table of Contents
[ xi ]
Writing code that changes according to the platform 338Writing cross-platform Tkinter 341Tkinter version di�erences across platforms 341Application menus across platforms 342
Menu widget capabilities 342Menu guidelines and standards 346Menus and accelerator keys 347
Cross-platform fonts 347Cross-platform theme support 348Window zoomed state 348
Improving our application's cross-platform compatibility 349Storing preferences correctly 349Specifying an encoding for our CSV le 351Making platform-appropriate menus 351
Preparing our MainMenu class 351Adding accelerators 355Building the Windows menu 357Building the Linux menu 359Building the macOS menu 360Creating and using our selector function 363
Summary 365Chapter 11: Creating Automated Tests with unittest 367Automated testing basics 367
A simple unit test 368The unittest module 370
Writing a test case 371TestCase assertion methods 373Fixtures 374Using Mock and patch 375Running multiple unit tests 377
Testing Tkinter code 377Managing asynchronous code 378Simulating user actions 378
Specifying an event sequence 379Managing focus and grab 380Getting widget information 381
Writing tests for our application 381Testing the data model 381Testing le reading in get_all_records() 383Testing le saving in save_record() 385More tests on the models 387
Testing our Application object 387Testing our widgets 392
Unit testing the ValidatedSpinbox widget 393
Table of Contents
[ xii ]
Integration testing the ValidatedSpinbox widget 395Testing our mixin class 400
Summary 402Chapter 12: Improving Data Storage with SQL 403
PostgreSQL 404Installing and con guring PostgreSQL 404Con guring PostgreSQL using the GUI utility 405Con guring PostgreSQL using the command line 405
Modeling relational data 406Primary keys 406
Using surrogate primary keys 407Normalization 408
First normal form 409Second normal form 410Third normal form 411More normalization forms 411
Entity-relationship diagrams 412Assigning data types 414
Creating the ABQ database 415Creating our tables 415
Creating the lookup tables 415The lab_checks table 417The plot_checks table 417
Creating a view 419Populating the lookup tables 420
Connecting to PostgreSQL with psycopg2 420psycopg2 basics 421Parameterized queries 423Special cursor classes 425
Integrating SQL into our application 426Creating a new model 426
Saving data 431Getting the current seed sample for the plot 434
Adjusting the Application class for the SQL backend 435Implementing SQL logins 435Updating the Application._on_save() method 437Removing le-based code 438
Adjusting the DataRecordForm for SQL data 438Reordering elds 438Fixing the load_record() method 439Improving auto- ll 440
Updating the RecordList for the SQLModel 441We're done! 444
Summary 444

Table of Contents
[ xiii ]
Chapter 13: Connecting to the Cloud 447HTTP using urllib 447
HTTP transaction fundamentals 448HTTP status codes 448
Basic downloading with urllib.request 449Generating POST requests 450
Downloading weather data to ABQ Data Entry 451Creating a weather data model 451Parsing the XML weather data 453Implementing weather data storage 456
Adding the GUI elements for weather download 458RESTful HTTP using requests 461
Understanding RESTful web services 461The Python requests library 462
Installing and using requests 462Interacting with authenticated sites using Session 463The requests.Response object 465
Implementing a REST backend 466The authenticate() method 468The upload_ le() method 470The check_ le() method 470The get_ le() method 471
Integrating REST upload into the application 471Creating a CSV extract 472Creating the upload callback 473Finishing up 476
SFTP using paramiko 478Setting up SSH services for testing 478Installing and using paramiko 479
Using paramiko 479Inspecting our connection 481Using SFTP 481
Implementing an SFTP model 482Uploading les 485Checking a le's existence 486
Using SFTPModel in our application 487Finishing up 490
Summary 491Chapter 14: Asynchronous Programming with Thread and Queue 493Tkinter's event queue 494
Event queue control 494The update() methods 494The after() methods 495

Table of Contents
[ xiv ]
Common uses of event queue control 496Smoothing out display changes 496Mitigating GUI freezes 497
Running code in the background with threads 500The threading module 500
Tkinter and thread safety 502Converting our network functions to threaded execution 503
Using the threaded uploader 505Passing messages using a queue 506The Queue object 506Using queues to communicate between threads 508
Adding a communication queue to our threaded uploader 510Creating a communications protocol 511Sending messages from the uploader 513Handling queue messages 514
Using locks to protect shared resources 516Understanding the Lock object 516Using a Lock object to prevent concurrent uploads 518
Threading and the GIL 518Summary 519
Chapter 15: Visualizing Data Using the Canvas Widget 521Drawing and animation with Tkinter's Canvas 521
Drawing on the Canvas 522Rectangles and squares 522Ovals, circles, and arcs 524Lines 525Polygons 526Text 526Images 527Tkinter widgets 527Canvas items and state 528
Canvas object methods 528Scrolling the Canvas 530Animating Canvas objects 533Setting up the playing eld 533Setting our players 534Animating the racers 535Running the game loop and detecting a win condition 539
Creating simple graphs using Canvas 542Creating the model method 543Creating the chart view 544Updating the application 549
Advanced graphs using Matplotlib 551Data model method 551

Table of Contents
[ xv ]
Creating the bubble chart view 552Updating the Application class 555
Summary 558Chapter 16: Packaging with setuptools and cxFreeze 559
Creating distributable packages with setuptools 559Preparing our package for distribution 560Creating a requirements.txt le 560Creating a pyproject.toml le 562Adding a license le 563Making our package executable 564
Con guring a setup.py script 565Basic metadata arguments 566Packages and dependencies 567Adding extra les 569De ning commands 570Testing the con guration 571
Creating and using source distributions 571Testing our source distribution 572
Building a wheel distribution 573Creating executables with cx_Freeze 575
First steps with cx_Freeze 575The build_exe options 577Including external les 578Building executables 580
Cleaning up the build 580Building Windows executables with cx_Freeze 581Building a Windows installer le 582
Building macOS executables with cx_Freeze 586Building macOS application bundles 586Building macOS .dmg les 587
588Summary�Appendices 589A: A Quick Primer on reStructuredText 591B: A Quick SQL Tutorial 603Other Books You May Enjoy 619Index 625

[ xvii ]
PrefaceWriting a book involves much more than the application of grammar and punctuation rules. In the same way, developing an application requires more than a knowledge of programming languages and library APIs. A mere mastery of syntax rules and function calls is not in itself suf�cient for designing applications thatempower users to perform work, safeguard valuable data, and produce awlessoutput. As programmers, we also need to be able to interpret user requests and expectations into effective interface designs and pick the best technologies to implement them. We need to be able to organize large code bases, test them, and maintain them in a way that keeps them manageable and free from careless errors.
This book aims to be much more than a reference manual for a particular GUI toolkit. As we walk through a �ctitious workplace scenario, you will get a taste of what it'slike to be an application programmer in a small of�ce environment. In addition tolearning Tkinter and a few other useful libraries, you will learn many of the skills you need to move from being a writer of short scripts to a writer of fully-featured graphical applications. By the time you've �nished the book, you should feelcon�dent that you can develop a simple but useful data-oriented application for aworking environment.
Who this book is forThis book is for beginners who have learned the basics of Python but haven't writtenmuch beyond simple scripts. We'll walk you step-by-step through designing andcreating a larger application, and we'll introduce you to skills that will help youadvance as a programmer.
It's also aimed at those who have used Python for data science, web development,or system administration, but who now want to branch out into creating GUI applications. We'll go through the knowledge and skills required to create local GUIapplications.

Preface
[ xviii ]
Finally, this book may also be useful for experienced Python programmers who just want to learn Tkinter, as much of the book details the �ner points of using theTkinter library.
What this book coversChapter 1, Introduction to Tkinter, introduces you to the basics of the Tkinter library and walks you through creating a basic Tkinter application. It will also introduce you to IDLE as an example of a Tkinter application.
Chapter 2, Designing GUI Applications, goes through the process of turning a set of user requirements into a design that we can implement.
Chapter 3, Creating Basic Forms with Tkinter and Ttk Widgets, shows you how to create a basic data entry application that appends entered data to a CSV �le.
Chapter 4, Organizing Our Code with Classes, will introduce you to general object-oriented programming techniques as well as Tkinter-speci�c uses for classes that willmake our GUI programs more maintainable and understandable.
Chapter 5, Reducing User Error with Validation and Automation, demonstrates how to automatically populate and validate data in our form's inputs.
Chapter 6, Planning for the Expansion of Our Application, familiarizes you with how to break a single-�le script intelligently into multiple �les, how to build a Pythonmodule that you can import, and how to separate the concerns of a large codebase to make it more manageable.
Chapter 7, Creating Menus with Menu and Tkinter Dialogs, outlines the creation of a main menu using Tkinter. It will also show the use of several built-in dialog types to implement common menu functionality.
Chapter 8, Navigating Records with Treeview and Notebook, details the construction of a data record navigation system using the Ttk Treeview and Notebook, as well as the conversion of our application from append-only to full read, write, and update capabilities.
Chapter 9, Improving the Look with Styles and Themes, informs you of how to change the colors, fonts, and widget styles of your application, and how to use them to make your application more usable and attractive.
Chapter 10, Maintaining Cross-Platform Compatibility, goes over Python and Tkinter techniques to keep your application running smoothly across Windows, macOS, and Linux systems.
Preface
[ xix ]
Chapter 11, Creating Automated Tests with unittest, discusses how to verify your code with automated unit tests and integration tests.
Chapter 12, Improving Data Storage with SQL, takes you through the conversion of our application from CSV at-�le storage to SQL database storage. You'll learn all aboutSQL and relational data models as well.
Chapter 13, Connecting to the Cloud, covers how to work with network resources such as HTTP servers, REST services, and SFTP servers. You'll learn to interact with theseservices to download and upload data and �les.
Chapter 14, Asynchronous Programming with Thread and Queue, explains how to use asynchronous and multithreaded programming to keep our application responsive during long-running processes.
Chapter 15, Visualizing Data Using the Canvas Widget, teaches you how to work with the Tkinter Canvas widget to create visualizations and animations. You'll also learnhow to integrate Matplotlib charts and build a simple game.
Chapter 16, Packaging with setuptools and cxFreeze, explores preparing your Python application for distribution as a Python package or a standalone executable.
To get the most out of this bookThis book expects that you know the basics of Python 3. You should know how to write and run simple scripts using built-in types and functions, how to de�ne yourown functions, and how to import modules from the standard library.
You can follow this book on a computer running a current version of Microsoft Windows, Apple macOS, or a distribution of GNU/Linux. Ensure that you have Python 3 and Tcl/Tk installed (Chapter 1, Introduction to Tkinter, contains instructions for Windows, macOS, and Linux) and that you have a code editing environment with which you are comfortable (we suggest IDLE since it comes with Python and uses Tkinter. We do not recommend the use of Jupyter, Spyder, or similar environments aimed at analytical Python rather than application development). In the later chapters, you'll need access to the internet so that you can install Pythonpackages and the PostgreSQL database.
Download the example code lesThe code bundle for the book is also hosted on GitHub at https://github.com/PacktPublishing/Python-GUI-Programming-with-Tkinter-2E. We also have other code bundles from our rich catalog of books and videos available at https://github.com/PacktPublishing/. Check them out!
Preface
[ xx ]
Download the color imagesWe also provide a PDF �le that has color images of the screenshots/diagramsused in this book. You can download it here: https://static.packt-cdn.com/downloads/9781801815925_ColorImages.pdf.
Conventions usedThere are a number of text conventions used throughout this book.
CodeInText: Indicates code words in text, database table names, folder names, �lenames, �le extensions, pathnames, dummy URLs, user input, and Twitterhandles. For example: "Save the code in solve_the_worlds_problems.py and execute it by typing python solve_the_worlds_problems.py at a terminal prompt."
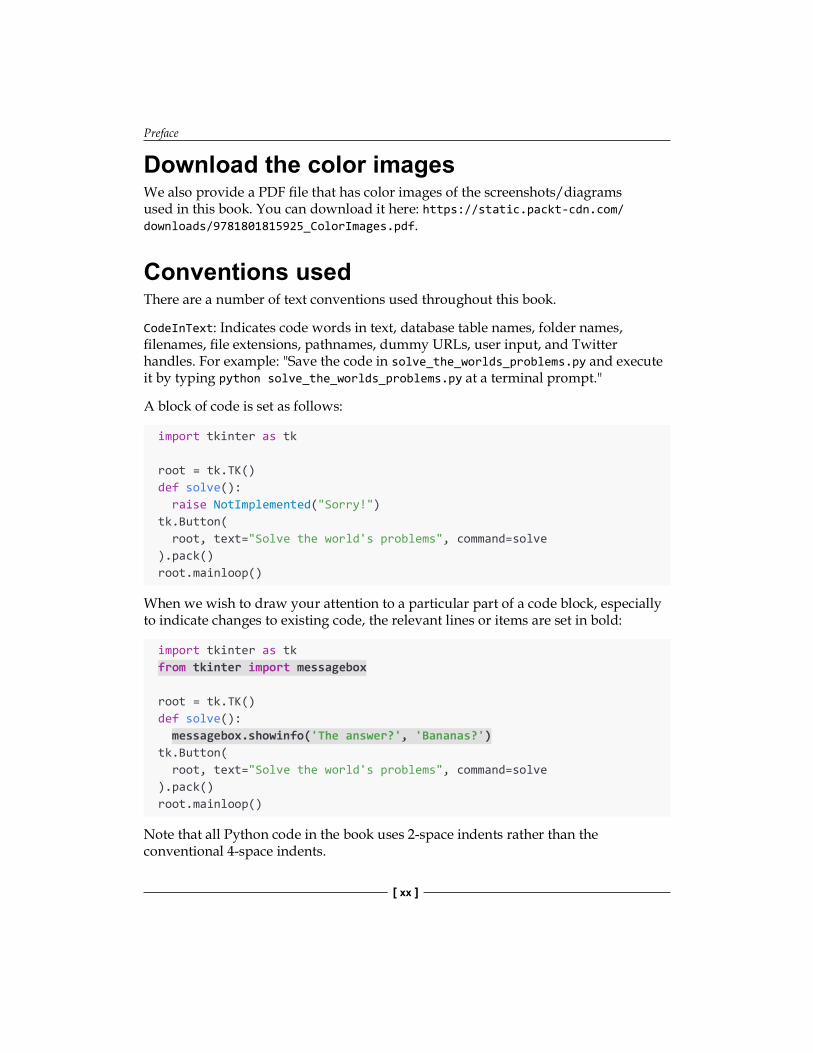
A block of code is set as follows:
import tkinter as tk
root = tk.TK()def solve(): raise NotImplemented("Sorry!")tk.Button( root, text="Solve the world's problems", command=solve).pack()root.mainloop()
When we wish to draw your attention to a particular part of a code block, especially to indicate changes to existing code, the relevant lines or items are set in bold:
import tkinter as tkfrom tkinter import messagebox
root = tk.TK()def solve(): messagebox.showinfo('The answer?', 'Bananas?')tk.Button( root, text="Solve the world's problems", command=solve).pack()root.mainloop()
Note that all Python code in the book uses 2-space indents rather than the conventional 4-space indents.

Preface
[ xxi ]
Any command-line input or output is written with a $ indicating the prompt, as follows:
$ mkdir Bananas$ cp plantains.txt Bananas/
Command line input intended for the Python shell or REPL is printed with a prompt of >>>, like so:
>>> print('This should be run in a Python shell')'This should be run in a Python shell'
Expected output from the shell is printed on a line with no prompt.
Bold: Indicates a new term, an important word, or words that you see on the screen, for example, in menus or dialog boxes. For example: "Select System info from the Administration panel."
Executing Python and pipWhen we need to instruct the reader to execute a Python script in this book, we indicate a command line such as the following:
$ python myscript.py
Depending on your operating system or Python con�guration, the python command may execute Python 2.x rather than Python 3.x. You can verify this by running the following command:
$ python --versionPython 3.9.7
Warnings or important notes appear like this.
Tips and tricks appear like this.
Preface
[ xxii ]
If this command outputs Python 2 rather than 3 on your system, you will need to alter any python commands so that your code is executed in Python 3. Typically, that means using the python3 command instead, like so:
$ python3 myscript.py
The same caveat applies to the pip command used to install libraries from the Python Package Index. You may need to use the pip3 command instead to install libraries to your Python 3 environment, for example:
$ pip3 install --user requests
Get in touchFeedback from our readers is always welcome.
General feedback: Email [email protected], and mention the book's title in thesubject of your message. If you have questions about any aspect of this book, please email us at [email protected].
Errata: Although we have taken every care to ensure the accuracy of our content, mistakes do happen. If you have found a mistake in this book, we would be grateful if you would report this to us. Please visit http://www.packtpub.com/submit-errata, selecting your book, clicking on the Errata Submission Form link, and entering the details.
Piracy: If you come across any illegal copies of our works in any form on the Internet, we would be grateful if you would provide us with the location address or website name. Please contact us at [email protected] with a link to the material.
If you are interested in becoming an author: If there is a topic that you have expertise in and you are interested in either writing or contributing to a book, please visit http://authors.packtpub.com.
ReviewsPlease leave a review. Once you have read and used this book, why not leave a review on the site that you purchased it from? Potential readers can then see and use your unbiased opinion to make purchase decisions, we at Packt can understand what you think about our products, and our authors can see your feedback on their book. Thank you!
For more information about Packt, please visit packtpub.com.

Preface
[ xxiii ]
Share Your ThoughtsOnce you've read Python GUI Programming with Tkinter, Second Edition, we'd love tohear your thoughts! Please click here to go straight to the Amazon review page for this book and share your feedback.
Your review is important to us and the tech community and will help us make sure we're delivering excellent quality content.

[ 1 ]
1Introduction to Tkinter
Welcome, Python coder! If you've learned the basics of Python and want to startdesigning powerful GUI applications, this book is for you.
By now, you have no doubt experienced the power and simplicity of Python. Perhaps you've written web services, performed data analysis, or administeredservers. Perhaps you've written a game, automated routine tasks, or simply playedaround with code. But now you're ready to tackle the GUI.
With so much emphasis on web, mobile, and server-side programming, the development of simple desktop GUI applications seems increasingly like a lost art; many otherwise experienced developers have never learned to create one. What a tragedy! Desktop computers still play a vital role in work and home computing, and the ability to build simple, functional applications for this ubiquitous platform should be a part of every software developer's toolbox. Fortunately, for Pythoncoders, that ability is well within reach thanks to Tkinter.
In this chapter, you will cover the following topics:
• In Introducing Tkinter and Tk, you'll learn about Tkinter, a fast, fun, easy-to-learn GUI library built in to the Python Standard Library; and IDLE, an editor and development environment written in Tkinter.
• In An overview of basic Tkinter, you'll learn the basics of Tkinter with a "HelloWorld" program and create a Survey application.
Introduction to Tkinter
[ 2 ]
Introducing Tkinter and TkThe Tk widget library originates from the Tool Command Language (Tcl) programming language. Tcl and Tk were created by John Ousterhout while he was a professor at Berkeley in the late 1980s as an easier way to program the engineering tools being used at the university. Because of its speed and relative simplicity, Tcl/Tk rapidly grew in popularity among academic, engineering, and Unix programmers. Much like Python itself, Tcl/Tk originated on the Unix platform and only later migrated to macOS and Windows. Tk's practical intent and Unix roots still inform itsdesign today, and its simplicity compared to other toolkits is still a major strength.
Tkinter is a Python interface to the Tk GUI library and has been a part of the Python standard library since 1994 with the release of Python version 1.1, making it the de-facto GUI library for Python. Documentation for Tkinter, along with links for further study, can be found in the standard library documentation at https://docs.python.org/3/library/tkinter.html.
Choosing TkinterPython coders who want to build a GUI have several toolkit options to choose from; unfortunately, Tkinter is often maligned or ignored as a legacy option. To be fair, it'snot a glamorous technology that you can describe in trendy buzzwords and glowing hype. However, Tkinter is not only adequate for a wide variety of applications but also has some advantages that can't be ignored:
• Tkinter is in the standard library: With few exceptions, Tkinter is available wherever Python is available. There is no need to install pip, create virtual environments, compile binaries, or search the web for installation packages. For simple projects that need to be done quickly, this is a clear advantage.
• Tkinter is stable: While Tkinter development has not stopped, it is slow and evolutionary. The API has been stable for years, the changes mainly being additional functionality and bug �xes. Your Tkinter code will likely rununaltered for years or decades to come.
• Tkinter is only a GUI toolkit: Unlike some other GUI libraries, Tkinter doesn't have its own threading library, network stack, or �lesystem API. Itrelies on regular Python libraries for such things, so it's perfect for applying aGUI to existing Python code.
• Tkinter is simple and no-nonsense: Tkinter is very basic and to-the-point; it can be used effectively in both procedural and object-oriented GUI designs. To use Tkinter, you don't have to learn hundreds of widget classes, a markupor templating language, a new programming paradigm, client-server technologies, or a different programming language.
Chapter 1
[ 3 ]
Tkinter is not perfect, of course. It also has some disadvantages:
• Tkinter's default look and feel is dated: Tkinter's default appearance haslong lagged behind current trends, and it still bears a few artifacts from the 1990s Unix world. While it lacks niceties like animated widgets, gradients, or scalable graphics, it has nevertheless improved a great deal in the last few years, thanks to updates in Tk itself and the addition of themed widget libraries. We'll learn how to �x or avoid some of Tkinter's more archaicdefaults throughout the book.
• Tkinter lacks more complex widgets: Tkinter is missing advanced widgets like rich text editors, 3D graphics embedding, HTML viewers, or specialized input widgets. As we'll see later in this book, Tkinter gives us the ability tocreate complex widgets by customizing and combining its simple ones.
Tkinter might be the wrong choice for a game UI or slick commercial application; however, for data-driven applications, simple utilities, con�guration dialogs, andother business logic applications, Tkinter offers all that is needed and more. In this book we're going to be working through the development of data entry applicationfor a workplace environment, something that Tkinter can handle admirably.
Installing TkinterTkinter is included in the Python standard library for the Windows and macOS distributions. So, if you have installed Python on these platforms using the of�cialinstallers, you don't need to do anything to install Tkinter.
However, we're going to be exclusively focused on Python 3.9 for this book; so, youneed to make sure that you have this version or later installed.
Installing Python 3.9 on WindowsYou can obtain Python 3 installers for Windows from the python.org website by performing the following steps:
1. Go to https://www.python.org/downloads/windows.2. Select the latest Python 3 release. At the time of writing, the latest version is
3.9.2.3. Under the Files section, select the Windows executable installer appropriate
to your system's architecture (x86 for 32-bit Windows, x86-64 for 64-bitWindows; if you're unsure, x86 will work on either).
4. Launch the downloaded installer.
Introduction to Tkinter
[ 4 ]
5. Click on Customize installation. Make sure the tcl/tk and IDLE option is checked (it should be by default).
6. Continue through the installer with all defaults.
Installing Python 3 on macOSAs of this writing, macOS ships with Python 2.7 built in. However, Python 2 was of�cially deprecated in 2020, and the code in this book will not work with it, so macOS users will need to install Python 3 to follow this book.
Follow this procedure to install Python3 on macOS:
1. Go to https://www.python.org/downloads/mac- osx/ .2. Select the latest Python 3 release. At the time of writing, the latest version is
3.9.2.3. Under the Files section, select and download the macOS 64-bit/32-bit
installer.4. Launch the .pkg �le that you've downloaded and follow the steps of the
install wizard, selecting defaults.
Installing Python 3 and Tkinter on LinuxMost Linux distributions include both Python 2 and Python 3; however, Tkinter is not always bundled with it or installed by default. To �nd out if Tkinter is installed,open a Terminal and try the following command:
$ python3 -m tkinter
This should open a simple window showing some information about Tkinter. If you get ModuleNotFoundError instead, you will need to use your package manager to install your distribution's Tkinter package for Python 3. In most major distributions,including Debian, Ubuntu, Fedora, and openSUSE, this package is called python3-tk.
Introducing IDLEIDLE is an integrated development environment that is bundled with the of�cialPython software distributions for Windows and macOS (it's readily available in mostLinux distributions as well, usually as idle or idle3).
Chapter 1
[ 5 ]
IDLE is written in Python using Tkinter, and it provides us with not only an editing environment for Python but also a great example of Tkinter in action. So, while IDLE's rudimentary feature set may not be considered professional gradeby experienced Python coders, and while you may already have a preferred environment for writing Python code, I encourage you to spend some time using IDLE as you go through this book.
IDLE has two primary modes: shell mode and editor mode. We'll take a look at thosein this section.
Using the shell mode of IDLEWhen you launch IDLE, you begin in shell mode, which is simply a Python Read-Evaluate-Print-Loop (REPL) similar to what you get when you type python in a Terminal window.
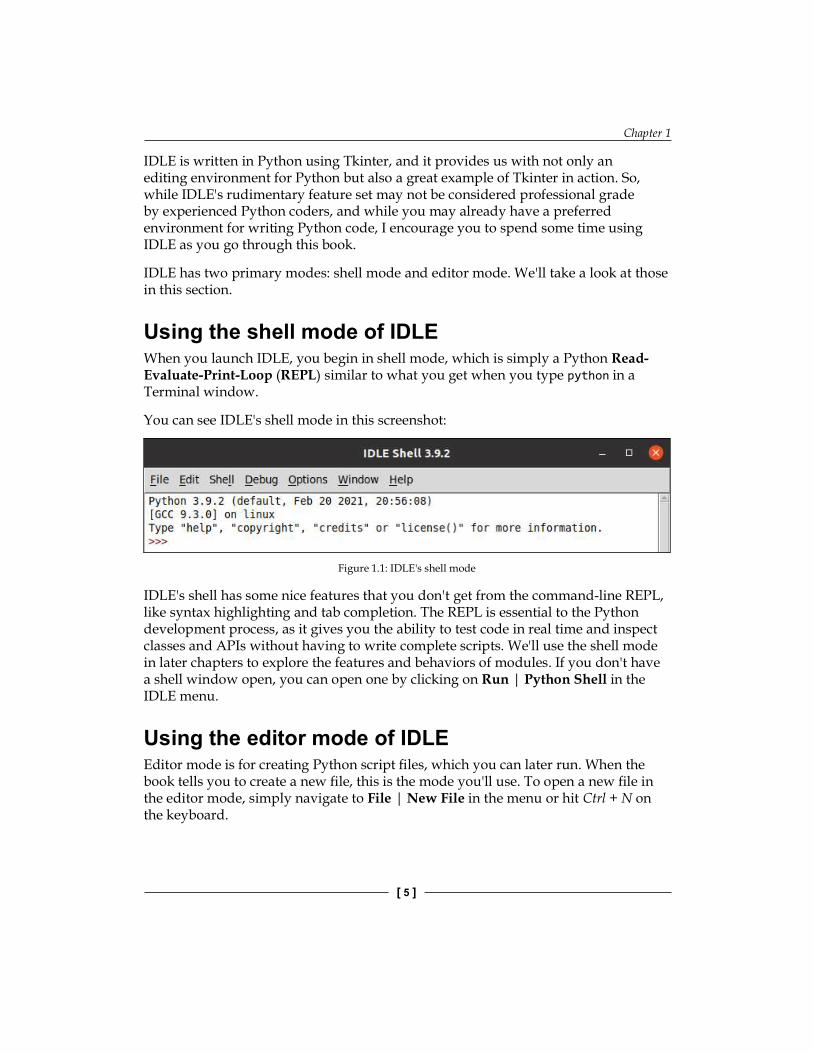
You can see IDLE's shell mode in this screenshot:
Figure 1.1: IDLE's shell mode
IDLE's shell has some nice features that you don't get from the command-line REPL,like syntax highlighting and tab completion. The REPL is essential to the Python development process, as it gives you the ability to test code in real time and inspect classes and APIs without having to write complete scripts. We'll use the shell modein later chapters to explore the features and behaviors of modules. If you don't havea shell window open, you can open one by clicking on Run | Python Shell in the IDLE menu.
Using the editor mode of IDLEEditor mode is for creating Python script �les, which you can later run. When thebook tells you to create a new �le, this is the mode you'll use. To open a new �le inthe editor mode, simply navigate to File | New File in the menu or hit Ctrl + N on the keyboard.

Introduction to Tkinter
[ 6 ]
This image shows IDLE's �le editor:
Figure 1.2: IDLE's �le editor
You can run your script without leaving IDLE by hitting the F5 key in the editor mode; IDLE will open a shell-mode window to execute the script and display the output.
IDLE as a Tkinter exampleBefore we start coding with Tkinter, let's take a quick look at what you can do withit by inspecting some of IDLE's UI. Navigate to Options | Con�gure IDLE from the main menu to open IDLE's con�guration settings. Here you can change IDLE'sfonts, colors and theme, keyboard shortcuts, and default behaviors, as shown in this screenshot:
Figure 1.3: IDLE con�guration settings
Chapter 1
[ 7 ]
Consider some of the following components that make up this user interface:
• There are drop-down menus that allow you to select between large sets of options.
• There are checkable buttons that allow you to select between small sets of options.
• There are many push buttons that you can click on to execute actions.• There is a text window that can display multi-colored text.• There are labeled frames that contain groups of components.• There are tabs across the top of the screen to select different sections of the
con�guration.
In Tkinter (as in most GUI libraries), each of these components is known as a widget; we're going to meet these widgets and more throughout this book and learn howto use them as they've been used here. We'll begin, however, with something muchsimpler.
Creating a Tkinter Hello WorldOne of the grand traditions in any programming language or library is to create a "Hello World" program: that is, a program that displays Hello World and exits. Let'swalk through creating a "Hello World" application for Tkinter and talk about the pieces of it along the way.
First, create a new �le called hello_tkinter.py in IDLE or your favorite editor, and enter the following code:
"""Hello World application for Tkinter"""import tkinter as tk
The �rst line is called a docstring, and every Python script should start with one. At a minimum, it should give the name of the program but can also include details about how to use it, who wrote it, and what it requires.
The second line imports the tkinter module into our program. Although Tkinter is in the standard library, we have to import it before we can use any of its classes or functions.
Sometimes, you may see this import written as from tkinter import *. That approach is called a wildcard import, and it results in all the objects being brought into the global namespace. While popular in tutorials for its simplicity, it's a bad ideain actual code as there is a possibility of a collision between our own variable names and all names in the tkinter module, which can cause subtle bugs.
Introduction to Tkinter
[ 8 ]
To avoid this, we're going to keep tkinter in its own namespace; however, to keep the code concise, we'll alias tkinter to tk. This convention will be used throughout the book.
Every Tkinter program must have exactly one root window, which represents both the top-level window of our application, and the application itself. Let's create ourroot window, like so:
root = Tk()
The root window is an instance of the Tk class. We create it by calling Tk() as we'vedone here. This object must exist before we can create any other Tkinter objects, and when it is destroyed, the application quits.
Now, let's create a widget to put in our window:
label = Label(root, text="Hello World")
This is a Labelwidget, which is just a panel that can display some text. The �rstargument to any Tkinter widget is always the parent widget (sometimes called master widget); in this case, we've passed in a reference to our root window. Theparent widget is the widget on which our Label will be placed, so this Label will be directly on the root window of the application. Widgets in a Tkinter GUI are arranged in a hierarchy, each widget being contained by another all the way up to the root window.
We've also passed in a keyword argument, text. This argument, of course, de�nesthe text that will be placed on the widget. For most Tkinter widgets, the majority of con�guration is done using keyword arguments like this.
Now that we've created a widget, we need to actually place it on the GUI:
label.pack()
The pack() method of the Label widget is called a geometry manager method. Its job is to determine how the widget will be attached to its parent widget, and to draw it there. Without this call, your widget would exist but you wouldn't see it anywhereon the window. pack() is one of three geometry managers, which we'll learn moreabout in the next section.
The last line of our program looks like this:
root.mainloop()
Chapter 1
[ 9 ]
This line starts our application's event loop. The event loop is an in�nite loop thatcontinually processes any events that happen during the execution of the program. Events can be things like keystrokes, mouse clicks, or other user-generated activity. This loop runs until the program exits, so any code after this line will not be run until the main window is closed. For this reason, this line is usually the last one in any Tkinter program.
Run the program in IDLE by hitting F5, or in your Terminal by typing the following command:
$ python hello_tkinter.py
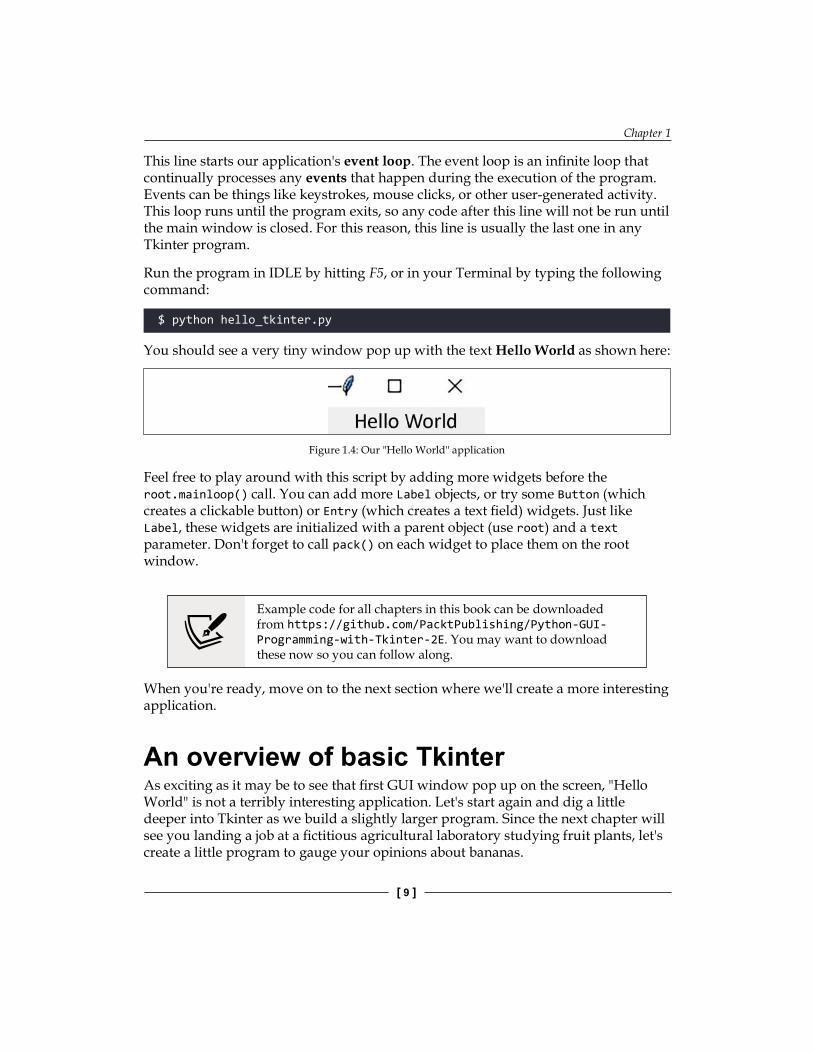
You should see a very tiny window pop up with the text Hello World as shown here:
Figure 1.4: Our "Hello World" application
Feel free to play around with this script by adding more widgets before the root.mainloop() call. You can add more Label objects, or try some Button (which creates a clickable button) or Entry (which creates a text �eld) widgets. Just likeLabel, these widgets are initialized with a parent object (use root) and a text parameter. Don't forget to call pack() on each widget to place them on the root window.
When you're ready, move on to the next section where we'll create a more interestingapplication.
An overview of basic TkinterAs exciting as it may be to see that �rst GUI window pop up on the screen, "HelloWorld" is not a terribly interesting application. Let's start again and dig a littledeeper into Tkinter as we build a slightly larger program. Since the next chapter will see you landing a job at a �ctitious agricultural laboratory studying fruit plants, let'screate a little program to gauge your opinions about bananas.
Example code for all chapters in this book can be downloaded from https://github.com/PacktPublishing/Python-GUI-Programming-with-Tkinter-2E. You may want to download these now so you can follow along.
Introduction to Tkinter
[ 10 ]
Building a GUI with Tkinter widgetsStart a new �le in your editor called banana_survey.py, and begin by importing tkinter like so:
# banana_survey.py"""A banana preferences survey written in Python with Tkinter"""
import tkinter as tk
As with hello_tkinter.py, we need to create a root window before we can create any widgets or other Tkinter objects:
root = tk.Tk()
Once again, we've called this object root. The root window can be con�gured invarious ways; for example, we can give it a window title or set its size like so:
# set the titleroot.title('Banana interest survey')# set the root window sizeroot.geometry('640x480+300+300')root.resizable(False, False)
The title() method sets our window title (that is, the name that shows up in the task manager and in the window decorations), while geometry() sets the window size. In this case, we're telling the root window to be 640 by 480 pixels. The +300+300 sets the position of the window on the screen — in this case, 300 pixels from the top and 300 pixels from the left (the position portion is optional, if you only care about the size). Notice that the argument to geometry() is a string. In Tcl/Tk, every argument is treated as a string. Since Tkinter is just a wrapper that passes arguments on to Tcl/Tk, we'll often �nd that strings are used to con�gure Tkinter objects – evenwhen we might expect to use integers or oats.
The resizable() method sets whether or not our window can be resized horizontally and vertically, respectively. True means the window can be resized in that direction, False means its dimension is �xed. In this case, we want to prevent the resizingof the window so that we don't have to worry about making the layout exible towindow size changes.
Now let's start adding widgets to our survey. We've already met the Label widget, so let's add one:
title = tk.Label( root,

Chapter 1
[ 11 ]
text='Please take the survey', font=('Arial 16 bold'), bg='brown', fg='#FF0')
As we saw in our "Hello World" example, the �rst argument passed to any Tkinterwidget is the parent widget on which the new widget will be placed. In this case, we'll be placing this Label widget on the root window. The remaining arguments to a widget are speci�ed as keyword arguments. Here, we've speci�ed the following:
• text, which is the text the label will display.• font, which speci�es the family, size, and weight of the font used to display
the text. Notice again that the font settings are speci�ed as a simple string,just as our geometry settings were.
• bg, which sets the background color for the widget. We've used a color namehere; Tkinter recognizes a great many color names, similar to those used by CSS or X11.
• fg, which sets the foreground (text) color for the widget. In this case, we'vespeci�ed a short hexadecimal string, in which the three characters representthe red, green, and blue values respectively. We can also use a six-character hex string (for example, #FFE812) for �ner-grained control over the color.
In Chapter 9, Improving the Look with Styles and Themes, we'll learn more sophisticatedways to set up fonts and colors, but this will work just �ne for now.
Tkinter has many interactive widgets for data entry, of course, the simplest being the Entry widget:
name_label = tk.Label(root, text='What is your name?')name_inp = tk.Entry(root)
The Entry widget is just a simple text-input box designed for a single line of text. Most input widgets in Tkinter do not include a label of any kind, so we've added oneto make it clear to our user what the entry box is for.
One exception to that is the Checkbuttonwidget, which we'll create next:
eater_inp = tk.Checkbutton( root, text='Check this box if you eat bananas')
Introduction to Tkinter
[ 12 ]
A Checkbutton creates a check box input; it includes a label that sits next to the box, and we can set its text using the text argument.
For entering numbers, Tkinter provides the Spinboxwidget. Let's add one:
num_label = tk.Label( root, text='How many bananas do you eat per day?')num_inp = tk.Spinbox(root, from_=0, to=1000, increment=1)
A Spinbox is like an Entry, but features arrow buttons that can increment and decrement the number in the box. We've used several arguments to con�gure it here:
• The from_ and to arguments set the minimum and maximum values that the buttons will decrement or increment to, respectively. Notice that from_ has an extra underscore at the end; this is not a typo! Since from is a Python keyword (used in importing modules), it can't be used as a variable name, sothe Tkinter authors chose to use from_ instead.
• The increment argument sets how much the arrow buttons will increase or decrease the number.
Tkinter has several widgets that allow you to choose from preset selection values; one of the simplest is Listbox, which looks like this:
color_label = tk.Label( root, text='What is the best color for a banana?')color_inp = tk.Listbox(root, height=1) # Only show selected item# add choicescolor_choices = ( 'Any', 'Green', 'Green-Yellow', 'Yellow', 'Brown Spotted', 'Black' )for choice in color_choices: color_inp.insert(tk.END, choice)
The Listbox takes a height argument that speci�es how many lines are visible; bydefault the box is big enough to show all the options. We've changed that to 1 so that only the currently selected option is visible. The others can be accessed using the arrow keys.

Chapter 1
[ 13 ]
To add options to the box, we need to call its insert() method and add each option one at a time. We've done that here using a for loop to save repetitive coding. The �rstargument to insert speci�es where we want to insert the option; note that we've useda special constant provided by tkinter, tk.END. This is one of many special constants de�ned in Tkinter for certain con�guration values. In this case, tk.END means the end of the widget, so that each choice that we insert will be placed at the end.
Another way to let a user select between a small number of options is the Radiobutton widget; these are like Checkbutton widgets, but, similar to the mechanical preset buttons in (very, very old) car radios, they only allow one to be checked at a time. Let's create a few Radiobutton widgets:
plantain_label = tk.Label(root, text='Do you eat plantains?')plantain_frame = tk.Frame(root)plantain_yes_inp = tk.Radiobutton(plantain_frame, text='Yes')plantain_no_inp = tk.Radiobutton(plantain_frame, text='Ewww, no!')
Notice what we've done here with plantain_frame: we've created a Frame object and used it as the parent widget for each of the Radiobutton widgets. A Frame is simply a blank panel with nothing on it, and it's useful for organizing our layouthierarchically. We'll use Frame widgets quite often in this book for keeping groups of widgets together.
Entrywidgets work �ne for single-line strings, but how about multi-line strings? Forthose, Tkinter offers us the Text widget, which we create like this:
banana_haiku_label = tk.Label( root, text='Write a haiku about bananas')banana_haiku_inp = tk.Text(root, height=3)
The Text widget is capable of much more than just multi-line text, and we'll explorea few of its more advanced capabilities in Chapter 9, Improving the Look with Styles and Themes. For now, though, we'll just use it for text.
Our GUI would not be complete without a submit button for our survey, which is provided by the Button class, like so:
submit_btn = tk.Button(root, text='Submit Survey')
We'll use this button to submit the survey and display some output. What widget could we use to display that output? It turns out that Label objects are useful for more than just static messages; we can use them to display messages at runtime as well.
Introduction to Tkinter
[ 14 ]
Let's add one for our program output:
output_line = tk.Label(root, text='', anchor='w', justify='left')
Here we've created the Label widget with no text (since we have no output yet). We're also using a couple of additional arguments for Label:
• anchor determines which side of the widget the text will be stuck to if the widget is wider than the text. Tkinter sometimes uses cardinal directions (North, South, East, and West) abbreviated to their �rst letter whenever itneeds to specify a side of a widget; in this case, the string 'w' indicates the West (or left) side of the widget.
• justify determines which side the text will align to when there are multiple lines of code. Unlike anchor, it uses conventional 'left', 'right', and 'center' options.
anchor and justify may seem redundant, but they have slightly different behavior. In a multiline text situation, the text could be aligned to the center of each line, but the whole collection of lines could be anchored to the west side of the widget, for example. In other words, anchor affects the whole block of text with respect to the containing widget, while justify affects the individual lines of text with respect to the other lines.
Tkinter has many more widgets, and we'll meet many of them throughout theremainder of the book.
Arranging our widgets with geometry managersIf you were to add root.mainloop() to this script and execute it as-is, you would see… a blank window. Hmmm, what happened to all those widgets we just created? Well, you may remember from hello_tkinter.py that we need to use a geometry manager like pack() to actually place them somewhere on their parent widgets.
Tkinter has three geometry manager methods available:
• pack() is the oldest, and simply adds widgets to one of the four sides of a window sequentially.
• grid() is newer and preferred, and allows you to place widgets within a 2-dimensional grid table.

Chapter 1
[ 15 ]
• place() is a third option, which allows you to put widgets at speci�c pixelcoordinates. It is not recommended, as it responds poorly to changes in window sizes, font sizes, and screen resolution, so we won't be using it inthis book.
While pack() is certainly �ne for simple layouts involving a handful of widgets, itdoesn't scale so well to more complex layouts without an inordinate amount of Frame widget nesting. For this reason, most Tkinter programmers rely on the more modern grid() geometry manager. As the name suggests, grid() allows you to lay out widgets on a 2-dimensional grid, much like a spreadsheet document or HTML table. In this book, we'll focus primarily on grid().
Let's start laying out the widgets of our GUI using grid(), beginning with the title label:
title.grid()
By default, a call to grid() will place the widget in the �rst column (column 0) of the next empty row. Thus, if we were to simply call grid() on the next widget, it would end up directly under the �rst. However, we can also be explicit about this using therow and column arguments, like so:
name_label.grid(row=1, column=0)
Rows and columns count from the top-left corner of the widget, starting with 0. Thus, row=1, column=0 places the widget in the second row at the �rst column. If wewant an additional column, all we need to do is place a widget in it, like so:
name_inp.grid(row=1, column=1)
The grid automatically expands whenever we add a widget to a new row or column. If a widget is larger than the current width of the column, or height of the row, all the cells in that column or row are expanded to accommodate it. We can tell a widget to span multiple columns or multiple rows using the columnspan and rowspan arguments, respectively. For example, it might be nice to have our title span the width of the form, so let's amend it accordingly:
title.grid(columnspan=2)
As columns and rows expand, the widgets do not expand with them by default. If we want them to expand, we need to use the sticky argument, like this:
eater_inp.grid(row=2, columnspan=2, sticky='we')

Introduction to Tkinter
[ 16 ]
sticky tells Tkinter to stick the sides of the widget to the sides of its containing cell so that the widget will stretch as the cell expands. Like the anchor argument we learned about above, sticky takes cardinal directions: n, s, e, and w. In this case we'vespeci�ed West and East, which will cause the widget to stretch horizontally if thecolumn expands further.
As an alternative to the strings, we can also use Tkinter's constants as arguments tosticky:
num_label.grid(row=3, sticky=tk.W)num_inp.grid(row=3, column=1, sticky=(tk.W + tk.E))
There is no real difference between using constants and string literals as far as Tkinter is concerned; however, the advantage of using constants is that your editing software can more easily identify if you've used a constant that doesn't exist than aninvalid string.
The grid() method allows us to add padding to our widgets as well, like so:
color_label.grid(row=4, columnspan=2, sticky=tk.W, pady=10)color_inp.grid(row=5, columnspan=2, sticky=tk.W + tk.E, padx=25)
padx and pady indicate external padding – that is, they will expand the containing cell,but not the widget. ipadx and ipady, on the other hand, indicate internal padding. Specifying these arguments will expand the widget itself (and consequently the containing cell).
Figure 1.5: Internal padding (ipadx, ipady) versus external padding (padx, pady)
Tkinter does not allow us to mix geometry managers on the same parent widget; once we've called grid() on any child widget, a call to the pack() or place() method on a sibling widget will generate an error, and vice versa.
Chapter 1
[ 17 ]
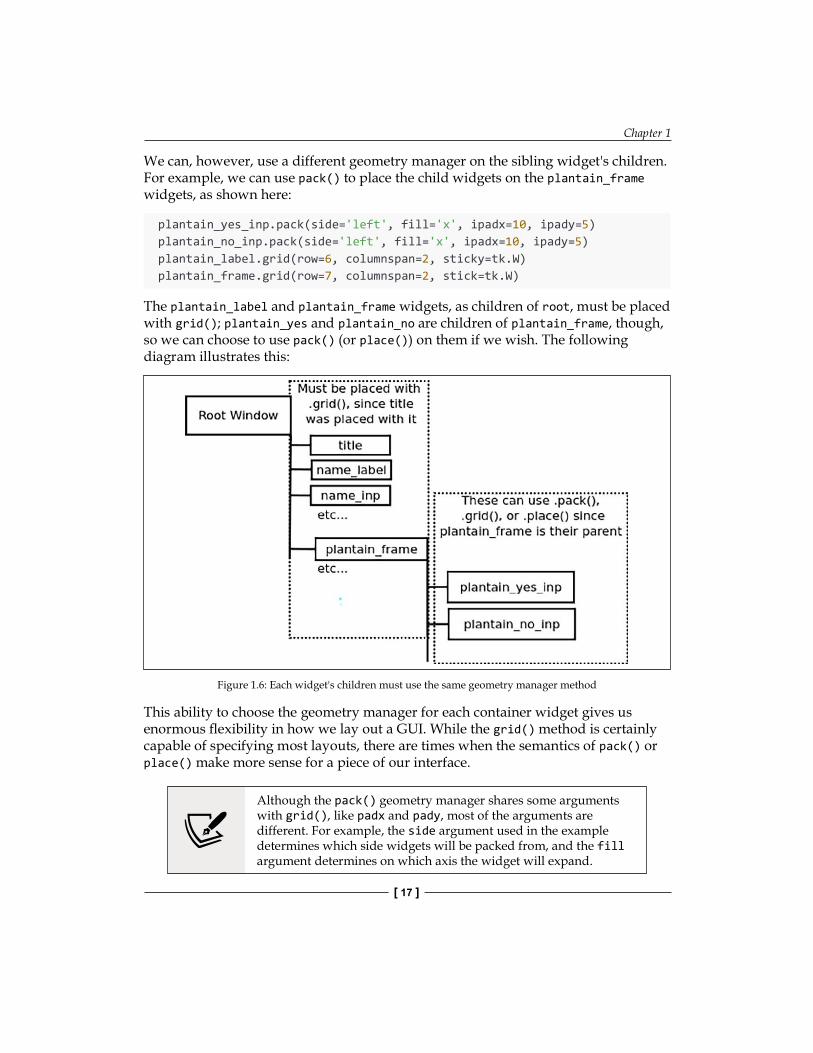
We can, however, use a different geometry manager on the sibling widget's children.For example, we can use pack() to place the child widgets on the plantain_frame widgets, as shown here:
plantain_yes_inp.pack(side='left', fill='x', ipadx=10, ipady=5)plantain_no_inp.pack(side='left', fill='x', ipadx=10, ipady=5)plantain_label.grid(row=6, columnspan=2, sticky=tk.W)plantain_frame.grid(row=7, columnspan=2, stick=tk.W)
The plantain_label and plantain_frame widgets, as children of root, must be placed with grid(); plantain_yes and plantain_no are children of plantain_frame, though, so we can choose to use pack() (or place()) on them if we wish. The following diagram illustrates this:
Figure 1.6: Each widget's children must use the same geometry manager method
This ability to choose the geometry manager for each container widget gives us enormous exibility in how we lay out a GUI. While the grid() method is certainly capable of specifying most layouts, there are times when the semantics of pack() or place() make more sense for a piece of our interface.
Although the pack() geometry manager shares some arguments with grid(), like padx and pady, most of the arguments are different. For example, the side argument used in the example determines which side widgets will be packed from, and the fill argument determines on which axis the widget will expand.
Introduction to Tkinter
[ 18 ]
Let's add the last few widgets to our window:
banana_haiku_label.grid(row=8, sticky=tk.W)banana_haiku_inp.grid(row=9, columnspan=2, sticky='NSEW')submit_btn.grid(row=99)output_line.grid(row=100, columnspan=2, sticky='NSEW')
Note that we've stuck the Text widget (banana_haiku_inp) to all four sides of its container. This will cause it to expand both vertically and horizontally as the grid is stretched. Also notice that we've skipped to rows 99 and 100 for the last two widgets.Remember that unused rows are collapsed into nothing, so by skipping rows or columns we can leave space for future expansion of our GUI.
By default, Tkinter will make our window just large enough to contain all the widgets we place on it; but what happens if our window (or containing frame) becomes larger than the space required by our widgets? By default, the widgets will remain as they are, stuck to the upper-left side of the application. If we want the GUI to expand and �ll the space available, we have to tell the parent widget whichcolumns and rows of the grid will expand. We do this by using the parent widget'scolumnconfigure() and rowconfigure() methods.
For example, if we want our second column (the one containing most of the input widgets) to expand into unused space, we can do this:
root.columnconfigure(1, weight=1)
The �rst argument speci�es which column (counting from 0) we want to affect. Thekeyword argument weight takes an integer which will determine how much of the extra space the column will get. With only one column speci�ed, any value greaterthan 0 will cause that column to expand into the leftover space.
The rowconfigure() method works the same way:
root.rowconfigure(99, weight=2)root.rowconfigure(100, weight=1)
This time, we've given two rows a weight value, but note that row 99 is given a weight of 2 while 100 is given a weight of 1. In this con�guration, any extra verticalspace will be divided between rows 99 and 100, but row 99 will get twice as much of it as row 100.
As you can see, using a combination of grid(), pack() sub-frames, and some careful planning, we can achieve complex GUI layouts fairly easily in Tkinter.
Chapter 1
[ 19 ]
Making the form actually do somethingWe've got a nice form all laid out now, complete with a submit button; so how do we make it actually do something? If you have only written procedural code in the past, you may be confused about how the ow of code works in a GUI application. Unlikea procedural script, the GUI cannot simply execute all the code from top to bottom. Instead, it has to respond to user actions, such as a button click or a keystroke, whenever and in whatever order they happen. Such actions are known as events. To make the program respond to an event, we need to bind the event to a function, which we call a callback.
There are a few ways to bind events to callback functions in Tkinter; for a button, the simplest is to con�gure its command attribute, like so:
submit_btn.configure(command=on_submit)
The command argument can be speci�ed when creating a widget (for example, submit_btn = Button(root, command=on_submit)), or after creation of the widget using its configure() method. configure() allows you to change a widget'scon�guration after it's created, by passing in arguments just as you would whencreating the widget.
In either case, command speci�es a reference to a callback function to be called when the button is clicked. Note that we do not put parentheses after the function name here; doing so would cause the function to be called and its return value would be assigned to command. We only want a reference to the function here.
The callback function needs to exist before we can pass it to command. So, before the call to submit_btn.configure(), let's create the on_submit() function:
def on_submit(): """To be run when the user submits the form""" pass
submit_btn.configure(command=on_submit)
It is conventional to name callback functions in the format on_<event_name> when they are speci�cally created to respond to a particular event. However, it's notrequired, nor always appropriate (for example, if a function is a callback for many events).
A more powerful method of binding events is to use the widget's bind() method, which we will discuss in more detail in Chapter 6, Planning for the Expansion of Our Application.

Introduction to Tkinter
[ 20 ]
Our on_submit() callback is rather boring at the moment, so let's make it better.Remove the pass statement and add in this code:
def on_submit(): """To be run when the user submits the form"""
name = name_inp.get() number = num_inp.get()
selected_idx = color_inp.curselection() if selected_idx: color = color_inp.get(selected_idx) else: color = '' haiku = banana_haiku_inp.get('1.0', tk.END)
message = ( f'Thanks for taking the survey, {name}.\n' f'Enjoy your {number} {color} bananas!' ) output_line.configure(text=message) print(haiku)
The �rst thing we'll do in this function is retrieve values from some of the inputs. Formany inputs, the get() method is used to retrieve the current value of the widget. Note that this value will be returned as a string, even in the case of our Spinbox.
For our list widget, color, things are more complicated. Its get() method requires an index number for a choice, and returns the text for that index number. We can use the widget's curselection() method to get the selected index. If there are no selections made, the selected index will be an empty tuple. In that case, we'll just setcolor to an empty string. If there is a selection, we can pass the value to get().
Getting data from the Text widget is again slightly different. Its get() method requires two values, one for a starting location and another for an ending location. These follow a special syntax (which we'll discuss in Chapter 3, Creating Basic Forms with Tkinter and Ttk Widgets), but basically 1.0means the �rst character of the �rstline, and tk.END is a constant that represents the end of the Text widget.
Retrieving data from our Checkbutton and Radiobutton is not possible without using Tkinter control variables, which we'lltalk about in the section below, Handling data with Tkinter control variables.