louis columbus - vintage apple
TRANSCRIPT
Louis Columbus
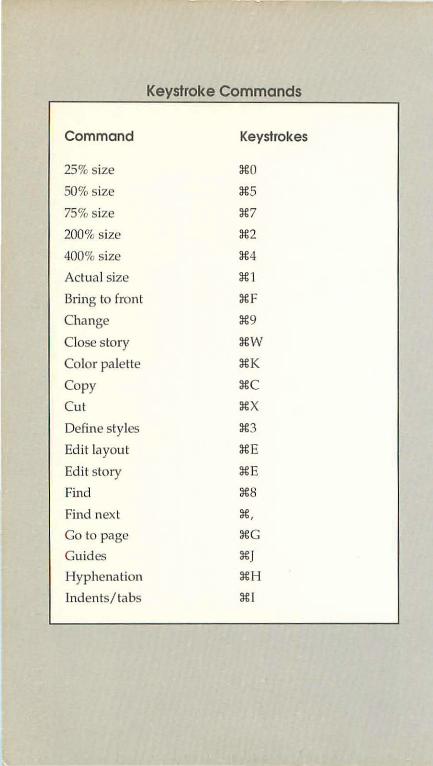
Keystroke Commands
Command Keystrokes
25% size :t€0
50% size :t€5
75% size :t€7
200% size :t€2
400% size :t€4
Actua l size :t€1
Bring to front :tf:F
Change :t€9
Close story :tf:W
Color pa lette :tf:K
Copy :tf:C
Cut :tf:X
Define styles :t€3
Edit Ia you t :tf:E
Ed it story :tf:E
Find :t€8
Find next 3€,
Go to page :M:G
Guides :M:J
Hyphenation :tf:H
Indents/ tabs :t€1
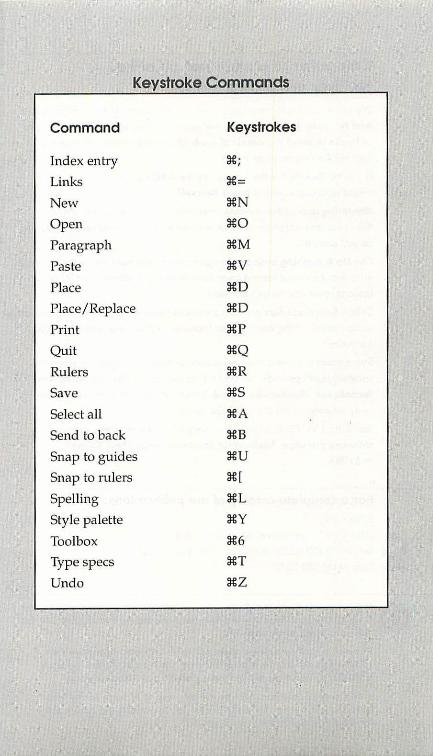
Keystroke Commands
Command Keystrokes
Index entry ~· I
Links ~=
New ~N
Open ~0
Paragraph ~M
Paste ~v
Place ~D
Place/Replace ~D
Print ~p
Quit ~Q
Rulers ~R
Save ~s
Select all ~A
Send to back ~B
Snap to guides ~u
Snap to rulers ~[
Spelling ~L
Style palette ~y
Toolbox ~6
Type specs ~T
Undo ~z
Computer users are not all alike. Neither are SYBEX books. We know our customers have a variety of needs. They've told us so.
And because we've listened, we've developed several distinct types
of books to meet the needs of each of our customers. What are you
looking for in computer help?
If you're looking for the basics, try the ABC's series, or for a more
visual approach, select Teach Yourself.
Mastering and Understanding titles offer you a step-by-step introduc
tion, plus an in-depth examination of intermediate-level features, to use
as you progress.
Our Up & Running series is designed for compu ter-l iterate consumers
who want a no-nonsense overview of new programs. Just 20 basic
lessons, and you're on your way.
SYBEX Encyclopedias provide a comprehensive reference and expla
nation of all of the commands, features and functions of the subject
software.
Sometimes a subject requires a special treatment that our standard
series doesn' t provide. So you'll find we have titles like Advanced Techniques, Handbooks, Tips & Tricks, and others that are specifi
cally tailored to satisfy a unique need.
You' ll find SYBEX publishes a variety of books on every popu lar
software package. Looking for computer help? Help Yourself
to SYBEX.
For a complete catalog of our publications: SYBEX Inc.
2021 Challenger Drive, Alameda, CA 94501
Tel: (415) 523-8233/(800) 227-2346 Telex: 336311
Fax: (415) 523-2373
SYBEX is committed to using nolurol resources wisely to preserve and improve our environment. This is why we hove been printing the text of books like this one on recycled paper since 1982.
This year our use of recycled paper will result in the saving o f more than 15,300 trees. We will/ower air pollution effluents by 54,0CXJ pounds, save 6,300,0CXJ gallons of water, and reduce landfill by 2,700 cubic yards.
In choosing a SYBEX book you ore not only making a choice for the best in skills and information, you ore also choosing to enhance the quality of life for all of us.

PageMaker 4.0 Macintosh Version Instant Reference
Page Maker® 4.0 Macintosh® Version Instant Reference
Louis Columbus
S't13EX®
San Francisco • Paris • Dusseldorf • Soest
Acquisitions Editor: Dianne King Developmental Editor: james A. Compton Editor: Stefan Griinwedel Technical Editor: Celia Stevenson Word Processors: Ann Dunn, Deborah Maizels, and Lisa Mitchell Series Book Designer: Ingrid Owen Production Artist: Eleanor Ramos Screen Graphics: Cuong Le Desktop Publishing Production: M.D. Barrera a11d Dan Brodnitz Proofreader: Lisa Haden Indexer: Ted La ux Cover Designer: Archer Design
SYBEX is a registered tTademark of SYBEX, Inc.
TRADEMARKS: SYBEX has attempted throughout this book to d istingujsh proprietary trademarks from descriptive terms by following the capita lization sty le used by the manufacturer.
SYBEX is not a ffiliated with any manufacturer.
Every effort has been made to supply comple te and accurate information. However, SYBEX assumes no responsibility for its use, nor for any infringement of the intelk'Ctual property r ights of third parties whicl1 would result from such use.
Copyright ©1991 SYBEX Inc., 2021 Challenger Drive, Alameda, CA 94501. World rights reserved. No part of this publication may be stored in a retrieval system, transmitted, or reproduced in any way, including but not limited to photocopy, photograph, m.1gnetic or other record, 1\~thout the prior agreement and written permission of the publisher.
Ubrary of Congress Card Number: 90-71935 ISBN: 0-89588-78S.6 Manufactured in the United States of America 10 9 8 7 6 54 3 2 1

To my wife, Chenjl, for her constant and
enthusiastic support

Acknowledgments
Thanks are due to the following people: at SYBEX, Jim Compton for providing skillful guidance in all matters pertaining to the manuscript; Dianne King, for her enthusiasm for the project; Stefan Griinwedel, for his timely assistance and great attitude in editing the manuscript; and, at Aldus Corporation, Freda Cook for providing timely information and current softw·are. Special thanks to Ken Freund and Uri Leder of CalComp. Ken Freund provided much of the initial enthusiasm and flexibility that made this book possible, and Uri Leder shared his knowledge of the Macintosh, as well as his Macintosh computer and LaserWriter.
Table of. Contents
Introduction
Actual Size Alignment Auto flow Book
XV
Bring to Front/Send to Back Change Clear
Close Close Story Color Palette
Column Guides
Copy Copy Master Guides Create Index CreateTOC Cut Define Colors
Define Styles Display Master Items Display Paragraph Display Style Names Edit Layout Edit Story Export Fill Find/Find Next Fit in Window
1
1
2 4
5 6 8
9
10 11
11
13 13 14 16 17 18 20 22 22 23 24
24
25 27
28 30
xii
Fit in World 31 Font 31 Go to Page 32 Guides 33 Help 34 Hyphenation 35 Image Control 38 Import 40 Indents/Tabs 42 Index Entry 45 Insert Pages 46 Leading 48 Line 49 Link Info 51 Link Options 52 Links 53 Lock Guides 56 New 57 New Story 57 Open 59 Page Setup 60 Paragraph 63 Paste 68 Percentage Size 69 Place 70 Place/Replace 71
Preferences 72
Print 74 Quit 79 Remove Pages 80 Revert 81 Rounded Comers 82

Rulers Save Save As Scroll Bars Select All Set Width
Show Clipboard Show Index Size Snap to Guides Snap to Rulers Spelling Style Style Palette Text Rotation Text Wrap Toolbox Track Type Specs Type Style Undo Zero Lock
Appendix A
Using PageMaker on a Network 107
AppendixB
Converting Files across PlaHorms
and Version Numbers 111
83
83
84
85
86 87 88
89 90 91 92
93 95 96 97
98 99
101 102 104 105 106
xiii

xiv
Converting 3.X Files to 4.0 Files 111 Converting IBM PC-Based Files
to Macintosh Files 112
Index
115

XV
Introduction
TI1e goal of Uus book is to provide you with a comprehensive and concise, easy-to-use reference of PageMaker 4.0 commands on the Macintosh. It has been developed for all levels of Macintosh computer users. Entries are arranged conveniently in alphabetical order, and include a description of the command-whether it is used in Layout view, Story view, or bo th- followed by the steps to implement it, often with keystroke shortcuts. Relevant dialog box options are then described in detail.
This book also features an appendix that describes how to use PageMaker 4.0 on a netvvork, and an appendix that explains how to convert Macintosh or PC-based PageMaker 3.0 files to PageMaker 4.0 files on the Macintosh.
Alignment 1
I ACTUAL SIZE I • MODE
Layout view
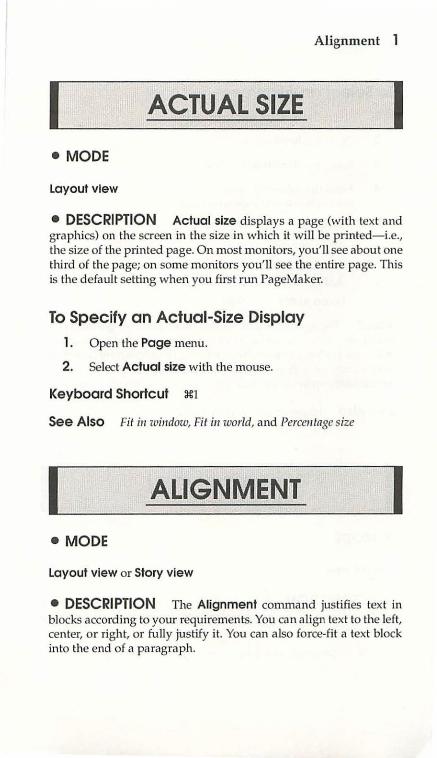
• DESCRIPTION Actual size displays a page (with text and graphics) on the screen in the size in which it will be printed-i.e., the size of the printed page. On most monitors, you' ll see about one third of the page; on some monitors you'll see the entire page. This is the default setting when you first run PageMaker.
To Specify an Actual-Size Display
1. Open the Page menu.
2. Select Actual size with the mouse.
Keyboard Shortcut Xl
See Also Fit i11 window, Fit in world, and Perce11tage size
I ALIGNMENT I • MODE
Layout view or Story view
• DESCRIPTION The Alignment command justifies text in blocks according to your requirements. You can align text to the left, center, or right, or fully justify it. You can also force-fit a text block into the end of a paragraph.
2 Autoflow
To Select an Alignment
1. Select the block of text to be modified.
2. Open the Type menu.
3. Select the Alignment option.
4. From the submenu, select one of the options below. Or use the keyboard-equivalent commands:
' Align left O:JgL
Align center O:JgC
Align right O:JgR
Justify 0 :JgJ
Force justify O:JgF
Result The specific selections you make in the Alignment command will become thedefaultvaluesforall text typed in paragraphs. If you select a block of text before selecting the Alignment command, your paragraph will match the options selected. You can also use the Force justify option to fit a headline into the parameters of your page.
See Also Hyplwnation, Pamgrnpll, and Track
I AUTO FLOW I • MODE
Layout view
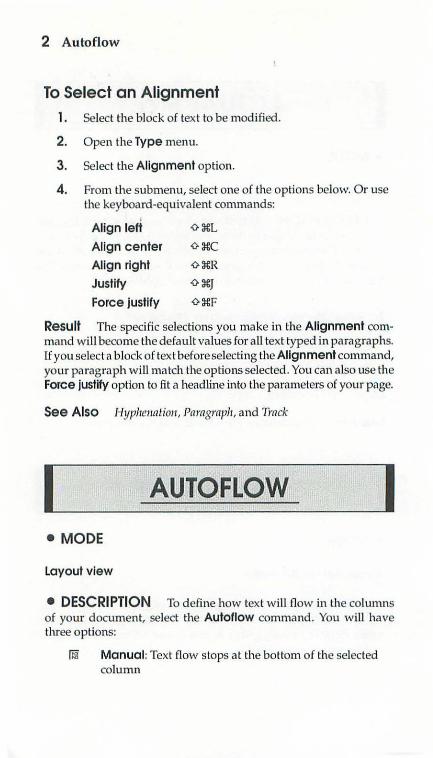
• DESCRIPTION To define how text will flow in the columns of your document, select the Autotlow command. You will have three options:
fiji Manual: Text flow stops a t the bottom of the selected column
Autoflow 3
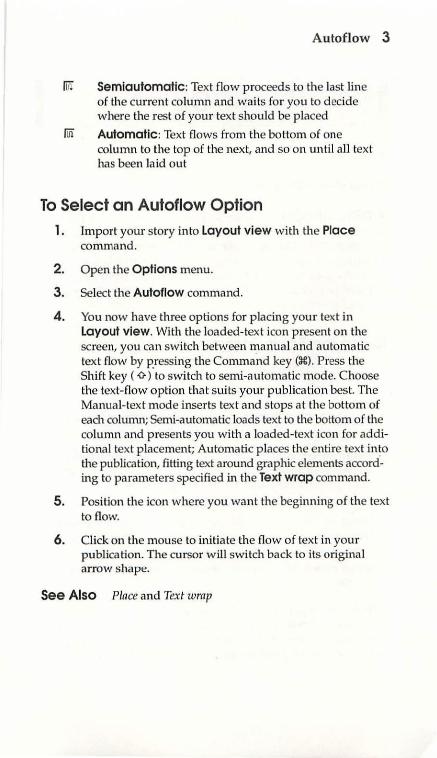
!iii Semiautomatic: Text flow proceeds to the last line of the current column and waits fo r you to decide where the rest of your text should be placed
!iii Automatic: Text flows from the bottom of one column to the top of the next, and so on until all text has been laid out
To Select an Autoflow Option
1. Import your story into Layout view with the Place command.
2. Open the Options menu.
3. Select the Autoflow command.
4. You now have three options for placing your text in Layout view. With the loaded-text icon present on the screen, you can switch between manual and automatic text flow by P.ressing the Command key (3€). Press the Shift key ( O) to switch to semi-automatic mode. Choose the text-flow option that suits your publica tion best. The Manual-text mode inserts text and stops at the bottom of each column; Semi-automatic loads text to the bottom of the column and presents you with a loaded-text icon for additional text placement; Automatic places the entire text into the publication, fitting text around graphic elements accord·ing to parameters specified in the Text wrap command.
5. Position the icon where you want the beginning of the text to flow.
6. Click on the mouse to initiate the flow of text in your publication. The cursor will switch back to its original arrow shape.
See Also Place and Text wrap
4 Book
I BOOK I • MODE
Layout view or Story view
• DESCRIPTION The Book command consolidates a series of files into a single document or book, which can be referenced with the Create TOC, Create index, and Print commands. Although the files that make up a book do not have to be open at once for the Book feature to work, they must be all on the same disk. If not, PageMaker will alert you when you attempt to print the book by teUing you that it cannot find the file.
To Use the Book Command
1. Open the File menu.
2. Select the Book option.
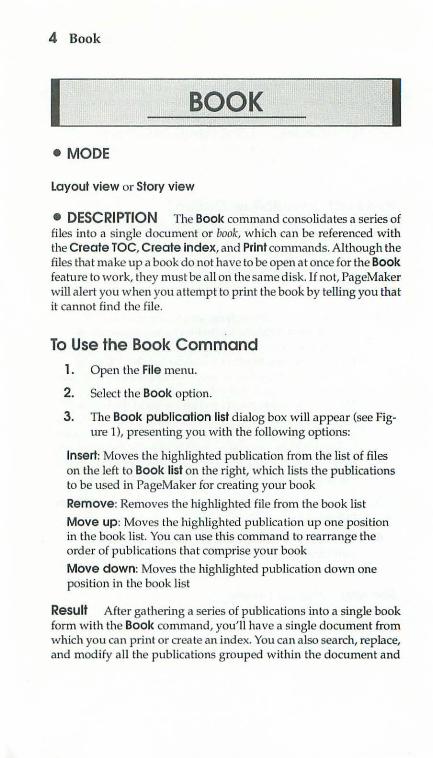
3. The Book publication list dialog box w iU appear (see Fig-ure 1 ), presenting you with the following options:
Insert: Moves the highlighted publication from the list of files on the left to Book list on the right, which lists the publications to be used in PageMaker for creating your book
Remove: Removes the highlighted file from the book list
Move up: Moves the highlighted publication up one position in the book list. You can use this command to rearrange the order of publications that comprise your book
Move down: Moves the highlighted publication down one position in the book list
Result After ga thering a series of publications into a single book form with the Book command, you' ll have a single document from which you can print or create an index. You can also search, replace, and modify all the publications grouped within the document and
Bring to Front/Send to Back 5
named within the Book comman d just as you would for a s ingle publication.
See Also Crenle i11dex, Create TOC, and Pri11t
Book publlcetlon list
= I NT. liARD DI SK
l ei~ Aldus PageMa f 00 0
• D Composs Re ... D Final Project D Moe News D maclotter ~ D Otrly Report [) Summe r Pro ...
CJ::§D
~ Book list :
,.-----,
Insert lo·· [ Remoue j [ Mout• up I I '1UUl' dOUIII I
Figure 1: The Book Publication List dialog box
• MODE
BRING TO FRONT I SEND TO BACK
Layout view
• DESCRIPTION These commands determine how different items in your PageMaker document overlap: they define the rela tive position of multiple stacked images on a page. The Bring to front command brings in an image to the front of the screen (or top of the stack). The Send to back command sends the top item on the stack to the bottom.
6 Change
To Bring to Front
Select the item you want to move and press XF.
To Send to Back
Select the item you want to move and press XB.
See Also Preferences
I CHANGE I • MODE
Story view
• DESCRIPTION The Change command offers a convenient way of searching for and replacing any text within a file, including text that has a different paragraph style, font, font size, and type style.
To Use the Change Command 1. Open the Edit menu.
2. Select the Change option.
Keyboard Shortcut X9
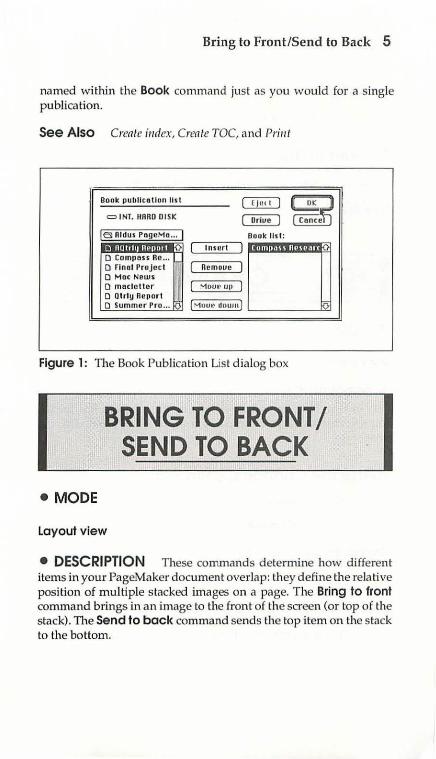
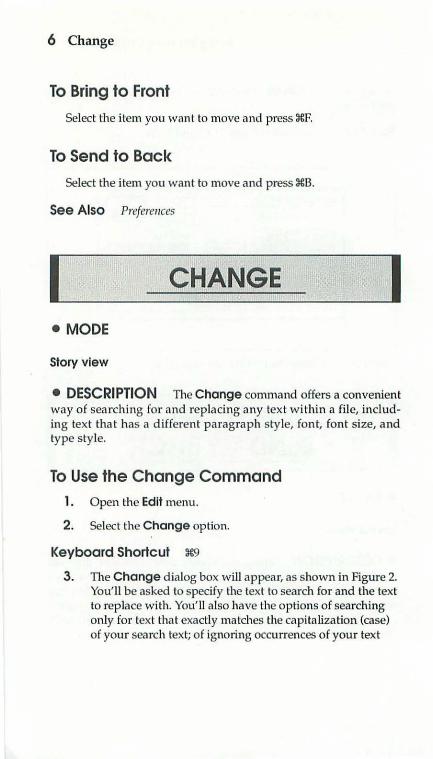
3. The Change dialog box will appear, as shown in Figure 2. You'll be asked to specify the text to search for and the text to replace with. You' ll also have the options of searching only for text that exactly matd1es the capitalization (case) of your search text; of ignoring occurrences of your text
Change 7
that are embedded in larger words; and of spedfying that PageMaker should search only in a marked block of text, in the entire current story, or in all stories.
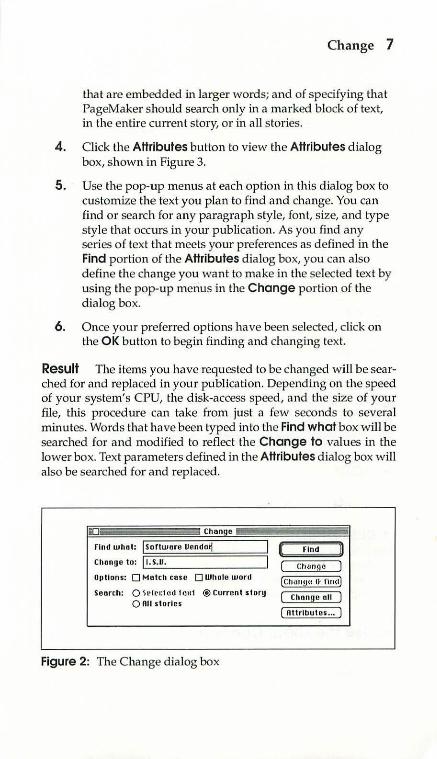
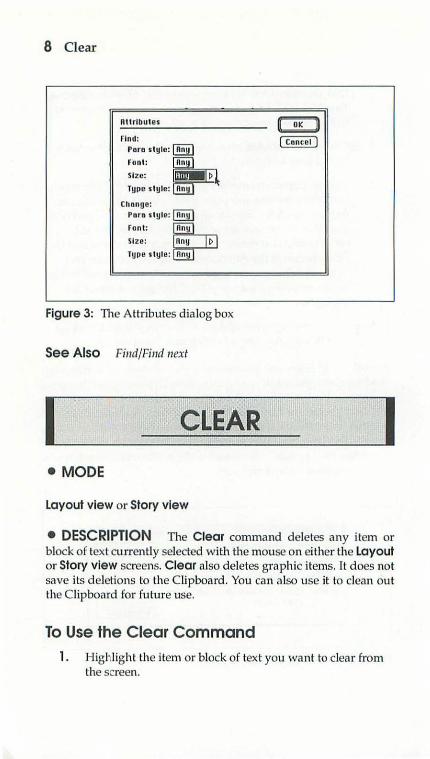
4. Click the Attributes button to view the Attributes dialog box, shown in Figure 3.
5. Use the pop-up menus at each option in this dialog box to custom ize the text you plan to find and change. You can find or search for any paragraph style, font, size, and type style that occurs in your publication. As you find any series o f text tha t meets your p references as defi11ed in the Find portion of the Attributes dialog box, you can also define the change you want to make in the selected text by using the pop-up menus in the Change portion of the dialog box.
6. O nce your preferred options have been selected, click on the OK button to begin finding and changing text.
Result The items you have requested to be changed will be searched for and replaced in your publication. Depending on the speed of your system's CPU, the disk-access speed, and the size of your file, this procedure ca11 take from just a few seconds to several minutes. Words that have been typed into the Find what box will be searched for and modified to reflect the Change to values in the lower box. Text parameters defined in the Attributes dialog box will also be searched for and replaced.
10 Chan e
find what: I software Uendo~
Chango t o: Lll_.s_.u_. -------'
Options: D Motch coso D Whole word
Search: 0 St•h,:1<!CI 1CII1 ®Current story 0 Rll storles
Figure 2: The Change d ialog box
I find II ( CtWIIfJO
(CtllllllJI! I~ Ond)
( Change all )
( nttrlbutos ... )
8 Clear
Attributes
Change: Para s tyle: [5I r on t: ;-"•" w._,-,
Figure 3: ll1e Attributes dialog box
See Also Find/Find next
• MODE
Layout view or Story view
u OK n [ Cancel ]
• DESCRIPTION The Clear command deletes any item or block of text currently selected with the mouse on either the Layout or Story view screens. Clear also deletes graphic items. It does not save its deletions to the Clipboard. You can also use it to clean out the Clipboard for fu ture use.
To Use the Clear Command
1. Highlight the item or block of text you want to clear from the screen.
Close 9
2. Open the Edit menu.
3. Select Clear.
See Also Cut and Copy
I CLOSE I • MODE
Layout view or Story view
• DESCRIPTION The Close command ends a session in either Layout or Story view modes. In Layout view it closes just the current document; in Story view it captures and closes your document with all the graphic elements, including text enhancements, text blocks, and font attributes.
To Close Your Document
Select Close from the File menu. You will be asked whether you want to save the document. If you want the entire publication to be saved with the latest changes you have made, click on the OK button. If after selecting Close you have yet to name the publication about to be closed, PageMaker will prompt you with a Save publication as dialog box. In either of the above instances, after making the correct selections, click on the OK button to close the document and return to the Macintosh desktop. Clicking Cancel returns you to the PageMaker desktop.
See Also Save, Save ns, and Quit
1 0 Close Story
I CLOSE STORY I • MODE
Story view
• DESCRIPTION The Close story command prompts you to determine whot action to take with your story. ff you haven' t transported the story into the Layout view for pasting up, Close story will prompt you with a d ialog box, asking whether you wont to place or d iscard the story, or cancel the command. lf the story has al re<~dy been placed, Close story will automatically close the Story view and show the Layout view.
To Close Your Story
With the mouse, open the Story menu and select Close story.
Keyboard Shortcut :ICW
Result Selecting the Close story command will automatically close the story you ore working on and return you to the Layout view. If the sto ry you are working on has not been placed when Close story is selected, <1 dialog box w ill appear, presenting you with the following options:
Place: Loads the story into a text icon for you to place physically on the page
Discard: Discards the story without saving it
Cancel: Cancels the Close story command
Select the preferred action with your mouse. You will be either returned to the story you are writing or shown the Layout view of your publication with the story placed in it.
See Also New story and Plnce/Replace
Column Guides 11
I COLOR PALETTE I • MODE
Layout view or Story view
• DESCRIPTION The Color palette allows you to color graphics and text in your PageMaker document.
To Color an Item 1. Highlight the item to be colored.
2. Open the Windows menu and select Color palette.
Keyboard Shortcut :tt:K
3. The color palette will appear; scroll within it or resize it to see more of the available colors. Click on a color to apply it to your selected text or graphic. Keep in mind that PageMaker treats every graphic element as a single entity, capable of assigning one color per graphic element only. After you are finished with the color palette, dick on the Close button in the upper-left corner.
See Also Define colors
I COLUMN GUIDES I • MODE
Layout view
12 Column Guides
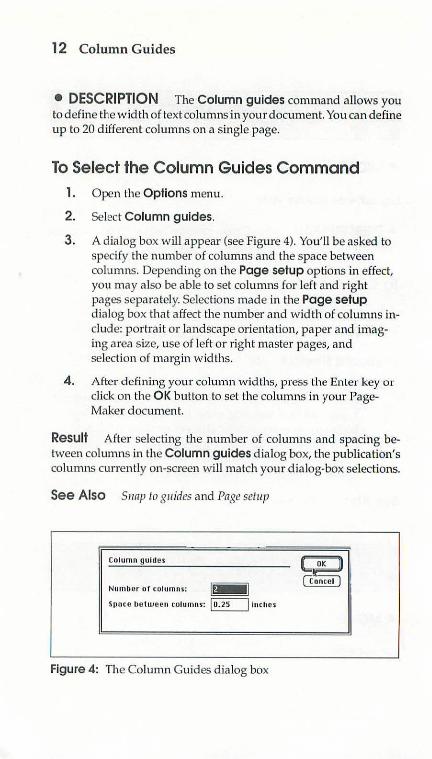
• DESCRIPTION The Column guides command allows you to define the wid th of text columns in your document. You can define up to 20 different columns on a single page.
To Select the Column Guides Command
1. Open the Options menu.
2. Select Column guides.
3. A dialog box will appear (see Figure 4). You'll be asked to specify the number of columns and the space between columns. Depending on the Page setup options in effect, you may also be able to set columns for left and right pages separately. Selections made in the Page setup dialog box tha t affect the number and width of columns include: portrait or landscape orientation, paper and imaging area size, use of left or right master pages, and selection of margin widths.
4. After defining your column widths, press the Enter key or cl ick on the OK button to set the columns in your PageMaker document.
Result After selecting the number of columns and spacing between columns in the Column guides dia log box, the publication's columns currently on-screen will match your d ialog-box selections.
See Also Snap to guides and Page setup
Column guides
Number or columns:
Spocc betw een columns: ~Inches:
Figure 4: The Column Guides dialog box
Copy Master Guides 13
I I • MODE
Layout view or Story view
• DESCRIPTION The Copy command duplicates selected items: it automatically places a copy of the selected graphic image or text block in the Clipboard, erasing its prior contents. You can then place the Clipboard copy anywhere in your document, while keeping the copy in the Clipboard.
To Copy an Item
1. Highlight the item you want to copy into the Clipboard .
2. Select Copy from the Edit menu.
Keyboard Shortcut :ll:C
See Also Clear, C11t, and Paste
• MODE
Layout view
• DESCRIPTION When you have created a master page for a publication and customized the column guides on a particular page in that publication, use Copy master guides to restore the default master column-guides. This command is not available when the default master guides are in effect.
14 Create Index
To Select the Copy Master Guides Command
1. Open the Page menu.
2. Select Copy master guides.
Result When the Copy master guides command has been completed, non-printable guide rulers will appear on the specific page of your publication. A ./ will appear next to the Copy master guides command reference in the Page menu to inform you that this command has been selected. This command is a toggle; select it again to cancel it.
See Also Book
I CREATE INDEX I • MODE
Layout view or Story view
• DESCRIPTION The Create index comma nd represents the final stages of creating an index- formatting and generating the finished index from entries you've written using Index entry and perhaps edited with Show index. In Layout view, the standard PageMaker mouse pointer changes into a loaded-text icon so you can place the index in your active document. In Story view, PageMaker creates a separate story and saves the index under your chosen fi le name.
To Create an Index
1. Open the Options menu.
2. Select the Create Index option.
Create Index 15
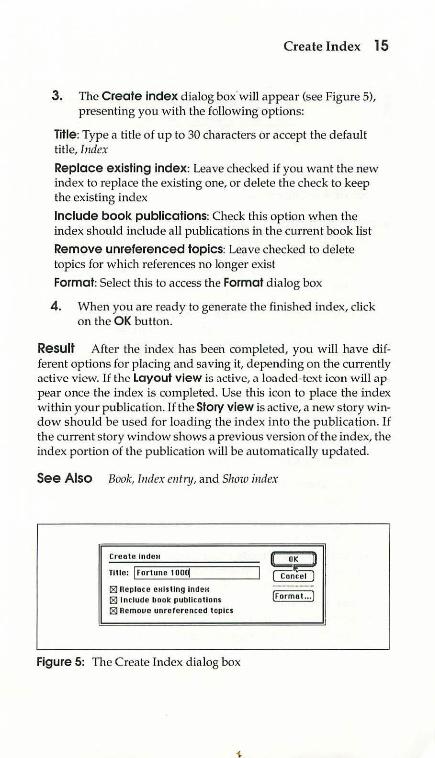
3. The Create index d ialog box· will appear (see Figure 5), presenting you with the following options:
Title: Type a title of up to 30 characters or accept the default title, Index
Replace existing index: Leave checked if you want the nev,r index to replace the existing one, or delete the check to keep the existing index
Include book publications: Check this op tion when the index should include a il publications in the current book list
Remove unreferenced topics: Leave checked to delete topics for which references no longer exist
Format: Select this to access the Format dialog box
4. When you are ready to generate the finished index, click on the OK button.
Result After the index has been comple ted, you w ill have different options for p lacing and saving it, depending on the currently active view. lf the Layout view is active, a loaded-text icon will appear once the index is completed. Use this icon to place the index within your publication. If the Story view is active, a new story w indow should be used for loading the index into the publication. If the current story window shows a previous version of the index, the index portion of the publication will be automatically updated.
See Also Book, l11dex entry, and Show index
Cretlte lndeH
Title: I Fortune 1 ooq
[81 Replace CHis ling indeH [811 nclude book publlcollons [81 nemoue unrcfer enced topics
Figure 5: The Create Index dialog box
CJD ~
16 Create TOC
I CREATETOC I • MODE
Layout view or Story view
• DESCRIPTION The Create TOC command enables you to create a table of contents either for a single document, or for all
· publications in a book list. Creating a table of contents within a PageMaker document is a two-step process. First you must specify the contents: each type of paragraph head ing (for example, first- or second-level heads) to be included should be defined as a shjle, using the Define styles command (:11:3) on the Type menu and the Paragraph specifications (:1€M) command. Second, check Include In table of contents in the resulting dia log box.
To Generate a Table of Contents 1. Open the Options menu after you've defined the contents
to be included.
2. Select the Create TOC option.
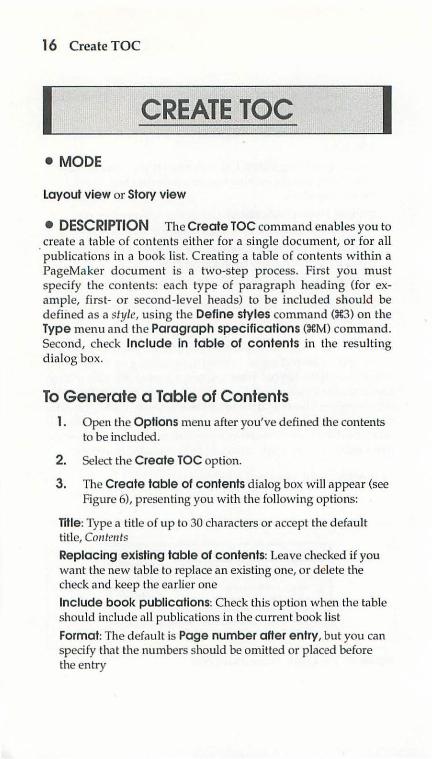
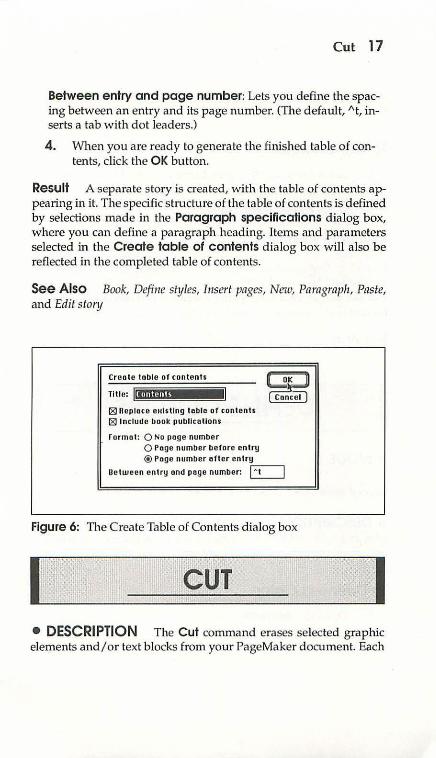
3. The Create table of contents dialog box will appear (see Figure 6), presenting you with the following options:
Title: Type a title of up to 30 characters or accept the default title, Contents
Replacing existing table of contents: Leave checked if you want the new table to replace an existing one, or delete the check and keep the eartier one
Include book publications: Check this option when the table should include all publications in the current book list
Format: The default is Page number after entry, but you can specify that the numbers should be omitted or placed before the entry
Cut 17
Between entry and page number: Lets you define the spacing between an entry and its page number. (The default, "t, inserts a tab with dot leaders.)
4. When you are ready to generate the finished table of contents, click the OK button.
Result A separate story is created, with the table of contents appearing in it. The specific structure of the table of contents is defined by selections made in the Paragraph specifications dialog box, where you can define a paragraph heading. Items and parameters selected in the Create table of contents dialog box will also be reflected in the completed table of contents.
See Also Book, Defim styles, Insert pages, New, Paragraph, Paste, and Edit ston;
Croni c loble or contents
11ue: Umrmc f8] ncplocc cHI sUng loble or con Ients f8] 1nclude book publlcouons
Formal : 0 No poge number 0 Page number before entry ®Page number orter enlry
OD ~
Del ween enlry ond poge number: ~
Figure 6: TI1e Create Table of Contents dialog box
I I • DESCRIPTION The Cut command erases selected g raphic elements and/or text blocks from your PageMaker document. Each
18 Define Colors
item will be stored in the Clipboard until you paste it somewhere or replace it with another en try.
To Cut a n Item
1. Select the image or highlig ht the portion of text you want to cut into the Clipboard.
2. Select Cut from the Edit menu
Keyboard Shortcut :!€X.
Result Any graphic element or text block selected with the pointer will be copied to the Clipboard, erasing its prior contents. Cut can also be used for copying a series of text onto the Clipboard for addi tion into another story or publication-layout page.
See Also Clear, Copy, Paste, and Text wrap
• MODE
layout view
• DESC RIPTION Use the Define colors command to create, edi t, and select PANTONE-certified colors on the color palette for enhancing elements in your PageMaker document.
To Define a Color
1. Open the Ele ments menu.
Define Colors 19
2. Choose the Define colors option.
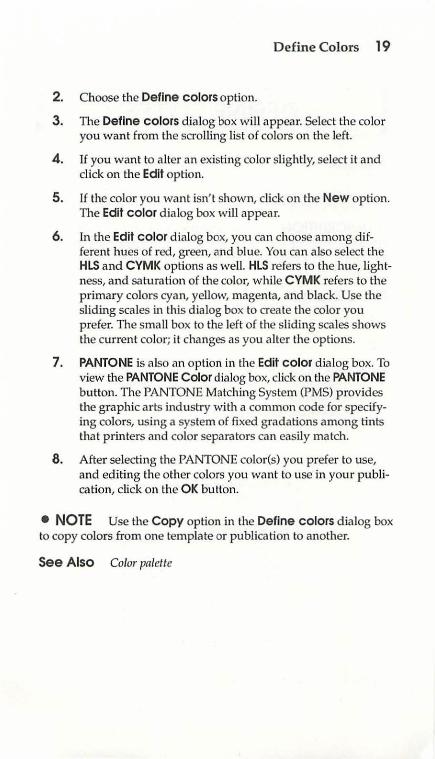
3. The Define colors dialog box will appear. Select the color you want from the scrolling list of colors on the left.
4. If you want to alter an existing color slightly, select it and click on the Edit option.
5. If the color you want isn' t shown, dick on the New option. The Edit color dialog box will appear.
6 . In the Edit color dialog box, you can choose among different hues of red, green, and blue. You can also select the HLS and CYMK options as well. HLS refers to the hue, ligh tness, and saturation of the color, while CYMK refers to the primary colors cyan, yellow, magenta, and black. Use the sliding scales in this dialog box to create the color you prefer. The small box to the left of the sliding scales shows the current color; it changes as you alter the options.
7. PANTONE is also an option in the Edit color dialog box. To view the PANTONE Color dialog box, click on the PANTONE button. The PANTONE Matching System (PMS) provides the graphic arts industry with a common code for specifying colors, using a system of fixed gradations among tin ts that printers and color separators can easily matd1.
8. After selecting the PANTONE color(s) you prefer to use, and editing the other colors you want to use in your publication, click on the OK button.
• NOTE Use the Copy option in the Define colors d ialog box to copy colors from one template or publica tion to another.
See Also Color palelte

20 Define Styles
• MODE
Layout view or Story view
• DESCRIPTION Use the Define styles dialog box to define preferred styles (of font, size, heading, etc.) for body text, captions, headlines, and subheads. You can also define new style selections.
To Define a Style
1. Open the Type menu.
2. Select Define styles.
Keyboard Shortcut 3€3.
3. The Define styles dialog box will appear (see Figure 7). Choose the specific style you prefer from the scrolling list on the left.
Define styles - OEIIJ~ Style: I Cencol ]
Dody teut ~ Cop lion
~ Headline Subheod I (nL•mn•n~ ) Sublleoa 2
b; ~ Hudl~
Figure 7: The Define Styles dialog box

Define Styles 21
4. Once you've selected the style, you can copy, edit, or remove it from the list. The options available are defined below:
New: Displays the Edit style dialog box shown in Figure 8. Use it to redefine the paragraph style for the currently active publication
Edit: Displays the Edit style dialog box as well. Note that clicking on the Based on and Next style options leads to a pop-up menu for selecting additional values. The Edit style dialog box also has options for modifying the type, paragraph, tabs, and hyphenation style of your selected text
Remove: Removes the specific style from the list
Copy: Copies different styles from one publication to another
5. Once you have selected the different paragraph style selections, click on the OK button.
• NOTE When importing a text file from another Macintosh publication, select Retain format from the Place dialog box. The in1ported file's paragraph style characteristics will show up on the Style palette.
See Also Hyphenation, Indents/tabs, Paragraph, Sh;le, and Type specs
Edit s tyle
Name:
Based on: I Headline I NeKI style: I Headline I Hudl~ • l'ltlilt : Hudlln•
Figure 8: The Edit Style dialog box
OD ~ ~ ~ ~ ~
22 Display Paragraph
I I • MODE
Layout view
• DESCRIPTION When the Display master Items command is selected, all items fro m the master page will be shown on the current page, including the (otherwise nonprinted) column and row guides d efined on the master page.
To Display or Hide Master Items 1. Open the Page menu .
2. Select Display master items. This is a toggle; when it is on, you ' Ll see a check mark (.1) before the name. Select Display master Items again to tum it o ff and hide the master items.
Result By selecting this command, all text and graphic elements appearing on the master pages of your publication will appear on the specific page of the publication you are now viewing. This command is useful for displaying header and footer information, as well as headlines that a re used throughout your publication .
See Also Copy master guides
I DISPLAY PARAGRAPH I • MODE
Story view
Display Style Names 23
• DESCRIPTION The Display 11 (paragraph) command enables you to display or hide the special characters embedded in a story. All paragraph-notation ('U) characters will be shown, in addition to normal spaces, hard carriage-rehtrns, page numbers, index numbers, and line ends.
To Select the Display Paragraph Command
I
1. Open the Options menu.
2. Select Display 11. This is a toggle; when it is on, you'll see a check mark (.f) before the name. Select Display 11 again to turn it off and hide the special characters.
DISPLAY STYLE NAMES I • MODE
Story view
• DESCRIPTION The Display style names command presents a one-inch column to the left of the story window that lists the style names for each d isplayed paragraph.
To Display Style Names
1. Open the Options menu.
2. Select the Display style names option. This is a toggle; when it is on, you'll see a check mark (.f) before the name. Select Display style names again to turn it off and hide the style names.
See Also Define styles and Edit story
24 Edit Story
I I • MODE
Story view
• DESCRIPTION This command switches you from Story view to Layout view. The cursor position in your text is kept the same in both views. If no layout (or publication) window is already on-screen, this command will create a new one.
To Access the Edit Layout Command
1. Open the Edit menu .
2. Select Edit layout from the menu.
Keyboard Shortcut ~E
I EDIT STORY I • MODE
Layout view
• DESCRIPTION This command switches you from Layout view to Story view. The cursor position in your text is kep t the same in both views. If no story window is already on-screen, . this command will create a new one.
Export 25
To Access the Edit Story Command
l. Open the Edit menu.
2. Select Edit story from the menu.
Keyboard Shortcut ~E
I EXPORT I • MODE
Layout view or Story view
• DESCRIPTION The Export command translates PageMaker files into fonnats usable by other Macintosh word-processing programs, such as Apple Mac Write II, Microsoft Word v. 3.0 and 4.0, and WriteNow v. 1.0 and 2.0. You can export either an entire file or a highlighted block of text in your document.
To Export a Document
1. After highlighting the text block to be exported, open the File m enu.
2. Select the Export option.
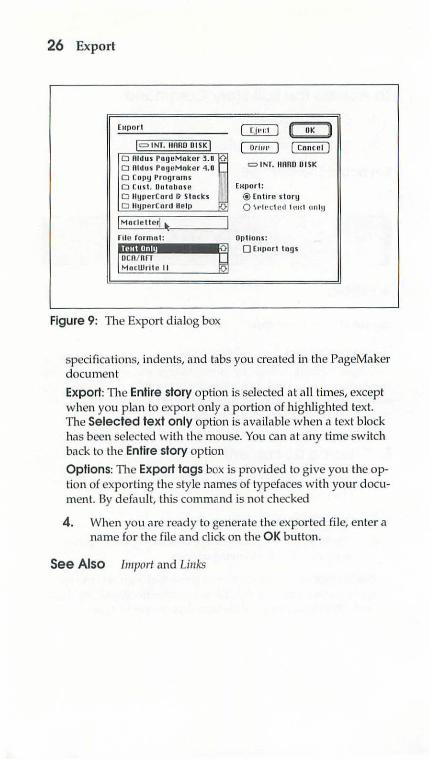
3. The Export d ia log box will appear (see Figure 9), present-ing you with the following options:
File Format: Select the file format into which you want to export your document. If the one you want is not lis ted, highlight Text Only. Selecting your file format preserves all type
26 Export
Eocporl
I= INT. liARD DI SK I 0 Aldus PogcMaker ~.0 12 0 Aldus PngeMnker 4.0 0 Copy Progrorns D Cust. Uul nbose 0 llyperCnrd ~ Slacks 0 ll4por Cord llclp I:R
IMn c le lle~ II: J
~ [OK H
~~ = INT. 11000 DI SK
Eocporl : ® Enllre slory 0 \ •• l t'&1 (~ d l mt t uui!J
rile ro rrnol: Dpllons:
~~~····I,Qj 0 Eocpo rl logs ocntnn Mnci!Jrl l c II
Figure 9: The Export dialog box
specifications, indents, and tabs you created in the PageMaker document
Export: The Entire story option is selected at all limes, except when you p lan to export only a portion of highlighted text. The Selected text only option is available when a text block has been selected with the mouse. You can a t any time switch back to the Entire story option
Options: The Export tags box is provided to give you the option of exporting the style names of ty pefaces with your document. By default, this command is not checked
4. When you are ready to generate the exported fi le, enter a name for the file and cl ick on the OK button.
See Also import and Li11ks
Fill 27
I FILL I • MODE
Layout view
• DESCRIPTION The Fill command adds shading, patterns, or solids to fill any shapes you have created in PageMaker. You can select varying percentages of grayscale from the Fill menu.
To Access the Fill Command
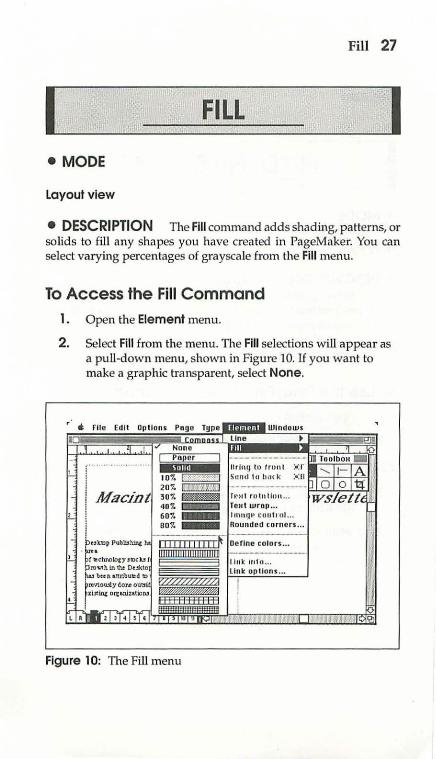
1. Open the Element menu.
2. Select Fill from the menu. The Fill selections will appear as a pull-down menu, shown in Figure 10. If you want to make a graphic transparent, select None.
Figure 10: The Fill menu
28 Find/Find Next
See Also Li11e
I FIND/FIND NEXT I • MODE
Story view
• DESCRIPTION The Find command can search an entire document for selected portions of text or phrases, paragraph styles, font types, font sizes, or typestyles. Once you activate the Find command, you can move the subsequent dialog box around the screen, using it as needed. After the first instance of your search is found, Find becomes the Find next command.
To Use the Find/Find Next Command
1. Open the Edit menu.
2. Select the Find command.
Keyboard Shortcut 3€8
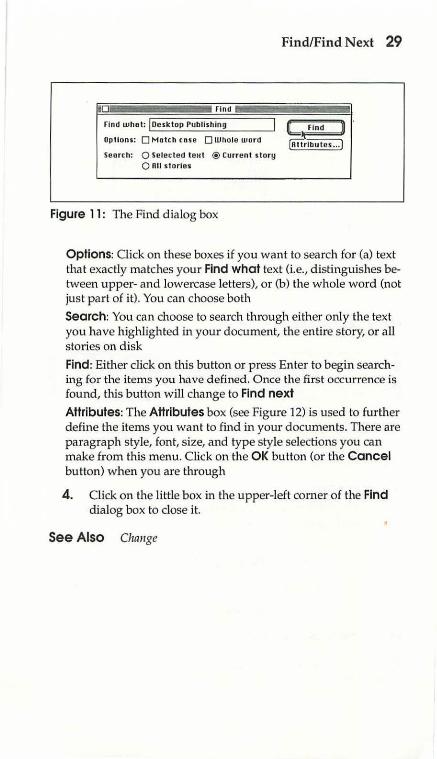
3. TI1e Find dialog box will appear (see Figu re 11 ), presenting you with the following options:
Find what: Use this area in the dialog box to type the text for which you are searching. If you are searching for typestyles, fonts, or font sizes, leave this area blank
10 Find
Find whet: Jocsktop Publishing
Options: 0 Match case 0 Whole word
search: 0 Selected t ewt ®Current story 0 All stories
Figure 11: The Find dialog box
Find/Find Next 29
Options: Click on these boxes if you want to search for (a) text that exactly matches your Find what text (i.e., distinguishes between upper- and lowercase letters), or (b) the whole word (not just part of it). You can choose both
Search: You can choose to search through either only the text you have highlighted in your document, the entire story, or all stories on disk
Find: Either click on this button or press Enter to begin searching for the items you have defined. Once the first occurrence is found, this button will change to Find next
Attributes: The Attributes box (see Figure 12) is used to fur ther define the items you want to find in your documents. There are paragraph style, font, size, and type style selections you can make from this menu. Click on the OK button (or the Cancel button) when you are through
4. Click on the little box in the upper-left corner of the Find dialog box to close it.
See Also Change
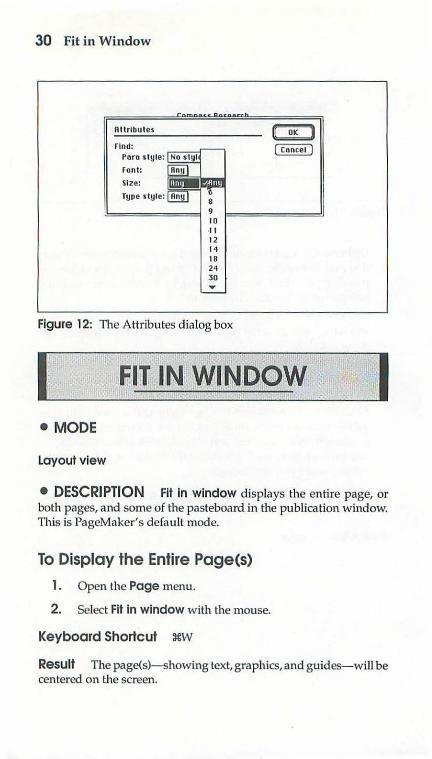
30 Fit in Window
Attributes
24 30 ....
Figure 12: The Attributes dialog box
I • MODE
Layout view
K OK ll ( Cancel ]
I
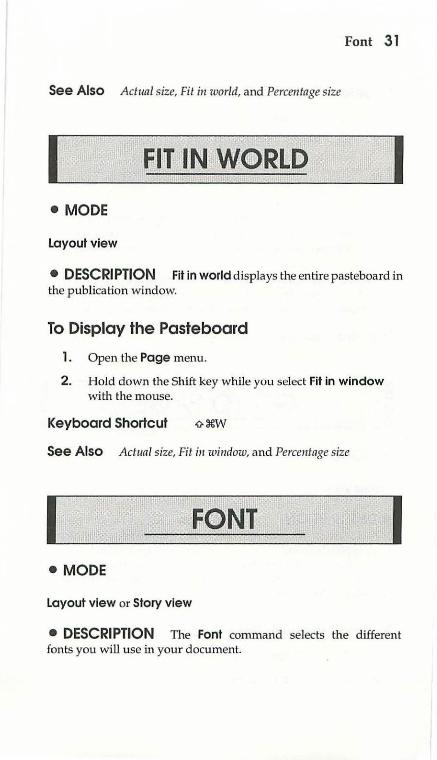
• DESCRIPTION Fit in window displays the entire page, or both pages, and some of the pasteboard in the publication window. This is PageMaker's default mode.
To Display the Entire Page(s)
1. Open the Page menu.
2. Select Fit in window with the mouse.
Keyboard Shortcut :tew
Result The page(s)-showing text, graphics, and guides-will be centered on the screen.
Font 31
See Also Actual size, Fit in world, and Percentage size
• MODE
Layout view
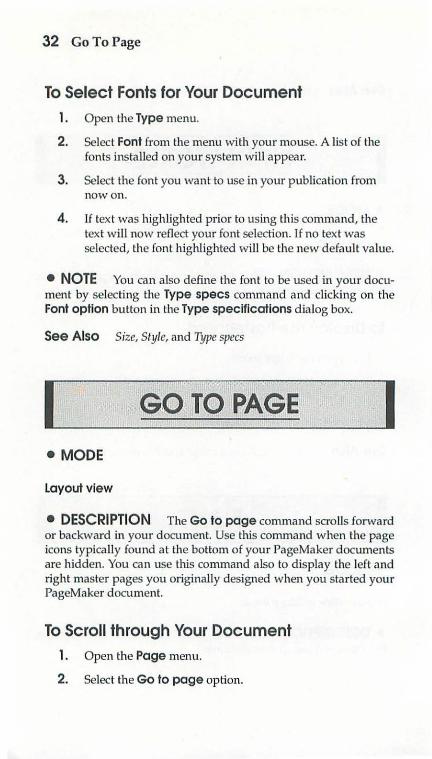
• DESCRIPTION Fit in world displays the entire pasteboard in the publication window.
To Display the Pasteboard
1. Open the Page menu.
2. Hold down the Shift key while you select Fit in window with the mouse.
Keyboard Shortcut
See Also Actual size, Fit in window, and Percentage size
• MODE
Layout view or Story view
• DESCRIPTION The Font command selects the different fonts you will use in your document.
32 GoToPage
To Select Fonts for Your Document 1. Open the Type menu.
2. Select Font from the menu with your mouse. A list of the fonts installed on your system will appear.
3. Select the font you want to use in your publication from now on.
4. If text was highlighted prior to using this command, the text will now reflect your font selection. If no text was selected, the font highlighted will be the new default value.
• NOTE You can also define the font to be used in your document by selecting the Type specs command and clicking on the Font option button in the Type specifications d ialog box.
See Also Size, Sl yle, and Type specs
I G0TOPAGE I • MODE
Layout view
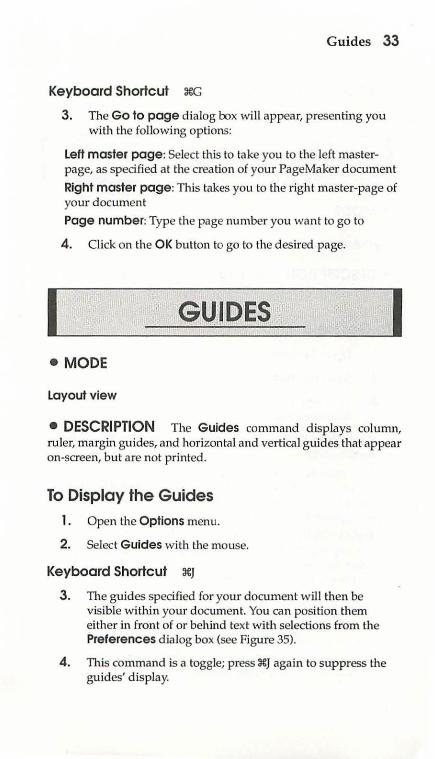
• DESCRIPTION The Go to page command scro lls forward or backward in your document. Use this command when the page icons typically found at the bottom of your PageMaker documents are hidden. You can use this command also to display the left and right master pages you originally designed when you started your PageMaker document.
To Scroll through Your Document 1. Open the Page menu.
2. Select the Go to page option.
Guides 33
Keyboard Shortcut xc
3. The Go to page dia log box will appear, p resenting you with the following options:
Left master page: Select this to take you to the left masterpage, as specified at the creation of your PageMaker docum ent
Right master page: This takes you to the right master-page of your document
Page number: Type the page number you want to go to
4. Click on the OK button to go to the desired page.
I GtiiDES I • MODE
Layout view
• DESCRIPTION The Guides command displays column, ruler, margin guides, and horizontal and vertical guides that appear on-screen, but are not printed.
To Display the Guides
1. Open the Options menu.
2. Select Guides with the mouse.
Keyboard Shortcut 3CJ
3. The guides specified for your document w ill then be visible within your document. You can position them either in front of or behind text with selections from the Preferences dialog box (see Figure 35).
4. This command is a toggle; press XJ again to suppress the guides' display.
34 Help
See Also Column guides and Preferences
I HELP I • MODE
Layout view or Story view
• DESCRIPTION The Help command provides direct access to information on using PageMaker commands.
To Get Help
1. Open the Windows menu.
2. Select the Help command.
3. The Help ctialog box \·Vill appear, presenting you with the following options:
Using Help: Click on this button to find out how to use the Help system
Commands: Click on this button to see a list of all the commands in PageMaker for which help is available. Once they are listed on the screen, double-click on the one you are interested in learning more about Topics: Click on this button to view a list of topics that pertain to using PageMaker. You can scroll through the items and select the one you are interested in learning more about by double-clicking on the subject
Select: Although dimmed on the introductory Help screen, the Select button can be clicked on to access additional information about a specific command. It becomes available after you've selected Topics or Commands Quit Help: Click on this button to leave the Help series of commands and return to your previous screen
Hyphenation 35
• NOTE If you have an extended keyboard, just press the Help key. After the cursor on the screen turns into a question mark, double-click on the command you want to learn more about from the Topics or Commands menus.
I HYPHENATION I • MODE
Layout view or Story view
• DESCRIPTION You can use the Hyphenation command to define how words in your stories and publications appear hyphenated. You can hyphenate words in manual mode, manual mode with the aid of a dictionary to define syllable breaks, and manual hyphenation with the use of an algorithm.
To Hyphenate a Document
1. Open the Type menu.
2. Select Hyphenation with the mouse.
Keyboard Shortcut 3€H
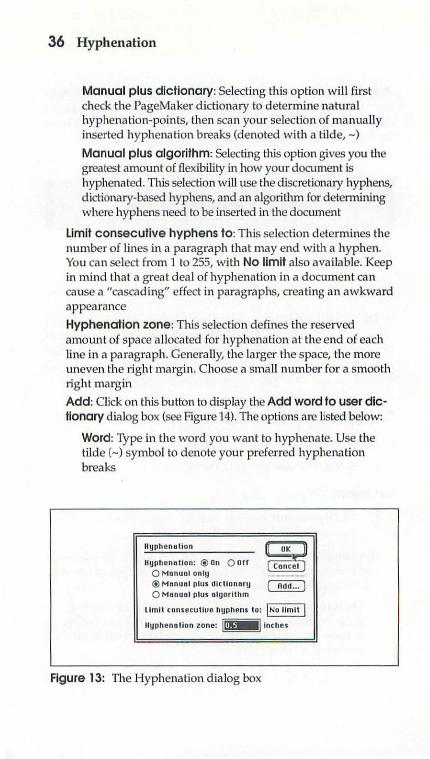
3. The Hyphenation dialog box will appear (see Figure 13), presenting you with the following options:
Hyphenation: Click the On or Off circle to toggle the hyphenation feature on or off. The level of hyphenation depends on th~ following optional settings:
Manual only: lf this option is selected, hyphenation will occur in words that contain a hyphen you have embedded in them using the Add dialog box, explained later in this command reference section
36 Hyphenation
Manual plus dictionary: Selecting this option will first check the PageMaker dictionary to determine natural hyphenation-points, then scan your selection of manually inserted hyphenation breaks (denoted with a tilde,-)
Manual plus algorithm: Selecting this option gives you the greatest amount of flexibility in how your document is hyphenated. This selection will use the discretionary hyphens, dictionary-based hyphens, and an algorithm for determining where hyphens need to be inserted in the document
limit consecutive hyphens to: This selection determines the number of lines in a paragraph that may end with a hyphen. You can select from 1 to 255, with No limit aJso ava ilable. Keep in mind that a great deal of hyphenation in a document can cause a "cascading" effect in paragraphs, creating an awkward appearance
Hyphenation zone: This selection defines the reserved amount of space a llocated for hyphenation a t the end of each line in a paragraph. Generally, the larger the space, the more uneven the right margin. Choose a small number for a smooth •ight margin
Add: Click on this button to d isplay the Add word to user die· tionary dialog box (see Figure 14). The options are listed below:
Word: Type in the word you want to hyphenate. Use the tilde(-) symbol to denote your preferred hyphenation breaks
llyph eno tion
Hyphenation: ®on 0 orr 0 Manual only ® Manual plus dictionary 0 Manual plus algorithm
GJ ( Cancel]
~
limit consecutlue hyphens to: JNo limit J
Hyphenation zone: Jill Jlnches
Figure 13: The Hyphenation dialog box
Hyphenation 37
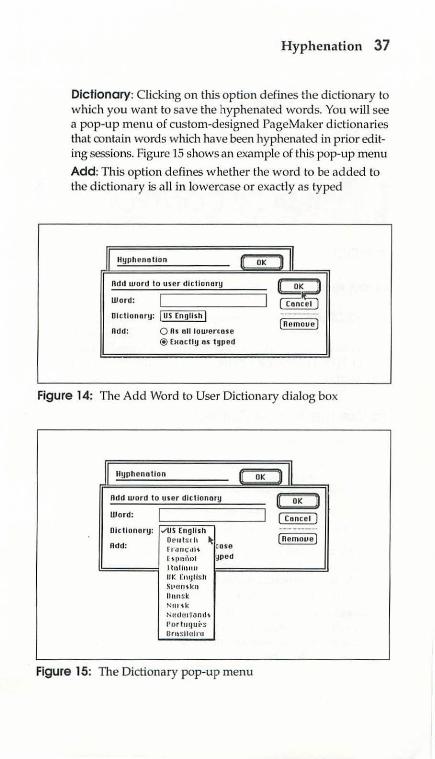
Dictionary: Clicking on this option defines the dictionary to which you want to save the hyphenated words. You will see a pop-up menu of custom-designed PageMaker dictionaries that contain words which have been hyphenated in prior editing sessions. Figure 15 shows an example of this pop-up menu
Add: This option defines whether the word to be added to the dictionary is all in lowercase or exactly as typed
lr llyph e nollon II OK
Add word t o use r dic tionary
I Wo rd: !!:::::==::;-----' Dl ctlonory: I US English l Add: 0 As nil lowertnse
@ [HOCII y OS t ype d
lll
~ I ( Rcrnou c )
Figure 14: The Add Word to User Dictionary d ialog box
llllyphcnotlon II OK 111 Rdd word l o u ser dlctlonnry I! OK ~ Word: I ~ Dlc llonory: v'US Engli s h -·------·
Dl•uts c h ~ cose (Remoue)
Rdd: frtiii C •I i ~
[ ' pnt\o t ~pod I tnl innn Il K [1\l.t iiSII St1 (W, kn IJnnsk N tll '\k
Nedc!t1and' Pnrtwrui.•s Ur"slluiru
Figure 15: The Dictionary pop-up menu

38 Image Control
Remove: Click on this button to remove the displayed word from the hyphenation dictionary
See Also Deji11e styles and Pnrngmplz
I IMAGE CONTROh
• MODE
Layout view
I
• DESCRIPTION The Image control command allows you to adjust the contrast, image intensity, and screen patterns of any grayscale or black-and-white images imported in a tagged-image file format, or TIFF. The Image control command does not apply to color TIFF images.
To Use the Image Control Command
1. Select the imported TIFF graphic.
2. Open the Element menu.
3. Select Image control with your mouse.
4. The Image control d ialog box will appear (see Figure 16), presenting you with the following options:
Black and white: If the graphic you are importing is a blackand-whi te image, this selection will be highlighted automatically. If the imported image is in a grayscale (i.e., in a tone of gray) this selection will not be highlighted
Screened: This option will be automatically highlighted if your imported image is grayscaled. If you import a black-andwhite image, and want to convert its screen appearance to a grayscale, select this option
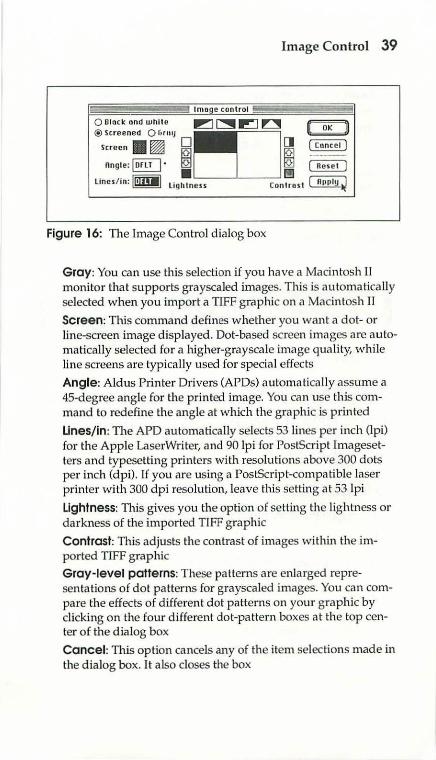
Image Control 39
lmo c con trol
Q Biockondwhllc ~~~~ U OK H ®Screened Q l;rouJ ~ • •
screen B ~ 0 [J ( Cancel I Angle: §Q' ~ ~ i ~-:sc i I
lines/ in: fg Ug~ness Con~ost ~
Figure 16: The Image Control dialog box
Gray: You can use this selection if you have a Macintosh II monitor that supports grayscaled images. This is automatically selected when you import a TIFF graphic on a Macintosh II
Screen: This command defines whether you want a dot- or line-screen image displayed. Dot-based screen images are automatically selected for a higher-grayscale image quality, while line screens are typically used for special effects
Angle: Aldus Printer Drivers (APDs) automatically assume a 45-degree angle for the printed image. You can use this command to redefine the angle at which the graphic is printed
Unes/ in: The APD automatically selects 53 lines per inch (!pi) for the Apple LaserWriter, and 90 lpi for PostScript Imagesetters and typesetting printers with resolutions above 300 dots per inch (dpi). If you a.re using a PostScript-compatible laser printer with 300 dpi resolution, leave this setting at 53 !pi
Lightness: l11is gives you the option of setting the lightness or darkness of the imported TIFF graphic
Contrast: This adjusts the contrast of images within the imported TIFF graphic
Gray-level patterns: These patterns are enlarged representations of dot patterns for grayscaled images. You can compare the effects of different dot patterns on your graphic by clicking on the four different dot-pattern boxes at the top center of the dialog box
Cancel: This option cancels any of the item selections made in the dialog box. It also closes the box
40 Import
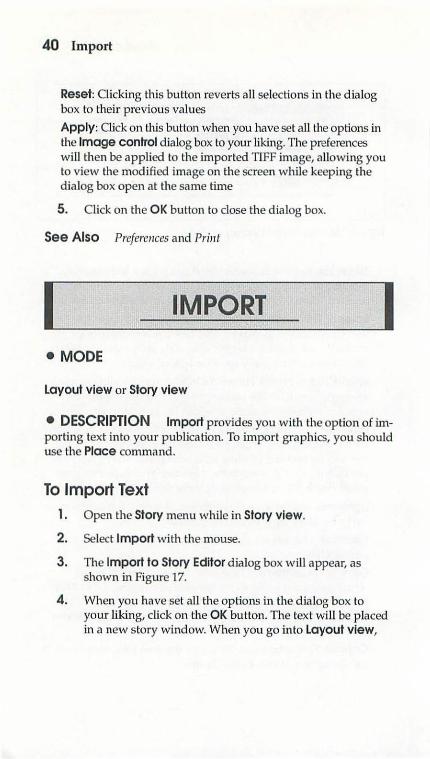
Reset: Clicking this button reverts all selections in the dialog box to their previous values
Apply: Click on this button when you have set ail the options in the Image control dialog box to your liking. The preferences will then be applied to the imported TIFF image, a llowing you to view the modified image on the screen while keeping the dialog box open at the same time
5. Click on the OK button to close the dialog box.
See Also Preferences and Prillt
I IMPORT I • MODE
Layout view or Story view
• DESCRIPTION Import provides you with the option of importing text into your publication. To import graphics, you should use the Place command.
To Import Text 1. Open the Story menu while in Story view.
2. Select Import with the mouse.
3. The Import to Story Editor dialog box will appear, as shown in Figure 17.
4. When you have set all the options in the dialog box to your liking, click on the OK button. The text will be placed in a new story window. When you go into Layout view,

Import to story Editor
lo Aldus PogoMoker 4.0 I D lllolon ln\t•llro Old n ... :!J 0 Aldus Installer ltis tonJ 0 AQtrl~ Report D Compass Research 0 rlnal Project 0 Moe News 0 macle tter 0 Otrt Report
Place:
Import 41
~OQ ~~
= INT. liARD DISK
® Rs now stor~ 0 Reploclng entire s tory 0 Inserting teHt
Options: 181 Retain format 181 Conuert quotes 0 Road togs
Figure 17: The d ialog box for importing text
the mouse pointer will change to show that you must place the text somewhere in the document or on the pasteboard.
There are three ways to import a story:
As new story: Places the imported document as a new story into your list of publications
Replacing entire story: Replaces the entire story currently on-screen
Inserting text: Places the imported text into the existing story as additional text
Options for importing a story are as follows:
Retain format: Retains the format of the incoming text file
Convert quotes: Translates quotation marks in the imported text fi le so that they are consistent with PageMaker conventions
Read tags: Reads the tags attached to the incoming data fi le that defines the fi le's font- and character-style attributes
See Also New story Place and Plnce/Replnce
42 Indents/Tabs
• MODE
Layout view
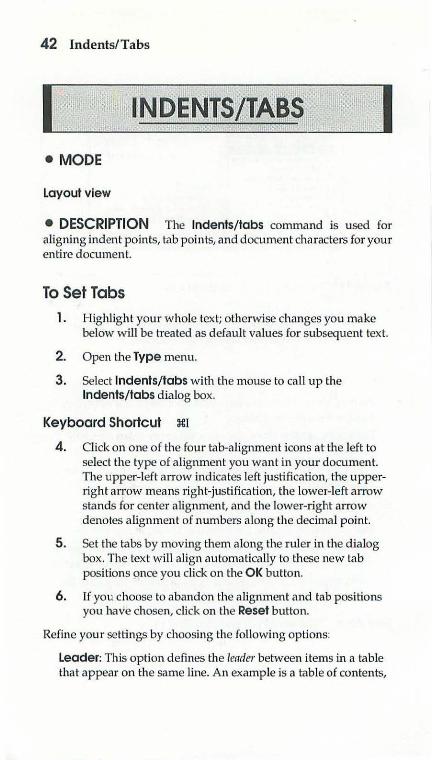
• DESCRIPTION The Indents/tabs command is used for aligning indent points, tab points, and document characters for your entire document.
To Set Tabs 1. Highlight your whole text; otherwise changes you make
below will be treated as default values for subsequent text.
2. Open the Type menu.
3. Select Indents/tabs with the mouse to call up the Indents/tabs dialog box.
Keyboard Shortcut 3l:I
4. Click on one of the four tab-alignment icons at the left to select the type of alignment you want in your document. The upper-left arrow indicates left justification, the upperright arrow means right-justification, the lower-left arrow stands for center alignment, and the lower-right arrow denotes alignment of numbers along the decimal point.
5. Set the tabs by moving them along the ruler in the dialog box. The text will align automatically to these new tab positions once you click on the OK button.
6. If you choose to abandon the alignment and tab positions you have chosen, click on the Reset button.
Refine your settings by choosing the following options:
Leader: This option defines the leader between items in a table that appear on the same line. An example is a table of contents,

Indents/Tabs 43
in which the page numbers can be separated from the text by a row of double-spaced dots. You can select periods, hyphens, a solid line, or customize your own leader style for use in your publication. The Indents/tabs dia log box with the Leader option selected is shown in Figure 18.
Position: Click here to view the pop-up menu of options, shown in Figure 19. The options within this menu are:
Add tab: This option adds tabs at the column position typed in the Position box
Delete tab: To delete a tab, type the tab's location in the Position box and select this option
Move tab: Moves a tab from one location to another
Repeat tab: This option sets tab locations automatically along the length of the ruler. The distance between tabs is
Figure 18: The Leader Options pop-up menu
l eader
1~1~ 1
.Figure 19: The Position Options pop-up menu
44 Indents/Tabs
calculated by repeating the distance from the zero point of the ruler to the first tab
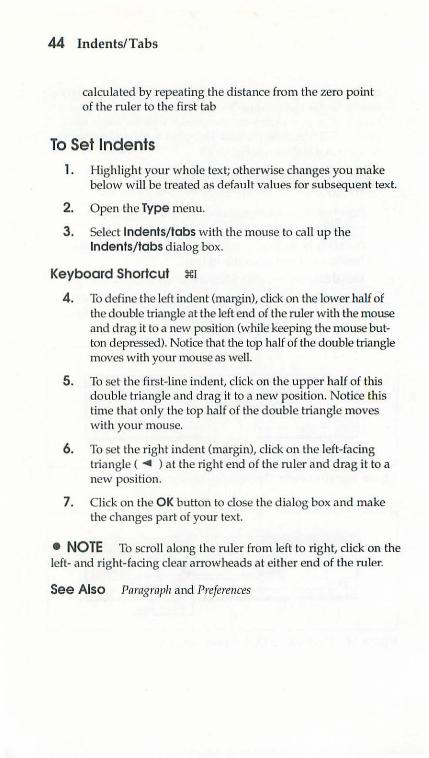
To Set Indents 1. Highlight your w hole tex t; otherwise changes you make
below will be treated as default values for subsequent text.
2. Open the Type menu.
3. Select Indents/tabs with the mouse to ca ll up the Indents/ tabs dialog box.
Keyboard Shortcut :11:1
4. To define the left indent (margin), click on the lower half of tl1e double triangle at the left end of the ruler with the mouse and drag it to a new position (willie keeping the mouse button depressed). Notice that the top half of tl1e double triangle moves with your mouse as well.
5. To set the fi rst-line indent, click on the upper half of this double triang le and d rag it to a new position. Notice this time that only the top half of the double triangle moves with your mouse.
6. To set the right indent (margin), d ick on the left-facing triangle ( ~ ) a t the right end o f the ruler and drag it to a new position.
7. Click on the OK button to close the dialog box and make the changes part of your text.
• NOTE To scroll along the ruler from left to right, click on the left- and right-facing clear arrowheads at either end of the ruler.
See Also Pnrngrnph and Preferences
Index Entry 45
• MODE
Layout view or Story view
• DESCRIPTION The Index entry command creates index entries for your publication's index.
To Create an Index Entry
1. Open the Options menu.
2. Select Index entry.
Keyboard Shortcut :1:€;
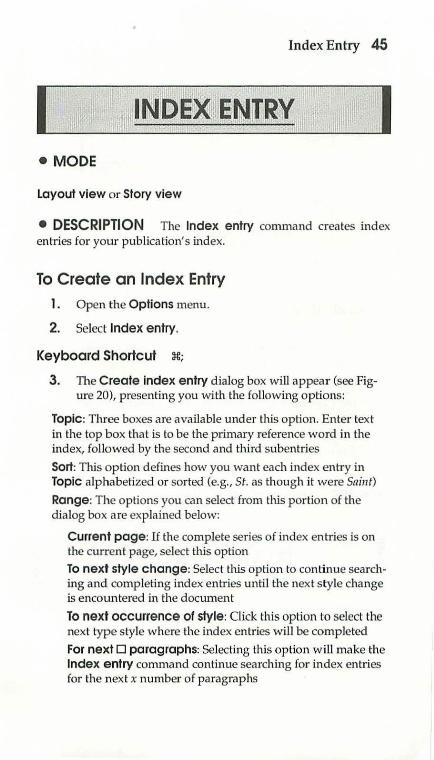
3. The Create index entry dialog box w ill appear (see Fig-ure 20), presenting you with the following options:
Topic: Three boxes are available under this option. Enter text in the top box that is to be the primary reference word in the index, followed by the second and third subentries
Sort: This option defines how you want each index entry in Topic alphabetized or sorted (e.g., St. as though it were Snint)
Range: The options you can select from this portion of the dialog box are explained below:
Current page: If the complete series of index entries is on the current page, select this option
To next style change: Select this option to continue searching and completing index entries until the next style change is encountered in the document
To next occurrence of style: Click this option to select the next type s tyle where the index entries w ill be completed
For next 0 paragraphs: Selecting this option will make the Index entry comm and continue searching for index entries for the next x number of paragraphs
46 Insert Pages
Creo le lndoH entry
Topic: Sorl: I 1!1! ...--------,
P====~l
J Rongc: ®curren t pege
DO ~ (Topic ... )
~
0 To ncut s tyle chonge O To neHt occurrence or style: J Body teHt l 0 r or ncut ~ peregraphs 0 t ross- rorc rencc (H- re f)
Re ference ouerrlde: D Bold D Italic D Underline
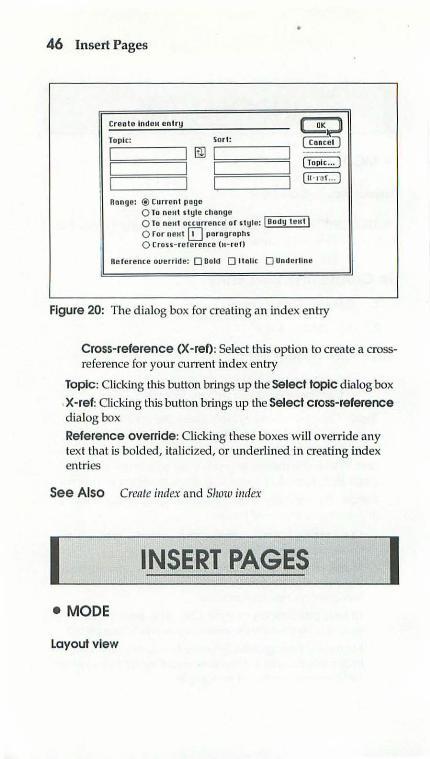
Figure 20: The dialog box for creating an index entry
Cross-reference (X-ref): Select this option to create a crossreference for your current index entry
Topic: Clicking this button brings up the Select topic dialog box
X-ref: Clicking this button brings up the Select cross-reference dialog box
Reference override: Clicking these boxes will override any text that is bolded, ita licized, or underlined in creating index entries
See Also Create index and Show index
I INSERT PAGES I • MODE
layout view

Insert Pages 47
• DESCRIPTION The Insert pages command adds pages to your publication in the same format as the existing pages.
To Insert Pages into a Document 1. Open the Page menu.
2. Select the Insert pages option.
3 . The Insert pages dialog box will appear (see Figure 21), presenting you with the following options:
Insert: This option defines how many pages you want inserted into your document- up to a total of 999 pages in your PageMaker document, provided your computer has enough disk space
Before/ After/ Between current page(s): Select where you want the additional page(s) inserted into your publicationeither before, after, or between the curren t page(s). PageMaker automatically remembers all pages affected by the insertion(s)
4. After selecting the number and location of where page(s) will be inserted into your document, click on the OK button.
Result Additional page number icons will appear in th e lowerleft portion of your screen. The inserted pages will have the same format and guide characteristics as defined in the master pages of your publication.
See Also New and Remove pages
Insert pages
Inser t~ poge(s): 0 oeror~ current page ® nncr currenl poge
fl OK II ( Cancel )
0 Dctwccn current pag e•
Figure 21: The Insert Pages dialog box
48 Leading
I LEADING I • MODE
Layout view and Story view
• DESCRIPTION The Leading command defines the amount of lending-spacing (or white space) between lines of text-in your publication. If no text is selected, the options selected with the Leading command will be reflected in text entered in subsequent publications.
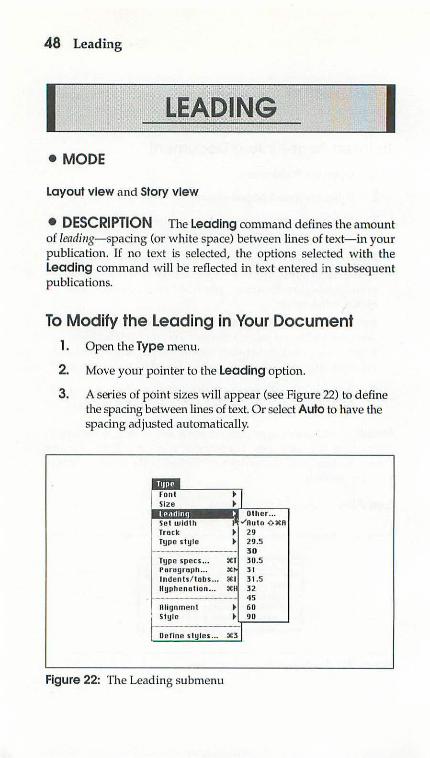
To Modify the Leading in Your Document 1. Open the Type menu.
2. Move your pointer to the Leading option.
3. A series of point sizes will appear (see Figure 22) to define the spacing between fu1es of text. Or select Auto to have the spacing adjusted automatically.
ID'I!ml font : I Size . ,,
' Other ... Set widt h I -'nut o <>Xn Track ~ 29 Type style ~ 29.5
30 Type specs ... XT 30.5 rarugr-oph ... X' 3 1 Indents/ l obs ... X I 31.5 llyphenntion ... XI 32
f.-- 45 Alignment ~ 60
j St yle ~ 90
Define s t yles ... X 3 1
Figure 22: TI1e Leading submenu
Line 49
Keyboard Shortcut O:t!:A
4. You can also select Other from the Leading submenu. This will bring up the Other leading dialog box in which you can enter the number of points for the leading. Unless you want a certain effect, leading should be at least 20 percent greater than the text's font size. When you have decided on the amount of leading, click on the OK button.
See Also Paragraph and Type specs
I LINE I • MODE
Layout view
• DESCRIPTION The Line command is used to select from different line-width point sizes, line patterns, and the option of reversing lines from black to white.
To Change the Style of Lines 1. Highlight the line you want to modify.
2. Open the Element menu.
3. Choose the line option.
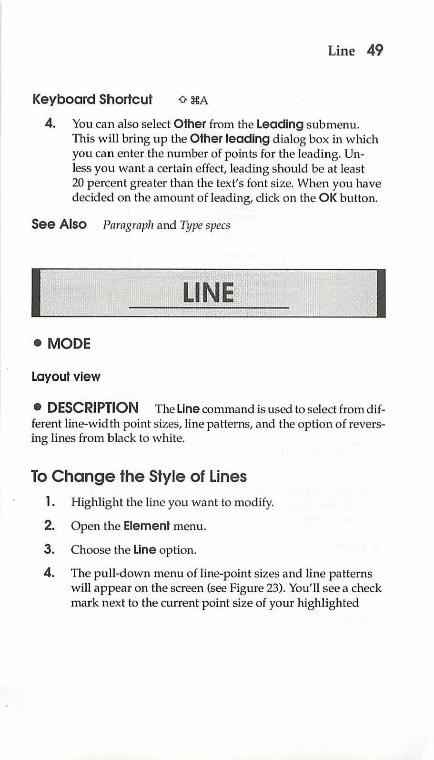
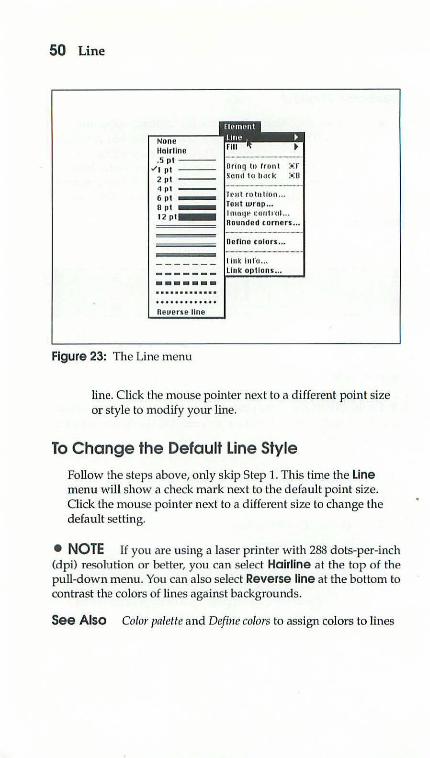
4. The pull-down menu of line-point sizes and line patterns will appear on the screen (see Figure 23). You'll see a check mark next to the current point size of your highUghted
50 Line
flol rllne .S pt---
"'1 pt 2 p i 4pt -6 pt Opt -12pl -
--····· neuerse line
Figure 23: The Line menu
line. Click the mouse pointer next to a different point size or style to modify your line.
To Change the Default Line Style
Follow the steps above, only skip Step 1. This time the Line menu will show a check mark next to the default point size. Click the mouse pointer next to a d ifferen t size to change the default setting.
• NOTE If you are using a laser printer witl1 288 dots-per-inch (dpi) resolution or better, you can select Hairline at the top of the pull-down menu. You can also select Reverse line at the bottom to contrast the colors of lines against backgrounds.
See Also Color palette and Define colors to assign colors to lines
Linklnfo 51
• MODE
Layout view
• DESCRIPTION The Link info command gives you information on links you have made between text and graphic fi les that are independent of your p ublication file.
To Get Information about Links
1. Highlight a graphic or text section.
2. Open the Element menu.
3. Select the Link info option.
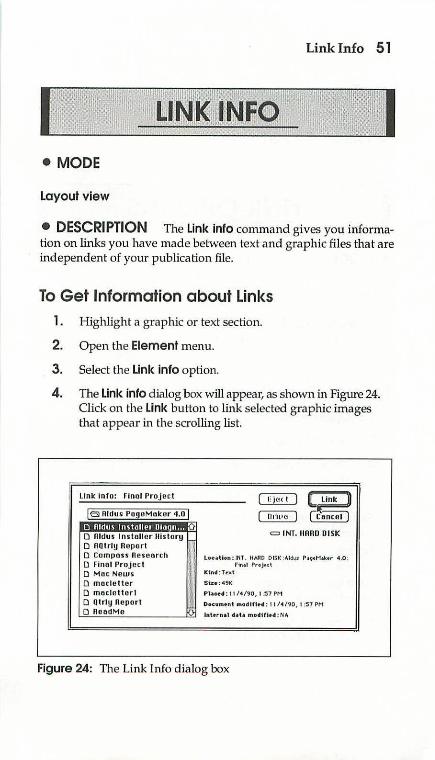
4. The Link info dialog box will appear, as shown in Figure 24. Click on the Link button to link selected graphic images that appear in the scrolling list.
link info: Final Project
l e~ Aldu• Poge Mokor 4.0 I D Aldu~ ln~taiiPI Olagn ... r!.l D Aldus I ns lollcr llis tory D AQtrly Repo rt 0 Compass neseorch D Final Project [) Mnc Ne w s D mocle ller D moc le llerl D Qtrly Re port D Ae odMe
= INT. liARD DISK
Lo~.11tlon : INT. HARD DISK :Aldur P-19<tM~tr 4.0: r n.1 Proj4-cl
k ind:Tt)Ct
Siu: <l' l(
Pl.acH : 11/ 4 /90, I ~7 PH
Ooc:Utnt'nt lrtodlf1t·4 : 11 / 4/90 , I :57 PM
Figure 24: The Link Info dialog box
52 Link Options
5. Click on Cancel to close the box; it won' t cancel the link, however.
See Also Links and Link options
I LINK O.PTIO.NS 11 ' ' ',! ,
• MODE
Layout view
• DESCRIPTION The Link options command defines how you want to have your linked images and publications updated and stored.
To Select Default Link Options 1. Open the Element menu.
2. Select Link options.
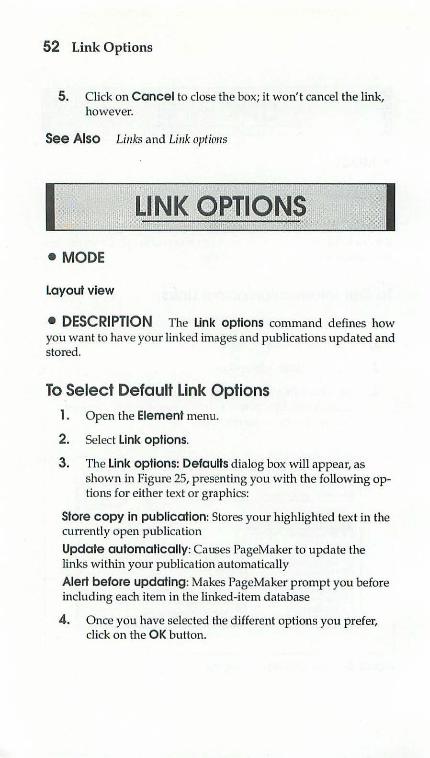
3 . The Link options: Defaults dialog box will appear, as shown in Figure 25, presenting you with the following options for either text or graphics:
Store copy in publication: Stores your highlighted text in the currently open publica tion
Update automatically: Causes PageMaker to update the links within your publication automatically
Alert before updating: Makes PageMaker prompt you before including each item in the linked-item database
4. Once you have selected the different options you prefer, click on the OK button.
link options: Dc foults
Te Ht: f8l Shu tt <OPI.Iill IHthllca lum
181 Update outomatlcally !81 nlcrt before updating
Grophlcs: f8l Store cop~ In publico lion
f81 Updot c outomotlcolly !81 nlort be fore up doling
CEJ) ~
Figure 25: Dialog box showing link options
Links 53
• NOTE If you highlig ht text or a graphic before doing Step 1 above, only the relevant half of the dialog box will be shown onscreen.
See Also Links and Link info
I LINKS I • MODE
Layout view or Story view
• DESCRIPTION The Link command joins different files together tha t make up your total publication. It is a cross-referencing command, linking fi les that are external to your main publication to their locations w ithin it. You can also ensure that these files are "flagged" with an update code.
54 Links
To Link Files 1. Define the text to be linked to your publication by high
lighting it. (Or link to outside text and graphic files with the Link options command .)
2. O pen the File menu.
3. Select Links w ith the mouse.
Keyboard Shortcut X=
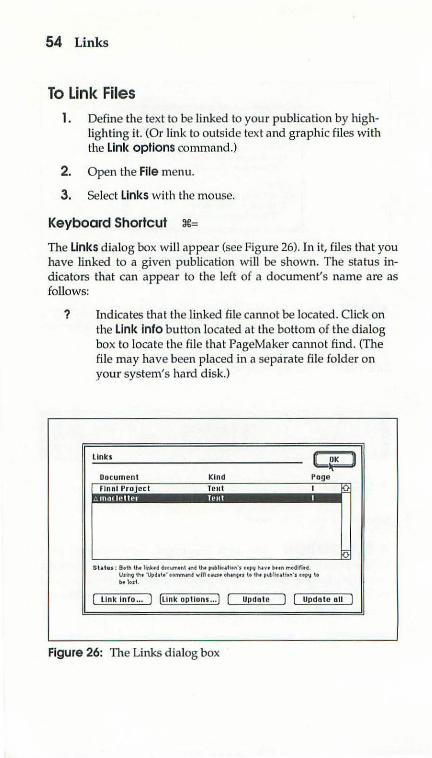
The Links dialog box will appear (see Figure 26). In it, files tha t you have linked to a given publication will be shown. The status indicators that can appear to the left of a document's name a re as follows:
? Indicates tha t the linked file cannot be located. Click on the link info button located at the bottom of the dialog box to locate the file that PageMaker canno t find. (The file may have been placed in a separate file folder on your system's hard d isk.)
Links CijD Document Kind Page Final Projec t Teut t
In !:Ohhu: : Beth Uw 'hnb4 tltc'i'Mtll a.nd tM ~lic-llli•l'l·s ctf'l! IUv t "" " modifit CI
Usift,; \ht "!Jp~lltt' ~~~ ... m c:wu ~"iU t• lh• •l.ltlhutftn's u~ t• ~lost.
( Link Info ... ) {Link options ... ) ( Update ) ( Update all )
Figure 26: TI1e Links dialog box
Links 55
+ Indicates that the linked file has been modified, and that once the publication file is opened, it too will be modified
6 Indicates that both the publication and the linked file have been modified. If you click on the Update button, all changes made to the internal copy will disappear: i.e., you'll get a copy of the external file
0 Indicates that the linked file has been modified since being originally linked. This also indicates that links have not been updated, because they were not set to be updated
Indicators (besides the page numbers) that can appear in the page column of the dialog box are explained below:
Page#?
LM
RM PB ov
X
A linked file or graphlc is in a story that has not been saved or composed; therefore no page number exists for the link
Location of link is in the left master-page
Location of link is in the right master-page
Link has been completed to the pasteboard
Linked element (e.g., inline graphic) is not shown because it is part of a text block that is overset or not fully flowed
The linked element resides in a story that has yet to be placed in Layout view
The buttons a t the bottom are explained below:
Link info: Provides file information about links to publications
Unk options: Indicates how linked files will be stored and updated
Update: Updates all externally linked files to the most recent internal publication file
Update all: Automatically updates all linked files with publications in PageMaker that have pre-established links
Once you have completed all your linking activity, click on the OK button.
56 Lock Guides
Result After selecting options in the Links dialog box, graphic elements and text files linked to your publication will be updated. Links completed in the dialog box will also be reflected in the Link info dialog box. Upon clicking on the Link options button, links will be updated automatically, or PageMaker will alert you prior to completing the links belween files.
See Also Link options, Link i11jo, Opw, Print, and Save as
I I • MODE
Layout view
• DESCRIPTION The Lock guides command locks column and ruler guides in place in your publication.
To Lock Guides 1. Open the Options menu.
2. Choose the Lock guides option.
3. Once the Lock guides option has been selected, a check mark will appear next to the name Lock guides in the menu. This command is a toggle; select it again to remove the check mark.
• NOTE If you decide to change the page dimens ions of your document with the Page setup command, you shou ld lock your guides-otherwise they may get moved.
See Also Preferences and Page set11p
NewStory 57
I NEW I • MODE
layout view
• DESCRIPTION Use the New command to create a new publication. It provides you with options for customizing the size, orientation, number of pages, and margins used in your new publication.
To Create a New Document
1. Select the File menu.
2. Select New ·with the mouse.
Keyboard Shortcut 3€N
3. The Page setup dialog box will appear, as shown in Figure 28. (See the figure and the discussion of the options in this dialog box under Page setup.)
4. After completing your option setting, click on the OK button. Your new document matching your parameter selections will appear on-screen.
See Also Book, Insert pages, Open, Page set11p, Preferences, and Remove pages
I I • MODE
Story view
58 New Story
• DESCRIPTION Use the New story command to begin a new story in a publication.
To Begin a New Story 1. Open the Story menu and select the New story option.
2. A new story window will appear on the screen. You can now begin writing a new story in this window.
3. Once your story is completed, choose Place from the File menu to place your story into the publication currently active in Layout view.
Keyboard Shortcut :H:D
4. If you attempt to save the story without placing it, a Place dialog box will appear, presenting you with the following options:
Place: Selecting this option closes the Story view and provides you with three options for placing your story in Layout view: manual, semi-automatic, and automatic
Discard: Discards the story you have in the active window, without saving it
Cancel: Cancels the command and brings you back to the active story window
• NOTE As long as no placed story is selected, you can select Edit story (:H:E) while in Layout view to begin a new story.
See Also Autoflow, Import, and Place/Replace
Open 59
I 0PEN I • MODE
Layout view
• DESCRIPTION Use the Open command to access publications you have already created and saved in PageMaker.
To Open a Publication
1. Open the File menu and select Open with the mouse.
Keyboard Shortcut 3€0
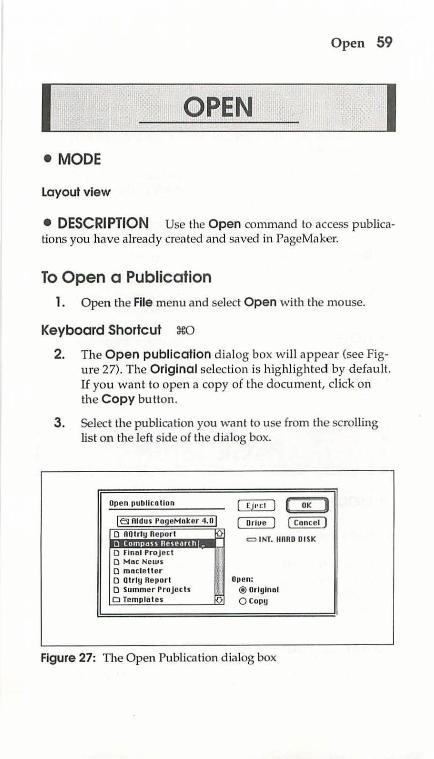
2. The Open publication dialog box will appear (see Figure 27). The Original selection is highlighted by default. If you want to open a copy of the document, cl ick on the Copy button.
3. Select the publication you want to use from the scrolling list on the left s ide of the d ialog box.
Open publico lion ~ H OK B l ei~ Aidus PogeMnker40 I ~ [cnncel)
0 AQtr1y Report
• .. 0 rlnol Project 0 Mbc News 0 moclcttc r 0 Qtrly Report 0 Summer Projects D Tcmplet es
.l, ~
= INT. liARD DISK
Open: ®Original QCopy
Figure 27: The Open Publication dialog box
60 Page Setup
4. As your file is being opened, PageMaker checks to determine if any links have been assigned. If a file to which a link has been made cannot be found, the Cannot find dia log box wi ll appear, presenting you with the following options:
link: If you ca n locate the file to which you are making the link in the scrolling list of files at the right side of the dialog box, highlight it and select Link
Ignore: TI1is informs PageMaker to ignore the attempted link to the publication being opened ,
Ignore all: This informs PageMaker to ignore all links to the publication being opened
5. After completing (or ignoring) the necessary links, click on the OK button to open your publication.
• NOTE You can have only one PageMaker document open at any time.
See Also Import, Links, Link info, New, Save, and Save as
• MODE
Layout view or Story view
• DESCRIPTION Use Page setup to change the page size, margin settings, page orienta tion, and selection of page numbers originally defined with the New command. Use this command also to edit your original page selections made with the New command.
To Set Up Your Page 1. Open the File menu and select the Page setup option.
Page Setup 61
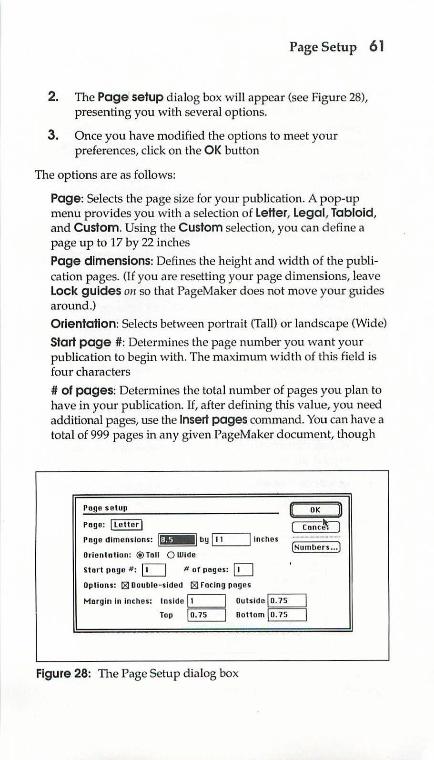
2. The Page setup dialog box will appear (see Figure 28), presenting you with several options.
3. Once you have modified the options to meet your preferences, click on the OK button
The options are as follows:
Page: Selects the page size for your publication. A pop-up menu provides you with a selection of Letter, Legat Tabloid, and Custom. Using the Custom selection, you can define a page up to 17 by 22 inches
Page dimensions: Defines the height and width of the publication pages. (If you are resetting your page dimensions, leave Lock guides on so that PageMaker does not move your guides around.)
Orientation: Selects between portrait (Tall) or landscape (Wide)
Start page #: Determines the page number you want your publication to begin with. The maxin1un1 width of this field is four characters
# of pages: Determines the total number of pages you plan to have in your publication. If, after defining this value, you need additional pages, use the Insert pages command. You can have a total of 999 pages in any given PageMaker document, though
Pogo setup
Page: \ Letter I Page dimensions: U•J I by ~ Inches
Orlentntlon: ®Toll 0 Wldo
Start page If: EJ II of pages: ~ Options: 181 Double-sided 181 Feeing pogos
I OK fi [""CW.tl (Numbers •.• )
Margin In Inches: Inside [=::::J Outside~ Top §CJ Dot tom §CJ
Figure 28: The Page Setup dialog box
62 Page Setup
the actual size of your pubUcation depends on the available amount of hard-disk memory
Options: Decides whether you want to have double-sided pages in your document and/or facing pages only. You can check one, both, or neither
Margin in (1111it of measure): Selections made in the Preferences command will be reflected in these boxes where your publication's dimensions are shown. The inside, outside, top, and bottom margins for the paper size selected in the Page option (mentioned above) are reflected in these four boxes
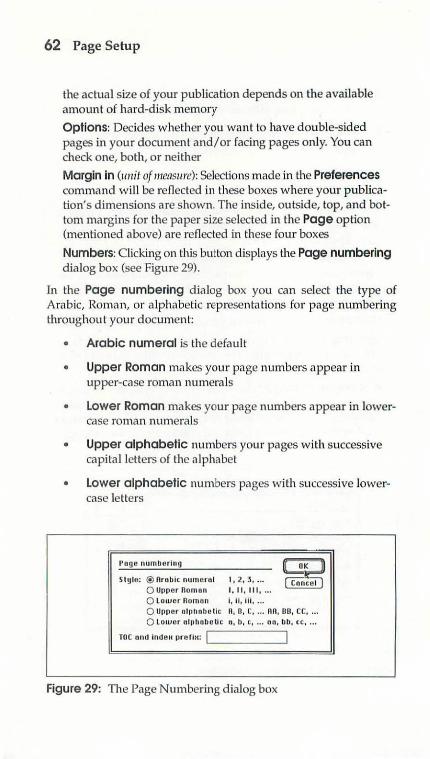
Numbers: Clicking on this button displays the Page numbering dialog box (see Figure 29).
In the Page numbering dia log box you can select the type of Arabic, Roman, or alphabetic representations for page numbering throughout your document:
• Arabic numeral is the default
• Upper Roman makes your page numbers appear in upper-case roman numerals
• lower Roman makes your page numbers appear in lowercase roman numerals
• Upper alphabetic numbers your pages with successive capital letters of the Rlphabet
• lower a lphabetic numbers pages with successive lowercase le tters
Poge numbering
Style: ® nrohic numeral I , 2, l, ... Q UpperAomon 1, 11, 11 1, ... 0 lower nomnn I, il, iii, .. . 0 Upper o lplluhelic A, 0, C, ... AA, DO, CC, .. . 0 l ower nlphobctic n, b, c, ... on, bb, cc, .. .
TOC ond lndeK preliM: '--------'
Figure 29: The Page Numbering dialog box
Paragraph 63
In the TOC and index prefix box you can enter a page number prefix, useful for identifying different sets of publications in your complete document or book.
See Also Insert pages, Lock guides, New, and Remove pages
• MODE
Layout view or Story view
• DESCRIPTION The Paragraph command redefines the appearance of paragraphs in your document. If you have your text tool highlighting text in a paragraph, then the changes with Paragraph will modify that paragraph. If no text is selected (your text tool is not in a paragraph), then your changes will be seen in the next paragraph you type.
To Design Your Paragraphs
1. Open the Type menu.
2. Select Paragraph with the mouse.
Keyboard Shortcut ~M
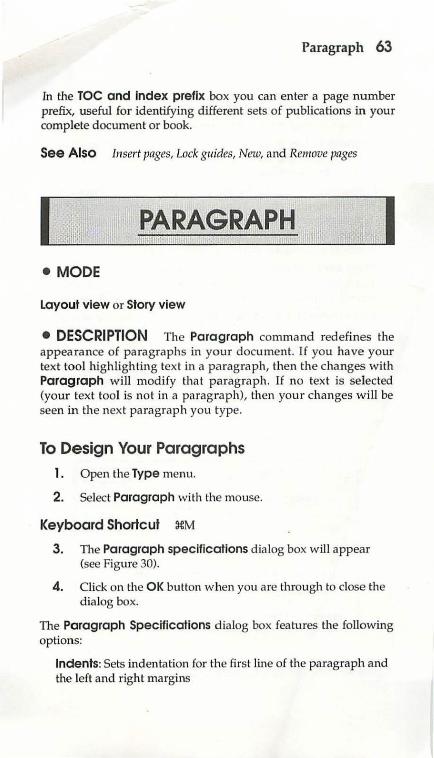
3. The Paragraph specifications d ialog box will appear (see Figure 30).
4 . Click on the OK button when you are through to close the dialog box.
The Paragraph Specifications dialog box features the following options:
Indents: Sets indentation for the first line of the paragraph and the left and right margins
64 Paragraph
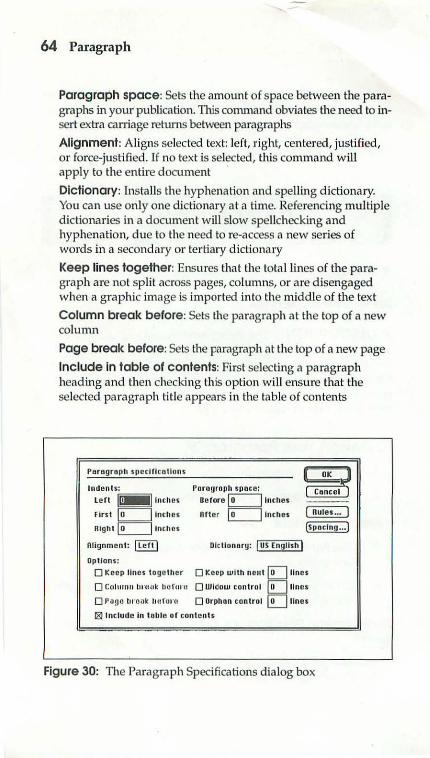
Paragraph space: Sets the amount of space between the paragraphs in your publication. This command obviates the need to insert extra carriage retums between paragraphs
Alignment: Aligns selected text: left, right, centered, justified, or force-justified . ff no text is selected, this command will apply to the entire document
Dictionary: Installs the hyphenation and spelling d ictionary. You can use only one dictionary at a time. Referencing multiple dictionaries in a document will slow spellchecking and hyphenation, due to the need to re-access a new series of words in a secondary or tertiary d ictionary
Keep lines together: Ensures that the total lines of the paragraph are not split across pages, columns, or are d isengaged when a g raphic image is imported into the middle of the text
Column break before: Sets the paragraph at the top of a new column
Page break before: Sets the paragraph at the top of a new page
Include in table of contents: First selecting a paragraph heading and then checking this option will ensure that the selected paragraph title appears in the table of contents
Peregraph speclflcallons
l ndenls:
left II• I Inches
first ~Inch es Right~ Inches
Al ignment: )left)
Options:
Paregroph spoce:
De foro~ Inches
After ~ Inches
Dictionary: I US English I
DD ~ ----( Rules ... I {Spacing ... ]
0 Keep lines together 0 Keep with neut @:] lines
0 Cohuruo lonwk he fur<! 0 Widow cont ro l @:] lines
0 I ' •' !JO torcak lourono 0 Drphon control @:] llnos
181 1ncludo In t oblo or contents
Figure 30: The Paragraph Specifications dialog box
Paragraph 65
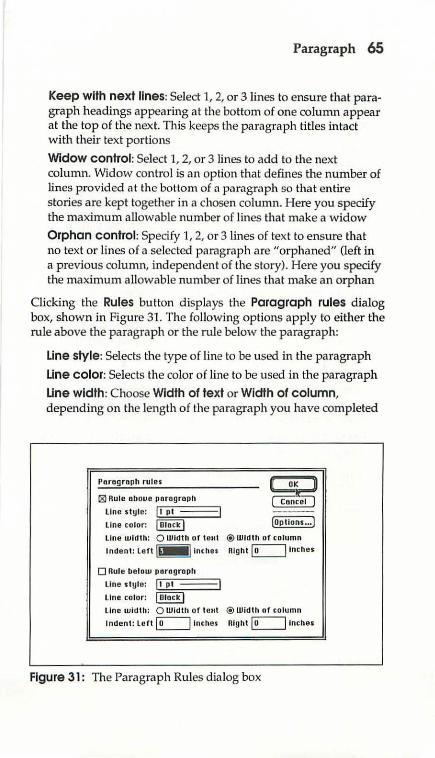
Keep with next lines: Select 1, 2, or 3 lines to ensure that paragraph headings appearing at the bottom of one column appear at the top of the next. This keeps the paragraph titles intact with their text portions
Widow control: Select 1, 2, or 3 lines to add to the next column. Widow control is an option that defines the number of lines provided at the bottom of a paragraph so that entire stories are kept together in a chosen column. Here you specify the maximum allowable number of lines that make a widow
Orphan control: Specify 1, 2, or 3 lines of text to ensure that no text or lines of a selected paragraph are "orphaned" (left in a previous column, independent of the story). Here you specify the maximum allowable number of lines that make an orphan
Clicking the Rules button d isplays the Paragraph rules dialog box, shown in Figure 31. The following options apply to either the rule above the paragraph or the rule below the paragraph:
Line style: Selects the type of line to be used in the paragraph
Line color: Selects the color of line to be used in the paragraph
Une width: Choose Width of text or Width of column, depending on the length of the paragraph you have completed
Pcrcgrcph rules
l8) Rule cboue pcrcgrop~
Line style: l l pi - --1 Line color: I Olock I line Width: 0 Width of loKI
Inden t: l ertll ! Inches
0 Rule below pcrcgroph
line slylo: 11 pi - --)
line col or: I Block I
DO ~ (Options ... )
® Width of column
Right EJ Inches
Line width: 0 Width of l oKI ® Wid!~ or column
Indent: Loft EJ lnc~os Rlg~t EJ inc~es
Figure 31: The Paragraph Rules dialog box
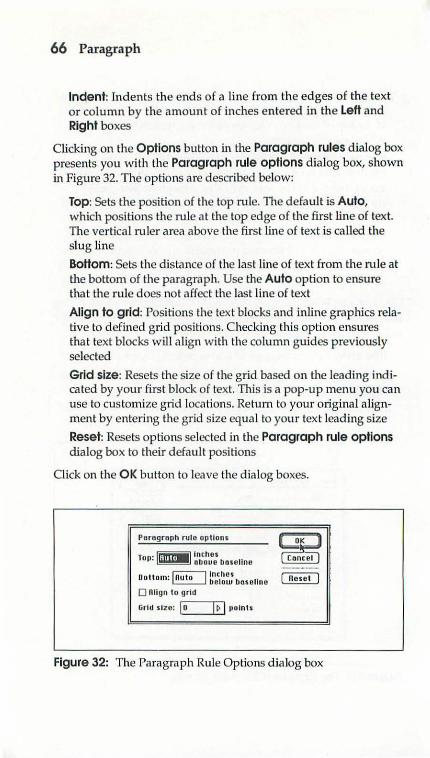
66 Paragraph
Indent: Indents the ends of a line from the edges of the text or column by the amount of inches entered in the Left and Right boxes
Clicking on the Options button in the Paragraph rules dialog box presents you with the Paragraph rule options dialog box, shown in Figure 32. The options are described below:
Top: Sets the position of the top rule. ll1e default is Auto, which positions the rule at the top edge of the first line of text. The vertical ruler area above the first Line of text is called the slug line
Bottom: Sets the distance of the last line of text from the rule at the bottom of the paragraph. Use the Auto option to ensure that the rule does not affect the last line of text
Align to grid: Positions the text blocks and inline graphics relative to defined grid positions. Checking this option ensures that text blocks will align with the column guides previously selected
Grid size: Resets the size of the grid based on the leading indicated by your first block of text. This is a pop-up menu you can use to customize grid locations. Retum to your original alignment by entering the grid size equal to your text leading size
Reset: Resets options selected in the Paragraph rule options dialog box to their default positions
Click on the O K button to leave the dialog boxes.
Pnr ngraph rulo op tion•
Tow lhmMIInches · oboue bnsellne
0 tt . r.;::-;:---,1 Inches 0 om.~ below bascllnu
0 Rllgn to grid
Grl~ size: l._o_--'-'1 ~_.l1•olnts
Figure 32: The Paragraph Rule Options dialog box
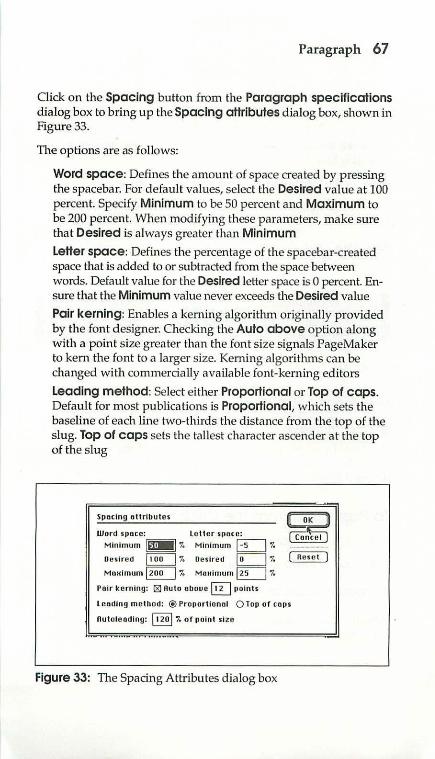
Paragraph 67
Click on the Spacing button from the Paragraph specifications dialog box to bring up the Spacing attributes dialog box, shown in Figure33.
The options are as follows:
Word space: Defines the amount of space created by pressing the spacebar. For defauJt values, select the Desired value at 100 percent. Specify Minimum to be 50 percent and Maximum to be 200 percent. When modifying these parameters, m ake sure that Desired is always greater than Minimum
Letter space: Defines the percentage of the spacebar-created space that is added to or subtracted from the space between words. Default value for the Desired letter space is 0 percent. Ensure that the Minimum value never exceeds the Desired value
Pair kerning: Enables a kerning algorithm originally provided by the font d esigner. Checking the Auto above option along with a point size greater than the font size signals PageMaker to kern the font to a larger size. Kerning algorithms can be changed with commercially available font-kerning editors
Leading method: Select either Proportional or Top of caps. Default for most publications is Proportional, which sets the baseline of each line two-thirds the distance from the top of the slug. Top of caps sets the tallest character ascender at the top ofthe slug
Spacing attributes
Word SJHJce: Lotter spocc:
Minimum j~joMI 7. Minimum EJ7.
Desired ~ '7. Desired ~ 7.
MoHimum ~ 1. Mo•1irnurn E)1.
DD ~
Polr kerning: l8J Auto obouc QiJ points
leading method: ®Proportional 0 Top of cnps
Rutoleo~lng: §} 7. of point size
Figure 33: The Spacing Attributes d ialog box
68 Paste
Autoleading: Defines the percentage of font size used for completing leading of paragraphs. The default value is 120 percent, which is 20 percent g reater than the normal font size
Reset: Resets all specifications defu1ed in the Spacing attributes dialog box
Click on the OK button to set the spacing attribu tes.
Oick on the next OK button to leave the Paragraph specifications dialog box.
See Also Alignment , Define stt;les, Indents/tabs, and Lending
• MODE
Layout view or Story view
• DESCRIPTION This command pastes text blocks or graphics that have been cut or copied from a publication placed in the Clipboard. If there are no items in the Clipboard, the Paste command is dimmed (unavailable).
To Paste Text from the Clipboard
1. Open the Edit menu.
2. Select Paste with the mouse.
Keyboard Shortcut 3€V
Result Items selected from the Clipboard will be pasted directly at the cursor's location in your publication. If the item to be inserted
Percentage Size 69
is a text block, the text being pasted will take on the typestyles, size, and other characteristics of the type style into which it has been inserted.
See Also Copy and Cut
• MODE
Layout view
• DESCRIPTION PageMaker allows you to enlarge a page onscreen tvvo or four times its normal size or reduce it by one quarter, one half, or three quarters.
To Select a Percentage Size
1. Open the Page menu.
2. Select one of the percentage sizes ava ilable with the mouse.
Keyboard Shortcut
:lf:O redr1ces 25 percent
:lf:5 reduces 50 percent
:lf:7 reduces 75 percent
:ll:2 enlarges 200 percent
:lf:4 enlarges 400 percent
See Also Actual size, Fit in window, and Fit in world
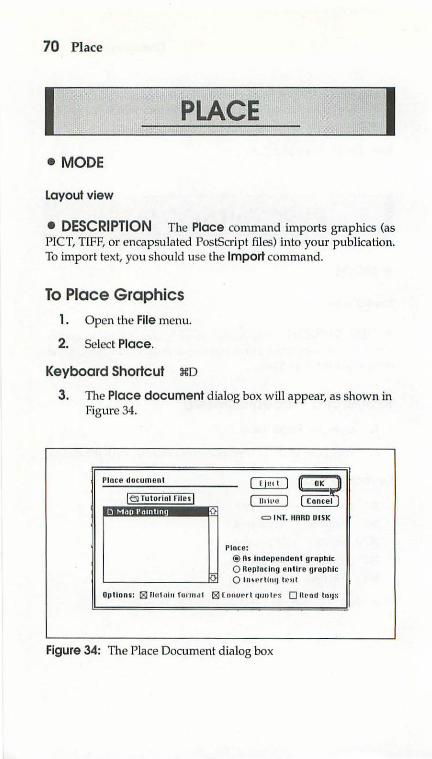
70 Place
I PLACE I • MODE
Layout view
• DESCRIPTION The Place command imports graphics (as PICT, TIFF, or encapsulated PostScript files) into your publication. To import text, you should use the Import command.
To Place Graphics
1. Open the File menu.
2. Select Place.
Keyboard Shortcut ~D
3. TI1e Place document dialog box will appear, as shown in Figure 34.
Place dncumcnl
101 Tutorlol rile s I = INT. IIRRD DISK
Ploce: ® As lndcpcndonl grophlc 0 Replacing entire grophlc 0 lnu~rtl tU.I h~ut
Options: 181 JI C11alu fnn no1 181 Conm.•rt tJUolt• s 0 nrn11 tiUJS
Figure 34: The Place Document dialog box
Place/Replace 71
4. After setting all the options of the Place command, click on the OK button. The files and images selected will be imported.
The options are as follows:
As independent graphic: Imports the selected graphic into your publication as an independent graphic, which is a separate graphic image, unattached to any other graphic element or series of text. An independent graphic is typically an imported PICT, PICT II, TIFF, or encapsulated PostScript file
Replacing existing graphic: Replaces the selected graphic with the one just imported and highlighted in the scrolling list of the djaJog box
When the text tool is active and an insertion point exists, you can create an in line graphic:
As inline graphic: Inserts the graphic element in the middle of the text, creating an in line graphic, w hich is a graphic element pasted into the Story view from the Scrapbook or Clipboard. An inline graphic can also be a PICT, PICT II, TIFF, or encapsulated PostScript file imported directly in to the Story view. An inline g raphic takes on the attributes of the text block in which it is contained
Result Place options, once selected, d ictate how the file that is now imported in layout view appears and flows on the page. It is recommended U1at you use the Autoflow command after placing text \·vith graphics into layout view.
See Also Autoflow, Import, Place/Rep/nee, and Preferences
PLACE/REPLA€E I • MODE
Story view
72 Preferences
• DESCRIPTION The Place or Replace command closes the story window and places a loaded-text icon within the Layout view portion of your publication.
To Place/Replace a Document 1. Open the File menu.
2. If you are editing a story that has never been placed in Layout view, you will only be able to select Place with the mouse. If you are editing a story that has already been placed in Layout view, you will only be able to select Replace with the mouse.
Keyboard Shortcut :1€0 for both Place and Replace
3. The Layout view window will appear with a loaded-text icon, signalling you to place the story into the layout view portion of the publication.
See Also Close, New, and Place
• MODE
Layout view or Story view
• DESCRIPTION The Preferences command defines your preferences for publication formats.
To Use the Preferences Command 1. Open the Edit menu.
2. Select the Preferences option.
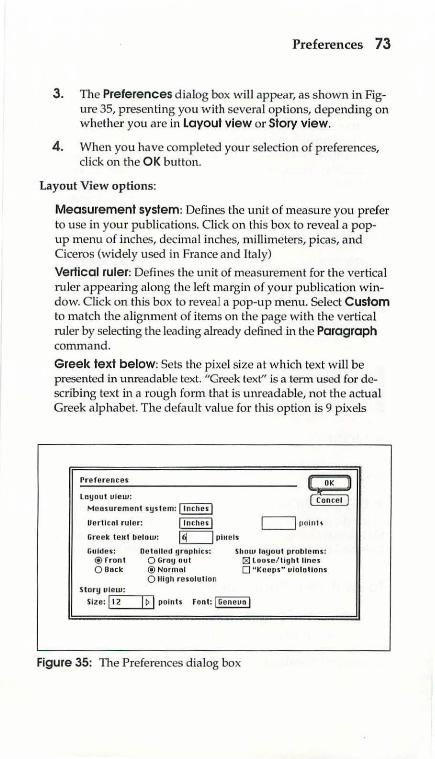
Preferences 73
3. The Preferences d ialog box will appt!aT, as shown in Figure 35, presenting you with several options, depending on whether you are in Layout view or Story view.
4. When you have completed your selection of preferences, click on the OK button.
Layout View options:
Measurement system: Defines the unit of measure you prefer to use in your publica tions. Click on this box to reveal a popup menu of inches, decimal inches, millimeters, picas, and Ciceros (widely used in France and Italy)
Vertical ruler: Defines the unit of measurement for the vertical ruler appearing along the left margin of your publication window. Click on this box to reveal a pop-up menu. Select Custom to match the alignment of items on the page with the vertical ruler by selecting the leading already defined in the Paragraph command.
Greek text below: Sets the pixel size a t which text will be presented in unreadable text. "Greek text'' is a term used for describing text in a rough form that is unreadable, not the actual Greek alphabet. The default value for this option is 9 pixels
Prefere nce s
Layout ulew: Mea surement sy<tem: J inche<J
Uertlcel ruler: ltnche•l c=1 (10 i f 1 1~ Greek teut below: ~ phcels
Guides: ® front 0 Dock
Ootollcd grophlc<: 0 Gray out ® Normal 0 High resolution
Show layout problems: 181 Loose/ 11ght lines 0 11Kocps" uiolotions
St ory u;.:le=w:..._: --,--, Size: ! 12 I~ I points Font: I Geneuol
Figure 35: The Preferences dialog box
74 Print
Guides: Displays all guides either in front of or behind text and graphic images
Show layout problems: Warns you of layout problems. Click in the Loose/tight lines box to show lines in a paragraph that are either too loosely or tightly spaced, based on settings in the Spacing attributes dialog box. Click in the "Keeps" violations box to highlight lines that violate the widow, orphan, and additional paragraph specifications defined in the Paragraph series of djalog boxes
Story View options:
Size: Sets the point size of text d isplayed in Story view
Font: Selects the font you prefer to use in Story view
See Also Alig11ment, Defille styles, Hyphenation, Pnrngmplt, Ston; editor, and Type styles
I PRINT I • MODE
Layout view
• DESCRIPTION The Print command prints your publication. Depending on the Aldus Printer Driver (APD) set during PageMaker installa tion, Page Maker will either bring up a Print to: LaserWriter dialog box or a Print options for: "lmageWriter" d ialog box.
To Print Your Publication 1. Open the File menu.
2. Select Print with the mouse.
Keyboard Shortcut 3€P
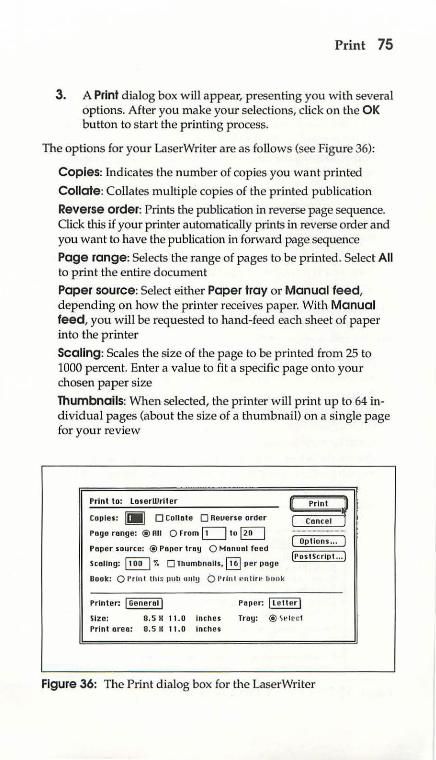
Print 75
3. A Print dialog box ,.,.ill appear, presenting you with several options. After you make your selections, click on the OK button to start the printing process.
The options for your LaserWriter are as follows (see Figure 36):
Copies: Indicates the number of copies you want printed
Collate: Collates multiple copies of the printed publication
Reverse order: Prints the publication in reverse page sequence. Click this if your printer automatically prints in reverse order and you want to have the publication in forward page sequence
Page range: Selects the range of pages to be printed. Select All to print the entire document
Paper source: Select eHher Paper tray or Manual feed, depending on how the printer receives paper. With Manual feed, you will be requested to hand-feed each sheet of paper into the printer
Scaling: Scales the size of the page to be printed from 25 to 1000 percent. Enter a value to fit a specific page onto your chosen paper size
Thumbnails: When selected, the printer will print up to 64 individual pages (about the size of a thumbnail) on a single page for your review
Print to: LoserWril er
Copies: [Ill] 0 Collote 0 neuerse order
Pogo range: ®All 0 from 0 to §] Pop or source: ® Poper troy 0 Monuol feed
Scollng: ~ "!. 0 Thumbnolls, ~per poge
Book:: 0 1•r1nt thfs putJ fii ii !J b l•r hl t ~n lln~ bo ok
Options .. .
(Post Script ... )
Printer. I Generol( Po per. I Letter(
Size: 8.5 II 11 .0 Inches Troy: ® so.- lt•ct Print oreo: 8.5 II 11 .0 Inches
Figure 36: The Print dialog box for the Laser Writer
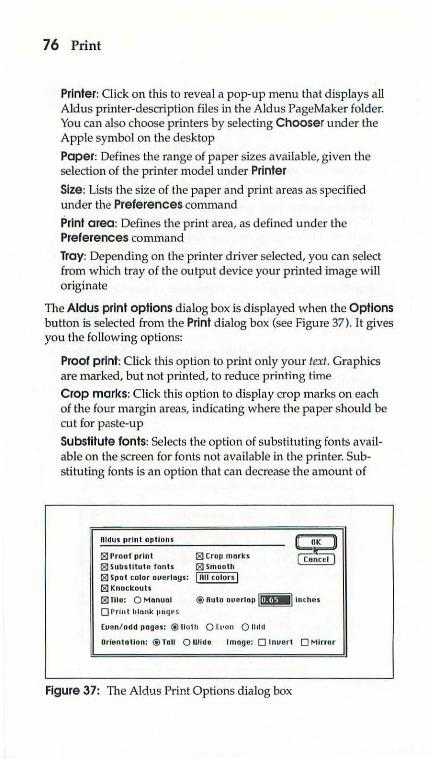
76 Print
Printer: Click on this to reveal a pop-up menu that displays all Aldus printer-description files in the Aldus PageMaker folder. You can also choose printers by selecting Chooser under the Apple symbol on the desktop
Paper: Defines the range of paper sizes available, given the selection of the printer model under Printer
Size: Lists the size of the paper and print areas as specified under the Preferences command
Print area: Defines the p rint area, as defined under the Preferences command
Tray: Depending on the printer driver selected, you can select from which tray of the output device your printed image will originate
The Aldus print options dialog box is d isplayed when the Options button is selected from the Print dialog box (see Figure 37 ). It gives you the following options:
Proof print: Click this option to print only your text. Graphics are marked, but not printed, to reduce p rinting time
Crop marks: Click this option to display crop marks on each of the four margin areas, indicating where the paper should be cut for paste-up
Substitute fonts: Selects the option of substituting fonts available on the screen for fonts not available in the printer. Substituting fonts is an option that can decrease the amount of
Aldus print optlono
l8l Proof print l8l Subs titute fonts l8l Spo t color ove rJoys: l8l Knockouts l8l Tile: 0 Me nuel 0 Prln l hhulk 11tHJ11S
l8l Crop me rks l8l Sm ooth I All colors I
® Auto overtop Ui!Mitnches
Even/ odd poges: ® llol ll 0 to•c11 0 ll ol ol
Drlentotlon: @ Tall O Wide lmoge: 0 Invert 0Mirror
Figure 37: The Aldus Prin t Options dialog box
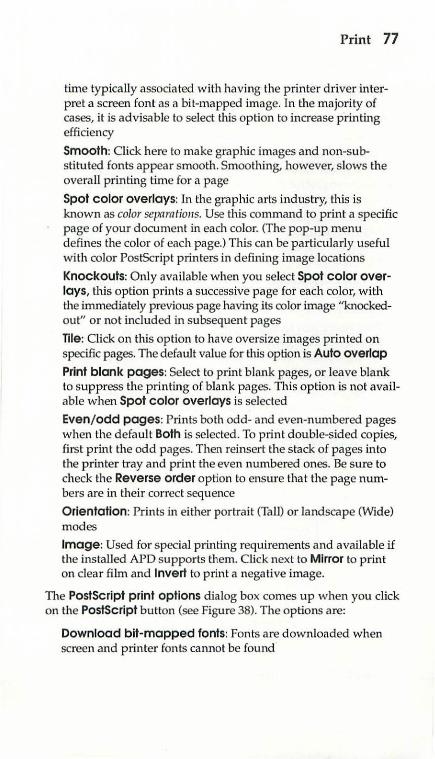
Print 77
time typically associated with having the printer driver interpret a screen font as a bit-mapped image. In the majority of cases, it is advisable to select this option to increase printing efficiency
Smooth: Click here to make graphic images and non-substituted fonts appear smooth. Smoothing, however, slows the overall printing time for a page
Spot color overlays: In the graphic arts industry, this is known as color separations. Use this command to print a specific page of your document in each color. (The pop-up menu defines the color of each page.) This can be particularly useful with color PostScript printers in defining image locations
Knockouts: Only available when you select Spot color overlays, this option prints a successive page for each color, with the immediately previous page having its color image "knockedout" or not included in subsequent pages
Tile: Click on this option to have oversize images printed on specific pages. The default value for this option is Auto overlap
Print blank pages: Select to print blank pages, or leave blank to suppress the printing of blank pages. This option is not available when Spot color overlays is selected
Even/ odd pages: Prints both odd- and even-numbered pages when the default Both is selected. To print double-sided copies, fi rst print the odd pages. Then reinsert the stack of pages into the printer tray and print the even numbered ones. Be sure to check the Reverse order option to ensure that the page numbers are in their correct sequence
Orientation: Prints in either portrait (Tall) or landscape (Wide) modes
Image: Used for special printing requirements and available if the installed APD supports them. Click next to Mirror to print on clear film and Invert to print a negative image.
The PostScript print options dialog box comes up when you click on the PostScript button (see Figure 38). The options are:
Download bit-mapped fonts: Fonts are downloaded when screen and printer fonts cannot be found
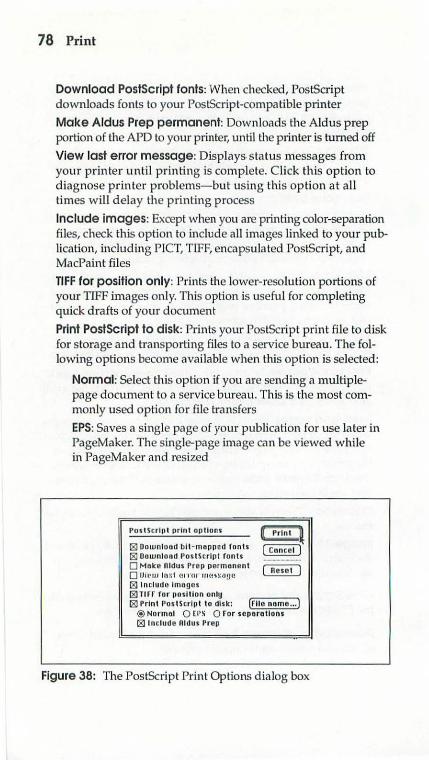
78 Print
Download PostScript fonts: When checked, PostScript downloads fonts to your PostScript-compatible printer
Make Aldus Prep permanent: Downloads the Aldus prep portion of the APD to your printer, Wltil the printer is turned off
VIew last error message: Displays. s tatus messages from your printer until printing is complete. Click this option to diagnose printer problems-but using this option at all times will delay the printing process
Include images: Except when you are printing color-separation files, check this option to include all images linked to your publication, including PICT, TIFF, encapsulated PostScript, and MacPaint files
TIFF for position only: Prints the lower-resolution portions of your TIFF images only. This option is useful for completing quick drafts of your document
Print PostScript to disk: Prints your PostScript print file to disk for storage and transporting files to a service bureau. The following options become available when this option is selected:
Normal: Select this option if you are sending a multiplepage document to a service bureau. This is the most commonly used option for file transfers
EPS: Saves a single page of your publication for use later in PageMaker. The single-page image can be viewed while in PageMaker and resized
PostScript print options
181 OoiUnl oad bit- mopped fonts 181 Doounlood Postscript fonts 0 Moke nidus Prep permonent rniiSii'i" 0 !111•111 lu s t 0 1 fU I' JIIU\ S CI ~JC' ~ 181 1ncludo lmegos 181Tiff for position only 181 Print Postscript t o disk: (ruo nnmo ... ]
®Normal 0 [ I' S 0 For separations 181 1nclude Aldu1 Prep
Figure 38: The PostScript Print Options dialog box
Quit 79
For separations: Prepares the publication for printing by a prepress program where color separa tions are commonly used. For color separations, use Aldus PrePrint
Include Aldus Prep: Includes portions of the APD that are needed for printing the publication. Select this option if you are unsure of whether the service bureau or printer to which you are taking the file has complete PostScriptprinter compatibilities
Reset: Resets all options to their default selections
File name: Click on this button to name the PostScript file being printed to disk. Type in the name of the file to be saved to disk. [f you have selected an encapsulated PostScript format or separations option, the appropriate fi le extension will be added to your file
See Also Book, Color palette, Page setup, and Preferences
I QUIT I • MODE
Layout view or Story view
• DESCRIPTION The Quit command exits you from PageMaker and returns you back to the Finder desktop.
To Exit PageMaker
Open the File menu and select Quit with the mouse.
Keyboard Shortcut :li:Q
80 Remove pages
If you are quitting a publication that has not been saved, you will be prompted with the Save changes dialog box:
• If you click on the OK button, you will see the Save publication as dialog box. Enter a file name and click on OK
• If you choose No, you will quit PageMaker without saving your document
• If you choose Cancel, you will go back to where you were in your document before you selected Quit
See Also Snve and Snve ns
I REMOVE PAGES I • MODE
Layout view
• DESCRIPTION The Remove pages command deletes one or more pages from your publication.
To Delete Page(s)
1. Open the Page menu and select the Remove pages option.
2. The Remove pages dialog box will appear. Enter the number of the first page you want to remove next to Removes page(s).
3. Enter the number of the final page you want to remove, if applicable, next to through.
4. When you have made the selection of the range of pages to be removed, click on the OK button.

Revert 81
See Also Clear, Insert pages, New, and Page setup
• MODE
Layout view or Story view
• DESCRIPTION The Revert command undoes all changes made to a publication prior to the last Save or Save as command. [t cannot be applied selectively to portions of a publication.
To Undo Changes
1. Open the File menu.
2. Select the Revert option .
3 . The Revert warning box will appear (see Figure 39), giving you the option of either reverting to the last saved version or cancelling the command. If you want to revert to the latest saved version of the publication you are working on, click on OK.
See Also Save, Save as, and Undo
I.\ Reuert t o 1os: t-s8ued ill version?
lC£) ( Cftncel
Figure 39: The Revert warning box
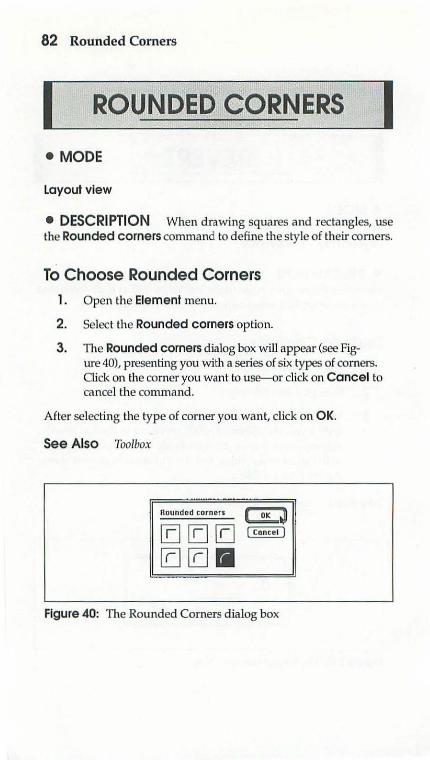
82 Rounded Comers
I ROUNDED CORNERS I • MODE
Layout view
• DESCRIPTION When drawing squares and rectangles, use the Rounded corners command to define the style of their comers.
To Choose Rounded Corners
1. Open the Element menu.
2. Select the Rounded corners option.
3. The Rounded corners dialog box will appear (see Fig-ure 40), presenting you with a series of six types of comers. O ick on U1e corner you want to use-or click on Cancel to cancel the command.
After selecting the type of corner you want, click on OK.
See Also Toolbox
Rounded cornen t:E:J [CJ [EJ [C) ( Cencel )
[Q[Q rl
Figure 40: The Rounded Corners d ialog box

Save 83
I I • MODE
Layout view
• DESCRIPTION The Rulers command adds horizontal and vertical rulers to the publication's window. It is useful for precise positioning of text blocks, graphic images, and lines in your publication.
To Use Rulers
Open the Options menu and select the Rulers option. This command is a toggle; it places a./ next to Rulers in the Options menu when it is set. Select Rulers again to deactivate this feature.
Result Rulers will appear in the publication's window, according . to the units of measure defu1ed in the Preferences command. The size of the rulers depends on the size and resolution of your screen, the units of measure you specify, and the display size you select.
See Also Guides, Page setup, Preferences, Snap to guides, Snap to rulers, and Zero lock
I I • MODE
Layout view or Story view
• DESCRIPTION The Save command saves changes and additions made to your publication. Use the keystroke version of this command frequently to ensure that your work is saved.
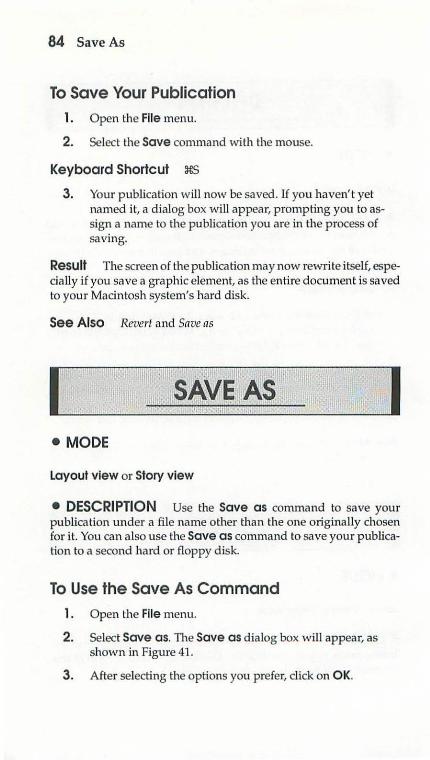
84 Save As
To Save Your Publication
1. Open the File menu.
2. Select the Save command with the mouse.
Keyboard Shortcut ~
3. Your publication will now be saved.lf you haven' t yet nctmed it, a d ialog box will appear, prompting you to assign a name to the publication you are in the process of saving.
Result The screen of the publication may now rewrite itself, especially if you save a graphic element, as the entire document is saved to your Macin tosh system's hard disk.
See Also Revert and Save as
I I • MODE
layout view or Story view
• DESCRIPTION Use the Save as command to save your publication under a fi le name other than the one originally chosen for it. You can also use the Save as command to save your publication to a second hard or floppy d isk.
To Use the Save As Command
1. Open the File menu.
2. Select Save as. The Save as dialog box will appear, as shown in Figure 41.
3. After selecting the options you prefer, click on OK.
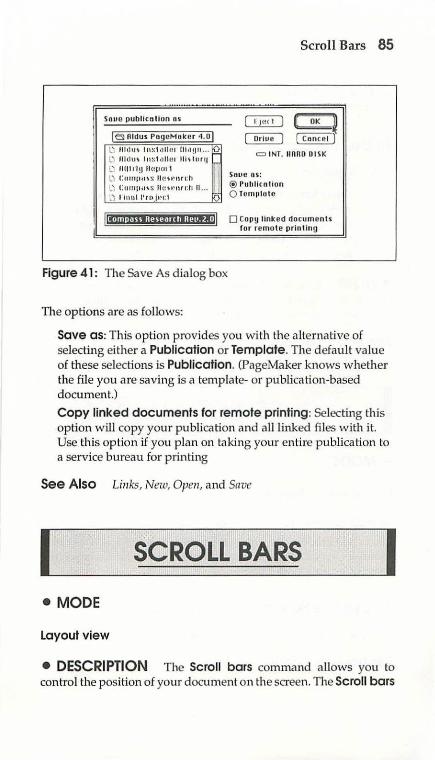
Souc publicetlon ••
le!~ Old us PogoMoker 4. D I Ll fll<lt" lnslioll"' lll.o!JII . .. f2 Ll flldt" lns l o llm Ill• llor or L) 1111111!1 II!<JI(III l1 Cumpci\ S llt~,.-urt:t• ... C:UHillci\S ll t~"· nr1: h II ... .. ) l tnull'ru fPI:1 0"
Figure 41: The Save As dialog box
The options are as follows:
Scroll Bars 85
~LiL~ ~~
= INT. IIRAO DISK
Soue ns: ® Puhllcotlon 0 Tcmplolc
0 Copy linked documents ror remot e printing
Save as: This option provides you with the alternative of selecting either a Publication or Template. The default value of these selections is Publication. (PageMaker knows whether the file you are saving is a template- or publication-based document.)
Copy linked documents for remote printing: Selecting this option will copy your publication and all linked files with it. Use this option if you plan on taking your entire publication to a service bureau for printing
See Also Links, New, Open, and Save
• MODE
Layout view
• DESCRIPTION The Scroll bars command allows you to control the position of your document on the screen. The Scroll bars
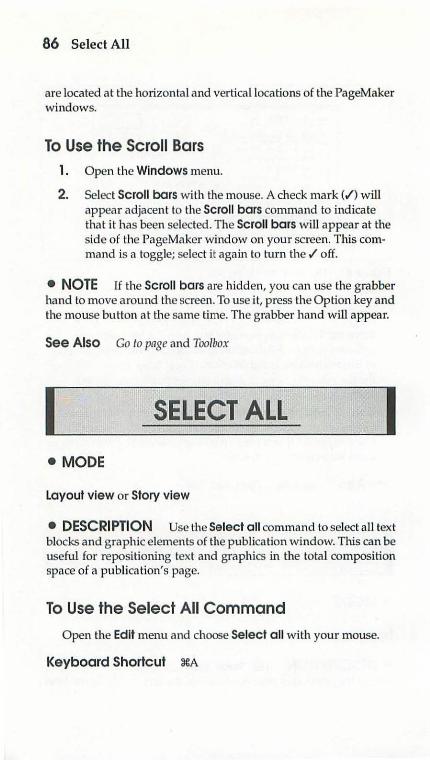
86 Select All
are located at the horizontal and vertical locations of the PageMaker windows.
To Use the Scroll Bars 1. Open the Windows menu.
2. Select Scroll bars with the mouse. A check mark (.I) will appear adjacent to the Scroll bars command to indicate that it has been selected. The Scroll bars will appear at the side of the PageMaker window on your screen. This command is a toggle; select it again to turn the .I off.
• NOTE [f the Scroll bars are hidden, you can use the grabber hand to move around the screen. To use it, press the Option key and the mouse button at the same time. The grabber hand will appear.
See Also Go to page and Toolbox
I SELECT ,(LL I • MODE
layout view or Story view
• DESCRIPTION Use the Select all command to select all text blocks and graphic elements of the publication window. This can be useful for repositioning text and graphics in the total composition space of a publication's page.
To Use the Select All Command
Open the Edit menu and choose Select all with your mouse.
Keyboard Shortcut ~€A
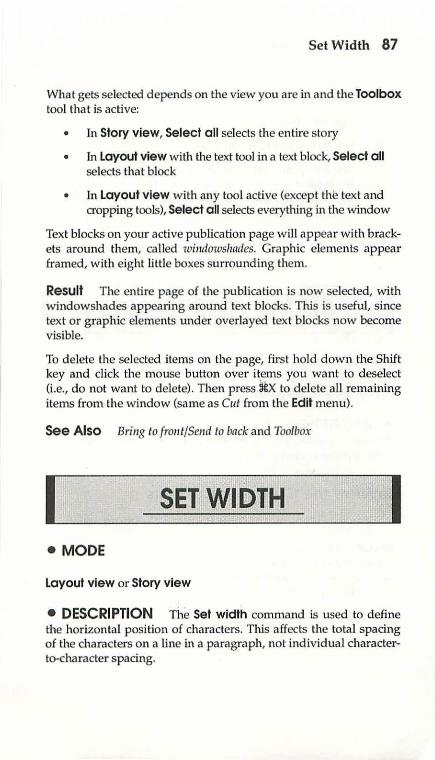
Set Width 87
What gets selected depends on the view you are in and the Toolbox tool that is active:
• In Story view, Select all selects the entire story
• In Layout view with the text tool in a text block, Select all selects that block
• In Layout view with any tool active (except the text and cropping tools), Select all selects everything in the window
Text blocks on your active publication page will appear with brackets around them, called windows/zades. Graphic elements appear framed, with eight little boxes surrounding them.
Result The entire page of the publica tion is now selected, ;vith >vindowshades appearing around text blocks. This is useful, since text or graphic elements under overlayed text blocks now become yjsible.
To delete the selected items on the page, first hold down the Shift key and click the mouse button over it,ems you want to deselect (i.e., do not want to delete). Then press al:X to delete all remaining items from the window (same as Cut from the Edit menu).
See Also Bring to front/Send to back and Toolbox
• MODE
Layout view or Story view
• DESCRIPTION The Set width command is used to define the horizontal position of characters. This affects the total spacing of the characters on a line in a paragraph, not individual characterto-character spacing.
88 Show Clipboard
To Set the Width of a Line
1. Open the Type menu.
2. Select the Set width option with the mouse.
3. The Set width pull-down menu will appear adjacent to the Type menu. You can select from the set percentages listed, or select Other to enter your own, between 1-250 percen t in 0.1 percent increments.
See Also Pnmgrnph, Tmck, and Type specs
I SHOW CLIPBOARD
• MODE
Layout view or Story view
I
• DESCRIPTION The clipboard is used to store text and gTaphic elements you have cut or copied from a publication. Check the contents of the clipboard before pasting items into your publication.
To Show the Clipboard Contents
Open the Edit menu and select the Show clipboard option.
Result The clipboard, a single window, will appear in the foreground of your screen, showing any items you have previously cut or copied . To close the clipboard dialog box, click on the close box in the upper-left corner.
See Also Copy, Cut, and Pnste
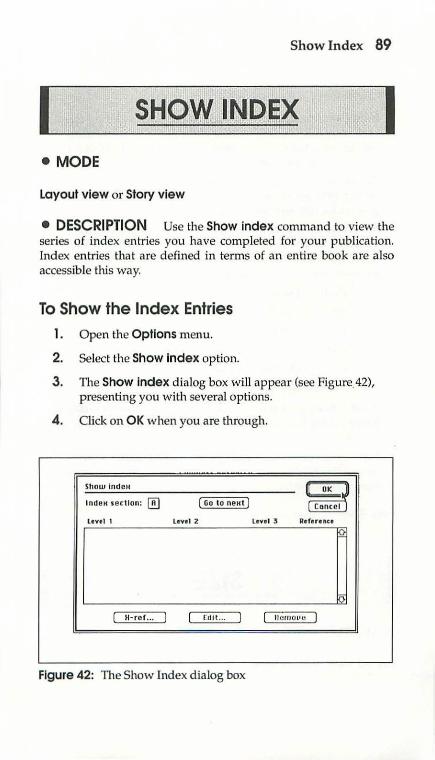
Show Index 89
I SHOW INDEX I' I
• MODE
layout view or Story view
• DESCRIPTION Use the Show index command to view the series of index entries you have completed for your publication. Index entries that are defined in terms of an entire book are also accessible this way.
To Show the Index Entries
1. Open the Options menu.
2. Select the Show Index option.
3. The Show Index dialog box will appear (see Figure.42), presenting you with several options.
4. Click on OK when you are through.
Show lndeH
lndeH section: @] [ Go lo neHt I Leve1 1 Level 2
11-ro r. .. [ill t...
Figure 42: TI1e Show Index dialog box
0!:] ~
lnel 3 Reference
fl(!lfl () l l(t
90 Size
The options are as follows:
Index section: Clicking thjs option provides a pop-up menu of the alphabet. Select the letter of the alphabet your index entries are listed under to d isplay them in the scrollable window in the Show Index dialog box
Go to next: Clicking thjs button displays the next alphabetic section of index entries. At least one index entry needs to be present for the next alphabetic letter to be shown
Reference: At the right of the scrolling lis t is a column called Reference. If it shows a number, it's a page reference. It can also show a ·reference code that defines the location of each index entry. The codes are defined below:
Code Location
PB Pasteboard
LM Left master page
RM Right master page
OV Overset (unplaced) text
US Unplaced story
X-ref: Clicking on this button displays the Create index entry dialog box. Use it to add names to the index or to crea te c'ross-references
Edit: Cjicking this button displays the Edit Index entry dialog box for use in editing any portion of the index currently displayed
See Also Crente inde.'l: and Index entn;
I SIZE
• MODE
Layout view or Story view
I
Snap to Guides 91
• DESCRIPTION The Size command controls the size of the font you are using in your publication. You can use this command to select different point sizes throughout your publication.
To Size Your Fonts
1. Highlight the text you want to change.
2. Open the Type menu.
3. Select the Size option.
4. A pull-down menu will appear adjacent to the Size option. The currently selected font will have a check mark next to it. The Other selection in the pull-down menu can be used to select point sizes from 4 to 650 points, in 0.1 point increments.
Result You' ll see the highlighted text change to reflect your la test font-size selection. If no text was highlighted , the next text typed in either layout or Story view will appear in the point size you selected.
See Also Font, Type specs, and Type style
I SNAP TO GUIDES I • MODE
Layout view
• DESCRIPTION Snap to guides is used to align text, graphics, and pointers precisely on the page.
To Snap to Guides 1. Open the Options menu.
92 Snap to Rulers
2. Select Snap to guides with the mouse.
Keyboard Shortcut xu This command is a toggle; select it again to turn it off.
Result New items in the publication (or old ones that you move again) will now be snapped to the guides.
See Also S1tnp to rulers
I SNAP TO RULERS I • MODE
Layout view
• DESCRIPTION Snap to rulers is used to align text blocks and graphic images precisely a t intersections of the vertical and horizontal ru ler lick marks. (The horizontal and vertical tick marks on a ruler define a transparent grid behind your publication's pages.)
To Snap to Rulers 1. Open the Options menu.
2. Select Snap to rulers with the mouse.
Keyboard Shortcut XI
TI1is command is a toggle; select it again to turn it off.
Result New text blocks and graphic elements (or old ones that you move again) wi ll snap to the ruler intersections on the page.
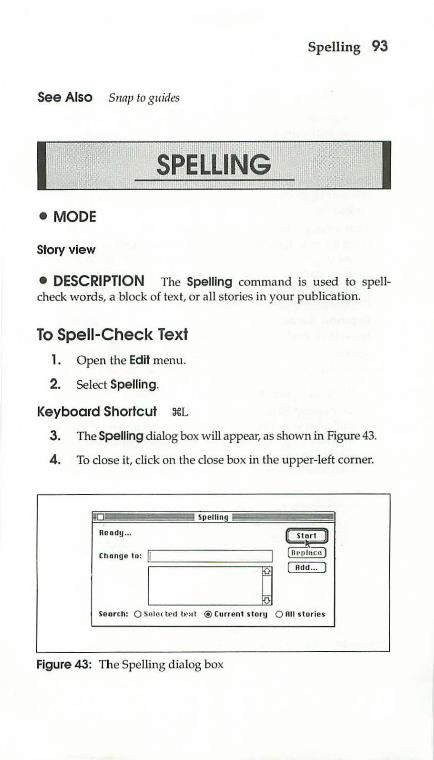
Spelling 93
See Also Snap to guides
• MODE
Story view
• DESCRIPTION The Spelling command is used to spellcheck words, a block of text, or all stories in your publication.
To Spell-Check Text
1. Open the Edit menu.
2. Select Spelling.
Keyboard Shortcut :1€L
3. The Spelling dialog box will appear, as shown in Figure 43.
4. To close it, click on the close box in the upper-left corner.
Spellln
Reedy ...
Seorch: 0 Sulcc h~1i h •,l t ® Current s tory 0 011 s torie s
Figure 43: The Spelling d ialog box
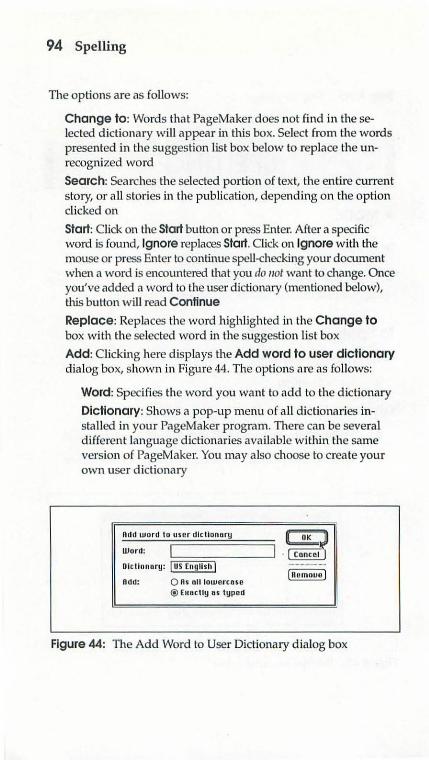
94 Spelling
The options are as follows:
Change to: Words that PageMaker does not find in theselected dictionary wi ll appear in this box. Select from the words presented in the suggestion list box below to replace the unrecognized word
Search: Searches the selected portion of text, the entire current story, or all stories in the publication, depending on the option clicked on
Start: Click on the start button or press Enter. After a specific word is found, Ignore replaces Start. Click on Ignore with the mouse or press Enter to continue spell-checking your document when a word is encountered that you do not want to change. Once you've added a word to the user dictionary (mentioned below), this button will read Continue Replace: Replaces the word highlighted in the Change to box with the selected word in the suggestion list box
Add: Clicking here displays the Add word to user dictionary dialog box, shown in Figure 44. The options are as follows:
Word: Specifies the word you want to add to the dictionary
Dictionary: Shows a pop-up menu of all dictionaries instaJled in your PageMaker program. There can be several different language d ictionaries available within the same version of PageMaker. You may also choose to create your own user dictionary
Add word to user dictionary U::J Word: ~:;:=:;:;:::::::;-----' · I cancel I Olctlonnry: I US English I Add: 0 As ntllowcrcnsc
® £1tnc t1y ns typed
Figure 44: The Add Word to User Dictionary d ialog box
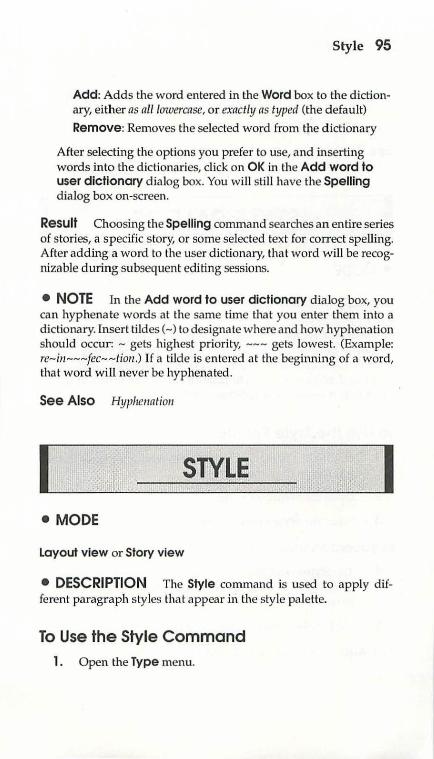
Style 95
Add: Adds the word entered in the Word box to the dictionary, either as all lowercase, or exactly as typed (the default)
Remove: Removes the selected word from the d ictionary
After selecting the options you prefer to use, and inserting words into the dictionaries, click on OK in the Add word to user dictionary dialog box. You will still have the Spelling dialog box on-screen.
Result Choosing the Spelling command searches an entire series of stories, a specific story, or some selected text for correct spelling. After adding a word to the user dictionary, that word will be recognizable during subsequent editing sessions.
• NOTE In the Add word to user dictionary dialog box, you can hyphenate words at the same time that you enter them into a dictionary. Insert tildes(-) to designate where and how hyphenation should occur: - gets highest priority, --- gets lowest. (Example: re-in---fec--tion.) If a tilde is entered a t the begitming of a word, that word will never be hyphenated.
See Also Hyphenation
I STYLE I • MODE
Layout view or Story view
• DESCRIPTION The Style command is used to apply different paragraph styles that appear in the style palette.
To Use the Style Command
1. Open the Type menu.
96 Style Palette
2. Select the Style option. A pull-down menu will appear with the different publication styles listed, which you can use to reformat paragraphs.
See Also Define styles, Pnragmph, and Style pnlette
I STYLE PALETTE
• MODE
Layout view or Story view
I
• DESCRIPTION To add a specific style to a paragraph, use the Style paleHe command. You can modify any paragraph in which you are currently working by leaving the text tool in the paragraph and accessing the Style paleHe command. (The text tool is the A that appears in the Toolbox window.)
To Use the Style Palette 1. Highlight a paragraph you want to modify, or leave the
text tool in the paragraph.
2. Open the Windows menu.
3. Select the Style palette option with the mouse.
Keyboard Shortcut :H:Y
4. The Styles scrollable window will appear. You may now choose which paragraph style to apply to your selected paragraph.
5. Click in the close box when you are through.
See Also Define sh;les, Style, and Toolbox
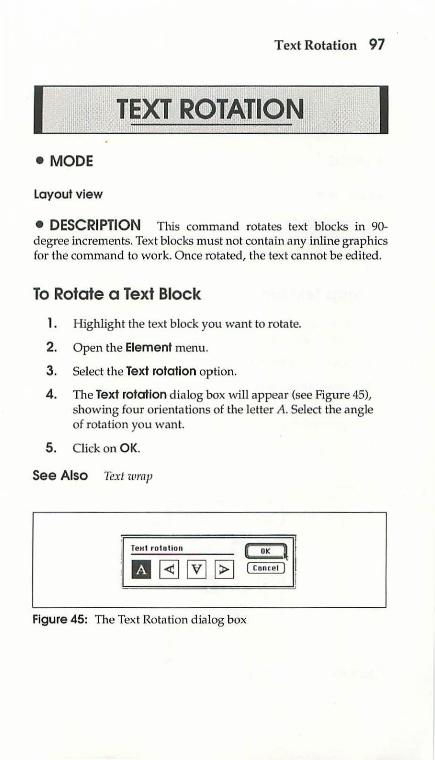
Text Rotation 97
I TEXT ROTATION I • MODE
layout view
• DESCRIPTION This command rotates text blocks in 90-degree increments. Text blocks must not contain any inline graphics for the command to work. Once rotated, the text cannot be edited.
To Rotate a Text Block
1. Highlight the text block you want to rota te.
2. Open the Element menu.
3. Select the Text rotation option.
4. The Text rotation dialog box will appear (see Figure 45), showing four orientations of the le tter A. Select the angle of rotation you want.
5. Click on OK.
See Also Text wrap
Figure 45: The Text Rotation dia log box
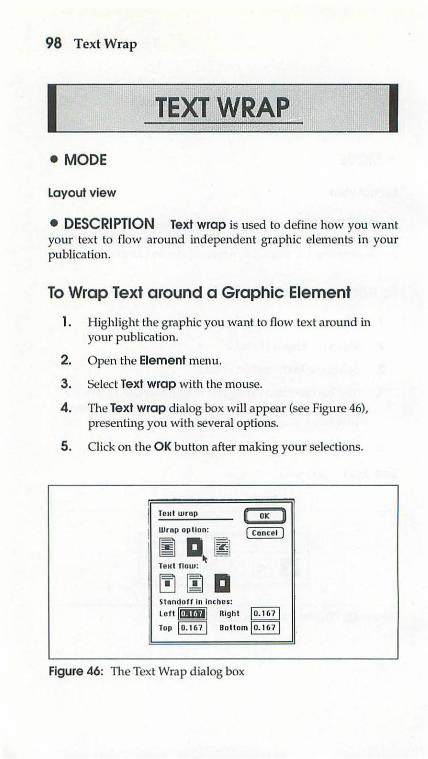
98 TextWrap
I I • MODE
Layout view
• DESCRIPTION Text wrap is used to define how you want your text to flow around independent graphic elements in your publica tion.
To Wrap Text around a Graphic Element
1. Highlight the graphic you want to flow text around in your publication.
2. Open the Element menu.
3. Select Text wrap with the mouse.
4. The Text wrap dialog box will appear (see Figure 46), presenting you with several options.
5. Click on the OK button after making your selections.
Tetel wrop n OK u I Cancel ) I Wrap option:
!; a~ ~ Tout flow:
5tondoflln Inches:
Left lullifll Right ~ Top ~ Ooltom lo.t67 1
Figure 46: The Text Wrap d ialog box
Toolbox 99
The options are as follows:
Wrap option: The first icon positions text over the graphic element. The second one creates a rectangular frame arotmd it. The third icon will be highlighted if you have already customized a graphic's boundary. You can use the Standoff in inches option to define the spacing around the graphic element when you select the second or third icon
Text flow: These icons define how text will flow on the page relative to graphic elements. The first icon stops flm·ving text when a graphic is encountered. The second icon causes the text to jump over the graphic element and begin at column locations below it. The third icon flows text around the graphic element
Standoff in inches: Use these values to define the amount of space or margins around the g raphic element. Select a large bottom margin if you plan to add captions to your graphic elements
• NOTE To set default values, make your Text wrap selections prior to beginning your publication.
See Also Page setup and Place
• MODE
Layout view
• DESCRIPTION The Toolbox command is used for on-screen access to the pointer, text, cropping, and d rawing tools.
To Display the Toolbox
1. Open the Windows menu.
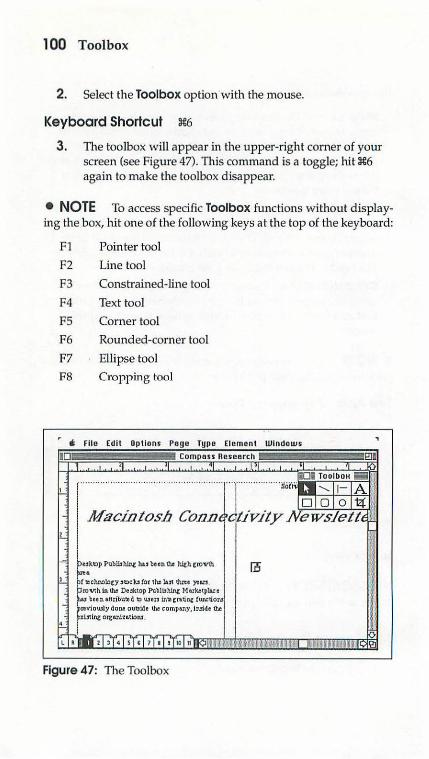
100 Toolbox
2. Select the Toolbox option with the mouse.
Keyboard Shortcut 31:6
3. The toolbox will appear in the upper-right corner of your screen (see Figure 47). This command is a toggle; hit 31:6 again to make the toolbox disappear.
• NOTE To access specific Toolbox functions without displaying the box, hit one of the following keys at the top of the keyboard:
Fl Pointer tool
F2 Line tool
F3 Constrained-line tool
F4 Text tool
FS Corner tool
F6 Rounded-corner tool
F7 Ellipse tool
FS Cropping tool
• IIi: File Edit Options Poge Type Element Windows
10 Compass Reoearch 01 . '1 ' .'1 .•t 1. '1 'I ' I
r·· ······················································· · · ·l· · ·· ····· ····· · ··sai"R~ ~o~~~"~ ~ ~~ 1
Macintosh Conn(d!ivity Aewslettt 11 I ,,
:I 1- ' ~~~··· .... ~--~ ..... ~ [0 j
• ' I 1Cchr.cl.ocy stxk3 toe the Jut thru yean. ::!' roVIb In w Oe*top Publillllnl: Mo:l<etplA:e
:1: bcen•nnbutr.d to wen in'Ztn.t.:inc !unctioN
i' rr<v1o\Uly dont ouald• tht comptny,INid< 1l1e -,.; xlstlt\c Oll:e.niutiDJU • 5 h: l illl"d 3T•I s1• 1 7T•I•T,• I nRQim'''hlHh . ~· "' J • Hr~UOH l!l
Figure 47: The Toolbox
Track 101
I TRACK I • MODE
Layout view or Story view
• DESCRIPTION Track is used to ad just the space between letters and words selected in your publication. If no text is selected, settings made in this dialog box will apply to the next text you type.
To Track Kern Your Text
1. Highlight the text you want to adjust.
2. Open the Type menu.
3. Select the Track option with the mouse.
4. TI1e Track pop-up menu will appear, presenting you with several options.
5. Click on the OK button.after you've made your selection.
The options are as follows:
No track: No track kerning or spacing is applied to the text (keyboard shortcut: o :1€Q)
Very loose: Applies track kerning to the selected text block, making the space between characters appear very wide on the page
Loose: Kerns the selected text, assuming a slightly larger point size
Normal: Applies track kerning to adjust the font at larger and smaller point sizes
Tight: Track kerns selected text to make characters appear closer than the font was designed for
Very tight: Cond enses text in the selected text block very tightly
1 02 Type Specs
See Also Alignment, Hyphenation, and Type specs
• MODE
Layout view or Story view
• DESCRIPTION The Type specs command is used for defining type specifications in your publication. You can set default "specs" by first accessing this command before beginning your publication .
To Define Type Specifications
1. Highlight the text for which you want to set type specifica tions.
2. Open the Type menu.
3. Select Type specs with the mouse.
Keyboard Shortcut :t~:T
4. The Type specifications dialog box will appear (see Figure 48), presenting you with several options.
5 . Click on the OK button when you have made your selections.
The options are as follows:
Font: Displays a pop-up menu of fonts you can select for use in your publication
Size: Presents a pop-up menu of the character sizes available for the font type selected
Leading: Displays a pop-up menu defining the different parameter selections for font leading, or vertical spacing. The
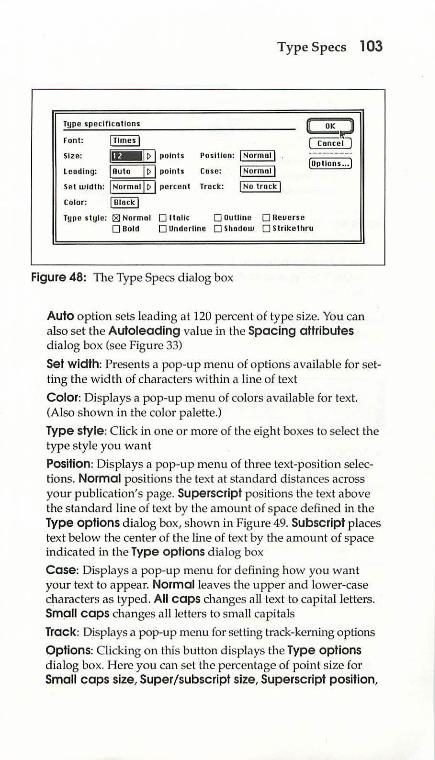
Type Specs 1 03
Type speclflcotions
Font: !!§!!] Size: ~~~ ~ I poin t s
l ending: I Auto I~ I point s
Se t wl~th: \ Norm nsj l> I per cent
Color: I Block I
Po sition: I Norm oi l .
Cose: I Norm oil
Tr nck: ~
Type style: 181 Normn l D ltnllc D Outline D neuerse
GtJ ~1] -------·
D Bold D Underline D Shndotu D Sl riket hr u
Figure 48: TI1e Type Specs d ialog box
Auto option sets leading a t 120 percen t of type size. You can also set the Autoleading value in the Spacing attributes dia log box (see Figure 33)
Set width: Presents a pop-up menu of options available for setting the w idth of characters w ithin a line of text
Color: Displays a pop-up menu of colors available for text. (Also shown in the color palette.)
Type style: Click in one or more of the eight boxes to select the type style you want
Position: Displays a pop-up menu of th ree text-position selections. Normal positions the text at sta ndard distances across your publication's page. Superscript positions the text above the standard line of text by the amount of space defined in the Type options d ialog box, shown in Figure 49. Subscript places text below the center of the line of text by the amount of space indicated in the Type options d ialog box
Case: Displays a pop-up menu for defining how you want your text to appear. Normal leaves the upper and lower-case characters as typed. All caps changes all text to capital letters. Small caps changes all letters to small capitals
Track: Displays a pop-up menu for setting track-kerning options
Options: Clicking on this button displays the Type options dialog box. Here you can set the percentage of point size for Small caps size, Super/ subscript size, Superscript position,
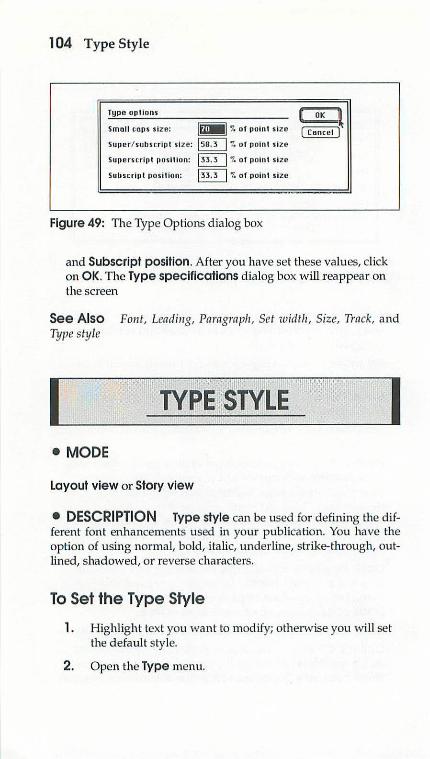
104 Type Style
Type options
Small caps size: lfl•M I '?, of point size
Super/ subscript size: ~'?.or point s ize
Superscript 11osltlon: §]"!.of point size
Subscrhot po•itlon: §]'?. of point size
Figure 49: The Type Options d ialog box
and Subscript position. After you have set these values, click on OK. The Type specifications dialog box will reappear on the screen
See Also Font, Leading, Paragraph, Set width, Size, Track, and Type style
• MODE
Layout view or Story view
• DESCRIPTION Type style can be used for defining the different font enhancements used in your publication. You have the option of using normal, bold, ita lic, underline, strike-through, outlined, shadowed, or reverse characters.
To Set the Type Style
1. Highlight text you want to modify; otherwise you will set the default style.
2. Open the Type menu.
Undo 105
3. Select the Type style option.
4. A list of type sty les wil l appear. Select the style you prefer to use and dick on OK when you are through.
• NOTE To create color text, highlight the text and select a color from the color palette.
See Also Color palette and Type specs
I UNDO I • MODE
Layout view or Story view
• DESCRIPTION Undo undoes the immediately previous addition or change made to your publication.
To Undo a Change
1. Open the Edit menu.
2. Select Undo with the mouse.
Keyboard Shortcut xz
• NOTE Depending on whether they are used in Layout or Story view, certain commands can be undone, and others cannot. If an action is undoable, you' ll see the word Undo under the Edit menu. If it is not, the word Undo will change to Cannot undo and be grayed out (unavailable).
Cutting, copying, pasting, moving text and graphic elements, editing text, changing the number of pages, copying master guides and Page setup parameters can be undone. Changes made with the

1 06 Zero Lock
Type and File menus are not undoable. The Styles and Color paleHe commands are irreversible as well.
See Also Revert
I ZERO LOCK I • MODE
Layout view
• DESCRIPTION Zero lock is used to anchor the zero point of the horizontal and vertical rulers in the publication window. The zero point is where the "0" tick marks intersect.
To Lock the Ruler's Zero Point
1. Open the Options menu.
2. Select the Zero lock option.
3. Use the pointer to drag the zero point to the location you prefer. A good spot to place the zero point is a t the upperleft corner of the image area on your publication page.
Result Your text and graphic elements will be positioned relative to the location of your ru lers. Moving and placing text blocks and graphic elements is easier once ru.lers have been locked into place.
See Also R11/ers
A ppendix A
Using PageMaker on a Network
107
PageMaker 4.0 can be used on all Macintosh-compatible network products on the market today. Performance of PageMaker 4.0 on a network can vary significantly, depending on the following factors:
Network speed: Page Maker 4.0 will run significantly faster on an Ethem et-based Local Area Network (LAN) than on a serialbased LAN. This is because the speed of Ethernet is several times greater than serial-based LANs. Suppose you send a 60K PageMaker file from a remote Macintosh II to a file server located in another room. With an Ethernet-based LAN this could take less than two minutes, while with a serial-based LAN this could take as long as five minutes. TOPS (by Sitka), which uses Apple Talk, can speed the printing process.
Size of files: If you are using a rela tively slow network, keep the files small, with minimal graphics and text. With a highspeed network, however, you can increase the size of your files.
Use of character and image enhancements in documents: The faster and less crowded your netvvork, the more you can use character and image enhancements in your files. If you have a high-speed network installed , you can send enhanced PageMaker publications during peak traffic hours of the day; with slower networks, reserve sending your files until traffic on the network is rela tively low.
Network user interfaces: When selecting a network program for u se with PageMaker, consider the convenience of using an INlT utility. INlT network programs are compatible with Apple Talk, which is supplied with every Macintosh. They increase the efficiency of file transfers on a network because they
108 Using PageMaker on a Network
run in the backgrow1d, freeing your computer for other uses. TOPS is one such network program that uses Apple Talk.
Relative traffic level of the network: Knowing how many users are sending files at the same tin1e across a network can help you send your PageMaker files efficiently. When someone else is printing, the network must allocate some of its time to watching the printer spooler on that user's system and coordinating when the print job can be sent to the printer; so avoid those times. Send PageMaker files across a network when the level of activity is relatively low. To find out the current level of activity on your network, look at the screen of the system that has been dedicated as the file server. Many network operating systems show a bar graph of tl1e relative amount of traffic on the network. Furthermore, programs such as TOPS monitor traffic and use an optimjzer to expedite messages over the network.
Location of PageMaker 4.0 on the network: PageMaker 4.0 is best used as a dedicated application, running on a single system. Frequent disk accesses, periodic saving of files, and the use of PageMaker features is relatively slow over a network. For tl1e best overall performance, have PageMaker installed on the Macintosh system where it will be used most. If you find that several members of your work group need a copy of PageMaker 4.0, contact Aldus Corporation for a network license.
Use and management of printer spoolers: Printer spoolers are invaluable when printing PageMaker 4.0 publications over any kind of network. A printer spooler intercepts a print job on the way to the printer, temporarily saving it to the hard disk. When the printer is available again, the print job is sent a t the printer's transmission rate. As all these background tasks are occurring, your computer is free and you can continue to work. Printer spoolers can be resident on your computer, or can be part of ti1e overall network operating system. Keep in mind that Apple's PrintMonitor is only compatible with Apple-specific peripherals (Apple L'lserWriter, LaserWriter SC, Image Writer, etc.). Several Apple developers are now offering printer spoolers for use on

109
networked Macintosh systems. SuperMac's LaserSpool is a spooler that perfom1s excellently over networks, and includes many customizable features. Contact your Apple dealer for details on any additional printer spoolers available.
To install a printer spooler, move the spooler icons into the system folder and reboot your system. The spooler acts as an INIT file, which becomes loaded once your system is rebooted. When you are ready to print, select the printer-spooler icon from the Chooser option under the Apple symbol, and complete your print job. Aldus has designed its drivers to work well with these third-party spoolers.
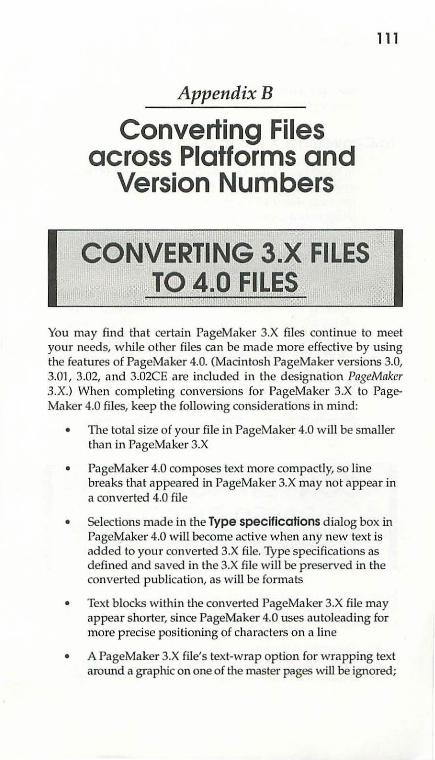
Appendix B
Converting Files across Platforms and
Version Numbers
CON~ERTING 3.X FILES T0 4.0 FILES
111
You may find that certain PageMaker 3.X files continue to meet your needs, while other files can be made more effective by using the features of PageMaker 4.0. (Macintosh PageMaker versions 3.0, 3.01, 3.02, and 3.02CE are included in the designation PngeMaker 3.X.) When completing conversions for PageMaker 3.X to PageMaker 4.0 files, keep the following considerations in mind:
• The total size of your fi le in PageMaker 4.0 will be smaller than in PageMaker 3.X
• PageMaker 4.0 composes text more compactly, so line breaks that appeared in PageMaker 3.X may not appear in a converted 4.0 file
• Selections made in the Type specifications dialog box in PageMaker 4.0 will become active when any new text is added to your converted 3.X file. Type specifications as defined and saved in the 3.X fi le will be preserved in the converted publication, as will be formats
• Text blocks within the converted PageMaker 3.X file may appear shorter, since PageMaker 4.0 uses autoleading for more precise positioning of characters on a line
• A PageMaker 3.X file's text-wrap option for wrapping text around a graphic on one of the master pages ·will be ignored;
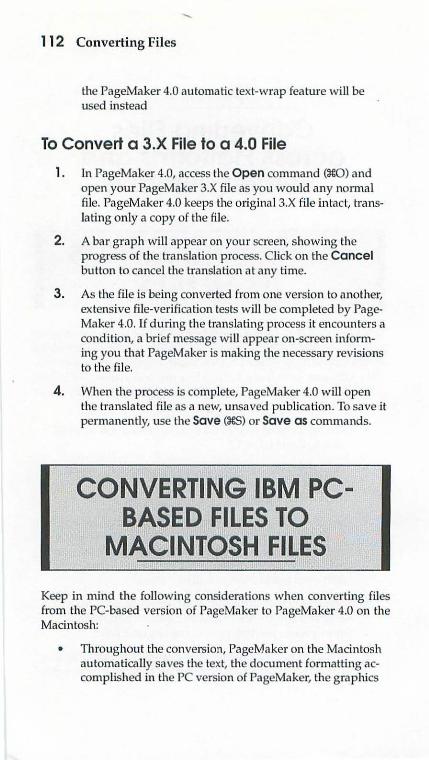
112 Converting Files
the PageMaker 4.0 automatic text-wrap feature wiU be used instead
To Convert a 3.X File to a 4.0 File
1. In PageMaker 4.0, access the Open command (31:0) and open your PageMaker 3.X file as you would any normal file. PageMa.ker 4.0 keeps the original 3.X file intact, transla ting only a copy of the file.
2. A bar graph will appear on your screen, showing the progress of the translation process. Click on the Cancel button to cancel the translation at any time.
3. As the file is being converted from one version to another, extensive file-verifica tion tests will be completed by PageMaker 4.0. If during the translating process it encounters a condition, a brief message will appear on-screen informing you that PageMa.ker is making the necessary revisions to the file.
4. When the process is complete, PageMaker 4.0 will open the translated file as a new, unsaved publication. To save it permanently, use the Save (3€5) or Save as commands.
CONVERJING IBM PCBASED FILES TO
MAGINTOSH FILES
Keep in mind the following considerations when converting files from the PC-based version of PageMaker to PageMaker 4.0 on the Macintosh:
• Throughout the conversion, PageMaker on the Macintosh automatically saves the text, the document formatting accomplished in the PC version of PageMaker, the graphics
113
stored in the converted file or publ ication, the complete encapsulated PostScript (EPS) graphic e lements, and the lowresolution screen versions of scanned images
• PageMaker on the Macintosh does not automatically transfer linked graphics or text files, draw-type or object-oriented graphics, graphic elements not completely stored in the publication, and tables built using the Table Editor. These files are considered as separa te items and must be converted ind ividually
• Prior to starting any file translations from the PC version ofPageMaker, save your files wi th Adobe PostScript fonts and d evice d rivers selected. While PageMaker4.0 is completing the file conversion, the PostScript fonts and printer driver will be seamlessly transferred from the PC version to the Macintosh version. If the incoming file from the PC has not been saved with PostScript fonts and p rinter drivers selected, the default values of PageMaker 4.0 will be applied to the d ocument
• Areas in PageMaker publica tions where draw-type or object-oriented graphics have been inserted on the PC w ill appear grayed out on the Macintosh, with an X over the area of the page where the image had been p laced. Use the file-conversion utilities of your PC-based draw packages to import the graphic files that are assigned to these X'ed areas as PJCT files
• Low-resolution images tha t have been saved in your PCbased version of PageMaker w ill be automatically converted by PageMa ker 4.0 on the Macin tosh. To re insert the high-resolu tion version of these graphic files, use the utilities fou nd in your PC-based graphics package to translate PC-based graphic files into P!CT files. Once the PICT file is available, relink the g raphic element to your publication with the Links command
• TI1e IBM extended-character set differs from the Macintosh character set. Since the Macin tosh screen technology is based on bi t-mapped characters instead of ANSI characters, the Macintosh can replicate the IBM characters conta ined in your document. Once your fi le is accessible on
114 Converting Files
the Macintosh, leave these characters as they appear; if you choose to reconvert the file back to the PC, these characters will be readable. If they are changed, the PC will not be able to recognize them
• NOTE lf your Macintosh system has SuperDrive, you will be able to read M5-DOS formatted disks without using communication programs that specialize in translating PC files to the Macintosh.
To Convert a PC File to a Macintosh File
1. Copy the PC version of your PageMaker file to a 3V2" disk.
2. Insert the disk into your Apple Macintosh SuperDrive. It will appear as an icon on the Macintosh system's desktop.
3. Use the Apple File Exchange to convert your file from PC format to Macintosh format.
4. Load PageMaker 4.0 on your Macintosh.
5. Press 3€0 to open the file converted from your PC version of PageMaker. The Open dialog box will appear.
6. Select the converted file and click on the OK button.
7. After completing your editing of the converted file, use the Save as command to save the converted file in the PageMaker 4.0 file format.
• NOTE If your Macintosh does not have SuperDrive insta1Jed, use one of the following communication programs: Aldus Corporation has tested MacLink by Data Viz, TOPS by Sitka, and MacBridge by Tangent Technologies, and fow1d these products to complete file transfers successfu1Jy. When using these programs, transfer the files in binary format.
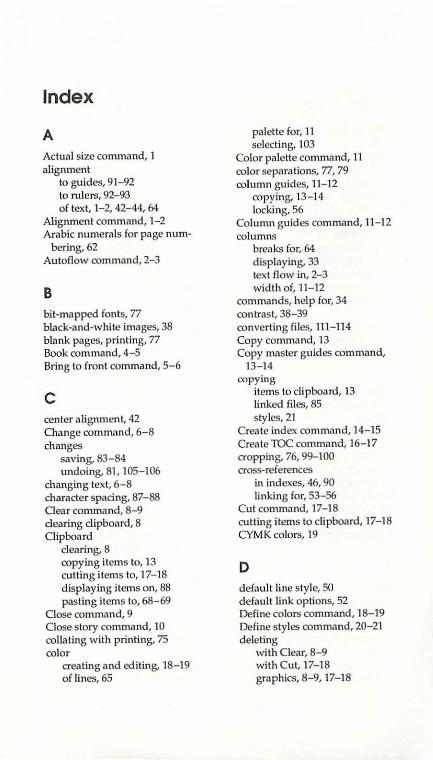
Index
A Actual size command, 1 alignment
to guides, 91-92 to rulers, 92-93 of text, 1-2, 42-44, 64
Alignment command, 1-2 Arabic numerals for page num
bering, 62 Autoflow command, 2-3
8 bit-mapped fonts, 77 black-and-white images, 38 blank pages, printing, 77 Book command, 4-5 Bring to front command, 5-6
c center alignment, 42 01ange command, 6-8 changes
saving. 83-84 undoing. 81, 105-106
changing text, 6-8 character spacing, 87-88 Clear command, 8-9 clearing clipboard, 8 Clipboard
clearing, 8 copying items to, 13 cutting items to, 17-18 displaying items on, 88 pasting items to, 68-69
Close command, 9 Close story command, 10 collating with printing, 75 color
creating and editing. 18-19 of lines, 65
palette for, 11 selecli ng, 103
Color palette command, 11 color separations, 77, 79 column guides, 11- 12
copying, 13-14 locking, 56
Column guides command, 11- 12 columns
breaks for, 64 displaying. 33 text flow in, 2-3 width of, 11- 12
commands, help for, 34 contrast, 38-39 converting files, 111- 114 Copy command, 13 Copy master guides command,
13-14 copying
items to clipboard, 13 li nked files, 85 styles, 21
Create index command, 14-15 Crea te TOC command, 16- 17 cropping, 76,99-100 cross-references
in indexes, 46, 90 linking for, 53-56
Cut command, 17-18 cutting items to clipboard, 17-18 CYM K colors, 19
D default line style, 50 default link opLions, 52 Define colors command, 18-19 Define styles command, 20-21 deleting
wi th Clear, 8- 9 with Cut, 17-18 graphics, 8-9, 17-18
116 INDEX
pages, 80-81 words from d ictionary, 38
dictionary, 36-38, 64, 94-95 Display master items command,
22 Display paragraph command,
22-23 Display s tyle names command, 23 displaying
actuill size, 1 clipboard , 88 columns, 33 entire pages, 30-31 entire pasteboi!rd, 31 guides, 33-34, 74 index en tries, 89-90 master pages, 22 rulers, 33 stacked images, 5-6
drawing tools, 99-100
E Edit layout commilnd, 24 Edit story command, 24- 25 editing
colors, 18- 19 with inline g raphics, 97 stories, 24-25 styles, 21
enlarging pages, 69 error messages, 78 even pages printing, 77 exiting PageMaker, 79-80 Export command, 25-26
F files
consolidating, 4-5 converting, 111-114 exporting, 25- 26 linking. See linking files saving, 83-85, 112- 113 size of on networks, 107
FiU command, 27-28
Find command, 28-30 Find next commilnd, 28-30 Fit in window commilnd, 30-31 Fit in world command, 31 flow of text, 2-3, 98-99 Font command, 31-32 fonts
bit-mapped , 77 enhancements for, 104- 105 and le11ding, 49, 68 PostScrip t, 78 sectrching for, 28-30 selecting, 31-32, 102 size of, 90-91, 102 substitute, 76-77
force justification, 2, 64 full alignment of text, 1-2
G Go to page command, 32-33 graphics
deleting, 8-9, 17- 18 flowing text around, 98-99 importing, 70-71 pasting, 68 selecting, 86-87
gray sca le, 38-39 Greek text, 73 grids
alignment to, 66 g rids, s ize of, 66
guides display ing, 33-34, 74 snapping to, 91-92
Guides command, 33-34
H height of pages, 61 Help command, 34-35 hiding master items, 22 HLS colors, 19 horizontal g uides, 33 horizontal rulers, 83, 106 Hyphenation command, 35-38
hyphenation dictionary, 64, 95
IBM files, converting, 112-114 Image control command, 38-40 images on networks, 107 Import command, 40-41 importing
adjusting images while, 38-40 graphics, 70-71 text, 21, 40-41
indentation, 44, 63, 66 Indents/tabs command, 42-44 independent gra phics, 71 ,98-99 index entries, displaying, 89-90 Index entry command, 45-46 indexes, 14- 15, 45-46, 89-90
cross-references in, 46, 90 INIT network programs, 107 inline graphics, 71,97 Insert pages command, 46-47 intensity, 38-39
J joining fi les, 53-56
K kerning, 67, 101 ,103 knockouts, 77
L landscape orientation, 61, 77 layout, 24, 73-74 leaders, 42-43 leading, 48-49,67, 102- 103 Leading command, 48-49 left alignment of text, 1-2, 42, 64 left margins, 44, 63 Line command, 49-50 Lines
number of, for printing, 39 spacing between, 48-49
spli tting of, 64 styles for, 49-50, 65-66 width of, 49, 65, 88
117
Link info command, 51-52 Link options command, 52-53 linking files, 51-56
with converting, 113 copying with, 85 with Open, 60
Links command, 53-56 Lock guides command, 56 low-resolution images, 113
M margin guides, 33 margins, 44, 62, 63 master page, displaying, 22 measurement system,
choosing, 73
N names
with saving, 84-85 of styles, 23
negative images, printing, 77 netvvorks, 107-109 New command, 57 New sto ry command, 57-58 numbering pages, 62-63
0 odd pages, printing, 77 Open command, 59-60 orientation of page, 61, 77 orphan control, 65
p
PageMaker 3.X files, converting, 111- 112 exiting, 79-80 using on a network, 107- 109
Page setup command, 60-63

118 INDEX
pages displaying actual size of, 1 displaying entire, 30-31 inserting, 46- 47 numbering, 62-63 removing, 80-81 size of, 61, 69
palette. See Color palette command
PANTONE-certified colors, 18-19 paper sizes, 76 Paragraph command, 63-68 paragraphs
appearance of, 63-68 displaying special characters
in, 22-23 spacing between, 64 styles for, 95-96 in tables of contents, 16
pasteboard, displaying entire, 31 Paste command, 68- 69 pasting items to clipboard, 68-69 patterns, 27, 38-39, 49 Percentage size command, 69 Place commands, 70-72 point size, 48-49,103-104 pointer tool, 99-100 portrait orientation, 61, 77 positioning
with g rids, 66 with rulers, 83 with scroll bars, 85-86 of s tacked images, 5-6
PostScript fonts, 78 Preferences command, 72-74 Print command, 74-79 printer-description files, 76 printers on ne tworks, 108-109 printing
blank pages, 77 even and odd pages, 77 page range, 75
proportional kerning, 67
Q Quit command, 79-80
R ranges
for indexes, 45 printing of, 75 reducing pages, 69 references with indexes, 90 Remove pages command, 80-81 Replace command, 71-72 replacing
text, 6-8 words wilh Spelling, 94
reverse order, printing in, 75 Revert command, 81 right alignment of text, 1-2, 42, 64 right margins, 44, 63 Roman numerals for page num-
bering, 62 rotating text, 97 Rounded corners command, 82 ruler guides, locking, 56 rulers, 73
anchoring, 106 displaying, 33 setting, 83 snapping to, 92-93
Rulers command, 83
s Save command, 83-84 Save as command, 84..:.85 saving
with Close, 9 files, 83-85, 112-113 with links, 52 with Quit, 80
seating with printing, 75 Scroll bars command, 85- 86
scroUing, 32-33 searching
for fonts, 28-30 for text, 6-8, 28-30, 94
Select all commnnd, 86-87 Send to back command, 5-6 Set width command, 87-88 shad ing, 27 shapes, filling, 27-28 Show clipboard command, 88 Show index command, 89-90 size
of display, 1, 30-31 of files, on networks, 1 07 offonts, 90-91, 102 of grids, 66 of pages, 61, 69 of paper, 76 of text, 48-49, 103-104
Size command, 90-91 smoothing, 77 Snap to guides command, 91-92 Snap to rulers command, 92-93 sorting of indexes, 45 spacing
of characters, 87-88 ol columns, 11-12 of lines, 48-49 of paragraphs, 64 in tables of contents, 17 of words and letters, 67,101
Spelling command, 93-95 spelling dictionary, 64 spoolerson networks, 108-109 stacked images, 5-6 status messages, 78 stories
beginning, 57-58 closing, 10 editing, 24-25
Style command, 95-96 Style palette command, 96 styles
copying and editing, 21
of corners, 82 defining, 20-21 displaying names of, 23 of lines, 49-50, 65-66 of paragraphs, 95-96 searching for, 28-30
subscripts, 103-104 substitute fonts, 76-77 superscri pts, 103
T tables of conten ts, 16-17, 64 tabs, 42-44 text
119
alignment of, 1-2, 42-44, 64 deleting, 8-9,17-18 flo\ving of, 2-3 with graphics, 98- 99 importing, 21, 40-41 kerning, 101 pasting, 68 rotating, 97 searching for, 6-8, 28-30 selecting, 86- 87 size of,48-49, 103-104 spacing between lines of,
48-49 styles for, 20-21
text columns, width of, 11-12 Text rotation command, 97 Text wrap command, 98-99 thumbnail printing, 75 tiles, 77 Toolbox command, 99-100 top of caps kerning, 67 topics
for help, 34 for indexes, 45-46
Track command, 101-102 trays, printer, 76 Type specs command, 102-104 Type style command, 104- 105 typestyles, searching for, 28-30

120 INDEX
u Undo command, 105- 106 undoing changes, 81, 105-106 updating with links, 52, 55-56
v vertical guides, 33 vertical rulers, 73, 83, 106
w widow control, 65
width of characters, 103 of columns, 11-12 of lines, 49, 65, 88 of pages, 61
windowshades, 87 words
z
hyphenation of, 35-38, 95 spacing of, 67, 101 spell d1ecking of, 93-95
Zero lock command, 106
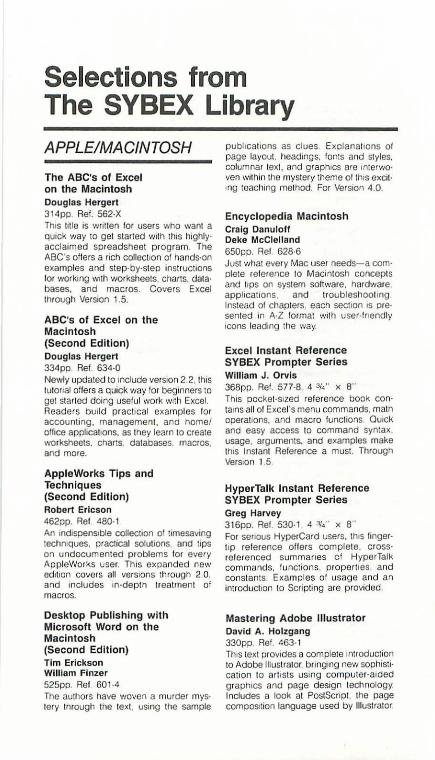
Selections from The SYBEX Library APPLE/MACINTOSH
The ABC's of Excel on the Macintosh Douglas Hergert 314pp Ref. 562-X Th1s Utle is wriuen lor users who want a quick way to get started w1th th1s highlyacclaimed spreadsheet program. The ABC's oilers a rich collect1on of hands-on examples and step-by-step instruCtiOns lor work1ng w1th worksheets charts. databases. and macros. Covers Excel through Version 1.5.
ABC's of Excel on the Macintosh (Second Edition) Douglas Hergert 334pp. Ret. 634-0 Newly updated to 1nctude version 2 2. this tutorial offers a quick way lor beginners to get started doing useful work with Excel. Readers build practical examples lor accounting, management . and home/ office applicat1ons, as they learn to create worksheets. cnans. databases. macros. and more.
AppleWorks Tips and Techniques (Second Edition) Robert Ericson 462op. Ref 480-1 An md,spens1ble coltect10n ol umesaving techmques, practical solutions, and ups on undocumented problems lor every AppleWorks user. Th1s expanded new ed1t1on covers all vers1ons through 2.0. and includes in-depth treatment of macros.
Desktop Publishing with Microsoft Word on the Macintosh (Second Edition) Tim Erickson William Finzer 525pp. Ref 601-4 The authors have woven a murder mystery through the text us1ng the sample
publications as clues Explanal,ons of page layoul. headings. fonts and styles. columnar text. and graphiCS are Interwoven within the mystery theme olth1s excit'ng teaching method. For Version 4.0.
Encyclopedia Macintosh Craig Danulof1 Deke McClelland 650pp. Ret 628·6 Just what every Mac user needs-a comolete reference to Macintosh concepts and lips on system software. hardware applicauons. and troubteshoo\mg Instead of chapters. each sect1on IS presented 1n A·Z format with user-lnendly 1cons tead1ng the way.
Excel Instant Reference SYBEX Prompter Series William J. Orvis 368pp. Ref. 577-8. 4 3f<' ' x 8" This pockel-s,zed reference book conta,ns all ol Excel's menu commands. math operat1ons. and macro functions Quick and easy access to command syntax. usage, arguments. and examples make th1s Instant Reference a must. Through VerSIOn I .5
HyperTalk Instant Reference SYBEX Prompter Series Greg Harvey 316pp. Rei. 530-1 4 3/a .. x 8" For senous HyperCard users. thiS lingerlip reference offers complete. crossreferenced summanes of HyperTalk commands. functions. propert1es. and constants. Examples of usage and an introduction to Scripting are provided.
Mastering Adobe Illustrator David A. Holzgang 330pp. Rei. 463-1 Th1s text prov1des a complete Introduction to Adobe llluslrator. bringing new sophistication to art1sts using compu1er·a1ded graphiCS and page design technology Includes a look at PostScript, the page composition language used by Illustrator
Mastering AppleWorks (Second Edition) Elna Tymes 479pp. Ref. 398·8 New chapters on busmess applications. data sharing DIF and Applesoft BASIC make th1s practical. 1n-depth tutorial even beller. Full d etails on AppleWorks desktop, word processing, spreadsheet and database funcuons.
Mastering Excel on the Macintosh (Third Edition) Carl Townsend 656'pp. Ref. 622-7 This h1ghly acclaimed lutonal has been updated for the latest vers1on of Excel Full o f extensive examples. tips, apphcauon templates. and illustratiOns. Th1s book makes a great reference for usmg worksheets. databases, graphics. charts. macros. and tables. For Vers1on 2.2
Mastering Microsoft Word on the Macintosh Michael J. Young 447pp. Ref. 54 1-7 This comprehenswe. step-by-step guide shows the reader through WOAD's extenSIVe capabilities, from baSIC ed1tmg to custom formats and desktop publ ish~ng . Keyboard and mouse 1nstruct10ns and pract:ce exerc1ses are 1ncluded. For Release 4.0.
Mastering Powerpolnt Karen L. Mc Graw, Ph.D. 425pp. Ref. 646-4 The com plete guide to c reating hJgh· .quahty graph1c presentations using PowerPoint 2.01 on the Macintoshoffeiing detailed, step-by-step coverage of everything from starting up the soft· ware to fine-luning your slide shows for maximum effect.
Mastering Ready, Set, Gol David A. Kater 482pp. Ref. 536-0 This hands-on introduction to the popula1
desktop publishing package for the Macintosh allows readers to produce professional-looking reports, brochures, and flyers Wrilten for Vers1on 4, this title has been endorsed by Letraset. the Ready, Set. Go! software publisher.
Understanding Hard Disk Management on the Macintosh J. Russell Roberts 334pp. Rei. 579·4 Th1s is the most comprehensive and acces~ble guide to hard disk usage for all Macin· tosh users. Complete coverage includes SCSI and senal dnves and ports. formatting. f.le fragmentation, backups, networks, and a helpfu ciagnostJC appendix.
Understanding HyperCard (Second Edition) Greg Harvey 654pp. Ref. 607·3 For Mac users who want clear-cui steps to quick mastery of HyperCard. this thorough tutonal introd uces HyperCard from the Brows,ng/Typ1ng and Authoring/ Paintmg levels all the way to Scripting w1th HyperTalk, the HyperCard programming language. No prior programmmg experience needed. For Version 1.2.
Using the Macintosh Toolbox with C (Second Edition) Fred A . Huxham David Burnard Jim Takatsuka 525pp. Ref. 572-7 Learn to program with the latest versions of Macintosh Toolbox using lh1s clear and succ1nct Introduction. Th1s popular title has been rev1sed and expanded to include dozens of new programm~ng examples for windows, menus, controls. alert boxes. and disk 1/0 . Includes hierarchical file system, Lighlspeed C, Resource files. and A ~aker.
DESKTOP PUBLISHING
The ABC's of the New Print Shop VIvian Dubrovln 340pp. Ret. 64()..4 Th1s beg1nner's guide stresses fun. pract1· cality and orig1nal 1deas. Hands-on tuton· als show haw to create greeting cards. invi tations. signs. flyers. letterheads. ban· ners. and calendars.
The ABC's of Ventura Robert Cowart Steve Cummings 390pp. Ref. 537·9 Created espec1ally for new desktop publishers. this IS an easy introduction to a complex prog ram. Cowart provides details on using the mouse. the Ventura side bar. and page layout. with careful explanations of publishing terminology. The new Ventura menus are all carefully expla1ned . For Version 2.
Mastering COREL DRAW! Steve Rimmer 403pp. Ref. 685·5 This four-color tutorial and user's guide covers draw1ng and tracing, text and speCial effects. f1le Interchange. and adding new fonts. With 1n-depth treatment of design principles. For verSion t . 1.
Mastering PageMaker on the IBM PC (Second Edition) Antonia Stacy Jolles 384pp. Ref. 521·2 A guide to every aspect of desktop pub· fishing with PageMaker: the vocabulary and baSICS of page deSign. layout. graphics and typography, plus instructions for creating fin1shed typeset publications of all kinds.
Mastering Ventura (Second Edition) Matthew Holtz 613pp. Ref. 581-6 A complete, step-by-step guide to IBM PC desktop publishing wi th Xerox Ventura
Publisher. Practical examples show how to use style sheets. format pages. cut and paste, enhance layouts. import matenal from other programs and more. For Version 2.
Understanding PFS: First Publisher Gerry Litton 310pp. Ref 616-2 Th1s complete gu1de takes users from the basics all the way through the most complex features ava1fable. Discusses work· ing ,-mh text and graphiCS. columns. clip art. and add-on software enhancements. Many page layout suggestions are 1ntro· duced. InCludes Fast Track speed notes.
Understanding PostScript Programming (Second Edition) David A. Hofzgang 472pp. Ref. 566-2 In-depth treatment of PostScnpt for programmers and advanced users working on custom desktop publishing tasks. Hands-on development of programs for font creat1on. Integrating graph1cs. printer Implementations and more.
Ventura Instant Reference SYBEX Prompter Series Matthew Holtz 320pp . Ref. 544- t . 4 Ji,, .. x a" This ccmpact volume offers easy access to the complex details of Ventura modes and options. commands. side-bars. file manage· ment. output deviCe configuration. and con· trol. Written for veroons through Ventura 2. 1! also inducles standard procedures for pro· jed and JOb control.
Ventura Power Tools Rick Altman 318pp. Ref. 592-t Renowned Ventura expert. Rick Altman presents strateg1es and techmques for the most effic1ent use of Ventura Publisher 2 This meludes a power d1sk with DOS u!lh· ties wh1ch is speoally deSigned for optl· mizing Ventura use. Learn how to soup up Ventura. edit CHP files. avoid design trag· edies, handle very large documents, and improve form.
Your HP LaserJet Handbook Alan R. Neibauer 564pp Ref 618·9 Get the most from your pnnter with thos step·by·step instruction book for usong LaserJet text and graphocs features such as cartndge and soft fonts, type selection. memory and processor enhancements. PCL programm1ng and PostScropt solu· loons Tn1s nands-on guode provodes spe· cofoc onstructoons 'or workong woth a vanety of software
CAD
The ABC's of AutoCAD (Second Edition) Alan R. Miller 375pp Ref. 584·0 This brief but effective introduction to AutoCAD quockly gets users draftong and desognong With this complex CADD pack· age The essential operatoons and capa· bilities of AutoCAD are neally deta1led. using ll proven. step·by·step me!hod that is laolored to the results·onented beginner.
The ABC's of AutoLISP George Omura 300pp. Ref. 620·0 Thos book is for users who want to unleash the full power of AutoCAD through the AutoLISP programm1ng ian· guage In non-technocal terms. the reader os shown how to store point locations. create new commands, and man1pulate coordonales and text Packed woth tops on common cod1ng errors
The ABC's of Generic CADD Alan R. Miller 278pp Ref 608·1 Thos out stan dong guode to computer-a1ded desogn and draftong woth Genenc CADD assumes no prev1ous experoence woth computers or CADD. This book w111 have users doong useful CADD work in record tome. oncludong basoc drawing woth the keyboard or a mouse. erasing and unerasong, making a copy of drawongs on your pnnter. addong text and organoz· ong your drawings usong layers.
Advanced Techniques in AutoCAD (Second Edition) Robert M. Thomas 425pp Ref. 593-X Develop custom applicatoons using screen menus. command macros, and AutoUSP programmong-no pnor pro· gramming expenence required Topics onctude customozong the AutoCAD envi· ronment. advanced data extraction tech· noques, and much more.
AutoCAD Desktop Companion SYBEX Ready Reference Series Robert M. Thomas 1094pp. Ref. 590·5 This is a complete reference work cover· ong all the features. command s. and user op:ions avaolable under AutoCAD Release 10, onctudong drawong basic and complex ent1l1es. edoting, displaying, pnnting, p lotting, and customizong draw· •ngz. mon1puloting the drawing database. and AutoLISP programming. Through Release tO.
AutoCAD Instant Reference SYBEX Prompter Series George Omura 390pp. Ref 548-4, 4 3j," x 8 ' This pocket-sized reference is a quock guide to all AutoCAD features. Des1gned for easy use. all commands are organized with exact syntax . a bnef description. optoons. tops. and references. Through Release tO.
Mastering AutoCAD (Third Edition) George Omura 825pp. Ref 574·3 Now in ots third edition, thiS tutorial guide to computer-aided design and draftong woth AutoCAD is per1ect for newcomers to CADD as well as AutoCAD users see kong greater proficoency. An architectural pro· ject serves as an example throughout. For Release 10
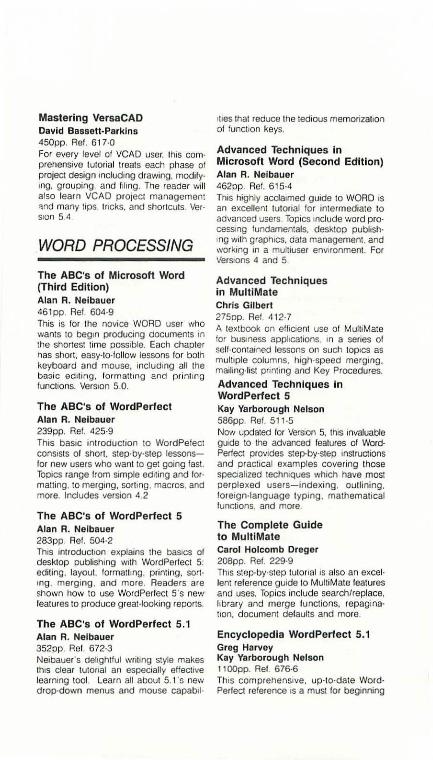
Mastering VersaCAD David Baaaett-Parklns 450pp. Ref. 617-0 For every level of VCAD user. lh1s comprehensive tutorial treats each phase of project design •ncludmg drawing, modify· 1ng, grouping, and f11ing. The reader will also learn VCAD p roject management 'lnd many tips. tncks, and shortcuts Vers•un 54
WORD PROCESSING
The ABC's of Microsoft Word (Third Edition) Alan R. Neibauer 461pp. Ret. 604-9 This is tor the novice WORD user who wants to beg1n producing documents in the shOrtest time possible. Each chapter has short. easy-to-tallow lessons tor both keyboard and mouse, includ1ng all the bncic editing, formatt•ng and print1ng functions. Vers•on 5.0.
The ABC's of WordPerfect Alan R. Neibauer 239pp. Ref. 425-9 This basic mtroductoon to WordPefect cons•sts ot short. step-by-step lessonsfor new users who want to get going last. Topics range tram s1mple ed•ting and for· matting. to merging, sortmg. macros. and more. lndudes version 4.2
The ABC's of WordPerfect 5 Alan R. Neibauer 283pp. Ret. 504-2 Th1s introduclion explains the basics of desktop publishing w1th WordPerfect 5: editing, layout. formalling, printing, sort· mg. merg•ng , and more. Readers are shown how to use WordPerlect 5's nevr leatures to produce great-looking reports.
The ABC's of WordPerfect 5.1 Alan R. Neibauer 352pp. Ret. 672-3 Neibauer's delightful wriling style makes th1s clear tutonat an especially effective learn•ng tool Learn all about 5. 1 · s new drop-down menus and mouse capab1l·
•t•es that reduce the tedious memonzat•on of funct•on keys.
Advanced Techniques in Microsoft Word (Second Edition) Alan R. Neibauer 462pp. Ref. 615·4 This highly acclaimed guide to WORD is an excellent tutorial for intermediate to advanced users. Topics 1nclude word processong tundamentals. desktop publish· •ng with graph•cs, data management, and working in a multiuser env11onment. For Versoons 4 and 5.
Advanced Techniques in MuitiMate Chris Gilbert 275pp. Ret. 4t2-7 A textbook on efficient use of MultiMate tor busoness applications. •n a senes at self-contained lessons on such top•cs as multiple columns. high-speed mergmg, mailing-list pnnt1ng and Key Procedures.
Advanced Techniques In WordPerfect 5 Kay Yarborough Nelson 586pp Ref. 511·5 Now updated for Version 5, th1s invaluable gu de to the advanced features of Word· Perfect prov•des step-by-ste:p mstructions and practical examples covering those specoalized techn1ques which have most perplexed users-indexing. outlining. tore•gn-language typmg, mathematical tun~tions. and more
The Complete Guide to MuitiMate Carol Holcomb Dreger 208pp. Ref. 229-9 Th1s st'Jp-by-step tutonal is also an excel· lent reterence guide to MultiMate teatures and uses. Topics include search/replace, library and merge functions. repaginauon. document detaults and more.
Encyclopedia WordPerfect 5.1 Greg Harvey Kay Yarborough Nelson t tOOpp. Ret 676·6 Th1s comprehens•ve. up-to-date WordPerfect reterence IS a must for beginning
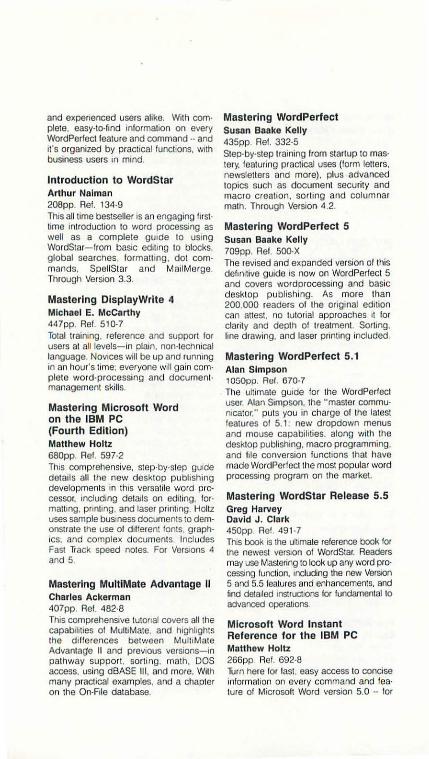
and expenenced users alike. W1th com· plete. easy-to-find mformatlon on every WordPerfect feature and command --and 1t's organized by practical functions. with business users 1n m1nd
Introduction to WordStar Arthur Naiman 208pp. Ref. 134-9 Th1s all time bestseller is an engaging lusttime Introduction to word processmg as well as a complete gUide to us1ng WordStar-from basic editing to blocks. global searches. formatting. dot commands. SpeiiStar and MaiiMerge. Through Version 3.3.
Mastering DisplayWrite 4 Michael E. McCarthy 447pp. Ref. 51 0-7 Total traimng. reference and support for users at all levels- in pla1n. non-technical language. Nov1ces Will be up and runn1ng in an hour's time; everyone will gain complete word-proc essing and documentmanagement skills.
Mastering Microsoft Word on the IBM PC (Fourth Edition) Matthew Holtz 680pp. Ret. 597-2 Th1s comprehensive. step-by-step gUide details all the new desktop publishing developments in th1s versatile word processor. includmg d eta1ls on ed1Jing, formatting. pnnt1ng. and laser pnntmg. Hollz uses sample bus1ness documents to demonstrate the use of different fonts graphICS. and complex documents Includes Fast Track speed notes. For VerSions 4 and 5
Mastering MultiMate Advantage II Charles Ackerman 407pp. Ref. 482-B This comprehensive tutonal covers all the capabi lities of MulliMate, and highlights the d1fferences between MultiMate Advantage II and preVIous vers1ons-1n pathway support. sorting. math. DOS access. using dBASE Ill, and more. With many prac11cal examples. and a chapter on the On-File database.
Mastering WordPerfect Susan Baake Kelly 435pp. Ref. 332-5 Step·by·step training from startup to mastery. featunng practical uses (form tellers. newslellers and more). plus advanced topics such as document security and macro creation. sort ing and columnar math. Through Version 4.2.
Mastering WordPerfect 5 Susan Baake Kelly 709pp. Ref. 500-X The revised and expanded version of this definitive guide is now on WordPerfect 5 and covers wordprocessing and basic desktop publishing. As more than 200,000 readers of the orig1nal ed1tion can auest. no tutorial approaches 1t for clarity and depth of treatment Sorting, line drawing, and laser printing included.
Mastering WordPerfect 5.1 Alan Simpson 1050pp. Ref. 670-7 The ultimate gUide for the WordPerfect user. Alan S1mpson, the "master communicator." puts you in charge of the latest features of 5. 1· new dropdown menus and mouse capabilities. along with the desktop publishing, macro programming. and file conversion functions that have made WordPerfect the most popular word processing program on the market.
Mastering WordStar Release 5.5 Greg Harvey David J. Clark 450pp Ref. 49 1-7 This book is the ultimate reference book for the newest verSion of WordStar. Readers may use Mastering to look up any word processing function. including the new Versoon 5 and 5.5 features and enhancements. and find deta·led Instructions for fundamental to advanced operabons
Microsoft Word Instant Reference for the IBM PC Matthew Holtz 266pp Ref. 692-B Turn here for fast. easy access to concise informat1on on every command and feature of Microsoft Word \•ersion 5.0 -- for
edrting, formatting. mergrng. style sheets. macros. and more. With exact keystroke sequences. discussion of command optrons. and commonly·performed tasks
Practical WordStar Uses Julie Anne Area 303pp. Ref. 107-1 A hands·on gUide to WordStar and MariMerge applicatrons. wrlh solutrons to comon problems and " reapes" for dayto·day tasks. Formalling. merge-printing and much more: plus a quick-reference command chart and notes on CP/M and PC·DOS. For Version 3.3.
Understanding Professional Write Gerry Litton 400pp Ref. 656-1 A complete gurde to Professronal Wnte thai takes you from creating your first srmple document. rnto a detarled descrip· uon of all major aspects of the software. Specral features place an emphaSis 011 the use of drfferent typestyles to create attractive documents as welt as potential problems and suggestro:1s on how 10 get around them.
Understanding WordStar 2000 David Kolodney Thomas Blackadar 275pp. Ret. 554·9 Thrs eng agrng. fast-paced series of tutorials covers everything from moving the cursor to print enhancements. format files. k ey glossanes. wrndows and MaiiMerge. Wrth p ractrcal examples. and notes for former WordStar users.
VIsual Guide to WordPerfect Jeff Woodward 457pp. Ret. 591·3 This is a visual hands-on guide which is rdeal for brand new users as the book shows each activrty keyst rake· bykeystroke. Clear ilfustratrons of computer
screen menus are ~r~cluded at every stage. Covers basic editrng, formalling lines, paragraphs. and pages, using the block feature, footnotes. search and replace. and more. Through Version 5.
WordPerfect 5 Desktop Companion SYBEX Ready Reference Series Greg Harvey Kay Yarborough Nelson 1006pp Ref. 522-0 Desktop publishrng features have been added to this compact encyclopedia. This trtle offers more detailed. crossreferenced entries on every software features rncludmg page formatting and layout. laser printing and word process· mg macros New users o' WordPerfect. and those new to Versron 5 and desktop pubhshmg writ fmd thrs easy to use for on· the-job help.
WordPerfect Instant Reference SYBEX Prompter Series Greg Harvey Kay Yarborough Nelson 254pp Ret. 4 76-3. 4 3/•" x 8" When you don't have trme to go drgging through the manuals, lhrs fingertip guide offers clear. conase answers: command summaries. correct usage. and exact keystroke sequences for on-the-JOb tasks. Convenrent organrzation reHects the structure of WordPerfect. Through Version 4.2.
WordPerfect 5 Instant Reference SYBEX Prompter Series Greg Harvey Kay Yarborough Nelson 3 16pp. Ref 535-2. 4 :J/4' x 8" Thrs pocket-srzed reference has all the program commands for the powerful WordPerfect 5 organrzed atphabetrcaJiy for qurck access. Each command entry has the exact key sequence. any reveal codes, a hst of available optrons. and optron-by-option discussrons.
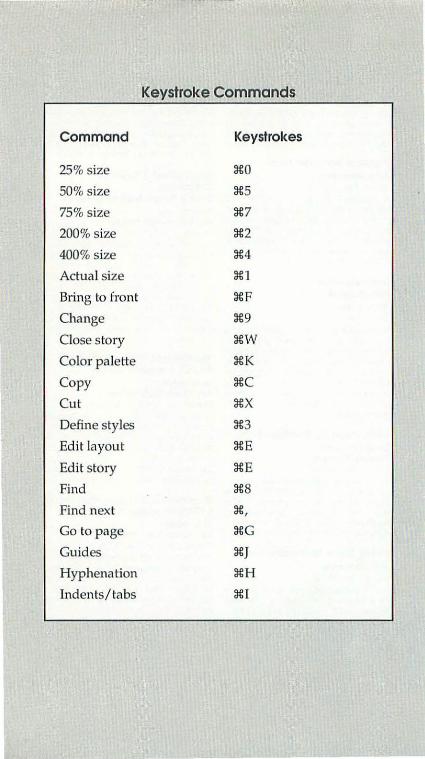
Keystroke Commands
Command Keystrokes
25% size ~0
50% size ~5
75% size ~7 I•
200% size ~2
400% size 3€4
Actual size 3€1
Bring to front 3€F
Change 3€9
Close story 3€W
Color palette 3€K
Copy ~c
Cut ~X
Define styles ~3
Edit layout ~E
Edit story ~E
Find 3€8
Find next 3€,
Go to page 3€G
Guides 3€J
Hyphenation ~H
Indents/tabs 3€1
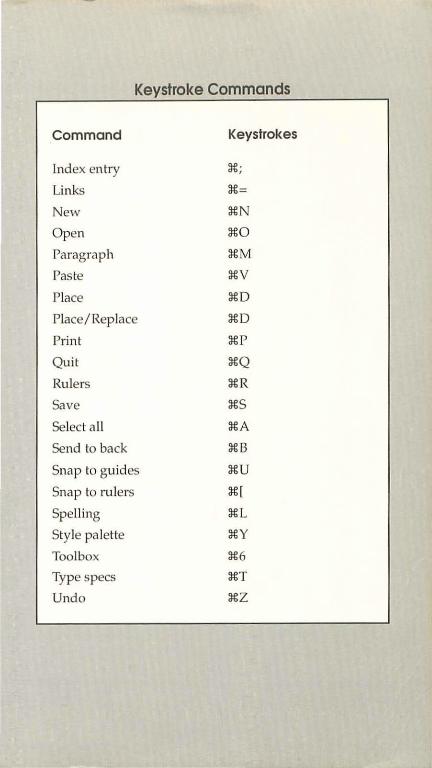
Keystroke Commands
Command Keystrokes
Index entry :!€· I
Links :!€ =
New :ll: N
Open :1€0
Paragraph :ll:M
Paste :ll: V
Place :ll:D
Place I Replace :ll:D
Print :ll:P
Quit :ll:Q
Ru lers :ll:R
Save :ll:S
Select a ll :ll:A
Send to back :ll: B
Snap to guides :ll:U
Snap to rulers :!€[
Spelling :ll: L
Style palette :ll: Y
Toolbox :1€6
Type specs :ll:T
Undo :ll:Z