gbk mplus / gfk mplus series - adam equipment
TRANSCRIPT

Adam Equipment
GBK Mplus / GFK Mplus Series
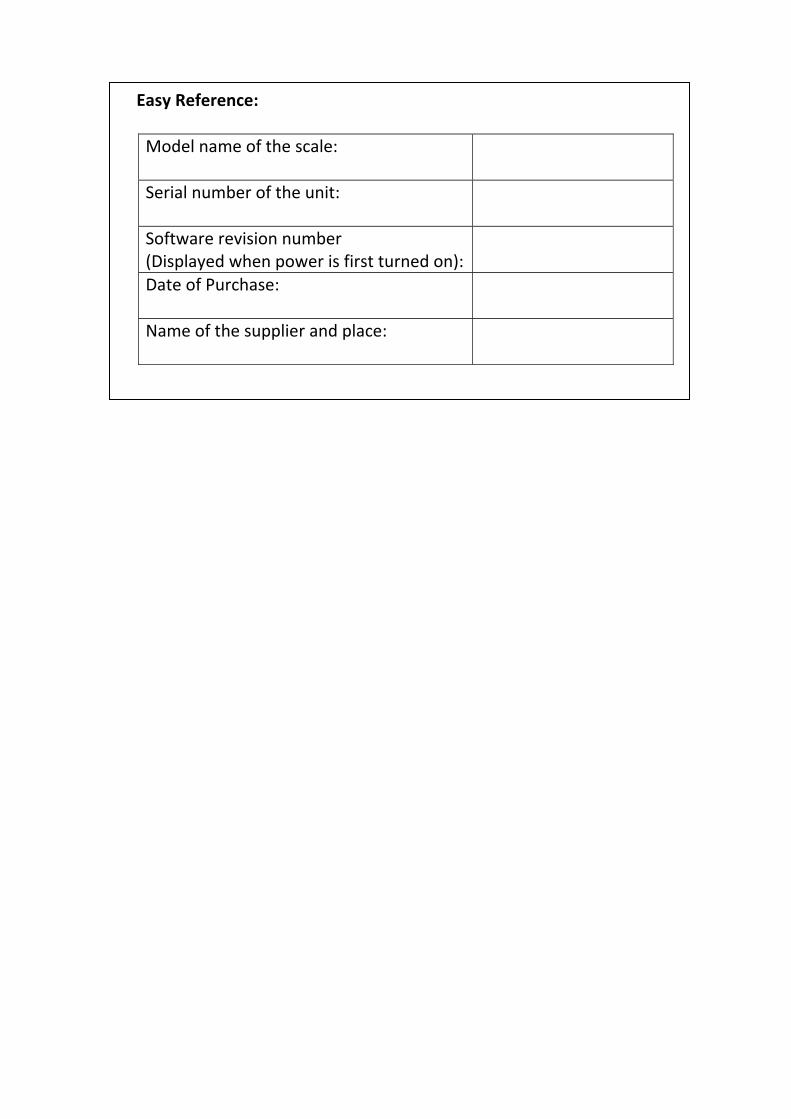
Easy Reference:
Model name of the scale:
Serial number of the unit:
Software revision number (Displayed when power is first turned on):
Date of Purchase:
Name of the supplier and place:

© Adam Equipment Company 2020
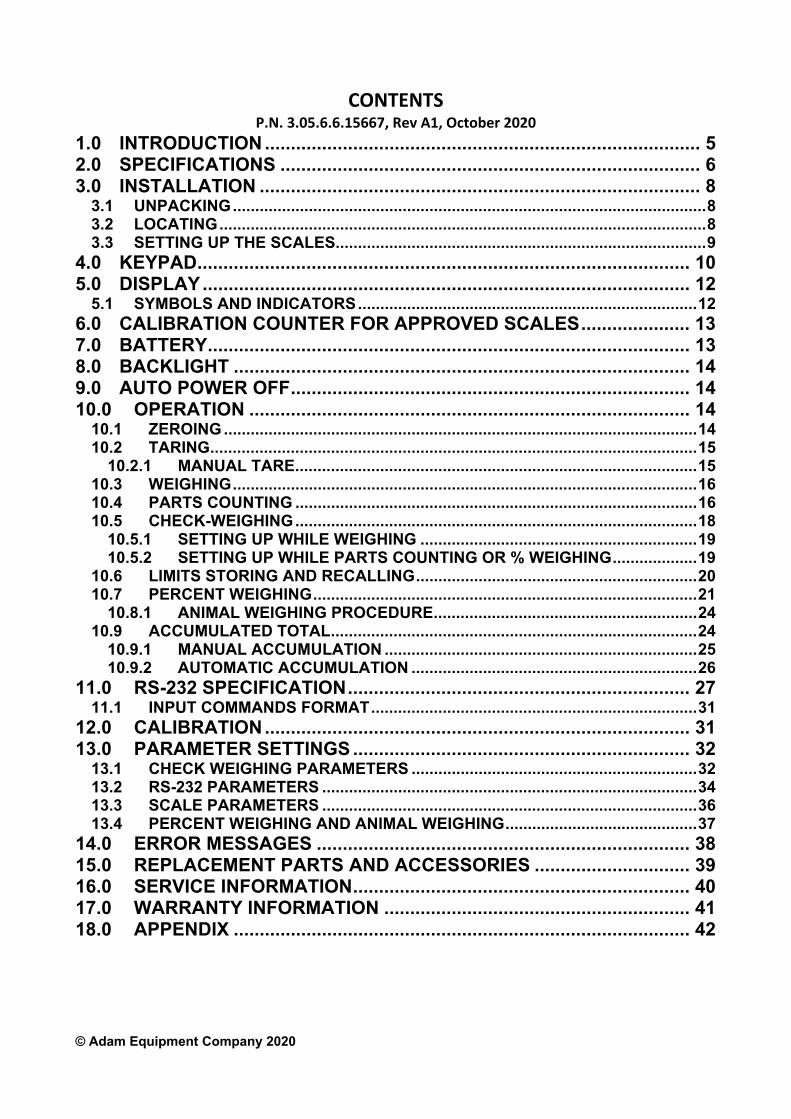
CONTENTS P.N. 3.05.6.6.15667, Rev A1, October 2020
1.0 INTRODUCTION .................................................................................... 5
2.0 SPECIFICATIONS ................................................................................. 6
3.0 INSTALLATION ..................................................................................... 8
3.1 UNPACKING .......................................................................................................... 8 3.2 LOCATING ............................................................................................................. 8 3.3 SETTING UP THE SCALES................................................................................... 9
4.0 KEYPAD ............................................................................................... 10
5.0 DISPLAY .............................................................................................. 12
5.1 SYMBOLS AND INDICATORS ............................................................................ 12 6.0 CALIBRATION COUNTER FOR APPROVED SCALES ..................... 13
7.0 BATTERY ............................................................................................. 13
8.0 BACKLIGHT ........................................................................................ 14
9.0 AUTO POWER OFF ............................................................................. 14
10.0 OPERATION ..................................................................................... 14
10.1 ZEROING .......................................................................................................... 14 10.2 TARING ............................................................................................................. 15
10.2.1 MANUAL TARE .......................................................................................... 15 10.3 WEIGHING ........................................................................................................ 16 10.4 PARTS COUNTING .......................................................................................... 16 10.5 CHECK-WEIGHING .......................................................................................... 18
10.5.1 SETTING UP WHILE WEIGHING .............................................................. 19 10.5.2 SETTING UP WHILE PARTS COUNTING OR % WEIGHING ................... 19
10.6 LIMITS STORING AND RECALLING ............................................................... 20 10.7 PERCENT WEIGHING ...................................................................................... 21
10.8.1 ANIMAL WEIGHING PROCEDURE ........................................................... 24 10.9 ACCUMULATED TOTAL .................................................................................. 24
10.9.1 MANUAL ACCUMULATION ...................................................................... 25 10.9.2 AUTOMATIC ACCUMULATION ................................................................ 26
11.0 RS-232 SPECIFICATION .................................................................. 27
11.1 INPUT COMMANDS FORMAT ......................................................................... 31 12.0 CALIBRATION .................................................................................. 31
13.0 PARAMETER SETTINGS ................................................................. 32
13.1 CHECK WEIGHING PARAMETERS ................................................................ 32 13.2 RS-232 PARAMETERS .................................................................................... 34 13.3 SCALE PARAMETERS .................................................................................... 36 13.4 PERCENT WEIGHING AND ANIMAL WEIGHING ........................................... 37
14.0 ERROR MESSAGES ........................................................................ 38
15.0 REPLACEMENT PARTS AND ACCESSORIES .............................. 39
16.0 SERVICE INFORMATION ................................................................. 40
17.0 WARRANTY INFORMATION ........................................................... 41
18.0 APPENDIX ........................................................................................ 42
© Adam Equipment Company 2020
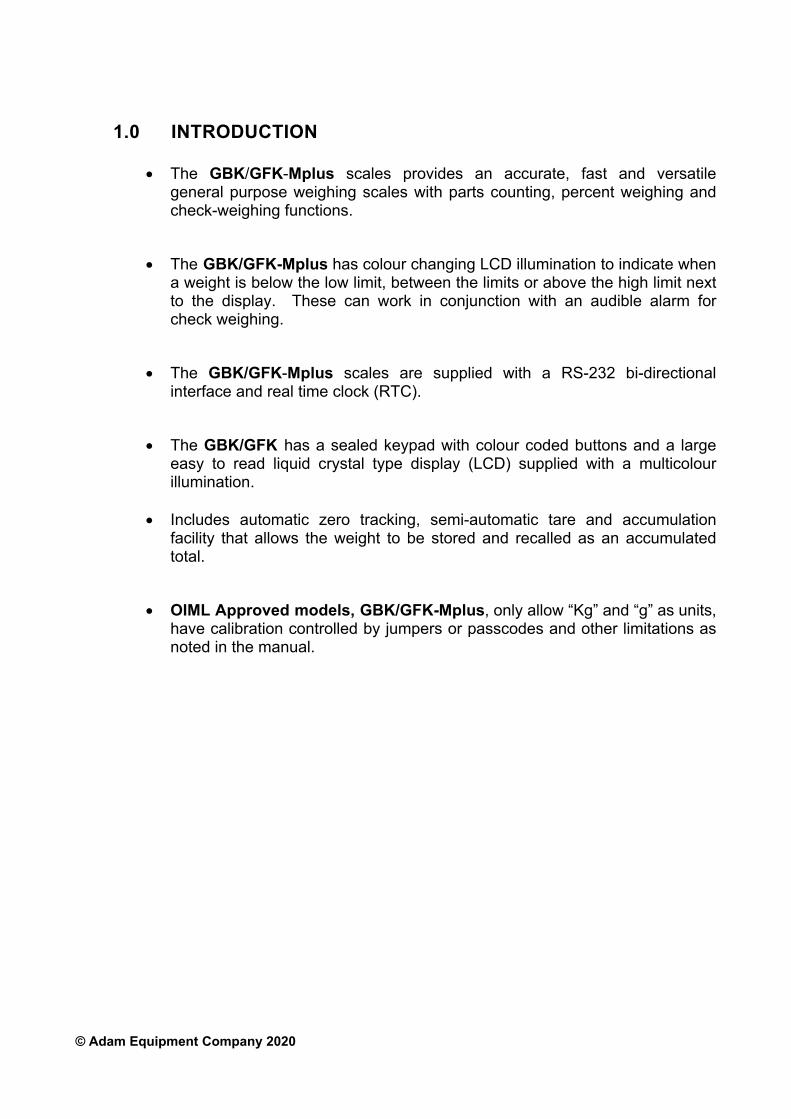
1.0 INTRODUCTION
The GBK/GFK-Mplus scales provides an accurate, fast and versatile general purpose weighing scales with parts counting, percent weighing and check-weighing functions.
The GBK/GFK-Mplus has colour changing LCD illumination to indicate when a weight is below the low limit, between the limits or above the high limit next to the display. These can work in conjunction with an audible alarm for check weighing.
The GBK/GFK-Mplus scales are supplied with a RS-232 bi-directional interface and real time clock (RTC).
The GBK/GFK has a sealed keypad with colour coded buttons and a large easy to read liquid crystal type display (LCD) supplied with a multicolour illumination.
Includes automatic zero tracking, semi-automatic tare and accumulation
facility that allows the weight to be stored and recalled as an accumulated total.
OIML Approved models, GBK/GFK-Mplus, only allow “Kg” and “g” as units, have calibration controlled by jumpers or passcodes and other limitations as noted in the manual.
© Adam Equipment Company 2020
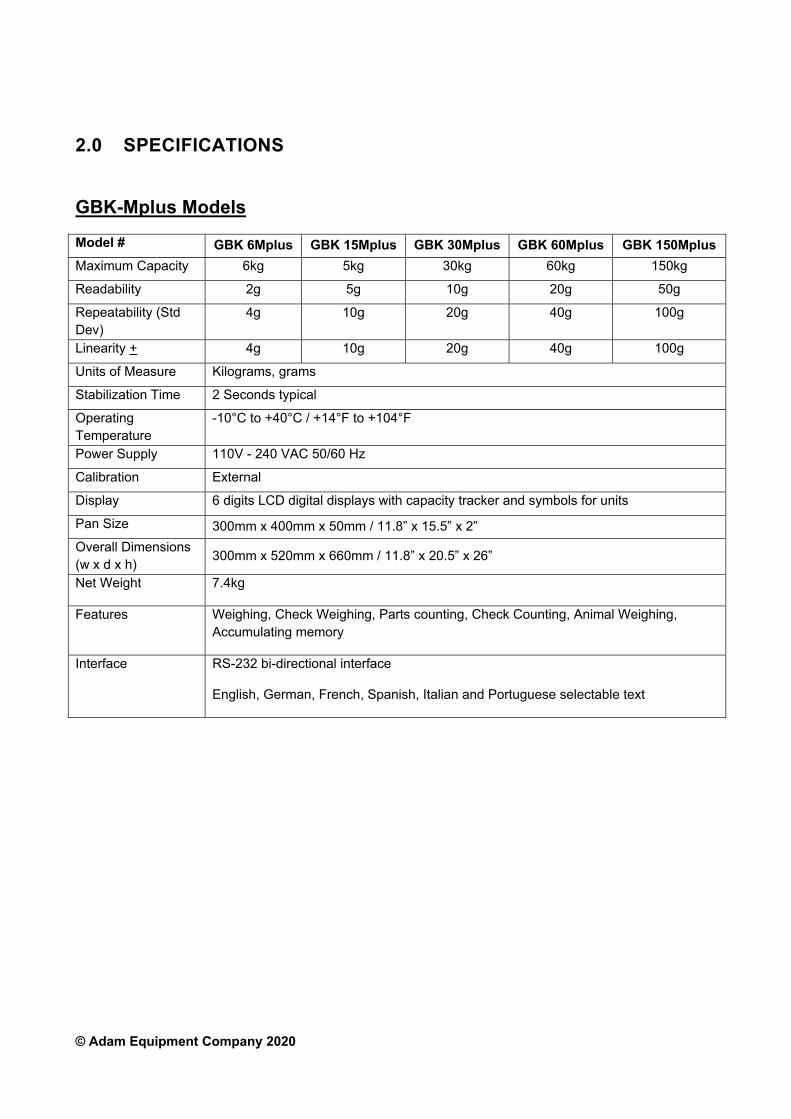
2.0 SPECIFICATIONS
GBK-Mplus Models
Model # GBK 6Mplus GBK 15Mplus GBK 30Mplus GBK 60Mplus GBK 150Mplus
Maximum Capacity 6kg 5kg 30kg 60kg 150kg
Readability 2g 5g 10g 20g 50g
Repeatability (Std Dev)
4g 10g 20g 40g 100g
Linearity + 4g 10g 20g 40g 100g
Units of Measure Kilograms, grams
Stabilization Time 2 Seconds typical
Operating Temperature
-10°C to +40°C / +14°F to +104°F
Power Supply 110V - 240 VAC 50/60 Hz
Calibration External
Display 6 digits LCD digital displays with capacity tracker and symbols for units
Pan Size 300mm x 400mm x 50mm / 11.8” x 15.5” x 2”
Overall Dimensions (w x d x h)
300mm x 520mm x 660mm / 11.8” x 20.5” x 26”
Net Weight 7.4kg
Features Weighing, Check Weighing, Parts counting, Check Counting, Animal Weighing, Accumulating memory
Interface RS-232 bi-directional interface
English, German, French, Spanish, Italian and Portuguese selectable text

© Adam Equipment Company 2020
GFK‐M Models
Model # GFK 60Mplus GFK 150Mplus GFK 300Mplus
Maximum Capacity 60kg 150kg 300kg
Readability 20g 50g 100g
Repeatability (Std Dev) 40g 100g 200g
Linearity + 40g 100g 200g
Units of Measure Kilograms, grams
Stabilization Time 2 second typical
Operating Temperature
-10°C to +40°C / +14°F to +104°F
Power Supply 110V - 240 VAC 50/60 Hz
Calibration External
Display 6 digits LCD digital displays with capacity tracker and symbols for units
Pan Size 400mm x 500mm
Overall Dimensions (w x d x h)
400 mm x 620 mm x 860 mm
Net Weight 12.5kg
Features Weighing, Check Weighing, Parts counting, Check Counting, Animal Weighing, Accumulating memory
Interface RS-232 bi-directional interface
English, German, French, Spanish, Italian and Portuguese selectable text
© Adam Equipment Company 2020
3.0 INSTALLATION
3.1 UNPACKING
The GBK/GFK-Mplus scales have already been adjusted to work with a platform and have been configured for this application. The platform and indicator have been calibrated as a pair and must be used together.
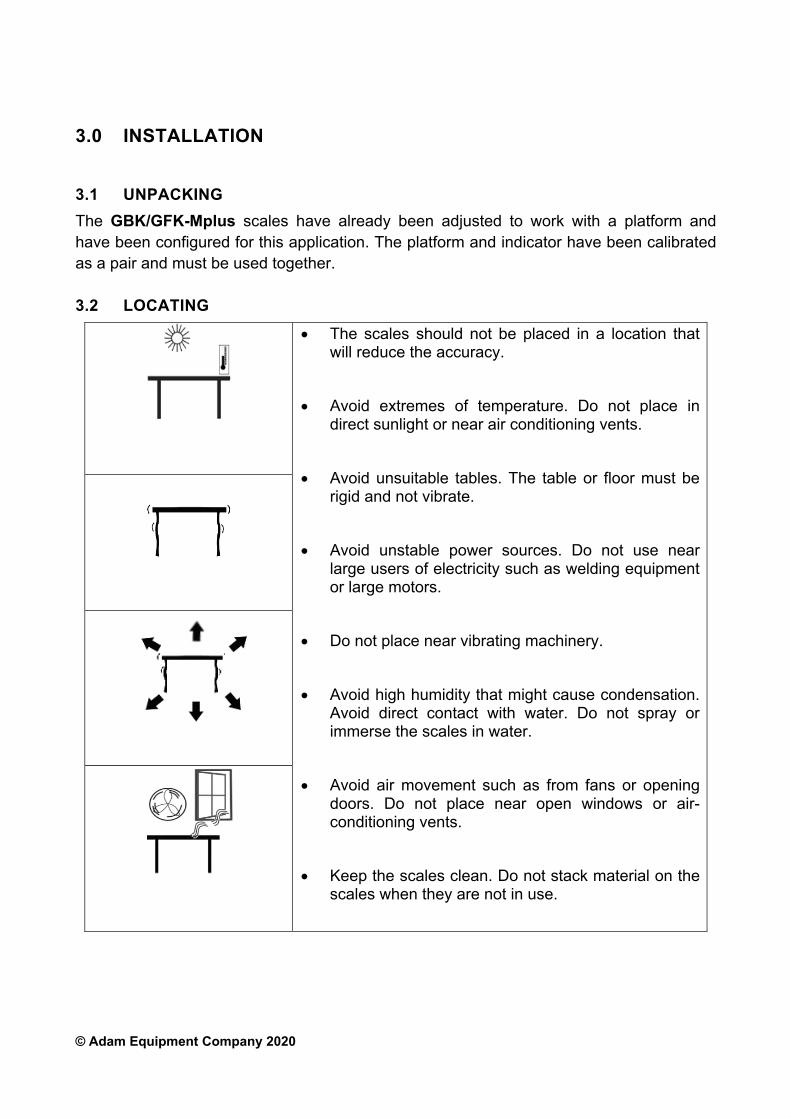
3.2 LOCATING
The scales should not be placed in a location that will reduce the accuracy.
Avoid extremes of temperature. Do not place in direct sunlight or near air conditioning vents.
Avoid unsuitable tables. The table or floor must be rigid and not vibrate.
Avoid unstable power sources. Do not use near large users of electricity such as welding equipment or large motors.
Do not place near vibrating machinery.
Avoid high humidity that might cause condensation. Avoid direct contact with water. Do not spray or immerse the scales in water.
Avoid air movement such as from fans or opening doors. Do not place near open windows or air-conditioning vents.
Keep the scales clean. Do not stack material on the scales when they are not in use.

© Adam Equipment Company 2020
3.3 SETTING UP THE SCALES
The pillar is attached to the base using a bracket that must be attached to the base frame first using the 4 bolts supplied. The pillar is secured to the bracket using 2 sets of screws. The cable from the base to the indicator module is run through the tube and taken out through the plastic support at the top. Excess cable can be stored within the tube.
The GBK/GFK-Mplus series comes with a stainless steel platform packed
separately. Place the platform in the base.
Level the scale by adjusting the four feet. If the scale rocks re-adjust the feet.
Attach the indicator module to the pillar by sliding it over the bracket with the flanges engaged in the groves on the base. Attach the cable from the base to the connector on the rear of the indicator.
Attach the power to the indicator. Press the [On/Off] key. The software revision number will be displayed followed by a self-test showing all digits before the zero is displayed along with the unit of weight that was selected last.
If the scale is an approved version, GBK/GFK-Mplus, and the Calibration Counter
has been enabled (see section 6) the current values will be displayed. These values should match the values marked on the scale at the time of verification, if it has been verified.

© Adam Equipment Company 2020
4.0 KEYPAD
KEYS PRIMARY FUNCTION SECONDARY FUNCTION
[Zero] Sets the zero point for all subsequent weighing. The display shows zero.
Escape from any setting menus
[Tare] It tares the scale and stores the current weight in memory as a tare value, subtracts the tare value from the weight and shows the results. This is the net weight.
Accept the set values
[Unit] This is used to select the weighing units from a preset list of available units.
Allows the weight, unit weight, and count to be seen when parts counting or to change from weight to % in percent weighing
[Low Limit]
&
[High Limit]
It sets the limits for check weighing and allows setting of either the low limit or the high limit or both.
None
© Adam Equipment Company 2020
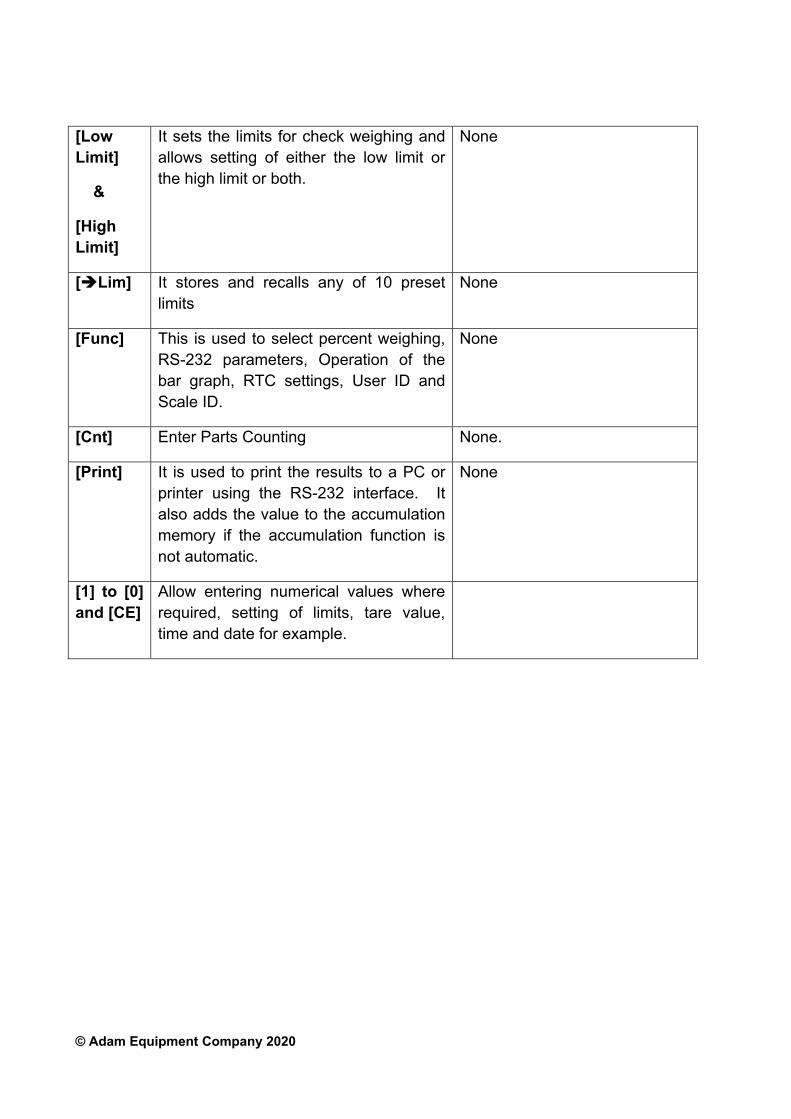
[Low Limit]
&
[High Limit]
It sets the limits for check weighing and allows setting of either the low limit or the high limit or both.
None
[Lim] It stores and recalls any of 10 preset limits
None
[Func] This is used to select percent weighing, RS-232 parameters, Operation of the bar graph, RTC settings, User ID and Scale ID.
None
[Cnt] Enter Parts Counting None.
[Print] It is used to print the results to a PC or printer using the RS-232 interface. It also adds the value to the accumulation memory if the accumulation function is not automatic.
None
[1] to [0] and [CE]
Allow entering numerical values where required, setting of limits, tare value, time and date for example.
© Adam Equipment Company 2020
5.0 DISPLAY
5.1 SYMBOLS AND INDICATORS
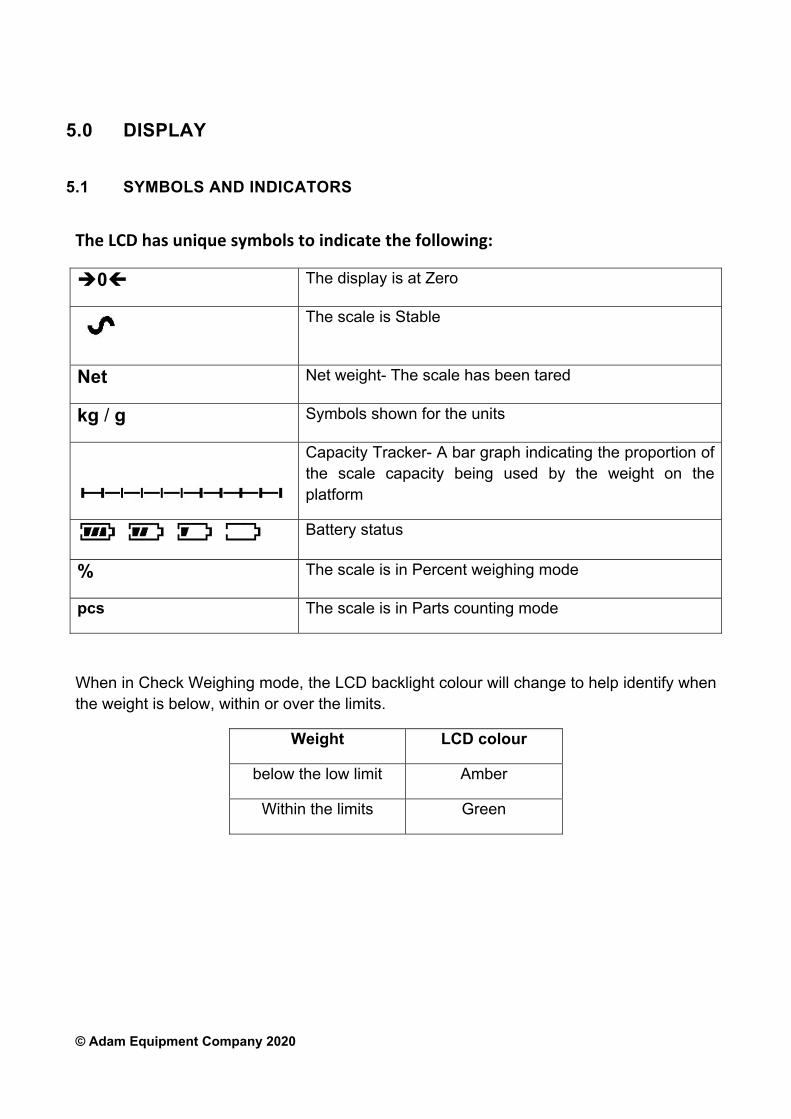
The LCD has unique symbols to indicate the following:
0 The display is at Zero
The scale is Stable
Net Net weight- The scale has been tared
kg / g Symbols shown for the units
Capacity Tracker- A bar graph indicating the proportion of the scale capacity being used by the weight on the platform
Battery status
% The scale is in Percent weighing mode
pcs The scale is in Parts counting mode
When in Check Weighing mode, the LCD backlight colour will change to help identify when the weight is below, within or over the limits.
Weight LCD colour
below the low limit Amber
Within the limits Green

© Adam Equipment Company 2020
6.0 CALIBRATION COUNTER FOR APPROVED SCALES
The approved (GBK/GFK-Mplus model) scales have the ability to control access to the calibration or metrology parameters using a passcode to limit access. The requirements for doing this stipulate the counters should be apparent and recorded in a suitable location on the scale.
In this way if the record of the Calibration or Parameter counters do not agree with recorded settings the responsible person inspecting the scale can take appropriate action.
The Counters are incremented any time the calibration section or the Factory parameters section have been modified.
At power on, the display will show the current software revision number followed by the
message of the Calibration Count “[AL[nt” then a number i.e. “123”. The number from the
counter memory. Then the Parameter Counter message of “PAr[nt” and probably a
different number, i.e. “234”. The counters cannot be reset to 0, they will increment until the display can no longer hold the values. (1 to 999999). It is expected we will never have more than 1 million calibrations in the life of the machine.
Each display is held for 1-2 seconds.
The indicator will then continue to do the display test and go to normal weighing.
7.0 BATTERY
The scales can be operated from the rechargeable battery, if desired. The battery life is determined by the number and impendence of the load cells connected. With a single load cell and backlight disabled the life is approximately 70 hours before needing to be recharged.
When the battery needs charging, the battery symbol will show as empty and it
will flash. If the battery symbol is flashing, the indicator will still operate for a period of time, after which, it will automatically switch off, to protect the battery.
To charge the battery, simply plug in the mains power supply. The indicator does
not need to be turned on. The battery symbol will scroll to indicate it is charging, it may take several hours to
fully charge the battery from empty. When the battery is charged to full capacity, the battery symbol will stop scrolling
and it will show as fully charged .
© Adam Equipment Company 2020
8.0 BACKLIGHT
The backlight for the LCD can be set by the user to always off, always on or automatic (on only when the indicator is in use or a key is pressed). See setting of
the parameter “S2 bL” in section 13.3.
The default backlight colour can be defined to White, Green, Red, Amber and Blue. Once defined to one of these colours, the backlight will still change colours during Check Weighing, and Check Counting, on all other situations it will illuminate
according to the user selection. See setting of the parameter “S2 bL” in section 13.3.
The intensity of the backlight can also be defined, there are three settings to choose
from, Low, Mid and High.
9.0 AUTO POWER OFF
The auto power off can be set by the user to disable the feature or to a pre-set time interval. See setting of the parameter “S3 AoF“ in section 13.3.
10.0 OPERATION
10.1 ZEROING
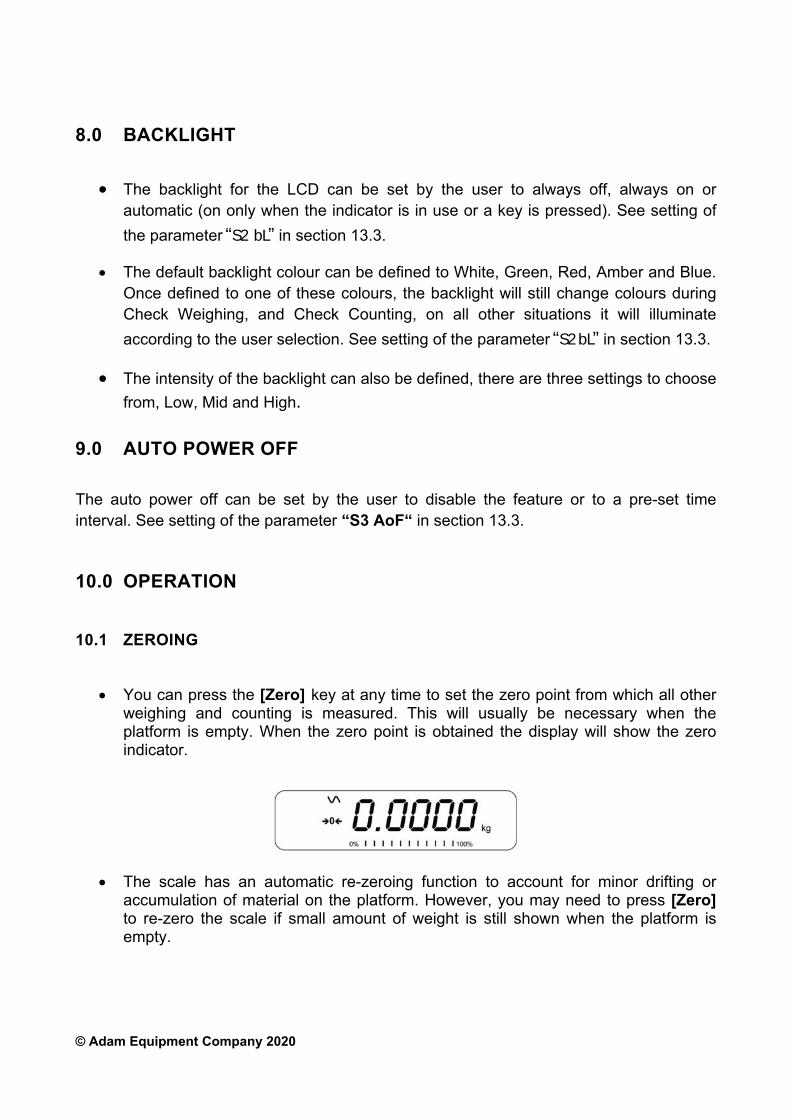
You can press the [Zero] key at any time to set the zero point from which all other weighing and counting is measured. This will usually be necessary when the platform is empty. When the zero point is obtained the display will show the zero indicator.
The scale has an automatic re-zeroing function to account for minor drifting or accumulation of material on the platform. However, you may need to press [Zero] to re-zero the scale if small amount of weight is still shown when the platform is empty.
© Adam Equipment Company 2020
10.2 TARING
10.2.1 Manual tare
Zero the scale by pressing [Zero]. The zero indicator will be on. Place a container on the platform and its weight will be displayed.
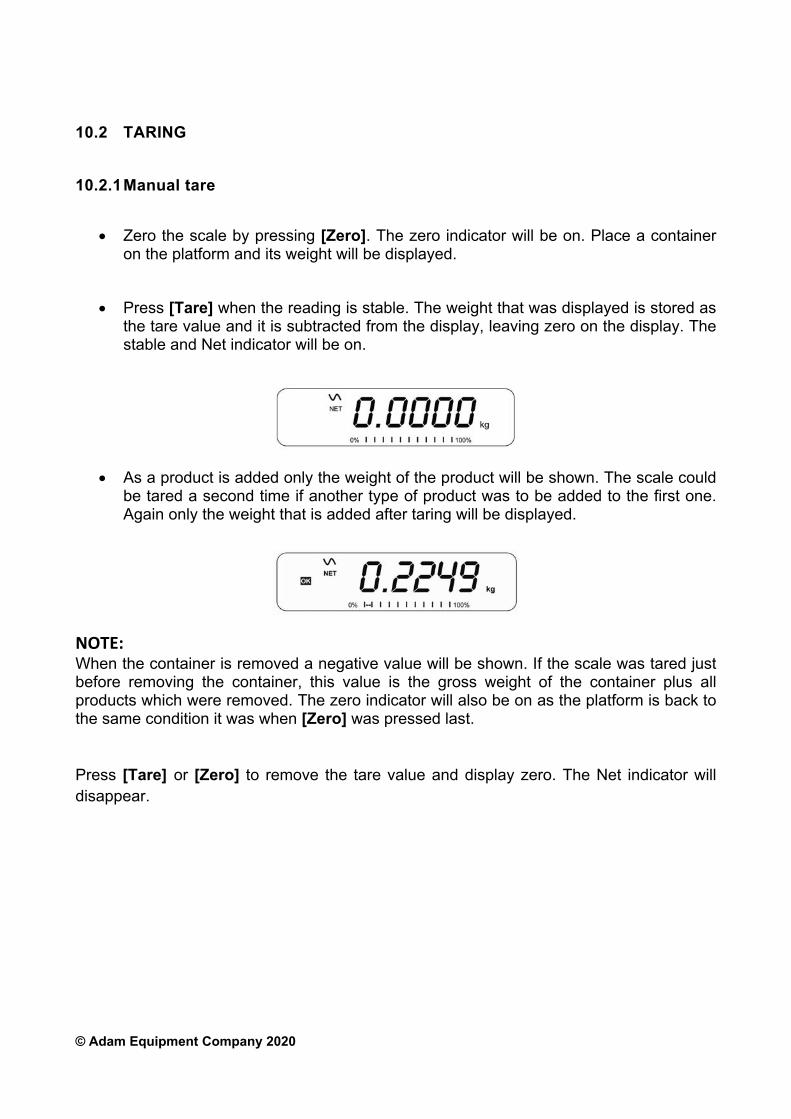
Press [Tare] when the reading is stable. The weight that was displayed is stored as the tare value and it is subtracted from the display, leaving zero on the display. The stable and Net indicator will be on.
As a product is added only the weight of the product will be shown. The scale could be tared a second time if another type of product was to be added to the first one. Again only the weight that is added after taring will be displayed.
NOTE: When the container is removed a negative value will be shown. If the scale was tared just before removing the container, this value is the gross weight of the container plus all products which were removed. The zero indicator will also be on as the platform is back to the same condition it was when [Zero] was pressed last.
Press [Tare] or [Zero] to remove the tare value and display zero. The Net indicator will disappear.
© Adam Equipment Company 2020
10.3 WEIGHING
To determine the weight of a sample, first tare an empty container if used, then place the sample in the container. The display will show the weight and the unit of weight currently in use.
To change the weighing unit press the [Unit] key. The only alternative weighing unit is grams. This can be enabled by the user in the parameters section. See section 13.3.
10.4 PARTS COUNTING
The scale can be used to count parts based on the average weight of a sample weighed. When more parts are added the total number of parts are displayed.
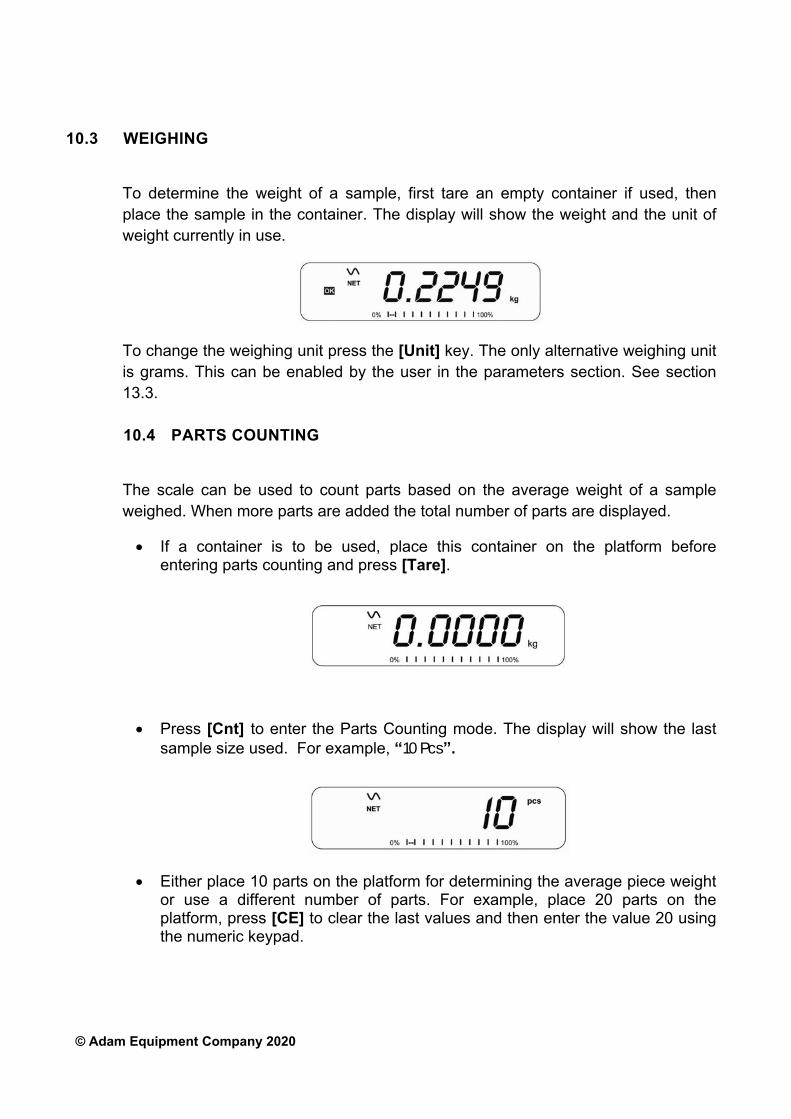
If a container is to be used, place this container on the platform before entering parts counting and press [Tare].
Press [Cnt] to enter the Parts Counting mode. The display will show the last sample size used. For example, “10 Pcs”.
Either place 10 parts on the platform for determining the average piece weight or use a different number of parts. For example, place 20 parts on the platform, press [CE] to clear the last values and then enter the value 20 using the numeric keypad.
© Adam Equipment Company 2020
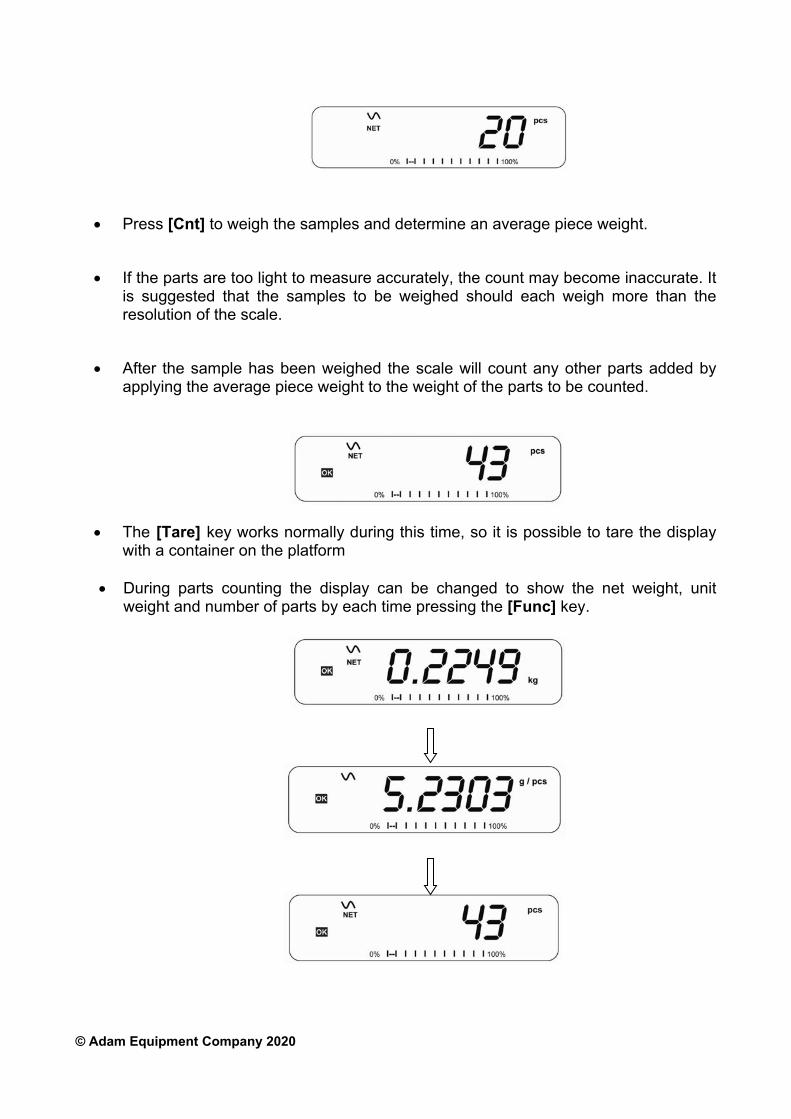
Press [Cnt] to weigh the samples and determine an average piece weight.
If the parts are too light to measure accurately, the count may become inaccurate. It is suggested that the samples to be weighed should each weigh more than the resolution of the scale.
After the sample has been weighed the scale will count any other parts added by applying the average piece weight to the weight of the parts to be counted.
The [Tare] key works normally during this time, so it is possible to tare the display with a container on the platform
During parts counting the display can be changed to show the net weight, unit
weight and number of parts by each time pressing the [Func] key.
© Adam Equipment Company 2020
To count a different sample quantity, press the [Cnt] key. The display will show the last used sample size. Either use this sample size with a different part or enter a new sample size as above.
To return to weighing, press [Unit] when “XX pcs” is displayed.
10.5 CHECK-WEIGHING
Check-weighing is a procedure to display an indicator or sound an alarm when the weight on the platform meets or exceeds the values stored in the memory. The memory holds values for a high limit and a low limit. Either or both the limits can be set by the user.
NOTE:
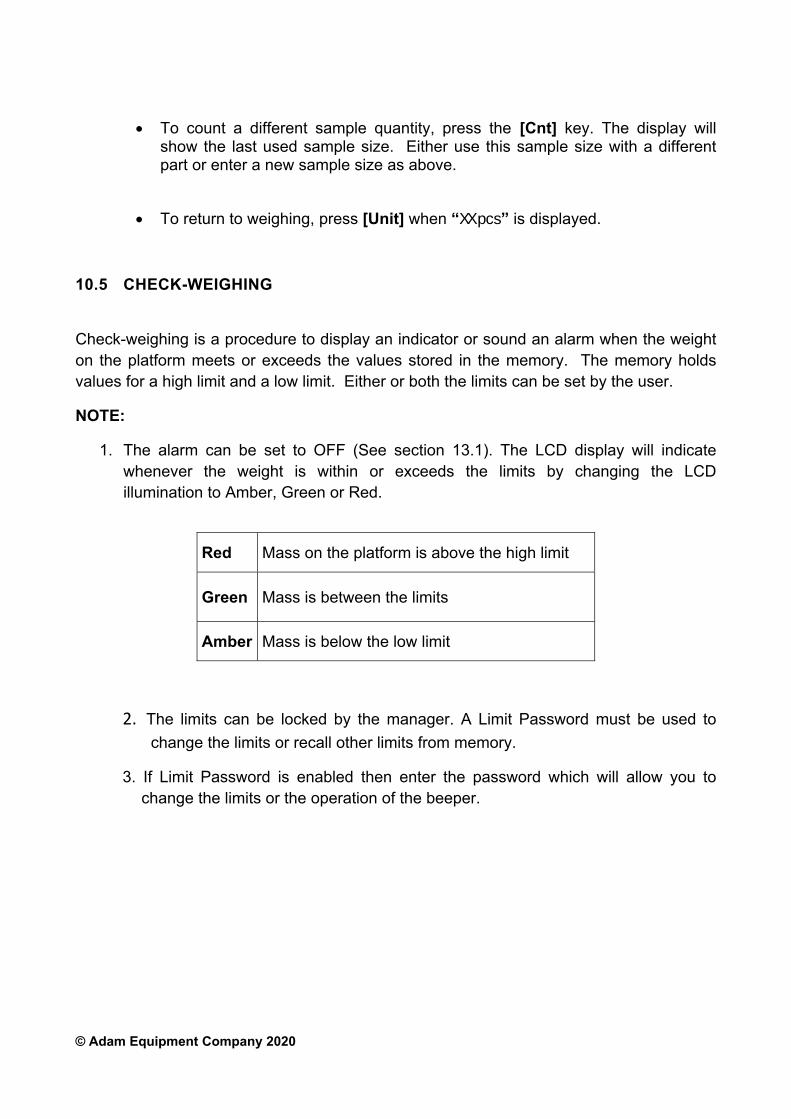
1. The alarm can be set to OFF (See section 13.1). The LCD display will indicate whenever the weight is within or exceeds the limits by changing the LCD illumination to Amber, Green or Red.
2. The limits can be locked by the manager. A Limit Password must be used to
change the limits or recall other limits from memory.
3. If Limit Password is enabled then enter the password which will allow you to change the limits or the operation of the beeper.
Red Mass on the platform is above the high limit
Green Mass is between the limits
Amber Mass is below the low limit
© Adam Equipment Company 2020
10.5.1 SETTING UP WHILE WEIGHING
Press the [Low Limit] key. It will show the current low limit. The “LO” symbol will appear on the display.
Press the [CE] key to clear the old value and then enter the new low limit using the numeric keys. The decimal point is fixed at the position that is used for the current weighing unit. When the desired value is shown press [Tare] to accept the value. If you want to reset the value to zero, press [CE] to clear the value.
The limits are displayed in the weighing unit in use.
To set the high limit press [High Limit], the display will show the high limit, the “HI” symbol will be on to the left side of the display. Set the high limit in the same way the low limit was set.
Pressing the [Tare] key to enter the value will return the scale to weighing, with the Check-weighing function enabled.
10.5.2 SETTING UP WHILE PARTS COUNTING OR % WEIGHING
During parts counting and percent weighing the limits are set in the same way as above. The limits are displayed in pcs or %.
See Section 10.4 for the description of parts counting and Section 10.7 for percent weighing.
NOTE:
1. The weight must be greater than 20 scale divisions for the check-weighing to operate.
2. To disable the check weighing function, enter zero into both the limits as described
above. When the current limits are shown, press [CE] to clear the settings, then press [Tare] to store the zero values.
© Adam Equipment Company 2020
10.6 LIMITS STORING AND RECALLING
The scale can store up to 10 sets of high and low limits in memory along with the weighing units in use (including pcs for parts counting and % for percent weighing) as well as settings for the beeper.
During Check weighing the current limits can be stored or previously stored units can be
recalled.
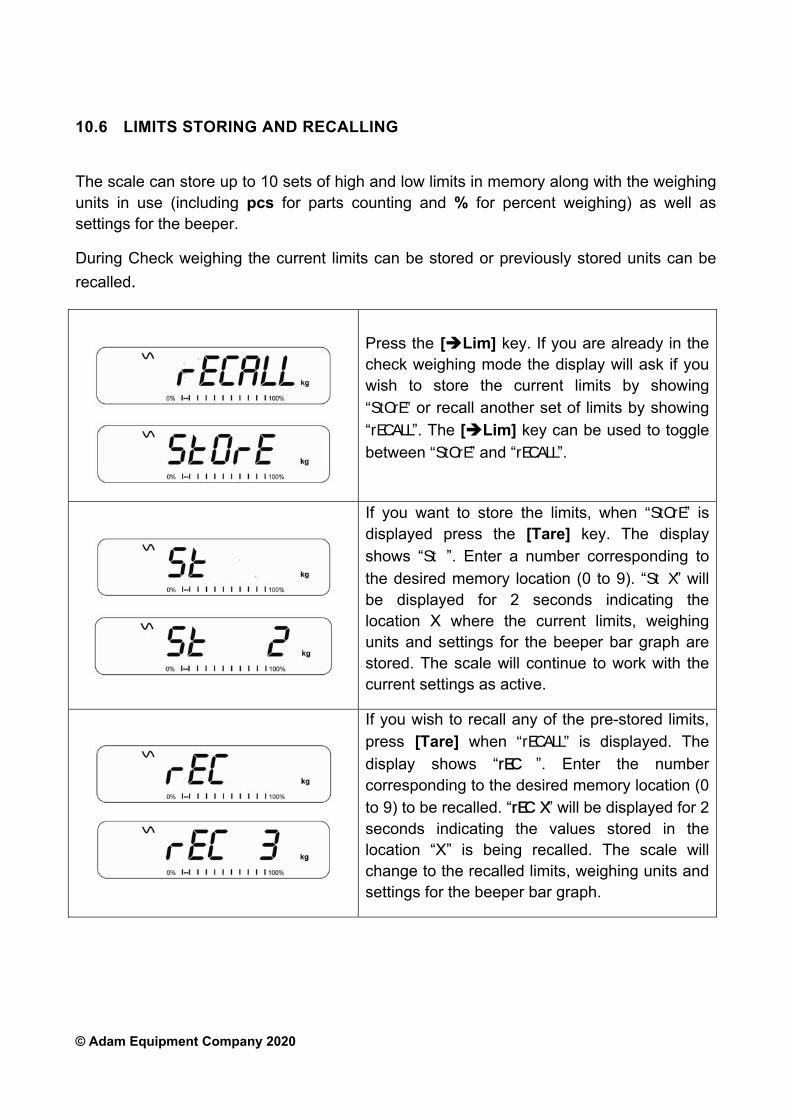
Press the [Lim] key. If you are already in the check weighing mode the display will ask if you wish to store the current limits by showing “StOrE” or recall another set of limits by showing
“rECALL”. The [Lim] key can be used to toggle
between “StOrE” and “rECALL”.
If you want to store the limits, when “StOrE” is displayed press the [Tare] key. The display shows “St ”. Enter a number corresponding to
the desired memory location (0 to 9). “St X” will be displayed for 2 seconds indicating the location X where the current limits, weighing units and settings for the beeper bar graph are stored. The scale will continue to work with the current settings as active.
If you wish to recall any of the pre-stored limits, press [Tare] when “rECALL” is displayed. The
display shows “rEC ”. Enter the number corresponding to the desired memory location (0 to 9) to be recalled. “rEC X” will be displayed for 2 seconds indicating the values stored in the location “X” is being recalled. The scale will change to the recalled limits, weighing units and settings for the beeper bar graph.

© Adam Equipment Company 2020
NOTE:
If the recalled limit is for parts counting, the display will show the last sample value used, ready for a new sample to be counted.
If the recalled unit is a percent weighing limit, the display will show the last sample value used, ready for a new sample to be weighed.
If the memory location was empty the scale will return to weighing.
10.7 PERCENT WEIGHING
The scale can be set to perform percent weighing. See Section 13.1.
The scale will use a mass on the platform as the 100% reference weight. If the platform is empty (or the scale is tared) then the user can input a reference weight using the keypad.
If using a reference weight (or object) as your 100% reference, add the weight to the to the platform.
Press [Func]. The first option is “FUnC 1”, press the [Func] key 3 more times to
display “FUnC 4”.
Press the [Tare] key. “P1 PCt” will be displayed.
Press [Tare] again to enter percent weighing. The scale will set the sample mass on the platform as 100% reference weight.
NOTE: If there is no reference weight on the platform and percent weighing function is entered, pressing [Tare] again will return the indicator to normal weighing.

© Adam Equipment Company 2020
Remove the sample weight. Then any other weight placed on the scale will be displayed as a percentage of the original sample. For example, if 3500g is placed on the scale and percent weighing is selected, the display will show 100.00%. Remove the 3500g weight and place a 3000g weight. The display will show 85.7% as 3000g is 85.7% of 3500g.
The number of decimal points will depend on the weight used. A smaller weight will show only “100%” while a larger weight might show “100.00%”.
If the scale was showing zero weight before entering this function, then the user must manually enter the weight to be set as 100%. When “F4 PCT” is displayed, enter the weight to be used for the 100% reference, then press [Tare] to accept the reference weight. The display will show “0.00 %”.
If the scale shows “x x . x x %”, which is the last weight used as a reference, press
[CE] to clear and use the numeric keypad to enter a new value. Press [Tare] to accept the new reference weight.
The weight entered must be greater than 50 scale divisions.
Press [Unit] to return to normal weighing.
NOTE: The display may jump by large numbers unexpectedly if small weights are used to set as 100% reference. The scale checks if the weight is too small and will show Error 8.
© Adam Equipment Company 2020
10.8 ANIMAL (Dynamic) WEIGHING
The scale can be set to animal (dynamic) weighing for weighing any items that are unstable or may move. See Section 13.4. The scale will use a special filter to minimise the effects of any movement on the platform.
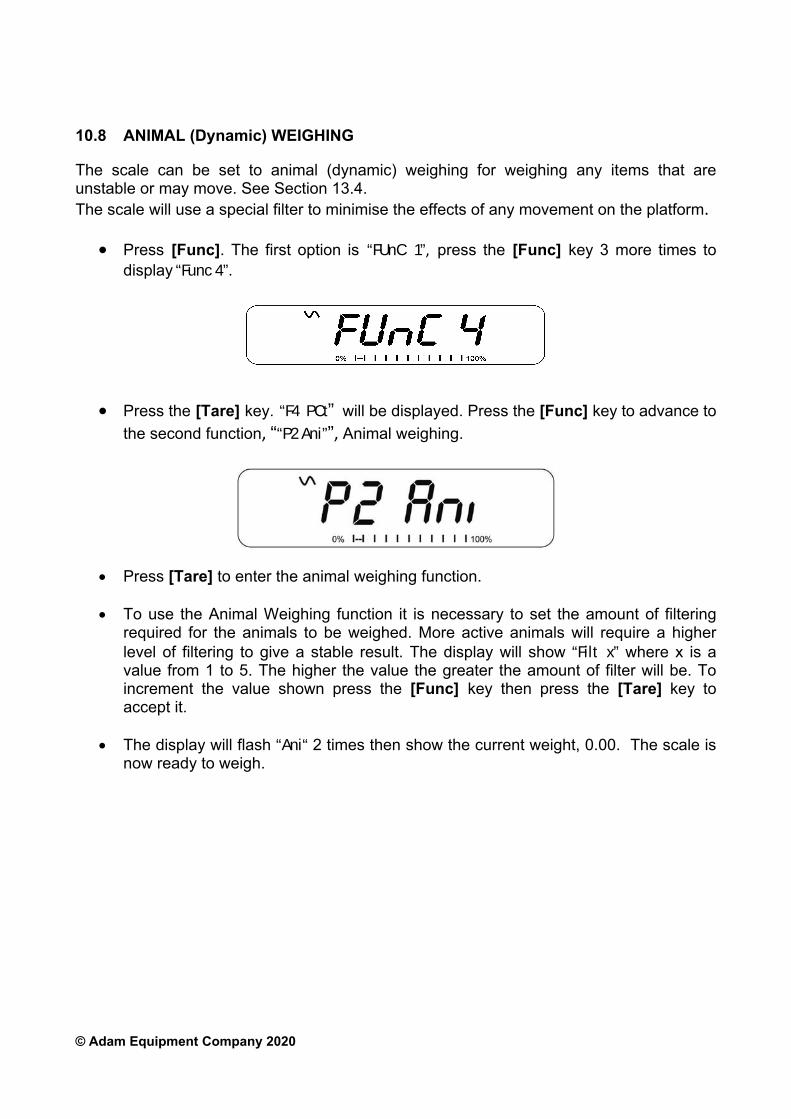
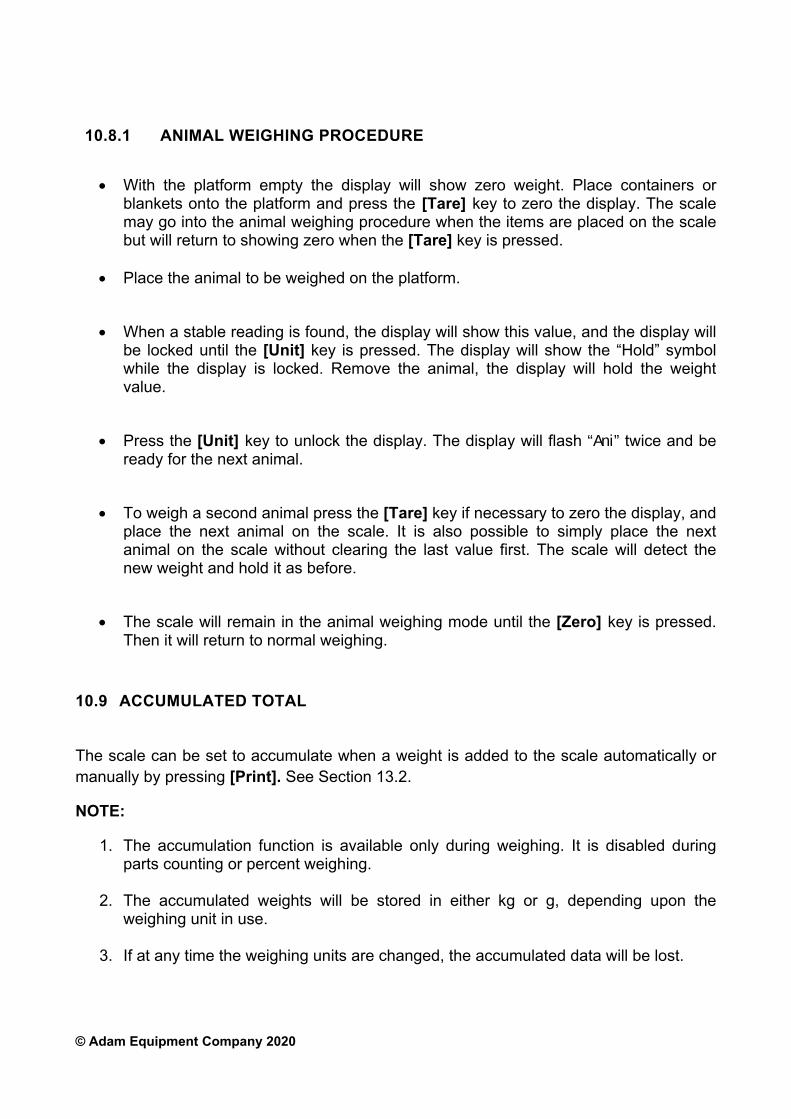
Press [Func]. The first option is “FUnC 1”, press the [Func] key 3 more times to display “Func 4”.
Press the [Tare] key. “F4 PCt” will be displayed. Press the [Func] key to advance to
the second function, ““P2 Ani””, Animal weighing.
Press [Tare] to enter the animal weighing function.
To use the Animal Weighing function it is necessary to set the amount of filtering required for the animals to be weighed. More active animals will require a higher level of filtering to give a stable result. The display will show “Filt x” where x is a value from 1 to 5. The higher the value the greater the amount of filter will be. To increment the value shown press the [Func] key then press the [Tare] key to accept it.
The display will flash “Ani“ 2 times then show the current weight, 0.00. The scale is now ready to weigh.
© Adam Equipment Company 2020
10.8.1 ANIMAL WEIGHING PROCEDURE
With the platform empty the display will show zero weight. Place containers or blankets onto the platform and press the [Tare] key to zero the display. The scale may go into the animal weighing procedure when the items are placed on the scale but will return to showing zero when the [Tare] key is pressed.
Place the animal to be weighed on the platform.
When a stable reading is found, the display will show this value, and the display will be locked until the [Unit] key is pressed. The display will show the “Hold” symbol while the display is locked. Remove the animal, the display will hold the weight value.
Press the [Unit] key to unlock the display. The display will flash “Ani” twice and be ready for the next animal.
To weigh a second animal press the [Tare] key if necessary to zero the display, and place the next animal on the scale. It is also possible to simply place the next animal on the scale without clearing the last value first. The scale will detect the new weight and hold it as before.
The scale will remain in the animal weighing mode until the [Zero] key is pressed. Then it will return to normal weighing.
10.9 ACCUMULATED TOTAL
The scale can be set to accumulate when a weight is added to the scale automatically or manually by pressing [Print]. See Section 13.2.
NOTE:
1. The accumulation function is available only during weighing. It is disabled during parts counting or percent weighing.
2. The accumulated weights will be stored in either kg or g, depending upon the
weighing unit in use.
3. If at any time the weighing units are changed, the accumulated data will be lost.

© Adam Equipment Company 2020
10.9.1 MANUAL ACCUMULATION
When the scale is set to manual accumulation, the weight displayed will be stored in the memory when the [Print] key is pressed and the weight is stable.
Remove the weight and press [Print] when the scale is at zero. The display will show "ACC 1" and then the weight in memory for 2 seconds before returning to normal. The weight can be output to a printer or PC using the RS-232 interface.
When the scale is at zero place a second weight on the platform. When stable press [Print] to accumulate the weight. The display will show "ACC 2" for 2 seconds and then show the new total.
Continue until all weights have been added. This can continue for up to 99 entries until the capacity of display is exceeded.
To view the total in memory press the [Print] key when the scale is at zero. The display will show the total number of accumulation "ACC xx" and the total weight before returning to zero.
To print the total, press [Print] to recall and then immediately press [Print] the second time to print the results.
To erase the memory, press [Print] to view the total and then immediately press [CE] to clear the memory.
© Adam Equipment Company 2020
10.9.2 AUTOMATIC ACCUMULATION
When the scale has been set to Automatic Accumulation the value is stored in memory automatically.
Place a weight on the platform. The beeper will sound when the scale is stable indicating the value is accepted. Remove the weight.
The display will show "ACC 1" and then the total in the memory before it returns to zero. Adding a 2nd weight will repeat the process.
While the weight is on the platform, press the [Print] key to view the values- first the accumulation number "ACC x" and then the total will be shown.
NOTE:
1. The scale will not show the value when a weight is removed.
2. In all cases the display must return to zero or a negative number, before another sample can be added to the memory.
3. More products can be added and [Print] be pressed again for up to 99 entries until the capacity of display is exceeded.
© Adam Equipment Company 2020
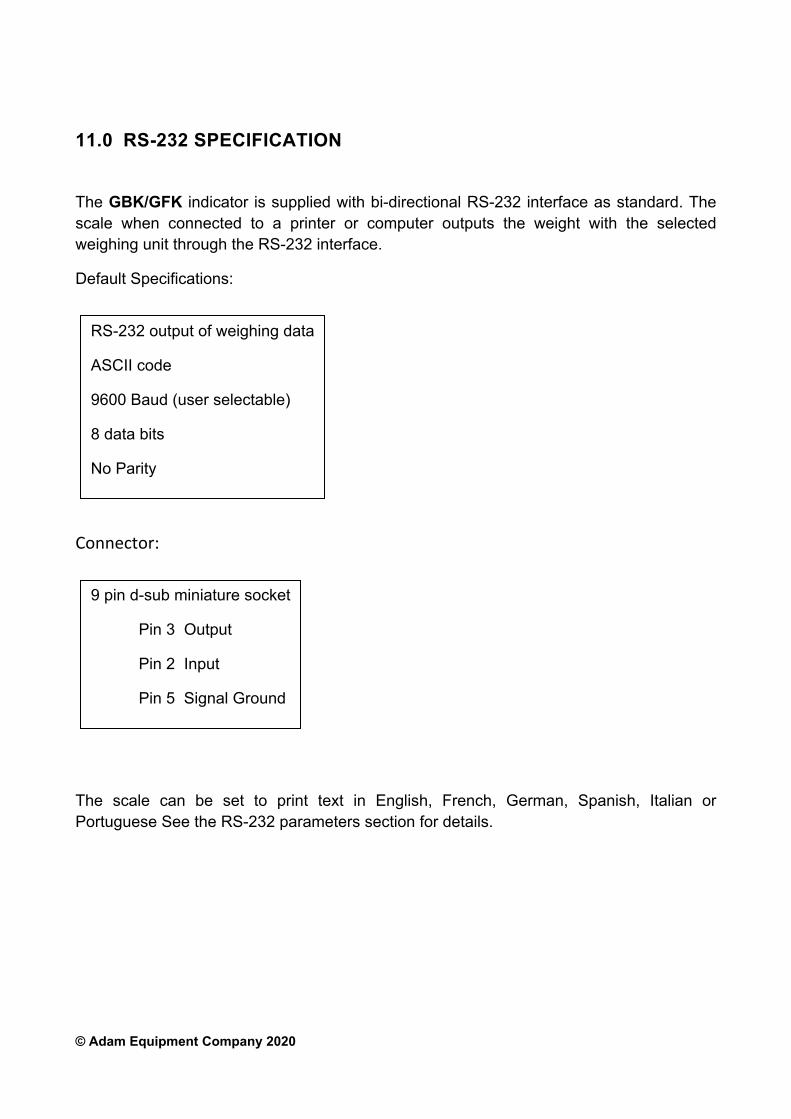
11.0 RS-232 SPECIFICATION
The GBK/GFK indicator is supplied with bi-directional RS-232 interface as standard. The scale when connected to a printer or computer outputs the weight with the selected weighing unit through the RS-232 interface.
Default Specifications:
Connector:
The scale can be set to print text in English, French, German, Spanish, Italian or Portuguese See the RS-232 parameters section for details.
RS-232 output of weighing data
ASCII code
9600 Baud (user selectable)
8 data bits
No Parity
9 pin d-sub miniature socket
Pin 3 Output
Pin 2 Input
Pin 5 Signal Ground
© Adam Equipment Company 2020
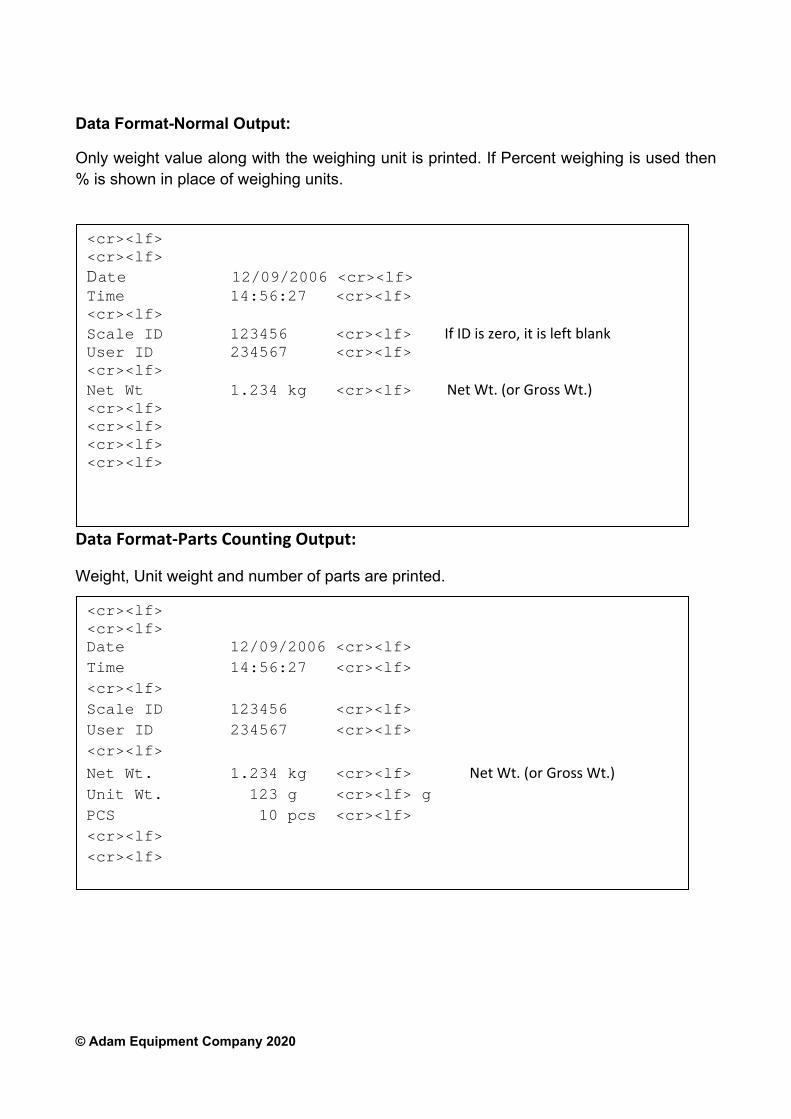
Data Format-Normal Output:
Only weight value along with the weighing unit is printed. If Percent weighing is used then % is shown in place of weighing units.
Data Format‐Parts Counting Output:
Weight, Unit weight and number of parts are printed.
<cr><lf> <cr><lf> Date 12/09/2006 <cr><lf> Time 14:56:27 <cr><lf> <cr><lf> Scale ID 123456 <cr><lf> User ID 234567 <cr><lf> <cr><lf> Net Wt. 1.234 kg <cr><lf> Net Wt. (or Gross Wt.) Unit Wt. 123 g <cr><lf> g PCS 10 pcs <cr><lf> <cr><lf> <cr><lf>
<cr><lf> <cr><lf> Date 12/09/2006 <cr><lf> Time 14:56:27 <cr><lf> <cr><lf> Scale ID 123456 <cr><lf> If ID is zero, it is left blank User ID 234567 <cr><lf> <cr><lf> Net Wt 1.234 kg <cr><lf> Net Wt. (or Gross Wt.) <cr><lf> <cr><lf> <cr><lf> <cr><lf>
© Adam Equipment Company 2020
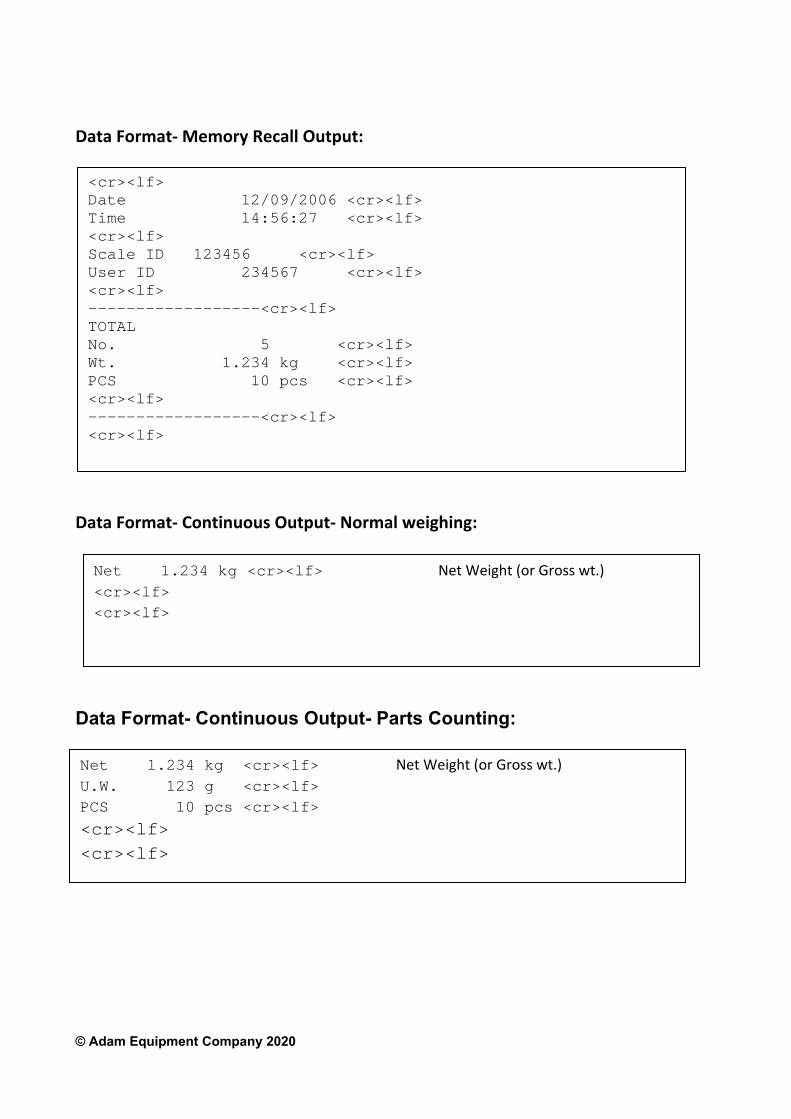
Data Format‐ Memory Recall Output:
Data Format‐ Continuous Output‐ Normal weighing:
Data Format- Continuous Output- Parts Counting:
<cr><lf> Date 12/09/2006 <cr><lf> Time 14:56:27 <cr><lf> <cr><lf> Scale ID 123456 <cr><lf> User ID 234567 <cr><lf> <cr><lf> ------------------<cr><lf> TOTAL No. 5 <cr><lf> Wt. 1.234 kg <cr><lf> PCS 10 pcs <cr><lf> <cr><lf> ------------------<cr><lf> <cr><lf>
Net 1.234 kg <cr><lf> Net Weight (or Gross wt.)
<cr><lf> <cr><lf>
Net 1.234 kg <cr><lf> Net Weight (or Gross wt.)
U.W. 123 g <cr><lf> PCS 10 pcs <cr><lf>
<cr><lf> <cr><lf>
© Adam Equipment Company 2020
NOTE:
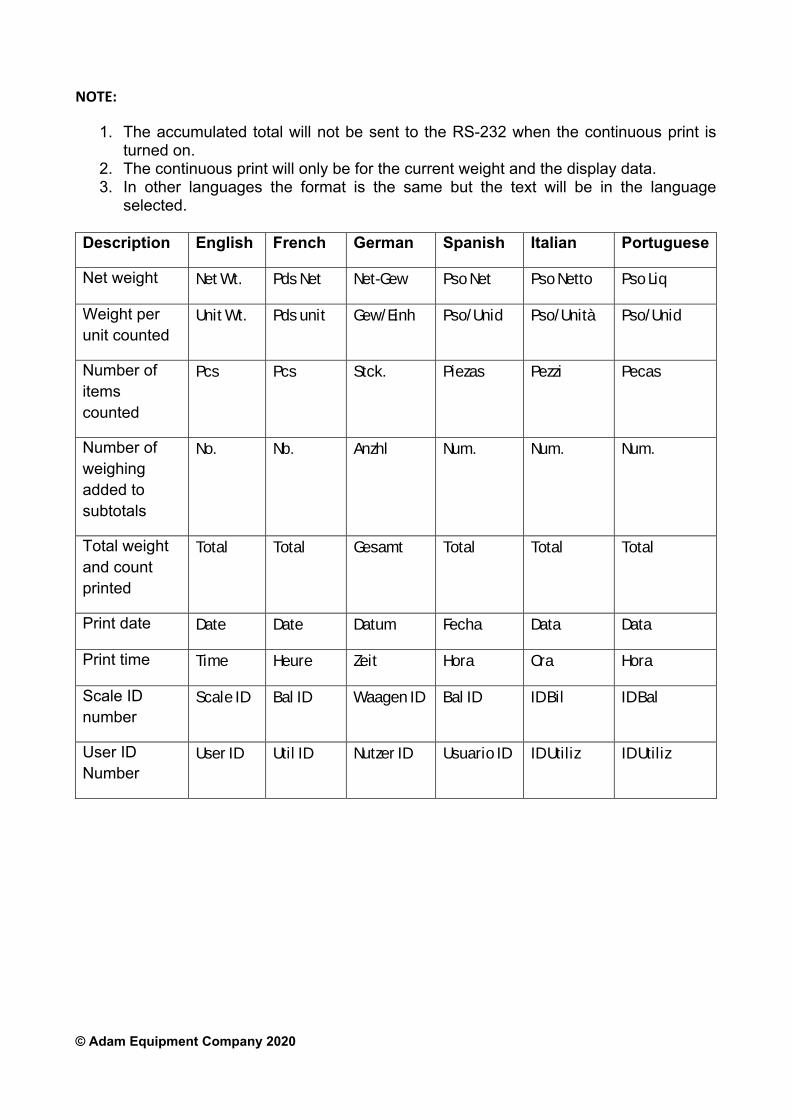
1. The accumulated total will not be sent to the RS-232 when the continuous print is turned on.
2. The continuous print will only be for the current weight and the display data. 3. In other languages the format is the same but the text will be in the language
selected.
Description English French German Spanish Italian Portuguese
Net weight Net Wt. Pds Net Net-Gew Pso Net Pso Netto Pso Liq
Weight per unit counted
Unit Wt. Pds unit Gew/Einh Pso/Unid Pso/Unità Pso/Unid
Number of items counted
Pcs Pcs Stck. Piezas Pezzi Pecas
Number of weighing added to subtotals
No. Nb. Anzhl Num. Num. Num.
Total weight and count printed
Total Total Gesamt Total Total Total
Print date Date Date Datum Fecha Data Data
Print time Time Heure Zeit Hora Ora Hora
Scale ID number
Scale ID Bal ID Waagen ID Bal ID ID Bil ID Bal
User ID Number
User ID Util ID Nutzer ID Usuario ID ID Utiliz ID Utiliz

© Adam Equipment Company 2020
11.1 INPUT COMMANDS FORMAT
The scale can be controlled with the following commands. Press the [Enter] key of the PC after each command.
T<cr><lf>
Tares the scale to display the net weight. This is the same as pressing [Tare].
Z<cr><lf> Sets the zero point for all subsequent weighing. The display shows zero.
P<cr><lf>
Prints the results to a PC or printer using the RS-232 interface. It also adds the value to the accumulation memory if the accumulation function is not set to automatic.
12.0 CALIBRATION
The GBK/GFK-Mplus approved bench scales models are sealed to prevent unauthorised calibration. Contact Adam Equipment or your supplier for more details. WARNING: CALIBRATION OF THE SCALES MAY MAKE IT ILLEGAL TO USE THE SCALES FOR SALES OF GOODS. CONTACT YOUR TRADING STANDARDS OFFICE FOR FURTHER ASSISTANCE.
© Adam Equipment Company 2020
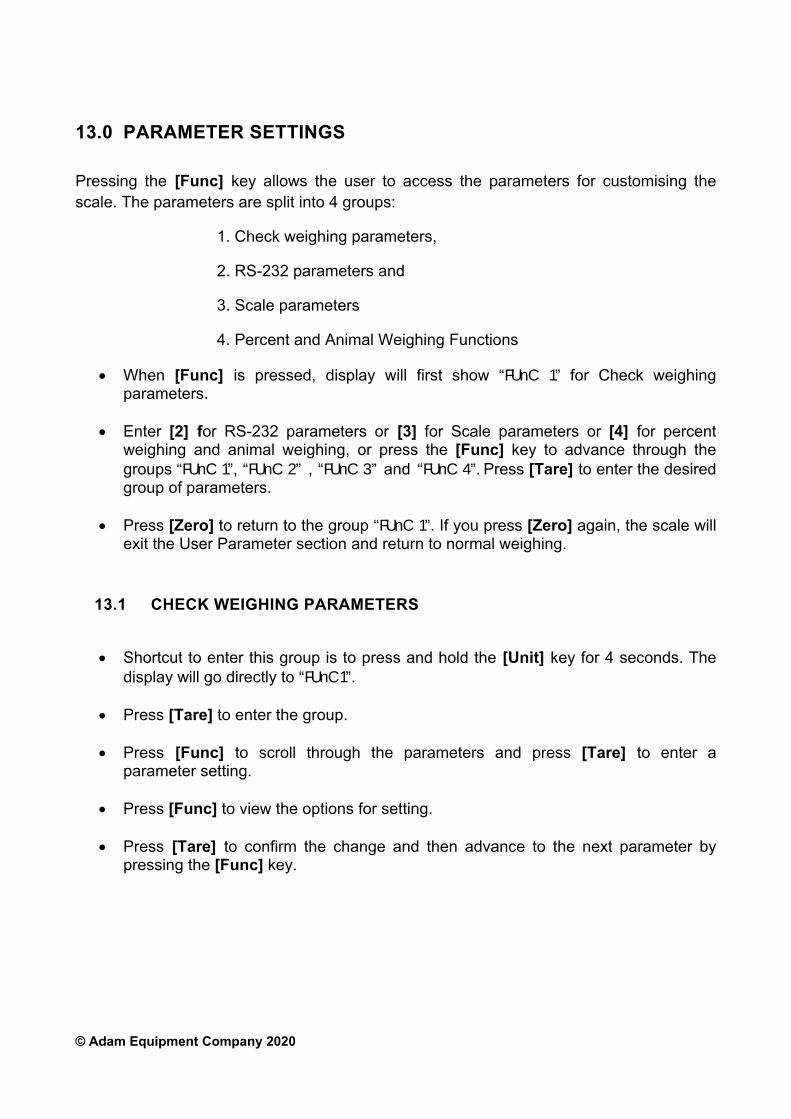
13.0 PARAMETER SETTINGS
Pressing the [Func] key allows the user to access the parameters for customising the scale. The parameters are split into 4 groups:
1. Check weighing parameters,
2. RS-232 parameters and
3. Scale parameters
4. Percent and Animal Weighing Functions
When [Func] is pressed, display will first show “FUnC 1” for Check weighing parameters.
Enter [2] for RS-232 parameters or [3] for Scale parameters or [4] for percent weighing and animal weighing, or press the [Func] key to advance through the groups “FUnC 1”, “FUnC 2” , “FUnC 3” and “FUnC 4”. Press [Tare] to enter the desired group of parameters.
Press [Zero] to return to the group “FUnC 1”. If you press [Zero] again, the scale will
exit the User Parameter section and return to normal weighing.
13.1 CHECK WEIGHING PARAMETERS
Shortcut to enter this group is to press and hold the [Unit] key for 4 seconds. The display will go directly to “FUnC 1”.
Press [Tare] to enter the group.
Press [Func] to scroll through the parameters and press [Tare] to enter a parameter setting.
Press [Func] to view the options for setting.
Press [Tare] to confirm the change and then advance to the next parameter by pressing the [Func] key.
© Adam Equipment Company 2020
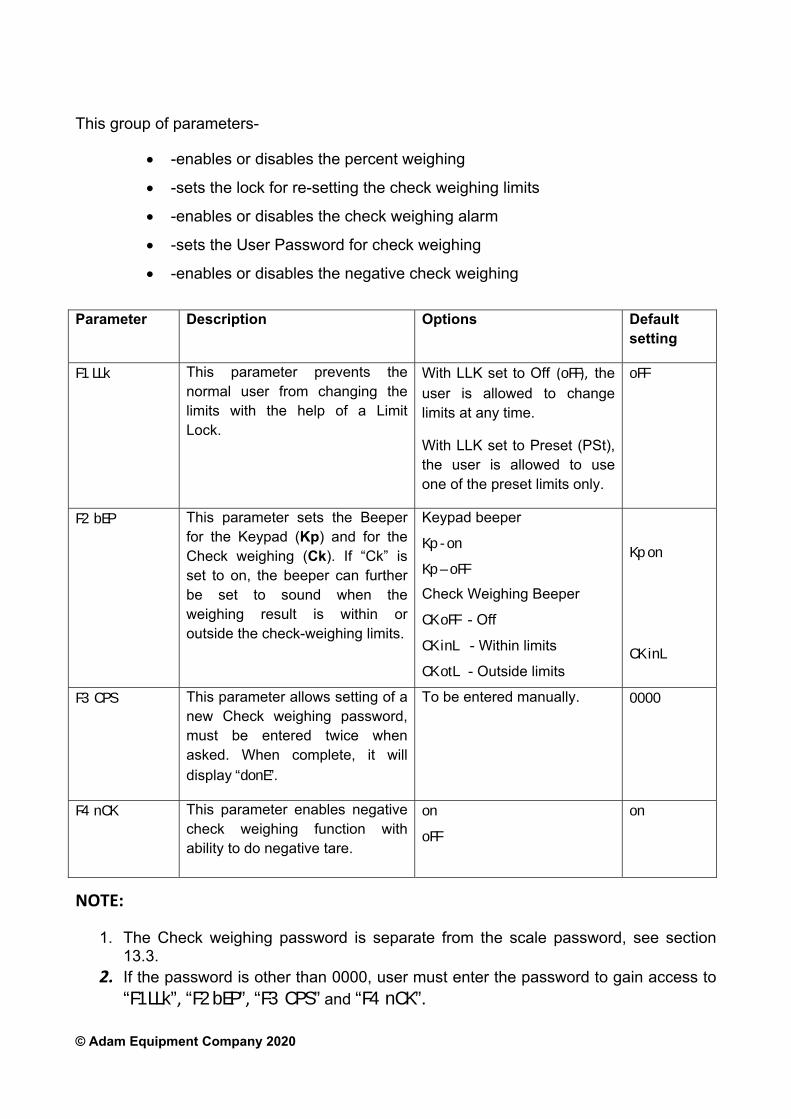
This group of parameters-
-enables or disables the percent weighing
-sets the lock for re-setting the check weighing limits
-enables or disables the check weighing alarm
-sets the User Password for check weighing
-enables or disables the negative check weighing
Parameter Description Options Default
setting
F1 LLk This parameter prevents the normal user from changing the limits with the help of a Limit Lock.
With LLK set to Off (oFF), the user is allowed to change limits at any time.
With LLK set to Preset (PSt), the user is allowed to use one of the preset limits only.
oFF
F2 bEP This parameter sets the Beeper for the Keypad (Kp) and for the Check weighing (Ck). If “Ck” is set to on, the beeper can further be set to sound when the weighing result is within or outside the check-weighing limits.
Keypad beeper
Kp - on
Kp – oFF
Check Weighing Beeper
CK oFF - Off
CK inL - Within limits
CK otL - Outside limits
Kp on
CK inL
F3 CPS This parameter allows setting of a new Check weighing password, must be entered twice when asked. When complete, it will display “donE”.
To be entered manually. 0000
F4 nCK This parameter enables negative check weighing function with ability to do negative tare.
on
oFF
on
NOTE:
1. The Check weighing password is separate from the scale password, see section 13.3.
2. If the password is other than 0000, user must enter the password to gain access to “F1 LLk”, “F2 bEP”, “F3 CPS” and “F4 nCK”.

© Adam Equipment Company 2020
13.2 RS-232 PARAMETERS
Shortcut to enter this group is to press and hold the [Print] key for 4 seconds. The display will go directly to “C1 on”.
Press [Func] to view the list of parameters.
Press [Tare] to enter a parameter. Press [Func] to view the options for the parameter settings.
Press [Tare] to confirm the change and then advance to the next parameter by pressing the [Func] key.
Press [Zero] to return to the group “FUnC 2”. If you press [Zero] again, the scale will exit the User Parameter section and return to weighing.
This group of parameters can be set by the user for setting the language, baud rate, printing mode, etc. The user can also set a Scale ID number and a User ID number.
Parameter Description Options Default Values or setting
C1 on Enable or disable the RS-232 interface
Prt on
Prt oFF
Prt on
C2 bd Baud Rate
1200
2400
4800
9600
19200
38400
57600
115200
4800

© Adam Equipment Company 2020
C3 PrM Printing Mode, Manual or Automatic, when Stable or Automatic Continuous
MA StA,
Au StA,
Au Con
MA StA
C4 Aon Enable or disable the Accumulation
AC on
AC oFF
AC on
C5 Ln Select Language EnGLi (English)
FrEnCH (French)
SPAn (Spanish)
GErmAn (German)
iTALi (Italian)
PortuG (Portuguese)
EnGLi
C6 UId Set User ID To be entered manually 000000
C7 Sid Set Scale ID To be entered manually 000000
C8 LAb Label report CoMP SiMP
CoMP
C9 CPY Number of copies per print
CoPY 1 to CoPY 8
CoPY 1
C10 LF Number of lines feed after each print
none to 9 LFCr 1 LFCr
© Adam Equipment Company 2020
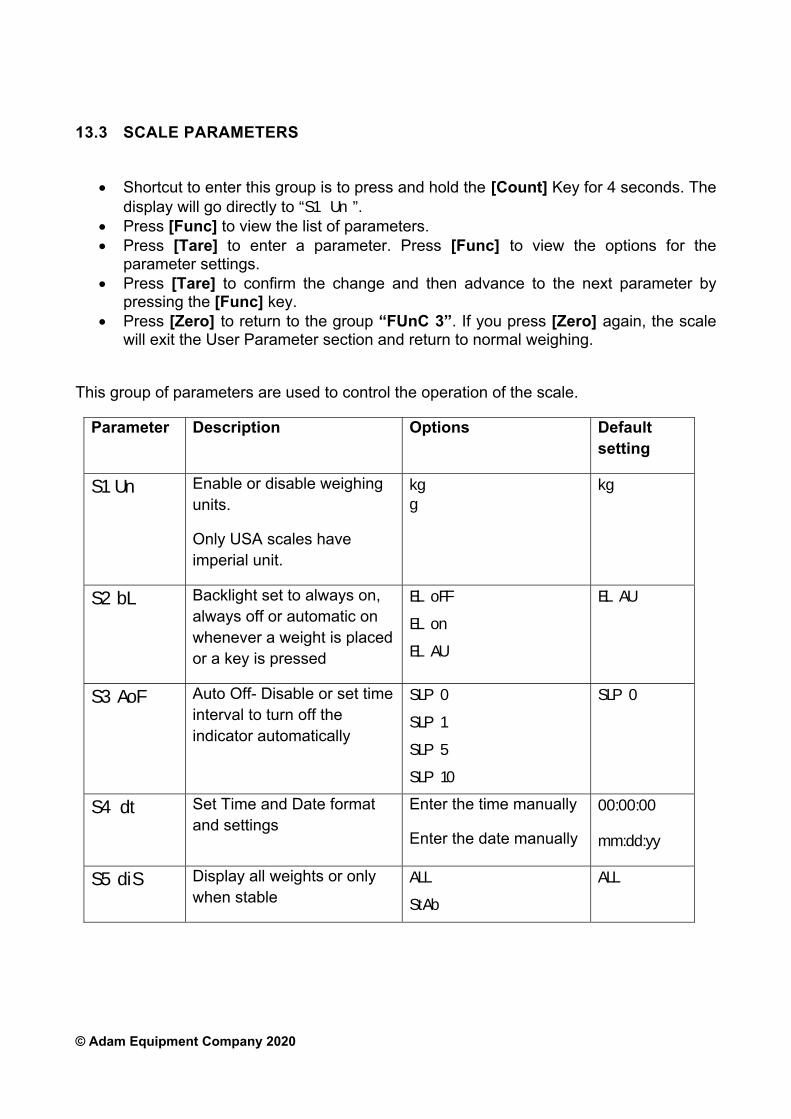
13.3 SCALE PARAMETERS
Shortcut to enter this group is to press and hold the [Count] Key for 4 seconds. The display will go directly to “S1 Un ”.
Press [Func] to view the list of parameters. Press [Tare] to enter a parameter. Press [Func] to view the options for the
parameter settings. Press [Tare] to confirm the change and then advance to the next parameter by
pressing the [Func] key. Press [Zero] to return to the group “FUnC 3”. If you press [Zero] again, the scale
will exit the User Parameter section and return to normal weighing.
This group of parameters are used to control the operation of the scale.
Parameter Description Options Default setting
S1 Un Enable or disable weighing units.
Only USA scales have imperial unit.
kg g
kg
S2 bL Backlight set to always on, always off or automatic on whenever a weight is placed or a key is pressed
EL oFF
EL on
EL AU
EL AU
S3 AoF Auto Off- Disable or set time interval to turn off the indicator automatically
SLP 0
SLP 1
SLP 5
SLP 10
SLP 0
S4 dt Set Time and Date format and settings
Enter the time manually
Enter the date manually
00:00:00
mm:dd:yy
S5 diS Display all weights or only when stable
ALL
StAb
ALL
© Adam Equipment Company 2020
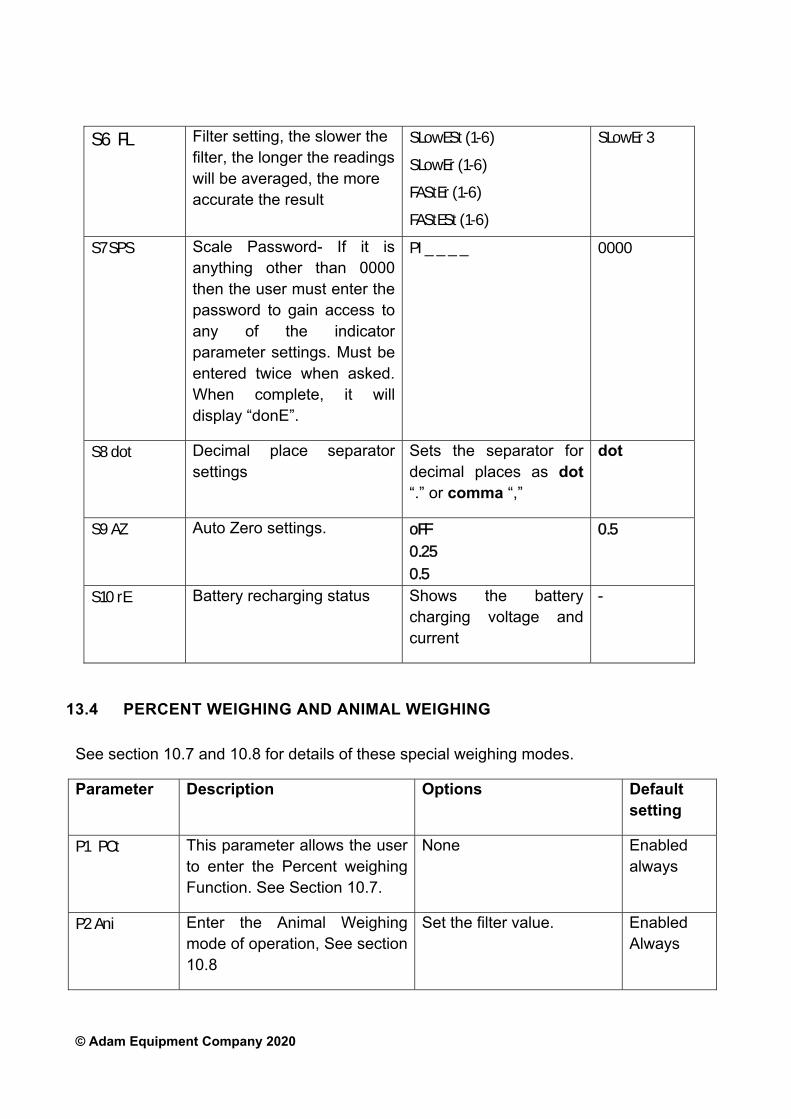
S6 FL Filter setting, the slower the filter, the longer the readings will be averaged, the more accurate the result
SLowESt (1-6)
SLowEr (1-6)
FAStEr (1-6)
FAStESt (1-6)
SLowEr 3
S7 SPS Scale Password- If it is anything other than 0000 then the user must enter the password to gain access to any of the indicator parameter settings. Must be entered twice when asked. When complete, it will display “donE”.
PI _ _ _ _
0000
S8 dot Decimal place separator settings
Sets the separator for decimal places as dot “.” or comma “,”
dot
S9 AZ Auto Zero settings. oFF 0.25 0.5
0.5
S10 rE Battery recharging status Shows the battery charging voltage and current
-
13.4 PERCENT WEIGHING AND ANIMAL WEIGHING
See section 10.7 and 10.8 for details of these special weighing modes.
Parameter Description Options Default setting
P1 PCt This parameter allows the user to enter the Percent weighing Function. See Section 10.7.
None Enabled always
P2 Ani Enter the Animal Weighing mode of operation, See section 10.8
Set the filter value. Enabled Always
© Adam Equipment Company 2020
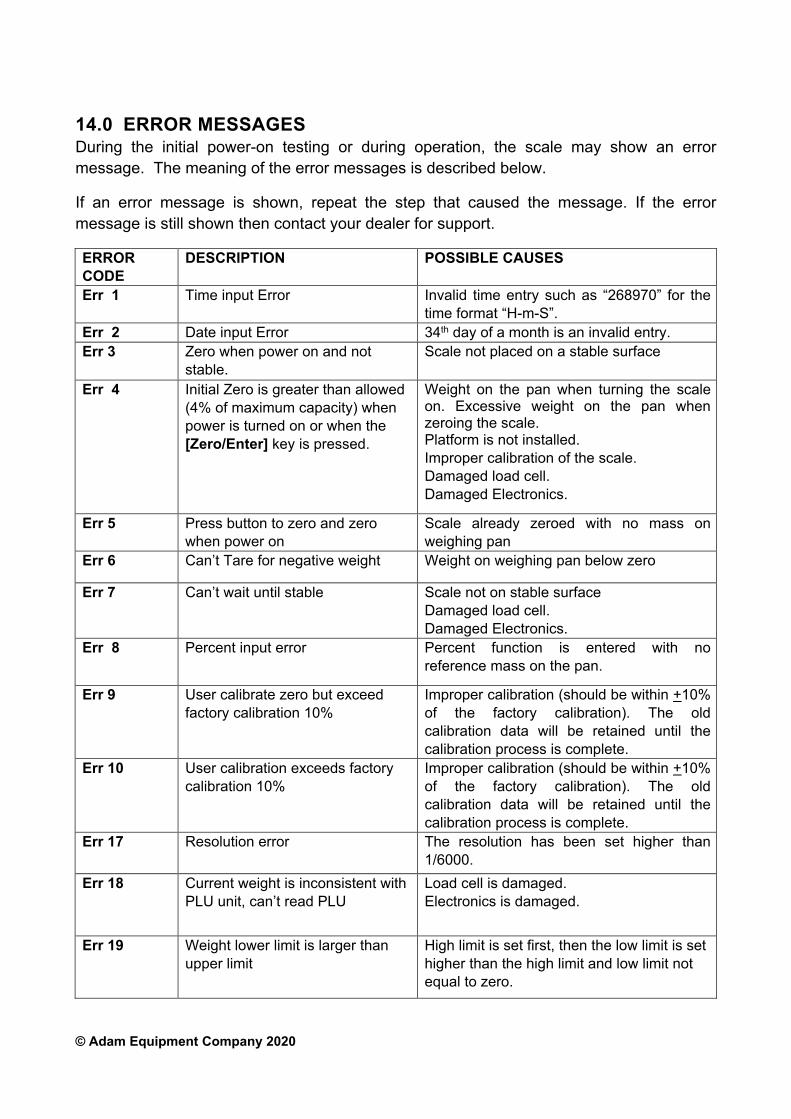
14.0 ERROR MESSAGES During the initial power-on testing or during operation, the scale may show an error message. The meaning of the error messages is described below.
If an error message is shown, repeat the step that caused the message. If the error message is still shown then contact your dealer for support.
ERROR CODE
DESCRIPTION POSSIBLE CAUSES
Err 1 Time input Error Invalid time entry such as “268970” for the time format “H-m-S”.
Err 2 Date input Error 34th day of a month is an invalid entry. Err 3 Zero when power on and not
stable. Scale not placed on a stable surface
Err 4 Initial Zero is greater than allowed (4% of maximum capacity) when power is turned on or when the [Zero/Enter] key is pressed.
Weight on the pan when turning the scale on. Excessive weight on the pan when zeroing the scale. Platform is not installed. Improper calibration of the scale. Damaged load cell. Damaged Electronics.
Err 5 Press button to zero and zero when power on
Scale already zeroed with no mass on weighing pan
Err 6 Can’t Tare for negative weight Weight on weighing pan below zero
Err 7 Can’t wait until stable Scale not on stable surface Damaged load cell. Damaged Electronics.
Err 8 Percent input error Percent function is entered with no reference mass on the pan.
Err 9 User calibrate zero but exceed factory calibration 10%
Improper calibration (should be within +10% of the factory calibration). The old calibration data will be retained until the calibration process is complete.
Err 10 User calibration exceeds factory calibration 10%
Improper calibration (should be within +10% of the factory calibration). The old calibration data will be retained until the calibration process is complete.
Err 17 Resolution error The resolution has been set higher than 1/6000.
Err 18 Current weight is inconsistent with PLU unit, can’t read PLU
Load cell is damaged. Electronics is damaged.
Err 19 Weight lower limit is larger than upper limit
High limit is set first, then the low limit is set higher than the high limit and low limit not equal to zero.

© Adam Equipment Company 2020
Err 20 PLU storage/ reading is more than 50
PLU number above max range of 50
Err ADC Can’t find ADC chip Damaged or missing ADC chip Load cell is damaged. Electronics is damaged.
---OL--- Weight over range Weight over scale range
undEr Weight is lower than -25e Weight below scale range
15.0 REPLACEMENT PARTS AND ACCESSORIES If you need to order any spare parts and accessories, contact your supplier or Adam Equipment. A partial list of such items is as follows-
Main Power cord or adaptor for USA versions.
Replacement Battery

© Adam Equipment Company 2020
16.0 SERVICE INFORMATION This manual covers the details of operation. If you have a problem with the scale that is not directly addressed by this manual then contact your supplier for assistance. In order to provide further assistance, the supplier will need the following information which should be kept ready:
A. Details of your company
‐Name of your company:
‐Contact person’s name:
‐Contact telephone, e‐mail,
fax or any other methods:
B. Details of the unit purchased
(This part of information should always be available for any future correspondence.
We suggest you to fill in this form as soon as the unit is received and keep a print‐out in
your record for ready reference.)
Model name of the scale: _____
Serial number of the unit:
Software revision number
(Displayed when power is first turned on):
Date of Purchase:
Name of the supplier and place:
C. Brief description of the problem
Include any recent history of the unit. For example:
‐Has it been working since it’s delivered
‐Has it been in contact with water
‐Damaged from a fire
‐Electrical Storms in the area
‐Dropped on the floor, etc.

© Adam Equipment Company 2020
17.0 WARRANTY INFORMATION Adam Equipment offers Limited Warranty (Parts and Labour) for the components failed due to defects
in materials or workmanship. Warranty starts from the date of delivery.
During the warranty period, should any repairs be necessary, the purchaser must inform its supplier or
Adam Equipment Company. The company or its authorised Technician reserves the right to repair or
replace the components at any of its workshops depending on the severity of the problems. However,
any freight involved in sending the faulty units or parts to the service centre should be borne by the
purchaser.
The warranty will cease to operate if the equipment is not returned in the original packaging and with
correct documentation for a claim to be processed. All claims are at the sole discretion of Adam
Equipment.
This warranty does not cover equipment where defects or poor performance is due to misuse,
accidental damage, exposure to radioactive or corrosive materials, negligence, faulty installation,
unauthorised modifications or attempted repair or failure to observe the requirements and
recommendations as given in this User Manual. Additionally rechargeable batteries (where supplied)
are not covered under warranty.
Repairs carried out under the warranty does not extend the warranty period. Components removed
during the warranty repairs become the company property.
The statutory right of the purchaser is not affected by this warranty. The terms of this warranty is
governed by the UK law. For complete details on Warranty Information, see the terms and conditions
of sale available on our web‐site.
| P a g e © Adam Equipment Company 2020
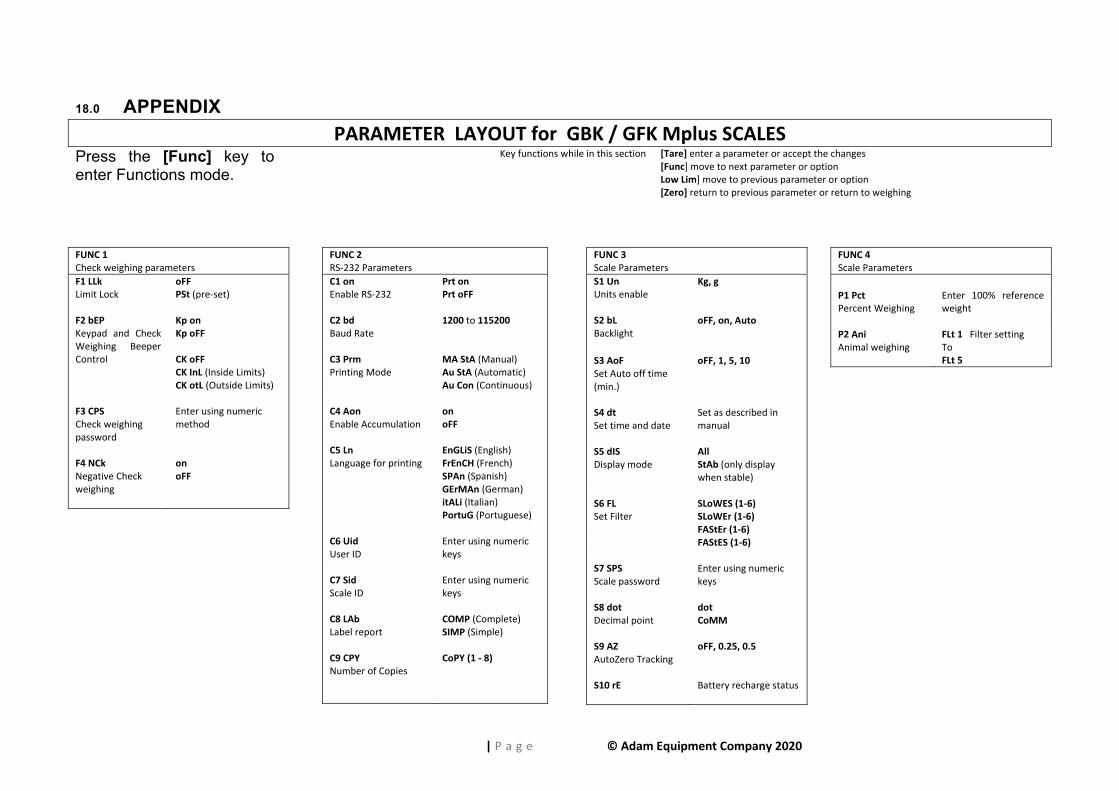
18.0 APPENDIX
PARAMETER LAYOUT for GBK / GFK Mplus SCALES Press the [Func] key to enter Functions mode.
Key functions while in this section [Tare] enter a parameter or accept the changes [Func] move to next parameter or option Low Lim] move to previous parameter or option [Zero] return to previous parameter or return to weighing
FUNC 1 Check weighing parameters
F1 LLk Limit Lock
oFF PSt (pre‐set)
F2 bEP Keypad and Check Weighing Beeper Control
Kp on Kp oFF CK oFF CK InL (Inside Limits) CK otL (Outside Limits)
F3 CPS Check weighing password
Enter using numeric method
F4 NCk Negative Check weighing
on oFF
FUNC 2 RS‐232 Parameters
C1 on Enable RS‐232
Prt on Prt oFF
C2 bd Baud Rate
1200 to 115200
C3 Prm Printing Mode
MA StA (Manual) Au StA (Automatic)
Au Con (Continuous)
C4 Aon Enable Accumulation
on oFF
C5 LnLanguage for printing
EnGLiS (English) FrEnCH (French) SPAn (Spanish) GErMAn (German) itALi (Italian) PortuG (Portuguese)
C6 Uid User ID
Enter using numeric keys
C7 Sid Scale ID
Enter using numeric keys
C8 LAbLabel report
COMP (Complete)SIMP (Simple)
C9 CPY Number of Copies
CoPY (1 ‐ 8)
FUNC 3 Scale Parameters
S1 Un Units enable
Kg, g
S2 bL Backlight
oFF, on, Auto
S3 AoF Set Auto off time (min.)
oFF, 1, 5, 10
S4 dt Set time and date
Set as described in manual
S5 dIS Display mode
All StAb (only display when stable)
S6 FL Set Filter
SLoWES (1‐6) SLoWEr (1‐6) FAStEr (1‐6)
FAStES (1‐6) S7 SPS Scale password
Enter using numeric keys
S8 dot Decimal point
dot CoMM
S9 AZ AutoZero Tracking
oFF, 0.25, 0.5
S10 rE Battery recharge status
FUNC 4 Scale Parameters
P1 Pct Percent Weighing
Enter 100% reference weight
P2 Ani Animal weighing
FLt 1 Filter setting To FLt 5
© Adam Equipment Company 2020
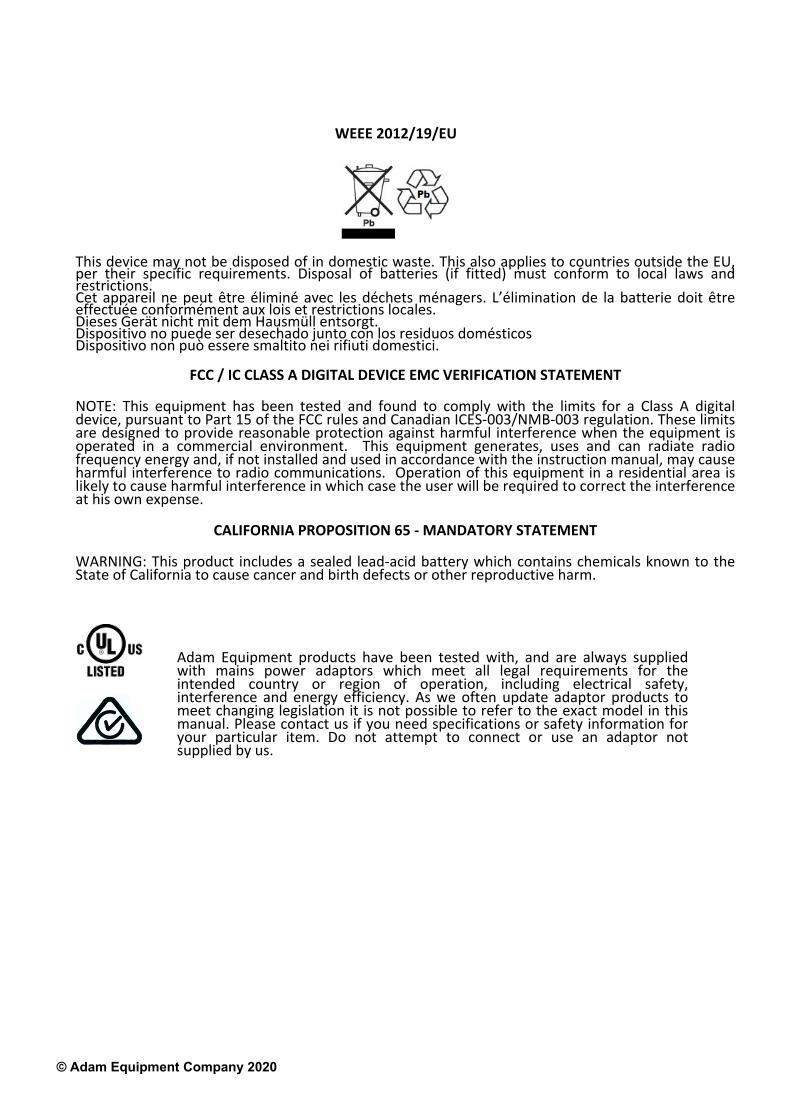
WEEE 2012/19/EU
This device may not be disposed of in domestic waste. This also applies to countries outside the EU, per their specific requirements. Disposal of batteries (if fitted) must conform to local laws and restrictions. Cet appareil ne peut être éliminé avec les déchets ménagers. L’élimination de la batterie doit être effectuée conformément aux lois et restrictions locales. Dieses Gerät nicht mit dem Hausmüll entsorgt. Dispositivo no puede ser desechado junto con los residuos domésticos Dispositivo non può essere smaltito nei rifiuti domestici.
FCC / IC CLASS A DIGITAL DEVICE EMC VERIFICATION STATEMENT
NOTE: This equipment has been tested and found to comply with the limits for a Class A digital device, pursuant to Part 15 of the FCC rules and Canadian ICES‐003/NMB‐003 regulation. These limits are designed to provide reasonable protection against harmful interference when the equipment is operated in a commercial environment. This equipment generates, uses and can radiate radio frequency energy and, if not installed and used in accordance with the instruction manual, may cause harmful interference to radio communications. Operation of this equipment in a residential area is likely to cause harmful interference in which case the user will be required to correct the interference at his own expense.
CALIFORNIA PROPOSITION 65 ‐ MANDATORY STATEMENT
WARNING: This product includes a sealed lead‐acid battery which contains chemicals known to the State of California to cause cancer and birth defects or other reproductive harm.
Adam Equipment products have been tested with, and are always supplied with mains power adaptors which meet all legal requirements for the intended country or region of operation, including electrical safety, interference and energy efficiency. As we often update adaptor products to meet changing legislation it is not possible to refer to the exact model in this manual. Please contact us if you need specifications or safety information for your particular item. Do not attempt to connect or use an adaptor not supplied by us.
© Adam Equipment Company 2020
ADAM EQUIPMENT is an ISO 9001:2015 certified global company with more than 40 years’ experience in the production and sale of electronic weighing equipment.
Adam products are predominantly designed for the Laboratory, Educational, Health and Fitness, Retail and Industrial Segments. The product range can be described as follows:
‐Analytical and Precision Laboratory Balances ‐Compact and Portable Balances ‐High Capacity Balances ‐Moisture analysers / balances ‐Mechanical Scales ‐Counting Scales ‐Digital Weighing/Check‐weighing Scales ‐High performance Platform Scales ‐Crane scales ‐Mechanical and Digital Electronic Health and Fitness Scales ‐Retail Scales for Price computing
For a complete listing of all Adam products visit our website at www.adamequipment.com
Adam Equipment Co. Ltd. Maidstone Road, Kingston
Milton Keynes MK10 0BD
UK Phone:+44 (0)1908 274545 Fax: +44 (0)1908 641339
e‐mail: [email protected]
Adam Equipment Inc. 1, Fox Hollow Rd. Oxford, CT 06478
USA
Phone: +1 203 790 4774 Fax: +1 203 792 3406
e‐mail: [email protected]
AE Adam GmbH. Instenkamp 4 D‐24242 Felde
Germany
Phone +49 (0)4340 40300 0 Fax: +49 (0)4340 40300 20
e‐mail: [email protected]
Adam Equipment S.A. (Pty) Ltd.
7 Megawatt Road, Spartan EXT 22 Kempton Park, Johannesburg,
Republic of South Africa
Phone +27 (0)11 974 9745 Fax: +27 (0)11 392 2587
e‐mail: [email protected]
Adam Equipment (S.E. ASIA) PTY Ltd
70 Miguel Road Bibra Lake
Perth WA 6163
Western Australia
Phone: +61 (0) 8 6461 6236 Fax +61 (0) 8 9456 4462
e‐mail: [email protected]
Adam Equipment (Wuhan) Co. Ltd.
A Building East Jianhua Private Industrial Park Zhuanyang Avenue
Wuhan Economic & Technological Development Zone 430056 Wuhan
P.R.China Phone: + 86 (27) 59420391 Fax + 86 (27) 59420388
e‐mail: [email protected]
© Copyright by Adam Equipment Co. All rights reserved. No part of this publication may be reprinted or translated in any form or by any means without the prior permission of Adam Equipment.
Adam Equipment reserves the right to make changes to the technology, features, specifications and design of the equipment without notice.
All information contained within this publication is to the best of our knowledge timely, complete and accurate when issued. However, we are not responsible for misinterpretations which may result from the reading of this material.
The latest version of this publication can be found on our Website.
www.adamequipment.com