fabrication of animatronic hand.pdf
TRANSCRIPT

Copyright © 2015 Skyfi Education Labs Pvt. Ltd. All Rights Reserved http://www.roboversity.com/
Copyright © 2015 Skyfi Education Labs Pvt. Ltd. All Rights Reserved http://www.roboversity.com/
FABRICATION
OF
ANIMATRONIC HAND

Copyright © 2015 Skyfi Education Labs Pvt. Ltd. All Rights Reserved http://www.roboversity.com/
FABRICATION OF ANIMATRONIC HAND
STEP 1: Take the coroplast with the size of 30x45.
NOTE: Coroplast will have upper surface and bottom surface in between both
the surface it looks like a tunnel.
STEP 2: Place your hand on the coroplast and sketch the outline of your hand
using a marker.
NOTE: The position of Coroplast (lines) should be kept in horizontal as shown
in the figure below.

Copyright © 2015 Skyfi Education Labs Pvt. Ltd. All Rights Reserved http://www.roboversity.com/
STEP 3: Take the cutter and draw (score) over Upper surface the hand outline
as shown in the figure.
NOTE: Cutter should be used carefully while scoring the coroplast.
STEP 4: After scoring completely on the outline in the coroplast repeat scoring
one more time with some pressure so that it will create an outline on the bottom
surface of your coroplast.

Copyright © 2015 Skyfi Education Labs Pvt. Ltd. All Rights Reserved http://www.roboversity.com/
STEP 5: Turn over the coroplast outline of a hand will be visible as shown in
the figure below.
STEP 6: Take the marker and sketch on the outline in the bottom side of the
coroplast and cut it with the cutter once again for easy removal.

Copyright © 2015 Skyfi Education Labs Pvt. Ltd. All Rights Reserved http://www.roboversity.com/
STEP 7: After removing the outline from the coroplast your prototype hand
will look like this as shown in the figure below.
STEP 8: Take the marker and draw as shown in the figure.
Front View Back View
STEP 9: Take the cutter and score on the marked surface, it will fold as shown
in the figure
Note: The scoring should be done on the Back surface of the coroplast.

Copyright © 2015 Skyfi Education Labs Pvt. Ltd. All Rights Reserved http://www.roboversity.com/
STEP 10: Take the coroplast and cut out the tunnels with the dimensions shown
in the figure.
STEP 11: Take the short tunnel and long tunnel, glue them for all the fingers as
shown below.
Copyright © 2015 Skyfi Education Labs Pvt. Ltd. All Rights Reserved http://www.roboversity.com/
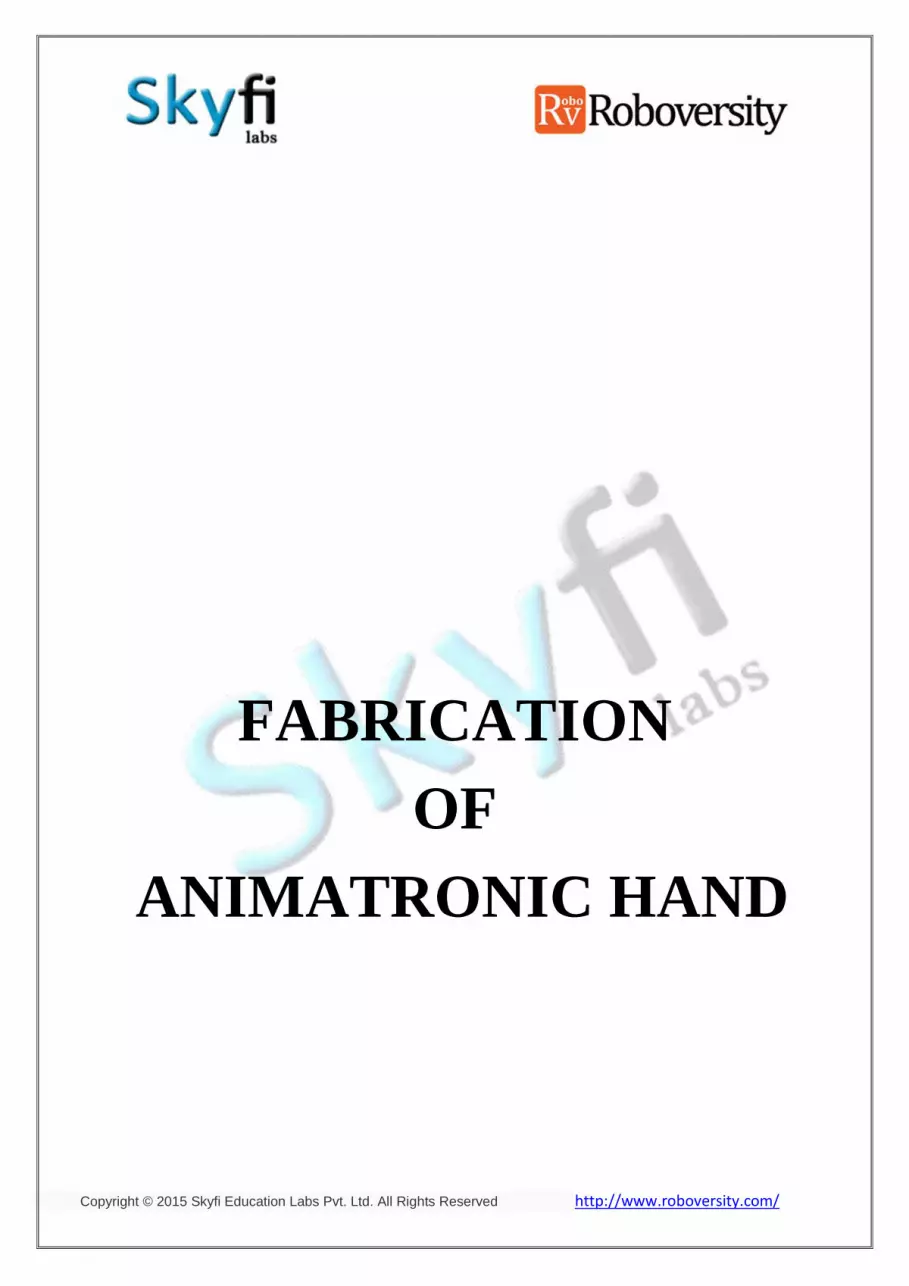
STEP 12: Take the short tunnel, glue them on back side for all the fingers as
shown below.
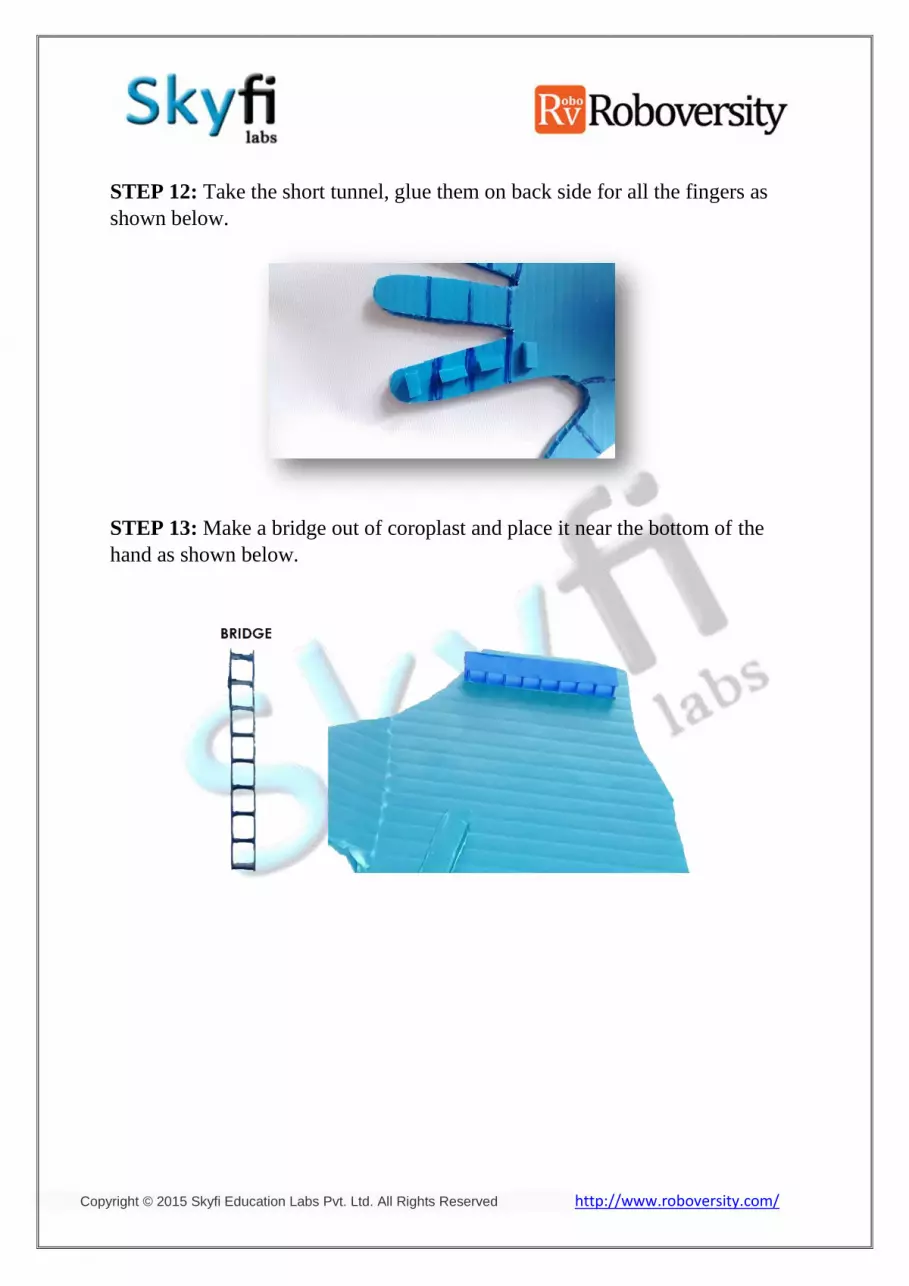
STEP 13: Make a bridge out of coroplast and place it near the bottom of the
hand as shown below.

Copyright © 2015 Skyfi Education Labs Pvt. Ltd. All Rights Reserved http://www.roboversity.com/
STEP 14: Tie the Rubber band to Top end first and pass them through the
tunnels and tie at the bottom according to the tension as shown below.
STEP 15: Tie the Rubber band to all fingers as shown below.
STEP 16: From the remaining Coroplast take the rectangle with the dimension
mention below.

Copyright © 2015 Skyfi Education Labs Pvt. Ltd. All Rights Reserved http://www.roboversity.com/
STEP 17: Make two holes for servo motors according to the dimensions as
shown below.
STEP 18: Take a small coroplast of rectangular shape and fix it in the side of
coroplast as shown in figure.
NOTE: This piece of coroplast is to fix a servo for thumb.

Copyright © 2015 Skyfi Education Labs Pvt. Ltd. All Rights Reserved http://www.roboversity.com/
STEP 19: Make a hole in one arm of the servo motors using 2mm drill bit as
shown below.
STEP 20: Place the servo motor as shown in the figure below.
Copyright © 2015 Skyfi Education Labs Pvt. Ltd. All Rights Reserved http://www.roboversity.com/
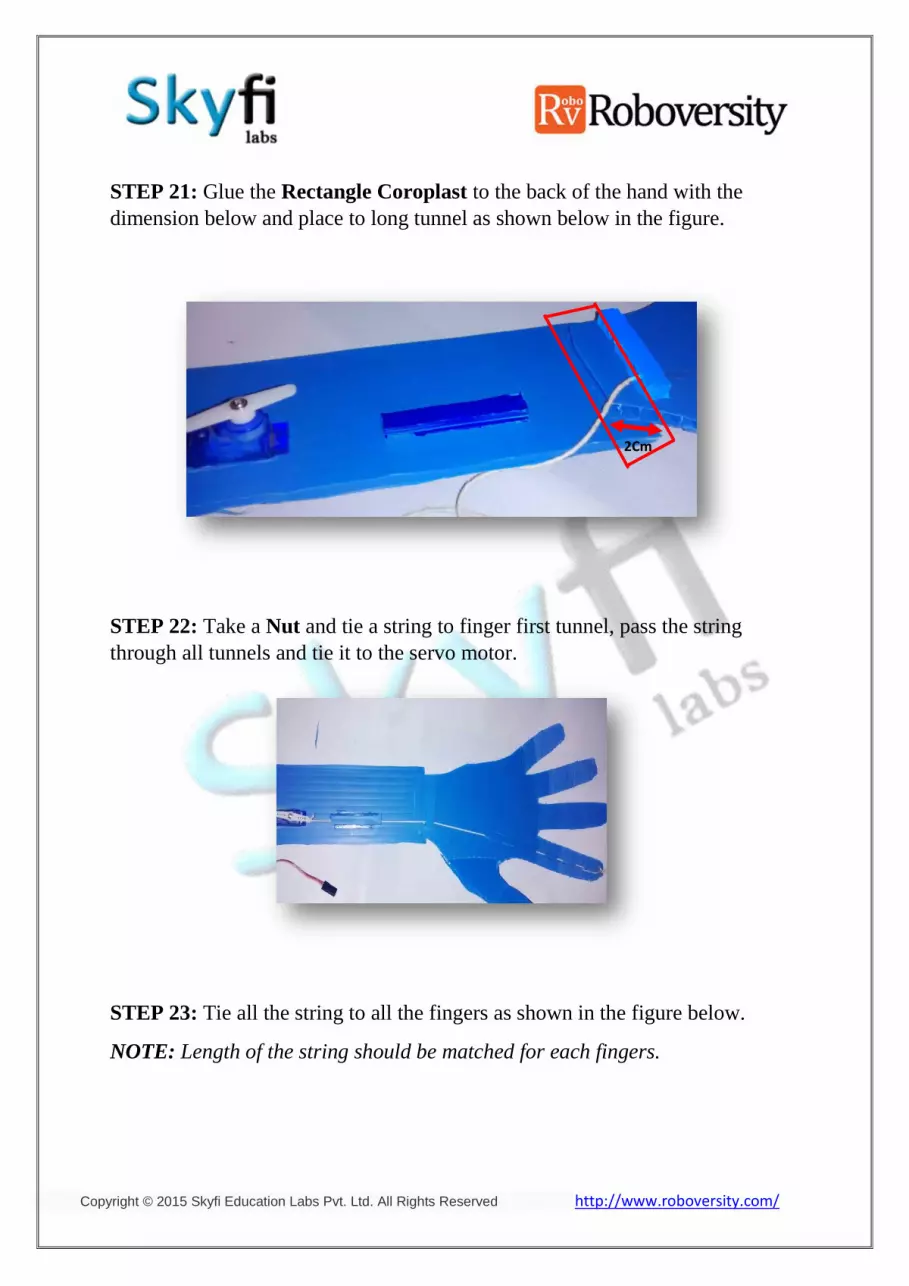
STEP 21: Glue the Rectangle Coroplast to the back of the hand with the
dimension below and place to long tunnel as shown below in the figure.
STEP 22: Take a Nut and tie a string to finger first tunnel, pass the string
through all tunnels and tie it to the servo motor.
STEP 23: Tie all the string to all the fingers as shown in the figure below.
NOTE: Length of the string should be matched for each fingers.
2Cm

Copyright © 2015 Skyfi Education Labs Pvt. Ltd. All Rights Reserved http://www.roboversity.com/
STEP 24: The complete setup is shown below in the figure.