dayne herren, ultimate-tattoo-guide.com. all rights reserved. the ultimate tattoo guide...
TRANSCRIPT

© Dayne Herren, Ultimate-Tattoo-Guide.com. All Rights Reserved.
i
The Ultimate Tattoo Guide
By Dayne Herren © 2004
The Ultimate Tattoo Guide Version 1.10 Published electronically by Dayne Herren, USA.
All Rights Reserved.
http://www.ultimate-tattoo-guide.com
© Dayne Herren, Ultimate-Tattoo-Guide.com. All Rights Reserved.
ii
Copyright © 2004 All rights reserved. No part of this book shall be reproduced,
stored in a retrieval system, or transmitted by any means,
electronic, mechanical, photocopying, recording or otherwise
without written permission from the publisher and author. No
patent liability is assumed with respect to the use of the
information contained herein. Although every precaution has
been taken in the preparation of this book, the publishers
and authors assume no responsibility for errors or omissions.
Nor is liability assumed for damages resulting from the use of
the information contained herein.
Trademarks All terms mentioned in this book that are known to be
trademarks or service marks have been appropriately
capitalized. The publisher cannot attest to the accuracy of
this information. Use of terms in this book should not be
regarded as affecting the validity of any trademarks or
service marks.
Warning and Disclaimer Every effort has been taken to make this book as complete
and accurate as possible, but no warranty or fitness is
implied. The information provided is on an “as is” basis. The
author and the publisher shall have neither liability nor
responsibility to any person or entity with respect to any loss
or damages arising from the information contained in this
book.
The author and publisher of this book is not a doctor or

© Dayne Herren, Ultimate-Tattoo-Guide.com. All Rights Reserved.
iii
medical practitioner. The information contained in The
Ultimate Tattoo Guide is ONLY for information purposes
only. The author and publisher will not be responsible or
liable for any harm or damage as the result of the tattooing
procedures and practices contained in the book.
Anyone who reads this book is agreeing to the statements
made in this disclaimer.
© Dayne Herren, Ultimate-Tattoo-Guide.com. All Rights Reserved.
iv
TABLE OF CONTENTS
ABOUT THE BOOK.......................................................................................................VI
PREFACE ....................................................................................................................VIII
GUIDELINES AND LEGAL INFORMATION FOR TATTOO ARTISTS......................... 0
PRACTICE TECHNIQUES AND IDEAS......................................................................... 9
TOOLS, EQUIPMENTS, AND MATERIALS FOR TATTOO ARTISTS ....................... 11
Preparation and Handling of Instruments and Equipment ..................................... 12
Needle-Making............................................................................................................. 14
Setting up the Machine ............................................................................................... 18
PIGMENTS, DYES, AND MAKING YOUR OWN INK .................................................. 22
Color Theory................................................................................................................ 29
SETTING UP YOUR PROFESSIONAL STUDIO.......................................................... 32
THE TATTOO PROCEDURE ....................................................................................... 35
Step-by-Step Methods for Safe Tattooing................................................................. 42
TAKE CARE OF YOUR HANDS! ................................................................................. 44
STYLES AND DESIGNS: DIFFERENT STROKES FOR DIFFERENT FOLKS ........... 49
Dragons........................................................................................................................ 50
Butterflies .................................................................................................................... 53
Floral Designs ............................................................................................................. 54
Stripes and Women: A Cultural History .................................................................... 55
Arms, Ankles, and Waistline Bands .......................................................................... 56

© Dayne Herren, Ultimate-Tattoo-Guide.com. All Rights Reserved.
v
Show Your American Pride with a Patriotic Tattoo................................................. 57
TATTOOING AND PAIN LEVELS................................................................................ 59
AFTERCARE ................................................................................................................ 59
TATTOO REMOVAL METHODS.................................................................................. 61
NUDITY AND PROFESSIONAL ETIQUETTE.............................................................. 64
30 FREQUENTLY ASKED QUESTIONS ANSWERED................................................ 67
TATTOO SCHOOLS AND LEARNING CENTERS ...................................................... 75
SUPPLIERS AND VENDORS ...................................................................................... 76
TATTOO STUDIOS....................................................................................................... 78
BOOKS AND PERIODICALS....................................................................................... 79
© Dayne Herren, Ultimate-Tattoo-Guide.com. All Rights Reserved.
vi
About the Book
When you wish to express yourself on the ultimate canvas – the
body – your own is the best place to start. Undeniably, deciding to
get a tattoo isn't at all simple. At least, not if you're thinking right. It's
all too easy to get inked in haste and then regret it for the rest of
your life. If you’re serious about getting the tattoo you really want,
give yourself some time to think it through.
The field of tattooing is wide open to any and all styles these days,
so keep your pencil to the paper and keep cranking out those
original designs. The better you are on paper, the better you will be
on skin.
This e-Book is the ultimate beginner's guide to tattoos: It teaches
you how to tattoo, a lot about tattooing and how to cultivate the art,
the supplies needed, techniques used, and includes general
guidelines and tips. This e-Book discusses tattooing concisely and
candidly and is jam-packed with detailed explanations. It patiently
guides you through the proper steps and procedures of how to join
the ranks of the professional tattoo artist.
So, if you want to become a tattooist or have an interest in this art
form, you’ve come to the right place. Remember: All tattoo artists
are not created equal, and if you want to be in the class of being
“more equal than others” – the realm of reputable artists who have
made successful careers of tattooing – you need the right skills.
Intended to be very straightforward, this e-Book does not attempt to
coax or convince you in any way. Tattoos are a very personal
choice, and most tattoo artists have at least one, and a great deal
© Dayne Herren, Ultimate-Tattoo-Guide.com. All Rights Reserved.
vii
of them have many tattoos, some of which they have gotten way
before they became tattoo artists and were most likely the reasons
they decided to take up the profession. They simply fell in love with
the art form. And this e-Book very well may enlighten even those
who’ve been in the business for many years; it’s certain that
beginners will discover some surprises about tattoo artistry.
Thus, for every tattoo fan, aspiring tattoo artist, student of medicine,
anthropology, history, or anyone else with an interest, The Ultimate
Tattoo Guide: A Handbook on Tattoo Art presents a compelling
read aimed at enriching your knowledge on the subject.
There is much to consider before the initial needle ever breaks the
skin. Tattoos are a long-term commitment. In some cases, they’re
forever. You certainly don’t want to have second thoughts about the
winking, one-eyed merman on your shoulder or the blazing red
demon on your neck.
This e-Book is especially useful if you want to study the art form or
are planning to set up a tattoo shop for the first time. It guides you
in getting started, gives you the basic dos and don’ts, and provides
some new ideas that might make things work better or easier for
you. For those already experienced in tattooing, this e-Book will
serve as a brush-up or reminder text and may even give you some
new ideas.
© Dayne Herren, Ultimate-Tattoo-Guide.com. All Rights Reserved.
viii
Preface
The sun is still barely visible at 6:15 p.m. on this last Saturday of
March, but already scores of men clad in scruffy jeans are doffing
their cheap T-shirts as they stream into my show at Leeds, a
requirement necessary for my fine arts degree. While I prepare to
begin my “performance,” the vanishing sun gives off an eerie cast
to the primitive, blue-black tattoos adorning the many torsos.
Sweltering hot, the atmosphere in the studio feels like a thick, wet
blanket. A woman with a friendly, lined face and bright blue eyes
approaches me, introducing herself as “Macy.” I've never met her
before, but she offers me a large sunflower wrapped in a yellow
ribbon. Her gift prefigures the far more intimate exchange to come:
She has agreed to take part in my performance – I will be tattooing
her.
Out come a bundle of fresh needles and a “power pack”: black,
purple, and two shades of red ink, various antiseptics, and the
tattoo gun. Gloves go on. It is so hot, and I am already perspiring
under the pressure to get this right. The first pair of latex gloves
breaks with a loud snap. I struggle to get on the next pair over
sweat-lined palms. My hands shake as I think about the crowds
pressing in to see what I'm doing.
I try to ignore them. I need steady hands. I concentrate. …
*******************************************************

© Dayne Herren, Ultimate-Tattoo-Guide.com. All Rights Reserved.
ix
There is nothing new about tattooing. The art has been passed
down through the centuries, dating back to ancient Egypt. What has
changed is the way we interpret it. From the arenas of Japanese
sumo wrestlers and the harems of kimono-clad, tiny-footed geishas,
tattoos found a new definition through rockers from the 1960s, like
Greg Allman and Janis Joplin that gradually came to portray a
figural representation of machismo and rebellion.
Most requested was that a dragon’s tail, an astro- logical symbol, or some other image that suited their
personalities be tattooed on their arms or semi- exposed shoulders. Interestingly, this art form has brought forth an amazing blend of innocence and
machismo, which is very natural-looking and appealing.
This primitive art form has come a long way in its interpretation.
First used only for special occasions, it became an every day part
of life with construction workers, taxi drivers, debt collectors, and
assorted gangsters or drug peddlers. The upper or middle echelons
of society eschewed it, however. And, as the popularity of the craft
increased, the “tough” guys kept coming in to tattoo parlors – and
bringing their girlfriends and wives with them. Most requested was
that a dragon’s tail, an astrophysical symbol, or some other image
that suited their personalities be tattooed on their arms or semi-
exposed shoulders. Interestingly, this art form has brought forth an
amazing blend of innocence and machismo, which looks very
natural and beautiful.
Some individuals have been inspired to use tattoos to decorate
their bodies in the belief that tattoos repel evil and provide
protection from danger. At the same time, these people believe the
tattoos endow their personalities with the images’ visual
© Dayne Herren, Ultimate-Tattoo-Guide.com. All Rights Reserved.
x
characteristics of strength or power, or perhaps some other wished-
for trait.
Traditionally, the masculinity of a tattoo depended on its theme, its size, and its location on the body.
Japanese prostitutes, called yujos, used tattoos to increase their
attractiveness to customers, and military men (particularly in the
Navy) as well as firefighters, have customarily had tattoos applied
to show evidence of bravery, valor, or strength. Traditionally, the
masculinity of a tattoo depended on its theme, its size, and its
location on the body.
As society’s attitudes have become more relaxed and lenient, along
with the progression and elevation of American tattoo skills, the art
form has gained in popularity and is now recognized as a legitimate
and appropriate way for anyone – in all social echelons -- to
decorate one’s body.
The body modifier – or tattoo artist – approaches the art of body
modification through the use of tattoos as a project wherein he or
she actually changes another’s body. That person then carries a
sign of personal identity different from the natural body state that
can be easily noticed by its location, if the person so chooses.
A tattoo attracts its admirers for as many different reasons as there
are people who get them. The motive for getting a tattoo can vary
from being deeply symbolic to merely a love for visual aesthetics.
Reasons run the gamut: to reclaim one’s body, as a rite-of-
passage, to express the nobility of enduring pain for beauty and
ornamentation, to obtain sexual release, to try and affect a
© Dayne Herren, Ultimate-Tattoo-Guide.com. All Rights Reserved.
xi
catharsis of some sort, to express aesthetic radicalism or non-
conformity, to show commitment to a partner – the list goes on.
Suffice it to say that many things attract people to this art form.
Although the original images of tattoos have been modified over
time, their themes and some designs have remained the same. For
instance, some people want to apply only a selected few icons on
their bodies such as fraternity house Greek symbols, insignia
related to biker gangs, prison cell-block images, and so on. But
more universal themes, such as plants, animals, historical or
cultural icons, insects, scenery, etc., remain always in vogue and
are considered classic. As you may have noticed at local college
campuses, girls invariably wear butterfly designs almost anywhere
on their bodies, and guys many times select designs like Celtic
knots for their ankles, necks, or arms
© Dayne Herren, Ultimate-Tattoo-Guide.com. All Rights Reserved.
0
Guidelines and Legal Information for Tattoo Artists
To the layman, tattooing may seem to be an easy endeavor. But
actually, there are many guiding principles to which the tattoo artist
must adhere when working on a human body. As for me, I became
a professional tattoo artist because of my love for this art form and
to demonstrate its limitless diversity through design, color, and size,
and as a social medium of expression.
One of the oldest examples of tattooing was on the body of a Bronze Age Man who
died more than 5,000 years ago found frozen intact in an Italian Glacier.
When asked to lecture a group of 10 students on the art of tattooing
as part of their curriculum, I realized that for those wanting to go
further and take up tattooing professionally, such small classes or
meetings with a professional tattoo artist were not comprehensive
enough. And that’s why I have written this e-Book – to help all
those enthusiasts who hold a fascination toward this ancient form of
expression. This e-Book allows me to reach not only students, but
to encompass a much wider audience.
As children, we’ve all drawn on ourselves, friends, and maybe even
our parents. We all did this because it gave us an immense sense
of creative pleasure at the time, whether we realized it or not.
Remember those fights with your siblings for the tattoo or the small
sticker that used to be free with the bubblegum pack? All those
© Dayne Herren, Ultimate-Tattoo-Guide.com. All Rights Reserved.
1
childhood events linked together form steppingstones for the
professional tattoo artist of the future.
But tattooing isn’t something that can be learned in just a day or
two. I have seen so many young people, quite enthusiastic at first
about learning the art; fail to make it a career after only a short
time. They lacked what it takes to become a true tattoo artist:
patience, obedience, and devotion to the art. But at the same time,
you also need some inborn talent, and you must respect the art
from which you want to make a career.
In earlier times, this art form was not easily learned. Artists never
revealed their secret techniques to anyone. Getting a chance to be
trained as an apprentice under someone skilled was a rare
opportunity. But now, it’s become a relatively easy endeavor – a job
– in which anyone can claim to specialize. You just have to buy a
cheap kit and start searching for willing subjects on which to work.
And you can do it – for a while, anyway, until your reputation
catches up with you – without possessing any talent whatsoever.
But if you are really serious about becoming a good, reputable
tattoo artist, you need the training and guidance found only by
learning from a professional – in addition to a strong determination
and a keenness to become a highly regarded tattoo artist.
Becoming a professional tattooist doesn’t require dreaming of it
since childhood. In fact, I didn’t decide on becoming a tattoo artist
until after I was out of college. I also had to go through a lot of
trouble. Tattooing was illegal in the city where I was living at that
time. Consequently, I had to travel an hour’s distance to reach the
© Dayne Herren, Ultimate-Tattoo-Guide.com. All Rights Reserved.
2
nearest studio where I’d finally found a professional tattoo artist
willing to train me.
To find that professional to train under, I began by visiting each
artist individually, instead of phoning in advance. Initially, every
artist I talked to either gave me a hard time by belittling me or just
dismissed me, as though I was just some bothersome kid. But
finally, one artist realized my sincerity and determination to learn
the art, and gave me an opportunity.
At first, I was given menial tasks, such as setting the price for each
tattoo with customers, cleaning up the clutter in the shop, and other
such work. It took a month of stubborn devotion to reach the stage
where my boss finally began giving me assignments to draw a rose,
a heart, and sometimes even a panther. Though I was thrilled to be
able to finally get to draw something, it was not at all difficult or
challenging for me, as I had already been to an advanced art
school and was good at drawing.
It soon became a boring task, but I did it with full dedication, as
these tattoos were very popular at that time. Days passed, and I
was learning fast. Then, finally I was taught the use of needles. I
started with three and went on to use as many as seven. My trainer
even bought me books on tattoos with very minute details, which I
studied and pored over many times. Eventually, with my trainer’s
permission, I was allowed to use one of his old machines – and I
had to learn it on my own, as he showed no willingness to teach me
anything about it.
Though my apprenticeship in that studio was akin to working in hell
at times, it also taught me many things. So, it’s my advice to those
© Dayne Herren, Ultimate-Tattoo-Guide.com. All Rights Reserved.
3
of you serious about the job, to check out everything for yourself
before stepping into the world of a novice tattooist. I don’t mean to
say that all trainers are bad. There are many eager to teach and
pass on this art form.
As far as training fees are concerned, some might charge you a lot,
while others may ask you to work free for them for a certain period
of time after the training period. You can learn new things from
every new master tattoo artist, but first make sure the trainer is truly
a professional. Go only to a reputable studio and deal with the
owner directly. Visit those that match your profile and portfolio of
your artwork, and if you have done any actual tattooing, be sure to
take photos. And two last things: Don’t be nervous and don’t be
afraid to ask questions.
If the owner likes your attitude and your work, he or she might ask
you to come back later and suggest you start drawing patterns from
tattoo magazines. If any design or pattern is mentioned specifically,
draw it – perfectly -- and take it back. If you succeed in gaining the
owner’s attention, you’ve won half the battle. By sincerely paying
attention and continuing with whatever tasks are thrown at you, you
will progress. But if you just inquire about a “job” and don’t bother to
produce your work, then you can forget about becoming a
successful tattoo artist. Professionals do not have the time to waste
on someone lacking determination – so demonstrate your sincerity
with an excellent portfolio of drawings – and
then ask to show them.
© Dayne Herren, Ultimate-Tattoo-Guide.com. All Rights Reserved.
4
Remember one thing: Even though you may be a very good artist,
and your designs look good on paper or other material, that doesn’t mean that you can also tattoo.
Continue to work on your on drawings and never let the thought
cross your mind you will earn a good reputation in this field without
lots of work.
If at anytime during your apprentice period you are asked to do
something you may not like, don’t balk. Make yourself a fixture at
the studio as much as possible, and whatever you do, don’t
question the owner for giving you a particular task.
You may think you’re all prepared to jump in and become a
tattooist, but do you know anything about the studio, the
instruments, sterilization, etc.? As a trainee, you will be responsible
to learn all these things and more.
Did you dream this would be a glamorous job? Maybe someday,
once you learn the ropes. But as an apprentice, the fact is, you’ve
got a lot of learning and hard work ahead of you.
Another hard fact is that only 10 percent of all people starting off as
an apprentice actually continue on to make tattooing a prosperous
career. It can’t be spoon-fed to you. You have to earn it. Plan on at
least six months to a year to master the skills and to learn the ins
and outs of the business. Ask questions, no matter how stupid they
might seem. Don’t be shy when you’re needing to learn.
When searching for a trainer, look for tattoo artists who have been
in business a good while, so you’ll know they can teach you the

© Dayne Herren, Ultimate-Tattoo-Guide.com. All Rights Reserved.
5
proper skills. And remember that along with the art of tattooing, you
need to learn about sterilization, care and usage of all the tools and
equipment, and business management. At the same time, needle-
making, prepping, making stencils, and every other aspect of the
business needs to be learned, too, which can’t be taught in a just
few months of apprenticeship. Without knowing these basics, you
won’t be allowed by any good mentor to start tattooing.
Your Goal: Finding a Trainer
While searching for your trainer or mentor, consider those with
more than five years’ experience. Don’t worry – you will come
across many of them. Some may be good, some bad, so choose
wisely. Your first priority should be to look for a strong, talented
tattoo artist who is well-experienced. Secondly, find one who
regards you as a promising new artist and who will willingly to take
you under his or her wing. Finally, because most of your time will
be spent with this mentor, look for someone with whom you can get
along well.
Sell Yourself With Your Portfolio
Your portfolio, which demonstrates your artistic abilities, is an
added advantage. Try to influence the potential guide or trainer by
using your portfolio. Your portfolio should be a combination of
drawings or paintings, along with wall paintings, carvings, etc. If you
have any certified training in anything related to art or tattooing, this
is a plus!
© Dayne Herren, Ultimate-Tattoo-Guide.com. All Rights Reserved.
6
The Proper Attitude: Willingness and Enthusiasm
Your attitude speaks volumes. Show your enthusiasm. Any
potential mentor wants someone with a lot of enthusiasm and a real
love for the art. Knowing about the art helps, but it doesn't mean
anything if you display little eagerness to learn more.
Your Ambition: To Gain Knowledge
As a beginner, don’t expect to take up the needles from the very
first day. You probably won’t even be allowed to touch the needles.
But what you can do is check your local library and the Internet,
and try to find out as much information as you can about human
anatomy, cross-contamination, blood-born pathogens, and
sterilization.
This kind of motivation results in gaining you a lot of knowledge and
reflects your sincerity to your mentor. You can visit the Red Cross
society or the nearest health department and take a short course
on blood-born pathogens. This benefits you in the long run and puts
you in good standing with your potential mentor. Initiate a
discussion on the importance of these studies when you pay your
first visit to ask for apprenticeship, but avoid sounding like a know-
it-all.
Get everything in writing regarding the terms of your
apprenticeship. And most importantly, sign the contract only when
you are 100 percent comfortable with its terms and conditions.
© Dayne Herren, Ultimate-Tattoo-Guide.com. All Rights Reserved.
7
The Price of Apprenticeship:
Money or Time
Be careful regarding money. There are a few artists offering free
apprenticeships, but they can be counted on your fingers.
Unfortunately, more and more artists are more interested in the
amount of money they will be getting rather than on providing a
good education. So search for a situation in which you not only will
learn, but one you can also afford. Know beforehand that if a trainer
doesn’t ask you for any money, that means you are expected to
devote a length of time to him or her after your training is
completed. Points to Remember…
During your training period, as well as after it, always treat your
customers with courtesy and respect. This helps toward ensuring
permanent customers.
During your training, be a keen observer. Get as many tips from
your mentor as you can. Finding a good studio and an experienced
artist willing to train you may mean relocating if his or her studio is
far from your residence. If relocation is not an option, be prepared
to take the extra time to get there on time. Tardiness and
absenteeism do nothing toward making a good impression on your
mentor. Even after you’ve completed your training, keeping in touch
with your mentor can be beneficial.

© Dayne Herren, Ultimate-Tattoo-Guide.com. All Rights Reserved.
8
Never try to learn by experimenting on your own body. This is
dangerous and unwise. Learn the sterilizing techniques to avoid
any harm to your customers. In the event any of your customers
contracts an infection or a disease due to your negligence, you not
only risk damaging your reputation, but you may also be the
defendant in a lawsuit or, worse yet, end up behind bars.
Legal Requirements Overview When it comes to the actual legal requirements, you need to check
with your local and state laws. Laws vary from state to state, and
also country to country. An easy way to find out this information is
to contact your local health department or law library to get the right
information so you can legally become a tattoo artist in your city.
You must make sure that when you do set up your place of
business be it at home or a separate office, it needs to provide a
clean and safe environment for you and your customers. You will
also need to follow the proper health procedures including
sterilization of equipment and supplies. DO NOT offer tattoo
services to minors or people you suspect are underage. Make sure
you have them show legit proof.
As far as health regulations, I would HIGHLY RECOMMEND that you read the documents listed below at their websites:
1. “Infection Control Guidelines for use in Tattooing and Skin Piercing”. It is in PDF format for free at: http://www.valeroyal.gov.uk/envhealth/Tattooing.pdf
© Dayne Herren, Ultimate-Tattoo-Guide.com. All Rights Reserved.
9
2. Health Practices in Tattooing is located at: http://www.dhs.vic.gov.au/phd/standardsofpractice/downloads/tattooing.pdf
3. “Guidelines for Tattooing” is located at: http://www.healthplanning.gov.bc.ca/protect/pdf/tattoo.pdf
Lastly, be sure you provide to all your customers or clients all the
health information on the health considerations of the tattoo
procedure. This includes what to expect before, during and after
the tattoo procedure takes place. This will include how to maintain
and care for a new tattoo.
Practice Techniques and Ideas
Before you ever perform your first REAL tattoo, why not get some extra
practice in first. So how do you do this?
There are two popular options. You can practice on fruit or on what is
called “synthetic skin”, or fake skin.
As far as fruit goes, many tattoo artists have practiced on oranges or even
cantaloupes. Basically, when practicing, if you break the surface and it
starts to crack or leak, you have gone to deep. I know this sounds like a
crazy idea, but trust me, you don’t want to “experiment” on yourself or
anyone else.
Synthetic skin is nearly identical to the look and feel of real skin. Do a
search online for suppliers. The good thing about synthetic skin is you
© Dayne Herren, Ultimate-Tattoo-Guide.com. All Rights Reserved.
10
can tattoo on both sides. Typical cost for synthetic skin is anywhere
between $10-$15.
If you do decide to practice on yourself, consider this. You won’t be able
to really hold the skin tight and also you will also incur pain at the same
time you are trying to concentrate. This could make it more difficult for
you to really get good practice. The best place to tattoo your self will most
likely be somewhere on your legs, not arms. It is much easier to stretch
and reach your legs than it is to focus on one of your arms.
Gearing Up for the Art of Tattooing
Below is a list of items required for your drawing kit. All these items
are easily found in your local art supply store.
• Berol Prismacolor pencils: Get at least a set of 12-24 different colors
• A pad of acetate paper • 2-5 Rapidoliner technical pens in sizes .25, .35, and .50. • A tracing paper pad • Scotch tape • A small, light table • Some loose drawing paper; copy paper works fine and is
inexpensive, as well. • As many tattoo publications as you can get your hands on • Several sizes of circle gauges • Several transparent triangles • A ruler • Several Sanford Design ebony, jet-black pencils
Once you get your tools, the rest depends upon you and your ability
to stick to the job.

© Dayne Herren, Ultimate-Tattoo-Guide.com. All Rights Reserved.
11
Be aware of a common blunder almost every trainee encounters:
Thinking you know everything there is to know after making just a
few designs on your friends. Keeping this kind of an attitude won’t
take you anywhere, so get rid of it – fast. You haven’t mastered the
skills yet; you’ve only scratched the surface and still have a long
way to go. If you do make a mistake – and you will – be brave
enough to acknowledge it and get it corrected by your trainer. Don’t
hide it in fear of criticism, which you will get, but when you do, view
it as constructive criticism. You will be making tons of mistakes –
that’s how you learn.
So keep a good attitude, drop the unnecessary pride, think big, and
keep trying hard to realize your dream. Appreciate the fact that you
have the opportunity to learn this art.
Tools, Equipments, and Materials for Tattoo Artists
Many of today's tattoo artists have had formal art training and have
also served a rigorous apprenticeship under an experienced
tattooist to learn the technical aspects of the medium. Just one of
the many things learned is that a good tattooist must have excellent
knowledge about the gear required for tattooing.
Tools of the trade include ink, ink cups, needles, and other
materials and equipment. A beginner’s kit, generally priced around
$200, usually includes a professional tattoo machine, an adjustable
power supply, a foot switch, clip cord, several tubes, and various
© Dayne Herren, Ultimate-Tattoo-Guide.com. All Rights Reserved.
12
tips and grips. You also need tattoo dyes, liner and shader needles,
as well as frames, coils, and springs.
Other necessary equipment includes razors (for shaving the skin –
hair obstructing the tattoo machine’s tubes hampers application)
and plastic bags used to cover spray bottles. Much of the tattooing
process concentrates on safety, since any type of puncture to the
skin – and that’s what a tattoo machine does – carries the risk of
infection and disease transference.
So once you’re set with all the necessary tools and equipment, you
then must always keep in mind all the safety precautions you’ve
learned when you actually begin tattooing.
Preparation and Handling of Instruments and Equipment
The following provides a general description of the tattooing process
and should not be taken as definitive procedures. All tattoo artists
have their own particular ways of working with their own procedures
for setup, sterilization, cleanup, etc., but these tips are helpful for
getting you started in the right direction until you’ve been in the
business long enough to establish your Standard Operating
Procedures.
Before the artist can begin tattooing he or she needs to set up a
designated work area. The work area should be free of everything
but items necessary for tattooing. This includes setting up the
following instruments and equipment:
© Dayne Herren, Ultimate-Tattoo-Guide.com. All Rights Reserved.
13
• Worktable cover: A sanitized cloth or paper towel on which to
place items needed for tattooing.
• Paper towels: Keep a roll handy, but sufficient sheets should
be torn off the roll prior to beginning a tattoo. If you run out
during a tattooing, remove the used gloves first, tear off the
needed sheets, and then put on new gloves. Never tear off a
sheet from the roll while wearing used gloves.
• Spray bottles: Have several bottles on hand containing
alcohol to prep the skin and several more to hold liquid
“green” soap, a hospital-grade germicidal soap used during
the tattoo process to clean up excess ink and blood.
• Ink cups: Keep a stock of these small, plastic, thimble-sized
containers for holding ink needed for tattooing. Inks are
poured into these cups from a larger container prior to
tattooing. Any unused ink must be properly disposed of after
tattooing into an approved waste container. Neither inks nor
cups should ever be re-used on anyone else.
• Razors: A supply of disposable safety razors are needed to
prepare the skin surfaces of your customers prior to
tattooing. Properly dispose of them after each tattooing in an
approved waste container or sharps container.
• Latex Gloves: A fresh pair of latex gloves for each procedure
must be used, so make sure you have a good supply. And
those gloves should touch only you during the procedure. If
you open drawers or answer the phone while performing a
procedure, they expose you to possible infection.
• Petroleum Jelly: Keep several jars or tubes on hand to
lubricate the skin and keep the tattooed area moist during the
tattooing process. Use a tongue depressor to scoop out the
amount needed, and then dispose of any unused portion
after the completing the tattoo.
© Dayne Herren, Ultimate-Tattoo-Guide.com. All Rights Reserved.
14
Needle-Making
Your primary tool for designing tattoos on someone’s body will be
the needle. Tattoos are created by multiple punctures in the skin
and injecting ink with a needle to instill pigment into the dermal
layer. Tattoo needles are actually not needles at all, but pins
(sometimes called “sharps”) attached to a needle bar, which is then
attached to the reciprocating mechanism within the tattoo machine.
Tattoo needles are solid needles made of metal, usually stainless
steel. At the end of the needle, it will typically be rounded or cone-
shaped. The reason for this is to make sure the ink is carried and
deposited into the dermis level of the skin.
Tattoo needles usually stay sharp and never go dull. In most
cases, they actually get sharper with more wear. But the
roundness of the tip may diminish causing the skin to be sliced
instead of making a clean puncture. This will result in less ink
being correctly deposited into the skin.
Make sure you check the needle tips often for any flaws! A
magnifying glass will help with this.
While single needles are sometimes used for extremely fine line
work, it is far more common for multiple needles to be combined
into groups to improve performance and hasten the job. Soldering
or welding them to a small block of steel usually works excellently
for this purpose.
© Dayne Herren, Ultimate-Tattoo-Guide.com. All Rights Reserved.
15
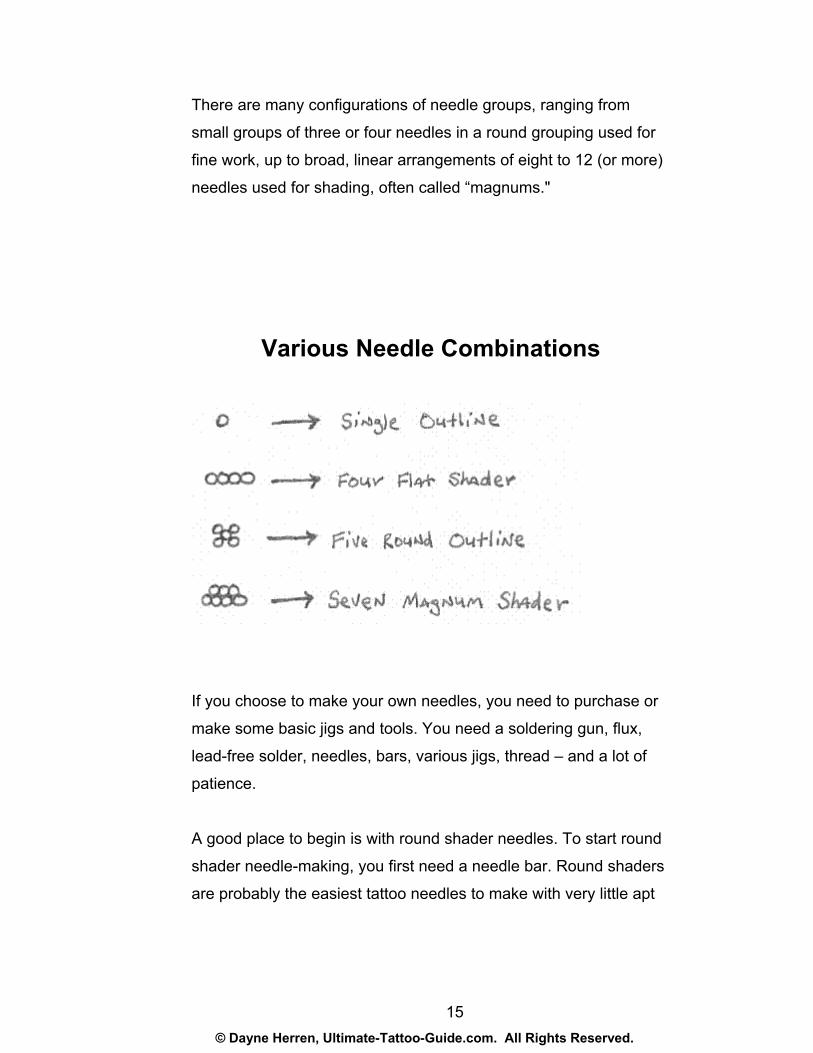
There are many configurations of needle groups, ranging from
small groups of three or four needles in a round grouping used for
fine work, up to broad, linear arrangements of eight to 12 (or more)
needles used for shading, often called “magnums."
Various Needle Combinations
If you choose to make your own needles, you need to purchase or
make some basic jigs and tools. You need a soldering gun, flux,
lead-free solder, needles, bars, various jigs, thread – and a lot of
patience.
A good place to begin is with round shader needles. To start round
shader needle-making, you first need a needle bar. Round shaders
are probably the easiest tattoo needles to make with very little apt
© Dayne Herren, Ultimate-Tattoo-Guide.com. All Rights Reserved.
16
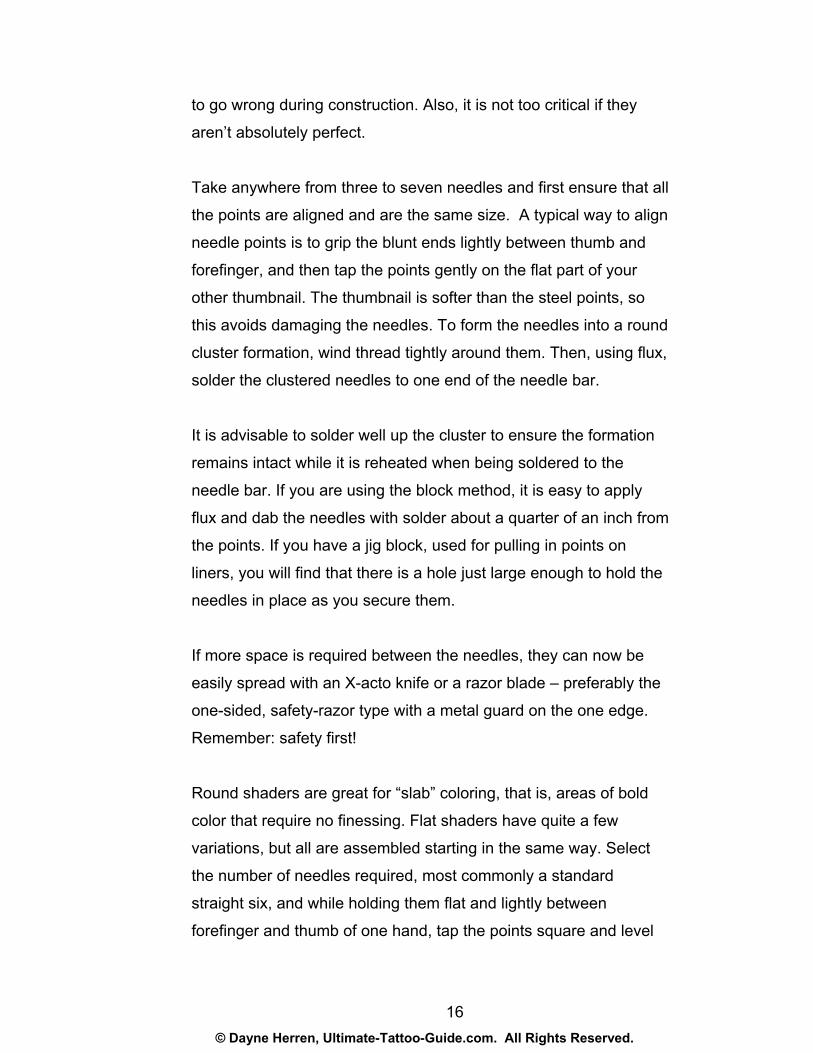
to go wrong during construction. Also, it is not too critical if they
aren’t absolutely perfect.
Take anywhere from three to seven needles and first ensure that all
the points are aligned and are the same size. A typical way to align
needle points is to grip the blunt ends lightly between thumb and
forefinger, and then tap the points gently on the flat part of your
other thumbnail. The thumbnail is softer than the steel points, so
this avoids damaging the needles. To form the needles into a round
cluster formation, wind thread tightly around them. Then, using flux,
solder the clustered needles to one end of the needle bar.
It is advisable to solder well up the cluster to ensure the formation
remains intact while it is reheated when being soldered to the
needle bar. If you are using the block method, it is easy to apply
flux and dab the needles with solder about a quarter of an inch from
the points. If you have a jig block, used for pulling in points on
liners, you will find that there is a hole just large enough to hold the
needles in place as you secure them.
If more space is required between the needles, they can now be
easily spread with an X-acto knife or a razor blade – preferably the
one-sided, safety-razor type with a metal guard on the one edge.
Remember: safety first!
Round shaders are great for “slab” coloring, that is, areas of bold
color that require no finessing. Flat shaders have quite a few
variations, but all are assembled starting in the same way. Select
the number of needles required, most commonly a standard
straight six, and while holding them flat and lightly between
forefinger and thumb of one hand, tap the points square and level
© Dayne Herren, Ultimate-Tattoo-Guide.com. All Rights Reserved.
17
on the thumbnail of the other hand, as mentioned earlier. Transfer
the needles to this hand and grip the points between thumb and
forefinger, ensuring that they do not move or twist, and then solder
the blunt ends.
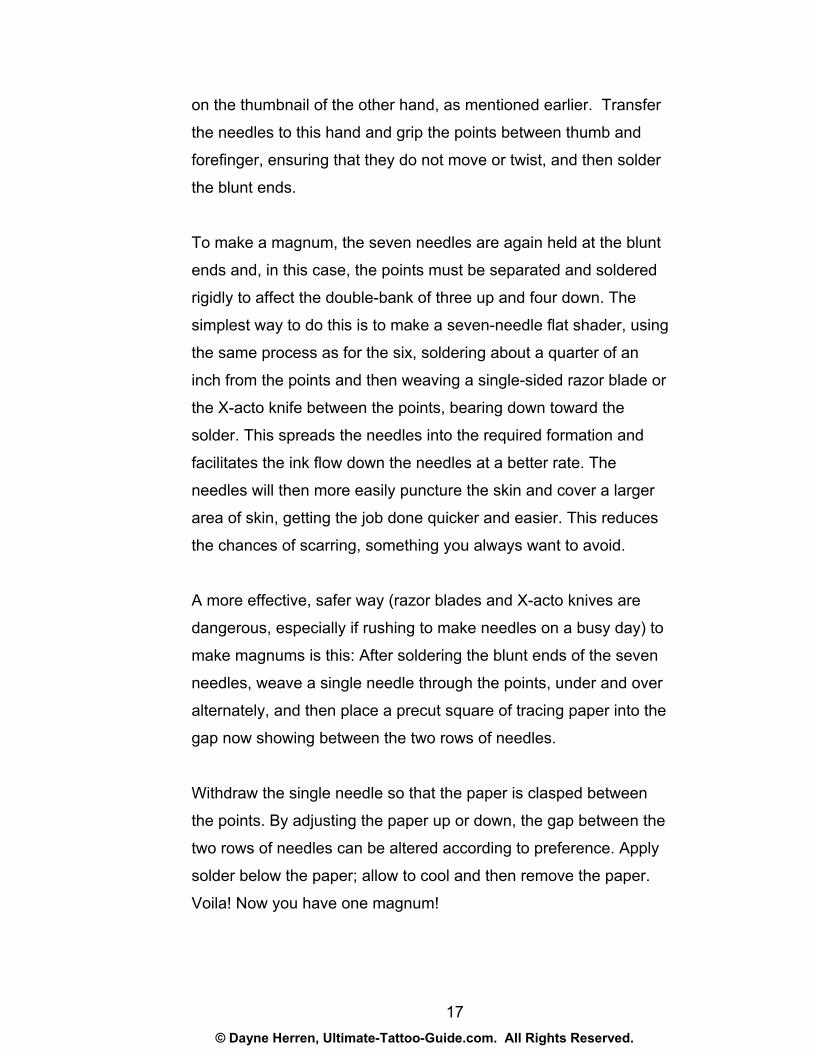
To make a magnum, the seven needles are again held at the blunt
ends and, in this case, the points must be separated and soldered
rigidly to affect the double-bank of three up and four down. The
simplest way to do this is to make a seven-needle flat shader, using
the same process as for the six, soldering about a quarter of an
inch from the points and then weaving a single-sided razor blade or
the X-acto knife between the points, bearing down toward the
solder. This spreads the needles into the required formation and
facilitates the ink flow down the needles at a better rate. The
needles will then more easily puncture the skin and cover a larger
area of skin, getting the job done quicker and easier. This reduces
the chances of scarring, something you always want to avoid.
A more effective, safer way (razor blades and X-acto knives are
dangerous, especially if rushing to make needles on a busy day) to
make magnums is this: After soldering the blunt ends of the seven
needles, weave a single needle through the points, under and over
alternately, and then place a precut square of tracing paper into the
gap now showing between the two rows of needles.
Withdraw the single needle so that the paper is clasped between
the points. By adjusting the paper up or down, the gap between the
two rows of needles can be altered according to preference. Apply
solder below the paper; allow to cool and then remove the paper.
Voila! Now you have one magnum!

© Dayne Herren, Ultimate-Tattoo-Guide.com. All Rights Reserved.
18
Now you can start making of tattoo “rakes.” These are so called
because they resemble a garden rake. With this type of formation,
the clearance between the needles is all-important. Although only
five needles are used, the speed with which they cover large areas
with dense color is phenomenal. Rakes are particularly good for
black and grey tattoos.
You next need to learn how to make quad needles. These get their
name from the fact that seven needles are used in a standard flat
shader formation, but with four needles standing out from the other
three. Made in the same way as the standard flat shader, but
before soldering the blunt ends, the four protruding needles must
be pushed into position with a loose needle or penknife. These are
tricky to make but are excellent for banging in large areas of solid
color, particularly black. One problem that can arise from using
quads is that the customer may feel more discomfort while being
tattooed. However, the plus side to this is that the extra speed of
coverage with this formation means the discomfort doesn't last as
long.
Setting up the Machine
It was New York-based tattoo artist Samuel O'Reilly who actually
invented the tattoo machine in 1891 (see illustration below). His
inspiration came from a device called the “electric pen,” invented by
Thomas Edison in 1876. The needle machine moves up and down,
powered by electricity and in the process, injects ink into the skin.
The process is technically quite simple: Two coils are attached to a
spring in the machine, which in turn, are attached to a power

© Dayne Herren, Ultimate-Tattoo-Guide.com. All Rights Reserved.
19
supply. When power isn’t applied to the gun, the spring holds the
two contacts together. The lower contact point is attached to the
coils and finally to the needle.
The needle movement is so fast, its difficult for the human eye to see. You only
hear the contacts making and breaking.
Operating the tattoo machine is a matter of care and knowledge.
Begin by attaching a rubber eyelet to the end of the armature bar.

© Dayne Herren, Ultimate-Tattoo-Guide.com. All Rights Reserved.
20
Now, select the desired needle assembly you are planning to use.
Then bend the needle bar a bit, but don’t bend it too much, just
enough to provide a solid contact for the rubber bands and to
facilitate proper contact between the needles and the tip. Now
insert the desired needle bar and needle assembly through the tube
clamping assembly and onto the rubber eyelet with the opening of
the loop facing left.
Carefully insert the needle bar assembly into the proper tube and
slide the tube up until the needles approaches the tube tip. At this
point, be very careful not to damage your needle tips when guiding
them through the tip. Insert the tube into the chuck and tighten
temporarily.
Place rubber bands around your machine to add tension to the
needle bar toward the back of the tube. Take a look at this point to
make sure the needle bar is not rubbing the tube. Move your
armature bar up and down to assure free movement, and to ensure
your needle bar loop is seated on your grommet or eyelet. If you

© Dayne Herren, Ultimate-Tattoo-Guide.com. All Rights Reserved.
21
plan to work off your tube, adjust your tube so the needles are 1/16
of an inch out when the armature bar is pulled down.
See that the needles overhang the end of the tip up to 1/32 of an
inch, at least. You are now ready to use your needle, so go ahead
and initiate the power supply and use your gun. When you switch
on the power, the machine produces a smooth sound with needle
movement between 1/16 of an inch and 3/32 of an inch. To adjust
the setting for desired speed, or voltage, you can do so by turning
the contact adjusting screw up or down.
Electrical tattoo machines are available now with many
conveniences. They have a steel casing, produce vertical vibration,
and more or less look similar to dentist’s drill. The solid, sterilized
needles of the machine puncture the skin at a rate of 50 to 3,000
times per minute. These needles are dipped in ink, which the
machine in to its tubing system. The tattoo machine than uses an
up-and-down motion to puncture the top layer of the skin and drive
insoluble, micrometer-sized particles of ink into the second layer of
skin, about 1/8 inch deep, with the help of boot switch.
Power Supply and Foot Pedal The power supply is the main source that supplies power to your
tattoo machine. A typical power supply will deliver power in the
range of 3-17 volts. There are various power supplies suitable for
supplying power to tattoo machines.
Power supplies are either regulate or unregulated. Regulated
power supplies provide the exact amount of the power stated with
little to no variation. Unregulated power supplies provide an average
© Dayne Herren, Ultimate-Tattoo-Guide.com. All Rights Reserved.
22
current that can fluctuate.
It is best to use regulated power supplies to achieve the smoothest and most reliable action. The foot pedal is simply how the tattoo artist stops and starts the
power supply going to the tattoo machine.
Autoclave
What is an autoclave? An autoclave is a sterilizer that combines
heat, pressure, and steam to kill microorganisms. The usual
temperature is around 250 degrees Fahrenheit (121 Degrees C)
under 10 pounds of pressure for 30 minutes. There may be other
slight variations to this.
Cleaning Tank (Ultrasonic)
The Ultrasonic Cleaning tank will clean your equipment before you
sterilize it. It will make sure there are no traces of blood, ink, or
other contaminants are left behind. The tank works by using very
high frequency vibrations to clean the equipment.
Pigments, Dyes, and Making Your Own Ink
The terms pigment, dye, and color are often used at random. Dye is
a substance that maintains its characteristic color even when
© Dayne Herren, Ultimate-Tattoo-Guide.com. All Rights Reserved.
23
divided into individual molecules (often soluble colors). Pigment is a
coloring product that consists primarily of uncolored molecules that
cause refraction through the arrangement of crystals, and this is
what makes a specific color.
The advantage to making your own ink is that you know exactly
what’s in it, and you can mix a carrier that suits your needs (for
example, ensuring that it is vegan-friendly). A typical homemade
carrier solution might be a mixture consisting of a small bottle of
vodka or Listerine with a little glycerin and propylene glycol blended
into a slurry along with the dry pigments.
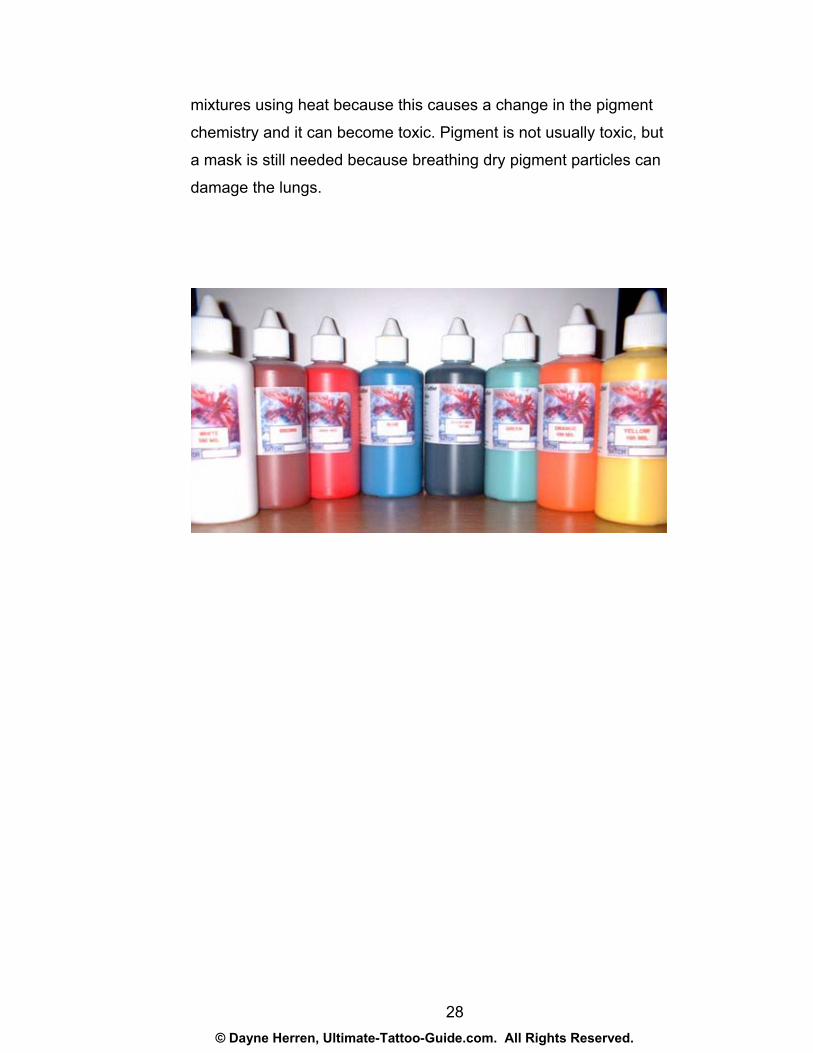
It is recommended for a beginner to purchase tattooing colors.
Many sample packs can be obtained online. These packs will give
you the basic colors that you need. When purchasing, the colors
will either come in liquid or powder form. The powder form will
need to be mixed with some sort of carrier fluid before being used.
As far as fluid colors are concerned, they come in two different
types. There are ones that are powdered pigments that are
suspended in a carrier fluid (predispersed colors) and others that
contain no pigment powder because the pigment is already
dissolved in the liquid.
So which is better?
Most prefer predispersed colors because of the lower health risks
involved. Also, most tattooist believe these colors produce a better
tattoo since the carrier fluid is absorbed by the body leaving the
powder pigment in the dermis skin.
© Dayne Herren, Ultimate-Tattoo-Guide.com. All Rights Reserved.
24
Common Ingredients Used In Most Carrier Fluids:
• Glycerin
• Witch Hazel
• Ethanol (Ethyl Alcohol)
• Purified Water
• Listerine
• Propylene Glycol
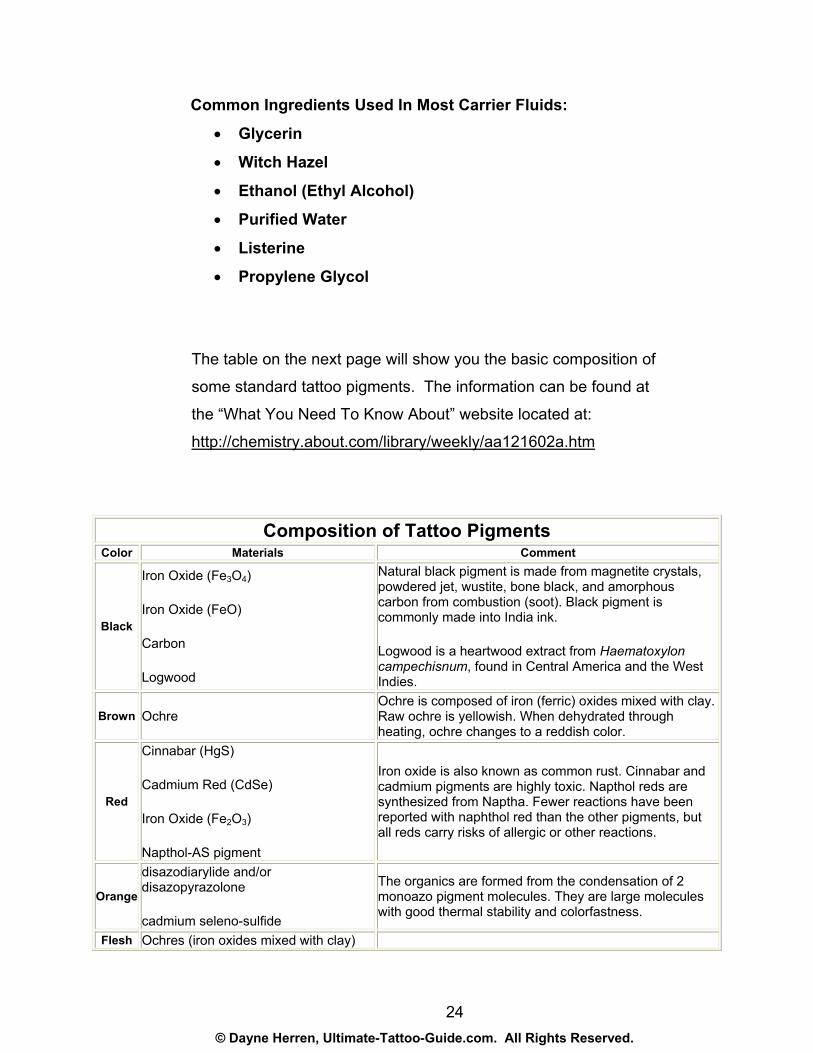
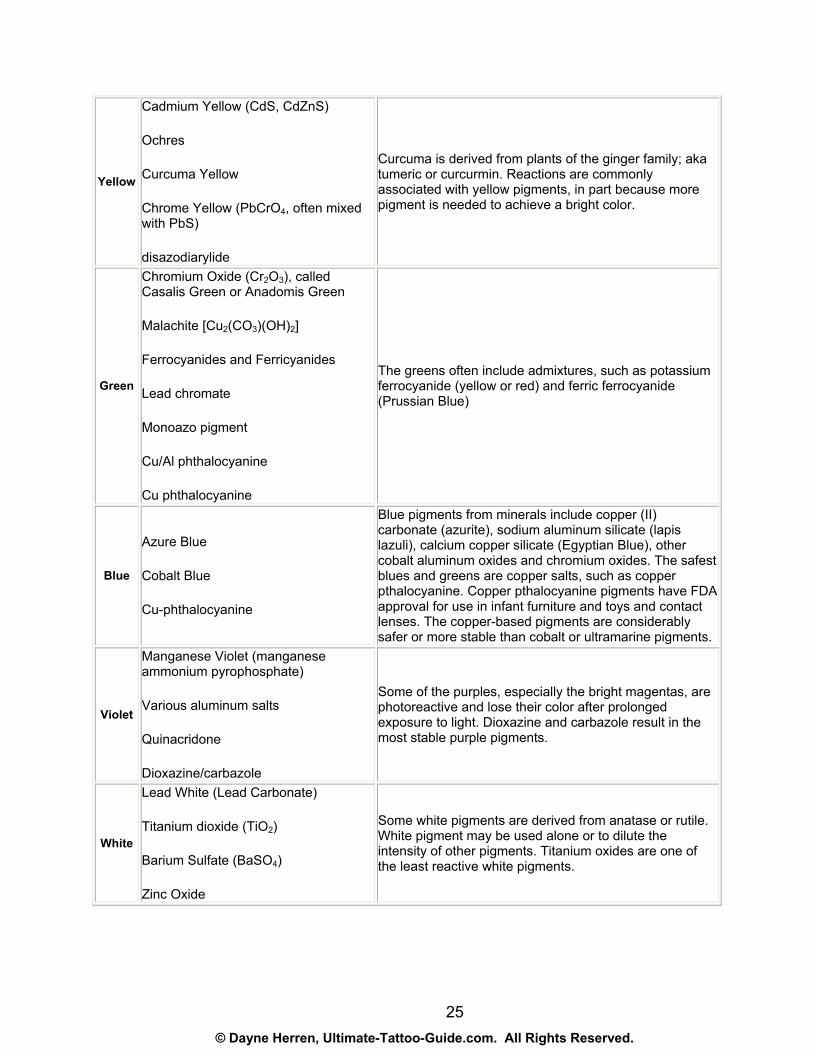
The table on the next page will show you the basic composition of
some standard tattoo pigments. The information can be found at
the “What You Need To Know About” website located at:
http://chemistry.about.com/library/weekly/aa121602a.htm
Composition of Tattoo Pigments Color Materials Comment
Black
Iron Oxide (Fe3O4)
Iron Oxide (FeO)
Carbon
Logwood
Natural black pigment is made from magnetite crystals, powdered jet, wustite, bone black, and amorphous carbon from combustion (soot). Black pigment is commonly made into India ink.
Logwood is a heartwood extract from Haematoxylon campechisnum, found in Central America and the West Indies.
Brown Ochre Ochre is composed of iron (ferric) oxides mixed with clay. Raw ochre is yellowish. When dehydrated through heating, ochre changes to a reddish color.
Red
Cinnabar (HgS)
Cadmium Red (CdSe)
Iron Oxide (Fe2O3)
Napthol-AS pigment
Iron oxide is also known as common rust. Cinnabar and cadmium pigments are highly toxic. Napthol reds are synthesized from Naptha. Fewer reactions have been reported with naphthol red than the other pigments, but all reds carry risks of allergic or other reactions.
Orange
disazodiarylide and/or disazopyrazolone
cadmium seleno-sulfide
The organics are formed from the condensation of 2 monoazo pigment molecules. They are large molecules with good thermal stability and colorfastness.
Flesh Ochres (iron oxides mixed with clay)
© Dayne Herren, Ultimate-Tattoo-Guide.com. All Rights Reserved.
25
Yellow
Cadmium Yellow (CdS, CdZnS)
Ochres
Curcuma Yellow
Chrome Yellow (PbCrO4, often mixed with PbS)
disazodiarylide
Curcuma is derived from plants of the ginger family; aka tumeric or curcurmin. Reactions are commonly associated with yellow pigments, in part because more pigment is needed to achieve a bright color.
Green
Chromium Oxide (Cr2O3), called Casalis Green or Anadomis Green
Malachite [Cu2(CO3)(OH)2]
Ferrocyanides and Ferricyanides
Lead chromate
Monoazo pigment
Cu/Al phthalocyanine
Cu phthalocyanine
The greens often include admixtures, such as potassium ferrocyanide (yellow or red) and ferric ferrocyanide (Prussian Blue)
Blue
Azure Blue
Cobalt Blue
Cu-phthalocyanine
Blue pigments from minerals include copper (II) carbonate (azurite), sodium aluminum silicate (lapis lazuli), calcium copper silicate (Egyptian Blue), other cobalt aluminum oxides and chromium oxides. The safest blues and greens are copper salts, such as copper pthalocyanine. Copper pthalocyanine pigments have FDA approval for use in infant furniture and toys and contact lenses. The copper-based pigments are considerably safer or more stable than cobalt or ultramarine pigments.
Violet
Manganese Violet (manganese ammonium pyrophosphate)
Various aluminum salts
Quinacridone
Dioxazine/carbazole
Some of the purples, especially the bright magentas, are photoreactive and lose their color after prolonged exposure to light. Dioxazine and carbazole result in the most stable purple pigments.
White
Lead White (Lead Carbonate)
Titanium dioxide (TiO2)
Barium Sulfate (BaSO4)
Zinc Oxide
Some white pigments are derived from anatase or rutile. White pigment may be used alone or to dilute the intensity of other pigments. Titanium oxides are one of the least reactive white pigments.
© Dayne Herren, Ultimate-Tattoo-Guide.com. All Rights Reserved.
26
Ink Caps and Tattooing Be sure that you never dip the tattoo needles directly into the ink
bottle. The reason? While using the needles, they will become
contaminated with blood and this can be spread throughout the
bottle causing a spread of infection or disease. The best way to
avoid this is to set aside a small amount of ink in a separate
container (these are called, “caps”). Use this ink only for the
individual tattoo job. When you are finished, don’t put the unused
ink back, just throw it all away.
You can buy these “caps” in various sizes from any professional
tattoo supplier. The smaller the number associated with the cap,
the smaller the size of the cap.
Make sure that you buy quality, professional tattoo colors. Don’t
just use any type of ink that you can find. This can be VERY
dangerous. It pays to be smart.
Making Your Own Ink Here are some instructions for preparing your own ink. Only
tattooists trained in aseptic techniques should follow these
instructions. Otherwise, save this information for when you have
such knowledge or use it to ask informed questions from someone
who has this type of training.
© Dayne Herren, Ultimate-Tattoo-Guide.com. All Rights Reserved.
27
Material and Equipment Required: dry pigment, vodka, glycerin,
medical-grade propylene glycol, blender, safety equipment (latex
gloves, paper face mask), and sterile ink bottles.
Instructions: 1. Use clean, sterile materials (see note below), and wear a paper
mask and disposable latex gloves.
2. Blend about 7/8 quart of vodka, one tablespoon glycerin, and one
tablespoon propylene glycol together until clear.
3. In blender jar, add one to two inches of powdered pigment and
enough liquid from Step 2 to form a slurry.
4. Mix on low speed for about 15 minutes, then on medium speed
for an hour. Pour through a funnel into sterilized ink bottles.
Adding a sterilized marble to each bottle aids in mixing.
5. Store away from sunlight or fluorescent lighting – ultraviolet rays
are capable of altering some pigments.
6. Record the amounts of liquid and powdered pigment to ensure
consistent colors.
7. Be careful to use proper amounts of glycerin and propylene
glycol. Too much glycerin gives the ink an unwanted oiliness, and
too much glycol creates a hard, brittle layer at the top of the ink.
Caveat: If you are not knowledgeable about aseptic techniques,
buy your ink already made – don't make your own!
Helpful Hints: Buy dry pigment from a tattoo supply house to save yourself the
difficulty of trying to order it directly from chemical suppliers.
Listerine or witch hazel can be substituted for the vodka, and some
people use distilled water, though it is not antibacterial. Don't use
rubbing alcohol or methanol. Do not sterilize pigments or their
© Dayne Herren, Ultimate-Tattoo-Guide.com. All Rights Reserved.
28
mixtures using heat because this causes a change in the pigment
chemistry and it can become toxic. Pigment is not usually toxic, but
a mask is still needed because breathing dry pigment particles can
damage the lungs.
© Dayne Herren, Ultimate-Tattoo-Guide.com. All Rights Reserved.
29
Color Theory
Why study color theory? Color is attractive. Color creates contrast
and emphasizes mapped features or data. Color builds visual
appeal and enhances understanding of the tattoo, thus improving
the symbolism of a particular tattoo design. It is preferable to use
color on tattoos, but it is easy for color to be used incorrectly. It is
important, therefore, for the tattooist to have a thorough
understanding of the many aspects of color in order to use it
effectively while tattooing a design.
Color can be very beautiful in knot works, but dark colors will defeat
the purpose of taking a lot of care with the braid lines. I use a
bright, light color in the knots, or none at all, and save the dark
colors for the negative spaces in the backgrounds. That serves to
bring the design forward in space, and since many of the smaller
negative bits close up to black anyway, a dark color fills them
nicely. It is often most effective to ink a new borderline just outside
the edge of the design, following the external edge, as a way of
strengthening the silhouette. If there is a background negative
space color, it can fill a border area and tie the whole piece
together.
A good starting point for understanding perceptual aspects of color
is to look at color dimensions, which are really psychological
dimensions to color perception. Color dimensions include hue (the
quality by which we distinguish one color from another), value (the
quality by which we determine light colors from dark ones), and
chroma (the quality that distinguishes a pure hue from a gray
© Dayne Herren, Ultimate-Tattoo-Guide.com. All Rights Reserved.
30
shade). As you can see, a color is unlikely to have one rigid
meaning. Actually, it may be more accurate to say that a color has
a variety of connotations – or implied meanings – that the viewer
may think of consciously or unconsciously.
Symbolic tattoos are more fashionable today than they once were.
Colors have connotations, and most people have learned these
connotations from childhood, just as they learn prejudices and
superstitions. A tattooist may or may not be superstitious; he or she
may not believe in actual meanings of colors, but color
connotations should be considered when tattooing. The generally
accepted meanings of colors often have a distinct bearing on
someone liking or disliking a tattoo.
While some color combinations can adversely affect tattoo
interpretation, there are other combinations that create nice effects,
that are complimentary and pleasing to look at or that accentuate
the tattoo and subdue the background so as to make the main
tattooed area or important tattoos stand out.
A professional who mixes his or her own inks from dry pigments
most likely knows the composition of the inks. Most tattoo inks
technically aren't inks. They are composed of pigments suspended
in a carrier solution. Today's pigments are primarily metal salts.
However, some pigments are plastics, and there are probably some
vegetable dyes, too. The pigment provides the color of the tattoo.
The plastic-based pigments are very intensely colored, but many
people have reported reactions to them. There are also pigments
that glow in the dark or in response to black (ultraviolet) light. These
pigments are notoriously risky. Some may be safe, but others are
© Dayne Herren, Ultimate-Tattoo-Guide.com. All Rights Reserved.
31
radioactive or otherwise toxic. Another concern is the increasing
variety of pigments and diluents being used in tattooing -- more
than fifty different pigments and shades – and the list continues to
grow. Although a number of color additives are approved for use in
cosmetics, none is approved for injection into the skin. Using an
unapproved color additive in tattoo ink adulterates the ink. Many
pigments used in tattoo inks are not approved for skin contact at all.
Some are industrial grade colors made to be used for printers' ink
or automobile paint.
Artists and tattoo students, however, know that there are countless
colors and shades in the color world and in the private world of an
artist's imagination. But why is it necessary to mix colors? Because
no manufacturer could produce the innumerable hues artists need.
And even if one did, where could we keep so many thousands of
tubes, jars, or cakes of tattoo coloring? How could we place them
on our palettes? This is why color mixing is necessary, and this is
why we cannot work with more than a comparatively small number
of well-selected, basic colors.
Begin with the lightest hue close to the color you want. To make the
shade lighter, add white color. Colors are stronger in some brands
than in others, and artists don't work like pharmacists, weighing
each ingredient on a scientific scale according to a prescription.
You can mix the colors on your palette, but the final result is in the
tattoo.
In tattooing, you can always change a mixture if it isn't just right.
The wrong color won't kill a tattoo customer the way an incorrectly
filled prescription might kill a patient. One of the beautiful features
of working in color, in any medium, is the ability to experiment, to

© Dayne Herren, Ultimate-Tattoo-Guide.com. All Rights Reserved.
32
watch the results, to see how the smallest bit of another color can
help or harm your tattooing art.
Setting Up Your Professional Studio
It’s essential to provide a casual, friendly atmosphere in your
studio, but it must be professional, as well. With a focus on
cleanliness, your studio must represent to customers a safe, good
place they can go to get a first-class piece of body art.
A tattoo studio needs an annually renewed tattoo permit – costing
usually around $100, depending upon what state you are in –
issued to the owner. The permit states all the governing rules and
should be prominently displayed in the studio. These rules include
such things as the necessity for an autoclave to sterilize needle
bars, bacterial endospore destruction tests for each autoclave
used, disposable razors, ink caps, sterile dressings for the tattoos,

© Dayne Herren, Ultimate-Tattoo-Guide.com. All Rights Reserved.
33
records on each patron, and more. This permit guarantees that the
studio and the artist meet the minimum state rules and regulations
that govern tattooing.
All states – and sometimes individual cities – have their own
regulations, but the following are examples of common
requirements:
• Each tattoo studio must have a workroom designated
specifically for applying tattoos that must be separated by
some type of barrier, such as a counter with a self-closing
door, from the waiting area. There should be sufficient
number of waste receptacles for the disposal of waste
materials.
• No animals are permitted in the workroom with the exception
of guide dogs or those used by handicapped persons.
• The workroom must be kept clean to prevent disease.
• Customers must be tattooed in the designated workroom
only.
• Equipment must not be shared between tattooists working on
clients simultaneously.
• All tables used for tattooing work must be made of easily
sanitized material, such as metal, that is smooth, non-porous,
and resistant to corrosion.
• There must be a hot-and-cold water hand-washing sink in the
workroom or within 10 feet of it.
Not only should the artist maintain excellent personal hygiene, but
the studio must also be kept immaculately clean. Allow no dirt or
garbage in the studio, and dust, vacuum, and mop daily after
closing. Workrooms, restrooms, hand-washing basins, and all other

© Dayne Herren, Ultimate-Tattoo-Guide.com. All Rights Reserved.
34
areas must be kept spotless. Utility rooms, refuse areas (where you
store trash cans), storage rooms, and workshop rooms must be
separated from tattooing areas by closed doors. If you live in the
same building as your studio, make sure your studio rooms are also
segregated from your living or sleeping quarters by closed doors.
Don’t just regard your studio as a business center – it must be part
of your life. Your studio is your “baby,” and must be nurtured. Think
about the prospects of your business in the long run as well as in
the short run. Develop personal and friendly relations with your
employees and customers, and make them comfortable so that
they look at your studio as something close to an extended home.
Continually interact with your employees and trainees. Both regular
employees as well as trainees – whether paying fees or
apprenticing under you for work they provide later – should be
working wholeheartedly. Maintain firm codes of conduct, much
easier to do when you share good relations with them.
If you can afford it, attend a local community college business
management course. These are relatively inexpensive, and you can
learn a lot about running a business. You can also attend seminars
and conventions, or even look for a mentor or counselor, but unless
you have a personal friendship with someone who does this type of
consulting, you may be charged up to $200 per hour for advice.
In any case, get your ducks in a row and plan well in advance
before inaugurating your business. This helps you to survive those
first lean years common in the tattoo business.

© Dayne Herren, Ultimate-Tattoo-Guide.com. All Rights Reserved.
35
The Tattoo Procedure
Sometimes we want to do things in life but without a clear idea of
how to go about doing them, we are stymied. In fact, we try to avoid
such endeavors due to fear of failure. This holds true in the case of
tattooing, too. If you don’t know the art, you feel scared to try. The
answer to this dilemma? Constant practice. If you know and have
practiced the procedure, you will lose your fear.
Dealing with Customers The very first step in tattooing is dealing with the initial customer. It
is best to set up the appointment ahead of time. A few helpful tips
that you may want to pass on to your customers will be:
Before the Appointment Checklist • Make sure you have eaten something within the previous 2-3
hours before your appointment to avoid getting dizzy or
fainting. Also, drink plenty of fluids before hand.
• Allow plenty of time for the tattoo procedure. Don’t set a
time limit.
• You will need a valid ID before any tattooing takes place.
• Where comfortable clothing that can be easily adjusted or
removed if necessary. Also wear clothes that you don’t mind
if they get ink stains on.
• Do not consume any medications that will cause your blood
to thin or consume alcohol before your appointment.
© Dayne Herren, Ultimate-Tattoo-Guide.com. All Rights Reserved.
36
It’s the duty of the artist to consult with, advise, and explain to the
customer the procedures and effects of tattooing. Taking the time
for in-depth consultation helps the customer greatly toward making
a decision. Ever since the start of my career I have tried, as far as
possible, to allay any fears or doubts before I start working on a
customer’s body.
Dealing with first-timers can often be the difficult, so I make it a
policy to deal with these customers with care. I chat with them and
try to make them comfortable. I strive to make the atmosphere in
the studio warm and homey to reduce any nervousness or tension.
To make sure they really want to continue with the procedure, I give
them time to relax. If any doubts they have about each and
everything related to the process exist, I try to address them and
even discuss irrelevant things, as well – anything to set them at
ease. Customers getting a tattoo for the first time usually fear the
pain most, so I try to reduce their fear by an honest explanation.
Always advise a first-timer to get a small design for a first tattoo,
and if comfortable with it, think about getting bigger ones. Let them
select a tattoo and then tell them about its significance, if there is
any. Offer advice to them on the most suitable areas to have the
tattoo applied. Then show them the instruments of tattooing and
explain their functions.
The first-time customer is usually anxious about pain, so explain to
them the function of the tattoo machine, how it works with a cluster
of needles that rapidly pierce the skin, the rhythmic shaking felt
during the procedure, etc. Knowledge often helps alleviate fear and
anxiety, but sometimes this might make them even more nervous.
© Dayne Herren, Ultimate-Tattoo-Guide.com. All Rights Reserved.
37
Explaining how the body releases endorphins, which reduces pain,
often helps to calm them.
Go on to explain the hygiene factor and reassure them of the safety
measures taken while you are tattooing. Show them the studio, the
equipment, and familiarize them with the entire sterilization
procedure. This makes them aware of all the health and safety
precautions you have adopted and goes a long way toward setting
their minds at ease – which, in turn, makes your job easier and
more enjoyable.
Once you start the actual tattooing process, joke with the customer
and make light conversation to distract him or her from focusing on
any blood or pain that might occur. Maintain eye contact (when
you’re not watching what you’re doing with the tattoo gun!) with the
customer. Playing soothing music and being calm yourself works
well to keep customers relaxed. Once the tattoo has been made,
brief your customer about the aftercare, hand out the written
instructions, and answer any questions.
Taking these extra steps when dealing with new customer’s results
in them coming back again and again. And don’t forget to respect
your old customers as well for being the bread and butter of your
business! The bottom line: Treat ALL your customers like you’d
want to be treated!

© Dayne Herren, Ultimate-Tattoo-Guide.com. All Rights Reserved.
38
Skin 101: Preparation and Needle Penetration
To begin, clean the part of the skin to be tattooed with alcohol.
Then, remove the hair with a new, disposable razor. Clean the area
a second time with the alcohol to ensure smoothness as well as an
extra hygienic measure. Many tattoo artists use a machine called a
“thermal fax” to create a stencil, which is then transferred onto the
skin. Soap, water, or sometimes stick deodorant is then used to
make the design dark and clear when transferring the stenciled
design onto the skin. Now it’s up to the tattoo artist – you! – to use
the needle effectively so that it goes as deeply into the dermal layer
of the skin as required to make clean, clear lines.
© Dayne Herren, Ultimate-Tattoo-Guide.com. All Rights Reserved.
39
Tattoo Positioning
The basic aim of the tattoo artist is to create a customer-selected
tattoo that stays for the customer’s entire lifetime. The work of the
tattoo machine is to make sure the tattoo is permanent. The
machine moves up and down like in a sewing machine and in the
process, carries ink into your skin.
Tattooing on sensitive body parts, like the ankle, is more painful
than on the arms or chest areas because skin with little or no fat
padding right above bones tends to be more sensitive. When
tattooing in such an area, to avoid pain for your customer, don’t
allow deeper penetration of the needles than absolutely necessary.
You must use some good judgment when tattooing such areas
because you want the tattoo to be good, but you also don’t want
your customer screaming with pain and/or bleeding excessively.
Take this into consideration before the actual tattooing begins and
discuss these pros and cons with your customer. Another type of
tattoo might be selected with less detail, or the customer may opt to
place the chosen design on another, “meatier” part of the body.
Stencil Making and Position Stencils are basically your “outline” or “map” for your tattoo job. If
you are a true artist and have lots of talent, you may be able to skip
a stencil all together and draw directly onto the skin. The best type
of pen for this would be a very fine point felt pen or a skin scribe
pen.
© Dayne Herren, Ultimate-Tattoo-Guide.com. All Rights Reserved.
40
If you are like most, you will want to use a stencil first.
Step 1: Making the Stencil
You can either create your own stencil on paper and perfect it or
you can buy pre-made stencils. The pre-made stencils are called
“flash” and you can find them for free on the Internet. Just do a
search for “flash” and “tattoo” and you should come up with several
sources.
When making your stencil, make one copy a line version only in
black and white. And also make one copy in full color with the solid
outlines in black. You can make these by hand or if you are good
with computer art programs, you can also use those.
Once you have both copies of your stencil complete. It is time to
transfer your idea over to the skin…
Step 2: Stencil Application
The first step in stencil application is to put your image on tracing
paper. Since tracing paper is sleek and plastic like, the ink will not
be absorbed into the paper, but it will stay on the surface. Next will
be to moisten the skin and slowly apply the tracing paper onto the
skin with the ink facing down. At this point, the ink will adhere to
the moistened skin. I might also note, instead of ink here, you can
use a heavy lead to transfer over.
© Dayne Herren, Ultimate-Tattoo-Guide.com. All Rights Reserved.
41
Experiment with the following to moisten the area:
• Alcohol (methylated spirits or vodka)
• Roll-On Deodorant
• “Speed Stick” Deodorant
• Liquid soap or dish washing detergent (mix with 20-30%
alcohol)
Next, slowly remove the paper from the skin. You should notice a
nice outline left on the skin that is transferred. Be sure to let this
dry on the skin before continuing.
Be sure you use high quality tracing paper and quality ink or lead
pencil for this. You will soon discover what works best for you.
Once you do this a few times, you will figure out fairly quickly how
to transfer your design smoothly.
Step 3: Verify Position of Stencil Design
Once you have transferred your design onto your customer, make
sure your customer is satisfied with the exact location and
placement. If not, adjust and do it again. Make sure that the client
is satisfied with the placement before beginning the actual tattoo
work.
© Dayne Herren, Ultimate-Tattoo-Guide.com. All Rights Reserved.
42
Position of the Customer and Tattooist It is best that BOTH you and the customer can be positioned very
comfortably. Both of you will need to realize that you will be in this
position for a little while. It is key that the tattooist have enough “elbow
room” to successful make the motions to create the tattoo.
It is advisable to take a break throughout and let the customer move or
adjusts their position if necessary.
Step-by-Step Methods for Safe Tattooing
Tattooing is a very hip, unconventional, and cool profession, but it is
not without risk. If strict sanitary procedures are not followed
appropriately, it can lead to dangerous consequences. The U.S.
Environmental Protection Agency (EPA) issues certain rules, known
as Universal Precautions, as part of its Blood-borne Pathogens
Rule. These rules should be stringently applied as safety
precautions prior to tattooing.
Not just for tattoo shops, these rules are for any health service
setting in which there is a risk of exposure to bodily fluids and/or
blood. Ensure safety by being vigilant that you or any tattoo artist
working for you follows these guidelines:
© Dayne Herren, Ultimate-Tattoo-Guide.com. All Rights Reserved.
43
• Before, during, and after a procedure, carefully check gloves
regularly for tiny pinholes or tears since ointment can erode
latex.
• Do not touch eyes, mouth, ears, or nose during tattooing.
• Do not smoke while wearing gloves.
• Pour ink in advance. If necessary to add more color, use a clean
tissue to open the pigment bottle, taking care not to allow contact
between the nozzle and contaminated trays.
• When cleaning tubes for color changes, rinse carefully and pat
dry – don’t blow excess water from the tube with your mouth.
• Spray liquid soap into a tissue and gently wipe away excess
fluids from tattooed skin – don’t spray directly onto bleeding area
because blood can become aerosolized and potentially inhaled.
• If a pen is used for freehand drawing on the skin, give it to the
customer when completed (the pen should be medical grade and
sterile) or dispose of properly.
• Bandage client with a packaged, sterile, non-stick-variety
bandage; use gauze to secure bandage and tape it to the
tattooed area using hypoallergenic products.
• Remove and properly dispose of gloves and wash hands with
germicidal soap.
All professional tattoo studios possess a sterile processing area to
clean materials used for tattooing. This is usually divided into four
areas: decontamination, assembly and packaging, sterile
processing, and sterile storage. Here all tools are decontaminated,
put together, and packaged for sterilization process, which is done
in two stages: disinfection and sterilization.
© Dayne Herren, Ultimate-Tattoo-Guide.com. All Rights Reserved.
44
A little knowledge is dangerous, but no knowledge is even more dangerous. This attractive art form can turn seriously detrimental if proper sanitary measures are not taken.
Take Care of Your Hands!
As a tattooist, your hands are everything, because they are your
source of income. Your hands are also a primary source for
infection, so always be aware of this and make it a constant practice
to ensure your hands are in good shape and free from germs.
Any cut or scratch can lead to disease. Avoid tattooing with any
lesions, dermatitis, or an allergic reaction on your hands until the
condition has cleared. And if you are allergic to latex gloves, don’t
take up tattooing as a profession unless a cure comes along.
Wash your hands properly even after using gloves, as the gloves
may carry germs inside them. Use a fresh pair on dry hands every
time. Customers may inspect you to check for any cuts, wounds,
sores, abrasions, or long nails and ask you to use a bandage or
© Dayne Herren, Ultimate-Tattoo-Guide.com. All Rights Reserved.
45
some other type of sterile cover on top of your gloves for extra
protection. Don’t be offended! This is a safety measure – for you
and the customer. Coverings may impede your drawing ability with
the tattoo machine, however, so the best idea would be to consider
forgoing work until your hands are completely healed.
Proper hand washing includes removing watches, rings, and other
jewelry that might contain bacteria and always use a nailbrush to
clean beneath fingernails. As mentioned earlier, always check for
any small hole or other defect in your gloves before and during use.
Time to Tattoo! Now that the customer is in place and the stencil has been correctly
applied to the skin, it is time to tattoo! You have come a long ways!
Now all of your patience and hard work is going to pay off!
Put simply, tattooing is done in major steps. 1. Outlining
2. Shading The first step is the basic outline of the tattoo. This can be
performed by using one to five needles attached to the needle bar.
Shading uses at least four needles or more grouped in a circle, flat,
or square arrangement (see illustration earlier in book).
© Dayne Herren, Ultimate-Tattoo-Guide.com. All Rights Reserved.
46
Setting Up The Machine and Loading
1. Open tattooing kit and place the top tray containing the
controllers securely on the workbench.
2. Remove tattoo gun from box and pull the two rubber bands up
toward the top of unit. Place gun on rubberized holding rack.
3. Select appropriate needle size (according to your tattoo design).
4. Carefully open needle package from the bottom, leaving needle
guard on.
5. Remove needle tube from the tattoo gun and gently slide needle
(with guard still attached) into the needle tube. With the front of
tattoo gun facing you, gently slide needle tube (with needle) into
tattoo gun body and attach the round end of needle onto the
rubber grommet with the open end of needle loop to your left.
Slide needle tube down until 1mm of the needle is protruding
from the end. Hand tighten wing nut until just snug.
6. Place the two rubber bands low around the needle and gun
body. This helps to hold the needle in place. Use only the
rubber bands provided with the kit. Set tattoo gun onto holding
rack.
7. Agitate tattoo ink vial 42 times. Fill paper cup with tattoo ink
using only what you’ll need for that session. Do not pour
contents back into stock vial, as this may result in
contamination. Place paper cup into plastic holder cup and
secure to holding rack. Keep power unit dry and away from
liquids.
8. Priming the needle: With the gun off, immerse tube tip into
paper cup taking care not to hit the sides or bottom of plastic
holder cup, as this will damage needle tips. Remove from ink
and turn on for a few seconds. Repeat this procedure three
times.
© Dayne Herren, Ultimate-Tattoo-Guide.com. All Rights Reserved.
47
9. Adjust speed according to your need and tattoo design. Speeds
of 100 to 120 Hz are common for shaders, and speeds as high
as 150 Hz are used for liners.
10. Always hold the tattoo gun perpendicular to area being
tattooed.
Other items that prove useful on or near the work area are a strong
light, reference pictures or photos, an ultrasonic cleaner, and a
stencil of the artwork to be applied.
Traditional, coil-type tattoo machines are powerful; they inject a
great amount of pigment per second and can create a finished work
unmatched in lasting ability. But because of this power, they also
carry the potential for problems, so always operate with care.
Needles can also be purchased from many sources or, as
mentioned earlier, you can make them yourself. Needles are affixed
inside tubing attached to the machine by a screw. This is held in
place at the back of the machine on a nipple-type apparatus.
Rubber bands, crossed from the needle to the coil base, are used
to create appropriate tension on the needle. Available power packs
for these machines vary from small, lightweight portables to larger,
digital units.
Ok, back to the tattoo procedure…
When doing the initial outlining, the needle should go to a depth of
about 1/16th of an inch. Shading will go less, about 1/64th of an
inch. Most pain is felt during the outlining stage, not the shading
stage.

© Dayne Herren, Ultimate-Tattoo-Guide.com. All Rights Reserved.
48
When you are doing the tattoo, you will notice that your customers
will have variations in skin “thickness” on different parts of their
body. This can vary quite a bit from person to person. So you may
have to adjust the levels according to the person’s skin. You will
also need to make adjustments when you are over an area of bone.
Tip: Use petroleum jelly as a light covering to help make smooth movements across the skin. When working with the skin, be sure to hold it taut as to make a
tight surface. This will help for clean penetration and straighter
lines. Be sure to hold the needle at a 45% position as seen in the
illustration below:
Carefully move the needle(s) until they are pushing into the skin at
the proper depth and level. Move smoothly yet firm as you begin to
make the lines. DO NOT hold the machine still with the needles contacting the skin. IF you do, this will cause a blob of ink and
will disrupt the evenness of the line.
Once you have completed a line, take a moment to wipe away any
blood or excess ink that may have splattered. You can use a
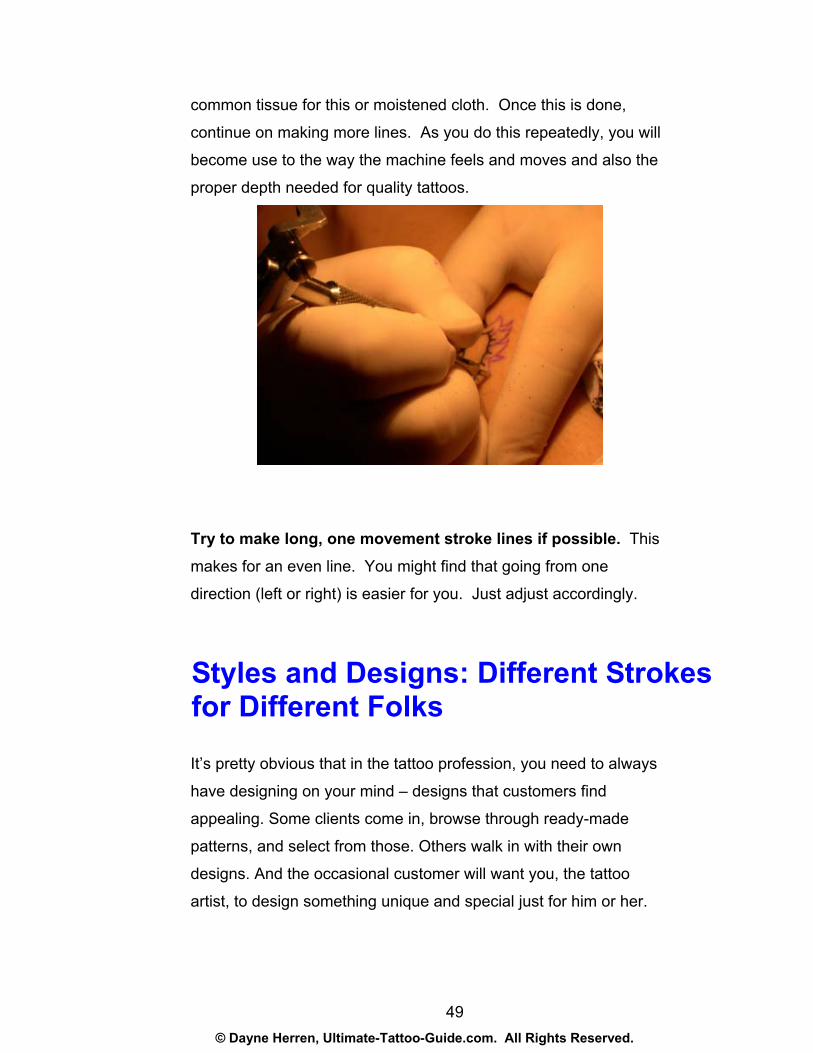
© Dayne Herren, Ultimate-Tattoo-Guide.com. All Rights Reserved.
49
common tissue for this or moistened cloth. Once this is done,
continue on making more lines. As you do this repeatedly, you will
become use to the way the machine feels and moves and also the
proper depth needed for quality tattoos.
Try to make long, one movement stroke lines if possible. This
makes for an even line. You might find that going from one
direction (left or right) is easier for you. Just adjust accordingly.
Styles and Designs: Different Strokes for Different Folks
It’s pretty obvious that in the tattoo profession, you need to always
have designing on your mind – designs that customers find
appealing. Some clients come in, browse through ready-made
patterns, and select from those. Others walk in with their own
designs. And the occasional customer will want you, the tattoo
artist, to design something unique and special just for him or her.

© Dayne Herren, Ultimate-Tattoo-Guide.com. All Rights Reserved.
50
By setting your imagination free, your customers will wear the best designs in town.
As a tattoo artist, part of your job – and part of the fun of the job – is
to stay abreast of current trends and styles. Maintain magazine
subscriptions that feature the latest in tattoos designs and surf the
Internet to keep tuned in to what’s hot and what’s not. Some people
prefer fantasy, while others prefer traditional or cultural tattoos.
Keep a wide selection of all styles – from traditional to tribal – to
accommodate most everyone. And keep drawing in that sketch
pad. You never know what brilliant creation of your own a
customers might want. Free your imagination – after all, you are an
artist!
Dragons
The dragon tattoo reigns as the most popular design in the world
and has for many years. In the 1970s, just after the hippie
movement, it was very common to find an image of a dragon sitting
on someone’s back along with its accompanying bulky head,
stretched neck, wide shoulders, broad legs, and powerful tail.
The origin of the dragon design can be traced to early Chinese
history as far back as 8,000 years ago. People in China were in
awe of this creature and held such beliefs as the possibility of a
twisting cloud in the sky materializing into a dragon. While for an
American, the dragon symbolizes rebellion, of opposing tradition.
In Chinese society, dragons are thought to give inner strength.
They bring charm to one’s life by helping overcome things such as
© Dayne Herren, Ultimate-Tattoo-Guide.com. All Rights Reserved.
51
divorce by reinstating families and are even considered to bring
good luck when starting a new profession.
The dragon has been an attraction in man’s life for ages. People
denote qualities of valor, boldness, and love to the dragon. While
dragons are often symbolically heroic, some people prefer to
characterize them as Godzilla-like monsters, devastating cities and
slaying the innocent.
I, personally, have a special preference for dragons. In fact, I love
them. My customers can ask for any kind of dragon, and I am able
to fulfill their requests. Some want it to be neither too ferocious nor
too placid. They always want it to be different from any others. So,
once you capture the correct of image of what the customer wants,
it’s time to start working. In the next section, I will take you through
the various steps of tattooing a dragon.
Start first with the cleaning. Use chafing antigen to clean the portion
of the body where the customer wants the tattoo drawn. To be on
the safe side, always make a rough sketch of the dragon on paper
and show it to the customer to confirm the design he or she wants.
If the customer approves the design, the next step is to draw the
outline of that design using a paint pen. You can use a golden
color, as it is easily washed away later and doesn’t remain on the
final image.
If you are new to this business, or just starting your tattooing
career, use large, distinct outlines and stay within the lines as much
as possible. Avoid tattooing upside down; it’s too easy to make
mistakes. When working on the tail, be careful to put the bottoms of
© Dayne Herren, Ultimate-Tattoo-Guide.com. All Rights Reserved.
52
any letters or numbers toward the outside edge of the figure.
Use lighter colors with body paints when coloring the tattoo, because a thin layer of a darker shade will
be more visible. But if you have already applied a darker color and want to lighten it, build up a thick
layer of light-colored paint to make it opaque.
Making scales requires some practice first on paper. So don’t hurry.
Take your time and prepare yourself for this step. Once the scales
are defined, the next step is free-hand shading. Paint the claws with
a mix of yellow and henna brown, and shade with a little red and
black.
By this time, most of your background needlework and coloring is
done, so now you can start outlining the details, emphasizing the
two main areas of the feet and the teeth.
After completing the artwork, the next thing is to bandage the fresh
tattoo, leaving the bandage on for a minimum of four hours. If the
tattoo is applied late in the evening, then it is better to leave it
bandaged overnight. At this point, your work is almost done. Now
you just have to wash the tattoo after removing the bandage. Don’t
use cloths or sponges; just hand wash using warm water and soap,
and allow to air dry. That’s all there is to it!
Use some alcohol-based lotion, if necessary, on the tattooed skin to
reduce pain. There is no need to bandage it again. The tattoo now
needs some exposure to the sun, but only when it has fully healed.
Because of its freshness, exposure to the sun before it has
completely healed can result in fading of the ink, so apply a strong
sunscreen to protect it. Tattoos normally take 7-10 days to heal.
© Dayne Herren, Ultimate-Tattoo-Guide.com. All Rights Reserved.
53
Butterflies
Butterfly tattoos are next popular on the list of trendy motifs. They
are eye-catching and make for a very good body tattoo collection.
The butterfly is best suited as a tattoo on cheeks, shoulders, ankles
and necklines. The fanciful design and the use of variously colored
inks make this design extremely graceful.
Did you know? “Charlie’s Angels” actress Drew Barrymore has six butterfly tattoos, one right next to her belly button.
I wanted a butterfly design for own body that no one had ever used
before. So I had a good friend of mine, who draws a great butterfly,
make a unique butterfly design for me. She drew an awesome
design, and I loved it. This was going to be my next tattoo. Now it
was just a matter of deciding exactly where I wanted it on my body.
I decided to get it on the back of my neck.
I took the design and looked at it for the next few days and kept
saying to myself, "Ok, I'm getting this. This is perfect for me.” So
after the paperwork was all filled out, I walked into the studio with
shaking hands and sweaty palms, and sat down in the chair with
my head down, waiting for the pain to begin. The guy who was
going to tattoo me started talking, and I can't even remember what
he was saying before he started tattooing me. The next thing I hear
is "Okay, here we go," and then all I heard was the gentle buzzing
of the tattoo gun making its design on the back of my neck.

© Dayne Herren, Ultimate-Tattoo-Guide.com. All Rights Reserved.
54
I now had a beautiful, dark purple, tribal butterfly on the back of my
neck, and I was pleased. I stood looking at it in the mirror for about
five minutes and kept saying, "Wow, it looks great. I love it. I love
it!" And that was it. I tipped the tattoo artist, who had been a really
nice guy, and went home with the back of my neck swollen – but
beautiful.
Floral Designs
Another form of tattoos common among women is the floral tattoo,
a design extremely popular with teenagers. In the Middle East,
these tattoos are quite popular, with the paintings and fabrics of
that culture inspiring the floral patterns. There, these tattoos
symbolize style, sophistication, sentiment, and even obsession. But
unfortunately, there are no definitive samples of these designs to
replicate. The only way to duplicate them would be to travel to the
Middle East, photograph them (if allowed to do so), and bring them
back to the U.S.
Women are the main customers of floral tattoos. While some want
large tattoos on their ankles and lower backs, others prefer small
tattoos on the inner portion of the wrist. Now, with the progressive
change in society’s perception, and tattoos no longer considered
“low class,” women are getting larger and more prominent floral
tattoos.
© Dayne Herren, Ultimate-Tattoo-Guide.com. All Rights Reserved.
55
Stripes and Women: A Cultural History
There does not seem to have been any widely distributed tattoo
design among women, although chin stripes (tamlughun) have
been more commonly found than any other, and those among
Eskimo women of the 19th century. Stripes served multiple
purposes in social contexts, most notably, those tattooed on the
chin. These were part of a rite of social maturity, a signal to men
that a woman had reached puberty.
It was believed that a girl who smiled and laughed too much would
cause the lines to spread and get thick. Therefore, a girl with a full
set of stripes on the chin, all of them thin, was considered to be a
good prospect as a wife, for she was clearly serious and
hardworking.
Before 1850, the women sometimes had a striped type of tattoo
that ran from their throat, to between their breasts, to mid-
abdomen. Some also had vertical striped or banded tattoos on the
abdomen, breasts, neck, and on their legs from the thighs down.
This was done when the girls were very young, under 10 years old,
but before reaching puberty. These tattoos marked the social status
of their families.
© Dayne Herren, Ultimate-Tattoo-Guide.com. All Rights Reserved.
56
Arms, Ankles, and Waistline Bands
Tattoo bands are most commonly placed around the ankle, arm, or
waistline. These bands, in many societies, have been a sign of
beauty or demanded by social custom, and most cultures have
considered it more important for a man to be tattooed in this way
than for a woman. Most banded designs requested in this day and
age, and in our Western culture are approximately palm-sized or
smaller in width for an upper arm, bicep, or forearm. However,
people do request much larger, more ambitious banded designs,
which are becoming not at all uncommon. There are some people
who have either one or both arms done totally in one, solid black
band from shoulder to wrist – just to be different.
Tattoos on the ankle can be inconspicuous or not, depending on
what type of clothing is worn. The ankle is a very aesthetically
appealing spot, though most people who have tattoos in that
location complain of the pain experienced when having the tattoo
applied.
The ankle is a painful place for tattooing because there is skin and bone and very little flesh.
I am not personally inclined to having tattoos on my arms, but the
idea of a band of stars around my ankle seemed the perfect place.
Various shapes and forms come into play in band designs. Animals
like the pig, monkey, tiger, deer, cat, fish, peacock, dove, spider,
crow, etc., are often incorporated into the band. Stylized vines,
leaves, and flowers, known as “kanote” designs, are also nicely
integrated into tattoo bands.

© Dayne Herren, Ultimate-Tattoo-Guide.com. All Rights Reserved.
57
Show Your American Pride with a Patriotic Tattoo
When it comes to tattoos, mermaids and the word “Mother" are out.
These days, people want something more original and less
hackneyed. Millions of Americans are wearing their patriotism on
their sleeves these days, and many are wearing it just beneath – on
their skin.
One of my friends got a tattoo to remind him of his old Kentucky
home. "That is where I grew up, where my family's at," he says
proudly when asked about the tattoo. Kentuckians are just one
group in the U.S. who have a serious love for their home state and
are eager to display it. Another Kentucky lover I know had his left
forearm tattooed as a way of paying full-on homage to Louisville.
On the inside, he has a graphically designed "Louisville" tattoo. On
the outside rests a “Louisville Slugger” emblem.
Everyone is getting patriotic tattoos nowadays. It’s hard to buy an
American flag now (because they are selling out), but you can get
one that's forever – in ink. And no one can take it from you. You
can't lose it. It's not going to break. You take it to your grave.
Flags and eagles predominate in patriotic tattoos, but people keep dreaming up
variations on the theme. Tattoos are all about displaying your individuality.
© Dayne Herren, Ultimate-Tattoo-Guide.com. All Rights Reserved.
58
Getting a tattoo sometimes means that you can't give blood,
another popular patriotic move of the moment, so you may want to
give this some serious thought. Many blood banks, including that of
the American Red Cross, refuse tattooed potential donors because
of the fear of disease, particularly Hepatitis C and the HIV virus,
though there are those who have no such regulations.
Flags and eagles predominate, but people keep dreaming up
variations on the theme. Tattoos are about displaying your
individuality. Customers come up with their own imaginative,
patriotic designs colored in red, flesh, and blue. Tattoos, especially
patriotic designs, have enjoyed a tremendous resurgence in recent
years. Once associated only with sailors, prisoners, and bikers, all
tattoos, including those with patriotic themes, have now become
part of the youth culture and are reaching acceptance status with
adults, as well.
© Dayne Herren, Ultimate-Tattoo-Guide.com. All Rights Reserved.
59
Tattooing and Pain Levels
When you begin to tattoo, you will notice that pain levels and tolerance will
vary from person to person. Be sure to put them at ease and make sure
you aren’t going to deep in the skin. Sometimes pain may cause one to
faint, get dizzy, or even vomit. If you notice signs of this, be sure to stay in
touch with the customer and ask them how they are doing. Also, take
breaks if necessary. This can consist of getting a drink, or stepping
outside for a breath of fresh air.
Taking a break will be beneficial for not only your customer, but also for
you as the tattoo artist.
Aftercare
Your tattoo is almost complete. You have transferred the exact
design, as asked by the customer, and it is perfect. But there is still
an important detail of the tattooing process that cannot be
overlooked – the process of aftercare. Until and unless the tattoo
heals properly, some anxiety will remain.
If good aftercare is not taken, the tattoo may turn out looking
marred or damaged. There may even be infection with scarring as a
result. So diligent aftercare must be taken for a tattoo to look good
for the long term.
Suggested Tattoo Aftercare Process: If good attention and aftercare are taken, the tattoo will look great
for a very long time, probably the lifetime of the customer. The
following steps required for proper healing are simple, yet critically
© Dayne Herren, Ultimate-Tattoo-Guide.com. All Rights Reserved.
60
important. You should make sure every customer has a written
copy of these aftercare instructions to take home.
FOR THE FIRST 1 TO 12 HOURS: Keep the protective covering
over your tattoo. This protective covering will prevent bacteria from
coming in contact with your tattoo. Leave bandage on for at least 4
hours, but not more than 12.
AFTER 12 HOURS: Remove the bandage with clean hands and
gently wash the tattoo with warm water and a mild soap. Do not use
a washcloth. Gently pat the tattoo dry.
FOR THE FIRST 7 DAYS: Keep your tattoo clean with a mild soap
and warm water. Do not soak your tattoo. When showering, wash
thoroughly but gently. Avoid long exposures with water. Your new
tattoo may become splotchy if over-cleaned. Do not use ointments
or creams at this time. Absolutely NO hot-tub use or baths – shower
only.
AFTER THE 7TH DAY: You may use small amounts of Lubriderm or
another unscented lotion to moisturize your tattoo. Lotion may help
minimize the itching. Do NOT scratch your tattoo. Too much lotion
may prevent your tattoo from healing properly. Apply a small
amount to the tattoo and gently work it into the skin. If the tattoo is
shiny or oily, you may be using too much lotion.
Things to Remember! You may notice a few changes in your tattoo during the healing
period, but don’t be concerned as these soon fade. Remember not
to overdo anything to avoid damaging your new body art. Apply
required amount of ointment only and adhere to the directions. If
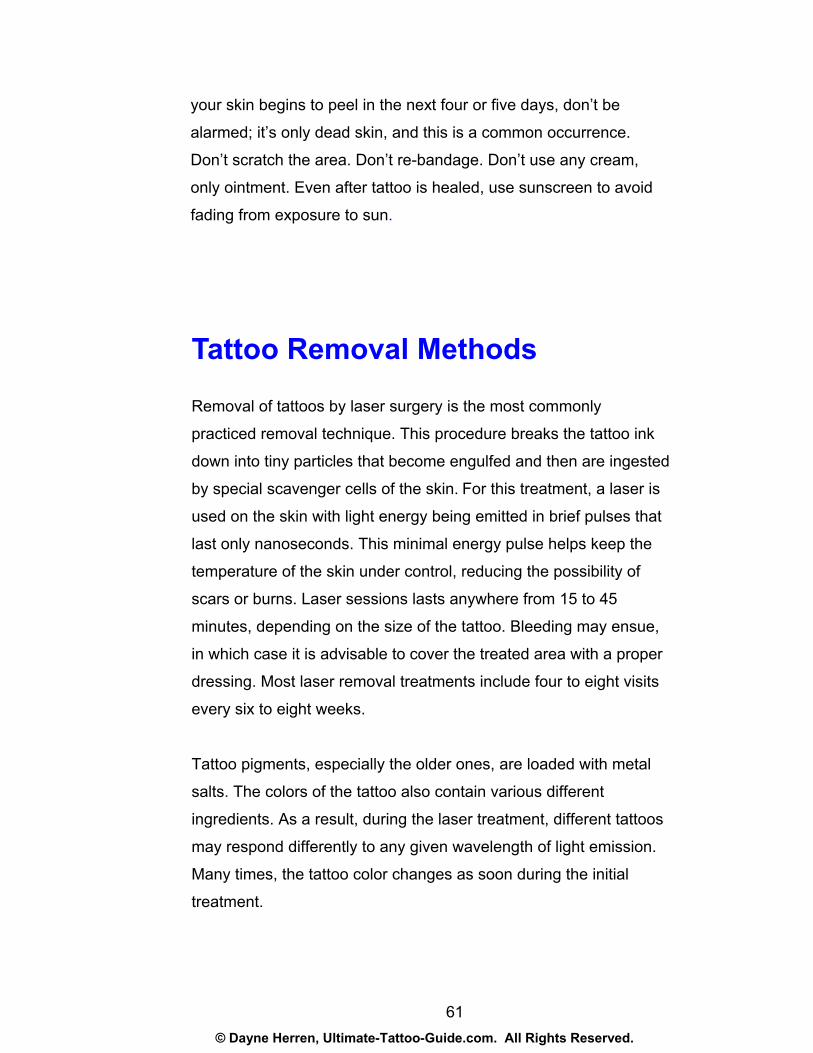
© Dayne Herren, Ultimate-Tattoo-Guide.com. All Rights Reserved.
61
your skin begins to peel in the next four or five days, don’t be
alarmed; it’s only dead skin, and this is a common occurrence.
Don’t scratch the area. Don’t re-bandage. Don’t use any cream,
only ointment. Even after tattoo is healed, use sunscreen to avoid
fading from exposure to sun.
Tattoo Removal Methods
Removal of tattoos by laser surgery is the most commonly
practiced removal technique. This procedure breaks the tattoo ink
down into tiny particles that become engulfed and then are ingested
by special scavenger cells of the skin. For this treatment, a laser is
used on the skin with light energy being emitted in brief pulses that
last only nanoseconds. This minimal energy pulse helps keep the
temperature of the skin under control, reducing the possibility of
scars or burns. Laser sessions lasts anywhere from 15 to 45
minutes, depending on the size of the tattoo. Bleeding may ensue,
in which case it is advisable to cover the treated area with a proper
dressing. Most laser removal treatments include four to eight visits
every six to eight weeks.
Tattoo pigments, especially the older ones, are loaded with metal
salts. The colors of the tattoo also contain various different
ingredients. As a result, during the laser treatment, different tattoos
may respond differently to any given wavelength of light emission.
Many times, the tattoo color changes as soon during the initial
treatment.
© Dayne Herren, Ultimate-Tattoo-Guide.com. All Rights Reserved.
62
There has been a lot of research to determine the most suitable
laser wavelength that can remove tattoo ink without damaging the
skin’s natural pigment. Full,100 percent removal is impossible, as
traces can always be detected. The most successful removal
depends highly upon the color of the tattoo. If the tattoo is
multicolored and complex, the chances to get it almost fully
removed from the body become less. The “ruby” laser has proven
to be the most effective laser treatment, working best on removing
bluish-black and green tattoos, but the same shows less results
with red, yellow, and orange colors. A laser called the “Nd:YAG”
laser is often used when the tattoo color is bluish-black or red, but
green colors do not respond well to this type laser treatment.
Here are some facts regarding laser removal of tattoos, which you
may want to keep in mind before you give or get that skull dripping
blood from its mouth and eyes as a tattoo:
• Multicolored professional tattoos, especially on the arms and
legs, tend to respond poorly to laser treatments, and most will
need 10 or more treatment sessions for nearly complete (about
95%) removal, regardless of which laser(s) is used.
• About half of all tattoos professionally applied will be only 50%
cleared after 10 treatments, especially those on the extremities.
• Amateur tattoos usually composed of carbon compounds (pencil
lead, ashes, India ink, etc.) can commonly be cleared almost
completely after four to six treatments.

© Dayne Herren, Ultimate-Tattoo-Guide.com. All Rights Reserved.
63
About the costs for laser tattoo removal: The size of the tattoo decides the fees for laser tattoo removal
treatment. Many laser centers charge half of the initial fee up front,
if the treatment is long term. The total cost of tattoo removal cannot
be predicted exactly because the number of treatments necessary
for removal varies. Generally, black or blue amateur tattoos require
less treatment as compared to the professional multicolored
tattoos.
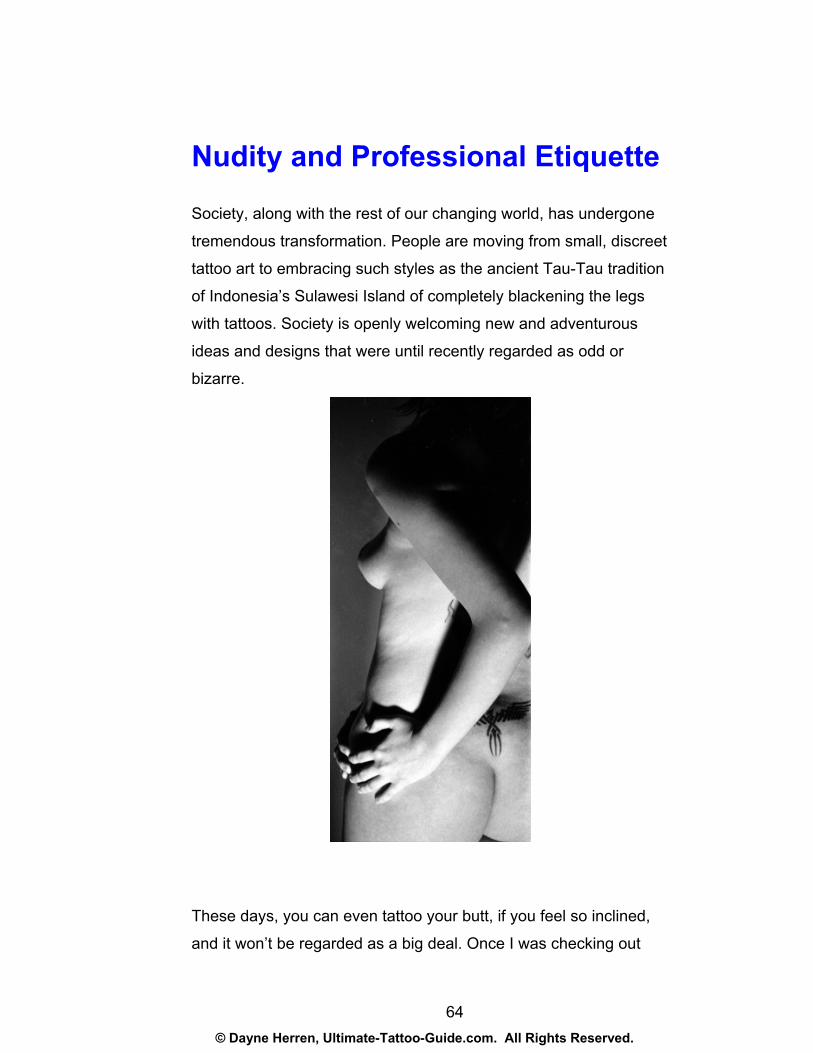
© Dayne Herren, Ultimate-Tattoo-Guide.com. All Rights Reserved.
64
Nudity and Professional Etiquette
Society, along with the rest of our changing world, has undergone
tremendous transformation. People are moving from small, discreet
tattoo art to embracing such styles as the ancient Tau-Tau tradition
of Indonesia’s Sulawesi Island of completely blackening the legs
with tattoos. Society is openly welcoming new and adventurous
ideas and designs that were until recently regarded as odd or
bizarre.
These days, you can even tattoo your butt, if you feel so inclined,
and it won’t be regarded as a big deal. Once I was checking out
© Dayne Herren, Ultimate-Tattoo-Guide.com. All Rights Reserved.
65
some primitive pictures from a local library and found a nude
picture of a woman with Celtic tattoo drawn in spherical waves
down her entire body. She looked stunning in the black inked
design. I considered it a perfect picture of body art. Credit must be
given to the artist who tattooed the nude body of this lady – to be
able to have done such a magnificent job without becoming
diverted by the loveliness of his subject. This is called
professionalism, which despite rumors to the contrary, even a tattoo
artist must maintain.
Tattooing a naked body is not non-physical. In fact, it involves
intimate physical contact of the artist’s hands with the body of the
customer. So it involves erotic movement by nature of its actions.
But this is a touchy (pardon the pun!) and controversial topic. And
whenever such controversies appear, most tattooists – for a variety
of reasons – choose to simply ignore them. According to these
professionals, this is an art and is performed without emotional
attachment – which is a very prudent way to work.
A lady once shared her experience of being tattooed on her breast
and related that she felt at ease the entire time, as the artist was
very professional and treated her with the utmost dignity and
respect. Situations like this may, for some, become problematic
with regard to repressing erotic feelings. The best thing to do is to
think of the skin of a person as just an ordinary canvas while at
work. By simply applying discipline and self-control, you can
maintain the decorum of your profession. Your customers’ safety
and trust are critical aspects of having a successful tattoo business,
and you would be making a foolish mistake to risk losing them. This
attitude may be more important than knowing how to draw, use the

© Dayne Herren, Ultimate-Tattoo-Guide.com. All Rights Reserved.
66
tools and equipment, or learning the business aspects of the tattoo
profession.
You are a professional and must not allow anything to degrade your
reputation. A good professional standing takes time to build and
should be protected above all else. So think of your customer
always as a friend whose skin is your canvas and protect your good
name by leaving all inappropriate thoughts at home.
© Dayne Herren, Ultimate-Tattoo-Guide.com. All Rights Reserved.
67
30 Frequently Asked Questions Answered 1. How can I become a tattoo artist? The best thing to do is to go to your favorite tattoo artist and ask
him or her if they would be willing to take you as a trainee. Go with
your portfolio of artwork and use that, along with your sincerity and
enthusiasm to favorably impress them. But remember: You must be
committed to paying your dues.
2. Is there any age requirement? You must be 18 years or older to become a tattooist.
3. Are there any qualifications required for this job? Yes. You must possess certifications on First Aid, Blood-borne
Pathogens, and CPR, at least six months training under a
professional, and attend all pertinent Red Cross programs every
three years.
4. How do I start? Finding a licensed, professional tattoo artist to apprentice under is
the first and most basic thing required.
5. How important is a tattoo license? Do I really need it? In most states it is mandatory to have a license before opening a
studio, and the public health department will visit your studio once a
year. They will check to make sure your studio possesses an
autoclave for sterilization and that you are following other health
and safety requirements.
© Dayne Herren, Ultimate-Tattoo-Guide.com. All Rights Reserved.
68
6. Is the tattoo permit any indicator of the skill of the artist? No, it isn’t. It is just a means to maintain the minimum state
sanitation standards by the artist and the studio. It has nothing to
with an artist’s ability. A tattoo artist’s reputation is the only indicator
of his or her skill – and it is wise to keep it in good standing.
7. What’s the procedure for applying bold lines? You can use either of two methods: Use a magnum if you are an
experienced tattooist, or you draw double line and color the inside
to get a fat, black line.
8. Are their any tattoo conventions? What are they like? There are lots of tattoo conventions. They range from small, shop-
sponsored, day- or weekend-long affairs to international,
organization-sponsored events lasting for several days.
Most tattoo conventions are held over a weekend, to not interfere
with work, and registrants can participate in contests and
exhibitions. If you don’t want to register but still want to participate
in the exhibition, you can do so on the day the event opens to the
public with a one-day admission fee.
Organizers sometimes arrange for hotels and other facilities to
provide bargains for participants, and in return, gaining the
concessions for hotel and airfare. Official registrants usually have
color-coded, hospital-style wristbands to denote them as being
participants, while those coming for a single day get hand-stamped.
These well-organized conventions are good, but still not in the
same league as an academic conference that includes numerous
workshops, meetings, poster sessions, etc.
© Dayne Herren, Ultimate-Tattoo-Guide.com. All Rights Reserved.
69
9. Can these conventions be attended by anyone? Yes, but be aware that they are not to everyone’s liking. These
conventions can be shocking for the uninitiated. So, if you plan to
visit a convention with your spouse and/or kids, do so only if they
are comfortable with tattoos and tattooing procedures.
10. How can I find out about working at a convention? First, search for an organization that puts together such events,
such as the larger, older tattoo establishments or tattoo equipment
manufacturers. Call them up and talk to them, and ask to send
pictures of your work with a brief description of your background in
this field. Let them know you are wanting to work at a convention.
The rest depends on you and the organizers.
11. Does regular use make tattoo needles dull? No, they don’t get dull. They get sharp due to the repetitive honing
motion from the tattoo machine, as the metal of the sanitary tube
rubs against the needles. As a result, the needles thin and wear
out. Needles in this condition become flat with razor-like edges and
begin cutting the skin instead of piercing small holes, as they
should.
12. Are there any kind of tattoo contests at a convention? There are several contests organized in conventions. Large
conventions typically limit competition to registrants only, while
small conventions welcome everyone to participate. Categories
may include best black and gray, most extraordinary, most ethnic,
best portrait, and best in general. These are judged either by
popular vote or by a panel of reputable, professional tattoo artists.
© Dayne Herren, Ultimate-Tattoo-Guide.com. All Rights Reserved.
70
13. Are there any specific situations when tattooing can’t be done? Yes. Do not tattoo pregnant women, diabetics, people allergic or
sensitive to chemicals, and individuals who have
immunosuppressed diseases.
14. How much time is required for the entire tattooing process? It depends on the size, design, desired color pattern, and pain-
bearing ability of the customer. Simple, small designs often take no
more than five to fifteen minutes. Larger artwork can take much
more time. However, large designs can be applied in different
sessions convenient to the customer. Several designs can be
applied over a period of a time in short sessions.
15. Is getting a tattoo very painful? Not much. It is more irritating than actually painful to the skin. And
certain parts of the body, such as the ankle or anywhere there is not
much “padding” are more sensitive than other areas.
16. How long does it take a tattoo heal? It takes at least two weeks for most tattoos to fully heal. However,
this too, is dependent upon the individual. Some people can take up
to two weeks longer to heal, depending upon their age, fitness, diet,
medicines taken, alcohol consumption, and aftercare of the tattoo.
17. Can drinking alcoholic beverages reduce the pain? No. In fact, tattooing is not done when a person is drunk, because
alcohol thins the blood, possibly leading to more bleeding. It is also
difficult for someone who is drunk to sit still.
© Dayne Herren, Ultimate-Tattoo-Guide.com. All Rights Reserved.
71
18. Is it harmful if my boyfriend/girlfriend kisses my new tattoo? Though beautiful, a new tattoo is still an open wound. It’s similar to
having a cut or a similar injury. So don’t allow kissing on any new
tattoo until it has healed.
19. Which is the best season for getting a tattoo? Any time of the year is all right to get a tattoo with the possible
exception of summer. Swimming, playing sports, and other in-the-
sun activities expose the skin to damage from ultraviolet rays and
may damage your tattoo.
20. Is there any possibility of getting HIV from a tattoo? This is highly improbable and has yet to happen. HIV as a virus is
too fragile to survive room temperature. Appropriate cleaning and
sanitizing practices kill all viruses and bacteria. But tattooing can be
dangerous as far as disease transmission is concerned if proper
hygienic practices are not followed. Proper precautions are a must.
21. How true is the fact that tattoos can cover scars? Some scars can be covered up by a tattoo, depending on
conditions like the age and uniformity of the scar. Highly lifted
surfaces of a scar may not allow the ink to stay. But a new tattoo
can almost always cover up an existing tattoo, provided it is larger
than the original one.
22. How long do the colors last? It depends on the design and the skill of artist as well as the level of
aftercare taken by the customer, particularly that of avoiding sun
exposure.
© Dayne Herren, Ultimate-Tattoo-Guide.com. All Rights Reserved.
72
23. How do I know that the needle used by the artist is new and clean? Ask the artist to do the sterilization process in front of you. Watch
while he or she sterilizes the needles and tubes and puts together
the tattoo machine. Don’t take chances when it comes to your
health.
24. How do I know that a particular tattoo or tattoo artist is good? Well-designed tattoos have flat lines and smooth, firm colors. As for
the artists, reputable tattoo artists have their work available to see
in a portfolio or other means of display. They also are known
throughout the business and referrals can be gotten from other
people whose body art you admire. When you visit a tattoo artist for
the first time, pay attention to how willing he or she is to take the
time to make you comfortable, and how clean the establishment
appears.
25. How and what should I check in their portfolio? There are many things by which you can determine the artistic skills
of the tattooist. For instance, check that lines are cleanly drawn,
straight, and well defined, and if the width of the tattoo is even and if
proportions are accurate. You can also check the color format, too
see if it’s nicely done and so on. Find out the types of people that
visit the shop by looking at the pictures. Does the shop specialize in
designing only a particular type of tattoo or is there a variety?
© Dayne Herren, Ultimate-Tattoo-Guide.com. All Rights Reserved.
73
26. What are glow-in-the-dark inks and fluorescent inks? If there were such things, fluorescent inks would glow under
ultraviolet light while phosphorescent inks would glow after
exposure to light. There are, however, no glow-in-the dark inks or
phosphorescent inks available for tattooing.
27. How do I know if I am allergic to the tattoo colors? Being allergic to tattoo color is unusual, but if you have allergic
reactions to other things, the possibility exists that tattoo color may
cause a reaction. If in doubt, consult your doctor before getting a
tattoo and take proper precautions.
28. Is there a risk of any disease transmission in the tattooing process? When blood and body fluids are involved, there is always a risk
disease transmission. So check out any studio you are considering
getting a tattoo from very carefully and always do business only
with those properly licensed who exhibit proper hygienic conditions.
29. Is it possible for tattoos to change over time? It actually depends upon you and the efforts you take in maintaining
the tattoo. If you regularly stretch the tattooed portion, it may
deteriorate. If you work out regularly, this can lead to stretching of
the muscle and may cause a deformation in the tattoo. Pregnancy
can also cause major change in a tattoo. The lower legs, feet,
shoulders, forearms, and the back of neck are areas of the body
resistant to change in a tattoo.

© Dayne Herren, Ultimate-Tattoo-Guide.com. All Rights Reserved.
74
30. Does lifting heavy weights affect a tattoo? As mentioned above, working out regularly can lead to possible
deformation; however, if you are weightlifting only sporadically and
not repeatedly stretching the muscle over a period of time, no
change should occur.
© Dayne Herren, Ultimate-Tattoo-Guide.com. All Rights Reserved.
75
Tattoo Schools and Learning Centers Tattoo School www.tattoo-school.com 25711 Southfield Rd., Lower Suite Southfield, MI 48075 Employs “neuro-linguistic programming” in a state-of-the-art power-
training method that prepares students for certification and to open
their own business in two short weeks.
American Tattooing Institute www.tatsmart.com 24833 North 36th Avenue Glendale, AZ 85310 A provider of online education and certification for the tattooing
industry. Helps new and existing artists obtain the best and most
affordable education and certification available in the tattooing
industry.
Safe Inking http://safeink.crnasomeday.com Provides a basic overview of universal precautions and disease
prevention for workers in the body art profession.
Joe Kaplan’s Tattoo School www.tattootradeschool.com Offers one- and three-day courses in tattoo artistry from a Mount
Vernon, New York-based studio in business for more than thirty
years.

© Dayne Herren, Ultimate-Tattoo-Guide.com. All Rights Reserved.
76
Suppliers and Vendors
American Tattoo Supply www.americantattoo.com Dermagraphics www.dermagraphics.com Bad Bellies www.badbellies.com 16263 E Lullwater Dr, Panama City Beach, FL 32413 Flashback Tattoo Supply www.flashbacktattoosupply.com 40 Rodick Pl, Bar Harbor, ME 04609 Global Tattoo Supplies (United Kingdom) www.robinsondixon.co.uk Boca Ta-2 www.bocata2.com 1006 NE 4th St, Williston, FL 32696 Spaulding and Rogers www.spaulding-rogers.com Joe Kaplan http://tattooequipment.com Industrial Strength LLC www.isneedles.com 7 Marshall St, Wallingford, CT 06492 Technical Tattoo Supply www.technicaltattoosupply.com Precision Tattoo Supply’s Online Store www.precisiontattoo.com Rare Classic Tattoo Photos www.rareclassictattoophotos.com 5783 Adobe Rd, Ste B, 29 Palms, CA 92277

© Dayne Herren, Ultimate-Tattoo-Guide.com. All Rights Reserved.
77
Tattoo Machines By Col Todd & Son www.tattoomachines.com InkSmith Industries www.inksmith.biz/index.html Unimax Supply Co Inc www.unimaxusa.com 269 Canal St, New York, NY 10013 21st Century Suppliers www.21stcenturytat2.com The Japan Tattoo Institute http://keibunsha.com Dennis Dwyer’s Precision Tattoo Supply www.precisiontattoo.com 2108 S Alvernon Way, Tucson, AZ 85711 Big Daddy’s Tattoo and Piercing Equipment www.bigdaddystat2.com PO Box 96093, Oklahoma City, OK 73143
Eagle I Tattoo Equipment www.eagle1tattoo.com 652 Ajax Dr, Madison Heights, MI 48071 Superior Tattoo Equipment www.superiortattoo.com 6501 N Black Canyon Hwy, Phoenix, AZ 85015 Tat-Kat Tattoo Supply www.tat-kat.com PO Box 213, Springwater, NY 14560
© Dayne Herren, Ultimate-Tattoo-Guide.com. All Rights Reserved.
78
Tattoo Studios
Primal Urge Tattoos www.primalurgetattoos.com 4035 Prince St, Conway, AR 72032 Immortal Ink Tattoo www.immortalink.com 157 1/2 S Washington St, Sonora, CA 95370 Living Ink www.livinginktattoo.com 192-A Larch Rd, Tracy, CA 95376 Gunpoint Tattoo www.808tattoo.com 438-A Uluniu St, Honolulu, HI 96734 A Tiki Tattoo www.atikitattoo.com 2229 Kuhio Ave, Honolulu, HI 96815 Lucky Cat Tattoos www.luckycattattoos.com 902 Route 25A, Miller Place, NY 11764 DV8 Productions www.dv8productions.com 3590 US Hwy 9W, Highland, NY 12528

© Dayne Herren, Ultimate-Tattoo-Guide.com. All Rights Reserved.
79
Books and Periodicals (All available at www.Amazon.com)
The Total Tattoo Book by Amy Krakow Tattooing A to Z: A Guide to Successful Tattooing/ Guide to Sterile Tattooing Techniques by Huck Spaulding The Tattoo Encyclopedia: A Guide to Choosing Your Tattoo by Terisa Green Bodies of Inscription: A Cultural History of the Modern Tattoo Community by Margo Demello Bushido: Legacies of the Japanese Tattoo by Takahiro Kitamura, Katie M. Kitamura American Tattoo by Alan Govenar 500 Tattoo Designs by Henry Ferguson Tribal Tattoo Designs by Maarten Hesselt Van Dinter

© Dayne Herren, Ultimate-Tattoo-Guide.com. All Rights Reserved.
80
Apprenticeship Information www.learnhowtotattoo.com www.expage.com/page/tattooschool
© Dayne Herren, Ultimate-Tattoo-Guide.com. All Rights Reserved.
81
SPECIAL BONUS REPORT!
The Art of the Tattoo:
Shading and Color Blending Technique
Introduction
Tattoos have become ubiquitous on the cultural landscape; once
apparently confined to aboriginal peoples, street gangs and ship crews,
they now seem elevated to a fashion accessory.
No self-respecting athlete would be without his crown of thorns or, in the
new fashion, flames up and down his biceps. And even seemingly
demure housewives sport an ankle-bracelet or a rose on their breasts; the
actors in the recent Lord of the Rings trilogy now sport a “group” tattoo.
And still the numbers rise; tattooing is hot, from the supermodels on the
runway to NFL locker rooms to the traditional market of bikers and sailors,
it seems a large segment of the populace is moving towards embracing
ink and permanent body art. Given its popularity, it is surprising how little
people know about the tattooing process, the options available in
tattooing, including various shading and blending techniques.
The methods for tattooing in the ancient world varied a bit; some early
tribes simply raised bloody welts along the skin, sometimes employing
color on the marking tool, sometimes settling only for the long-term
scarring. This technique is still found among the crocodile worshippers of
New Guinea, whose skin is intentionally scarred, repeatedly, in order to
© Dayne Herren, Ultimate-Tattoo-Guide.com. All Rights Reserved.
82
make a tribesman who has come of age look more like a crocodile. Some
early Arctic groups, ancestors of the Inuit and the Lapp, employed a
pigment made of soot, drawn through the skin with a needle and thread,
and made permanent markings.
Contemporary reasons for tattooing follow the ancient patterns, but never
before have so many people sought body art for the purposes of
beautification. In a sense, tattooing is as much an indication of the moral
as well as the cultural and aesthetic landscape of the early 21st century
C.E.
The Tattoo Machine
Unlike the bone hammers of the ancient world, modern tattooing employs
a needle attached to the end of a hand-tool that moves up and down
anywhere from 50 to 3000 times per minute. In a sense, then, the modern
tattoo machine simply does faster what aboriginal peoples did with the
steady tap-tap-tap of bone or wood on skin.
The tool sounds like a dentist’s drill and often imparts about the same
level of discomfort. Needles are dipped in ink which is sucked in by the
machine’s tubing system. This tubing system and the special tattoo
needles deliver the ink to the dermal layer of the skin.
The tattooing machine is connected to a DC power source of some type.
The portability of the power source allows the artist greater freedom of
movement; after all, people receiving a tattoo run the full gamut of size
and shapes.
The tattoo artist controls the speed at which the needle moves up and
down by means of a foot pedal. The needles inject pigment into the
dermis, penetrating the skin by a millimeter or so, and once on the dermis,
© Dayne Herren, Ultimate-Tattoo-Guide.com. All Rights Reserved.
83
which is considerably more stable than the epidermis, the tattoo will last
forever.
The basic design of the tattoo machine was invented by Thomas Edison
for industrial stamping in 1876. In 1891, Samuel O’Reilly patented a
design for the tube and needle system that allows ink to be placed into the
skin. Charlie Wagner also received a patent for a tattoo machine in 1904,
but his design and O’Reilly’s are clearly indebted to Edison’s stamping
system. Subsequent patents were issued in 1929 to Percy Waters and in
1979 to Carol Nightingale; Waters’ design has remained fairly standard
and Nightingale’s represents an elaboration with many extra design
features, including improved spring mounts and a contact screw that
ultimately leads to a simplification of the delivery system.
Thankfully, the modern tattoo machine allows for more accuracy and
better delivery of pigment than the traditional tools or archaic societies. In
addition, with the many needles available in the art of modern tattoo,
tattoo artists have the ability to perfect the art through special coloring,
blending and shading techniques.
Tattoos By Hand
Despite the advent of the tattoo machine, there are tattoo artists who
create body art by hand, with a single needle colored separately, dipped in
ink, and stabbed repeatedly into the dermis of the customer.
Shading techniques and color blending with hand tattooing requires
considerable patience on the parts of both the tattoo artist and the
customer. Certainly, while this technique requires special and different
skills from those needed by the tattoo artist who uses a tattoo machine, it
still provides amazing results.
© Dayne Herren, Ultimate-Tattoo-Guide.com. All Rights Reserved.
84
This process can take several months for an elaborate tattoo, although
some fans of skin art insist that this technique, while lengthening the
period (and the pain) of the application, yields superior work. All “real”
Japanese tattoo artists employ tattoos by hand.
Outlining
The outline is, perhaps, one of the most important aspects of a tattoo. It is
necessary. The outline provides the boundaries that a tattoo artist must
follow. Without a quality outline, shading and color blending become
infinitely more difficult for the tattoo artist.
Interestingly, a skilled tattoo artist will create a clear and beautiful outline,
making it easier to shade and color the tattoo. Alternatively, an unskilled
tattooist might create a shoddy outline, making it even more difficult for
them to shade and color the tattoo effectively.
Most tattoo artists work from a stencil, which is created by use of a
thermofax. In tattoo parlance, these are called flashes. Most artists cut
the fax and place it directly on the skin to be tattooed to provide a
complete outline for the work. This is similar to tracing or working with a
coloring book.
This is not to downplay the true art and skill required of a tattoo artist,
rather outlining is a necessary aspect of tattooing. Often, after the
coloring and shading fades slightly over the long-term, the tattoo outline
remains clear and this is why an outline of quality is so necessary for the
overall art and integrity of the tattoo.
Tattoo enthusiasts draw a sharp distinction between tattooists, who can
follow an outline, and tattoo artists, who do substantial, intricate, and often
beautiful work. Some customers may opt to allow the tattoo artist to
© Dayne Herren, Ultimate-Tattoo-Guide.com. All Rights Reserved.
85
freehand the tattoo. In either case, work begins by drawing the outline of
the tattoo.
After the outline is drawn, the tattoo artist switches to single-tipped
needles and begins making the tattoo with a thin black ink, working up,
rather than down, the tattoo line. Tattoo artists should always work
upward, not downward. Moving up the tattoo line lessens the chance for a
misstep and ensures that the tattoo artist will keep the client’s skin
stretched throughout the lining process. This technique ensures a clear
outline, which is vital and necessary to further enhance the tattoo with
shading and color.
A tattoo’s outline is the cornerstone of the tattoo. Without it, further
enhancement and artistry become difficult, if not impossible. Certainly, a
small minority of tattoo artists have worked without outlines. This
technique is not recommended. A skilled tattoo artist will always begin
with an outline, even if they boast enough artistry and expertise to create a
successful tattoo without an outline. No tattoo artist should jeopardize
their art or their customers’ satisfaction by proceeding onto shading and
coloring without having first created a clear and decipherable outline.
Truly, the outlining is the first real test of the tattoo artist’s skill. The tattoo
needle must not go in too deeply or too shallowly: Too deep a penetration
can cause excessive pain and bleeding, too shallow leaves unclear lines
after the tattoo heals. Clients who find that they are bleeding excessively
will lose confidence in the process, and the artist, rapidly.
Moreover, no matter how skilled the tattoo artist, the colors in a tattoo will
eventually fade (older tattoos especially show this fading), but the outline
itself remains an enduring testimony to the skill, or lack thereof, of the
artist. It is possible to create a tattoo without the outline, but tattoo artists
© Dayne Herren, Ultimate-Tattoo-Guide.com. All Rights Reserved.
86
are reluctant to do it for the simple reason that the colors will, invariably,
fade over time, whereas the black ink of the outline will remain in place
forever, ensuring the durability and integrity of the image.
The Tattoo Needles
If a tattoo’s integrity is so closely related to the artistry and expertise of the
tattoo artist, so too is it related to the quality and careful choice of needles.
Without quality and carefully chosen needles, a tattoo artist will have
greater difficulty in providing the delicate or not-so-delicate nuances that
are integral to the client’s choice in design.
In addition, certain types of needles are suitable for certain purposes and
certain areas on the body. Just as a doctor, taking into account the
strength of a person’s skin, would not choose to suture a facial wound with
a large needle or suture a knee wound with a delicate needle, so too a
tattoo artist consider the location of a tattoo before choosing his or her
needles.
Needles themselves are very similar to stainless-steel sewing machine
needles. Defined by the function they serve in the tattooing process,
needles can be divided into two categories: outline needles and shading
needles. These are also known as “rounds” and “flats,” respectively.
Outline Needles
Outline needles can come in several configurations, but all are essentially
arranged in a circle on the needle bar. The single-tipped needles are
simply one long needle with two additional needles trimmed off: three-tip
and five-tip needles. The three-tip outline needles form the shape of a
triangle, and the five-tip needles form an “X” pattern, are also used in the
outlining process.
© Dayne Herren, Ultimate-Tattoo-Guide.com. All Rights Reserved.
87
The single-tipped needle allows a bit finer line, for obvious reasons, but
the three and five-tipped needles offer greater width, thickness, and
visibility. Depending on the location and needs of the design, an artist
may choose an even thicker outlining needle. Some configurations allow
for nine or more needle tips, which create very thick and very visible tattoo
outlines. Outline needles are attached to rounded needle bars, and they
are also referred to as “rounds.”
Just as painters carefully choose their brushes, so too should a tattoo
artist select their needles. In choosing a round needle, a tattoo artist
should consider the number of needles actually warranted by the tattoo
design. Certainly, a delicate butterfly does not require a nine-point round,
nor does a thick, tribal arm band warrant a single point round. Yes,
needles are a tattoo artists brush, and a tattoo artist should always
carefully select his or her tools to match both the needs of the design and
the needs of his or her client.
Shading Needles
Unlike rounds, shading needles are usually arranged in a comb-like
formation. Like rounds, shading needles also come in various point
formations which indicate the number of actual needles—or “points”—
used to form the shading needle.
Shading needles usually come in four, six, seven and nine points.
Interestingly, there are also eight point shading needles. Eight-point
shading needles are arranged in a circle, and even larger numbers than
eight points are sometimes used. In tattoo parlance, shading needles can
also be known as “mags” or “magnums.”
© Dayne Herren, Ultimate-Tattoo-Guide.com. All Rights Reserved.
88
More commonly, however, shading needles are referred to as “flats.” Just
as round needles derive their name from the round formation of the
needles, flat needles derive their name from the flat, comb-like
arrangement of the various points.
Although tattoo artists can use a delicate, single-point or triple-point
needle for shading, the flat formation of shading needles is perfect for the
wispy coloring and shadowing necessary for a quality tattoo. This comb-
like formation allows an artist to deposit color or to shade a tattoo in an
effective manner: covering a good amount of area without depositing too
much color on a single line as would occur if the artist used a round
needle.
It is an intelligent move for a tattoo artist to solder needles by hand onto
the needle bar. This way, the artist can create the exact and precise
formation that is suitable for both the design and for the tattoo artist’s
client. A tattoo is an incredibly personal and individualistic piece of body
art (or it should be), so the technique and needle choice also needs to be
very personal and individualized to the client’s specific needs.
Since the tattoo needles are soldered by hand to the needle bar, the tattoo
artist chooses the configuration of needles that is right for a specific job.
Very good tattoo artists can enhance the credibility of their safety
procedures by breaking old needles off the bar in front of a client, opening
a fresh pack of needles and soldering the new needles onto the needle
bar. In this fashion, the client knows that he or she is in no danger of
being pricked by used needles.
Coloring a Tattoo
After the outlining is complete, the tattoo artist should begin coloring the
tattoo if required by the client and the design. Bear in mind that not all
© Dayne Herren, Ultimate-Tattoo-Guide.com. All Rights Reserved.
89
designs require color, and that, for stylistic reasons, many designs look
better and fade less if they are simply well-outlined and solid black.
As color can be added to a tattoo, a dazzling array of complications, both
physical and aesthetic, can enter the picture. A skilled and intelligent
tattoo artist will understand these potential complications and warn their
clients as well as mitigate the potential effects of coloring through expert
technique.
Tattoo Pigment and the FDA
Simply put, the tints and pigments that are used in tattoo ink are subject to
the approval of the Food and Drug Administration (FDA) as cosmetics.
Interestingly, most of the inks and pigments have been approved for
topical use only. This means that, for the vast majority of colored
pigments and ink, they are technically not supposed to be used
internally—even in the middle layer of the skin, the dermis, where actual
tattooing takes place. In fact, the FDA has not approved any pigment for
injection into the skin.
While the FDA does not currently monitor tattooing or tattoo pigments
heavily, what little monitoring they do might increase in the coming years
with increased interest of the general public in the once sub-cultural
industry of body art, including tattooing and piercing. Certainly, with the
growth in the popularity of tattoos and permanent make-up, the FDA is
starting to examine the health related issues.
Tattoo artists who consider the body art industry to be their profession and
a life-long occupation should be aware of the FDA and any changes or
requirements this governmental association makes in reference to
tattooing or the body art industry in general.
© Dayne Herren, Ultimate-Tattoo-Guide.com. All Rights Reserved.
90
A Variety of Colors and Pigments
As of now, there are approximately fifty pigments, tints and colors
commonly used in tattoo parlors. The number is increasing, seemingly
daily, as new pigments are mixed and new additives developed.
Colors include a variety of shades ranging from yellows (which are difficult
to distinguish on many skin tones) to vibrant azures, brilliant crimsons and
unusual violets. In addition, the true range of colors and pigments is
virtually unlimited, considering that a tattoo artist, just like a painter, can
blend colors together to create the perfect hue for their client’s tattoo.
Choosing Colors and Pigments
Just like in choosing needles for a given design or client, a tattoo artist
must be acutely aware of the needs and requirements of both the design
and their client. Interestingly, the client is actually of little help to the artist
in the arena, and the tattoo artist must rely on his or her own instincts and
skills in choosing the proper pigments. Sure, the client wants red—but
which red? Only the tattoo artist will be able to answer that question
adequately and professionally.
Just as a painter must know the properties of his canvas, so too must a
tattoo artist know and understand the properties of skin. Most importantly,
a tattoo artist must be aware of how a certain pigment looks after it has
been injected into a client’s skin.
Some pigments do not show up well or clearly on certain skin tones.
While most colors show up very well on light skin tones, they do not,
necessarily, show up well on dark skin tones. Clients with dark skin tones
have special needs when it comes to choosing colors and pigments.
© Dayne Herren, Ultimate-Tattoo-Guide.com. All Rights Reserved.
91
Tattoo Pigments and Dangers
As each new pigment contains different ingredients from which it derives
its coloring, they each pose different, although extremely limited, risks. It
is wise for tattoo artists to be aware of the potential risks that come from
the various pigments that they use within their parlor.
While every qualified and professional tattoo artist should be acutely
aware of and know how to mitigate the risks associated with tattooing
including the risk of blood-born illnesses, they should also be aware that
the pigments themselves can pose a risk to their clients. Although
reactions to ink are extremely rare, they do exist. With each new color
added to a tattoo, the risk of allergic reaction increases, although
nominally so.
Certain colors pose unknown dangers; reddish tints, for example, are
often made with metals like mercury or iron oxide (rust). Heavy metals in
larger doses are toxic; in very small doses, they are usually quite safe, but
direct application onto the dermal layer is not a use generally envisioned.
The blue tints can, in some processes, be made with cyanide (also used in
the industrial cleaning of ore samples and as a result a leftover product
from gold and bauxite mining).
Again, due to lack of regulation and monitoring, it can be difficult for tattoo
artists to choose perfectly safe colors. Fortunately, a tattoo artist can
choose among numerous medical-grade pigments that do not incorporate
heavy metals as ingredients. In fact, most tattoo pigments on the market
today are marketed as hypoallergenic. Granted, even if a tattoo artist
uses hypoallergenic pigments to the exclusion of all else, there is no
guarantee that their client will not have a reaction.
© Dayne Herren, Ultimate-Tattoo-Guide.com. All Rights Reserved.
92
Color Application
Color is applied with the flat needles. The actual color application process
can take anywhere from a few minutes to several hours or even several
visits depending on the size of the tattoo and the patience of both the artist
and the client.
First and foremost, the tattoo artist must choose the appropriate needle
density or ‘points’ of the comb-like shading needle. Just as in outlining,
certain designs and certain locations require a different number of points
associated with the flat needle. A delicate or small design warrants fewer
points than a larger or less intricate design.
In applying the color, the tattoo artist should stretch the skin so that it is
flat and similar to a painter’s canvas. The body shape of a tattoo artist’s
client plays a significant role in just how much an artist will need to stretch
his or her client’s skin.
While skinniness or fatness has little bearing on how much an artist must
stretch his or her client’s skin, a client’s actual muscle tone should be
taken into account. The skin of a client who is well-toned will require less
stretching than the skin of a client who lacks lean body mass.
Nevertheless, all skin is elastic and needs to be stretched by the tattoo
artist, even if only a little.
The artist must constantly overlap the work, going back and forth to
ensure that no gaps, also referred to as “holidays,” appear in the color of
the tattoo. These holidays can result from the skin not being properly
stretched by the artist or they may simply be a gap where the artist missed
a spot.
© Dayne Herren, Ultimate-Tattoo-Guide.com. All Rights Reserved.
93
The tattoo artist should strive for strong, solid and even hues. More often
than not, such strong coloring is what a tattoo artist’s clients want. In
addition, the colors will eventually fade and if the tattoo artist deposits a
strong, solid and even range of colors into the skin, it will increase the life
of the tattoo significantly. Coloring and shading generally offer the
greatest opportunity for the demonstration of the skill of the artist.
Color Application and Color Blending
As a very general rule, tattoo artists should work from lighter colors like yellows and whites to darker shades like crimson and deep blue.
Working from light to dark allows tattoo artists to make easier corrections.
While it is fairly simple and easy to cover up a lighter pigment with a
darker one, it is almost impossible to successfully cover a darker pigment
with a lighter one. Once a pigment has been injected into the dermis, it is
impossible to get it out, but it can be modified.
In blending colors, if, for instance, the design requires a smooth transition
from a light blue to a dark blue for perceived light balance, the tattoo artist
has a few options to consider. The usual procedure for the artist is to
oscillate between larger flats and smaller flats, depositing the lighter colors
first, then those of a medium hue and finally the darkest colors last.
Then the tattoo artist can reevaluate the color flow and balance, adding
more highlights to the light area and lowlights to the dark area by using a
low-point flat needle for added delicacy and subtle nuances of color
change and blending. At this point, some artists choose to revert from the
flat shading needles to the round needles originally used for outlining the
tattoo to add lines of color, including both lowlights and highlights.
While round needles create fairly distinct lines not usually desired in color
blending, they can create a clear, precise and much needed highlight to
© Dayne Herren, Ultimate-Tattoo-Guide.com. All Rights Reserved.
94
the color of the tattoo. This technique adds a bit of roundness to a flat
tattoo.
In addition, colors can be blended on the artist’s palette as well the client’s
skin, although given the number of shades already commercially available,
it is becoming more common simply to employ the existing shades. Still,
even if the artist is blending colors before applying them to the client’s
skin, it is wise to still work from light to dark, slowly blending the colors
together on the skin so that the tattoo doesn’t suffer a choppy appearance
reminiscent of a coloring book illustration.
If a blended and shaded image is desirable, again, it is easier to darken
something that is too light than to lighten something that is too dark, so
most tattoo artists prefer to and should use the lighter elements in the
blend first.
Post-color Application Care
After color has been applied, the tattoo is sprayed again and cleaned with
an anti-bacterial soap, and pressure is applied from a clean towel to
remove any blood or fluids that come to the surface during the application
process. Capillary bleeding is normal during the process, but provided
that the customer is not drunk and not taking blood thinners of any type, it
is easily controlled. The artist should blot, not rub or sweep, the fluids.
While colors may fade and the tattoo may lose some shape over time,
skilled tattoo artists will be able to mitigate long term fading by employing
correct technique. However, the mitigation of long term fading truly lies in
the hands of the customer.
Tattoo artists should counsel their customers on the proper care of tattoos
to prolong the artistic integrity and the clarity of the design. Such care
© Dayne Herren, Ultimate-Tattoo-Guide.com. All Rights Reserved.
95
includes warning clients against prolonged sun exposure, encouraging
them to apply sun screen and warning them to avoid deep exfoliation of
the skin around the tattoo or of the tattoo itself.
Shading
After the outline has been made, the area is once again thoroughly
washed. Some tattoo artists may change gloves. The outline is thickened
with a three or five tipped needle, and the ink used is also thicker.
After the outline is completed, the artist begins the process of shading.
The tattoo artist can employ a different needle set at this point, this one
with a flat, rather than a round, needle bar, for the shading needles.
These needles fill in color and shade a tattoo, once the initial outline has
been drawn.
As a general rule, fewer points allow for finer work, a higher number for
less detailed work. The artist shades in the tattoo, leaving the outline
black, and creates special effects that depend on the skills and experience
of the tattoo artist as well as the interests of the client and the stylistic
requirements of the design.
Shading Techniques Shadowing and shading techniques follow classical norms. The art of
tattoo is similar to most other two-dimensional arts including drawing and
painting. This means that, in creating a tattoo, a tattoo artist can vary his
or her lines and techniques in the same manner employed by classical
artists.
© Dayne Herren, Ultimate-Tattoo-Guide.com. All Rights Reserved.
96
For example, the artist can obtain depth or perspective on a tattoo as with
any other form of art, by varying the intensity or thickness with which he or
she applies a color. An artist can also attain the illusion of thickness or
openness on a figure or design by creating either thick or thin lines as the
design requires with a thick, high-point flat for a thick line or a low-point flat
for a thin line.
The artist can create a similar illusion by increasing the number of lines on
one side of an image and decreasing the number on the opposite side.
Similarly, a tattoo artist creates perspective on the image in the same
fashion any artist who creates a similar two-dimensional work.
One point-perspective is obtained by selecting a spot on the skin to which
the lines of a given figure will point, and two-point perspective is obtained
by selecting two opposite points where lines will converge. The effects of
such techniques can be stunning, and can showcase the true artistry of
the tattooist.
Tattoos and Size for Optimal Shading and Color Blending
Size matters. At least, in tattoo terms it does.
Tattoo artists often insist that certain designs warrant certain sizes. In
doing this, they are not trying to milk the customer for more cash.
Allowances must be made for the fact that the lines in a tattoo invariably
spread over time; if the lines are too close together in the original image,
the tattoo may end up indistinct and unclear.
As for any artist who takes pride in his or her work, a tattoo artist should
strive to create a tattoo that maintains its stylistic integrity; this often
means refusing to create excessively intricate small tattoos which will,
inevitably, lose their intricacy and, thus, their artistry over time.
© Dayne Herren, Ultimate-Tattoo-Guide.com. All Rights Reserved.
97
To maintain the long-term durability and style of any tattoo, tattoo artists
should avoid creating overtly intricate, shaded and multi-colored small
tattoos. Shading and color blending techniques are time consuming and
require the patience of both the tattoo artist and his or her client; for this
reason alone it is unwise to spend excessive time on color blending or
shading a tiny tattoo.
Instead, if a tattoo artist chooses to work a small tattoo, he or she should
employ a strong outline, and, if the tattoo must be in color, a deep, rich
and solid coloring that does not contain too much variation. A strong
outline and rich color will help to maintain the durability and long-term
integrity of a small tattoo; time and technique spent on shading and color
blending a tiny tattoo is simply time and technique wasted.
For larger tattoos, however, tattoo artists should feel free to employ
intricate shading and color blending techniques as it is on larger tattoos
that these techniques truly shine, displaying the skill of the artist. In
addition, as the intricate work will be employed on a larger skill, the
durability and integrity of the tattoo remains for a longer period of time.
Color Blending and Shading Techniques for Certain Body Parts
The actual location of a tattoo is important to consider in addition to the
tattoo’s size. Before employing intricate blending and shading techniques,
an artist must consider that certain parts of the body experience more
stress than do other parts. Moreover, the location on the body to which
the artist applies the tattoo also changes the amount of pain the client
experiences.
Certain areas of the body experience more day to day stress, use and
stretching than do other parts of the body. As the body part stretches and
© Dayne Herren, Ultimate-Tattoo-Guide.com. All Rights Reserved.
98
moves throughout the day, the integrity of the tattoo is at risk. The more
the skin of and around a tattoo is stretched, stressed and pulled the more
likely the pigment injected into the dermis will be pulled out of alignment.
This is akin to smudging a chalk drawing.
So, rather than spend excessive time on intricate blending and shading, a
tattoo artist is wise to spend that time on developing a strong outline and
strong, rich and solid color. Such technique will help to ensure the long-
term durability of the tattoo. Before employing time-consuming shading
and blending techniques, a tattoo artist would be wise to enquire as to
how much stress the client puts on the body part receiving the tattoo.
Body parts that experience high stress include the hands, feet, face and
genitalia. The risk to long-term durability of the tattoo is so great that
many tattoo policies have strict policies against tattooing these areas of
the body,
Less importantly, a tattoo artist must consider that pain sensitivity differs
from one area of the body to the next. While pain should be a
consideration, many clients either don’t mind the pain associated with
tattoos or they actually enjoy it.
Just as shading and color blending are time consuming, they are also
pain- intensive. Again, most clients would prefer to endure the pain for a
beautiful and intricate tattoo, but before subjecting one’s clients to a pain-
intensive color blending session, a tattoo artist should be wary of how
much his or her techniques will create pain for his or her client.
The arms, particularly the triceps and biceps, the chest, and the upper
back are generally less painful than wrists or ankles or the lower back; the
arms, chest, and upper back have more muscle and fat under the skin
© Dayne Herren, Ultimate-Tattoo-Guide.com. All Rights Reserved.
99
than wrists or ankles, which are closer to the bone and thus less well
protected.
Many novices opt for a tattoo on the gluteus maximus, the arms, or the
outside of the thighs, because the sensation of pain is so minimal in those
areas. Genital tattoos are not unknown, but given that the genitalia are
designed elastically, images are harder to make and shape more difficult
to maintain.
Needle Size and Pain
Pain is an understood by-product of the tattoo process. Enthusiasts
describe the pain in terms of being snapped by rubber bands repeatedly,
being pinched, and the buzzing feeling when the funny bone is struck or a
foot falls asleep, are all used to describe the feeling of the process itself.
The more pain sensitive or more perceptive sometimes use more
descriptive terms: a drill being powered into the skin or the skin being
stung repeatedly by ravenous mosquitoes are common analogies. In part,
the pain involved is a personal matter: without question, some people
have higher tolerances than others.
Some tattoo artists are simply more skillful than others and the size of the
needles, i.e., number of points or heads, the artists employ can directly
impact the amount of pain sensed by the client. Not surprisingly, many
people find multiple needle points less painful than a single point. This is
largely because the nerves being affected in a particular area are either
very acutely located (with a single needle) or more spread around (as with
multiple needle shading).
© Dayne Herren, Ultimate-Tattoo-Guide.com. All Rights Reserved.
100
Conclusion
Tattoos are fast moving from the back alleys of urban subculture to an
accepted beautification process of the general populace. As the
popularity tattoos increases, so does the ability of tattoo artists to explore
both the art and technique of tattooing.
The craft and artistry of tattooing is very similar to the craft and artistry of
any two-dimensional art form. In this way, many tattoo artists are able to
incorporate the stylistic techniques of perspective, shading and color
blending in the same way that painters are able to.
Nevertheless, it is wise for tattoo artists to perfect certain skills and
techniques while working with the human body and the permanence of
ink, pigment and needles. Working from light to dark and employing the
proper use of appropriate needles—flats or rounds—is integral in creating
a beautiful tattoo and maintaining the artistry of tattooing.

© Dayne Herren, Ultimate-Tattoo-Guide.com. All Rights Reserved.
101
I Want To Hear Your Comments…
I’m very interested in what you thought about The Ultimate Tattoo Guide. What did you like? What information would you like to see in future editions? I want to know. Please send me your feedback, comments, or testimonials to: [email protected] I may post your positive feedback or testimonials on the website www.ultimate-tattoo-guide.com (with your permission only of course). Thank you again for purchasing, The Ultimate Tattoo Guide! Dayne Herren Author and Publisher