control center reference guide - zenoss · control center reference guide 6 replace size with the...
TRANSCRIPT
Control Center Reference GuideRelease 1.2.0
Zenoss, Inc.
www.zenoss.com

2
Control Center Reference Guide
Copyright © 2016 Zenoss, Inc. All rights reserved.
Zenoss and the Zenoss logo are trademarks or registered trademarks of Zenoss, Inc., in the United States and other countries. All other trademarks,logos, and service marks are the property of Zenoss or other third parties. Use of these marks is prohibited without the express written consent ofZenoss, Inc., or the third-party owner.
Linux is a registered trademark of Linus Torvalds.
All other companies and products mentioned are trademarks and property of their respective owners.
Part Number: 1340.16.319
Zenoss, Inc.11305 Four Points DriveBldg 1 - Suite 300Austin, Texas 78726

3
Contents
About this guide.......................................................................................................................4
Chapter 1: Administration reference...............................................................5Adding space to a tenant device................................................................................................................. 5Backing up and restoring.............................................................................................................................6Snapshot and rollback................................................................................................................................10Stopping and starting Control Center for maintenance.............................................................................11
Chapter 2: Command-line interface reference..............................................18Invoking serviced.......................................................................................................................................18serviced.......................................................................................................................................................18serviced backup..........................................................................................................................................26serviced docker.......................................................................................................................................... 27serviced host...............................................................................................................................................27serviced key............................................................................................................................................... 28serviced log export.....................................................................................................................................29serviced pool.............................................................................................................................................. 29serviced restore.......................................................................................................................................... 31serviced script............................................................................................................................................ 31serviced service..........................................................................................................................................34serviced snapshot....................................................................................................................................... 35serviced-storage..........................................................................................................................................36Control Center configuration file.............................................................................................................. 39
Glossary...................................................................................................................................49

Control Center Reference Guide
4
About this guideControl Center Reference Guide provides information and procedures for managing Control Center.
Related publications
Title Description
Control Center Release Notes Describes known issues, fixed issues, and late-breaking information notincluded in other publications.
Control Center Planning Guide Provides both general and specific information about preparing to deploya Control Center cluster.
Control Center Installation Guide Provides detailed procedures for installing and configuring a ControlCenter cluster.
Control Center Reference Guide Provides information and procedures for managing Control Center. Thisinformation is also available as online help in the Control Center browserinterface.
Control Center Upgrade Guide Provides detailed procedures for updating a Control Center deploymentto the latest release.
Documentation feedback
To provide feedback about this document, or to report an error or omission, please send an email [email protected]. In the email, please include the document title (Control Center ReferenceGuide) and part number (1340.16.314) and as much information as possible about the context of your feedback.
Supported clients and browsers
The following table identifies the supported combinations of client operating systems and web browsers.
Client OS Supported Browsers
Internet Explorer 11 (Enterprise mode only; compatibility mode is notsupported.)
Internet Explorer 10 (Compatibility mode is not supported.)
Firefox 30 and above
Windows 7 and 8.1
Chrome 30 and above
Firefox 30Windows Server 2012 R2
Chrome 36
Firefox 30 and aboveMacintosh OS/X 10.9
Chrome 36 and above
Firefox 30 and aboveUbuntu 14.04 LTS
Chrome 37 and above
Firefox 30 and aboveRed Hat Enterprise Linux 6.5,CentOS 6.5
Chrome 37 and above

Administration reference
5
Administration reference 1This section contains information about and procedures for performing administrative tasks. Tasks includeadding application storage, copying applications and data, reverting to a backup or snapshot, and properlystopping and starting Control Center for maintenance purposes.
Adding space to a tenant deviceControl Center creates one virtual device in its LVM thin pool for each tenant (application) it manages, andstores tenant data in the virtual device. The initial size of a tenant virtual device is determined by the value ofthe SERVICED_DM_BASESIZE configuration variable when serviced is started for the first time. Use thisprocedure to increase the size of an existing tenant virtual device.
1 Log in to the master host as root, or as a user with superuser privileges.2 Display the amount of space available in the serviced thin pool, and then increase it, if necessary.
serviced volume status
The result includes detailed information about the serviced thin pool and about each tenant virtual device.
■ If the thin pool has enough space to support both a larger tenant device and the snapshots yourenvironment requires, proceed to the next step.
■ If the thin pool does not have enough space, perform the following substeps.a Identify the volume group to which the serviced thin pool belongs.
lvs --options=lv_name,vg_name,lv_size
The volume group associated with serviced-pool contains the serviced thin pool.b Display the amount of unused space in the volume group.
Replace Volume-Group-Name with the name of the volume group that contains the serviced thinpool:
vgs --no-headings --options=vg_free Volume-Group-Name
If the volume group contains the amount of free space you wish to add the serviced thin pool, proceedto the next substep. Otherwise, add physical or logical storage to the volume group.
c Add storage to the serviced thin pool.

Control Center Reference Guide
6
Replace Size with the amount of space to add to the serviced thin pool, and replace Volume-Group-Name with the name of the volume group that contains the serviced thin pool:
lvextend -L+SizeG Volume-Group-Name/serviced-pool
3 Increase the size of an existing tenant device.a Identify the tenant device to resize.
serviced volume status
b Increase the size of the tenant device.In the following command:
■ Replace Volume-Group-Name with the name of the volume group that contains the serviced thinpool.
■ Replace Tenant-Device-ID with the identifier of the tenant device.■ Replace Total-Device-Size with the sum of the existing device size plus the space to add to the device,
in gigabytes.
serviced-storage resize -d /opt/serviced/var/volumes \ -o dm.thinpooldev=/dev/mapper/Volume-Group-Name-serviced--pool \ Tenant-Device-ID Total-Device-SizeG
Backing up and restoringUse Control Center to back up applications that Control Center manages. Having accurate and tested systembackups can mitigate problems caused by software or hardware issues. The Control Center backup processcreates a compressed tar archive file (.tgz) that can be restored on the same cluster or a similar cluster.
Backups include the current state of the system, the state of all services, configuration information, andapplication data. The backup process leverages snapshot functionality. Therefore, when a backup is running, youcan start and restart services; there is no need to shut down the application or Docker containers. The servicesare only momentarily suspended to enable reading the data.
You can back up and restore applications by using the browser interface or the command-line interface (CLI).Results are comparable; however, the CLI offers an option to exclude subdirectories from a backup.
The default directory for backup files is /opt/serviced/var/backups. The directory can be changed byspecifying the SERVICED_BACKUPS_PATH environment variable in the Control Center configuration file, /etc/default/serviced.
When a full backup is not necessary, such as when you need a checkpoint before installing software, you canperform a snapshot of the system. If you need to revert back to a snapshot, use the rollback feature. You use theCLI to perform snapshot and rollback.
With both backup and snapshot, Control Center
■ Creates a tag for the Docker image of each service with metadata about the application data.■ Creates a separate snapshot of the LVM thin pool, which stores both application data and snapshots of the
application data.
When you create a backup, Control Center also exports the snapshots to an archive file and moves them out ofthe LVM thin pool. Backups do not affect time-to-live (TTL).

Administration reference
7
For more information, see Snapshot and rollback on page 10 and Command-line interface reference on page18.
Best practices for backup and restoreReview considerations and best practices that apply to application backup and restore.
■ Ensure that you have enough free space to receive and store backups. Running low on available disk spaceresults in errors and affects system performance.
■ To provide a historical archive, back up on a regular schedule. Back up as needed when you perform less-frequent tasks such as moving data from one instance to another or duplicating an instance for testing orfailover purposes.
■ Before upgrading or testing an application, ensure that you have a recent backup that successfully restores.■ Regularly back up the production environment and potentially the system from the initial deployment.■ Back up to a nonactive resource target, such as a separate disaster recovery system or test environment.■ Store backups on a machine other than the Control Center master.■ Copy or migrate backups to an off-system location for safekeeping and to help regulate storage space usage
on the master.■ Backups that were created using Control Center 1.0.x cannot be restored in Control Center 1.1.x or later.■ You can restore a backup to the system on which it was created or to an alternate system. When restoring a
backup from one system to an alternate system, ensure that
■ The alternate system mirrors at least one device from the backed-up system.■ Services that were added to the alternate system by a previous restore have been manually deleted.
■ Frequently test restoring from a backup to ensure that the backup restores successfully, and that the restoredsystem is an accurate representation of the state of the deployment when the backup was performed.
■ Restoring from a backup file does not remove services that were added after taking the backup. That is, ifyou create a backup, add a service, and then restore from the backup, the service is not deleted as part of therestore process.
■ If an outage occurs during a restore from a backup, you can resume the restore because Control Centerpreserves complete data on the system. For example, if two of six backed up snapshots are restored before anoutage, when you resume the restore, those two snapshots are saved on the system, and are not downloadedagain.
Backing up using the browser interfaceUsing the browser interface, you can create a backup of your entire system.
1 Log in to the Control Center browser interface.2 Click the Backup / Restore tab.3 Click Create Backup.4 At the prompt, confirm your selection by clicking Create Backup.
When the backup is complete, the compressed archive file name is displayed.
Backing up using the CLIAs an alternative to performing application backup from the Control Center browser interface, you can use thecommand-line interface (CLI).
Using the CLI, you can back up your entire system or specify one or more tenant volumes to exclude from thebackup. For example, to save resources, you might exclude the tenant volume that contains performance data,hbase-master. If you want to create a backup to restore on another system, you might exclude the tenantvolumes for the events database and index, mariadb-events and zeneventserver.

Control Center Reference Guide
8
The default directory for backup files is /opt/serviced/var/backups. The directory can be changed byspecifying the SERVICED_BACKUPS_PATH environment variable in the Control Center configuration file, /etc/default/serviced.
Backing up the entire system
1 Log in to the Control Center master host as root, or as a user with superuser privileges.2 Start the backup:
serviced backup /opt/serviced/var/backups
After a successful backup, the system displays the name of the backup file.
Example result:
backup-2016-10-31-203717.tgz
Exclude one tenant volume from the backup
By default, Control Center stores application data in /opt/serviced/var/volumes. The directorycan be changed by specifying the SERVICED_VOLUMES_PATH environment variable in the Control Centerconfiguration file, /etc/default/serviced. If necessary, replace /opt/serviced/var/volumeswith your path.
1 Log in to the Control Center master host as root, or as a user with superuser privileges.2 Display the Control Center tenant identifier.
ls /opt/serviced/var/volumes
Example result:
cvs0ul2tmvjcitolrm7p0d8bx
3 Display the directories under the Control Center tenant identifier.Replace Tenant-ID with the identifier displayed in the previous step.
ls /opt/serviced/var/volumes/Tenant-ID
4 Exclude the tenant volume from the backup.For example, exclude hbase-master. Replace Tenant-ID with your tenant identifier.
serviced backup /opt/serviced/var/backups \ --exclude /opt/serviced/var/volumes/Tenant-ID/hbase-master
If you use automated backups, edit the scripts to exclude tenant volumes.
Exclude multiple tenant volumes from the backup
By default, Control Center stores application data in /opt/serviced/var/volumes. The directorycan be changed by specifying the SERVICED_VOLUMES_PATH environment variable in the Control Centerconfiguration file, /etc/default/serviced. If necessary, replace /opt/serviced/var/volumeswith your path.
1 Log in to the Control Center master host as root, or as a user with superuser privileges.

Administration reference
9
2 Display the Control Center tenant identifier.
ls /opt/serviced/var/volumes
Example result:
cvs0ul2tmvjcitolrm7p0d8bx
3 Display the directories under the Control Center tenant identifier.Replace Tenant-ID with the identifier displayed in the previous step.
ls /opt/serviced/var/volumes/Tenant-ID
4 Exclude multiple tenant volumes from the backup.For example, exclude mariadb-events and zeneventserver. Replace Tenant-ID with your tenantidentifier.
serviced backup /opt/serviced/var/backups \ --exclude /opt/serviced/var/volumes/Tenant-ID/mariadb-events \ --exclude opt/serviced/var/volumes/Tenant-ID/zeneventserver
Restoring from a backupRestore an instance of an application from a backup file on the same system, or restore from a backup file toduplicate an instance on a new, similarly configured cluster.
If you are restoring from a backup that was created on another system, copy the backup archive file to the targetsystem.
1 Log in to the Control Center browser interface.2 In the Applications table, identify the name of the application instance.3 Stop the instance and verify that its subservices are stopped.
a In the Actions column of the Applications table, click Stop.b In the Stop Service dialog box, click Stop Service and Children.c In the Applications column of the Applications table, click the name of the stopped instance, and then
scroll down to the Services table to verify that all services are stopped.Because snapshots are loaded to disk, during a restore you are not required to stop services while the fileis loaded. Though the restore will not succeed, the snapshot and images are available for you to manuallyrollback each application.
4 Click the Backup / Restore tab.5 Beside the backup file that you want to use to restore your application, click Restore Backup. Confirm your
selection by clicking Restore.6 When the restore is finished, click the Applications tab, then click Start beside the instance you just
restored.7 Review and if necessary, define IP assignments.
a Click Applications and then click the application instance.b Review the IP Assignments table. If all services have an IP assignment, no action is required.c For any service that does not have an automatic IP assignment, click Assign, choose an IP, and then click
Assign IP.

Control Center Reference Guide
10
Snapshot and rollbackThough backups are the most reliable and durable way to preserve Docker images and configurations, creatinga backup of an entire application is not always practical. However, you need to safeguard against potential riskwhen changing the system. In these cases, you can create a snapshot of the system.
Snapshot functionality provides a time- and space-efficient method of copying data. Create a snapshot wheneveryou need a save point for Docker images, such as before committing container changes.
With both snapshot and backup, Control Center
■ Creates a tag for the Docker image of each service with metadata about the application data.■ Creates a separate snapshot of the LVM thin pool, which stores both application data and snapshots of the
application data.
Snapshots are intended to serve as short-term save points only, and therefore have a default time-to-live (TTL)value of 12 hours. If you need to keep a snapshot beyond the TTL, tag the snapshot to prevent it from beingdeleted after the TTL expires. For historical backups of data that you need to save long-term, create full backupsinstead of snapshots.
You can use the rollback functionality to go back to a snapshot image. For example, roll back if changes to anapplication cause a failure or other degradation. Rolling back returns the application and distributed file systemto the state that existed at the time of the snapshot.
Note Rolling back from a snapshot does not remove services that you added after creating the snapshot. Thatis, if you create a snapshot, add a service, and then roll back, the service remains on the system; it is not deletedas part of the roll back.
Control Center uses thin provisioning, which enables it to create snapshots of the application data volume. Thinprovisioning is a virtualization method that allocates data blocks only when data is written (copy-on-write).
Because snapshots track changes to the file system over time, their space requirements expand incrementallyas application data changes. Application data and snapshots share the same base device; therefore, ensure thatsnapshots do not fill up the base device storage. For information about extending storage, see Adding space to atenant device on page 5.
Creating a snapshot
1 Log in to the Control Center host as a user with serviced CLI privileges.2 Find the identifier of the service; for example, Zenoss.resmgr.
serviced service list
3 Create the snapshot.Replace SERVICEID with the identifier of the service.
serviced snapshot add SERVICEID
4 Verify the existence of the snapshot.
serviced snapshot list
5 To keep the snapshot for longer than the default 12-hour TTL, tag it.

Administration reference
11
Replace SNAPSHOTID with the identifier of your snapshot and TAG-NAME with your text.
serviced snapshot tag SNAPSHOTID TAG-NAME
6 To make a snapshot subject to the TTL value, untag it.Replace SNAPSHOTID with the identifier of your snapshot and TAG-NAME with your text.
serviced snapshot untag SNAPSHOTID TAG-NAME
Rolling back to a snapshot
Before rolling back, you must stop services that are used in the snapshot image. The following procedureincludes this step.
1 Log in to the Control Center host as a user with serviced CLI privileges.2 To roll back to a snapshot, you must find the identifier of the snapshot.
serviced snapshot list
3 Roll back to the snapshot.Replace SNAPSHOTID with the identifier of your snapshot. The --force-restart flag automaticallystops the affected services before rollback and starts them after completion.
serviced snapshot rollback SNAPSHOTID --force-restart
Stopping and starting Control Center for maintenance
Before performing maintenance, such as operating system upgrades or applying patches, properly stop and startControl Center. This section provides procedures for single-host and multi-host deployments.
Stopping Control Center (single-host deployment)
Use this procedure to stop the Control Center service (serviced) in a single-host deployment.
1 Log in to the master host as root, or as a user with superuser privileges.2 Identify the top-level service serviced is managing.
serviced service list
The top-level service is the service listed immediately below the headings line.3 Stop the top-level service.
Replace Service with the name or identifier of the top-level service:
serviced service stop Service
4 Monitor the stop.
serviced service status
When the status of the top-level service and all child services is stopped, proceed to the next step.5 Stop the Control Center service.
systemctl stop serviced
Control Center Reference Guide
12
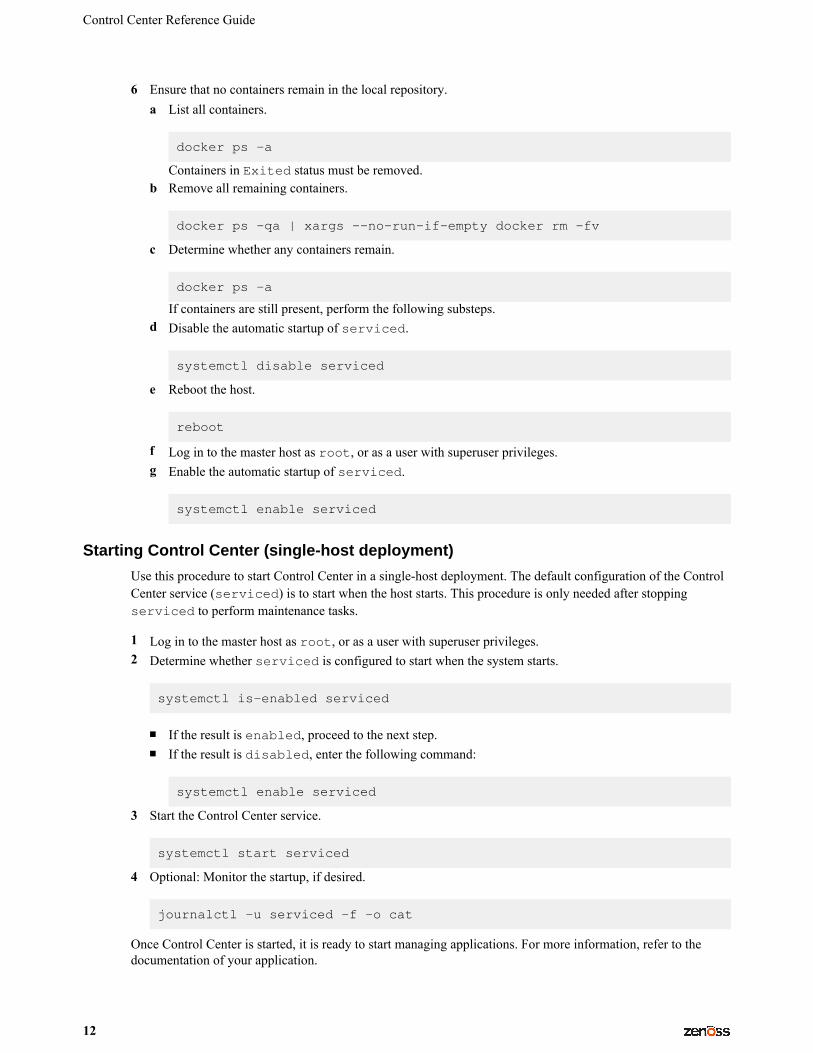
6 Ensure that no containers remain in the local repository.a List all containers.
docker ps -a
Containers in Exited status must be removed.b Remove all remaining containers.
docker ps -qa | xargs --no-run-if-empty docker rm -fv
c Determine whether any containers remain.
docker ps -a
If containers are still present, perform the following substeps.d Disable the automatic startup of serviced.
systemctl disable serviced
e Reboot the host.
reboot
f Log in to the master host as root, or as a user with superuser privileges.g Enable the automatic startup of serviced.
systemctl enable serviced
Starting Control Center (single-host deployment)
Use this procedure to start Control Center in a single-host deployment. The default configuration of the ControlCenter service (serviced) is to start when the host starts. This procedure is only needed after stoppingserviced to perform maintenance tasks.
1 Log in to the master host as root, or as a user with superuser privileges.2 Determine whether serviced is configured to start when the system starts.
systemctl is-enabled serviced
■ If the result is enabled, proceed to the next step.■ If the result is disabled, enter the following command:
systemctl enable serviced
3 Start the Control Center service.
systemctl start serviced
4 Optional: Monitor the startup, if desired.
journalctl -u serviced -f -o cat
Once Control Center is started, it is ready to start managing applications. For more information, refer to thedocumentation of your application.

Administration reference
13
Stopping Control Center (multi-host deployment)
To stop Control Center in a multi-host deployment, perform the procedures in this section, in order.
Stopping a master host (multi-host deployment)
Use this procedure to stop the Control Center service (serviced) on the master host in a multi-hostdeployment.
1 Log in to the master host as root, or as a user with superuser privileges.2 Identify the top-level service serviced is managing.
serviced service status
The top-level service is the service listed immediately below the headings line.3 Stop the top-level service.
Replace Service with the name or identifier of the top-level service:
serviced service stop Service
4 Monitor the stop.
serviced service status
When the status is stopped for the top-level service and all child services, proceed to the next step.5 Stop the Control Center service.
systemctl stop serviced
6 Ensure that no containers remain in the local repository.a Display the identifiers of all containers, running and exited.
docker ps -qa
■ If the command returns no result, stop. This procedure is complete.■ If the command returns a result, perform the following substeps.
b Remove all remaining containers.
docker ps -qa | xargs --no-run-if-empty docker rm -fv
c Display the identifiers of all containers, running and exited.
docker ps -qa
■ If the command returns no result, stop. This procedure is complete.■ If the command returns a result, perform the remaining substeps.
d Disable the automatic startup of serviced.
systemctl disable serviced
e Reboot the host.
reboot
f Log in to the master host as root, or as a user with superuser privileges.

Control Center Reference Guide
14
g Enable the automatic startup of serviced.
systemctl enable serviced
Stopping a delegate host (multi-host deployment)
Use this procedure to stop the Control Center service (serviced) on a delegate host in a multi-hostdeployment. Repeat this procedure on each delegate host in your deployment.
1 Log in to the delegate host as root, or as a user with superuser privileges.2 Stop the Control Center service.
systemctl stop serviced
3 Ensure that no containers remain in the local repository.a Display the identifiers of all containers, running and exited.
docker ps -qa
■ If the command returns no result, proceed to the next step.■ If the command returns a result, perform the following substeps.
b Remove all remaining containers.
docker ps -qa | xargs --no-run-if-empty docker rm -fv
■ If the remove command completes, proceed to the next step.■ If the remove command does not complete, the most likely cause is an NFS conflict. Perform the
following substeps.c Stop the NFS and Docker Engine services.
systemctl stop nfs && systemctl stop docker
d Start the NFS and Docker Engine services.
systemctl start nfs && systemctl start docker
e Repeat the attempt to remove all remaining containers.
docker ps -qa | xargs --no-run-if-empty docker rm -fv
■ If the remove command completes, proceed to the next step.■ If the remove command does not complete, perform the remaining substeps.
f Disable the automatic startup of serviced.
systemctl disable serviced
g Reboot the host.
reboot
h Log in to the delegate host as root, or as a user with superuser privileges.

Administration reference
15
i Enable the automatic startup of serviced.
systemctl enable serviced
4 Dismount all filesystems mounted from the Control Center master host.This step ensures no stale mounts remain when the storage on the master host is replaced.a Identify filesystems mounted from the master host.
awk '/serviced/ { print $1, $2 }' < /proc/mounts
■ If the preceding command returns no result, stop. This procedure is complete.■ If the preceding command returns a result, perform the following substeps.
b Force the filesystems to dismount.
for FS in $(awk '/serviced/ { print $2 }' < /proc/mounts)do umount -f $FSdone
c Identify filesystems mounted from the master host.
awk '/serviced/ { print $1, $2 }' < /proc/mounts
■ If the preceding command returns no result, stop. This procedure is complete.■ If the preceding command returns a result, perform the following substeps.
d Perform a lazy dismount.
for FS in $(awk '/serviced/ { print $2 }' < /proc/mounts)do umount -f -l $FSdone
e Restart the NFS service.
systemctl restart nfs
f Determine whether any filesystems remain mounted.
awk '/serviced/ { print $1, $2 }' < /proc/mounts
■ If the preceding command returns no result, stop. This procedure is complete.■ If the preceding command returns a result, perform the remaining substeps.
g Disable the automatic startup of serviced.
systemctl disable serviced
h Reboot the host.
reboot
i Log in to the delegate host as root, or as a user with superuser privileges.

Control Center Reference Guide
16
j Enable the automatic startup of serviced.
systemctl enable serviced
Starting Control Center (multi-host deployment)
Use this procedure to start Control Center in a multi-host deployment. The default configuration of the ControlCenter service (serviced) is to start when the host starts. This procedure is only needed after stoppingserviced to perform maintenance tasks.
1 Log in to the master host as root, or as a user with superuser privileges.2 Determine whether serviced is configured to start when the system starts.
systemctl is-enabled serviced
■ If the result is enabled, proceed to the next step.■ If the result is disabled, enter the following command:
systemctl enable serviced
3 Identify the hosts in the ZooKeeper ensemble.
grep -E '^\b*SERVICED_ZK=' /etc/default/serviced
The result is a list of 1, 3, or 5 hosts, separated by the comma character (,). The master host is always a nodein the ZooKeeper ensemble.
4 In separate windows, log in to each of the delegate hosts that are nodes in the ZooKeeper ensemble as root,or as a user with superuser privileges.
5 On all ensemble hosts, start serviced.The window of time for starting a ZooKeeper ensemble is relatively short. The goal of this step is to startControl Center on each ensemble node at about the same time, so that each node can participate in electingthe leader.
systemctl start serviced
6 On the master host, check the status of the ZooKeeper ensemble.a Attach to the container of the ZooKeeper service.
docker exec -it serviced-isvcs_zookeeper bash
b Query the master host and identify its role in the ensemble.Replace Master with the hostname or IP address of the master host:
{ echo stats; sleep 1; } | nc Master 2181 | grep Mode
The result includes leader or follower. When multiple hosts rely on the ZooKeeper instance on themaster host, the result includes standalone.
c Query the other delegate hosts to identify their role in the ensemble.Replace Delegate with the hostname or IP address of a delegate host:
{ echo stats; sleep 1; } | nc Delegate 2181 | grep Mode

Administration reference
17
d Detach from the container of the ZooKeeper service.
exit
If none of the nodes reports that it is the ensemble leader within a few minutes of starting serviced,reboot the ensemble hosts.
7 Log in to each of the delegate hosts that are not nodes in the ZooKeeper ensemble as root, or as a user withsuperuser privileges, and then start serviced.
systemctl start serviced
8 Optional: Monitor the startup, if desired.
journalctl -u serviced -f -o cat
Once Control Center is started, it is ready to start managing applications. For more information, refer to thedocumentation of your application.

Control Center Reference Guide
18
Command-line interface reference 2This section contains information about and procedures for using the Control Center command-line interface(CLI). The CLI uses the same application programming interface that the browser interface uses. To performmany actions, you can use either interface.
Invoking serviced
To use serviced, you need a login account on hosts in Control Center pools. The account must be a memberof the docker group.
You can invoke serviced from the Control Center master host or a delegate host. For example, to list theservices running on the master host, enter the following command:
serviced service list
To invoke serviced on a delegate host, you can specify the master host and port by using the --endpointglobal option. Replace Master-Host with the hostname or IP address of the Control Center master host.
Example:
serviced --endpoint Master-Host:4979 service list
Note To commit a container, you must run a serviced CLI session on the Control Center master host.
serviced
NAME
serviced - A container-based management system.
SYNTAX
serviced [global options] command [command options] [arguments...]

Command-line interface reference
19
DESCRIPTION
serviced is an open-source, application service orchestrator based on Docker.
GLOBAL OPTIONS
--docker-registry Master-Hostname:5000The local Docker registry to use. For more information, see SERVICED_DOCKER_REGISTRY in thesection about configuration file environment variables.
--static-ip IP-Address [--static-ip IP-Address]…One or more static IP addresses for a serviced instance to advertise. For more information, seeSERVICED_STATIC_IPS in the section about configuration file environment variables.
--endpoint Host:PortThe serviced RPC endpoint. The value of Host is the hostname or IP address of the master host. Thedefault value of Port is 4979. For more information, see SERVICED_ENDPOINT in the section aboutconfiguration file environment variables.
--outbound IP-AddressThe default startup routines of serviced include attempting to ping google.com. When a value is setfor this variable, serviced does not attempt the ping and assumes it does not have internet access.Use this option to specify the IP address of a network interface other than the default, or to preventserviced from assuming it has internet access. For more information, see SERVICED_OUTBOUND_IPin the section about configuration file environment variables.
--uiport:PortThe port on which the HTTP server listens for requests. The default value is 443, unlessSERVICED_UI_PORT is set in the configuration file. For more information, see the section aboutconfiguration file environment variables.
--nfs-client valueDetermines whether a serviced delegate mounts the DFS. The default value is 1 (enable) unlessSERVICED_NFS_CLIENT is set in the configuration file. For more information, see the section aboutconfiguration file environment variables.
Note Before changing the default, ensure that no stateful services can run on the host. Disabling the DFScan destroy application data. To disable mounting, set the value to 0.
--listen:PortThe serviced RPC endpoint on the local host. The default value of Port is 4979.
--docker-dns Option [--docker-dns Option]…One or more DNS configuration flags for Docker to use when starting containers.
--masterRun the application services scheduler and other internal services.
--agentRun application services scheduled by the master.
--mux PortThe port used for traffic among Docker containers. The default value is 22250, unlessSERVICED_MUX_PORT is set in the configuration file. For more information, see the section aboutconfiguration file environment variables.
--mux-disable-tlsDetermines whether inter-host traffic among Docker containers is encrypted with TLS. Intra-host trafficamong Docker containers is not encrypted.

Control Center Reference Guide
20
The default value is 0 (enabled) unless SERVICED_MUX_DISABLE_TLS is set to 1 (disable encryption) inthe configuration file.
--mux-tls-ciphers Option [--mux-tls-ciphers Option]…The list TLS ciphers serviced supports for mux traffic. The default may be set in bySERVICED_MUX_TLS_CIPHERS in the configuration file. For more information, see the section aboutconfiguration file environment variables.
--mux-tls-min-versionThe minimum version of TLS that serviced accepts for mux traffic. Valid values areVersionTLS11 and VersionTLS12. The default value is VersionTLS11 unlessSERVICED_MUX_TLS_MIN_VERSION is set in the configuration file. For more information, see thesection about configuration file environment variables.
--var PathThis option has been deprecated.
volumes-path PathThe location of serviced application data. The default path is /opt/serviced/var/volumesunless the value of the SERVICED_VOLUMES_PATH is set in the configuration file. For more information,see the section about configuration file environment variables.
isvcs-path PathThe location of serviced internal services data. The default path is /opt/serviced/var/isvcsunless the value of the SERVICED_ISVCS_PATH is set in the configuration file. For more information, seethe section about configuration file environment variables.
backups-path PathThe location of serviced backup files. The default path is /opt/serviced/var/backups unlessthe value of the SERVICED_BACKUPS_PATH is set in the configuration file. For more information, see thesection about configuration file environment variables.
etc-path PathThe location of serviced configuration files. The default path is /opt/serviced/etc.
--keyfile PathThe path of a digital certificate key file. Choose a location that is not modified during operating systemupdates, such as /etc.This key file is used for all TLS-encrypted communications (RPC, mux, and HTTP). The default, insecurekey file is created when the serviced web server first starts, and is based on a public key that is compiledinto serviced.The default value is $TMPDIR/zenoss_key.[0-9]+, unless SERVICED_KEY_FILE is set in theconfiguration file. For more information, see the section about configuration file environment variables.
--certfile PathThe path of a digital certificate file. Choose a location that is not modified during operating system updates,such as /etc. Certificates with passphrases are not supported.This certificate file is used for all TLS-encrypted communications (RPC, mux, and HTTP). The default,insecure certificate file is created when the serviced web server first starts, and is based on a publiccertificate that is compiled into serviced.The default value is $TMPDIR/zenoss_cert.[0-9]+, unless SERVICED_CERT_FILE is set in theconfiguration file. For more information, see the section about configuration file environment variables.
--zk Host:Port [--zk Host:Port]…One or more ZooKeeper endpoints. If multiple endpoints are specified, serviced tries each in turn until itconnects to a working server. The default may be set by SERVICED_ZK in the configuration file. For moreinformation, see the section about configuration file environment variables.

Command-line interface reference
21
--mount Option [--mount Option]…One or more bind mounts for a container. The syntax for Option isDOCKER_IMAGE,HOST_PATH[,CONTAINER_PATH].
--fstype DriverThe driver to manage application data storage on the serviced master host. The default isdevicemapper unless SERVICED_FS_TYPE is set in the configuration file. For more information, seethe section about configuration file environment variables.
--alias Alias [--alias Alias]…One or more DNS aliases to associate with a container.
--es-startup-timeout DurationThe number of seconds to wait for Elasticsearch to complete its startup. The default value is 600 seconds(10 minutes).
--max-container-age DurationThe number of seconds serviced waits before removing a stopped container. The default value is 86400seconds (24 hours), unless SERVICED_MAX_CONTAINER_AGE is set in the configuration file. For moreinformation, see the section about configuration file environment variables.
--max-dfs-timeout DurationThe number of seconds to wait for a snapshot to complete. The default value is 300 seconds (5 minutes).
--virtual-address-subnet SubnetThe private subnet for containers that use virtual IP addresses on a host. The default value is 10.3.0.0/16,unless SERVICED_VIRTUAL_ADDRESS_SUBNET is set in the configuration file. For more information,see the section about configuration file environment variables.
--master-pool-id Pool-IDThe name of the resource pool to which the serviced instance configured as master belongs. The defaultvalue of Pool-ID is default.
--admin-group GroupThe name of the Linux group on the serviced master host whose members are authorized to use theserviced browser interface. The default is wheel unless SERVICED_ADMIN_GROUP is set in theconfiguration file. For more information, see the section about configuration file environment variables.
--storage-opts Option [--storage-opts Option]…Storage arguments to initialize the filesystem.
--isvcs-start Option [--isvcs-start option Option]…Enables one or more internal services to run on a delegate host. Currently, only zookeeper is supported.If SERVICED_ISVCS_START is set in the configuration file, its value is used. For more information, see thesection about configuration file environment variables.
--isvcs-zk-id IndentifierThe unique identifier (a positive integer) of a ZooKeeper ensemble node. IfSERVICED_ISVCS_ZOOKEEPER_ID is set in the configuration file, its value is used. For moreinformation, see the section about configuration file environment variables.
--isvcs-zk-quorum Option [--isvcs-zk-quorum Option]…The list of nodes in a ZooKeeper ensemble. If SERVICED_ISVCS_ZOOKEEPER_QUORUM is set inthe configuration file, its value is used. For more information, see the section about configuration fileenvironment variables.

Control Center Reference Guide
22
--tls-ciphers Option [--tls-ciphers Option]…The list TLS ciphers that serviced accepts for HTTP traffic. If SERVICED_TLS_CIPHERS is set inthe configuration file, its value is used. For more information, see the section about configuration fileenvironment variables.
--tls-min-version VersionThe minimum version of TLS that serviced accepts for HTTP traffic. Valid values include the default,VersionTLS11, and VersionTLS12. If SERVICED_TLS_MIN_VERSION is set in the configurationfile, its value is used. For more information, see the section about configuration file environment variables.
--report-statsEnable reporting statistics in a container.
--host-stats Host:PortThe endpoint of the serviced metrics consumer service. The default value of Host is the IP addressof the master host, and the default value of Port is 8443. If SERVICED_STATS_PORT is set in theconfiguration file, its value is used instead of the default endpoint. For more information, see the sectionabout configuration file environment variables.
--stats-period DurationThe frequency, in seconds, at which delegates gather metrics to send to the serviced metrics consumerservice on the master host. The default value of Duration is 10, unless SERVICED_STATS_PERIOD isset in the configuration file. For more information, see the section about configuration file environmentvariables.
--mc-username UserThe username of the OpenTSDB account that MetricConsumer uses gain access to data stored byserviced.
--mc-password PasswordThe password of the OpenTSDB account that MetricConsumer uses gain access to data stored byserviced.
--cpuprofileInstructs a container to write its CPU profile to a file.
--isvcs-env Option [--isvcs-env Option]…Startup arguments to pass to internal services. The default value is no arguments, unlessSERVICED_ISVCS_ENV_[0-9]+ is set in the configuration file. For more information, see the section aboutconfiguration file environment variables.
--debug-port PortThe port on which serviced listens for HTTP requests for the Go profiler. The default value of Port is6006, unless SERVICED_DEBUG_PORT is set in the configuration file. To stop listening for requests, setthe value to -1. For more information, see the section about configuration file environment variables.
--max-rpc-clients CountThe preferred maximum number of simultaneous connections a serviced delegate uses for RPC requests.The value is used to create a pool of sockets, which are reused as needed. Increasing the value increases thenumber of open sockets and the use of socket-related operating system resources.When the demand for connections exceeds the supply of open sockets, serviced opens more sockets.When demand eases, serviced reduces the number of open sockets to the preferred maximum.The default value is 3, unless SERVICED_MAX_RPC_CLIENTS is set in the configuration file. For moreinformation, see SERVICED_MAX_RPC_CLIENTS in the section about configuration file environmentvariables.

Command-line interface reference
23
--rpc-dial-timeout DurationThe number of seconds serviced waits before giving up on attempts to connect to the RPC endpoint onthe master host.
--rpc-cert-verify ValueDetermines whether serviced is enabled to perform TLS certificate verification for RPC connections.The default value is false (disabled) unless SERVICED_RPC_CERT_VERIFY is set in the configurationfile. For more information, see the section about configuration file environment variables.
--rpc-disable-tls ValueDetermines whether serviced enabled to encrypt RPC traffic with TLS. The default value is false(disabled) unless SERVICED_RPC_DISABLE_TLS is set in the configuration file. For more information,see the section about configuration file environment variables.
--rpc-tls-ciphers Option [--rpc-tls-ciphersOption]…The list of TLS ciphers serviced prefers for RPC connections. If SERVICED_RPC_TLS_CIPHERS isset in the configuration file, its value is used. For more information, see the section about configuration fileenvironment variables.
--rpc-tls-min-version VersionThe minimum version of TLS serviced accepts for RPC connections. Valid values include thedefault, VersionTLS11, and VersionTLS12. The default value is VersionTLS10 unlessSERVICED_RPC_TLS_MIN_VERSION is set in the configuration file. For more information, see thesection about configuration file environment variables.
--snapshot-ttl DurationThe number of hours an application data snapshot is retained before removal. The default value is 12 unlessSERVICED_SNAPSHOT_TTL is set in the configuration file. For more information, see the section aboutconfiguration file environment variables.
--snapshot-space-percent ValueThe amount of free space in the thin pool, expressed as a percentage the total size. This value isused to determine whether the thin pool can hold a new snapshot. The default value is 20 unlessSERVICED_SNAPSHOT_USE_PERCENT is set in the configuration file. For more information, see thesection about configuration file environment variables.
--controller-binary PathThe path to the container controller binary. The default is /opt/serviced/bin/serviced-controller.
--log-driver fileThe log driver for all Docker container logs, including containers for Control Center internal services.
--log-config Option [--log-configOption]…A list of Docker --log-opt options as key=value pairs.
--ui-poll-frequency DurationThe number of seconds between polls from browser interface clients. The value is included in a JavaScriptlibrary that is sent to the clients. The default value is 3 unless SERVICED_UI_POLL_FREQUENCY isset in the configuration file. For more information, see the section about configuration file environmentvariables.
--storage-stats-update-interval DurationThe frequency in seconds that the thin pool usage is analyzed. The default value is 300 (five minutes)unless SERVICED_STORAGE_STATS_UPDATE_INTERVAL is set in the configuration file. For moreinformation, see the section about configuration file environment variables.

Control Center Reference Guide
24
--zk-session-timeout DurationThe number of seconds the ZooKeeper leader waits before flushing an inactive connection. The defaultvalue is 15 unless SERVICED_ZK_SESSION_TIMEOUT is set in the configuration file. For moreinformation, see the section about configuration file environment variables.
auth-token-expiryThe expiration time, in seconds, of delegate authentication tokens. The default value is 3600 (one hour)unless SERVICED_AUTH_TOKEN_EXPIRATION is set in the configuration file. For more information, seethe section about configuration file environment variables.
--logtostderrWrite log messages to STDERR instead of the system log.
--alsologtostderrWrite log messages to STDERR as well as the system log.
--logstashurl Host:PortThe endpoint of the logstash service. The default value of Host is the IP address or hostname of theserviced master host and the default value of Port is 5042. If SERVICED_LOG_ADDRESS is set in theconfiguration file, its value is used instead of the default endpoint. For more information, see the sectionabout configuration file environment variables.
--logstash-es Host:PortThe endpoint of the logstash Elasticsearch service. The default value of Host is the IP address of the masterhost, and the default value of Port is 9100. If SERVICED_LOGSTASH_ES is set in the configuration file, itsvalue is used instead of the default endpoint.
--logstash-max-days DurationThe maximum number of days to keep application logs in the logstash database before purging them. Thedefault value of Duration is 14, unless SERVICED_LOGSTASH_MAX_DAYS is set in the configurationfile. When this argument and --logstash-max-size are used at the same time, both conditionsare evaluated and enforced. For more information, see the section about configuration file environmentvariables.
--logstash-max-size QuantityThe maximum size of the logstash database, in gigabytes. When this argument and --logstash-max-days are used at the same time, both conditions are evaluated and enforced. The default value of Quantityis 10, unless SERVICED_LOGSTASH_MAX_SIZE is set in the configuration file. For more information, seethe section about configuration file environment variables.
--logstash-cycle-time DurationThe amount of time between logstash purges, in hours. The default value is 6 unlessSERVICED_LOGSTASH_CYCLE_TIME is set in the configuration file. For more information, see thesection about configuration file environment variables.
--v LevelThe log level serviced uses when writing to the system log. Valid values are 0 (normal) and 2(debug). The default value is 0, unless SERVICED_LOG_LEVEL is set in the configuration file. For moreinformation, see the section about configuration file environment variables.
--stderrthreshold LevelWrite log messages at or above Level to STDERR, in addition to the system log. The value of Level may be0 (INFO), 1 (WARNING), 2 (ERROR), or 3 (FATAL). The default value is 2.
--vmoduleModule-specific logging. For more information, refer to the Google Logging documentation.
--log_backtrace_at File:LineEmit a stack trace when logging hits the specified line and file.

Command-line interface reference
25
--config-file PathThe path of the configuration file. The default is /etc/default/serviced.
--allow-loop-back ValueDetermines whether loop-back files can be used with the devicemapper storage driver. This option isnot supported for production use.
--versionDisplay minimal version information about the serviced binary. To display additional information, usethe serviced version command.
[--help|--h]Display help information.
COMMANDS
backup
Copy all templates, services, and application data into a compressed tar archive file.config
Report on the serviced configuration.docker
Docker administration commands.[help|h]
Display a global or command-specific help message.host
Administer hosts.healthcheck
Report on the health of serviced.key
Display the host's public key.log
Administer logs.metric
Administer metrics.pool
Administer resource pools.restore
Reconstruct templates, services, and application data from a compressed tar archive file created withbackup.
script
Verify or perform the commands in a script file.service
Administer services.snapshot
Administer snapshots.server
Start serviced.

Control Center Reference Guide
26
template
Administer templates.version
Display serviced version information.volume
Administer volume data.
INVOCATION
Service (daemon) control commands include start, stop and reload. The reload command sendsSIGHUP to the daemon, which restarts all internal services except ZooKeeper.
sudo systemctl [start|stop|reload] serviced
MISCELLANEOUS
Sending SIGUSR1 to the serviced process toggles the log level between 0 and 2.
To attach to a container running on a remote host, log in to the container from the serviced master host. Ifyou are running a Linux shell on a delegate host, you can specify the --endpoint option in the servicedinvocation.
serviced relies on Docker, and some administration procedures include docker commands. However,commands that manipulate containers directly, such as docker pause, should not be used when servicedis running.
During installation, serviced creates the internal services directory on the master host, so servicedcommands must be run as root, or as a user with superuser privileges. After the master host is added as adelegate, serviced commands use the delegate host authorization keys, so root is no longer required.
ENVIRONMENTSERVICED_HOME
The install path of serviced. The default value is /opt/serviced.
FILES
/etc/default/serviced
serviced backupThe serviced backup command saves a snapshot of the current state of the system, the state of all services,and application data to a compressed tar archive file (.tgz).
USAGE
You can backup the entire system, or exclude certain directories, such as a directory that contains applicationperformance data. For more information and examples, see Backing up using the CLI on page 7.

Command-line interface reference
27
SYNTAX
serviced backup [command options] [arguments...]
OPTIONS--exclude '--exclude option --exclude option'
Subdirectory of the tenant volumes to exclude from a backup.--help, -h
Show the help for an option.
serviced dockerThe serviced docker command administers Docker images and registry.
USAGE
serviced docker [global options] command [command options] [arguments...]
COMMANDSThe following commands are available for serviced docker:sync
Asynchronously push all images from the serviced Docker registry index into the Docker registry.reset-registry
For upgrades only, download the latest images from the Docker registry and save them into the servicedDocker registry index.
migrate-registryMigrate Docker registry data into another remote registry.
overrideReplace an image in the Docker registry with a new image
help, hShow a list of commands or the help for a single command.
Usage
serviced docker
OPTIONS--generate-bash-completion
--help, -hShows the help for an option.
serviced hostThe serviced host command administers host data.

Control Center Reference Guide
28
USAGE
serviced host [global options] command [command options] [arguments...]
COMMANDSThe following commands are available for serviced host:list
Lists all hosts.add
Adds a host.remove, rm
Removes a host.register
Sets the authentication keys to use for a host. When KEYSFILE is -, keys are read from standard input(stdin).
set-memorySets the memory allocation for a specific host.
help, hShows a list of commands or the help for a single command.
Usage
serviced host
OPTIONS--generate-bash-completion
--help, -hShows the help for an option.
serviced keyThe serviced key command displays the host's public key.
USAGE
serviced key [global options] command [command options] [arguments...]
COMMANDSThe following commands are available for serviced key:list
Shows the public key for the host.reset
Regenerates the public key for the host.help, h
Show a list of commands or the help for a single command.

Command-line interface reference
29
Usage
serviced key
OPTIONS--generate-bash-completion
--help, -hShows the help for an option.
serviced log exportThe serviced log export command exports application log files from Elasticsearch for one or moreservices based on service identifier or service name.
USAGE
command export [command options] [arguments...]
Example:
serviced log export
OPTIONS--from
Specify the start date in format yyyy.mm.dd.--to
Specify the end date in format yyyy.mm.dd.--service '--service option --service option'
Specify the service ID or service name with path (<pool>/<path>/<name>). Includes all subservices.--out
Specify the path to the output files.--debug, -d
Show additional diagnostic messages.
serviced poolThe serviced pool command administers Control Center resource pool data.
USAGE
Use this command to view and manage Control Center resource pools.
SYNTAX
serviced pool [global options] command [command options] [arguments...]

Control Center Reference Guide
30
OPTIONS--generate-bash-completion
--help, -hShow the help for an option.
COMMANDSThe following commands are available for serviced pool:list
List all pools.add
Add a new resource pool.remove, rm
Remove an existing resource pool.list-ips
Lists the IP addresses for a resource pool.add-virtual-ip
Add a virtual IP address to a resource pool.remove-virtual-ip
Remove a virtual IP address from a resource pool.set-conn-timeout
Set a connection timeout for a high-latency resource pool (for example, 5m, 2h, 6.6s).set-permission
Set permission flags for hosts in a resource pool.help, h
Show a list of commands or the help for a single command.
serviced pool set-permission
The serviced pool set-permission command sets permission flags for hosts in the resource pool,POOLID. Before removing access to administrative functions (--admin), remove DFS access.
Syntax:
serviced pool set-permission [CommandOptions] POOLID
Command options:--dfs
Control permission to mount DFS.--admin
Control permission to use administrative functions.
Examples
Give a resource pool distributed file system (DFS) access:
serviced pool set-permission --dfs pool_01_140620

Command-line interface reference
31
Give a resource pool access to administrative functions:
serviced pool set-permission --admin pool_01_140620
Remove DFS access permission from a resource pool.
Note If you need to remove access to administrative functions, first remove DFS access.
serviced pool set-permission --dfs=false pool_01_140620
Remove resource pool access to administrative functions.
Note If you need to remove access to administrative functions, first remove DFS access.
serviced pool set-permission --admin=false pool_01_140620
serviced restoreThe serviced restore command restores an instance of an application from a backup file on the samesystem. You can also duplicate your instance on a similar cluster for testing or failover purposes by restoring abackup file to a new, similarly configured cluster.
USAGE
If you are restoring from a backup that was taken on another system, copy the backup archive file to the targetsystem. For more information, see Restoring from a backup on page 9.
SYNTAX
serviced restore [command options] [arguments...]
OPTIONS--help, -h
Show the help for an option.
serviced scriptThe serviced script command verifies or performs the commands in a script file.
USAGE
A script file is a text file that contains commands to automate common or repetitive tasks and tasks that mightrequire specific services or conditions.
The serviced script command provides three subcommands.help
Display the help message.parse
Verify the syntax of a script file.

Control Center Reference Guide
32
run
Perform the commands in a script file.
The correct invocation of serviced script run depends on whether the REQUIRE_SVC command ispresent in a script file.
■ If a script file does not include REQUIRE_SVC, no additional parameters are required. For example:
serviced script run task1.txt
■ If a script file includes REQUIRE_SVC, the --service parameter is required. For example:
serviced script run task2.txt --service Zenoss.core
The log file of a serviced script run invocation is /var/log/serviced/script-TIMESTAMP-$USER.log
Note To commit a container, a serviced script run invocation must be performed on the ControlCenter master host.
SYNTAX
The script file syntax rules are as follows:
■ Lines that contain no text and lines that start with the number sign character (#) are ignored.■ Lines are terminated with LF or CR+LF.■ A command and its arguments cannot span lines.■ The maximum number of characters per line (command and arguments) is 300000.■ Unless otherwise noted, all command arguments are treated as strings.
COMMANDS
Commands are performed in the order in which they occur in a script. Scripts terminate on completion and whena command returns an exit code other than zero.DESCRIPTION argument...
A statement about the script.Scripts may contain one or zero DESCRIPTION commands. At least one argument is required.
VERSION argumentA revision reference for the script.Scripts may contain one or zero VERSION commands. Only one argument is supported.
REQUIRE_SVC
The script needs a reference service in order to perform some or all of its tasks. The service is specified withthe --service parameter of the serviced script run command.Scripts may contain one or zero REQUIRE_SVC commands.
SNAPSHOT
Perform a snapshot. If a script command fails, serviced rolls back to the most recent snapshot.The REQUIRE_SVC command must be present in the script.Scripts may contain multiple SNAPSHOT commands.

Command-line interface reference
33
SVC_USE Image-IDUse the specified image for script commands that occur after this SVC_USE command. If your applicationuses multiple images, enter additional SVC_USE commands to specify each image. If the specified image isnot present in the local Docker registry, serviced attempts to pull it from Docker Hub.The REQUIRE_SVC command must be present in the script.Scripts may contain multiple SVC_USE commands. Only one argument is supported.
SVC_RUN Service Run-Command argumentsInvoke one of the pre-defined commands associated with a service.Service must be the absolute path of a service, with each service in the path separated by the soliduscharacter (/). For example, Zenoss.core/Zope.The REQUIRE_SVC command must be present in the script.Scripts may contain multiple SVC_RUN commands. Multiple arguments are supported.
SVC_EXEC [COMMIT|NO_COMMIT] Service argument...Start a new container to run arbitrary commands. (Equivalent to a non-interactive invocation of servicedservice shell.)When COMMIT is specified, changes are committed on successful completion of the commands inargument. When NO_COMMIT is specified, changes are not committed.Service must be the absolute path of a service, with each service in the path separated by the soliduscharacter (/). For example, Zenoss.core/Zope.The REQUIRE_SVC command must be present in the script.Scripts may contain multiple SVC_EXEC commands.
SVC_START {auto|recurse} ServiceStart a new instance of Service.If auto or recurse is not specified, all configured instances of Service are started. If auto or recurseis specified, all configured instances of Service and all of their child services are started.Service must be the absolute path of a service, with each service in the path separated by the soliduscharacter (/). For example, Zenoss.core/Zope.The REQUIRE_SVC command must be present in the script.Scripts may contain multiple SVC_START commands.
SVC_STOP {auto|recurse} ServiceStop the specified service.If auto or recurse is not specified, all instances of Service are stopped. If auto or recurse isspecified, all instances of Service and all of their child services are stopped.Service must be the absolute path of a service, with each service in the path separated by the soliduscharacter (/). For example, Zenoss.core/Zope.The REQUIRE_SVC command must be present in the script.Scripts may contain multiple SVC_STOP commands.
SVC_RESTART {auto|recurse} ServiceRestart the specified service.If auto or recurse is not specified, all instances of Service are restarted. If auto or recurse isspecified, all instances of Service and all of their child services are restarted.Service must be the absolute path of a service, with each service in the path separated by the soliduscharacter (/). For example, Zenoss.core/Zope.The REQUIRE_SVC command must be present in the script.

Control Center Reference Guide
34
Scripts may contain multiple SVC_RESTART commands.SVC_WAIT Service... [started|stopped|paused] Duration
Pause Duration seconds, or pause until the specified service or services reach the started, stopped, orpaused state. If the state is not reached when Duration expires, the command fails.Duration must be an integer.Each Service must be the absolute path of a service, with each service in the path separated by the soliduscharacter (/). For example, Zenoss.core/Zope.The REQUIRE_SVC command must be present in the script.Scripts may contain multiple SVC_WAIT commands.
serviced serviceThe serviced service command lets you manage an application's individual services.
USAGE
Use this command to perform administrative actions on a specific service.
SYNTAX
serviced service [global options] command [command options] \ [arguments...]
COMMANDSThe following commands are available for serviced service:list
List all services.status
Display the status of deployed services.add
Add a service.clone
Clone a service.remove, rm
Remove a service.edit
Edit a service in a text editor.assign-ip
Assign an IP address to service endpoints that require an explicit IP address.start
Start a service.restart
Restart a service.stop
Stop a service.

Command-line interface reference
35
shellStart a service instance.
runRun a service command in a service instance.
attachRun an arbitrary command in a running service container.
actionRun a predefined action in a running service container.
logsDisplay the log contents for a running service container by calling docker logs.
list-snapshotsList all snapshots of a service.
snapshotTake a snapshot of a service.
endpointsList the endpoints that are defined for a service.
public-endpointsManage public endpoints for a service.
help, hShow a list of commands or the help for a single command.
GLOBAL OPTIONS--generate-bash-completion
--help, -hShows the help for an option.
serviced service [start | restart | stop]
By default, Control Center version 5.2.0 and later schedules services in the background to start, restart, and stop.The asynchronous scheduling improves the speed of these operations, especially in large-scale installations.However, if you use a script that depends on synchronous scheduling that was used in earlier versions of ControlCenter, specify the command line option --sync.
Syntax:
serviced service [start | restart | stop] [-s|--sync] ServiceID
Command option:--sync, -s
Schedules services synchronously. Specify this flag if a script expects the serviced service[start | restart | stop] command to wait to return until the service operation has beenscheduled. If this flag is not specified, services are scheduled asynchronously, in the background.
serviced snapshotThe serviced snapshot command administers environment snapshots.

Control Center Reference Guide
36
USAGE
Use this command to create a short-term save point of a system. For more information, see Snapshot androllback on page 10.
SYNTAX
serviced snapshot [global options] \ command [command options] [arguments...]
COMMANDSThe following commands are available for serviced snapshot:list
List all snapshots.add
Take a snapshot of an existing service.remove, rm
Remove an existing snapshot.commit
Take a snapshot of and commit a given service instance.rollback
Restore the environment to the state of the given snapshot.tag
Tag an existing snapshot with TAG-NAME.untag
Remove a tag from an existing snapshot.help, h
Show a list of commands or the help for a single command.
OPTIONS--generate-bash-completion
--help, -hShow the help for an option.
serviced-storageThe serviced-storage command manages Control Center storage.
USAGE
Use this command to create LVM thin pools for Docker Engine and Control Center.
SYNTAX
serviced-storage [-h|--help] [-o DeviceMapperOption=Value] \ [-v] Command [CommandOptions]

Command-line interface reference
37
GLOBAL OPTIONS--help, -h
Shows the help information.-o DeviceMapperOption=Value
A device mapper option. Applies only to device mapper drivers.-v
Displays verbose logging.
COMMANDScheck
Check for orphaned devices.create
Create a volume on a driver.create-thin-pool
Create an LVM thin pool.disable
Disable a driver.init
Initialize a driver.list
Print volumes on a driver.mount
Mount an existing volume from a driver.remove
Remove an existing volume from a driver.resize
Resize an existing volume.set
Set the default driver.status
Print the driver statussync
Sync data from a volume to another volume.unset
Unset the default driver.version
Print the version and exit.
serviced-storage check
The serviced-storage check command searches for orphaned snapshot devices in the servicedapplication data thin pool and removes them, if requested. This command requires the path of servicedtenant volumes, which is determined by the SERVICED_VOLUMES_PATH variable in /etc/default/serviced. The default path is /opt/serviced/var/volumes.
Control Center Reference Guide
38
Syntax:
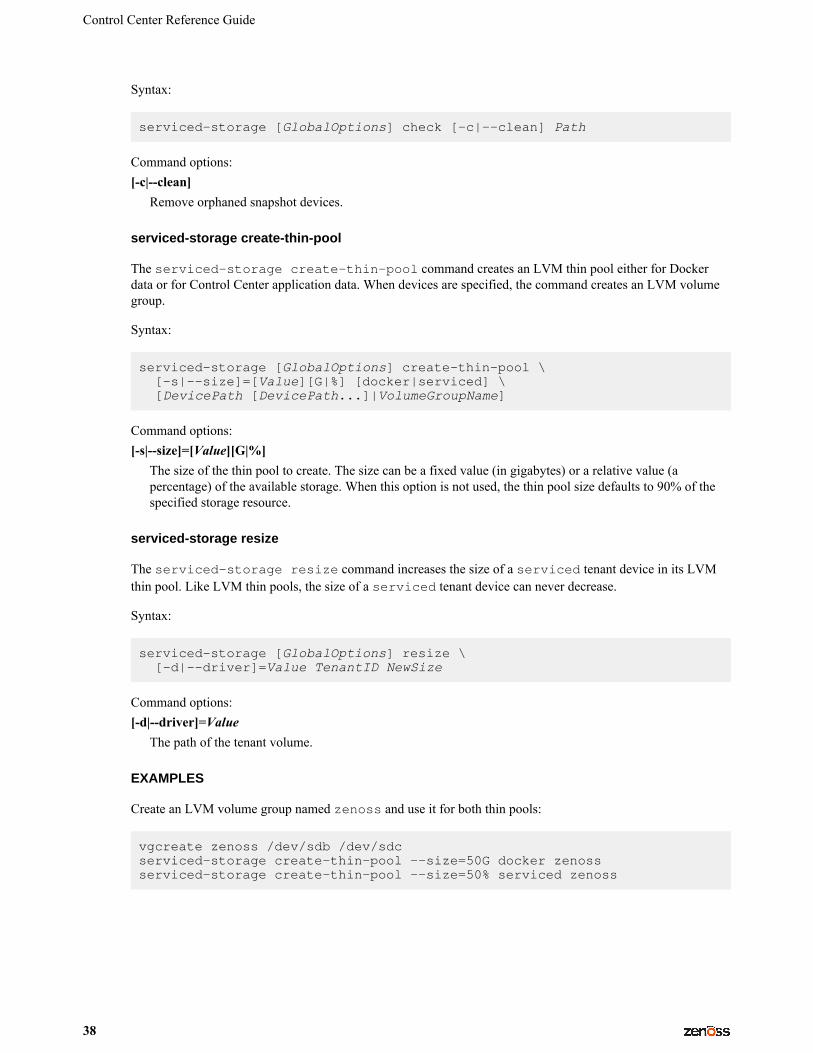
serviced-storage [GlobalOptions] check [-c|--clean] Path
Command options:[-c|--clean]
Remove orphaned snapshot devices.
serviced-storage create-thin-pool
The serviced-storage create-thin-pool command creates an LVM thin pool either for Dockerdata or for Control Center application data. When devices are specified, the command creates an LVM volumegroup.
Syntax:
serviced-storage [GlobalOptions] create-thin-pool \ [-s|--size]=[Value][G|%] [docker|serviced] \ [DevicePath [DevicePath...]|VolumeGroupName]
Command options:[-s|--size]=[Value][G|%]
The size of the thin pool to create. The size can be a fixed value (in gigabytes) or a relative value (apercentage) of the available storage. When this option is not used, the thin pool size defaults to 90% of thespecified storage resource.
serviced-storage resize
The serviced-storage resize command increases the size of a serviced tenant device in its LVMthin pool. Like LVM thin pools, the size of a serviced tenant device can never decrease.
Syntax:
serviced-storage [GlobalOptions] resize \ [-d|--driver]=Value TenantID NewSize
Command options:[-d|--driver]=Value
The path of the tenant volume.
EXAMPLES
Create an LVM volume group named zenoss and use it for both thin pools:
vgcreate zenoss /dev/sdb /dev/sdcserviced-storage create-thin-pool --size=50G docker zenossserviced-storage create-thin-pool --size=50% serviced zenoss

Command-line interface reference
39
If you specify devices or partitions, serviced-storage creates an LVM volume group with the same nameas the thin pool. The following example yields the same result as the previous, except the name of the volumegroup is docker instead of zenoss:
serviced-storage create-thin-pool --size=50G docker /dev/sdb /dev/sdcserviced-storage create-thin-pool --size=50% serviced docker
Create thin pools on separate block devices:
serviced-storage create-thin-pool --size=50G docker /dev/sdbserviced-storage create-thin-pool --size=200G serviced /dev/sdc
Create thin pools on separate partitions:
serviced-storage create-thin-pool --size=50% docker /dev/sdb1serviced-storage create-thin-pool serviced /dev/sdc3
Increase the size of the serviced LVM thin pool, and then increase the size of a serviced tenant device.
lvextend -L+300G zenoss/serviced-poolserviced-storage -o dm.thinpooldev=/dev/mapper/zenoss-serviced--pool \ resize -d /opt/serviced/var/volumes 58uuetj38draeu9alp6002b1y 200G
Identify the serviced application data thin pool, and then remove orphaned snapshot devices.
ls /dev/mapper | grep servicedserviced-storage -o dm.thinpooldev=/dev/mapper/zenoss-serviced--pool \ check -c /opt/serviced/var/volumes
Control Center configuration file
The Control Center configuration file, /etc/default/serviced, contains Bash environment variablesthat are read by the serviced daemon startup script. The order of the following list matches the order of thevariables in the file.
Note All of the environment variables declared in this file are available to all of the containers thatserviced manages. You can add any valid Bash shell variable to this file for application containers to use.For compatibility, please avoid variables that begin with SERVICED.
HOMEDefault: (the value of shell variable HOME)The path Docker Engine clients use to locate the .dockercfg authentication file, which contains DockerHub credentials.
TMPDIRDefault: (the value of shell variable TMPDIR)The path serviced uses for temporary files.
GOMAXPROCSDefault: 2The maximum number of CPU cores serviced uses.

Control Center Reference Guide
40
SERVICED_MASTERDefault: 1 (true)Assigns the role of a serviced instance, either master or delegate. The master runs the applicationservices scheduler and other internal services. Delegates run the application services assigned to theresource pool to which they belong.Only one serviced instance can be the master; all other instances must be delegates. The defaultvalue assigns the master role. To assign the delegate role, set the value to 0 (false). This variable must beexplicitly set on all Control Center cluster hosts.
SERVICED_MASTER_IPDefault: 127.0.0.1A convenience variable, for use in places where the IP address or hostname of the master host is required.This variable is unused unless it is both set here and referenced elsewhere. (For example, by replacing{{SERVICED_MASTER_IP}} with $SERVICED_MASTER_IP.)
SERVICED_MASTER_POOLIDDefault: defaultThe name of the default resource pool. This variable is only used the first time serviced is started.
SERVICED_ZKDefault: (none)The list of endpoints in the serviced ZooKeeper ensemble, separated by the comma character (,). Eachendpoint identifies an ensemble node.
SERVICED_DOCKER_REGISTRYDefault: {{SERVICED_MASTER_IP}}:5000The endpoint of the serviced Docker registry host. On delegate hosts, replace{{SERVICED_MASTER_IP}} with the IP address or hostname of the registry host, which by default isthe serviced master host.The value used to replace {{SERVICED_MASTER_IP}} in this variable must match the value of the --insecure-registry flag in the /etc/sysconfig/docker file.
SERVICED_OUTBOUND_IPDefault: (none)The default startup routines of serviced include attempting to ping google.com. When a value is setfor this variable, serviced does not attempt the ping and assumes it does not have internet access.Use this variable to specify the IP address of a network interface other than the default, or to preventserviced from assuming it has internet access.
Note Setting the Docker HTTP_PROXY or HTTPS_PROXY environment variables prevents access tothe IP address defined with this variable. To enable access, unset the Docker variables, and then reboot thehost.
SERVICED_STATIC_IPSDefault: (none)A list of one or more static IP addresses that are available for IP assignment. Use the comma character (,)to separate addresses.
SERVICED_ENDPOINTDefault: {{SERVICED_MASTER_IP}}:4979The endpoint of the serviced RPC server. Replace {{SERVICED_MASTER_IP}} with the IP addressor hostname of the serviced master host. The port number of this endpoint must match the value of theSERVICED_RPC_PORT variable defined on the serviced master host.

Command-line interface reference
41
SERVICED_MAX_RPC_CLIENTSDefault: 3The preferred maximum number of simultaneous connections a serviced delegate uses for RPC requests.The value is used to create a pool of sockets, which are reused as needed. Increasing the value increases thenumber of open sockets and the use of socket-related operating system resources.When the demand for connections exceeds the supply of open sockets, serviced opens more sockets.When demand eases, serviced reduces the number of open sockets to the preferred maximum.
SERVICED_RPC_PORTDefault: 4979The port on which the serviced RPC server listens for connections. The value of this variable mustmatch the port number defined for the SERVICED_ENDPOINT variable on all serviced delegate hosts.
SERVICED_RPC_CERT_VERIFYDefault: falseDetermines whether serviced performs TLS certificate verification for RPC connections. The certificateis defined by the SERVICED_CERT_FILE variable.
SERVICED_RPC_DISABLE_TLSDefault: falseDetermines whether serviced encrypts RPC traffic with TLS.
SERVICED_RPC_TLS_MIN_VERSIONDefault: VersionTLS10The minimum version of TLS serviced accepts for RPC connections. Valid values include the default,VersionTLS11, and VersionTLS12.
SERVICED_RPC_TLS_CIPHERSDefault: (list of ciphers)The list of TLS ciphers serviced prefers for RPC connections, separated by the comma character (,):
■ TLS_ECDHE_RSA_WITH_AES_128_CBC_SHA
■ TLS_RSA_WITH_AES_128_CBC_SHA
■ TLS_RSA_WITH_AES_256_CBC_SHA
■ TLS_ECDHE_RSA_WITH_AES_256_CBC_SHA
■ TLS_ECDHE_RSA_WITH_AES_128_GCM_SHA256
Other ciphers are supported; the preceding ciphers provide strong security for relatively low processingoverhead.An instance of serviced is on both ends of an RPC connection, so both daemons use the first cipher inthe list. To use a different cipher, put it first in the list, on all cluster hosts.
SERVICED_UI_PORTDefault: :443The port on which the HTTP server listens for requests. The value may be expressed as follows:
■ IP-Address:Port-Number■ :Port-Number■ Port-NumberAll Control Center cluster hosts must have the same value for this variable.
SERVICED_UI_POLL_FREQUENCYDefault: 3

Control Center Reference Guide
42
The number of seconds between polls from Control Center browser interface clients. The value is includedin a JavaScript library that is sent to the clients.
SERVICED_MUX_PORTDefault: 22250The port serviced uses for traffic among Docker containers.
SERVICED_MUX_DISABLE_TLSDefault: 0Determines whether inter-host traffic among Docker containers is encrypted with TLS. Intra-host trafficamong Docker containers is not encrypted. To disable encryption, set the value to 1.
SERVICED_MUX_TLS_MIN_VERSIONDefault: VersionTLS10The minimum version of TLS serviced accepts for mux traffic. Valid values include the default,VersionTLS11, and VersionTLS12.
SERVICED_MUX_TLS_CIPHERSDefault: (list of ciphers)The list of TLS ciphers serviced prefers for mux traffic, separated by the comma character (,):
■ TLS_ECDHE_RSA_WITH_AES_128_CBC_SHA
■ TLS_RSA_WITH_AES_128_CBC_SHA
■ TLS_RSA_WITH_AES_256_CBC_SHA
■ TLS_ECDHE_RSA_WITH_AES_256_CBC_SHA
■ TLS_ECDHE_RSA_WITH_AES_128_GCM_SHA256
Other ciphers are supported; the preceding ciphers provide strong security for relatively low processingoverhead.An instance of serviced is on both ends of a mux connection, so both daemons use the first cipher in thelist. To use a different cipher, put it first in the list, on all cluster hosts.
SERVICED_ISVCS_PATHDefault: /opt/serviced/var/isvcsThe location of serviced internal services data.
SERVICED_VOLUMES_PATHDefault: /opt/serviced/var/volumesThe location of serviced application data.
SERVICED_BACKUPS_PATHDefault: /opt/serviced/var/backupsThe location of serviced backup files.
SERVICED_KEY_FILEDefault: $TMPDIR/zenoss_key.[0-9]+The path of a digital certificate key file. Choose a location that is not modified during operating systemupdates, such as /etc.This key file is used for all TLS-encrypted communications (RPC, mux, and HTTP). The default, insecurekey file is created when the serviced web server first starts, and is based on a public key that is compiledinto serviced.
SERVICED_CERT_FILEDefault: $TMPDIR/zenoss_cert.[0-9]+

Command-line interface reference
43
The path of a digital certificate file. Choose a location that is not modified during operating system updates,such as /etc. Certificates with passphrases are not supported.This certificate file is used for all TLS-encrypted communications (RPC, mux, and HTTP). The default,insecure certificate file is created when the serviced web server first starts, and is based on a publiccertificate that is compiled into serviced.
SERVICED_TLS_MIN_VERSIONDefault: VersionTLS10The minimum version of TLS that serviced accepts for HTTP traffic. Valid values include the default,VersionTLS11, and VersionTLS12.
SERVICED_TLS_CIPHERSDefault: (list of ciphers)The list of TLS ciphers that serviced accepts for HTTP traffic, separated by the comma character (,):
1 TLS_ECDHE_RSA_WITH_AES_128_GCM_SHA256
2 TLS_ECDHE_ECDSA_WITH_AES_128_GCM_SHA256
3 TLS_ECDHE_RSA_WITH_AES_256_GCM_SHA384
4 TLS_ECDHE_ECDSA_WITH_AES_256_GCM_SHA384
5 TLS_ECDHE_RSA_WITH_AES_256_CBC_SHA
6 TLS_ECDHE_RSA_WITH_AES_128_CBC_SHA
7 TLS_ECDHE_RSA_WITH_3DES_EDE_CBC_SHA
8 TLS_ECDHE_ECDSA_WITH_AES_256_CBC_SHA
9 TLS_ECDHE_ECDSA_WITH_AES_128_CBC_SHA
10 TLS_RSA_WITH_AES_256_CBC_SHA
11 TLS_RSA_WITH_AES_128_CBC_SHA
12 TLS_RSA_WITH_3DES_EDE_CBC_SHA
13 TLS_RSA_WITH_RC4_128_SHA
14 TLS_RSA_WITH_AES_128_GCM_SHA256
15 TLS_RSA_WITH_AES_256_GCM_SHA384
16 TLS_ECDHE_ECDSA_WITH_RC4_128_SHA
17 TLS_ECDHE_RSA_WITH_RC4_128_SHA
To disable support for most ciphers, you can remove them from the list. The following rules apply to thelist:
■ The first cipher, TLS_ECDHE_RSA_WITH_AES_128_GCM_SHA256, must always be present in thelist of ciphers.
■ The first four ciphers in the list must always precede any of the ciphers that appear after the first four.The first four ciphers are valid for HTTP/2, while the remaining ciphers are not.
SERVICED_FS_TYPEDefault: devicemapperThe driver to manage application data storage on the serviced master host. Only devicemapper issupported in production deployments.The only supported storage layout for the devicemapper driver is an LVM thin pool. To create athin pool, use the serviced-storage utility. To specify the name of the thin pool device, use theSERVICED_DM_THINPOOLDEV variable.
SERVICED_DM_ARGSDefault: (none)

Control Center Reference Guide
44
Customized startup arguments for the devicemapper storage driver.SERVICED_DM_BASESIZE
Default: 100GThe base size of virtual storage devices for tenants in the application data thin pool, in gigabytes. The unitssymbol (G) is required. This variable is used when serviced starts for the first time, to set the initial sizeof tenant devices, and when a backup is restored, to set the size of the restored tenant device.The base size device is sparse device that occupies at most 1MB of space in the application data thin pool;its size has no immediate practical impact. However, the application data thin pool should have enoughspace for twice the size of each tenant device it supports, to store both the data itself and snapshots of thedata. Since the application data thin pool is an LVM logical volume, its size can be increased at any time.Likewise, the size of a tenant device can be increased, as long as the available space in the thin pool cansupport the larger tenant device plus snapshots.
SERVICED_DM_LOOPDATASIZEDefault: 100GSpecifies the size of the data portion of the loop-back file. This setting is ignored whenSERVICED_ALLOW_LOOP_BACK is false.
SERVICED_DM_LOOPMETADATASIZEDefault: 2GSpecifies the size of the metadata portion of the loop-back file. This setting is ignored whenSERVICED_ALLOW_LOOP_BACK is false.
SERVICED_DM_THINPOOLDEVDefault: (none)The name of the thin pool device to use with the devicemapper storage driver.
SERVICED_STORAGE_STATS_UPDATE_INTERVALDefault: 300 (5 minutes)The number of seconds between polls of kernel statistics about the application data thin pool.This setting is ignored when the operating system kernel version is less than 3.10.0-366.
SERVICED_ALLOW_LOOP_BACKDefault: falseDetermines whether loop-back files can be used with the devicemapper storage driver. This option isnot supported for production use.
SERVICED_MAX_CONTAINER_AGEDefault: 86400 (24 hours)The number of seconds serviced waits before removing a stopped container.
SERVICED_VIRTUAL_ADDRESS_SUBNETDefault: 10.3.0.0/16The private subnet for containers that use virtual IP addresses on a host. This value may be unique on eachcluster host, if necessary.RFC 1918 restricts private networks to the 10.0/24, 172.16/20, and 192.168/16 address spaces. However,serviced accepts any valid IPv4 address space.Specify the value in CIDR notation. A /29 network provides sufficient address space.
SERVICED_LOG_LEVELDefault: 0The log level serviced uses when writing to the system log. Valid values are 0 (normal) and 2 (debug).

Command-line interface reference
45
SERVICED_LOG_ADDRESSDefault: {{SERVICED_MASTER_IP}}:5042The endpoint of the logstash service. Replace {{SERVICED_MASTER_IP}} with the IP address orhostname of the serviced master host.
SERVICED_LOGSTASH_ESDefault: {{SERVICED_MASTER_IP}}:9100The endpoint of the Elasticsearch service for logstash. On delegate hosts, replace{{SERVICED_MASTER_IP}} with the IP address or hostname of the Elasticsearch host, which bydefault is the serviced master host.
SERVICED_LOGSTASH_MAX_DAYSDefault: 14The maximum number of days to keep application logs in the logstash database before purging them.
SERVICED_LOGSTASH_MAX_SIZEDefault: 10The maximum size of the logstash database, in gigabytes.
SERVICED_LOGSTASH_CYCLE_TIMEDefault: 6The amount of time between logstash purges, in hours.
SERVICED_STATS_PORTDefault: {{SERVICED_MASTER_IP}}:8443The endpoint of the serviced metrics consumer service. Replace {{SERVICED_MASTER_IP}} withthe IP address or hostname of the serviced master host.
SERVICED_STATS_PERIODDefault: 10The frequency, in seconds, at which delegates gather metrics to send to the serviced metrics consumerservice on the master host.
SERVICED_SVCSTATS_CACHE_TIMEOUTDefault: 5The number of seconds to cache statistics about services. The cache is used by Control Center browserinterface clients.
SERVICED_DEBUG_PORTDefault: 6006The port on which serviced listens for HTTP requests for the Go profiler. To stop listening for requests,set the value to -1.
SERVICED_ISVCS_ENV_[0-9]+Default: (none)
Startup arguments to pass to internal services. You may define multiple arguments, each for a differentinternal service. The variables themselves, and their arguments, use the following syntax:SERVICED_ISVCS_ENV_%d
Each variable name ends with a unique integer in place of %d.Service-Name:Key=Value
The value of each variable includes the following elements, in order:

Control Center Reference Guide
46
1 Service-Name, the internal service name. The following command returns the internal service namesthat may be used for Service-Name:
docker ps | awk '/serviced-isvcs:/{print $NF}'
2 The colon character (:).3 Key, a variable to pass to the internal service.4 The equals sign character (=).5 Value, the definition of the variable to pass to the internal service.
The following example variable passes ES_JAVA_OPTS=-Xmx4g to the Elasticsearch internal service.
SERVICED_ISVCS_ENV_0=serviced-isvcs_elasticsearch-logstash:ES_JAVA_OPTS=-Xmx4g
SERVICED_ADMIN_GROUPDefault: wheelThe name of the Linux group on the serviced master host whose members are authorized to use theserviced browser interface. You may replace the default group with a group that does not have superuserprivileges.
SERVICED_ALLOW_ROOT_LOGINDefault: 1 (true)Determines whether the root user account on the serviced master host may be used to gain access tothe serviced browser interface.
SERVICED_IPTABLES_MAX_CONNECTIONSDefault: 655360The default value of this variable ensures that a serviced delegate does not run out of connections if theserviced master goes down. The connections are automatically cleaned up by the kernel soon after theserviced master comes back online.
SERVICED_SNAPSHOT_TTLDefault: 12The number of hours an application data snapshot is retained before removal. To disable snapshot removal,set the value to zero. The application data storage can fill up rapidly when this value is zero or too high.
SERVICED_NFS_CLIENTDefault: 1DEPRECATED: Prevent a delegate host from mounting the DFS.
SERVICED_SERVICE_MIGRATION_TAGDefault: 1.0.2Overrides the default value for the service migration image.
SERVICED_ISVCS_STARTDefault: (none)Enables one or more internal services to run on a delegate host. Currently, only zookeeper is supported.
SERVICED_ISVCS_ZOOKEEPER_IDDefault: (none)The unique identifier of a ZooKeeper ensemble node. The identifier must be a positive integer.
SERVICED_ISVCS_ZOOKEEPER_QUORUMDefault: (none)

Command-line interface reference
47
The comma-separated list of nodes in a ZooKeeper ensemble. Each entry in the list specifies the ZooKeeperID, IP address or hostname, peer communications port, and leader communications port of a node in theensemble. Each quorum definition must be unique, so the IP address or hostname of the "current" host mustbe 0.0.0.0.The following example shows the syntax of a node entry:
ZooKeeper-ID@Host-IP-Or-Name:2888:3888
SERVICED_DOCKER_LOG_DRIVERDefault: json-fileThe log driver for all Docker container logs, including containers for Control Center internal services. Validvalues:
■ json-file
■ syslog
■ journald
■ gelf
■ fluentd
■ none
This is a direct port of the Docker --log-driver option.SERVICED_DOCKER_LOG_CONFIG
Default: max-file=5,max-size=10mA comma-separated list of Docker --log-opt options as key=value pairs. To specify the defaultvalues for a log driver, or for drivers that need no additional options, such as journald, use a singlecomma character (,) as the value of this variable.
SERVICED_DOCKER_DNSDefault: (empty)The IP address of one or more DNS servers. The value of this variable is injected into each Docker Enginecontainer that serviced starts. Separate multiple values with the comma character (,).
SERVICED_OPTSDefault: (empty)Special options for the serviced startup command.
SERVICED_SNAPSHOT_USE_PERCENTDefault: 20The amount of free space in the thin pool specified with SERVICED_DM_THINPOOLDEV, expressed as apercentage the total size. This value is used to determine whether the thin pool can hold a new snapshot.
SERVICED_ZK_SESSION_TIMEOUTDefault: 15The number of seconds the ZooKeeper leader waits before flushing an inactive connection.
SERVICED_ES_STARTUP_TIMEOUTDefault: 240The number of seconds to wait for the Elasticsearch service to start.
SERVICED_MAX_DFS_TIMEOUTDefault: 300The number of seconds until a DFS snapshot attempt times out.
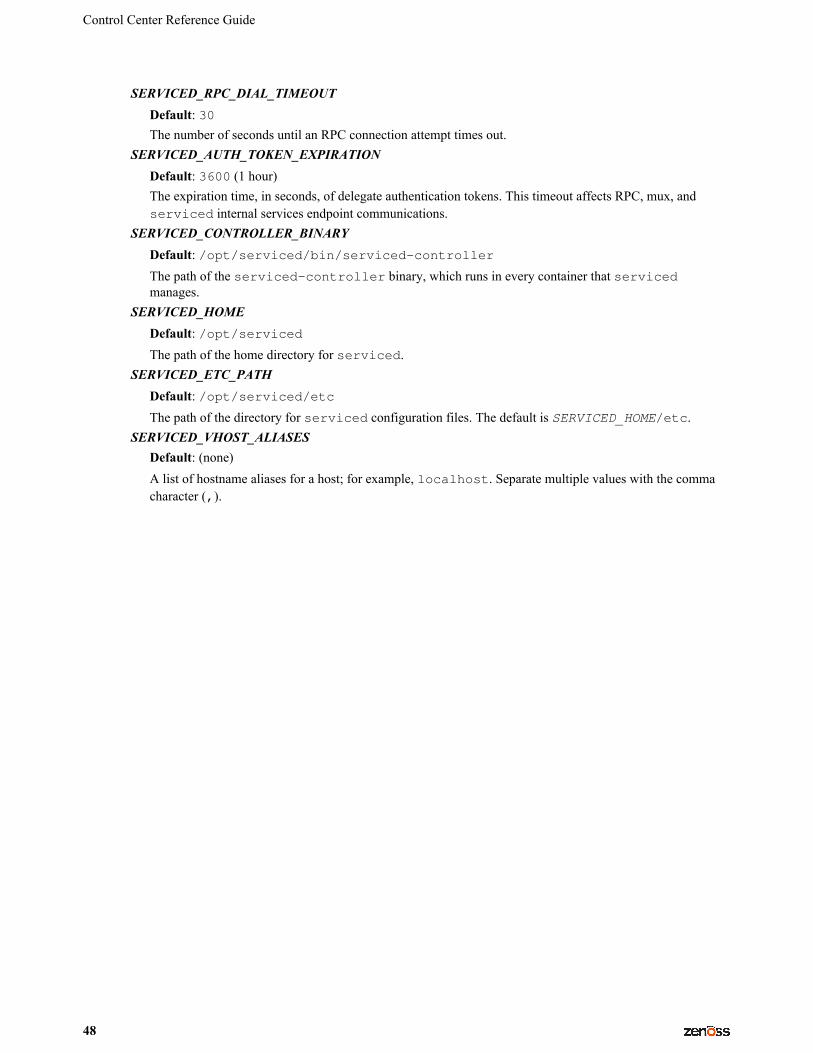
Control Center Reference Guide
48
SERVICED_RPC_DIAL_TIMEOUTDefault: 30The number of seconds until an RPC connection attempt times out.
SERVICED_AUTH_TOKEN_EXPIRATIONDefault: 3600 (1 hour)The expiration time, in seconds, of delegate authentication tokens. This timeout affects RPC, mux, andserviced internal services endpoint communications.
SERVICED_CONTROLLER_BINARYDefault: /opt/serviced/bin/serviced-controllerThe path of the serviced-controller binary, which runs in every container that servicedmanages.
SERVICED_HOMEDefault: /opt/servicedThe path of the home directory for serviced.
SERVICED_ETC_PATHDefault: /opt/serviced/etcThe path of the directory for serviced configuration files. The default is SERVICED_HOME/etc.
SERVICED_VHOST_ALIASESDefault: (none)A list of hostname aliases for a host; for example, localhost. Separate multiple values with the commacharacter (,).

Glossary
49
Glossary
applicationA collection of one or more software programs that have been converted into Docker containers.
clusterThe collection of hosts in one or more Control Center resource pools.
delegate hostA host that runs the application services scheduled for the resource pool to which it belongs. A system can beconfigured as delegate or master.
master hostThe host that runs the application services scheduler, the Docker registry, the distributed file system, and otherinternal services, including the server for the Control Center browser interface. A system can be configured asdelegate or master. Only one system in a Control Center cluster can be the master.
resource poolA collection of one or more hosts, each with its own compute, network, and storage resources. The name of thedefault resource pool is default. Control Center uses resource pools (except the default pool) to run serviceson specific hosts.
serviceA process and its supporting files that Control Center runs in a single container to provide specific functionalityas part of an application.
service definitionA service definition contains the information that Control Center needs to start and manage a service, inJavaScript Object Notation (JSON) format.
service templateA service template contains one or more service definitions, in JavaScript Object Notation (JSON) format.
servicedThe name of the Control Center service and a command-line client for interacting with the service.
tenantAn application that Control Center manages.