welcome booklet - d2e2oszluhwxlw.cloudfront.net · • welcome booklet • quick reference chart...
TRANSCRIPT

Welcome Booklet

2

3
Welcome. Things are heating up ... get ready!
In the box. Let’s unpack and admire your goodies.
At a glance. An overview of Cricut EasyPress controls.
Make it last. Suggestions for the longest-lasting iron-ons.
Instructions. Just a few easy steps to iron-on success.
The Cricut Advantage™. Resources for info and inspiration.
Cut your own designs. Tips for all you Cricut crafters.
Time and temperature chart. The perfect settings for your project.
More questions? Find answers at help.cricut.com/easypress.
4
6
8
10
12
16
20
22
4
Welcome
WELCOME
Hello, future iron-on pro. We’re so thrilled this Cricut EasyPress has found its way into your amazing hands. You inspired us with your passion to create and challenged us with your creative need: crazy-simple iron-on transfers that last and last and last. So, here you go! We cannot wait to see what you make with the magic of iron-on.

5

6
• Cricut EasyPress
• Safety Base
• Welcome Booklet
• Quick Reference Chart
• Practice project materials
• Warranty
IN THE BOX
In the box

7
Countdown timerBeeps when iron-on transfer is complete
Precise digital controlsEasy to set exact temperature and time
Comfortable handleSafe and easy to grip during use
9" x 9" evenly heated plateDry, even heat means flawless transfers
Safety BaseInsulated base keeps Cricut EasyPress™
in a protected, resting position
Auto shutoffShuts off automatically after 10 minutes
At a glanceThe simple Cricut EasyPress controls are the secret to your iron-on success. You’ll love the results.
TIP: To find the correct time and temperature settings for your specific iron-on project, refer to the included Quick Reference Chart. If you don’t see your project specifics listed, visit help.cricut.com/easypress.
8 AT A GLANCE

9
Set temperaturePress Temp button, then adjust value with plus (+) and minus (-) buttons. To switch from Fahrenheit to Celsius, press and hold the Temp button.
Set timePress Timer button, then adjust value with plus (+) and minus (-) buttons.
What the lights meanOrange light means it’s heating up.Green light means temperature has been reached.
Start timerPress the Cricut C button to start the countdown. A beep signals time is up.

10 MAKE IT LAST
Make it lastMaximize the life of your iron-on projects wash after wash with these suggestions.
Before iron-on application For awesome results, always pre-wash and thoroughly dry your fabrics. When washing, do not use fabric softener. If you have no time for washing, you’ll still get pretty great results.
During iron-on application
Just before transfer, preheat your base fabric for 3-5 seconds to remove wrinkles and moisture. After adhering your design, flip your fabric and repeat on the other side. Use the same settings.
After iron-on application
Wait at least 24 hours before washing. Always wash inside-out. Do not bleach. Wash only in cool water, then tumble dry low or lay flat to dry. For foil iron-ons, hand-wash in cold water only.
Get more great tips and suggestions at help.cricut.com/easypress.

11

Instructions
12 INSTRUCTIONS
We’ll take on a T-shirt in the following steps, but you can apply these instructions to anything your heart desires, from a purse to a pillowcase … to a wedding dress? (Yes, it’s been done!) We want to see the projects you’ve made using Cricut EasyPress. Share your iron-on creations using #CricutMade & #CricutEasyPress.
Caution: It may be easy, but it's also HOT. Handle EasyPress with care.

13
Get prepped
Power on Cricut EasyPress. Find a firm, flat, heat-resistant surface around waist height. We recommend that you use Cricut EasyPress Mat (pictured, sold separately) as your foundation. Just be sure to avoid flimsy, padded ironing boards.
Set time and temperature
Use the Quick Reference Chart to determine the settings for your project. The beep signals Cricut EasyPress is ready to use.
1
2

1414
Preheat mat and base material
Place Cricut EasyPress on your fabric for 3 – 5 seconds to remove wrinkles and moisture.
Position your design
Place your design where you want it. Make sure the shiny side (clear liner) is facing up.
4
3
INSTRUCTIONS

15
Apply heat on both sides
Place Cricut EasyPress on your design. Start the timer. Hold Cricut EasyPress in place and apply gentle pressure until it beeps. Flip the T-shirt and apply heat on the back side of the design for 10 – 15 seconds.
Wait ... before the big reveal!
Let the iron-on film cool completely before you test a corner. If the liner does not lift easily, reapply and reheat a few more seconds. Woo-hoo, that’s it!
6
5

16 THE CRICUT ADVANTAGE
The Cricut Advantage™
• For the most magnificent results, use Cricut EasyPress with Cricut brand iron-on film. We don’t just suggest “average” temperature and time settings for any old heat press on any random fabric. We give you precise and rigorously tested settings for the very press that is now in your hand. Use our Quick Reference Chart to make every project perfect.
• Because each iron-on type has unique properties, you'll be amazed at all the possibilities when you learn the nuances of a fabulous foil, gorgeous glitter, or majestic metallic. We’ll always share our insights, along with our best pro tips, at help.cricut.com/easypress.
Crafting with iron-on is part art and part science. We’ve given you a basic foundation to create iron-on projects that truly last. When you’re ready for advanced projects we’ll be here for you then, too. On the next few pages are ideas designed to inspire your imagination.

17

1818
Learn to love the “layer”Make a multicolored and textured masterpiece with an iron-on technique called layering. We’ll show you exactly how to do it and which iron-on types work best at help.cricut.com/easypress.
Yes, you can go big Indeed, you can have huge success with a large iron-on design! Get our step-by-step instructions on how to tackle your most ambitious ideas at help.cricut.com/easypress.
19
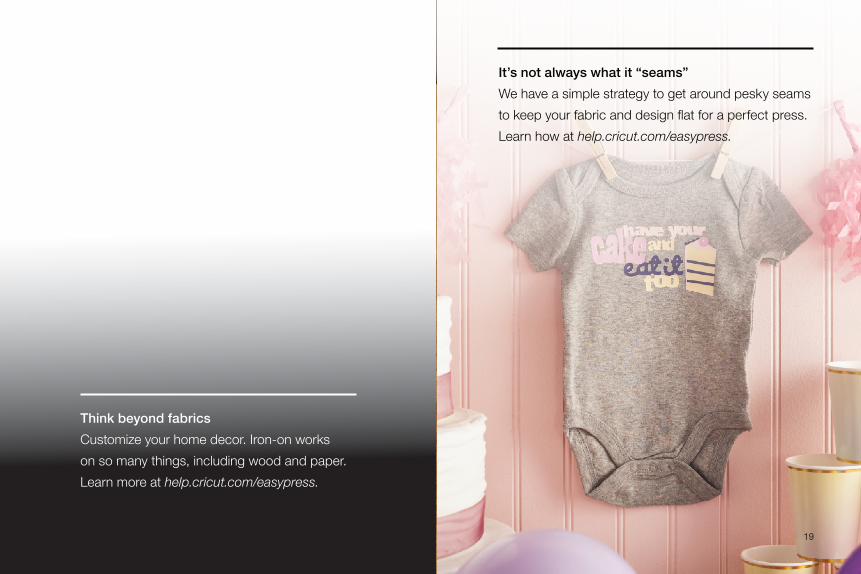
Think beyond fabricsCustomize your home decor. Iron-on works on so many things, including wood and paper. Learn more at help.cricut.com/easypress.
It’s not always what it “seams”We have a simple strategy to get around pesky seams to keep your fabric and design flat for a perfect press. Learn how at help.cricut.com/easypress.

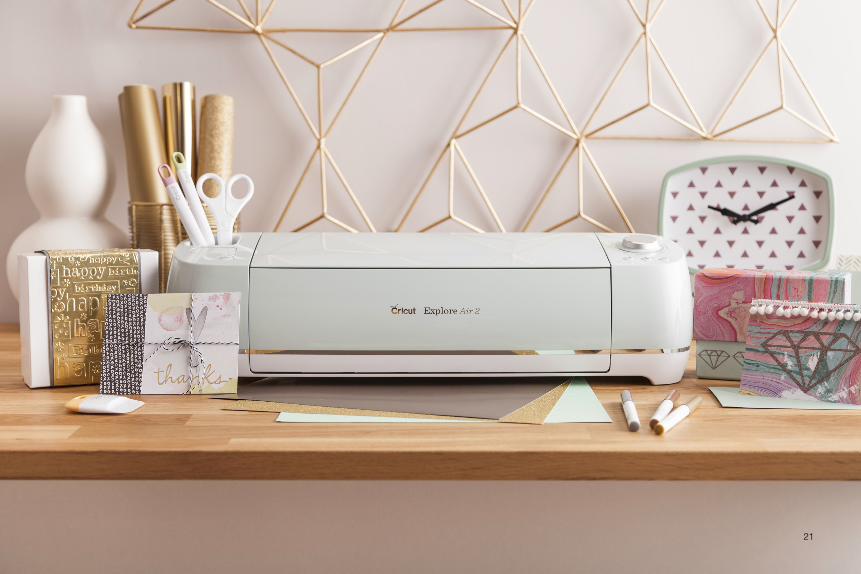
20 CUT YOUR OWN DESIGNS
Cut your own designs
Before cutting, always mirror (reverse) your design.
If your image includes text or is asymmetrical, you must mirror it in Design Space before you cut. Otherwise, once it’s transferred, your design will appear backward.
When cutting, remember this: shiny side faces down.
When using your Cricut machine to cut a design from iron-on film, the clear liner (shiny side) always sticks to your cutting mat.
Cricut machines and Cricut EasyPress are optimized for Cricut iron-on films.
When you select your iron-on type, your Cricut machine automatically adjusts for cut depth. When you use Cricut brand iron-on film, you’ll get the perfect cut and a perfect press every time. Visit shop.cricut.com.
The real fun starts when you cut your own iron-on designs using your Cricut cutting machine and Design Space® software.
21

22
Base material
100% Cotton
295°F / 145°C35 sec
305°F / 150°C30 sec
340°F / 170°C20 sec
330°F / 165°C20 sec
285°F / 140°C30 sec
305°F / 150°C20 sec
320°F / 160°C15 sec
330°F / 165°C30 sec
265°F / 130°C30 sec
285°F / 140°C15 sec
285°F / 140°C20 sec
285°F / 140°C30 sec
255°F / 125°C30 sec
265°F / 130°C30 sec
275°F / 135°C20 sec
275°F / 135°C20 sec
270°F / 130°C40 sec
270°F / 130°C40 sec
270°F / 130°C40 sec
275°F / 135°C40 sec
305°F / 150°C30 sec
305°F / 150°C30 sec
305°F / 150°C30 sec
305°F / 150°C30 sec
275°F / 135°C20 sec
275°F / 135°C20 sec
285°F / 140°C20 sec
285°F / 140°C20 sec
Cotton / polyblend Polyester Nylon blend
or silk Cotton canvas Burlap FeltIron-on type
Foil
Lite / Metallic
Glitter
Holographic
TIME AND TEMPERATURE CHART
Time and temperature chartUse this chart (or the Quick Reference Chart) to determine the perfect time and temperature settings for yourproject. For a complete list of Cricut EasyPress settings go to help.cricut.com/easypress.

23

help.cricut.comAnswers to all your Cricut questions
learn.cricut.com Educational videos, instruction manuals, and other learning materials
cricut.com/blog News, announcements, tips, and inspiration
youtube.com/officialcricutInstructional videos, news, and more
facebook.com/officialcricutJoin the discussion and connect with the Cricut community
cricut.com/contact-usLive chat and email support
Useful Links