subharmonic synthesizer - studio · pdf filecongratulations on your purchase of the dbx®...
TRANSCRIPT

®
120ASubharmonicSynthesizer
withModeled Waveform Synthesis™
User Manual

WARNING FOR YOUR PROTECTIONPLEASE READ THE FOLLOWING:
KEEP THESE INSTRUCTIONS
HEED ALL WARNINGS
FOLLOW ALL INSTRUCTIONS
DO NOT USE THIS APPARATUS NEAR WATER
CLEAN ONLY WITH A DRY CLOTH.
DO NOT BLOCK ANY OF THE VENTILATION OPENINGS. INSTALL IN ACCORDANCE WITH THEMANUFACTURER’S INSTRUCTIONS.
DO NOT INSTALL NEAR ANY HEAT SOURCES SUCH AS RADIATORS, HEAT REGISTERS, STOVES,OR OTHER APPARATUS (INCLUDING AMPLIFIERS) THAT PRODUCE HEAT.
ONLY USE ATTACHMENTS/ACCESSORIES SPECIFIED BY THE MANUFACTURER.
UNPLUG THIS APPARATUS DURING LIGHTNING STORMS OR WHEN UNUSED FOR LONG PERI-ODS OF TIME.
Do not defeat the safety purpose of the polarized or grounding-type plug. A polarized plughas two blades with one wider than the other. A grounding type plug has two blades anda third grounding prong. The wide blade or third prong are provided for your safety. Ifthe provided plug does not fit your outlet, consult an electrician for replacement of theobsolete outlet.
Protect the power cord from being walked on or pinched particularly at plugs, conve-nience receptacles, and the point where they exit from the apparatus.
Use only with the cart stand, tripod bracket, or table specified by the manufacture, or soldwith the apparatus. When a cart is used, use caution when moving the cart/apparatuscombination to avoid injury from tip-over.
Refer all servicing to to qualified service personnel. Servicing is required when the appa-ratus has been damaged in any way, such as power-supply cord or plug is damaged, liq-uid has been spilled or objects have fallen into the apparatus, the apparatus has beenexposed to rain or moisture, does not operate normally, or has been dropped.
POWER ON/OFF SWITCH: The Power switch used in this piece of equipment DOES NOT breakthe connection from the mains.
ALL-POLE MAINS SWITCH: An all-pole mains switch with a contact separation of at least3mm in each pole shall be incorporated in the electrical installation of the rack or build-ing.
FOR UNITS EQUIPPED WITH EXTERNALLY ACCESSIBLE FUSE RECEPTACLE: Replace fuse withsame type and rating only.
MULTIPLE-INPUT VOLTAGE: This equipment may require the use of a different line cord,attachment plug, or both, depending on the available power source at installation. Connectthis equipment only to the power source indicated on the equipment rear panel. To reducethe risk of fire or electric shock, refer servicing to qualified service personnel or equiv-alent.
This Equipment is intended for rack mount use only.
SAFETY INSTRUCTIONS
NOTICE FOR CUSTOMERS IF YOUR UNIT IS EQUIPPED WITH A POWER CORD.
WARNING: THIS APPLIANCE MUST BE EARTHED.
The cores in the mains lead are coloured in accordance with the following code:
GREEN and YELLOW - Earth BLUE - Neutral BROWN - Live
As colours of the cores in the mains lead of this appliance may not correspond with the coloured markingsidentifying the terminals in your plug, proceed as follows:
• The core which is coloured green and yellow must be connected to the terminal in the plugmarked with the letter E, or with the earth symbol, or coloured green, or green and yellow.
• The core which is coloured blue must be connected to the terminal marked N or coloured black.• The core which is coloured brown must be connected to the terminal marked L or coloured red.
This equipment may require the use of a different line cord, attachment plug, or both, depending on theavailable power source at installation. If the attachment plug needs to be changed, refer servicing to qual-ified service personnel who should refer to the table below. The green/yellow wire shall be connecteddirectly to the units chassis.
WARNING: If the ground is defeated, certain fault conditions in the unit or in the system to which it is con-nected can result in full line voltage between chassis and earth ground. Severe injury or death can thenresult if the chassis and earth ground are touched simultaneously.
LIVE
E
NEUTRAL
EARTH GND
CONDUCTOR
L
N
BROWN
BLUE
GREEN/YEL
BLACK
Normal Alt
WIRE COLOR
WHITE
GREEN
The symbols shown above are internationally accepted symbols that warn of potential hazards withelectrical products. The lightning flash with arrowpoint in an equilateral triangle means that thereare dangerous voltages present within the unit. The exclamation point in an equilateral triangle indi-cates that it is necessary for the user to refer to the owner’s manual.
These symbols warn that there are no user serviceable parts inside the unit. Do not open the unit.Do not attempt to service the unit yourself. Refer all servicing to qualified personnel. Opening thechassis for any reason will void the manufacturer’s warranty. Do not get the unit wet. If liquid isspilled on the unit, shut it off immediately and take it to a dealer for service. Disconnect the unit dur-ing storms to prevent damage.
CAUT ION
ATTENT ION: RISQUE DE CHOC ELECTRIQUE - NE PAS OUVRIR
WARNING: TO REDUCE THE R ISK OF F IRE OR ELECTRICSHOCK DO NOT EXPOSE TH IS EQUIPMENT TO RA IN OR MOISTURE
RISK OF ELECTRIC SHOCKDO NOT OPEN
IMPORTANT SAFETY INSTRUCTIONS
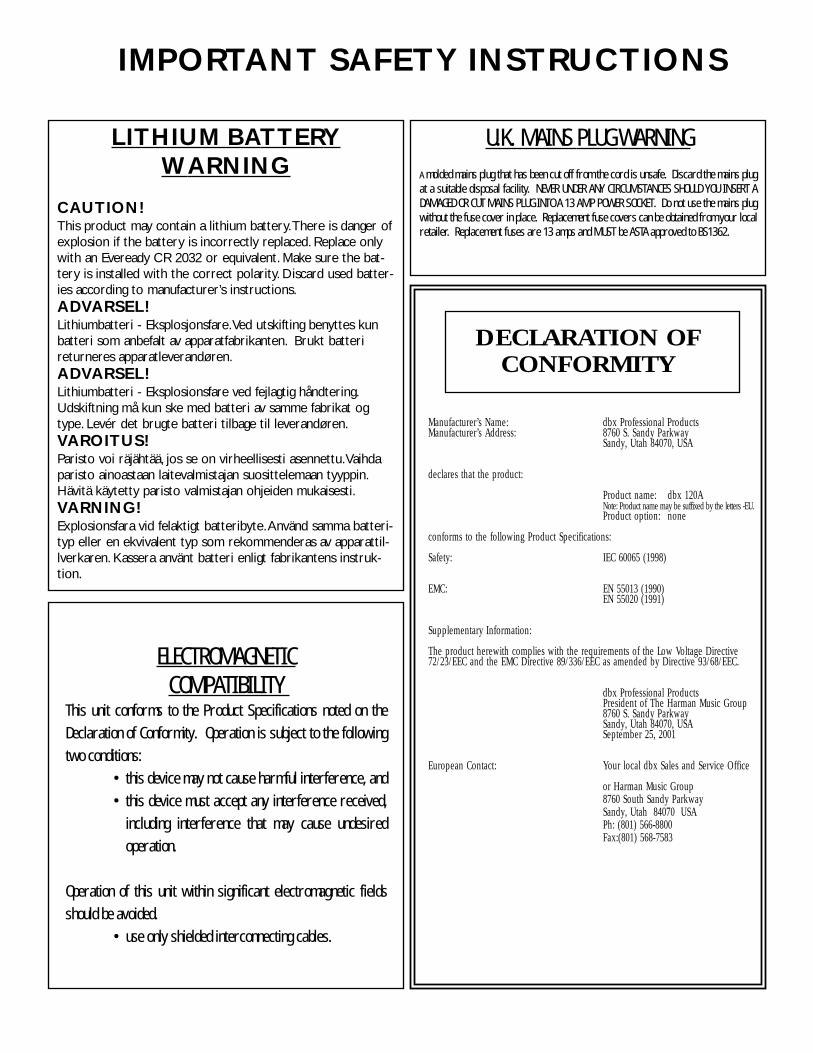
U.K. MAINS PLUG WARNINGA molded mains plug that has been cut off from the cord is unsafe. Discard the mains plugat a suitable disposal facility. NEVER UNDER ANY CIRCUMSTANCES SHOULD YOU INSERT ADAMAGED OR CUT MAINS PLUG INTO A 13 AMP POWER SOCKET. Do not use the mains plugwithout the fuse cover in place. Replacement fuse covers can be obtained from your localretailer. Replacement fuses are 13 amps and MUST be ASTA approved to BS1362.
LITHIUM BATTERYWARNING
CAUTION!This product may contain a lithium battery.There is danger ofexplosion if the battery is incorrectly replaced. Replace onlywith an Eveready CR 2032 or equivalent. Make sure the bat-tery is installed with the correct polarity. Discard used batter-ies according to manufacturer’s instructions.ADVARSEL!Lithiumbatteri - Eksplosjonsfare.Ved utskifting benyttes kunbatteri som anbefalt av apparatfabrikanten. Brukt batterireturneres apparatleverandøren.ADVARSEL!Lithiumbatteri - Eksplosionsfare ved fejlagtig håndtering.Udskiftning må kun ske med batteri av samme fabrikat ogtype. Levér det brugte batteri tilbage til leverandøren.VAROITUS!Paristo voi räjähtää, jos se on virheellisesti asennettu.Vaihdaparisto ainoastaan laitevalmistajan suosittelemaan tyyppin.Hävitä käytetty paristo valmistajan ohjeiden mukaisesti.VARNING!Explosionsfara vid felaktigt batteribyte.Använd samma batteri-typ eller en ekvivalent typ som rekommenderas av apparattil-lverkaren. Kassera använt batteri enligt fabrikantens instruk-tion.
IMPORTANT SAFETY INSTRUCTIONS
ELECTROMAGNETICCOMPATIBILITY
This unit conforms to the Product Specifications noted on theDeclaration of Conformity. Operation is subject to the followingtwo conditions:
• this device may not cause harmful interference, and • this device must accept any interference received,
including interference that may cause undesiredoperation.
Operation of this unit within significant electromagnetic fieldsshould be avoided.
• use only shielded interconnecting cables.
DECLARATION OFCONFORMITY
Manufacturer’s Name: dbx Professional ProductsManufacturer’s Address: 8760 S. Sandy Parkway
Sandy, Utah 84070, USA
declares that the product:
Product name: dbx 120ANote: Product name may be suffixed by the letters -EU.Product option: none
conforms to the following Product Specifications:
Safety: IEC 60065 (1998)
EMC: EN 55013 (1990)EN 55020 (1991)
Supplementary Information:
The product herewith complies with the requirements of the Low Voltage Directive72/23/EEC and the EMC Directive 89/336/EEC as amended by Directive 93/68/EEC.
dbx Professional ProductsPresident of The Harman Music Group8760 S. Sandy ParkwaySandy, Utah 84070, USASeptember 25, 2001
European Contact: Your local dbx Sales and Service Office
or Harman Music Group8760 South Sandy ParkwaySandy, Utah 84070 USAPh: (801) 566-8800Fax:(801) 568-7583

Table of Contents120AIntroduction
0.1 Defining the 120A .............................................i
0.2 Service Contact Info.........................................ii
0.3 Warranty............................................................ii
Section 1 - Operation and Appendix
1.1 Rear Panel Connections ...................................1
1.2 Front Panel Connections..................................1
1.3 Operating Notes ...............................................2
1.4 Basic Connection..............................................4
Appendix
A.1 Block Diagram .................................................5
A.2 Specifications....................................................6
A.3 Wiring Diagrams ..............................................7
®
120A User ManualTable of Contents

INTROCUSTOMER SERVICE INFO
120A DEFINEDWARRANTY INFO
®
INTRODUCTION120A
Introduction
®
120A User Manuali
120ACongratulations on your purchase of the dbx® Professional Products 120A SubharmonicSynthesizer with Modeled Waveform Synthesis™. The 120A has been specifically optimized toenhance Bass audio material for use in a variety of professional applications, including night-club and dance DJ mixing, theatre and film sound, music recording, live music performance andbroadcasting.
The 120A’s two separate bands of subharmonic synthesis provide the best combination ofsmoothness and control, and the independent low frequency boost circuit is designed to get themost out of high-performance low frequency speaker systems. Flexible system interfacing isachieved by providing main outputs which can be full range (including synthesis) or high-fre-quency ONLY, along with a separate subwoofer output with its own level control.
This manual will be your guide to understanding the full functionality of the powerful 120A.After you have become familiar with the unit, we encourage you to experiment and find cre-ative ways that the 120A can help you optimize your specific application.
The 120A’s patented modeled Waveform Synthesis™ process builds a synthesized waveformusing the wave shapes of the original bass material, producing a new Waveform Modeled™ bassnote, exactly one octave below the bass in the original audio signal path. Unlike other attemptsat bass synthesis, the dbx Professional Products 120A process produces smooth, musical lowfrequencies that do not interfere with mid and high-band information even when the maximumsynthesis and boost are applied. The result is a low-end punch that people really feel, even atsystem levels that won’t destroy sound equipment or damage hearing. The 120A offers the fol-
lowing features:
• Patented Modeled Waveform Synthesis™ Circuitry insures that mid and
high frequencies are not affected
• Individual Controls for Two Separate ranges of Subharmonic Frequencies,
plus Master Synthesis Level Control
• Separate Low Frequency Boost Circuit
• Separate Subwoofer Output
• 1/4” Balanced Inputs and 1/4” Impedance-Balanced Outputs
• RCA Inputs
• LF Synthesis LED Indicators
• Selectable Crossover with 80Hz and 120Hz crossover points
INTRODUCTION

®
Introduction120A
120A User Manual
If you require technical support, contact dbx Customer Service. Be prepared to accuratelydescribe the problem. Know the serial number of your unit. This is printed on a sticker attachedto the rear panel. If you have not already taken the time to fill out your warranty registrationcard and send it in, please do so now.
Before you return a product to the factory for service, we recommend you refer to the manu-al. Make sure you have correctly followed installation steps and operation procedures. If youare still unable to solve a problem, contact our Customer Service Department at (801) 568-7660for consultation. If you need to return a product to the factory for service, you MUST contactCustomer Service to obtain a Return Authorization Number.
No returned products will be accepted at the factory without a Return Authorization Number.
Please refer to the warranty below, which extends to the first end-user. After expiration of thewarranty, a reasonable charge will be made for parts, labor, and packing if you choose to usethe factory service facility. In all cases, you are responsible for transportation charges to the fac-tory. dbx will pay return shipping if the unit is still under warranty.
Use the original packing material if it is available. Mark the package with the name of the ship-per and with these words in red: DELICATE INSTRUMENT, FRAGILE! Insure the package prop-erly. Ship prepaid, not collect. Do not ship parcel post.
This warranty is valid only for the original purchaser and only in the United States.
1). The warranty registration card that accompanies this product must be mailed within 30 daysafter purchase date to validate this warranty. Proof-of-purchase is considered to be the bur-den of the consumer.
2). dbx warrants this product, when bought and used solely within the U.S., to be free fromdefects in materials and workmanship under normal use and service.
3). dbx liability under this warranty is limited to repairing or, at our discretion, replacing defec-tive materials that show evidence of defect, provided the product is returned to dbx WITHRETURN AUTHORIZATION from the factory, where all parts and labor will be covered upto a period of two years. A Return Authorization number must be obtained from dbx bytelephone. The company shall not be liable for any consequential damage as a result of theproduct's use in any circuit or assembly.
4). dbx reserves the right to make changes in design or make additions to or improvementsupon this product without incurring any obligation to install the same additions orimprovements on products previously manufactured.
5). The foregoing is in lieu of all other warranties, expressed or implied, and dbx neitherassumes nor authorizes any person to assume on its behalf any obligation or liability in con-nection with the sale of this product. In no event shall dbx or its dealers be liable for spe-cial or consequential damages or from any delay in the performance of this warranty dueto causes beyond their control.
0.3 Warranty
0.2 Service Contact Info
ii

120A
®
®
120A User Manual 1
Front and rear Descriptions Section 1120A
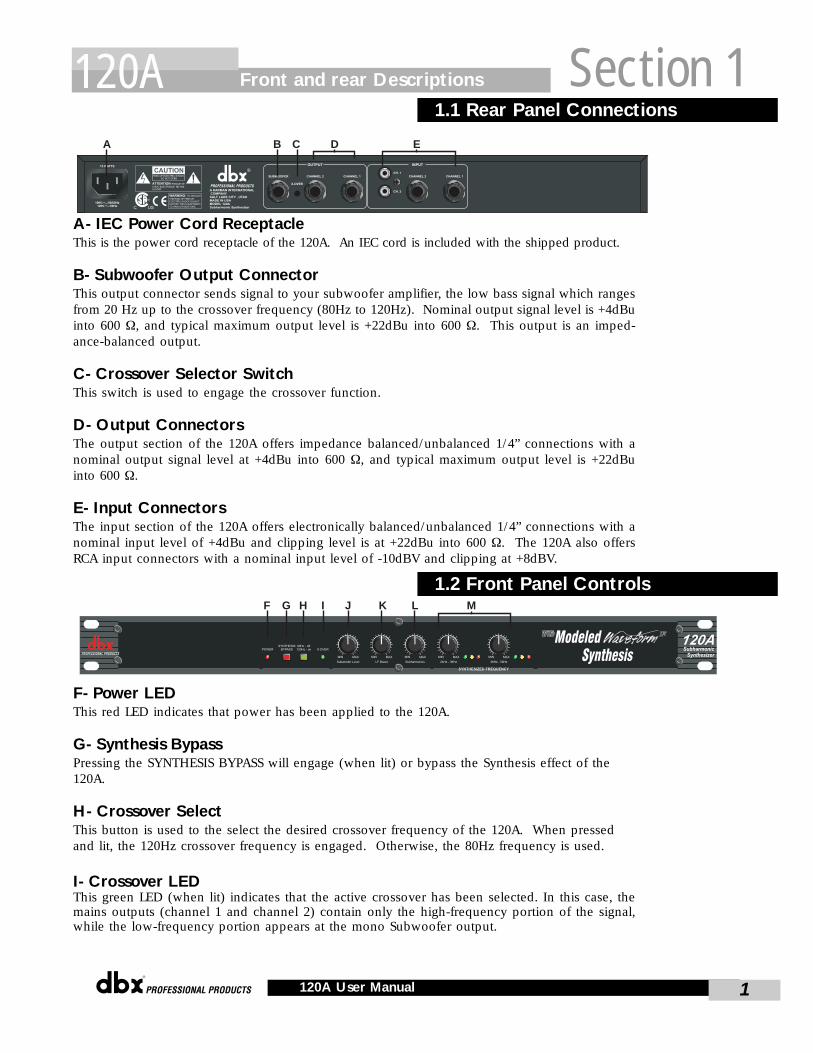
A- IEC Power Cord ReceptacleThis is the power cord receptacle of the 120A. An IEC cord is included with the shipped product.
B- Subwoofer Output ConnectorThis output connector sends signal to your subwoofer amplifier, the low bass signal which rangesfrom 20 Hz up to the crossover frequency (80Hz to 120Hz). Nominal output signal level is +4dBuinto 600 Ω, and typical maximum output level is +22dBu into 600 Ω. This output is an imped-ance-balanced output.
C- Crossover Selector SwitchThis switch is used to engage the crossover function.
D- Output ConnectorsThe output section of the 120A offers impedance balanced/unbalanced 1/4” connections with anominal output signal level at +4dBu into 600 Ω, and typical maximum output level is +22dBuinto 600 Ω.
E- Input ConnectorsThe input section of the 120A offers electronically balanced/unbalanced 1/4” connections with anominal input level of +4dBu and clipping level is at +22dBu into 600 Ω. The 120A also offersRCA input connectors with a nominal input level of -10dBV and clipping at +8dBV.
F- Power LEDThis red LED indicates that power has been applied to the 120A.
G- Synthesis Bypass Pressing the SYNTHESIS BYPASS will engage (when lit) or bypass the Synthesis effect of the120A.
H- Crossover Select This button is used to the select the desired crossover frequency of the 120A. When pressedand lit, the 120Hz crossover frequency is engaged. Otherwise, the 80Hz frequency is used.
I- Crossover LEDThis green LED (when lit) indicates that the active crossover has been selected. In this case, themains outputs (channel 1 and channel 2) contain only the high-frequency portion of the signal,while the low-frequency portion appears at the mono Subwoofer output.
SubharmonicSynthesizer
F G H I J K L M
1.2 Front Panel Controls
A B C D E
1.1 Rear Panel Connections

Front and Rear Panel Descriptions
®
120A User Manual2
Section 1 120AJ- Subwoofer Level ControlThis control sets the level of the low frequency crossover signal (original program plus synthe-sized harmonics) coming out of the SUBWOOFER jack.
K- LF Boost ControlThis control is used to even out the total apparent Bass output of the 120A. Use the LF Boostto gently boost the bass on each channel (after the harmonics are summed in) to fill in thegap between the synthesized low bass (below 55 Hz) and the mid-bass of the original pro-gram. Always be careful of using excessive boost, especially if the Subharmonics control ispast its midpoint, or if you are using a speaker equalizer, or any other bass tone control.
LF BOOST can be used with or without Subharmonic Synthesis.
L- Subharmonics ControlThis control, along with the individual frequency controls, sets the amount of synthesized bassthat the 120A adds to the program. Its affect depends not only on where it is set between MINand MAX, but also on how much bass is present in the original signal to be augmented. Notethat the effect will be most apparent in systems with subwoofers or other speakers that effec-tively reproduce very low bass tones.
M- 24Hz-36Hz and 36Hz-56Hz Level ControlsThese controls individually let you customize the amount of the respective synthesized fre-quencies to be added in, tuning the ultimate bass response of your system to taste. Forexample, if the sound is too woofy or growly, try turning down the 36Hz-56Hz level. If yourwoofers are bottoming out (making a ticking, popping sound), or fuses are blowing, or youramp is clipping, try turning down the 24Hz-36Hz level. You may find that a setting producesfine results in one room, but produces too much boominess in another. If this occurs, adjustthe controls as needed, (e.g., increase one or the other of the band levels). Experimentationwill pay off with smooth, full, deeply extended bass. Remember, you are not selecting a fre-quency. You are controlling the overall level of each band.
Setting LevelsDo not use the 120A at its extreme settings with loud volume levels, especially with digitally-produced audio.
Very low bass frequencies call for considerable amplifier power and for loudspeakers that cantake this considerable power. However, the 120A not only can boost the bass that is presentin the original program, but can simultaneously generate sizable amounts of new bass at evenlower frequencies. If not used with care, the 120A can damage system components (e.g.woofers can be readily damaged by very loud bass, intentional or otherwise). dbx ProfessionalProducts cannot take responsibility for any damage to the amplifier, loudspeakers, or otherstereo components that results from the 120A.
When using the 120A (or any other component in your system), reduce the system’s outputlevel. It is also recommended that all of the 120A front panel controls be set to fully counter-clockwise to minimum (MIN). When installation is complete, carefully return the system to nor-mal listening levels and adjust the 120A to taste.
If clipping occurs, lower the volume and decrease the 120A settings. Note: Never try to repro-duce non-musical sounds like artillery explosions or gunfire with the 120A.
1.3 Operating Notes

®
Avoiding TransientsAny sharp noises from your sound system can be hard on your system, and since the 120Aamplifies and augments all low-frequency information, extra caution is called for at all times.To be safe, turn the power amp on last, and off first. and always keep the main volume con-trol low or off when turning the system or any of its components on.
To further reduce the chance of dangerous transients, make sure your system is operating at itsoptimum performance. We recommend you have all switches, button and knobs on yourequipment cleaned by a qualified person (especially if any rasp or crackle is present). If you
are using a turntable, check to make sure that the cueing is gentle.
Speaker PlacementFor systems with multiple speakers, we recommend placing each speaker so that the distancesfrom the center of its woofer to the three nearest boundaries are as different as possible. Thesedistances are measured along the speaker cabinet sides, not in a straight line. When these dis-tances are the same, the bass response of most speakers is roughest, with peaks and dips morethan 10dB apart over just a few notes. Putting a conventional box-shaped speaker wooferdown in a corner will make it sound very bassy, but for the evenness of bass, it’s the worst spotavailable.
The formula for calculating maximum different distances a, b, and c and least bumpyspeaker placement is: a/b= b/c, or b2 = ac, where a, b, and c are never equal.
The same acoustic laws apply to your listening position: the smoothest bass will result whenthe distances from your head to the three nearest boundaries are as different as possible. Inthe same manner, the boomiest rooms have all three dimensions the same and the smoothesthave them maximally different.
If you do reposition your speakers, you should also reset any output level controls on the backof the speaker cabinet. Many speakers offer a slight HF or MF boost with these controls all theway up, and the new increase in bass might be better balanced by such a maximum setting.
The 120A is not intended only as a device to create wall crumbling low-end. Judicious use witha pair of full range speakers can create the sense that a pair of speakers with 15” woofers isbeing used. An additional benefit of improving the sound of smaller speakers is that a pair ofsmaller speakers and a 120A is more portable than a pair of two larger speakers.
Turntable Feedback and Low Frequency RumbleIf you are using the 120A with a turntable, the increased levels of bass may make your turntablesystem more susceptible to feedback, wherein the turntable base, platter, cartridge/stylus,and/or the disc itself actually pickup and replay bass from the speakers. One symptom is anincreasing, flapping rumble as you turn the volume up (severely, the system begins to howl)that disappears or is markedly reduced when the tonearm is lifted off the record. The cure isto isolate the turntable, making it immune to low-frequency vibrations. Any LF rumble in thesystem from turntable, air conditioning, through mics, etc., will be boosted by the 120A.
To reduce turntable feedback, begin by locating the turntable and the speakers as far apart aspractical. Next, short of replacing the turntable, since some turntables are much more prone tofeedback than others, shock-absorber feet designed specifically for this problem. A massive base or table under the turntable may decouple it from the cases.
Note for CD Players: High levels of Bass can cause CD players to skip. It is a good idea tolocate CD players away from low-end drivers and loudspeakers, and shock mount them.
Operating Notes Section 1120A
120A User Manual 3
Connecting to Your System
®
3120A User Manual4
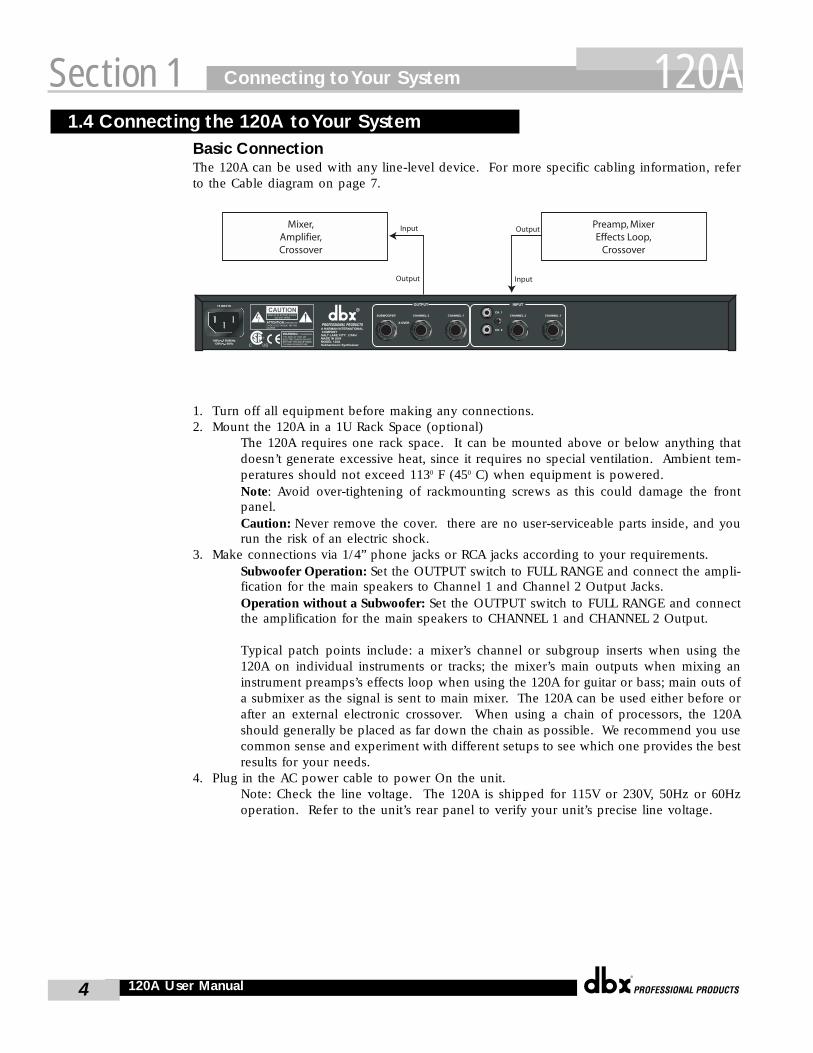
Section 1 120ABasic ConnectionThe 120A can be used with any line-level device. For more specific cabling information, referto the Cable diagram on page 7.
1. Turn off all equipment before making any connections. 2. Mount the 120A in a 1U Rack Space (optional)
The 120A requires one rack space. It can be mounted above or below anything thatdoesn’t generate excessive heat, since it requires no special ventilation. Ambient tem-peratures should not exceed 1130 F (450 C) when equipment is powered.Note: Avoid over-tightening of rackmounting screws as this could damage the frontpanel.Caution: Never remove the cover. there are no user-serviceable parts inside, and yourun the risk of an electric shock.
3. Make connections via 1/4” phone jacks or RCA jacks according to your requirements.Subwoofer Operation: Set the OUTPUT switch to FULL RANGE and connect the ampli-fication for the main speakers to Channel 1 and Channel 2 Output Jacks.Operation without a Subwoofer: Set the OUTPUT switch to FULL RANGE and connectthe amplification for the main speakers to CHANNEL 1 and CHANNEL 2 Output.
Typical patch points include: a mixer’s channel or subgroup inserts when using the120A on individual instruments or tracks; the mixer’s main outputs when mixing aninstrument preamps’s effects loop when using the 120A for guitar or bass; main outs ofa submixer as the signal is sent to main mixer. The 120A can be used either before orafter an external electronic crossover. When using a chain of processors, the 120Ashould generally be placed as far down the chain as possible. We recommend you usecommon sense and experiment with different setups to see which one provides the bestresults for your needs.
4. Plug in the AC power cable to power On the unit.Note: Check the line voltage. The 120A is shipped for 115V or 230V, 50Hz or 60Hzoperation. Refer to the unit’s rear panel to verify your unit’s precise line voltage.
1.4 Connecting the 120A to Your System

Block Diagram Appendix120AAppendix
24-3
6Hz
36-5
6Hz
A.1 Block diagram
®
5
Appendix
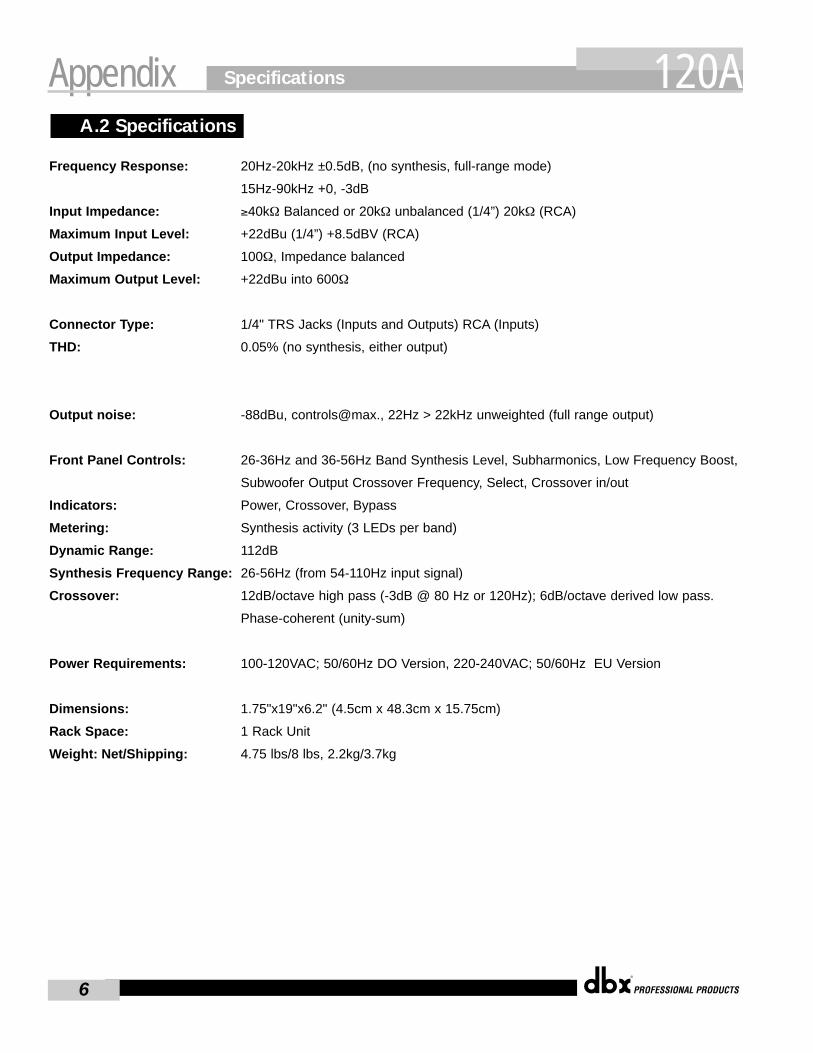
Frequency Response: 20Hz-20kHz ±0.5dB, (no synthesis, full-range mode)
15Hz-90kHz +0, -3dB
Input Impedance: ≥40kΩ Balanced or 20kΩ unbalanced (1/4”) 20kΩ (RCA)
Maximum Input Level: +22dBu (1/4”) +8.5dBV (RCA)
Output Impedance: 100Ω, Impedance balanced
Maximum Output Level: +22dBu into 600Ω
Connector Type: 1/4" TRS Jacks (Inputs and Outputs) RCA (Inputs)
THD: 0.05% (no synthesis, either output)
Output noise: -88dBu, controls@max., 22Hz > 22kHz unweighted (full range output)
Front Panel Controls: 26-36Hz and 36-56Hz Band Synthesis Level, Subharmonics, Low Frequency Boost,
Subwoofer Output Crossover Frequency, Select, Crossover in/out
Indicators: Power, Crossover, Bypass
Metering: Synthesis activity (3 LEDs per band)
Dynamic Range: 112dB
Synthesis Frequency Range: 26-56Hz (from 54-110Hz input signal)
Crossover: 12dB/octave high pass (-3dB @ 80 Hz or 120Hz); 6dB/octave derived low pass.
Phase-coherent (unity-sum)
Power Requirements: 100-120VAC; 50/60Hz DO Version, 220-240VAC; 50/60Hz EU Version
Dimensions: 1.75"x19"x6.2" (4.5cm x 48.3cm x 15.75cm)
Rack Space: 1 Rack Unit
Weight: Net/Shipping: 4.75 lbs/8 lbs, 2.2kg/3.7kg
A.2 Specifications
®
120A User Manual
Specifications
®
6
120A

®
120A User Manual®
Wiring Diagrams Appendix 120A
7
The 120A has 1/4”, balanced/unbalanced inputs and is designed for nominal +4dBu levels. The 120A also offers RCAconnectors, and is designed for nominal -10dBV levels.
Input Cable ConfigurationsThe 120A will accept either balanced or unbalanced sources as long as cables are wired according to the followingdiagrams. In an emergency, 1/4” mono cables will work. Connect the sleeve to the cable’s shield. Note: for maxi-mum hum rejection with a balanced source, avoid common grounding at the 120A’s input and output. The best start-ing point is to ground the shield of the input cable at the source device (leaving it unconnected at the 120A).
Output Cable ConfigurationsThe 120A will drive either balanced or unbalanced loads as long as the cables are wired according to the followingfigures. The output’s impedance at 100Ω, allowing operation with virtually any load. Nominal operating level is+4dBu into 600Ω. If using 1/4” mono plugs, at the output, the 120A will be grounded to the load device. This cancause a ground loop. By using 1/4” balanced phone plugs, the grounds of both the 120A and the load can be isolat-ed to reduce hum. Leave the shield unconnected at the load device.
A.3 Installation Considerations and Wiring Diagrams

®
8760 South Sandy Pkwy.Sandy, Utah 84070
Phone: (801) 568-7660Fax: (801) 568-7662
Questions or comments?E•mail us at: [email protected]
or visit our World Wide Web home page at:www.dbxpro.com
A Harman International Company
18-2217 ®