real-ear measurements with the a-35 presented by: kristina frye frye electronics, inc
TRANSCRIPT
Real-ear Measurements with
the A-35
Presented by: Kristina FryeFrye Electronics, Inc

Topics Interface from the A-35
Entering an Audiogram and Creating a Target Performing Insertion Gain Measurements Measurements in SPL: Comparing HTLs and
UCLs Testing with Visible Speech Testing Open Fit Hearing Aids
Doing all this from the FONIX NOAH Module
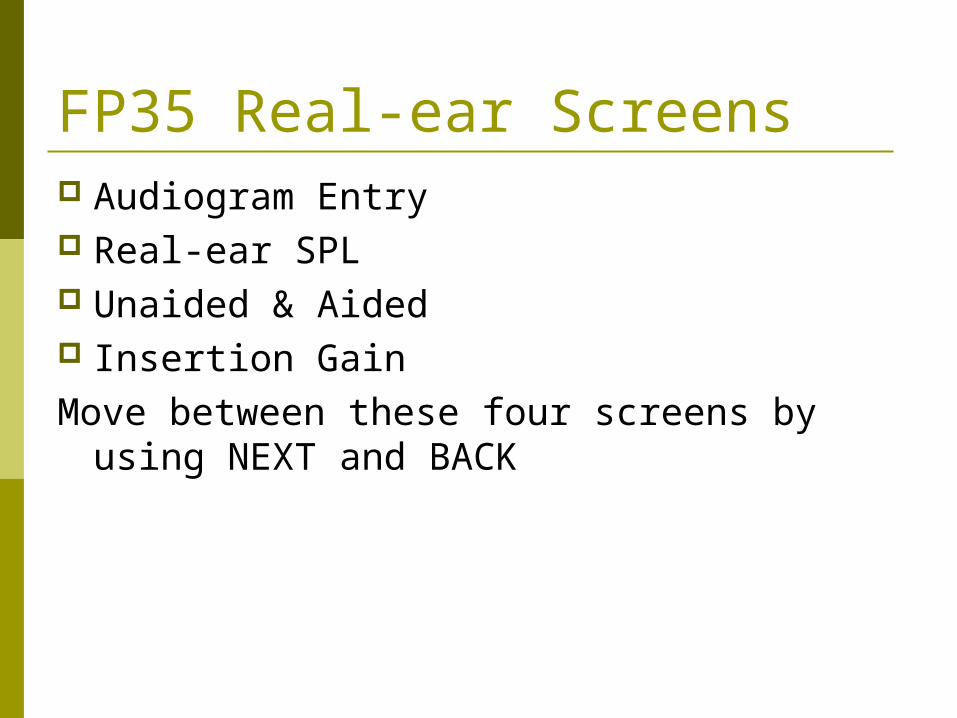
FP35 Real-ear Screens Audiogram Entry Real-ear SPL Unaided & Aided Insertion GainMove between these four screens by using
NEXT and BACK
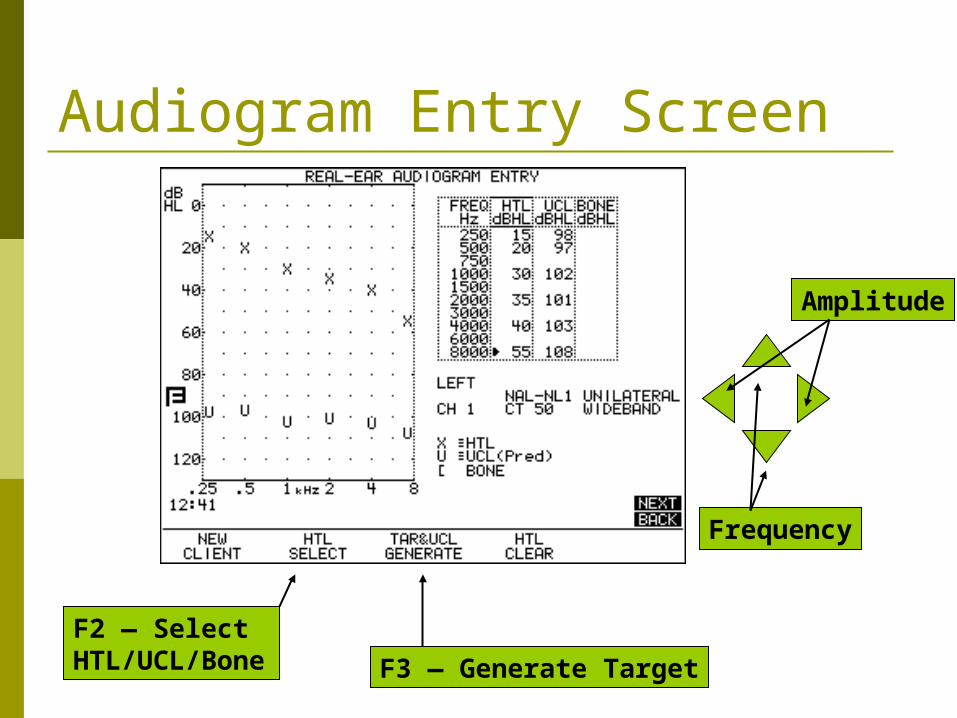
Audiogram Entry Screen
F2 — Select HTL/UCL/Bone F3 — Generate Target
Frequency
Amplitude

NAL-NL1 Target SettingsPress MENU and BACK to change target
settings Compression Channels (1-18) Aid Limiting (Type of output limiting) Fit Type (Unilateral or Bilateral) Reference (Almost always Head Surface)
The Compression and Channels settings have the most impact on the target!

Insertion Gain TestingPress NEXT until you enter the Real-ear Insertion Gain screen
Traditional Real-ear Protocol Measuring the Insertion Gain Response
Let’s get sidetracked for a few minutes…
PROS and CONS of Measuring the Unaided Response

Save Time!To save testing time, you can probably skip the unaided response measurement!
Thresholds are measured with an occluded response
Targets are generated from those thresholds
Many hearing aids alter the ear canal resonance when inserted, so the unaided response is extraneous data

Exceptions
Fitting a mild/moderate loss: Make sure that the hearing aid is proving a benefit to the patient
Checking the position of the probe microphone
When is the unaided response useful?
Back to the Protocol…

Proper Placement of Microphones
Marked 30 mmfrom the tip for Adultsand 25 mm for children
Probe Mic
RefMic
Inter-TragalNotch
Above the Pinna
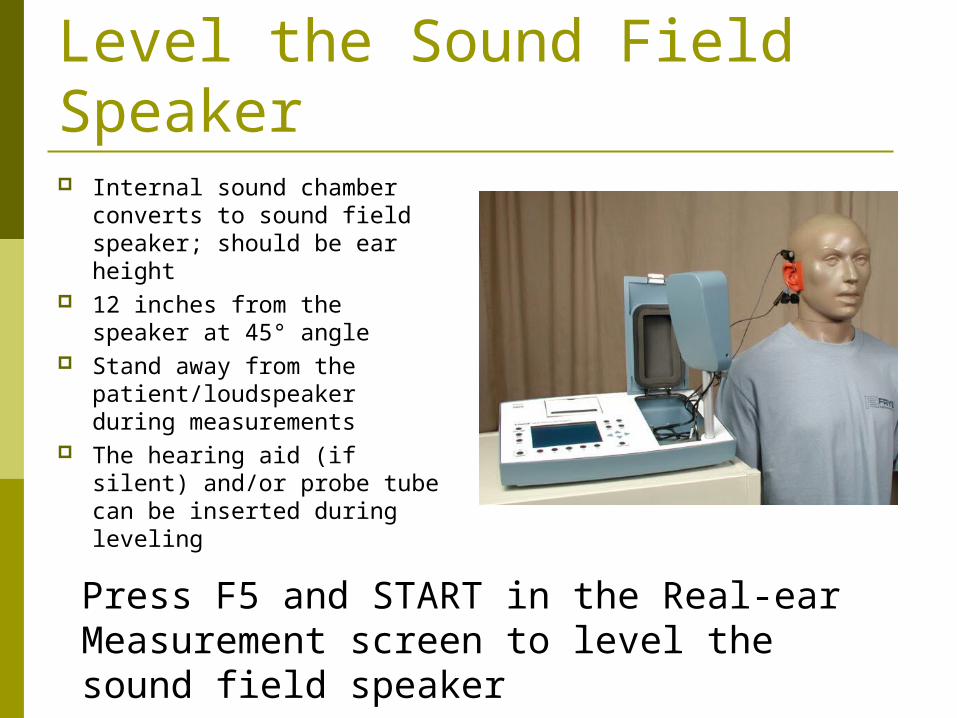
Level the Sound Field Speaker Internal sound chamber
converts to sound field speaker; should be ear height
12 inches from the speaker at 45° angle
Stand away from the patient/loudspeaker during measurements
The hearing aid (if silent) and/or probe tube can be inserted during leveling
Press F5 and START in the Real-ear Measurement screen to level the sound field speaker
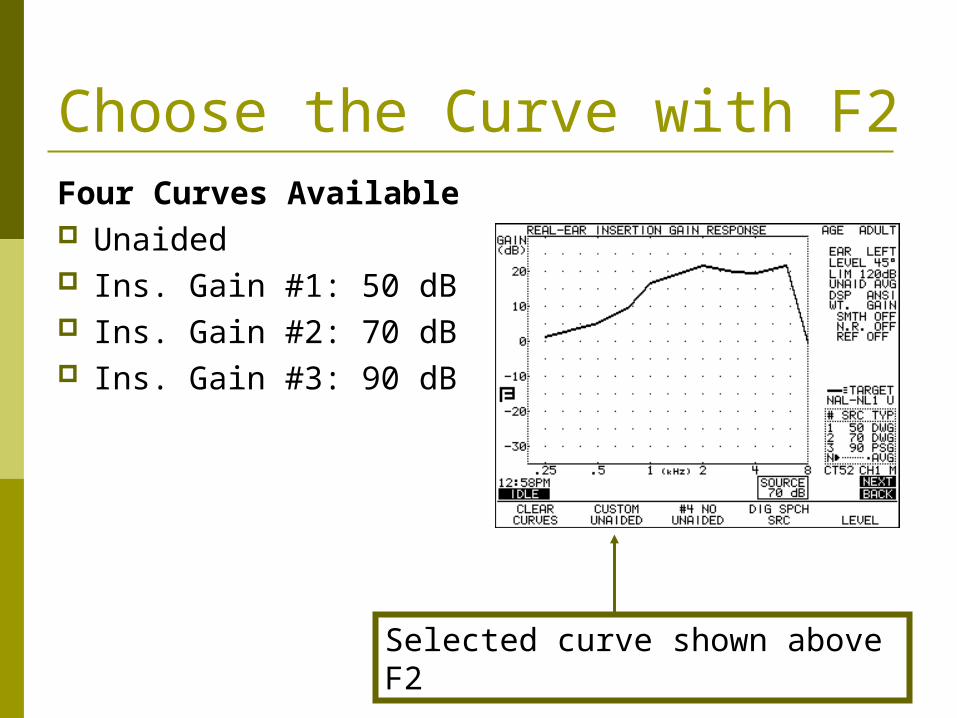
Choose the Curve with F2Four Curves Available Unaided Ins. Gain #1: 50 dB Ins. Gain #2: 70 dB Ins. Gain #3: 90 dB
Selected curve shown above F2
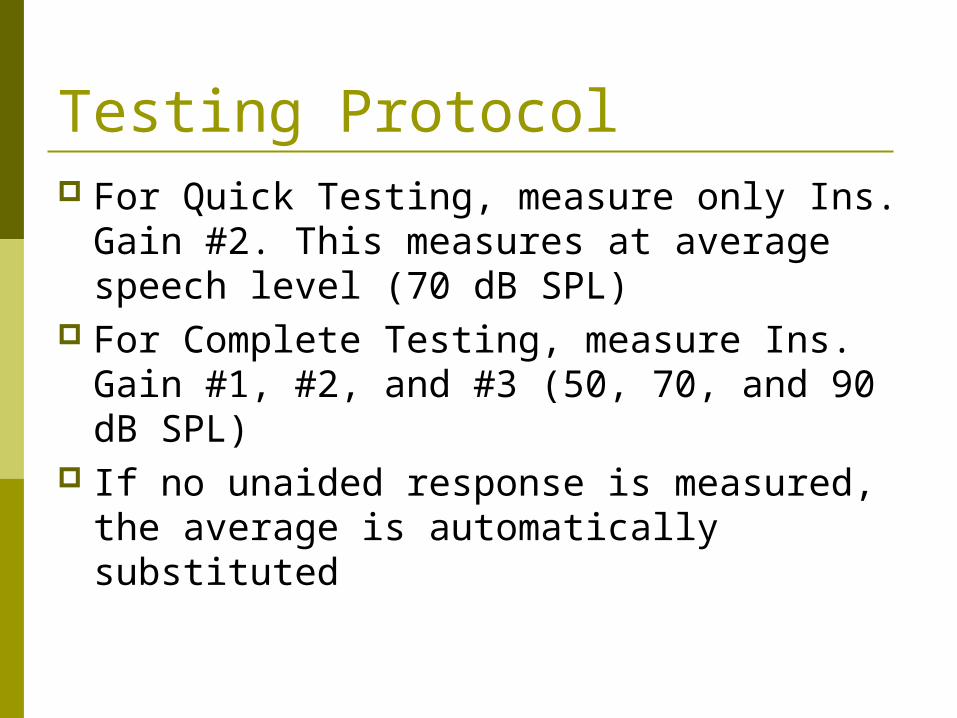
Testing Protocol For Quick Testing, measure only Ins. Gain
#2. This measures at average speech level (70 dB SPL)
For Complete Testing, measure Ins. Gain #1, #2, and #3 (50, 70, and 90 dB SPL)
If no unaided response is measured, the average is automatically substituted
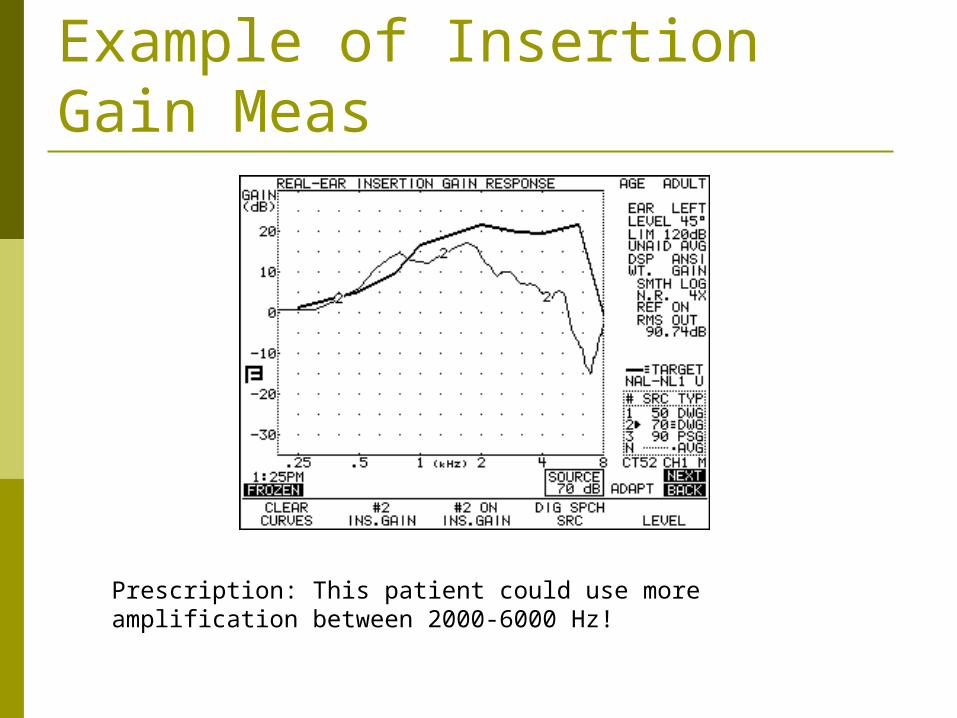
Example of Insertion Gain Meas
Prescription: This patient could use more amplification between 2000-6000 Hz!
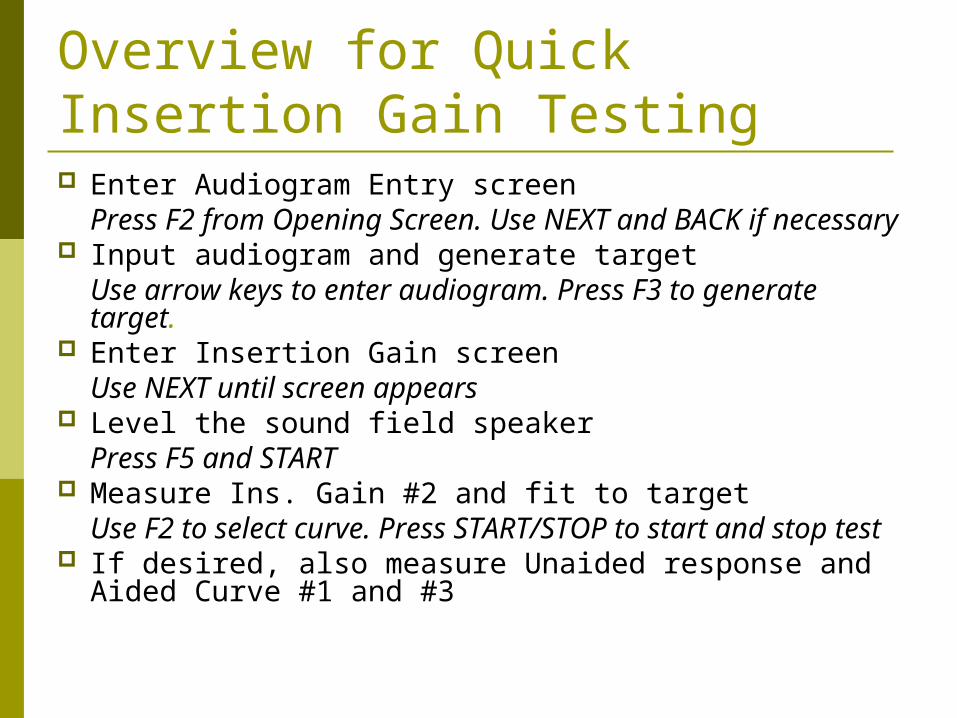
Overview for Quick Insertion Gain Testing Enter Audiogram Entry screen
Press F2 from Opening Screen. Use NEXT and BACK if necessary
Input audiogram and generate targetUse arrow keys to enter audiogram. Press F3 to generate target.
Enter Insertion Gain screenUse NEXT until screen appears
Level the sound field speakerPress F5 and START
Measure Ins. Gain #2 and fit to targetUse F2 to select curve. Press START/STOP to start and stop test
If desired, also measure Unaided response and Aided Curve #1 and #3
The Real-ear SPL Protocol
Compare the Real-ear Response to HTLs and UCLs on one graph
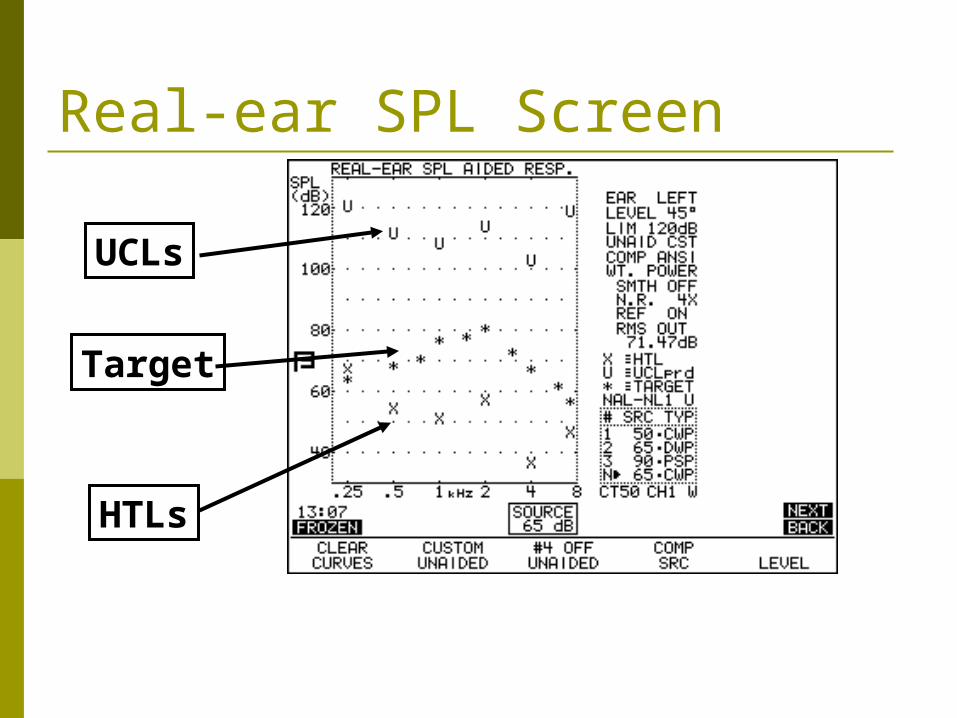
Real-ear SPL Screen
UCLs
Target
HTLs
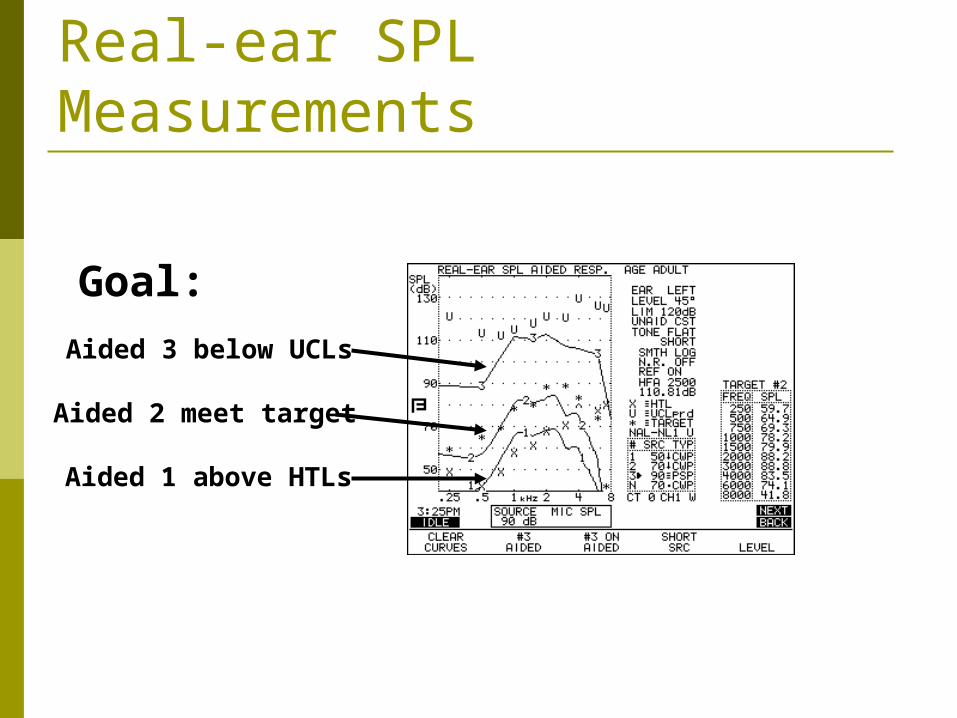
Real-ear SPL Measurements
Aided 3 below UCLs
Aided 2 meet target
Aided 1 above HTLs
Goal:

Overview of the SPL Protocol Enter Audiogram Entry screen
Press F2 from Opening Screen. Use NEXT and BACK if necessary
Input audiogram and generate targetUse arrow keys to enter audiogram. Press F3 to generate target.
Enter Real-ear SPL screenUse NEXT until screen appears
Level the sound field speakerPress F5 and START
Measure Aided #1 to compare to HTLs Use F2 to select curve. Press START/STOP to start and stop test
Measure Aided #2 to compare to the target Measure Aided #3 to compare to UCLs
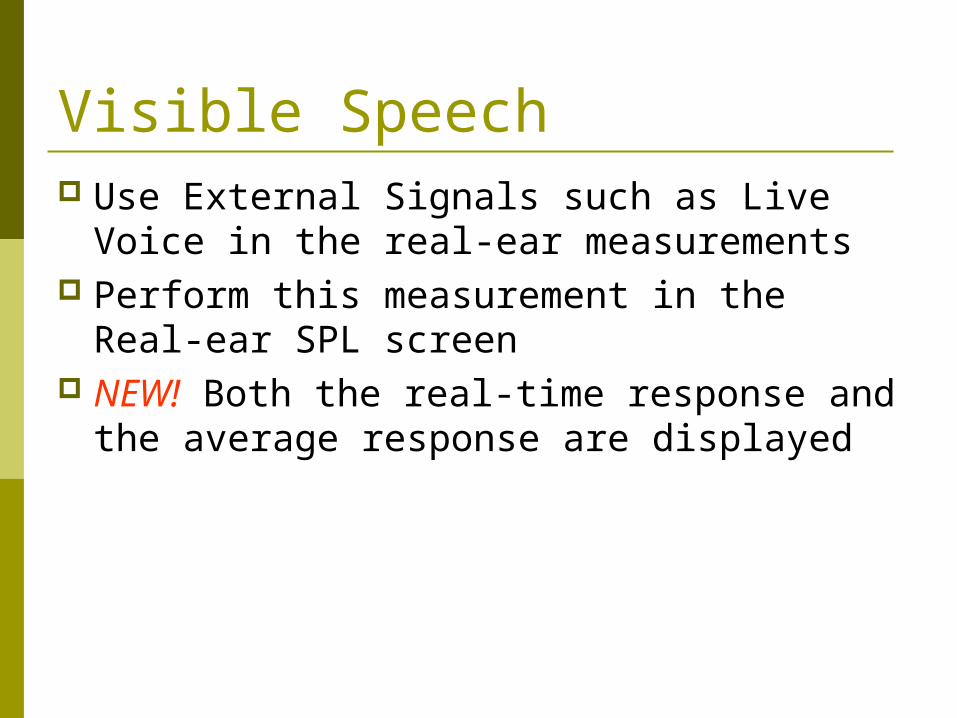
Visible Speech Use External Signals such as Live Voice in
the real-ear measurements Perform this measurement in the Real-ear
SPL screen NEW! Both the real-time response and the
average response are displayed
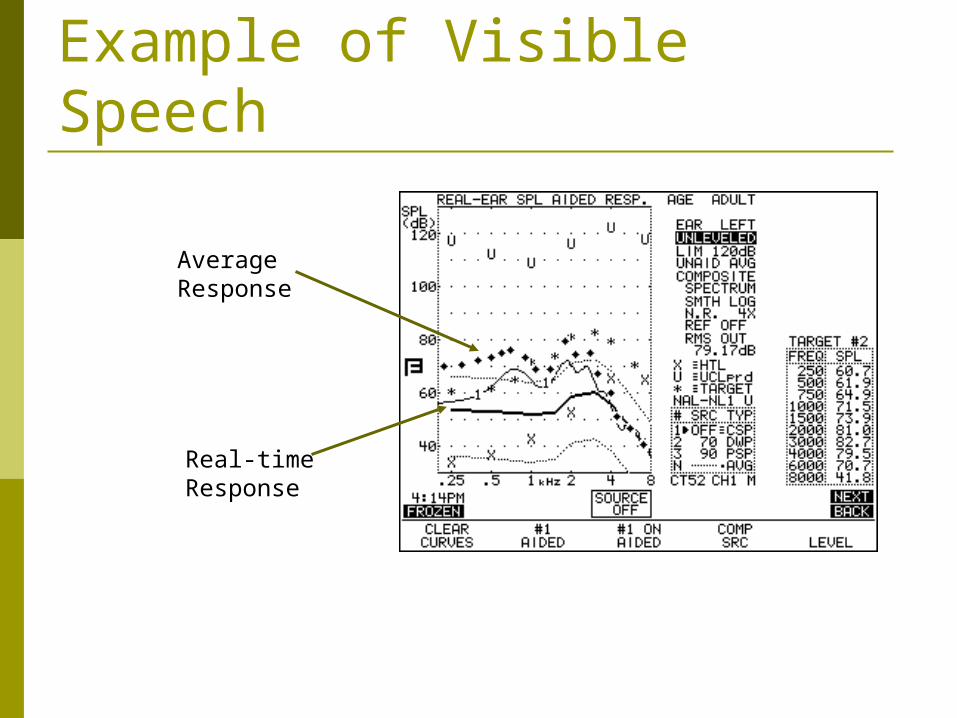
Example of Visible Speech
Average Response
Real-time Response
Visible Speech Protocol Enter Audiogram Entry screen
Press F2 from Opening Screen. Use NEXT and BACK if necessary
Input audiogram and generate targetUse arrow keys to enter audiogram. Press F3 to generate target.
Enter Real-ear SPL screenUse NEXT until screen appears
Put analyzer in Spectrum Analysis mode Use F4 to select the source type. Use DOWN arrow to turn source OFF.
Perform Visible Speech measurementPress START/STOP to start measurement. Begin speech signal.
Open Fit Hearing Aids Coupler measurements: Use our new Open
Fit Coupler! Real-ear measurements: Same protocol
but disable the reference microphone
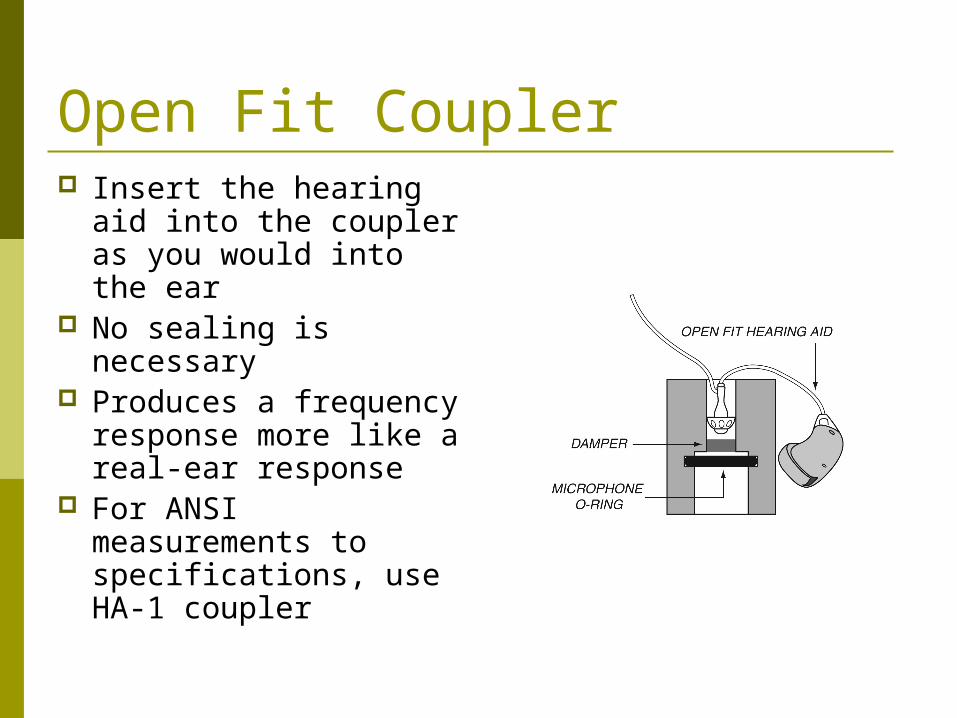
Open Fit Coupler Insert the hearing aid
into the coupler as you would into the ear
No sealing is necessary
Produces a frequency response more like a real-ear response
For ANSI measurements to specifications, use HA-1 coupler
Real-ear Measurements Some Open Fit hearing aids interfere with
the reference microphone measurement outside the ear (feedback management and/or amplified signal escaping from ear)
Disable the REF MIC setting in the real-ear measurement screen local menu
Test as usual Expect very little amplification below 1000
Hz. Fit to target only in mid-to-high frequencies
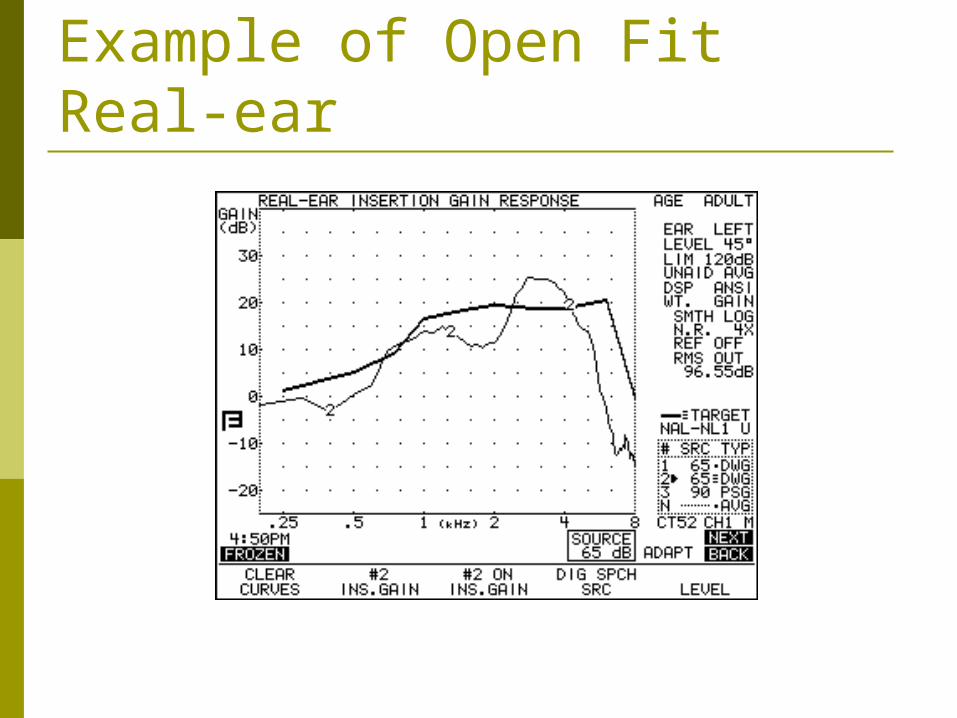
Example of Open Fit Real-ear
Using the FONIX NOAH Module Friendly Windows-based interface Automatically use NOAH audiogram Can send NOAH audiogram to analyzer Perform real-ear and coupler
measurements from computer Save all results into NOAH database On Top window: Perform real-ear while
adjusting the hearing aid!

Interface

Now for a FONIX NOAH Module Demonstration!