quick start user manual - hiseeu
TRANSCRIPT

QUICK START USER MANUAL
About user manual: before installation and use of the product, please read this manual in detail
and keep it for future reference.

COMPANY STATEMENT:
1. We ensure the integrity and accuracy of the Manual contents, if there is any doubt or dispute,
we have the right of final interpretation.
2. Manual book will be updated according to product enhancements, and described products or
processes will be regularly changed or updated. Updated contents will be added in the new
version without prior notice.
3. The manual contents for user’s reference only, please take practicality as standard.
4. Manual book mentioned parts, components and accessories are for illustrative purpose only,
do not stand for purchase configuration, please refer to the packing list for actual configuration
details.

1. HIGH DEFINITION CAMERA INTERFACE
BOM
P1 Waterproof RJ45 white 23-RJ45FS8P8CBS-00R 1PCS
White 33-0813PVC55W-00R 12.5g
P2 DC8.0(5.5*2.5) nut 21-F5525801-00R 1PCS
White 33-0813PVC55W-00R 4.1g
B1
1251TA 50% gold-plating 11-1251ATG-R 8PCS
1251H-8P environmental 11-1251AH-18R 1PCS
White 33-0813PVC55W-00R
1 31-2464263P242262ALW50-00R L=480MM 1PCS
2 SR White 33-0813PVC55W-00R 8.6g
3 PVC pipe Ø 2.8*155 white, thick 33-081028155WJH-00R 1PCS
4 PVC pipe Ø 3.5*155 white, thick 33-081035155WJH-00R 1PCS
* Which leads to the interface will be subject to the actual product
B1
P1
P2
Orange 2
3
4
5
6
7
8
Green and White
Green
Brown and White
Brown
Orange and White 1
Red
Black
1
2

2. CONNECTION Connection: connect IP cameras, computer and hub in LAN
3. OPERATION Notice: The default IP address is 192.168.0.99; please change our computer IP address in the
same network segment. User Name: admin Password: admin
3.1 ACTIVEX INSTALLATION
For first use IP equipment, please download the Active X, and it needs to setup the IE to ensure
install it correctly. It is advised to use IE8, and operation as following:
1. Open IE, Internet Zone-Modify configuration of ActiveX in Security setting, click”Prompt”of
unsigned ActiveX, as figure:
2. Open IE, and then log on. Please operate the ActiveX when it shows safety warning, as figure:
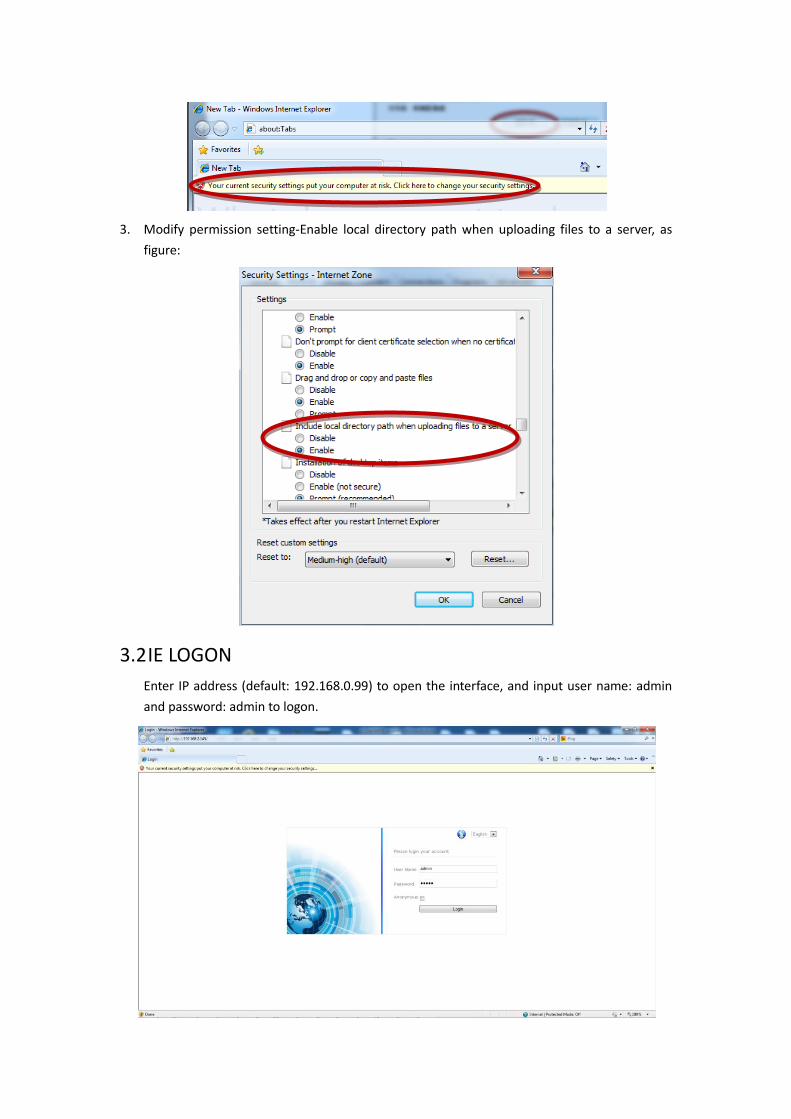
3. Modify permission setting-Enable local directory path when uploading files to a server, as
figure:
3.2 IE LOGON
Enter IP address (default: 192.168.0.99) to open the interface, and input user name: admin
and password: admin to logon.

After log on, prompt set up. Close IE, after setting up, open the IE again to enter into preview
interface.
3.3 IP MODIFY
Click ”Configuration” to enter the setup interface, and click ”TCP/IP” of “Network”, and modify IP
address, Subnet, Gateway and DNS, and click ”save” to save the modification, then the device will
restart again, please logon with the new IP address

4. DIMENSION MINI HD NETWORK INTEGRATED PTZ CAMERA
Picture 1 CABLE

Picture 2 Structure dimension
Picture 3 Installation

Picture 4 Wall bracket dimension