playworks game guide · 2020-01-01 · the playworks game guide playworks is a nonprofit...
TRANSCRIPT

PLAYWORKS for every kid.
PLAYWORKSGAME GUIDEfor recess staff, educators, youth workers & parents

Page | 2
The Playworks Game Guide
Playworks is a nonprofit organization whose mission is to improve the health and well-being of children by increasing opportunities for physical activity and safe, meaningful play.

Page | 3
Table of Contents
Ice Breakers ………………………………………………………….. 5
Readiness Games………..……………………………..……………. 32
Tag Games ……………………………………………..…………… 90
Cooperative Games ……………………………………………….. 134
Core Playground Games and Sports………………………………. 186
Suggested Core Games Modifications…………………………….. 281
Health and Fitness: FitKid Program ……………………………… 282
Minute Moves and Energizers…..…………………………………. 292

Page | 4
Toolbar Codes On the bottom of each game description, there is a convenient toolbar so you can quickly
identify games that meet your specific needs.
Example Toolbar
Toolbar Key
pK-6th+ Grade Range: Indicates games appropriate for grade level.
I Inclusive: A game that facilitates every student being able to participate.
N No Equipment: Games that are played with no equipment.
M Minute Moves: 2-5 minute classroom activity providing students with a quick break to
increase blood-flow and classroom readiness.
T Transitional: Small, quick activities that allow for a fluid change in games, to create a
line or to travel from one place to another.
C Good for Classroom: Games that can be played in classrooms in case of inclement
weather.
Special Needs: Games that are suitable for students with different special needs; see
back of page for further descriptions.
Ad- A.D.H.D/A.D.D
Au- Autism
Bl- Blindness/Visually Impaired
Cp- Cerebral Palsy
De- Deaf/Hard of Hearing
Ed- Emotionally Disturbed
L Level: Progressively identifies the developmental level of each game - Level 1, 2 or 3.
L1 are accessible for all skill levels
L2 and L3 require some prior skill development
Be sure to teach the appropriate skills prior to playing an L2 or L3
activity.
pK-6th+ I N M T C Ad,Au,Bl,Cp,De,Ed L1

Page | 5
Ad – A.D.H.D. – For students with A.D.H.D./A.D.D. it is best to use games that have little or
brief instruction and involve lots of movement.
Au – Autism – There is a spectrum of autism, so be aware that some students will have an
easier time than others. Autism often affects the development of social skills, as well as some
resulting delay in speech. Use visual cues to help students understand expectations.
Bl – Blindness/Visually Impaired – Use games that have clear, verbal cues and movement
in a personal space.
Cp – Cerebral Palsy - Use games that encourage lots of body movement to improve
fine/gross motor skills and abilities.
De – Deafness/Hard of Hearing – Use visual cues to help students understand expectations,
as well as act out/demonstrate what you want the students to do.
Ed – Emotionally Disturbed – Allow for students to have personal space, as well as a safe
area or person who will support the student if s/he is feeling upset.

Ice Breakers
Ice breakers are an effective and fun way to begin building community among your students. The most
basic of these games help students familiarize themselves with each other’s names. Other games
encourage students to share information about themselves. These exchanges help students build
relationships with their classmates as they get to know each other. Participation in these ice breakers also
helps students feel more comfortable engaging in further games and activities.

Page | 7
Ball Toss Race
Group Size: 10-30
Age Group: K-5th grades
Length of Activity: 10 minutes
Developmental Goals: To combine physical and verbal skills to enhance awareness, learn everyone’s
name
Skills Practiced: Passing, catching, memory and verbal communication
Equipment Needed: One or more balls
Before You Start:
Have the group get into a circle and have one or more balls ready.
How to Play:
The leader will begin by throwing, rolling, or bouncing a ball (depending on the age and skill
level) to another player while saying the other person’s name loudly. Explain that it is very
important to remember to whom they passed the ball.
Keep passing the ball around the circle so that everyone has received the ball one time. You can
have students sit down once they have received the ball, to make sure nobody gets it twice.
When the last person gets the ball have them pass it back to you.
Now without the ball, go around the circle in the same order and have the students say to whom
they will pass the ball.
Once students have that, try it with the ball and see how fast they can go.
Mid-point questions:
Who has an idea how to get the ball to everyone more quickly?
What do you think about adding a second ball?
Shall we time ourselves and then try to beat our time?
Closing questions:
What do you think this game teaches? Is it fun?
Can you think of anything that would make this game better?
Variation(s):
To make the game more interesting you can add more balls and balls of different sizes.
Catch and Throw Style (K-2) – Have the students form a circle around the leader. The leader can
then pass the ball to each player in the circle. When the student catches the ball, everyone in the
class yells out that student’s name. Go around in a circle until everyone has a turn, then randomly
pass the ball and see how fast they can go.
pK-5th I C Ad,Au,Cp,De,Ed L1

Page | 8
Bob the Bunny
Group Size: 8-20
Age Group: 1st-5th grade
Length of Activity: 5-10 minutes
Developmental Goal: To develop observation skills and tactile development
Skills Practiced: Teamwork and keeping a rhythm
Equipment Needed: A small object, preferably a bunny
Set Up: None
Before You Start:
Gather group of students in a circle. Have students place their hands behind their backs.
Choose one student to be in the middle.
How to Play:
The person in the middle tries to guess who on the outside of the circle is holding the bunny.
To begin, the person in the middle closes his/her eyes while the group begins chanting in rhythm,
“Bob the Bunny, Bob, Bob, the Bunny!”
As you are chanting start passing the bunny around the circle, keeping the bunny behind you.
Once the bunny is in motion, the person in the middle opens their eyes. S/he gets 3 tries to guess
who is holding the bunny; the group is still chanting and passing the bunny.
If the person in the middle guesses correctly they change places with the person who was caught
holding the bunny.
If the person in the middle does not guess correctly within 3 tries s/he becomes part of the circle
and a new person is chosen to go in the middle.
Variation(s): Give students the opportunity to change the name of the character (i.e. incorporate the
school/local sports team mascot, birthday students’ name, etc.)
Play with multiple bunnies.
1st-5th I C Bl,Cp,De L1

Page | 9
Evolution
Group Size: 10-40
Age Group: 4th-5th grades
Length of Activity: 10-15 minutes
Developmental Goal: To increase social comfort and to improve nonverbal communication
Skills Practiced: Following directions
Equipment Needed: None
Set Up: Area with clear boundaries, classroom
Before You Start:
Have the whole group gather in a contained area.
Explain the evolution of all life in our group goes in this order: First the egg, then the chicken, the
dinosaur, rock star, superhero.
Each stage of evolution has a corresponding action – egg is low to the ground with hands over
their head, chicken walks like a chicken and clucks, dinosaur has arms outstretched like big jaws,
rock star plays a guitar, and a superhero flies around the play space.
Demonstrate clearly the different steps and order of evolution, including what to do if you win or
do not win Ro-Sham-Bo.
Make sure that everyone knows how to play Ro-Sham-Bo.
Remind players that they can only do Ro-Sham-Bo with someone who is at the same stage of
evolution; this encourages students to interact with many different people, not just their friends.
How to Play:
Everyone begins as an egg.
Players mix up, pair up and play Ro-Sham-Bo.
The person who wins evolves to the next step, the person who did not win goes down a stage. If
the player is already an egg s/he remains an egg.
Players pair up again, only with someone who is in the same stage of evolution.
When a player evolves all the way to a superhero, s/he is finished and can fly around the area.
Game ends when all the players are also superheroes or when the time limit is up.
Variation:
Allow players who lose Ro-Sham-Bo to remain at their current stage of evolution – this makes
the game go a little faster.
4th-5th I N C Ad,Cp,De,Ed L2

Page | 10
Find Somebody Who
Group Size: 3-25
Age Group: K-5th grades
Length of Activity: 10-15 minutes
Developmental Goals: To share and learn about one another. To understand there are commonalities
within groups.
Skills Practiced: Speaking and listening
Equipment Needed: None
Before You Start:
Gather the group in a contained area.
How to Play:
Instructor begins by saying, “Find somebody who…” filling in the blank
Options are endless. Here are a few:
…has the same number of brothers and sisters as you
…shares the same favorite color as you
…was born in the same month as you, etc.
Students must find a partner.
As partners they are to decide who side A is and who side B is and then clasp hands in
the air so the leader knows they are ready.
Instructor specifies a particular piece of information A and B are to share with each other.
Options are endless. Here are a few:
If you could be any animal what would it be and why?
What is one thing you would change about the school to make it a better place?
If you could have a magical power what would it be?
How do you know somebody is being a good friend?
After each person has had a chance to speak, the instructor begins a second round of “Find
Somebody Who…”
Three rounds are optimal.
Variation(s):
Instead of having the shares be verbal shares, give group challenges (example- figure out how to
support each other’s weight with both partners balancing on one foot, do the C’mon In and Sit
Down Game- see the Cooperative Games section).
Lead them in partner stretches.
K-5th I N T C Ad L2
Going on a Picnic
Group Size: 3-25
Age Group: K-5th grades
Length of Activity: 10-15 minutes
Developmental Goals: To learn everyone’s name, memorization, spelling, sound and letter recognition
Skills Practiced: Following directions
Equipment Needed: None
Before You Start:
Have the whole group seated in circle.
Give an example of a food that begins with the same letters as your first name.
How to Play:
Explain to the group that they are all going on a picnic together and are all responsible for
bringing a food item.
Each person is to bring a food that begins with the first letter of their first name.
Ask for a volunteer to go first. They are to say their name and what they are bringing to the
picnic.
The next person, first introduces the person (and the person’s food choice) who just went then
her/himself and her/his food.
The third person to go introduces the first two people and then himself/herself and so on until
everyone has gone.
K-5th I N C Bl L2

Page | 12
Hi, My Name Is…
Group Size: 3-30
Age Group: K-5th grades
Length of Activity: 10-15 minutes
Developmental Goals: To learn everyone’s name, increase social comfort
Skills Practiced: Public speaking
Equipment Needed: None
Before You Start:
Gather the group in a contained area. If played outside, lay out clear boundaries.
Demonstrate the greetings with a volunteer.
Make sure all students can repeat back the demonstrated greetings.
How to Play:
At a given signal everyone goes around introducing themselves to one another. Students go up to
each other and they shake hands. Four exchanges happen while shaking hands:
1. The first person says, “Hi, my name is _________.”
2. The second person says, “Hi, my name is _____________”
3. The first person says, “Nice to meet you.” The second person repeats this back to his/her
partner.
4. The first person says, “See you later.” The second person says something similar in
response, “See ya!” or “Bye!”
Once that four-part exchange happens, the partners split up and find someone else to introduce
themselves to.
Players go around trying to meet as many other players as possible in one minute.
Variation:
Students can use signals or sign language to develop nonverbal communication.

Page | 13
If You Really Knew Me
Group Size: 3-30
Age Group: K-5th grades
Length of Activity: 10-15 minutes
Developmental Goals: To share and learn about one another, increase social comfort
Skills Practiced: Speaking and listening
Equipment Needed: None
Before You Start:
Demonstrate what one round will look like
Lead a discussion about attentive listening before beginning the activity. Help students define
what “attentive listening” means and what it looks like. It is fully hearing what the other person is
saying without interrupting and not thinking about your own thing or how you want to respond
while being spoken to. It includes facing the person who is speaking, making eye contact,
nodding or other physical responses to what is being said, etc.
Make sure students know if they are A or B.
How to Play:
Group students in pairs and decide who student A is and who is student B.
Student A silently listens to student B for one minute (or shorter for younger groups).
Student B finishes off the sentence, “If you really knew me, you would know that…” What is
being shared about themselves can range from
Family information- “If you really knew me you would know that I am the youngest of 4
siblings.”
School information -“If you really knew me you would know that my favorite subject in
school is Art.”
Favorite/ least favorite things- “If you really knew me you would know that I hate
broccoli.”
Anything else they want to share about themselves.
Student B repeats this phrase over and over again completing it with a new piece of information
each time. After a minute the roles are reversed and student B listens while student A shares.
K-5th I N C Ad,Au,Cp,De,Ed L1 K-5th I N C Bl,Cp L2

Page | 14
I Love My Neighbor, Especially My Neighbor Who…
Group Size: 3-25
Age Group: K-5th grades
Length of Activity: 10-15 minutes
Developmental Goals: To have students recognize commonalties within the group and to identify
personal characteristics
Skills Practiced: Following directions
Equipment Needed: One less chair/cones than the number of participants
Set Up: Position chairs/cones to form a circle
Before You Start:
Make sure students understand the rules.
Cue students to think about what they will say if they get to be in the middle.
Briefly discuss awareness and review Ro-Sham-Bo in case there is a tie.
How to Play:
The person standing in the center of the circle begins the game by saying “I love my neighbor
especially my neighbor who…”
S/he completes the sentence with a piece of information that is true for him/her
Example: “I love my neighbor, especially my neighbor who:
was born outside of California
loves to play basketball
has a pet
is an only child, etc.
As soon as s/he is finished with the statement, everyone who this applies to (including the person
in the center) gets up from their chair and runs to any empty chair that is not right next to them.
The person who remains standing begins a second round of the game.

Page | 15
K-5th I C L2

Line of Silence
Group Size: 3-25
Age Group: K-5th grades
Length of Activity: 10-15 minutes
Developmental Goals: To help students see themselves in relationship to one another and improve
nonverbal communication
Skills Practiced: Following directions
Equipment Needed: None
Before You Start:
Explain this is a silent challenge.
Demonstrate or brainstorm other ways to communicate without talking.
How to Play:
Instruct students to line up in a particular order.
Examples include: according to height (tallest to shortest), date of birth (from January 1
to December 31), or any other category.
After the first round, have a discussion with the students about what was challenging about doing
that line up, different ways they communicated with each other and other creative ways they
might do a line up.
Give them a second category for lining up.
K-5th I N T C CpDe L2

Movement Name Game
Group Size: 3-25
Age Group: preK-5th grades
Length of Activity: 10-15 minutes
Developmental Goal: To learn everyone’s name
Skills Practiced: Repetition and memorization
Equipment Needed: None
Before You Start:
Have the whole group stand in a circle.
Demonstrate how to speak loudly while doing a large movement.
Have everyone repeat your name and movement.
How to Play:
The first person begins the circle rotation by loudly saying his/her name while at the same time
doing a movement.
The whole group repeats back the name and movement.
The next student says her/his name and does a movement of his/her own.
Again whole group repeats back the name and movement.
This call and response continues around the circle until everyone has gotten a turn.
Variation(s):
For a second rotation specify the kind of movement the students are to make- must leave the
ground, must land on one foot, must spin around, etc.
Pre-K: Send students into the middle of the circle to do their movement so everyone can see.
pK-5th I N C Bl,Cp,De L1

Name Touch
Group Size: 5-30
Age Group: 3rd-6th+ grades
Length of Activity: 10 minutes
Developmental Goals: To develop listening skills, memorization and learn everyone’s name
Skills Practiced: Listening, peripheral vision, reflexes and awareness
Equipment Needed: None
Set Up: None
Before You Start:
Go around and say everyone’s name (if this is the first time playing, name tags help)
Demonstrate safe tagging/high fives
Light touch, like butterfly wings
Unsafe tags/high fives: hard contact that might hurt the person being tagged
Students form a close circle with one player in the middle.
Everyone except the player in the middle holds both hands out in front with their palms up.
How to Play:
The leader begins the game by loudly saying the name of someone who’s standing in the circle.
The player in the middle then tries to tag that person whose name was called.
The player whose name was called must say another player’s name before s/he is tagged by the
person in the middle.
When a player gets tagged before s/he can say a name, s/he switches places and goes to the
middle.
The player who successfully tags a person in the circle gets to call out a name to begin the next
round.
Variation(s):
Have the players standing in the circle close their eyes so they cannot see the person in the middle
coming towards them.
Have the circle take a few steps back so the person in the middle has to run towards the players.
3rd-6th+ I N C L1
Partner Introductions
Group Size: 3-25
Age Group: K-5th grades
Length of Activity: 10-15 minutes
Developmental Goals: Learning about one another and listening to directions
Skills Practiced: Listening, speaking and memorization
Equipment Needed: None
Before You Start:
Have the whole group gather in a contained area.
Lead a discussion about attentive listening before beginning the activity. Help students define
what “attentive listening” means and what it looks like. It is fully hearing what the other person is
saying without interrupting and not thinking about another topic or how you want to respond
while being spoken to. It includes facing the person who is speaking, making eye contact,
nodding or other physical responses to what is being said, etc.
How to Play:
Group students into pairs and decide who side A is and who is side B.
Side A silently listens to side B for one minute (or shorter for younger groups) while side B
introduces himself, sharing anything he wants to share about himself.
Reverse roles so side A has introduced him/herself to side B.
Gather the whole group in a circle.
Everyone takes a turn introducing their partner, by name, to the group, sharing the information
they have just collected about their partner.
Variation:
Run it like an interview session and give teams sheets of paper with different questions to ask
each other.
K-5th I N C L2

Page | 20
Pulse
Group Size: 10-35
Age Group: 1st-5th grades
Length of Activity: 10 minutes
Developmental Goals: To develop quick reflexes and awareness
Skills Practiced: Hand-eye coordination
Equipment Needed: Ball or small object, chair or other object to place the ball on, quarter or other coin
with a heads/tails differential
Set Up: Place a small object or ball on top of a chair
Before You Start:
Review that the game is a silent game. All players except for the first two in line must have their
heads down and eyes closed.
Split players onto two teams and have them face each other while holding hands with their
teamnates. The ball or small object will be at the end of the lines in the middle of the two teams.
Demonstrate gentle hand squeezing and consequences for not doing so.
How to Play:
The objective is for a team to grab the small object before the other does by passing the current
down one person at a time.
The judge will flip a coin; if the coin lands HEADS then the players at the front of the line may
start the current by gently squeezing the hand of the person next to them. The next person in
line squeezes the third person’s hand, and so on, until the current reaches the end of the
line. The team whose end person grabs the ball first gets a point.
If the coin lands TAILS then no reaction should occur and after a few seconds the judge should
flip the coin again. In the event a team grabs the ball on a TAILS coin flip, that team will have a
point subtracted from their total.
After the round, the person at the front of the line will move to the end of the line and everyone
will move one spot up. Everyone should have an opportunity to be the grabber as well as the
initiator, depending on group size.
First team to 10 points wins.
Variation:
Instead of gently squeezing, players can also raise hands and perform a “wave” effect.
Alternate Name of the Game:
Electrical Current
1st-5th I C De L1

Page | 21
Pumpkin Face, Raisin Face
Group Size: 5-20
Age Group: preK-1st grades
Length of Activity: 5-10 minutes
Developmental Goals: To develop the ability to listen and follow directions
Skills Practiced: Following instructions, social comfort
Equipment Needed: None
Set Up: Classroom or small area
Before You Start:
A magic word can be used to get the students to stand up and move to the starting area after you
explain the game to them.
How to Play:
Children and adults stand in a circle.
Adult models what a ‘Pumpkin Face’ and a ‘Raisin Face’ look like.
“Pumpkin Face” = open your body up. Stand on your tip-toes. Put your arms up and stretch.
Stretch out your face by opening your mouth big, your eyes wide, and look like a scary Pumpkin
Face.
“Raisin Face”= Getting very low and bending your legs until you are sitting on the back of your
legs (get very small). Close your face in by squinting your eyes, sucking in your lips, and
tightening your cheeks.
Have the children practice while also saying ‘Pumpkin Face’ or ‘Raisin Face.’
The adult leads the activity by going back and forth between calling out Pumpkin Face and Raisin
Face. Children will then act out and stretch in character.
pK-1st I N M C Ad,Au,Bl,Cp,De,Ed L1

Page | 22
Ro-Sham-Bo Rock Star
Group Size: 10-50
Age Group: 3rd-5th grades
Length of Activity: 5-10 minutes
Developmental Goals: To increase social comfort, learn everyone’s name, improve verbal and
nonverbal communication
Skills Practiced: Ro-Sham-Bo and following directions
Equipment Needed: None
Before You Start:
Review the rules of Ro-Sham-Bo.
Make sure everyone understands the rules and how they support the person who wins Ro-Sham-
Bo.
How to Play:
Group students into pairs.
Have each partner group introduce themselves and play a round of Ro-Sham-Bo (or enough
rounds to break a tie).
The student who does not win becomes the winner’s cheerleader, following them and shouting
‘Go _____!’
The winner moves on to play another winning student.
Each round, the winner advances to play again and the non-winners and any previous
cheerleaders are now all cheering for that winner.
The game continues this way until it is down to two players and the whole group is cheering for
one or the other.
Alternate Names:
Ro-Sham-Bo Champion
Ro-Sham-Bo Cheerleader

Page | 23
Sardines
Group Size: 10-30
Age Group: 2nd-5th grades
Length of Activity: 10-20 minutes
Developmental Goals: To develop awareness, creative thinking and social comfort
Skills Practiced: Spatial awareness
Equipment Needed: None
Set Up: None
Before You Start:
Designate a large playing area that has places to hide
Make sure students understand the rules, boundaries and the importance of safety
How to Play:
One player goes off to hide.
The rest of the group counts (you can decide what number to count to) and then splits up and goes
looking for the player who is hiding.
When a player finds the hidden person, the player joins him or her in the hiding place.
The game is over once everyone is cramped in one place.
The first person to find the hidden player, become the hider in the next round.
Variation(s):
“Where Did it Go?” Style
One person is designated as the person who is “it” and hides away from the group.
The rest of the players stay at the designated “base” and sing “tell me where to go, tell me where
to go…” for 15 seconds.
The players then go and search for the person who is “it”.
Whoever finds the “it” person yells “it went over here!” and all the players still looking must run
back to base before being tagged by the hider.
Whoever was tagged becomes the next person to hide.
3rd-5th I N C Ad, De L1 2nd-5th I N C L1

Shape Shifter
Group Size: 10 – 30
Age Group: preK – 5th grades
Length of Activity: 5 minutes
Developmental Goals: To support group management, identify the components of shapes, and form
different types of shapes.
Skills Practiced: Listening, spatial awareness, and shape recognition.
Equipment Needed: None
Set Up: Identify a space with safe boundaries that fits the entire group in the shape of a circle (this will
allow the group to morph into appropriate shapes throughout game).
Before You Start:
Use attention getters to initiate countdown for each round of game.
Talk about different shapes and the amount of sides each shape has.
Model with students the ways in which they move their bodies to create shapes.
Students should not touch one another and should exhibit good listening skills.
How to Play:
The object of the game is to form the shape the leader identifies at the beginning of the round
within a specific amount of time.
Then every student in the class (100 % participation) should use their body to form the shape.
Students should stand straight-up, side-by-side to form the shape.
Students should form the sides and angles of the different shapes.
After each round debrief the shape making sure the shape has the right amount of sides and
the angles are approximately accurate.
Repeat and form different shapes.
Variation(s):
Have the students form the shape without speaking, therefore practicing their nonverbal
communication.
Have the students skip, hop, or act like their favorite animal while forming the shape in order
to encourage different types of movement.
pK-5th K C De L1

Spark
Group Size: 10-30
Age Group: 2nd-5th grades
Length of Activity: 10-20 minutes
Developmental Goals: To develop nonverbal communication, hand-eye coordination, creative thinking,
body awareness, teamwork, decision-making capabilities
Skills Practiced: Reflexes, observation, body awareness, cooperation, memory, Ro-Sham-Bo
Equipment Needed: One cone for every two students
Set Up: Designate an open area indoors or outdoors (a classroom works fine).
Before You Start:
Divide students into pairs.
Have the students in each pair stand facing each other anywhere in the space.
Place a cone on the floor/ground in between each pair of students.
Remind students that this is a silent game.
How to Play:
When the adult blows his/her whistle, each pair of students invents a patterned clap without
talking and using only their hands.
Give the pairs of students about a minute to find a rhythm and memorize/get used to their claps.
The adult says “Spark” and the students stop clapping and try to touch their cones with one hand
before their partners touch them (if both students touch the cone at the same time, they can Ro-
Sham-Bo).
The student who touches the cone first picks up the cone.
The students who are holding cones walk around the space to find new partners who are not
holding cones (the partners who are not holding cones can stay where they are).
The cone is placed on the floor/ground between the two new partners, and the adult blows his/her
whistle and the new partners invent their own patterned clap.
Game continues until each student has had at least a few different invent-a-clap partners.
Variation:
Music can be used to inspire clap patterns; when the music starts, the students start clapping.
When the music stops, students stop clapping and reach for their cones.
2nd-5th I C Ad,Au,Ed L1

Page | 26
Splat!
Group Size: 10-30
Age Group: 3rd-6th+ grades
Length of Activity: 10 minutes
Developmental Goals: To develop quick thinking and concentration.
Skills Practiced: Body and spatial awareness, listening to directions.
Equipment Needed: None
Set Up: Group forms a circle with one player in the middle
Before You Start:
Make sure students understand the importance of safety and control
Make sure all students know the rules and what happens if you are last to splat
How to Play:
The player standing in the middle of the circle is the “splatter”.
The splatter randomly points at someone and shouts “SPLAT!”
The person the splatter points at must duck down; then the two players either side of the ducker
must “splat” each other by pointing at the other and yelling “SPLAT!”
The last one to splat sits down, and the player who is ducking stands back up.
The game continues until there are two players left, have them Ro-Sham-Bo to determine who
will be the new splatter in the middle.
Variation:
Instead of sitting down when last to splat, have that player switch with the player in the middle.
Or have them perform a task to get back in the game.
3rd-8th I N C De L1

Superstar
Group Size: 6-30
Age Group: 2nd-6th+ grades
Length of Activity: 10-15 minutes
Developmental Goals: To learn about one another and improve nonverbal communication
Skills Practiced: Listening and speaking
Equipment Needed: none
Before You Start:
Have the whole group gather in a contained area
Put students into pairs.
Demonstrate with volunteer, examples of commonalities that meet the criteria. “I wouldn’t tell
my partner that I have brown hair because he/she can see that. I wouldn’t say that I am in
elementary school because my partner already knows that. I might say, my favorite food is pizza.
What’s yours? Or I might ask, ‘What city were you born in?’
How to Play:
Each group will have 1-2 minutes to find out how many things they have in common that:
They didn’t already know, and
Are not visible
When the time is up have youth get into a circle, standing next to their partner.
One-by-one each pair will share one thing they have in common.
After sharing their commonality, if others in the group also share that commonality they will put
their hands in the air, lunge forward, and yell “SUPERSTAR!”
The next pair then shares their commonality and the process continues until all pairs have shared.
Variation(s):
Have youth switch partners and do a round where they have to find out what they have in
common around a specific topic (sports, school and so on).
Having youth do a round where they can’t speak and can only act out ideas is not only fun, but
helps them with their nonverbal skills.
2nd-6th+ I N C Au,Bl,Cp L2

Page | 28
Telephone/Rumor
Group Size: 10-20
Age Group: 2nd-5th grades
Length of Activity: 5-15 minutes
Developmental Goal: To develop teamwork and good listening
Skills Practiced: Following directions
Equipment Needed: Blackboard and chalk (paper and pencil will do)
Set Up: None
Before You Start:
Practice passing whispered rumor/ messages.
Review rules and ask for questions.
Divide class into 2 teams.
Choose 1 person from each team to meet together and create a rumor/message.
How to Play:
At the signal, the first person on each team will whisper the rumor/message to the next person on
their team.
S/he will whisper the message/rumor to the next person and so on.
The message/rumor cannot be repeated a second time. This is a relay-type game, pass on what
you’ve heard.
The last person to receive the rumor/message must run to the chalkboard and write the message.
The team that is closest to the correct message/rumor gets a point.
Choose new players to create the message and play again.
Variation(s):
Instead of a message/rumor, it can be a short list of celebrities or grocery list.
Use this game as an opportunity to incorporate the food pyramid, history, geography, or any
other academic subject into play.
2nd-5th I N C Bl L1
Page | 29
Tomato
Group Size: 3-25
Age Group: 3-6th+ grades
Length of Activity: 10-15 minutes
Developmental Goals: To learn quick thinking and build rapport
Skills Practiced: Gross muscle control
Equipment Needed: None
Before You Start:
Have the whole group stand or sit in a circle.
How to Play:
One person begins as the “Answerer”.
Everyone in the circle takes turn asking appropriate questions. The Answerer must answer every
question with the word “tomato”.
If the Answerer laughs or says something other than “tomato”, the person asking the question
becomes the new Answerer.
Variation:
Change the word.
3rd-6th+ I C Bl L1

Page | 30
Tornado
Group Size: 10-30
Age Group: K–3rd grades
Length of Activity: 5-10 minutes
Developmental Goals: To develop social comfort and strategic thinking
Skills Practiced: Throwing and following directions
Equipment Needed: One playground ball
Set Up: None
Before You Start:
Make sure the students understand the object of the game is to not have the ball
Students should understand that only the Tornado spins, and that they must pass the ball to the
student next to them.
How to Play:
Students make one big circle.
A single student begins in the middle as the Tornado.
The class passes the ball around the circle while the Tornado in the middle spins around 10 times.
When the Tornado stops, whoever has the ball becomes the next Tornado.
Variation(s): Allow students to alter the direction of the ball, have more than one ball going at the same
time, or alter the number of spins.
K-3rd I C Ad,Cp,De L1

Page | 31
When Nature Calls
Group Size: 5-20
Age Group: Grades 1st-6th+ grades
Length of Activity: 10-20 minutes
Developmental Goal: Awareness of different animal sounds
Skills Practiced: Rhythm, hand-eye coordination
Equipment Needed: Yardstick or long object
Before You Start:
Circle up players about shoulder-to-shoulder but with some personal space in between.
How to Play:
One person in the middle closes his/her eyes and spin slowly with the yardstick as the circle
moves in a clockwise motion
The player in the middle taps the yardstick on the ground three time to let the circle knows it’s
time to stop moving. Next the player in the middle extends the yardstick toward a player.
Whoever the yardstick is pointing to must grab the end of the yardstick and to the best of their
ability make the animal sound the player in the middle asks for. The player in the middle may ask
for any animal within the animal kingdom or even extinct animals like dinosaurs.
The player in the middle gets one guess to name which player is making the animal sound.
Players who make the sound get a chance to be in the middle afterward.
Alternate Name of the Game:
Animal Kingdom
1st-6th+ I C Ad,Bl L2

Who Stole the Cookies?
Group Size: 5-20
Age Group: preK -1st grades
Length of Activity: 10 minutes
Developmental Goals: Combining physical and verbal skills to enhance awareness. Learn each other’s
names.
Skills Practiced: Rolling and catching, memory, verbal communication
Equipment Needed: 1 playground ball
Set Up: Have the children stand in a circle
Before You Start:
Practice rolling the ball to players with each person sitting down after they roll the ball.
Practice singing one round of the song
How to Play:
The Song --
Class: Who stole the cookies from the cookie jar? Coach ___ stole the cookies from the cookie
jar!
Coach: Who me?
Class: Yes you!
Coach: Couldn’t be!
Class: Then who?
The coach will then roll the ball to a student in the circle (saying his or her name) and sit down.
After the coach has said the child’s name…
Class: ______ stole the cookies from the cookie jar!
…and repeat as above.
Continue to roll the ball to everyone in the group and repeat the song for each person.
pK-1st I T C Cp L1

Page | 33
I See, I See!
Group Size: Any size
Age Group: preK-2nd grades
Length of Activity: Under 10 minutes
Development Goals: Students are able to unleash their potential for creativity. Because there are no “right” or “wrong” actions
in this game, they are developing self-confidence, as well as awareness that everyone has an equal ability
to participate.
Skills Practiced:
Fine and gross motor skills
Equipment Needed: Cones for boundaries, imagination
Set Up: Can be played outside, in a gym or in a classroom. Get the students’ attention with attention
getters.
Before You Start:
Make sure the students know to NOT make any body contact with each other (to prevent injury).
Demonstrate the boundaries of the space and their own physical boundaries.
Students need to know the playing boundaries.
How to Play:
Students begin walking around in the designated area. (Make the walk fun: have them do a cool
walk, slow-mo walk, zombie walk, etc.)
When Coach says the words "I See, I See," the students freeze.
After the students freeze, they will ask Coach, "What do you see?"
Coach will then say, "I See ______." The blank can be anything.
Whatever Coach says, the students act it out in the designated area.
An example dialogue for the game:
COACH: "I See, I See!!"
STUDENTS: "What do you see?"
COACH: "I see a superhero flying in the sky!"
[Students then act like superheroes flying in the sky.]
After the students have successfully acted, Coach will then repeat the phrase, "I See, I See," and
the game will continue in the same type of action/dialogue, but with a new action.
pK-2nd I T C Ad,Au,Cp,Ed L1
Page | 34
Readiness Games Before learning to read, kids must be taught the alphabet. Similarly, for sports and games there are
building blocks you can use to prepare students to go out and play. Some children learn how to hop, skip
and jump naturally, while others need more instruction and encouragement. For all elementary grades, the
games in this section help to build a foundation of basic skills that both develop capacities in the
individual students, as well as establish a common movement vocabulary for an entire group.

Alligator Swamp Trail
Group Size: 10-30
Age Group: K-2nd grades
Length of Activity: 5-10 minutes
Developmental Goal: To develop balance
Skills Practiced: Balance, coordination and awareness
Equipment Needed: Jump Ropes (if needed)
Set Up: Use existing lines on the yard or create them using jump ropes.
Before You Start:
Make sure all students understand that the goal is to stay on the line (swamp trail).
Talk about how to pay attention to the person in front you so they don’t accidentally knock their
classmate off the trail.
How to Play:
Give a description that you and the class are now entering the alligator swamp.
To stay safe they must stay on the line, but if they step off they could get their foot chomped on
by an alligator. Make sure to be dramatic to make it more fun.
Have the children follow you around the swamp and tell them if you see an alligator near them!
Variation:
Change the swamp into anything you can imagine (shark tank/volcano lava).
pK-2nd I T C Ad,Au,Cp,De,Ed L1

Page | 36
Animal Farm
Group Size: 20-40
Age Group: preK-5th grades
Length of Activity: 10-15 minutes
Developmental Goals: To develop children’s listening and cooperation skills.
Skills Practiced: Awareness and listening.
Equipment Needed: None
Before You Start:
Get students into a circle and have them count off from one to five.
Assign an animal for each of the five numbers.
Tell students what animal their number corresponds to and what sound that animal makes. They
could be a dog (bark), a duck (quack), a cow (moo), a cat (meow), a sheep (baa), a lion (roar), etc.
Make sure every student has been assigned and remembers their animal.
How to Play:
Students must keep their eyes shut during the game.
They must find their fellow matching animals by making their sounds while walking slowly
around the area with their hands up to act as a bumper.
The game is over when everyone has found their group or when the first group is complete and
together.
Variation(s):
Instead of numbers, give students pictures of different animals which they need to represent with
the corresponding sound.
Depending on the age and ability of your group you can use more or fewer animals to make
groups larger or smaller.
Animals Two by Two style:
Have animal cards with or without pictures depending on age group.
Begin the game by giving each student one animal card.
Explain that s/he must move around the room while imitating the movements of the animal whose
name appears on the card (For younger students a picture may be necessary).
As each student moves around the room, s/he must look for another who is imitating the same
animal.
When a student finds her/his animal mate, the partners stand together until everyone has found a
mate.
pK-5th I N M T C Bl L2
Page | 37
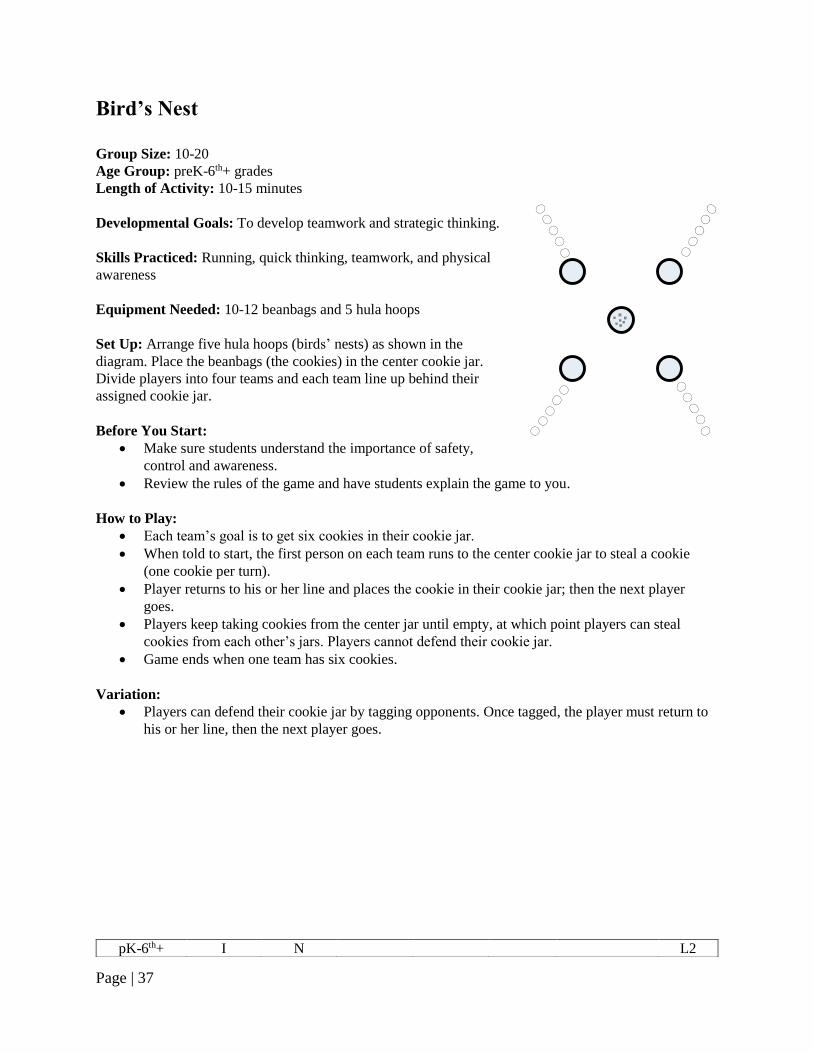
Bird’s Nest
Group Size: 10-20
Age Group: preK-6th+ grades
Length of Activity: 10-15 minutes
Developmental Goals: To develop teamwork and strategic thinking.
Skills Practiced: Running, quick thinking, teamwork, and physical
awareness
Equipment Needed: 10-12 beanbags and 5 hula hoops
Set Up: Arrange five hula hoops (birds’ nests) as shown in the
diagram. Place the beanbags (the cookies) in the center cookie jar.
Divide players into four teams and each team line up behind their
assigned cookie jar.
Before You Start:
Make sure students understand the importance of safety,
control and awareness.
Review the rules of the game and have students explain the game to you.
How to Play:
Each team’s goal is to get six cookies in their cookie jar.
When told to start, the first person on each team runs to the center cookie jar to steal a cookie
(one cookie per turn).
Player returns to his or her line and places the cookie in their cookie jar; then the next player
goes.
Players keep taking cookies from the center jar until empty, at which point players can steal
cookies from each other’s jars. Players cannot defend their cookie jar.
Game ends when one team has six cookies.
Variation:
Players can defend their cookie jar by tagging opponents. Once tagged, the player must return to
his or her line, then the next player goes.
pK-6th+ I N L2

Clap and Move
Group Size: 5-30
Age Group: preK-2nd grades
Length of Activity: 5 minutes
Developmental Goal: To develop listening skills
Skills Practiced: Running forward and backward, skipping, hopping, galloping, etc…
Equipment Needed: None
Set Up: Set up a clearly designated rectangular play area with visible boundaries
Before You Start:
Students know what signal indicates they can begin to run
Clap a few times with a different number, i.e. twice or six times, to demonstrate what signal does
not sound like. Then clearly clap three times and count out loud to show what the signal sounds
like.
How to Play:
Students are listening for the signal of three claps in a row
When you clap three times they will run to the other side of the field without touching
anyone else
Once the students have done this successfully several times, you repeat the game with a different
method for them to get across the field, for example skipping, hopping or leaping
Variation(s):
Change the number of claps students are listening for
Change the rhythm of the claps so it is harder to hear the number of claps
Use visual cues, such as body movements, for students who have difficulty hearing
Indoor Modifications:
Instead of clapping, snap your fingers to keep the noise down
Modify movements so that they are safe for the area that you are using
pK-2nd I N T C Ad,Au,Cp,De,Ed L1

Page | 39
Colors
Group Size: 10-30
Age Group: PreK-1st grades
Length of Activity: 5 minutes
Developmental Goals: To develop color identification and listening skills
Skills Practiced: Spatial awareness, running, walking, skipping and following directions
Equipment Needed: Several items/dots of various colors
Set Up: Place colored items/dots throughout playing area
Before You Start:
Identify visual boundaries (coned or chalked)
Review colors
Give students a movement to use- walking, skipping, chicken walk, running
Address moving while being aware of others
How to Play:
Call out a color. Every student must move to a dot of that color and place one foot on the dot
Be sure that every student found a dot, and there aren’t too many students on any dot
Give students the chance to name other objects with that color. “The sun is yellow! So are our
pencils!”
Start all over with a new color
Variation:
Instead of calling out a color, call out an object such as the grass. Students must run to a dot of
that object’s color (i.e. green)
Indoor Modification:
Modify movements so that they are safe for the area that you are using
pK-1st I M Ad,Cp L1
Page | 40
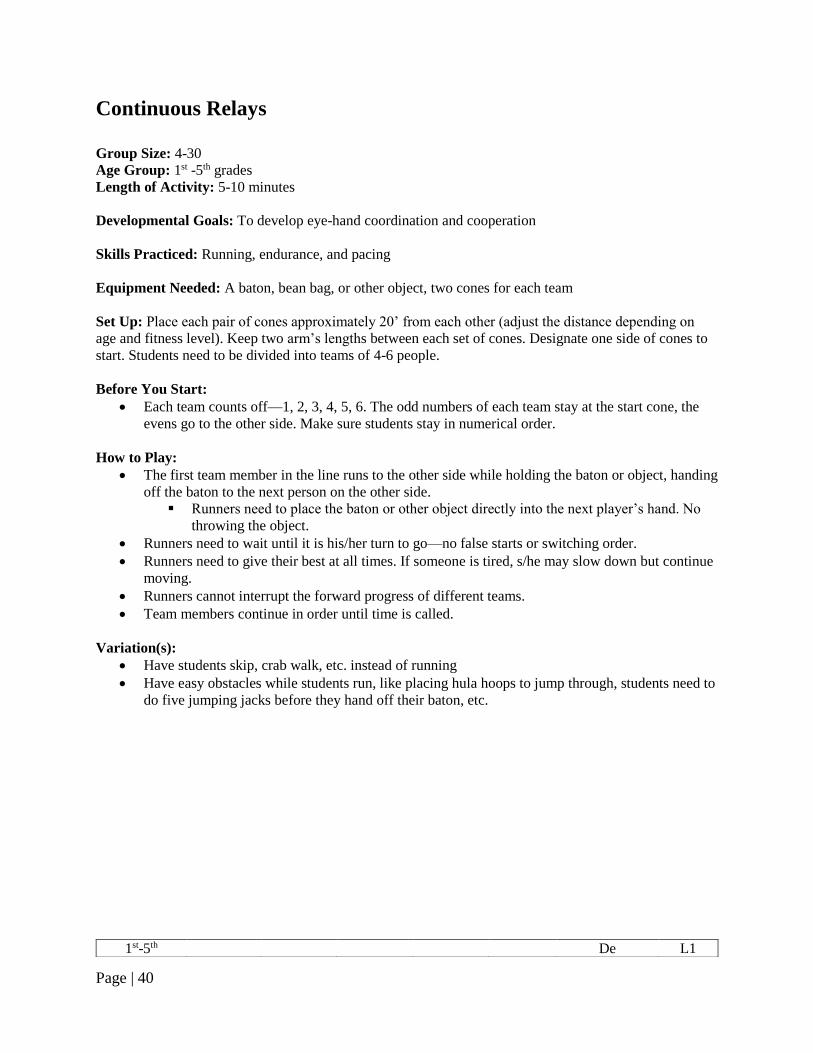
Continuous Relays
Group Size: 4-30
Age Group: 1st -5th grades
Length of Activity: 5-10 minutes
Developmental Goals: To develop eye-hand coordination and cooperation
Skills Practiced: Running, endurance, and pacing
Equipment Needed: A baton, bean bag, or other object, two cones for each team
Set Up: Place each pair of cones approximately 20’ from each other (adjust the distance depending on
age and fitness level). Keep two arm’s lengths between each set of cones. Designate one side of cones to
start. Students need to be divided into teams of 4-6 people.
Before You Start:
Each team counts off—1, 2, 3, 4, 5, 6. The odd numbers of each team stay at the start cone, the
evens go to the other side. Make sure students stay in numerical order.
How to Play:
The first team member in the line runs to the other side while holding the baton or object, handing
off the baton to the next person on the other side.
Runners need to place the baton or other object directly into the next player’s hand. No
throwing the object.
Runners need to wait until it is his/her turn to go—no false starts or switching order.
Runners need to give their best at all times. If someone is tired, s/he may slow down but continue
moving.
Runners cannot interrupt the forward progress of different teams.
Team members continue in order until time is called.
Variation(s):
Have students skip, crab walk, etc. instead of running
Have easy obstacles while students run, like placing hula hoops to jump through, students need to
do five jumping jacks before they hand off their baton, etc.
1st-5th De L1

Page | 41
Cookie Jar
Group Size: 10-30
Age Group: preK-5th grades
Length of Activity: 15-20 minutes
Developmental Goals: To develop active listening and evasion skills.
Skills Practiced: Running, tagging and evading
Equipment Needed: None
Set Up: Set up a rectangular play area with enough space in between for the group to run around in
Before You Start:
Demonstrate safe tagging:
Light touch, like a butterfly wings, on the back or shoulder.
Unsafe tags: hard contact that might cause the person being tagged to fall.
Line students up shoulder to shoulder along one of the boundary lines, making sure there is
adequate space for the students to spread out.
Practice the verbal cues so the whole group asks “Cookie Monster, Cookie Monster are you
Hungry?” in unison.
Review boundaries and consequences for going out of bounds.
How to Play:
Explain that the students are cookies and you are the Cookie Monster. It is almost lunchtime for
you and you may be hungry.
The students must ask you, “Cookie Monster, Cookie Monster are you hungry?”
If you say “yes” they must try to run across the play area without getting tagged by you.
If you say “no” they must remain where they are and ask again until you say “yes.”
If a student gets tagged they become your helpers.
Variation(s):
Modify for older kids who may not relate to Cookie Monster, i.e. “Boogie Monster”.
Once the game is understood, allow one of the students to be the Cookie Monster.
pK-5th I N Ad,De,Ed L1

Page | 42
Cut the Cake
Group Size: 10-40
Age Group: 1st-3rd grades
Length of Activity: 5-15 minutes
Developmental Goal: To develop quick thinking capabilities.
Skills Practiced: Running, physical awareness, teamwork and quick thinking
Equipment Needed: None
Set Up: None
Before You Start:
Gather group into a circle holding hands. This circle is the Cake.
Demonstrate the safe way to Cut the Cake.
Choose a volunteer to help with a demonstration.
The two arms that are connected become the knife, which is used to slice the cake.
Force is not necessary to slice the cake. Students who are forming the cake should allow
the knife to slice through without resistance.
Make sure students understand the importance of safety, control and awareness.
Emphasize that students must work with their partner to be successful. One partner cannot pull
the other around the circle; they should run next to each other.
How to Play:
Two people walk around the circle holding hands and decide where they want to ‘cut the cake’.
To do so, they use a slicing motion to gently break the chosen connected hands with their arms,
then begin running around the outside of the circle.
The two people whose hands were ‘cut’ reconnect with each other and let go of the person on
their other side, creating a second pair.
The new team has to run in the opposite direction around the circle and try to get back to the open
spot before the first pair.
The first team back to the opening becomes part of the circle
The second team back begins a new round and gets to Cut the Cake. Any tie can be
solved with Ro-Sham-Bo.
Continue the game until all students have had a turn.
1st-3rd I N M C L1

Dance Freeze
Group Size: 8-30+
Age Group: preK-5th grades
Length of Activity: 5-15 minutes
Developmental Goal: To increase aerobic fitness through ongoing dance
Skills Practiced: Increase aerobic fitness, develop various motor skills and coordination, listening and
awareness.
Equipment Needed: Radio, tape or CD player
Set Up: Designate an open area free of obstacles approximately 20’x20’. Have the radio or tape/CD
player ready with an appropriate station or music selection.
How to Play:
In this activity, students dance as the music plays.
When the music stops, each student must freeze immediately and hold that position until the
music begins again.
If a player does not freeze immediately, s/he does 10 jumping jacks during the start of the next
round and then rejoins the dance.
Since this is an aerobic game, it is better for students to not get “out.”
Variation(s):
Assign students as a look-out and have them pick out a unique dance move. When the music
stops, they demonstrate the move for everyone; the group tries the new move at the start of the
next round.
Rather than have students do 10 jumping jacks, have them do something else- push-ups, a balance
challenge, act as DJ, etc.
pK-5th I M C Ad,Au,Bl,Cp,De,Ed L1

Dead Fish
Group Size: 2-50
Age Group: preK-5th grades
Length of Activity: 5-10 minutes
Developmental Goals: To develop body consciousness and listening to directions
Skills Practiced: Body awareness, following directions, and gross muscle control
Equipment Needed: None
Set Up: None
Before You Start:
Remind students they need to find their own space; there is no touching in this game.
Talk about what a dead fish might look and act like.
How to Play:
The leader of the game calls a countdown [5-4-3-2-1 DEAAAD FIIISH!], during which the
students can run around and make as much noise as they want (if you are playing in a classroom,
have students walk and talk quietly).
When the leader says ‘Dead Fish’, all students must do their best impression of a dead fish. Often
this involves lying down.
The leader walks among the fishes, looking for movement.
If a student moves (beyond blinking), s/he is out and must go to the line.
Variation:
When students get out, they can help look for movement or try to entice other players to move.
pK-5th I N C L1

Sleepy Bunny
Group Size: Any size
Age Group: preK-5th grades
Length of Activity: Under 10 minutes
Development Goals: To develop body consciousness and listening to directions.
Skills Practiced: Body awareness, following directions, and gross muscle control
Equipment: None
Set Up: Can be played outside, in a gym or in a classroom. Create boundaries for the play space.
Before You Start:
Remind students they need to find their own space- there is no touching in this game.
Ask how a bunny hops and what a sleepy bunny might look and act like.
Decide on a “magic word.”
How to Play:
The leader of the game calls out the magic word. Once the magic word is called, the students can
hop around like bunnies and make as much noise as they want (if you are playing in a classroom,
have students hop quietly).
When the leader says "Sleepy Bunny", all students must do their best impression of a sleepy
bunny. Often, this involves lying down (and possibly even snoring).
The leader walks among the bunnies, looking for movement.
If a student moves, s/he must perform a task (i.e. jumping jacks, running in place for 10 seconds,
etc...) to get back in.
Variation(s):
Instead of looking for movement, the leader may look for the "best" sleepy bunny, who will then
receive a high five-- and/or can then choose the next animal.
Changing the animal-- sleepy cow/dog/cat/lion/monkey/etc... (students must act and sound like
the animal)
pK-5th I N C Au,Ed L1

Page | 46
Drop the Cookie!
Group Size: 10+
Age Group: K-5th grades
Length of Activity: 10 minutes
Developmental Goals: Sense of boundaries, eye-foot coordination, listening to directions
Skills Practiced: Agility, pivoting, body and spatial awareness, evasion, safe tagging
Equipment Needed: Cones (preferably half-cones)
Set Up: Any area, classroom auditorium or yard with clearly marked boundaries
Before You Start:
Show the kids the “cookies” and tell them how delicious they are
Review boundaries and safe tagging
How to Play:
Review boundaries and safe tagging:
Hand out cones to about a third of the group.
The kids who do not have cones chase down those who do. When they tag them they yell “Drop
the cookie!”
The kid who is tagged must drop it and run away.
The tagger picks up the cone and then is chased by the other kids.
Variation(s):
This can be played with pool noodles and the kids yell “Drop the Spaghetti!” You can
probably make something up for whatever equipment you have on hand.
Could be made into a name game and the kids have to yell “Hey (insert name here), drop the
cookie!”
If played in class, emphasize safety and spatial awareness and have students hop, play on their
knees, etc.
K-5th I C Ad L1

Page | 47
Find a Place
Group Size: 10-20
Age Group: K-5th grades
Length of Activity: 5-10 minutes
Developmental Goals: planning, creative thinking, listening to directions, eye-hand coordination, eye-
foot coordination, geographic orientation, sense of boundaries, memorization and active listening
Skills Practiced: Cooperation, running, reflexes, gross muscle control, balance, following directions,
observation, body and spatial awareness
Equipment Needed: Classroom or a basketball sized area (Optional: jump ropes, basketballs)
Set Up: Set up a clearly designated play area (marked with cones if you are in a large open space)
Before You Start:
Make clear boundaries of where students may choose their places to stand
How to Play:
Have students find a place in the room (this will be their first place).
Explain to the students they need to memorize where their first place in the room is.
Students must be at least an arm’s length away from the closest person to them.
Tell the students to find a second place in the room; this will be their second place (once again
remind them to remember the first and second places they stood)
For the younger students two places would be just fine. Older students can play this game with up
to about 4 or 5 places.
Have students stand at their first place.
On a signal, have students transition to their second place by: jumping, walking, fire feet, Michael
Jackson style, hopping on one foot, karate kid style, walk like giants crushing buildings, penguin
walk, doing the dougie or the jerk, skipping, jumping like a frog, walking backwards, etc.
You may count down from ten or five seconds depending on what transition style you choose and
what age group you are working with (the one foot hop, and the penguin walk may take longer
than just walking or fire feet).
Variation:
Have students come up with their own ways of traveling from place to place
K-5th I N M T C Ad,Cp,De,Ed L1

Page | 48
Four Corners
Group Size: 5-40
Age Group: 1st -5th grades
Length of Activity: 5-20 minutes
Developmental Goal: To develop decision making capabilities.
Skills Practiced: Running, physical awareness, decision making and nonverbal communication.
Equipment Needed: None
Set Up: Game should be played in an area with four corners. This can be a classroom or an area on the
yard. If your yard does not have corners, create designated areas using cones or play on the kickball field.
Before You Start:
Have students split equally among the four corners.
Do a practice round with leader in the middle.
How to Play:
The student in the middle will close their eyes and count slowly and loudly from 10 to 0.
While they are counting, all other students may stay where they are or quietly move to a different
corner. When the counter gets to 0, all students must be at a corner (if not they sit down).
After counting, the student in the middle points to corner of his/her choice and can only open
their eyes after having done so.
Any students standing in that corner must sit down.
If no one is standing at the chosen corner, all students sitting may stand up and get back
into the game.
When only one student is left standing, s/he becomes the counter for the next round.
Variation(s):
Change the middle person when one person has been in the middle for 2 minutes.
The counter can say that they will point to the loudest corner.
This works for an indoor game as well.
Teach this game on the kickball field to help students learn where the different bases are.

Page | 49
1st-5th I N C Ad,De L1

Grocery Store
Group Size: 20 - 50
Age Group: K-5th grades
Length of Activity: 10-15 minutes
Developmental Goals: To develop students’ memorization skills and listening to directions
Skills Practiced: Running, agility, safe tagging, spatial awareness and evasion
Equipment Needed: At least 3 sets of 4 same-color cones needed (4 green cones, 4 yellow cones, 4 red
cones, 4 orange cones, 4 purple cones, 4 blue cones)
Set Up: Set up 3-6 sets of cones around in a given area. Each set of 4 cones should make a square. (The
bigger the area used the more fun.)
Before You Start:
Demonstrate safe tagging:
Light touch, like butterfly wings, on the back or shoulder.
Unsafe tags: hard contact might cause the person being tagged to fall
Remind kids to be aware of others running around them
Assign each set of cones a fruit or vegetable that corresponds to their color (e.g. purple cones =
grapes, yellow cones = lemons, etc.)
Make sure students can repeat which fruit each color of cones corresponds to
How to Play:
The leader starts as the Shopper. The Shopper will yell out, “I am going to the store to buy
some… grapes!”
All the students must then run over to the box of purple cones without being tagged by the
shopper.
If they do get tagged they become a shopper and a tagger as well.
Variation:
Instead of starting all the kids in one box and yelling out different fruits, start them out as workers
in the grocery store and the leader as the manager. If you say “I need the floors swept” all the
students must walk around the play area pretending to sweep the floors until the leader yells,
“The shopper needs… grapes!” and then the students need to make it to the grape box without
being tagged.
K-5th I Ad L1

Home Run Tag
Group Size: 15-30
Age Group: K-3rd grades
Length of Activity: 10+ minutes
Developmental Goals: Running. Help students understand the base paths for kickball, baseball, and
whiffleball. Help improve spatial awareness and proper tagging techniques.
Skills practiced: Running, tagging, swinging a bat.
Equipment needed: Half cones or actual baseball gloves to designate the taggers. Bases to create a
square boundary.
Set Up: Create a square area with bases similar to that on a baseball field. Make sure you address that the
imaginary base paths from base to base are the boundaries. Have gloves/cones on hand ready to designate
the taggers.
Before you start:
Demonstrate how to hit a make believe home run at home plate.
Review running through the bases.
Make sure the students know the proper way to do a home run trot, which should be a fun jog.
Review the use of butterfly tags in the tag game.
Let the students know not to run outside of the base paths and to be cautious around the base path
area.
How to play:
Designate a small number of baseball taggers.
Everybody will spread out inside of the baseball diamond.
On the magic word or whistle students begin running away from the fielders or “taggers”.
Make sure students run inside the designated boundaries.
If you are tagged by a fielder you must run to home plate and line up a pitch and pretend to hit a
home run.
After you hit your home run you begin your home run trot around the bases, waving to the crowd,
tilting your cap doing whatever it is your favorite big leaguer does.
After you have made your way back to home plate you are allowed back into the game.
After a designated amount of time, choose new field taggers and restart the game.
Variation(s):
Instead of using actual tags have the taggers partner up and roll soft foursquare balls through in
the diamond. This will help avoid so many people running the bases at one time.
Have the students hop around the bases after they are tagged. This makes it more difficult and
gives another form of exercise besides running.
K-3rd I Ad,Au,Cp,De L2

Page | 52
Hop’n Freeze
Group Size: 20-30
Age Group: K-2nd grades
Length of Activity: 10-15 minutes
Developmental Goal: To develop listening skills
Skills Practiced: Hopping, jumping, skipping, running and balance
Equipment Needed: None
Set Up: Use boundaries to create an appropriate-sized play area.
Before You Start:
Demonstrate how to avoid contact with each other.
Students should be able to repeat all rules and signals.
Spread students out to avoid contact and collisions.
How to Play:
You must stay inside the boundaries,
On 1st signal: students begin hopping (skipping, jumping, etc.),
On 2nd signal: students must freeze in a balanced position (on one foot, one foot and one hand,
etc.),
Repeat several times; change what students do for each signal.
Variation(s):
Have the children play this game while balancing a beanbag on their head.
Have them go while holding hands with a partner and give added balancing challenges.
K-2nd I N M C Ad,Au,De L1

Page | 53
Indoor Hopscotch
Group Size: 5-20
Age Group: preK-1st grades
Length of Activity: 10 minutes
Developmental Goals: To develop gross motor skills and memorization skills
Skills Practiced: Balance, jumping, letter and number recognition
Equipment Needed: Construction paper, scissors and tape
Set Up: Small area or classroom
Before You Start:
Cut out shapes (triangles, circles or squares) and draw letters and/or numbers on them
Lay them out all over the floor
How to Play:
Have child begin at one end of the room and see if he/she can jump from shape to shape (square
to square, circle to circle).
Before the child jumps on the next shape have him/her identify the letter or number he/she is
planning to jump to.
Variation:
Teacher or parent does the jumping while child is the letter/number caller.
Activity can be done with colors, animals, etc.

Page | 54
pK-1st M C Ad,Au,Cp,De,Ed L1

Page | 55
Jump the River
Group Size: 5-20
Age Group: preK-K grades
Length of Activity: 10 minutes
Developmental Goals: Develop gross motor skills and coordination
Skills Practiced: To develop locomotor skills and stability movements
Equipment Needed: Something to jump over (jump ropes, hula hoops or tape lines on the floor). Provide
at least one object to jump over per child.
Set Up: Classroom or small play area
Before You Start:
To assist children in learning the fundamentals of jumping, have children practice by taking off
on two feet and by swinging their arms forward when they jump.
How to Play:
Explain to the children that they are taking a walk in the woods and may need to cross a stream or
river. Ask children to walk throughout the space and when they come to a river (rope, hoop, or
tape line on floor) they need to jump over the river without getting their feet wet. Children should
work independently of their classmates during this activity.
When landing, children should land on two feet spreading their feet about shoulder width apart so
they have a wide base of support when they land. After landing, children should proceed to and
jump over the next river. Emphasis should be placed on landing on both feet at the same time
without falling over.
Variation(s):
Ask children to draw or paint their own rivers on large sheets of paper. Make sure they draw fish,
trees, and other objects in and alongside their river. Tape children's drawings to the floor and
pretend that the class is going on a trip. When children reach the different rivers scattered
throughout the room they must swing their arms and jump over the river, landing on the other
side without falling over.
Teachers may also want to integrate this idea with a book they read to children about rivers or
ways people travel.
pK-K I M G C Ad,Au,Cp,De,Ed L1

Page | 56
Lava Game
Group Size: 5-30
Age Group: preK–3rd grades
Length of Activity: 10 minutes
Developmental Goals: To develop student’s ability to keep their balance and cooperation.
Skills Practiced: Hopping and jumping
Equipment Needed: Several Hula Hoops
Set Up: Lay hula hoops in a line (either in a row or zigzag)
Before You Start:
Demonstrate how to avoid contact with each other.
Students should be able to repeat all rules and signals.
Have students line up in a straight line.
How to Play:
Create a scenario, tell the students that they are in a volcano and the only way to get out before it
erupts is hopping on the stones (the hula hoops).
One at a time, each student should run, hop, or jump through the hula hoops.
Once a player has made it across safely have them line up at the end.
If a student misses a hula hoop they go back to the end of the line and wait to try again.
Game finishes once everyone has made it across the lava safely.
Variation(s):
For older groups, have students go 2 or more at a time.
Lay out the hula hoops further apart once players understand the game, making it more difficult
to cross the lava.
When a player misses a hoop, they can only use 1 leg. If they miss again a hula hoop is removed
and they can use both legs again.
pK-3rd I C Au L1

Page | 57
Leap Frog
Group Size: 20-30
Age Group: 2nd-5th grades
Length of Activity: 15-20 minutes
Developmental Goal: To develop cooperation.
Skills Practiced: Jumping and ducking
Equipment Needed: None
Set Up: Create a start and finish line (if applicable).
Before You Start:
Set up 2 single-file lines. Space children out so there is enough room for the leap frog to land in
between.
Demonstrate safe ways to jump over people and how they should stay in a safe crouched position.
Make sure all students understand the need for safety and cooperation.
How to Play:
The students are now frogs trying to cross a pond with their fellow frogs.
To stay on the lily pads they must hop in a straight line one over the other.
The frog at the back of the line will go first.
They will hop over the frogs in front of them (who are crouched down to make it easier for the
jumping frog) until they reach the front, where they will stop.
After the leaping frog has made it to the front of the line and is crouched down, the next frog at
the back of the line will begin to jump forward.
Frogs jump to a finish line, or you can set a number of times each frog must jump.
Variation(s):
See how fast or how high each group can go.
Make more than one line and do a relay race.
2nd-5th I N Ad,De L1
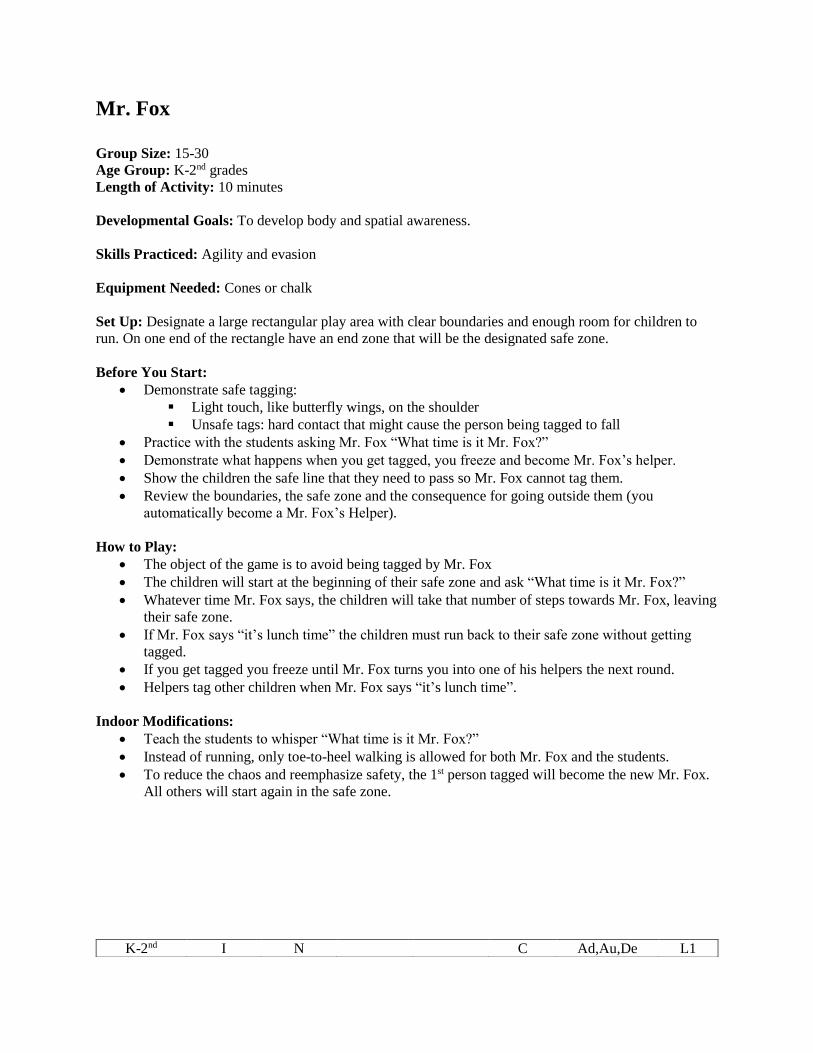
Mr. Fox
Group Size: 15-30
Age Group: K-2nd grades
Length of Activity: 10 minutes
Developmental Goals: To develop body and spatial awareness.
Skills Practiced: Agility and evasion
Equipment Needed: Cones or chalk
Set Up: Designate a large rectangular play area with clear boundaries and enough room for children to
run. On one end of the rectangle have an end zone that will be the designated safe zone.
Before You Start:
Demonstrate safe tagging:
Light touch, like butterfly wings, on the shoulder
Unsafe tags: hard contact that might cause the person being tagged to fall
Practice with the students asking Mr. Fox “What time is it Mr. Fox?”
Demonstrate what happens when you get tagged, you freeze and become Mr. Fox’s helper.
Show the children the safe line that they need to pass so Mr. Fox cannot tag them.
Review the boundaries, the safe zone and the consequence for going outside them (you
automatically become a Mr. Fox’s Helper).
How to Play:
The object of the game is to avoid being tagged by Mr. Fox
The children will start at the beginning of their safe zone and ask “What time is it Mr. Fox?”
Whatever time Mr. Fox says, the children will take that number of steps towards Mr. Fox, leaving
their safe zone.
If Mr. Fox says “it’s lunch time” the children must run back to their safe zone without getting
tagged.
If you get tagged you freeze until Mr. Fox turns you into one of his helpers the next round.
Helpers tag other children when Mr. Fox says “it’s lunch time”.
Indoor Modifications:
Teach the students to whisper “What time is it Mr. Fox?”
Instead of running, only toe-to-heel walking is allowed for both Mr. Fox and the students.
To reduce the chaos and reemphasize safety, the 1st person tagged will become the new Mr. Fox.
All others will start again in the safe zone.
K-2nd I N C Ad,Au,De L1

My DVD Player
Group Size: 10-30
Age Group: K-6th+grades
Length of Activity: 10 minutes
Developmental Goal: To develop students’ ability to listen to directions
Skills Learned: Running, following directions, reflexes and awareness
Equipment Needed: None
Set Up: A rectangle of boundaries
Before You Start:
Have students repeat back what action goes with each command.
How to Play:
The person calling the game may call any command found on a remote control
Play – Students begin walking towards finish line.
Fast Forward – Students run to finish line.
Rewind – Students move backwards.
Pause – Students freeze.
Slow Motion – Students move super slowly.
Power Off – Students crouch down like an egg.
Power On – Students stand up.
Students must react to the commands called.
The goal is to make it all the way to the finish line.
When a student makes a mistake s/he must do 10 jumping jacks, or another short activity, to re-
enter the game.
Variation(s):
For younger grades start with just two or three commands and add new ones as they master the
original commands.
Students who make a mistake:
Join the leader on the sideline as judges
Remain in the game but must go back to the starting line.
K-6th+ I N T Ad,Au L1

Pony Express
Group Size: 20-30
Age Group: 1st–6th+ grades
Length of Activity: 10-15 minutes
Developmental Goal: To develop teamwork and cooperation
Skills Practiced: Running, endurance and pacing
Equipment Needed: Chalk, two cones and two bean bags
Set Up: A very large square or rectangle
Before You Start:
Demonstrate safe tagging:
Light touch, like butterfly wings on the shoulder
Unsafe tags: hard contact that might cause the person being tagged to fall
Divide the students into two teams.
Have one team line up diagonally at one cone, and the other team line up diagonally at the other
cone, with both teams facing out.
Hand one bean bag to the first student in each line.
How to Play:
On the leader’s signal, the first student for each team begins to run counterclockwise around the
square/rectangle, making sure to run completely around the lines (i.e. no cutting corners).
After the first student has run an entire lap, s/he hands off the bean bag to the next student in line,
and s/he begins to run a lap.
The object for both teams is to catch up to the other team and tag the student running on the
shoulder to score a point.
If someone is tagged, a new round begins at each cone with the first student in line.
Variation(s):
Try walking, skipping, hopping, etc. (if the space is smaller, or for younger students)
With more advanced groups, no equipment is necessary if you have natural boundaries, students
can high-five the next person in line.
1st-6th+ Ad,De L1

Page | 61
Poop Deck
Group Size: 5-35
Age Group: 1st-3rd grades
Length of Activity: 5-20 minutes
Developmental Goals: To develop listening skills and awareness.
Skills Practiced: Running, physical and spatial awareness, listening and reflexes
Equipment Needed: None
Set Up: A large rectangle split into 3 equal sections (basketball court works with key lines extended with
chalk), designate/label sections: Poop Deck, Quarter Deck and Main Deck.
Before You Start:
Line students up on the sideline. Make sure all students have room to move safely between the
decks.
Make sure all students know where each deck is located.
Review the importance of awareness and honesty.
How to Play:
Students line up with their toes behind the sideline.
The leader stands at the end-line and shouts either: poop deck, quarter deck or main deck.
All students must then run to the designated area.
The last student to cross over the line into the area is out until the next round. The caller
is the judge (but students usually know when they do not make it).
When only a few students are left; begin a new round.
Variation(s):
The Decks can be answers/solutions to trivia or math for older students.
The last student in becomes the new caller for the next round.
Combine commands with that of Shipwreck.
Instead of students becoming judges, if they arrive last they do 10 jumping jacks and get back in
the game.
Create new commands, incorporating other skills e.g., walking, skipping, hopping, jogging
backwards, etc. (Also good to consider for safety reasons)
Poop Main Quarter
Deck Deck Deck

Page | 62
1st-3rd I N Ad,De L1

Push-Catch
Group Size: 4-30
Age Group: K -5th grades
Length of Activity: 5-10 minutes
Developmental Goals: To develop listening and motor skills
Skills Practiced: Catching and throwing.
Equipment Needed: 1 ball (preferably a gator-skin ball)
Set Up: None
Before You Start:
Ask students to make a big circle, with some space between themselves and the people next to
them.
Play starts in the middle with the ball.
How to Play:
Explain that the thrower in the middle will go around the circle tossing the ball to each person
saying “Push” or “Catch”
If the thrower says “Push” the person that the ball is thrown to needs to catch it.
If the thrower says “Catch” the person that the ball is thrown to needs to push it back.
If they do the correct motion according to the command they remain in the game, if they do the
wrong action they sit until the next round.
Next round starts when there is one person left standing
Variation(s):
The game can be played where the thrower can go in any order and can also incorporate snake
eyes/faking out the students in the circle.
This game can be used for various league practices like volleyball but instead of saying “push” or
“catch”, you say “bump” or “volley”.

Page | 64
Rainbow Run
Group Size: 2-20
Age Group: preK-6th+ grades
Length of Activity: 10-15 Minutes
Developmental Goal: To improve memory through two approaches: 1) Color and pattern recognition 2)
Directional and spatial awareness (through running)
Skills Practiced: Gross motor control, spatial awareness, memory, peripheral vision, creative thinking,
and running
Equipment Needed: Hula hoops, as many as you want but use at least 5 with each a different color
Set Up: Set up hula hoops in random arrangement around playing area. Do not place hula hoops directly
together
Before You Start:
Rainbow Run requires a lot of running so be sure to stretch out before you start this game.
How to play:
The students will form a line at a designated starting point
One person is chosen to be Simon. Simon is in charge of determining the pattern the runners
will run by calling out colors in an order of their choosing. The colors Simon can call
depends on how many colors you have.
Let’s assume we have six hula hoops, one of each color, color (red, yellow, orange, green,
blue and purple). For example, Simon can call “red, green, and blue!” and the runner would
have to run to those color hoops in that order. So in the case of 6 hula hoops one of each
color, that number can be anywhere from one to six.
Also, colors may be repeated. For example, Simon can call “yellow, green, blue, yellow” or
“green, blue, green, red”. The length of the pattern can be changed at any point by the coach.
This means you can start the game with a three color pattern, subsequently increasing it to
five, etc.
After the runner completes the pattern, they become the new Simon, while the previous
Simon joins the runner line
Variation(s):
Add a time limit for the kids to finish the pattern in
For older kids, you can add in multiple hoops of the same color, and they have to figure out
the fastest way to complete a given pattern
Keep adding colors to the pattern and see how long a pattern the group can complete in the
allotted time
K-5th I C Ad L1

Page | 65
Red Light, Green Light
Group Size: 1-50
Age Group: preK-5th grades
Length of Activity: 5 minutes
Developmental Goal: To develop awareness
Skills Practiced: Listening, observation and agility
Equipment Needed: None
Set Up: Clearly define the playing area with a designated starting line and finish line.
Before You Start:
Make sure all students know the rules and what happens if they move on a ‘Red Light’.
Explain how to move quickly and safely.
How to Play:
Start with all students along the starting line,
When you say ‘Green Light’ everyone will walk towards the finish line,
When you say ‘Red Light’ everyone must immediately stop.
If students are still moving when you call ‘Red Light’, they must go back to the starting
line.
Start a new round when everyone gets across the finish line or when most of the students make it
across the finish line.
Variation(s):
Give variations of how children may move towards the finish line, e.g. hop, skip, gallop etc.
The leader can designate him/herself as the finish line. This enables the game to move around so
that when students begin to get close to the finish line (the leader) the finish line moves farther
away.
For the hearing impaired, you can turn your back towards the group for red light and turn around
(face your group) for green light.
Indoor Modifications:
Remind students that no running is allowed.
Green Light=Walk, Yellow Light = Slow Motion, Red Light =Stop.
If there are too many kids to play safely in the space, divide into groups and play multiple rounds.
The first person to finish round 1 can be the leader for round 2.
pK-5th I N T C Ad,Au,De L1
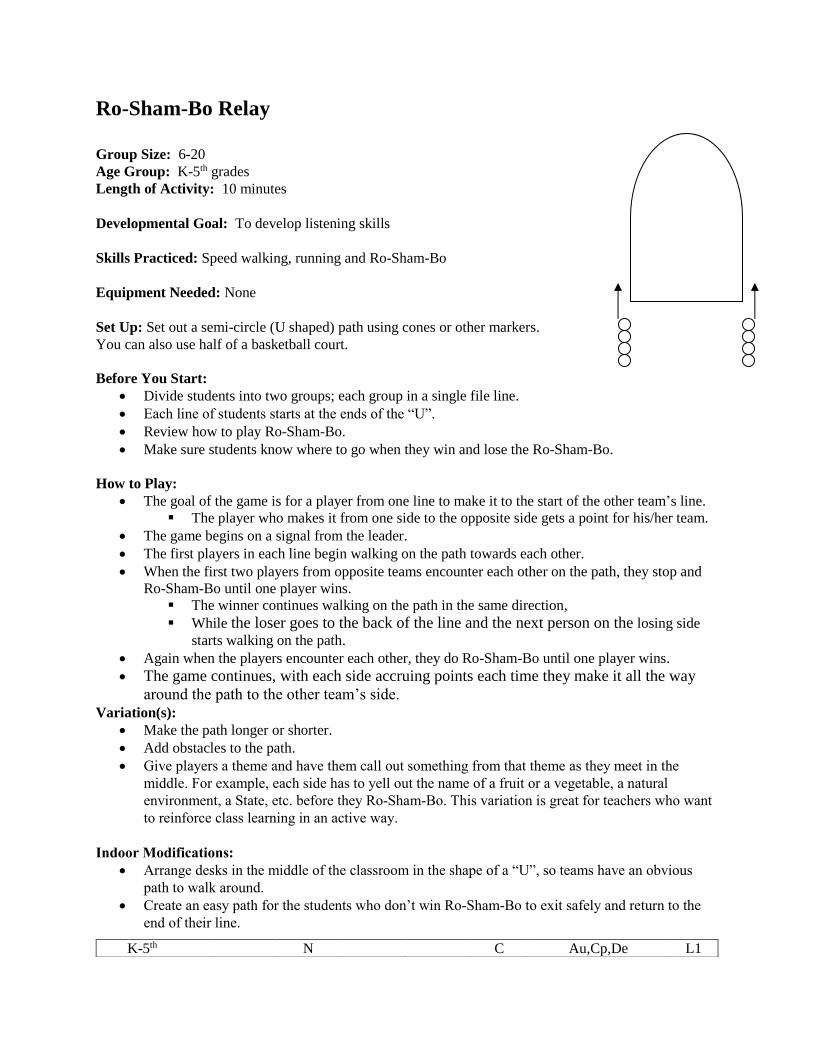
Ro-Sham-Bo Relay
Group Size: 6-20
Age Group: K-5th grades
Length of Activity: 10 minutes
Developmental Goal: To develop listening skills
Skills Practiced: Speed walking, running and Ro-Sham-Bo
Equipment Needed: None
Set Up: Set out a semi-circle (U shaped) path using cones or other markers.
You can also use half of a basketball court.
Before You Start:
Divide students into two groups; each group in a single file line.
Each line of students starts at the ends of the “U”.
Review how to play Ro-Sham-Bo.
Make sure students know where to go when they win and lose the Ro-Sham-Bo.
How to Play:
The goal of the game is for a player from one line to make it to the start of the other team’s line.
The player who makes it from one side to the opposite side gets a point for his/her team.
The game begins on a signal from the leader.
The first players in each line begin walking on the path towards each other.
When the first two players from opposite teams encounter each other on the path, they stop and
Ro-Sham-Bo until one player wins.
The winner continues walking on the path in the same direction,
While the loser goes to the back of the line and the next person on the losing side
starts walking on the path.
Again when the players encounter each other, they do Ro-Sham-Bo until one player wins.
The game continues, with each side accruing points each time they make it all the way
around the path to the other team’s side. Variation(s):
Make the path longer or shorter.
Add obstacles to the path.
Give players a theme and have them call out something from that theme as they meet in the
middle. For example, each side has to yell out the name of a fruit or a vegetable, a natural
environment, a State, etc. before they Ro-Sham-Bo. This variation is great for teachers who want
to reinforce class learning in an active way.
Indoor Modifications:
Arrange desks in the middle of the classroom in the shape of a “U”, so teams have an obvious
path to walk around.
Create an easy path for the students who don’t win Ro-Sham-Bo to exit safely and return to the
end of their line.
K-5th N C Au,Cp,De L1

Page | 67
Run If…
Group Size: 10-30
Age Group: preK-1st grades
Length of Activity: 5 minutes
Developmental Goals: To develop students’ listening and awareness
Skills Practiced: Self-identity and listening
Equipment Needed: None.
Set Up: Cone and/or chalk out a space to play, with two lines some distance apart.
Before You Start:
Identify the boundaries.
Line up students on one line and have them point/go to the other line
How to Play:
Call out “Walk if…”, “Run if…” or “Hop if…” and an identifier “you have shoe laces”. All
students who have shoe laces will walk/run/hop (or another movement) to the other line and wait
on it.
Continue to call out other identifiers. “Run if you have Velcro shoes!” “Run if you have on
sandals!” until all students are on the other line.
Turn-around and continue game with new identifiers back to the first line.
Notes:
Be aware of what identifiers you use. Be inclusive. Avoid identifiers based on race, class and gender.
Indoor Modification:
Instead of having students move from one line to another, have them “Run”, “Walk”, “Hop”, etc.
in place.

Page | 68
Running Through the Forest
Group Size: 1-30
Age Group: preK-2nd grades
Length of Activity: 5 minutes
Developmental Goals: To develop students’ imaginations, creative thinking and listening to directions
Skills Practiced: Jogging, jumping, running, ducking and following instructions
Equipment Needed: None
Before You Start:
Have students stand on their home bases
How to Play:
Tell all of the students to imagine that they are not on the yard, but that they are in a forest.
Explain that students are explorers going on a walk through the forest using their imaginations.
Have all the students walk in place while you describe the trip the class is taking through the
woods. Occasionally have the students duck under “branches” and jump over fallen “trees.”
Slowly begin to speed up the pace the children are walking.
Maybe you hear something coming and you speed up so it doesn’t catch the class. Soon the class
is jogging in place instead of walking.
Suddenly yell that there is a bear or some kind of predator chasing them and speed the jog to a
run.
Add in the “branches” and the “fallen trees” so that the students are warming up their other
muscles as well by jumping and ducking.
After the students are winded, slow them down again.
Next you can pretend to “swim” across a river or “climb” a tree or cliff.
Anything other variation that requires movement at different speeds and loosens the body is great.
The activity can carry on for however long and however silly as necessary.
Variation:
After students are familiar with this warm-up, it's fun to have their input on the type of story to
tell or journey to take--the beach, a hike through the mountains, etc.
I N C Ad, Au L1
pK-2nd I N M C Ad,Au,Bl,Cp,De,Ed L1

Journey Around the World
Group Size: Any size
Age Group: preK-2nd grades
Length of Activity: Any time
Development Goals: To develop creativity, cognitive development, application of classroom learning,
and following directions
Skills Practiced: Body control
Equipment: Spots or cones for each child to mark his or her space
Set Up: Set out a spot or cone for each child. This can be done indoors or outdoors.
Before You Start:
Explain to the students that you are going on a journey...AROUND THE WORLD!! And you all
can go anywhere in the whole wide world that you want.
Remind the students to stay on their spots & listen to the directions or some consequence will be
given (jumping jacks, sitting out for the next destination, etc.).
How to Play:
Choose one student to pick the first destination (e.g. China), then ask another student to choose
the mode of transportation you will use to get there (e.g. swimming). Have all the students act
out the mode of transportation on their spots for a few seconds before reaching your destination.
Once you decide you have arrived, ask a few of the students what you can see/do while there and
act those out accordingly (e.g. see some Pandas in China, go to the beach in Mexico, run away
from cheetahs that are chasing you in Africa, hide from mummies in the Great Pyramids, etc.).
Make sure every child has an opportunity to provide some input into the journey and let this be as
student-driven as possible. Can be as short or as long as you have time for or they remain
engaged.
pK-2nd I M T C Ad,Au,Bl,Cp,Ed L1

Page | 70
Scramble
Group Size: 5-30
Age Group: K-2nd grades
Length of Activity: 5 minutes
Developmental Goal: To develop active listening capability.
Skills Practiced: Use of peripheral vision and jumping jacks
Equipment Needed: Painted/chalked numbers/spots for home bases.
Set Up: Make a number of Xs spread out on an open play area with clear boundaries for “home bases”.
Have students find a “home” spot.
Before You Start:
Make sure all students have and know where their home base is located.
Demonstrate and practice proper jumping jacks.
Review the signals with the students.
Emphasize the importance of awareness and safety.
How to Play:
Explain a series of signals each which correlates with an action that the students must perform.
You can make up your own signals that you want students to practice. You can use the “end of
recess” signal in order to practice recess expectations (e.g. 1 whistle tweet means freeze, 2 whistle
tweets means return to home base)
When you roll your arms, it means scramble and the children can move all around the designated
area until they see or hear the next signal.
A student who is slow to get back to their “home base” is assigned three jumping jacks to
complete before returning to the game
Variation:
This game can be used to teach children where their home bases are for warm-ups and cool-
downs during Class Game Time.
Indoor Modifications:
Adjust how the students move: skipping, hopping, backwards, heel-to-toe
Students move all around the room. When you say the magic word they have to quickly walk
back to their desks and stand behind their chair. The last two back have to do ten jumping jacks
each.

Page | 71
Secret Agent
Group Size: 10-30
Age Group: K -5th grades
Length of Activity: 10 minutes
Developmental Goals: To develop active listening and awareness
Skills Practiced: Agility and observation
Equipment Needed: 1 Cone
Set Up: Clearly define the playing area with a designated starting line
Before You Start:
Make sure all students know the rules and what happens if they are caught moving on “Abort!”
Demonstrate how to move quickly and safely
How to Play:
Have one player, the secret agent, stand 50 ft. or more away from the other players, the spies.
The secret agent has his or her back towards the spies, and to start each round the secret agent
yells “Access Agent” and the spies advance toward the secret agent’s cone to try and capture it.
At any moment the secret agent can turn around and shout “Abort!” Then the spies must stop
immediately and any spy caught moving must sit down where he or she is and wait till the next
game.
The first spy to reach the secret agent’s cone becomes the new secret agent for the next game.
Variation:
Instead of sitting down when caught moving, the spies have to go back to the starting line and can
continue playing
Indoor Modifications:
Adjust how the students move; skipping, hopping, backwards, heel-to-toe
Use hand signals instead of words, to keep the noise down.
If there are too many students for the room, divide into groups and use multiple rounds.
K-2nd I N M C Ad,Ed L1

Page | 72
Sequence Touch
Group Size: 15-30
Age Group: K-5th grades
Length of Activity: 5 minutes
Developmental Goal: To develop memorization skills
Skills Practiced: Evasion and spatial awareness
Equipment Needed: None
Set Up: Designate an area that has objects that many students can run to and tag (i.e. basketball hoop,
fence, grass and so on)
Before You Start:
Demonstrate how to avoid other people when running towards the object you are trying to tag.
Always keep your head up.
You do not have to always go straight, move side to side to avoid running into other
people.
Explain the importance of being aware of yourself and others around you.
Show them where the return location is after they tag all of the objects.
How to Play:
The object of the game is to remember and tag all of the objects that the leader lists off as quickly
as you can and return to the designated area.
When the leader says the magic word “banana” students go and tag all of the things the leader
called out, such as a basketball hoop, a fence, and something green. When you have tagged all of
those objects return your home base before the leader finishes counting down from 10.
Variation(s):
Have the students touch the objects with different parts of their bodies
Have the children skip, hop, or act like their favorite animal while tagging the objects
Indoor Modifications:
Be mindful of the space you’re in and modify the directions based on its limitations.
Instead of running, walk or hop.
Choose objects to tag that aren’t breakable and won’t be overly congested.
K-5th I N M T C Ad,Au,De L1

Sharks and Minnows
Group Size: 10-100
Age Group: preK-5th grades
Length of Activity: 10 minutes
Developmental Goals: To develop listening skills and a sense of boundaries.
Skills Practiced: Agility and awareness
Equipment Needed: None
Set Up: Set up a clearly designated rectangular play area with visible boundaries.
Before You Start:
Once children understand what the sharks will say, what the minnows do and when and where to
run when ‘Shark Attack!’ is called, they are ready to start.
How to Play:
Choose a few students to be sharks and everyone else will be minnows.
The sharks stand in the middle of the play area and say “Fishy, fishy, come out and play.” The
minnows slowly walk towards the sharks.
At any time, the sharks can yell “Shark Attack!”
The minnows must run to the opposite boundary line without being tagged.
If a minnow is tagged, s/he also becomes a shark.
When there are only one or two minnows left; they become the sharks in the next round.
Variation(s):
Another option is to have minnows run back to the starting line when “Shark Attack” is called.
You can choose different predators and prey.
Change the consequences for getting tagged.
If you get tagged on the first attempt to get to the other side, you become a shark.
On all following attempts, if you are tagged, you become seaweed and you cannot move
your feet.
Indoor Modifications:
Instead of running, only toe-to-heel walking is allowed for both sharks and minnows.
If there are too many kids to play safely in the space, divide into groups and play multiple rounds.
Another option would be for the Sharks to say “Fishy, fishy, come out and play, if…” and call out
different characteristics (“if you are wearing the color green” or “if you have a sister”.) This
would help limit the number of people moving at any one time.
pK-5th I N C Ad,De L1

Page | 74
Veggie Tray
Group Size: Large group (10 or more)
Age Group: 1st-5th grades
Length of Activity: 10 minutes or more
Development Goals: To develop spatial awareness and evasion techniques
Skills Practiced: Evasion, agility, safe tagging, endurance
Equipment: None
Set Up: Can be played outside or in a gym. Set up boundaries. Decide where the kids will start the game
and where they will run to.
Before You Start:
Remind the kids about safe tagging and consequences for not tagging safely.
Remind them of the boundaries of the game.
Choose 1 or 2 people to be taggers
Line players up on one end of the play space and count them off into equal-numbered groups
forming teams with vegetable names: Celery, Broccoli, Carrots, Tomatoes
Tell them to remember what vegetable name you give them.
How to Play:
The object of the game is to make it across the area without being tagged.
The taggers stand in the middle of the area and call out one or more of the veggie team names.
When the runners hear their veggie team name called they must try and run to the other side of
the area. If the taggers call out Veggie Tray all the veggies must run to the other side.
If a player gets tagged they have to sit on the ground where they were tagged until the next round.
They are not allowed to move their feet, but can tag runners passing by.
The last vegetable standing wins and becomes the new tagger.
1st-5th I N C Ad,De L2

Page | 75
Farmers
Group Size: Large group (10 or more)
Age Group: 3rd-6th+ grades
Length of Activity: 10 minutes or more
Development Goals: To develop readiness, cooperation, and spatial awareness
Skills Practiced: Readiness, cooperation, strategic thinking, personal safety, and safe tagging
Equipment: None
Set Up: Can be played outside or in a gym. Define the boundaries of your tag area by chalk, cones, lines
on the gym floor, etc.
Before You Start:
Review safe, butterfly tagging
Identify the boundaries
Divide the students into different groups of animals, i.e. horse, sheep, pig.
Choose students to be taggers in the middle of the tag area.
How to Play:
Have the students who were chosen to be “Farmers” (taggers) stand in the middle of the tag area.
The other students are animals on the farm and they are given the role of one of three animals, i.e.
horse, sheep, and pig.
The Farmers call out an animal (i.e. horse) and the students who are "horses" have to run to the
other side of the tag area without getting tagged.
Students who get tagged have to sit down. Students who are sitting can try to tag another
person as they run by.
Players who are sitting can rejoin the game by tagging another member of their animal
team. The tagged person would sit while the tagger gets back in the game.
The Farmers can also call out “Barnyard” for all the animals to run across.
Variation(s):
An alternate way to get back into the game is to tag a different animal. When this happens the
tagger and the tagged switch animals. For example if you were a horse and you were sitting
down and tagged a sheep, you can stand back up, but you're a sheep now, and the person who you
tagged is now a horse.
Choose different animals, even if they aren't typical farm animals (i.e. elephant, penguin, etc.)
Have the students act the part of their animal (i.e. gallop like a horse, hop like a rabbit, moo like a
cow, etc.). Be silly and have fun!
3rd-6th+ I N C Ad,Cp L1

Page | 76
Shipwreck
Group Size: 6-60
Age Group: K-6th grades
Length of Activity: 5-45 minutes
Developmental Goals: To increase children’s listening skills, endurance, and awareness.
Skills Practiced: Running, balancing, physical awareness, memory, verbal and nonverbal
communication, cooperation, evasion, and nautical terms
Equipment Needed: A large rectangle with a center line (a basketball court works well).
Set Up: Have students line up on a clearly marked line in the middle of the playing area.
Before You Start:
Make sure students know the commands you will be using. Start with a few and increase the
number of commands you use as students are able to remember them.
How to Play:
The leader explains that s/he is the captain of the boat/ship and is going give commands to the
students/crew to perform a specific movement or sound.
Explain that the crew is sailing treacherous seas and needs to work together and follow the
captain’s commands to survive.
If crew members do not follow the commands correctly or are the last to follow the command
they must go sit in the “brig” on the sidelines.
Explain the playing area and designate which end is the “bow” of the ship and which end is the
“stern.” The goal is to be the last crew member standing.
Commands:
1. Roll call: the crew must line up at the mid-
line of the playing area, feet together, toes
on the line, salute and say “aye-aye
captain!” The crew may not lower their
salute until the captain salutes and says “at
ease.”
2. Crow’s nest: students act as if they’re
climbing up a ladder to the crow’s nest, the
top of the main mast, an area at the highest
point of the ship to lookout.
3. Swab the deck: students act like they’re
mopping the deck.
4. Shark attack: the captain becomes a shark
and tries to tag the crew. Those tagged go to
the “brig”.
5. Break time: active crew members can run to
the “brig” and tag as many people as
possible. Those that are tagged can come
back in and play again. Make sure everyone
gets let out of the “brig” during break time.
6. Sailor overboard: crew pairs up and decides
which one gets on their hands and knees and
which one stands a places a foot gently on
the other’s back while acting like their using
a spyglass to find the sailor in the water.
7. Drop anchor: crew lies on their backs with
legs up and acts like an anchor.
8. Pirates: crew closes one eye, puts up a hook
finger, hobbles around like they have a peg-
leg and say “Aaargh!”
9. Row to Shore: crew gets in lines of 4;
students act as if they are rowing to safety,
while singing “Row, Row, Row Your Boat”
K-6th I N L2

Page | 77
Simon Says
Group Size: 1-30
Age Group: K-3rd grades
Length of Activity: 5-10 minutes
Developmental Goal: To increase listening skills
Skills Practiced: Running, skipping, hopping and balancing
Equipment Needed: None
Before You Start:
Play a practice round to make sure students understand.
Students are clear on the consequences when they do not follow directions.
Students understand how to maintain safe distances between themselves.
How to Play:
Explain that you are going to give directions to perform a specific movement or sound.
Students should only follow your direction if you first say “Simon Says”.
If someone follows your direction when you don’t say “Simon Says” they receive a consequence.
Possible consequences are:
o Sitting out a round
o 10 jumping jacks
o Run a lap
The leader can call all types of directions, i.e. touch your nose, toes, etc., stretch to the sky, run in
place, jump 5 times, skip high, make silly animal noises, etc.
Variation(s):
A basketball version of this is called Shaq Says which might be more appropriate for older
children and basketball practice. In this game all of the commands are obviously basketball
related. For example: Defense- all the players should go into a defensive position, Slide- all of the
players would shuffle their feet once in the direction you move. Other commands are pass, shoot,
dribble in front, around your back, between your legs, with your left hand, spin on your finger,
dunk, etc.
You can be really sneaky and say, “Great job, you can relax and stand up now” and get them all
out!
Allow students to take on the leader role and be “Simon”.
Pre-K: Instead of saying “Simon says”, say “touch your nose” while touching your nose at the
same time. Students should mirror the action and touch their nose. Continue the game, saying
touch your ears, touch your knees, etc. When students get the hang of that, say touch your _____,
but touch a different body part. Most of the students will copy the movement and laugh when
they realize the mistake.
K-3rd I N M T C Au,Bl,Cp L1
Page | 78
Sports Clubs
Group Size: 10-30
Age Group: preK-2nd grades
Length of Activity: 5 minutes
Developmental Goals: To develop students’ listening skills and build confidence
Skills Practiced: Following directions and gross muscle control
Equipment Needed: None
Set Up: None
Before You Start:
Make sure all students have space.
Review several types of games with students and actions for those games.
-Examples:
Basketball
Tag
Four Square
Boxing
Tennis
Gymnastics
Football
Identify a signal for a silent freeze.
How to Play:
Call out a game and model the action, all students will “play” that game by acting it out.
Give signal to freeze. Repeat with different games.
pK-2nd I N M C Ad,Au,Cp,De,Ed L1

Page | 79
Super Happy Fun Time
Group Size: 1-15
Age Group: K-5th grades
Length of Activity: 5-10 minutes
Developmental Goals: To develop memorization, creative thinking, and listening to directions
Skills Practiced: Agility, body and spatial awareness, and following directions
Equipment Needed: Cones, small objects of various shapes and colors, small bucket or bag, dodgeballs
(optional)
Set Up: Lay out boundaries (usually a rectangle and students move through it the long way). Dodgeballs
are placed along the side lines and where the adult will be standing.
Before You Start:
Review the importance of listening, paying attention, and being careful of others around you.
Go over how to safely throw the dodge balls.
How to Play:
Explain that in your bucket/bag, you have various objects.
Each object means something different as in the students need to do jumping jacks, run, walk
backwards, skip, fast feet, etc.
They must pay attention to what you are holding up and do that movement.
Start by reminding what the correlating movement is, then stay silent for a challenge.
Their goal is to make it to the finish line first. That person is then allowed to change the
movement to anything they’d like for one of the objects.
Variation(s):
For older students, pick one object to mean that they need to run back to where they started. If
you are able to tag them with a dodgeball, they must go to a sideline spot with a dodgeball. For
later rounds when you hold up that object, they help you try to get people out with the dodgeballs.
Come up with any movement you want depending on age and/or interests (this will keep it
interesting for you and the kids).
Add more objects (increase complexity, challenge students more).

Page | 80
Switch
Group Size: 5-30
Age Group: preK-5th grades
Length of Activity: 10 minutes
Developmental Goal: To develop active listening capability.
Skills Practiced: Agility and conflict resolution
Equipment Needed: None
Set Up: A four-square court or 4 cones forming a square and one in the middle.
Before You Start:
Make sure students know the 4 areas to run to.
Review how to do Ro-Sham-Bo.
Play a practice round.
How to Play:
5 players play at a time. Each player occupies a corner or the middle.
Play begins when the person in the middle says “Switch”.
All players must find a new corner/cone to occupy.
Once “Switch” is called, you cannot go to the middle and you must switch to a different
corner every round.
If two players arrive at the corner at the same time a quick Ro-Sham-Bo is played, winner
stays.
The next person in line goes to the middle and begins the next round.
Variation(s):
Use different shapes
Add more areas the students can run to
Use 4 different colored hula hoops. Have the student in the middle call out a color that signals the
players to run/switch. The caller runs to the color which s/he called aloud. All other players have
to switch hula hoops but may not run to the color that was called out.
Indoor Modifications:
Instead of running after the middle player says "Switch!," have each player do a different
movement, like walking on their tip toes, crab walking, bunny hopping, lunges, frog hopping - be
creative! You can decide on a set of different movements that the player in the middle can call
out. For example, the middle player can say "Bunny Hop Switch" and all players must bunny hop
to a new corner cone.
All other Switch rules still apply.
K-5th I C Ad,Au,Cp,De,Ed L1 pK-5th N C Au,De,Ed L1

Page | 81
Tip It Over, Pick It Up
Group Size: 10-30
Age Group: K-3rd grades
Length of Activity: 5-10 minutes
Developmental Goals: To follow directions and remember a task
Skills Practiced: Listening, coordination and awareness
Equipment Needed: A contained area, square or circle, 20-30 cones
Set Up: Place cones randomly inside the boundaries of the game
Before You Start:
Make sure students understand safety precautions such as hands and feet should be kept to
themselves and be aware of other students.
Students understand what to do when you blow the whistle.
Students know what team they are on and what their task is.
How to Play:
Divide students into two teams.
One team is known as the “Tipper overs”, who must knock the cones over.
The other team as the “Picker uppers”, who must stand the cones up.
The “Tipper overs” must tip over all the cones, the “Picker uppers” need to stand the cones up.
Cones must be tipped or picked up gently with one hand; their feet should never touch the cones.
On your whistle all students must freeze and put their hands in the air.
Count how many cones are tipped and how many are standing.
After the first round switch the team’s roles so each team gets a chance to do the other job.
Each round is one minute in length.
Alternative Names:
Builders and Bulldozers
Mountains and Valleys
Indoor Modifications:
If not enough room can be created indoors to play the game normally, divide the class into 4
groups and take turns in rotations.
Another option could be to place cones on top of desks, chairs, tables, etc. if floor space is at a
premium. If you try this option, remember to give extra reminders about safety.
K-3rd I C Ad,Au,Cp,De L1
Page | 82
Weather Vane/Jump Whistle
Group Size: 10-20
Age Group: K-5th grades
Length of Activity: 5-10 minutes
Developmental Goals: Learn basic geographical directions and orientation
Skills Practiced: Following directions, active listening and spatial awareness
Equipment Needed: None
Set Up: Outside or Classroom
Before You Start:
Point and call out to students the four compass directions, have the students repeat and point out
the directions North, South, East and West.
Practice jumping and facing the compass directions as they are called, be sure that everyone
understands the position of the compass direction called out.
Review boundaries, being mindful and aware of space.
Review rules, ask for questions.
How to Play:
Have students scatter out in the designated play area or classroom.
Call out a compass direction, and have students jump in place making the necessary turn in the
air to face the direction called.
Make sure that all kids are rotating in the same direction.
If a child is already facing the compass direction that is called, you can have them do one of two
things such as jump and land in the same position or they stand still.
If a student is facing in the wrong direction or jumping when not supposed to s/he is out. S/he
can get back into the game after sitting out a round or doing an exercise to get back in.
Variation:
Can be used as jump rope game with a large jump rope or small jump ropes.
Add a “reverse” command.
Add movements as a visual cue rather than a blowing your whistle
Jump Whistle Style:
Have all students face forward. Each time the coach blows the whistle, the children are to jump
one time towards the right (moving in a square, 4 jumps and they are back facing you).
Two whistles and their backs are to you, three whistles and they are facing your right.
You can alternate the whistle blows (e.g. one, two, three, two, one, three, two, or four).
If a child is not facing the correct way, s/he must do 5 jumping jacks to rejoin the game.
K-5th I N M C Ad,Au,Bl,Cp,De,Ed L1

Page | 83
Where Are You?
Group Size: 10-30
Age Group: preK-5th grades
Length of Activity: 5-10 minutes
Developmental Goals: To develop memorization and listening skills
Skills Practiced: Visualization and spatial awareness.
Equipment Needed: None
Set Up: Have children seated in the play area/classroom.
Before You Start:
Review signals for closing and opening their eyes.
Students should be able to repeat all rules and signals.
Give an example of a question, have students practice with their eyes open.
How to Play:
Allow students 1 minute to observe/study their surroundings as if they were detectives.
On your signal, have students close their eyes and imagine the room.
Ask a variety of questions:
How many doors are there?
Point to the door that takes you to the hallway.
Point to the door that takes you to the playground.
What colors are the walls, ceiling, and floor?
What color is the rug?
Point to the fire extinguisher.
Students can point to, say or raise their hand to give the answer.
Variation(s):
Allow students to take over the role of facilitation.
Play in complete silence, so all students can experience success by allowing them to process at
their own speed.
For older students, ask more difficult and more detailed-oriented questions.
pK-5th I N C Au L1

Page | 84
Whistle Mixer
Group Size: 15-30
Age Group: K-6th+ grades
Length of Activity: 10-15 minutes
Developmental Goal: To develop listening skills.
Skills Practiced: Following directions
Equipment Needed: Whistle
Set Up: Set up a clearly designated play area with visible boundaries.
Before You Start:
Students need to be scattered within a playing area. Have them walk around without touching
each other. Feel free to have them skip, hop, jump, etc.
Have a practice round so students can get the idea before they are put under the pressure of sitting
out a game.
How to Play:
When the leader blows the whistle a specific number of times the students must form groups with
the same number of people as whistle.
If s/he blows the whistle four times the students must group themselves in groups of four
(five whistles=groups of five, etc.).
Students can be directed to hold hands or perform a number of physical movements once they
form their group.
Those students who were not able to form with a group will go to the “waiting area” and be out
just one turn.
Variation:
You can challenge the more advanced students by requiring them to perform a specific task when
the whistle is blown before they can form groups.
Pre-K: When the adult blows the whistle, kids must find a partner as quickly as possible. Remind
students to let go of their partner’s hand before telling them to go again. Repeat, asking them to
find a new partner each time.
Indoor Modification:
Instead of using a whistle, clap or snap to reduce the noise indoors.
K-6th+ I N M T C Ad,De L1

Page | 85
Zoo
Group Size: 10-30
Age Group: preK-2nd grades
Length of Activity: 5 minutes
Developmental Goals: To develop students listening skills and spatial awareness
Skills Practiced: Listening, knowledge of letters and animals
Equipment Needed: None
Set Up: Create boundaries
Before You Start:
Make sure all students know the boundaries for the game
Give students several examples of animals
Remind students to be aware of others around them
Give students a signal to begin and to freeze
How to Play:
Give students the begin signal. All students will walk within the region like the animal of her/his
choice, but must be silent
Give the freeze signal. All students will freeze and make the sound of her/his animal
Variation:
As students begin to learn sounds or letters better, give the class a sound of a letter or letter itself,
and all students must be an animal that starts with that sound or letter. Review any new animals
chosen afterward so everyone can learn sounds and animals.
pK-2nd I N M C De L1

Page | 86
Concentration Ball
Group Size: Any size
Age Group: 1st-6th+ grades
Length of Activity: Under 10 minutes
Development Goals: To increase cognitive abilities such as memory, attention, and making decisions.
Skills Practiced: Throwing and catching, body awareness and the ability to stay in a circle are also tested.
Equipment: Dodgeball or playground ball that can be easily thrown and caught
Set Up: Can be played outside, in a gym or in a classroom. Have students form a circle with a little bit of
room between each child.
Before You Start:
Explain how to make a good, underhand toss with eye contact
Explain that students have to say the intended recipient’s name before throwing.
How to Play:
You pick a theme, such as Animals.
One person starts with the ball and says an animal, then says the name of someone in the circle
and tosses them the ball.
That person must say the name of a different animal, and the name of another student and tosses
the ball to that person.
You may not repeat answers and you only have 3 seconds to say yours.
If a student repeats an answer or can’t complete their turn within the allotted time, you may
have them do some jumping jacks before rejoining the circle. Once three people get stuck you
switch themes. Some examples of themes include, sports, colors, fruits, singers, etc.
Variation(s):
For younger students you may go in a circle handing off the ball or you may try rolling it instead.
o If you notice this as a problem, you may also add a rule about not throwing it back to the
person that tossed it to you.
1st-6th+ I C Au,Ed L1

Page | 87
Heart Smart
Group Size: Any size
Age Group: 1st-6th+ grades
Length of Activity: Under 10 minutes
Development Goal: Understand what behaviors are or are not healthy for the mind and body
Skills Practiced: Listening, running, spatial awareness
Equipment: None
Set Up: Can be played outside, in a gym or in a classroom. Have kids stand by their desks if in a
classroom, or circle up if outside or in the gym
Before You Start:
Let the kids know that they will be learning about activities that are healthy or unhealthy for their
heart (you can also target the brain, muscles, lungs, other organs or body parts).
How to Play:
The leader says a sequence of activities, some of which are good for the heart, some of which are
not.
When the leader says an activity that is healthy for the heart, the players all have to run in place
(or do another action - add actions as the game goes on, like push-ups, jumping jacks, etc.).
If the activity is not healthy, they need to stand still.
For example, running, swimming, eating vegetables, and taking vitamins are all healthy for the
heart and the players would have to do an action after the leader said one of these actions.
Smoking, eating fast food, and watching TV are not good for the heart, so after the leader says
one of those actions, the players would stand still.
If the leader notices that a player(s) runs after the leader says an unhealthy activity, or doesn't run
after s/he states a healthy activity, don't address those players directly or call them out. Instead,
teach the whole group why the activity is healthy or unhealthy, or ask for a volunteer to state why
the activity is healthy or unhealthy, so that the whole group has an understanding of the concept.
Then, move on to the next statement.
1st-6th+ I N C Ad,Au,Bl,Ed L1

Page | 88
Quick Count
Group Size: Any size
Age Group: 3rd-6th+ grades
Length of Activity: Under 10 minutes
Development Goals: To build interpersonal skills and practice mathematics
Skills Practiced: Skipping, running, jogging etc.
Equipment: None
Set Up: Can be played outside, in a gym or in a classroom. Designate an area (fence, wall, coned-off
section) that students can safely run/jog/skip to.
Before You Start:
Divide students into pairs.
Have the pairs of students stand equal-distance from the designated area. Make sure that students
all have a safe and clear path to run/skip/jump toward the designated area.
How to Play:
Each student gets and faces their partner with one hand behind his or her back. On the count of
"1, 2, 3- Go!" each person brings their hand from behind their back, showing any number 1-5
with their fingers. The first person to call out the total number of fingers between them wins.
The student who did not win skips, runs, or jogs to the designated area and returns.
Once each pair of students has played 3 times have the students change partners.
Variation:
If you are playing with older kids you can do multiplication after the initial rounds of addition.
3rd-6th+ I N C Ad,Au,Cp,Ed L1

Page | 89
Detective Frog (This is Poison Dart Frog)
Group Size: Any size
Age Group: 1st-5th grades
Length of Activity: Under 10 minutes
Development Goals: To develop focus, logic, and deduction
Skills Practiced: Paying attention and peripheral vision
Equipment: None
Set Up: Can be played outside, in a gym or in a classroom. Enough space is needed to have all students
sit in a circle and for the Detective to walk around the circle.
Before You Start:
Have students stand in a circle.
How to Play:
The job of the Detective is to seek out and catch the Suspect Frog before they claim too many
victims. The Detective has 3 guesses to spot the suspect before they get away.
If caught, the suspect reforms and vows to be the next Detective to catch any suspects the next
time.
All students stand in a circle. Once a Detective is chosen (and leaves the play area) all students
are to sit in the circle with their heads down as the leader chooses the suspect. Once chosen, the
Suspect’s job is to nab as many victims as possible using his ultimate weapon. Being that the
Suspect is a frog, that weapon is his tongue. When the suspect lashes their tongue out at you, as a
victim you are nabbed and must lie down.
Based on who and where victims fall, the Detective must use this information to figure out the
suspect. Remember, they only have 3 tries!
Variation(s):
You can place a timer on how long the Detective has to find the Suspect.
It can be a race to see how fast the Detective can find the Suspect before they nab a specific
amount of victims.
You can give out clues as to who the Suspect may be (works well if the Suspect takes a long time
to nab victims)
Have the Suspect have to do 5-10 jumping jacks if they do not nab a certain amount of victims
before being caught.
Have the Detective do 5-10 jumping jacks if they do not nab the Suspect in their 3 tries.
The jumping jacks can be replaced with any silly dance or exercise (running round the circle a
few times, etc.)
1st-5th I N C Au,De L1

Page | 90
Hula Ball
Group Size: Small group (Less than 10)
Age Group: 1st-5th grades
Length of Activity: Under 10 minutes
Development Goals: To develop communication and conflict resolution skills
Skills Practiced: Hand and eye coordination
Equipment: 3 Hula Hoops, 1 Rubber Kickball
Set Up: Can be played outside, in a gym or in a classroom. Set up the three hula hoops to look like
Mickey Mouse’s head in the play space. Make sure the hula hoops are touching each other. Put down
cones or a marker to designate a place where the waiting students will line up.
Before You Start:
One player is behind each hula hoop and the rest of the players are waiting in cheering line.
Encourage students to use positive language (cheer on their classmates or say good job, nice try)
and give high-fives as students go to the end of the line.
How to Play:
The concept of the game is to bounce the ball in another person's hula hoop.
The ball can only bounce once in any hula hoop.
Each player needs to hit the ball with any part of his/her hand into an opposing player's hula hoop
after it has bounced only once in their hula hoop.
If the ball lands on a hula hoop, or goes out of bounds before it bounces, the player who hit the
ball needs to return to the waiting/cheering line for another try. If a player hits the ball and it
bounces again in her/his hula hoop, s/he also needs to return to the waiting line.
If a player catches or holds the ball, that player needs to return to the waiting line.
If the ball bounces more than one time before it is hit into another hula hoop, the player who let
the ball bounce needs to return to the waiting line for another try.
If the ball is returned before it is allowed to bounce, the player who returned the ball early needs
to return to the waiting line.
When a student returns to the waiting/cheering line, they will be replaced by the next student
waiting in line.
Variation(s):
Designating a serving hoop and having students rotate (similar to 4 Square)
Adding multiple Hula Hoops or additional balls
1st-5th Au,Ed L1

Page | 91
Jungle Race
Group Size: Large group (10 or more)
Age Group: preK-2nd grades
Length of Activity: Under 10 minutes
Development Goals: To develop teamwork and strategic planning
Skills Practiced: Balance and agility
Equipment: 2 hula hoops, Polyspots, 2 boxes of small plastic figures (insects, dinosaurs etc.), hand
puppets (snakes, frogs, birds etc.) (optional), jump ropes (optional), cones (optional)
Set Up: Can be played in a gym or in a classroom. Lay out two separate paths using polyspots. Put one
hula hoop at the beginning of each path. Put a box of small plastic figures at the end of each path. You
can make the course more difficult by creating larger gaps between spots or adding cones and jump ropes
as additional obstacles.
Before You Start:
Demonstrate moving (walking, jumping, hopping, leaping) along the polyspots without stepping
onto the actual floor.
Divide the group into two teams.
Encourage students to cheer for their teammates and give high-fives as students return to the end
of the line.
How to Play:
This is NOT an actual race. Every player will have one chance to go through the obstacle course
by only stepping on the polyspots.
The player will begin at the first polyspot with or without a puppet on one hand. They will walk
towards the box of small plastic figures, and grab as many figures as possible by using the mouth
of the puppet (they cannot use 2 hands to collect the figures).
After grabbing the figures the player must go back using the polyspots to walk (or jump, leap,
etc.) on, and drop the figures into the hula hoop.
Once the player has let go of their figures, they hand their puppet to the next player and walk to
the back of the line.
Only the figures that land in the hula hoop will be counted. After everyone has had a turn, do a
final count of figures that landed in the hoops. The team with the most figures in their respective
hula hoop wins.
Variation(s):
Add cones or wiggle jump ropes to jump over to increase the difficulty.
pK-2nd T Ad,Au,De,Ed L1

Page | 92
Lucky Charms
Group Size: Any size
Age Group: preK-2nd grades
Length of Activity: Under 10 minutes
Development Goal: To develop interpersonal relations
Skills Practiced: Memory and spatial awareness
Equipment: 30+ cones - 8 of them with a paper shape taped on the underside (heart, star, rainbow,
clover, blue moon, pot of gold, horseshoe, red balloon), hula hoop
Set Up: Can be played outside, in a gym or in a classroom. Transform eight of the cones into "lucky
charms," meaning they have a piece of paper taped on the underside. There should be one of each of the
following: heart, star, rainbow, clover, blue moon, pot of gold, horseshoe, red balloon. Scatter the cones
around the play area so that the lucky charms are not visible (both lucky charms and plain cones). Place a
hula hoop or “pot of gold” in the center of the play space.
Before You Start:
Line the students up and show the boundaries of the play space.
Explain to the children that a leprechaun needs their help finding his lucky charms, so it is their
job to search for them as fast as they can and return them to the pot of gold.
Remind students to watch where they are going so they don't run into one another.
Tell students how they are allowed to move for the round (i.e. Walking, running, skipping,
zombie walking, etc.)
How to Play:
At the magic word, students move (walking, skipping, etc.) around and look at the underside of
one cone at a time.
If it does not have a lucky charm, they return it to its place. If it does have a lucky charm, they
place it in the center of the hula hoop (or "pot of gold") as fast as they can.
When all 8 lucky charms have been collected, the game is over.
Variation:
Play multiple rounds of the game, keeping time for each one so that the students can try to get a
faster time. Have the students calculate how many seconds slower or faster they are each round.
pK-2nd I T C Ad,Au,Ed L1

Page | 93
Wright Family Vacation
Group Size: Any size
Age Group: preK-6th+ grades
Length of Activity: Under 10 minutes
Development Goals: To develop listening skills, patience, and teamwork
Skills Practiced: Hand-eye coordination and multitasking
Equipment: Enough objects that each player has something to hold – the objects should not be too
heavy, sharp, or full of liquid.
Set Up: Can be played outside, in a gym or in a classroom. Have an open space where all of the
participants can stand or sit in a circle.
Before You Start:
Have the class stand in a circle (within arm’s reach of the person next to them).
Provide each participant with an object (tennis ball, etc.).
Make sure students know which way is left and which way is right.
Stand on a chair and/or be loud
How to Play:
Instruct the players that you will read a story.
Whenever they hear the word "left", everyone must pass their object left.
Whenever they hear "right", pass their object to the person on their right.
To see if they are alert you can start by saying something like "Let's get right down to it," or
“Oops, I left my glasses at home.” If the students do not pass their object when you say right and
left, remind them they have to do it anytime they hear one of the words.
The story goes:
One day the Wright family decided to take a vacation. The first thing they had to decide was who
would be left at home since there was not enough room in the Wright family car for all of them.
Mr. Wright decided Aunt Linda Wright would be the one left at home. This made Aunt Linda
Wright so mad that she left the house immediately yelling, "It will be a right cold day before I
return."
The Wright family now bundled up the children, Tommy Wright, Susan Wright, Timmy
Wright and Shelly Wright and got into the car and left. Unfortunately, as they turned out of the
driveway someone had left a trashcan in the street so they had to turn right around and stop the
car. They told Tommy Wright to get out of the car and move the trashcan so they could get
going. Tommy took so long they almost left him in the street. Once the Wright family got on the
road, Mother Wright wondered if she had left the stove on. Father Wright told her not to worry
he had checked the stove and she had not left it on. As they turned right at the corner, everyone
started to think about other things that they might have left undone.
No need to worry now, they were off on a right fine vacation. When they arrived at the gas
station, Father Wright put gas in the car and then discovered that he had left his wallet at home.
So Timmy Wright ran home to get the money that was left behind. After Timmy had left, Susan

Page | 94
Wright started to feel sick. She left the car saying she had to throw up. This of course got Mother
Wrights attention and she left the car in a hurry. Shelly Wright wanted to watch Susan get sick,
so she left the car too. Father Wright was left with Tommy Wright who was playing a game in
the back seat.
With all this going on Father Wright decided that this was not the right time to take a vacation,
so he gathered up all of the family and left the gas station as quickly as he could. When he arrived
home, he turned left into the driveway and said "I wish the Wright family had never left the
house today!"
(You can vary your speed with how fast you read it and it's a great way to get teachers involved
and it really doesn't get old)
pK-6th+ I C Bl,Ed L1

Page | 95
Tag Games
Tag games have a timeless popularity that often surprises adults. We may have a hard time viewing tag as
a ‘real’ game in the context of sports. However, tag games are not only uniformly successful and fun for
elementary age students, but these games are also accessible to most students and can teach a number of
basic movement skills that lead toward other more complex games and sports. The tag games included in
this chapter range from simply teaching agility and evasion to more elaborate games that teach
cooperation, teamwork and strategic thinking. Dive in, introduce these games to your students, and enjoy
the smiles and laughter to come!
Gotcha!

Page | 96
7-Up Tag!
Group Size: 10-50
Age Group: 2nd-6th+ grades
Length of Activity: 10 minutes
Developmental Goals: To develop hand-eye coordination & a sense of shared space
Skills Practiced: Running, agility, safe tagging, spatial awareness, evasion
Equipment Needed: colored jerseys (pinnies)
Set Up: Designate a large play area with clear boundaries with room for students to run
Before You Start:
Review the boundaries
Pick 7 people to be taggers
Have the taggers put on the colored pinnies
Demonstrate safe tagging
Light touch, like butterfly wings, on the shoulder
Unsafe tags: hard contact that might cause the person being tagged to fall.
How to Play:
7 taggers stand in the play area while the rest of the group stands on a boundary line
The students on the boundary line turn around and close their eyes and stick out their thumb
7 taggers go around and tap one thumb each
When they are done, the taggers say “Heads Up, 7-up!”
The students that were tagged then have to chase the 7 taggers to find out who tapped their thumb
If a tagger did not tap a student’s thumb, they must say “Not me!”
The students that were tagged continue tagging the original taggers until they find out who tagged
them
Coach can do a countdown to start a new round
2nd-6th+ I Ad L1

Page | 97
Animal Tag
Group Size: 10-20
Age Group: K-2nd grades
Length of Activity: 5-10 minutes
Developmental Goals: To develop hand-eye coordination and an ability to listen to directions
Skills Practiced: Evasion, agility, safe tagging, body and spatial awareness and running
Equipment Needed: None
Set Up: Designate a large play area with clear boundaries and enough room for students to run around
safely.
Before You Start:
Demonstrate safe tagging:
Light touch, like butterfly wings on the shoulder
Unsafe tags: hard contact that might cause the person being tagged to fall
Review the boundaries and the consequences for going outside them
Group students into 2 groups, assign each group to be an animal
Have groups practice making the sound of their animal
How to Play:
The goal is to turn everyone into the same animal as your group.
Once the game begins all students should be making animals noises and trying to safely tag each
other
Once a student is tagged, s/he becomes the animal of the person that tagged her/him.
The game continues until all students are the same animal
Variation(s):
Create more animal groups
Choose 1-3 students that cannot be changed from their original animal (to keep the game going
continuously)
For the hearing impaired, you could have children do animal movements instead of using verbal
cues.
K-2nd I N De L1

Page | 98
Arena/Flag Tag
Group Size: 15- 40
Age Group: 3rd-6th+ grades
Length of Activity: 15-20 minutes
Developmental Goal: To develop eye-hand coordination
Skills Practiced: Evasion, running, safe tagging and spatial awareness
Equipment Needed: Any type of flag or jersey (one per student)
Set Up: A basketball court-sized space. Evenly space cones on the outside of the boundaries.
Before You Start:
Provide an example of where and how to place flags (in a pocket or waist band at least ¾ of the
flag showing)
Express the need for safe and fair play, including: no flag guarding, rolling on the ground, taking
flags off the ground, or calling out “cheater”.
Give students a safe way to express their needs to review the quality of the game, i.e.
approaching Coach or rock-paper-scissors.
Review boundaries and rules, ask for questions.
How to Play:
Everyone moves within the boundaries trying to avoid each other.
If a player grabs a flag, they must place it on the ground.
Once a flag is on the ground, it is considered off limits.
When a player loses her or his flag, s/he must get down on the ground (sitting or kneeling).
In order to get back off the ground, a player who is kneeling may grab a runner’s flag and place
the flag in her or his pocket.
Variation(s):
Allow students to crawl on their knees while trying to regain a flag.
Double Flag Tag: using two flags. Both flags must be pulled before the player goes down to the
ground.
3rd-6th+ I Ad,De,Ed L1
Page | 99
Band Aid Tag
Group Size: 10-50
Age Group: K-5th grades
Length of Activity: 5 minutes
Developmental Goal: To develop eye-hand coordination
Skills Practiced: Evasion, running, safe tagging and agility
Equipment Needed: None
Set Up: Designate a clear playing area. Designate a ‘hospital’ outside the play area
Before You Start:
Demonstrate safe tagging:
Light touch, like butterfly wings, on the shoulder.
Unsafe tags: hard contact that might cause the person being tagged to fall.
Review what to do when you get tagged
Make sure students know where the hospital is and how to be “treated”.
How to Play:
Ask for a volunteer to be “it”.
If a student is tagged, s/he must take one hand and put it directly on the place where they were
tagged. The hand is a “band aid”.
S/he can continue to run around trying to tag others and avoid being tagged but s/he must keep
his/her ‘band aid’ on, now s/he only has one free hand.
If s/he is tagged again, s/he must take the other hand and place it on the second spot where s/he
was tagged. S/he can still continue to run around with both “band aids” on.
If s/he is tagged a third time, s/he has to go to the ‘hospital’ and do ten jumping jacks to get back
in the game.
Variation(s):
Students can be “treated” at the hospital by counting to 20 and then returning to the game without
any “band aids”.
Students can go to the hospital at any time to remove any band aids. They do not have to wait
until they are tagged the second or third time.

Page | 100
K-5th I N Ad,De L1

Page | 101
Blob Tag
Group Size: 20-30
Age Group: 1st-5th grades
Length of Activity: 15-20 minutes
Developmental Goal: To develop cooperation
Skills Practiced: Evasion, agility, endurance, safe tagging and running
Equipment Needed: None
Set Up: Designate a playing area large enough run around in.
Before You Start:
Ask for two volunteers, and assign both of them to be “it”. They become The Blob and must link
elbows.
Demonstrate safe tagging:
Light touch, like butterfly wings, on the back or shoulder.
Unsafe tags: hard contact that might cause the person being tagged to fall.
Demonstrate with volunteers how to move with a partner, how to link when you are tagged, and
how to separate when there are four people in The Blob.
Make sure the students understand the rules, boundaries and the importance of safety.
Spread students out within playing area.
How to Play:
When play begins, The Blob tries to tag the rest of the players.
When someone gets tagged s/he also links elbows and becomes part of The Blob.
When a fourth player is tagged, The Blob then separates into two separate Blobs.
Every time a Blob becomes four players it splits; two players detach creating two separate Blobs.
Play continues until all of the players are turned into Blobs.
If a player runs out of bounds while trying to avoid The Blob, s/he must then connect with the
nearest Blob and continue to play.
The last two players can then become the first Blob for the next game.
Variation:
If students are playing safely, the Blob can stay connected and continue to grow bigger and
bigger until all the players are tagged. Challenge the class to stay together when they move.
1st-5th I N Ad,De L1

Page | 102
Capture the Flag
Group Size: 10-30
Age Group: 2nd-6th+ grades
Length of Activity: 10-40 minutes
Developmental Goals: To develop teamwork, cooperation, strategic thinking and verbal communication
Skills Practiced: Reflexes, evasion, running, safe tagging, spatial awareness and endurance.
Equipment Needed: Cones and two flags
Set Up: Divide the playing field in half and designate
two small “zones” on both sides to hold people who
are tagged. There can also be a designated circle on
each side where the flag is placed.
Before You Start:
Divide students into two teams.
Make sure students understand all rules and know where the boundaries are located.
Demonstrate safe tagging:
Light touch, like butterfly wings, on the back or shoulder.
Unsafe tags: hard contact that might cause the person being tagged to fall.
How to Play:
Each team tries to take the other team’s flag and return across the center line without being
tagged.
When guarding the flag zone or the holding zone, a defender must be at least 2’ away from the
zone boundaries.
If a player is tagged while on their opponent’s side they must go to the holding zone on their
opponent’s side.
If a player who has stolen the flag is tagged, the flag is returned to the flag zone, and the player
goes to the holding zone.
A player can be freed from the holding zone when a teammate crosses the center line and tags the
player; both players then receive a free walk back to their side.
A player can only free one teammate at a time.
If an opposing player can get both feet into the flag zone without being tagged, they can remain
there without safely (without getting tagged) before attempting to cross the center line.
Variation(s):
There are several rules that you may change or add depending on the age and number of students playing:
Limit the number of players allowed in the circle at one time
Allow a player in the circle to throw the flag to a teammate. The flag must still be carried over the
center line however.
The players in the holding zone can join hands and reach out of the zone to make it easier to be
freed. When this happens, all players in the holding zone are freed when a player tags someone.
2nd-6th+ I L3

Page | 103
Cat and Mice
Group Size: 10-30
Age Group: preK-2nd grades
Length of Activity: 5 minutes
Developmental Goal: To develop a sense of shared space
Skills Practiced: Evasion, spatial awareness
Equipment Needed: 5 hula hoops (or enough so 5 students could share a hoop)
Set Up: Place hula hoops out in a game space that is coned or chalked out
Before You Start:
Identify the game boundaries.
Inform students that the hula hoops may not move from their spots.
Provide an example of the game.
Demonstrate safe tagging:
Light touch, like butterfly wings on the shoulder
Unsafe tags: hard contact that might cause the person being tagged to fall
Identify five students to be cats (or one cat for every four mice).
How to Play:
Allow four students to place a foot in each hula hoop. This will be their mouse hole.
Call out “Mice travel!” and all the students/mice must find a new mouse hole/hula hoop.
While mice are looking for a new hole, the cat will try to tag a mouse.
If a mouse gets tagged, s/he will become the cat, and the cat will get to be a mouse.
Variations:
Have mice who are tagged go to a mouse container and have other mice rescue them.
Tagged mice turn into cats to help tag other mice.
Tagged mice can do jumping jacks or other tasks to get back in the game.
pK-2nd I Ad,De L1

Page | 104
Chair Tag
Group Size: 10-30
Age Group: 1st-6th+ grades
Length of Activity: 10 minutes
Developmental Goal: To develop spatial awareness
Skills Practiced: Safe tagging, time management, and follow directions
Equipment Needed: None
Set Up: Classroom with chairs and space to move.
Before You Start:
Make sure all students understand how to tag properly
Review that everyone gets one turn, and that students should ‘take’ the spot of the student they’ve
tagged
How to Play:
Everyone begins standing behind his/her chair.
A student is chosen to begin, and s/he must quickly tag another student and sit in his/her chair.
The student that’s been tagged must tag another student and take his/her spot.
Each student may only have one turn per round (tip – have students raise their hands if they have
not had a turn yet).
Each student has 5 seconds to tag another student, and the adult facilitates the game by counting
down loudly for each student.
Variation(s):
Students can move in pairs.
Students can have more or less time.
Students can be required to do a special “high-five” to “tag” someone.
Students in the class can work together as a team to reach a certain time goal.
1st-6th+ I N T C L1

Page | 105
Charades Tag
Group Size: 10-30
Age Group: 3rd-5th grades
Length of Activity: 10-20 minutes
Developmental Goals: To develop non-verbal communication and teamwork
Skills Practiced: Pantomiming, running, evasion and cooperation.
Equipment Needed: None
Set Up: Three lines with equal distance between them.
Before You Start:
Make sure the students understand how to play charades.
Do a couple of warm-up rounds so they get the idea of acting in silence and guessing the action.
Divide the group into two teams.
Each team comes up with an action or scenario they will act out.
Give categories to help the kids decide. Younger grades: animals, occupations and sports.
For older grades make it more challenging with movies, songs, people and so on.
Have one person from each team whisper to you what their charade will be.
Demonstrate safe tagging:
Light touch, like butterfly wings, on the back or shoulder.
Unsafe tags: hard contact that might cause the person being tagged to fall.
How to Play:
Once each team has told you what their charade will be, have the two teams face off, by standing
equal distance from the middle line.
Decide who will act out their charade first.
On your signal one team acts out their charade while the other team guesses.
When you hear a correct guess say ‘yes’ or give another signal.
The team that guessed correctly will then chase the acting team back to the acting team’s safety
line. If anyone is tagged s/he joins the other team.
Then the next team acts out their charade and the process is repeated.
Variation:
You can also combine categories e.g. an animal doing a sport.
3rd-5th I N C Ad,De L2

Page | 106
Color Tag
Group Size: 10-20
Age Group: 1st-3rd grades
Length of Activity: 5-15 minutes
Developmental Goals: Practice identifying colors and number sense
Skills Practiced: Following instructions, running, spatial awareness, safe tagging and jumping jacks
Equipment Needed: Anything with different colors (cones, hula hoops, bean bags, paper, etc.).
Set Up: A basketball court sized space. Evenly space cones on the outside of the boundaries.
Before You Start:
Practice doing spelling jumping jacks, spelling out the colors you will be using.
Demonstrate safe tagging:
Light touch, like butterfly wings on the shoulder
Unsafe tags: hard contact that might cause the person being tagged to fall
Review boundaries and rules, ask for questions.
Choose 1-3 people to start as the taggers.
How to Play:
Everyone moves within the boundaries trying to avoid the taggers.
When you are tagged, you must run to the color designated by the tagger.
Each time the tagger touches someone, s/he must say a color for that person to go to.
Once you run to the color, you must spell it out while doing jumping jacks before coming back
in to the tag area.
Variation(s):
Instead of colors, set up stations with numbers. You can set up stations with X number of bean
bags, and students must perform counting jumping jacks.
FIT KID- for older kids, you can set up Strength and Flexibility stations.
1st-3rd I Ad, De L1

Page | 107
Cones Conquest
Group Size: 10-30
Age Group: 4th-6th+ grades
Length of Activity: 10-20 minutes
Developmental Goal: To develop cooperation
Skills Practiced: Evasion, safe tagging, and teamwork
Equipment Needed: 12 cones divided equally into 2 colors (6 each), additional cones to mark “zone”
Set Up: Use a rectangular space with a center line. Set up one zone on each side of the field, this zone
will be where players who get tagged can wait. Place 6 cones of one color on each side of the field.
Before You Start:
Divide players into 2 teams. Assign each team to a side of the playing field.
Make sure students understand all rules and know where the boundaries are located
Demonstrate safe tagging:
Light touch, like butterfly wings on the shoulder
Unsafe tags: hard contact that might cause the person being tagged to fall
How to Play:
Each team is trying to bring the opposing teams’ cones to their side while keeping their own
cones safe on their side.
You can only carry one cone of a single color at a time (if cones are green and blue, a player can
only carry one green and one blue at a time).
If tagged while on the opposite side, the player must return the cones in his or her hands to where
they came from and then go to the waiting zone on the opposite side of the field from their team.
Players can be released from the waiting zone by being tagged out by a teammate and get a free
walk back to their side.
The game is over when one team has all of their cones plus the other team’s cones on their side.
Variation:
Tagged players do not have to return the cones, they can leave the cones where they were tagged
4th-6th+ I De L2

Page | 108
Don’t Get Caught with the Cookie
Group Size: 10-30
Age Group: 3rd-5th grades
Length of Activity: 5-15 minutes
Developmental Goals: To develop gross motor skills and teamwork
Skills Practiced: Throwing, catching, communication, safe tagging and awareness
Equipment Needed: Enough balls for half of the students
Set Up: A safe area with boundaries
Before You Start:
Choose 2 students to be the taggers
Give out balls (cookies) to other students
How to Play:
Taggers are trying to tag all students who have possession of the ball (cookie)
If you have the ball and get tagged, you must put the cookie back in the jar (a bag outside the
boundary area)
If you are tagged, you must go to the sideline and cheer on your class.
Students can pass the cookies to each other to avoid getting tagged while holding the ball.
Variation(s):
Limit the movement of players who have possession of the ball i.e., players can only take X
number of steps or players must remain still
Limit the way in which players can pass the ball i.e., overhand, underhand, rolling,
girl/boy/girl/boy
3rd-5th I Ad,De L1

Page | 109
Dragon Tail
Group Size: 4-40
Age Group: K-3rd grades
Length of Activity: 15 minutes
Developmental Goal: To learn tagging skills while working on teamwork.
Skills Practiced: Tagging, evasion, and teamwork.
Equipment Needed: None
Before You Start:
Demonstrate safe tagging:
Light touch, like butterfly wings, on the shoulder
Unsafe tags: hard contact that might cause the person being tagged to fall
Review where students should go when they’ve been tagged.
Review how to safely and gently touch someone’s shoulders as part of the Dragon’s tail.
How to Play:
One student, the Dragon, can only tag other students.
When a student is tagged, s/he becomes part of the Dragon’s tail by gently placing their hands on
his/her shoulders and following him/her around the play area.
The Dragon continues to tag students until everyone is part of the tail.
It is important to play the first round walking, and work your way up to faster speeds depending
on students’ abilities at playing safely and the space available.
Variation(s):
Allow the person at the end of the tail to tag students along with the Dragon
For advanced groups, let everyone start off as a Dragon. When a Dragon is tagged he/she joins
the tail of the person who tagged him/her. Keep going until there is only one giant Dragon (works
a little like Ro-Sham-Bo Rockstar).
K-3rd I N Ad,De L1 K-3rd I N Ad,De L1
Page | 110
Eagle and the Mouse
Group Size: 10-30
Age Group: K-5th grades
Length of Activity: 10-15 minutes
Developmental Goal: To improve observation skills
Skills Practiced: Agility, running, safe tagging
Equipment Needed: None.
Set Up: Two lines 10-15 feet apart.
Before You Start:
Form two lines (teams) of students, standing shoulder-to-shoulder with at least one arm’s length
between them. One team is standing on one of the lines, with their backs to other line (safe spot).
Demonstrate using volunteers.
Draw the students in by telling a story. A mouse was wandering in a field when it began
to smell the scent of an eagle. It could not see the eagle (which it knew liked to hide in
trees) but it knew the eagle was nearby. So the mouse decided to remain very still so the
eagle would not see it. The eagle knew the mouse was very good at finding safe places to
hide from eagles so it also remained very still waiting for the right moment to pounce out
of the tree and go after the mouse.
Make sure students know when they may move and where the safe spot is.
Demonstrate safe tagging:
Light touch, like butterfly wings on the shoulder
Unsafe tags: hard contact that might cause the person being tagged to fall
How to Play:
Designate one team as the eagles who will remain very still until it has decided to go after the
mouse, but once it moves, even a little bit, the mouse can start running.
The mouse cannot move until it sees the eagle move.
The mouse wants to make it to a “safe” spot, the other line.
Talk to the students about places that are safe and have them visualize safe places while
they are playing.
As the students get better at getting to their safe spot, shorten the distance between the mouse and
the eagle.
Discussion Questions:
Do you feel you have enough safe spots in your life?
How hard was it to get to your safe spot?
How could this game help you to be safe?
Variation:
The Lizard and the Fly is basically the same game but instead of the students going from a
standing position they must both start from the ground on their backs. When the lizard starts to
move the fly can also get up and run.
K-5th I N L2

Page | 111
Elbow Tag
Group Size: 20-30
Age Group: 3rd-5th grades
Length of Activity: 10 minutes
Developmental Goals: To develop cooperation and strategic thinking.
Skills Practiced: Evasion, spatial awareness, running and safe tagging
Equipment Needed: None
Set Up: Designate a playing area large enough to run in.
Before You Start:
Have the group pair up with a partner.
Partners should link arms at the elbows and have both hands on their hips.
Ask for two volunteers and assign one of them to be “it” and the other to be the “runner”.
Demonstrate safe tagging:
Light touch, like butterfly wings, on the back or shoulder.
Unsafe tags: hard contact that might cause the person being tagged to fall.
Have the students practice how to detach, and explain who becomes the “runner” and who stays
linked at the elbow.
How to Play:
The student who is “it” must try to tag the “runner”.
The “runner” must find a pair of students and link arms at the elbow with one of them.
The person on the other side of that pair detaches and is now being chased by the person who is
“it”.
The new “runner” must then find another pair to link up with, in turn detaching another person.
If the “runner” gets tagged before they can find someone to link elbows with, the “runner” then
becomes “it” and chases the other person.
The “runner” must link to another pair within 5 seconds.
Variation(s):
If the person who is “it” gets tired you can make the person who detaches from the pair become
“it”. This person will then be trying to tag the player that was just chasing the “runner”. This way
the person who is “it” is constantly changing every time someone links arms. It gets a little
confusing but it is very fun to play.
The leader says “Switch” and the “runner” becomes “it”.
Let both the runner and the tagger link elbows, so both have a chance to change, and more
students get to play.
Allow all students the option to be linked to a partner. If you are unattached you can get tagged.
Any two unlinked players can decide to link together to be safe from getting tagged
Indoor Modifications:
Instead of running, only toe-to-heel walking is allowed.
Make sure you address the safety issues of tag in between desks.
3rd-5th I N C Ad,De L1

Page | 112
Everyone’s It
Group Size: 10-30
Age Group: K-5th grades
Length of Activity: 10 minutes
Developmental Goal: To develop eye-hand coordination
Skills Practiced: Running, evading, safe tagging and counting
Equipment Needed: None
Set Up: Establish boundaries; a relatively small, safe area so that constant motion is encouraged
Before You Start:
Demonstrate safe tagging:
Light touch, like butterfly wings, on the shoulder.
Unsafe tags: hard contact that might cause the person being tagged to fall.
Review the boundaries and the consequence for going outside them.
Start over from zero.
Perform 10 jumping jacks to get back in the game.
How to Play:
The object is for students to tag and keep a running count of everyone they touch in three
minutes.
No one is “it” and no one stops playing or “freezes” when tagged.
Variation(s):
You can change the amount of time that the students play and the location of the boundaries.
If a student is tagged it counts against her/his score.
Page | 113
Fake Out
Group Size: 20-30
Age Group: 3rd-5th grades
Length of Activity: 10-15 minutes
Developmental Goal: To develop creative thinking
Skills Practiced: Evasion techniques, safe tagging, endurance and running
Equipment Needed: Two cones (more if there are no lines for boundaries).
Set Up: Designate a rectangular play area large enough to run in. Place cones on each baseline (width).
Before You Start:
Split group into two teams with each team lined up on opposite baselines. Have cones placed a
few feet behind the baseline marking where the single file line should start.
Designate one side as the “Taggers” or “Defense” and the other side as the “Fakers” or the
“Offense.”
Demonstrate safe tagging:
Light touch, like butterfly wings, on the back or shoulder.
Unsafe tags: hard contact that might cause the person being tagged to fall.
Demonstrate how someone can move their body to “fake out” the person trying to tag them.
Have a few students try it before you begin with the whole class.
Make sure everyone knows which line is the “fakers” and which is the “taggers”, the roles of
each, where the boundaries are and the importance of safety.
How to Play:
The object is for the “faker” to run past the “tagger” and reach the opposite baseline without
getting tagged.
The “faker” can move in any direction while making their fakes but must stay within the
boundaries.
The “tagger” is trying to tag the “faker” with two hands.
The first two people in each line begin the game by stepping into the playing area.
The play is done when either the “faker” reaches the baseline or is tagged. In either case the
players switch lines each time. Make sure the class stays in a single file line a few feet away
from the baseline (not across the baseline) so the players do not run into each other.
Variation(s):
If players are tagging safely, the boundaries can be increased and each side can have two or three
players go at the same time.
Each “tagger” can get one or both of the “fakers.”
K-5th I N Ad,De L1 3rd-5th N L1

Page | 114
Feed the Dog/Cat (Relay)
Group Size: 8 - 30
Age Group: preK -6th grades
Length of Activity: 10 minutes
Developmental Goals: To develop eye-hand coordination, cooperation and teamwork.
Skills Practiced: Running/racing, endurance, pacing
Equipment Needed: 4–10 hula hoops, 20-60 fluffy balls or any other small item that can be transferred
easily from one space to another (large rubber bands also work). Cones to mark starting lines. Play on a
large, lined space, such as a basketball court or soccer field.
Set Up:
Depending on how many students are playing, set up pairs of two hoops (preferably of the same
color) next to each other at the end of the court or field. Opposite from the two hoops, put a cone
at the other end of the court or field (preferably the same color as the hoops) to mark the team’s
starting line. Each team has a cone and two hoops. So, if there are 3 teams, there should be 3
cones and 6 hoops set up. Place anywhere from 10 – 15 fluffy balls (or other small object) inside
one of the hoops in each pair. Each team’s setup should look like this:
How to Play:
Split students into teams (assign them each a color cone to stand behind)
On the whistle, the first player on each team runs to the hoops, or “doggy bowls” and transfers
one object (“piece of food”) into the other bowl. The piece of food must be inside the other bowl
before s/he can run back and give the next player a high-five, After receiving the high-five, the
next player can take his/her turn transferring another piece of food to the other bowl.
The team is done once all pieces of food are inside the other dog bowl.
Variation(s):
Have students keep going until all the food is back in original bowl.
Change the animal name, call it “Zookeeper,” etc. Use your creativity
pK-6th C Ad,Au,Cp,De,Ed L1
Cone

Page | 115
Fox Hunt/Squirrel Scramble
Group Size: 20-50
Age Group: 4th-6th+ grades
Length of Activity: 15 minutes
Developmental Goals: To develop evasion skills and strategy.
Skills Practiced: Evasion, spatial awareness, endurance, running, and agility.
Equipment Needed: Cones, tape or chalk for boundaries
Set Up:
You need players to be trees, players to be squirrels (half of tree total plus a few) and a few
players to be the foxes.
For a class size of 22, assign 12 kids to be trees.
Each of those players will pair up with another to be one tree, which will give you 6 trees.
There will be 8 squirrels. This is to create the problem of not enough trees for all the squirrels.
There are also two foxes to catch those loose squirrels.
For a group of 40, have 22 kids be trees giving you 11 trees, 14 squirrels, and 4 foxes.
Before You Start:
Establish boundaries
Demonstrate safe tagging
How to Play:
The trees go out into the play area first.
Two people become a tree by standing face to face and holding hands with arms raised over their
heads.
Once the trees are into position, you send the squirrels out to find a home.
A squirrel must stand underneath the raised arms to be in a tree.
If a squirrel has no home he or she goes to another squirrel’s home and taps them on the shoulder.
That squirrel must leave the home out the other side of the tree and find a new home.
Give the squirrels a few minutes of establishing a cycle of tree swapping.
Once this has been done, send in the foxes and they are to tag any loose squirrels.
Those tagged squirrels either wait until the next round of play or do an exercise (jumping jacks,
push-ups, etc.) to get back in the game.
After a few squirrels are tagged, start to take away (cut down) trees thus making the game more
challenging.
Alternate Name of the Game: Squirrel Scramble
4th-6th+ I N L1

Page | 116
Freeze Tag
Group Size: 20-30
Age Group: K-5th grades
Length of Activity: 15-20 minutes
Developmental Goals: To develop cooperation and listening to directions
Skills Practiced: Evasion, agility, running, body awareness, safe tagging and following directions
Equipment Needed: None
Set Up: Open area with boundaries
Before You Start:
Demonstrate safe tagging:
Light touch, like butterfly wings on the shoulder
Unsafe tags: hard contact that might cause the person being tagged to fall
Review how to give a double high-five
Select two students to be ‘it’
How to Play:
To begin, the students spread out within the open area, and the leader designates what movement
everyone should be using (i.e. running, skipping, hopping, walking, etc.).
If a student gets tagged, s/he immediately freezes
To ‘unfreeze’ a player, another student must give the frozen person a double high-five.
Neither student may be tagged while unfreezing someone and taggers cannot stand around
waiting for them to finish.
The leader should switch taggers and styles of movement.
Variation(s):
Tunnel Tag: When a student gets tagged, s/he freezes with their feet shoulder-width apart on the
ground. To ‘unfreeze’ a player, another student must crawl through the player’s legs from the
front.
To ‘unfreeze’ a player, another student must shake hands with the frozen player and both must
share their favorite cartoon, favorite food, what they want to be when they grow up, etc.
K-5th I N C Ad,De L1

Page | 117
Frog Catcher
Group Size: 5-20
Age Group: preK-2nd grades
Length of Activity: 10 Minutes
Developmental Goals: To develop body and spatial awareness
Skills Practiced: Body awareness, following directions and gross muscle control
Equipment Needed: Beanbags for insects, hula hoops for lily pads
Set Up: Small area with clearly marked boundaries or classroom
Before You Start:
Have a discussion about frogs living in ponds. Frogs like to hang out on their lily pads when they
are not looking for insects to eat.
Scatter the beanbags around the yard or room; place hula hoops at random around the room or
play area.
Practice safe hopping to and from their lily pads.
Demonstrate safe tagging:
o Light touch, like butterfly wings, on the back or shoulder.
o Unsafe tags: hard contact that might cause the person being tagged to fall.
Review counting down from 5 seconds.
How to Play:
The objective of this game is to avoid being tagged by the frog catcher.
You are the frog catcher, waiting for the frogs to get off their lily pads.
At your signal, have children hop to gather insects and have them leap back to their lily pad.
o While kids are leaping around to catch insects, pretend to try and catch (tag) them.
o If a frog is tagged, the frog must go to the shore banks (on the side of the room or play
area) and perform a task (i.e. 5 jumping jacks, sit-ups, etc.) to get back into the game.
o The frogs are safe and cannot be tagged while on their lily pads. However a frog can only
stay on their lily pads for 5 seconds before the lily pad gets too heavy and starts to sink.
Last student remaining can be next frog catcher.
Variation(s):
Have kids share some of their insects with a sick neighbor frog by taking them to the other side of
the pond (across the room).
Have multiple frog catchers.
pK-2nd I M C Ad,Au,Cp,De L1

Page | 118
Fruit Basket
Group Size: 10-35
Age Group: 3rd-5th grades
Length of Activity: 10-20 minutes
Developmental Goals: To develop spatial awareness and evasion techniques
Skills Practiced: Evasion, agility, safe tagging, endurance
Equipment Needed: Large rectangle area, basketball court size
Before You Start:
Line players up and count them off into four groups, Apples, Oranges, Bananas, Grapes (or other
fruit if you prefer)
Have each fruit group line up on different sides of the rectangle, along the sidelines and baselines
Review safe tagging techniques and consequences for not doing so
Choose a volunteer or two to be Taggers, depending on group size
How to Play:
The object is for players to safely cross the court without being tagged. Players on the sidelines
will only cross to the other sideline each round; likewise, players on the baselines will only cross
over to the other baseline
The coach will call out any combination of fruit i.e. APPLES, BANANAS! etc. Each team must
cross if their fruit is called. Coach may call out 1-3 fruits at a time or call out FRUIT BASKET
which means all four groups must cross at the same time
If a player is tagged or makes contact with another fruit, they must turn into a Fruit Tree. They
are planted into the ground, not allowed to move, but still able to tag crossing fruits
The last player who is not a Fruit Tree or tagger wins
Stepping outside of the boundaries to avoid a tag automatically makes that player a Fruit Tree
Alternate Name of the Game:
Car Lot – use car names instead of Fruits
3rd-5th I N Ad L1

Page | 119
Fun in a Box
Group Size: 6-30 students
Age Group: K-5th grades
Length of Activity: 10 minutes
Developmental Goals: To develop cooperation and a sense of boundaries
Skills Practiced: Safe tagging, boundary awareness, and evasion
Equipment Needed: Two jerseys if desired
Set Up: None
Before You Start:
Review safe, butterfly tagging.
Identify the boundaries, and make sure you have a large playing area.
Ask students if they are familiar with “The Cat in the Hat”. Also, if they know Thing 1 and
Thing 2.
Go over how the game is going to work.
How to Play:
Start the students on one of the boundaries. On a magic word or a whistle, have the students
move around the playing area (like a warm-up). You can have them move however you wish,
though usually skipping or hopping.
Have the students freeze, and spread students out a little if necessary.
Randomly select two students to be Thing 1 and Thing 2. These are the only two students who
can move throughout the house. Preferably these two students can pretend to be flying kites.
All of the other students are household items. They cannot move their feet, only their arms in
order to tag.
If a household item tags Thing 1 or Thing 2, they switch roles.
Variation:
Set Up an obstacle course and divide the students into two teams – Things 1 and Things 2.
K-5th I N L1
Page | 120
Heads or Tails
Group Size: 8-20
Age Group: K-5th grades
Length of Activity: 10 minutes
Developmental Goal: To develop active listening
Skills Practiced: Agility, running, evasion, and safe tagging
Equipment Needed: A coin
Set Up: Set up an area with two far boundaries and a dividing line directly in the middle.
Before You Start:
Demonstrate safe tagging:
Light touch, like butterfly wings on the shoulder
Unsafe tags: hard contact that might cause the person being tagged to fall
How to Play:
Divide the group so that everyone has a partner.
Line all of the students up on the middle line, so that they are back to back with their partner.
Designate one side as “Heads” and the other as “Tails.”
Flip a coin, and announce to the students what side came up.
If it comes up heads, all of the “Heads” students have to run back to their side before they are
tagged by their “Tails” partner. If “Tails” is called, the reverse happens.
After each round, reset with partners back in the middle
Variation(s):
The adult can announce “Heads” or “Tails” without a coin flip.
To make the game more difficult, make the students run to the opposite side
Could also play “Giants, Wizards, & Elves” style, where a student has to switch teams if s/he is
tagged. This would only work if there were no partners, and anyone could tag someone on the
opposite team.
K-5th I N L1

Page | 121
Hoop Scoot Tag
Group Size: 10-20
Age Group: 3rd-6th+ grades
Length of Activity: 10 minutes
Developmental Goals: To develop body and spatial awareness and strategic thinking
Skills Practiced: Running, evasion, safe tagging and agility
Equipment Needed: 5-9 hula-hoops and 2-3 tennis balls
Set Up: Scatter the hoops in the play area several feet apart. Select players to be “it” and give them a
tennis ball to carry for identification.
Before You Start:
Demonstrate safe tagging:
Light touch, like butterfly wings on the shoulder
Unsafe tags: hard contact that might cause the person being tagged to fall
Review the boundaries and the consequences for going outside them
How to Play:
The object is for players to run from one hoop to another without being tagged
Only three players can stand in a hoop at a time, and for no longer than five seconds
If a player stands too long in a hoop, the tagger begins counting the seconds. If after five seconds
the player hasn’t left the hoop he or she is automatically caught. The person who was caught
switches role with the tagger
When the taggger tags a player the two switch roles and the tennis ball gets passed to the new “it”
and the game continues
Variation:
You can make the play area smaller, and have fewer hula hoops to make it more difficult

Page | 122
3rd-6th+ I C Ad,De L1

Page | 123
Joey Roundup
Group Size: 10-35
Age Group: 1st-6th+ grades
Length of Activity: 10-20 minutes
Developmental Goals: To develop body and special awareness
Skills Practiced: Evasion, hopping, safe tagging, and endurance
Equipment Needed: 4 cones (more if there are no lines or boundaries present i.e. basketball court)
Set Up: Designate a large rectangular play area with clear boundaries with a small square inside the
middle of the rectangle.
Before You Start:
Demonstrate safe tagging
Review where to go if one gets tagged
Demonstrate hopping technique
Choose one or two volunteers (depending on group size) to be the Flyer or Boomer
Split players onto two teams to start at each side of the rectangular play area
How to Play:
The object is for the Joeys (baby kangaroos) to hop past momma or poppa kangaroo
(Flyer/Boomer) and attempt to reach the other side of the play area without being tagged
Flyers (female) and Boomers (male) are able to run while all Joeys must hop
If a Joey gets tagged safely in the appropriate place, then he/she must now join the Flyers and
Boomers in rounding up the rest of the Joeys
Variation:
All players must hop including The Flyer or Boomer
Alternate Name of the Game:
Chickens and Hen
1st-6th+ I Ad,De L1

Page | 124
Dinosaur Park
Group Size: 10-30
Age Group: K-5th grades
Length of Activity: 10-15 minutes
Developmental Goals: To develop active listening skills and a sense of boundaries
Skills Practiced: Evasion, running, safe tagging, and spatial awareness
Equipment Needed: One ball
Set Up: Designate a clear playing area, designate a ‘Dinosaur’s Belly’ outside the playing area
Before You Start:
Choose a few volunteers to be dinosaurs and assign dinosaur names to these volunteers,
(tagasaurus, danceasaurus, jumping jackasaurus etc.)
Review safe tagging techniques and consequences for not doing so.
Make sure students know where the Dinosaur’s Belly is and how to get back into the game.
How to Play:
The game starts with a toss of the ball to one of the dinosaurs.
Dinosaurs are supposed to pass the ball to one another. They are the only ones allowed to touch
the ball.
The rest of the students are cave people, and they have to act out the movement/command of
whichever dinosaur has the ball at that, ie. dancing or jumping jacks.
If the cave people are caught not following the movement, or are tagged by the ‘tagasaurus’, they
then get eaten by the dinosaur and have to go to the Dinosaur’s Belly.
The cave people can be freed from the belly only if they chant the words “Drop that ball” and
then the dinosaur accidentally or purposefully (depending on how packed the belly is) drops the
ball.
After a few minutes, assign new dinosaurs for a new round and ask them to create their own
dinosaur name this time.
Variation(s):
Only allow a dinosaur to hold the ball for 5 seconds at a time. This gets the cave people moving
quicker.
For the hearing impaired, you could incorporate visual cues or a movement for “Drop that ball”.
K-5th I De L1
Page | 125
Magic Tag
Group Size: 15-30
Age Group: K-3rd grades
Length of Activity: 10 minutes
Developmental Goal: To develop cooperation
Skills Practiced: Agility, evasion and safe tagging
Equipment Needed: None
Set Up: Designate a large play area with clear boundaries that has room for students to run
Before You Start:
Demonstrate safe tagging:
Light touch, like butterfly wings, on the shoulder
Unsafe tags: hard contact that might cause the person being tagged to fall
Demonstrate that when you get tagged you turn into a magic wand.
Demonstrate how you turn the magic wand back into a person.
Designate 3 magicians to start the game.
Review the boundaries and the consequence for going outside them (you automatically become a
magic wand)
How to Play:
The object of the game is to avoid being tagged by the magicians who are trying to turn everyone
into magic wands.
If you get tagged by the magician you turn into a magic wand and freeze.
You stay a magic wand until two people join hands creating a circle around you and say
“Abracadabra!” to undo the spell.
If you are not tagged you are avoiding the magicians and undoing the spell for the magic wands.
Rotate the magicians so that everyone has a chance to be the magician.
Variations:
You can make undoing the magic wand sillier with a dance and a song.
Pre-K: Instead of joining hands to create a circle around a magic wand, two students must simply
shake hands and say the magic word, abracadabra, to undo the spell.
K-3rd I N Ad L1

Page | 126
Maze Tag
Group Size: 20-40
Age Group: 2nd-5th grades
Length of Activity: 10 minutes
Developmental Goal: To develop strategic thinking
Skills Practiced: Spatial awareness, evasion, safe tagging and agility
Equipment Needed: As many cones as students
Set Up: Open area
Before You Start:
Demonstrate safe tagging:
Light touch, like butterfly wings on the shoulder
Unsafe tags: hard contact that might cause the person being tagged to fall
Set up all the cones in a grid formation (i.e. in a square or rectangle with cones an equal distance
away from each other).
Use enough cones for all the students except the tagger and the runner.
Choose one student to start as the tagger and one to start as the runner.
How to Play:
Have all students other than the tagger and runner stand by a cone in the maze.
On the leader’s signal, the tagger starts trying to tag the runner.
To become part of the maze and avoid being tagged, the runner taps the shoulder of a student in
the maze, and takes his/her place by the cone.
That student now becomes the runner, until s/he taps another students’ shoulder.
If a student gets tagged before getting into the maze, s/he is now the tagger.
Variation(s):
If the group is more advanced, eliminate the cones and have students hold their space in the maze
without a visual aid.
When the leader calls “Switch”, the runner and tagger change rolls; the tagger becomes the runner
and the runner is now the tagger.
2nd-5th I L1

Page | 127
Move Your Feet
Group Size: 10 to 30
Age Group: K-3rd grades
Length of Activity: 5-10 minutes
Developmental Goals: To develop hand-eye and eye-foot coordination
Skills Practiced: Running, evasion, agility, throwing at a small target, throwing low for dodgeball
Equipment Needed: 3 or 4 dodgeballs
Set Up: Mark off a large rectangular area in which all of the students in your group may run safely.
Before You Start:
Review the boundaries of the game.
Demonstrate how taggers use the ball: throw the ball low so that it hits the runner on the shoe.
Choose quiet listeners to be taggers.
Switch taggers every few minutes.
Explain where runners go if the ball hits their foot (to a designated space to do a certain number
of jumping jacks, toe touches, or an exercise of your choice)
Remind taggers that after they throw the ball they must go get it to throw again.
Reinforce that runners do not want to be touched by the ball; if a ball rolls by them they cannot
kick it nor can they pick it up!
How to Play:
When the game begins, taggers try to throw the ball at the runners’ feet.
Both taggers and runners may move anywhere within the boundaries.
The ball may come from any side so runners must be very alert!
Variation(s):
Increase the number of balls and taggers (makes the game more difficult)
Tell taggers that they must roll the ball at the runners’ feet (makes the game easier to play for
kindergartners)
Alternate Name: Foot Tag
K-3rd I Ad,De,Ed L1
Page | 128
Odds and Evens Tag
Group Size: 10 -30
Age Group: 1st-5th grades
Length of Activity: 15-20 minutes
Developmental Goals: To develop problem-solving, cooperation, teamwork, conflict resolution, strategic
thinking, number sense, and math skills
Skills Practiced: Running, evasion, endurance, Ro-Sham-Bo, safe tagging, reflexes, and observation
Equipment Needed: None
Set Up: This game is most easily played in a gym or a square space, or outside with two lines of cones on
the far ends of the playing area.
Before You Start:
Introduce the concept of odd and even numbers.
Split the group into two teams and name one the even team and one the odd team.
Review boundaries.
Demonstrate safe tagging.
How to Play:
The game is played by both teams walking into the middle of the playing area in a side-by-side
line, facing the opposite team.
The leader calls out a math problem. If the answer is odd, then the odd team chases the even team
back to their side, and vice versa.
If members from the even team can reach their side or safe area without being tagged by a
member of the odd team, and vice versa, they are safe. However, if you get tagged before you
reach the safe area then you become a member of the other team.
The game concludes when all players are on one team.
Variation(s):
The math problems can change based on the age of students. If playing with younger students,
call out a single number, and students run or chase based on whether it’s odd or even. For older
students, use more challenging math problems.
1st-5th I N L2
Page | 129
Off the Ground Tag
Group Size: 10-30
Age Group: preK-6th+ grades
Length of Activity: 10 minutes
Developmental Goal: To develop eye-foot coordination
Skills Practiced: Evasion, awareness, safe tagging and running
Equipment Needed: Play area with curbs or benches or other areas to step off the ground.
Set Up: None
Before You Start:
Designate a large playing area
Demonstrate safe tagging:
Light touch, like butterfly wings on the shoulder
Unsafe tags: hard contact that might cause the person being tagged to fall
Demonstrate what is considered “off the ground”
How to Play:
Designate a chaser.
During the game the chaser cannot tag another player if he or she is not on the ground (such as
standing on a bench or curb).
A tagged player then joins the chaser until there are a few players left
Variation:
Players are safe if they are standing on a designated surface such as painted lines or anything
green.
pK-6th+ I N C Ad,De L1

Page | 130
Pacman Tag
Group Size: 10-30
Age Group: K-5th grades
Length of Activity: 10 minutes
Developmental Goals: To develop evasion skills and strategy.
Skills Practiced: Evasion, safe tagging, boundary awareness
Equipment Needed: None (or tape, chalk, or cones if no lines are available)
Set Up: Designate a safe playing area large enough to run in with connected lines on the ground (use gym
if available)
Before You Start:
● Demonstrate safe tagging:
○ Light touch, like butterfly wings, on back or shoulder
○ Unsafe tags: hard contact that might cause the person being tagged to fall
● Review the lines on the ground
● Explain the signal for when the game will start and end
● Designate a start place for tagger(s)
How to Play:
● Select one or two students depending on the group and area size to be the tagger or “pac
person/people”
● The object is to avoid being tagged by a pac person by running ONLY along the lines on the
ground.
● A pac person can also only run along the lines on the ground
● A runner may not jump from line to line (i.e. on a basketball court, students may not jump from
top of the key to the free throw line, etc.)
● If a student is tagged, they sit down on the line where they were tagged and become a barrier. No
runners may pass by a sitting student, but a pac person can pass.
● The game continues until there are only one or two students left or until all students have been
tagged.
Variation(s):
Allow students who are sitting to be additional sitting taggers and switch places with a running
student if they tag them while sitting.
Add additional pac people to make the game more difficult for older students.
K-5th I N Ad,Au,Cp,De,Ed L2

Page | 131
Shout Tag
Group Size: 10-30
Age Group: preK-6th+ grades
Length of Activity: 10 minutes
Developmental Goals: To develop body and spatial awareness and listening
Skills Practiced: Evasion, agility, safe tagging and running
Equipment Needed: None
Set Up: Designate a large play area with clear boundaries that has room for students to run and enough
items to be used as safe zones
Before You Start:
Demonstrate safe tagging:
Light touch, like butterfly wings on the shoulder
Unsafe tags: hard contact that might cause the person being tagged to fall
Review what to do when you get tagged
How to Play:
Designate a person who is “it”.
The person who is “it” shouts out something that the other players must touch to be safe from
being tagged. For example: if “metal!” was shouted the other players must touch something
nearby that is metal (fence, car, etc.). Others ideas to be shouted can include colors, other
materials, shapes, etc.
Only one person can be safe at the same place at a time.
If tagged then join the original person who is “it” and jointly decide on another thing to shout.
Variation:
Change the number of players that can be at safe zone at a time
pK-6th+ I Ad,De L1

Page | 132
Statue Tag
Group Size: 5-35
Age Group: K-2nd grades
Length of Activity: 5 minutes
Developmental Goals: To develop shape identification and verbal communication
Skills Practiced: Running, evasion, safe tagging, freezing and body awareness
Equipment Needed: None
Set Up: Set up clear boundaries for play area. For smaller groups the play area needs to be smaller.
Before You Start:
Review body shapes-wide, narrow, rounded, twisted, crooked, small, tall, pointed, flat and so on
with the students.
Show students how to freeze versus moving and let them practice. Have a flag or a jersey for the
person who will be “it”.
Demonstrate safe tagging:
Light touch, like butterfly wings, on the back or shoulder.
Unsafe tags: hard contact that might cause the person being tagged to fall.
Review what to do when tagged, and what to do when you go outside the boundary, being careful
not to run into other classmates.
How to Play:
Assign a student to be “it” and put the jersey or flag on them.
Students that go outside the boundaries become frozen.
Be sure all students know who is “it”.
Change the shape in which students must freeze as every round.
Variation(s):
Students can become unfrozen through a particular action by another unfrozen player, i.e. when
tapped on the shoulder.
For larger groups the leader can choose more people to be “it”.
Vary the play area or have a time limit for taggers to freeze everyone as an added challenge.
K-2nd I N Ad,De L1

Page | 133
Toe Touch Tag
Group Size: 10-30
Age Group: 2nd-5th grades
Length of Activity: 10-15 minutes
Developmental Goals: To develop hand-eye coordination, accuracy, teamwork, cooperation, verbal
communication and strategic thinking
Skills Practiced: Running, evading, throwing/sliding, spatial awareness
Equipment Needed: Bean bags, cones or tape
Set Up: Divide the playing field in half and designate two small “zones” on both sides to hold people
who are tagged.
Before You Start:
Divide students into two teams
Make sure all students understand all rules and know where the boundaries are located
Demonstrate how to safely slide the bean bag to get your opponent out
How to Play:
Each team tries to slide their bean bags to the other team’s side
To get people out, you must hit an opponent’s foot with a bean bag
If you are hit in the foot with a bean bag, you go to your opponent’s “jail” zone
Teammates can free each other from jail if they can slide the bean bag into the jail zone
You can block your opponent from getting a bean bag into the jail zone with your hands , but you
may not sit down to block
Variation(s):
If you do not have a surface where the bean bag can slide easily, students can lob the bean bag.
Students would then go to jail if they were hit from the knee down. Also, instead of having the
team slide the bean bag into the jail, you can have a crate next to the jail that they must lob it into.
2nd-5th I Ad,De,Ed L2

Page | 134
Triangle Tag
Group Size: 4 -80
Age Group: 2nd -5th grades
Length of Activity: 5 minutes
Developmental Goals: To develop strategic thinking and verbal communication
Skills Practiced: Evasion, teamwork and safe tagging.
Equipment Needed: None
Set Up: Designate a clear playing area
Before You Start:
Divide students into groups of four with three of the four holding hands in a circle.
Help players choose one of the three players holding hands to be the “runner”, the person to be
tagged.
Demonstrate safe tagging:
Light touch, like butterfly wings, on the shoulder.
Unsafe tags: hard contact that might cause the person being tagged to fall.
How to Play:
The player outside the circle is the “tagger”, trying to tag the runner.
The other two players holding hands in the circle will help to protect the designated runner by
moving the circle in different directions.
The tagger cannot go inside the circle and s/he cannot lean on the arms of the people holding
hands. Once the tagger has tagged the runner, the positions change.
Keep an eye on the play and make sure groups are changing positions.
Variation:
Tornado Tag: Have the two players who are protecting the runner keep their eyes closed.
2nd-5th I N M C Ad,De L1

Page | 135
Watch Your Back - Everybody’s It - Banana Tag
This game is so popular that it goes by all three names.
Group Size: 15-30
Age Group: K-5th grades
Length of Activity: 10-15 minutes
Developmental Goal: To develop memorization skills
Skills Practiced: Evasion, spatial awareness, safe tagging and stamina.
Equipment Needed: None
Set Up: Designate a large play area with clear boundaries
Before You Start:
Demonstrate safe tagging:
Light touch, like butterfly wings, on the shoulder
Unsafe tags: hard contact that might cause the person being tagged to fall
Review the boundaries and the consequence for going outside them (you automatically have to
get on one knee)
How to Play:
The object of the game is to tag as many people as you can without getting tagged yourself
If you do get tagged you take a mental picture of who tagged you and then drop one knee and
freeze.
When the individual who tagged you gets tagged you can get up and start tagging again.
Players must be honest and take a knee if tagged.
Mid-Point Question:
Are people remembering who tagged them?
Variation(s):
You can make the play area smaller to make it more difficult.
You can make the students skip, hop, act like their favorite animal while tagging and evading.
K-5th I N Ad,De L1

Page | 136
Where Did It Go?
Group Size: 10-20
Age Group: preK-6th+ grades
Length of Activity: 10 minutes
Developmental Goal: To develop listening to directions
Skills Practiced: Agility, evasion, awareness, safe tagging and running
Equipment Needed: None
Set Up: Designate seeking/hiding area and a base
Before You Start:
Demonstrate safe tagging:
Light touch, like butterfly wings on the shoulder
Unsafe tags: hard contact that might cause the person being tagged to fall
How to Play:
One person is designated as the person who is “it” and hides away from the group.
The rest of the players stay at the designated “base” and sing “tell me where to go, tell me where
to go...” for 15 seconds.
Then players go and search for the person who is “it”.
Whoever finds the ‘it’ person hiding yells “It went over here!” and all the players away from base
must run back to base before being tagged.
Whoever was tagged becomes the next person to hide.
pK-6th+ I N L1

Page | 137
Where the Wild Things Are
Group Size: 4-30 students
Age Group: K-5th grades
Length of Activity: 10 minutes
Developmental Goals: To develop eye-hand coordination, creative thinking, and a sense of boundaries.
Skills Practiced: Safe tagging and boundary awareness
Equipment Needed: A large playing area and a jersey to identify Max
Set Up: Have all of the students line up on one of the boundaries. Select one student to be “Max.”
Before You Start:
Review safe, butterfly tagging
Identify the boundaries
Review a quick version of “Where the Wild Things Are” - ask students questions about the book.
Review how Wild Things act (with their terrible teeth gnarling, their terrible claws showing, and
their terrible eyes rolling).
How to Play:
King/Queen Max has arrived on a mysterious island filled with random creatures (who are
moving around the island however you wish – hopping, running, skipping, etc.).
If Max tags a creature, s/he goes to the boundary and moves around the outside of the playing
area acting like a Wild Thing.
Students also become Wild Things if they go outside of the boundary before being tagged.
Variation:
Players could start out as Wild Things and can become tame creatures under the leadership of
Max when tagged. Tame creatures can then link arms to create a team, similar to blob tag.
K-5th I L1

Page | 138
“Who Let the Dogs Out?”
Group Size: 5-50
Age Group: 1st-5th grades
Length of Activity: each round = 5 minutes
Developmental Goals: To help kids gain a better understanding of spatial awareness and increase motor
function. Kids will also work on multitasking and good sporting behavior.
Skills Practiced: Running, safe tagging, honesty
Equipment Needed: cones (# depends on however many “doghouses” you want to have)
Set Up: Make sure you have a large open space that is safe for running
Before You Start:
Pick 4 students to be the “dogs”
Give each “dog” a cone and ask them to spread out and place their cone in a spot which will
become their “doghouse”
Make sure all students know which “doghouse” belongs to which “dog”
Remind kids how to tag safely (butterfly tag)
Review boundary lines for the game
How to Play:
Each “dog” is a tagger. Everyone else is a “cat” and is trying not to get caught by a “dog”
If a “cat” gets tagged, then that student must go to the doghouse belonging to the “dog” that
tagged them (could be a different color cone).
Each “dog” is trying to tag as many “cats” as he/she can
A round is over when all “cats” have been sent to a “doghouse”
Variation(s):
The more kids you have, the more “dogs” you can choose
Instead of running: walk, walk heel/toe, animal walk, etc.
Alternate Names of the Game:
Cats & Dogs; Dog Pound
1st-5th I Ad,De L1

Page | 139
Grumps Island
Group Size: Large group (10 or more)
Age Group: preK-6th+ grades
Length of Activity: 10 minutes or more
Development Goal: To develop teamwork and cooperation
Skills Practiced: Running, safe tagging, evasion
Equipment Needed: Chalk or cones if outside
Set Up: Can be played outside or in a gym. This game is easiest played on a basketball court with end
lines and a center circle. If outside use chalk or cones to create boundaries
Before You Start:
Demonstrate safe tagging
Explain the boundaries including the lines they run between and the center circle (island)
Explain that the two end lines are the shores and the circle is an island with everything else as the
ocean.
How to Play:
The students must attempt to go across the ocean, but it is “too far to swim without a break” so
students must stop at the island on their way.
The Island has a Grump on it that will try and tag the students as they step onto his/her island.
Students must put at least one foot onto the island before they can go across to the other side.
If students get tagged, they become Grumps with her/him.
Grumps must keep one foot on the island at all times because Grumps are too old to swim.
If students successfully put one foot on the island and get to the other side, they should wait there
until the next round when they will swim back.
You may have to start counting down because students will take a long time trying to get onto the
island.
Variation(s):
Students must actually pretend like they are swimming by doing a swim stroke across the water.
Grumps can hold hands and make a chain to stretch off of the island and tag others (only 3-5th)
pK-6th+ I Ad,De L1

Page | 140
Shrink Tag
Group Size: Large group (10 or more)
Age Group: 1st-6th+ grades
Length of Activity: 10 minutes or more
Development Goal: To develop spatial awareness
Skills Practiced: Evasion, spatial awareness, safe tagging, and running endurance
Equipment: Cones, chalk, tape, jump ropes or pre-existing lines to mark boundaries
Set Up: Can be played outside or in a gym. Designate a large play area with clear boundaries to separate
the different zones. Zone 1: Giant square or rectangle. Zone 2: Large circle or oval area inside Zone 1.
Zone 3: Small circle inside Zone 2.
Before You Start:
Demonstrate safe tagging: Light touch, like butterfly wings, on the shoulder or the back
Review how to play Ro-Sham-Bo
Explain the game and show the boundaries. Make sure students know they can only tag or play
Ro-Sham-Bo with students in the same zone.
How to Play:
In the game everyone is “it” - you can tag anybody, and anybody can tag you. Everyone starts in
Zone 1.
The object of the game is to tag as many people as you can without getting tagged yourself while
you are in Zone 1.
If you get tagged in Zone 1, you need to enter Zone 2.
Everyone in Zone 2 can tag each other and be tagged.
If you get tagged in Zone 2, you need to enter Zone 3. If you tag someone in Zone 2, you get to
go back to Zone 1.
Zone 3 is not a tag zone, but a Ro-Sham-Bo Zone. When in Zone 3 you will need to play Ro-
Sham-Bo with someone else in Zone 3 to get back in Zone 2.
1st-6th+ I Ad,Au,Cp,De L1
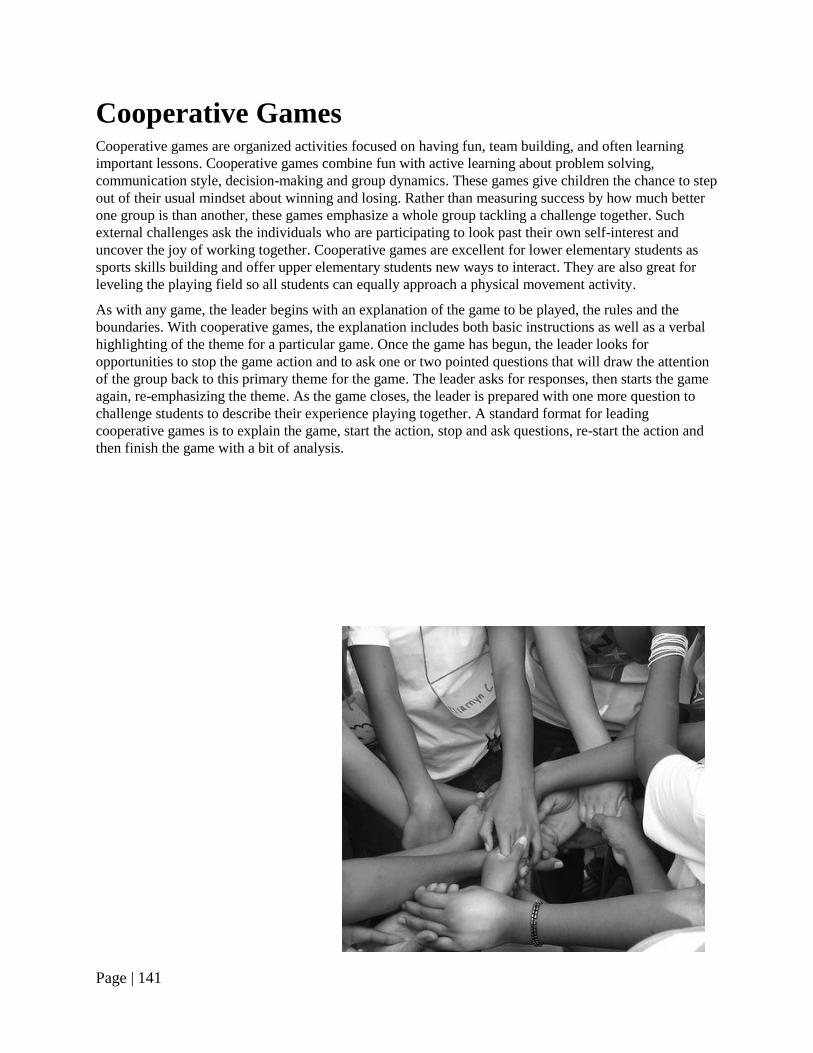
Page | 141
Cooperative Games Cooperative games are organized activities focused on having fun, team building, and often learning
important lessons. Cooperative games combine fun with active learning about problem solving,
communication style, decision-making and group dynamics. These games give children the chance to step
out of their usual mindset about winning and losing. Rather than measuring success by how much better
one group is than another, these games emphasize a whole group tackling a challenge together. Such
external challenges ask the individuals who are participating to look past their own self-interest and
uncover the joy of working together. Cooperative games are excellent for lower elementary students as
sports skills building and offer upper elementary students new ways to interact. They are also great for
leveling the playing field so all students can equally approach a physical movement activity.
As with any game, the leader begins with an explanation of the game to be played, the rules and the
boundaries. With cooperative games, the explanation includes both basic instructions as well as a verbal
highlighting of the theme for a particular game. Once the game has begun, the leader looks for
opportunities to stop the game action and to ask one or two pointed questions that will draw the attention
of the group back to this primary theme for the game. The leader asks for responses, then starts the game
again, re-emphasizing the theme. As the game closes, the leader is prepared with one more question to
challenge students to describe their experience playing together. A standard format for leading
cooperative games is to explain the game, start the action, stop and ask questions, re-start the action and
then finish the game with a bit of analysis.

Page | 142
All Tangled Up
Group Size: 15-30
Age Group: 2nd -6th+ grades
Length of Activity: 15 minutes
Developmental Goals: To develop verbal communication, cooperation, strategic thinking and problem
solving skills.
Skills Practiced: Body awareness and following directions
Equipment Needed: None
Set Up: None
Before You Start:
Divide the students into small groups of up to twelve people and have them form a tight circle.
How to Play:
The students take one hand and grab the hand of anyone in the group except the people standing
next to them.
The students take their other hand and grab the hand of anyone in the group except the people
standing next to them and the person they are already holding hands with.
The challenge is to get untangled without letting go of each other’s hands. Emphasize that getting
untangled requires a lot of communication and cooperation.
Mid-point questions:
Is there anything about this game that is particularly difficult?
Has anyone discovered any secrets that might help the rest of the group get untangled?
Closing questions:
Was this game difficult?
How did people feel when they found it hard to get untangled?
Did anyone get tempted to cheat and just let go of a hand?
Shall we try the game again and time ourselves to see how long it takes to get untangled?
Variation(s):
Make the groups larger.
Add restrictions to their communication methods.
2nd-6th+ I N C L2

Page | 143
Ants on a Log
Group Size: 10-20
Age Group: K-5th grades
Length of Activity: 10 minutes
Developmental Goals: To develop strategic thinking and cooperation
Skills Practiced: Balance, agility and body awareness
Equipment Needed: A designated line for the play
Set Up: None
Before You Start:
Line up the students on a line.
Number the students 1-10 (or to whatever number depending on how many students are playing).
How to Play:
Once the students are in line in specific order, the object of the game is to get the whole group to
switch positions on the line without falling off the line.
If student #1 begins on the left end of the line, he or she should end up on the right end of the
line.
The order of the students should remain exactly how it was before, only in reverse.
Mid-point questions:
What are some ideas the group has discovered to help stay on the line?
Is this game easy or hard?
Closing Questions:
What is this game trying to teach?
Can anyone think of a way to make this game better or more interesting?
Variation(s):
Split the students into two groups.
They should be standing on the line facing the other group.
The object is to have the two groups switch places, staying in the same order.
Vary the width of the line with a wider line being easier or vary the distance of the playing area
from the ground to add a challenge.
K-5th I C De L1

Page | 144
Back-to-Back Get Up
Group Size: 10-40
Age Group: 3rd-6th+ grades
Length of Activity: 10 minutes
Developmental Goals: To develop verbal communication, cooperation and strategic thinking
Skills Practiced: Balance and gross muscle control
Equipment Needed: None
Set Up: None
Before You Start:
Divide students into pairs
Have students stand back to back
How to Play:
Have partners cooperatively press their backs together and try to sit down, slowly
Once everyone sits down, have them try to stand back up still pressing backs together and moving
their feet close to their bottoms
Variation:
Increase the size of the group working together
3rd-6th+ I N C Ad,Bl,De L1

Page | 145
Birds of Prey
Group Size: 10-40
Age Group: K-5th grades
Length of Activity: 10 minutes
Developmental Goals: To develop cooperation
and teamwork.
Skills Practiced: Nonverbal communication,
awareness and reflexes
Equipment Needed: A bandana and a quarter
Set Up: None
Before You Start:
Divide the students into two equal teams.
Have each team get into two single file lines holding hands, with the teams facing each other.
The leader stands at the front between the two lines.
Place the bandana on the ground at the rear of the lines directly in between the two lines.
Remind the students that they must keep their eyes shut and remain silent.
How to Play:
Flip a quarter. Only the first players in each line can watch to see if it is heads or tails.
The rest of the players must have their eyes closed.
If the quarter shows ‘heads,’ the players at the front send a squeeze (or pulse) down the line,
which should reach the end of the line.
When the squeeze reaches the back player, he or she opens his/her eyes and tries to pick up the
bandana first.
Whichever team wins the bandana, the player in the front moves to the back of the line and the
players rotate forward.
If the coin is tails, no action happens. The leader just flips the coin again.
The game ends when the player who began the game at the front of the line reaches the front
again.
Closing Questions:
What is this game trying to teach?
Did anyone learn any secrets during the course of the game to make it go more smoothly?
What positions did people like the best?
Variation(s):
Play sitting down.
Have a different signal to pass back.
If a player sends a pulse when the leader does not show heads, the player at the back returns to
the front of the line, making the game more challenging and longer.
Eyes closed
Eyes closed
Page | 146
Blindfold Building
Group Size: 4-30
Age Group: 5th-6th+ grades
Length of Activity 15 minutes
Developmental Goals: To develop communication, leadership and problem-solving skills.
Skills Practiced: Following directions and spatial awareness
Equipment Needed: A long enough rope for every person to hold on with two hands (can tie several
together), and a blindfold for each person.
Before You Start:
Help the group pick a representative who will be the only one who can ask the three questions
during the game.
Have your group begin in a straight line, blindfold them and lay a rope out by their feet.
Make sure everyone understands the game and its rules.
How to Play:
On your signal the students attempt to pick up the rope at their feet.
Hands must remain on the rope; they may not let go of the rope for more than 2 seconds.
Instruct the students to form a shape (square, triangle, circle, etc.).
Through their representative students may ask the leader three questions during the game.
The leader will repeat the question so that everyone can hear and then give the answer.
When the group feels they have completed the task have them drop the rope at their feet and take
a step back.
Ask the group if they think they have successfully made their shape.
After you get all of their answers, have them remove their blindfolds.
Mid-point Questions:
What are the challenges of this game so far?
Has anyone discovered anything that might help anyone else?
What could you do to make the game move more smoothly?
Closing Questions:
What are the skills this game is trying to teach?
Did you learn anything about yourself while playing this game?
What might you do to change the game to make it better?
Variation(s):
For more advanced groups place the rope bunched up about 10 feet away from the group and
have them find the rope first, then form their shape.
Give the students a time limit.
K-5th I Bl,De L2 5th-6th+ I C Cp,De L3

Page | 147
Blindfold Pick Up
Group Size: 10-30
Age Group: 1st-5th grades
Length of Activity: 10-15 minutes
Developmental Goals: To develop verbal communication, leadership, sound recognition, teamwork,
active listening, and voice identification.
Skills Practiced: Following directions, spatial awareness, balance, giving clear directions
Equipment Needed: 4 hula hoops, lots of “pickable” items (small flat cones, pinnies, flags, softballs,
bean bags, etc.)
Set Up: Place a hula hoop at each corner of your playing area. Scatter all of the pickable items all over
the floor.
Before You Start:
Partner up the class.
Ro-Sham-Bo to see who is “blindfolded” first (To blindfold oneself, simply have students close
their eyes and cover them with one hand).
Have partners clarify their voices to each other. Mention that voice confusion can lead to
accidents.
Stress that the game is much more fun and fair if you are blindfolded when you are supposed to
be.
How to Play:
One partner is blindfolded; the other partner is the communicator. Start the game after
mentioning the rules.
Using vocal commands (simple or creative), the communicator needs to guide his/her blindfolded
partner to a pickable item. The communicator CANNOT touch his/her blindfolded partner (Use
voice only. Can follow blindfolded partner.)
Once the blindfolded partner is led to a pickable item, the communicator will then direct the
blindfolded partner to pick up the item, bring it to a hula hoop (home base), and drop it inside of
the hula hoop. The blindfolded partner keeps his/her blindfold on at all times.
After the blindfolded partner drops the pickable item inside the home base, the partners switch
roles (blindfolded partner now becomes the communicator, communicator becomes the
blindfolded partner). When that partner drops another item into a home base, the partners switch
roles again.
The game ends when all of the pickable items are inside the home bases.
Variation(s):
With 2-4 different color hula hoops, split the partners into 2-4 teams.
For more advanced classes, add some obstacles (tables, chairs, etc.) to require the communicators
to be more vocal and clear with their directions. If played indoors, classrooms and cafeterias
provide natural obstacles.
1st-5th I C Ad L1

Page | 148
Bridge Ball
Group Size: 10-30 players Age Group: 2nd-5th grades
Length of Activity: 10-15 minutes
Developmental Goals: To improve hand-eye coordination and strategic play
Skills Practiced: Hand-eye coordination, blocking
Equipment Needed: 1 or 2 playground balls
Set Up: Have students stand in a circle, foot to foot. Their feet should be slightly more than shoulder
width apart, forming a “bridge.” Have students get into ready position with their hands on their knees.
Before You Start:
Make sure students know not to reach in front of others in order to get the ball!
How to Play:
The object of the game is for players to try to hit the ball between other players’ bridges and
block balls from coming through their own bridges. Players get a letter in the word “bridge” each
time the ball goes through their legs. Once a player has spelled bridge, the game restarts.
Players may only hit the ball with an open palm (as with 4-square and monkey soccer). No
throwing.
They may catch the ball if it is head height. They must then hit the ball back into play.
If a ball goes outside the circle, the player closest to it when it went out may go and get it.
Variation(s):
Instead of spelling “bridge”, players can turn around and play backwards once the ball has gone
through their legs (once, twice or however many times you decide)..
Add a ball or two once students know how to play.
Put a player in the middle of the circle to keep the game moving faster.
2nd-5th I Ad,Au,Bl,Cp,De,Ed L1

Page | 149
Bubbles
Group Size: 20-30
Age Group: K-6th+ grades
Length of Activity: 10 minutes
Developmental Goals: To develop cooperation skills and eye-hand coordination.
Skills Practiced: Awareness and gross muscle control
Equipment Needed: One or two beach balls
Set Up: None
Before You Start:
Spread out students in an open playing area sitting on the ground.
Talk about safety and demonstrate how to avoid contact with each other.
How to Play:
The object of the game is to keep the ball up as long as possible by hitting the ball in the air.
Students should call the ball by saying “I got it!”
Students can only hit the ball one time in a row.
Students must remain on the ground.
They can use any part of their bodies to hit the ball.
To challenge them, talk about setting a school record.
Variation(s):
Add another beach ball.
For more advanced groups, add on more challenges such as going in sequential order and/or
seeing how many hits they can get in one minute without dropping the ball or going out of order.
Once students understand the concept of positions, being responsible for the area around them
and not intruding on the space of other students, you may allow them to stand up and play.
K-6th+ I C Au,De L1

Page | 150
Castle Ball
Group Size: 10-20
Age Group: 3rd-6th+ grades
Length of Activity: 10 minutes
Developmental Goal: To practice working together as a team while playing both offense and defense.
Skills Practiced: Running, accuracy, hand-eye coordination and spatial awareness
Equipment Needed: colored jerseys, cones, hula hoops and soft foam balls
Set Up: Designate a large play area with clear boundaries that has room for students to run. Castle Ball is
like building a “house of cards” out of 6 hula hoops (or cones). The structure will stand on its own but
will fall when a ball strikes any part of it. To build the castle teams place one hoop on the floor, four
hoops form the sides, and on the top.
Before You Start:
Split group into 2 teams
Use cones to delineate boundaries
How to Play:
Try to knock down the castle of the other team, while protecting your own.
One point is awarded each time a castle is knocked down, even if a player bumps into his/her own
castle.
Castles that are knocked down should be set up as quickly as possible so players can continue
playing.
The game is separated by a center line, which players cannot cross to retrieve a ball.
It is also best to have a throwing line inside each team’s area to make sure all balls are thrown
from the same distance.
Teams are not to throw at castles any closer than that line.
Players should be encouraged to pass the ball to teammates to surprise the defenders or to make
sure everyone gets to throw the ball.
In defending the castle, players should be alert, on the balls of their feet, and cooperate with their
teammates to form strategies that will best defend their “castles”.
Once a castle is knocked down a new round is started.
Variation(s):
Depending on the space available have many games going on at the same time. It works best
when teams are 3-on-3 and no more than 4-on-4.
Add an additional ball
Alternate Name of the Game: Sandcastle
3rd-6th+ I L2

Page | 151
Chair Game
Group Size: 6-20
Age Group: 4th-6th+grades
Length of Activity: 10-20 minutes
Developmental Goals: To develop teamwork, nonverbal communication, and strategic thinking
Skills Practiced: Agility, evasion, and body and spatial awareness
Equipment Needed: An equal number of chairs to the number of participants
Set Up: Inside, have all students bring a chair and arrange them in a close circle with no gaps.
Before You Start:
Review safety rules (no diving, no head first lunges, one person to a chair)
How to Play:
Every participant should start seated in a chair in a circle.
The leader chooses one student to stand in the middle, so one chair is open.
The goal of the person in the middle is to sit in the empty chair.
All seated students must work together to stop the person in the middle from sitting in the open
chair. The person next to the empty seat tries to beat the person in the middle to it by shuffling
over, creating a new empty seat. The person next to the newly-opened seat scoots over too,
and so on.
The game continues until the person in the middle makes it safely to the open seat. The facilitator
then picks someone new to go into the middle.
Variation:
Instead of chairs, have players stand on cones (safer, can be played outdoors).
4th- 6th+ I C L1

Page | 152
Charades Relay
Group Size: 10-30
Age Group: 3rd-6th+ grades
Length of Activity: 10 minutes
Developmental Goals: To develop nonverbal communication, social comfort and teamwork
Skills Practiced: Body awareness and pantomiming
Equipment Needed: None
Set Up: Divide group into 2 or more teams. Have everyone spread out so that they cannot overhear the
surrounding teams
Before You Start:
Review basics of charades. One person acts out a word or phrase without speaking while the team
tries to guess. Show an example to the class. Prepare a list of items from among several
categories (see below).
How to Play:
This game is a charades race and the categories are Fast Food, Electrical Appliances, and Cartoon
Heroes. Teams compete against each other to trying to be the first to guess all items on the list.
To start ask one member from each team to come to you. Whisper the first word into their ear and
return them to their group to being acting it out.
Once a member of the group guesses the word correctly, someone new from that team runs to the
instructor for the next word. No one can come up twice until everyone has acted out an item from
the list.
The new member must tell the instructor the word they just guessed to receive the next word from
the list.
The game is over once a team completes the entire list
Sample List:
1. Superman 2. Curly Fries
3. Storm 4. Blender
5. In-n-Out 6. Blow Dryer
7. Incredible Hulk 8. Dishwasher
9. Milk Shake 10. McNuggets
11. Batman 12. Scooby Doo
13. Ipod 14. KFC
15. Captain America 16. Taco
17. Wii 18. Wonder Woman
19. Onion Rings 20. Computer
Alternate Names: FFEACH
4th-6th+ I C L1

Page | 153
C’mon In and Sit Down
Group Size: 10-30
Age Group: 1st -5th grades
Length of Activity: 10 minutes
Developmental Goal: To build teamwork and cooperation.
Skills Practiced: Verbal communication and strategic thinking
Equipment Needed: None
Set Up: None
Before You Start:
Have students form a circle, holding hands.
Students let go of hands and make a quarter turn to the right so that everyone’s left shoulder is
pointing to the middle of the circle and their eyes are on the back of the person in front of them.
Have the group take a couple of side-steps towards the center of the circle so that everyone is nice
and snug.
Make sure everyone is standing close together and listening for the count of three.
How to Play:
Once everyone is in position, the leader explains that on the count of three everyone should sit
down on the knees of the person behind them.
If it is successful, everyone should be sitting comfortably on someone else’s knees.
Variation:
For older kids, try walking together if the circle is tight. As the challenge gets easier, add more
people to the circle and ask the children if they have any ideas to make it more difficult.
1st-5th+ I N C L2

Page | 154
Crooked Circle
Group Size: 20-30
Age Group: 2nd -5th grades
Length of Activity: 5 minutes
Developmental Goal: Working with a group to meet a challenge.
Skills Practiced: Trust.
Equipment Needed: None.
Set Up: None
Before You Start:
Have students form a circle. Count off by 1s and 2s.
Explain that the game is a challenge and discuss the concept of ‘trust.’
Designate a signal to start.
Make sure students are holding hands and remember their numbers.
Emphasize the importance of holding hands firmly but not painfully.
How to Play:
The students hold hands and when you give the signal, the 1s lean forward and the 2s lean
backward. The challenge is to keep holding hands and get balanced while half the group is
leaning back and the other half forward.
Once the group has managed to balance, bring them back to center and change roles.
If the group has switched roles successfully, challenge them to do it with their eyes shut.
Discuss how ‘trust’ played a role in the game.
Variation(s):
Play it in a straight line with the ends standing straight.
Put bean bags on their heads and challenge the team to not drop any while switching.
2nd-5th I N M C L1

Page | 155
Disco Inferno
Group Size: 10-20
Age Group: 5th-6th+ grades
Length of Activity: 10-15 minutes
Developmental Goal: To have students work together to solve a problem.
Skills Practiced: Team Building, dexterity
Equipment Needed: None
Before You Start:
Have a small group of students hold hands in a straight line, all facing in the same direction.
The person at the end puts their hand up against a wall or holds onto a pole.
How to Play:
The task is for everyone, including the person with their hand around the pole or up against the
wall, to end up with their arms folded across their chest.
None of the students can let go of their hands and the person at the end must keep his/her hand on
the wall or pole.
Give students plenty of time to discuss possible strategies and solutions.
Strategies:
One solution to this problem is that the end person who is free to move, leads the entire group
under the arm of the person attached to the pole or wall. This end person continues to lead the
group under the wall person's arm again and again until everyone has their arms crossed. Finally
the end person turns and faces the opposite direction w/o taking their arm off of the wall (this
crosses their arms).
Another possible solution is to have the person at the end put their inside arm on the wall and
have the rest of the line grab the inside arm of the person next to them.
Alternate Name of the Game: Twisted People
5th-6th+ I N C L2

Page | 156
Dog Chases Its Tail
Group Size: 10-20
Age Group: preK-6th+ grades
Length of Activity: 10 minutes
Developmental Goals: To develop communication, cooperation and teamwork
Skills Practiced: Agility and body awareness
Equipment Needed: Bandana
Set Up: Set up a clearly designated play area
Before You Start:
Have players line up holding each other around the waist. (DO NOT allow kids to hook fingers
through belts or belt loops).
Remind students not to run, only speed walk
Description:
Have the last player tuck a bandana in his or her pocket so that it hangs down like a tail.
Next, the front of the line begins to chase the end of the line, attempting to grab the bandana.
Players in the middle can help or hinder the head or tail, depending on their whims. If the line
breaks, the player who let go must step out, shortening the line.
Variation:
Set up two lines of players, creating two dogs that can chase each other’s tails.
pK-6th+ I Ad,De L1

Page | 157
Dress Me
Group Size: 8-30
Age Group: 2nd-6th+ grades
Length of Activity: 5-10 minutes
Developmental Goals: To develop problem-solving skills, cooperation, teamwork, verbal
communication, and social comfort.
Skills Practiced: Body awareness and gross muscle control
Equipment Needed: Two oversized short-sleeved shirts
Set Up: Two teams of equal number each with a designated area
Before You Start:
Be sure students understand the rules.
How to Play:
Divide students into two groups.
Give each group an oversized T-shirt.
Have one student from each team put the shirt on and then hold hands with another player on
his/her team.
The other members of the team have to then move the shirt from the first player onto the
other. (Eventually they will realize that the shirt must be turned inside out for this to work. It
also might help to have only one or two people transfer the shirt, for example the next players in
line, but the other team members may instruct.) It may be necessary to have someone to hold
down each child’s own shirt so that it does not come over his/her head along with the game shirt.
The player who is now wearing the shirt then takes the hands of a different player and the first
player helps the rest of the team transfer the shirt.
This continues until each member of the team has worn the shirt.
The first team to transfer the shirt onto every member of them team wins.
Variation:
This can be played with just one group instead of competing groups.
2nd-6th+ I C L2

Page | 158
Fox and the Rabbit
Group Size: 20-30
Age Group: K-2nd grades
Length of Activity: 10-15 minutes
Developmental Goals: To develop cooperation and strategic thinking
Skills Practiced: Awareness and tactile development
Equipment Needed: Two balls of different size and/or color
Set Up: None
Before You Start:
Have the group form a circle.
Hand the balls out to two people on opposite sides of the circle.
Designate which ball is the fox and which is the rabbit.
Explain that each ball is like a hot potato and should not be held for more than one second.
How to Play:
The object of the game is for the fox to catch the rabbit.
Both the fox and the rabbit move by being passed (not thrown) around the circle in any direction.
If a student is holding the fox they should pass the ball to the person next to them, whomever is
closer to the rabbit. Those players holding the rabbit should pass to someone farther away from
the fox.
When the fox catches the rabbit start a new round
Variation(s):
For younger groups start, with a Hot Potato warm up, giving them the basic idea of how to
receive the ball and get rid of it quickly.
If the group can’t catch the rabbit, add an extra fox to the game.
Add multiple balls and see if they can cross over each other.
K-2nd I C De,Ed L1
Page | 159
Giants, Wizards, Elves
Group Size: 12-50
Age Group: 3rd -5th grades
Length of Activity: 10 minutes
Developmental Goals: To develop cooperation and group decision-making capacity
Skills Practiced: Verbal communication, quick reflexes, running and safe tagging
Equipment Needed: None
Set Up: Have clearly designated boundaries at the back and the sides of the play area, evenly distanced
from a middle line.
Before You Start:
Demonstrate movement and sound for each main character in the game:
The giant stands up tall with hands raised over the head and says, “Aaargh!”
The wizard stands with one foot in front of the other, arms extended toward the front with the
fingers wiggling and makes the sound, “Hissssss!”
The elves squat down and move from side to side with their arms waving about and make the
sound that comes when you blow air out of your lips.
Have the whole group practice each of the movements and sounds.
Explain which character wins over which: giant wins over wizard, wizard wins over elf, and elf
wins over giant.
Demonstrate safe tagging.
Light touch, like butterfly wings, on the back or shoulder.
Unsafe tags: hard contact that might cause the person being tagged to fall.
Number teams by 1s and 2s and put each team on opposite sides of the middle line.
How to Play:
Each team huddles up on their side of the play area and chooses a first and second choice of a
character to be.
The play begins when each team moves to the middle line and the leader yells, “One, two, three,
what’s it going to be?” Each team does the movement and sound of their first choice. Whichever
team has the dominant character chases the other team back to their rear boundary line.
Anyone who is tagged before getting to that rear line becomes part of the opposite team.
If both teams choose the same first choice, the leader calls out the signal phrase and the teams
change to their second choice. If they choose the same second choice, the teams regroup and pick
two more.
Variation:
Use three different objects, movements, and sounds. Possible options include:
baseball/football/basketball with the sounds, ‘steerike’, ‘huthuthuthut’ and ‘swooooooooosh’ or
Lions, Tigers and Bears with roars, growls and snuffles.
3rd-5th I N Ad,De L2

Page | 160
Hula Hoop Challenge
Group Size: 10-30
Age Group: K-5th grades
Length of Activity: 10 minutes
Developmental Goal: To develop cooperation and teamwork
Skills Practiced: Coordination, body awareness
Equipment Needed: 2 hula hoops
Set Up: None
Before You Start:
Have students form a circle, holding hands.
Demonstrate to the group how to get through the hula hoop without using hands.
Make sure students stay in a circle holding hands.
How to Play:
Place the hula hoop around two people’s interlocked hands.
Explain that the goal of the game is to get the hula hoop all the way around the circle without
anyone letting go of their teammate’s hands.
Closing Questions:
What is the game trying to teach?
Do you think you improved as the group practiced more times?
What was fun about the game?
Were you frustrated at any point during the game?
Variation(s):
Have the group beat a chosen time.
Play with their eyes shut.
Divide group into two circles and have them compete.
Pre-K: Have students stand in a circle with plenty of room between them. Start by walking
around the circle with the hula hoop, helping each student practice going through it. Then set up
the challenge without holding hands, simply going through the hoop, then passing it over to the
next person. After they have done this successfully many times, have them try it holding hands.
Adult should walk along with the hoop, helping students as needed.
K-5th I Ad,Au,Bl,Cp,De,Ed L1

Page | 161
Invent a Game
Group Size: 4-50
Age Group: 3rd -6th+ grades
Length of Activity: 30 minutes
Developmental Goals: To develop creativity and group decision-making capacity.
Skills Practiced: Brainstorming, planning, leadership and creative thinking.
Equipment Needed: A range of sports equipment - hula hoops, balls, cones, ropes, etc.
Set Up: Divide sports equipment up into piles based on the amount of groups playing.
Before You Start:
Divide students into teams and place them with a pile of equipment.
If needed, give groups examples of game ideas to get them started.
Make sure each group has enough room to make up and practice their game.
How to Play:
Students will use all the equipment in their pile to make up their own game.
They need to establish boundaries, rules, equipment use and any other specific information for
their game.
Students choose a name for their game and prepare to teach their game to the other groups.
The groups take turns teaching and playing each of their invented games.
Variation(s):
Change the group size to increase the communication challenge.
Limit the types of equipment to increase the creativity challenge.
3rd-6th+ I C Au,De,Ed L3

Page | 162
Key Punch
Group Size: 6-30
Age Group: 4th-6th+grades
Length of Activity: 20-45 minutes
Developmental Goals: To develop problem-solving, teamwork, eye-foot coordination, and
communication
Skills Practiced: Body and spatial awareness and observation
Equipment Needed: 25 sequentially numbered paper plates (or other number markers) and chalk or tape
to mark off the playing area.
Set Up: Make a 4’ x 6’ (approx.) rectangle with tape or chalk. Place the 25 numbered plates randomly
inside.
Before You Start:
Allow teams a few minutes to strategize after the rules are explained.
How to Play:
Divide group into teams (3 or 4 groups of 5-7 players works best).
Each group has to touch the plates in order from 1-25 as fast as they can. The coach will keep
track of the total time of each attempt. Only one person can be inside the rectangle at a time, and
every member of the team must touch at least one plate each round.
Five second penalties are given each time two people are inside of the rectangle at the same time
and when a plate is touched out of order.
Have each team set a goal time. Time each attempt, alternating between teams, but allow time to
give each team 2-3 attempts. Allow shorter times to strategize between each attempt.
4th-6th+ I L2

Page | 163
Knock Down
Group Size: 10-30
Age Group: 2nd -6th+ grades
Length of Activity: 10-15 minutes
Developmental Goals: To develop strategic thinking, teamwork skills
Skills Practiced: Throwing, catching, spatial awareness
Equipment Needed: 4-10 triangular cones (not the little cones), little cones for a center line, a variety of
dodgeballs (3-5)
Set Up: Create a designated playing area. Place the little cones across the center of the playing area to
separate the 2 teams. About 5 ft. from either end of the boundary lines, place a row of 2-5 large cones
evenly spaced apart
Before You Start:
Split students into even teams; make sure each team knows which side is their side
Review boundary lines, and no crossing of the center line
How to Play:
The object of the game is to knock down all of your opponents’ large cones before they do the
same to yours.
Students may not cross the center line while throwing or to retrieve a ball
Each team is allowed to have one person at EACH cone that protects only that same cone,
however, they are not allowed to touch the cone. They can only deflect the balls from hitting the
cone.
If someone accidently knocks over their own cone, it remains down.
Once all cones are knocked down on one side, the game is over.
Variation(s):
If there are too many players in a small area or the game is going too slowly you can add in the
element of dodgeball.
In addition to knocking over the cones players can also knock out opponents by hitting them with
the ball from the waist down.
o If hit you must step out of the game until someone from your team catches a ball in the
air or until you do 10 jumping jacks, etc.
2nd-6th+ I Ad,Au,De,Ed L2

Page | 164
Knots on a Rope
Group Size: 5- 30
Age Group: 3rd-5th grades
Length of Activity: 10-20 minutes
Developmental Goals: To develop problem-solving, leadership, cooperation, teamwork and strategic
thinking skills.
Skills Practiced: Balance, body awareness and following directions
Equipment Needed: Rope(s)
Set Up: Open area
Before You Start:
Tie several evenly-spaced knots into the rope(s).
Have the students grasp the rope between knots with one hand, spacing themselves evenly.
How to Play:
The object of the game is to get the knots out of the rope, without ever moving or taking the one
hand off of the rope.
Students cannot switch hands.
Variation(s):
After a group has succeeded at the activity, you can increase the difficulty by giving them a
time limit, increasing the number of knots, or making the knots more complicated to untangle.
Blindfold a few members of the group (to enhance verbal communication and teamwork).
3rd-5th I C De L2

Page | 165
Magic Bubble Machine
Group Size: 10-40
Age Group: 3rd - 5th grades
Length of Activity: 10-15 minutes
Developmental Goals: To build cooperation, teamwork and verbal communication
Skills Practiced: Sensory awareness.
Equipment Needed: Bean bags or other soft, squishy items (one per two students), blindfolds
Set Up: A basketball court or similar space
Before You Start:
Pair the students up
Explain that they have been transformed into Magic Bubble Machines! The Magic Bubble
Machine will only work if they act as a team.
One person will be the Bubble Spitter who is blindfolded and cannot see.
The other person is the Driver who must direct the Bubble Spitter where to go and throw
Have each pair decide who will be the Bubble Spitter and who will be the Driver
How to Play:
The object is for the Bubble Spitter to hit other Bubble Spitters with a bubble (bean bag), while
avoiding being hit themselves.
The Driver must direct their Bubble Spitter to help them hit other Bubble Spitters or avoid being
hit. The Bubble Spitter cannot move without being directed by the Driver.
The Driver must also direct the Bubble Spitter to pick up bubbles on the ground.
When a Bubble Spitter is hit, both the Bubble Spitter and the Driver move to the sideline where
they can now see the other Bubble Machines and distract them by also calling out directions!
The game is over when one team remains.
Variation:
Make teams of 4 or 5 people. Each team links up by placing their hands on the shoulder of the
person in front of them. The Driver is the last person in the chain and everyone else is
blindfolded. The Bubble Spitter is the person in the front of the chain.
3rd-5th I L2

Page | 166
Maze Game
Group Size: 12 per maze
Age Group: 2nd -5th grades
Length of Activity: 10 minutes
Developmental Goal: To develop strategic thinking.
Skills Practiced: Problem-solving, communication,
memorization teamwork.
Equipment Needed: One maze per twelve students that is 5’x5’
square, set of markers.
Set Up: Have the maze set up with a designated ‘start’ and ‘end.’
Create a map of the correct path the students must travel.
Before You Start:
Number students 1-12.
Remind students that this is a silent game.
How to Play:
Students must stay silent for the whole game.
Tell students there is a hidden path from the start to the end of the maze.
Point these two spots out.
As a group, their goal is to find the secret path and get everyone from start to end.
Students take turns according to their number and gets a chance to guess where the path is.
When it is their turn, they will step into the maze at the start and begin to choose an adjacent
square - either forward, to the side or diagonal to the one they are standing on.
The student may look to his/her classmates for help.
Classmates may signal silently, but may not use facial expressions:
Yes- by giving a thumbs up,
Maybe- by giving thumbs in the middle or
No- by giving a thumbs down.
If the square they have stepped into is on the path, let them know by saying “Yes.” If it is a
square that is not on the path, tell them “No.” Or use silent signals, too.
Students continue their turn if they are right.
Once they step into an incorrect square, it is the next person’s turn.
As they begin to discover the path, they can mark it with markers to help the rest of the group.
Once they have uncovered the secret path, each person needs to go through from start to end.
Variation(s):
Squares can be repeated in the course of the path.
Do not inform students of the markers, just have them by the side of the maze and see if they
notice.
Let students make up their own silent signals instead of using the thumb method.
X X
X X
X
X X X
X X
2nd-5th I N C L2

Page | 167
One Fish, Two Fish, Red Fish, Blue Fish
Group Size: 10-35
Age Group: 1st-6th+ grades
Length of Activity: 10 – 15 minutes (usually with a planning break in the middle)
Developmental Goals: problem-solving, leadership, cooperation, teamwork, nonverbal communication,
verbal communication, conflict resolution, eye-hand coordination, strategic thinking, planning, creative
thinking, listening to directions.
Skills Practiced: Balance, agility, body and spatial awareness, throwing, catching, running, following
directions, reflexes
Equipment Needed: A rubber chicken, stuffed animal, cone or other small, throw-able object
Set Up: A visible starting line marked by cones, paint or surface differences.
Before You Start:
Students will be lined up on the starting line.
The object (rubber chicken) is placed somewhere in front of the starting line.
How to Play:
The adult stands behind the object facing the students.
The adult turns around with his/her back to the students and loudly says, “One Fish, Two Fish,
Red Fish, Blue Fish”
The students may only move while the adult is turned the other way and is speaking the phrase.
When the adult finishes “blue fish”, s/he turns around and all the students must freeze.
If any of the students are moving after “blue fish,” the whole group goes back to the line.
If no students are caught moving, the adult turns around again and loudly says, “One Fish, Two
Fish, Red Fish, Blue Fish” and the students can move from their current spot.
Once students get close enough to take the object from behind the adult, the students then hide it
behind their backs so the adult does not know which student has the object.
Students still may only move during the phrase, but once the object is taken, the adult gets to
guess who has the object. (One guess per roughly 8 students.)
If the adult guesses correctly, the object is returned and the students start over at the line.
After incorrect guesses, the students continue moving during the phrase.
The object is for the students to get the object back to their starting line without the adult
guessing who has it.
Variation(s):
Set a number of how many people must hold the object
Increase the distance (to lengthen game and give more opportunities)
No throwing the object (to increase complexity)
Indoor Modifications:
Adjust how the students move; skipping, hopping, backwards, heel-to-toe
Use hand signals instead of words, to keep the noise down.
If there are too many students for the room, divide into groups and use multiple rounds.
1st-6th+ I Ad,De,Ed L2

Page | 168
Over Under
Group Size: 10-30
Age Group: 2nd - 5th grades
Length of Activity: 10 minutes
Developmental Goal: To develop cooperation and teamwork.
Skills Practiced: Running, passing and receiving.
Equipment Needed: One ball per team (teams of 8-10 students)
Set Up: Designate a start and finish line
Before You Start:
Have students line up behind each other in groups of 8-10, spreading out one arm’s length
distance apart.
Demonstrate how to pass the ball over someone’s head then under someone’s legs.
Give the person in front of the line a ball.
How to Play:
The object of the game is for the group to pass back the ball either over their head or under their
legs, alternating methods with each person (first person passes over their head, second person
passes under their legs, third person over their head, and so on).
When the last person in line gets the ball, he or she runs/skips/jumps/etc. to the front of the line
and starts passing the ball back again.
Play until the students reach a finishing point (the line should have moved up with each new start)
or until a specific number of turns.
Variation(s):
Have students shut their eyes while they are passing and receiving.
Play with a basketball where the players must take (or make!) a shot at a basket before returning
to the front of the line.
Add dribbling challenges such as left/right hand only or pivoting before passing the ball back.
Play with a soccer ball with similar challenges.
2nd-5th I Au,De L1
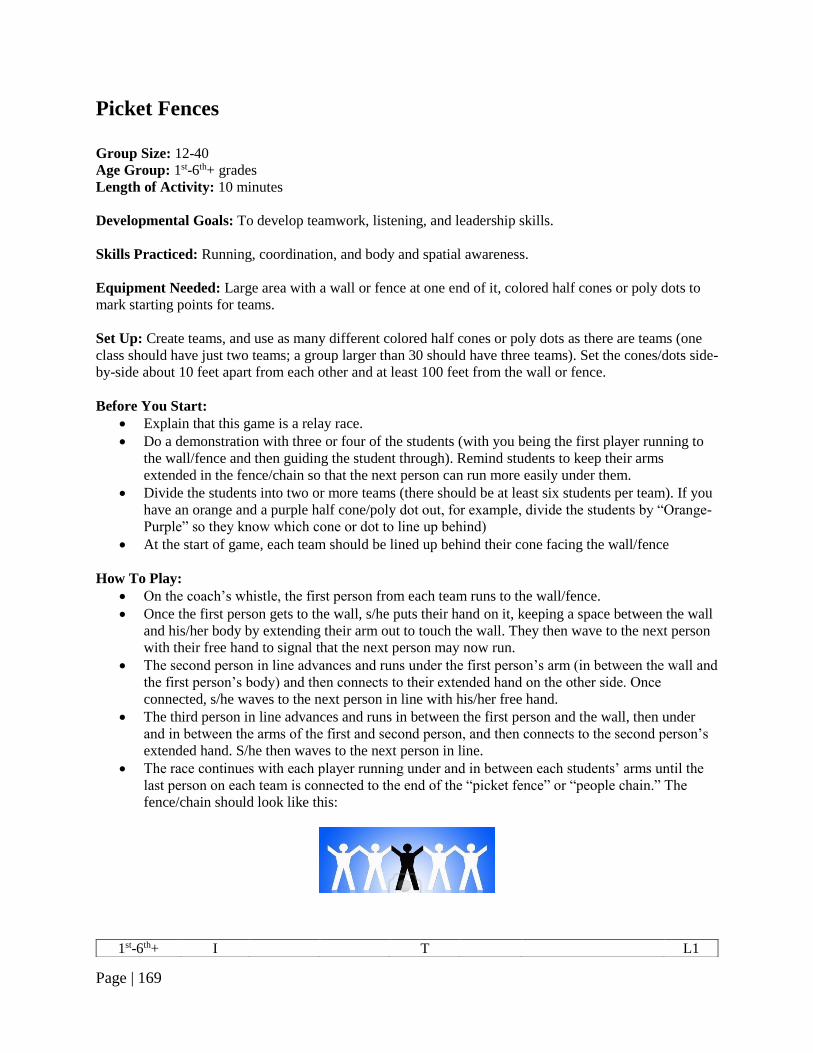
Page | 169
Picket Fences
Group Size: 12-40
Age Group: 1st-6th+ grades
Length of Activity: 10 minutes
Developmental Goals: To develop teamwork, listening, and leadership skills.
Skills Practiced: Running, coordination, and body and spatial awareness.
Equipment Needed: Large area with a wall or fence at one end of it, colored half cones or poly dots to
mark starting points for teams.
Set Up: Create teams, and use as many different colored half cones or poly dots as there are teams (one
class should have just two teams; a group larger than 30 should have three teams). Set the cones/dots side-
by-side about 10 feet apart from each other and at least 100 feet from the wall or fence.
Before You Start:
Explain that this game is a relay race.
Do a demonstration with three or four of the students (with you being the first player running to
the wall/fence and then guiding the student through). Remind students to keep their arms
extended in the fence/chain so that the next person can run more easily under them.
Divide the students into two or more teams (there should be at least six students per team). If you
have an orange and a purple half cone/poly dot out, for example, divide the students by “Orange-
Purple” so they know which cone or dot to line up behind)
At the start of game, each team should be lined up behind their cone facing the wall/fence
How To Play:
On the coach’s whistle, the first person from each team runs to the wall/fence.
Once the first person gets to the wall, s/he puts their hand on it, keeping a space between the wall
and his/her body by extending their arm out to touch the wall. They then wave to the next person
with their free hand to signal that the next person may now run.
The second person in line advances and runs under the first person’s arm (in between the wall and
the first person’s body) and then connects to their extended hand on the other side. Once
connected, s/he waves to the next person in line with his/her free hand.
The third person in line advances and runs in between the first person and the wall, then under
and in between the arms of the first and second person, and then connects to the second person’s
extended hand. S/he then waves to the next person in line.
The race continues with each player running under and in between each students’ arms until the
last person on each team is connected to the end of the “picket fence” or “people chain.” The
fence/chain should look like this:
1st-6th+ I T L1

Page | 170
Pizza Delivery
Group Size: 5-30
Age Group: 3rd-5th grades
Length of Activity: 10-15 minutes
Developmental Goals: To develop cooperation, teamwork and verbal communication.
Skills Practiced: Balance, agility, running, pacing and following directions
Equipment Needed: Hula hoops and bean bags
Set Up: Designate a starting line and a delivery spot.
Before You Start:
Divide the students into groups of 4-5.
Give each group a hula hoop.
Model how to safely run with someone inside the hula hoop – everyone facing forward,
communicating, and working as a team.
How to Play:
The object is to deliver all the bean bags (pizzas) to the delivery spot.
One student begins as the ‘pizza,’ by standing in the middle of the hula hoop with a bean bag.
The other students begin as runners and hold onto the outside of the hula hoop.
The team runs the pizza to the delivery spot and places the bean bag on the ground before going
back to the starting line.
Once they return from the first trip, the team switches the student that is the pizza, and makes
another delivery run.
This continues until all students have had a chance to be the pizza or until all bean bags are
delivered.
Variations:
For more advanced groups challenge them by:
having them speed walk backwards,
making the pizza balance the bean bag on his/her head during any forward movement,
have the pizza blindfolded so that the runners have to communicate to the pizza on what
to do.
3rd-5th I L2

Page | 171
Quarter Football
Group Size: 10-20
Age Group: 3rd-6th+ grades
Length of Activity: 10-20
Developmental Goals: To develop teamwork, listening, cooperation and strategic thinking.
Skills Practiced: Spatial awareness, running, agility and evasion
Equipment Needed: A quarter or any small object that will fit inside a fist and pinnies for at
least one of the teams.
Set Up: A football field or a rectangle with two end zones.
Before You Start:
Divide the students into two teams
Demonstrate safe tagging:
Light touch, like butterfly wings on the shoulder
Unsafe tags: hard contact that might cause the person being tagged to fall
How to Play:
Each team gets 4 tries/downs to move the quarter from one end zone to the other.
The offensive team huddles up and chooses one student to hold the quarter.
Both teams line up facing each other, standing shoulder to shoulder behind their
respective end zones.
The Coach or any offensive player says “hike” or “go”, and the offensive team tries to get
into the end zone, while the defense tries to safely tag all the offensive players.
Once tagged, offensive players must freeze where they are. When everyone on the
offensive team has been tagged or made it to the end zone, the player with the quarter
raises their hand.
If the player with the quarter makes it to the end zone without being tagged, it is a point
and a turnover to the other team.
If the player with the quarter is tagged another round/down is played. The offensive team
lines up for their next try at the yard line where the player with the quarter was tagged.
The offensive team can huddle and secretly change who is carrying the quarter each
round/down.
The defensive team lines up behind their end zone for every round/down.
If a touchdown is not scored within four downs, it is an automatic turnover and the other
team gets four tries from the where the last team ended.
If a touchdown is scored, the defensive team gets to start with the quarter from the end
zone.
Variation:
Allow the offense only 3 tries for a shorter field
3rd-6th+ I N L2

Page | 172
Quarterback Training Camp
Group Size: 10-30
Age Group: 3rd-5th grades
Length of Activity: 10-20 minutes
Developmental Goals: To develop teamwork, cooperation, eye-hand coordination, and strategic
thinking.
Skills Practiced: Balance, agility, body and spatial awareness, throwing, running, evasion, and reflexes
Equipment Needed: 5 different colored hula hoops, 4-7 cones, 4 footballs, 4 soft dodgeballs
Set Up: Place cones in a straight line. This line is the “line of scrimmage.” Place dodgeballs on one side
of the line. One or two of the hula hoops should be spread out close to the line of cones and the
remaining hoops should be spread further and further from the line, but on only one side of the line. On
the other side of the line, place the 4 footballs about five steps away from the cones.
Before You Start:
Review how to throw a football. Review safe dodgeball throwing (NO Headshots and
everything above the waist doesn’t count as a hit).
How to Play:
Get students into a single-file line. The first 4 students step out on defense. They line up on one
side of the cones near the dodgeballs.
The next five students step out and pick up the hula hoops. These five are the offensive
“receivers”
The final student is the Quarterback. He/she stands on the opposite side of the cones, away from
all other players, next to the footballs.
When the whistle blows, the quarterback has 4 chances (4 footballs) to throw a football to one of
his/her offensive players by throwing it through their hula-hoop. When the ball is thrown, the
hula hooper can take up to three steps to try to help the ball through the hoop.
While the Quarterback throws, the four defensive players are trying to hit him/her with a
dodgeball.
The play is over when all four footballs/five dodgeballs have been thrown, or if the defense hits
the Quarterback with a dodgeball.
If the quarterback successfully throws a ball into a hula hoop, that is a point for the offense and
those six players (Five with hula hoop and Quarterback) stay on the field while the defense goes
to the end of the line.
If the quarterback is hit with a dodgeball or is unable to throw through a hoop, the offense must
go to the end of the line and the defense stays
Variation(s):
With fewer players, you could decrease number of defensive and offensive players. You could
have one defensive player with dodgeballs, one quarterback with footballs, and one receiver with
a hula hoop.
3rd-5th Ad,De L3

Page | 173
Relay Lock Race
Group Size: 6-30
Age Group: 2nd-5th grades
Length of Activity: 10 minutes
Developmental Goals: To develop cooperation, teamwork, and eye-foot coordination
Skills Practiced: Balance, and body and spatial awareness
Equipment Needed: None
Set Up: To be played in a large, open area
Before You Start:
Divide students into groups of 5-8 and line them up on the far end of the area.
How to Play:
The first two students in each line stand back-to-back and interlock both arms.
Without letting go, both students must make their way to the opposite end of the playing area and
back as fast as they can.
Once the first two get back to line, the next two in line must go in the same manner.
The game runs continuously until the adult stops it, so there are no winners or losers.
Variation(s):
Place obstacles to make the challenge more difficult.
Start everyone at the same place and time so that it is a race instead of a relay (for a field day
event).
2nd-5th I N L1

Page | 174
Run & Rally
Group Size: 10-20
Age Group: 3rd-6th+ grades
Length of Activity: 10 minutes
Developmental Goals: To develop active listening capability, cooperation, teamwork and problem-
solving.
Skills Practiced: Verbal communication, listening, quick reflexes and running
Equipment Needed: Cones (one per team)
Set Up: None
Before You Start:
Talk about safety and demonstrate how to avoid contact with each other.
Remind students to remain with original team.
Review the boundaries.
Divide the group equally into two or three teams.
Have each team line up in a single file line behind their assigned cone
How to Play:
On your command, “On the signal ‘run’ you need to [touch something yellow]…ready? Run!”
everyone on all the teams must complete the assigned task and return to their starting line
formation.
When the players are starting to return to their line, call out “Rally!” and assign a line formation
that the teams must make (i.e. line up by height, tallest to shortest).
Variation(s):
Challenge team to play the game without talking
Have players touch two or more objects before returning
3rd-6th+ I T L2

Page | 175
School Olympics
*This is a great event to do at the end of the year to get kids re-motivated and the Program Coordinator re-
motivated and really excited.
Group Size: The whole school!
Age Group: K-8th grades, vary activities according to age
Length of Activity: Preparation for a month, 1-2 day event
Developmental Goals: To develop a sense of community, work as a team, have fun while being
competitive and learn to work toward a goal.
Skills Practiced: Tons! (Depends on the activities you choose)
Equipment Needed: Balls, cones, books, ropes, hula hoops, signs to get kids excited about their
teams
Set Up: Choose events and announce the date of the Olympics. Plan out the logistics of the
Olympic day. Be sure you have helpers to run multiple events, inform them of their duties and the
rules, create a schedule of events, make awards for all participants (if possible). Make sure event
locations are safe and free of debris.
Before the Olympics:
Divide each class in the school into two country-named teams and announce them.
A month or so before the day of the Olympics, teach the classes all the events in Class
Game Time and have them practice the events in their actual teams all the way up to the
actual event (this builds excitement and lets students feel “professional” in their events).
Build excitement around the Olympics, posters and practice areas at recess and so on.
Encourage teachers to have their students make big flags and/or miniature flags they can
pin onto their clothing. They can also make headbands with a country symbol.
Hold a training for your Junior Coaches to help you on Olympics day by cheering on
teams and helping them to follow the rules of each game.
Olympics:
On the day of the Olympics, divide students into different grade spans so that they
compete against similar age levels.
Ask teachers to run events on your yard if you want.
Be very clear to the students about expectations of sporting behavior
Encourage students to use supportive language and make it clear that students who
misbehave will be removed from the games.
Suggestion: end the Olympics with a junior coaches & coach vs. teachers tug-of-war to
make the students laugh.
Events:
Shoeless Joe Jackson:
Have students line up and place a cone on the other end of the yard.
The first time they race to the far cone, they will remove one shoe, then
run back and go to the end of the line.
On their second turn, students will remove their other shoe at the cone,
run back and go to the end of the line.

Page | 176
The third time, the student must find their shoes in the shoe mountain,
put them both on, and run to the end of the line. Once the student is done,
they sit down and remain quiet.
The team is done once everyone has their shoes on and tied, and are all
sitting down quietly in their line.
Over/Under
Have teams line up behind each other, spreading out one arm’s length
distance apart.
Give the person in front of the line a ball.
The teams must pass back the ball either over their head or under their
legs, alternating methods with each person
When the last person in line gets the ball, he or she runs to the front of
the line and starts passing the ball back again.
The team is finished when the first person is back at the front of the line.
Bookworm:
Students race to a cone while balancing a book on their heads.
They cannot use their hands to touch the book.
Whenever the book falls, students must freeze and place the book back
on top of their heads before continuing on.
Once the student is done, they are to sit down and be quiet.
The team is done once everyone has finished the race and is sitting down
quietly in their line.
Three-Legged Race:
Students pair up on their teams and use a jump rope or piece of cloth to
tie their two legs together above their thigh.
Advise students to pick up the long ends of the rope and link arms for
better balance.
As a pair they run to the finish line (a cone).
The team is done once everyone has finished racing and is sitting down
quietly in their line.
Tug of War
Divide participants into two groups.
Each team holds onto opposite ends of a long rope, with a flag tied to the
middle of the rope.
Place two cones under the rope, equal distance from the middle (2’-5’)
Each team tries to pull the rope until the flag passes the cone.
Ball Race:
Students pair up on their teams and form a line.
Place a cone for the start line and set up a hula hoop with bean bags or
small balls on the other end of the yard.
Students must place a red bouncy ball between their torsos with both
torsos still facing front. They put their arms on each other’s shoulders.
Keeping the ball held between them but without holding it with their
hands, the partners race to the hula hoop.
Once they get to the hula hoop, one partner tries to pick up a bean bag,
with the ball remaining between the partners’ bodies

Page | 177
They return to the start line with the bouncy ball still between them, drop
the bean bag there and give the bouncy ball to the next set of partners in
line.
If the ball drops while they are running, the partners must freeze in place
and put the ball back in place, before continuing on.
The team is done once they have picked up all of the bean bags from the
hula hoop and returned to the start line.
Whole Yard Obstacle Course:
Have students go down the slides in the playground, hula hoop, jump
rope, shoot hoops, shoot goals, etc.

Page | 178
Land, Sea, Air Group Size: 8-50
Age Group: K - 8th+ grades, all ages
Length of Activity: 5-10 minutes
Developmental Goals: to develop skills of listening, following directions and coordination.
Skills Practiced: Listening to directions, jumping / hopping, freezing, coordination, getting “out”
and getting back in.
Equipment Needed: A line: painted, made with cones or one found in the play space or a carpet if
inside.
Set Up: Establish a simple line or boundary.
Before You Start: This game benefits from telling a story. After reading through the game, come up with
a story that will help you bring the students into the game.
How to Play:
• Players will all start on one side of the line, which the leader designated as the land.
• When the leader calls out “Sea,” the players need to jump over the line into the sea.
• When the leader calls out “Air,” the players need to jump up and land back in the same spot where they
were standing (not crossing over into the other area).
• When the leader calls out a space where the players are already standing, the players should remain
standing on the ground. Example: Calling out “Land” when the players are all standing on land already.
• The leader can call out “Land,” “Sea” or “Air” in any order, mixing it up to be fun and silly.
• When a player makes a mistake, they can do a silly task to get back into the game. Examples: 5 seconds
of shaking, swimming the back stroke for 5 seconds or getting a high-five from the leader.
Variation(s):
• The leader could use various other calls for different movements, based on the age & ability of the
players. Some possible examples are:
“Bridge” – one foot in the sea, one foot on the land
“Pirate” – standing/jumping on one foot until the leader calls “Argh”
“Tornado” – spin in a circle one time
The leader could use this game as a transitional game wherein the players who make a
wrong movement are then to (get a drink, get snack, start homework, line up, etc.).

Page | 179
School Yard Golf
Group Size: 10 – 20
Age Groups: 2nd -5th grades
Length of Activity: 30 minutes
Developmental Goals: Develop cooperation and decision-making skills
Skills Practiced: Fine motor skills and strength perception
Equipment Needed: Golf balls/tennis balls, hockey sticks, chalk, cones
Set Up: Look around your yard and create a miniature golf layout. Find hills, divots, ramps, stairs, planter
boxes, tables etc. to utilize as obstacles. To create a course, mark each hole with a number, 1-18. A
standard golf course has 18 holes, adapt to what your space permits. Each hole should have a tee box, a
place to start, and a cup/cone where each hole ends.
Before You Start:
Demonstrate safety with hockey sticks and golf/tennis balls.
Review the course and obstacles to look out for.
Group students into teams of 2 or 3. Each team should determine an order in which they will take
turns.
Players should be able to tell you how to play, taking turns and maintaining safety.
How to Play:
Each team will receive 1 ball and 1 hockey stick.
You may Ro-Sham-Bo to determine which team will tee off first.
The object of the game is to get your ball into the cup in the fewest amount of tries.
Once all teams have teed off, the team furthest from the hole should shoot.
If the ball advances past another team, the team who is now furthest from the hole gets a turn.
If the ball fails to advance past another team, that team shoots again until they are no longer the
team furthest from the hole.
Players on each team take turns.
Each team needs to count how many shots it takes to get the ball from the tee into the hole.
Variation(s):
Use a Frisbee instead of a golf ball.
Play a Scramble: All players get to shoot every time it is the team’s turn. Once all have shot the
team decides which ball it will use to take their next shot. All other players pick up their balls.
Everyone gets to shoot again from that spot when it is their team’s turn. The team must use each
person’s shot at least once.
2nd-5th I L3

Page | 180
Shadow Shadow
Group Size: 2-100
Age Group: preK-6th+ grades
Length of Activity: 5 minutes
Developmental Goals: To develop creative thinking and social comfort
Skills Practiced: Agility, body awareness and reflexes
Equipment Needed: None
Set Up: None
Before You Start:
Demonstrate how to move and how to be a shadow.
Choose a volunteer to help you.
Exaggerate and make funny movements to add fun to the game.
Designate a signal to begin moving and to stop moving.
Emphasize the importance of awareness, to avoid contact with your partner and others.
How to Play:
The object is to continuously follow a partner without running into him/her.
Identify what type of movement is possible (walking, fast walking, running, etc.).
Designate signals for the pairs to:
begin moving around the play area,
stop moving.
Change roles after one minute so both sides have the chance to lead.
Variation:
Add various movements: skipping, hopping, leaping, crawling, etc.
pK-6th+ I N M C De,Ed L1

Page | 181
Squash Balls
Group Size: 10-30
Age Group: 4th -5th grades
Length of Activity: 15 minutes
Developmental Goals: To develop cooperation, strategic thinking and verbal communication
Skills Practiced: Balance, body awareness and gross muscle control
Equipment Needed: Lots of old tennis balls
Set Up: Set up a clearly designated play area.
Before You Start:
Have students line up across the play area with a partner.
Demonstrate how to stand and balance on tennis balls with the “balls of their feet” rather than
their heels.
Allow students to practice with their partners before starting.
Some groups may require spotters.
Pass out four tennis balls to each player (eight balls per pair).
How to Play:
The challenge is to cross a small area with your partner while holding hands and standing only on
tennis balls.
The area is filled with “toxic goop” and the only thing that will protect you from it are tennis
balls.
If one of the partners steps on the ground they must start over.
Variation(s):
Have groups of three or four go across, or just one.
Let pairs come up with creative ways to cross.
Allow for more or fewer tennis balls.
4th-5th I L2

Page | 182
Stash It
Group Size: 10-50
Age Group: 3rd- 6th+ grades
Length of Activity: 10 minutes
Developmental Goals: To develop hand-eye coordination & spatial awareness
Skills Practiced: Running, agility, and spatial awareness
Equipment Needed: Colored jerseys, hula hoops, footballs (one per hoop).
Set Up: Designate a large play area with clear boundaries that has room for students to run
Before You Start:
Make sure the hoops have enough space between each other
Have students pair up
Inform kids to keep their head and eyes up to prevent running into another person
How to Play:
Hoops are scattered about the play area with 1 football in each hoop; partners (seated) by their
hula hoop.
On your signal to begin, all players move around the play area, grabbing footballs (one at a time)
from other hoops (not their own) and return it to their own hoop.
Players are not allowed to “guard” the football(s) in their hoop.
First team to get 4 footballs in their own hoop yell “Bingo” and a new round will begin.
Variation(s):
Use different balls
Incorporate Tag
Alternate Names of the Game: Ball Stash, Bingo Ball
3rd-6th+ I Ad,De L2

Page | 183
Tally Ho!
Group Size: 15-50
Age Group: 2nd -5th grades
Length of Activity: 10 minutes
Developmental Goals: To develop cooperation skills and strategic thinking.
Skills Practiced: Agility and spatial awareness
Equipment Needed: None
Set Up: None
Before You Start:
Divide students into four groups.
Demonstrate what it looks like to stand shoulder-to-shoulder.
Remind students that they must stay in the same exact line order.
How to Play:
Students line up in their groups shoulder-to-shoulder and need to remember the order in which
they are standing. Each group becomes a side of the boat, making a square.
The leader stands in the middle of the boat.
The side that the leader is facing becomes the front of the boat. The side behind the leader
becomes the back of the boat. And the same goes for the right and left side of the boat.
These designations stay permanent throughout the game.
Once the boat is formed, the leader can turn to his/her right or left.
The students need to quickly reform their original line order, making up the correct side of the
boat depending on which way the leader is facing.
Once the groups correctly reassemble, the students grab hands, lift them in the air and yell “Tally
Ho!”
The leader changes orientation again, and the sides of boat must realign again.
Variation:
Students close their eyes and the leader moves completely out of the boat to other spots in the
playing area. Students open their eyes and reconfigure to their original positions from a different
orientation.
2nd-5th I N M C L1

Page | 184
The Wave
Group Size: 10-30
Age Group: K-5th grades
Length of Activity: 5-10 minutes
Developmental Goal: To develop nonverbal communication
Skills Practiced: Awareness and gross muscle control
Equipment Needed: None
Before You Start: Ask students to get into a circle and hold hands.
How to Play:
The leader announces they will start the impulse by slowly whipping the arm of someone to either
their right or left.
The motion should flow continuously through the group until it returns to the leader.
First just focus on completing the task.
After they get the hang of it run an impulse in opposite directions at the same time and
see if they can pass through each other.
Mid-Point Questions:
Have you noticed anything that makes the wave flow more easily?
Have you discovered any secrets to making the wave flow smoothly and quickly?
Shall we time ourselves to see how quickly we can get the wave around?
Does anyone have any guesses about how long it will take?
Closing Questions:
What were some things that made this game difficult?
What did you discover along the way that made the game work more smoothly?
Is there anything you might change about the game to make it more interesting?
Variation(s):
Another style of this game is called ‘Pass the Squeeze, Please’ in which a soft squeeze of the
hand is passed around the circle.
If they get really good have them do it with their eyes shut.
K-5th I N C L1

Page | 185
Tic-Tac-Toe Toss
Group Size: 10 per court
Age Group: 1st-6th+ grades
Length of Activity: 10 minutes
Developmental Goals: To develop hand-eye coordination & spatial awareness
Skills Practiced: Accuracy, hand-eye coordination
Equipment Needed: 2 different-colored Frisbees/balls/spots, 4 jump ropes and tape or 9 hula hoops to
make the game board
Set Up: Designate a large play area with clear boundaries that has room for students to be able to throw
Before You Start:
Make the tic tac toe court
Split students into two teams
Designate colors
Demonstrate what three in a row looks like
How to Play:
Each team will have a set of colored balls, spots, or Frisbees.
A person from Team 1 will throw their object attempting to land the object in an open square on
the game board. Then a person from Team 2 will do the same.
The team to finish the tic-tac-toe first, either horizontally, vertically, or diagonally signals the
start of a new game.
Variation:
Equipment: Make the game board a little larger if necessary
Alternate Names of the Game: X&O Toss
1st-6th+ I C Au,Cp,De L1
Page | 186
Toxic Waste Dump
Group Size: 15-30
Age Group: 4th – 6th+ grades
Length of Activity: 20 minutes
Developmental Goal: To develop communication, teamwork and leadership skills.
Skills Practiced: Balance and body awareness
Equipment Needed: Potato sacks, cardboard, carpet squares, or anything that can be stood on
and carried easily
Set Up: A clearly marked start and finish line
Before You Start:
Divide students into two teams.
Each team receives an equal number of potato sacks, one less than the number of people
in the group.
Brainstorm strategies and give examples if needed.
Make sure students have all their supplies and can repeat the rules.
How to Play:
The object of the game is to get all team members from one side of town to the other
without touching the toxic sludge.
Players can only be in the safe zone if they are standing on a potato sack.
If students step off the potato sack and into the toxic sludge, they must return back to the
other side of town.
If a potato sack is placed into the toxic sludge without being constantly touched by a
player, the whole team must return back to the other side of town.
Each team should come up with a strategy on how to get all of their teammates across
safely.
Variation(s):
Choose the amount of potato sacks based on the experience level of the group.
Less potato sacks makes the game harder.
Inform them that their side of town is going to explode in 10 minutes and they must have
everyone across by that time.
Have students figure out their plan first. During the game they must remain silent.
Randomly blindfold a few members of the group.
4th-6th+ I C L3

Page | 187
Traffic Jam
Group Size: 6-20
Age Group: 4th-6th+ grades
Length of Activity: 15-30 minutes
Developmental Goals: To develop strategic thinking, problem-solving, teamwork, and verbal
communication
Skills Practiced: Following directions
Equipment Needed: Several cones - one more cone than the number of students playing.
Set Up: Line up cones in a straight line with one more cone than people.
Before You Start:
Line people up on every cone, leaving one empty in the middle.
All people on one side of the middle cone will turn right; the others will turn left (so that
they are facing each other).
After explaining the rules, allow the group time to strategize.
How to Play:
The object of the game is to get all players to the opposite side of the middle cone than
they started on.
Players can only move to an unoccupied space.
Players can’t move backwards or turn around.
Players may move around one player to an open space.
Players may not move around more than one person at a time.
If a team reaches a point where they can no longer move, they must start over in their
original positions.
Variation(s):
If there are more than 10 people or so in the group, you can break up into two teams to
see which can do it faster.
For older students, you could have them try to solve the algebraic equation of how many
moves it would take.
4th-6th+ I C L2

Page | 188
Trust Falls
Group Size: 2-30
Age Group: 3rd -5th grades
Length of Activity: 5 minutes
Developmental Goals: To understand the concept of trust and develop communication skills
Skills Practiced: Balance and body awareness
Equipment Needed: None
Before You Start:
Divide group into partners. Partners should be of similar body type.
Briefly discuss concept of ‘trust.’
Have students practice everything before beginning.
Designate a signal to get into ready position and a signal to begin the dialogue.
Demonstrations:
Ready Positions
Faller: Feet together, legs stiff, arms folded across chest.
Catcher: One leg back and straight, and one leg forward and bent, with both arms
slightly bent in front of chest with palms facing outward.
Verbal Cues Before Fall.
1. Faller says “Spotter ready?”
2. Catcher says “Ready.”
3. Faller says “Falling.”
4. Catcher says “Fall on.”
Choose a pair to demonstrate entire sequence of ready positions, verbal cues, falling and
catching and getting back to ready position.
How to Play:
Have partners stand in two lines facing each other. Have one side turn around.
Give signal for both sides to get into ready positions.
Signal for verbal cues.
Students fall and get back to ready position.
Let them go through cycle with the same roles three times and have them switch roles.
Once they switch, go back to step-by-step instructions.
Variation(s):
Form a circle of five students, standing shoulder-to-shoulder in the Catcher ready
position. Have one student in the center in the Faller ready position. The student in the
center allows their body to fall in any direction around the inside of the circle while the
Catchers gently support them.
Have two groups of six students line up facing each other with their arms outstretched
and interlaced. One student stands on a chair in ready position with his/her back to the
two lines. Go through the verbal cues and fall back onto the interlaced arms. If you want
to make it even more challenging, have the person falling stand on a table versus a chair.
3rd-5th I N C L2

Page | 189
Unfreeze a Friend
Group Size: 3-25
Age Group: preK-5th grades
Length of Activity: 10-15 minutes
Developmental Goal: To practice helping others.
Skills Practiced: Balance and movement
Equipment Needed: Bean bags for every student
Before You Start:
Have the whole group stand in a circle.
Announce the boundaries and any safety issues.
Demonstrate how to balance a bean bag on one’s head.
Provide every student a bean bag and a chance to practice balancing on her or his head.
How to Play:
Every student must balance a bean bag on her or his head.
The game begins with the leader announcing a movement, such as walk, jog or skip.
Everyone must move around the space doing the stated movement while still balancing
the bean bag on his or her head.
If a student’s bean bag falls from her or his head, the student must let it drop to the
ground and freeze their body.
Other students may pick up bean bags and hand them to the frozen students to help them
return to the game.
Variation:
PreK-2nd: Allow students to pick up their own bean bags to return to the game. Or allow
unfrozen students to pick up frozen students’ bean bags while holding their own.
pK-5th+ I Ad,De,Ed L1

Page | 190
Wolves and Bunnies
Group Size: 10-50
Age Group: 3rd -5th grades
Length of Activity: 10 minutes
Developmental Goals: To develop teamwork, cooperation, strategic thinking and verbal
communication
Skills Practiced: Agility, pivoting, spatial awareness, throwing and catching
Equipment Needed: One tennis ball for every ten players
Set Up: Designate clear boundaries, have correct number of tennis balls.
Before You Start:
Have students stand in a circle to demonstrate the game.
Demonstrate safe tagging with the tennis ball.
Light touch, on the back or shoulder.
Unsafe tags: hard contact that might cause the person being tagged to fall.
Choose six volunteers and designate two wolves and four rabbits to demonstrate game in
slow motion.
Choose the first two wolves to begin the game.
How to Play:
The object of the game is for the wolves to catch all the bunnies.
Bunnies can move all around the play area.
Wolves can also move all around the play area if they are not holding a tennis ball.
When wolves have a tennis ball, they cannot take any steps and can only pivot on one
foot.
Wolves can only tag bunnies with the tennis ball in their hand.
Wolves without tennis balls should position themselves to tag a rabbit when the ball is
thrown to them by another wolf.
When a bunny is tagged, it immediately turns into a wolf.
When only a few bunnies are left, they become wolves to begin the next round.
A time limit of 3-10 minutes, depending on group size, can be enforced
Variation(s):
Use different examples of predator and prey.
Add more or fewer balls or balls of different sizes.
Limit the size of the playing area.
Indoor Modifications:
Use bean bags or something softer to play in a classroom.
Move desks to the outside of the classroom to create a natural boundary.
3rd-5th I L2
Page | 191
House, Tree, Neighbor
Group Size: 10-30+
Age Group: 3rd-6th grades
Length of Activity: Under 10 minutes
Development Goals: To practice listening, readiness, and teamwork skills
Skills Practiced: Spatial awareness, agility and peripheral vision
Equipment: none
Set Up: Can be played outside, in a gym, or in a classroom. Find a space where the students can
easily form a large circle and put cones, polyspots, or chalk where they are to stand, or use
already-painted circles on the floor.
Before You Start:
Form players into a circle
How to Play:
The leader of the game will stand in the middle of the circle.
At each round of play, the leader will point toward one player who is in the circle, and
say either "House," "Tree," or "Neighbor."
If the leader says "House," the person who he/she points to has to crouch down, and the
players on either side of him/her have to turn toward each other and form a "roof" over
the frame of the house (the middle player) by giving each other a high-ten over the
player's head.
If the leader says "Tree," that player must stand like a tree trunk, straight and with his/her
arms to his/her side. The two players on either side then form branches by facing away
from each other and form arches with their arms away from the trunk.
If the leader says "Neighbor" to a player, that player must cross their arms and hands in
front of his/her body, reaching out their hands to the players on either side of them. The
players on the sides then quickly shake the middle player's hands.
The speed of the game can get faster as it goes on and players get better. If a player
makes a mistake, they can do jumping jacks and get back into the circle, distract or cheer
for the remaining players in the circle, or if it is played at the end of a game time, be
eliminated and go back to their seats/classroom.
Variation:
Be creative and think of other items you can form using 3 players!
3rd-6th I N C Au L1

Page | 192
Benchball
Group Size: 10-30+
Age Group: 3rd-6th+ grades
Length of Activity: 10 minutes or more
Development Goals: To develop teamwork, hand-eye coordination, and strategic thinking skills.
Skills Practiced: Catching, throwing, spatial awareness, and agility
Equipment: Chalk, tape, or any other material to create a line, several dodgeballs,
half-cones
Set Up: Can be played outside or in a gym. Create a large rectangular space (gym, use cones,
etc.) At each end of the rectangular space, set up “benches,” using chalk, tape, or cones. The
bench should be large enough to eventually fit half the students who will participate in the game.
Set up the dodgeballs on half-cones along the middle line that the players can run to and grab
once the game starts.
Before You Start:
Line up players and explain the game.
How to Play:
Divide the class into two teams and give one team jerseys. Team 1 should be on one half
of the court, Team 2 on the other.
Both teams choose a goalie. The goalie stands on the "bench" on the opposition's half of
the court.
Players attempt to throw the ball to their goalie to catch, without it being caught or
intercepted by the other team.
As teams score goals, the scoring player joins the goalie on the bench. Players pass the
ball between themselves until someone decides to shoot, but must stay on their half of the
court. The goal of the game is to get all the players of your team on your bench, so that
they have more people to throw the ball to.
Once all the players on a team are on a bench, a new game begins.
3rd-6th I Ad,Au,Ed L1

Page | 193
Hot Spots
Group Size: Any size
Age Group: 1st-5th grades
Length of Activity: 10 minutes or more
Development Goals: To develop teamwork, hand-eye coordination, and depth perception.
Skills Practiced: Dribbling, passing, and shooting a basketball.
Equipment: 4 cones, 20-25 polyspots (as many as there are available), 4 basketballs, 1 basketball
hoop
Set Up: Can be played outside or in a gym. Set up the cones in a row at about half court on a
basketball court. If two hoops are available and space permits it, two games can play
simultaneously. Scatter the polyspots all around in front of the basketball hoop.
Before You Start:
Divide players into four teams
Have teams line up behind a cone, facing the basketball hoop.
How to Play:
One player at a time from each team will dribble to a polyspot to stand on and shoot the
ball.
If the player makes the shot, s/he picks up the polyspot and retrieves the ball. S/he then
gets to bring the polyspot back to his/her team and passes the ball to the next player
standing in line, who then dribbles to his/her own spot to shoot from.
If the player misses the shot s/he gets the ball and passes it to the next player on his/her
team.
Play continues in this manner until all of the spots are claimed or time runs out.
Variation(s):
Adjust the size and number of teams depending on the size of group.
Allow students to take a second shot if they miss.
This game can be modified to most any sport: soccer--shoot from a spot into the soccer
goal, volleyball--serve the ball over the net from a spot
1st-5th I Ad,Au,Cp
Ed L1
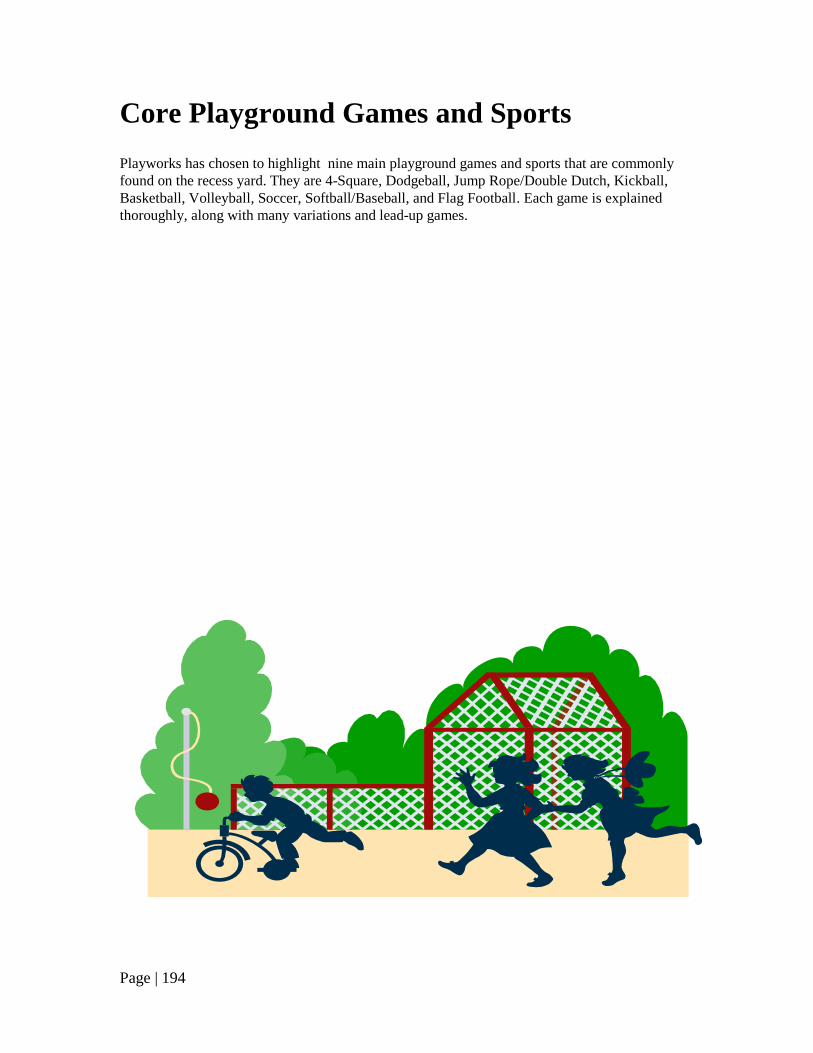
Page | 194
Core Playground Games and Sports
Playworks has chosen to highlight nine main playground games and sports that are commonly
found on the recess yard. They are 4-Square, Dodgeball, Jump Rope/Double Dutch, Kickball,
Basketball, Volleyball, Soccer, Softball/Baseball, and Flag Football. Each game is explained
thoroughly, along with many variations and lead-up games.

Page | 195
4-Square
Group Size: 4-12
Age Group: K-6th+ grades
Length of Activity: 10-20 minutes
Developmental Goals: To develop eye-hand coordination and strategic thinking skills.
Skills Practiced: Underhand and overhand ball hitting, balance, agility and spatial awareness
Equipment Needed: One playground ball
Set Up: A standard 4-square area is one large square, 10’ x 10’ divided into four smaller squares (5’ x 5’),
and each box is labeled A, B, C, D or 1, 2, 3, 4. The box labeled A or 1 contains a smaller service box (1.5’
x 1.5’) located in the far outside corner of the square.
Before You Start:
One student is in each square and the other students wait in line.
The student in square A or 1 is the server, and that student controls play of the game.
How to Play:
Play begins when the server drops the ball once into his/her square then hits it into a different
square (serves the ball). The server must keep both feet in the service box until the serve is
completed.
The ball can only bounce once in any square.
Each student needs to hit the ball with any part of their hand into an opposing student’s square
after it has bounced only once in their own square.
If the ball lands on a line, or goes out of bounds before it bounces, the student who hit the ball
needs to return to the waiting/cheering line for another try. If a student hits the ball and it bounces
again in his/her square, s/he also needs to return to the waiting line.
If the ball bounces more than one time before it is hit into another square, the student who let the
ball bounce needs to return to the waiting line for another try.
If the ball is returned before it is allowed to bounce, the student who returned the ball early needs
to return to the waiting line.
Anytime a student moves out of the game into the waiting line, a square is left open. The person in
front of the line advances to square D or 4, and the remaining students advance to close the gaps
between A or 1 and D or 4.
Variation(s):
Two players can cover one square, working as a team.
Use two 4-square courts next to each other for 8-square.
To focus more on jump rope and hula hoop skills, as well as learn the rotation order on the court,
put either one jump rope or one hula hoop in each of the 4 squares, have one student step into each
square, have the student in A or 1 say ‘go,’ and see how long each student can jump rope or hula
hoop.
Indoor Modifications:
Use a beach ball, instead of a normal 4-Square ball. The goal of the game is to keep the ball in the
air, in the area.
If the ball lands in your square or you hit it out of the area, you rotate out. All other 4-Square rules
apply.
K-6th+ C Ad,Au,De,Ed L2

Page | 196
Drop and Hit 2-Square
Group Size: 2-30
Age Group: K-5th grades
Length of Activity: 10 minutes
Developmental Goal: To develop eye-hand coordination.
Skills Practiced: Underhand and overhand ball hitting
Equipment Needed: Enough standard rubber playground balls for each pair
Before You Start:
Use the 4-square courts or create 2 adjacent boxes approximately 5 feet square with
chalk or rope.
Explain the under hand position for hitting the ball.
Have two students volunteer to help demonstrate.
Point out various rules and directions.
Review the rules and ask students to repeat them back to you.
How to Play:
The game begins when one player serves the ball. They let the ball bounce once and then
hit it into their partners box.
The receiving player must let the ball bounce once and then return it.
Play continues until the ball:
o Is hit outside the square
o Bounces twice before it is returned
o Is not allowed to bounce
o Is hit onto a line
o Is carried or held
If there are only two students, the server is the player who stopped the play.
If there are players waiting in line, the player who stopped the play goes to the end of the
line and the next player comes in.
Variation:
Allow older students to add a limited number of more complex rules, i.e. “blackjacks,”
“double-hits”. These rules should be clear and agreed upon before the game begins.
Indoor Modifications
Use a balloon or beach ball to play indoors. The goal of the game is to keep the ball in the
air, in the area.
If the ball lands in your square or you hit it out of the area, you rotate out. All other
outdoor rules apply.
K-5th Ad,Au,De,Ed L1

Page | 197
Catch and Drop
Group Size: 2-4 per playing group
Age Group: preK-2nd grades
Length of Activity: 10 minutes
Developmental Goal: To develop eye-hand coordination.
Skills Practiced: Underhand and overhand ball hitting, ball placement, and agility
Equipment Needed: Enough standard rubber playground balls for each group
Before You Start:
Use the four-square courts on the playground and/or draw new courts with chalk if
needed.
Explain how to hit the ball and where to place the ball.
Use student volunteers to demonstrate.
Point out various rules and directions.
Choose several volunteer groups to demonstrate before having everyone begin.
Ask students how many bounces can occur in their square and to name three ways play
can be stopped.
How to Play:
The game begins when one player serves the ball.
Players let the ball bounce once and then hit it into a different player’s box.
The receiving player must let the ball bounce once, and then s/he may catch it before
s/he returns the ball.
Play continues until the ball:
Is hit outside the square
Bounces twice before it is returned
Is not allowed to bounce
Is hit onto a line
When a player stops the play, s/he goes to the end of the line and a new player comes in
at square D. Remaining players close the gaps, moving up as necessary.
Variation:
Instead of allowing a catch before the ball is returned, you can allow a variety of
different techniques before each player returns the ball.
Examples are bubbles or spins.
Indoor Modifications
Use a balloon or beach ball to play indoors. The goal of the game is to keep the ball in the
air, in the area.
If the ball lands in your square or you hit it out of the area, you rotate out. All other
outdoor rules apply.

Page | 198
Team 2-Square
Group Size: 4-30
Age Group: K-6th+ grades
Length of Activity: 10-20 minutes
Developmental Goals: To develop eye-hand coordination and teamwork
Skills Practiced: Underhand and overhand ball hitting, ball placement, and agility
Equipment Needed: 4-Square court(s), playground ball(s)
Set Up: Set up a standard 4-Square area (see 4-Square page); or the game also works well with
two 4-Square courts spaced about five feet apart (draw with chalk if needed).
Before You Start:
Review standard rules of 4-Square, as well as any variations used at your school
Two students are in each “square” (either half of a standard court or the entire square if
playing with two courts)
Decide which team will serve
How to Play:
Standard rules of 4-Square apply, along with all of the ways play can be stopped:
If the ball bounces twice in a team’s square
If a student hits the ball out of bounds or into their own square
If a student does not allow the ball to bounce before returning it
The variation for Team 2-Square is that teams must take turns hitting the ball, alternating
back and forth between each student. If one student serves the ball and it is returned, the
other student on their team must hit it back. If one student hits the ball twice in a row,
their team must go to the end of the line.
If playing with two full courts, the space between the courts will be considered out.
Variation(s):
Add more courts/squares to play team 3-square or team 4-square
Add more players to each team
pK-2nd Ad,Au,Cp,De,Ed L1
Team A
Team B
Team A
Team B
or

Page | 199
4-Square Switch
Group Size: 4-10 per 4-square court
Age Group: 2nd-6th+grades
Length of Activity: 10-15 minutes
Developmental Goals: To develop verbal communication, conflict resolution, and eye-hand
coordination
Skills Practiced: Evasion skills, ball bouncing, and reflexes
Equipment Needed: 4-Square court, ball
Set Up: Same setup as 4-Square.
Before You Start:
Designate a place for the line to start.
How to Play:
Play starts with a serve from student in square number 1 (or letter A).
After the ball bounces in a square but before the student plays it, they can call out another
number (1-4) or letter (A, B, C, or D) to switch with.
These two players must switch squares.
After switching the players must play any ball in their new square.
The same rules apply as regular 4-square; if students don’t continue the play of the ball
they go to the end of the line.
Variation:
Restrict how many switches can occur in a round (1 per student, 5 per round).
K-6th+ L2
Page | 200
X-Square
Group Size: 4-20
Age Group: 3rd-5th grades
Length of Activity: 10-15 minutes
Developmental Goals: To develop eye-hand coordination and strategic thinking skills
Skills Practiced: Overhand hitting, underhand hitting, balance, agility, and spatial awareness
Equipment Needed: Two playground balls
Set Up: A 4-Square Court (10’ x 10’)
Before You Start:
One student is in each square and the other students wait in line.
Start by demonstrating diagonal 2-square with a student (Square A/1 hitting to Square
C/3). Review key 2-Square rules.
Review spiking and tell students that it is not allowed.
Review the importance of staying in own square when student is still in the game, going
to the back of the line outside of the playing area when out, and entering the game from
the outside of the playing area.
How to Play:
Play begins when the student in Square A serves the ball to the student in Square C, and
Square B serves to Square D.
The ball must bounce and can only bounce once in the diagonally opposite square.
The receiving student hits and returns the ball back to the respective server.
Play continues until the balls:
Land outside the square or on the side squares.
Bounce twice before being returned.
Are not allowed to bounce.
Are carried or held.
Hit each other.
The student who stopped the play goes to the end of the waiting line outside of the
playing area, and the next student enters that square, avoiding the playing area.
When play is stopped for one pair, play continues and does not stop for the other pair.
The student who stays in the playing area remains in his/her square and does not rotate.
Students who remain in the playing area will serve the ball to the new player.
During game play, if both balls hit each other, then play is stopped and all four players in
the playing area will need to return to the waiting line. The next four students in the
waiting line advance to the playing area starting at Square A.
Variation(s):
Play with either one hand or two hands.
2nd-6th+ I L3

Page | 201
Two students can cover one square, working as a team (a 4-Square area bigger than 10’ x
10’ recommended).
Hantis
Group Size: Any size
Age Group: 3rd-6th + Grades
Length of Activity: 10-30 minutes
Developmental Goals: Teamwork, hand-eye coordination, agility, ambidexterity, creativity.
Skills Practiced: Fine and gross motor skills, hand-eye coordination, burst movement.
Equipment needed: 4 tables (any table size will suffice; equal-sized, 6-foot banquet tables are
optimal), 1 tennis ball.
Before You Start:
Explain the goal of the game.
Review possessions, outs, rotation and how to serve.
Encourage a hands-on approach to learning the game.
Set Up: Game can be played anywhere. Spread the four tables on yard evenly apart from each
other in a rectangle formation. Provide enough space around the outside of the tables to allow for
movement.
How to Play:
The goal of the game is to get any player on the opposing team out while defending your
team's tables.
Serve the ball with your hand, in the exact same style as a serve in Ping Pong. Only
instead of a net, there are gaps between play areas.
During each possession of play, each player on a team is allowed 2 hits with their hands
(or any body part, head, foot, chest, etc.) and 1 hit on their table. Possession changes
when the ball makes contact with an opposing player or opposing table.
A player is out when:
The player strikes the ball 3 times in one possession.
The ball strikes a player's table 2 times in one possession.
The ball strikes a player and hits the ground.
The ball strikes a player's table and hits the ground.
Like in 4-Square, every time a player gets out, a new player from the line rotates in to the
first table. The player to your right or left is your teammate, but because of rotation,
teams will change every play. The last table in the rotation is the serving table.
Players will hit the ball back and forth across the tables until an out is made.
Variation:
When players become more adept at hitting the ball, encourage movement, passing and tricks
like: Alley-Oop passing, behind the back shots, between the legs, heading the ball, etc.
3rd-5th L3 3rd-6th+ C Ad,De L3

Page | 202
Jetsetter 4-Square
Group Size: 5-15
Age Group: 2nd-6th grades
Length of Activity: 10+ minutes
Developmental Goals: Eye-hand coordination, conflict resolution, geographic knowledge
Skills Practiced: Throwing, dodging, defense, reflexes
Equipment Needed: 4-Square court, playground ball, sidewalk chalk
Set Up: Using sidewalk chalk, write the names of four different countries in the squares of the
court. These can be countries that are actually next to each other, or ones from around the globe.
If you like, you can also draw an “island” or two next to the court and name them Greenland,
Madagascar, Australia, etc. Draw a small square about 7-10 feet from the court – this is where the
“Traveler” will stand. Draw a line behind the square for students to line up behind.
Before You Start:
Review the rules of 4-Square so that everyone is familiar with the basics.
Introduce the concept of hitting the ball out of your square before it bounces
Introduce the concept of throwing the ball into the court from outside of it.
Talk about countries. Ask if anyone can name another country. Ask if anyone has ever
visited or lived in another country. Explain that in this game, students will get to “visit”
several countries.
How to Play:
The court starts out empty while the students line up behind the line.
The first student steps into the square. This person is the “traveler.”
The traveler throws the ball into the court, aiming for a country.
If the ball lands in a square, the traveler gets to go stand there. (If the ball bounces in
Hungary, he/she goes to stand in Hungary.) Note that it doesn’t matter where else the ball
rolls – the first bounce is what matters.
The next student steps up into the square and aims for a country.
As students fill in the square of the court, they try to stop the ball from bouncing in their
own squares. The traveler gets to take whatever square was hit, and if that square is
already occupied, the previous occupant goes to the back of the line. (If the next traveler
hits the ball in Hungary, he goes to stand in Hungary, and the first player goes to the back
of the line.)
Players can protect their countries by hitting the ball out of their squares, but they may
not catch the ball. There is no limit on the number of hits they can have.
If a player hits the ball out of his/her country, and it lands in another country, the traveler
occupies the country the ball lands in.
If a player hits a ball out of her country and it lands outside of the court, in the “ocean,”
the traveler does not claim a country, but goes to the back of the line.
continued

Page | 203
Variation(s):
Level 2: This level is played with regular 4-Square rules. Players let the ball bounce one
time before hitting it. If any player hits the ball out, catches the ball, or hits it into his own
square, he goes to the back of the line, and the traveler claims that square.
Level 3: In this level, players can claim more than one country. If a player is in the
square “Japan” and she hits the ball into the square “Guatemala,” she is now occupying
both countries, and the player from “Guatemala” goes to the back of the line. In this
level, the traveler can only claim a country if the ball hits the square it was thrown at.
Alternate Name: World Domination (tennis version)
2nd-6th I Ad,De L2

Page | 204
Wall Ball
Group Size: 2 - 20
Age Group: 1st-5th grade
Length of Activity: 10 minutes
Developmental Goals: To develop basic ball handling skills and eye-hand coordination.
Skills Practiced: Underhand and overhand ball-hitting and agility.
Equipment Needed: Enough standard rubber playground balls for each group
Before You Start:
Use a play area with a smooth, wide wall, marked boundaries are helpful.
Demonstrate how to hit the ball against the wall.
Choose students to help demonstrate game.
As they play, point out various rules and directions.
Ask students to explain the boundaries and how to hit the ball.
How to Play:
The game begins when one player serves the ball by hitting the ball towards the wall.
The ball must bounce one time on the ground before it reaches the wall.
The receiving player must let the ball hit the wall and bounce once before returning it.
The player can then return the ball by hitting it and reaching the wall in one bounce off
the ground.
Play continues until the ball:
Bounces outside the boundaries
Hits the wall without bouncing off the ground
Bounces twice before it is returned
Is not allowed to bounce
Hits a line
When a player stops the play, s/he goes to the end of the line and a new player comes
into the game.
The remaining player is the server, and begins the next game.
Variation:
After play has advanced past this basic game, players can add special rules. For example,
instead of requiring one bounce before returning the ball, a player could allow returns
before the ball bounces, as well as on a single bounce.
1st-5th Ad,De,Ed L2

Page | 205
Dodgeball
Group Size: 10-30
Age Group: K-6th+ grades
Length of Activity: 10-20 minutes
Developmental Goals: To develop teamwork and eye-hand coordination.
Skills Practiced: Throwing, catching, running, evasion, agility and body and spatial awareness
Equipment Needed: Several playground balls
Set Up: Set up a standard dodgeball court: 40 yard x 20 yard rectangle with a center line
dividing it into 2 squares. Identify a waiting area on each side of the court along the sidelines for
each team. An approximate court size for kindergarteners is 20 yards x 10 yards.
Before You Start:
Each team has the same amount of students and is assigned to one-half of the court.
Each team starts with one or more playground balls.
How to Play:
After a signal to start, students throw the balls back and forth across the center line.
All students try to avoid being hit with the ball while trying to hit the opposing teams’
players from the waist down.
If the ball hits an opposing student from the waist down (including a hand or arm that is
below waist level) before the ball hits the ground, the student who got hit must go to the
waiting zone on their side of the court.
If a student catches a ball thrown by an opposing team’s student before that ball hits the
ground, the player who threw the ball goes to the waiting zone on their side of the court.
If a student attempts to catch an opposing team’s throw and drops it, the student who
dropped the ball has to go to the waiting zone on their side of the court.
If a student goes outside the boundaries while trying to avoid being hit, s/he must go to
the waiting zone on their side of the court.
Students in the waiting zone should stay in line by the order in which they got to the
zone. One student may re-enter the game each time a teammate catches a ball before it
bounces.
A ball which has gone out of bounds can only be retrieved by the students on the side
from which the ball went out of play.
The round is over when all players on a team are in the waiting zone.
Variation:
To start the game, place all playground balls on the center line. Students line up on their
team’s end line, and on a signal, run to the middle trying to get a ball. To ensure safety,
create a buffer zone in which students cannot get hit about 4 feet from the center line for
each team.
K-6th+ Ad,De L2
Page | 206
Bowling Dodgeball
Group Size: 10-30
Age Group: preK- 3rd grades
Length of Activity: 5-15 minutes
Developmental Goal: To develop strategic thinking.
Skills Practiced: Throwing and rolling
Equipment Needed: 2+ dodgeballs, 4+ cones
Set Up: Place two lines of cones on either side of the playing field
Before You Start:
Review underhand throws/rolling
Place students in two (or more) lines
How to Play:
Students take turns throwing/rolling a dodgeball at cones attempting to knock them over.
Encourage each student to run after her/his dodgeball after it is thrown.
As students advance have them back up and attempt longer throws.
As students advance, form more lines and add dodgeballs.
Variation:
Make lines of cones two feet behind both end lines of a rectangle. Allow two teams to
compete to knock-over each other’s cones and protect their own cones
pK-3rd I Ad,De L1

Page | 207
Rollerball
Group Size: 2-20
Age Group: K-5th grades
Length of Activity: 5-15 minutes
Developmental Goal: To develop eye-hand coordination.
Skills Practiced: Evasion, peripheral vision, rolling, agility and spatial awareness
Equipment Needed: One playground ball or soft dodgeball
Before You Start:
Use a play area with clear boundaries and a wall or fence.
The “dodgers” will stand with their backs against the wall or fence.
The “pitcher” faces them, approximately 5’ away.
Mark clearly where the pitcher stands, the play area for the active dodgers and where
dodgers go when they are tagged by the ball.
Be prepared to explain the boundaries and different roles in the game to the children.
Be prepared with consequences if the pitcher hits the dodgers above the waist.
How to Play:
The point of the game is to avoid being hit with the ball.
The pitcher tries to roll the ball to hit the dodgers from the waist down.
Tell students where the players should stand to dodge the ball and point out where the
pitcher stands.
Pick a pitcher and line the rest of the children against the fence or wall as dodgers.
When a dodger is hit by the ball from the waist down, they step off the wall and join you
in cheering.
The last dodger to be hit by the ball is the new pitcher.
Variation(s):
When a dodger is hit s/he also becomes a pitcher. As the game progresses there are more
pitchers and fewer dodgers. This requires adding a few more balls. It also must be clear
how pitchers will share the balls.
After dodgers are tagged, they need to perform a task, like jumping jacks, in order to get
back into the game.
K-5th L1

Page | 208
Bring Down the House!
Group Size: 12-15
Age Group: 3rd-6th+ grades
Length of Activity: 20 minutes
Developmental Goals: To build teamwork while improving both eye-hand coordination and
sense of boundaries
Skills Practiced: Agility, peripheral vision, reflexes, body and spatial awareness, throwing
Equipment Needed: As many dodgeballs as about 1/2 the students participating, 4 tall cones
that can be knocked over easily, 14-17 pods, and a timer/watch.
Set Up: Use four cones to make a square 4x4 square and mark the placement of cones with pods
underneath. Use pods to make a circle around the cones with a radius of approx. 10 ft.
Before You Start:
Have students find a spot around the circle.
Explain that the four cones in the middle represent a house and there are tornadoes in the
forecast, threatening to knock it down.
Pick two students to be the first team and have them stand inside the cone house.
Explain to the team that is their job to protect their home from being knocked down and
give the team a minute to strategize before they start.
How to Play:
On the start of the clock/timer, those students on the circle must try to knock the cones
down with the dodge balls.
The balls must be thrown from outside the circle. Students may go inside the circle to
retrieve a ball but they must then toss it to someone on the outside of the circle in order
for it to be thrown.
The object of the game is to be the team inside the cones that keeps the house standing
for the longest period of time.
When a cone is hit, the team has to pick the cone back up as quickly as possible but cones
must be put back in proper spot.
To protect the cones, the team may block it with their hand or other body parts.
Seconds can be added onto a team’s time for the following infractions:
Standing on the cones, holding the cones up, or squatting over the cones as
means to protect them.
Catching, hitting, or kicking the ball away when a dodge ball is thrown at a cone.
When 3 cones are down at one time, the clock/timer stops.
Keep picking new teams of two to go in the middle to try to beat the previous times.
Variation(s):
For younger grades, make it so that that clock stops when 2 cones are down at one time.
You may make the radius of the circle bigger or smaller (to make it harder or easier.)
Make an ultimate challenge to see how long one person can survive in the house.
You may need to add more dodgeballs to make it more inclusive.
3rd-6th+ I Ad,De L2

Page | 209
Circle Dodgeball
Group Size: 6-30
Age Group: 1st-5th grades
Length of Activity: 5-20 minutes
Developmental Goals: To develop eye-hand coordination and strategic thinking skills.
Skills Practiced: Evasion, agility, throwing, spatial awareness and peripheral vision
Equipment Needed: Two playground balls, 5 flags/jerseys and chalk
Before You Start:
Make a circle approximately 30’ across with chalk.
Place evenly spaced Xs all the way around the circle, enough for each person in the
group.
Be prepared to discuss safety rules, especially regarding the ball hitting only from the
waist down. Have a consequence ready for throwing above the waist and enforce it.
Remind students that the throwers stay outside of the circle.
How to Play:
The game is played with all the students on Xs on the outside circle attempting to hit
players on the inside of the circle with the ball, only from the waist down.
Choose 1-5 students to start in the center of the circle.
Each player in the middle has a flag or jersey in his/her hand.
If a player on the inside is hit from the waist down, s/he must trade places with the
player who rolled or threw the ball.
The player also hands off the flag to the new person in the circle.
Only players with a flag should be inside the circle
The players on the outside can only hit the inside players from the waist down.
The outside players must stay on their Xs while retrieving or throwing the ball.
A player cannot reach in front of another player to retrieve the ball.
If any player strays off of their X to retrieve a ball, they are out and must wait a
few minutes before playing again.
If a ball goes outside the circle, only one player at a time should retrieve it. The player
closest to where the ball exited the playing area should retrieve a lost ball.
If the players on the outside cannot hit any of the inside players for two full minutes, the
round is over and a new round starts with new players on the inside chosen by the leader.
Variation(s):
Split the class into teams. One team is inside the circle, the other is outside. Once a
player from inside the circle has been hit, s/he is out. When a whole team is out, switch.
Choose 3 players to start inside the circle forming a small snake by having the 2nd and 3rd
players holding the shoulders of the person in front of them. Students on the outside are
trying to hit the tail of the snake. When someone hits the tail s/he becomes the head of
the snake and the tail goes to the outside of the circle to become a thrower.
1st-5th I De L1

Page | 210
Gaga Ball
Group Size: 20-40
Age Group: 1st–6th+ grades
Length of Activity: 15 minutes
Developmental Goals: To develop eye-hand coordination and strategic thinking skills.
Skills Practiced: Evasion, balance, agility, spatial awareness and peripheral vision
Equipment Needed: Cones and a few playground balls or soft, bouncy balls
Before You Start:
Use a playing area, preferably circular, about 15 feet wide, with clear boundaries. Disc
cones work well.
Be prepared to discuss why it is important to follow the agreed-upon rules.
Have consequences ready for broken rules and enforce them fairly.
How to Play:
Everyone stands on the boundaries. The leader drops the ball in the center and as it
bounces three times, players say 'ga-ga-ball' aloud as a group. This signals the beginning
of play.
After play has started, players can move within the boundaries.
Players use their hands to hit the ball towards other players. The goal is to hit other
players with the ball from the knee down. If a player is hit with the ball from the knee
down, they are out. When they are out, they go to the boundary line and help keep the
ball in the play area by acting as a wall or a cushion.
You can only hit the ball with an open hand. No catching, throwing, or holding the ball.
You can only touch the ball one time in a row. The ball needs to hit either a boundary or
another person before you can touch it again.
Explain that one more goal of the game is to prevent the ball from leaving the play area.
Rather than jumping away from a ball that will go out of bounds, players should try to
hit it into play.
Play ends when there is only one player left, or when time has been called.
1st-6th+ I Ad,De L2

Page | 211
SPUD
Group Size: 5-40
Age Group: 2nd-5th grades
Length of Activity: 10-30 minutes
Developmental Goals: To develop verbal communication and listening to directions.
Skills Practiced: Throwing, spatial awareness, following directions, running, evasion and
balance
Equipment Needed: One playground ball
Before You Start:
Line students up and give each their own number to remember.
Students often forget their number; ask them to repeat it to you to make sure they
remember.
Explain the rules and ask for students to explain it back to you.
Review Dodgeball safety rules, especially throwing only below the waist.
Teach, and fairly enforce, a consequence for throwing above the waist.
Gather everyone up in a bunch around you to begin.
How to Play:
With everyone standing close to you, throw the ball straight into the air while shouting
out one of the student’s numbers.
The student whose number has been called quickly gets the ball and shouts “SPUD” as
soon as they touch it.
All other students run away until they hear “SPUD.”
When they hear “SPUD”, the players freeze exactly where they are.
The student with the ball may then take 4 steps, spelling “S”, “P”, “U”, “D” with each
step towards any other student.
S/he may then roll or throw the ball at a student, trying to hit below the waist.
The frozen student cannot move their feet, but may try to catch the ball or evade with
their upper body.
If the student is hit with the ball, they get a letter (i.e. “S”).
If they catch it or the thrower misses, the thrower gets a letter.
Whichever student received a letter gets to begin the next round by throwing the ball up
and shouting a new number.
If a student gets all four letters (SPUD) they are out and get to do a task (i.e. jumping
jacks) to get back into the game.
Variation(s):
Children can freeze in different poses which you call out at the beginning of each round.
Math equations can be shouted out, where the answer is the student’s number.

Page | 212
Snowball Alley
Group Size: 10-30
Age Group: K–5th grades
Length of Activity: 10-20 minutes
Developmental Goal: To develop strategic thinking
Skills Practiced: Throwing, catching, evasion, jumping and running
Equipment Needed: Cones and 3-7 playground balls
Before You Start:
Create an “alleyway” with the cones.
Spread out the balls outside the alley.
Explain the rules and ask the students to explain them back to you.
Clearly define the safety rules, especially keeping the balls low to the ground.
Teach, and fairly enforce, a consequence for throwing balls above the waist.
Divide the group into two teams.
One team lines up shoulder-to-shoulder at one end of the alley.
Divide the second team in half. Each half stands outside either set of cones,
with the alley in the middle.
How to Play:
When the teams are ready, give a signal.
The running team now has 10 seconds to run from one end of the alley to the other.
As they are running, the other team attempts to roll the “snowballs” and hit the
runners below the waist.
Throwers must stay behind the cones when they throw or it doesn’t count if they
hit someone.
If a runner gets hit or does not make it to the other end of the alley in 10 seconds
they cheer in a designated area.
When all of the runners are eliminated, the teams switch roles.
2nd-5th I Ad,De L2 K-5th I Ad,De L1
Start
Finish

Page | 213
Tunnel Ball
Group Size: 10-30
Age Group: 3rd-6th+ grades
Length of Activity: 15-30 minutes
Developmental Goals: To develop teamwork and a sense of boundaries
Skills Practiced: Throwing, reflexes, and defense
Equipment Needed: 3 or more dodgeballs, 3 larger cones (or targets), and smaller cones or
chalk to designate the circles
Set Up: The smaller circle should be the size of a large hula hoop. Inside this circle will be three
larger cones. The larger circle should be big enough that students outside of it should not be able
to hit the cones in the middle too easily.
Before You Start:
Remind students about dodgeball safety rules
How to Play:
Divide the group into two teams – “Offense” & “Defense”
The Offense will stand outside of the large circle, the Defense will be in between the two
circles. Both teams can move freely within their areas, but cannot cross over into the
other team’s zone.
The offensive team will have 3 dodgeballs. To “score”, they will have to knock over the
cones in the center. Once all 3 cones have been knocked over, have the teams switch
roles.
The defensive team can block the balls and defend the cones with any part of their body,
as long as they don’t cross into the center circle.
If the ball is stuck in the center, the defensive team must throw it back to the outside.
Variation(s):
Use only one ball and one target (to encourage passing and teamwork).
Use more balls to make sure that everyone feels involved.

Page | 214
3rd-6th+ I L2

Page | 215
Pin Down
Group Size: 8-50
Age Group: 1st-6th+ grades
Length of Activity: 10-30 minutes
Developmental Goals: To develop problem-solving, cooperation, teamwork, verbal
communication, eye-hand coordination, strategic thinking, listening to directions, active
listening, depth perception, and a sense of boundaries
Skills Practiced: Agility, pivoting, body and spatial awareness, throwing, catching, peripheral
vision, following directions, evasion, reflexes, observation, and defense
Equipment Needed: 8-14 bowling pins or pyramid cones, 3-6 playground balls, lines or cones to
mark boundaries
Set Up: A large rectangular space, with a line of cones in the middle to separate each team's side
from the other. Balls can be balanced on top of these cones. Bowling pins or pyramid cones
should be arranged along each team's base line.
Before You Start:
Set up a signal/whistle for freezing. Remind students that no balls may be thrown after
the freeze signal/whistle.
Remind students that they are throwing the balls at the pins/cones, not at other students.
How to Play:
The group should be divided into two teams, and each team goes to their end line to wait
for the signal to begin the game.
At no time may a student from one team cross over onto the other team's side.
When the game begins, students run to the center to grab balls.
The goal of the game is to knock over the opposing team’s pins while defending your
own, by throwing or rolling the balls.
Students may not kick the balls.
If a pin gets knocked down, no one may touch it. The leader takes the pin out of play.
Students may defend their pins by standing in front/back/alongside of it, but if they knock
it over by mistake, it is taken out of play.
The game ends when one team has knocked down all the others’ pins.
Variation(s):
Separate the space into quadrants or thirds and play with more teams
Add more balls or pins
1st-6th+ I L2

Page | 216
Race Track
Group Size: 9-30
Age Group: 2nd-5th grades
Length of Activity: 10-15 minutes
Developmental Goals: To develop cooperation, teamwork, eye-hand coordination, strategic
thinking, and a sense of boundaries
Skills Practiced: Body and spatial awareness, throwing, running, and evasion
Equipment Needed: 3-6 dodgeballs
Set Up: Set up a circular race track with cones or chalk:
Before You Start:
Divide group into three teams: Team 1 begins in the center of the track with the
dodgeballs, team 2 begins at a starting line in the track, and team 3 is spread outside the
track.
How to Play:
The game involves various heats or rounds, in which students act as race cars running
around the track trying to evade the dodgeballs.
In diagram above, Team 2 is the first set of race cars. At the starting signal, team
members begin running around the track in one direction. They run continuously around
the track for the entire heat (determined at the beginning – i.e. 1 minute), regardless of
whether they get hit by a ball.
Team 1 is trying to throw the dodgeballs at the cars and hit them from the waist down.
Team 1 must stay inside the track when they throw the balls.
Team 3 retrieves the balls that are overthrown and throws them back to Team 1 as
quickly as possible. Team 3 does not throw balls at the cars.
After the heat is over, teams switch positions. Team 2 goes into the center of the track to
be the next throwers, Team 1 goes to the outside of the track to retrieve thrown balls, and
Team 3 moves into the track to be the next set of cars.
Variation(s):
Have race cars and/or throwers keep track of the number of hits they get.
If a car gets hit by a ball, s/he moves to outside of track until another car gets hit.
Change how students are moving around the track, and/or vary the length of heats.
2nd-5th I L2
1 1 1 1
111
2 2 2 2
3
3 3
3
Page | 217
Rim Dodgeball
Group Size: 10-30
Age Group: 3rd-5th grades
Length of Activity: 10-15 minutes
Developmental Goals: To develop cooperation, teamwork, verbal communication, eye-hand
coordination, and depth perception.
Skills Practiced: Throwing, catching, dodging, and shooting
Equipment Needed: 4-5 small/medium-sized playground balls, 2 baskets on opposite sides of
gymnasium floor
Set Up: Divide teams up evenly, place playground balls in center of gym floor between the two
teams
Before You Start:
Have students on both teams start by touching the wall.
Explain to students that they need to aim at the waist and below when throwing the
dodgeballs.
If a student is hit in the head/face they will not be out.
If a student hits another student in the head more than once s/he may be subject to time
out of the game.
How to Play:
Both teams should be on the wall on their side of the court, with the balls in the middle.
When the leader blows the whistle, students may run for the balls in the center, making
sure to not cross the half court line dividing up the teams.
For a student to temporarily be "out" they must either be hit with the ball, or throw a ball
that the other team catches. When a student is temporarily "out," they stand on the side
wall.
For students to get back in the game, someone on their team must throw the ball across to
the other teams’ side and hit the backboard/rim. Once a student hits the backboard/rim,
all of his/her teammates are allowed back in the game.
The game is over when all the students on one team are knocked out to the side wall, or
when someone throws the ball from their side into the opposing teams’ basket.
Variation(s):
Impose a time limit
Hitting the backboard will only allow 1 student back in, students must hit only the rim to
let the whole team back in
3rd-5th L2

Page | 218
Crossover Dodgeball
Group Size: 10-30
Age Group: 3rd-6th+ grades
Length of Activity: 10-20 minutes
Developmental Goal: To develop strategic thinking.
Skills Practiced: Throwing, catching and evasion
Equipment Needed: 3-5 dodgeballs
Set Up: Large rectangle divided in half
Before You Start:
Review dodgeball safety rules, especially throwing only below the waist
Teach, and fairly enforce, a consequence for throwing above the waist
How to Play:
Played just like official Dodgeball, but instead of going to the waiting area when you get
hit you cross sides joining the other team.
There are 4 ways to get “out”
If a player is hit below the waist
If s/he tries to catch the ball and drops it
If s/he throws the ball and someone on the other team catches it before it bounces
If a player goes outside the boundaries unless they are chasing after a ball that
has gone out on their side
Game ends when everyone is on one side.
3rd-6th+ Ad,De,Ed L2

Page | 219
Medic Dodgeball
Group Size: 10-30
Age Group: 2nd-6th+ grades
Length of Activity: 10-30 minutes
Developmental Goals: To develop cooperation skills and strategic thinking.
Skills Practiced: Throwing, catching, evasion and teamwork
Equipment Needed: Three or more soft, bouncy balls or dodgeballs
Before You Start:
Use a divided rectangle as the playing area, such as a volleyball or basketball court. An
area set up with cones also works.
Review Dodgeball safety rules, especially throwing only below the waist.
Teach, and fairly enforce, a consequence for throwing above the waist.
How to Play:
The group is divided into 2 teams, each starting on opposite ends of the court, with a line
separating them in the middle.
Teams have 1 minute to huddle and decide who their teams’ Medic is. Ask someone
from each team to tell you who the secret Medic is.
Tell students to wait for your signal to begin and then pass out the balls.
When both teams are ready, on their lines, give the signal to begin.
The teams then start throwing balls at each other. There are 4 ways to get “wounded”.
If a player is hit below the waist
If s/he tries to catch the ball and drops it
If s/he throws the ball and someone on the other team catches it before it bounces
If a player goes outside the boundaries unless they are chasing after a ball that
has gone out on their side.
When a player is “wounded” s/he must kneel down.
A player who is “wounded” can still catch and throw the ball but cannot move
from the place where s/he is kneeling.
If a Medic comes by and taps a “wounded” player on the shoulder s/he is healed
and can move again.
If the medic gets out, no one can heal her/him and the medic cannot tag her/himself.
The game is over when all players on a team are down/”wounded”. This game can go on
for a very long time. Consider having 3 five-minute rounds instead of a 15-minute game.
Variation(s):
Medic & Spy: The leader of the game can at any time yell, “SPY! 10 Seconds!” and then
slowly count to 10. The designated spy on each team is allowed to take one ball across
the line and try to get the other players out. The spy must be back on his or her side
before time is up. If the spy does not make it back in time, they are out and can be tagged
by the medic.
2nd-6th+ I Ad,De L3

Page | 220
Nation Ball
Group Size: 10-30
Age Group: 3rd-6th+grades
Length of Activity: 10-30 minutes
Developmental Goal: To develop an understanding of teamwork
Skills Practiced: Throwing, catching and evasion
Equipment Needed: 2-6 dodgeballs, soft playground balls
Before You Start:
Use any rectangle with a center line as a play area
Review Dodgeball safety rules, especially throwing only below
the waist.
Teach, and fairly enforce, a consequence for throwing above the
waist.
Explain the rules to students and ask them to explain the game
back to you.
How to Play:
This game is very similar to standard Dodgeball. Students start spread out with each
team on one side of the center line. Distribute the balls evenly between the teams.
Upon the start signal, students can begin throwing balls at each other. There are 4 ways to
get “out”.
If a player is hit below the waist
If s/he tries to catch the ball and drops it
If s/he throws the ball and someone on the other team catches it before it bounces
If a player goes out of bounds while trying to avoid being hit
When a player is hit with the ball, they must go anywhere out of bounds on the other
team’s side.
Players outside the boundaries must get the ball anytime it goes out of bounds on that
side.
They are still trying to get the opposite team’s players out.
At any time, players can pass to their teammates, whether those teammates are in or out.
The game ends when all players from one team are outside the boundaries.
Variation(s):
If a player outside the boundaries hits an opponent, s/he returns to her/his team inside the
boundaries.
Players can be placed outside the boundaries to start with.
Limit the area where players can go once they get out i.e., only behind the end line.
3rd-6th+ I Ad,De,Ed L3
At start
During play

Page | 221
Sprout-Ball
Group Size: 4-40
Age Group: 2nd-5th grades
Length of Activity: 5-30 minutes
Developmental Goal: To develop evasive movement.
Skills Practiced: Evasion, use of peripheral vision, aim, accuracy and strategy
Equipment Needed: A soft, bouncy playground ball.
Before You Start:
Set up a large play area with clear boundaries appropriate for number of players.
Explain: boundaries, roles in the game and the concept of returning to active play when
the person who hit you gets hit.
Review Dodgeball safety rules, especially throwing only below the waist.
Teach, and fairly enforce, a consequence for throwing above the waist.
How to Play:
The “dodgers” will make a line on one of the boundary lines.
The object of the game is to avoid being hit with the ball from the waist down.
Students have 5 seconds to spread out inside the play area.
The leader throws the ball in the air. Students must wait for the ball to bounce 3 times
before they can grab the ball.
Once a student has the ball they may take no more 3 steps with the ball before they
throw, or pass.
If a student has been hit, below the waist, or tries to catch the throw and drops it, they
must sit down exactly where they were hit.
If a student’s throw is caught, the thrower must sit.
If a student with the ball has taken their three steps and another student is sitting, the
student with the ball may pass to the sitting student.
After the student makes a pass they can move, as many steps as they want, to a
new location and wait to receive a pass back from the sitting student.
When the student gets the ball back they make take three more steps and throw or
pass.
A student (A), who has been hit, may not stand up and continue playing until the student
(B), who hit student (A), is hit.
If student (B) has hit multiple students and then is hit him/herself, all the students
hit by student (B) can stand up and play again.
Play continues until there is only one student left standing. In the event that the ball goes
out of bounds, one student will retrieve the ball and begin by taking three steps as soon
as they step back in bounds with the ball.

Page | 222
Variation(s):
Impose a time limit on holding/throwing the ball.
Students can decide whether or not to pass the ball back to the original student.
Students must roll or bounce the ball.
2nd-5th I Ad,De L3

Page | 223
Puloga (Variation of Sprout-Ball - Distant)
Group Size: Any size
Age Group: 3rd-6th+ grades
Length of Activity: 10 minutes or more
Development Goal: To develop strategic thinking
Skills Practiced: Throwing, catching, evasion
Equipment: Dodgeballs (about 1 for every 3 players), a belt with 2 flags for each player
Set Up: Can be played outside or in a gym. Use a large rectangular area with clear boundary
lines.
Before You Start:
Hand out a belt with 2 flags attached to each player.
Explain the game. Emphasize safe moving throughout the play area and safe dodgeball
throwing practices (only below the waist.)
Designate an out-of-bounds area (basketball court boundaries work well for this game).
Have students spread out throughout the play area.
How to Play:
On the signal, players try to throw the dodgeballs at each other. If a player is hit with the
dodgeball, s/he must remove one of her/his own flags--but then can continue in the game.
The removed flag is dropped to the ground.
Players with or without a ball can attempt to remove a flag from opposing players (no
physical contact allowed). Players may not protect their flags from being removed.
A player who loses two flags — either by being hit with a ball and/or having a flag
removed by an opposing player — will be required to collect two flags from the ground
and go to the side of the playing area, and complete 5 jumping jacks before putting on his
or her flags again and rejoining the game. When exiting the play area to reattach flags,
players should hold their flags over their heads to indicate they are out of the game.
Background/Variation:
Background on the game: Puloga is an Australian Aborigine game. It is a re-creation of
mock combat tournaments that took place in the Cardwell and Tully River areas of north
Queensland, Australia. It was essentially an entertainment activity, though the
opportunity was taken to settle disputes. At Cairns the Yidinji people called these
activities puloga. Adapted from:
http://www.ausport.gov.au/participating/indigenous/resources/games_and_activities/indiv
idual_games/ball_games/puloga.pdf
Variation: This game can also be played with two separate teams. Use pinnies or
different-colored flags to designate the teams.
3rd-6th+ I Ad,De L3

Page | 224
Job Dodgeball
Group Size: 10-30
Age Group: 3rd-6th+grades
Length of Activity: 10-20 minutes
Developmental Goals: To develop problem solving, communication and teamwork.
Skills Practiced: Throwing, passing, catching, evasion and running.
Equipment Needed: 2 large playground balls
Set Up: Use a large space (approx. 40x50 ft.) with a safe zone for each team along the baselines;
place balls in the center of the field.
Before You Start:
Review dodgeball safety rules, especially throwing/ tagging only below the waist
Teach, and fairly enforce, a consequence for throwing/ tagging above the waist
Explain the rules to students and ask them to explain the game back to you
Divide the players into 2 teams and assign members of each team their special jobs,
Throwers- can throw the ball at opposing players
Taggers- must hold on to the ball and tag opposing players
Rollers- can only roll/ pass the ball to members of his/her team
How to Play:
Start each team in their safe zone.
When ready, yell “Go!” and players will run to the middle and grab the balls using them
to tag opposing players below the waist or on the arms. (Tags can be made either by
throwing the ball or by holding it and touching another player).
The hardest part is that each player can only do their specified job; therefore a roller
cannot tag a player out, they can only pass the ball to teammates.
Encourage students to communicate and think strategically.
If players are in their safe zone they cannot be tagged.
When a player gets tagged s/he becomes part of the other team.
Variation:
Change the special jobs to help teach new skills for other games
3rd-6th+ I Ad,De L3

Page | 225
Mix it Up
Group Size: 10-30
Age Group: 2nd–5th grades
Length of Activity: 10 minutes
Developmental Goals: To work on strategic thinking and listening to directions.
Skills Practiced: Agility, evasion, throwing, peripheral vision and following directions.
Equipment Needed: One playground ball
Set Up: Medium-sized circle with cones
Before You Start:
Have the students circle up around the cones.
Practice moving the ball across the circle with underhand hits.
How to Play:
The leader begins the game by quietly telling one student to touch two different color
cones (i.e., blue and purple), that are not right next to each other.
The student has to try and touch both colored cones and return to his/her spot in the circle
without getting hit by one of the balls in the middle of the circle.
If a student is hit, s/he can return to the circle after doing 5 jumping jacks.
After one student has finished, the leader tells the next student what colored cones to
touch.
Variation(s):
Tell the students about their cone colors out of order.
Have students touch more or fewer than 2 cones.
Add a 2nd or 3rd ball, and have more than one student touching cones at once.
2nd-5th I Ad,De L2

Page | 226
Dodgeball Switch
Group Size: 5-30 (12 recommended minimum)
Age Group: 4th-5th grades
Length of Activity: 10-30 minutes
Developmental Goals: Motor skills, ability to rotate and take turns with other students.
Skills Practiced: Strategy, throwing, hand-eye coordination and physical agility.
Equipment Needed: 5 hula hoops (or cones) and dodgeballs.
Set Up: A very large square made with 4 hula hoops, with a fifth hula hoop in the middle.
Before You Start:
Make sure the kids remember the basic rules of Switch.
Review safety rules: how to throw a dodgeball and where it is acceptable to aim.
How to Play:
Begin with one player in each hula hoop. The player in the middle has a dodgeball.
The player in the middle (the Thrower) yells “Switch!” All other players have 10 seconds
to find a new hula hoop to occupy.
The Thrower has 3 steps (or however many is appropriate given the size of your square)
to take in any direction, before throwing the ball at one of the other players (the Runners).
If the Thrower misses the Runner, then the Thrower returns to the end of the line
and all Runners remain in the game. The first player in line becomes the new
Thrower.
If the Thrower hits a Runner, then the Thrower takes that Runner’s place in any
available hula hoop. The Runner returns to the end of the line. The first player in
line becomes the new Thrower.
After this is successful, add one more Thrower to the center hula hoop. Each Thrower has
his/her own dodgeball. No matter what the result of the play, there will be two players
“out” and two new Throwers.
Keep adding to the number of players allowed in each of the five hula hoops.
Notes:
The best number of players to have in the game at any one time is 12, with 4 Throwers
in the center, and 2 Runners in each corner. With 4 new players coming in every play, it
has a fast rotation and very little down time.
This game is best played on grass, to avoid balls rolling far away on missed throws. If
you play on blacktop, be prepared to have a system for retrieving the balls.
A good lead-up to this game is Double Switch (or triple, or quadruple, etc.), which is just
Switch with more than one student on each cone/hula hoop.
Variation:
For younger children, you can play Kickball Switch, on the Kickball diamond (the bases
for corners and the pitcher’s mound for the center). Use a kickball instead of a dodgeball,
and kids have to directly tag the player with the ball instead of pegging. This game is
4th-5th I L2

Page | 227
useful to help your kids understand how bases keep them safe, and that they are not
allowed to peg with the ball.
Watch Out!
Group Size: 10-30
Age Group: K-8th grades
Length of Activity: 15-20 minutes
Developmental Goal: To develop strategic thinking.
Skills Practiced: Evasion, agility, running and spatial awareness.
Equipment Needed: Several playground balls
Set Up: Large rectangle with boundary lines (preferably a gym)
Before You Start:
Have all the students line up on one side of the space
Review that they only become part of the boundaries when they are hit from the waist
and below
How to Play:
The leader begins in the middle of the space with 2 playground balls, and shouts a magic
word (any word the group has agreed upon) to signal students to start running to the other
side.
If a student is hit with a ball while attempting to cross, s/he becomes part of the
boundaries to help return balls to the adult.
Play continues until there are two students left, and the next round begins with those
students in the middle with 4 playground balls.
Variation(s):
More or fewer students can begin in the middle
More or fewer balls can be used depending on the desired length of time for the game

Page | 228
K-6th+ I C L2

Page | 229
Cookie Jar Scramble
Group Size: 10-30
Age Group: 3rd-5th grades
Length of Activity: 10-30 minutes
Developmental Goals: To develop cooperation and teamwork
Skills Practiced: Speed, agility, coordination, throwing and passing
Equipment Needed: Cones and dodgeballs
Set Up: Mark a large rectangular field with cones and scatter dodgeballs randomly around the
inside of the rectangle.
Before You Start:
Start with students (cookies) in a line on one end of the rectangle.
Have students repeat key rules and point out the boundaries
Review safety rules
Only aim below the waist
Teach, and fairly enforce, a consequence for throwing/ tagging above the waist.
How to Play:
On your signal, cookies have 10 seconds to run from one end to the other, staying within
the boundaries.
The cookie monster attempts to peg the cookies with dodgeballs.
Cookie monsters must throw the ball, (cannot tag cookies with their hands or with a ball
in hand)
The cookie monster is free to run if s/he is not holding any balls. If s/he is holding a ball,
s/he may only pivot on one foot.
The cookie monster may not pass or roll the ball to him/herself as a method of
transportation. This is why it’s a good idea to scatter the balls ahead of time.
If there is more than one cookie monster, they may pass the ball to one another, as long as
they only move when they are not holding a ball.
Cookies are not allowed to touch a ball lying on the ground.
Those pegged by a ball become cookie monsters in the next round.
Play continues until you want the game to start over, or all cookies have been turned into
cookie monsters.
Notes:
If there are more cookie monsters than dodgeballs, then those without balls are floaters
who should run to where the cookies are, and call for a ball to be passed to them. Most
kids will not figure this out on their own, so be sure to point that out to them so they do
not feel like they are out once they become a cookie monster.
3rd-5th I Ad,De L2

Page | 230
Deweke
Group Size: Small group (Less than 10)
Age Group: 3rd-6th+ grades
Length of Activity: 10 minutes or more
Development Goals: To develop strategic thinking and teamwork
Skills Practiced: Throwing, evasion, foot-eye coordination
Equipment: 1 hula hoop, 12 bean bags, 3 dodgeballs
Set Up: Can be played outside or in a gym. Place the hula hoop in the center of the playing area
with the beanbags nearby, outside of the hula hoop. Create a boundary line around the hula hoop
– use chalk, tape or a pre-existing line.
Before You Start:
Have the students stand on the boundary line around the hula hoop--this will be the line
the "throwers" need to stay behind.
Explain the rules of the game. Emphasize that students must stay behind the boundary
line to throw a dodgeball.
Review safe dodgeball throwing practices (only throw below the waist)
Choose a student to stand in the middle.
How to Play:
One player stands in the middle of the play area, near the bean bags and hula hoop. The
other players stand outside the boundary line, with dodgeballs.
When play begins, the child in the middle has to take the beanbags between his/her feet
and then throw them inside the hula hoop while jumping--no hands allowed.
In the meantime, the players must try to hit the player in the middle with the ball. If the
ball hits him/her, then the player who hits him/her goes into the middle.
The trick is not to be hit while standing in the middle and to try to get the hoop full of
bean bags. If the hoop is full, then s/he knocks the hoop out of the way to show the others
that s/he has completed one round.
Background/Variation:
Background on Deweke: Deweke is a children's street game in Botswana. There, the
children try to put crushed cans into a tub without being hit by a homemade ball (likely
made out of trash). Adapted from: http://www.2ukids.nl/Pages/Games/africa.html
Variation: To make this game more challenging, have players put the beanbags into a
crate or box instead of hula hoop.
3rd-6th+ I Ad,De,Ed L3

Page | 231
Jump Rope/Double Dutch
Group Size: 3-10
Age Group: K-5th grades
Length of Activity: 10-20 minutes
Developmental Goals: To develop eye-foot coordination, cooperation and teamwork.
Skills Practiced: Jumping, rhythm, timing, balance and body awareness.
Equipment Needed: Jump rope(s)
Set Up: For both double dutch and single rope jumping, a standard jump rope is 15 feet long.
Waiting players form a line, or designate and follow a jumping order. Jump rope is the most
common and widely played cooperative playground game – all active participants (turners and
jumpers) need to be aware and be paying attention for the jumper to do the best job s/he can.
Before You Start:
At a recess: 1 rope grants one jumping turn, 2 ropes (double dutch) grants two jumping
turns.
How to Play:
The turners each hold one end of the rope and face each other; when turning the rope
should be arced and touch the ground at one center point.
The jumper stands in front facing one turner with the side of one foot touching the rope at
the center point of the rope.
After a jumper has completed his/her turn s/he takes the place of a turner, and the turner
goes to the end of the line. Make this clear so there is not confusion about the
responsibilities.
No do-overs are allowed; once a turn has happened, the player needs to show sporting
behavior and fair play by taking his/her turn turning the rope.
Variation(s):
Please see the Skills Building section, as there are many different fundamental and
advanced skills that can be integrated while jumping rope individually or playing double
dutch.
K-5th C Ad,Au,Cp,De,Ed L1/L2
Page | 232
Snake
Group Size: 3-20
Age Group: preK-2nd grades
Length of Activity: 5 minutes
Developmental Goals: To develop foot-eye coordination and cooperation.
Skills Practiced: Jumping and rope handling skills
Equipment Needed: Several jump ropes
Before You Start:
Review concept of personal safe space when turning a jump rope.
Explain the concept of taking turns in a jumping order and in the different roles.
Demonstrate the skill and use students to help you.
Ask students to explain the concepts and the rules back to you.
How to Play:
This is an extremely simple and fun way for students to begin learning the eye-foot
coordination needed to jump rope.
Divide students into small groups.
Each group gets one rope. Two students are turners, everyone else jumps.
The two turners kneel or sit on the ground and hold the rope to the ground.
The turners’ job is to move the rope back and forth first slowly and lowly then
increasingly faster while the jumpers try to jump over the rope – either using the two-
footed or one-footed jump.
The challenge is also to try and jump over the rope without touching the rope.
The players switch positions when you give a signal.
If necessary, start the activity with still ropes for one full round.
pK-2nd C Ad,Au,Cp,De,Ed L1

Page | 233
Helicopter
Group Size: 4-30
Age Group: preK-5th grades
Length of Activity: 10-15 minutes
Developmental Goal: To develop the eye-foot coordination needed to learn to jump rope.
Skill practiced: Jumping and timing
Equipment Needed: Several jump ropes
Before You Start:
Review concept of personal safe space when turning a jump rope.
Explain the concept of taking turns in a jumping order and in the different roles.
Demonstrate the skill and use students to help you.
Ask students to explain the game to you.
Make a large (20’ diameter) circle with chalk if you will be using a long (10’-15’) rope.
Make enough X’s on the perimeter of the circle for each player.
Caution: Make sure that students know to stay outside of the circle until the rope is
low to the ground!
How to Play:
Students stand on an X on the edge of the circle.
The leader begins slowly turning the rope in a helicopter fashion over his/her head and
says “Helicopter, helicopter over my head, I chose a color and the color is… (insert
color).”
At that point, the leader begins turning the spin on the ground and the students with the
mentioned color anywhere on their bodies or clothes take one step forward and attempt
to jump over the rope, which is now low to the ground.
Play stops when a student is hit with or stops the rope with his/her feet.
The leader then begins again with a new color..
Variation(s):
Start with the rope circling on the ground and several children already positioned to
jump as a warm-up.
Change the chant at the start of the game.
pK-5th C Ad,Au,De,Ed L1
Page | 234
Zero, 1, 2, 3
Group Size: 4-20
Age Group: K–5th grades
Length of Activity: 10 minutes
Developmental Goals: To develop basic jump roping skills, understanding jump rope school
rules
Skills Practiced: Turning with a partner, entering and exiting the rope and jumping
Equipment Needed: Several jump ropes
Before You Start:
Review concept of personal safe space when turning a jump rope.
Explain the concept of taking turns in a jumping order and in the different roles.
Demonstrate the skill and use students to help you.
Ask students to explain the concepts and the game back to you.
How to Play:
Divide students into groups of 4-10, depending on number of available ropes and student
age.
Younger students need smaller groups; older students are challenged by larger
groups. Each group gets one rope.
The leader assigns two turners and gives each jumping student a number.
This number is the jumping order for each group.
The two turners begin by turning the rope.
One-by-one the students enter the rope and then exit the rope.
In the first round, the jumpers try to run under the rope without jumping or touching the
rope.
In the second round, the jumpers jump once and exit on their turn.
After the jumpers have jumped once and exited, they go through and jump twice, then
three times etc.… until you signal it is time to switch.
If a jumper misses on their turn, s/he goes back in line and continues to try the same
number of jumps, until s/he successfully jumps and exits.
Be sure to rotate the students who are turning the rope.
Variation(s):
For more skillful and advanced jumpers, change from just jumping and exiting to doing
tricks while jumping.
Examples of tricks are turning around while jumping, touching the ground while
jumping, crisscrossing the feet or one-footed jumps.
K-5th I Ad,Au,De,Ed L1

Page | 235
Jump Challenge
Group Size: 5-20
Age Group: 3rd-8th grades
Length of Activity: 10 minutes
Developmental Goals: To develop leadership, cooperation, teamwork, verbal communication,
eye-foot coordination, strategic and creative thinking.
Skills Practiced: Balance, agility and endurance
Equipment Needed: Several jump ropes
Set Up: Open area
Before You Start:
Split the group into teams of 5-6 students each.
Give each team one regular jump rope and one double dutch jump rope.
Assign each group a jump area, giving enough space for all teams to jump.
How to Play:
Each team will have 30 seconds to get as many jumps completed as possible, and
everyone must jump at least once. (If not, that team’s score is zero.)
After each round, encourage the teams to huddle up and discuss new strategies so they
can get more jumps.
Variation(s):
Give the teams more or fewer jump ropes.
Make a suggestion to tie the ropes together and have more than one person jump at the
same time.
3rd-6th+ I Ad,Au,Bl,De,Ed L2

Page | 236
Kickball
Group Size: 8-30
Age Group: K-6th+ grades
Length of Activity: 10-30 minutes
Developmental Goals: To develop teamwork, depth-perception,
and eye-hand and eye-foot coordination.
Skills Practiced: Kicking, catching, running and throwing
Equipment Needed: Kickball and bases
Set Up: A regulation kickball field is 60’ x 60’ between bases.
An approximate size for kindergarten is 30’ x 30’ between bases.
A base line is the running path between bases. Explain the
positions on the team – standard teams are 9 players each.
3 base players: 1st, 2nd, 3rd
3 outfield: left, center, right
1 shortstop, 1 pitcher, and 1 catcher
Before You Start:
The team who wins Ro-Sham-Bo chooses whether to kick or field first.
The kicking team gets into their kicking order, and the fielding team goes to their
positions.
How to Play:
The pitcher controls the play of the game. Play begins with the pitcher rolling the ball to
the kicker. Play stops when the ball is thrown to the pitcher.
Teams switch sides after three outs or nine runs are scored. Outs are granted when:
The kicker kicks a fly ball and it is caught before it touches the ground. Note:
When a fly ball is in the air, the base runners must remain on base until after the
ball is caught (called tag-up) before they can advance to the next base.
The base player has control over the ball and a foot on the base before the base-
runner reaches the base.
The base-runner is tagged on his/her body by a fielder with the ball before s/he
arrives at the base. Note: If the base-runner must advance because of another
runner or kicker behind, it is called a force-out and the fielding team only has to
tag the base to call an out. If there is no runner or kicker behind, it is not a force-
out and the fielder with the ball must tag the base-runner.
One base-runner passes another.
A base-runner intentionally interferes with a fielder trying to recover the ball.
A runner advances one base on an overthrow to the base player.
A run is scored for the kicking team when a base-runner touches all 4 bases, in order,
without being called out at any time.
If the ball is kicked and rolls out of bounds before going past first or third base, it is a
foul ball.
Three fouls by an individual kicker equal an out.
If a ball is touched by a fielder before it bounces, it is a fair ball.
K-6th+ De L3
Catcher
Pitcher
1st Base
Person
3rd
Base
Person
2nd
Base
Person
Short
Stop
Left
Field
Center
Field Right
Field

Page | 237
Crazy Kickball
Group Size: 10-20
Age Group: K-3rd grades
Length of Activity: 15 minutes
Developmental Goals: To develop teamwork, depth-perception, and eye-hand and eye-foot
coordination.
Skills Practiced: Kicking, catching, running, and throwing
Equipment Needed: Bases, cones, 3 or more kickballs and a hula hoop
Before You Start:
On a traditional kickball field, place a large container that can hold many balls at the
pitcher’s mound, a hula hoop also works well.
Mark the outfield with enough numbers for half the group. The numbers should
designate outfield play positions. Positions can be marked with cones or chalk.
Do not put positions farther into the outfield than you expect the students to kick.
Discuss the importance of staying at your position, calling your ball and, if necessary,
passing the ball to teammates in the outfield.
Also inform students to stay behind the pitcher while students are kicking.
Have everyone run the bases once all together in a single file line.
This is a good game to teach the basic concepts of fielding and passing while staying in a
position zone, as well as running the bases. With all this action, everyone is involved.
How to Play:
Divide the group into infield and outfield teams and give each child on each team a
number.
The numbers denote the kicking order and their positions in the outfield.
Kickers come up one at a time. They kick the ball into the field and run around the bases
continuously for a homerun.
Emphasize to the runners that they need to touch each base with their foot.
While one kicker runs, the next kicker comes up to home plate and kicks.
There are many balls so there can be many runners going around the bases at a time.
The fielders retrieve the kicked balls, pass them infield and put them into the container.
The fielders are trying to quickly pass the balls infield to keep the container full.
Tell the fielders to get the balls that come toward their position and throw them
inward to the nearest player until the ball gets back into the container.
Have students pass the ball to each other rather than running it all the way back.
When the whole kicking team has kicked and run the bases one time, the teams switch.
Variation(s):
For older students who know the game of kickball, players can stop at any base and wait
for the next kick before continuing to run.
Allow more than one player can be on a base at a time.
You could try allowing players to be tagged out in between bases.
K-3rd I L2

Page | 238
Strategy Kickball
Group Size: 16-40
Age Group: 1st-5th grades
Length of Activity: 15 minutes
Developmental Goal: To develop the capacity for team play and strategy.
Skills Practiced: Kicking, catching, running, throwing and passing
Equipment Needed: 1 cone or home plate, a standard rubber playground
ball, 4 large tumbling mats or chalk or cones to designate larger-than-usual
bases
Before You Start:
The field is set up in a rectangle with four large bases.
A cone is placed in the center of one width of the rectangle,
between 'fourth' base and first base.
Review with students the concepts of calling your ball and fair
play.
Divide the group into two teams and set a kicking order.
Demonstrate running the bases and throwing below the waist.
Ask the students to explain the game back to you.
How to Play:
The point of the game is to kick the ball and run the bases 2x and touch home without
being called out. Have your team score as many points as possible. The following are the
steps to playing the game:
The kicker kicks the pitch at the cone (home), and then runs the bases.
1st, 2nd, 3rd, 4th, then back to 1st, 2nd, 3rd, 4th and then home.
The kickers, once they have begun to run the bases, can run at any time during
play.
The runners can get “out” in the following ways:
If a fly ball is caught by the fielding team.
The runner is tagged with the ball while between bases.
If the ball hits the player above the waist, s/he gets a free walk home and a point for the
kicking team.
There are no foul balls but players are not allowed to kick the ball backwards.
Once a team has 5 outs or a 5-minute inning has gone by, they switch sides.
Variation(s):
All play stops when the pitcher has the ball.
Add additional balls.
Increase the number of times the students run the bases.
1st-5th I L2
1
2 3
4
Pitcher
Cone/Home
Page | 239
Trick ‘O Treat
Group Size: 15-45
Age Group: 2nd-6th+ grades
Length of Activity: 10-20 minutes
Developmental Goals: Cooperation, teamwork, geographic orientation, sense of boundaries
Skills Practiced: Speed and agility, body and spatial awareness, running and endurance,
peripheral vision and observation
Equipment Needed: 2-4 balls and one hula-hoop. Balls can be of any kind, but medium-larger
sized is recommended.
Set Up: Ideal play space is a kickball diamond, with the balls set up in the middle of the
diamond. If a kickball diamond is not available, a triangle or diamond can be set up using cones
as boundaries. It is recommended that a hula hoop be used as a guard around the balls to keep
them from rolling away. There should always be one fewer balls than teams (i.e. 4 teams = 3
balls, 3 teams = 2 balls).
Before You Start:
Divide students up into 4 groups. There should be a minimum of 4 students/group, and a
maximum of 10-11.
If there are not enough for 4 students/group, divide students into 2, or 3 groups,
instead. Remember to decrease amount of balls according to number of teams.
Have each team line up behind each base. The base they are lined up behind is their
home base. Their home base is also the door to the house with the treats (“balls”) they
want to grab before they run out.
Assign a number to each student (in a similar fashion to “Steal the Bacon”)
If teams are not even, have as many students as you need to be multiple numbers
so that each student is assigned at least one number.
How to Play:
Each team begins with a line behind their home base. All team members should be
prepared to run in the direction of a regular kickball home run (counterclockwise).
Note: All students from each team should be running the same direction
At the blow of the whistle, the adult calls out a number. Students whose number is called
must run a home run back to their home base without cutting any corners.
Preventing cutting corners: Attach a consequence like 5 jumping jacks
for each cut corner.
Passing: If student catches up to another, they must pass from the outside
around the other student.
When student returns to their home base, they must touch it to indicate they “rang the
doorbell” to enter and grab a treat. Once they touch their home base they are allowed to
run inside the house and grab the “treats” in the middle.
Note: Each student can only grab one ball each round.
Once all balls have been grabbed, the last student without the “treat” is “tricked”, and
his/her team receives a point. The team with the least amount of points wins.
2nd-6th+ I Ad,Au,Cp,De,Ed L2

Page | 240
Ultimate Kickball
Group Size: 16-40
Age Group: 1st-5th grades
Length of Activity: 15 minutes
Developmental Goals: To develop verbal communication and teamwork
Skills Practiced: Kicking, catching, running, throwing and passing to teammates
Equipment Needed: 4 cones or bases and a standard rubber playground ball
Before You Start:
This game can be played on a regular kickball field or by using 4 cones for bases in a
large area.
Bases should be large enough to fit multiple players.
Remind players to play in a position and to call the ball.
Encourage passing the ball.
Remind students to tag softly with the ball.
How to Play:
The object of the game is to kick the ball, run the bases, and touch home without getting
out and have your team score as many points as possible.
Divide the group into 2 teams.
There are no foul balls
Players can kick the ball backwards only if there is a backstop or wall behind home plate
There can be more than one runner on a base at any time
Runners may choose to stay on one base if it is unsafe to run.
Runners can pass each other at any time.
Runners must return to the previous base if the pitcher has the ball before they are half-
way to the next base
Runners can get out when their fly ball is caught before it bounces or if they are tagged
while not on a base.
Teams switch after one time through the kicking rotation.
Notes: This version of kickball works well because it allows the advanced players to run fast
through the bases, and the beginning players to take their time and learn the game.
1st-5th Ad,De L3

Page | 241
Over-Under Kickball
Group Size: 10-40
Age Group: 1st-5th grades
Length of Activity: 15 minutes
Developmental Goal: To develop cooperation and teamwork.
Skills Practiced: Kicking, catching, running, throwing and verbal communication
Equipment Needed: Cones for bases and a standard rubber playground ball
Before You Start:
Set up cones as bases on a traditional kickball field.
This game can played with all four bases or two bases.
Practice the over/under passing together as a whole group or a short relay race
How to Play:
When the ball is pitched, the first student kicks the ball and runs the bases.
The runner goes continuously, trying to get around the bases as many times as possible.
If you are using two bases the student runs back and forth as many times as
possible.
The fielders retrieve the ball. Once a fielder gains possession of the ball, his/her
teammates run as quickly as possible to line up in single file behind her/him.
The ball is then handed over the student’s head to the next person in line.
(over)
The second person hands the ball through his/her legs (under) to the next
person who then hands the ball over her/his head again.
The students pass the ball over and under until the last person in line has
possession of the ball and yells, “Stop!”
At this point, the runner freezes where s/he is and announces how many time s/he made it
around to home plate.
One point is given for each base s/he has touched.
Everyone on the first team gets a chance to kick and then the teams switch sides.
Variation(s):
Runners go around bases as a team. See Example B in Kickball Group Time.
After fielding players pass the ball, have the last person run to front of the line to go
through the Over-Under line twice.
1st-5th Ad,De,Ed L2

Page | 242
Mountain Ball
Group Size: 14-30
Age Group: 3rd-5th grades
Length of Activity: 15-30 minutes
Developmental Goal: To develop the capacity to play as a team.
Skills Practiced: Kicking, catching, passing, running, throwing, and strategy.
Equipment Needed: 2 cones or markers and a standard rubber playground ball.
Before You Start:
This game can be played using home base and second base on a regular kickball field or
by using 2 cones for bases in a large area.
Demonstrate the two ways a player can get out. Remind players about playing their
positions and calling a ball that is coming into their position zone.
Explain the rules and then ask the students to explain the game back to you.
How to Play:
The object of the game is to kick the ball, run to the base and back home without getting
“out.” Have your team score as many points as possible.
There are NO foul balls
Players can kick the ball in any direction.
One runner on a base at any time
A runner is out when:
A fly ball is caught before it bounces
The runner is tagged with the ball, not on a throw. No pegging.
On a fly ball base-runner must tag up before going home.
Teams switch after one time through the kicking rotation or three outs.
3rd-5th De L2

Page | 243
Bounce Ball
Group Size: Large group (10 or more)
Age Group: 1st-6th+ grades
Length of Activity: 10 minutes or more
Development Goal: Spatial awareness
Skills Practiced: Hand-eye coordination, foot-eye coordination, throwing, elusive movements
Equipment Needed: Dodgeballs (about 1 for every 2 students)
Set Up: Can be played outside or in a gym. Designate a safe area with enough room for kids to
move
Before You Start:
Demonstrate what a “one bounce” throw is. It is a throw that hits the ground one time
and then strikes another player.
How to Play:
Students are free to run around the area (gym, outside within boundaries, etc.) as they
please.
When a student picks up a ball they must stop moving and their feet become frozen.
Students throw the balls at other players using the “one bounce” throw.
If a student gets hit by a ball that has been “one bounced” they must sit down where they
got hit.
Students that are sitting are not out of the game, they attempt to get balls as they roll past
them.
If they get a ball, they may throw it, while still sitting down, at a player that is standing.
If they hit the standing player, the sitter gets to stand up and the player that got hit will sit
down.
Play continues this way for the rest of the game.
Make sure to emphasize that you may not move if you have a ball and that you should not
move while sitting down to get a ball.
Variation(s):
For younger students, if a player gets hit, they can simply do 5 jumping jacks and then
return to the game.
1st-6th+ I Ad,De L2

Page | 244
Multi-Ball (Formally known as Kick It, Throw It, Punt It)
Group Size: 10-20
Age Group: 2nd-5th grades
Length of Activity: 15-30 minutes
Developmental Goals: To develop understanding of the structure of a kickball field and team
play.
Skills Practiced: Kicking, catching, running, throwing, fielding, understanding a batting order,
strategy, and memory.
Before You Start:
On a traditional kickball field, place a kickball, football, and frisbee at home base.
Mark the outfield with enough numbers for half the group.
The numbers should designate outfield play positions.
Discuss the importance of staying at your position, calling your ball and, if necessary,
passing the ball or equipment to teammates in the outfield.
Be prepared to discuss staying in your kicking order for players in the infield.
Explain the rules and then ask students to explain the game back to you.
How to Play:
Divide the group into infield and outfield teams and give each child on each team a
number.
The numbers denote the kicking order and their positions in the outfield.
Kickers come up to home plate one at a time.
They can kick the kickball into the field, punt the football or throw the frisbee.
Then, the student runs around the bases continuously.
The fielders retrieve the equipment, pass them infield and put them on their appropriate
bases;
kickball 1st, football 2nd, frisbee 3rd.
The fielders are trying to quickly place the equipment before the runner reaches
home base.
If the runner gets home first that’s a point scored.
Remind students to be careful about base blocking and stepping on equipment when
running the bases.
Variation(s):
Add more equipment choices.
Equipment retrieved can all be placed at the pitcher’s mound.
Use three regular playground balls, and let the students kick, throw, or punt all three.
2nd-5th L3

Page | 245
Kick-Basket-Ball
Group Size: 10-30
Age Group: 4th-6th+ grades
Length of Activity: 15-30 minutes
Developmental Goals: To develop
communication, teamwork, eye-hand and
eye-foot coordination.
Skills Practiced: Kicking, throwing, passing,
catching, shooting baskets, and running
Equipment Needed: 2 playground balls,
4 cones, and a basket
Set Up: Lay out the playing field as in the diagram.
Before You Start:
Offensive team lines up behind the basket, second player in line is the thrower holding
the second ball
The fielding team spreads out on the field as in baseball, one player being the pitcher, and
one being the shooter
Demonstrate when and where to make a basket for both teams
How to Play:
At the start of each player’s turn, the pitcher gets one ball and the offensive team’s
thrower gets the other
Play begins with the pitcher rolling the ball to the kicker
The kicker kicks the ball and has to run all four bases
Before running home the runner must make a basket, taking as many shots as needed to
make one
The thrower for the offensive team can throw the ball to the base runner (the kicker) after
he or she has rounded third base
After the base runner (the kicker) makes a basket, s/he runs home
The thrower then becomes the next kicker, and the next person becomes the thrower
Meanwhile, players on the fielding team must retrieve the kicked ball and throw it to first
base, second base and third base
Third baseman throws the ball to the designated team shooter, who shoots a basket,
taking as many shots as needed to make one
If the kicking team scores a basket first, the team gets a point. If the fielding team makes
a basket first, it is an out against the kicking team
Once both teams are shooting, everyone is counting down 10 seconds at which the turn is
over.
Variation:
Rather than having outs, first team to make a basket gets a point.
4th-6th+ I L3
Basket
Team Shooter
1st base
2nd base
3rd base

Page | 246
Kindergarten Kickball
Group Size: 10-20
Age Group: preK-6th+ grades
Length of Activity: 10-20 minutes
Developmental Goals: To develop an understanding of the structure of a kickball field and
develop eye-hand and eye-foot coordination.
Skills Practiced: Kicking and running the bases
Equipment Needed: 1 kickball, 40 cones (depending on your kickball space)
Set Up: Lay down cones along each of the baselines (approximately 10 cones between home and
1st, 10 between 1st and 2nd, etc.).
Before You Start:
Demonstrate running the bases and collecting the cones
Ask the students to explain the game back to you
How to Play:
Divide players into 2 teams, kickers and outfielders.
Coach is all-time pitcher.
The outfielders should spread out; their goal is to get the kicked ball back to the pitcher
as quickly as possible.
There are no outs and no foul balls. The kickers line up and kick one at a time.
The pitcher rolls the ball to the kicker and they kick it as hard as they can.
Then the kicker runs along the baseline picking up as many cones as possible before the
ball is returned to the pitcher.
Once the pitcher has the ball, he or she yells “Stop!” to the kicker, and the kicker stops
running and collecting cones and returns to home base.
The cones collected are placed back at home base in a pile.
Then the next kicker kicks and runs along the baseline collecting cones.
Kickers can run either direction on the baselines, but cannot run across the pitcher’s
mound.
The inning is over once all kickers have kicked or if all cones have been collected.
Variation(s):
Kickers must run the bases in order
Outfield must tag a base that the kicker is running towards before they yell “Stop!”
For larger and older classes, put out more cones so all students get a chance to kick.
Allow tags and pegs to get outs for older classes. If tagged, the picked-up cones cannot be
placed in the pile.
pK-6th+ De L1

Page | 247
Steal the Bacon – Traditional
Group Size: 8-20
Age Group: K-5th grades
Length of Activity: 10-15 minutes
Developmental Goals: To develop teamwork, listening skills, and number recognition.
Skills Practiced: Running, body and spatial awareness, following directions and evasion.
Equipment Needed: Any object or ball (rubber chicken, cone, tennis ball, etc.) to be the “bacon”
Set Up: Large rectangular area, such as a basketball court or field. Designate clear boundary
lines.
Before You Start:
Describe the rules and demonstrate running into the center, grabbing the “bacon”, and
running it across their team’s goal line (one at each end of the playing area).
Ask the students to describe the rules of the game back to you.
Remember that younger students may have a difficult time remembering their numbers.
Asking them to show you their number with their fingers will help them remember.
How to Play:
Divide the students into 2-4 groups; each team sits on a boundary line.
Give each student a number. Each group should have a 1, a 2, etc.
Place the “bacon” in the center of the playing area. Assign each team one goal line at
either end of the playing area.
The adult calls out a number, and all students with that number run to pick up the
“bacon”.
The student who gets the “bacon” first tries to run across his/her team’s goal line without
being tagged. The student whose number was called who did not get the “bacon” should
try to tag the other player before they get across the goal line.
Once someone is tagged or gets across their goal line, the round is over, all the students
who played in the round give each other high-fives, and they go back to the boundary
line with their teams.
Variation(s):
For older students: Use addition/subtraction, multiplication/division to call out the numbers; “the
players with the number that is equal to 2 plus 3.”
Call more than one number at a time and require students to pass the bacon once
before they can score.
Pre-K: Have students stay seated while they are waiting for their turn. Use a washable
marker to write their numbers on their hands. Place two balls/objects in a hula hoop in
the center and make sure each team knows which ball and which goal is theirs. Before
playing, demonstrate how to stand up, get the ball, kick/throw/roll it through the goal,
retrieve the ball, put it back into the hula hoop and sit back down.
K-5th I De L2

Page | 248
Basketball
Group Size: 8-24
Age Group: 2nd-6th+ grades
Length of Activity: 10-30 minutes
Developmental Goals: To develop leadership, teamwork, and eye-hand coordination.
Skills Practiced: Passing, catching, pivoting, peripheral vision, running, endurance and pacing
Equipment Needed: Basketball and basketball hoops
Set Up:
10-12 players on each team
5 on court, per team - 1 center, 2 forwards, 2 guards
Standard court size is 92’ (28 m) x 50’ (15 m). The court is divided into two halves; at the
center of each end is a bottomless net basket, suspended by a backboard 10’ high.
Foul-shot lines and an arc are on both halves, in front of and under the basket.
Before You Start:
Divide students into two teams.
How to Play:
Play begins with a jump ball in the center of the court with each teams’ center jumping
to attain possession. The players begin on the opposite half court of their basket.
The offensive team has possession of the ball, the defensive team does not. The players
must dribble the ball down the court – bouncing the ball with one hand for every two
steps taken.
A ball going out of play over the boundaries stops the game. The ball is thrown back into
play by the opposing team of the person who last touched the ball.
Points are scored when the ball passes through the net. Foul shots equal 1 point; a basket
made behind the arc equals 3 points; all other baskets equal 2 points.
After a basket is made, the team that did not score is granted possession; they must
throw the ball into play behind the boundary, under the scored basket.
A foul and two foul shots (free shots without interference by defense) are granted to the
offended team when:
A defensive player interferes with the offensive player by making body contact
with his/her hands.
An offensive player runs into a planted (standing still) defensive player.
Unnecessary and deliberate tripping, pushing, or inappropriate language occurs.
Violations by the player handling the ball result in a turnover – possession of the ball
switches teams. The ball is thrown into play from outside the boundary.
Violations by the player handling the ball are:
Traveling: the ball is carried for more than 2 steps; the player stops moving and
holds the ball with both hands and then moves his/her pivot foot.
Double Dribbling: the ball is dribbled with both hands at the same time; the ball
is dribbled, then held with both hands, and then dribbled again (to avoid this
violation, the player must either pass or shoot the ball).
2nd-6th+ Ad,De L3

Page | 249
Power
Group Size: 3-20
Age Group: 2nd-5th grades
Length of Activity: 10-15 minutes
Developmental Goal: To provide an opportunity to practice the skills for traditional basketball.
Skills Practiced: Shooting, rebounding and catching
Equipment Needed: 1 basketball per group, basketball hoops
Before You Start:
Explain and demonstrate the game.
Ask students to explain the game back to you.
Have a drill or skills-building activity for those students who get out, so they are
working on a basketball skill while waiting for another round.
Divide students into groups. Each group has a ball and is assigned a hoop.
Make sure the children know how to spell the word you use. For younger students, use
chalk or a poster to remind them.
How to Play:
Give each player in each group a number.
The student who is the number 1 takes a shot from anywhere within the game
boundaries.
If student 1 makes the shot, the student who is number 2 has to attempt a shot from the
same spot. If number 2 makes the shot, number 3 attempts the same shot, on down the
line.
If a shot is missed, following a shot being made, the player who missed the shot earns a
letter. In this case it will be a ‘P’, which is the first letter in the word power.
The next player can again shoot from anywhere and does not earn a letter if they miss.
Once a player has earned all the letters in the word POWER, they are out. The game is
over when all players have earned all five letters in POWER.
A letter can only be earned if the person shooting misses directly after someone else
makes a basket.
Variation(s):
Use a different word to spell.
Allow different moves before the shot that also need to be replicated if the shot is made.
2nd-5th Au,De,Ed L2

Page | 250
Basketball ‘Playworks’
Group Size: 2-8
Age Group: 1st-6th+ grades
Length of Activity: 10-30 minutes
Developmental Goals: To develop concentration skills, eye-hand coordination, and depth
perception.
Skills Practiced: Shooting, rebounding, peripheral vision, running, and pivoting.
Equipment Needed: One basketball and one basketball hoop, half of basketball court
Set Up:
Give each student a number (for example: #1 thru #8 if there are eight players)
Explain that each student will be shooting on their own and no one will be playing
defense on the shooters.
#2 player will rebound #1’s shot, #3 will rebound #2’s shot and so on. #1 will rebound
the last #’s shot.
Have all players line up on the free throw line or sideline to start.
How to Play:
#1 will take a shot from the free throw line. #2 will then have to rebound that shot,
whether it goes in or not, before the ball bounces two times on the court. If the ball
bounces more than once, that rebounding student (#2) gets the first letter “P” of
PLAYWORKS (each sequential time the ball bounces more than once, the rebounding
student gets the next letter of PLAYWORKS).
#2 freezes wherever s/he is able to rebound the ball (even if s/he is off the court – there
are no line boundaries).
#2 can take up to three steps from where s/he rebounds the ball, and then takes a shot.
#3 then goes for the rebound through the same process.
The first person to spell out all the letters of PLAYWORKS is out and has to do a task
(like 20 jumping jacks, 2 laps around the yard, etc.) before getting back in the game.
In between shots, the rebounder waits wherever s/he took his/her last shot (if
standing/waiting students need to move a little to get out of the way of a rebounder that’s
okay)
The ball must hit a part of the backboard or rim (not just the net) for the shot to count. If
the ball does not hit part of the backboard or rim, the shooter shoots again.
Variation(s):
For younger students, allow the ball to bounce two times before getting a letter
Shorten the word to “PLAY” for a shorter game
If a student rebounds the ball before it bounces at all, s/he can erase the last letter that
s/he got
If a player makes a shot, s/he can erase the last letter that s/he got
1st-6th+ L2

Page | 251
10
Group Size: Small group (Less than 10)
Age Group: 3rd-6th+ grades
Length of Activity: 10 minutes
Development Goals: Understanding basketball concepts, interpersonal relations, hand-eye
coordination and basketball shooting
Skills Practiced: Fine and gross motor skills, shooting basketball, rebounding
Equipment Needed: 1 basketball per each group of ten or fewer.
Set Up: Basketball court
Before You Start: Put students into groups of ten or fewer, and have them form a straight line at
the free throw line.
How to Play:
The first player shoots: if s/he misses, s/he goes to the end of the line.
If s/he makes a basket the next player must make 2 baskets.
If the following player does not make 2 baskets then they get 2 points. If the
player makes 2 baskets then the next player must make 3 baskets or get 3 points
etc.
If the first player makes the basket but the second player doesn’t, points will restart to
1point (similar to the basketball game “Horse”, or in this manual, “Power”.)
Once a player makes it to 10 they are out for the round.
Variation(s):
Shoot from a shorter or further distance or use a smaller hoop for younger students.
Players who are out can perform tasks (jumping jack, push-ups etc.) to return to the
game.
3rd-6th+ I Ad,Cp,De,Ed L2

Page | 252
Around the World
Group Size: 3-20
Age Group: 2nd-5th grades (K-1st with a mini-hoop)
Length of Activity: 10-15 minutes
Developmental Goal: To provide an opportunity to practice the basic skills for traditional
basketball.
Skills Practiced: Shooting, rebounding and catching
Equipment needed: 1 basketball per group, basketball hoops
Before You Start:
Place cones or chalk marks around the perimeter of the key (area near the hoop).
Explain the rules of the game.
Demonstrate how a player moves to the next marker and shoots again after a successful
shot.
Demonstrate how a player, after missing their shot, moves under the basket and
rebounds the ball for the next player.
Ask the students to explain the game back to you.
How to Play:
Line players up behind first cone/chalk mark.
The first student (#1) shoots from the first spot. If s/he makes the basket, s/he advances
and shoots from the next spot. The same player continues around the markers until a
basket is missed.
After #1 misses, s/he goes under the basket and rebounds the ball for player #2.
Player #2 rebounds the ball for player #3, etc.
Player #1 returns to the end of the line.
When all other players have had turns, Player #1 returns to the last place s/he made a
basket and continues as before from that spot.
A player is finished when s/he has successfully made baskets all the way around the
court.
Variation:
Once a player makes it all the way around, they have to go backwards around the circuit.

Page | 253
Steal the Bacon – Basketball Style
Group Size: 8-20
Age Group: 2nd-5th grades
Length of Activity: 10-15 minutes
Developmental Goals: To develop eye-hand coordination and listening skills
Skills Practiced: Dribbling, shooting and rebounding
Equipment Needed: 1-4 Basketball hoops, 2-4 Basketballs
Before You Start:
Use a basketball court, or a large rectangular area.
Designate clear boundary lines.
Describe the rules and demonstrate the skills.
Ask the students to describe the rules of the game back to you.
Remember that younger students may have a difficult time remembering their numbers.
Asking them to show you their number with their fingers will help them remember.
How to Play:
Divide the students into 2-4 groups; each team sits on a boundary line.
Give each student a number. Each group should have a 1, a 2, etc.
Assign each team one ball, which is placed in the center of the court.
The leader calls out a number.
All students with that number run to pick up their team’s ball.
The students run back to the basketball hoop/s and attempt to make a shot. If a student
makes the basket s/he earns a point for her/his team, then s/he returns the ball back to the
designated area in the center of the court.
Variation(s): As students’ age and skill level progresses, several elements can be added or
changed to keep this game interesting and exciting.
Allow students to continue attempting shots until one is made.
For K – 1st: Have students dribble to the hoop or back to their spot in line.
For older students: Use addition/subtraction, multiplication/division to call out the numbers; “the
players with the number that is equal to 2 plus 3.”
One ball per 2 teams can be used for 1 on 1 play with defense and rebounding.
Both players try to make the first shot, using the same ball, at the same basket.
Players can compete against each other on a half court (1 v 1, 2 v 2, 3 v 3) or full
court (4 v 4, 5 v 5).
K-5th Au,De,Ed L2
Page | 254
Twenty-One
Group Size: 3-20
Age Group: 3rd-6th+ grades
Length of Activity: 10-15 minutes
Developmental Goals: To develop eye-hand coordination, teamwork and communication.
Skills Practiced: Dribbling, catching, shooting, pivoting, guarding, and rebounding
Equipment Needed: 1 Basketball per student group of 3-5, a designated basketball hoop for each
group.
Before You Start:
Designate clear boundaries for each group.
Give each group one ball and identify one player to have first possession.
Explain the rules with a demonstration.
Ask the students to explain the game back to you.
How to Play:
Divide players into groups of 3-5 with each group having a designated goal or hoop.
The student with first possession puts the ball into play by shooting a free throw shot.
Whoever rebounds the ball has possession. Decide who will be the first to guard the
player who has possession of the ball.
Only one person can guard the player who has control over ball, other players wait to get
the rebound. There is no double-teaming. When a player loses possession of the ball or
misses a shot, the new player who has gained possession of the ball attempts to shoot.
Once the game is in play the person who last shot the ball or who last had possession of
the ball is the only player who can guard the player that currently has the ball.
Each time a player makes a basket; they get two points and go to the free throw line.
Each successful free throw is an additional point.
The first player to earn 21 points, without going over, is the winner. If a player goes over
21 points their total score goes back to 11.
As skill level progresses, expect more from the game. For example, in kindergarten it is
okay for students to walk/run while holding the ball, third graders need to be more aware
of fouls and dribbling.
2nd-5th I Au,De,Ed L2

Page | 255
Knockout
Group Size: 5-15
Age Group: 3rd-6th+ grades
Length of Activity: 10-15 minutes
Developmental Goals: To develop eye-hand coordination and depth perception.
Skills Practiced: Dribbling, shooting, rebounding and agility
Equipment Needed: 2 basketballs per 1 basketball hoop.
Before You Start:
Explain the rules of the game. Be prepared to do several demonstrations, stopping in the
middle to ask students what comes next.
Ask the students to explain the game back to you.
How to Play:
Students form one line at a cone a few feet behind the foul line, facing the basket.
The first two players in line get a ball.
The object of the game is to have your entire line of players make a basket before the
other line does.
Player #1 takes their first shot from the foul line.
As soon as player #1 attempts the first shot, player #2 can attempt a shot from
the foul line.
If a player misses their first shot from the foul line, they can then rebound and shoot
from anywhere on the court.
Both players are trying to be the first to make a basket.
If Player # 2 makes it before Player #1, Player #1 was “knocked out”
Both players pass their balls to the person at the front of the line.
Both players go to the end of the line.
If Player #1 makes it first, Player #2 continues to shoot until s/he makes a basket.
Player #1 passes the ball to the first person in line and goes to the end of the line.
Player #3 shoots a foul shot, now trying to get it in before Player #2.
Once a player scores or is knocked out they should pass their ball to the next person in
line as quickly as possible.
Players may not at any time touch the other player’s ball with their body or their ball.
Variation(s):
If player #2 scores before player #1, player #1 is out and waits until the next game and
player #2 goes to the end of the line, and the process continues.
Players can hit each other’s basketball with their own ball. This can only be done after
the ball is in the air. All players should know and agree to this rule before beginning.
pK-6th+ Ad,De L2 3rd-6th+ Au,De,Ed L2

Page | 256
Medic Basketball
Group Size: 6-25
Age Group: 3rd-6th+ grades
Length of Activity: 15-30 minutes
Developmental Goals: To develop cooperation, teamwork, nonverbal communication, eye-hand
coordination, strategic thinking, and depth perception.
Skills Practiced: Shooting a basketball
Equipment Needed: One basketball and a few cones
Set Up: Set up two cones near each basketball hoop where you’d like the teams to shoot from.
Before You Start:
Divide students into two equal teams and have them line up behind the cones.
How to Play:
Give each team a few minutes to select a medic.
The first student in each line will have a chance to shoot the ball (have them play Ro-
Sham-Bo to see who goes first). If the student makes a basket, s/he goes to the end of the
line, earning a point for the team and remaining in the game. If the student misses, s/he
will leave the line and stand off to the side.
If the medic makes a basket, every student who previously missed can return to the line.
Play continues until one line has lost all of their players or the teams have combined to
equal a set number of baskets.
Variation(s):
If the medic has previously missed a shot, s/he can return to the game if one of his/her
teammates makes a basket (can allow the game to continue longer, and increase all
student involvement).
Allow students to shoot from anywhere they want or increase the distance of the shot.
(Varies the difficulty depending on the skill level of the group.)
3rd-6th+ I L2

Page | 257
Three Lines Basketball
Group Size: 6-30
Age Group: 3rd-6th+ grades
Length of Activity: 10-40 minutes
Developmental Goals: To develop teamwork and communication.
Skills Practiced: Dribbling, catching, shooting, pivoting, guarding and rebounding
Equipment Needed: 1 basketball, 3 cones, 1 basketball hoop, marked boundaries
Before You Start:
Place 3 cones across the half-court line.
Explain the rules of the game and the rules of basketball.
Ask the students to explain the game back to you.
How to Play:
Arrange students into three single-file lines, one behind each cone.
The first student in each line steps forward, turns and faces the next student in line.
The three people that have stepped out are a team of three and will play defense.
They will be playing in a half-court game against the next students who are first in line
behind each cone.
The three students who are now at the front of the line form another team of three.
Other students in line are waiting their turn to play while cheering.
The defenders get ready as the first offensive player starts with the ball.
The player passes the ball to one of her/his teammates to start the game.
The object of the game is to be the first team to score.
The following rules apply:
If a player shoots and misses, either team can rebound the ball and shoot again
immediately.
When a point is scored the team that made the basket stays on the court to play
the next three people in line.
o The team that scored starts on defense.
o The team that did not score returns to the end of the lines.
If a foul is called, the player who has been fouled gets to throw the ball in from
out of bounds.
If a game is taking too long, count down from 10..9..8.. etc.
The last player holding the ball takes a free throw. If the player makes it, her/his
team stays on the court.
If the player misses, her/his team returns to the end of the line and the other team
stays on the court.
If a team wins three times in a row, they get three claps and return to the end of the line.
Variation:
Players cannot dribble, in order to move the ball they must pass.
3rd-6th+ Ad,De L2

Page | 258
Pass and Move Basketball
Group Size: 6-12
Age Group: 2nd – 5th grades
Length of Activity: 10-15 minutes
Developmental Goals: To develop teamwork, communication and eye-hand coordination.
Skills Practiced: Passing, shooting, pivoting, rebounding and moving without the ball.
Equipment Needed: 1 basketball, 1 or 2 basketball hoops.
Before You Start:
This game can either be played on a full basketball court with 8-12 players or on a half
court with 6-8 players.
Boundaries should be marked if the court is not already lined.
Explain the game to the students and ask them to explain the game back to you.
Review basic basketball rules.
How to Play:
Students should be divided into two even teams.
On a full court, teams should be assigned a basket at which their team will shoot.
In a half-court game, an area should be marked where the ball must be returned to after a
defensive rebound in order to restart the offense.
Toss the ball in the air between two players for a jump ball at half court (for older
students) or Ro-Sham-Bo (with younger students) to see which team receives first
possession of the ball.
The game is played with the exact rules of regular basketball except players may not
dribble the basketball.
When a player has possession of the ball, s/he can only pivot, pass, or shoot.
Players who do not have control of the ball can move and try to get open for a pass.
Variation(s):
On a full court, a second ball can be added to increase the pace of the game and increase
contact with the ball.
Designate a specific number of passes that a team must make before they are allowed to
shoot and/or make a rule that every player must receive a pass before a shot is attempted.
2nd-5th I De L2

Page | 259
Defensive Drills
Group Size: 3-20
Age Group: 3rd-5th grades
Length of Activity: 10-15 minutes
Developmental Goal: To develop an understanding of one-on-one defense.
Skills Practiced: Dribbling, defense and agility.
Equipment Needed: Basketball, cones
Before You Start:
Prepare an area, preferably a basketball court, marked by cones, chalk, or lines.
Prepare students for an activity that will have several short games.
Review basketball rules.
How to Play:
Quickness
Divide players into two groups, lined up shoulder-to-shoulder.
Lines should face each other across a bounded area.
Start with both lines facing each other, while you are standing between the two
lines.
Throw the ball down the court and the first person from each line runs down the
court to retrieve the ball.
The player who gets the ball first attempts to dribble the ball back to you.
The other player plays defense.
When the ball is back in your hands, the next people in line are up.
Shoulder Move
Paired off, players face each other, holding onto each other’s shoulders.
Players take turns leading each other, moving around the court.
You can give different signals to signify different movements, i.e. one whistle
means move left, two whistles means move right.
Pursuit
Players pair up.
One player leads, moving all around the court, while the other player must follow
and stay within 3 ft. of the leader.
Players switch after 1 minute or when you give a signal.
Cone Weaving
Set up several rows of cones, side-by-side with about 4 ft. between them.
Pair students and have them line up behind each row of cones.
Players must weave through the cones in pairs, without passing or tripping over
each other, for a designated amount of time (i.e. 2 minutes).
You can signal a change of direction.
3rd-5th I Ad,Au,Cp,Ed L1

Page | 260
Basketball Bowling
Group Size: 5-25
Age Group: 3rd-6th+ grades
Length of Activity: 5-15 minutes
Developmental Goals: To develop eye-hand coordination and increase listening capabilities.
Skills Practiced: Following directions, running and shooting
Equipment Needed: 1 basketball
Set Up: A basketball court-sized space, using one half of the basketball court as the boundaries.
Before You Start:
Review boundaries and rules, ask for questions.
Have students line up in a single file line behind the free throw.
Practice shooting the basketball from the free throw line.
How to Play:
Have all the players line up in a single file line behind the free throw line facing the
basket.
The first person in line shoots from the free throw line, once the shot goes up all players
in line must disperse trying to get away from the ball.
On a made shot the player who made the shot must retrieve the basketball.
Once s/he retrieves the basketball, they must yell “FREEZE”, at which point all
the players must stand still.
The player with the ball then rolls the ball towards a player trying to hit them
with the ball.
If the ball touches a player, that player is out of the game until the next game
round.
On a missed shot, the next player in line must retrieve the ball before it bounces three
times.
Once s/he retrieves the ball they must also yell “FREEZE”, and attempt to hit
someone by rolling the ball.
If they are unsuccessful they are out of the game until the next round.
The player who missed the shot must also run away trying to avoid the player
with the ball.
Variation(s):
Players can receive a letter instead of immediately being out of the game.
For instance they can use the word “B-O-W-L”, and can get hit four times, to make the
game more inclusive.
3rd-6th+ I Ad,Au,De,Ed L2

Page | 261
Tap Ball
Group Size: 10-20
Age Group: 3rd-6th+ grades
Length of Activity: 15 minutes
Developmental Goals: The purpose of this activity is for students to reinforce their skills of
basketball, soccer, and football. This activity involves the shooting of soccer, passing of football,
and the concept of dribbling in basketball.
Skills Practiced: Running, accuracy, hand-foot-eye coordination and spatial awareness.
Equipment Needed: 2 nets or cones for goal area, soft foam ball
Set Up: Designate a large play area with clear boundaries that has room for students to run.
Create a safety shooting line that offensive players cannot cross when attempting to score.
Before You Start:
Split group into 2 teams
Use cones or lines to delineate boundaries
Go over safety zone, and safety shooting line
How to Play:
The game begins with a jump ball or tip-off, like in basketball.
The player who gets the ball can run with it, however, if they choose to run they have to
tap the ball up and down in their hand as they run.
It is called a travel if the player runs with the ball without tapping it, just like in
basketball.
Opposing players may steal the ball.
Players may pass the ball by throwing.
Players may not pick up the ball off the ground with their hands. They must use their legs
and jump up and catch it, or kick it up in the air to be caught.
Players must make at least 3 passes before scoring a goal.
The goalie on each team may use their hands to pick the ball up within the designated
safety zone, past the shooting line.
Players may throw or kick the ball into the goal.
Variation(s):
Depending on the space available have many games going on at the same time. It works
best when teams are 5-on-5, not including the goalie.
Add an additional ball.
Alternate Names of the Game: Tap Speedball
3rd-6th+ I L3

Page | 262
Soccer
Group Size: 8-24
Age Group: 2nd-6th+ grades
Length of Activity: 10-30 minutes
Developmental Goals: To develop eye-foot coordination, teamwork, verbal communication and
strategic thinking.
Skills Practiced: Running, spatial awareness, kicking, peripheral vision and endurance.
Equipment Needed: One soccer ball and two nets/goals.
Set Up: A major league soccer field is a little larger than the size of a football field. The width of
the field is 50 yards minimum/100 yards maximum; the length is a minimum of 100
yards/maximum of 130 yards.
Before You Start:
There are 11 players on each team: a goalie, defenders, midfielders, and forwards.
First possession is awarded to the team who wins a coin flip or Ro-Sham-Bo.
How to Play:
The game begins with a kickoff in the center.
The two teams stand on opposite sides of the field and wait until the team awarded
possession passes the ball forward.
Once the ball has been touched forward, play begins.
However, play cannot begin by dribbling the ball; the first touch of the game is a pass.
When the ball goes out of play from a side boundary line, it is put back in play with a
throw in.
This is an overhead throw using two hands with both feet remaining on the
ground.
The throw in is given to the team who did not cause the ball to go out of bounds.
A corner kick is awarded when the ball goes over the end boundary but not through the
goal, and is last touched by a defensive player.
The ball is placed at the nearest corner, and the offensive team gets a free kick.
A goal kick is awarded when the ball goes over the end boundary but not through the
goal, and is last touched by an offensive player.
The ball is placed in front of the goal area, and the defensive team gets a free
kick.
Tripping, pushing, and deliberate use of the hands are called fouls.
A foul results in a free kick from the point of the foul by the person who received
the trip/push/use of hands.
Illegal use of the hands includes anything from just below the shoulder and
down; including elbows and arms.
A goal is scored when the ball passes through the marked goal area.
If the game uses cones for a goal, the shot must be below head level of the goalie.
Play then stops, the ball is returned to the center of the field, and the non-scoring
team restarts play with a kick off identical to the one that began the game.
2nd-6th+ I Ad,De L3

Page | 263
Keep Away Soccer
Group Size: 6-20
Age Group: K-5th grades
Length of Activity: 10 minutes
Developmental Goals: To develop eye-foot coordination, communication and cooperation.
Skills Practiced: Kicking, passing, trapping and spatial awareness.
Equipment Needed: 1 ball, preferably a size 4 soccer ball, and jerseys.
Before You Start:
Set up an area with clear boundaries, using lines or cones.
Explain the rules of the game and ask students to explain the game back to you.
Review the basic soccer rules which you are reinforcing with this game.
Explain and demonstrate the concepts of passing with the side of your foot, evading
players on the other team, calling for a pass, spreading out and safe defense, without
touching.
How to Play:
Split students into two teams.
Have one or both teams wear jerseys so players can tell who is on their team.
Begin with three or four players keeping it away from one player.
For the lower skill levels, begin the keep-away game with only one or two
players, rotating them periodically.
As the players become more comfortable with the ball, the teams can be made
more even.
Players try to keep possession of the ball by passing the ball with their teammates.
The team that does not have possession attempts to regain the ball and keep the ball
away from the other team.
Points can be given if teams make a certain number of passes before the other team
touches the ball.
Assign players a position so they have a spot on the field they know they should play
near.
K-5th I Ad,De L2

Page | 264
Soccer 4-Square
Group Size: 4-16
Age Group: 4th-6th+ grades
Length of Activity: 10-20 minutes
Developmental Goals: To develop eye-foot coordination and strategic thinking skills
Skills Practiced: Juggling soccer ball and short passes
Equipment Needed: One soccer ball
Set Up: A standard 4-square area is one large square that is divided into 4 smaller squares of
equal proportion measuring approximately 5’ x 5.’ Each square is labeled sequentially A, B, C,
and D.
Before You Start:
One student is placed in each square and the rest form a line outside of the square labeled
D.
The student in square A is always the one that serves the ball.
How to Play:
Play begins when the server drops the ball and kicks it so that is bounces at knee height
into another player’s square. Make sure the server is not kicking the ball at the other
players or so hard that it is not returnable.
The ball can bounce one time in your square each time you kick or make legal contact
with the ball. All hits are legal except using your hands, as in soccer.
If the ball bounces in your square it is your job to legally hit the ball so it bounces in
another players’ square.
If you kick the ball out of bounds or into another player you go to the end of the line.
If the ball hits the line between boxes A and B (for example) either player in A or B
square can attempt to make contact with the ball and legally hit it into another players’
square.
If the ball bounces twice in your square without legally being touched in between
bounces, that player goes to the end of the line.
4th-6th+ Ad,De L2

Page | 265
Wide Goal Soccer
Group Size: 12-32
Age Group: 2nd-6th+ grades
Length of Activity: 10-20 minutes
Developmental Goals: To develop eye-foot coordination, communication and teamwork.
Skills Practiced: Dribbling, stopping, passing, kicking and spatial awareness.
Equipment Needed: One soccer ball, cones to mark end zone line.
Before You Start:
Prepare one large rectangular playing area, preferably on grass (30’x 90’) with marked
end zones.
Review the soccer concepts that you want to teach through this game.
Explain the rules of the game and ask the students to explain the game back to you.
Teach the students what makes a kick a goal for their team.
Demonstrate all the basic skills needed: throw ins, passes, traps, shots, etc.
How to Play:
Students are divided into two teams; each team is divided equally into forwards and
goalies.
Have 2 students Ro-Sham-Bo to see which team starts with possession of the ball.
The game begins with a forward pass from the center.
The forwards try to kick the ball across the opposite team’s goal line; the goalies try to
stop the goals.
Only the goalies can use their hands.
Goalies kick or throw the balls from saved goals back into the field. After a goal is
scored, the ball comes back to the center of the field and possession is granted to the
non-scoring team.
When the ball goes out of bounds, a forward from the opposite team throws it into play.
Fouls (illegal use of hands, pushing, tripping, etc.) result in a free kick from the point of
foul from the person who received the foul.
Change positions either after a goal is scored, a time limit or you give a signal.
Variation:
Multi-balls: add more than one ball to the game for more involvement, after the game is
successful.
2nd-6th+ I Ad,De L3

Page | 266
World Cup Soccer
Group Size: 15-25
Age Group: 2nd-6th+ grades
Length of Activity: 20 minutes
Developmental Goals: To develop teambuilding, eye-foot coordination and a sense of
boundaries
Skills Practiced: Body/spatial awareness, kicking, endurance
Equipment Needed: 2-3 soccer balls, multiple pinnies of different colors, cones
Set Up: Make sure you have a large space; set boundaries and goals with cones.
Before You Start:
Break group into even teams. Number of teams depends on total number of students
(usually 4-5 per team) multi-colored pinnies usually work well for distinguishing teams
Pick two students to be the goalies
Designate an area on the sidelines for each team
Review safety precautions
How to Play:
The game is a multi-round free-for-all between all of the teams.
The goal is to score a goal in either net as fast as you can.
You need to pass the ball at least twice before you score.
If a team scores a goal, they qualify for the next round and should return back to their
designated area on the sidelines.
Each round is played until there is one team left on the field without a goal. This team is
out of the tournament and they now become cheerers.
Rounds will be played until there is one world cup champion at the end.
The game starts on the signal. Once all of the balls are thrown into the playing area then
all the players can enter.
The goalie should throw the balls back towards the center of the playing area to keep the
flow of the round.
Variation:
No one is eliminated. Keep playing free-for-all rounds.
2nd-6th+ I Ad,De,Ed L2/3

Page | 267
Steal the Bacon – Soccer Style
Group Size: 8-20
Age Group: 2nd-5th grades
Length of Activity: 10 minutes
Developmental Goal: To develop eye-foot coordination.
Skills Practiced: Dribbling, shooting, defense, listening and following instructions
Equipment Needed: 2 soccer balls, four cones
Before You Start:
Set up a large rectangular area and note the boundary lines
Place cones at opposite ends of field to create goals and put the soccer balls in the
middle of the field.
Stand in a position where you can see the entire play area and the students can easily
hear your calls.
Teach the rules of the game and have the students explain the game back to you.
Review the basic concepts and skills of soccer that you want to reinforce through the
game.
How to Play:
Divide the students into two groups
Give each student on both teams a number so that each team has a #1, #2, etc.
Remember that younger students may have a difficult time remembering their
numbers. Asking them to show you their number with their fingers will help
them remember.
Each team sits on opposite sidelines in a line facing each other.
For each round, call out a number.
The student with that number runs to his/her team’s ball.
The student dribbles the ball towards their team’s goal and attempts a shot.
If s/he makes it, the team gets a point, and then s/he returns the ball back to the
designated team area in the center of the field.
If s/he doesn’t make the shot, s/he just returns to his/her seat.
Make sure that everyone has a turn at this before using variations.
Variation(s): As students’ age and skill level progresses, several elements can be added or
changed to keep this game interesting and exciting.
Two teams can play with one soccer ball so that they are playing against each other and
playing defense as well as offense.
More than one number can be called at once to encourage passing.
2nd-5th I Ad,De L2
Page | 268
Knock-Down Soccer
Group Size: 8-20
Age Group: 2nd-6th+ grades
Length of Activity: 15-25 minutes
Developmental Goals: To develop eye-foot coordination, communication and teamwork.
Skills Practiced: Dribbling and shooting
Equipment Needed: 2-4 soccer balls, 8-10 cones, jerseys
Before You Start:
Set up a large rectangular area with boundary lines.
Set up a row of 4-5 cones at opposite ends of the soccer field approximately 2 feet apart.
Explain the rules of the game and ask the students to explain the game back to you.
Review the basic soccer skills you are trying to reinforce through the game.
Demonstrate passing and trapping with the inside of the foot.
How to Play:
Divide the students into 2 groups with some visible way of recognizing who is on what
team (ex: light shirts/dark shirts or jerseys)
The object of the game is to knock down your opponent’s cones with a soccer ball.
Cones can only be counted if it is a soccer ball that knocks them down.
After a player has knocked a cone down, s/he picks up the cone, takes it to her/his side
of the field, and lines it up next to her/his teams’ own row of cones.
The game ends when one team has all of the cones on their side of the field.
There should be at least two balls in play so that all the students are engaged in part of
the game.
Variation:
The more advanced the children become, the more balls you can add to the game.
2nd-6th+ I Ad,De L2

Page | 269
Soccer Smash
Group Size: Any size
Age Group: 1st-6th+ grades
Length of Activity: 10 minutes or more
Development Goals: To practice teamwork and develop defensive and offensive soccer skills.
Skills Practiced: Foot-eye coordination, precision, spatial awareness, agility, and defensive
maneuvering
Equipment Needed: 10 tall cones, 2 soccer balls, hula hoops (optional)
Set Up: Can be played outside or in a gym. The ideal play area is about the size of a basketball
court or larger. Divide the play area in half, into two courts. 5 Cones must be set up equally,
scattered around each side of the court. Cones may be placed inside hula hoops as a guideline of
where to stand.
Before You Start:
Explain and/or demonstrate that players must stand at least two feet away from the cones
and center dividing line (or stand outside the hula hoops).
Explain that the ball must stay below head level and that hands are not allowed to touch
the ball.
Sort lined-up students into two groups using their favorite soccer teams. (ex. Real Madrid
and Barcelona) or whatever you like.
Each team receives a soccer ball. Choose a volunteer from each team.
Play starts on a magic word, whistle blow, or first kick, etc.
How to Play:
The goal of the game is to knockdown all the cones on the opposite court, in the time
allotted, by only using soccer moves.
If a team knocks down all the cones, play resets.
Only legal soccer moves are allowed. The ball can be hit with feet, chest, or head.
If a student touches the ball with his/her hand, pause the game and let one student from
the other team take a free shot at one of their cones (Penalty Kick). Alternatively, you can
assign that student as the ball retriever when soccer balls leave the play area.
Students must stay at least two feet behind the center dividing line on their side of the
court.
Variation(s):
Add more cones. Playing with 20+ cones on each side will make the game more exciting,
especially for younger students.
Add more soccer balls. It turns the game into a soccer-style castle ball.
With a smaller or younger group you can have just one team. They can kick and try to
accurately hit the cones on the other side
Alternate Names of the Game: Soccer Castle Ball
1st-6th+ I Ad,De L2

Page | 270
Monkey Soccer
Group Size: 10-20
Age Group: 2nd-6th+ grades
Length of Activity: 10-20 minutes
Developmental Goals: To develop an understanding of moving a ball towards a goal and
teamwork.
Skills Practiced: Passing, shooting and following directions
Equipment Needed: 1 soccer ball, 4 cones, and enough jerseys for one team
Set Up: Mark each goal with 2 cones
Before You Start:
Review playing area and location of team’s goals.
Review the soccer concepts that you want to teach through the game.
Explain the rules of the game and ask the students to explain the game back to you.
Demonstrate how to use your arms and hands for the game.
Emphasize safety and keeping your head up, to avoid running into other players.
How to Play:
Play soccer, but you can only use your arms and hands to hit and pass the ball.
You cannot use your feet and you cannot pick up the ball.
Variation(s):
Add more than one ball to the game for more involvement, after the game is successful
Pre-K/K/1st: Modify to do a relay race or steal-the-bacon format for safety.
2nd-6th+ I Ad,De L2

Page | 271
Crab Soccer
Group Size: 8-30
Age Group: K-6th+ grades
Length of Activity: 10-20 minutes
Developmental Goals: To work on eye-foot coordination and teamwork.
Skills Practiced: Balance, agility, kicking, pacing and body awareness
Equipment Needed: One large light ball, preferably a beach ball
Set Up: One large rectangular playing area, preferably in a gym with marked goals.
Before You Start:
Divide students into 2 teams, with 2 goalies
Explain the crab position (both hands and feet touching the ground, with stomachs
toward the ceiling/sky)
How to Play:
Only movement in the crab position is allowed for the entire game.
Students can only kick or hit the ball with their feet and/or head – no hands are allowed.
The leader drops the ball in the center of the field for a kick-off to begin the game, as
well as after each point scored.
Each team is trying to put the ball into their opposing team’s goal.
If the ball goes out of bounds, the leader throws it back into play.
Variation:
Add more balls and/ or goals to the game
K-6th+ I Ad,De L2

Page | 272
Crossfire Soccer
Group Size: 15 – 30
Age Groups: 3rd-5th grades
Length of Activity: 20 minutes
Developmental Goals: To develop teamwork, verbal communication and eye-foot coordination.
Skills Practiced: Endurance, evasion, kicking and awareness
Equipment Needed: 3 sets of 2 cones, 1 large bouncy ball, 2-3 soccer balls
Set Up: Set up 3 goals forming a large triangle. Set the big ball in the middle of all 3 goals and
the soccer balls in front of the goals.
Before You Start:
Make 2-3 teams of players.
Review safety precautions.
How to Play:
Within each team, players must join arms with a partner, so students are moving in pairs.
The goal is to kick the soccer balls so they hit the big ball into one of the goals.
Just as in regular soccer no hands are allowed.
The big ball can only be moved by using the other soccer balls.
Teams cannot score on the same goal consecutively.
3rd-5th I Ad,De L2

Page | 273
Volleyball
Group Size: 10-24
Age Group: 2nd-6th+ grades
Length of Activity: 10-30 minutes
Developmental Goals: To develop teamwork, verbal communication and eye-hand
coordination.
Skills Practiced: Agility and spatial awareness
Equipment Needed: A volleyball and a net
Set Up: 10-12 players on each team, 6 on court (4 players can be used), all players rotate
positions. A standard volleyball court is 60’x 30’, divided by a net standing 8’ high, and has lines
(or cones) marking the boundaries.
Before You Start:
Teams are placed on either side of the net. First possession is awarded to the team who
wins a coin flip or Ro-Sham-Bo.
How to Play:
Play begins with the server, serving (or hitting) the ball over the net from the back right.
On the serve, the ball must go over the net without touching it;
On all other plays, the ball can be played after hitting the net.
If the ball hits the net on the first serve attempt, the server gets a second attempt.
After the ball is served, a rally begins.
A maximum of 3 hits is allowed per side to get the ball over the net during a rally
A player can only hit the ball one time in a row.
Only the serving team can score.
The serving team earns a point when the receiving team fails to return the ball in
3 or fewer hits or lets the ball drop within or on their boundaries.
A point is also scored if a returned ball lands, without being touched, outside the
serving team’s boundaries.
The serve changes sides when the serving team fails to return the ball in 3 or fewer hits or
lets the ball drop within or on the boundaries.
The change of serve is called a Side Out.
The serve also changes if the serving team hits or returns a ball that lands,
without being touched, outside the receiving team’s boundaries.
Players rotate clockwise every time they regain the serve.
If the ball hits any part of a player’s body and can still be knocked over the net in 3 or
fewer hits, the ball is still in play.
A game is completed when one team reaches 15 points and is ahead of the other team by
2 points.
Serving and rallies continue until both the point score and the 2-point difference is met.
After one game is played, teams switch sides and exchange high-fives.
First possession is awarded to the previously lower-scoring team.
A match is completed when one team wins three out of five games.
2nd-6th+ I Ad,De L3

Page | 274
Booty Ball
Group Size: 8-20
Age Group: 2nd-5th grades
Length of Activity: 10-20 minutes
Developmental Goal: To provide an introductory game to standard volleyball.
Skills Practiced: Beginning volleyball skills and teamwork.
Equipment Needed: Chairs or cones to mark and enclose playing area; 1 large (4’ in diameter),
light ball/beach ball.
Before You Start:
Set up a rectangular area divided into 2 squares, each large enough for half of the group
to comfortably sit with space for each player.
Chairs, facing outwards to enclose playing area and act as the “net”.
Teach the game to the students and ask them to explain it back to you.
Teach the concept of the set and passing to teammates.
Be ready for students to be very silly the first few times they hear the name of the game.
Demonstrate the concept.
How to Play:
Divide the students into 2 teams
Students sit on their team’s side, spaced out evenly on the floor.
Drop the ball into play onto one of the team areas.
Players attempt to hit the ball to the other team, over the chairs which are dividing the
court.
Players may hit the ball with arms, legs, or any body part, but may not lift their bottom
off of the ground.
Only three hits allowed per side. Help the students count out loud.
Players try to keep the ball volleying back and forth as long as possible.
Variation(s):
Knee Ball – Same as above, except students must stay on their knees.
Chair Volleyball – Students are divided into teams and spread out on the court, sitting in
chairs. They can hit the ball with anybody part, but cannot get up out of the chair.
Multi-balls – add one or more balls into the mix. Follow same exact format.
Competitive – add the serving component and award points following regulation rules.
2nd-5th I Ad,Au,Cp,De,Ed L2

Page | 275
Clean Your Room!
Group Size: 8-30
Age Group: K-5th grades
Length of Activity: 10 minutes
Developmental Goal: To teach moving a ball over the net.
Skills Practiced: Bumping, setting and serving.
Equipment Needed: 10-30 balls, volleyball net, marked boundaries.
Before You Start:
Set up a traditional volleyball court, using lines or cones for clear boundaries.
Balls are evenly distributed on each teams’ side before game begins.
Review the concepts of bumping, setting and serving with student volunteers.
Teach the rules of the game and ask the student to explain it back to you.
How to Play:
Divide students into two teams.
Students are not allowed to touch any balls until you give the signal.
When you give the signal for the game to begin, all students try to get the balls to the
other side of the net.
They can bump, set, serve, throw, etc.
You can focus on one type of hit, or let the students choose.
This process continues until you give the stop signal.
After the end of the playing time, the number of balls on each side is counted.
The goal of the game is to have no balls left on your team’s side.
Redistribute balls before you begin the next round.
Variation(s):
Change the start and stop sound for a listening challenge.
Have teammates cheer for balls that get returned without them touching the ground.
Have teammates cheer for balls that are returned without touching the ground, and only
volleyball techniques were used (bumps or sets, not catches and throws).
K-5th I Ad,Au,Cp,De,Ed L2

Page | 276
Catch and Pass Volleyball
Group Size: 8-30
Age Group: 2nd-5th grades
Length of Activity: 10 minutes
Developmental Goals: To teach teamwork, working together to get the ball over the net.
Skills Practiced: Teamwork, throwing, catching, passing
Equipment Needed: 1 ball, net, marked boundaries, cones if necessary.
Before You Start:
Set up a traditional volleyball court, using lines or cones for clear boundaries.
Balls are evenly distributed on each teams’ side before game begins.
Review the concepts of bumping, setting and serving with student volunteers.
Teach the rules of the game and ask the students to explain it back to you.
Emphasize the concept of passing and looking for the best place to return the ball.
How to Play:
Divide the students into 2 teams.
Students are arranged in standard volleyball formation, with 4-6 on each side of the net.
Others wait in a line on each side to rotate into the game.
The ball is served by throwing it over the net.
Players must catch, pass, and throw the ball back over the net in three or fewer tries.
Play continues until one team:
Hits or throws the ball out of the boundaries.
Does not put the ball into play on the other side of the net in three tries or less.
Allows the ball to touch the floor on their side.
This game can be used to teach rotation.
Only the serving team can earn points.
If the serving team loses a volley, the other team gets the serve.
Teams rotate each time they regain the serve.
2nd-5th I Ad,Au,Cp,De,Ed L1

Page | 277
4-Square Volleyball
Group Size: 12-20
Age Group: 4th-6th+ grades
Length of Activity: 10-20 minutes
Development Goals: To develop teamwork and communication.
Skills Practiced: Bumping, setting and serving
Equipment Needed: 1-3 volleyballs
Set Up: Use a painted 4-square or divide a large square into four sections
Before You Start:
Review how to bump, set, and serve.
Make sure students know how to rotate in and out of the playing area.
How to Play:
Play begins with one student serving from his/her corner.
Serve can be to any of the other 3 players.
Each player gets one attempt to set or bump the ball to another player without the ball
hitting the ground.
If the student misses or hits the ball out of bounds then s/he returns to the end of the line.
Play re-starts with a serve.
Variation(s):
Team 4-square volleyball: use a large 4-square (approximately 24’ x 24’). Place 3-4
students on a team, each team gets a square. Each team gets a maximum of 3 hits to
return the ball to another square.
4th-6th+ Ad,De L2

Page | 278
Softball/Baseball
Group Size: 8-24
Age Group: 2nd-6th+ grades
Length of Activity: 10-30 minutes
Developmental Goals: To develop teamwork, verbal
communication and eye-hand coordination.
Skills Practiced: Running, throwing, catching and depth perception
Equipment Needed: Softball/baseball mitts, one ball, one bat, one
catcher’s mask, and bases.
Set Up: 9 players on each team. Field positions: 3 base-players (1st,
2nd, 3rd), 3 outfield (left, center, right fields), 1 short-stop, 1 pitcher and 1 catcher.A regulation
softball field is 60’x 60’ between the bases; a regulation baseball field is 90’x 90’. A base line
marks the running path between the bases.
Before You Start:
The team who wins Ro-Sham-Bo gets to choose whether to bat or field first.
How to Play:
The pitcher controls the play of the game.
Play begins with the pitcher throwing the ball to the person up to bat, the batter.
Play stops when the ball is thrown to the pitcher.
Teams switch sides after three outs or nine runs are scored.
Outs are granted when:
The batter swings and misses the ball three times; the miss is called a strike.
The batter hits a fly ball and it is caught before it touches the ground.
When a fly ball is in the air, the base runners remain on base until after
the ball is caught (called tag-up) before they can run to the next base.
The base-player has control over the ball and a foot on the base before the batter
(now base-runner) reaches the base.
If the base-runner must advance because of another runner or batter
behind, it is called a force-out and the fielding team only has to tag the
base to call an out.
If there is no runner or batter behind, it is not a forced situation and the
fielder with the ball must tag the base-runner with the ball.
The base-runner is tagged on his/her body with the ball before s/he arrives at the
base.
One base-runner passes another.
A base-runner intentionally interferes with a fielder trying to recover the ball.
If the ball is hit outside the base lines, it is called a foul.
Fouls count as strikes, however a foul does not count as strike 3.
If a fielder attempts to throw the ball to a base- player and the ball is overthrown, the
runner advances one base.
A run is scored for the batting team when a base-runner touches all 4 bases, in order,
without being called out at any time.
2nd-6th+ Ad,De L3
Catcher
Pitcher
1st Base
Person
3rd
Base
Person
2nd
Base
Person
Short
Stop
Left
Field
Center
Field Right
Field

Page | 279
Crazy Softball
Group Size: 8-20
Age Group: K-2nd grades
Length of Activity: 10 minutes
Developmental Goals: To develop teamwork, verbal communication and eye-hand
coordination.
Skills Practiced: Batting, base running, fielding, catching, throwing and playing a position.
Equipment Needed: 1 bat, 5 tennis or softballs, 1 bucket, marked field with bases and tee
(optional).
Before You Start:
Set up the field with bases.
Review the concepts of softball and baseball that you want to teach through the game.
Review safety rules, especially the “Swing, Drop, Run” rule for the batting.
Teach the game to the students and then ask them to explain the game back to you.
Demonstrate hitting, running the bases and fielding (with a pass to a teammate).
How to Play:
Divide students into two teams.
The fielding team gets distributed in their positions; everyone is in the field, even if you
need to have more than 9 in the field.
Give the batting team a batting order and line them up in a safe area to the side of the
field.
You are the pitcher (if no tee is available) with a bucket of balls next to your feet.
Pitch the ball to the batter.
After the batter hits the ball, s/he automatically runs the bases, without stopping at any
one base.
There are no fouls in this game.
After rounding the bases, the runner returns to the end of the line.
The fielding team gets the ball back to the pitcher as quickly as they can, passing the ball
in through teammates.
Teams switch sides after everyone has had one chance to hit the ball and run bases. After
everyone has had a hit, you can switch after 5 minutes.
Variation(s):
Speed! – One ball is used. After the batter hits the ball, s/he must run the bases in order,
continuously until the ball is fielded to the pitcher, or tagged out. The goal is to see how
far the runner can get before being stopped. Switch after 3 outs or when time is called.
One Base Advance – After the batter hits the ball, s/he advances through the bases one at
a time, stopping and then running each time a ball is hit by the next batter.

Page | 280
Tee Ball
Group Size: 10-20
Age Group: K-5th grades
Length of Activity: 15-20 minutes
Developmental Goals: To develop teamwork, verbal communication and eye-hand coordination.
Skills Practiced: Throwing, catching, fielding, batting, base running and position playing
Equipment Needed: Tennis balls or plastic wiffle balls, bases, baseball tee or tall cone, one
plastic or foam bat.
Before You Start:
Set up the field with the bases and with the tee as home plate.
Review the concepts of softball and baseball that you want to teach through the game.
Review safety rules, especially the “Swing, Drop, Run” rule for the batting.
Teach the game to the students and then ask them to explain the game back to you.
Demonstrate hitting, running the bases and fielding (with a pass to a teammate).
How to Play:
Divide students into two teams
The fielding team gets distributed in their positions; everyone is in the field, even if you
need to have more than 9 in the field.
Give the batting team a batting order and line them up in a safe area to the side of the
field.
This game is played following the softball & baseball rules; with the exception that
pitcher does not pitch the ball to the batter.
You are the pitcher and control the play of the game. Play starts when you place the ball
on the tee and the batter hits the ball off the tee.
Play stops when the ball is returned back to you.
Teams switch sides when either:
3 outs are achieved
a time limit is reached
after the team batting rotation.
Variation(s):
Throw ball – The fielding team is set up in the regular baseball/softball format. The
batter throws the ball into the field from home plate, and then proceeds to run the bases.
Fielders can catch a thrown ball in the air or tag the runner for an out, just like in
regular baseball.
Play ends when the catcher at home plate has the ball.
This is a good alternative when the yard is too crowded to risk someone getting
hit by a batted ball or a swinging bat.
For young grades, have students run the bases without calling outs.
K-5th Ad,De L2

Page | 281
Pickle
Group Size: 10-20
Age Group: 2nd-5th grades
Length of Activity: 15-20 minutes
Developmental Goals: To develop cooperation and communication.
Skills Practiced: Throwing, catching, fielding, agility and timing, base running and position
playing.
Equipment Needed: Tennis balls and 2 cones for bases.
s
Before You Start:
Place the bases 20-30’ apart and select 2 students to be the throwers at each base.
Teach the rules of the game and ask the students to explain them back to you.
Review the concepts of softball and baseball that you are reinforcing through this game.
Model the activity with 2 volunteers.
How to Play:
The students stand in between the two bases. The two throwers start by throwing the ball
back and forth to each other.
After the third throw, the students in the middle attempt to run to one of the bases. The
throwers pass the ball quickly and try to tag the runners while holding the ball.
The runners are only safe if they are standing on the bases.
Runners count how many times they can advance to each base without being tagged.
If a runner is tagged three times they switch positions with the thrower.
Variation(s):
This can also be played with a kickball so that the throwers are allowed to tag a student
by throwing the ball at a runner aiming for the waist or below.
2nd-5th Ad,De L1

Page | 282
Tennis Baseball
Group Size: 10-20
Age Group: 1st-5th grades
Length of Activity: 15-20 minutes
Developmental Goal: To develop eye-hand coordination needed to hit a ball with a racket.
Skills Practiced: Throwing, catching, fielding, batting, base running and position playing
Equipment Needed: Tennis balls, bases or cones and tennis or racquetball racquet
Before You Start:
Set up a typical baseball field with bases.
Teach the rules of the game and ask the students to explain them back to you.
Review the concepts of softball and baseball that you are reinforcing through this game.
Demonstrate the skills needed.
How to Play:
Divide students into two teams.
The fielding team gets distributed in their positions; everyone is in the field, even if you
need to have more than 9 in the field.
Give the batting team a batting order and line them up in a safe area to the side of the
field.
This game is played following the softball & baseball rules; with the exception that
pitcher allows the ball to bounce once before it reaches the batter. The batter hits with a
racquet rather than a bat.
You are the pitcher and control the play of the game.
Play starts when you throw the ball underhand towards home plate.
Play stops when the ball is returned back to you.
Teams switch sides when either:
after the full team batting rotation
a time limit is reached
3 outs are achieved
Variation:
Boom Ball – Play with the same rules and boundaries as tennis baseball except the ball
being used is a volleyball or soccer ball and the batter uses an actual soft/baseball bat or
a 5 gallon water jug attached to a handle.
1st-5th Ad,De L2
Page | 283
Roller Baseball
Group Size: 10-30
Age Group: 3rd-5th grades
Length of Activity: 10-30 minutes
Developmental Goals: To develop cooperation and communication.
Skills Practiced: Batting, catching and verbal communication
Equipment Needed: 1 kickball, 1 bat, home plate
Set Up: A baseball/kickball area
Before You Start:
Divide the group into two teams.
Line up the outfield team as you would for a game of baseball.
Line up the infield team in a straight line about 15 feet behind home plate, or in safe
place near the batter (but not in the playing field).
Practice rolling the ball between players’ legs together as a group or as a short relay
How to Play:
The pitcher pitches the kickball to the first player, who hits it with the bat.
As the ball rolls to the outfield, the batter runs around his or her team as many times as
possible.
Meanwhile, the players in the outfield line up behind the player who caught the ball.
They all stand one behind the one another with their legs apart.
The player who caught the ball rolls it between his or her legs and between the legs of the
team.
When the last player in line gets the ball, he or she runs to the front of the line and yells
“Stop!” and the batter stops running.
The hitting team keeps track of how many times the batter completely ran around them,
by counting aloud.
After three batters, teams switch positions.
Play continues until everyone has batted.
Variation:
Have the batter run continuously around the bases instead of around his or her
teammates.
3rd-5th I Ad,De,Ed L2

Page | 284
Wall Baseball
Group Size: 4-20
Age Group: 3rd-6th+ grades
Length of Activity: 15 minutes
Developmental Goals: To develop eye-hand coordination, communication and teamwork.
Skills Practiced: Catching, throwing and spatial awareness
Equipment Needed: One tennis ball
Set Up: Open area with a large wall
Before You Start:
Split the students into two teams. The 1st team on offense has one person up to bat and
everyone else on the sideline. The 2nd team on defense spreads all its players out around
the playing area (should be about the size of the infield area for kickball) adjacent to the
wall
Have students tell you where the boundaries are and be sure they know the object is to
catch the ball in as few bounces as possible.
Set boundaries.
How to Play:
The player on offense who is up to bat throws the tennis ball against the wall, it must go
above a line on the wall of at least 6ft. (the higher the line the easier it is so for lower
grades so 10 or 12 feet may be better).
When the ball bounces off the wall the team on defense tries to catch it. If they catch it
before it hits the ground that is an out.
However, if the ball bounces once before someone catches it that’s a single, two bounces
is a double, three bounces a triple, and four bounces is a home run.
There are no bases, so outs can only be made if the ball is caught in the air. It is crucial to
remember where the “imaginary runners” are for scoring purposes.
If a ball bounces beyond the boundary, those out-of-bounds bounces do not count.
Variation(s):
Include base running.
Allow a double play (two outs) if a defensive player catches the ball in the air and then
immediately throws it to a teammate who catches the ball without it bouncing.
3rd-6th+ Ad,De L2

Page | 285
Flag Football
Group Size: 8-24
Age Group: 2nd-6th+ grades
Length of Activity: 10-30 minutes
Developmental Goals: To develop leadership, teamwork, verbal communication, eye-hand
coordination and depth perception.
Skills Practiced: Agility, pivoting, spatial awareness, throwing, catching, running, evasion and
endurance.
Equipment Needed: One football, two sets of waist flags, and cones.
Set Up: Place the cones on an open field/space to form a large rectangle, and create two small
end zones on each end of the field. Also place cones at the midfield line, and at the 5-yard line on
each end of the field.
Before You Start:
Divide students into even teams, preferably 6 on 6.
Have two students do Ro-Sham-Bo to determine which team will have possession first.
How to Play:
On the leader’s signal, the offensive team begins at the 5-yard line.
Teams have 4 downs to get to midfield for a first down and 4 downs to score (maximum
of 8 downs per possession).
The game is non-contact. (No blocking allowed.)
All changes of possession start at the 5-yard line, except interceptions which start at the
spot of interception. (If an interception occurs in the end zone, the ball is placed on the 5-
yard line.)
Passing:
The quarterback has 7 seconds to throw the ball.
There is no rushing the quarterback.
The quarterback cannot run the ball.
Running/Receiving:
The quarterback makes direct handoffs to other players. No pitches/laterals
allowed.
The quarterback should be aware of no run zones (5 yards from each end zone
and 5 yards on either side of midfield). The leader will let teams know when
they’ve entered this zone.
Runners and receivers cannot use hands to prevent players from pulling the flag.
No fumbles. The ball is placed at the spot of the fumble.
Interceptions cannot be returned. The ball is placed at the spot of interception.
Two handoffs are allowed every 4 downs, no passing after a handoff.
Only forward passes are allowed.
Penalties: All penalties are 5 yards and a loss of down.
2nd-6th+ I Ad,De L3

Page | 286
21 - Football
Group Size: 10-20
Age Group: 3rd-6th+
Length of Activity: 10 minutes
Developmental Goals: To practice catching and throwing while being defended and defending
areas of a field
Skills Practiced: Running, agility, hand-eye coordination and spatial awareness
Equipment Needed: colored jerseys, cones, football
Set Up: Designate a large play area with clear boundaries that has room for students to run
Before You Start:
Split group into 2 teams
o You will need a rectangular shaped field or court with zones
marked lengthwise by cones for every two teams. (see diagram) Inform kids to keep their head and eyes up to prevent running into
another person
How to Play:
The object of the game is for teams to score 21 points by completing
passes in different areas of the field.
One team begins on the line of scrimmage and attempts to complete a pass within a zone
to score points.
The teams switch from offense to defense after every 4 passes.
All players must stay within the field.
The defending team will cover the offensive team players to hold them to as few points as
possible.
The quarterback must stand behind the line of scrimmage.
Points are scored for a catch at certain positions on the field and are determined by the
zone in which the ball is caught, not where the player runs.
If a defensive team intercepts (catches) the ball from the offensive team, the defensive
team scores 3 points.
Alternate Name of the Game: In the Zone
3rd-6th+ Ad,De L2

Page | 287
Flag Fake Out
Group Size: 20-30
Age Group: 3rd-5th grades
Length of Activity: 10-15 minutes
Developmental Goals: To develop eye-hand coordination and strategic thinking.
Skills Practiced: Evasion, agility, spatial awareness, peripheral vision, endurance and pacing
Equipment Needed: One or two flags per student, several cones
Set Up: Open area
Before You Start:
Designate a playing area large enough to run in (a large rectangle).
Place cones on each baseline (width) if there are no lines.
Divide the students into two teams with each team lined up on opposite baselines.
Have cones placed a few feet behind the baseline marking where the single file line
should start.
Designate one side as the defense and the other side as the offense.
Review with students how to safely take someone’s flag, and how to ‘fake out’ the
defense.
How to Play:
On the leader’s signal, the first two people in each line begin the game.
The object is for the offense to run past the defense and reach the opposite baseline
without getting their flag taken.
The offense can move in any direction while making their ‘fakes,’ but they must stay
within the boundaries.
The defense player tries to take the offense player’s flags.
The play is over when either the offense reaches the baseline or gets their flags taken.
When the play is over, the students go back to the end of the opposite line from which
they started.
Variation(s):
If students are playing safely, the boundaries can be increased and each side can have two
or three team members going at the same time.
3rd-5th Ad,De L1

Page | 288
Trivia Football
Group Size: 8-30
Age Group: 3rd-6th grades
Length of Activity: 10-20 minutes
Developmental Goals: To develop cooperation, teamwork, and eye-hand coordination
Skills Practiced: Agility, throwing, catching, and safe tagging
Equipment Needed: One football; and cones, chalk, or tape for boundaries
Set Up: Set up large rectangular field with plenty of room for four students to run. Place two
cones a few feet apart on both of the far ends of the field.
Before You Start:
Divide students into four groups. Have them line up with their assigned group behind the
cones at each end of the field, facing towards the middle. There should be two groups at
each end of the far ends of the field.
Demonstrate safe tagging:
Light touch, like butterfly wings on the shoulder
Unsafe tags: hard contact that might cause the person being tagged to fall
How to Play:
Explain to the students that both groups on the same side of the rectangle are a team.
The students at the front of each line (four total, two on each side) are active each round.
The adult stands near the middle holding the football and ask a question (math, spelling,
science, etc.) pertaining to something that class is learning. When the first person yells
out the correct answer, the adult throws him/her the football.
The student with the football and his/her partner try to make it to the other end of the
field without being tagged by their two opponents.
Students are allowed to pass the ball to their partner or run with it, but can only be tagged
when holding the ball.
After a player is tagged, the ball hits the ground, or a team scores, all players return to the
end of their original line and the next four players go.
Variation(s):
Instead of tagging, kids can play with flags if available (good warm-up for flag football)
Can remove the trivia altogether and this game becomes a version of team fakeout
3rd-6th+ I Ad L2

Page | 289
Ultimate Football
Group Size: 10-20
Age Group: 2nd-6th grades
Length of Activity: 10-20 minutes
Developmental Goals: To develop teamwork, cooperation, verbal communication and eye-hand
coordination.
Skills Practiced: Balance, agility, pivoting, throwing, catching and running
Equipment Needed: One football and several cones
Set Up: Open area
Before You Start:
Use the cones to create boundaries for a field with two end zones.
Divide the students into two even teams.
Have one student from each team do Ro-Sham-Bo to determine who has possession first.
Line both teams up on each baseline of the field.
How to Play:
On the leader’s signal, the team starting on defense throws or kicks (depending on skill
level) the ball to the offensive team.
One player from the offense either catches the ball or picks it up from where it lands, and
tries to pass it to one of his/her teammates.
When anyone on either team has the ball, s/he can only use one pivot foot to move. They
cannot take steps or run with the ball.
The offense tries to advance the ball down the field with passes, and scores a point if one
of the team members catches the ball in the end zone.
The defense tries to block or knock down the ball to gain possession. If a ball is knocked
down or intercepted, play of the game is switched and the defense now becomes the
offense, heading toward their end zone.
Variation(s):
Use different colored jerseys, if necessary, to clarify the teams, as directions change often
in this game and many students may get confused.
For students just learning the game, allow one or two steps when they are throwing the
ball.
2nd-6th+ I Ad,De L3

Page | 290
Interception
Group Size: 3-25
Age Group: 3rd-6th+ grades
Length of Activity: 5-20 minutes
Developmental Goals: To develop eye-hand coordination and teamwork.
Skills Practiced: Throwing, catching, running, evasion and defense.
Equipment Needed: At least one football
Set Up: Open area
Before You Start:
Get the students into 1-3 lines, depending on the size of the group.
Explain the three main positions of the game: defender, receiver, and quarterback, as
well as the rotation of the positions.
How to Play:
In each line, the first person goes down the field to start as the defender.
The second person takes a step to the right to start as the receiver.
The third person has the ball to start as the quarterback.
When the quarterback says ‘hike,’ the receiver runs toward the goal line and the defender
moves toward the receiver.
The quarterback is trying to throw the ball to the receiver so that s/he can catch it and run
to the end zone without being tagged.
Several things will end the round of play:
If the ball drops
If the defender catches the ball
If the defender tags the receiver
If the receiver scores
Once the round of play is over, the students switch positions.
The quarterback becomes the receiver, the receiver goes down the field to become
the defender, and the defender gets back in line.
Variation(s):
Have more than one receiver and defender.
Allow handoffs as well.
Apply the game to kickball with the positions of pitcher, kicker, and outfielder.
Apply the game to basketball with the positions of point guard, forward, and defender.
3rd-6th+ Ad,Ed L2

Page | 291
Red Light, Green Light Football
Group Size: 10-15
Age Group: preK-2nd grades
Length of Activity: 10 minutes
Developmental Goals: To develop basic football knowledge while incorporating teamwork and
the fun of Red Light, Green Light
Skills Practiced: Following instructions, safe tagging, strategic running, evasion, teamwork
Equipment Needed: Football, and 6 cones for end-zones and lines (optional 2 jerseys)
Set Up: Open area
Before You Start:
Use cones to set up two end-zones on opposing sides.
Use cone(s) for student to form a line
How to Play:
First two students line up with jerseys as defensive players
Next two students line up in the opposing position as offensive players
On offense, one student is the hiker and hikes the football to the running back on
command. The hiker then becomes a blocker. After receiving the ball, the running back
attempts to run to the opposite end-zone without being tagged gently with two hands by
the defense.
IMPORTANT: Once the ball is hiked, an adult or Junior Coach can shout Red Light or
Green Light to change the pace of the game. Red Light makes all players freeze, and
green light makes all players resume play.
The penalty for players who do not freeze on RED LIGHT is 5 steps backwards.
Game is over when the offense makes it to the end-zone or if the running back is tagged.
Variation(s):
Incorporate “Yellow Light” making all players run in slow motion.
Change the penalty.
pK-2nd Ad,De,Ed L2

Page | 292
4-Square Categories (Variation of 4-Square)
Group Size: Any size
Age Group: 1st-5th grades
Length of Activity: 10 minutes or more
Development Goals: Students will be able to categorize items, students will be able to think of
an item and say it out loud while playing 4-square (rotating, high-fiving, using Ro-Sham-Bo,
hitting the ball, etc.)
Skills Practiced: Hitting a ball out of your square, moving to get the ball
Equipment Needed: Playground ball, a court made of 4 squares
Set Up: Can be played outside or in a gym. Make sure you have enough playground balls,
possibly label the squares with chalk if this is the first time playing 4-square.
Before You Start:
Get students’ attention
Explain to them that this is a game similar to 4-square
Have them repeat the 4-square rules or go over them again yourself
Explain what a category is and give a few examples:
o Fruit is a category and what could be in that category (peaches, oranges, apples
etc.).
o What wouldn't go in that category?
o What are other categories?
How to Play:
Play is just like regular 4-square but before you can hit a ball out of your square you need
to say something in that round's category.
If you do not say something in the category or repeat something already said, you are out.
The server would start and say the category (depending on their age, it can be one that
they have made up or one that you have given them), such as "Fruits".
The server would then say a fruit (ie. “pear”) and serve the ball into someone else's
square.
Categories can be repeated, a category's round ends when a person gets out and has to go
to the end of the line.
1-5th C Ad,Au,Ed L2

Page | 293
Suggested Core Games Modifications
(Modifying games for lower grades or to change-up/reintroduce games)
Basketball
Use various size balls (size, weight, texture, color)
Allow traveling and two-hand dribble
Disregard three-second lane violation
Use larger/lower goal
Slow the pace, especially when first learning
If student uses wheelchair, allow him to hold ball on his lap while pushing wheelchair
Use beeper ball, radio under basket for individual with visual impairment
Golf
Use a club with a larger head, shorter/lighter club, or colored/larger balls
Practice without a ball
Use tee for all shots
Shorten distance to hole
Soccer
Use walking instead of running
Reduce playing area
Play six-to-a-side soccer
If student uses a wheelchair, allow him to hold ball on lap while pushing the wheelchair
Use a deflated ball, nerf ball, beeper ball, brightly colored ball
Softball
Use velcro balls and mitts
Use larger or smaller bats
Use a batting tee and Incrediballs or beeper balls
Reduce the base distances
Shorten the pitching distance
If individual is in wheelchair, allow them to push ball off ramp, off lap, or from tee
Provide a peer to assist anyone who needs help
Players without disabilities play regular-depth defense
Students without disabilities count to ten before tagging out person with disability
Tennis
Use larger, lighter, and brightly-colored balls
Use shorter, lighter racquets or larger head racquets
Slow down the ball
Lower the net or do not use a net
Hit ball off tee
Allow a drop serve and stand closer to net on serve
Do not use service court
Use a peer for assistance
Volleyball
Use larger, lighter, softer, brightly-colored balls
Allow players to catch ball instead of volleying
Allow student to self-toss and set ball
Lower the net and/or reduce the playing court
Stand closer to net on serve and allow ball to bounce first

Page | 294
Health and Fitness: FitKid Program
Playworks has created a Health and Fitness program called FitKid in an effort to address the need
for a radical shift in attitudes about children, physical activity, and educational priorities in the
United States. This Health and Fitness FitKid program introduces material that will enhance
children’s understanding of the physical body and how it works. The goal is to stimulate
discussion and projects that inspire motivation and curiosity about each child’s level of fitness.
We also hope to teach students how to set a series of short-term goals and offer fun and
interesting games, exercises, and activities to help children build endurance, strength, and
flexibility and plant seeds for lifelong health and well-being.
The FitKid Program is organized into three sections: endurance, flexibility, and strength.
Endurance Activities Minute Masters
Whistle Walk/Run
Pace Yourself
Flexibility Activities Flexibility Stations
o Forward Bend
o Lunge
o Calf Stretch
o Soaring Eagle
o Sitting Eagle
o Flamingo
Strength Activities Partner Crunches
Leg Lifts for the Abs
Chest and Arms Strengthening Stations
o Bent leg push up
o Flexed-arm hang or pull-ups
o Strong arm
Other Endurance Activities:
Continuous Relays
Dance Freeze
Everyone’s It
Capture the Flag
Clap and Move

Page | 295
Minute Masters
Group Size: 1-30
Age Group: preK-6th+ grades
Length of Activity: 10 minutes
Developmental Goals: To build endurance and develop an understanding of the importance of having a
healthy heart.
Skills Practiced: Jogging, jumping, running, dribbling, and following instructions.
Equipment Needed: None (optional: jump rope, basketball and bench)
Set Up: Make four clearly-designated stations.
Before You Start:
Divide students into four separate groups and have them gather in designated areas.
Walk through and demonstrate each station as you explain it verbally.
How to Play:
The students in station #1 will be asked to jog in place.
The students in station #2 will be asked to do jumping jacks.
The students in station #3 will be asked to jog in a large circle.
The students in station #4 will be asked to walk at a natural pace.
At the whistle, students do their station’s activity for one minute without stopping.
At the one-minute whistle, students switch stations and begin the next task for one minute without
stopping.
Variation:
For more advanced students, include such activities as jumping rope continuously, dribbling a
ball while on the move, and stepping up and off a low bench.
pK-6th+ I N M C Ad,Au,Bl,Cp,De,Ed L1

Page | 296
Whistle Walk/Run
Group Size: Any amount
Age Group: preK-6th+ grades
Length of Activity: 5-10 minutes
Developmental Goal: To gradually develop aerobic endurance.
Skills Learned: Awareness of effort when exercising aerobically.
Equipment Needed: A track, cones, or lines to mark a running area.
Set Up: Mark the running path with cones, chalk or painted lines.
Before You Start:
The students can start in a huddled group or a line. Review boundaries or track.
Demonstrate what the 1 and 2 whistle blows and the finish whistle blow sound like. While you
practice the whistle blows, have a student go through the motions of walking/running.
How to Play:
The students have 10 minutes; within those 10 minutes, there are certain times when the
directions will be to walk, and other times when the directions will be to jog/run.
One whistle blow means walk, two whistle blows means run.
The goal is to be able to jog/run for the entire time until the walk whistle blows.
The time period for walking and running will vary in length.
Students begin walking at a one-whistle blow (in order to allow the body to warm-up).
Passing is allowed, making sure that students are aware of their personal space, as well as of the
other students.
They will know they are at the end of the 10 minutes at a long sustaining whistle.
Variation(s):
The students sprint (run as fast as they can) during the 2 whistle blows. This also helps increase
strength.
The students can count and record the number of “laps” they do from start to finish. This helps
the students make, set, and see improvement towards goals.
pK-6th+ I N Ad,Au,Cp,De,Ed L1

Page | 297
Pace Yourself
Group Size: 6-30
Age Group: 2nd-6th+ grades
Length of Activity: 2-10 minutes
Developmental Goals: To pace oneself so one’s heart rate increases/decreases; to build endurance and
stamina; to practice setting and meeting goals.
Skills Practiced: How to pace and regulate effort.
Equipment Needed: A track or circle running area.
Set Up: Mark the running space with cones or chalk, if needed.
Before You Start:
While the leader describes the activity, four students can demonstrate the jogging process and
how to set an easy, relaxed pace.
How to Play:
Class forms a single-file line (if the group is large, you can divide the group into two or three
smaller groups).
The goal is for the group to jog around the running area without passing anyone and without
stopping until time is called.
The main rules to follow are:
Students must maintain their order at all times.
Students are not allowed to pass other runners or interfere with others’ forward progress
(keep hands and feet to themselves).
Variation(s):
Divide the class into groups of at least 6, but no more than 10. In this activity, the leader sets an
easy pace, and when the leader says “Go!” the last person in line moves to the right of the line
and sprints (runs as fast as s/he can) ahead and becomes the first person in line. At this point, the
new leader slows down to match the previously set easy pace. Initially, the last person should
wait until “go” is called to sprint ahead – as the groups’ understanding of the game progresses,
the last person in line can run and pass the group as soon as the previous last person becomes the
new leader. This activity adds a strength-building component to a good aerobic base activity.
The mode of travel can be changed to walking only, skipping, jumping, jumping rope (everyone
has their own single size jump rope) and so on.
2nd-6th+ I N Ad,De,Ed L1
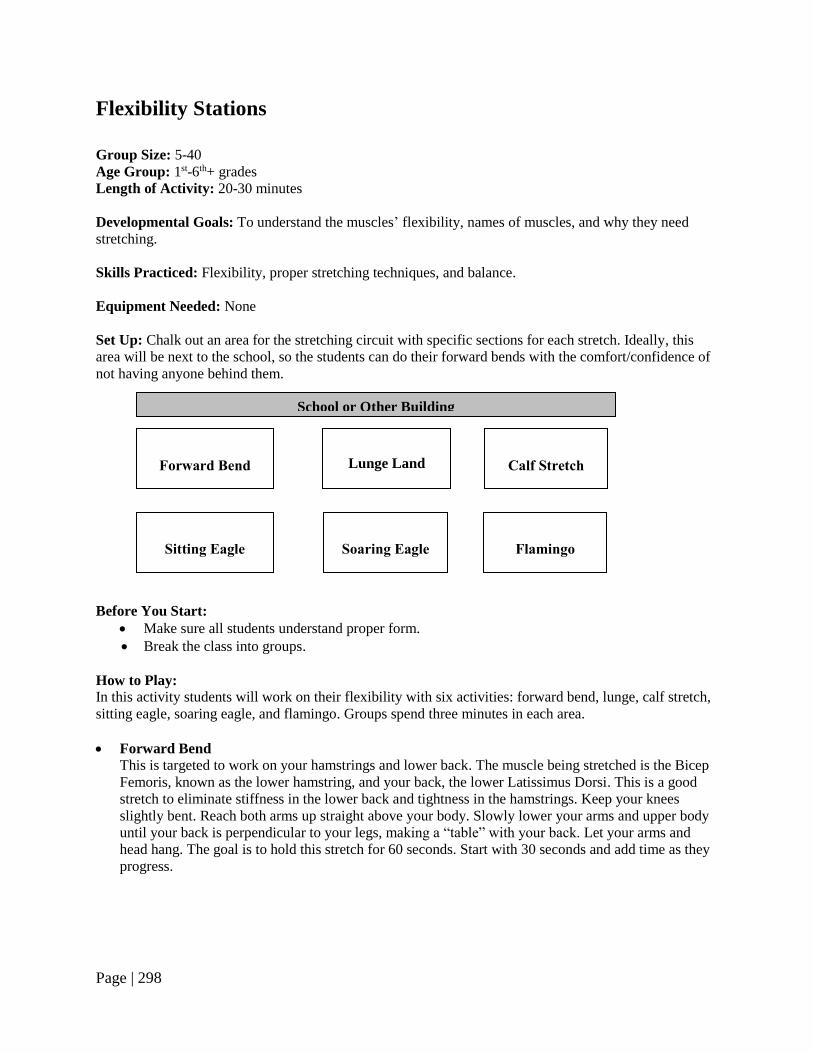
Page | 298
Flexibility Stations
Group Size: 5-40
Age Group: 1st-6th+ grades
Length of Activity: 20-30 minutes
Developmental Goals: To understand the muscles’ flexibility, names of muscles, and why they need
stretching.
Skills Practiced: Flexibility, proper stretching techniques, and balance.
Equipment Needed: None
Set Up: Chalk out an area for the stretching circuit with specific sections for each stretch. Ideally, this
area will be next to the school, so the students can do their forward bends with the comfort/confidence of
not having anyone behind them.
Before You Start:
Make sure all students understand proper form.
Break the class into groups.
How to Play: In this activity students will work on their flexibility with six activities: forward bend, lunge, calf stretch,
sitting eagle, soaring eagle, and flamingo. Groups spend three minutes in each area.
Forward Bend
This is targeted to work on your hamstrings and lower back. The muscle being stretched is the Bicep
Femoris, known as the lower hamstring, and your back, the lower Latissimus Dorsi. This is a good
stretch to eliminate stiffness in the lower back and tightness in the hamstrings. Keep your knees
slightly bent. Reach both arms up straight above your body. Slowly lower your arms and upper body
until your back is perpendicular to your legs, making a “table” with your back. Let your arms and
head hang. The goal is to hold this stretch for 60 seconds. Start with 30 seconds and add time as they
progress.
Forward Bend
Calf Stretch
Lunge Land
Sitting Eagle
Soaring Eagle
Flamingo
School or Other Building

Page | 299
Lunge
This is targeted to stretch the anterior hip. The muscle you are trying to stretch
is called the Tensor Fasciae Latae. Extend the left leg back, knee bent, so that
the top of the foot is resting on the ground. Bend your front right knee making
sure the foot is flat and the knee is at 90 degrees. Gently lean your body forward
over the front foot, keeping your back and torso straight while extending the
hip. The goal is to hold this stretch for 60 seconds. Start with 30 seconds and
add time as they progress. Stretch both left and right legs equally.
Calf Stretch
The muscle that will stretch is called the Gastrocnemius, also known as the
calf. This stretch helps prevent the possibility of pulling/tightening of the calf.
Stand with one foot in front of the other, shoulder width apart, with the
front foot facing forward and the back foot at a 45-degree angle. The
front knee is bent just far enough so it does not go past the foot and the
back leg is straight without the knee locking. Press the heel of the back leg
into the floor until a stretch is felt in the calf muscle. Count to 30. Switch so
the back leg is now forward and repeat.
Soaring Eagle
This stretches the triceps muscles. The muscle you are trying to stretch is called the
Triceps Brachii. Reach your left arm up as if you are waving to a friend, bend the
elbow and drop the forearm and hand behind your head. Reach your right arm behind
you, at rib height and see if you can clasp hands. Count to 30. If it is difficult for the
students to clasp hands you may also introduce this stretch with foot long strips of
cloth for students to hold onto until they become more flexible. Caution: do not let
students help each other grasp hands as each student should only stretch as far as they
are able.
Sitting Eagle
This stretches the upper back. Hold both arms out in front of you with your
palms up. Cross your right arm over your left. Bring your palms up
towards your face and then give yourself a high-five. Count to 60. Repeat with
the left arm on top.
Flamingo
The muscle being stretched is the quadriceps, the large thigh muscle. It is a good
muscle to loosen up prior to running. Stand on one foot - if balancing is a
challenge, hold onto the shoulder of a partner or a wall. Also try touching your
nose or forehead with one finger. Hold the ankle with the opposite hand and raise
the heel of the lifted foot to the buttocks (or as close as comfortable). Keep your
body upright; do not jump while stretching. The goal is to hold this stretch for 60
seconds. Start with 30 seconds and add time as they progress. Stretch both left and
right legs equally.
1st-6th+ I N C Ad,Au,Bl,Cp,De,Ed L1

Page | 300
Partner Crunches
Group Size: 5-40
Age Group: 1st-6th+ grades
Length of Activity: 10 minutes
Developmental Goals: To develop an understanding of the stomach muscles and how they work, when
to rest, and working in pairs.
Skills Practiced: Proper curl-up position, proper breathing and movement coordination, and an idea of
quality over quantity.
Equipment Needed: Mats, carpet squares or the mat under a play structure.
Set Up: Set up an area with mats, carpet squares or on the padding under the play structure where
students can work in pairs or small groups.
Before You Start:
Demonstrate the proper way to do crunches.
Pair the students up.
How to Play:
Crunches work primarily on the upper abdomen. The partner is watching in order to count, to
encourage the active student to focus on maintaining the proper form.
Correct form is when the heels never leave the ground, hands are free and not grabbing the head
and the neck is not straining. If any of these things happen, the child should stop and rest.
Children should go at their own pace, and not spend more than one minute for each turn.
Lay on the back with the knees bent, feet on the floor, arms stretched down by the sides,
palms down not holding anything
Take a big dragon breath in, and then slowly breathe out while sliding the hands down
closer to the feet by lifting the torso up off the mat. Then return the head to the floor,
letting the hands slide back. Students should take one breath lying down and then repeat.
Goals are five repetitions for 1st & 2nd grades, 10 repetitions for 3rd & 4th grades and 15
repetitions for 5th grade, then have the partners switch. Each student should get three
turns.
1st-6th+ I N C Ad,Au,Bl,Cp,De,Ed L1
Page | 301
Leg Lifts for the Abs
Group Size: 5-40
Age Group: 1st-6th+ grades
Length of Activity: 10 minutes
Developmental Goals: To develop an understanding of the stomach muscles and how they work, when
to rest, and working in pairs.
Skills Practiced: Proper breathing and movement coordination, strengthening the lower abdomen, and
the concept of quality over quantity.
Equipment Needed: Mats, carpet squares or the mat under a play structure.
Set Up: Set up an area with mats, carpet squares or on the padding under the play structure where
students can work in pairs or small groups.
Before You Start:
First demonstrate, and then have students practice pointing and flexing their feet.
Pair the students up.
How to Play:
The partner is watching primarily to count and encourage the active student to stay in the proper
form.
Correct form is heels never landing completely on the floor and head never leaving the ground. If
either of these things happens, the child should stop and rest. Children should go at their own
pace, but should not spend more than one minute for each turn.
1. Lay on the back with the knees bent, lift the bottom off the ground, and then place the hands
down underneath the bottom, palms facing down.
2. Take a big dragon breath in and lift the feet off the ground, bringing your knees towards your
chest.
3. Slowly lower the feet towards the ground touching the heels gently then immediately bring
knees back up towards the chest.
4. Breathe and then point your feet and slowly lower them to the ground, this time touching the
toes gently and then immediately bringing them back up again. Repeat.
5. Goals are 10 repetitions for 1st & 2nd grades, 15 repetitions for 3rd, 4th & 5th grades then have
the partners switch. Each student should get three turns.
1st-6th+ I N C Ad,Au,Bl,Cp,De,Ed L1

Page | 302
Chest and Arms Strengthening Stations
Group Size: 5-40
Age Group: 1st-6th+ grades
Length of Activity: 20-30 minutes
Developmental Goal: To understand the chest and arm muscles and how they work.
Skills Practiced: Strengthening the chest area, learning proper push-up and chin-up position, proper
breathing and movement coordination, concept of form over quality over quantity.
Equipment Needed: Mats or the mat under a play structure
Set Up: Have a designated area for each exercise.
Before You Start:
These exercises take a fair amount of explanation on the first go-around.
Make sure all students understand proper form and the breathing of each exercise.
Students are ready for push-ups when they understand banana back vs. good back and
how to coach each other using only one finger to touch the back for corrections.
Break the class into three groups.
How to Play: In this activity, students will work on their chest and arm muscles with three activities: bent-leg push-ups,
pull-ups or bent-arm hang, and strong arms. Groups spend three minutes in each area.
1. Bent-leg push-ups: Most students cannot keep their back flat when doing push-ups, which
puts a lot of pressure on the lower back and can cause damage. To introduce this type of
push-up, ask the students to raise their hand if they know an adult that complains about their
back (most children will). Tell them that you are teaching them this special push-up that will
keep them from having an aching back when they get older. Pair students up so they can
coach each other on their form.
Show an example of a bad push up with a curved banana back, then show a good bent-leg
push-up (explained below). Then ask the teacher to be your partner. Do a bent-leg push
up with first collapsed shoulders, and have the teacher touch your back with one finger
where you are collapsed, then correct your form. Then again, with the middle of your
back in a banana shape, have the teacher touch you where you should straighten out.
Explain to the students that you will have them do the same thing.
Have one of the pair get on his/her knees with their upper legs straight off the ground so
they are tall.
Tell the student to put his/her hands on the ground and walk them forward until the hands
are slightly forward of the shoulders.
Have them breathe in as they go down, with elbows bending out to the side until the chin
almost touches the ground, then breathe out as they push back up.
Goals are five repetitions for 1st & 2ndgrades, 10 repetitions for 3rd, 4th & 5th grades, then
have the partners switch. Each student should get three turns.

Page | 303
2. Flexed-Arm Hang or Pull-Ups (pull-ups for 4th+ grades only): These work the arms, chest
and upper back. To do this exercise you need monkey bars and, unless you have a willing
teacher to assist you, you can only work with one student at a time. Have students who are
waiting their turn cheer on the student whose turn it is (if class dynamics are very positive) or
stretching and practicing other exercises. Students who are finished can pair up and do strong
arms (see below).
At the monkey bars have the student hang so the chin is above the bar, and elbows are in
by the side.
Hold as long as possible. Make sure students are not resting the chin on the bar.
Goals are five repetitions for 1st & 2nd, grades and 10 repetitions for 3rd, 4th & 5th then
have the partners switch. Each student should get three turns.
3. Strong arms: This is really a preparation for true push-ups. It works the upper chest, back
and arms. Do an example then have the students pair up, the partner watching for form and
counting by one, one thousand or Mississippi. Correct form is a completely flat back, with no
collapse in the shoulders. If either of these things happens, the child should stop and rest.
Get into bent-knee push-up position with the hands directly below the shoulders.
Stretch out one leg at a time with the legs straight behind, so that only the toes are on the
ground.
Hold this position until tired or until there is a loss of form i.e. a collapse in the back or
shoulders.
Have the partners switch. Each student should get three turns.
1st-6th+ I C Ad,Ad,Bl,Cp,De,Ed L1

Page | 304
Minute Moves/Energizers
Minute Moves are useful, short activities that can be scheduled during reading or math blocks in the
morning. Typically these morning blocks cannot be interrupted by Class Game Time, which can make
scheduling difficult. This usually means that students are sedentary in their classroom for a couple of
hours at a time. Minute Moves allow you to lead 2-5 minute classroom activities where students perform
stretches and participate in low-intensity physical movements. The goal of Minute Moves is to provide
students with a quick break to increase blood-flow and classroom readiness. It is also a great opportunity
for you to develop a rapport with students and teachers that you are not able to schedule on a consistent
basis. It is imperative that Minute Moves sessions are highly structured so that students are able to
quickly return to classroom work afterwards. If possible, include academic pieces as part of your session,
such as using spelling words or math while stretching.
1. Opening (1 minute): Choose one of the following activities:
Stretches
Chair Aerobics
Hokey Pokey Aerobics
Hula-Hoop Circle
Move Your Body
Simon Says
Smile if You Love Me
Story Time Warm Up
Surfing Warm Up
What Changed?
2. Activity (3 minutes): Choose one of the following activities:
Ball Toss Race
Bullfrog Game
Bumpity Bump
Circle Animals
Concentration Crunch
Detective
Ducks Fly
Face to Face
Heads-Up
7-Up
Hokey Pokey Aerobics
Hula-Hoop Circle
All Tied Up
Hot Potato
Instant ID
Look Up
Move your Body
Partner to Partner
Pass the Ball
Phrase Game
Silent Ball
Simon Says
Smile if You Love Me
Story Time Warm Up
Sun Monarch
Surfing Warm Up
The Ball Toss Race
What Changed?
Wonder Ball
Indoor Marco Polo
Up Down Stop Go
You Can Two Can Workout
3. Cool Down (1 minute): Examples-
meditation, deep breathing, etc.
Page | 305
Boom-Sha-Boom
Group Size: 3-30
Age Group: K-5th grades
Length of Activity: 5 minutes
Developmental Goal: To develop eye-hand coordination
Skills Practiced: Pacing and reflexes
Equipment Needed: None
Set Up: Have the students form a circle; students should have a little space between them.
Before You Start:
Review the clapping motion, which is: clap your hands, then your hands go out like your giving
your two neighbors a high-five.
How to Play:
Begin the clapping motion as soon as you start the words. There are four verses.
Every verse is basically the same, but the body part changes.
The verse: Czechoslovakia, boom-sha-boom, Yugoslavia, boom-sha-boom, let’s get the rhythm in
our _______ (do round motion only), we’ve got the rhythm in our _______ (do all the motions).
Blank fillers:
Round 1: hands (motion is three claps)
Round 2: feet (three stomps) Second blank motion is 3 stomps then 3 claps.
Round 3: head (shake head and say ay,ay,ay). Second blank motion is 3 head shakes, 3
stomps, and 3 claps.
Round 4: hips (shake hips and say boing, boing, boing). Second blank motion is 3 hip
shakes, 3 head shakes, 3 stomps, and 3 claps.
Variation:
For more of a challenge, have students continuously walk in a circle.
K-5th I N M T C Ad,Au,Bl,Cp,De,Ed L2

Page | 306
Boppity Bop Bop Bop
Group Size: 10-30
Age Group: 2nd-6th+ grades
Length of Activity: 5-15 minutes
Developmental Goals: To develop verbal communication, strategic thinking, and eye-hand
coordination.
Skills Practiced: Following directions, reflexes, and observation.
Equipment Needed: None
Set Up: The class should be standing in a circle, shoulder-to-shoulder.
Before You Start:
Go over instructions. Provide examples of each sequence and use call and response to
make sure students know how to play the game.
All ties are resolved with Ro-Sham-Bo.
How to Play:
The group gathers in a circle, with one student in the middle (selected by the leader).
The student in the middle walks up to/points to a student in the circle and says “Boppity
Bop Bop Bop.” If student in the middle completes the phrase before the other student
says “Bop,” the two switch places. If the student on the outside says “Bop” before the
middle student finishes the phrase, the game continues with the same student in the
middle.
The student in the middle can fake out students on the outside by simply pointing and
saying “Bop” to a student in the circle. If the outside student says “Bop,” the two
students switch places.
Variation(s):
To make the game more challenging, add these commands:
House: Student in the middle walks/points to a student and says “House.” The
student who was pointed to must squat down and say “Come in! Come in!” while
making a “come here” gesture with his/her hands. The two students on either side of
the squatting student must make a roof with their arms over the squatting student. The
student who reacts last out of the three goes in the middle.
Airplane: Student in the middle walks/points to a student and says “Airplane.” The
student who was pointed to makes aviator sunglasses/goggles with his hands. The
students on either side make an airplane wing with the appropriate arm (student to the
left sticks out his/her left arm, student on the right sticks out his/her right).
Palm Tree: Student in the middle walks/points to a student and says “Palm Tree.”
The student who was pointed to makes him/herself a palm tree in the breeze with
arms in the air, waving them side to side. The two students to the immediate left and
right of the palm tree do the hula dance.
2nd-6th+ I N M C Ad,Au L2

Page | 307
Bullfrog Game
Group Size: 10-30
Age Group: K- 5th grades
Length of Activity: 5-10 minutes
Developmental Goals: To develop memorization and listening skills
Skills Practiced: Gross muscle control
Equipment Needed: None
Set Up: None
Before You Start:
Circle the students, with their hands outstretched to the side with their palms facing up. The right
hand should be on top of their neighbor's left hand (continuous around the circle).
How to Play:
The leader begins the chant and a slap is passed around the circle along with the chant, "Down by
the banks of the hanky panky, where the bullfrog jumps from bank to banky, with an E, I, O, U, it
got on a lily with a big kerr-plop! (Some students seem to know another version, but this one is
shorter and easier to remember...).
When you get to the kerr-plop on the last beat, the person tries to move his or her hands before
they are slapped.
If they move their hand before it is hit, the hitter who misssed is out, if they don't move it in time,
the person whose hand was hit is out.
The players who are out move to the outside of the circle and help sing the song.
Variation:
Younger students (K-1st) can sit in the middle as “chicken soup” when they get out. Then students
don’t lose interest too quickly and they stay part of the game.
K-5th I N M C Ad,De L1

Page | 308
Bumpity-Bump Bump
Group Size: 10-20
Age Group: K-2nd grades
Length of Activity: 5-15 minutes
Developmental Goals: To increase listening skills, social comfort, memorization and to learn everyone’s
name.
Skills Practiced: Spatial awareness and quick reflexes
Equipment Needed: None
Set Up: Cafeteria, auditorium, classroom.
Before You Start:
The group forms a circle with Player 1 in the center.
How to Play:
Player 1 walks up to a player in the circle and says one of four things: “Left,” “Right,”
“Straight,” or “Center,” followed immediately by the phrase, “Bumpity-Bump, Bump, Bump.”
Player 2 must make the correct response before Player 1 finishes saying “Bumpity-Bump, Bump,
Bump.”
The correct response for the command “left” is the name of the person on Player Two’s left; for
“right,” it’s the name of the person on his or her right, for “straight,” it’s his or her own name;
and for “center,” it’s the name of Player 1 (in the center).
If Player 2 responds correctly and in time, Player 1 repeats the process with another player.
If Player 2 responds incorrectly or too late, s/he takes the center position.
K-2nd I N M C Ad,De L2

Page | 309
Cha-Cha Slide
Group Size: 10-30
Age Group: preK-6th+grades
Length of Activity: 15-20 minutes
Developmental Goal: This goal of this game is to increase aerobic fitness through dance.
Skills Practiced: Following instructions
Equipment Needed: CD player and the Cha-Cha Slide CD
Set Up: Can be played in a cafeteria, gym, or classroom with chairs and desks to the side.
Before You Start:
Make sure there is ample space for children to stand side-by-side.
Emphasize safety and remind students they should not touch anyone else during the dance.
How to Play:
In this activity, students listen and dance to the instructions of the song and the adult.
Variation(s):
For younger students, adult can face same direction as the students.
Adult or students can add their own dance moves.
pK-6th+ I M C Ad,Au,Bl,Cp,De,Ed L1

Page | 310
Chair Aerobics
Group Size: 10-20
Age Group: K-6th+ grades
Length of Activity: 15-25 minutes
Developmental Goals: To practice listening to directions and understand the importance of exercise.
Skills Practiced: Following instructions, breathing and flexibility.
Equipment Needed: Chairs, can be played in either cafeteria, classroom, or gym.
Set Up: If possible, have students move their chairs several feet away from their desks in classroom.
Before You Start:
Begin with a warm up with slow music, if available.
After four or five minutes of stretching, switch to faster music and lead students through several
chair exercises.
Review boundaries and rules, ask for questions.
How to Play:
While sitting on their chairs have them: hold the bottom of the chair with both hands and raise
alternate knees up and down.
Reach down to the floor with the left hand then the right hand.
Hold the bottom of the chair with both hands and alternate lifting each leg straight up to seat
level and down again.
Stand in front of the chair and place the hands on either side of the chair, raise the right leg
backwards straight up and down 10 times, and then repeat with the left leg.
Variation:
Increase breath counts and reps for older students.
K-6th+ I M C Ad,Au,Bl,Cp,De,Ed L1

Page | 311
Chuck Race
Group Size: 10-25
Age Group: 1st-4thgrades
Length of Activity: 5-10 minutes
Developmental Goals: To develop cooperation, teamwork, nonverbal communication, strategic thinking,
and planning.
Skills Practiced: Following directions, gross muscle control, and ball placement.
Equipment Needed: 1 rubber chicken
Set Up: None
Before You Start:
Children should be standing behind their desks with their chair pushed in.
Explain that during this activity, they will not be able to talk.
The group’s goal is to beat the clock. They want to accomplish the task as quickly as possible.
How to Play:
When the adult says the magic word, s/he will start a stopwatch and pass Chuck (the chicken) to
one student.
That student will walk to another student, hand over Chuck to that student, and sit in that
student’s chair.
Play continues. Each time a student gets the chicken, s/he walks to another student, hands over
the chicken, and sits in the other student’s seat.
Play continues until all of the students are sitting. The last student to be standing must bring
Chuck to the leader, at which point the time is stopped and announced.
Alternate Names:
This is a variation of Ball Toss Race. It can, however, be done in a classroom with no extra space
for a circle. It doesn’t involve throwing, so it can work almost anywhere.
Variation(s):
With older students or for an additional challenge, have each student only pass to someone not in
their section of the room etc. (Without this rule, strategic groups may discover they can just pass
Chuck to someone next to them in order to pass him faster.)
Set a realistic time goal and debrief what worked and what the group wants to change to make it
go faster. (Work together, come up with a plan, etc.)
Give a five second penalty for any noise.
1st-4th I M T C Ad,Au,Bl,Cp,De,Ed L1

Page | 312
Circle Animals
Group Size: 10-20
Age Group: preK-6th+ grades
Length of Activity: 15-25 minutes
Developmental Goal: The object of this game is for students to think quickly and work together.
Skills Practiced: Following instructions, concentration, and flexibility
Equipment Needed: Cafeteria, classroom, or gym
Set Up: Clear open space
Before You Start:
Begin in a circle.
Choose two or three animals to mimic.
Review the sounds and actions of each animal with students.
Demonstrate how each animal formation will look.
Review boundaries and rules, ask for questions.
How to Play:
All students begin in a circle, with one student chosen to be in the center of the circle.
The student in the center will point to a student on the circle and call out an animal.
The student, who is pointed to, along with the student to his/her right and left, has to create the
animal that was named.
If the student in the center points to Joe and says, “Rabbit”, Joe holds 2 fingers over his head
making rabbit ears.
The 2 students next to Joe each tap one foot on the ground to mimic hopping.
Students who do not do the correct movement are out.
These students now move to the center of the circle and choose animals for people to create.
Game continues until only three students are left.
Variation(s):
Other animals include: Elephant – middle: makes trunk with arm, left and right: make ears by
placing arms in ½ circle shapes next to head of middle. Cat – middle: makes claws with hands,
left and right: use fingers of one hand to create whiskers next to face of middle.
pK-6th+ I N M C Ad L1

Page | 313
Concentration Crunch
Group Size: 10-20
Age Group: preK-6th+ grades
Length of Activity: 25-30 minutes
Developmental Goals: Students will increase listening, memorization, and numbers ability.
Skills Practiced: Core strength, abdominal crunches, sequencing.
Equipment Needed: An open space in a cafeteria, classroom, or gym.
Set Up: If possible, have students move their chairs several feet away from their desks if you’re using a
classroom.
Before You Start:
Begin with a warm up of stretches.
Review the correct way of performing an abdominal crunch.
Practice a few reps of abdominal crunches.
Have the students sit in a circle.
Instruct them to count off around the circle starting with the number one, and tell them that they
MUST remember their numbers.
How to Play:
The game begins with one student, chosen by the adult, calling out a random number.
The person whose number is called must immediately call out another number.
If a student significantly hesitates, s/he will perform five abdominal crunches.
The student then calls out a new number and the game continues.
Variation:
Increase breath counts and reps for older students.
pK-6th+ I N M C Ad,Au,Bl,Cp,De,Ed L2

Page | 314
Dance Move
Group Size: 10-30
Age Group: preK-5th grades
Length of Activity: 5-10 minutes
Developmental Goals: To share and learn about one another, and develop social comfort.
Skills Practiced: Balance, body and spatial awareness, following directions, and observation.
Equipment Needed: None
Set Up: None
Before You Start:
All students and adults should be standing in a circle.
Explain ground rules: no touching anyone or anything, no falling down, keep it appropriate
(consequences as appropriate by grade, jumping jacks, a time out, etc.).
How to Play:
With one student in the center of the circle, doing whatever dance they want, (within the
previously-stated safety rules), everyone claps and chants this song:
Let me see your dance move,
Your dance move,
Your dance move.
Let me see your dance move,
Your dance move at this school.
Immediately afterwards, everyone joins in and does the same dance that the student in the middle
did while chanting:
We can do it too,
And too,
And too.
We can do it too,
We can do your dance move!
The group chants both parts, and the student in the middle closes his/her eyes and spins around.
The group counts to ten and on the count of ten, the student in the middle freezes. Whoever s/he
is pointing to is the next person in the middle.
If the person chosen randomly does not want to go in the middle, they have the right to pass. The
adult points to the next person in the circle until there is a volunteer.
pK-5th I N M C Ad,Au,Bl,Cp,De,Ed L1

Page | 315
Detective
Group Size: 20-30
Age Group: preK-6th+ grades
Length of Activity: 5-15 minutes
Developmental Goal: To develop memorization.
Skills Practiced: Observation
Equipment Needed: None
Set Up: Classroom, other indoor space
Before You Start:
This game can be played in a circle or at their desks.
Roll call with every student to make sure everyone knows everyone else’s names.
How to Play:
One student leaves the room and becomes the detective.
Choose one student to hide in a place in the room where they will not be visible.
The rest of the circle changes places or changes seats.
Call the detective back into the room.
The detective then tries to guess who is hidden.
If s/he guesses correctly, s/he is the detective again.
If s/he is wrong, the hiding student is the new detective.
Variation:
This game can be played in a circle or at their seats. If they are at their seats, all students must
trade seats before the detective enters the room.
pK-6th+ I N M C Ad,Au,Cp,De,Ed L2

Page | 316
Duck, Duck, Goose
Group Size: 10-30
Age Group: preK-3rd grades
Length of Activity: 5-10 minutes
Developmental Goal: To develop social comfort.
Skills Practiced: Running, safe tagging and following directions.
Equipment Needed: None
Set Up: None
Before You Start:
Gather the students in a circle, sitting down.
Demonstrate safe tagging:
Light touch, like butterfly wings on the shoulder
Unsafe tags: hard contact that might cause the person being tagged to fall
How to Play:
One student is chosen as the fox who walks around the group, lightly touching each player on the
head while saying “Duck,” with each touch.
When the student says “Goose”, the person who was touched gets up and tries to tag the fox.
Once the fox picks a goose, s/he is trying to run around the circle and sit down where the goose
was.
If the fox gets tagged, s/he goes into the middle, the cooking pot, for one round.
The goose then becomes the next fox and another round begins.
Variation(s):
Students stay in the cooking pot until there are 5 people, then they can re-join the game.
Duck, Duck Splash: Instead of tapping students on the head while saying “duck”, give the fox a
half cup of water to dip their fingers in and flick a bit of water on each person. When the fox
wants to choose a goose s/he dumps the remaining water on their head and says “splash!”
Allow students options to play without getting wet.
pK-3rd I N M C Ad,Au,De,Ed L1

Page | 317
Ducks Fly
Group Size: 10-25
Age Group: K-2nd grades
Length of Activity: 5-10 minutes
Developmental Goal: Develop the ability to listen to directions.
Skills Practiced: Following directions and gross muscle control.
Equipment Needed: None
Set Up: None
Before You Start:
Have students stand next to their desks
Randomly choose a leader
How to Play:
The leader will stand in front of the class and call out “Ducks Fly.”
The students must now begin to flap their wings.
The leader will continue to call out animals by saying, for example, “Birds Fly” or “Crows Fly.”
As long as the leader calls out an animal that flies, the students will continue to flap their wings.
If the leader says an animal that does not fly the class should stop flapping their wings.
Students caught continuing to flap must sit down.
Choose a new leader after every four or five animals are called.
The round continues until four or five students are left standing.
K-2nd I N M C Ad,Ed L1

Page | 318
Group Count
Group Size: Any size
Age Group: 1st-6th+ grades
Length of Activity: 10 minutes
Development Goals: Concepts, interpersonal relations, team work and patience
Skills Practiced: Fine and gross motor skills, counting.
Equipment Needed: None
Set Up: Review counting up to ten with younger kids.
Before You Start:
Explain to the group that mistakes will be made and mistakes should be celebrated.
Demonstrate with a few students how to take turns calling numbers.
How to Play:
Your group is trying to count to ten (or higher) collectively.
The facilitator says 1 to get the game started.
Any student then says the next numerical number. If any of the numbers are repeated or said at
the same time, then your group starts back at 1.
Try to see how long it takes over a couple of days, weeks, or months. Give high fives around the
group when finished.
Variation(s):
Increase difficulty for older grades by counting higher.
Perform a task (i.e. jumping jacks, push-ups etc.) if mistakes are made.
1st-6th+ I N M C Ad,Au,Bl,Cp,Ed L1
Page | 319
Heads-Up, 7-Up
Group Size: 10-20
Age Group: preK-6th+ grades
Length of Activity: 5-10 minutes
Developmental Goals: Practicing strategic thinking and learning names.
Skills Practiced: Following instructions and listening.
Equipment Needed: None
Set Up: Play in a classroom or cafeteria.
Before You Start:
Review rules and boundaries.
How to Play:
Seven students are taggers.
They stand in front of the room and say, "Heads down, thumbs up!" and the rest of the class puts
their heads down with their thumbs up.
Every tagger goes around and taps one thumb.
When they are done, the seven taggers say, "Heads-up, 7-up!"
Then the tagged people stand up and try to guess who tagged them. If they guess correctly, they
switch places.
pK-6th+ I N M C Ad,Au,Bl,Cp,De,Ed L1

Page | 320
Hokey Pokey Aerobics
Group Size: 10-40
Age Group: K-5th grades
Length of Activity: 5-10 minutes
Developmental Goal: To develop the ability to listen to directions.
Skills Practiced: Gross motor control, balance and social comfort.
Equipment Needed: None
Set Up: None
Before You Start:
Gather the students in a circle
How to Play:
Use a recording of the Hokey Pokey, or have the students sing it themselves.
Sing while doing the corresponding movement:
Put your right foot in (lunge forward on the right leg)
Put your right foot out (return to standing position)
Put your right foot in and shake it all about (lunge forward on right leg and lightly bounce
up in down in lunge position)
Do the Hokey Pokey and turn yourself around (do jumping jacks while turning in a
circle)
Repeat above but do the opposite for the left leg.
Continue to sing while working the following body parts
Right arm and left arm (in-extend arm at the elbow, out-flex arm at the elbow, shake-
bicep curls)
Head (in-slowly touch chin to chest, out-back to starting position, shake- slowly side to
side)
Right hip and left hip (in-side jump in, out-side jump out, shake- jump side to side)
Whole self (in- forward jump, out- backward jump, shake-jump in and out)
Finish with “Do the Hokey Pokey and turn yourself around, that’s what it’s all about!”
End with partner high fives.
Variation(s):
Each time your turn yourself around you can incorporate different movements:
Hopping on one foot
Running in place
Leg squats
K-5th I N M C Ad,Au,Bl,Cp,De,Ed L1

Page | 321
Hot Potato
Group Size: 10-20
Age Group: K-5th grades
Length of Activity: 5-10 minutes
Developmental Goal: To practice hand-eye coordination.
Skills Practiced: Following instructions, hand-eye coordination and spatial awareness.
Equipment Needed: At least one ball, or something to pass.
Set Up: If playing in a classroom, move desks and chairs to make room to form a circle (if possible).
Before You Start:
Warm-up by tossing the ball from student to student with safe throws (underhand).
Have students form a circle or stand next to their desks.
Review rules and boundaries.
How to Play:
Pass the ball around the circle or class without dropping the ball.
If someone drops it, they sit in the center ("hot potato soup" pot).
After the end of each round, increase the speed that the ball is tossed around the circle.
Variation(s):
With younger students (K to first grade), sit in a circle; start out first handing, then rolling the
ball, then transition into tossing.
If you do not have music…students sit in a circle and pass a ball in one direction. Students should
pass the ball as quickly as possible without throwing or dropping it. The whole group says the
verse as the ball is passed. The student holding the ball when the verse ends must do 5 jumping
jacks before returning to the game. Verse: “Pass the ball round and round. Pass it quickly or
you’ll be found. If you’re the one to hold it last, you will owe 5 jumping jacks. You are it!”
K-5th I N M C Ad,Au,Cp,Bl,De,Ed L1

Page | 322
Indoor Marco Polo
Group Size: 5-30
Age Group: 3rd-6th+ grades
Length of Activity: 10 minutes
Developmental Goals: To develop cooperation, teamwork, verbal communication and listening to
directions.
Skills Practiced: Following directions, spatial and physical awareness.
Equipment Needed: None
Set Up: Small area or classroom
Before You Start:
Choose one student to be ‘it’ and another student to be his/her guide.
Have the rest of students spread out in the space and review that they are walking, not running.
Review the boundaries with the students.
How to Play:
The student that is ‘it’ closes his/her eyes and calls out ‘Marco’ and all the other students respond
‘Polo.’
The student that is ‘it’ moves toward the rest of the students, trying to tag them, with help from
the guide, who places his/her hands on the shoulders of the student that’s ‘it’ and directs him/her
away from objects throughout the room.
When someone is tagged, the student who was ‘it’ becomes the new guide.
Variation:
To increase difficulty, the guide can talk the person around obstacles instead of using his/her
hands on shoulders.
3rd-6th+ I N M C Ad,Au,Ed L1

Page | 323
Instant ID
Group Size: 6-20
Age Group: 1st-5th grades
Length of Activity: 10-15 minutes
Developmental Goals: To develop cooperation and learn everyone’s name.
Skills Practiced: Quick reflexes
Equipment Needed: A blanket or something that acts like a curtain.
Set Up: None
Before You Start:
Divide into two teams.
Have two people hold a large, thick blanket up like curtain.
How to Play:
Have a person from each team stand facing each other with the blanket between, then quickly
drop the blanket.
First one to correctly say the other person's name earns a point for his/her team.
Variation:
Have teams line up with their backs to each other, choose a person from each team to walk
backwards until their backs are almost touching. Allow the other players to face each other. The
team gives their player in the middle hints to who is standing behind them.
1st-5th M C Ad,Au,Cp,De,Ed L1
Page | 324
Look Up
Group Size: 10-30
Age Group: 1st-5th grades
Length of Activity: 5-10 minutes
Developmental Goals: To develop the ability to listen to directions and increase social comfort.
Skills Practiced: Following directions
Equipment Needed: None
Set Up: None
Before You Start:
Begin with two circles of players.
Make sure students knows how to react to the commands.
How to Play:
One person is chosen in each circle to be the caller who starts by saying, “Look down!”
Everyone looks down at their feet
When the caller says “Look up!” everyone looks up directly at someone else in that circle (no fair
looking around).
If two people are looking at each other, they both go to the other circle.
If caller leaves the circle, a new caller is chosen.
1st-5th I N M C Ad,Au,Cp,De,Ed L1

Page | 325
Magic Ball
Group Size: 5-25
Age Group: K-2nd grades
Length of Activity: 5-8 minutes
Developmental Goals: To develop creative thinking and cooperation.
Skills Practiced: Throwing, catching, and following directions.
Equipment Needed: One ball
Set Up: Have students sit in a circle.
Before You Start:
Talk about how to pass a ball, instead of throwing it at the person next to them.
How to Play:
In the circle, have students think of three magic words.
Repeat and practice the magic words in a particular order a few times.
Come up with what the “magic” ball is going to turn into (ex. a sticky ball), say the magic words
and all of a sudden the ordinary recess ball turns into a magic ball. Pick up the ball and pass it in a
sticky motion... hands sticking to the sides of the ball.
Have each student take a turn with the magic ball. Once the ball gets back to you place it back in
the center of the circle and come up with a new magic ball (ex. a heavy ball, an apple, a slippery
ball, take student ideas).
Variations:
Have students stand up in a circle, make the circle bigger or smaller. Use different types of
passing (ex. bounce pass, chest pass, rolling).
K-2nd I M T C Ad,Au,Cp,De,Ed L1

Page | 326
Mouse Trap
Group Size: 10-20
Age Group: 2nd-5th grades
Length of Activity: 5-10 minutes
Developmental Goals: To develop cooperation, teamwork and strategic thinking.
Skills Practiced: Spatial awareness, agility and reflexes
Equipment Needed: None
Set Up: None
Before You Start:
Choose 6 students to make a "trap" by making a circle holding hands
Remind students to be aware of others around them
How to Play:
One child is a "cat" with his or her back to the circle, but part of the circle.
All other students are mice going in and out of the "trap."
When the cat yells "snap!", the arms of the trap goes down to catch mice.
The caught mice then become part of the "trap".
When only one student is left, the game ends and s/he become the cat for the next round.
2nd-5th I N M C Ad,Cp,De,Ed L1

Page | 327
Musical Chairs
Group Size: 6-25
Age Group: K-6th+ grades
Length of Activity: 10-20 minutes
Developmental Goals: To develop strategic thinking, listening to directions and social comfort.
Skills Practiced: Following directions and reflexes.
Equipment Needed: Chairs/ cones (one chair fewer than the number of students participating) and
music.
Set Up: Arrange chairs in a circle with the seats facing outwards.
Before You Start:
Students are gathered in a circle around the chairs.
How to Play:
Play the music and have the students walk around the perimeter of the chair circle.
When the music stops, the students have to immediately sit in a chair.
The one person left standing is out.
Remove another chair and continue until only one student is left.
Variation:
Remove one chair after each round but keep every student in the game. The challenge then is to
get every student seated on a diminishing number of chairs. In other words, they have to share
chairs.
K-6th+ I M C Ad,Au,Cp,Ed L1

Page | 328
Mystery Creature
Group Size: 3-40
Age Group: 3rd–6th+ grades
Length of Activity: 10-20 minutes
Developmental Goals: To develop verbal communication, strategic thinking, and creative thinking.
Skills Practiced: Forming thoughtful questions.
Equipment Needed: Small pieces of paper, pen, tape (optional).
Set Up: Write the names of several different animals on the small sheets of paper.
Before You Start:
Review with students how to frame “yes or no” questions.
Give students ideas for clue-finding questions, such as the animal’s environment/habitat,
physical traits, etc.
How to Play:
Stick an animal to the forehead of one student, not allowing him/her to see what’s written. The
student then asks yes or no questions to try and guess the animal that’s been assigned. Examples:
“Am I big?,” “Do I have scales?,” “Am I a mammal?”
Variation(s):
Pass the animal card to all students, except for one, instead of sticking the name to the student’s
forehead.
3rd-6th+ I N M C Ad,Au,Cp,De,Ed L1

Page | 329
Oh, The Places You’ll Go!
Group Size: 8-30 students
Age Group: 2nd-5th grades
Length of Activity: 10-15 minutes
Developmental Goals: To develop teamwork, goal setting, planning, and creative thinking.
Skills Practiced: Running and following directions.
Equipment Needed: None
Set Up: Make sure to have a large playing area, with four corners and a place for one person to stand in
the middle.
Before You Start:
Talk about goals the students might have in life.
Talk about the use and importance of the imagination.
Tell students which corner is #1, 2, 3, and 4.
How to Play:
Have one student stand in the middle; s/he is driving the “Go Wherever We Want Ship.”
The driver will cover their eyes and count to ten. By the time s/he gets to ten, all of the students
should be in one of the four corners.
Before opening his/her eyes, the driver picks one of the corners. S/he then looks and tells
everyone what kind of creature s/he sees – real or imaginary.
The people in that corner have to act like that creature (or their best interpretation of it) while the
people in the other corners are taking pictures of what they see.
Switch drivers after each round.
Variation:
To focus more on goals, have the driver say what kind of profession/job/activity s/he sees people
doing.
2nd-5th I N M T C Ad,Au,Cp,De,Ed L2

Page | 330
One Word
Group Size: 8-30
Age Group: 3rd-6th+ grades
Length of Activity: 10-20 minutes
Developmental Goals: To develop problem-solving and brainstorming.
Skills Practiced: Following directions.
Equipment Needed: Whiteboard/chalkboard, if possible.
Set Up: Indoor space with a white board, chalkboard, or notepad.
Before You Start:
Divide the group into two (or more) teams.
Remind the students that no actions are allowed, only one word clues.
How to Play:
Select one volunteer from each team to come to the front of the room and face the class.
Write down a word that can be easily seen by the rest of the class, but not the volunteers.
Each team must brainstorm a one word clue to try to help their volunteer teammate guess the
word. For example, if the word is “basketball”, the team could give clues like “hoop” or “sport.”
They could not say something like “Boston Celtics” or “dribbling down the court.” You cannot
say any part of the word, like “ballin’.”
Alternate clues and guesses until one person guesses correctly. Take new volunteers and give the
group a new clue.
Variation:
If the group is very good at the game, offer up phrases as clues instead of single words.
3rd-6th+ I N M C Ad,Bl,Cp,De,Ed L1

Page | 331
Partner to Partner
Group Size: 10-20
Age Group: preK-6th+ grades
Length of Activity: 5-10 minutes
Developmental Goals: To increase social comfort and develop listening skills.
Skills Practiced: Following instructions, spatial awareness and learning body parts.
Equipment Needed: None
Set Up: Gym or classroom. If in a classroom, push tables and chairs back.
Before You Start:
Warm-up with some basic stretches and a bit of cardio.
Have students form a circle.
Review rules and boundaries.
Review different body parts. For instance: elbow, knee, toes, pinky, thumb, etc.
How to Play:
One player is chosen to stand in the center; everybody else partners up and stands in the circle
with their partners next to them.
The player in the middle calls out commands such as "elbow to elbow," "back to back," "knee to
knee." Players take these positions accordingly.
When the person in the middle calls "partner to partner", all the players have to find a new partner
while the person in the middle tries to get a partner.
If they are successful the person left without a partner becomes the new person in the middle and
starts to give commands.
Variation(s):
Instead of having students just switch body parts; you can have them keep everything connected.
For example; if you say, ‘hand to hand,’ and then toe to toe, they would have their hands and toes
connected at the same time. If you then added elbow to elbow, they’d have all three body parts
connected.
Turn this game into a tag game by calling out a body part (i.e. shoulder, elbow, toe, knee, etc.)
and their job is to tag their partner on that spot before their partner tags them.
o Be sure to review safe tagging.
o 1st person to be tagged must perform a task to get back into the game (i.e. jumping jacks,
push-ups, etc.)
pK-6th+ I N M C Ad,Au,Bl,Cp,De,Ed L1

Page | 332
Phrase Game
Group Size: 6-20
Age Group: 3rd-6th+ grades
Length of Activity: 5-10 minutes
Developmental Goals: To develop social comfort and memorization.
Skills Practiced: Following directions.
Equipment Needed: None
Set Up: None
Before You Start:
Each student selects a different phrase. (Have them make up their own, or have students pull
phrases out of a hat.)
How to Play:
All students say their phrase out loud one at a time.
Leader chooses one student to begin the game. First student says their own phrase, then the
phrase of another student.
The student whose phrase was said, then says their own phrase and the phrase of another student.
If a player hesitates or fails to recognize their phrase, they are out.
For example: Will’s phrase is “PLAYWORKS rocks!” Tamika’s phrase is “There is no I in
TEAM.” James’ phrase is “I like candy.” Will begins the game saying, “PLAYWORKS rocks!
There is no I in TEAM.” It is then Tamika’s turn to respond because her phrase was called out.
Tamika says, “There is no I in TEAM. I like Candy.” It would then be James’ turn, and so on.
3rd-6th+ I N M C Ad,Au,Bl,Cp,De,Ed L2

Page | 333
Real Close
Group Size: 5-20
Age Group: 2nd – 6th+ grades
Length of Activity: 10 minutes
Developmental Goals: To develop strategic thinking, eye-hand coordination and teamwork.
Skills Practiced: Spatial awareness, throwing and depth perception.
Equipment Needed: As many cones as students (several different colors of cones as well).
Set Up: Small area or classroom
Before You Start:
Arrange the cones in a circle as home bases for each individual student and assign the teams
based on what color cone the student has (i.e. all students with red home bases will be the red
team).
Set an object in the middle of the circle as a target.
How to Play:
Going around the circle, each team member throws his/her cone toward the target.
If a cone lands on top of the target, the team gets 5 points.
If a cone lands to be touching the target, the team gets 3 points.
If a cone lands within the leader’s foot length from the target, the team gets 1 point.
After all students have thrown their cones, the points are added up for the teams.
Note – no points are awarded until all cones are thrown, because it is possible to knock another
students’ cone out of point range.
Variation(s):
Change the point system – award points for throwing a cone on top of another player’s cone,
award fewer points (make the team scores closer together)
Move the target closer or farther away (adjust difficulty level)
Alternate Names of the Game: Close Enough
2nd-6th+ I M C Ad,Au,Cp,De,Ed L1

Page | 334
Recycle Ball
Group Size: 3-30
Age Group: preK-3rd grades
Length of Activity: 5-15 minutes
Developmental Goals: To develop teamwork, cooperation, and social comfort.
Skills Practiced: Following directions, passing a ball, and eye-hand coordination.
Equipment Needed: 1 playground ball and a recycling bin.
Set Up: Place the recycling bin in the middle of a large circle.
Before You Start:
Have the group sit in a big circle.
Emphasize the importance of cheering on their classmates and being positive.
Have the group practice passing the ball hand-to-hand around the circle while singing a song the
group has chosen.
Emphasize that the ball should be passed hand-to-hand, not thrown or rolled across the circle.
Emphasize that the only time a student should stand up is when they are holding the ball at the
end of the song. Only the leader (or a pre-selected student) can touch the recycling bin and
retrieve the ball.
How to Play:
Let the group pick a song they want to sing.
While singing the song pass the ball hand-to-hand around the circle.
When the song ends, the person holding the ball stands up and tries to throw the ball into the
recycling bin from where they are standing.
The leader retrieves the ball, gives the thrower a high five, prompts a positive response from the
group, and starts the game/song again with a new student.
Variation:
With PreK, let each student try throwing the ball into the recycling bin before starting the game
and make sure the group shouts "Good try _____(students’ name)" for each person.
pK-3rd I N M C Ad,Au,Cp,De,Ed L1

Page | 335
Rhythm Detective
Group Size: 10-25
Age Group: 3rd- 6th grades
Length of Activity: 10-15 minutes
Developmental Goals: To develop cooperation, problem-solving and creative thinking.
Skills Practiced: Keeping a rhythm and following directions.
Equipment Needed: None
Set Up: None
Before You Start:
Students begin in a circle.
How to Play:
A person is chosen to leave the room.
A student in the circle is chosen to start a rhythm with their hands, feet or body.
Everyone in the circle copies the rhythm.
The leader of the rhythm can change it every few seconds and the rest of the group changes as
well.
The person who has been out of the room returns and tries to notice who is leading the rhythm.
They have three guesses.
If s/he guesses correctly, the leader of the rhythm becomes the detective and the previous
detective chooses the next rhythm leader.
If they can’t guess in three guesses, they choose the next detective and someone else gets chosen
for the rhythm leader.
3rd-6th I N M C Ad,Au,Cp,De,Ed L2

Page | 336
Safari
Group Size: 2-50
Age Group: K-3rd grades
Length of Activity: 10-15 minutes
Developmental Goals: To develop listening to directions and creative thinking.
Skills Practiced: Following directions and gross muscle control.
Equipment Needed: One chair; something to serve as a steering wheel, if desired.
Set Up: Select one student to lead a group of tourists on a safari. That student can sit in the chair and the
other students remain in the playing area.
Before You Start:
If inside, remind the students that the tour bus is at a safe distance from the animals, meaning that
even though animals are loud, we should only hear a dull roar from them at most. If outside, it
doesn’t matter and we can be more adventuresome by taking tourists closer to the animals.
For younger groups, go over what kinds of animals we might see in jungles, plains, or deserts.
Remind the students about safe play, especially if indoors.
How to Play:
The tour guide is driving a bus of tourists through the African jungle, plains, and deserts. On the
way they spot different animals and let the passengers know what they see. Whatever animal the
tour guide sees, the rest of the players have to act like that animal.
Switch tour guides after 3-5 animals.
Variation:
Switch the location of the tour. You could go to the Arctic, a farm, down a river, etc.
K-3rd I N M C Ad,Au,Bl,Cp,De,Ed L1

Page | 337
Sandman
Group Size: 15-30
Age Group: 3rd-6th+ grades
Length of Activity: 10-20 minutes
Developmental Goal: To develop nonverbal communication and social comfort.
Skills Practiced: Following directions and observation.
Equipment Needed: None
Set Up: None
Before You Start:
All students are sitting in a circle with legs crossed.
Students should close/cover their eyes while leader picks one person to be the ‘sandman’ (by
lightly tapping him/her on the head one time) and one person to be the ‘alarm clock’ (by lightly
tapping him/her on the head two times).
How to Play:
Once the roles are chosen, students open their eyes.
The ‘sandman’ can put people to sleep by winking at them.
If a student is winked at, he/she should silently count to ten, and then place their hands together
next to their cheek to indicate that they are sleeping.
The alarm clock can wake up ‘sleeping’ students by looking at a sleeping student and touching
his/her own nose. If the ‘alarm clock’ is put to sleep, he/she can no longer wake others up.
Players can try to guess who the ‘sandman’ is, but only while they are still in the game.
If a student guesses incorrectly, they become tired and fall asleep until the round is over.
Variation:
This game can also be played without an ‘alarm clock’. Students that the ‘sandman’ winks at fall
asleep for the rest of the game.
3rd-6th+ I N M C Ad,Au,Cp,De,Ed L2

Page | 338
Silent Ball
Group Size: 5-30
Age Group: preK-6th grades
Length of Activity: 5-10 minutes
Developmental Goals: To develop nonverbal communication and eye-hand coordination.
Skills Practiced: Throwing and catching.
Equipment Needed: A ball
Set Up: None
Before You Start:
Students spread out in playing area standing up.
How to Play:
Leader counts down, “3, 2, 1, Silent.”
Students pass the ball to another person in the play area.
A student must sit down if:
S/he drops the ball
S/he makes a bad pass
They talk or make noise.
Play continues until only one student remains.
The last student to remain standing gets to be first to throw the ball in the next round.
All students who were out can return to play at the start of a new round.
If game is progressing slowly, create challenge by limiting time to throw, having all students take
steps back, keep one hand behind back at all times and so on.
Variation(s):
Pre-K Variation: Have students sit or stand in a circle. See if they can pass the ball around the
circle without anyone laughing or talking. Add more balls for a challenge round.
Silent Trees!: Start with students sitting on the ground, when a player is out s/he stands up and
becomes a tree. Trees must remain planted i.e. they cannot move their feet. The tree can re-enter
the game by deflecting or intercepting a pass. The person who was unsuccessful at making a pass
becomes a tree.
pK-6th I M C Ad,Au,Cp,De,Ed L1

Page | 339
Silent Ball at the Museum
Group Size: 5-30
Age Group: 1st-6th+ grades
Length of Activity: 5-25 minutes
Developmental Goals: To develop nonverbal communication, eye-hand coordination, listening to
directions, and social comfort.
Skills Practiced: Throwing and catching.
Equipment Needed: Playground ball(s)
Set Up: Classroom/other indoor space or outdoor area with clearly defined boundaries.
Before You Start:
The leader chooses one student to be the “Night Guard” or “Janitor”
To start, count down “5, 4, 3, 2, 1… Frozen!”
How to Play:
As the name indicates, this game is a combination of Night at the Museum/Janitor and Silent Ball
Elements from both games apply:
Silent Ball: students must remain completely silent while passing a ball around the room.
Night at the Museum/Janitor: when the Night Guard/Janitor is looking at you, you must
remain frozen. When his/her back is turned, you are free to move around.
Ways for students to get “out”: moving while the Night Guard/Janitor is looking at them, making
any kind of noise, making a bad pass or dropping the ball.
If the ball is thrown from a student who is behind the Night Guard/Janitor’s back to a student in
front of the Night Guard/Janitor, that student may move to catch the ball without being called out.
However, once they have caught the ball they must remain frozen until the Night Guard/Janitor
looks away from them.
Variation(s):
Add more balls (to increase complexity, challenge students more)
Add more night guards (greatly increases complexity, challenges students a lot more)
Make it a challenge to see how many passes students can complete without anyone getting out.
1st-6th+ I M T C Ad,Au,Cp,De,Ed L2

Page | 340
Smile if You Love Me
Group Size: 10-30
Age Group: 1st-5th grades
Length of Activity: 5-10 minutes
Developmental Goals: To develop social comfort and creative thinking.
Skills Practiced: Gross muscle control.
Equipment Needed: None
Set Up: None
Before You Start:
Have the students form a circle and place one student in the center of the circle.
How to Play:
The object of the game is for the student in the middle to make another student smile while those
around him try to keep from smiling.
The student in the middle will choose any other student, stand directly in front of him or her, and
say, “Smile if You Love Me.”
The center student may also make funny faces, but may not touch his/her classmate. In response,
the circle member must try to keep a straight face.
If the student does not smile, s/he remains part of the bigger circle.
If the student does smile, s/he must join the center student in trying to make someone else smile.
The game continues until everyone is smiling.
1st-5th I N M C Ad,Au,Bl,Cp,De,Ed L1

Page | 341
Sun Monarch
Group Size: 5-20
Age Group: 3rd-6th grades
Length of Activity: 5-10 minutes
Developmental Goals: To develop listening skills and creative thinking.
Skills Practiced: Following directions
Equipment Needed: None
Set Up: None
Before You Start:
The group stands at one end of the room in a line.
How to Play:
One person stands in the middle of the room and says, “I am the sun.”
The first person from the line steps forward, faces the group and says something that relates to the
sun, such as “I am the light” or “I am the heat.”
It can also be the opposite, like “I am the dark” or “I am the cold.” Finally, it can be other
meanings of the word or the sound of the word. “Sun” may be interpreted as “son” so that the
person could say, “father” or “sister.”
The two people trade places and the new person repeats what she just said.
The next person steps up and gives a new word that relates to that word.
Variation:
You can begin with any subject matter.
3rd-6th I N M C Ad,Au,Cp,De,Ed L2

Page | 342
Surfing Warm Up
Group Size: 10-30
Age Group: preK-5th grades
Length of Activity: 5-10 minutes
Developmental Goal: To develop listening skills.
Skills Practiced: Endurance, gross muscle control and balance.
Equipment Needed: CD player, the song Wipe Out.
Set Up: None
Before You Start:
Have students spread out with plenty of personal space.
Start the music.
How to Play:
When the drums are playing have the students do a specific movement (pretend to drum to the
beat, jog in place, dance, etc.).
When the music changes, have the students pretend to be surfing. Have them stretch and lean in
different ‘surfing’ positions, working on maintaining their balance.
The activity will repeat itself as the music style in the song changes.
pK-5th+ I M C Ad,Au,Bl,Cp,De,Ed L1

Page | 343
The Bone
Group Size: 10-20
Age Group: 2nd-5th grades
Length of Activity: 10-15 minutes
Developmental Goals: To develop strategic thinking and listening skills.
Skills Practiced: Following directions.
Equipment Needed: Something to act as a "bone" and a blindfold.
Set Up: None
Before You Start:
Form a circle with students sitting down.
Pick one child to be the dog. The dog sits in the center of the circle on a chair, blindfolded,
guarding his or her "bone" (placed under the chair).
The rest of the students are silent.
How to Play:
The leader chooses one student by silently pointing to them.
This person must try to steal the bone without getting caught.
The dog has to bark and point in the direction from which s/he thinks the stealer is approaching.
The dog only gets three chances to bark.
If the stealer makes it back to his or her spot before the dog catches him or her, the stealer gets to
be the dog.
If the dog catches the stealer, the game continues with the same dog and the leader chooses a
different stealer.
2nd-5th I M C Ad,Au,Bl,Cp,De,Ed L1

Page | 344
This is a…
Group Size: 5-15
Age Group: 4th-6th+ grades
Length of Activity: 5-10 minutes
Developmental Goals: To develop cooperation and keeping a rhythm.
Skills Practiced: Quick reflexes.
Equipment Needed: A variety of classroom objects.
Set Up: This game can be difficult to get the hang of, but is very funny once you do.
Before You Start:
Students begin in a circle.
How to Play:
All objects will be passed to the right. There is a series of exchanges that need to occur before the
object can be passed from one person to another.
The person with the object (Player 1) turns to the person on their right (Player 2) and says,
Player 1, “This is a pencil.”
Player 2, “A what?”
Player 1, “A pencil.”
Player 2, “A what?”
Player 1, “A pencil.”
Player 2, “Oh, a pencil.”
The object can then be passed. This exchange must be completed for each item to be passed.
Start different objects in different parts of the circle to add to the challenge. If you are good, you
can pass an object at the same time as you are receiving an item.
4th-6th+ I N M C L2

Page | 345
This is My Nose
Group Size: 10-30
Age Group: 3rd-5th grades
Length of Activity: 5-10 minutes
Developmental Goals: To develop problem-solving and listening to directions.
Skills Practiced: Following directions.
Equipment Needed: None
Set Up: None
Before You Start:
The group forms a circle, standing shoulder-to-shoulder.
How to Play:
The leader starts in the center, walks up to a player in the circle, points to his or her own elbow
and says, “This is my nose.”
The player must point to his or her nose and say, “This is my elbow.”
The leader goes up to another player, points to another body part and misnames it.
In order to move out of the middle, the center person must make a player in the circle mess up
and say or point to the wrong body part.
When this happens, they trade places.
3rd-5th I N M C Ad,Au,Cp L2

Page | 346
Trash Can Basketball
Group Size: 2-20
Age Group: K-6th+ grades
Length of Activity: 10-20 minutes
Developmental Goals: To develop memorization and strategic thinking.
Skills Practiced: Throwing
Equipment Needed: Cones; an empty trash can or container; and a soft ball, beanbag, or wadded up
piece of paper.
Set Up: Indoors. Set up one empty container, 2-3 cones to mark where students will stand in line, and
three other markers of varying distances from the container.
Before You Start:
Separate students into teams of 6-8 and have them line up behind the cones.
How to Play:
Ask a question related to something the students are learning in class (math problem, spelling
word, etc.). Only the students at the front of each line can answer. If someone from the back of
the line answers, that line is disqualified for that round.
Whoever answers the question first wins the right to shoot the “ball” into the container.
They have three choices:
1. Shoot from the closest spot (slam dunk) for 1 point.
2. Shoot from the medium spot for 2 points.
3. Shoot from the farthest spot for 3 points.
After each round, the contestants return to end of the line.
Variation(s):
If the shooter misses, the other students at the front of the line get a chance to shoot (greater
involvement for everyone).
Give the shooters only one designated spot to shoot from (speeds up the game).
Let all students shoot (good for K-1st).
K-6th+ I M C Ad,De L2

Page | 347
Trivia Tic-Tac-Toe
Group Size: 10-20
Age Group: 1st-5th grades
Length of Activity: 10-20 minutes
Developmental Goals: To develop strategic thinking, memorization, and teamwork.
Skills Practiced: Following directions and observation.
Equipment Needed: Tape, chalk, cones, or jump ropes to make a tic-tac-toe board.
Set Up: Can be played inside or out. Make a tic-tac-toe board with tape, chalk, cones, or jump ropes.
Before You Start:
Remind the students about the importance of working together, but only answering when it is
their turn.
Show students how to represent “X” (Standing with both arms and legs extended wide) and “O”
(arms raised above your head in a full circle).
How to Play:
Divide students into two teams, Team “X” and Team “O”.
Take one volunteer from each team and ask a question related to something they are learning in
class (math problems, spelling words, etc.). Whichever student answers correctly first gets to
choose a square to stand in for their team.
Choose a new volunteer for each team and repeat until one team has three in a row.
Variation:
Also can play this game with bean bags. If they get a question right, they win the chance to throw
a bean bag into a square. (Adds an element of physical with mental skills).
1st-5th I M C Ad,Au,Bl,Cp,De,Ed L2

Page | 348
Turtle Game
Group Size: 0-100
Age Group: preK-K
Length of Activity: 5 minutes
Developmental Goal: Nonverbal communication, listening to directions
Skills Practice: Body and spatial awareness, following directions.
Equipment needed: N/A
Set Up: Designate a playing area with clear boundaries.
Before You Start:
First remind students of their personal bubbles that should not be popped.
Talk about turtles. Are they fast or slow? Are they brave or scared?
Have each student crouch very small, like a turtle in its shell.
How to Play:
While you clap softly each child will sneak out a part of his or her body- head, arm, elbow, foot,
knee- and slowly explores the space around, stretching further and further out.
At the sound of a loud clap, that part goes back into the “shell” very quickly.
The game is repeated with another body part.
Finally, let the body part lead the child all the way out so he or she is exploring all of the space
with the most “open” body posture possible.
Variation(s):
On different sounds students will move a different part of the body. For instance, when you clap,
the students move their arms, when you stomp the students move their heads and when you snap
the students move their legs.
For the hard-of-hearing, you can change the clap to a movement that indicates a body part.
pK-K I N M C Ad,Au,Bl,Cp,De,Ed L1

Page | 349
Up, Down, Stop, Go
Group Size: 10-30
Age Group: preK-5th grades
Length of Activity: 10 minutes
Developmental Goals: To develop students’ concentration and listening skills.
Skills Practiced: Body and spatial awareness, running in place and following directions.
Equipment Needed: None.
Set Up: Cafeteria, gym, or classroom.
Before You Start:
Have students stand up either by their seats or spread around the room/play area.
Demonstrate the appropriate actions for “up”, “down”, “stop”, or “go”
On “Up”, students should squat down.
On “Down”, students should jump, or stretch up as high as they can.
On “Stop”, students should move around the play area in a specific movement (walking,
jogging, running, skipping, hopping, etc.) or, if students cannot move around the play
area, they should run in place.
On “Go”, students should freeze.
Students not doing the correct movement can complete a task (jumping jacks, come give the adult
a high five, etc.) before returning to the game.
Do a practice round first so that all students understand the commands and movements that go
with them, and understand what to do if they get the movements mixed up.
How to Play:
Call out the commands “up”, “down”, “stop”, or “go” one at a time.
For the first few minutes, watch the group and stop when students do the wrong movement and
prompt those students to complete the designated task (jumping jacks, etc.).
After the first few minutes, call out the commands without stopping for those who make a
mistake. They can just quickly do the task and get back in the game.
Variation:
Pre-K Variation: Use literal commands (up means up, down means down, etc.). Start out just
doing up and down. Then do stop and go. Then mix up all four commands.
pK-5th I N M C Ad,Au,Bl,Cp,De L1

Page | 350
What Are You Doing?
Group Size: 10-20
Age Group: 4th-6th+ grades
Length of Activity: 10-15 minutes
Developmental Goal: To develop creative thinking and listening to directions.
Skills Practiced: Body awareness and following directions
Equipment Needed: None
Set Up: None
Before You Start:
Students get in line and the first two students face each other.
How to Play:
Student A does a motion like in charades, and then student B asks “What are you Doing?”
Student A must name a motion that doesn’t match the motion that they are doing.
Student B must do the motion that student A named.
Student A then asks, “What are you doing?”
Game continues until one of the students messes up. When a student messes up they go to the end
of the line and the next student steps up.
Variation:
Have multiple lines going to increase participation.
4th-6th+ N M C Ad,De L2

Page | 351
What Changed?
Group Size: 10-30
Age Group: K-5th grades
Length of Activity: 5-10 minutes
Developmental Goals: To develop memorization, problem-solving and creative thinking.
Skills Practiced: Gross muscle control, body awareness and balance.
Equipment Needed: None
Set Up: None
Before You Start:
Pick four people to be up front.
How to Play:
They stand in front of the group in a frozen posture and the rest of the group memorizes how they
are positioned.
Then, the group turns around and the four up front choose one thing each to change about their
stance or appearance.
When ready, the group turns back around.
If students notice something different about any of the four, they raise their hand to guess what is
different about someone up front.
If that person guesses right, they trade places with the person up front.
After the group has guessed all four people up front’s changes, a new round begins.
K-5th I N M C Au,De L1

Page | 352
Wink-Ums
Group Size: 10-30
Age Group: 3rd-6th+ grades
Length of Activity: 10 minutes
Developmental Goals: To develop strategic thinking and nonverbal communication.
Skills Practiced: Agility, body and spatial awareness and evasion.
Equipment Needed: Chairs (enough for 1/2 the number of players, plus one extra)
Set Up: Make a circle with the chairs
Before You Start:
Demonstrate safe tagging:
Light touch, like butterfly wings on the shoulder.
Unsafe Tags: hard contact that might cause the person being tagged to fall.
Demonstrate how to stand behind the chair with your head down and hands behind your back.
Demonstrate how to sit in the chair.
How to Play:
Divide the group in half. Have one group sit in the chairs and the other group stand behind the
chairs.
There should be one chair with no one sitting in it but has a student standing behind it, they are
the “winker”.
The students standing behind the chairs should have their head down and hands behind their back.
The students sitting should look at the winker and sit all the way back in their chair.
If the winker winks at a sitting student they need to try and sneak away from their chair and make
it to the empty chair without being tagged by the student behind them.
If tagged, students switch positions (sitting student stands behind their original chair and standing
student takes a seat) and the same winker tries again. If not tagged, the student standing behind
the new empty chair becomes the winker.
3rd-6th+ I M C De L1

Page | 353
Wonderball
Group Size: 10-30
Age Group: preK-5th grades
Length of Activity: 10 minutes
Developmental Goals: To develop students’ concentration, cooperation and eye-hand coordination skills.
Skills Practiced: Passing, doing jumping jacks, and awareness.
Equipment Needed: 1 playground ball.
Set Up: Decide on a space that is big enough for the entire class to form a circle.
Before You Start:
Have the group sit or stand in a circle.
Practice 5 jumping jacks (for younger ages).
Practice passing the ball around the circle (for younger ages).
Practice singing one round of the song
How to Play:
Start passing the ball around the circle while singing the wonderball song:
The Song --
The wonderball goes round and round,
to pass it quickly you are bound,
if you’re the one to hold it last,
you will owe 5 jumping jacks,
you are it!
The child who is holding the ball when the song ends gets up and does 5 jumping jacks in the
middle of the circle.
Then pick the child who is sitting the quietest to start the next round.
You should move around the circle with the ball to make sure it gets around, a lot of kids will try
to hold the ball so they will be last or won’t be able to hold the ball.
pK-5th I M C Bl,Cp,De L1
Page | 354
Yee Ha!
Group Size: 5-25
Age Group: 1st-6th+ grades
Length of Activity: 5-10 minutes
Developmental Goals: Taking turns, active listening, following directions, social comfort.
Skills Practiced: Observation, following directions.
Equipment Needed: None
Set Up: Have group form a circle with room in between everyone.
Before You Start:
Review and practice all the “moves” as a group to make sure everyone knows how to play.
If indoors, it is important to explain voice volume. This game can get loud.
Some students can be shy with this game at first. Explain that it is more fun if everyone is silly
and loud.
How to Play:
Explain that this game is all about spreading energy around to people. There are a few ways to
pass along the energy:
1. You can pass it to the left by using your RIGHT arm and swinging it in front of you over
your belly while saying/yelling Yee Ha!
2. You can pass it to the left by doing the same as #1 but by using your LEFT arm.
3. You can pass it across the circle by taking a step forward while pointing to the person
you want to give it to and saying/yelling Down Little Doggie!
If the group has these down, you can add MORE!
Round em’ up! = The person who says it waves an arm in the air while yelling and then the
group has to all enter the center of the circle and then find a new spot in the circle. This
person goes again.
Hoe Down! = A person can be skipped by placing both hands on their head making a barn.
This move skips the person next in the circle. This move is special because it can ONLY be
used after a Yee Ha move. It cannot be used after Down Little Doggie.
Dosey Doe = If a person yells this, everyone needs to find a partner, hook arms, and skip
around a few times. The person who says this goes again.
Make up your own!
Variation(s):
Make this a game of elimination by having kids leave the circle if they make a mistake i.e. uses a
wrong hand or says something wrong. That person can then try to confuse or mess up the group.
If the group is really into it, they can create their own moves or names of moves. They will have
more ownership and want to play it more.
1st-6th+ I N M C Ad,Cp,De L2

Page | 355
You Can, Two Can Workout
Group Size: 5-30
Age Group: 2nd-5th grades
Length of Activity: 5-15 minutes
Developmental Goal: To develop listening skills.
Skills Practiced: Gross muscle control, balance, body awareness and following directions.
Equipment Needed: Donated canned goods.
Set Up: Make sure you allow plenty of time for students to bring in canned goods, about 2 per student.
Talk with your school staff when planning this activity, and have lots of extra on hand for those who
forget or cannot afford to bring their own.
Before You Start:
Have students spread out with enough space to do some basic exercises.
How to Play:
Have students hold one can in each hand while performing exercises such as: arm circles, arm
curls, shadow boxing, bench press, butterflies, trunk twists, lat pulls, lunges, squats, etc.
At the end of the period, collect all food items for donation.
You can use this activity as an opportunity to talk to the students about helping those in need; ask
them how it made them feel to donate the items.
2nd-5th I M C Ad,Au,Bl,Cp,De,Ed L1

Page | 356
Zip, Zap, Pop
Group Size: 10-20
Age Group: 3rd-6th+ grades
Length of Activity: 5-10 minutes
Developmental Goals: To practice listening to directions, concentration, and social comfort
within group.
Skills Practiced: Paying attention, following directions.
Equipment Needed: None
Set Up: Designate playing space large enough for the group to form a circle (cafeteria, gym,
classroom)
Before You Start:
Have the group stand in a circle. Explain the three different actions, ‘Zip’, ‘Zap’, and
‘Pop’:
First pass a ‘Zip’ around the circle, accompanied by placing a hand on top of the
head with the fingers pointing at the person on either side. Pass word and
movement around circle in the same direction.
Pass ‘Zap’ around, accompanied by putting the hand under the chin the opposite
direction from which ‘Zip’ was just passed around.
A ‘Pop’ is done by pointing to anyone in the circle, who then passes a Zip to
someone else around circle. Make sure that a there is eye contact with the person
receiving the ‘Pop’.
The actions must always come in the same order, Zip, Zap, then Pop.
Once everyone is familiar with the words and movements begin the game.
How to Play:
The leader starts with a ‘Zip’ and passes it to the person either to their left or right.
It is up to the person who receives it which direction to pass it, and they do a ‘Zap’.
The next person must ‘Pop’ it, sending it to someone across the circle.
‘Zip’ and ‘Zap’ can be sent in either direction.
If person hesitates they are out and can go around the outside of the circle heckling the
group, saying the words Zip, Zap, Pop in people’s ears, trying to distract them.
3rd-6th+ I N M C De L2

Page | 357
Games Index- By Category Ice Breakers Ball Toss Race 7 Bob the Bunny 8 Evolution 9 Find Somebody Who 10 Going on a Picnic 11 Hi, My Name Is… 12 If You Really Knew Me 13 I Love My Neighbor, Especially
My Neighbor Who… 14 Line of Silence 16 Movement Name Game 17 Name Touch 18 Partner Introductions 19 Pulse 20 Pumpkin Face, Raisin Face 21 Ro-Sham-Bo Rock Star 22 Sardines 23 Shape Shifter 24 Spark 25 Splat! 26 Superstar 27 Telephone/Rumor 28 Tomato 29 Tornado 30 When Nature Calls 31 Who Stole the Cookies? 32 I See, I See! 33
Readiness Games Alligator Swamp Trail 35 Animal Farm 36 Bird’s Nest 37 Clap and Move 38 Colors 39 Continuous Relays 40 Cookie Jar 41 Cut the Cake 42 Dance Freeze 43 Dead Fish 44 Sleepy Bunny 45 Drop the Cookie! 46 Find a Place 47 Four Corners 48 Grocery Store 50 Home Run Tag 51 Hop’n Freeze 52 Indoor Hopscotch 53 Jump the River 55 Lava Game 56 Land Sea Air, 170
Leap Frog 57 Mr. Fox 58 My DVD Player 59 Pony Express 60 Poop Deck 61 Push-Catch 63 Rainbow Run 64 Red Light, Green Light 65
Ro-Sham-Bo Relay 66 Run If… 67 Running through the Forest 68 Journey around the World 69 Scramble 70 Secret Agent 71 Sequence Touch 72 Sharks and Minnows 73 Veggie Tray 74 Farmers 75 Shipwreck 76 Simon Says 77 Sports Clubs 78 Super Happy Fun Time 79 Switch 80 Tip It Over, Pick It Up 81 Weather Vane/Jump Whistle 82 Where Are You? 83 Whistle Mixer 84 Zoo 85 Concentration Ball 86 Heart Smart 87 Quick Count 88 Detective Frog (This is Poison
Dart Frog) 89 Hula Ball 90 Jungle Race 91 Lucky Charms 92 Wright Family Vacation 93
Tag Games 7-Up Tag! 96 Animal Tag 97 Arena/Flag Tag 98 Band Aid Tag 99 Blob Tag 101 Capture the Flag 102 Cat and Mice 103 Chair Tag 104 Charades Tag 105 Color Tag 106 Cones Conquest 107 Don’t Get Caught with the
Cookie 108 Dragon Tail 109 Eagle and the Mouse 110 Elbow Tag 111 Everyone’s It 112 Fake Out 113 Feed the Dog/Cat (Relay) 114 Fox Hunt/Squirrel Scramble 115 Freeze Tag 116 Frog Catcher 117 Fruit Basket 118 Fun in a Box 119 Heads or Tails 120 Hoop Scoot Tag 121 Joey Roundup 123 Dinosaur Park 124
Magic Tag 125 Maze Tag 126 Move Your Feet 127 Odds and Evens Tag 128 Off the Ground Tag 129 Pacman Tag 130 Shout Tag 131 Statue Tag 132 Toe Touch Tag 133 Triangle Tag 134 Watch Your Back 135 Where Did it Go? 136 Where the Wild Things Are 137 “Who Let the Dogs Out?” 138 Grumps Island 139 Shrink Tag 140
Cooperative Games All Tangled Up 142 Ants on a Log 143 Back-to-Back Get Up 144 Birds of Prey 145 Blindfold Building 146 Blindfold Pick Up 147 Bridge Ball 148 Bubbles 149 Castle Ball 150 Chair Game 151 Charades Relay 152 C’mon In and Sit Down 153 Crooked Circle 154 Disco Inferno 155 Dog Chases Its Tail 156 Dress Me 157 Fox and the Rabbit 158 Giants, Wizards, Elves 159 Hula Hoop Challenge 160 Invent a Game 161 Key Punch 162 Knock Down 163 Knots on a Rope 164 Magic Bubble Machine 165 Maze Game 166 One Fish, Two Fish, Red Fish,
Blue Fish 167 Over Under 168 Picket Fences 169 Pizza Delivery 170 Quarter Football 171 Quarterback Training Camp 172 Relay Lock Race 173 Run & Rally 174 School Olympics 175 School Yard Golf 179 Shadow Shadow 180 Squash Balls 181 Stash It 182 Tally Ho! 183 The Wave 184

Page | 358
Tic-Tac-Toe Toss 185 Toxic Waste Dump 186 Traffic Jam 187 Trust Falls 188 Unfreeze a Friend 189 Wolves and Bunnies 190 House, Tree, Neighbor 191 Benchball 192 Hot Spots 193
Core Playground Games and
Sports 4-Square 195 Drop and Hit 2-Square 196 Catch and Drop 197 Team 2-Square 198 4-Square Switch 199 X-Square 200 Hantis 201 Jetsetter 4-Square 202 Wall Ball 204 Dodgeball 205 Bowling Dodgeball 206 Rollerball 207 Bring Down the House! 208 Circle Dodgeball 209 Gaga Ball 210 SPUD 211 Snowball Alley 212 Tunnel Ball 213 Pin Down 215 Race Track 216 Rim Dodgeball 217 Crossover Dodgeball 218 Medic Dodgeball 219 Nation Ball 220 Sprout-Ball 221 Puloga (Variation of Sprout-Ball
- Distant) 223 Job Dodgeball 224 Mix it Up 225 Dodgeball Switch 226 Watch Out! 227 Cookie Jar Scramble 229 Deweke 230 Jump Rope/Double Dutch 231 Snake 232 Helicopter 233 Zero, 1, 2, 3 234 Jump Challenge 235 Kickball 236 Crazy Kickball 237 Strategy Kickball 238 Trick ‘O Treat 239 Ultimate Kickball 240 Over-Under Kickball 241 Mountain Ball 242 Bounce Ball 243 Multi-Ball 244 Kick-Basket-Ball 245 Kindergarten Kickball 246
Steal the Bacon – Traditional
247 Basketball 248 Power 249 Basketball ‘Playworks’ 250 10 251 Around the World 252 Steal the Bacon – Basketball
Style 253 Twenty-One 254 Knockout 255 Medic Basketball 256 Three Lines Basketball 257 Pass and Move Basketball 258 Defensive Drills 259 Basketball Bowling 260 Tap Ball 261 Soccer 262 Keep Away Soccer 263 Soccer 4-Square 264 Wide Goal Soccer 265 World Cup Soccer 266 Steal the Bacon – Soccer Style
267 Knock-Down Soccer 268 Soccer Smash 269 Monkey Soccer 270 Crab Soccer 271 Crossfire Soccer 272 Volleyball 273 Booty Ball 274 Clean Your Room! 275 Catch and Pass Volleyball 276 4-Square Volleyball 277 Softball/Baseball 278 Crazy Softball 279 Tee Ball 280 Pickle 281 Tennis Baseball 282 Roller Baseball 283 Wall Baseball 284 Flag Football 285 21- Football 286 Flag Fake Out 287 Trivia Football 288 Ultimate Football 289 Interception 290 Red Light, Green Light Football
291 4-Square Categories (Variation
of 4-Square) 292
Suggested Core Games
Modifications 293
Health and Fitness: FitKid
Program 294 Minute Masters 295 Whistle Walk/Run 296 Pace Yourself 297 Flexibility Stations 298
Partner Crunches 300 Leg Lifts for the Abs 301 Chest and Arms Strengthening
Stations 302
Minute Moves/Energizers 304 Boom-Sha-Boom 305 Boppity Bop Bop Bop 306 Bullfrog Game 307 Bumpity Bump Bump 308 Cha-Cha Slide 309 Chair Aerobics 310 Chuck Race 311 Circle Animals 312 Concentration Crunch 313 Dance Move 314 Detective 315 Duck, Duck, Goose 316 Ducks Fly 317 Group Count 318 Heads-Up, 7-Up 319 Hokey Pokey Aerobics 320 Hot Potato 321 Indoor Marco Polo 322 Instant ID 323 Look Up 324 Magic Ball 325 Mouse Trap 326 Musical Chairs 327 Mystery Creature 328 Oh, The Places You’ll Go! 329 One Word 330 Partner to Partner 331 Phrase Game 332 Real Close 333 Recycle Ball 334 Rhythm Detective 335 Safari 336 Sandman 337 Silent Ball 338 Silent Ball at the Museum 339 Smile if You Love Me 340 Sun Monarch 341 Surfing Warm Up 342 The Bone 343 This is a… 344 This is My Nose 345 Trash Can Basketball 346 Trivia Tic-Tac-Toe 347 Turtle Game 348 Up, Down, Stop, Go 349 What Are You Doing? 350 What Changed? 351 Wink-Ums 352 Wonderball 353 Yee Ha! 354 You Can, Two Can Workout 355 Zip, Zap, Pop 356

Page | 359
Games Index- Alphabetically
10, 239
21- Football, 274
4-Square, 187
4-Square Categories (Variation of 4-
Square), 280
4-Square Switch, 191
4-Square Volleyball, 265
7-Up Tag!, 91
All Tangled Up, 135
Alligator Swamp Trail, 33
Animal Farm, 34
Animal Tag, 92
Ants on a Log, 136
Arena/Flag Tag, 93
Around the World, 240
Back-to-Back Get Up, 137
Ball Toss Race, 6
Band Aid Tag, 94
Basketball, 236
Basketball ‘Playworks’, 238
Basketball Bowling, 248
Benchball, 184
Bird’s Nest, 35
Birds of Prey, 138
Blindfold Building, 139
Blindfold Pick Up, 140
Blob Tag, 95
Bob the Bunny, 7
Boom-Sha-Boom, 293
Booty Ball, 262
Boppity Bop Bop Bop, 294
Bounce Ball, 231
Bowling Dodgeball, 197
Bridge Ball, 141
Bring Down the House!, 199
Bubbles, 142
Bullfrog Game, 295
Bumpity Bump Bump, 296
C’mon In and Sit Down, 146
Capture the Flag, 96
Castle Ball, 143
Cat and Mice, 97
Catch and Drop, 189
Catch and Pass Volleyball, 264
Cha-Cha Slide, 297
Chair Aerobics, 298
Chair Game, 144
Chair Tag, 98
Charades Relay, 145
Charades Tag, 99
Chest and Arms Strengthening
Stations, 290
Chuck Race, 299
Circle Animals, 300
Circle Dodgeball, 200
Clap and Move, 36
Clean Your Room!, 263
Color Tag, 100
Colors, 37
Concentration Ball, 81
Concentration Crunch, 301
Cones Conquest, 101
Continuous Relays, 38
Cookie Jar, 39
Cookie Jar Scramble, 217
Crab Soccer, 259
Crazy Kickball, 225
Crazy Softball, 267
Crooked Circle, 147
Crossfire Soccer, 260
Crossover Dodgeball, 208
Cut the Cake, 40
Dance Freeze, 41
Dance Move, 302
Dead Fish, 42
Defensive Drills, 247
Detective, 303
Detective Frog (This is Poison Dart
Frog), 84
Deweke, 218
Dinosaur Park, 117
Disco Inferno, 148
Dodgeball, 196
Dodgeball Switch, 215
Dog Chases Its Tail, 149
Don’t Get Caught with the Cookie,
102
Dragon Tail, 103
Dress Me, 150
Drop and Hit 2-Square, 188
Drop the Cookie!, 44
Duck, Duck, Goose, 304
Ducks Fly, 305
Eagle and the Mouse, 104
Elbow Tag, 105
Everyone’s It, 106
Evolution, 8
Fake Out, 107
Farmers, 70
Feed the Dog/Cat (Relay), 108
Find a Place, 45
Find Somebody Who, 9
Flag Fake Out, 275
Flag Football, 273
Flexibility Stations, 286
Four Corners, 46
Fox and the Rabbit, 151
Fox Hunt/Squirrel Scramble, 109
Freeze Tag, 110
Frog Catcher, 111
Fruit Basket, 112
Fun in a Box, 113
Gaga Ball, 201
Giants, Wizards, Elves, 152
Going on a Picnic, 10
Grocery Store, 47
Group Count, 306
Grumps Island, 132
Hantis, 193
Heads or Tails, 114
Heads-Up, 7-Up, 307
Heart Smart, 82
Helicopter, 221
Hi, My Name Is…, 11
Hokey Pokey Aerobics, 308
Home Run Tag, 48
Hoop Scoot Tag, 115
Hop’n Freeze, 49
Hot Potato, 309
Hot Spots, 185
House, Tree, Neighbor, 183
Hula Ball, 85
Hula Hoop Challenge, 153
I Love My Neighbor, Especially My
Neighbor Who…, 13
If You Really Knew Me, 12
Indoor Hopscotch, 50
Indoor Marco Polo, 310
Instant ID, 311
Interception, 278
Invent a Game, 154
Jetsetter 4-Square, 194
Job Dodgeball, 213
Joey Roundup, 116
Journey around the World, 64
Jump Challenge, 222
Jump Rope/Double Dutch, 219
Jump the River, 51
Jungle Race, 86
Keep Away Soccer, 251
Key Punch, 155
Kickball, 224
Kick-Basket-Ball, 233
Kindergarten Kickball, 234
Knock Down, 156
Knock-Down Soccer, 256
Knockout, 243
Knots on a Rope, 157
Land Sea Air, 170
Lava Game, 52
Leap Frog, 53
Leg Lifts for the Abs, 289
Line of Silence, 14
Look Up, 312
Lucky Charms, 87
Magic Ball, 313
Magic Bubble Machine, 158
Magic Tag, 118
Maze Game, 159
Maze Tag, 119
Medic Basketball, 244
Medic Dodgeball, 209
Minute Masters, 283
Mix it Up, 214
Monkey Soccer, 258
Mountain Ball, 230
Mouse Trap, 314
Move Your Feet, 120
Movement Name Game, 15
Mr. Fox, 54
Multi-Ball, 232
Musical Chairs, 315
My DVD Player, 55

Page | 360
Mystery Creature, 316
Name Touch, 16
Nation Ball, 210
Odds and Evens Tag, 121
Off the Ground Tag, 122
Oh, The Places You’ll Go!, 317
One Fish, Two Fish, Red Fish, Blue
Fish, 160
One Word, 318
Over Under, 161
Over-Under Kickball, 229
Pace Yourself, 285
Pacman Tag, 123
Partner Crunches, 288
Partner Introductions, 17
Partner to Partner, 319
Pass and Move Basketball, 246
Phrase Game, 320
Picket Fences, 162
Pickle, 269
Pin Down, 205
Pizza Delivery, 163
Pony Express, 56
Poop Deck, 57
Power, 237
Puloga (Variation of Sprout-Ball -
Distant), 212
Pulse, 18
Pumpkin Face, Raisin Face, 19
Push-Catch, 58
Quarter Football, 164
Quarterback Training Camp, 165
Quick Count, 83
Race Track, 206
Rainbow Run, 59
Real Close, 321
Recycle Ball, 322
Red Light, Green Light, 60
Red Light, Green Light Football,
279
Relay Lock Race, 166
Rhythm Detective, 323
Rim Dodgeball, 207
Ro-Sham-Bo Relay, 61
Ro-Sham-Bo Rock Star, 20
Roller Baseball, 271
Rollerball, 198
Run & Rally, 167
Run If…, 62
Running Through the Forest, 63
Safari, 324
Sandman, 325
Sardines, 21
School Olympics, 168
School Yard Golf, 171
Scramble, 65
Secret Agent, 66
Sequence Touch, 67
Shadow Shadow, 172
Shape Shifter, 22
Sharks and Minnows, 68
Shipwreck, 71
Shout Tag, 124
Shrink Tag, 133
Silent Ball, 326
Silent Ball at the Museum, 327
Simon Says, 72
Sleepy Bunny, 43
Smile if You Love Me, 328
Snake, 220
Snowball Alley, 203
Soccer, 250
Soccer 4-Square, 252
Soccer Smash, 257
Softball/Baseball, 266
Spark, 23
Splat!, 24
Sports Clubs, 73
Sprout-Ball, 211
SPUD, 202
Squash Balls, 173
Stash It, 174
Statue Tag, 125
Steal the Bacon – Basketball Style,
241
Steal the Bacon – Soccer Style, 255
Steal the Bacon – Traditional, 235
Strategy Kickball, 226
Sun Monarch, 329
Super Happy Fun Time, 74
Superstar, 25
Surfing Warm Up, 330
Switch, 75
Tally Ho!, 175
Tap Ball, 249
Team 2-Square, 190
Tee Ball, 268
Telephone/Rumor, 26
Tennis Baseball, 270
The Bone, 331
The Wave, 176
This is a…, 332
This is My Nose, 333
Three Lines Basketball, 245
Tic-Tac-Toe Toss, 177
Tip It Over, Pick It Up, 76
Toe Touch Tag, 126
Tomato, 27
Tornado, 28
Toxic Waste Dump, 178
Traffic Jam, 179
Trash Can Basketball, 334
Triangle Tag, 127
Trick ‘O Treat, 227
Trivia Football, 276
Trivia Tic-Tac-Toe, 335
Trust Falls, 180
Tunnel Ball, 204
Turtle Game, 336
Twenty-One, 242
Ultimate Football, 277
Ultimate Kickball, 228
Unfreeze a Friend, 181
Up, Down, Stop, Go, 337
Veggie Tray, 69
Volleyball, 261
Wall Ball, 195
Wall Baseball, 272
Watch Out!, 216
Watch Your Back, 128
Weather Vane/Jump Whistle, 77
What Are You Doing?, 338
What Changed?, 339
When Nature Calls, 29
Where Are You?, 78
Where Did it Go?, 129
Where the Wild Things Are, 130
Whistle Mixer, 79
Whistle Walk/Run, 284
Who Let the Dogs Out?, 131
Who Stole the Cookies?, 30
Wide Goal Soccer, 253
Wink-Ums, 340
Wolves and Bunnies, 182
Wonderball, 341
World Cup Soccer, 254
Wright Family Vacation, 88
X-Square, 192
Yee Ha!, 342
You Can, Two Can Workout, 343
Zero, 1, 2, 3, 222
Zip, Zap, Pop, 344
Zoo, 80