photo journal - tech speakers · i didn’t think i would use this many clamps, but they came in...
TRANSCRIPT

Photo Journal
‘Audrey’ Horn-loaded SystemFA4740: Transducer Theory
May 2nd, 2010
- Nathan P. Miller

First step was to design the horn.This is better suited for a front nonfolding horn, but I guess it worked.

Further development of the horn in Excel.Helped me calculate correct turning points in the horn.

A small collection of renderings made in UG NX5.Modeling in NX5 was great because of the easy constraint system.

Getting the first cuts done.Bleh too many cuts for the liking.

Starting to get a collection of wood.Used three sheets of 11-ply birch plywood.

All pieces cut into panels.Ready for cutting specific angles on most edges.

Some random pieces and scrap.I didn’t end up having all that much extra, however.

Getting holes cut for the drivers!My router skilz greatly improved after this project was said and done.

Wood completely cut and beveled.You can see all the 45° angles on the external pieces on the left there.
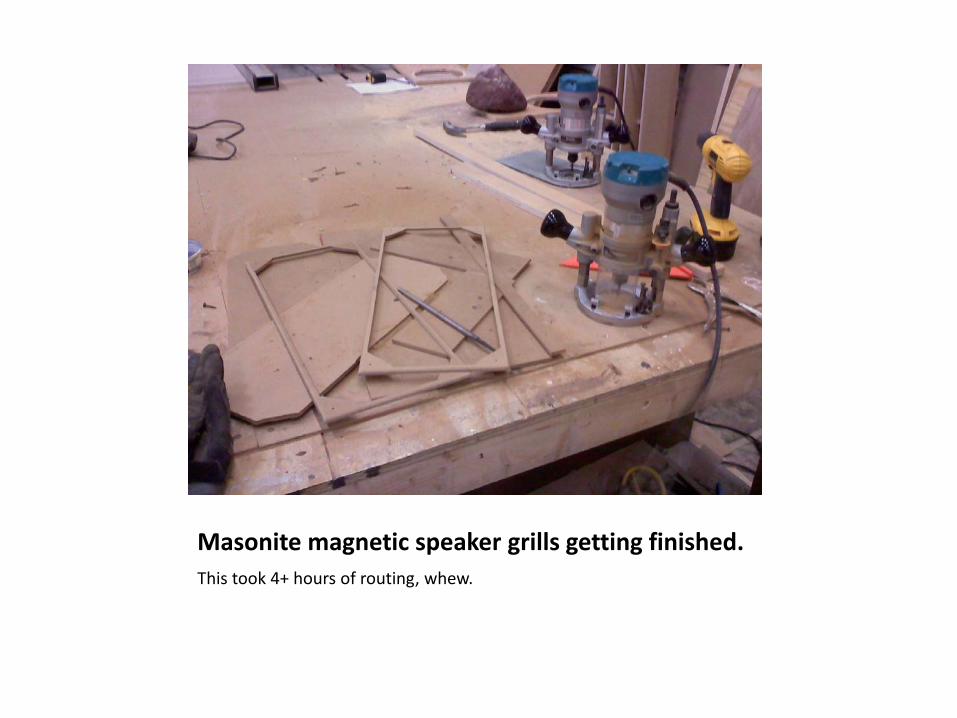
Masonite magnetic speaker grills getting finished.This took 4+ hours of routing, whew.

Pieces being dry-fitted together.You can now easily see how things were going to go together.

A better look at the finished horn design.Still dry-fitted, but you can get a great idea how it was going to end up.

Finally gluing things together.The front plywood baffle with a sheet of MDF for reinforcement were heavily glued together to give a very strong base for the driver.

Finishing up the gluing.The one side wall was going to be left unglued so that I could access the chamber for tuning purposes.

Completely glued together and standing.Almost ready to be pumping music!

Everything put together.Front speaker grill and side wall all in place ready for a driver.

All the tools/clamps I used while gluing thingsI didn’t think I would use this many clamps, but they came in handy!

Getting the other channel glued together.You can also see Will’s concrete speakers on the table there.

Placing the new Fostex FE206En in place.It was exciting finally getting the driver in its home.

Close-up of the driver.You can also get a better look at the speaker grill (minus the cloth).

Terminal cups all wired up.Yeah ugly screws are ugly, but w/e they can be cut off.

Full system wired up.Not that it’s all that hard with one driver, ha.

Finally ready for music!I even hooked up my phone to it directly; it worked because of how sensitive the speakers were.

‘Audrey’ system hooked up to fine wine: MC30sBrought them down to the AES (MTU Chapter) lab and hooked them up to our McIntosh MacKit 30s from 1963-ish. They were epic.

In the theatre for testing.Spent weeks in here to tune them to get the most base and to level off the high end.

Chamber sealing and acoustical stuffing.Not shown is the baffle step compensator to lower the high frequencies.

Thanks for checking out my project!Hopefully you don’t criticize my work too much, haha.