on line requisition training manual · requisition approval history can be viewed at foiapht....
TRANSCRIPT

1
BANNER 9
On-Line Requisition Training Manual
Purchasing Department
Phone: 601-877-6154

2
Table of Contents
Logging into Banner 4
Account Login .......................................................................................................................... 4
Overview 5
User Name and Password ........................................................................................................ 5
Requisition 6
Entering Form Name ............................................................................................................... 7
Requisition Overview .............................................................................................................. 8
Requisition/Delivery Information ........................................................................................... 9
Vendor Information ............................................................................................................... 10
Vendor Option .................................................................................................................. 11-12
Commodity Entry .................................................................................................................. 14
Item Text .......................................................................................................................... 13-14
Fund Entry ............................................................................................................................. 16
Completing Requisition 19
3
Table of Contents

4
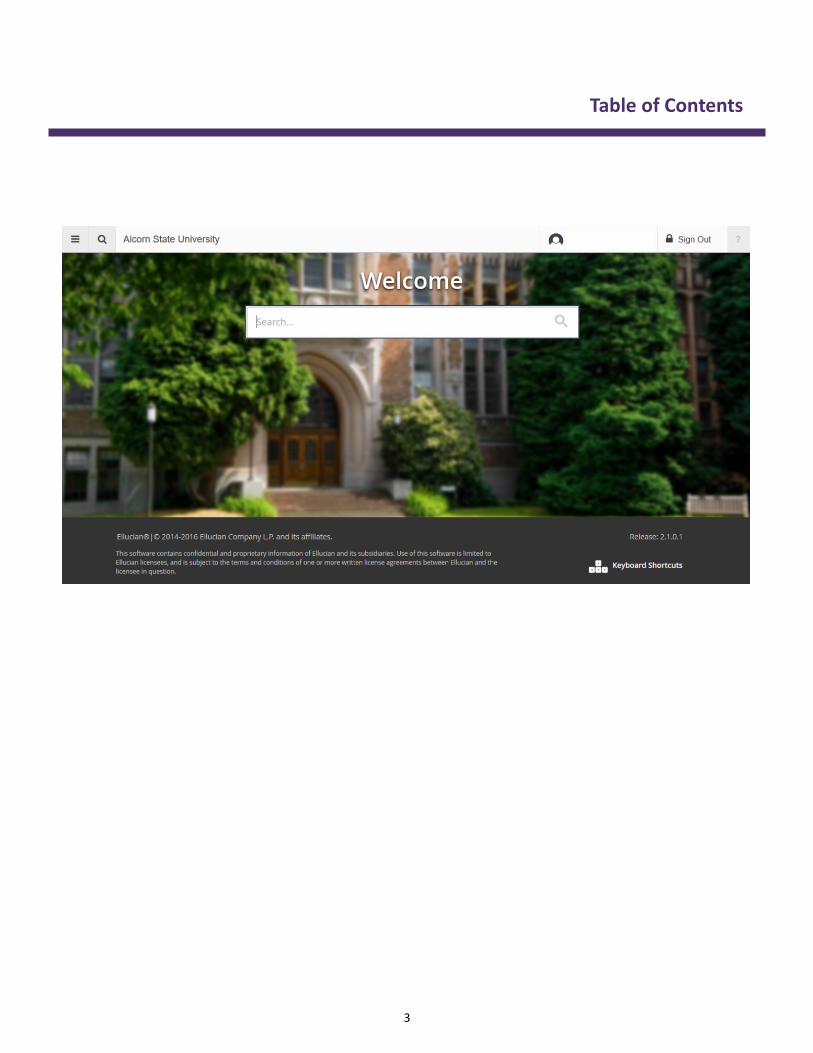
Open your Internet browser, and key in the following URL in the address window. www.alcorn.edu/Banner.
Sign In with “university credential”.
Purchasing Dept .
Banner 9

5
Initially, you will sign-in on the screen below.
Account Login
BANNER 9
Overview
Consist of your university: email address and Password

6
Logging into
Banner 9
.
“Your Name will Appear Here”
Creating a Requisition

7
Type Form Name
Banner 9
Overview
TIP
Keyboard Shortcuts

8
Click here
NOTE: Please be careful when typing in an existing Requisition # to avoid creating a new requisition
number.
Requisition
Banner 9
Requisition Type “NEXT” Then Click green “GO” button (at the top right)
TIP You can click “Next Section” which
is located at the bottom left corner of
the page (Atl+Page Down)

9
Banner 9
TIP To proceed to the next section: Click the “Vendor Information”
tab OR Next Section (located at the bottom left corner)
Required Fields: *
* Delivery Date* - The date must be reasonable and later than the Transaction Date.
**Organization* - Input organization which will be used for the expenditure
*** Ship To* - The Central Receiving information will auto populated after you select from the Ship-To-List
Requestor/Delivery information

10
Banner 9
Vendor information
If Vendor ID is known, input the V# in the vendor field and press Tab.
The vendor’s address and contact information will populate.
11
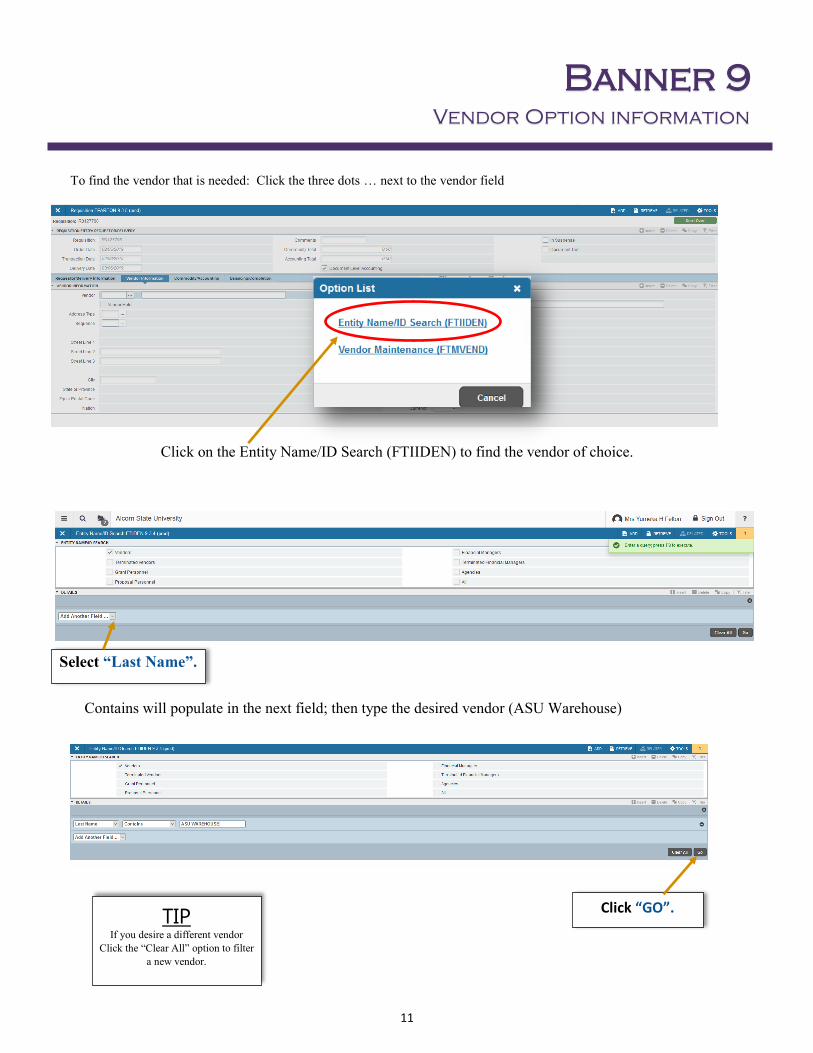
To find the vendor that is needed: Click the three dots … next to the vendor field
Banner 9
Vendor Option information
Click on the Entity Name/ID Search (FTIIDEN) to find the vendor of choice.
Click “GO”.
Contains will populate in the next field; then type the desired vendor (ASU Warehouse)
Select “Last Name”.
TIP If you desire a different vendor
Click the “Clear All” option to filter
a new vendor.

12
Banner 9
Vendor Save information
Click “SELECT”.
Click “SAVE” first. TIP To proceed to the next sec-
tion: Click the “Block Next”
option.
Vendor info will populate under the vendor information tab. This will include the vendor’s address.
NOTE The Requisition number is listed at the top corner of this page.
13
COMMODITY/ACCOUNTING
Banner 9
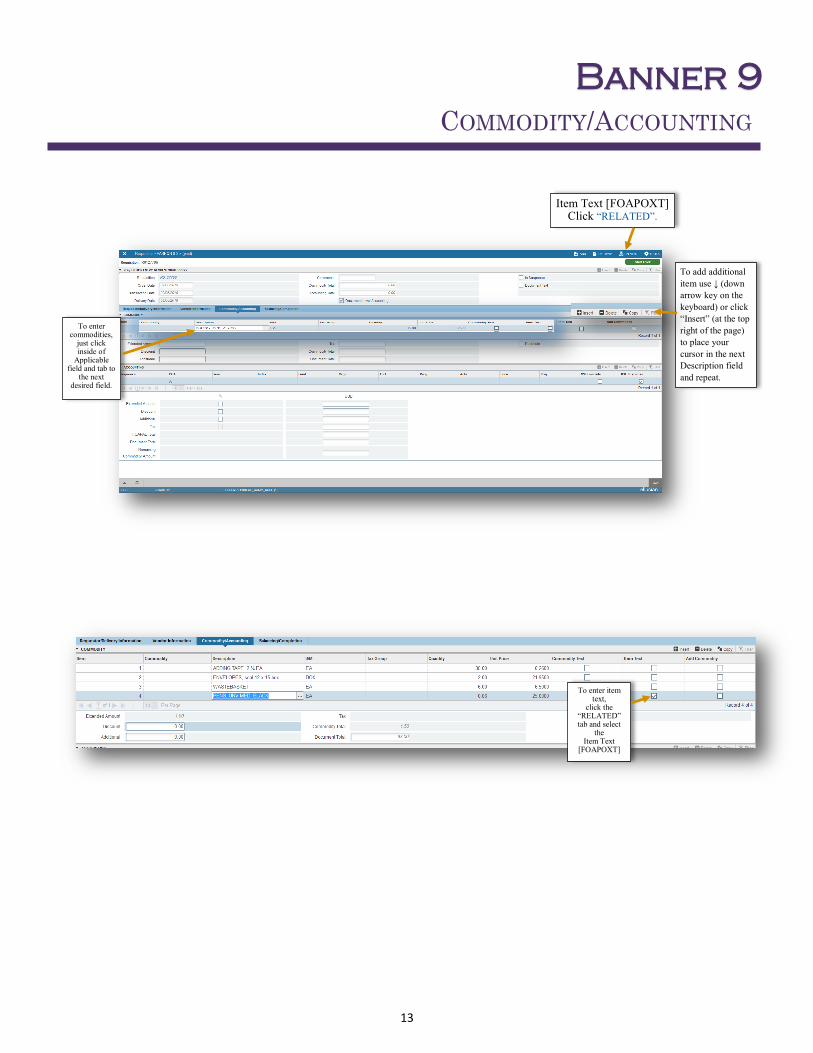
Item Text [FOAPOXT] Click “RELATED”.
To enter commodities,
just click inside of
Applicable field and tab to
the next desired field.
To add additional
item use ↓ (down
arrow key on the
keyboard) or click
“Insert” (at the top
right of the page)
to place your
cursor in the next
Description field
and repeat.
To enter item text,
click the “RELATED” tab and select
the Item Text
[FOAPOXT]
14
COMMODITY TO RELATED/ITEM TEXT
Banner 9
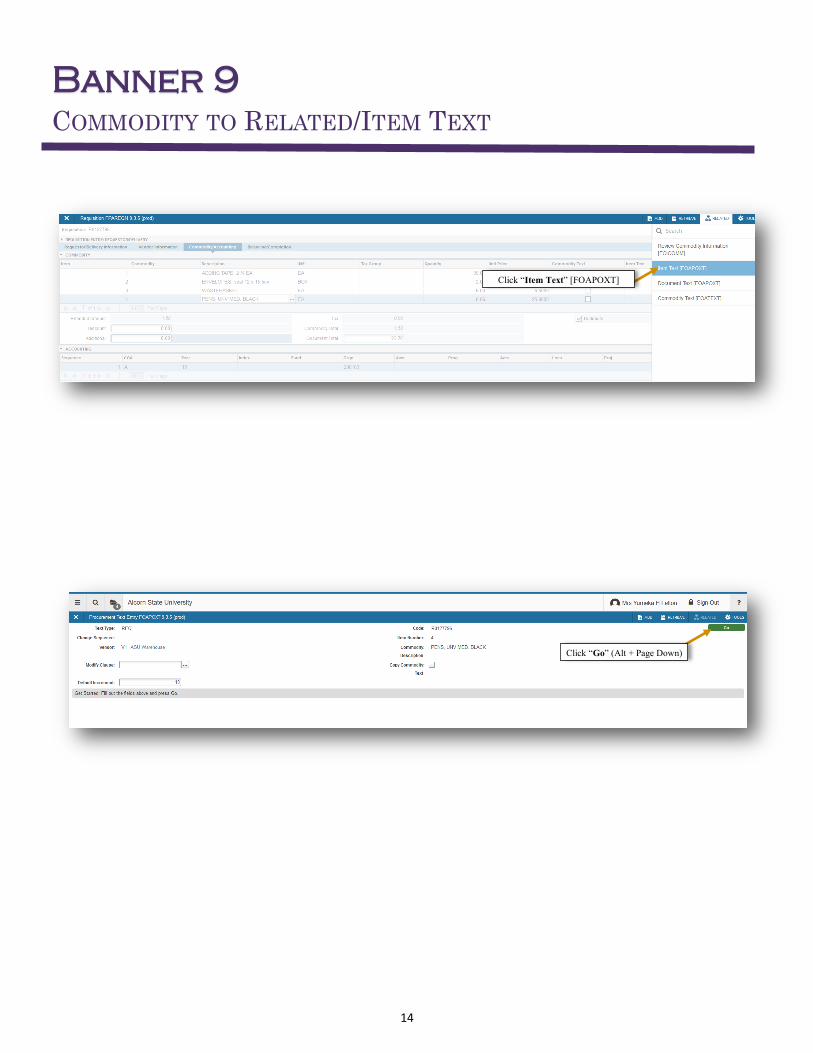
Click “Go” (Alt + Page Down)
Click “Item Text” [FOAPOXT]

15
COMMODITY TO RELATED
Banner 9
Click here to
Exit “Item Text”
To add additional lines
use ↓ (down arrow key
on the keyboard) or click
“Insert” (at the top right
of the page) to place
your cursor in the next
field and repeat.
Add item text description here
Click (Alt + Page Down)

16
ACCOUNTING ENTRY
Banner 9
Click inside of the account box to enter the Account
number.
After you have completed all the items and funding sources, click the “Balancing/
Completion” tab OR Block Next located at the bottom left corner

17
COMPLETE REQUISITION
Banner 9
Complete Requisition
Incomplete Requisition
Click “Complete”: You must click complete to submit the requisition for
the APPROVAL level. It will remain in suspense if it is not complete and
will not be forwarded for approvals.

18
NOTES
Banner 9
Requisition Approval History can be viewed at FOIAPHT. Review Banner messages daily using
GUAMESG (no longer receive notification).
Items at no charge must be part of “item text” on the last line ordered. (Do Not use All caps for item de-
scription)
Banner requisitions cannot exceed 99 lines in order for the purchase order to be processed.
Please upload any quotes or contracts related to the requisition in the Banner Document Management Sys-
tem (BDMS).
NOTE

19
2019 TRAINING MANUAL
Banner 9

20
SPR19
ALCORN STATE UNIVERSITY