overview advantages disadvantages logging into the site creating a requisition checking status...
TRANSCRIPT

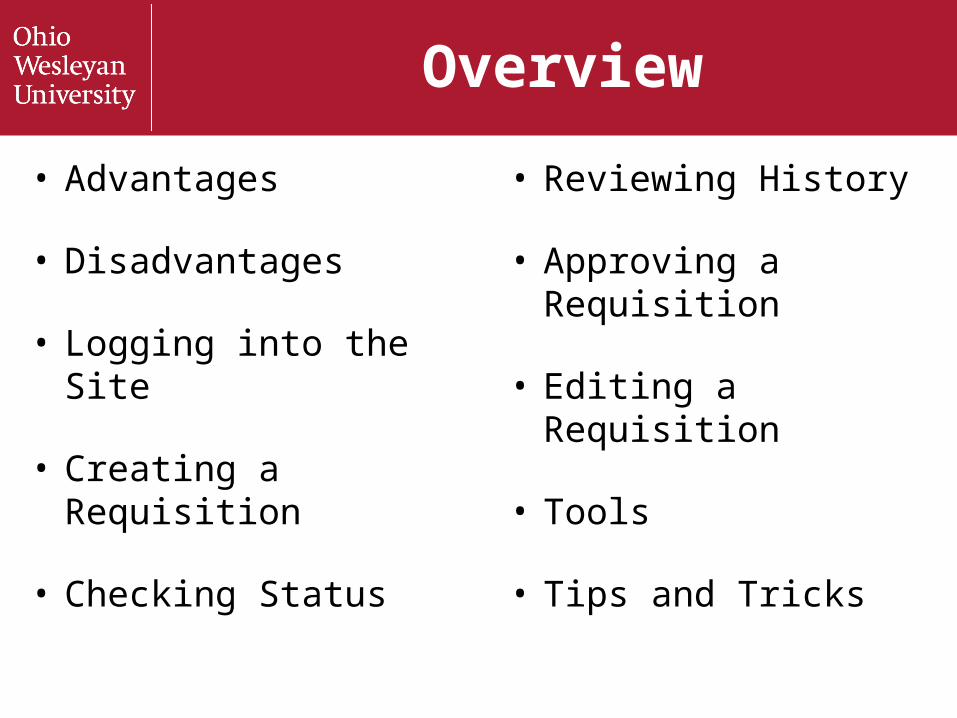
Overview
• Advantages
• Disadvantages
• Logging into the Site
• Creating a Requisition
• Checking Status
• Reviewing History
• Approving a Requisition
• Editing a Requisition
• Tools
• Tips and Tricks
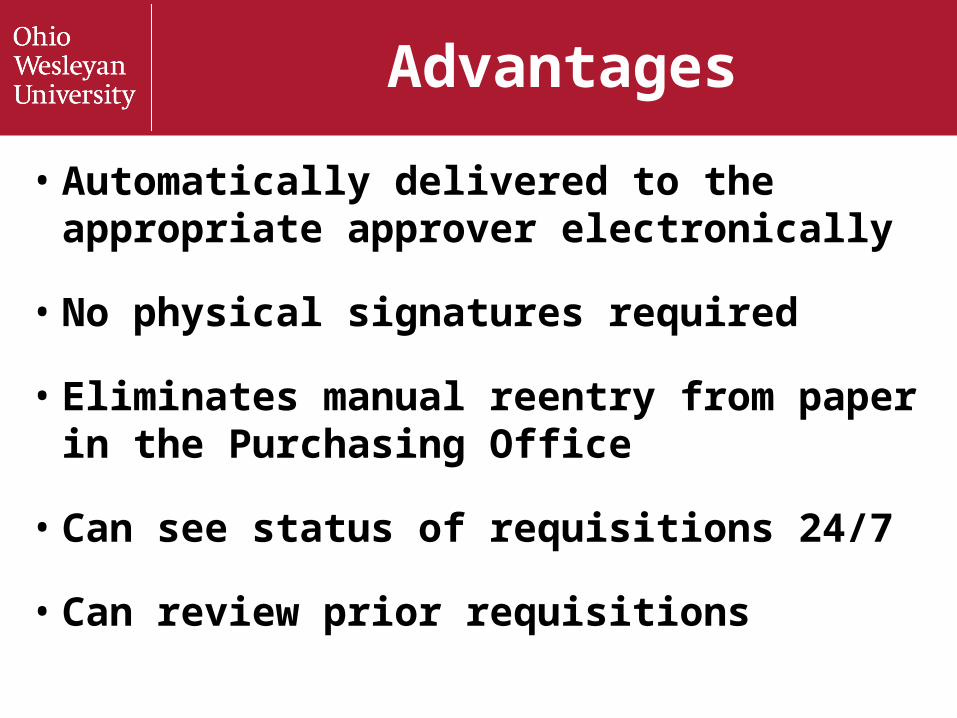
Advantages
• Automatically delivered to the appropriate approver electronically
• No physical signatures required
• Eliminates manual reentry from paper in the Purchasing Office
• Can see status of requisitions 24/7
• Can review prior requisitions
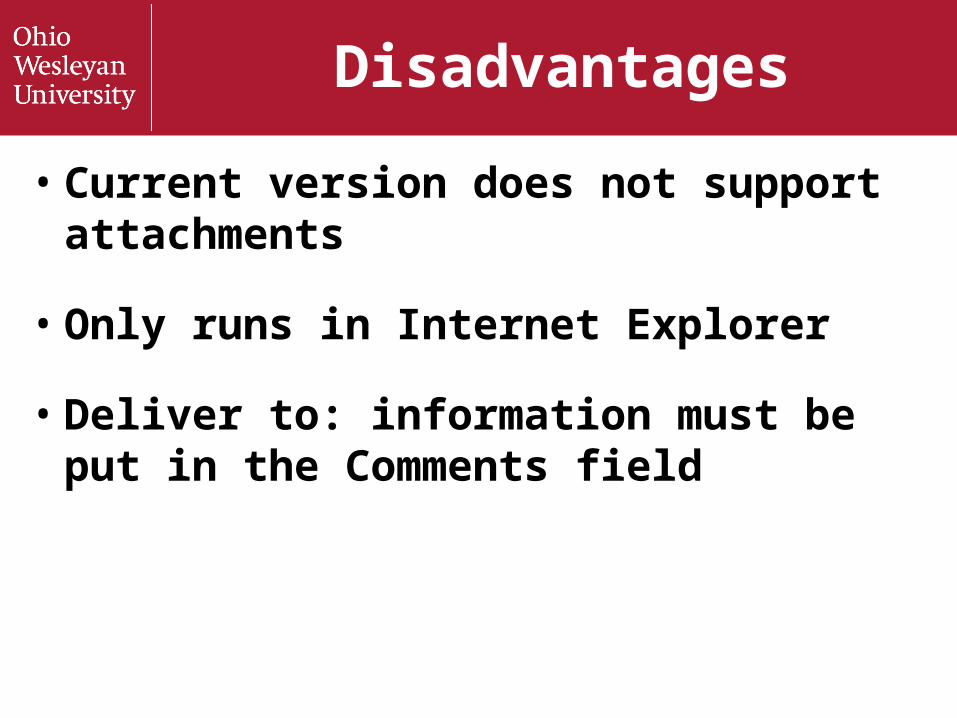
Disadvantages
• Current version does not support attachments
• Only runs in Internet Explorer
• Deliver to: information must be put in the Comments field
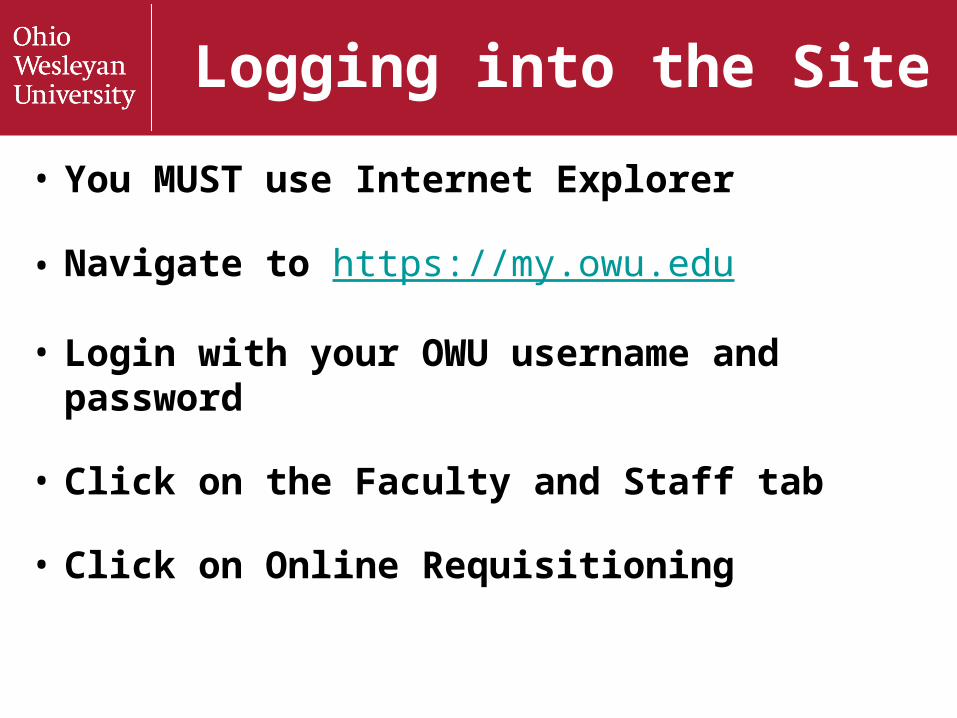
Logging into the Site
• You MUST use Internet Explorer
• Navigate to https://my.owu.edu
• Login with your OWU username and password
• Click on the Faculty and Staff tab
• Click on Online Requisitioning
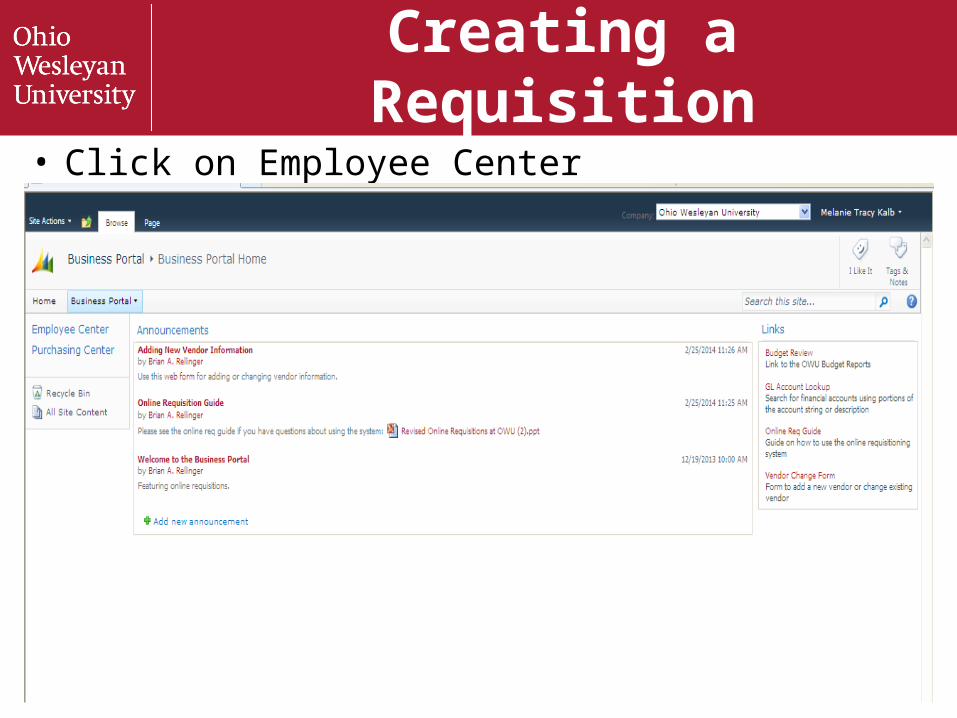
Creating a Requisition
• Click on Employee Center
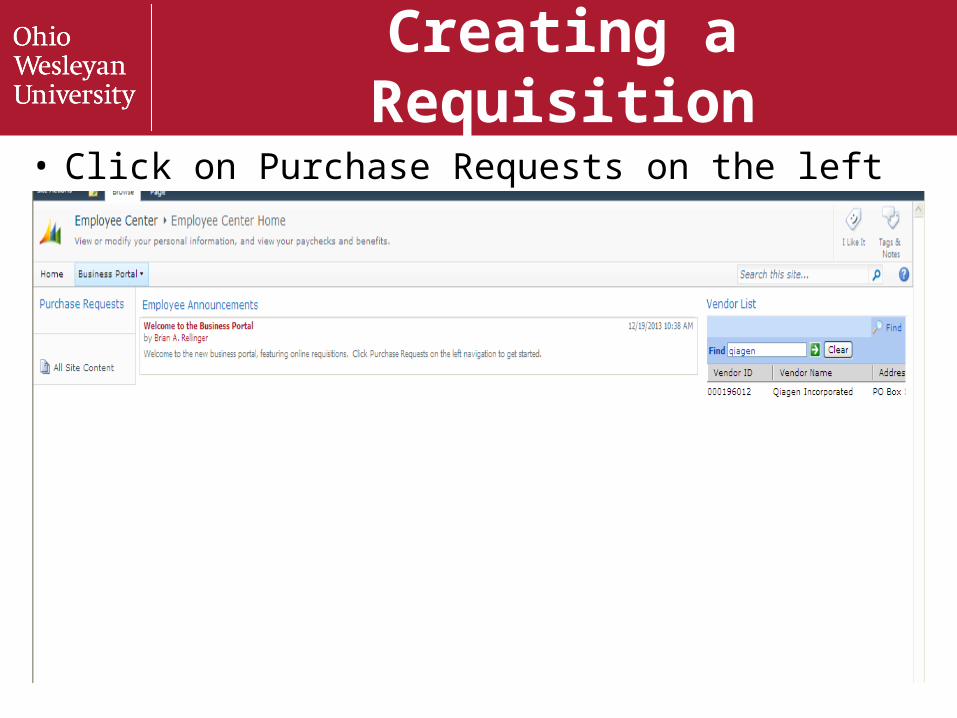
Creating a Requisition
• Click on Purchase Requests on the left hand toolbar
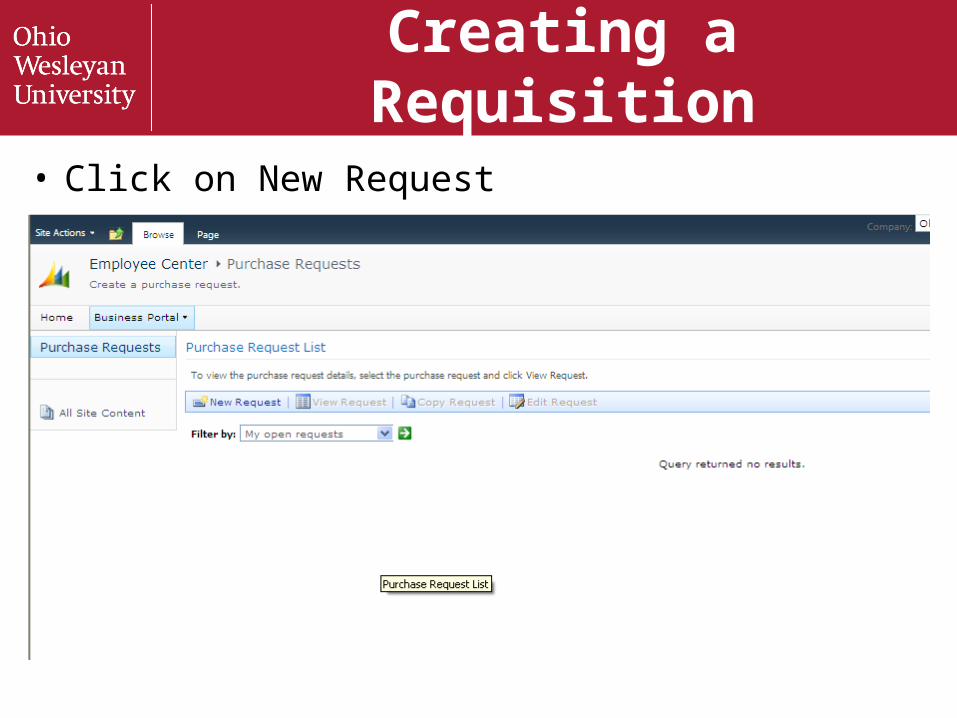
Creating a Requisition
• Click on New Request

Creating a Requisition
• Type in a title and click New Item
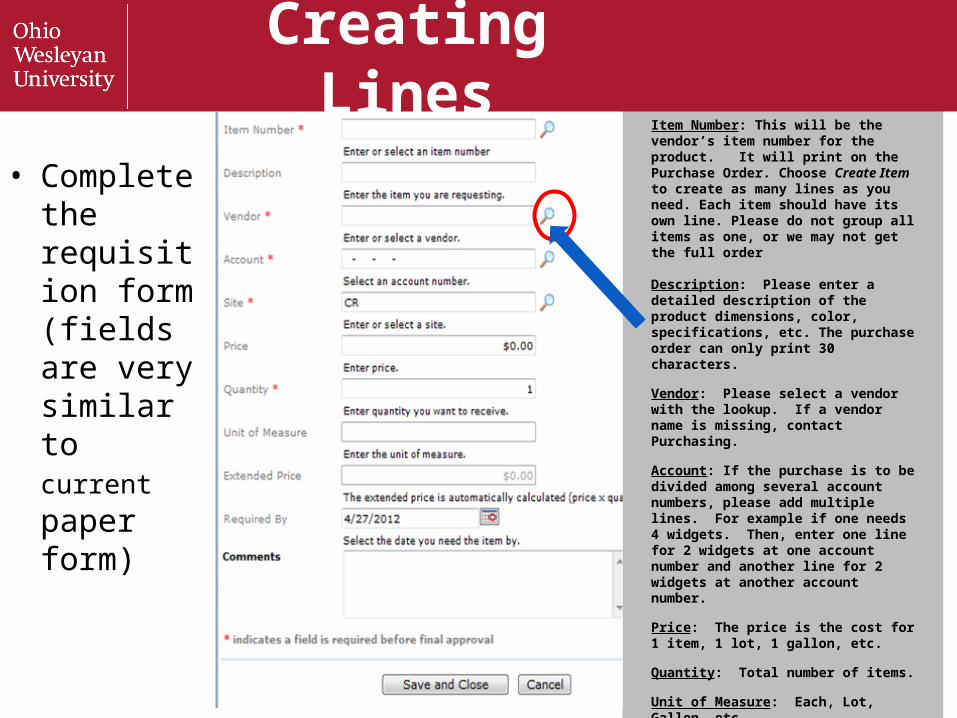
Item Number: This will be the vendor’s item number for the product. It will print on the Purchase Order. Choose Create Item to create as many lines as you need. Each item should have its own line. Please do not group all items as one, or we may not get the full order
Description: Please enter a detailed description of the product dimensions, color, specifications, etc. The purchase order can only print 30 characters.
Vendor: Please select a vendor with the lookup. If a vendor name is missing, contact Purchasing.
Account: If the purchase is to be divided among several account numbers, please add multiple lines. For example if one needs 4 widgets. Then, enter one line for 2 widgets at one account number and another line for 2 widgets at another account number.
Price: The price is the cost for 1 item, 1 lot, 1 gallon, etc.
Quantity: Total number of items.
Unit of Measure: Each, Lot, Gallon, etc.
Required By: Date should not be today’s date. Enter a reasonable time frame for delivery. We don’t want the vendor to think we want it sent overnight at any cost.
Comments: This must include the department and room number for delivery. This information is required for Central Receiving.
Creating Lines
• Complete the requisition form (fields are very similar to current paper form)

Selecting a Vendor• Click on Find, and type the Vendor Name, Click on the green
arrow, highlight vendor name, click select and close.
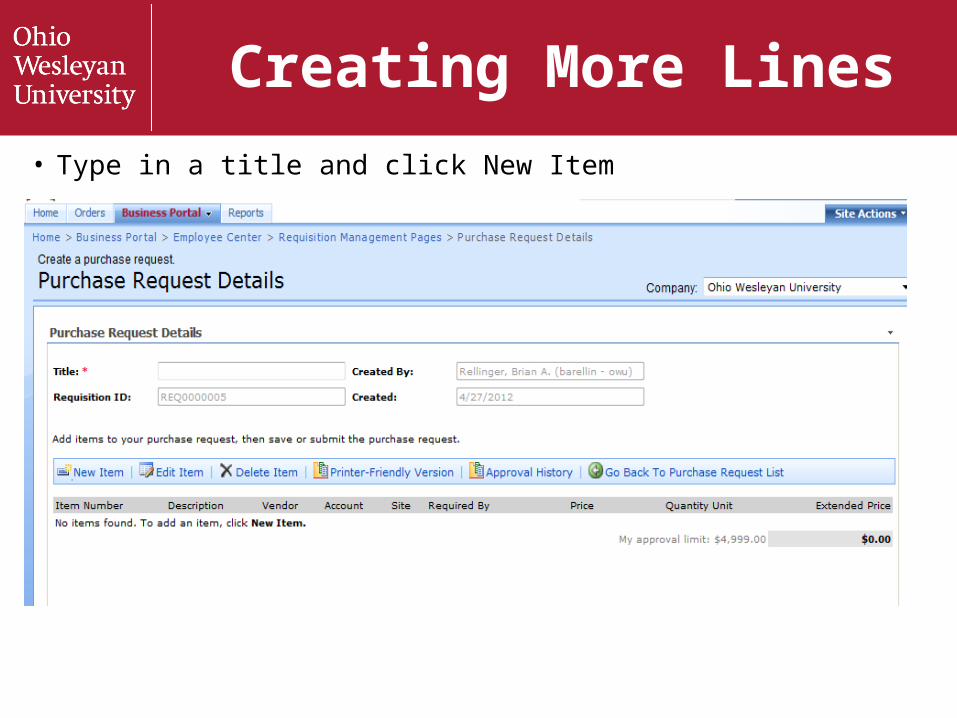
Creating More Lines
• Type in a title and click New Item
• Continue to add New Items to add more lines to your requisition.
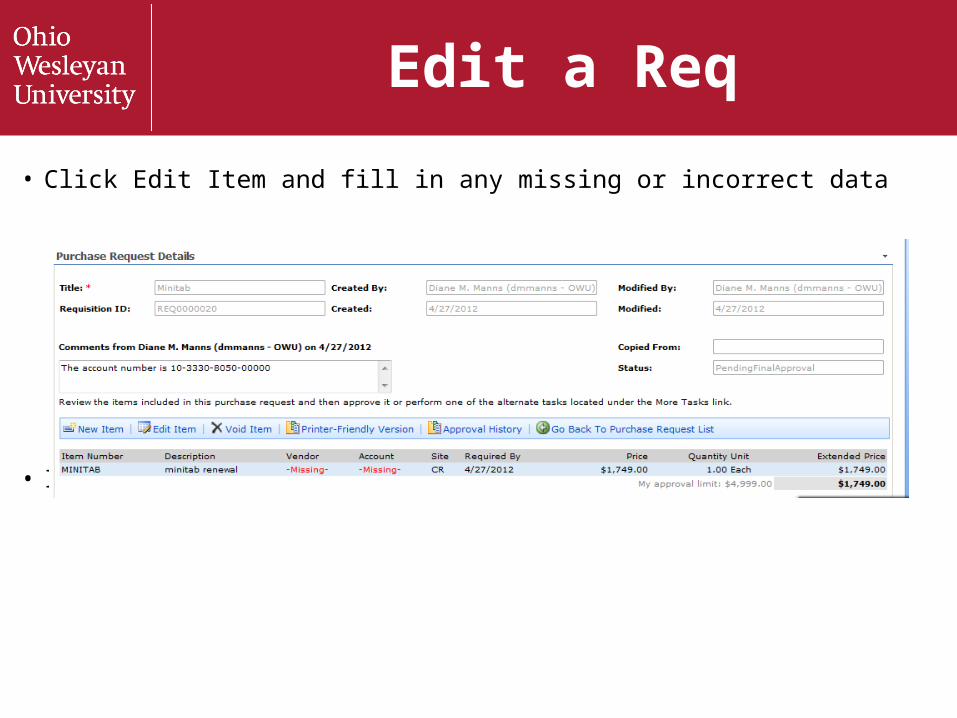
Edit a Req
• Click Edit Item and fill in any missing or incorrect data
• If no edits are necessary, submit the requisition
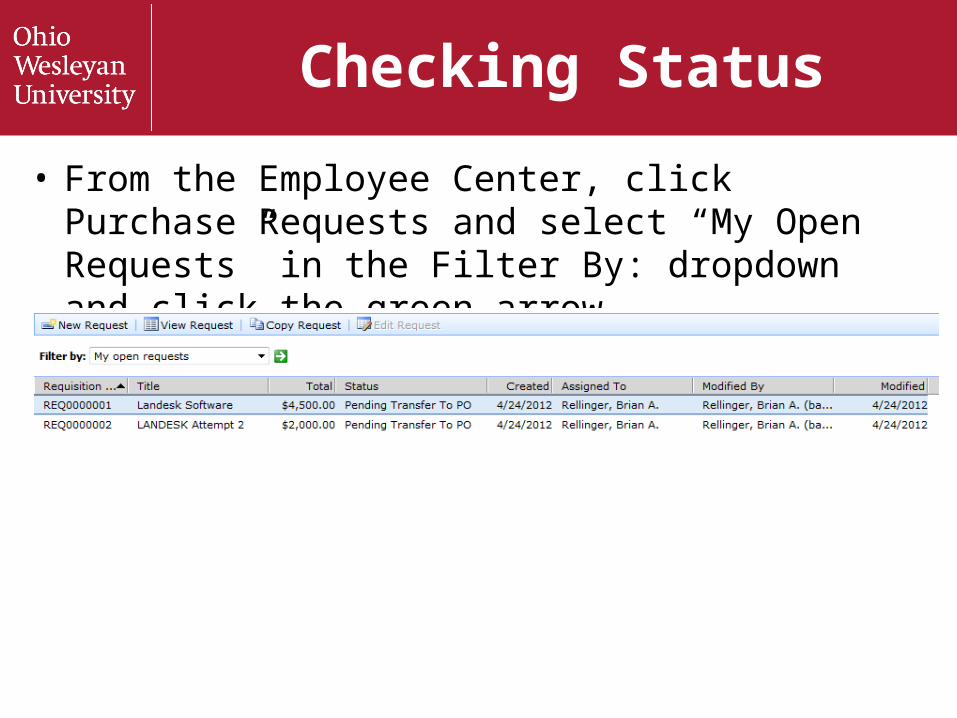
Checking Status
• From the Employee Center, click Purchase Requests and select “My Open Requests” in the Filter By: dropdown and click the green arrow.
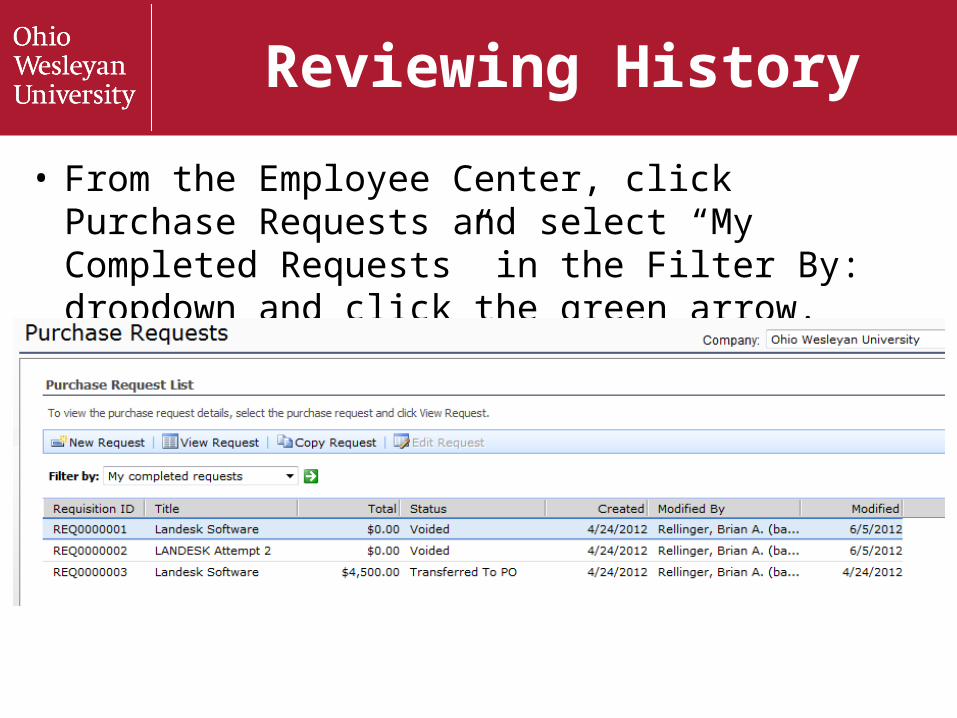
Reviewing History
• From the Employee Center, click Purchase Requests and select “My Completed Requests” in the Filter By: dropdown and click the green arrow.
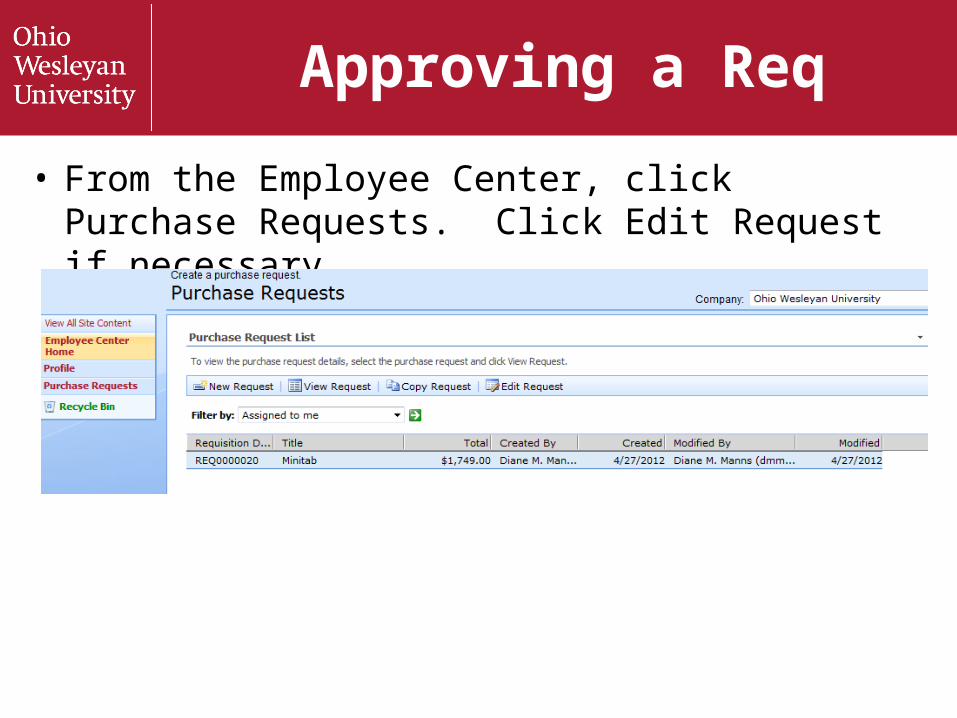
Approving a Req
• From the Employee Center, click Purchase Requests. Click Edit Request if necessary.
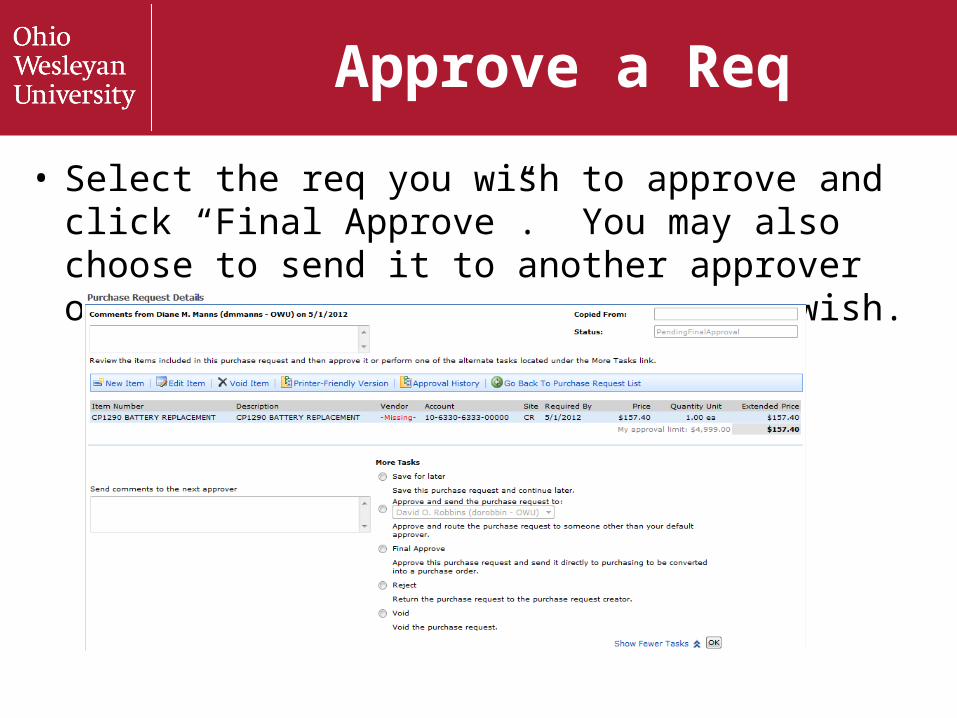
Approve a Req
• Select the req you wish to approve and click “Final Approve”. You may also choose to send it to another approver or send it back to creator if you wish.
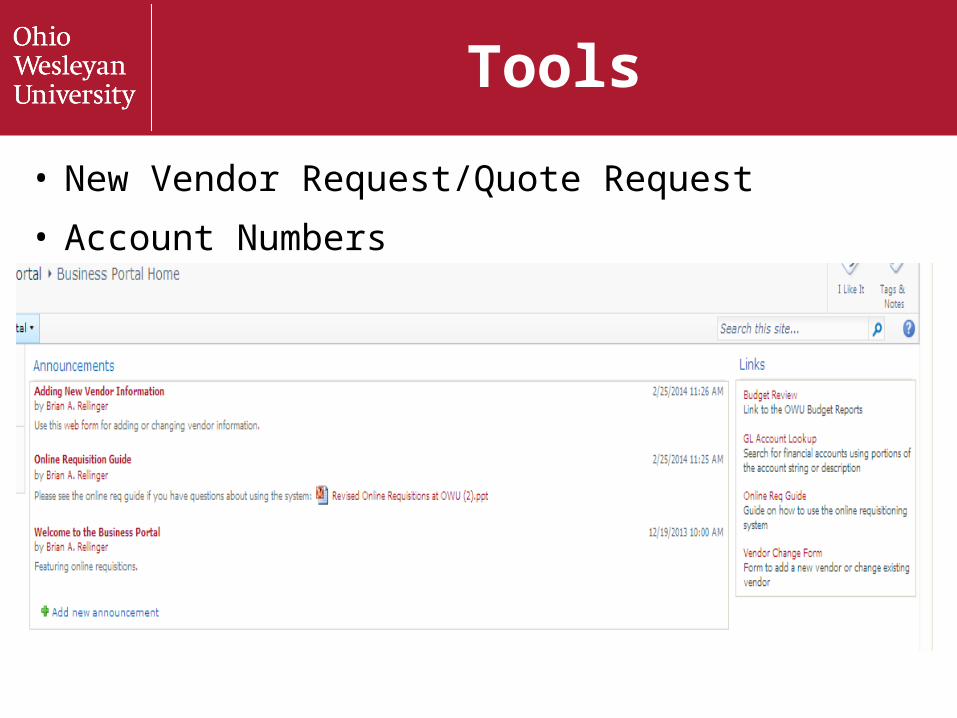
Tools
• New Vendor Request/Quote Request
• Account Numbers
Tips and Tricks
• If you need to charge an item to multiple accounts, create as many line items as necessary.
• You will still need to send over the supporting documentation – such as a quote. We recommend using scan to email and sending the documents with the requisition # in the subject of the email message to Purchasing.
Internet Explorer “Fixes”
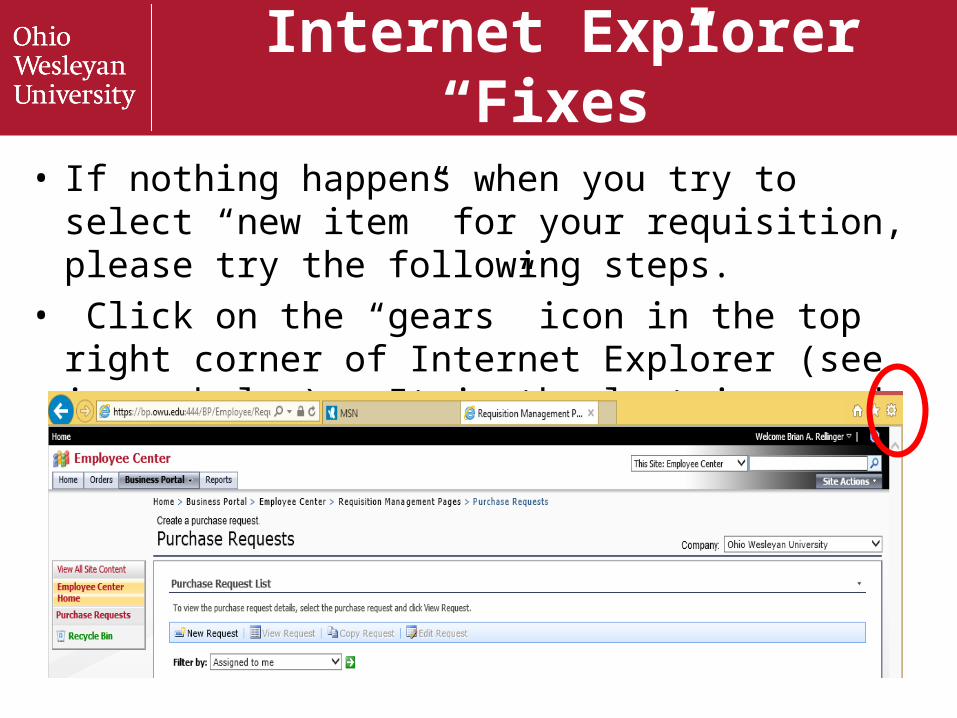
• If nothing happens when you try to select “new item” for your requisition, please try the following steps.
• Click on the “gears” icon in the top right corner of Internet Explorer (see image below). It is the last icon and next to the star icon.
Internet Explorer “Fixes”
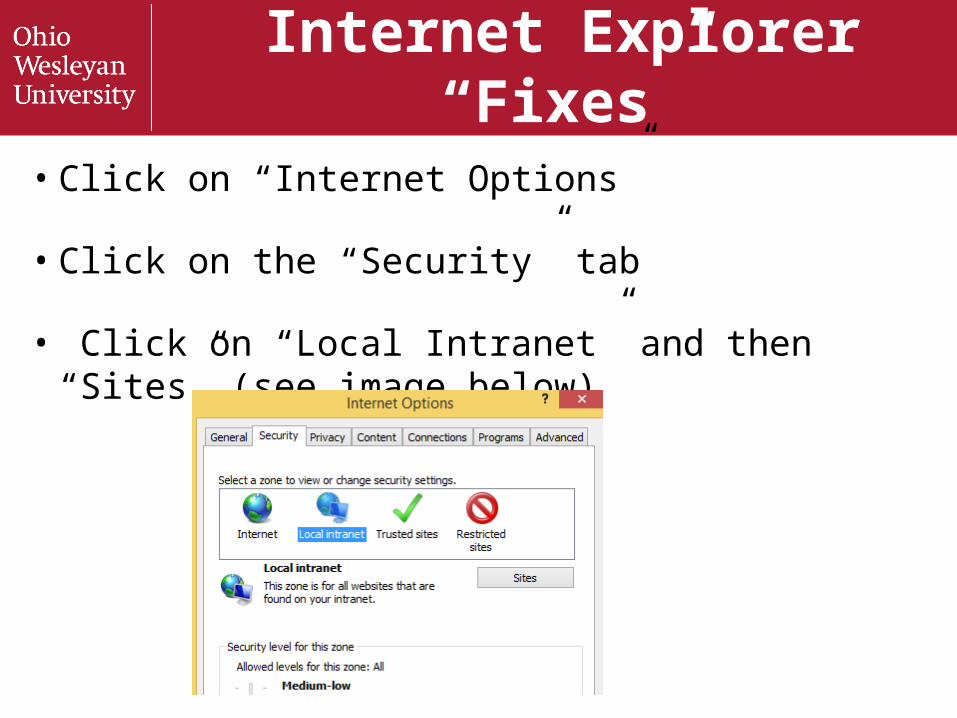
• Click on “Internet Options”
• Click on the “Security” tab
• Click on “Local Intranet” and then “Sites” (see image below)
Internet Explorer “Fixes”
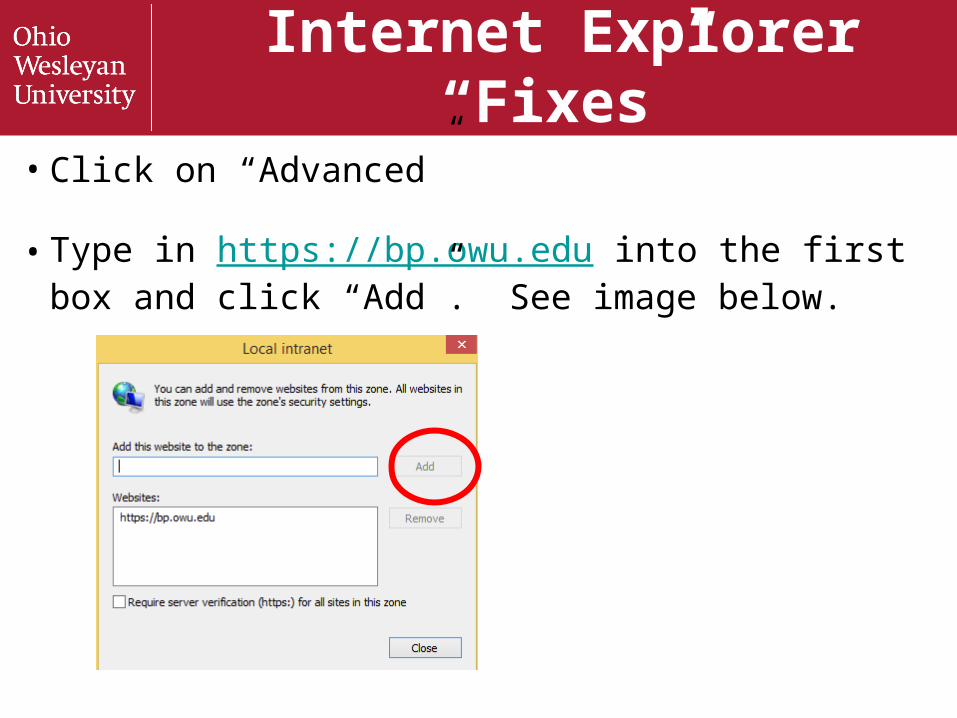
• Click on “Advanced”
• Type in https://bp.owu.edu into the first box and click “Add”. See image below.
Internet Explorer “Fixes”
• Click “Close, “Ok, and “Ok”.
• Close Internet Explorer and re-launch. Navigate to Online Requisitions and allow modules to install if prompted.
Script Error “Fixes”
• Close Internet Explorer
• Click on the Start Menu
• Navigate to All Programs
• Right-Click on Internet Explorer
• Select Run As Administrator
• Re-Launch Internet Explorer
• Select Yes to Install all Scripts
Using a Mac
• Type cloud.owu.edu in your web browser
• Click on the "VMWare Horizon View HTML Access" icon on the right
• Type cloudguest as the username and Bishops2 as the password
• Click on the "Windows 7 VDI Pool" icon
• Double click on the "Online Requisitions" icon on the desktop
• IMPORTANT: Please close the browser window when finished so others can use the service.