laboratory practice ii - wordpress.com...the dimension table is joined to the fact table using a...
TRANSCRIPT

Lab Manual
Laboratory
Practice II Class/Branch: BE(Comp)

Department of Computer Engineering, SIEM, Nashik Page 1
Sandip Foundation's
Sandip Institute of Engineering and Management, Nashik
Department of Computer
Engineering
SEMESTER-I
[A.Y. 2018 - 2019]
LABORATORY MANUAL
Laboratory Practice- II
(Subject Code: 410247)
TEACHING SCHEME: EXAMINATION SCHEME:
Practical: 4 Hrs/Week Term Work: 50 Marks
Presentation: 50 Marks
Prepared by:
Prof. D.S.Shingate

Department of Computer Engineering, SIEM, Nashik Page 2
List of Assignments
Elective-I 410244(D): Data Mining and Warehousing
1. For an organization of your choice, choose a set of business processes. Design star /
snow flake schemas for analyzing these processes. Create a fact constellation schema
by combining them. Extract data from different data sources, apply suitable
transformations and load into destination tables using an ETL tool. For Example:
Business Origination: Sales, Order, and Marketing Process.
2. Consider a suitable dataset. For clustering of data instances in different groups, apply
different clustering techniques (minimum 2). Visualize the clusters using suitable tool.
3. Apply a-priori algorithm to find frequently occurring items from given data and
generate strong association rules using support and confidence thresholds. For
Example: Market Basket Analysis
4. Consider a suitable text dataset. Remove stop words, apply stemming and feature
selection techniques to represent documents as vectors. Classify documents and
evaluate precision, recall.
Elective II 410245(D): Mobile Communication
5. Design simple GUI application with activity and intents e.g. Design an android
Application for Phone Call or Calculator
6. Design an android application for media player.
7. Design an android Application for SMS Manager
8. Design an android Application using Google Map To Trace The Location of Device
9. Design an android Application for Frame Animation

Department of Computer Engineering, SIEM, Nashik Page 3
Experiment No: 01
Title:
Roll No: ________ Class: _____ Batch: _____
Date of Performance: ___ /___/_____
Date of Assessment: ___ /___/_____
Particulars Marks
Attendance (05)
Journal (05)
Performance (05)
Understanding(05)
Total (20)
Signature of Staff Member
Department of Computer Engineering, SIEM, Nashik Page 4
Elective-I 410244(D): Data Mining and Warehousing Experiment No: 01
Aim: For an organization of your choice, choose a set of business processes. Design star / snow
flake schemas for analyzing these processes. Create a fact constellation schema by combining
them. Extract data from different data sources, apply suitable transformations and load into
destination tables using an ETL tool. For Example: Business Origination: Sales, Order, and
Marketing Process.
Objective:
Implementation of the problem statement using ETL Tool.
Star / snow flake schemas for analyzing processes.
Theory:
Star / snow flake schemas:-
The star schema and the snowflake schema are ways to organize data marts or entire data
warehouses using relational databases. Both of them use dimension tables to describe
data aggregated in a fact table.
Everyone sells something, be it knowledge, a product, or a service. Storing this
information, either in an operational system or in a reporting system, is also a need. So
we can expect to find some type of sales model inside the data warehouse of nearly every
company.
Let‟s take one more look at the sales model in both the star and snowflake schemas.

Department of Computer Engineering, SIEM, Nashik Page 5
The most obvious characteristic of the star schema is that dimension tables are not
normalized. In the model above, the pink fact_sales table stores aggregated data created
from our operational database(s). The light blue tables are dimension tables. We decided
to use these five dimensions because we need to create reports using them as parameters.
The granulation inside each dimension is also determined by our reporting needs.
From this model, we can easily see why this schema is called the „star schema‟: it looks
like a star, with the dimension tables surrounding the central fact table.
Characteristics of Star Schema:
Every dimension in a star schema is represented with the only one-dimension
table.
The dimension table should contain the set of attributes.
The dimension table is joined to the fact table using a foreign key
The dimension table are not joined to each other
Fact table would contain key and measure
The Star schema is easy to understand and provides optimal disk usage.
The dimension tables are not normalized. For instance, in the above figure,
Country_ID does not have Country lookup table as an OLTP design would have.
The schema is widely supported by BI Tools

Department of Computer Engineering, SIEM, Nashik Page 6
A Snowflake Schema
A Snowflake Schema is an extension of a Star Schema, and it adds additional
dimensions. It is called snowflake because its diagram resembles a Snowflake.
The dimension tables are normalized which splits data into additional tables. In the
following example, Country is further normalized into an individual table.
This snowflake schema stores exactly the same data as the star schema. The fact table has the
same dimensions as it does in the star schema example. The most important difference is that the
dimension tables in the snowflake schema are normalized. Interestingly, the process of
normalizing dimension tables is called snowflaking.

Department of Computer Engineering, SIEM, Nashik Page 7
Characteristics of Snowflake Schema:
The main benefit of the snowflake schema it uses smaller disk space.
Easier to implement a dimension is added to the Schema
Due to multiple tables query performance is reduced
The primary challenge that you will face while using the snowflake Schema is that you
need to perform more maintenance efforts because of the more lookup tables.
Star Vs Snowflake Schema: Key Differences
Star Schema Snowflake Schema
Hierarchies for the dimensions are stored in
the dimensional table.
Hierarchies are divided into separate tables.
It contains a fact table surrounded by
dimension tables.
One fact table surrounded by dimension table
which are in turn surrounded by dimension
table
In a star schema, only single join creates the
relationship between the fact table and any
dimension tables.
A snowflake schema requires many joins to
fetch the data.
Simple DB Design. Very Complex DB Design.
High level of Data redundancy Very low-level data redundancy
What is ETL?
ETL is an abbreviation of Extract, Transform and Load. In this process, an ETL tool extracts
the data from different RDBMS source systems then transforms the data like applying
calculations, concatenations, etc. and then load the data into the Data Warehouse system.
In ETL data is flows from the source to the target. In ETL process transformation engine takes
care of any data changes.

Department of Computer Engineering, SIEM, Nashik Page 8
What is ELT?
ELT is a different method of looking at the tool approach to data movement. Instead of
transforming the data before it's written, ELT lets the target system to do the transformation.
The data first copied to the target and then transformed in place.
ELT usually used with no-Sql databases like Hadoop cluster, data appliance or cloud
installation.

Department of Computer Engineering, SIEM, Nashik Page 9
List of open source ETL Tools
1] CloverETL
CloverETL is a pure Data Integration software suite making rapid development
and enterprise capabilities available in a light footprint package. It allows you to efficiently
develop, deploy and automate transparent data transformations, from file-to-database loads to
automating complex data movement between databases, files and Web Service APIs. It
provides an effective blend of rapid visual design of transformations and workflows with full
coding customization capabilities and automation.
2] Jedox
With the user-friendly and powerful tool Jedox Integrator (ETL), you have the
opportunity to combine all database systems with the multidimensional Jedox OLAP server
and thus integrate BI/PM applications with Jedox fast and easy into existing IT landscapes.
Optimize with the Jedox Integrator Data Integration in order to have important data wherever
they are needed.
3] Pentaho
With an intuitive, graphical, drag and drop design environment and a proven,
scalable, standards-based architecture, Data Integration is increasingly the choice for
organizations over traditional, proprietary ETL or Data Integration tools. Data Integration (or
Kettle) delivers powerful Extraction, Transformation, and Loading (ETL) capabilities, using a
groundbreaking, metadata-driven approach.
4] Talend
Talend is the leading developer of open source Data Integration systems.
Recognized as “visionary” in recent Gartner reports on the Data Integration sector, Talend
makes powerful ETL and Data Management technology easily available to organizations of
all sizes with Talend Open Studio for Data Integration. Rather than bogging down in the
business case writing and budgetary haggling associated with buying solutions from one of
the few behemoths of the proprietary data management software market, one can download
Talend Open Studio for Data Integration today, for free, and dig right into productive work on

Department of Computer Engineering, SIEM, Nashik Page 10
ETL and other projects.
Snapshot of Talend Open Studio for Data Integration ETL tool

Department of Computer Engineering, SIEM, Nashik Page 11
CONCLUSION:
Thus we have learned to extract data from different data sources, apply suitable
transformations and load into destination tables using an ETL tool.
FAQ’s:
1) What is Star / snow flake schemas?
2) What are ETL and ELT?
3) What are different open source ETL tools are used?

Department of Computer Engineering, SIEM, Nashik Page 12
Experiment No: 02
Title:
Roll No:________ Class:_____ Batch:_____
Date of Performance: ___ /___/_____
Date of Assessment: ___ /___/_____
Particulars Marks
Attendance (05)
Journal (05)
Performance (05)
Understanding(05)
Total (20)
Signature of Staff Member

Department of Computer Engineering, SIEM, Nashik Page 13
Experiment No: 02
Aim: Apply a-priori algorithm to find frequently occurring items from given data and generate
strong association rules using support and confidence thresholds. For Example: Market Basket
Analysis
Objective:
Implementation of the problem statement using Weka tool.
Finding frequently occurring items from given data.
Theory:
A-priori algorithm:
Apriori is an algorithm for frequent item set mining and association rule learning over
transactional databases. It proceeds by identifying the frequent individual items in the database
and extending them to larger and larger item sets as long as those item sets appear sufficiently
often in the database. The frequent item sets determined by Apriori can be used to determine
association rules which highlight general trends in the database: this has applications in domains
such as market basket analysis.
1] Finding itemsets with high support
Using the apriori principle, the number of itemsets that have to be examined can be
pruned, and the list of popular itemsets can be obtained in these steps:
Step 0. Start with itemsets containing just a single item, such as {apple} and {pear}.
Step 1. Determine the support for itemsets. Keep the itemsets that meet your minimum support
threshold, and remove itemsets that do not.
Step 2. Using the itemsets you have kept from Step 1, generate all the possible itemset
configurations.
Step 3. Repeat Steps 1 & 2 until there are no more new itemsets.

Department of Computer Engineering, SIEM, Nashik Page 14
2] Finding item rules with high confidence or lift
We have seen how the apriori algorithm can be used to identify itemsets with high
support. The same principle can also be used to identify item associations with high confidence
or lift. Finding rules with high confidence or lift is less computationally taxing once high-support
itemsets have been identified, because confidence and lift values are calculated using support
values.
Take for example the task of finding high-confidence rules. If the rule
{Mango, chips -> apple}
has low confidence, all other rules with the same constituent items and with apple on the right
hand side would have low confidence too. Specifically, the rules
{ Mango -> apple, chips}
{ Mango -> apple, Mango }
would have low confidence as well. As before, lower level candidate item rules can be pruned
using the apriori algorithm, so that fewer candidate rules need to be examined.
Limitations
1. Computationally Expensive. Even though the apriori algorithm reduces the number of
candidate itemsets to consider, this number could still be huge when store inventories are
large or when the support threshold is low. However, an alternative solution would be to
reduce the number of comparisons by using advanced data structures, such as hash tables, to
sort candidate itemsets more efficiently.
2. Spurious Associations. Analysis of large inventories would involve more itemset
configurations, and the support threshold might have to be lowered to detect certain
associations. However, lowering the support threshold might also increase the number of
spurious associations detected. To ensure that identified associations are generalizable, they
could first be distilled from a training dataset, before having their support and confidence
assessed in a separate test dataset.
Example:
Assume that a large supermarket tracks sales data by stock-keeping unit (SKU) for each
item: each item, such as "butter" or "bread", is identified by a numerical SKU. The supermarket
has a database of transactions where each transaction is a set of SKUs that were bought together.

Department of Computer Engineering, SIEM, Nashik Page 15
Let the database of transactions consist of following itemsets:
Itemsets
{1,2,3,4}
{1,2,4}
{1,2}
{2,3,4}
{2,3}
{3,4}
{2,4}
We will use Apriori to determine the frequent item sets of this database. To do this, we will say
that an item set is frequent if it appears in at least 3 transactions of the database: the value 3 is the
support threshold.
The first step of Apriori is to count up the number of occurrences, called the support, of each
member item separately. By scanning the database for the first time, we obtain the following
result
Item Support
{1} 3
{2} 6
{3} 4
{4} 5
All the itemsets of size 1 have a support of at least 3, so they are all frequent.
The next step is to generate a list of all pairs of the frequent items.
For example, regarding the pair {1,2}: the first table of Example 2 shows items 1 and 2
appearing together in three of the itemsets; therefore, we say item {1,2} has support of three.
Item Support
{1,2} 3
{1,3} 1
{1,4} 2
{2,3} 3
{2,4} 4
{3,4} 3
The pairs {1,2}, {2,3}, {2,4}, and {3,4} all meet or exceed the minimum support of 3, so they
are frequent. The pairs {1,3} and {1,4} are not. Now, because {1,3} and {1,4} are not frequent,
any larger set which contains {1,3} or {1,4} cannot be frequent. In this way, we can prune sets:
we will now look for frequent triples in the database, but we can already exclude all the triples
that contain one of these two pairs:

Department of Computer Engineering, SIEM, Nashik Page 16
Item Support
{2,3,4} 2
in the example, there are no frequent triplets. {2,3,4} is below the minimal threshold, and the
other triplets were excluded because they were super sets of pairs that were already below the
threshold.
We have thus determined the frequent sets of items in the database, and illustrated how some
items were not counted because one of their subsets was already known to be below the
threshold.
CONCLUSION:
Thus we have applied a-priori algorithm to find frequently occurring items from
given data and generated strong association rules using support and confidence thresholds.
FAQ:
1. Explain a-priori algorithm?
2. What is support and confidence thresholds value?

Department of Computer Engineering, SIEM, Nashik Page 17
Experiment No: 03
Title:
Roll No: ________ Class: _____ Batch:_____
Date of Performance: ___ /___/_____
Date of Assessment: ___ /___/_____
Particulars Marks
Attendance (05)
Journal (05)
Performance (05)
Understanding(05)
Total (20)
Signature of Staff Member

Department of Computer Engineering, SIEM, Nashik Page 18
Experiment No: 03
Aim: Consider a suitable text dataset. Remove stop words, apply stemming and feature selection
techniques to represent documents as vectors. Classify documents and evaluate precision, recall.
Objective:
Implementation of the problem statement using python.
Remove stop words, apply stemming and feature selection.
Theory:
1] Stop words:
In computing, stop words are words which are filtered out before or after processing of natural
language data (text). Though "stop words" usually refers to the most common words in a
language, there is no single universal list of stop words used by all natural language processing
tools, and indeed not all tools even use such a list. Some tools specifically avoid removing these
stop words to support phrase search.
Any group of words can be chosen as the stop words for a given purpose. For some search
engines, these are some of the most common, short function words, such as the, is, at, which, and
on. In this case, stop words can cause problems when searching for phrases that include them,
particularly in names such as "The Who", "The The", or "Take That". Other search engines
remove some of the most common words—including lexical words, such as "want"—from a
query in order to improve performance.
Code to remove stop words with the nltk tool in python module
from nltk.tokenize import sent_tokenize, word_tokenize
from nltk.corpus import stopwords
data = "All work and no play makes jack dull boy. All work and no play makes jack
a dull boy."
stopWords = set(stopwords.words('english'))
words = word_tokenize(data)
wordsFiltered = []
for w in words:
Department of Computer Engineering, SIEM, Nashik Page 19
if w not in stopWords:
wordsFiltered.append(w)
print(wordsFiltered)
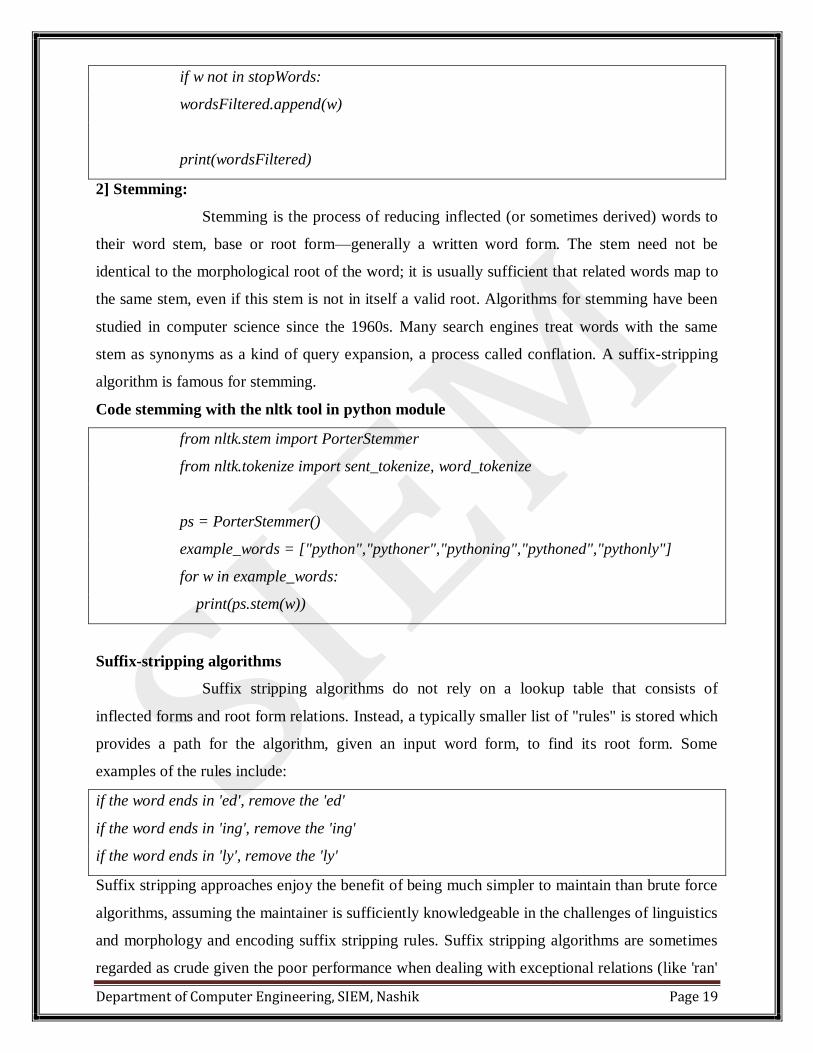
2] Stemming:
Stemming is the process of reducing inflected (or sometimes derived) words to
their word stem, base or root form—generally a written word form. The stem need not be
identical to the morphological root of the word; it is usually sufficient that related words map to
the same stem, even if this stem is not in itself a valid root. Algorithms for stemming have been
studied in computer science since the 1960s. Many search engines treat words with the same
stem as synonyms as a kind of query expansion, a process called conflation. A suffix-stripping
algorithm is famous for stemming.
Code stemming with the nltk tool in python module
from nltk.stem import PorterStemmer
from nltk.tokenize import sent_tokenize, word_tokenize
ps = PorterStemmer()
example_words = ["python","pythoner","pythoning","pythoned","pythonly"]
for w in example_words:
print(ps.stem(w))
Suffix-stripping algorithms
Suffix stripping algorithms do not rely on a lookup table that consists of
inflected forms and root form relations. Instead, a typically smaller list of "rules" is stored which
provides a path for the algorithm, given an input word form, to find its root form. Some
examples of the rules include:
if the word ends in 'ed', remove the 'ed'
if the word ends in 'ing', remove the 'ing'
if the word ends in 'ly', remove the 'ly'
Suffix stripping approaches enjoy the benefit of being much simpler to maintain than brute force
algorithms, assuming the maintainer is sufficiently knowledgeable in the challenges of linguistics
and morphology and encoding suffix stripping rules. Suffix stripping algorithms are sometimes
regarded as crude given the poor performance when dealing with exceptional relations (like 'ran'

Department of Computer Engineering, SIEM, Nashik Page 20
and 'run'). The solutions produced by suffix stripping algorithms are limited to those lexical
categories which have well known suffixes with few exceptions. This, however, is a problem, as
not all parts of speech have such a well formulated set of rules.
3] Feature Extraction:
In machine learning and statistics, feature selection, also known as variable
selection, attribute selection or variable subset selection, is the process of selecting a subset of
relevant features (variables, predictors) for use in model construction.
1. Feature selection techniques are used for four reasons:
2. Simplification of models to make them easier to interpret by researchers/users
3. Shorter training times
4. To avoid the curse of dimensionality
5. Enhanced generalization by reducing over fitting(formally, reduction of variance)
Feature Extraction architecture :-
Figure shows the architecture for a simple information extraction system. It
begins by processing a document using several of the procedures discussed in 3 and 5.: first,
the raw text of the document is split into sentences using a sentence segmenter, and each
sentence is further subdivided into words using a tokenizer. Next, each sentence is tagged
with part-of-speech tags, which will prove very helpful in the next step, named entity
detection. In this step, we search for mentions of potentially interesting entities in each
sentence. Finally, we use relation detection to search for likely relations between different
Department of Computer Engineering, SIEM, Nashik Page 21
entities in the text.
CONCLUSION:
Thus we have studied to remove stop words, apply stemming and feature
extraction techniques to represent documents as vectors.
FAQ:
1. What is stop words?
2. What are stemming and feature selection techniques?

Department of Computer Engineering, SIEM, Nashik Page 22
Experiment No: 04
Title:
Roll No:________ Class:_____ Batch:_____
Date of Performance: ___ /___/_____
Date of Assessment : ___ /___/_____
Particulars Marks
Attendance (05)
Journal (05)
Performance (05)
Understanding(05)
Total (20)
Signature of Staff Member

Department of Computer Engineering, SIEM, Nashik Page 23
Experiment No: 04
Aim: Design simple GUI application with activity and intents e.g. Design an android
Application for Phone Call or Calculator
Objective:
Implementation of the problem statement using Android.
Write test cases for Positive and Negative testing.
. Theory:
Introduction
Abstract Windowing Toolkit (AWT) is used for GUI programming in java.
Container:
The Container is a component in AWT that can contain another components like
buttons, textfields, labels etc. The classes that extends Container class are known
as container.

Department of Computer Engineering, SIEM, Nashik Page 24
Window:
The window is the container that have no borders and menubars. You must use
frame, dialog or another window for creating a window.
Panel:
The Panel is the container that doesn't contain title bar and MenuBars. It can have
other components like button, textfield etc.
Frame:
The Frame is the container that contain title bar and can have MenuBars. It can
have other components like button, textfield etc.
Commonly used Methods of Component class:
1)public void add(Component c)
2)public void setSize(intwidth,int height)
3)public void setLayout(LayoutManager m)
4)public void setVisible(boolean)
Creating a Frame:
There are two ways to create a frame:
1. By extending Frame class (inheritance)
2. By creating the object of Frame class (association)
public void setBounds(intxaxis, intyaxis, int width, int height);
have been used in the above example that sets the position of the button.

Department of Computer Engineering, SIEM, Nashik Page 25
Changing the state of an object is known as an event. For example, click on button, dragging
mouse etc. The java.awt.event package provides many event classes and Listener interfaces for
event handling.
Event classes and Listener interfaces
Event Classes Listener Interfaces
1. ActionEvent ActionListener
2. MouseEvent MouseListener 3. MouseMotionListener
4. MouseWheelEvent MouseWheelListener
5. KeyEvent KeyListener
6. ItemEvent ItemListener
7. TextEvent TextListener
8. AdjustmentEvent AdjustmentListener
9. WindowEvent WindowListener
10. ComponentEvent ComponentListener
11. ContainerEvent ContainerListener
12. FocusEvent FocusListener
Steps to perform Event Handling:
1. Implement the Listener interface and overrides its methods
2. Register the component with the Listener
Swing is a part of JFC (Java Foundation Classes) that is used to create GUI
application. It is built on the top of Swing is a part of JFC (Java Foundation Classes)
that is used to create GUI application. It is built on the top of AWT and entirely written
in java.
Advantage of Swing over AWT:
1. There are many advantages of Swing over AWT. They are as follows:
2. Swing components are Plateform independent & It is lightweight.

Department of Computer Engineering, SIEM, Nashik Page 26

Department of Computer Engineering, SIEM, Nashik Page 27
What is JFC? The Java Foundation Classes (JFC) are a set of GUI components which simplify the
development of desktop applications.
Basic Operational Test Cases:
Check the calculator if it starts by specific means like from searching for calculator
in search bar and then executing application. Or by accessing menu item in the
Windows.
Check if the calculator window maximizes to certain window size.
Check if the calculator closes when the close button is pressed or if the exit menu is clicked from file > exit option.
Check if the help document is accessed from Help>Documentation. Check if the
calculator allows copy and paste functionality.
Check if the calculator has any specific references. Check if all the numbers are
working ( 0 to 9)
Check if the arithmetic keys (+, -, *, %, /) are working.
Check if the clear key is working.
Check if the brackets keys are working. Check if the sum or equal key is working.
Check if the square and square root key is working.
Functionality Test Cases
Check the addition of two integer numbers.
Check the addition of two negative numbers.
Check the addition of one positive and one negative number.
Check the subtraction of two integer numbers.
Check the subtraction of two negative numbers.
Check the subtraction of one negative and one positive number.
Check the multiplication of two integer numbers.

Department of Computer Engineering, SIEM, Nashik Page 28
Check the multiplication of two negative numbers.
Check the multiplication of one negative and one positive number.
Check the division of two integer numbers.
Check the division of two negative numbers.
Check the division of one positive number and one integer number.
Check the division of a number by zero.
Check the division of a number by negative number.
Check the division of zero by any number.
Check if the functionality using BODMAS/BIDMAS works as expected.
Advanced Tests on Scientific Calculator
Check if the sin, cos, tan and cos is operational using the keys.
Check if the x-1, x!,|x|,x^y and f(x) is operational and works as expected.
Check if the natural logarithm key i operational and works as expected.
Check if the factorial key is working as expected.
Check if the real and imaginary component keys are working as expected.
Check if the complex conjugate keys are working as expected.
Conclusion:
Thus we have studied to Design an android Application for Calculator.
FAQ:
1. Write different name of Automated Testing Tool?
2. What do you know about Selenium?
3. What do you know about Junit?
4. What do you know about monkey talk?
5. What do you mean by positive and Negative testing?
Department of Computer Engineering, SIEM, Nashik Page 29
Experiment No: 05
Title:
Roll No:________ Class:_____ Batch:_____
Date of Performance: ___ /___/_____
Date of Assessment : ___ /___/_____
Particulars Marks
Attendance (05)
Journal (05)
Performance (05)
Understanding(05)
Total (20)
Signature of Staff Member

Department of Computer Engineering, SIEM, Nashik Page 30
Experiment No: 05
Aim: Design an android application for media player.
Objective:
Implementation of the problem statement using Android studio.
Study of android operating system and programming.
Theory:
What is Android?
Android is an open source and Linux-based Operating System for mobile devices such
as smartphones and tablet computers. Android was developed by the Open Handset Alliance, led
by Google, and other companies.
Android offers a unified approach to application development for mobile devices which
means developers need only develop for Android, and their applications should be able to run on
different devices powered by Android.
The first beta version of the Android Software Development Kit (SDK) was released by
Google in 2007 where as the first commercial version, Android 1.0, was released in September
2008.
On June 27, 2012, at the Google I/O conference, Google announced the next Android
version, 4.1 Jelly Bean. Jelly Bean is an incremental update, with the primary aim of improving
the user interface, both in terms of functionality and performance.
The source code for Android is available under free and open source software licenses.
Google publishes most of the code under the Apache License version 2.0 and the rest, Linux
kernel changes, under the GNU General Public License version 2.
History of Android

Department of Computer Engineering, SIEM, Nashik Page 31
The code names of android ranges from A to L currently, such as Aestro, Blender,
Cupcake, Donut, Eclair, Froyo, Gingerbread, Honeycomb, Ice Cream Sandwitch, Jelly Bean,
KitKat and Lollipop. Let's understand the android history in a sequence.
Android Project Components
1. src : This contains the .java source files for your project. By default, it includes an
MainActivity.java source file having an activity class that runs when your app is launched
using the app icon.
2. Gen:This contains the .R file, a compiler-generated file that references all the resources
found in your project. You should not modify this file.
3. bin :This folder contains the Android package files .apk built by the ADT during the
build process and everything else needed to run an Android application.
4. res/drawable-hdpi :This is a directory for drawable objects that are designed for high-
density screens.
5. res/layout:This is a directory for files that define your app's user interface.
6. res/values :This is a directory for other various XML files that contain a collection of
resources, such as strings and colors definitions.
7. AndroidManifest.xml :This is the manifest file which describes the fundamental

Department of Computer Engineering, SIEM, Nashik Page 32
characteristics of the app and defines each of its components.
Why Android ?
Media Player:
Android is providing MediaPlayer class to access built-in mediaplayer services like playing
audio,video e.t.c. In order to use MediaPlayer , we have to call a static Method create() of this
class.
MediaPlayer mediaPlayer = MediaPlayer.create(this, R.raw.song);
The second parameter is the name of the song that you want to play. You have to make a new
folder under your project with name raw and place the music file into it.
Once you have created the Mediaplayer object you can call some methods to start or stop the
music. These methods are listed below.

Department of Computer Engineering, SIEM, Nashik Page 33
mediaPlayer.start();
mediaPlayer.pause();
On call to start() method, the music will start playing from the beginning. If this method is
called again after the pause() method , the music would start playing from where it is left and not
from the beginning.
In order to start music from the beginning , you have to call reset() method.
mediaPlayer.reset();
Conclusion:
Thus we have studied to Design an android Application for media player which is useful for
playing multimedia data
FAQ:
1. What is Android?
2. What are the code names of android?
3. What are the advantages of android?
4. What is intent?
5. What is activity?
6. What are the life cycle methods of android activity?
7. What is NDK?

Department of Computer Engineering, SIEM, Nashik Page 34
Experiment No: 06
Title:
Roll No:________ Class:_____ Batch:_____
Date of Performance: ___ /___/_____
Date of Assessment: ___ /___/_____
Particulars Marks
Attendance (05)
Journal (05)
Performance (05)
Understanding(05)
Total (20)
Signature of Staff Member
Department of Computer Engineering, SIEM, Nashik Page 35
Experiment No: 06
Aim: Design an android Application for SMS Manager
Objectives:
Implementation of the problem statement using Android studio.
Study of android operating system and programming.
Theory:
Android Send and Receive SMS (Text and Data/Binary) Messages with SmsManager and
Intents:
The Android SDK does support to capability of sending SMS/MMS messages in two
ways (from your app):
Invoke an SMS client app via Implicit Intents.
Send the SMS directly you by using the SmsManager telephony class API.
We‟ll delve into both the approaches.
Using Implicit Intents
Using Android implicit intents we can display a list of SMS client apps that the user
already has on his phone that he can use. Obviously if they have only one app (which is
generally the default Messaging app unless other apps registered themselves for these intents
using intent filter) then that‟ll open up directly without presenting the user with a dialog filled
with a list of choices that can be made. We can either use the ACTION_SENDTO action or
ACTION_VIEW.
Using the SmsManager API
With the android.telephone.SmsManager class, we can send an SMS automatically in two
lines of API code.
String phoneNumber = "9999999999";

Department of Computer Engineering, SIEM, Nashik Page 36
String smsBody = "Message from the API";
// Get the default instance of SmsManager
SmsManager smsManager = SmsManager.getDefault();
// Send a text based SMS
smsManager.sendTextMessage(phoneNumber, null, smsBody, null, null);
This method requires the SEND_SMS permission which you should request in the manifest file.
<uses-permission android:name="android.permission.SEND_SMS" />
The first argument passed to sendTextMessage() is the destination address to which the message
has to be sent and the second argument is the SMSC address (it‟s also like a phone number
generally) to which if you pass null, the default service center of the device‟s carrier will be
used. Third argument is the text message to be sent in the SMS. The fourth and fifth arguments if
not null must be pending intents performing broadcasts when the message is successfully sent (or
failed) and delivered to the recipient.
Divide and Send Multipart Text Messages
Generally an SMS is restricted to 160 (7 bit) characters or 140 (8 bit) characters. So if
your message is longer than that, then you‟ll have to divide it into multiple parts using
divideMessage() and then send with the sendMultipartTextMessage() method.
Send Binary (Data) SMS
We can send binary messages (as opposed to text based messages that we covered earlier)
to specific application ports using sendDataMessage(). According to this Stack Exchange thread
data sms is one which is sent over 2G/3G as well as GSM. I‟ve tested it with mobile data turned
off and it works fine charging me the same amount, so not very sure on whether it uses 2G/3G or
not, but generally the term data is used in telephony when it‟s related to network (tcp/ip).
Anyway, SMS‟s are generally sent to a specific port on the device (which is probably port 0
[zero]). But using sendDataMessage() we can send SMS‟s to some other random port on which
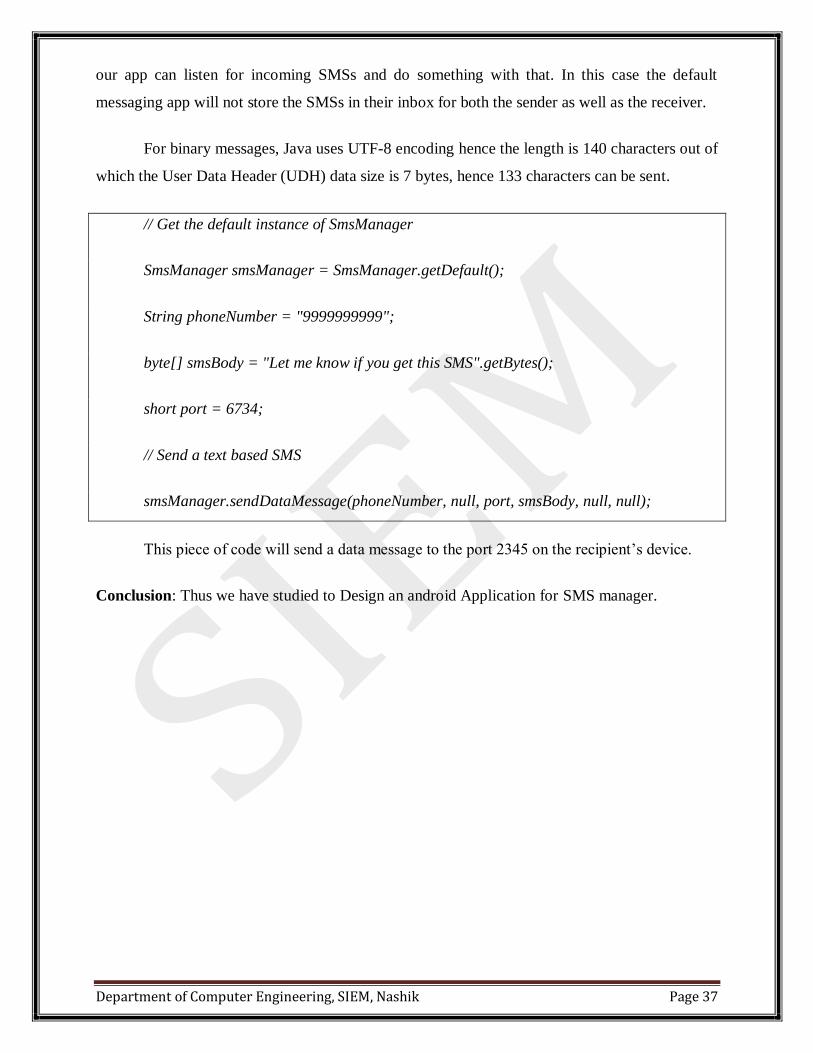
Department of Computer Engineering, SIEM, Nashik Page 37
our app can listen for incoming SMSs and do something with that. In this case the default
messaging app will not store the SMSs in their inbox for both the sender as well as the receiver.
For binary messages, Java uses UTF-8 encoding hence the length is 140 characters out of
which the User Data Header (UDH) data size is 7 bytes, hence 133 characters can be sent.
// Get the default instance of SmsManager
SmsManager smsManager = SmsManager.getDefault();
String phoneNumber = "9999999999";
byte[] smsBody = "Let me know if you get this SMS".getBytes();
short port = 6734;
// Send a text based SMS
smsManager.sendDataMessage(phoneNumber, null, port, smsBody, null, null);
This piece of code will send a data message to the port 2345 on the recipient‟s device.
Conclusion: Thus we have studied to Design an android Application for SMS manager.
Department of Computer Engineering, SIEM, Nashik Page 38
Experiment No: 07
Title:
Roll No: ________ Class: _____ Batch: _____
Date of Performance: ___ /___/_____
Date of Assessment: ___ /___/_____
Particulars Marks
Attendance (05)
Journal (05)
Performance (05)
Understanding(05)
Total (20)
Signature of Staff Member

Department of Computer Engineering, SIEM, Nashik Page 39
Experiment No: 07
Aim: Design an android Application using Google Map to Trace the Location of Device
Objective:
Implementation of the problem statement using Android studio.
Use of GPS.
Theory:
Google Maps
Google Maps is a Web-based service that provides detailed information about
geographical regions and sites around the world. In addition to conventional road maps, Google
Maps offers aerial and satellite views of many places. In some cities, Google Maps offers street
views comprising photographs taken from vehicles.
Google Maps offers several services as part of the larger Web application, as follows.
A route planner offers directions for drivers, bikers, walkers, and users of public
transportation who want to take a trip from one specific location to another.
The Google Maps application program interface (API) makes it possible for Web site
administrators to embed Google Maps into a proprietary site such as a real estate guide or
community service page.
Google Maps for Mobile offers a location service for motorists that utilizes the Global
Positioning System (GPS) location of the mobile device (if available) along with data
from wireless and cellular networks.
Google Street View enables users to view and navigate through horizontal and vertical

Department of Computer Engineering, SIEM, Nashik Page 40
panoramic street level images of various cities around the world.
Supplemental services offer images of the moon, Mars, and the heavens for hobby
astronomers.
Google Maps API
After the success of reverse-engineered mashups such as chicagocrime.org and
housingmaps.com, Google launched the Google Maps API in June 2005 to allow developers to
integrate Google Maps into their websites. It is a free service, and currently does not contain ads,
but Google states in their terms of use that they reserve the right to display ads in the future.
By using the Google Maps API, it is possible to embed Google Maps into an external
website, on to which site-specific data can be overlaid. Although initially only a JavaScript API,
the Maps API was expanded to include an API for Adobe Flash applications (but this has been
deprecated), a service for retrieving static map images, and web services for performing
geocoding, generating driving directions, and obtaining elevation profiles. Over 1,000,000 web
sites use the Google Maps API, making it the most heavily used web application development
API.
Google Map SDK:
With the Maps SDK for Android, you can add maps based on Google Maps data to your
application. The API automatically handles access to Google Maps servers, data downloading,
map display, and response to map gestures. You can also use API calls to add markers, polygons,
and overlays to a basic map, and to change the user's view of a particular map area. These objects
provide additional information for map locations, and allow user interaction with the map. The
API allows you to add these graphics to a map:
Icons anchored to specific positions on the map (Markers).
Sets of line segments (Polylines).
Enclosed segments (Polygons).

Department of Computer Engineering, SIEM, Nashik Page 41
Bitmap graphics anchored to specific positions on the map (Ground Overlays).
Sets of images which are displayed on top of the base map tiles (Tile Overlays).
Get Started:
This guide is a quick start to adding a map to an Android app. Android Studio is the
recommended development environment for building an app with the Maps SDK for Android.
Step 1. Download Android Studio
Follow the guides to download and install Android Studio.
Step 2. Install the Google Play services SDK
Add Google Play services to Android Studio.
Step 3. Create a Google Maps project
Follow these steps to create a new app project including a map activity:
1. Start Android Studio.
2. Create a new project as follows:
If you see the Welcome to Android Studio dialog, choose Start a new Android
Studio project, available under 'Quick Start' on the right of the dialog.
Otherwise, click File in the Android Studio menu bar, then New, New Project.
3. Enter your app name, company domain, and project location, as prompted. Then click
Next.
4. Select the form factors you need for your app. If you're not sure what you need, just
select Phone and Tablet. Then click Next.
5. Select Google Maps Activity in the 'Add an activity to Mobile' dialog. Then click
Next.
6. Enter the activity name, layout name and title as prompted. The default values are fine.
Then click Finish.

Department of Computer Engineering, SIEM, Nashik Page 42
Android Studio starts Gradle and builds your project. This may take a few seconds. For more
information about creating a project in Android Studio, see the Android Studio
documentation. When the build is finished, Android Studio opens the google_maps_api.xml
and the MapsActivity.java files in the editor. (Note that your activity may have a different
name, but it will be the one you configured during setup.) Notice that the
google_maps_api.xml file contains instructions on getting a Google Maps API key before
you try to run the application. The next section describes getting the API key in more detail.
Step 4. Get a Google Maps API key
Your application needs an API key to access the Google Maps servers. The type of key you
need is an API key with restriction for Android apps. The key is free. You can use it with any
of your applications that call the Maps SDK for Android, and it supports an unlimited
number of users.
To get your API key from Android Studio:
Use the link provided in the google_maps_api.xml file that Android Studio created for
you:
1. Copy the link provided in the google_maps_api.xml file and paste it into your
browser. The link takes you to the Google Cloud Platform Console and supplies
the required information to the Google Cloud Platform Console via URL
parameters, thus reducing the manual input required from you.
2. Follow the instructions to create a new project on the Google Cloud Platform
Console or select an existing project.
3. Create an Android-restricted API key for your project.
4. Copy the resulting API key, go back to Android Studio, and paste the API key
into the <string> element in the google_maps_api.xml file.
Step 5. Hello Map! Take a look at the code
Examine the code supplied by the template

Department of Computer Engineering, SIEM, Nashik Page 43
Conclusion: Thus we have studied to design an android Application using Google Map to Trace
the Location of Device
Experiment No: 09
Title:
Roll No:________ Class:_____ Batch:_____
Date of Performance: ___ /___/_____
Date of Assessment: ___ /___/_____
Particulars Marks
Attendance (05)
Journal (05)
Performance (05)
Understanding(05)
Total (20)
Signature of Staff Member

Department of Computer Engineering, SIEM, Nashik Page 44
Experiment No: 09
Aim: Design an android Application for Frame Animation
Objective:
+
Implementation of the problem statement using Android studio.
Study of Animation drawable package.
. Theory:
Introduction
It‟s been said that Animation is the state of being alive. Something that gives you an
illusion. In mobile application development too this has got its own significance.
In Android Frame Animation, you will be swapping frames repeatedly, so that it appears
continuous to the human eye and we feel that it is animated. Frame is referred to an image. So to
implement frame by frame animation in android, one needs to have set of images, which
describes a motion.
XML Drawables:
We have two options here: we can use XML drawables (such as shape drawables) or
actual image files. For the sake of simplicity, we‟re going to use the following series of PNG
images:
In a production application, we would also make sure to have images sized appropriately
for different screen densities. For now, shove those images into the res/drawable-mdpi folder
Now that we have our images to cycle through, the next step is to define an XML Drawable for

Department of Computer Engineering, SIEM, Nashik Page 45
our animation. Once again, we are faced with two possibilities: the Animation-list and the
Animated-selector.
android:drawable:
Reference to a drawable resource to use for the frame. If not given, the drawable must be defined
by the first child tag.
May be a reference to another resource, in the form "@[+][package:]type/name" or a theme
attribute in the form "?[package:]type/name".
android:duration:
Amount of time (in milliseconds) to display this frame. May be an integer value, such as
"100".
android:oneshot:
If true, the animation will only run a single time and then stop. If false (the default), it
will continually run, restarting at the first frame after the last has finished.
May be a boolean value, such as "true" or "false".
Animation-List:
Animation-list is the default Frame Animation of choice, as it was introduced in API 1. It
works everywhere, and it‟s simple. It just cycles through a sequence of provided images in a
given order with given durations.
Here‟s an example of an Animation-list for my heart filling up, placed in
res/drawable/animation_list_filling.xml:
<?xml version="1.0" encoding="utf-8"?>
<animation-list xmlns:android="http://schemas.android.com/apk/res/android"
android:oneshot="true">
<item
android:duration="500"
android:drawable="@drawable/ic_heart_0"/>
<item
android:duration="500"
android:drawable="@drawable/ic_heart_25"/>
<item

Department of Computer Engineering, SIEM, Nashik Page 46
android:duration="500"
android:drawable="@drawable/ic_heart_50"/>
<item
android:duration="500"
android:drawable="@drawable/ic_heart_75"/>
<item
android:duration="500"
android:drawable="@drawable/ic_heart_100"/>
</animation-list>
Each item in the list is just pointing to one of the images in our sequence from earlier. All
we have to do is place them in the correct order and then add an appropriate duration in
milliseconds.
You might notice the android:oneshot=”true” in both of these code snippets, which is
simply an attribute of the animation-list for playing the animation once and then stopping. If this
is set to “false,” the animation will play on repeat.
Set Up the ImageViews
It‟s time to set up some ImageViews for us to play with. Set backgroung of imageview as our
created animation file as shown in code snippets
<ImageView
android:id="@+id/imageview_animation_list_filling"
android:layout_width="wrap_content"
android:layout_height="wrap_content"
android:background="@drawable/animation_list_filling"
/>
Starting the Animations
The behavior for starting the animations differs between the two implementations, so we‟ll start
with the animation-list.
Animation-List
In our Activity, we grab a reference to the ImageView and then start the animation, like so:
ImageView mImageViewFilling = (ImageView)
findViewById(R.id.imageview_animation_list_filling);
((AnimationDrawable) mImageViewFilling.getBackground()).start();

Department of Computer Engineering, SIEM, Nashik Page 47
Those code snippets can be put in onCreate (automatically begins when the Activity begins) or in
an OnClickListener (waits for user interaction). The choice is yours!