interstage bpm server and console installation guide...
TRANSCRIPT
FUJITSU SoftwareInterstage Business ProcessManagerV11.4.1
Server and ConsoleInstallation Guide(JBoss Application Server)
J2U3-0059-11ENZ0(00)August 2017

August 2017Publication Date
11Revision
Interstage is a trademark of Fujitsu Limited.Microsoft, Windows, and Windows Server are registeredtrademarks of Microsoft Corporation in the United Statesand other countries.UNIX is a registered trademark of the Open Group in theUnited States and in other countries.Oracle and Java are registered trademarks of OracleCorporation and its subsidiary and related companies in theUnited States and other countries.Linux is a registered trademark of Linus Torvalds in the USAand other countries.Red Hat, the Red Hat "Shadow Man" logo, RPM, MaximumRPM, the RPM logo, Linux Library, PowerTools, LinuxUndercover, RHmember, RHmember More, Rough Cuts,Rawhide and all Red Hat-based trademarks and logos aretrademarks or registered trademarks of Red Hat, Inc. in theUnited States and other countries.All other trademarks and trade names mentioned have beenregistered by their respective manufacturer.
Trademarks
All rights reserved, including those of translation into otherlanguages. No part of this manual may be reproduced inany form whatsoever by means of photocopying, microfilmingor any other process without the written permission of FujitsuLimited.
All Rights Reserved,Copyright © FUJITSULIMITED 2005-2017
High Risk Activity
The Customer acknowledges and agrees that the Product is designed, developed andmanufactured as contemplated for general use, including without limitation, general officeuse, personal use, household use, and ordinary industrial use, but is not designed,developed and manufactured as contemplated for use accompanying fatal risks or dangersthat, unless extremely high safety is secured, could lead directly to death, personal injury,severe physical damage or other loss (hereinafter "High Safety Required Use"), includingwithout limitation, nuclear reaction control in nuclear facility, aircraft flight control, air trafficcontrol, mass transport control, medical life support system, missile launch control inweapon system. The Customer shall not use the Product without securing the sufficientsafety required for the High Safety Required Use. In addition, Fujitsu (or other affiliate'sname) shall not be liable against the Customer and/or any third party for any claims ordamages arising in connection with the High Safety Required Use of the Product.
Table of ContentsAbout this Manual............................................................................7
1 System Configurations for Interstage BPM Server.....................10
1.1 Minimum Configuration: All Systems on the same Computer........................10
1.2 Database on Remote Computer..........................................................................11
2 System Configurations for Interstage BPM Console..................12
2.1 Minimum Configuration: All Systems on the same Computer........................12
3 System Requirements for Interstage BPM Server and Console.13
3.1 Hardware Requirements for Interstage BPM Server and Console..................13
3.2 Minimum Software Requirements for Server and Console..............................13
3.3 Minimum Software Requirements for Web Browser Clients...........................13
4 Preparing for Setup of Interstage BPM Server and Console.....14
4.1 Database Server Preparation..............................................................................144.1.1 Configuring Microsoft® SQL Server.......................................................................144.1.2 Configuring Oracle.................................................................................................154.1.3 Starting the Database Server.................................................................................16
4.2 Application Server Preparation..........................................................................164.2.1 Installing and Configuring JBoss EAP 6 for Interstage BPM Server and Console..164.2.2 Update the domain server configuration................................................................174.2.3 Disabling the Remoting Security............................................................................184.2.4 Configuring JBoss EAP 6 Domain.........................................................................184.2.5 Setting-up the JDBC Module..................................................................................21
4.3 Directory Server Preparation..............................................................................22
5 Setting-up Interstage BPM Server and Console.........................23
5.1 Permissions Required for Setup........................................................................23
5.2 Overview of the Setup Procedure.......................................................................23
5.3 Setup Database and Interstage BPM on the Same Computer.........................245.3.1 Copy Interstage BPM engine directory from Product Media..................................255.3.2 Updating the Interstage BPM Configuration File....................................................255.3.3 Running the Interstage BPM Setup Script.............................................................26
Interstage BPM Server and Console Installation Guide (JBoss Application Server) 3
Table of Contents
5.4 Setup Database and Interstage BPM on the Different Computer....................285.4.1 Copy database setup directory to database machine............................................285.4.2 Updating the database setup script on the database machine..............................295.4.3 Update the configuration file on Interstage BPM Server machine.........................30
5.5 User Accounts and Groups.................................................................................31
5.6 Switching on Java Security.................................................................................32
5.7 Encrypting the Password for Datasource..........................................................33
5.8 Starting Interstage BPM Server..........................................................................35
5.9 Starting Interstage BPM Console and Tenant Management Console.............365.9.1 Starting Interstage BPM Mobile Application...........................................................37
5.10 Starting Interstage BPM OpenID Provider.........................................................37
6 Setting Up a Directory Service......................................................38
6.1 Setting Up Microsoft® Active Directory.............................................................386.1.1 Configuring Users and Groups for Interstage BPM with GUI of Microsoft® Active
Directory.................................................................................................................386.1.2 Using Existing Active Directory Users and Groups................................................426.1.3 Adding New Users Using the GUI..........................................................................426.1.4 Adding New Groups Using the GUI.......................................................................456.1.5 Adding Members to a Group Using the GUI..........................................................47
6.2 Setting Up Oracle Directory Server Enterprise Edition ...................................496.2.1 Configuring Users and Groups for Interstage BPM with GUI of Oracle Directory
Server Enterprise Edition.......................................................................................506.2.2 Using Existing Oracle Directory Server Enterprise Edition Users and Groups......556.2.3 Adding New Oracle Directory Server Enterprise Edition Users.............................556.2.4 Adding New Groups...............................................................................................55
6.3 Group Caching.....................................................................................................56
6.4 User Attribute Caching........................................................................................56
6.5 Changing Username and Password of Tenant Owner .....................................57
7 Un-setup Interstage BPM Server and Console............................58
7.1 Un-setup Interstage BPM Server and Console from the Application Server..587.1.1 Confirm the Un-setup Configuration File................................................................587.1.2 Running the Un-setup Script .................................................................................597.1.3 Backup Resources.................................................................................................607.1.4 Remove engine Directory.......................................................................................60
Interstage BPM Server and Console Installation Guide (JBoss Application Server) 4
Table of Contents
8 Upgrading Interstage BPM from Previous Versions...................61
8.1 Outline...................................................................................................................618.1.1 Back up the Interstage BPM materials...................................................................618.1.2 Upgrade Database.................................................................................................618.1.3 Upgrade Interstage BPM and Migrate Application Resources...............................68
8.2 Migrating Application Resources from Previous Versions to this Version ofInterstage BPM.....................................................................................................69
8.3 Migrating Application Owners from Previous Versions to this Version ofInterstage BPM.....................................................................................................70
8.4 Migrating WebDAV Repository and UDDI Registry from Previous Versions tothis Version of Interstage BPM...........................................................................70
8.5 Additional Steps for Handling Pre-11.0 Console URLs....................................718.5.1 Steps to Overcome the URL-incompatibility Problem............................................72
8.6 Additional Steps for FormStyles while Migrating from Interstage BPMConsole11.1.........................................................................................................................72
8.7 Additional Steps for Interstage BPM Console...................................................728.7.1 Deleting Interstage BPM Console..........................................................................728.7.2 Updating System Properties for Web Server Port..................................................73
AppendixA Security...........................................................................................74
A.1 Interstage BPM Operation Model........................................................................74
A.2 Password Encryption...........................................................................................75
A.3 Using Demo Mode and Security Mode...............................................................77
A.4 Configuring SMTP Authentication for Use with Interstage BPM.....................78
A.5 Using the Configuration Export and Import Scripts.........................................78
A.6 Configuring JBoss Application Server for Secure Access of Interstage BPMConsole.................................................................................................................81
A.6.1 Configuring a Keystore and Obtaining a Signed Certificate...................................82A.6.2 Configuring Interstage BPM Console on JBoss EAP 6 Application Server for HTTPS
connection..............................................................................................................84A.6.3 Updating Interstage BPM Server Parameters........................................................85A.6.4 Configuring Truststore for Interstage BPM Server and Console to access Secure
URLs......................................................................................................................85
A.7 Configuring Interstage BPM Server for secure WebDAV DMS access...........86
AppendixB Clustering, Load Balancing, and Failover...................................88
Interstage BPM Server and Console Installation Guide (JBoss Application Server) 5
Table of Contents

B.1 Setting up an Interstage BPM Cluster on JBoss EAP 6...................................88
B.2 Pre-Setup Operations for Cluster Setup............................................................89B.2.1 Verifying the Multicast Connectivity........................................................................89B.2.2 Configuring the Shared Resource Root.................................................................90B.2.3 Configuring JBoss EAP 6 Domain for Cluster Environment...................................91B.2.4 Configuring JBoss Domain Security for Cluster Environment................................93
B.3 Cluster Setup Operations....................................................................................95
B.4 Post Setup configurations in cluster environment...........................................95B.4.1 Configuring Environment Variables........................................................................95B.4.2 Starting and Stopping the Cluster..........................................................................96
B.5 Automated Failover Settings..............................................................................96
AppendixC Overview of NTLM Authentication Protocol .............................100
C.1 Setup NTLM Authentication Protocol for Interstage BPM Console..............101
AppendixD Overview of SSO Authentication................................................103
D.1 Setup SSO Authentication for Interstage BPM Console................................104
D.2 Updating the OpenID Provider Configuration.................................................104
D.3 Configuration for SSL .......................................................................................107
Appendix E Troubleshooting...........................................................................108
E.1 Log File Information...........................................................................................108
E.2 Resolving Specific Error Situations.................................................................108E.2.1 Interstage BPM Server Fails to Start....................................................................108E.2.2 Error in Trace.log..................................................................................................109E.2.3 Failure in Writing to an Oracle Database.............................................................109
E.3 Errors during Setup of the Interstage BPM Server ........................................109
E.4 Errors Related to Interstage BPM Database Creation/Update.......................112
E.5 Manual Procedure for Un-setup of Interstage BPM Server and Console.....113
E.6 Contacting Your Local Fujitsu Support Organization.....................................115
Index .......................................................................................................117
Interstage BPM Server and Console Installation Guide (JBoss Application Server) 6
Table of Contents

About this ManualThis manual describes how to configure the system environment and setup the Interstage BusinessProcess Manager (Interstage BPM) Server and Console.Note that the Interstage BPM Tenant Management Console setup is automatically performed whenyou setup Interstage BPM Console.
Intended AudienceThis manual is intended for Interstage BPM Super Users, who are administrators managing InterstageBPM Server. It assumes that the reader has a working knowledge of• Operating system administration• Application server administration• Database administration• Directory Service administration
This Manual ContainsHere is a list of what is in this manual:
DescriptionTitleChapter
Description of the typical systemconfigurations for the setup ofInterstage BPM Server.
System Configurations for InterstageBPM Server
1
Description of the typical systemconfigurations for the setup ofInterstage BPM Console.
System Configurations for InterstageBPM Console
2
Description of the minimumsystem requirements byplatform.
System Requirements for InterstageBPM Server and Console
3
Instructions for preparingexternal systems like thedatabase or the applicationserver.
Preparing for Setup of Interstage BPMServer and Console
4
Instructions for performing setupof Interstage BPM Server andConsole.
Setting-up Interstage BPM Server andConsole
5
Instructions for setting up yourDirectory Service.
Setting Up a Directory Service6
Instructions for removing aninstance of Interstage BPMServer and Console from theapplication server
Un-setup Interstage BPM Server andConsole
7
Instructions for performing anupgrade.
Upgrading Interstage BPM fromPrevious Versions
8
Interstage BPM Server and Console Installation Guide (JBoss Application Server) 7
About this Manual
DescriptionTitleChapter
Instructions for securityimplementation on InterstageBPM.
SecurityAppendix A
Instructions for setting up acluster of Interstage BPMServers.
Clustering, Load Balancing, andFailover
Appendix B
Instructions to enable NTLMAuthentication Protocol forInterstage BPM Console
Overview of NTLM AuthenticationProtocol
Appendix C
Instructions to enable SSOAuthentication Protocol forInterstage BPM Console
Overview of SSO AuthenticationAppendix D
Information to help youtroubleshoot problemsassociated with using InterstageBPM.
TroubleshootingAppendix E
Screenshots of the products that appear in this manual are approximations only. What you see whenusing the product may differ in appearance due to platform or product version differences.
Typographical ConventionsThe following conventions are used throughout this manual:
MeaningExample
Text, which you are required to type at acommand line, is identified by Courier font.
command
Text, which is visible in the user interface, is bold.screen text
Reference material is in italics.Reference
A command parameter is identified by Courierfont.
Parameter
Other ReferencesThe following references for Interstage Business Process Manager are also available:• Release Notes
Contains an overview of Interstage Business Process Manager, setup tips, and late-breakinginformation that could not make it into the manuals.
• Interstage Business Process Manager Server and Console Installation GuideDescribes software and hardware requirements, setup procedure for Interstage Business ProcessManager Server and Console
• Interstage Business Process Manager Server Administration GuideExplains how to configure and administrate Interstage Business Process Manager Server. Thisguide also describes the configuration parameters of the Interstage BPM Server.
Interstage BPM Server and Console Installation Guide (JBoss Application Server) 8
About this Manual
• Interstage Business Process Manager Developer's GuideDescribes how to use the Interstage Business Process Manager API to customize and extendInterstage BPM to fit the unique needs of your organization.
• Interstage Business Process Manager Studio User's GuideExplains how to model processes using the Interstage Business Process Manager Studio.
• Interstage Business Process Manager Tenant Management Console Online HelpExplains how to use the Interstage Business Process Manager Tenant Management Consoleuser interface.
• Interstage Business Process Manager Console Online HelpExplains how to use the Interstage Business Process Manager Console user interface.
• API Javadoc DocumentationThis HTML documentation provides the API and syntax of the packages, interfaces and classesfor developing custom applications or embedding Interstage Business Process Manager intoother products.
AbbreviationsThe products described in this manual are abbreviated as follows:• "Interstage Business Process Manager" is abbreviated as "Interstage BPM".• "Microsoft® Windows Server® 2008" and "Microsoft® Windows Server® 2012" are abbreviated
as "Windows Server".• "Oracle Solaris" might be described as "Solaris", "Solaris Operating System", and "Solaris OS"
in this document.• "Microsoft® SQL Server 2008 Standard Edition", "Microsoft® SQL Server 2008 Enterprise Edition",
"Microsoft® SQL Server 2012 Standard Edition", "Microsoft® SQL Server 2012 BusinessIntelligence Edition" and "Microsoft® SQL Server 2012 Enterprise Edition" are abbreviated as"Microsoft® SQL Server", "Microsoft SQL Server", or "SQL Server".
• "Oracle Database 11g R1 Standard Edition", "Oracle Database 11g R1 Standard Edition One","Oracle Database 11g R1 Enterprise Edition", "Oracle Database 11g R2 Standard Edition", "OracleDatabase 11g R2 Standard Edition One", "Oracle Database 11g R2 Enterprise Edition", "OracleDatabase 12c R1 Standard Edition", "Oracle Database 12c R1 Enterprise Edition" are abbreviatedas "Oracle".
• "JBoss Enterprise Application Platform" is abbreviated as "JBoss EAP".• "Java Development Kit" and "Java SE Development Kit" is abbreviated as "JDK".• "Java Runtime Environment" and "Java SE Runtime Environment" is abbreviated as "JRE".
Export ControlsExportation/release of this document may require necessary procedures in accordance with theregulations of your resident country and/or US export control laws.
Interstage BPM Server and Console Installation Guide (JBoss Application Server) 9
About this Manual
1 System Configurations for Interstage BPM ServerInterstage Business Process Manager (Interstage BPM) is a server-based workflow engine with APIs(Application Programming Interfaces) for workflow application development.The Interstage BPM Server runs on an application server providing load balancing and failovercapabilities, and it operates with a database, which persistently stores and maintains all processinformation.A user and group store is required to manage Interstage BPM user accounts and to expand a groupinto a list of users. Depending on your choices when setting up the server, users are managed eitherin Interstage BPM's local user store or in a Directory Service. Groups can be managed in InterstageBPM's local group store, in a Directory Service or in both systems.The Interstage BPM Server is shipped with setup script, which is used to• Configure the database and the application server• Setup the Interstage BPM Server and Console to the application serverThe system configurations described in the next sections are typically used. The decision of theconfiguration to be used depends on the desired performance of the employed systems.
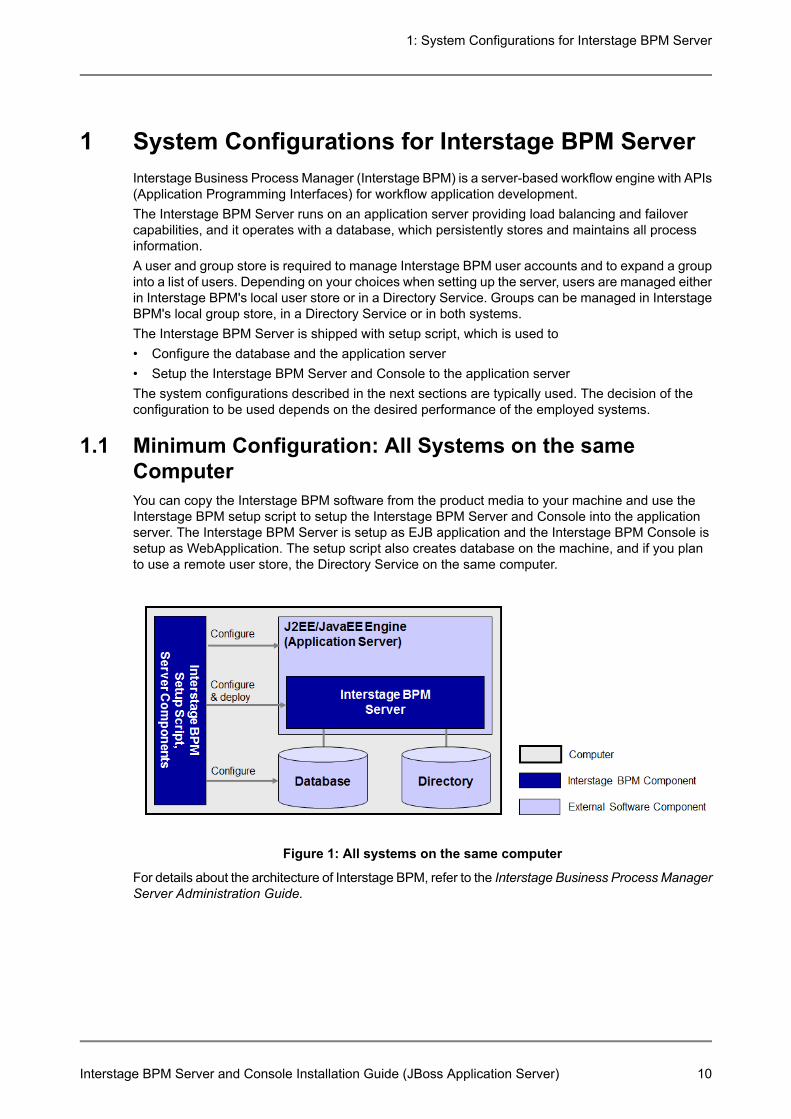
1.1 Minimum Configuration: All Systems on the sameComputerYou can copy the Interstage BPM software from the product media to your machine and use theInterstage BPM setup script to setup the Interstage BPM Server and Console into the applicationserver. The Interstage BPM Server is setup as EJB application and the Interstage BPM Console issetup as WebApplication. The setup script also creates database on the machine, and if you planto use a remote user store, the Directory Service on the same computer.
Figure 1: All systems on the same computer
For details about the architecture of Interstage BPM, refer to the Interstage Business ProcessManagerServer Administration Guide.
Interstage BPM Server and Console Installation Guide (JBoss Application Server) 10
1: System Configurations for Interstage BPM Server

1.2 Database on Remote ComputerThe following figure shows a configuration where the Interstage BPM Server and the database aresetup on separate computers.
Figure 2: Database on Remote Computer
To set up this configuration, you copy the database setup script from the Interstage BPMServer-computer to the database server computer. And, you can use the database setup script tocreate the database.The Interstage BPM setup script can then be run from that Interstage BPM Server-computer toconfigure the application server and setting up the Interstage BPM Server to the application server.In the configuration shown above, the Directory Service is also installed on a remote computer.However, this has no impact on the Interstage BPM setup procedure.
Interstage BPM Server and Console Installation Guide (JBoss Application Server) 11
1: System Configurations for Interstage BPM Server
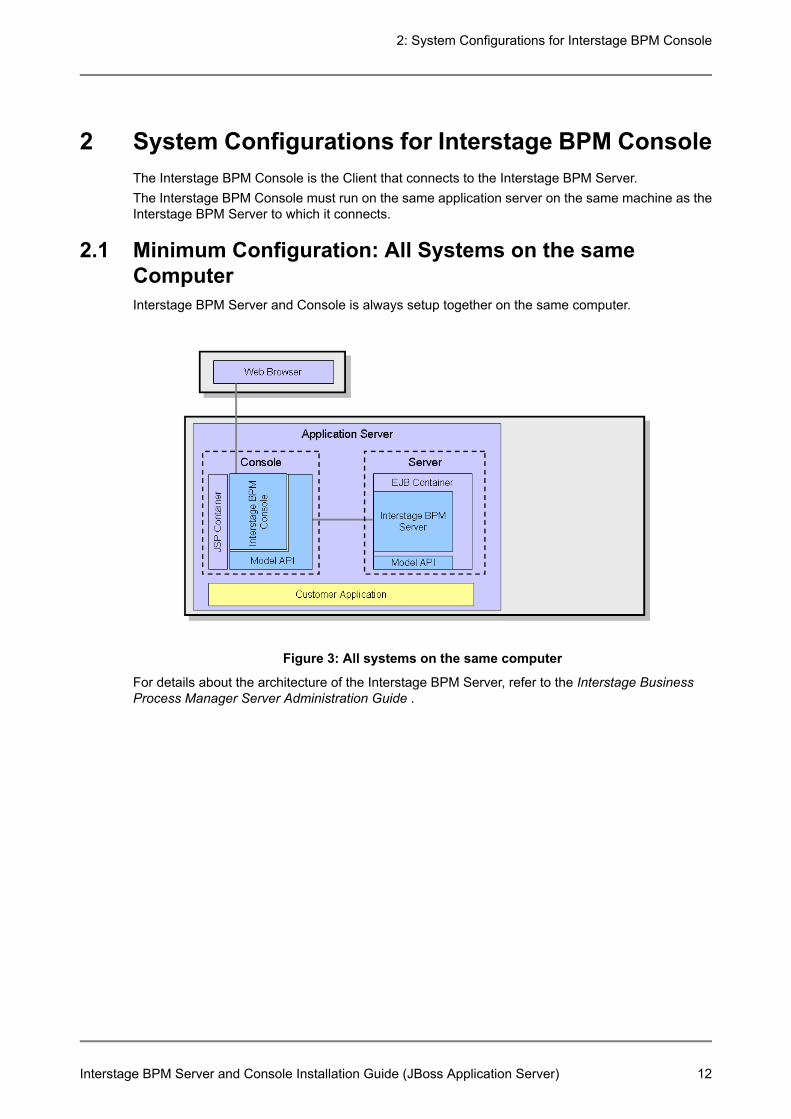
2 System Configurations for Interstage BPM ConsoleThe Interstage BPM Console is the Client that connects to the Interstage BPM Server.The Interstage BPM Console must run on the same application server on the same machine as theInterstage BPM Server to which it connects.
2.1 Minimum Configuration: All Systems on the sameComputerInterstage BPM Server and Console is always setup together on the same computer.
Figure 3: All systems on the same computer
For details about the architecture of the Interstage BPM Server, refer to the Interstage BusinessProcess Manager Server Administration Guide .
Interstage BPM Server and Console Installation Guide (JBoss Application Server) 12
2: System Configurations for Interstage BPM Console

3 System Requirements for Interstage BPM Serverand Console
3.1 Hardware Requirements for Interstage BPM Server andConsole
Machine and Processor
ProcessorMachineOperatingSystem
Minimum: Intel® Xeon® processor,2GHz, 2 Core or greater
Fujitsu PRIMERGY or other IntelArchitecture servers
Windows
Minimum: SPARC64 V (kernel arch:sun4u/sun4us/sun4d) processor, 1.1GHz, 2 Core or greater
Fujitsu PRIMEPOWER or other Solarisservers
Solaris
Minimum: Intel® Xeon® processor,2GHz, 2 Core or greater
Fujitsu PRIMERGY or other IntelArchitecture server
Linux
MemoryMinimum: 2 GB
Hard DriveInterstage BPM setup: 300 MBDatabase server installation: Please refer to the product documentation.Database space: The amount of database space required depends upon your business situation.Please contact your Local Fujitsu Support Organization for more information about the estimation.
3.2 Minimum Software Requirements for Server and ConsoleFor software requirements for the server, refer to the Interstage BPM Server Release Notes.For software requirements for the Console, refer to the Interstage BPM Console Release Notes.
3.3 MinimumSoftware Requirements forWebBrowser ClientsFor software requirements for the client machines connecting to the Console remotely, refer to theRelease Notes.
Interstage BPM Server and Console Installation Guide (JBoss Application Server) 13
3: System Requirements for Interstage BPM Server and Console
4 Preparing for Setup of Interstage BPM Server andConsoleThis chapter explains how to set up your environment before executing setup of Interstage BPM.
4.1 Database Server PreparationThis section provides instructions in configuring your database software for use by Interstage BPM.You must create a new database instance for Interstage BPM. When setting up the Interstage BPMServer and Console, you will specify this instance. These instructions use the default databaseinstance for the purpose of providing an example.
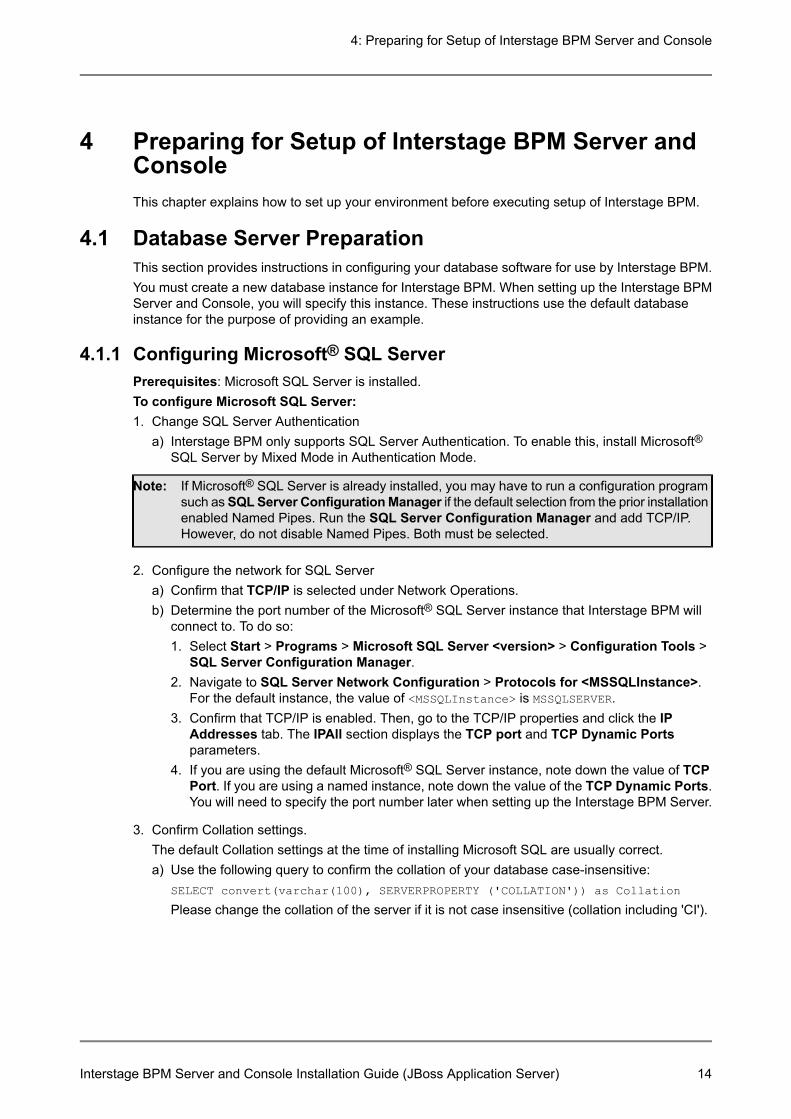
4.1.1 Configuring Microsoft® SQL ServerPrerequisites: Microsoft SQL Server is installed.To configure Microsoft SQL Server:1. Change SQL Server Authentication
a) Interstage BPM only supports SQL Server Authentication. To enable this, install Microsoft®SQL Server by Mixed Mode in Authentication Mode.
If Microsoft® SQL Server is already installed, you may have to run a configuration programsuch asSQLServer ConfigurationManager if the default selection from the prior installationenabled Named Pipes. Run the SQL Server Configuration Manager and add TCP/IP.However, do not disable Named Pipes. Both must be selected.
Note:
2. Configure the network for SQL Servera) Confirm that TCP/IP is selected under Network Operations.b) Determine the port number of the Microsoft® SQL Server instance that Interstage BPM will
connect to. To do so:1. Select Start > Programs > Microsoft SQL Server <version> > Configuration Tools >
SQL Server Configuration Manager.2. Navigate to SQL Server Network Configuration > Protocols for <MSSQLInstance>.
For the default instance, the value of <MSSQLInstance> is MSSQLSERVER.3. Confirm that TCP/IP is enabled. Then, go to the TCP/IP properties and click the IP
Addresses tab. The IPAll section displays the TCP port and TCP Dynamic Portsparameters.
4. If you are using the default Microsoft® SQL Server instance, note down the value of TCPPort. If you are using a named instance, note down the value of the TCP Dynamic Ports.You will need to specify the port number later when setting up the Interstage BPM Server.
3. Confirm Collation settings.The default Collation settings at the time of installing Microsoft SQL are usually correct.a) Use the following query to confirm the collation of your database case-insensitive:
SELECT convert(varchar(100), SERVERPROPERTY ('COLLATION')) as Collation
Please change the collation of the server if it is not case insensitive (collation including 'CI').
Interstage BPM Server and Console Installation Guide (JBoss Application Server) 14
4: Preparing for Setup of Interstage BPM Server and Console
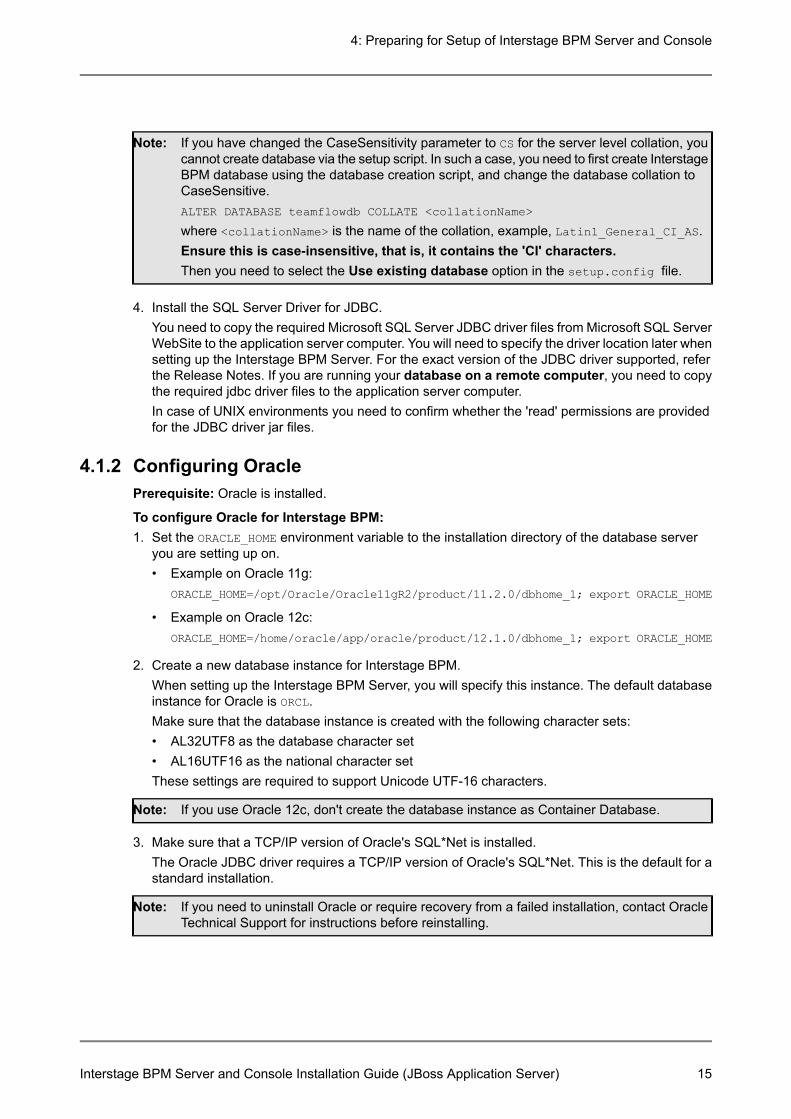
If you have changed the CaseSensitivity parameter to CS for the server level collation, youcannot create database via the setup script. In such a case, you need to first create InterstageBPM database using the database creation script, and change the database collation toCaseSensitive.ALTER DATABASE teamflowdb COLLATE <collationName>
where <collationName> is the name of the collation, example, Latin1_General_CI_AS.Ensure this is case-insensitive, that is, it contains the 'CI' characters.Then you need to select the Use existing database option in the setup.config file.
Note:
4. Install the SQL Server Driver for JDBC.You need to copy the required Microsoft SQL Server JDBC driver files from Microsoft SQL ServerWebSite to the application server computer. You will need to specify the driver location later whensetting up the Interstage BPM Server. For the exact version of the JDBC driver supported, referthe Release Notes. If you are running your database on a remote computer, you need to copythe required jdbc driver files to the application server computer.In case of UNIX environments you need to confirm whether the 'read' permissions are providedfor the JDBC driver jar files.
4.1.2 Configuring OraclePrerequisite: Oracle is installed.
To configure Oracle for Interstage BPM:1. Set the ORACLE_HOME environment variable to the installation directory of the database server
you are setting up on.• Example on Oracle 11g:
ORACLE_HOME=/opt/Oracle/Oracle11gR2/product/11.2.0/dbhome_1; export ORACLE_HOME
• Example on Oracle 12c:ORACLE_HOME=/home/oracle/app/oracle/product/12.1.0/dbhome_1; export ORACLE_HOME
2. Create a new database instance for Interstage BPM.When setting up the Interstage BPM Server, you will specify this instance. The default databaseinstance for Oracle is ORCL.Make sure that the database instance is created with the following character sets:• AL32UTF8 as the database character set• AL16UTF16 as the national character setThese settings are required to support Unicode UTF-16 characters.
If you use Oracle 12c, don't create the database instance as Container Database.Note:
3. Make sure that a TCP/IP version of Oracle's SQL*Net is installed.The Oracle JDBC driver requires a TCP/IP version of Oracle's SQL*Net. This is the default for astandard installation.
If you need to uninstall Oracle or require recovery from a failed installation, contact OracleTechnical Support for instructions before reinstalling.
Note:
Interstage BPM Server and Console Installation Guide (JBoss Application Server) 15
4: Preparing for Setup of Interstage BPM Server and Console

4. Install the Oracle Driver for JDBC.a) You need to copy the required Oracle JDBC driver files from Oracle WebSite to the application
server computer. You will need to specify the driver location later when setting up the InterstageBPM Server. For the exact version of the JDBC driver supported, refer the Release Notes. Ifyou are running your database on a remote computer, you need to copy the required jdbcdriver files to the application server computer.
b) In case of UNIX environments you need to confirm whether the 'read' permissions are providedfor the JDBC driver jar files.
4.1.3 Starting the Database ServerSince configuration information must be written to the database during setup, ensure that the databaseserver is running prior to setting up Interstage BPM Server. Start the database server according tothe documentation provided with your database server.
4.2 Application Server Preparation
4.2.1 Installing and Configuring JBoss EAP 6 for Interstage BPM Serverand ConsoleThe JBoss EAP 6 features two modes for running application server - Standalone and Domain.The Interstage BPM will be configured in domain mode that allows you to run and manage multipleservers from a single location (domain-controller). Note the following information:• The Interstage BPM server uses "full-ha" profile for setup.To install JBoss for Interstage BPM:1. For JBoss EAP 6, download the jboss-eap-6.[version].zip from the Red Hat website. The
zip file contains a ready-to-use JBoss Application Server installation.2. Unzip the downloaded file to a directory of your choice.
The JBoss installation path must not contain blanks or special characters such as ~ $ @.Note:
3. Verify that your JBoss installation directory contains at least the following subdirectories: <JBossInstallation Directory> is assumed to be JBoss here.
Figure 4: JBoss Installation Directory with Required Subdirectories
Interstage BPM Server and Console Installation Guide (JBoss Application Server) 16
4: Preparing for Setup of Interstage BPM Server and Console
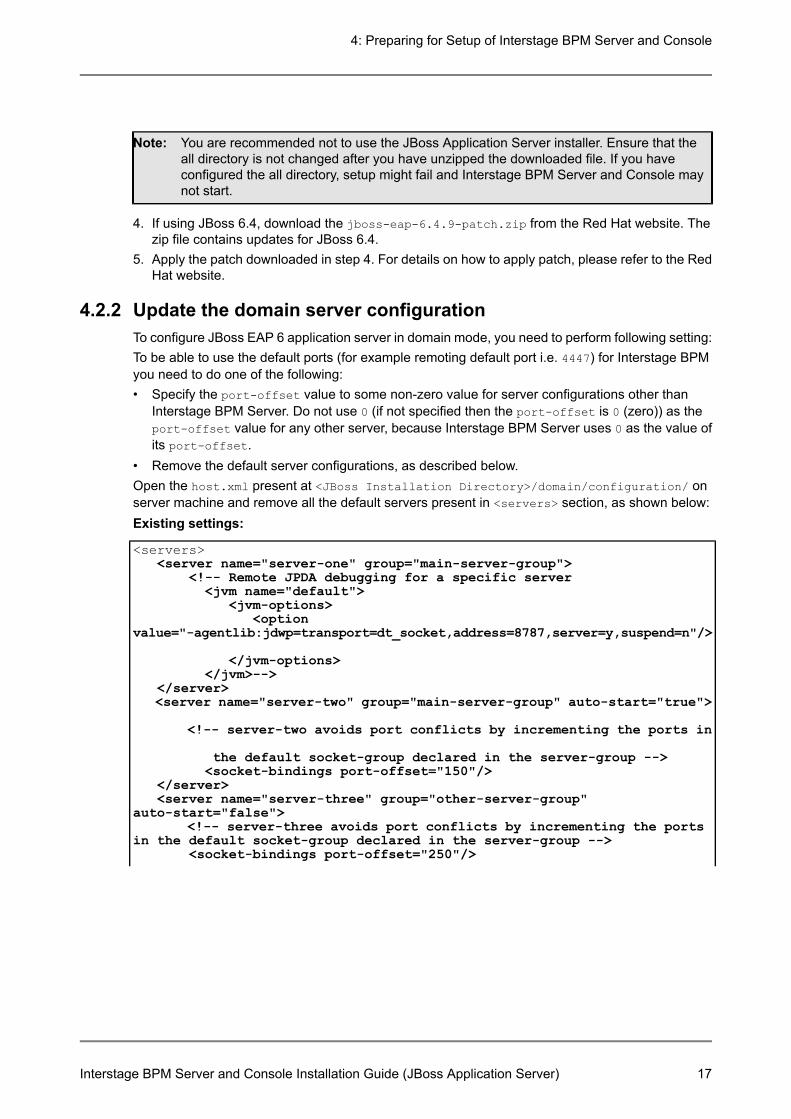
You are recommended not to use the JBoss Application Server installer. Ensure that theall directory is not changed after you have unzipped the downloaded file. If you haveconfigured the all directory, setup might fail and Interstage BPM Server and Console maynot start.
Note:
4. If using JBoss 6.4, download the jboss-eap-6.4.9-patch.zip from the Red Hat website. Thezip file contains updates for JBoss 6.4.
5. Apply the patch downloaded in step 4. For details on how to apply patch, please refer to the RedHat website.
4.2.2 Update the domain server configurationTo configure JBoss EAP 6 application server in domain mode, you need to perform following setting:To be able to use the default ports (for example remoting default port i.e. 4447) for Interstage BPMyou need to do one of the following:• Specify the port-offset value to some non-zero value for server configurations other than
Interstage BPM Server. Do not use 0 (if not specified then the port-offset is 0 (zero)) as theport-offset value for any other server, because Interstage BPM Server uses 0 as the value ofits port-offset.
• Remove the default server configurations, as described below.Open the host.xml present at <JBoss Installation Directory>/domain/configuration/ onserver machine and remove all the default servers present in <servers> section, as shown below:Existing settings:
<servers><server name="server-one" group="main-server-group">
<!-- Remote JPDA debugging for a specific server<jvm name="default">
<jvm-options><option
value="-agentlib:jdwp=transport=dt_socket,address=8787,server=y,suspend=n"/>
</jvm-options></jvm>-->
</server><server name="server-two" group="main-server-group" auto-start="true">
<!-- server-two avoids port conflicts by incrementing the ports in
the default socket-group declared in the server-group --><socket-bindings port-offset="150"/>
</server><server name="server-three" group="other-server-group"
auto-start="false"><!-- server-three avoids port conflicts by incrementing the ports
in the default socket-group declared in the server-group --><socket-bindings port-offset="250"/>
Interstage BPM Server and Console Installation Guide (JBoss Application Server) 17
4: Preparing for Setup of Interstage BPM Server and Console
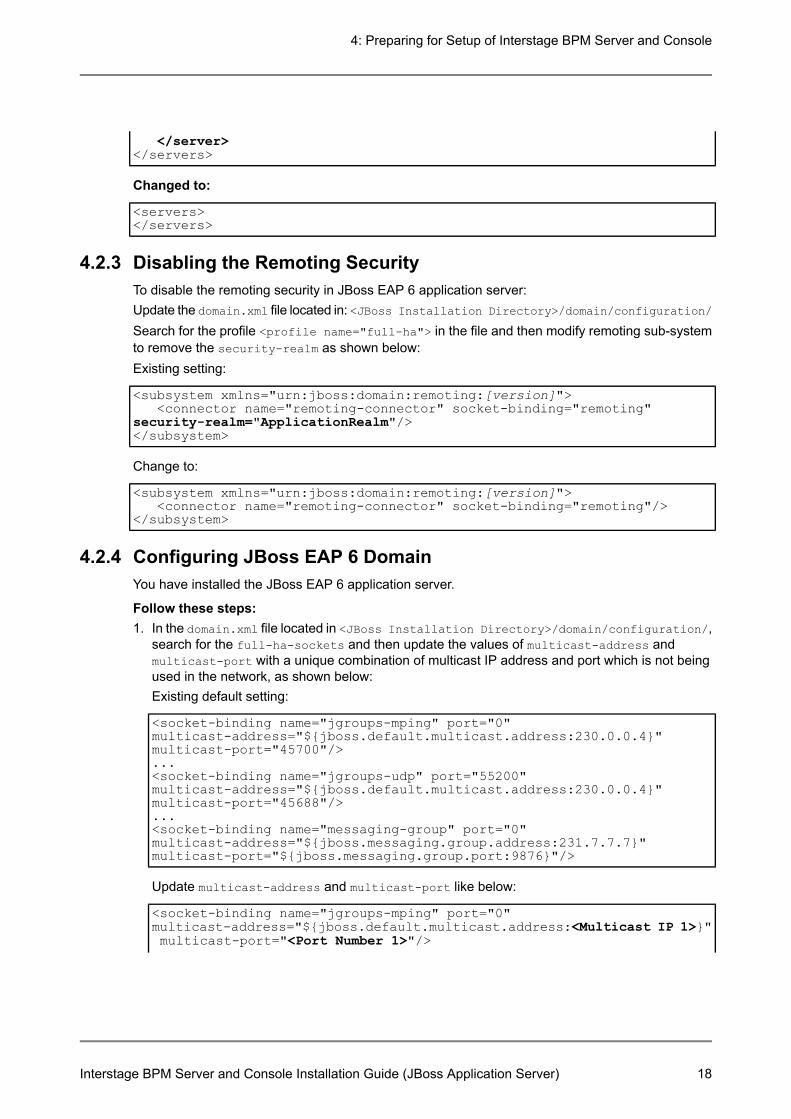
</server></servers>
Changed to:
<servers></servers>
4.2.3 Disabling the Remoting SecurityTo disable the remoting security in JBoss EAP 6 application server:Update the domain.xml file located in: <JBoss Installation Directory>/domain/configuration/
Search for the profile <profile name="full-ha"> in the file and then modify remoting sub-systemto remove the security-realm as shown below:Existing setting:
<subsystem xmlns="urn:jboss:domain:remoting:[version]"><connector name="remoting-connector" socket-binding="remoting"
security-realm="ApplicationRealm"/></subsystem>
Change to:
<subsystem xmlns="urn:jboss:domain:remoting:[version]"><connector name="remoting-connector" socket-binding="remoting"/>
</subsystem>
4.2.4 Configuring JBoss EAP 6 DomainYou have installed the JBoss EAP 6 application server.
Follow these steps:1. In the domain.xml file located in <JBoss Installation Directory>/domain/configuration/,
search for the full-ha-sockets and then update the values of multicast-address andmulticast-port with a unique combination of multicast IP address and port which is not beingused in the network, as shown below:Existing default setting:
<socket-binding name="jgroups-mping" port="0"multicast-address="${jboss.default.multicast.address:230.0.0.4}"multicast-port="45700"/>...<socket-binding name="jgroups-udp" port="55200"multicast-address="${jboss.default.multicast.address:230.0.0.4}"multicast-port="45688"/>...<socket-binding name="messaging-group" port="0"multicast-address="${jboss.messaging.group.address:231.7.7.7}"multicast-port="${jboss.messaging.group.port:9876}"/>
Update multicast-address and multicast-port like below:
<socket-binding name="jgroups-mping" port="0"multicast-address="${jboss.default.multicast.address:<Multicast IP 1>}"multicast-port="<Port Number 1>"/>
Interstage BPM Server and Console Installation Guide (JBoss Application Server) 18
4: Preparing for Setup of Interstage BPM Server and Console
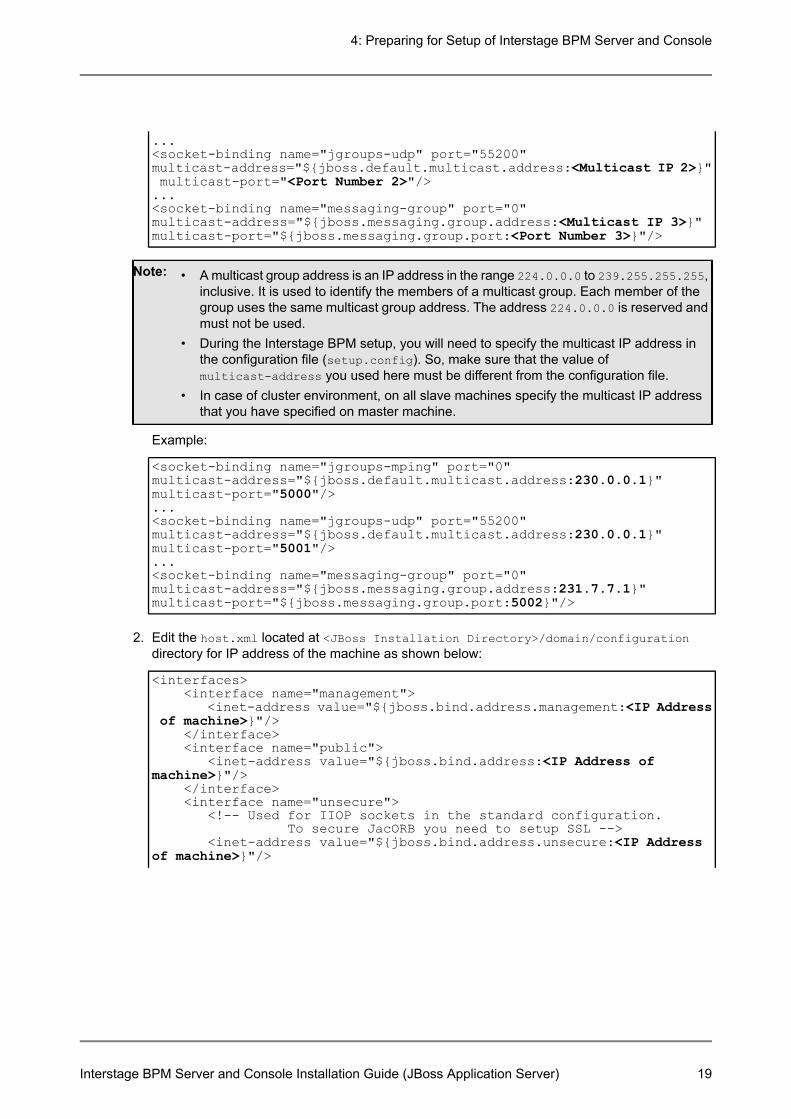
...<socket-binding name="jgroups-udp" port="55200"multicast-address="${jboss.default.multicast.address:<Multicast IP 2>}"multicast-port="<Port Number 2>"/>...<socket-binding name="messaging-group" port="0"multicast-address="${jboss.messaging.group.address:<Multicast IP 3>}"multicast-port="${jboss.messaging.group.port:<Port Number 3>}"/>
Note: • A multicast group address is an IP address in the range 224.0.0.0 to 239.255.255.255,inclusive. It is used to identify the members of a multicast group. Each member of thegroup uses the same multicast group address. The address 224.0.0.0 is reserved andmust not be used.
• During the Interstage BPM setup, you will need to specify the multicast IP address inthe configuration file (setup.config). So, make sure that the value ofmulticast-address you used here must be different from the configuration file.
• In case of cluster environment, on all slave machines specify the multicast IP addressthat you have specified on master machine.
Example:
<socket-binding name="jgroups-mping" port="0"multicast-address="${jboss.default.multicast.address:230.0.0.1}"multicast-port="5000"/>...<socket-binding name="jgroups-udp" port="55200"multicast-address="${jboss.default.multicast.address:230.0.0.1}"multicast-port="5001"/>...<socket-binding name="messaging-group" port="0"multicast-address="${jboss.messaging.group.address:231.7.7.1}"multicast-port="${jboss.messaging.group.port:5002}"/>
2. Edit the host.xml located at <JBoss Installation Directory>/domain/configurationdirectory for IP address of the machine as shown below:
<interfaces><interface name="management">
<inet-address value="${jboss.bind.address.management:<IP Addressof machine>}"/>
</interface><interface name="public">
<inet-address value="${jboss.bind.address:<IP Address ofmachine>}"/>
</interface><interface name="unsecure">
<!-- Used for IIOP sockets in the standard configuration.To secure JacORB you need to setup SSL -->
<inet-address value="${jboss.bind.address.unsecure:<IP Addressof machine>}"/>
Interstage BPM Server and Console Installation Guide (JBoss Application Server) 19
4: Preparing for Setup of Interstage BPM Server and Console
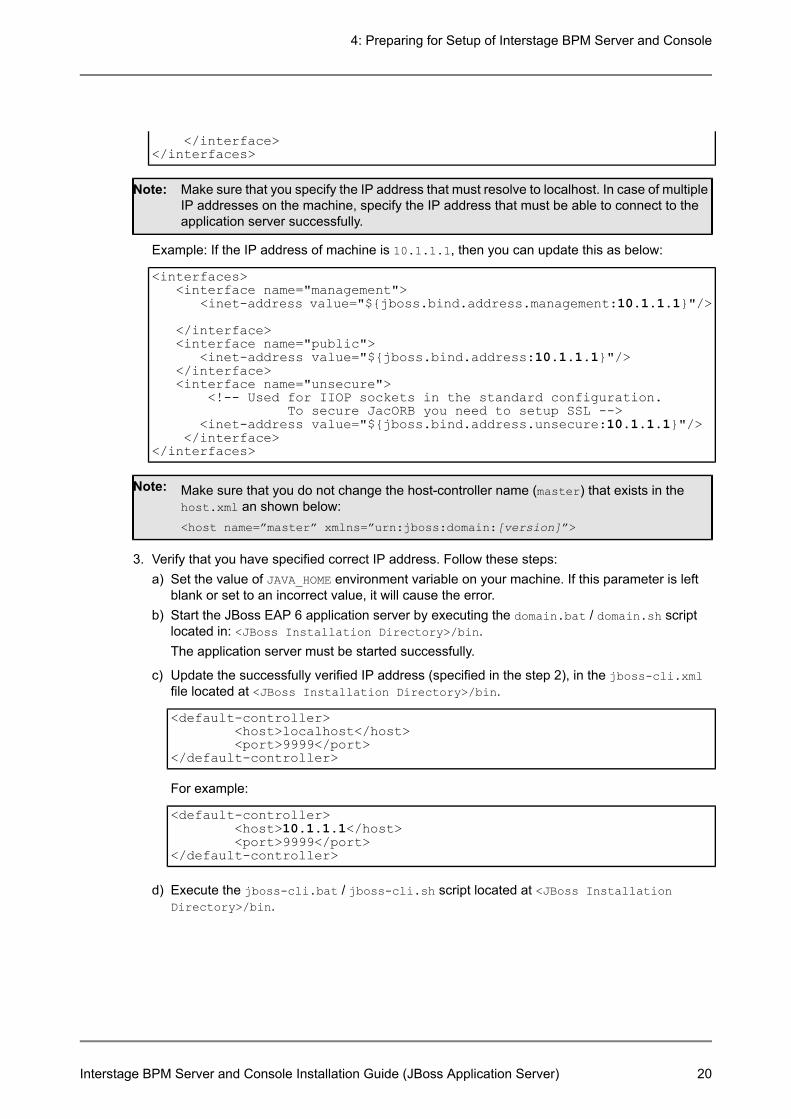
</interface></interfaces>
Make sure that you specify the IP address that must resolve to localhost. In case of multipleIP addresses on the machine, specify the IP address that must be able to connect to theapplication server successfully.
Note:
Example: If the IP address of machine is 10.1.1.1, then you can update this as below:
<interfaces><interface name="management">
<inet-address value="${jboss.bind.address.management:10.1.1.1}"/>
</interface><interface name="public">
<inet-address value="${jboss.bind.address:10.1.1.1}"/></interface><interface name="unsecure">
<!-- Used for IIOP sockets in the standard configuration.To secure JacORB you need to setup SSL -->
<inet-address value="${jboss.bind.address.unsecure:10.1.1.1}"/></interface>
</interfaces>
Make sure that you do not change the host-controller name (master) that exists in thehost.xml an shown below:<host name=”master” xmlns=”urn:jboss:domain:[version]”>
Note:
3. Verify that you have specified correct IP address. Follow these steps:a) Set the value of JAVA_HOME environment variable on your machine. If this parameter is left
blank or set to an incorrect value, it will cause the error.b) Start the JBoss EAP 6 application server by executing the domain.bat / domain.sh script
located in: <JBoss Installation Directory>/bin.The application server must be started successfully.
c) Update the successfully verified IP address (specified in the step 2), in the jboss-cli.xmlfile located at <JBoss Installation Directory>/bin.
<default-controller><host>localhost</host><port>9999</port>
</default-controller>
For example:
<default-controller><host>10.1.1.1</host><port>9999</port>
</default-controller>
d) Execute the jboss-cli.bat / jboss-cli.sh script located at <JBoss InstallationDirectory>/bin.
Interstage BPM Server and Console Installation Guide (JBoss Application Server) 20
4: Preparing for Setup of Interstage BPM Server and Console

e) Execute the below command to connect to JBoss application server:
connect
The connection should be established successfully.
4. Stop the JBoss application server according to the instructions in the section Starting InterstageBPM Server on page 35.
4.2.5 Setting-up the JDBC ModuleTo configure the JDBC module in Domain Mode:Follow these steps:1. Execute the jboss-cli.bat / jboss-cli.sh script located at <JBoss Installation
Directory>/bin/.2. Make sure that status of CLI is [disconnected] and then execute the below command:
[disconnected/]module add --name=<jdbc module name>--resources=<jdbc_jar_path>--dependencies=javax.api,javax.transaction.api
• <jdbc module name> is the name of the JDBC module that will be created. Please note downthis name because you will need to specify the same name in the configuration file later.
In case of cluster environment, the JDBC module name must be same on all cluster nodes.Note:
• <jdbc_jar_path> is the location of the jdbc jar file of the database you have selected.
Example for Oracle:
[disconnected/]module add --name=com.oracle.jdbc--resources=C:\PRG\jdbcjars\ojdbc7.jar--dependencies=javax.api,javax.transaction.api
For JBoss EAP 6.1.0, make sure that the jar file and JBoss6 both are present in the samedrive. Also, make sure that you do not include the drive name in the path. For example, incase of Oracle database, if the path of jar file is C:\PRG\jdbcjars\ojdbc7.jar then youmust specify \PRG\jdbcjars\ojdbc7.jar.
Note:
3. Execute the following command to exit from the CLI prompt:
[disconnected/]quit
If you need to remove this JDBC module, follow these steps:Note:1. Execute the jboss-cli.bat / jboss-cli.sh script located at <JBoss Installation
Directory>/bin
2. Execute the following commands:module remove --name=<jdbc module name>
Example for Oracle:module remove --name=com.oracle.jdbc
Interstage BPM Server and Console Installation Guide (JBoss Application Server) 21
4: Preparing for Setup of Interstage BPM Server and Console
4.3 Directory Server PreparationIf you use local user management system, you do not need to do this step. Local user managementsystem is user management function for Interstage BPM that is provided by Interstage BPM. In theLocal user management system, all of the users for Interstage BPM are created in the database.If you want to use external directory service to manage Interstage BPM users, you need to registerLDAP Access for users before setting up Interstage BPM Server and Console. How to setup externaldirectory service is described in Setting Up a Directory Service on page 38.
Interstage BPM Server and Console Installation Guide (JBoss Application Server) 22
4: Preparing for Setup of Interstage BPM Server and Console

5 Setting-up Interstage BPM Server and ConsoleFor Interstage BPM Server and Console, refer to System Requirements for Interstage BPM Serverand Console on page 13. Refer to the Release Notes for details on the required componentsmentioned in the procedures described in this chapter.If you want to change the Interstage BPM configuration after setup, you can do so by following theinstructions in the Interstage BPM Server Administration Guide.
5.1 Permissions Required for Setup
Permissions Required for SetupYou must have read, write and execute permissions on the setup directory of the Interstage BPMServer and Console.
On Solaris and Linux, if you are setting up as a non-root user, Interstage BPM Server willnot be installed as a package.
Note:
5.2 Overview of the Setup ProcedureThis section summarizes the steps required to setup the Interstage BPM Server and Console. Thesetup procedure depends on whether the database and the application server are installed on thesame or on different computers.To connect to a Directory Service and login to Interstage BPM, you must configure and start theDirectory Service before starting the Interstage BPM Server.
If you are upgrading from a previous version of Interstage BPM, refer Upgrading InterstageBPM from Previous Versions on page 61.
Note:
Running the Database and Interstage BPM Server, Console on the SameComputer1. Prepare the database and make sure that the database server is running.
Refer to section Database Server Preparation on page 14.
2. Prepare the application server and make sure it is running.Refer to section Application Server Preparation on page 16.
3. If you want to connect to a Directory Service, you must configure it before starting the InterstageBPM Server.Refer to chapter Setting Up a Directory Service on page 38.
4. Setup Interstage BPM.For setting Interstage BPM on the same computer, refer to section Setup Database and InterstageBPM on the Same Computer on page 24.
5. Switch on Java security.Refer to section Switching on Java Security on page 32.
6. Encrypt the password for datasource.Refer to section Encrypting the Password for Datasource on page 33.
Interstage BPM Server and Console Installation Guide (JBoss Application Server) 23
5: Setting-up Interstage BPM Server and Console
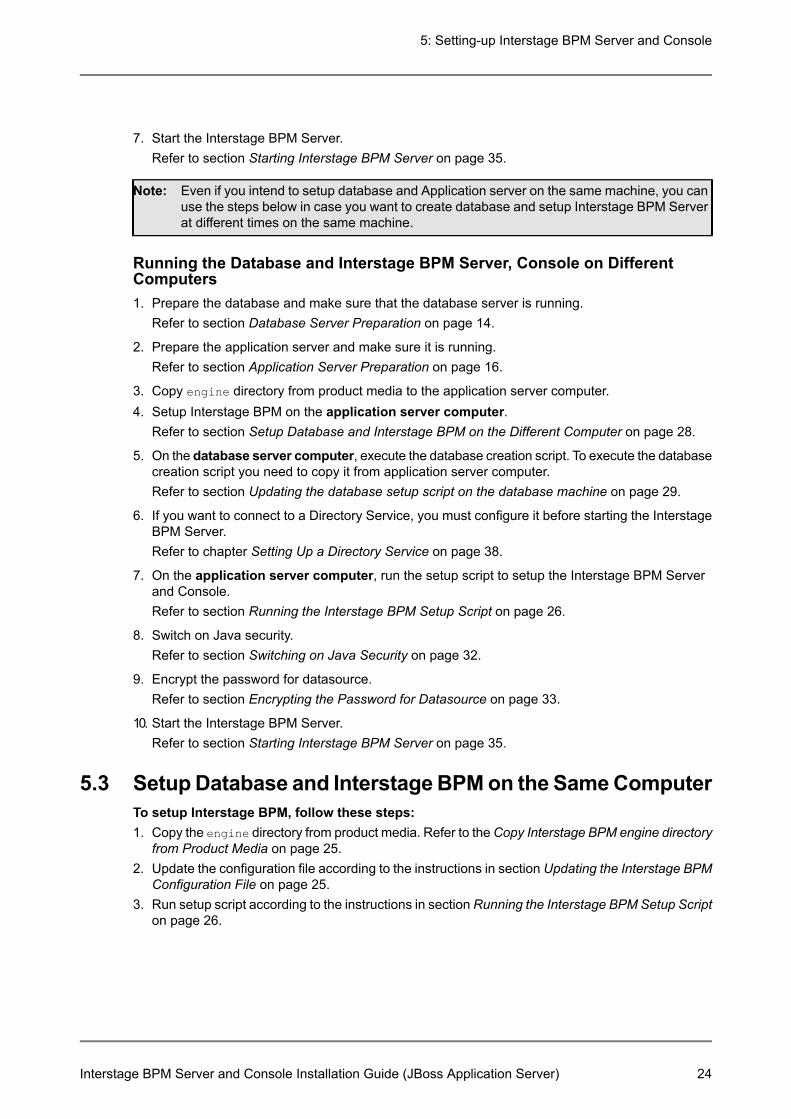
7. Start the Interstage BPM Server.Refer to section Starting Interstage BPM Server on page 35.
Even if you intend to setup database and Application server on the same machine, you canuse the steps below in case you want to create database and setup Interstage BPM Serverat different times on the same machine.
Note:
Running the Database and Interstage BPM Server, Console on DifferentComputers1. Prepare the database and make sure that the database server is running.
Refer to section Database Server Preparation on page 14.
2. Prepare the application server and make sure it is running.Refer to section Application Server Preparation on page 16.
3. Copy engine directory from product media to the application server computer.4. Setup Interstage BPM on the application server computer.
Refer to section Setup Database and Interstage BPM on the Different Computer on page 28.
5. On the database server computer, execute the database creation script. To execute the databasecreation script you need to copy it from application server computer.Refer to section Updating the database setup script on the database machine on page 29.
6. If you want to connect to a Directory Service, you must configure it before starting the InterstageBPM Server.Refer to chapter Setting Up a Directory Service on page 38.
7. On the application server computer, run the setup script to setup the Interstage BPM Serverand Console.Refer to section Running the Interstage BPM Setup Script on page 26.
8. Switch on Java security.Refer to section Switching on Java Security on page 32.
9. Encrypt the password for datasource.Refer to section Encrypting the Password for Datasource on page 33.
10. Start the Interstage BPM Server.Refer to section Starting Interstage BPM Server on page 35.
5.3 SetupDatabase and InterstageBPMon the SameComputerTo setup Interstage BPM, follow these steps:1. Copy the engine directory from product media. Refer to theCopy Interstage BPM engine directory
from Product Media on page 25.2. Update the configuration file according to the instructions in section Updating the Interstage BPM
Configuration File on page 25.3. Run setup script according to the instructions in sectionRunning the Interstage BPM Setup Script
on page 26.
Interstage BPM Server and Console Installation Guide (JBoss Application Server) 24
5: Setting-up Interstage BPM Server and Console
If any error occurs in the script execution, check the configuration file updated in step 2 and thenre-execute the setup script. However, if an error caused due to pre-exisitng components ofInterstage BPM, then you need to un-setup the Interstage BPM and again execute this setupscript. Refer to the Un-setup Interstage BPM Server and Console on page 58
5.3.1 Copy Interstage BPM engine directory from Product MediaTo copy Interstage BPM engine directory, follow these steps:1. Create a directory on your machine where you want to setup Interstage BPM and copy the engine
directory from Interstage BPM product media to the directory created on your machine.In case of UNIX environment, you must grant execute permissions to the script setup.sh file.
Make sure that there are no space character or special characters (such as '~', '$', '@') inthe path of directory where you are copying the engine directory.
Note:
5.3.2 Updating the Interstage BPM Configuration FileBefore execution of setup script, you need to update the configuration file for the values of parametersrequired to setup the Interstage BPM.Follow these steps:1. Open the setup.config file located in the <engine directory>/server directory in a text editor.
To edit setup.config file, use the text editor that can edit LF characters.Note:
2. Update the configuration parameters as described in the setup.config file. The parameters areclassified under following categories:
For security reasons, it is recommended that passwords should be specified from commandprompt as Command Line Parameters. For details, referRunning the Interstage BPMSetupScript on page 26. If passwords are specified in the configuration file, the file should besecured.
Note:
• Interstage BPM Environment Parameters: Specify the environment you have selected forsetting up the Interstage BPM. For example, specify the selected application server, database.execution_mode_selectionThis parameter specifies the mode of setup execution. Specify the value of this parameter as0 to setup the Interstage BPM Server and Console.database_creation_selectionThis parameter specifies whether the existing database is to be used or create a new database.
• Application Server Parameters: Specify the parameters only for the application server thatyou have selected for setting up the Interstage BPM.
• Database Parameters: Specify the parameters only for database that you have selected forsetting up the Interstage BPM.
• Interstage BPM System Administrator: Specify the parameters for system administrator(Super User).
• Interstage BPM Tenant: Specify the parameters for Tenant Administrator.
Interstage BPM Server and Console Installation Guide (JBoss Application Server) 25
5: Setting-up Interstage BPM Server and Console
If you want to use directory server to manage Interstage BPM users, refer to the sectionSetting Up a Directory Service on page 38 for more information on how to setup a directoryservice.
Note:
• Interstage BPM Console: Specify the parameters for Interstage BPM Console.
Notes about Parameters of Configuration FileRead the following instructions before updating the parameters values in configuration file.• db_ibpm_password:
• For SQL Server: By default, Microsoft SQL Server enforces a password policy that preventsusers from using simple passwords. Make sure that you enter a password that meets thepassword policy requirements. Otherwise, the setup will fail. For details on the password policy,refer to the Microsoft SQL Server documentation.
• db_port:• For SQL Server: Ensure that TCP/IP is selected under Network Operations while configuring
Microsoft SQL Server. Please refer to the section Configuring Microsoft® SQL Server on page14.
• For Oracle: The port number is typically 1521. You can check the actual port number in thetargets.xml file located in the <ORACLE_HOME>/<hostname>_<SID>/sysman/emd directory.
• db_instance_name• For Oracle: The connection identifier usually corresponds to the database name unless the
database name is longer than eight characters. In this case, a truncated version of the databasename is used. You can verify the actual connection identifier in the tnsnames.ora file locatedin the <ORACLE_HOME>/network/admin directory.
• LDAPAccessUserID: If you have selected a Directory Service, by default, the user accountdefined on this screen is also used to log into the Directory Service. If you want to use a differentuser, you must change the LDAPAccessUserID and LDAPAccessUserPassword configurationparameters of the Interstage BPM Server. Refer to the Server Administration Guide for moreinformation.
5.3.3 Running the Interstage BPM Setup ScriptBefore executing the setup script, do the following:• Set the value of JAVA_HOME environment variable on your machine. Specify the JDK version that
is mentioned in the Interstage BPM Server Release Notes . If this parameter is left blank or setto an incorrect value, it will cause the error.
• Make sure that the configuration file is updated properly.• Make sure JBoss EAP 6 application server is up and running by executing the domain.bat /
domain.sh script located in: <JBoss Installation Directory>/bin. Interstage BPM ServerRelease Notes.
Make sure that there are no space character or special characters (such as '~', '$', '@') inthe path of JDK.
Note:
JRE is not supported.Note:
Interstage BPM Server and Console Installation Guide (JBoss Application Server) 26
5: Setting-up Interstage BPM Server and Console
Execute Interstage BPM setup script:Run the following setup script located in the <engine directory>/server directory as mentionedbelow.• For Windows: setup.bat• For UNIX: setup.shExecute the setup script using the following command:• On Windows:
setup.bat [-<option>] [<parameter name>=<value>] [<parametername>=<value>]...
• On UNIX:
setup.sh [-<option>] [<parameter name>=<value>] [<parametername>=<value>]...
Options:• -configFilePath <Path of configuration file>: This option is used to specify the path of
configuration file located in a directory other than that of setup.bat / setup.sh.• -onlyValidation: This option is used to execute the setup script in validation mode. If you specify
this option, only the content of the configuration file is verified but the actual setup of InterstageBPM will not be performed.
Command Line Parameters:All the parameters specified in the setup.config file can be specified as the command lineparameters. The error occurs if you specify any parameter that is not supported. The format ofspecification is <parameter name>=<value>. You can specify multiple parameters delimited byspace character.If you want to use space character in the value of a parameter then you need to enclose entire<parameter name>=<value> in double quotes. For example: "DATAFILE_PATH=C:\ProgramFiles\Microsoft SQL Server\MSSQL11.MSSQLSERVER\MSSQL\DATA".If you want to use special characters on your shell, you need to escape such a character at thecommand line option. If you want to use un-escape character, you need to write in the setup.configfile.In the following example, path of setup.config file is specified, and password is set to the parameterof appserver_admin_password and db_admin_password. Also the setup script is executed inValidation mode.On Windows:
setup.bat -configFilePath C:\engine\server\setup.config –onlyValidationappserver_admin_password=password db_admin_password=password
On UNIX:
setup.sh -configFilePath /opt/FJSVibpm/engine/server/setup.config–onlyValidationappserver_admin_password=password db_admin_password=password
Interstage BPM Server and Console Installation Guide (JBoss Application Server) 27
5: Setting-up Interstage BPM Server and Console

How to Confirm Successful SetupAfter executing the setup, if you receive the Setup Successful message, then the setup of InterstageBPM server and console is completed successfully and you can now proceed to the next step.However, if you receive the Setup Failed: <error message> message, then it indicates that thesetup is failed due to some reason. You can check the cause of any errors that occur during setupby viewing the deployment.log file, located at the following location:• On Windows: <engine directory>\server\deployment\logs
• On UNIX: <engine directory>/server/deployment/logs
Each time you execute the setup script, the contents of deployment.log file will beoverwritten. In some cases like specifying inappropriate options, the log file might notgenerated.
Note:
When setup execution fails, depending on the cause of failure you might require to executeun-setup script. For further information, refer toUn-setup Interstage BPMServer and Consoleon page 58.
Note:
5.4 Setup Database and Interstage BPM on the DifferentComputerTo setup Interstage BPM, follow these steps:1. Copy the engine directory from Interstage BPM product media. Refer to the Copy Interstage
BPM engine directory from Product Media on page 25.2. Copy the database directory specific to database you are using. Refer to the Copy database
setup directory to database machine on page 283. Update and run the database setup script on the machine where database is installed according
to the instructions in section Updating the database setup script on the database machine onpage 29
4. Update the configuration parameters as described in the setup.config file. Refer to the sectionUpdate the configuration file on Interstage BPM Server machine on page 30.
5. Run setup script according to the instructions in sectionRunning the Interstage BPM Setup Scripton page 26.If any error occurs in the script execution, check the configuration file updated in step 4 and thenre-execute the setup script. However, if an error caused due to pre-existing components ofInterstage BPM, then you need to un-setup the Interstage BPM and again execute this setupscript. Refer to the Un-setup Interstage BPM Server and Console on page 58.
5.4.1 Copy database setup directory to database machineTo copy database setup directory, follow these steps:1. Copy the directory specific to database you are using from the <engine
directory>/server/deployment/dbsetup directory to the machine where database is installed.For Example:• For Oracle: oracle• For Microsoft SQL Server: sqlserver
Interstage BPM Server and Console Installation Guide (JBoss Application Server) 28
5: Setting-up Interstage BPM Server and Console

In this directory, only shell scripts and sql scripts are included. To use these scripts, you do notneed to install Java on the database machine.
In UNIX, you must grant following permissions for the directory you just copied (for example<engine directory>/server/deployment/dbsetup/oracle) to the user who executesthe scripts.
Note:
• Directory: 'Read', 'Write' and 'Execute' permissions.• All files: 'Read' permission.• All script (.sh) files: 'Execute' permission.
5.4.2 Updating the database setup script on the database machinePrerequisite: You have prepared the database server as instructed in section Database ServerPreparation on page 14.
To use the database creation script:1. Login to the machine where the database is installed.2. On the database machine, navigate to the directory where you copied the script files, and edit
the following parameters in the configuration file. The name of the configuration file depends onOperating System of the database machine as mentioned below:• For Windows: config.bat• For UNIX: config.sh
Note: • When editing parameters, do not include values in double-quotes. An example of thecorrect way to specify a value:DATAFILE_PATH=C:\Program Files\Microsoft SQLServer\MSSQL11.MSSQLSERVER\MSSQL\DATA.
• For security reasons, the password specified in the configuration file should be secured.
• Parameters common to all databases:• USER
Database User NameSample value: ibpmuser
• PASSWORDDatabase User Password
• For Oracle:• SID
Oracle System IDSample value: orcl
• SYSTEM_PASSWORDSystem User Password
• ORACLE_HOMEORACLE home directorySample value on Windows: C:\app\oracle\product\11.2.0\dbhome_1
Interstage BPM Server and Console Installation Guide (JBoss Application Server) 29
5: Setting-up Interstage BPM Server and Console
Sample value on UNIX: /opt/app/oracle/product/11.2.0/dbhome_1
• DATAFILE_PATHPath to store data filesSample value on Windows: C:\app\oracle\oradata\orc1Sample value on UNIX: /opt/app/oracle/oradata/orcl
• For SQL Server:• ADMIN_USER
Database Administrator UserSample value: sa
• ADMIN_PASSWORDDatabase Administrator Password
• PORTDatabase Port NumberSample value: 1433
• SQLSERVER_HOMESQLSERVER home directorySample value on Windows: C:\Program Files\Microsoft SQL Server
• DATAFILE_PATHPath to store data filesSample value on SQL Server 2012: C:\Program Files\Microsoft SQLServer\MSSQL11.MSSQLSERVER\MSSQL\DATA.
3. Run the setup script. The name of the setup script depends on Operating System of the databasemachine as mentioned below:• For Windows: dbsetup.bat• For UNIX: dbsetup.sh
Running these scripts causes the older database to be deleted. So, when you run thesescripts for the first time and if database does not exist on the machine, you will receive anerror message saying database deletion failed. This is correct behavior.
Note:
If you create database using the database creation script, validation is not performed bythe Setup Script. Therefore you need to confirm all of the preparation requirements describedin section Database Server Preparation on page 14.
Note:
5.4.3 Update the configuration file on Interstage BPM Server machineBefore executing the setup script, do the following:
To update the configuration file on Interstage BPM Server machine:1. Open the setup.config file located in the <engine directory>/server directory in a text editor.
Interstage BPM Server and Console Installation Guide (JBoss Application Server) 30
5: Setting-up Interstage BPM Server and Console

You can change the file name and location of these configuration files. The updated filename and location will need to be specified in the setup script in next step. For example,here we use setup.config as the configuration file name.
Note:
2. Update the configuration parameters as described in the setup.config file. The parameters areclassified under following categories:
For security reasons, it is recommended that passwords should be specified from commandprompt as Command Line Parameters. For details, referRunning the Interstage BPMSetupScript on page 26. If passwords are specified in the configuration file, the file should besecured.
Note:
• Interstage BPM Environment Parameters: Specify the environment you have selected forsetting up the Interstage BPM. For example specify the selected application server, database.execution_mode_selectionThis parameter specify the mode of setup execution. Specify the value of this parameter as0 to setup the Interstage BPM Server and Console.Database_creation_selectionThis parameter specify whether the existing database is to be used or create a new database.Specify the value of this parameter as 1 as the existing database is to be used.
• Application Server Parameters: Specify the parameters only for the application server thatyou have selected for setting up the Interstage BPM.
• Database Parameters: Specify the parameters only for database that you have selected forsetting up the Interstage BPM.
• Interstage BPM System Administrator: Specify the parameters for system administrator(Super User).
• Interstage BPM Tenant: Specify the parameters for Tenant Administrator.
If you want to use directory server to manage Interstage BPM users, refer to the sectionSetting Up a Directory Service on page 38 for more information on how to setup a directoryservice.
Note:
• Interstage BPM Console: Specify the parameters for Interstage BPM Console.
5.5 User Accounts and GroupsEvery user that is to work with Interstage BPM needs a user account and must be assigned to oneor more groups.
To create user accounts and groups that are valid for Interstage BPM, use only alphanumericcharacters, hyphens, and underscore characters ("_"). User names and group names mustnot begin with an at character ("@") as this is used to identify Agents in Interstage BPM.
Note:
Interstage BPM administrator accounts must be members of a special group named by defaultAdminRole.If you have configured the Interstage BPM Server to use a Directory Service, you need to configurethe Directory Service before starting the Interstage BPM Server. For details, refer to chapter SettingUp a Directory Service on page 38.
Interstage BPM Server and Console Installation Guide (JBoss Application Server) 31
5: Setting-up Interstage BPM Server and Console

If you have configured the Interstage BPM Server to use its local user store, the Interstage BPMSuper User account has already been created in the user store. There is no need to perform furtherconfiguration steps before starting the Interstage BPM Server. For details on creating additional useraccounts and groups, refer to the Interstage Business Process Manager User's Guide.
5.6 Switching on Java SecuritySetup script setup the Interstage BPM in SaaS mode. In SaaS mode, it is critical to ensure that eachtenant has access to only their own resources, and no other tenant's resources. To achieve thissecurity, you need to manually switch on Java security. If you use only the default tenant or you don'tneed to achieve the security, you don't have to switch on Java security.The tenant resources to be uploaded to server are stored to the directory corresponding to tenantname in <engine directory>. Without switching on Java security, there is no limitation to accessto external resources from a custom JavaAction or a Java class of agent. In this case, you can accessto any resource and execute it.With switching on Java security, the permissions enable access restrictions by using the customclass loader of Interstage BPM. If lacking for execution permissions by default to perform a workflowapplication, you can add the lacking permissions by editing the policy.xml file to grant them.
The policy.xml file is provided by Interstage BPM itself. For details, refer to ChangingTenant Resource Permissions in Administration Guide.
Note:
For JBoss:1. When you setup Interstage BPM, a policy.txt file is created at <engine
directory>/server/instance/default/resources. Confirm that the content of this policy.txtfile is as given below:
grant {permission java.security.AllPermission;
};
2. Uncomment the SECMGR="true" line in the below configuration file for JBoss.• For Windows: <JBoss Installation Directory>\bin\domain.conf.bat
• For UNIX: <JBoss Installation Directory>/bin/domain.conf
This step is not required for JBoss EAP 6.1.0/6.2.0.Note:
3. Append the following new Java VM options for the <jvm-options> element in host.xml locatedin the <JBoss Installation Directory>/domain/configuration/ directory.
<servers><server name="ibpm-server" group="iflow-server-group" auto-start="true">
<jvm name="default"><jvm-options><option value="-Djava.security.policy=<engine
directory>/server/instance/default/resources/policy.txt"/></jvm-options></jvm>...
Interstage BPM Server and Console Installation Guide (JBoss Application Server) 32
5: Setting-up Interstage BPM Server and Console
</server></servers>
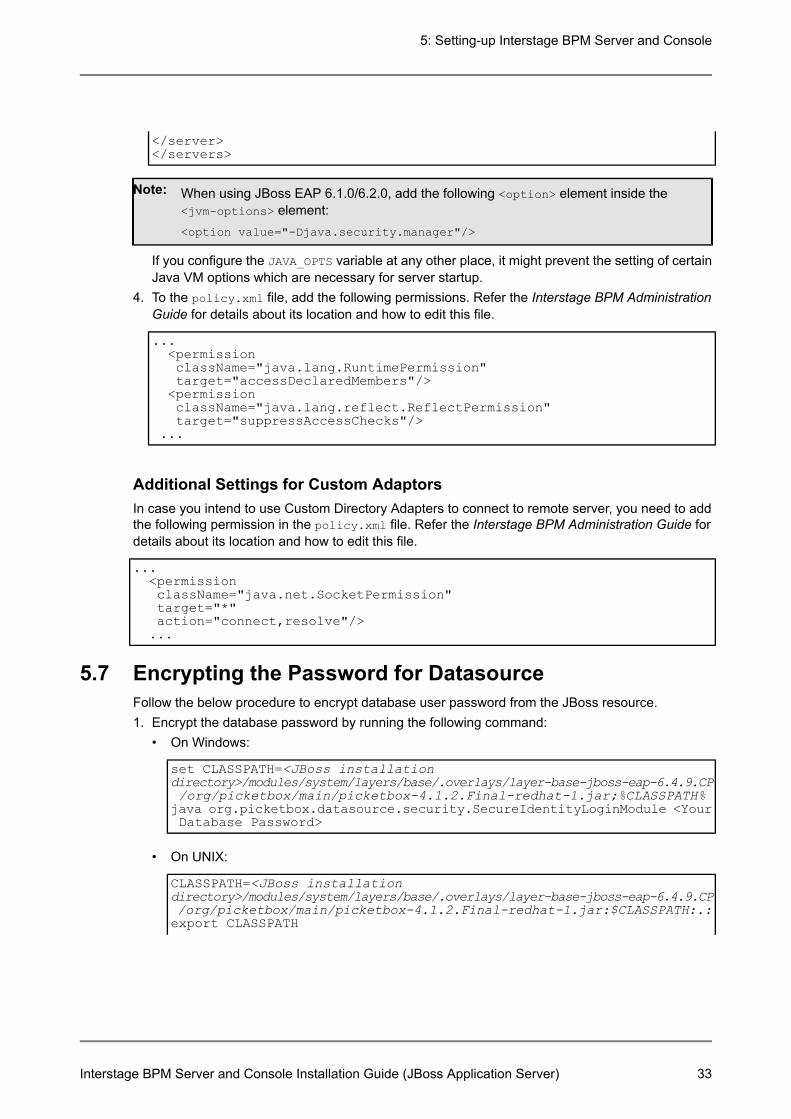
When using JBoss EAP 6.1.0/6.2.0, add the following <option> element inside the<jvm-options> element:<option value="-Djava.security.manager"/>
Note:
If you configure the JAVA_OPTS variable at any other place, it might prevent the setting of certainJava VM options which are necessary for server startup.
4. To the policy.xml file, add the following permissions. Refer the Interstage BPM AdministrationGuide for details about its location and how to edit this file.
...<permissionclassName="java.lang.RuntimePermission"target="accessDeclaredMembers"/><permissionclassName="java.lang.reflect.ReflectPermission"target="suppressAccessChecks"/>
...
Additional Settings for Custom AdaptorsIn case you intend to use Custom Directory Adapters to connect to remote server, you need to addthe following permission in the policy.xml file. Refer the Interstage BPM Administration Guide fordetails about its location and how to edit this file.
...<permissionclassName="java.net.SocketPermission"target="*"action="connect,resolve"/>...
5.7 Encrypting the Password for DatasourceFollow the below procedure to encrypt database user password from the JBoss resource.1. Encrypt the database password by running the following command:
• On Windows:
set CLASSPATH=<JBoss installationdirectory>/modules/system/layers/base/.overlays/layer-base-jboss-eap-6.4.9.CP/org/picketbox/main/picketbox-4.1.2.Final-redhat-1.jar;%CLASSPATH%java org.picketbox.datasource.security.SecureIdentityLoginModule <YourDatabase Password>
• On UNIX:
CLASSPATH=<JBoss installationdirectory>/modules/system/layers/base/.overlays/layer-base-jboss-eap-6.4.9.CP/org/picketbox/main/picketbox-4.1.2.Final-redhat-1.jar:$CLASSPATH:.:export CLASSPATH
Interstage BPM Server and Console Installation Guide (JBoss Application Server) 33
5: Setting-up Interstage BPM Server and Console
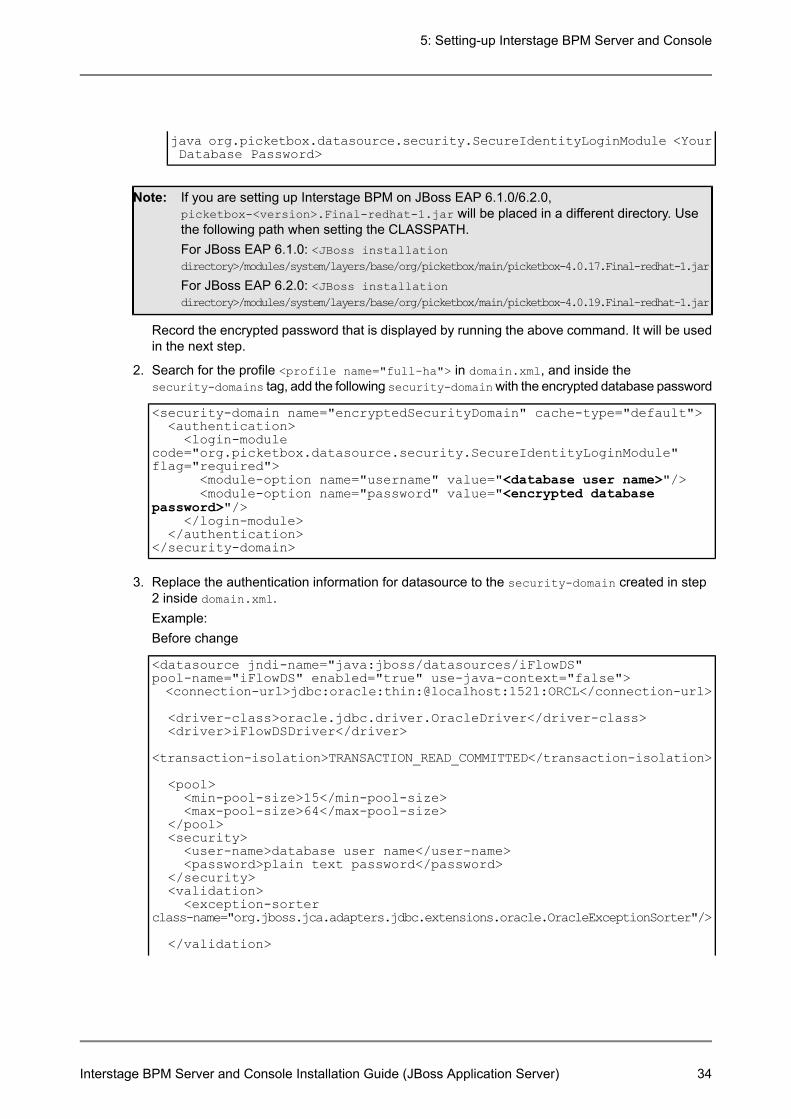
java org.picketbox.datasource.security.SecureIdentityLoginModule <YourDatabase Password>
If you are setting up Interstage BPM on JBoss EAP 6.1.0/6.2.0,picketbox-<version>.Final-redhat-1.jar will be placed in a different directory. Usethe following path when setting the CLASSPATH.For JBoss EAP 6.1.0: <JBoss installationdirectory>/modules/system/layers/base/org/picketbox/main/picketbox-4.0.17.Final-redhat-1.jar
For JBoss EAP 6.2.0: <JBoss installationdirectory>/modules/system/layers/base/org/picketbox/main/picketbox-4.0.19.Final-redhat-1.jar
Note:
Record the encrypted password that is displayed by running the above command. It will be usedin the next step.
2. Search for the profile <profile name="full-ha"> in domain.xml, and inside thesecurity-domains tag, add the following security-domainwith the encrypted database password
<security-domain name="encryptedSecurityDomain" cache-type="default"><authentication><login-module
code="org.picketbox.datasource.security.SecureIdentityLoginModule"flag="required">
<module-option name="username" value="<database user name>"/><module-option name="password" value="<encrypted database
password>"/></login-module>
</authentication></security-domain>
3. Replace the authentication information for datasource to the security-domain created in step2 inside domain.xml.Example:Before change
<datasource jndi-name="java:jboss/datasources/iFlowDS"pool-name="iFlowDS" enabled="true" use-java-context="false"><connection-url>jdbc:oracle:thin:@localhost:1521:ORCL</connection-url>
<driver-class>oracle.jdbc.driver.OracleDriver</driver-class><driver>iFlowDSDriver</driver>
<transaction-isolation>TRANSACTION_READ_COMMITTED</transaction-isolation>
<pool><min-pool-size>15</min-pool-size><max-pool-size>64</max-pool-size>
</pool><security><user-name>database user name</user-name><password>plain text password</password>
</security><validation><exception-sorter
class-name="org.jboss.jca.adapters.jdbc.extensions.oracle.OracleExceptionSorter"/>
</validation>
Interstage BPM Server and Console Installation Guide (JBoss Application Server) 34
5: Setting-up Interstage BPM Server and Console

<timeout><blocking-timeout-millis>10000</blocking-timeout-millis><idle-timeout-minutes>0</idle-timeout-minutes>
</timeout></datasource>
After change
<datasource jndi-name="java:jboss/datasources/iFlowDS"pool-name="iFlowDS" enabled="true" use-java-context="false"><connection-url>jdbc:oracle:thin:@localhost:1521:ORCL</connection-url>
<driver-class>oracle.jdbc.driver.OracleDriver</driver-class><driver>iFlowDSDriver</driver>
<transaction-isolation>TRANSACTION_READ_COMMITTED</transaction-isolation>
<pool><min-pool-size>15</min-pool-size><max-pool-size>64</max-pool-size>
</pool><security><security-domain>encryptedSecurityDomain</security-domain>
</security><validation><exception-sorter
class-name="org.jboss.jca.adapters.jdbc.extensions.oracle.OracleExceptionSorter"/>
</validation><timeout><blocking-timeout-millis>10000</blocking-timeout-millis><idle-timeout-minutes>0</idle-timeout-minutes>
</timeout></datasource>
4. Remove the passwords from backup files of domain.xml. Datasource passwords are also recordedin domain.v<number>.xml under <JBoss Installationdirectory>/domain/configuration/domain_xml_history/<serial number>. The file is keptas a backup of domain.xml files and not used during operation. Please remove the passwordsfrom the files for security reasons.
5.8 Starting Interstage BPM ServerPrerequisites:• You have finished the setup script successfully. For details, refer Running the Interstage BPM
Setup Script on page 26.
If you are setting up Interstage BPM on JBoss EAP 6.2.0 or later, add system parameterByPassJBoss6EjbLoadAfterEjbCreatewith the value false before starting the InterstageBPM. For information on how to add new system property, please refer to section Usingthe Configuration Export and Import Scripts on page 78.
Note:
You start the Interstage BPM Server by starting the JBoss Application Server.To start the server:Run domain.bat / domain.sh located in the <JBoss Installation Directory>/bin directory.
Interstage BPM Server and Console Installation Guide (JBoss Application Server) 35
5: Setting-up Interstage BPM Server and Console
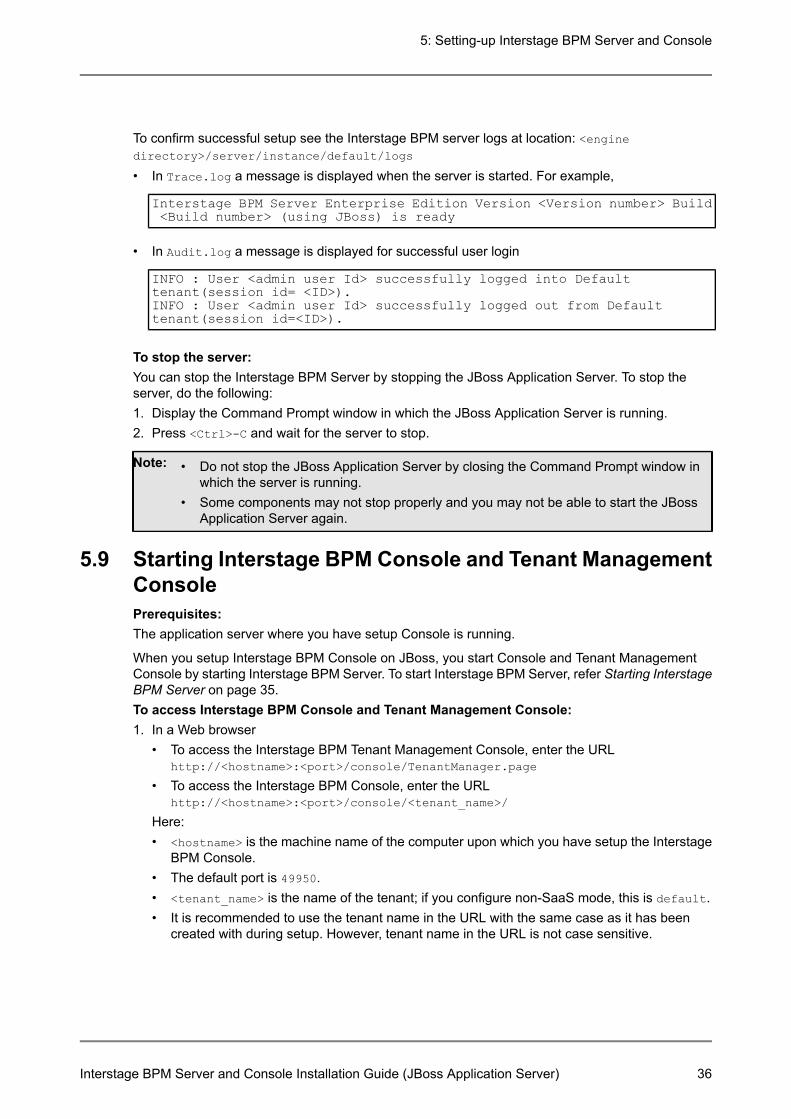
To confirm successful setup see the Interstage BPM server logs at location: <enginedirectory>/server/instance/default/logs
• In Trace.log a message is displayed when the server is started. For example,
Interstage BPM Server Enterprise Edition Version <Version number> Build<Build number> (using JBoss) is ready
• In Audit.log a message is displayed for successful user login
INFO : User <admin user Id> successfully logged into Defaulttenant(session id= <ID>).INFO : User <admin user Id> successfully logged out from Defaulttenant(session id=<ID>).
To stop the server:You can stop the Interstage BPM Server by stopping the JBoss Application Server. To stop theserver, do the following:1. Display the Command Prompt window in which the JBoss Application Server is running.2. Press <Ctrl>-C and wait for the server to stop.
Note: • Do not stop the JBoss Application Server by closing the Command Prompt window inwhich the server is running.
• Some components may not stop properly and you may not be able to start the JBossApplication Server again.
5.9 Starting Interstage BPM Console and Tenant ManagementConsolePrerequisites:The application server where you have setup Console is running.
When you setup Interstage BPM Console on JBoss, you start Console and Tenant ManagementConsole by starting Interstage BPM Server. To start Interstage BPM Server, refer Starting InterstageBPM Server on page 35.To access Interstage BPM Console and Tenant Management Console:1. In a Web browser
• To access the Interstage BPM Tenant Management Console, enter the URLhttp://<hostname>:<port>/console/TenantManager.page
• To access the Interstage BPM Console, enter the URLhttp://<hostname>:<port>/console/<tenant_name>/
Here:• <hostname> is the machine name of the computer upon which you have setup the Interstage
BPM Console.• The default port is 49950.• <tenant_name> is the name of the tenant; if you configure non-SaaS mode, this is default.• It is recommended to use the tenant name in the URL with the same case as it has been
created with during setup. However, tenant name in the URL is not case sensitive.
Interstage BPM Server and Console Installation Guide (JBoss Application Server) 36
5: Setting-up Interstage BPM Server and Console
The Login page appears.
2. Log on to Console or Tenant Management Console.
You can now begin using Interstage BPM Console and Tenant Management Console. Refer theInterstage BPMConsole Online Help and Interstage BPM Tenant Management Console Online Helpfor details.
5.9.1 Starting Interstage BPM Mobile ApplicationTo start Interstage BPM Mobile Application:1. In your mobile device's Browser, open the Interstage BPM Mobile application at the following
URL: http://<hostname>:<port>/console/<tenant_name>/
The Login page appears.
2. Log on to Interstage BPM Mobile application.
You can now begin using Interstage BPM Mobile application. Refer the Interstage BPM ConsoleOnline Help for details.
5.10 Starting Interstage BPM OpenID ProviderPrerequisites: The application server where you have setup OpenID Provider is running.
When you setup Interstage BPM OpenID Provider on JBoss, you start OpenID Provider by startingInterstage BPM Server. To start Interstage BPM Server, refer Starting Interstage BPM Server onpage 35.
Interstage BPM Server and Console Installation Guide (JBoss Application Server) 37
5: Setting-up Interstage BPM Server and Console
6 Setting Up a Directory ServiceThis chapter provides instructions for setting up your Directory Service.
6.1 Setting Up Microsoft® Active DirectoryThis section provides instructions for setting up Microsoft® Active Directory. Active Directory uses aform of the Lightweight Directory Access Protocol (LDAP). Like all LDAP-type Directory Services,Active Directory organizes people into Groups, and maintains a user profile with the appropriatepermissions for each user.The Active Directory setup procedure must be performed on the domain controller for your networkby an Administrator.
6.1.1 Configuring Users and Groups for Interstage BPM with GUI ofMicrosoft® Active DirectoryThis section explains how to configure users and groups for Interstage BPM with the GUI of MicrosoftActive Directory.1. Create an Organizational Unit (ou) named as Groups.
This ou should also be specified in the setup.config file during Interstage BPM setup. (You canchange this value to another value.)a) Open the Active Directory Management Console (Active Directory Users and Computers).b) In the Console tree, right-click the required domain, select New, and click Organizational
Unit.c) Type the name of the organizational unit (Groups).The following are common rules for configuring users and groups for Interstage BPM:• To create Groups that are valid for Interstage BPM, use only alphanumeric characters, hyphens,
and underscore characters ("_"). Group names must not begin with an 'at' character ("@") asthis is used to identify Agents in Interstage BPM.
2. Create an Organizational Unit (ou) named as People.(You cannot change this value to another value.)a) Open the Active Directory Management Console (Active Directory Users and Computers).b) In the Console tree, right-click the required domain, select New, and click Organizational
Unit.c) Type the name of the organizational unit (People).
Interstage BPM Server and Console Installation Guide (JBoss Application Server) 38
6: Setting Up a Directory Service

At this point, the directory tree of LDAP root looks as follows:
Figure 5: Creating Groups and People
3. Create LDAP-access user.This user is specified as SuperUser during the setup of Interstage BPM. For example, here weuse ibpm_server1 as LDAP-access user.a) Open the Active Directory Management Console (Active Directory Users and Computers).b) Right-click the People object, click New, and select User.c) Enter the new user's information for ibpm_server1 and click Next.
For the user, Active Directory requires you to provide a First name, Last name, Full name,and User logon name. Interstage BPM requires both a user login name and password to login.
If you use Built-in SSO authentication, do not include any forwardslash "/" or backslash '\'characters in the user ID that you create.
Note:
d) Enter the user's password, and click Next.e) Confirm the adding of the new user by clicking Finish in the confirmation dialog box.
Although entering a password and confirming it are optional for Active Directory, InterstageBPM requires a password to log in. The other fields such as E-Mail, Phone, and Fax arenot used by Interstage BPM.
Note:
Interstage BPM Server and Console Installation Guide (JBoss Application Server) 39
6: Setting Up a Directory Service
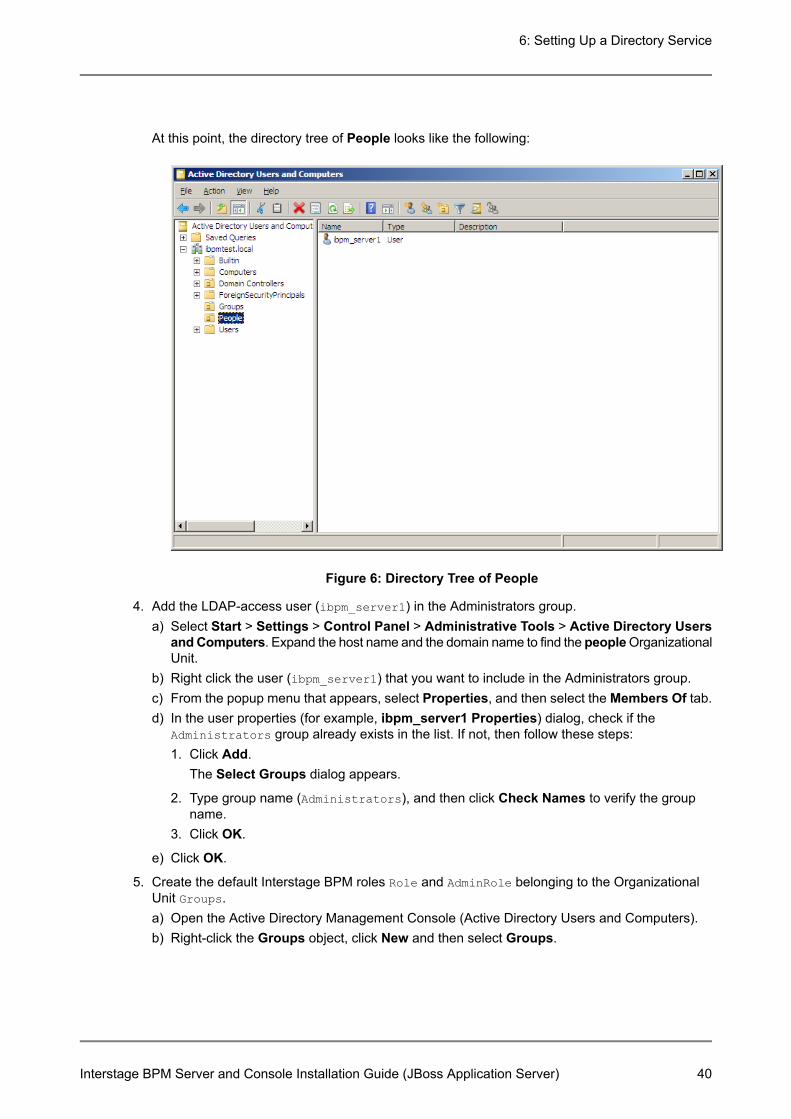
At this point, the directory tree of People looks like the following:
Figure 6: Directory Tree of People
4. Add the LDAP-access user (ibpm_server1) in the Administrators group.a) Select Start > Settings > Control Panel > Administrative Tools > Active Directory Users
andComputers. Expand the host name and the domain name to find the peopleOrganizationalUnit.
b) Right click the user (ibpm_server1) that you want to include in the Administrators group.c) From the popup menu that appears, select Properties, and then select the Members Of tab.d) In the user properties (for example, ibpm_server1 Properties) dialog, check if the
Administrators group already exists in the list. If not, then follow these steps:1. Click Add.
The Select Groups dialog appears.
2. Type group name (Administrators), and then click Check Names to verify the groupname.
3. Click OK.
e) Click OK.
5. Create the default Interstage BPM roles Role and AdminRole belonging to the OrganizationalUnit Groups.a) Open the Active Directory Management Console (Active Directory Users and Computers).b) Right-click the Groups object, click New and then select Groups.
Interstage BPM Server and Console Installation Guide (JBoss Application Server) 40
6: Setting Up a Directory Service
c) Create the group's information for AdminRole.d) Double-click the AdminRole object, and navigate to the Member tab.e) Click Add, and enter ibpm_server1. Now ibpm_server1 is linked to AdminRole group.f) Repeat these steps to create the Role group, and add ibpm_server1 to the Role group.
After normal setup using Active Directory, the default Administrator Role is assigned to aGroup called AdminRole. You can change this default name by modifying the AdminRoleparameter of the Interstage BPM Server.
Note:
6. Create the IflowUsers group belonging to the Organizational Unit Groups.a) Open the Active Directory Management Console (Active Directory Users and Computers).b) Right-click the Groups object, click New and then select Groups.c) Create the group's information for IflowUsers. Also, create this object as Distribute.d) Double-click the IflowUsers object, and navigate to the Member tab.e) Click Add, and enter ibpm_server1.
7. Create the IflowGroups group belonging to the Organizational Unit Groups.a) Open the Active Directory Management Console (Active Directory Users and Computers).b) Right-click the Groups object, click New and then select Groups.c) Create the group's information for IflowGroups. Also, create this object as Distribute.d) Double-click the IflowGroups object, and navigate to the Member tab.e) Click Add, and enter AdminRole.f) Similarly, add Role to IflowGroups.
Interstage BPM Server and Console Installation Guide (JBoss Application Server) 41
6: Setting Up a Directory Service

At this point, the directory tree of Groups looks like the following:
Figure 7: Directory Tree of Groups
You have now completed the configuration for Active Directory. You can now setup Interstage BPMwith Microsoft Active Directory.
6.1.2 Using Existing Active Directory Users and GroupsIf you are new to Interstage BPM and are already using Active Directory as the Directory Service tomaintain your organization's Users and Groups, you can use your existing directory structure withInterstage BPM. You can do this by designating which of your LDAP Users and Groups you will beable to use in Interstage BPM. This involves the modification of two special LDAP Groups, IflowUsersand IflowGroups.To give your LDAP Users access to Interstage BPM as Interstage BPM users, add them as membersof the IflowUsers group. You can add each user individually or add a group that contains the users.Users in the group sub-levels will also have access permission. To use your LDAP Groups directlyin Interstage BPM add them as members of the IflowGroups group.
6.1.3 Adding New Users Using the GUITo create users that are valid for Interstage BPM, use only alphanumeric characters,hyphens, and underscore characters ("_"). User names must not begin with an at character("@") as this is used to identify Agents in Interstage BPM.
Note:
Interstage BPM Server and Console Installation Guide (JBoss Application Server) 42
6: Setting Up a Directory Service
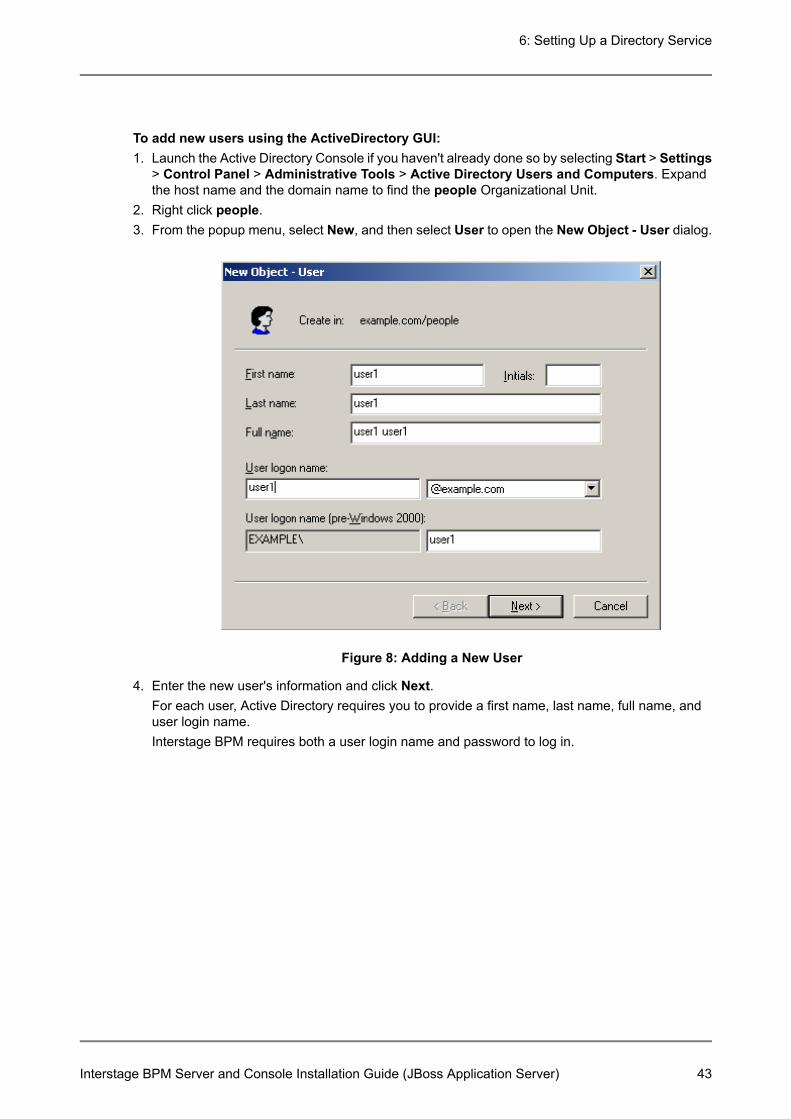
To add new users using the ActiveDirectory GUI:1. Launch the Active Directory Console if you haven't already done so by selecting Start > Settings
> Control Panel > Administrative Tools > Active Directory Users and Computers. Expandthe host name and the domain name to find the people Organizational Unit.
2. Right click people.3. From the popup menu, select New, and then select User to open the New Object - User dialog.
Figure 8: Adding a New User
4. Enter the new user's information and click Next.For each user, Active Directory requires you to provide a first name, last name, full name, anduser login name.Interstage BPM requires both a user login name and password to log in.
Interstage BPM Server and Console Installation Guide (JBoss Application Server) 43
6: Setting Up a Directory Service

5. Enter the user's password, and make sure that User must change password at next logoncheck box is not selected. Click Next.
Figure 9: Adding a New User
Interstage BPM Server and Console Installation Guide (JBoss Application Server) 44
6: Setting Up a Directory Service
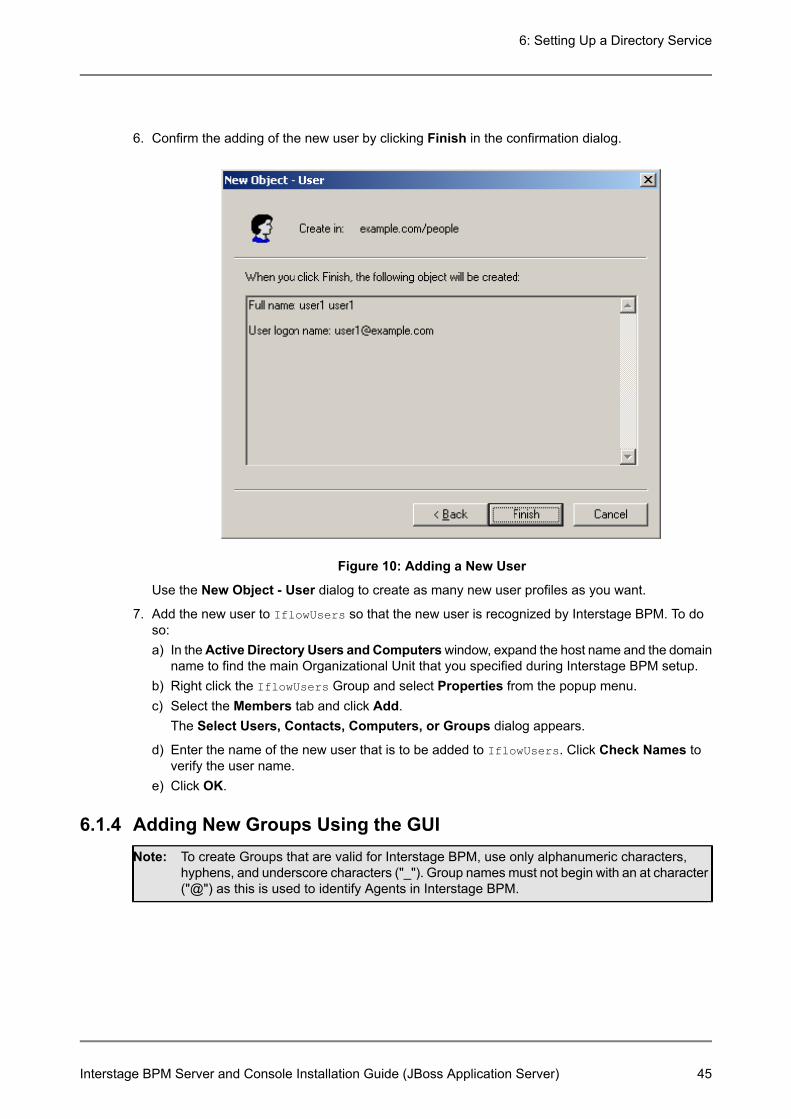
6. Confirm the adding of the new user by clicking Finish in the confirmation dialog.
Figure 10: Adding a New User
Use the New Object - User dialog to create as many new user profiles as you want.
7. Add the new user to IflowUsers so that the new user is recognized by Interstage BPM. To doso:a) In theActive Directory Users and Computerswindow, expand the host name and the domain
name to find the main Organizational Unit that you specified during Interstage BPM setup.b) Right click the IflowUsers Group and select Properties from the popup menu.c) Select the Members tab and click Add.
The Select Users, Contacts, Computers, or Groups dialog appears.
d) Enter the name of the new user that is to be added to IflowUsers. Click Check Names toverify the user name.
e) Click OK.
6.1.4 Adding New Groups Using the GUITo create Groups that are valid for Interstage BPM, use only alphanumeric characters,hyphens, and underscore characters ("_"). Group names must not begin with an at character("@") as this is used to identify Agents in Interstage BPM.
Note:
Interstage BPM Server and Console Installation Guide (JBoss Application Server) 45
6: Setting Up a Directory Service

To add a new Group using the GUI:1. Launch the Active Directory Console if you haven't already done so by selecting Start > Settings
> Control Panel > Administrative Tools > Active Directory Users and Computers. Expandthe host name and the domain name to find the groups Organizational Unit.
2. Right click groups.3. From the popup menu, select New, and then select Groups to open the New Object - Groups
dialog.4. Add the new Group's information, and then click OK to add your new Group.
In the example below, the Group Role is added.
Figure 11: Adding New Groups
5. Confirm the adding of the new Group by clicking Finish in the confirmation dialog box.Use the New Object - Groups dialog to create as many new user profiles as you want.For each Group, Active Directory requires you to provide a unique name for your Group.
6. Add the new Group to IflowGroups so that the new Group is recognized by Interstage BPM. Todo so:a) In theActive Directory Users and Computerswindow, expand the host name and the domain
name to find the main Organizational Unit that you specified during Interstage BPM setup.b) Right click the IflowGroups Group and select Properties from the popup menu.c) Select the Members tab and click Add.
The Select Users, Contacts, Computers, or Groups dialog appears.
Interstage BPM Server and Console Installation Guide (JBoss Application Server) 46
6: Setting Up a Directory Service

d) Enter the name of the new Group that is to be added to IflowGroups. Click Check Namesto verify the Group name.
e) Click OK.
6.1.5 Adding Members to a Group Using the GUITo add members to a Group using the GUI:1. Launch the Active Directory Console if you haven't already done so by selecting Start > Settings
> Control Panel > Administrative Tools > Active Directory Users and Computers. Expandthe hostname and the domain name to find the groups Organizational Unit.
2. Right click the group to which you want to add members.3. From the popup menu that appears select Properties, and then select theMembers tab to display
the Group's properties dialog.The Properties dialog for the group named "Role" is used in the following example. ibpm_exampleis already a member of the group named "Role". It is highly recommended that you use a groupwith a more meaningful name than "Role" in your own programming practice, since this nametends to be very confusing to talk about.
Figure 12: Adding Members
4. In the Role Properties dialog, click Add.
Interstage BPM Server and Console Installation Guide (JBoss Application Server) 47
6: Setting Up a Directory Service
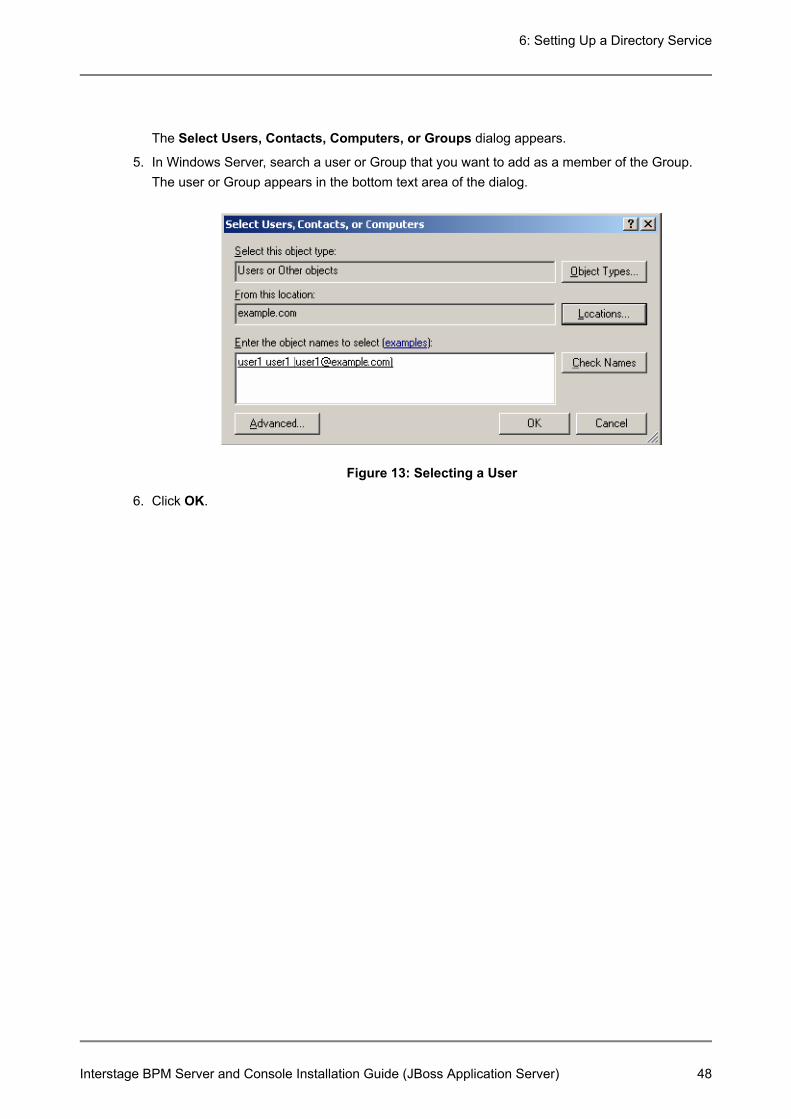
The Select Users, Contacts, Computers, or Groups dialog appears.
5. In Windows Server, search a user or Group that you want to add as a member of the Group.The user or Group appears in the bottom text area of the dialog.
Figure 13: Selecting a User
6. Click OK.
Interstage BPM Server and Console Installation Guide (JBoss Application Server) 48
6: Setting Up a Directory Service
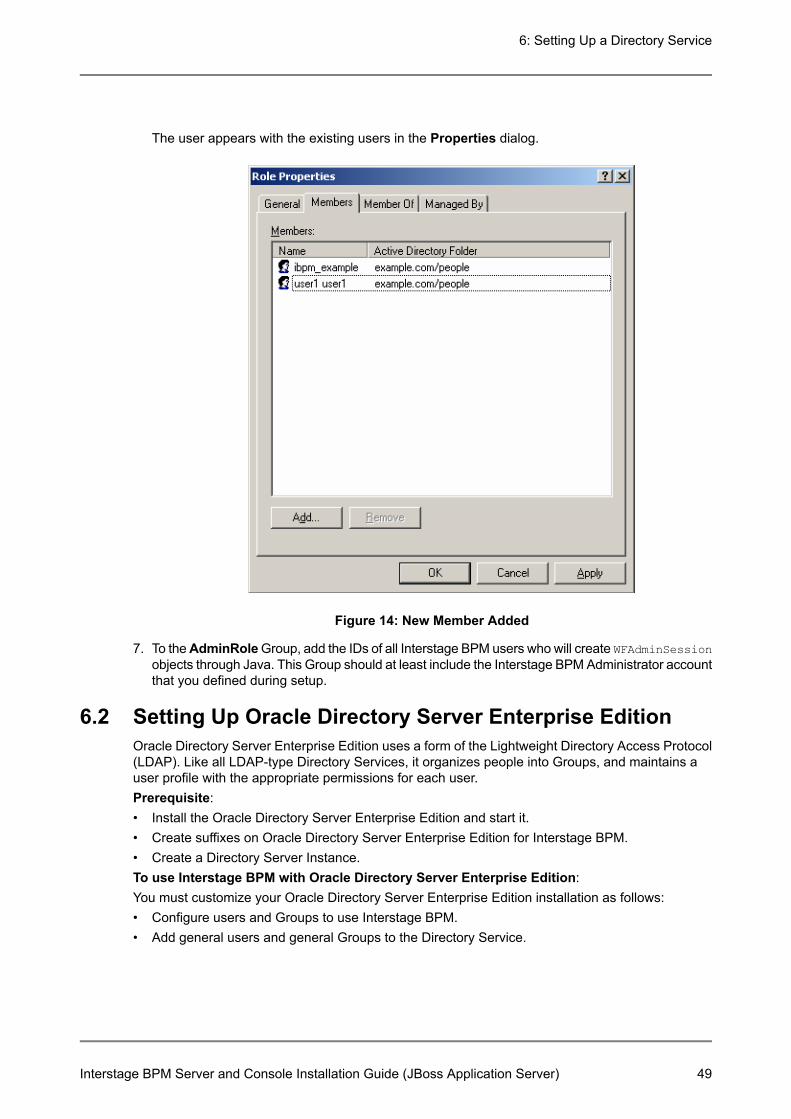
The user appears with the existing users in the Properties dialog.
Figure 14: New Member Added
7. To theAdminRoleGroup, add the IDs of all Interstage BPM users who will create WFAdminSessionobjects through Java. This Group should at least include the Interstage BPM Administrator accountthat you defined during setup.
6.2 Setting Up Oracle Directory Server Enterprise EditionOracle Directory Server Enterprise Edition uses a form of the Lightweight Directory Access Protocol(LDAP). Like all LDAP-type Directory Services, it organizes people into Groups, and maintains auser profile with the appropriate permissions for each user.Prerequisite:• Install the Oracle Directory Server Enterprise Edition and start it.• Create suffixes on Oracle Directory Server Enterprise Edition for Interstage BPM.• Create a Directory Server Instance.To use Interstage BPM with Oracle Directory Server Enterprise Edition:You must customize your Oracle Directory Server Enterprise Edition installation as follows:• Configure users and Groups to use Interstage BPM.• Add general users and general Groups to the Directory Service.
Interstage BPM Server and Console Installation Guide (JBoss Application Server) 49
6: Setting Up a Directory Service
6.2.1 Configuring Users and Groups for Interstage BPM with GUI ofOracle Directory Server Enterprise EditionThis section explains how to configure users and groups for Interstage BPM with the GUI of OracleDirectory Server Enterprise Edition.1. Create an Organizational Unit (ou) named as Groups.
This ou should also be specified in the setup.config file during Interstage BPM setup. (You canchange this value to another value.)a) Open the Oracle Directory Service Control Center, and select the Browse tab of Entry
Management.b) Specify the DN that you want to use in the View DN drop-down list.c) Click New Entry to start the New Entry wizard.d) In the Choose Object Class screen, for Entry Type, select Organizational Unit-
(organizationalUnit).e) In the Configure Attribute screen, enter Groups for the Organization Unit (ou).The following are common rules for configuring users and groups for Interstage BPM:• To create users that are valid for Interstage BPM, use only alphanumeric characters, hyphens,
and underscore characters ("_"). User IDs must not begin with an 'at' character ("@") as thisis used to identify Agents in Interstage BPM.
2. Create an Organizational Unit (ou) named as People.(You cannot change this value to another value.)a) In the Oracle Directory Service Control Center, select the Browse tab of Entry Management.b) Specify the DN that you want to use in the View DN drop-down list.c) Click New Entry to start the New Entry wizard.d) In the Choose Object Class screen, for Entry Type, select Organizational Unit-
(organizationalUnit).e) In the Configure Attribute screen, enter People for the Organization Unit (ou).
Although entering a password and confirming it are optional for Oracle Directory ServerEnterprise Edition, Interstage BPM requires a password to log in. The other fields such asE-Mail, Phone, and Fax are not used by Interstage BPM.
Note:
Interstage BPM Server and Console Installation Guide (JBoss Application Server) 50
6: Setting Up a Directory Service

At this point, the directory tree of LDAP root looks as follows:
Figure 15: Creating Groups and People
3. Create LDAP-access user.This user is specified as SuperUser during the setup of Interstage BPM. For example, here weuse ibpm_server1 as LDAP-access user.a) In the Oracle Directory Service Control Center, select the Browse tab of Entry Management.b) Under the People group you created earlier, click New Entry and start the New Entry wizard.c) In the Choose Object Class screen, for Entry Type, select User - (inetOrgPerson).d) In the Configure Attribute screen, enter ibpm_server1 for cn and sn fields of Required
Attributes.e) In the Configure Attribute screen, enter ibpm_server1 for User ID(uid) field of Allowed
Attributes. Also enter information for Password and Confirm Password fields.
If you use Built-in SSO authentication, do not include any forwardslash "/" or backslash '\'characters in the user ID that you create.
Note:
Interstage BPM Server and Console Installation Guide (JBoss Application Server) 51
6: Setting Up a Directory Service

At this point, the directory tree of People looks like the following:
Figure 16: Directory Tree of People
4. Create the default Interstage BPM roles Role and AdminRole belonging to the OrganizationalUnit Groups.a) In the Oracle Directory Service Control Center, select the Browse tab of Entry Management.b) Under the Groups group you created earlier, click New Entry and start the New Entry wizard.c) In the Choose Object Class screen, for Entry Type, select Static Group -
(groupOfUniqueNames).d) In the Configure Attribute screen, enter AdminRole for Full Name (cn) field of Required
Attributes.e) In the Configure Attribute screen, in Allowed Attributes, for both Groups select the default
user you created in the previous step.f) Similar to the steps just performed for AdminRole, repeat these steps for Role.
Interstage BPM Server and Console Installation Guide (JBoss Application Server) 52
6: Setting Up a Directory Service
After a normal installation using the Oracle Directory Server Enterprise Edition, the defaultAdministrator Group is called AdminRole. You can change this default name by modifyingthe AdminRole parameter of the Interstage BPM Server. For the parameter description,refer the Interstage BPM Server Administration Guide. To this Group, add the IDs of allInterstage BPM users who will access administration functions in the Interstage BPM Consoleor create WFAdminSession objects through Java. This Group should at least include theInterstage BPM Administrator account that you defined during setup (typically ibpm_server1).
Note:
5. Create the IflowUsers group belonging to the Organizational Unit Groups.a) In the Oracle Directory Service Control Center, select the Browse tab of Entry Management.b) Under the Groups group you created earlier, click New Entry and start the New Entry wizard.c) In the Choose Object Class screen, for Entry Type, select 'Static Group -
(groupOfUniqueNames).d) In the Configure Attribute screen, enter IflowUsers for Full Name (cn) field of Required
Attributes.e) In the Configure Attribute screen, in Allowed Attributes, add ibpm_server1 for Group
Member (uniqueMember) field. By using the Add button, for both Groups select the defaultuser you created in step 3.
6. Create the IflowGroups group belonging to the Organizational Unit Groups.a) In the Oracle Directory Service Control Center, select the Browse tab of Entry Management.b) Under the Groups group you created earlier, click New Entry and start the New Entry wizard.c) In the Choose Object Class screen, for Entry Type, select 'Static Group -
(groupOfUniqueNames).d) In the Configure Attribute screen, enter IflowGroups for Full Name (cn) field of Required
Attributes.e) In theConfigure Attribute screen, inAllowed Attributes, add AdminRole and Role forGroup
Member (uniqueMember) field. By using the Add button, you can select AdminRole andRole you created in step 4.
Interstage BPM Server and Console Installation Guide (JBoss Application Server) 53
6: Setting Up a Directory Service
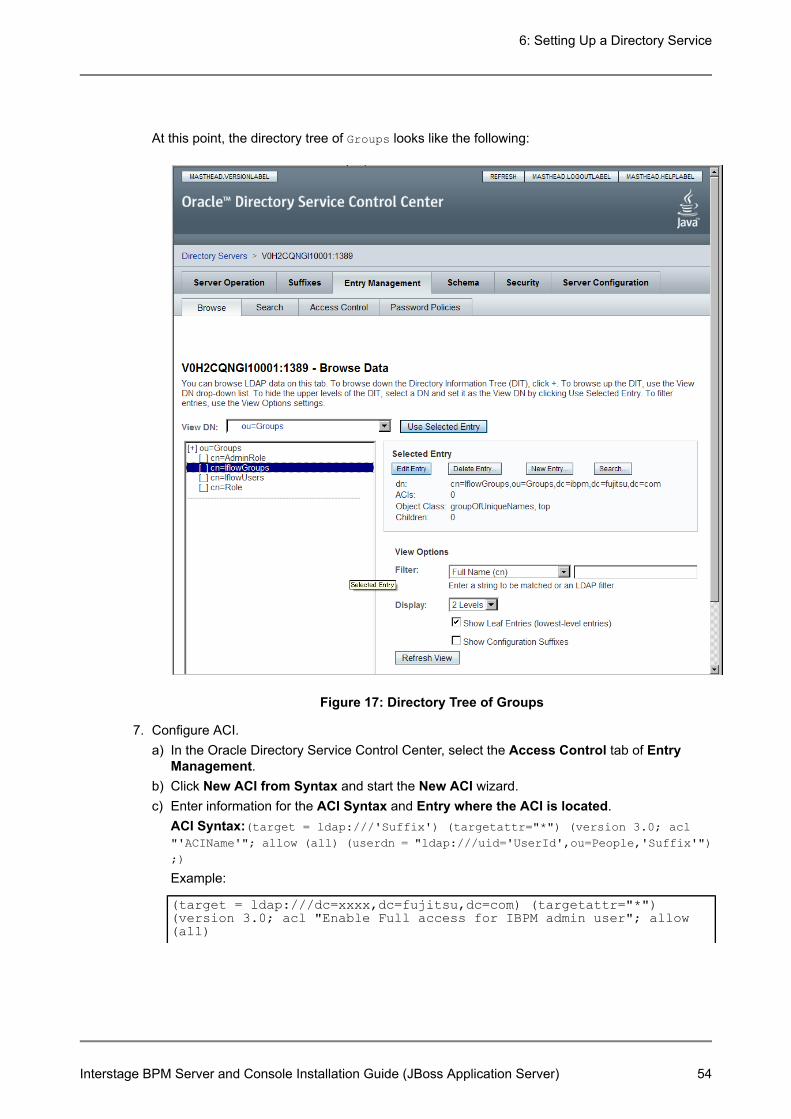
At this point, the directory tree of Groups looks like the following:
Figure 17: Directory Tree of Groups
7. Configure ACI.a) In the Oracle Directory Service Control Center, select the Access Control tab of Entry
Management.b) Click New ACI from Syntax and start the New ACI wizard.c) Enter information for the ACI Syntax and Entry where the ACI is located.
ACI Syntax:(target = ldap:///'Suffix') (targetattr="*") (version 3.0; acl"'ACIName'"; allow (all) (userdn = "ldap:///uid='UserId',ou=People,'Suffix'");)
Example:
(target = ldap:///dc=xxxx,dc=fujitsu,dc=com) (targetattr="*")(version 3.0; acl "Enable Full access for IBPM admin user"; allow(all)
Interstage BPM Server and Console Installation Guide (JBoss Application Server) 54
6: Setting Up a Directory Service
(userdn ="ldap:///uid=ibpm_server1,ou=People,dc=xxxx,dc=fujitsu,dc=com") ;)
Entry where the ACI is located: SuffixExample:
dc=xxxx,dc=fujitsu,dc=jp
You have now completed the configuration for Oracle Directory Server. You can now setup InterstageBPM with Oracle Directory Server Enterprise Edition.
6.2.2 Using Existing Oracle Directory Server Enterprise Edition Usersand GroupsIf you are new to Interstage BPM and are already using Oracle Directory Server Enterprise Editionas the Directory Service to maintain your organization's users and Groups, you can use your existingdirectory structure with Interstage BPM. You can do this by designating which LDAP Users andGroups can be used directly within Interstage BPM. This involves the modification of two specialLDAP Groups, IflowUsers and IflowGroups.To give your LDAP Users access to Interstage BPM add them as members of the IflowUsers Group.You can add each user individually or add a Group that contains the users. Users in the Groupsub-levels are also given access. To use your LDAP Groups within Interstage BPM add them asmembers of the IflowGroups Group.
6.2.3 Adding New Oracle Directory Server Enterprise Edition UsersWhen you want to add a new user as a general Interstage BPM user, you need to create a user thatbelongs to ou=People.To add a new user:1. Open the Oracle Directory Service Control Center, and select the Browse tab of Entry
Management.2. Under the People group, click New Entry and start the New Entry wizard.3. In the Choose Object Class screen, for Entry Type, select User - (inetOrgPerson).4. In the Configure Attribute screen, enter the username of the new user in the cn and sn fields
of Required Attributes.5. In the Configure Attribute screen, enter the LDAP User ID for User ID(uid) field of Allowed
Attributes. Also enter information for Password and Confirm Password fields.
6.2.4 Adding New GroupsWhen you want to add new groups as general Interstage BPM group, you need to create a groupand add it to Role group.1. Open the Oracle Directory Service Control Center, and select the Browse tab of Entry
Management.2. Under the Groups group, click Edit Entry to start the Edit Entry wizard for the group named
"Role".3. In the Allowed Attributes screen, add the group you want by using the Add button.
Interstage BPM Server and Console Installation Guide (JBoss Application Server) 55
6: Setting Up a Directory Service

6.3 Group CachingWhen the Interstage BPM Server starts up, Interstage BPM connects to the Directory Service andcopies all of the user and Group information defined in LDAPUsersDN and LDAPGroupsDN to a cacheon the Interstage BPM Server. This increases Interstage BPM performance because user and Groupinformation no longer has to be retrieved from the Directory Service, which might be running on aseparate network computer. It retrieves it from the LDAP Cache that is on the local computer inmemory.If the cache is not updated, users added since the start of the Interstage BPM Server would not beable to login to or use Interstage BPM. To avoid this, the cache has to be updated periodically.The LDAPGroupCacheAgeSec parameter of the Interstage BPM Server specifies how often the LDAPCache is updated. Groups that have been in service for longer than the period of time specified inthe LDAPGroupCacheAgeSec parameter are checked, and new user and Group information is retrievedfrom the Directory Service. The default value for this parameter is 3600 seconds; that is, the LDAPCache will be checked every hour. If this parameter is set to -1, new user and Group information isretrieved from the Directory Service every time it is needed. Refer to the Interstage Business ProcessManger Server Administration Guide for more information about the configuration parameters of theInterstage BPM Server.Each entry in the cache has a timestamp that is set to the last time that group was read from theDirectory Service. Whenever someone calls the Directory Adapter to fetch a Group, the DirectoryAdapter checks if that Group is in the cache:• If the Group requested is not in the cache, it is read in and timestamped with the current time.• If the Group requested is already in the cache, the timestamp is checked. If the Group was
timestamped before the previous cache check (it is at a time before LDAPGroupCacheAgeSecseconds ago), then just that Group is deleted from the LDAP Cache and read back in from theDirectory Service. All other Groups in the cache are unaffected.
6.4 User Attribute CachingThe generic structure of an Interstage BPM user's profile is stored using multiple user attributes.These attribute values include the user's ID, email, manager or subordinate's ID, and so on. Inclusionof manager or subordinate information in the Interstage BPM user profile allows mapping of yourcompany’s organization and people structure so that Interstage BPM can further use this information.The RequiredUserAttribute property of Interstage BPM stores names of user attributes that arenecessary to be defined for a user profile.All attributes specified for RequiredUserAttribute are not cached. Only attributes for which thecache option is specified are cached. Storing attributes in the local database cache allows InterstageBPM to quickly search and retrieve these attribute values for any user, from the cache. Retrievedattribute values can further be used for different purposes (for example, directly allocating a task toa particular user's manager or subordinate, or viewing what tasks a user’s subordinates are allocatedto).Interstage BPM server refreshes the user attribute values in the cache in the following scenarios:• When you modify the value of the RequiredUserAttribute Interstage BPM property• When you call the Model API WFAdminSession.refreshAllUserProfileCache() method
Interstage BPM Server and Console Installation Guide (JBoss Application Server) 56
6: Setting Up a Directory Service
6.5 Changing Username and Password of Tenant OwnerWhen a tenant is created, the Tenant Owner name and password specified while creation of thetenant are stored in Interstage BPM Server tenant properties of ServerUserName, ServerPasswordand in LDAPAccessUserID, LDAPAccessUserPassword for LDAP-related directory services.If you change Tenant Owner name or password then please do not forget to change these InterstageBPM Server tenant properties as well and also re-activate the tenant.But, if you use Local User Management (LUM) as a directory service and change the Tenant Ownerpassword then ServerPassword will be changed automatically at the same time. In this scenario,you need not re-activate the tenant.
Interstage BPM Server and Console Installation Guide (JBoss Application Server) 57
6: Setting Up a Directory Service
7 Un-setup Interstage BPM Server and ConsoleThis chapter explains how to un-setup Interstage BPM Server and Console from an applicationserver.
7.1 Un-setup Interstage BPM Server and Console from theApplication ServerYou can un-setup the Interstage BPM Server and Console from the application server using thesetup script.
When you un-setup the Interstage BPM Server and Console , the Interstage BPM databasewill not be removed.
Note:
To un-setup an Interstage BPM Server and Console instance:Log out of all Interstage BPM Clients and close all Browser windows.Follow the steps described below:1. Confirm the configuration parameters according to the sectionConfirm the Un-setup Configuration
File on page 58.2. Run the unsetup script according to the instructions in section Running the Un-setup Script on
page 593. Backup your data according to the instructions in section Backup Resources on page 604. Remove the engine directory according to the section Remove engine Directory on page 60.
7.1.1 Confirm the Un-setup Configuration FileMake sure the configuration parameters are properly set in the unsetup.config file located at<engine directory>/server directory. You can specify the value of parameters which are not set,either in the unsetup.config file or using the command line parameters while executing the unsetupscript, as the value is not specified for parameter of password.
If you have set the password parameters in the configuration file, secure the file for securityreasons.
Note:
Basically, when unsetup.config file does not exist, executing un-setup is not neccessary.However, under certain conditions (for example - when directory from previous setup isdeleted without executing un-setup), the unsetup.config file needs to be created manuallyusing the following steps:
Note:
1. Use the following template located in the <enginedirectory>/server/deployment/configFile/directory to create the un-setupconfiguration file.• For Windows: unsetup-template-Win.config• For UNIX: unsetup-template-Unix.config
2. Rename the template file you used in step 1 to unsetup.config.3. Copy unsetup.config to <engine directory>/server directory.
Interstage BPM Server and Console Installation Guide (JBoss Application Server) 58
7: Un-setup Interstage BPM Server and Console
7.1.2 Running the Un-setup ScriptStop the Interstage BPM Server by stopping the JBoss Application Server before executing theunsetup script. For further information refer to To stop the server section of Starting Interstage BPMServer on page 35.
To un-setup an Interstage BPM Server and Console instance:Run the following unsetup script located in the <engine directory>/server directory as mentionedbelow.For Windows: unsetup.batFor UNIX: unsetup.shExecute the setup script using the following command:• On Windows:
unsetup.bat <parameter name>=<value> <parameter name>=<value>...
• On UNIX:
unsetup.sh <parameter name>=<value> <parameter name>=<value>...
All the parameters specified in the unsetup.config file can be specified as the command lineparameters. The error occurs if you specify any parameter that is not supported. The format ofspecification is <parameter name>=<value>. You can specify multiple parameters delimited byspace character.If you want to use space character in the value of a parameter then you need to enclose entire<parameter name>=<value> in double quotes. For example: "DATAFILE_PATH=C:\ProgramFiles\Microsoft SQL Server\MSSQL11.MSSQLSERVER\MSSQL\DATA".If you want to use special characters on your shell, you need to escape such a character at thecommand line option. If you want to use un-escape character, you need to write in theunsetup.config file.In the following example, password is set to the parameter of appserver_admin_password andas_message_broker_password:On Windows:
unsetup.bat appserver_admin_password=password db_admin_password=password
On UNIX:
unsetup.sh appserver_admin_password=password db_admin_password=password
If the administrative security mode is enabled and you run the unsetup script, a dialog boxappears with prompts for username and password. Specify the username and passwordthat you have configured for global security.
Note:
How to Confirm Successful Un-setupAfter executing the un-setup, if you receive the Un-setup Successful message, then the un-setupof Interstage BPM server and console is completed successfully and you can now proceed to thenext step.
Interstage BPM Server and Console Installation Guide (JBoss Application Server) 59
7: Un-setup Interstage BPM Server and Console
However, if you receive the Un-setup Failed: <error message> message, then it indicates thatun-setup is failed due to some reason. You can check the cause of any errors that occur duringun-setup by viewing the deployment.log file, located at the following location:• On Windows: <engine directory>\server\deployment\logs
• On UNIX: <engine directory>/server/deployment/logs
Each time you execute the un-setup script, the contents of deployment.log file will beoverwritten. In some cases like specifying inappropriate options, the log file might notgenerated.
Note:
If the un-setup also fails, you need to manually delete the resources. Refer to the sectionErrors during Setup of the Interstage BPM Server on page 109
Note:
7.1.3 Backup ResourcesBefore you go to next step, you need to back up your resources. For detail information, refer ServerAdministration Guide .
7.1.4 Remove engine DirectoryYou can remove the engine directory that you have copied during the setup of Interstage BPM.
Interstage BPM Server and Console Installation Guide (JBoss Application Server) 60
7: Un-setup Interstage BPM Server and Console
8 Upgrading Interstage BPM from Previous Versions8.1 Outline
The basic steps for upgrading from previous version of Interstage BPM are described below:To upgrade from previous versions of Interstage BPM:1. Backup the complete Interstage BPM materials.2. Uninstall the previous version of Interstage BPM.3. Create a directory on your machine where you want to setup Interstage BPM and copy the engine
directory from Interstage BPM engine directory on product media to the directory created on yourmachine
4. Upgrade your database according to the instructions in section Upgrade Database on page 61.5. Upgrade the Interstage BPM Server and migrate application resources as described in Migrating
Application Resources from Previous Versions to this Version of Interstage BPM on page 69.
Following sections explain the instructions for each of these steps.
8.1.1 Back up the Interstage BPM materialsTo upgrade from previous versions of Interstage BPM:1. Before uninstalling the previous version of Interstage BPM:
• Back up the Interstage BPM database - This is the only way to ensure the retention of yourcurrent Interstage BPM data. The upgrade process automatically migrates (and thereforeoverwrites) process definitions to the current release's formats. Use the default functionalitiesof your database software for backing up your database.
• Export out the Interstage BPM Server properties using the Interstage BPM export script. (Fordetails, refer Using the Configuration Export and Import Scripts on page 78.) This preservesyour previous server configurations. (If upgrading from Interstage BPM v7.x or v8.x, theuninstallation program automatically saves your configuration files with the suffix previousappended to their file names. For example, the ibpm.properties file is saved asibpmprevious.properties. ) After setting up the new version of Interstage BPM, you canuse the saved properties file to manually configure your new server setup. For information onhow to change the server configuration, refer to the Interstage Business Process ManagerServer Administration Guide.
• Back up all files from the previous agents/ folder• Back up all files from the previous calendar/ folder• Back up the resources/DataSourceDefinition.xml file• Back up the resources/fileListenerConf.xml file• Back up the DmsCollections.xml file and the directories specified in it - these directories
contain data that users have previously uploaded.
8.1.2 Upgrade DatabaseThe database upgrade procedure consists of the following 3 main steps:1. Schemamigration: This upgrade script does not require Java execution environment. This script
must be executed with admin credentials on the machine where database is installed. In case ofupgrading remote database, you need to copy the database upgrade script to remote database
Interstage BPM Server and Console Installation Guide (JBoss Application Server) 61
8: Upgrading Interstage BPM from Previous Versions

machine and then configure the database parameters and execute the script, which will performthe database migration.
2. Data migration: This step executes data conversion and initialization for new schema. This steprequires Java execution environment and can be executed from a remote machine that hasInterstage BPM setup. Hence you do not need to execute this step on the remote databasemachine. This step fails if schema migration is not completed successfully.
If the Java execution environment is available on the database machine, you can executethis step on the database machine also.
Note:
3. Post upgrade operations: This is the final step to complete the database upgrade. This scriptdoes not require Java execution environments and must be executed on the database machine.In case of upgrading remote database, you need to copy the database upgrade script to theremote database machine and then configure the database parameters and execute the script,which will perform the post upgrade operations. This step fails if data migration is not completedsuccessfully.Before starting the execution of database upgrade script, you need to configure the parametersin the configuration file. These parameters indicates which step to execute. You can either executeall the scripts at one go or you can manually inspect and sequentially execute these three stepsof database upgrade procedure if your database resides on a machine other than the InterstageBPM Server setup. For information regarding the configuration parameters, refer to the Parametersfor the database upgrade configuration file on page 62
Parameters for the database upgrade configuration fileBefore you execute database upgrade script, you need to configure parameters in the databaseupgrade configuration file config.bat / config.sh located at <enginedirectory>/server/deployment/dbupgrade/bin directory.You can edit config.bat / config.sh file using the text editor.
If special characters are included in the parameter value, you need to escape the characterfollowed by your shell.
Note:
Configuration Parameters for Database Upgrade:
DescriptionConfiguration Parameter
This parameter specifies whether the schema migration has tobe performed or not. The valid values are y or n.• If set to y, this parameter enables the schema migration.• If set to n, this parameter disables the schema migration.Please refer to Upgrading Database on page 66 for the usageexample.
MIGRATE_SCHEMA
This parameter specifies whether the data migration has to beperformed or not. The valid values are y or n.• If set to y, this parameter enables the data migration.• If set to n, this parameter disables the data migration.Please refer to Upgrading Database on page 66 for the usageexample.
MIGRATE_DATA
Interstage BPM Server and Console Installation Guide (JBoss Application Server) 62
8: Upgrading Interstage BPM from Previous Versions

DescriptionConfiguration Parameter
This parameter specifies whether the post upgrade operationshas to be performed or not. The valid values are y or n.• If set to y, this parameter enables the post upgrade operations.• If set to n, this parameter disables the post upgrade operations.Please refer to Upgrading Database on page 66 for the usageexample.
POST_UPGRADE
This parameter specifies the edition you are upgrading from. Thevalid values are y or n.• If set to y, this parameter indicates that you are upgrading from
AE(Advanced Edition) to EE(Enterprise Edition)• If set to n, this parameter indicates that you are upgrading from
EE to EE
AE_TO_EE
This parameter specifies the absolute path to the top-level directoryof your database installation.Sample Value• For Oracle:
• On Windows: C:\app\oracle\product\12.1.0\dbhome_1• On UNIX:
/home/oracle/app/oracle/product/12.1.0/dbhome_1
• For Microsoft SQL Server: C:\Program Files\MicrosoftSQL Server
DB_HOME
This parameter specifies the absolute path to the directory whereyour data files resides.Sample Value• For Oracle:
• On Windows: C:\app\oracle\oradata\orcl• On UNIX: /home/oracle/app/oracle/oradata/orcl
• For Microsoft SQL Server: C:\Program Files\MicrosoftSQL Server\MSSQL11.MSSQLSERVER\MSSQL\DATA
DATAFILE_PATH
Interstage BPM Server and Console Installation Guide (JBoss Application Server) 63
8: Upgrading Interstage BPM from Previous Versions

DescriptionConfiguration Parameter
This parameter specifies the absolute path of the JDBC driver.This parameter is mandatory to specify if you have setMIGRATE_SCHEMA=y while upgrading from pre-10.1 version ofInterstage BPM or if you have set MIGRATE_DATA=y.Sample Value• For Oracle:
• On Windows:C:\app\oracle\product\12.1.0\dbhome_1\jdbc\lib\ojdbc7.jar
• On UNIX:/home/oracle/app/oracle/product/12.1.0/dbhome_1/jdbc/lib/ojdbc7.jar
• For Microsoft SQL Server:On Windows: C:\MicrosoftSQLServer2012JDBCDriver\sqljdbc_4.0\enu\sqljdbc41.jar
JDBC_DRIVER_PATH
This parameter specifies the absolute path to the top-level directoryof the JDK installation.Sample Value: D:\java\jdk1.7.0_80This parameter is mandatory to specify if you have setMIGRATE_SCHEMA=y while upgrading from pre-10.1 version ofInterstage BPM or if you have set MIGRATE_DATA=y.
JAVA_HOME
This parameter specifies the type of database used. The validvalues are:• oracle
• mssql
DB_TYPE
This parameter specifies the IP address or host name of themachine where database is installed. If you do not specify thevalue of this parameter localhost will be used.
DB_HOST
This parameter specifies the port on which your database isrunning. It is used for creating database connection.Sample Value:• For Oracle: 1521• For Microsoft SQL Server: 1433
DB_PORT
This parameter is specific to oracle database and indicates theconnection identifier used for creating database connection andexecuting Oracle SQL scripts.
ORCL_SID
This parameter specifies the name of the database user.Sample Value: ibpmuser
DBUSER
Interstage BPM Server and Console Installation Guide (JBoss Application Server) 64
8: Upgrading Interstage BPM from Previous Versions
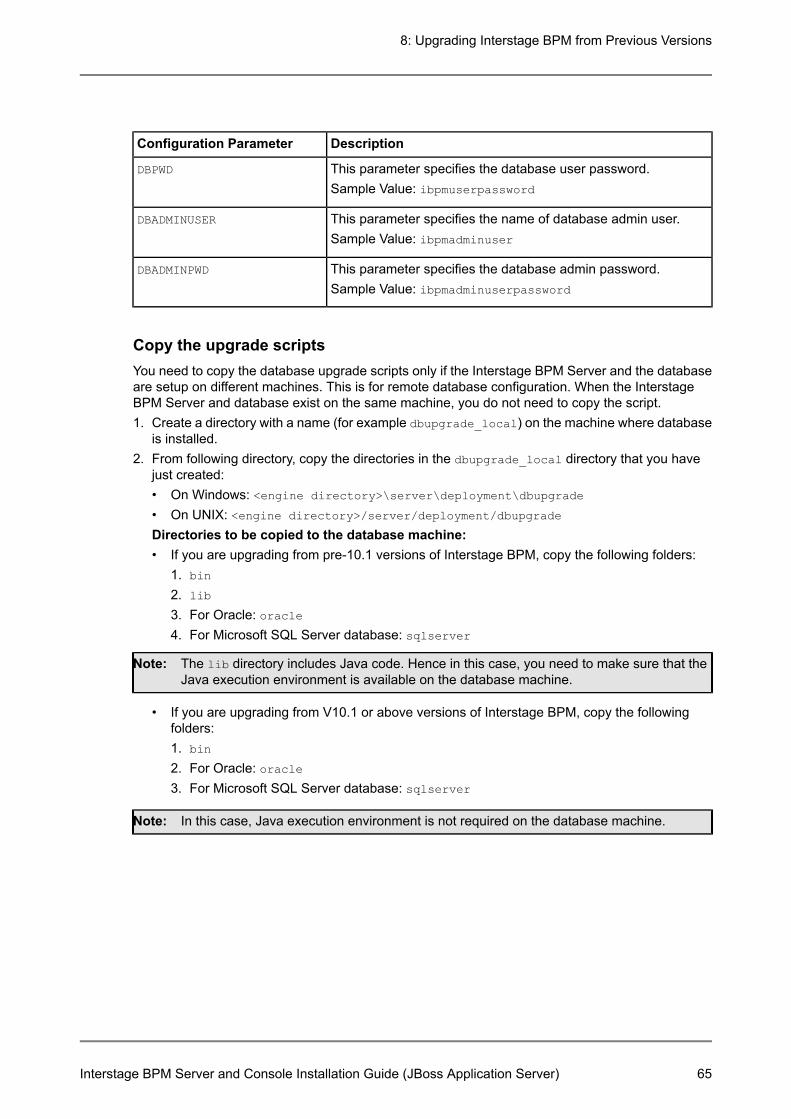
DescriptionConfiguration Parameter
This parameter specifies the database user password.Sample Value: ibpmuserpassword
DBPWD
This parameter specifies the name of database admin user.Sample Value: ibpmadminuser
DBADMINUSER
This parameter specifies the database admin password.Sample Value: ibpmadminuserpassword
DBADMINPWD
Copy the upgrade scriptsYou need to copy the database upgrade scripts only if the Interstage BPM Server and the databaseare setup on different machines. This is for remote database configuration. When the InterstageBPM Server and database exist on the same machine, you do not need to copy the script.1. Create a directory with a name (for example dbupgrade_local) on the machine where database
is installed.2. From following directory, copy the directories in the dbupgrade_local directory that you have
just created:• On Windows: <engine directory>\server\deployment\dbupgrade
• On UNIX: <engine directory>/server/deployment/dbupgrade
Directories to be copied to the database machine:• If you are upgrading from pre-10.1 versions of Interstage BPM, copy the following folders:
1. bin
2. lib
3. For Oracle: oracle4. For Microsoft SQL Server database: sqlserver
The lib directory includes Java code. Hence in this case, you need to make sure that theJava execution environment is available on the database machine.
Note:
• If you are upgrading from V10.1 or above versions of Interstage BPM, copy the followingfolders:1. bin
2. For Oracle: oracle3. For Microsoft SQL Server database: sqlserver
In this case, Java execution environment is not required on the database machine.Note:
Interstage BPM Server and Console Installation Guide (JBoss Application Server) 65
8: Upgrading Interstage BPM from Previous Versions

In UNIX, you must grant following permissions for the dbupgrade_local directory to theuser who executes the scripts.
Note:
• The dbupgrade_local directory and sub-directories: 'Read', 'Write' and 'Execute'permissions.
• All files: 'Read' permission.• All script (.sh) files: 'Execute' permission.
Upgrading DatabasePre-requisites: You have uninstalled the previous version of Interstage BPM.
In case of Oracle database in UNIX environment, make sure that you have set the followingenvironment variables as mentioned below:
Note:
• ORACLE_HOME=<Database Installation directory>
For example:ORACLE_HOME=/home/oracle/app/oracle/product/12.1.0/dbhome_1; exportORACLE_HOME
• ORACLE_SID=<Database identifier>
For example:ORACLE_SID=orcl; export ORACLE_SID
If you want to execute the database upgrade script in the Java execution environment andthe Interstage BPM Server and database are exist on the same machine, follow these steps:1. Configure the parameters in the config.bat / config.sh file located at:
• On Windows: dbupgrade\bin• On UNIX: dbupgrade/binConfigure the parameters as below:
MIGRATE_SCHEMA=yMIGRATE_DATA=yPOST_UPGRADE=y
For more information, refer to the Parameters for the database upgrade configuration file onpage 62
2. Run the upgrade script dbupgrade.bat / dbupgrade.sh as shown below. The script file locatedat the:• On Windows: dbupgrade\bin• On UNIX: dbupgrade/binIf you want to overwrite values of any of the database configuration parameters that you havespecified in the configuration file config.bat / config.sh, at runtime you can provide theparameters and its value from the command line while executing the upgrade script.
Use the following command to execute this script:
dbupgrde.bat dbuser=<dbuser> dbpwd=<db password> dbadminuser=<dbadministrator> dbadminpwd=<db administrator password> JDBC_DRIVER_PATH
Interstage BPM Server and Console Installation Guide (JBoss Application Server) 66
8: Upgrading Interstage BPM from Previous Versions
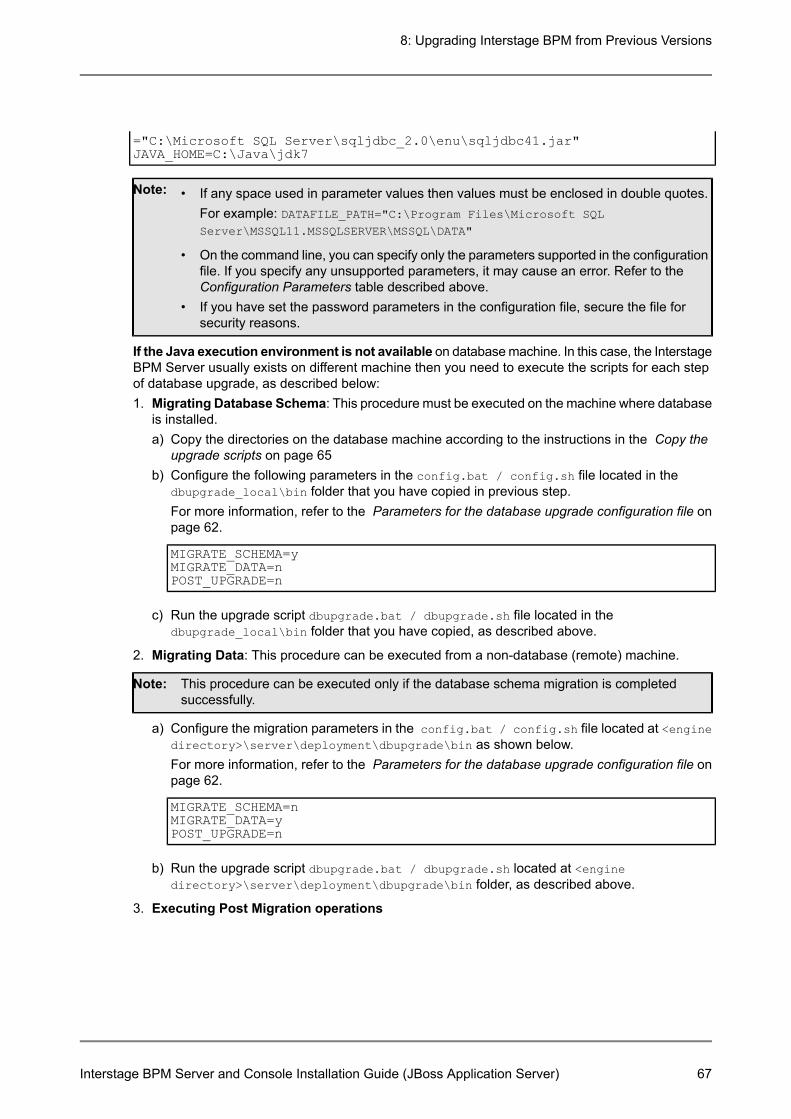
="C:\Microsoft SQL Server\sqljdbc_2.0\enu\sqljdbc41.jar"JAVA_HOME=C:\Java\jdk7
Note: • If any space used in parameter values then values must be enclosed in double quotes.For example: DATAFILE_PATH="C:\Program Files\Microsoft SQLServer\MSSQL11.MSSQLSERVER\MSSQL\DATA"
• On the command line, you can specify only the parameters supported in the configurationfile. If you specify any unsupported parameters, it may cause an error. Refer to theConfiguration Parameters table described above.
• If you have set the password parameters in the configuration file, secure the file forsecurity reasons.
If the Java execution environment is not available on database machine. In this case, the InterstageBPM Server usually exists on different machine then you need to execute the scripts for each stepof database upgrade, as described below:1. Migrating Database Schema: This procedure must be executed on the machine where database
is installed.a) Copy the directories on the database machine according to the instructions in the Copy the
upgrade scripts on page 65b) Configure the following parameters in the config.bat / config.sh file located in the
dbupgrade_local\bin folder that you have copied in previous step.For more information, refer to the Parameters for the database upgrade configuration file onpage 62.
MIGRATE_SCHEMA=yMIGRATE_DATA=nPOST_UPGRADE=n
c) Run the upgrade script dbupgrade.bat / dbupgrade.sh file located in thedbupgrade_local\bin folder that you have copied, as described above.
2. Migrating Data: This procedure can be executed from a non-database (remote) machine.
This procedure can be executed only if the database schema migration is completedsuccessfully.
Note:
a) Configure the migration parameters in the config.bat / config.sh file located at <enginedirectory>\server\deployment\dbupgrade\bin as shown below.For more information, refer to the Parameters for the database upgrade configuration file onpage 62.
MIGRATE_SCHEMA=nMIGRATE_DATA=yPOST_UPGRADE=n
b) Run the upgrade script dbupgrade.bat / dbupgrade.sh located at <enginedirectory>\server\deployment\dbupgrade\bin folder, as described above.
3. Executing Post Migration operations
Interstage BPM Server and Console Installation Guide (JBoss Application Server) 67
8: Upgrading Interstage BPM from Previous Versions

This procedure can be executed only if the data migration is completed successfully.Note:
a) On the machine where database is installed, navigate to the dbupgrade_local\bin directoryand configure the migration parameters in the config.bat / config.sh file as shown below.For more information, refer to the Parameters for the database upgrade configuration file onpage 62.
MIGRATE_SCHEMA=nMIGRATE_DATA=nPOST_UPGRADE=y
b) Run the upgrade script dbupgrade.bat / dbupgrade.sh located in the dbupgrade_local\bindirectory, as described above.
If you are using JBoss EAP 6.2.0 or later after upgrade and was using an older version ofJBoss EAP before upgrade, add system parameter ByPassJBoss6EjbLoadAfterEjbCreatewith the value false. For information on how to add new system property, please refer tosection Using the Configuration Export and Import Scripts on page 78.
Note:
8.1.3 Upgrade Interstage BPM and Migrate Application ResourcesTo upgrade Interstage BPM and migrate application resources:1. Setup the Interstage BPM Server and/or Console according to the instructions in section Setting-up
Interstage BPM Server and Console on page 23.
Specify 1 to database_creation_selection in setup.config. Otherwise, the old databasewill be overwritten and you will lose all of the previous work that is stored in the database.
Note:
Once upgrade is completed, the ApplicationSecurityMode server configuration parameteris set to Secure (SaaS mode) by default as the setup is always in SaaS mode. Thereforeif you want to keep using Interstage BPM with non-SaaS mode, you should change theproperty value from Secure to Relax. How to change server parameters is described in theInterstage BPM Server Administration Guide.
Note:
2. Migrate application resources as described in Migrating Application Resources from PreviousVersions to this Version of Interstage BPM on page 69.
3. Start the Interstage BPM Server and Console. Refer the following sections:• Starting Interstage BPM Server on page 35• Starting Interstage BPM Console and Tenant Management Console on page 36
4. If needed, migrate the application owners as described in Migrating Application Owners fromPrevious Versions to this Version of Interstage BPM on page 70
Interstage BPM is now upgraded to the latest version.
Interstage BPM Server and Console Installation Guide (JBoss Application Server) 68
8: Upgrading Interstage BPM from Previous Versions
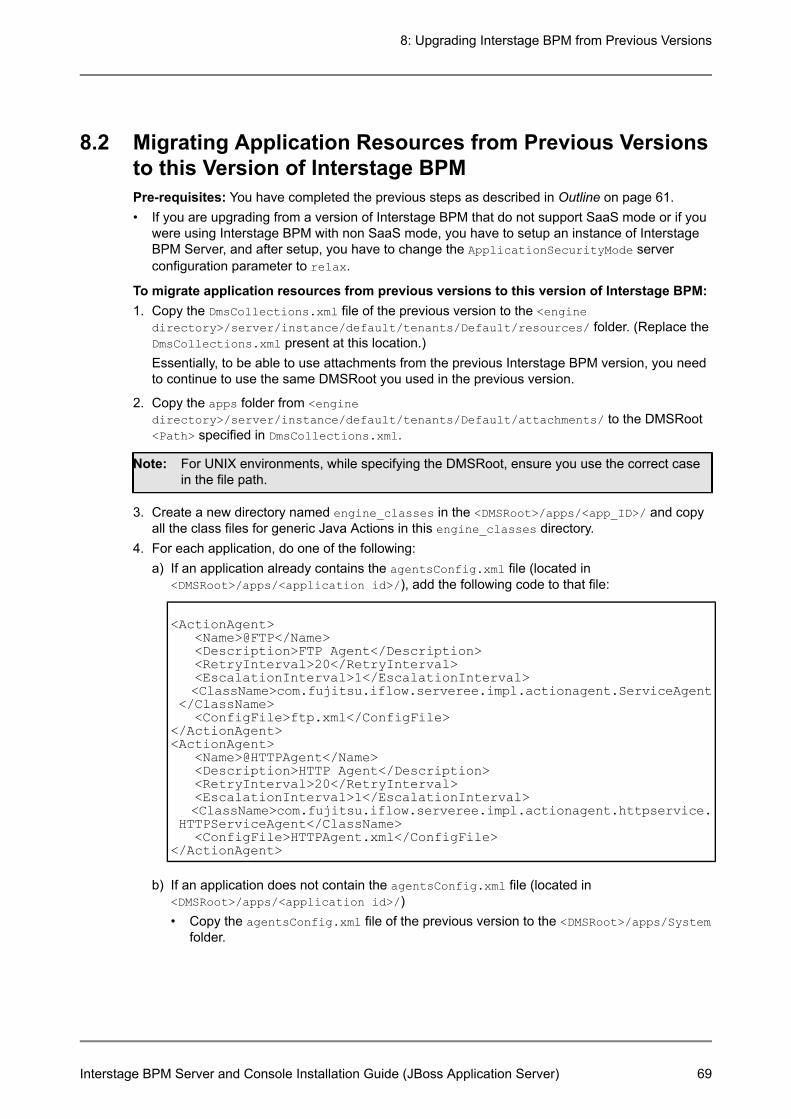
8.2 Migrating Application Resources from Previous Versionsto this Version of Interstage BPMPre-requisites: You have completed the previous steps as described in Outline on page 61.• If you are upgrading from a version of Interstage BPM that do not support SaaS mode or if you
were using Interstage BPM with non SaaS mode, you have to setup an instance of InterstageBPM Server, and after setup, you have to change the ApplicationSecurityMode serverconfiguration parameter to relax.
To migrate application resources from previous versions to this version of Interstage BPM:1. Copy the DmsCollections.xml file of the previous version to the <engine
directory>/server/instance/default/tenants/Default/resources/ folder. (Replace theDmsCollections.xml present at this location.)Essentially, to be able to use attachments from the previous Interstage BPM version, you needto continue to use the same DMSRoot you used in the previous version.
2. Copy the apps folder from <enginedirectory>/server/instance/default/tenants/Default/attachments/ to the DMSRoot<Path> specified in DmsCollections.xml.
For UNIX environments, while specifying the DMSRoot, ensure you use the correct casein the file path.
Note:
3. Create a new directory named engine_classes in the <DMSRoot>/apps/<app_ID>/ and copyall the class files for generic Java Actions in this engine_classes directory.
4. For each application, do one of the following:a) If an application already contains the agentsConfig.xml file (located in
<DMSRoot>/apps/<application id>/), add the following code to that file:
<ActionAgent><Name>@FTP</Name><Description>FTP Agent</Description><RetryInterval>20</RetryInterval><EscalationInterval>1</EscalationInterval><ClassName>com.fujitsu.iflow.serveree.impl.actionagent.ServiceAgent
</ClassName><ConfigFile>ftp.xml</ConfigFile>
</ActionAgent><ActionAgent>
<Name>@HTTPAgent</Name><Description>HTTP Agent</Description><RetryInterval>20</RetryInterval><EscalationInterval>1</EscalationInterval><ClassName>com.fujitsu.iflow.serveree.impl.actionagent.httpservice.
HTTPServiceAgent</ClassName><ConfigFile>HTTPAgent.xml</ConfigFile>
</ActionAgent>
b) If an application does not contain the agentsConfig.xml file (located in<DMSRoot>/apps/<application id>/)• Copy the agentsConfig.xml file of the previous version to the <DMSRoot>/apps/System
folder.
Interstage BPM Server and Console Installation Guide (JBoss Application Server) 69
8: Upgrading Interstage BPM from Previous Versions
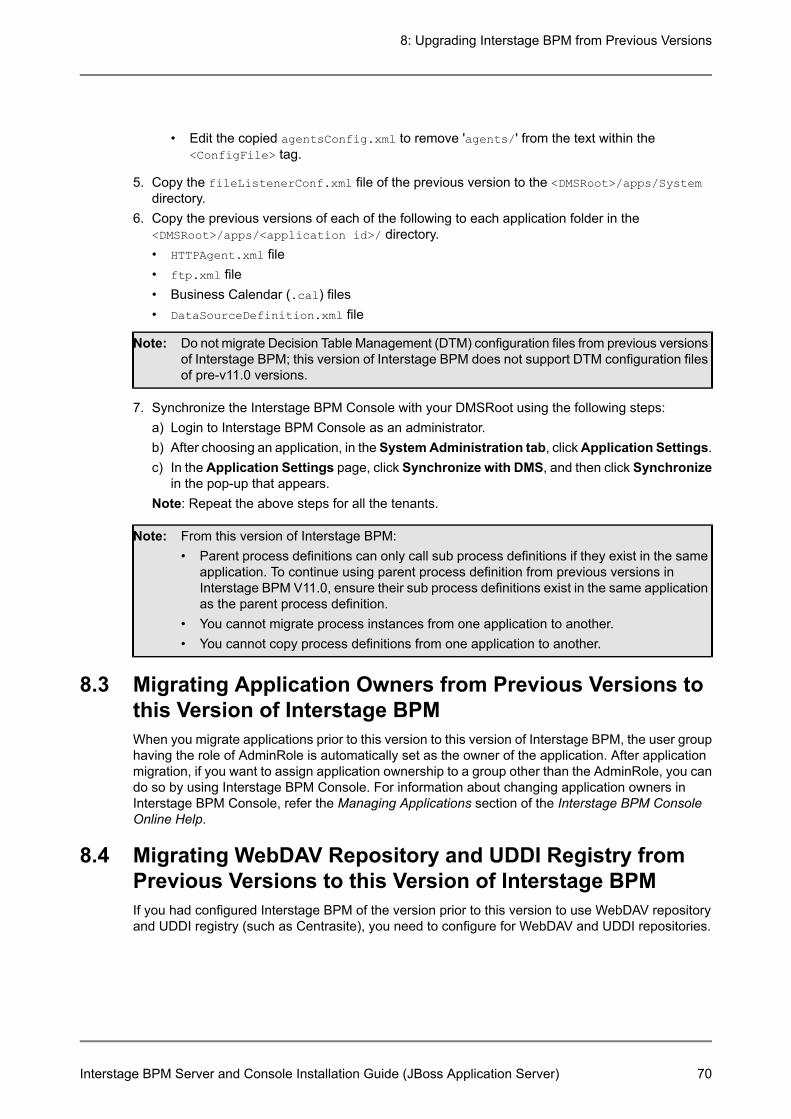
• Edit the copied agentsConfig.xml to remove 'agents/' from the text within the<ConfigFile> tag.
5. Copy the fileListenerConf.xml file of the previous version to the <DMSRoot>/apps/Systemdirectory.
6. Copy the previous versions of each of the following to each application folder in the<DMSRoot>/apps/<application id>/ directory.• HTTPAgent.xml file• ftp.xml file• Business Calendar (.cal) files• DataSourceDefinition.xml file
Do not migrate Decision Table Management (DTM) configuration files from previous versionsof Interstage BPM; this version of Interstage BPM does not support DTM configuration filesof pre-v11.0 versions.
Note:
7. Synchronize the Interstage BPM Console with your DMSRoot using the following steps:a) Login to Interstage BPM Console as an administrator.b) After choosing an application, in the SystemAdministration tab, clickApplication Settings.c) In the Application Settings page, click Synchronize with DMS, and then click Synchronize
in the pop-up that appears.Note: Repeat the above steps for all the tenants.
From this version of Interstage BPM:Note:• Parent process definitions can only call sub process definitions if they exist in the same
application. To continue using parent process definition from previous versions inInterstage BPM V11.0, ensure their sub process definitions exist in the same applicationas the parent process definition.
• You cannot migrate process instances from one application to another.• You cannot copy process definitions from one application to another.
8.3 Migrating Application Owners from Previous Versions tothis Version of Interstage BPMWhen you migrate applications prior to this version to this version of Interstage BPM, the user grouphaving the role of AdminRole is automatically set as the owner of the application. After applicationmigration, if you want to assign application ownership to a group other than the AdminRole, you cando so by using Interstage BPM Console. For information about changing application owners inInterstage BPM Console, refer the Managing Applications section of the Interstage BPM ConsoleOnline Help.
8.4 Migrating WebDAV Repository and UDDI Registry fromPrevious Versions to this Version of Interstage BPMIf you had configured Interstage BPM of the version prior to this version to use WebDAV repositoryand UDDI registry (such as Centrasite), you need to configure for WebDAV and UDDI repositories.
Interstage BPM Server and Console Installation Guide (JBoss Application Server) 70
8: Upgrading Interstage BPM from Previous Versions

This configuration is possible by using Interstage BPM Tenant Management Console or theImportProperties command.After this configuration is complete, you need to synchronize the Interstage BPM Server with yourWebDAV and UDDI repositories before you can use already published information or publish newprocess definitions. Use the following steps to achieve this:1. After upgrade and configuration of Interstage BPM Server and Console, start the Interstage BPM
Server and Console.• Starting Interstage BPM Server on page 35• Starting Interstage BPM Console and Tenant Management Console on page 36
2. Login to Interstage BPM Console as an administrator.3. After choosing an application, in the System Administration tab, click Application Settings.4. In the Application Settings page, click Synchronize with Repository, and then click
Synchronize in the pop-up that appears.Once synchronization is successful, an appropriate message is displayed.
Now this version of Interstage BPM is ready to be used with WebDAV and UDDI repositories
8.5 Additional Steps for Handling Pre-11.0 Console URLsFrom version 11.0 of Interstage BPM Console, the Interstage BPM Console URL has been changed,making older versions of URLs such as those of Remote Sub-Processes, Service Registry, and soon incompatible when called from previous versions of Interstage BPM.To overcome this problem, deploy the Compatibility Proxy WAR provided in this release using thesteps listed in this section.
Note: 1. For a remote subprocess, perform the steps listed here only in the following cases:• When both the Parent and child process instances are running, and you upgrade
Interstage BPM on the parent server to v11.0• When the parent process is running but the child process instance has not yet started,
and you upgrade Interstage BPM on the child server to v11.0
In order to use the Compatibility Proxy for supporting pre-V11.0 URLs, the following requirementsmust be met:• You should setup an instance of Interstage BPM Server, and after setup, you should change the
ApplicationSecurityMode server configuration parameter to relax.• The Compatibility Proxy should be deployed at the original pre-V11 context root, and the V11
Console should be deployed at a different context root. For example, if the pre-v11.0 Consolewas deployed at the context root ibpmconsole, then you should install the compatibility proxy atibpmconsole and the V11 Console at any other context root, for example, console. The defaultcontext root for V11 Console is console, which is different from the default context root for anyprevious version. So if you have followed the defaults, this requirement rule will be automaticallysatisfied.
• V10.x had the restriction that two applications cannot have process definitions with the samename. This restriction has been removed in V11.0. But to use the Compatibility Proxy, the samerestriction needs to be followed, that is, two applications should not have process definitions withthe same name.
Interstage BPM Server and Console Installation Guide (JBoss Application Server) 71
8: Upgrading Interstage BPM from Previous Versions

8.5.1 Steps to Overcome the URL-incompatibility ProblemPre-requisites: You have completed the previous steps as described in Outline on page 61:• You have setup an instance of Interstage BPM Server and Console, and after setup you have
changed the ApplicationSecurityMode server configuration parameter to relax.
To overcome the URL-incompatibility problem caused by pre-11.0 URLs:1. Create a folder whose name corresponds to your pre-v11.0 context root (for example ibpmconsole)
at any location on your machine.2. Copy the webserviceproxy.war file from the console directory on the product media to the
folder created in step 1.3. Extract webserviceproxy.war to the ibpmconsole directory using the following java command:
jar -xvf webserviceproxy.war
4. After extracting the jar, edit the proxy.conf file located under <ExtractionDirectory>\WEB-INF\config and update the ServerBaseURL parameter in this file to the v11port number and context root.
5. Copy the jbossall-client.jar file available in the <JBoss Installation Directory>/client/folder to the WEB-INF/lib/ folder of the extracted WAR.
6. Start the JBoss Application server.7. Start the Interstage BPM Server and Console. Refer the following topics:
• Starting Interstage BPM Server on page 35• Starting Interstage BPM Console and Tenant Management Console
8.6 Additional Steps for Form Styles while Migrating fromInterstage BPM Console 11.1Versions of Interstage BPM Console later than v11.1 allow changing the look and feel of InterstageBPM Console forms using Interstage BPM Console itself. If you are migrating from Interstage BPMConsole 11.1, and you were using custom stylesheets for either:• tenants (stylesheet placed under //<console
WAR>/tenant/<tenantName>/web/styles/custom.css or //<consoleWAR>/web/styles/custom.css), OR
• applications (stylesheet placed under //<consoleWAR>/tenant/<tenantName>/apps/<appName>/web/styles/customTheme.css)
after migration, ensure you define form-specific style classes in the custom CSS files.
8.7 Additional Steps for Interstage BPM Console
8.7.1 Deleting Interstage BPM ConsoleIn version 11.2.1 of Interstage BPM, Interstage BPM Console is always setup with Interstage BPMServer. Therefore if you do not want to work with Interstage BPM Console you can un-setup it fromyour application server.On JBoss: Delete console.war from the following directory:• On Windows: <JBoss Installation Directory>\jboss-as\server\ibpm\deploy\console.war
• On UNIX: <JBoss Installation Directory>/jboss-as/server/ibpm/deploy/console.war
Interstage BPM Server and Console Installation Guide (JBoss Application Server) 72
8: Upgrading Interstage BPM from Previous Versions

8.7.2 Updating System Properties for Web Server PortIf you changed your WebServer port from default value, you need to change the following Systemproperties.• ServerBaseURL• ServerEmailBaseURLYou can update these values via the Interstage BPM Tenant Management Console or Import/Exportproperty commands. How to change properties using Tenant Management Console is explained inthe Interstage BPM Tenant Management Console Online Help. Details of using import/exportcommands are described in the Interstage BPM Server Administration Guide.
Interstage BPM Server and Console Installation Guide (JBoss Application Server) 73
8: Upgrading Interstage BPM from Previous Versions

Appendix A: SecurityInterstage BPM can be set to two security levels: Demo Mode and Security Mode. Demo Mode isuseful while key members of your work team learn the features of the software. Later, Security Modeprovides a stable and controlled environment for implementing Interstage BPM across your company.
A.1 Interstage BPM Operation ModelIt is assumed that Interstage BPM is used in an organizational Intranet. VPN is used when connectingfrom Internet to Intranet. In most situations, end-users will work with Interstage BPM applications viaa firewall, administrators, however, will be using the server segment.End-users do not need to run applets or other clients requiring the Interstage BPM model. This meansthat the only port that needs to be opened in the firewall is the standard HTTPS port (443) and theWeb Server in the server segment.The following diagram depicts a setup situation where Interstage BPM applications are used via afirewall. It also shows possible security threats – these are described in more detail in the subsequenttable.
Figure 18: Interstage BPM Operation Model
The following table lists the possible security threats as well as possible solutions:
Interstage BPM Server and Console Installation Guide (JBoss Application Server) 74
Appendix A: Security
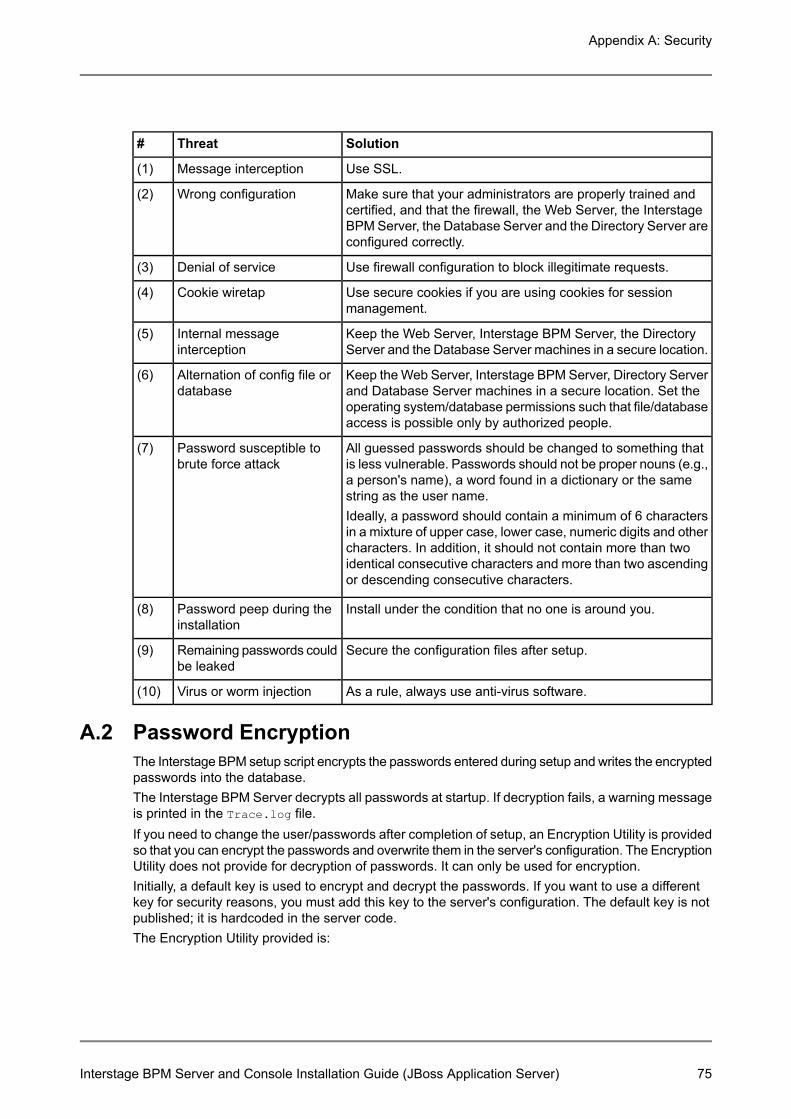
SolutionThreat#
Use SSL.Message interception(1)
Make sure that your administrators are properly trained andcertified, and that the firewall, the Web Server, the InterstageBPM Server, the Database Server and the Directory Server areconfigured correctly.
Wrong configuration(2)
Use firewall configuration to block illegitimate requests.Denial of service(3)
Use secure cookies if you are using cookies for sessionmanagement.
Cookie wiretap(4)
Keep the Web Server, Interstage BPM Server, the DirectoryServer and the Database Server machines in a secure location.
Internal messageinterception
(5)
Keep the Web Server, Interstage BPM Server, Directory Serverand Database Server machines in a secure location. Set theoperating system/database permissions such that file/databaseaccess is possible only by authorized people.
Alternation of config file ordatabase
(6)
All guessed passwords should be changed to something thatis less vulnerable. Passwords should not be proper nouns (e.g.,a person's name), a word found in a dictionary or the samestring as the user name.Ideally, a password should contain a minimum of 6 charactersin a mixture of upper case, lower case, numeric digits and othercharacters. In addition, it should not contain more than twoidentical consecutive characters and more than two ascendingor descending consecutive characters.
Password susceptible tobrute force attack
(7)
Install under the condition that no one is around you.Password peep during theinstallation
(8)
Secure the configuration files after setup.Remaining passwords couldbe leaked
(9)
As a rule, always use anti-virus software.Virus or worm injection(10)
A.2 Password EncryptionThe Interstage BPM setup script encrypts the passwords entered during setup and writes the encryptedpasswords into the database.The Interstage BPM Server decrypts all passwords at startup. If decryption fails, a warning messageis printed in the Trace.log file.If you need to change the user/passwords after completion of setup, an Encryption Utility is providedso that you can encrypt the passwords and overwrite them in the server's configuration. The EncryptionUtility does not provide for decryption of passwords. It can only be used for encryption.Initially, a default key is used to encrypt and decrypt the passwords. If you want to use a differentkey for security reasons, you must add this key to the server's configuration. The default key is notpublished; it is hardcoded in the server code.The Encryption Utility provided is:
Interstage BPM Server and Console Installation Guide (JBoss Application Server) 75
Appendix A: Security
com.fujitsu.iflow.utilities.TextEncrypter.class
To call the Encryption Utility, use the encryption script located in <enginedirectory>/client/samples/configuration:• On Windows: EncryptPassword.bat• On UNIX: EncryptPassword.sh
Encrypting a Password With the Default KeyTo encrypt a password with the default key, run the script with the following option:On Windows: EncryptPassword.bat -e "<TextPassword>"
On UNIX: EncryptPassword.sh -e "<TextPassword>"
Make sure to enclose the password and the encryption key in double quotes. Otherwise,the encryption process might fail. As double quotes are delimiters, do not use double quotesin the encryption key.
Note:
Encrypting Passwords With a New KeyYou are recommended to encrypt your passwords with your own key.To encrypt a single password with a new key, run the script with the following options:On Windows: EncryptPassword.bat -e "<TextPassword>" "<Key>"
On UNIX: EncryptPassword.sh -e "<TextPassword>" "<Key>"
If a key other than the default key is used, it should contain more than 23 characters.Make sure to enclose the password and the encryption key in double quotes. Otherwise,the encryption process might fail. As double quotes are delimiters, do not use double quotesin the encryption key.
Note:
During startup of the Interstage BPM Server, the key needs to be present in the server's configuration.Therefore, before starting the server, use the configuration export and import scripts to add thefollowing parameter to the server's configuration:EncryptionKey=<Key>
For details on the procedure, refer to section Using the Configuration Export and Import Scripts onpage 78. For security reasons, the key can be removed again from the system or tenant configurationfile that you imported into the database.Alternatively, you can encrypt all passwords in a system or tenant configuration file at the same timebefore importing it into the database. To do this, substitute all passwords in the configuration file withactual text passwords and encrypt the configuration file by running the script with the following options:On Windows: EncryptPassword.bat -f "<Path of Configuration File>" "<Key>"
On UNIX: EncryptPassword.sh -f "<Path of Configuration File>" "<Key>"
Make sure to enclose the file path and the encryption key in double quotes. Otherwise, theencryption process might fail. As double quotes are delimiters, do not use double quotesin the encryption key.
Note:
The following parameters in the configuration file are encrypted using this method:• LDAPAccessUserPassword
• MetadataRepositoryPassword
Interstage BPM Server and Console Installation Guide (JBoss Application Server) 76
Appendix A: Security
• ServerPassword
• SMTPPassword
• SWAPLinkagePassword
• UDDIPublisherPassword
ExampleUse the following command to encrypt all passwords in the system or tenant configuration file at thesame time.On Windows: EncryptPassword.bat -f"C:\SomeDirectory\MyServerConfiguration.properties" "EWAERJQ23FIQ0J22"
On UNIX: EncryptPassword.sh -f "/SomeDirectory/MyServerConfiguration.properties""EWAERJQ23FIQ0J22"
If including all leading and trailing white space characters in a password, use -t optioninstead of -f option not to trim the leading and trailing white space characters.
Note:
A.3 Using Demo Mode and Security ModeInterstage BPM can be set to two security levels: Demo Mode and Security Mode. Demo Mode isuseful while key members of your work team learn the features of the software. Later, Security Modeprovides a stable and controlled environment for implementing Interstage BPM across your company.Demo Mode restricts access to Interstage BPM in two ways:• Only the person who is assigned a work item may make choices about it, thus advancing the
process to the next work item - or completing it.• Only members of the AdminRole can access administration functions in the Interstage BPM
Console.All Interstage BPM users can experiment with all of Interstage BPM functions, including creating andediting process definitions and process instances.In Security Mode, access to process definitions, process instances, and work items are restrictedto the specific people who need to use them. The following are examples of people who need to usethem:• Only members of the Role specified in the TemplatePublishers parameter of the Interstage
BPM Server can create new process definitions.• Only the process instance owners, current assignees, and Interstage BPM Administrators can
view any specific process instances. (Current assignees are those who have active taskassignments. This does not include people who will have task assignments later in the process.)
• Only the process instance owners, current assignees, and Interstage BPM Administrative Userscan edit their specific process instances. This means they can change User Defined Attributesand add or delete attachments. However, they are not allowed to edit the process structure.
To set up Security Mode:• Add the following parameters to the server configuration:
SecuritySwitch=true
This setting enables Security Mode.TemplatePublishers =<Registered Role>
Interstage BPM Server and Console Installation Guide (JBoss Application Server) 77
Appendix A: Security
This Role must be registered in Interstage BPM's local group store or in your Directory Service.For example, if you have defined a Role of pubRole, you would typeTemplatePublishers=pubRole. Be aware that this key takes effect only if the Security Mode isswitched on.For information on how to add parameters, refer to section Using the Configuration Export andImport Scripts on page 78.
A.4 Configuring SMTP Authentication for Use with InterstageBPM
Only a System Administrator should perform these instructions.Note:
If you required SMTP Authentication for logging in to Interstage BPM, use the following instructions:1. Set up an email server and enable SMTP Authentication.2. Add the following parameters to the server configuration:
SMTPServerHost=<Email Server Host Name>
SMTPUserName=<User Name for SMTP Authentication>
SMTPPassword=<Password for SMTP authentication>
For details on the procedure, refer to section Using the Configuration Export and Import Scriptson page 78.
3. Design a process definition to test the email feature.Refer to the Interstage Business Process Manager Studio User's Guide for information on howto design process definitions.
If the SMTPUserName or SMTPPassword are set correctly, the email will be accepted by the emailserver. If neither the SMTPUserName nor SMTPPassword values are blank, Interstage BPM will usethe SMTP authentication feature.
A.5 Using the Configuration Export and Import ScriptsPrerequisite: The database server is running.
Interstage BPM comes with configuration export and import scripts that allow you to change theserver configuration. You can use these scripts to add parameters that are not present in theconfiguration or remove parameters from the configuration. If the server fails to start or denies logindue to configuration errors, you can use the scripts to import a working configuration into the database.You can add or edit both System as well as Tenant properties using the export and import scripts.For more information about System and Tenant properties, refer the Interstage BPM ServerAdministration Guide.The Interstage BPM Server is not required to be running for the configuration export and importscripts to be used.To use the configuration export and import scripts:1. Export the server configuration by running the export script located in <engine
directory>/server/deployment/bin:
Interstage BPM Server and Console Installation Guide (JBoss Application Server) 78
Appendix A: Security

Configuration Export ScriptOperating System
• For System Properties:exportProperties.bat <File Name> <Database User Name><Password>
Example:exportProperties.bat MyServerConfiguration.propertiesSomeUserName SomePassword
• For Tenant Properties:exportProperties.bat <File Name> <Database User Name><Password> <TenantName>
Note that <TenantName> is case-sensitive.Example:exportProperties.bat MyServerConfiguration.propertiesSomeUserName SomePassword Default
Windows
• For System Properties:exportProperties.sh <File Name> <Database User Name><Password>
Example:exportProperties.sh MyServerConfiguration.propertiesSomeUserName SomePassword
• For Tenant Properties:exportProperties.sh <File Name> <Database User Name><Password> <TenantName>
Note that <TenantName> is case-sensitive.Example:exportProperties.sh MyServerConfiguration.propertiesSomeUserName SomePassword Default
UNIX
For <File Name>, specify the file name and, optionally, the path of the configuration file to begenerated. If you do not specify a path, the configuration file is written to the current directory.For <Database User Name> and <Password>, specify the database user account that you definedduring setup of the Interstage BPM Server.
Before you make any changes to the configuration file, create a copy of the configurationfile you exported as a back-up. In case you make errors while editing parameters and importthe file, Interstage BPM Server may not be able to start or errors may occur at runtime. Insuch a case you can use the back-up file which contains a working configuration.
Note:
2. Make the required changes in the generated configuration file.If you want to add parameters, use the following syntax:<Parameter Name>=<Parameter Value>
Interstage BPM Server and Console Installation Guide (JBoss Application Server) 79
Appendix A: Security

Note: • Parameter names and values are case sensitive.• Any backslashes "\" or colons ":" used in parameter values must be escaped by
backslashes. For example, a server address is specified like this:ibpmhost\:49950
• Some configuration parameters have a <Hostname> or <Hostname>.<Servername> suffixappended to their names. These suffixes are automatically removed during the exportand are automatically appended during the import. Do not add these suffixes to theparameter names.
Passwords in the generated configuration file are encrypted for security reasons. If you changea password, you are recommended to encrypt it before importing the configuration file. Passwordsare not automatically encrypted during the import. For details on how to encrypt passwords, referto section Password Encryption on page 75.
3. Import the updated configuration file into the database by running the import script located in<engine directory>/server/deployment/bin:
Interstage BPM Server and Console Installation Guide (JBoss Application Server) 80
Appendix A: Security
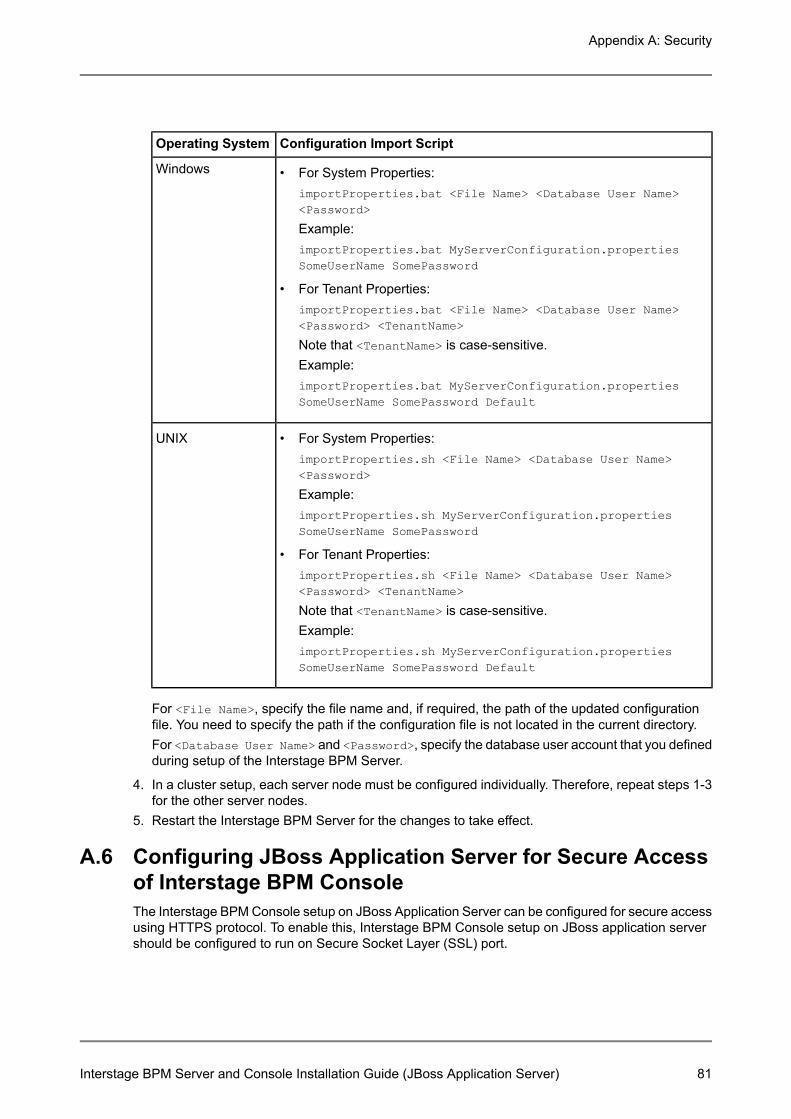
Configuration Import ScriptOperating System
• For System Properties:importProperties.bat <File Name> <Database User Name><Password>
Example:importProperties.bat MyServerConfiguration.propertiesSomeUserName SomePassword
• For Tenant Properties:importProperties.bat <File Name> <Database User Name><Password> <TenantName>
Note that <TenantName> is case-sensitive.Example:importProperties.bat MyServerConfiguration.propertiesSomeUserName SomePassword Default
Windows
• For System Properties:importProperties.sh <File Name> <Database User Name><Password>
Example:importProperties.sh MyServerConfiguration.propertiesSomeUserName SomePassword
• For Tenant Properties:importProperties.sh <File Name> <Database User Name><Password> <TenantName>
Note that <TenantName> is case-sensitive.Example:importProperties.sh MyServerConfiguration.propertiesSomeUserName SomePassword Default
UNIX
For <File Name>, specify the file name and, if required, the path of the updated configurationfile. You need to specify the path if the configuration file is not located in the current directory.For <Database User Name> and <Password>, specify the database user account that you definedduring setup of the Interstage BPM Server.
4. In a cluster setup, each server node must be configured individually. Therefore, repeat steps 1-3for the other server nodes.
5. Restart the Interstage BPM Server for the changes to take effect.
A.6 Configuring JBoss Application Server for Secure Accessof Interstage BPM ConsoleThe Interstage BPM Console setup on JBoss Application Server can be configured for secure accessusing HTTPS protocol. To enable this, Interstage BPM Console setup on JBoss application servershould be configured to run on Secure Socket Layer (SSL) port.
Interstage BPM Server and Console Installation Guide (JBoss Application Server) 81
Appendix A: Security
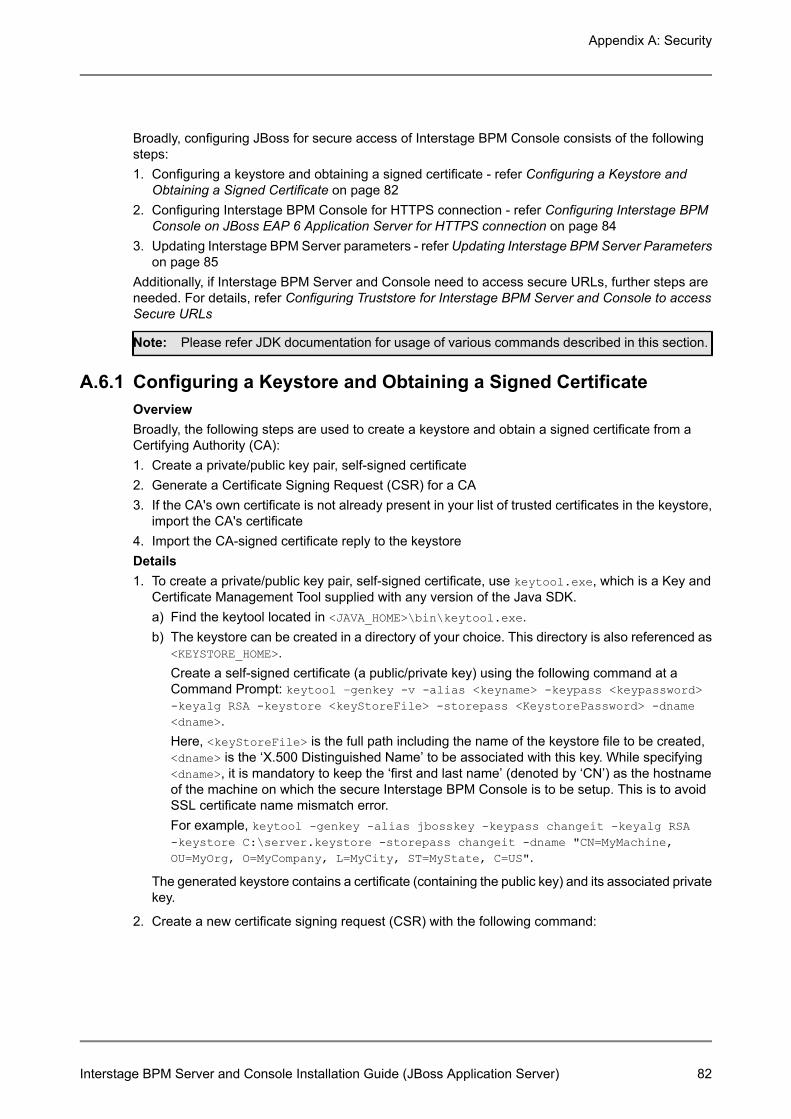
Broadly, configuring JBoss for secure access of Interstage BPM Console consists of the followingsteps:1. Configuring a keystore and obtaining a signed certificate - refer Configuring a Keystore and
Obtaining a Signed Certificate on page 822. Configuring Interstage BPM Console for HTTPS connection - refer Configuring Interstage BPM
Console on JBoss EAP 6 Application Server for HTTPS connection on page 843. Updating Interstage BPM Server parameters - refer Updating Interstage BPM Server Parameters
on page 85Additionally, if Interstage BPM Server and Console need to access secure URLs, further steps areneeded. For details, refer Configuring Truststore for Interstage BPM Server and Console to accessSecure URLs
Please refer JDK documentation for usage of various commands described in this section.Note:
A.6.1 Configuring a Keystore and Obtaining a Signed CertificateOverviewBroadly, the following steps are used to create a keystore and obtain a signed certificate from aCertifying Authority (CA):1. Create a private/public key pair, self-signed certificate2. Generate a Certificate Signing Request (CSR) for a CA3. If the CA's own certificate is not already present in your list of trusted certificates in the keystore,
import the CA's certificate4. Import the CA-signed certificate reply to the keystoreDetails1. To create a private/public key pair, self-signed certificate, use keytool.exe, which is a Key and
Certificate Management Tool supplied with any version of the Java SDK.a) Find the keytool located in <JAVA_HOME>\bin\keytool.exe.b) The keystore can be created in a directory of your choice. This directory is also referenced as
<KEYSTORE_HOME>.Create a self-signed certificate (a public/private key) using the following command at aCommand Prompt: keytool –genkey -v -alias <keyname> -keypass <keypassword>-keyalg RSA -keystore <keyStoreFile> -storepass <KeystorePassword> -dname<dname>.Here, <keyStoreFile> is the full path including the name of the keystore file to be created,<dname> is the ‘X.500 Distinguished Name’ to be associated with this key. While specifying<dname>, it is mandatory to keep the ‘first and last name’ (denoted by ‘CN’) as the hostnameof the machine on which the secure Interstage BPM Console is to be setup. This is to avoidSSL certificate name mismatch error.For example, keytool -genkey -alias jbosskey -keypass changeit -keyalg RSA-keystore C:\server.keystore -storepass changeit -dname "CN=MyMachine,OU=MyOrg, O=MyCompany, L=MyCity, ST=MyState, C=US".
The generated keystore contains a certificate (containing the public key) and its associated privatekey.
2. Create a new certificate signing request (CSR) with the following command:
Interstage BPM Server and Console Installation Guide (JBoss Application Server) 82
Appendix A: Security
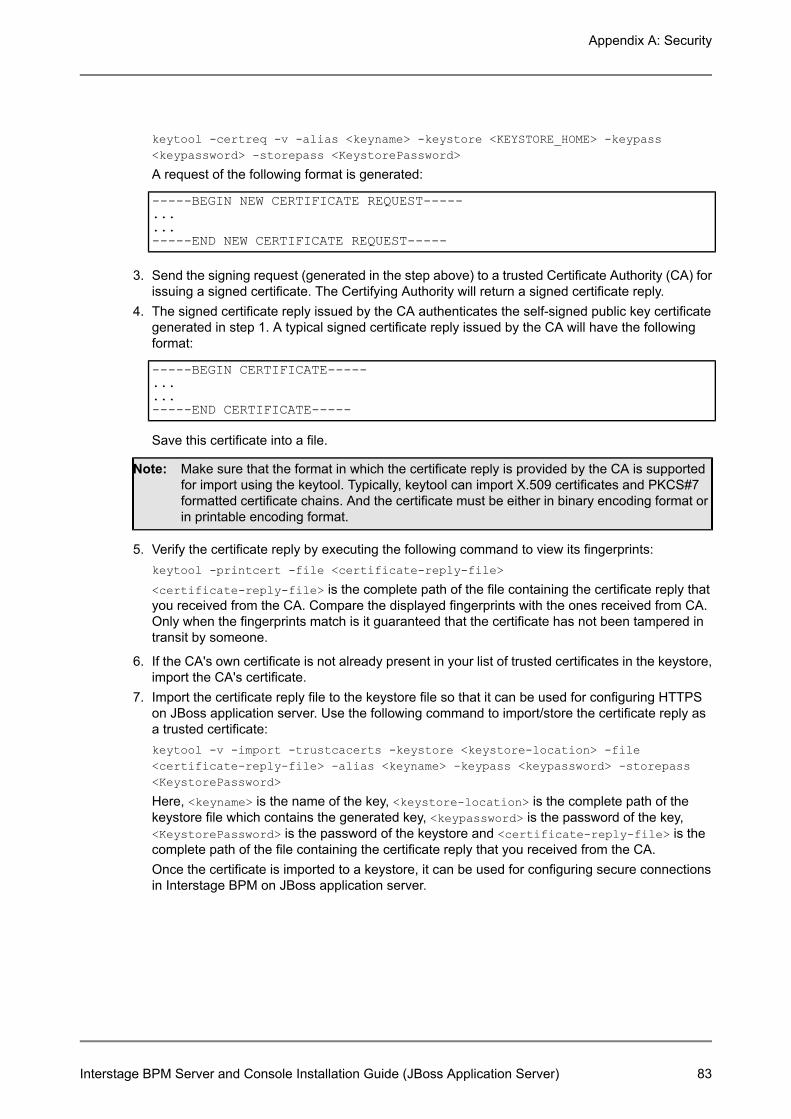
keytool -certreq -v -alias <keyname> -keystore <KEYSTORE_HOME> -keypass<keypassword> -storepass <KeystorePassword>
A request of the following format is generated:
-----BEGIN NEW CERTIFICATE REQUEST-----......-----END NEW CERTIFICATE REQUEST-----
3. Send the signing request (generated in the step above) to a trusted Certificate Authority (CA) forissuing a signed certificate. The Certifying Authority will return a signed certificate reply.
4. The signed certificate reply issued by the CA authenticates the self-signed public key certificategenerated in step 1. A typical signed certificate reply issued by the CA will have the followingformat:
-----BEGIN CERTIFICATE-----......-----END CERTIFICATE-----
Save this certificate into a file.
Make sure that the format in which the certificate reply is provided by the CA is supportedfor import using the keytool. Typically, keytool can import X.509 certificates and PKCS#7formatted certificate chains. And the certificate must be either in binary encoding format orin printable encoding format.
Note:
5. Verify the certificate reply by executing the following command to view its fingerprints:keytool -printcert -file <certificate-reply-file>
<certificate-reply-file> is the complete path of the file containing the certificate reply thatyou received from the CA. Compare the displayed fingerprints with the ones received from CA.Only when the fingerprints match is it guaranteed that the certificate has not been tampered intransit by someone.
6. If the CA's own certificate is not already present in your list of trusted certificates in the keystore,import the CA's certificate.
7. Import the certificate reply file to the keystore file so that it can be used for configuring HTTPSon JBoss application server. Use the following command to import/store the certificate reply asa trusted certificate:keytool -v -import -trustcacerts -keystore <keystore-location> -file<certificate-reply-file> -alias <keyname> -keypass <keypassword> -storepass<KeystorePassword>
Here, <keyname> is the name of the key, <keystore-location> is the complete path of thekeystore file which contains the generated key, <keypassword> is the password of the key,<KeystorePassword> is the password of the keystore and <certificate-reply-file> is thecomplete path of the file containing the certificate reply that you received from the CA.Once the certificate is imported to a keystore, it can be used for configuring secure connectionsin Interstage BPM on JBoss application server.
Interstage BPM Server and Console Installation Guide (JBoss Application Server) 83
Appendix A: Security
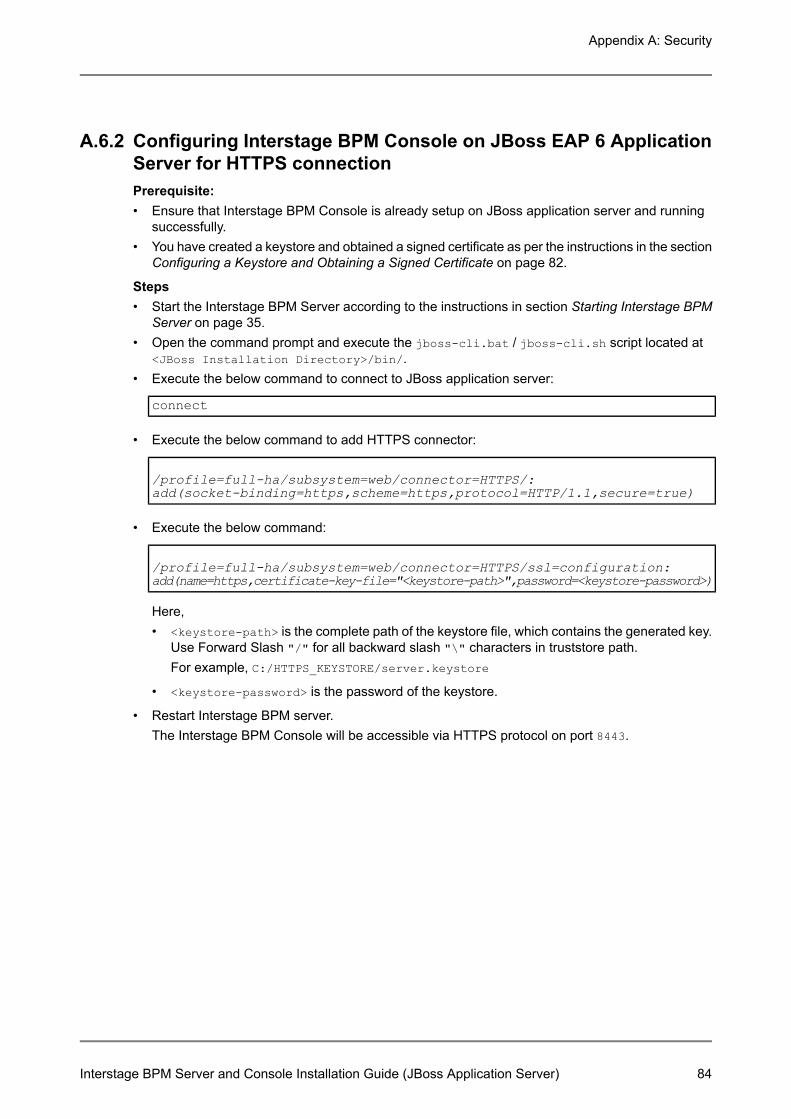
A.6.2 Configuring Interstage BPM Console on JBoss EAP 6 ApplicationServer for HTTPS connectionPrerequisite:• Ensure that Interstage BPM Console is already setup on JBoss application server and running
successfully.• You have created a keystore and obtained a signed certificate as per the instructions in the section
Configuring a Keystore and Obtaining a Signed Certificate on page 82.
Steps• Start the Interstage BPM Server according to the instructions in section Starting Interstage BPM
Server on page 35.• Open the command prompt and execute the jboss-cli.bat / jboss-cli.sh script located at
<JBoss Installation Directory>/bin/.• Execute the below command to connect to JBoss application server:
connect
• Execute the below command to add HTTPS connector:
/profile=full-ha/subsystem=web/connector=HTTPS/:add(socket-binding=https,scheme=https,protocol=HTTP/1.1,secure=true)
• Execute the below command:
/profile=full-ha/subsystem=web/connector=HTTPS/ssl=configuration:add(name=https,certificate-key-file="<keystore-path>",password=<keystore-password>)
Here,• <keystore-path> is the complete path of the keystore file, which contains the generated key.
Use Forward Slash "/" for all backward slash "\" characters in truststore path.For example, C:/HTTPS_KEYSTORE/server.keystore
• <keystore-password> is the password of the keystore.
• Restart Interstage BPM server.The Interstage BPM Console will be accessible via HTTPS protocol on port 8443.
Interstage BPM Server and Console Installation Guide (JBoss Application Server) 84
Appendix A: Security

Note: • If you want you can change the https port number, you can change it using JBoss CLIcommand:/socket-binding-group=full-ha-sockets/socket-binding=https:write-attribute(name=port,value=<PORT_VALUE>)
Example:/socket-binding-group=full-ha-sockets/socket-binding=https:write-attribute(name=port,value=49953)
• If there is an error occurs while adding the HTTPS Connector, you can remove it usingJBoss CLI command:/profile=full-ha/subsystem=web/connector=HTTPS/ssl=configuration:remove
Now re-try above steps for adding HTTPS Connector again.
A.6.3 Updating Interstage BPM Server ParametersChange http to https in the values of the following Interstage BPM Server parameters:• ServerBaseURL• ServerEmailBaseURLRefer the Interstage BPMServer Administration Guide for details on how to update server parameters.
A.6.4 Configuring Truststore for Interstage BPM Server and Console toaccess Secure URLsThe Interstage BPM Server and Console would need to access ‘secure URLs’ in following scenarios:• When accessing remote subprocess using ASAP/SWAP URLs which is setup either on a local
or a remote Interstage BPM Console• For Web services – for example, both Interstage BPM web services and other external web
services can be accessed from a web service javaaction• When XSD is used for trigger validation
For information about how Interstage BPM Server can be configured to access secureWebDAV, refer Configuring Interstage BPM Server for secure WebDAV DMS access onpage 86.
Note:
For accessing a particular secure URL from Interstage BPM, it is essential that:• This URL is hosted on a website which has a CA certified certificate.• The JRE used for starting Interstage BPM should be able to identify the self-signed certificate of
the root CA of this website as a trusted certificate. The trusted certificates for a JRE are thosewhich are included as trusted entries either in the cacerts file (the cacerts file represents asystem-wide keystore with CA certificates, located at <jrehome>/lib/security) or in the truststorefile.
To configure truststore for Interstage BPM Server and Console to access secure URLs:Configure the truststore for Interstage BPM by adding the truststore's path to the Interstage BPMServer’s JVM Configuration using below steps:1. Open the command prompt and execute the jboss-cli.bat / jboss-cli.sh script located at
<JBoss installation directory>/bin/
Interstage BPM Server and Console Installation Guide (JBoss Application Server) 85
Appendix A: Security

2. Execute the below command to connect to JBoss application server:
connect
3. Execute the below command to add truststore path (Use Forward Slash "/" for all BackwardSlash "\" characters in truststore path).
/system-property=javax.net.ssl.trustStore:add(value="<keystore-path>")
4. Re-start Application Server.
A.7 Configuring Interstage BPM Server for secure WebDAVDMS accessWebDAV compliant directory can be configured as DMS root for the IBPM Server. This WebDAVdirectory may be configured for secure access using HTTPS url. In such a case additional configurationshould be done on IBPM.To configure Interstage BPM server for secure WebDAV DMS access:1. Export the IBPM configuration from the database into a configuration file.
For information on exporting the configuration file, refer Using the Configuration Export and ImportScripts on page 78.
2. Copy the root CA certificate used by WebDAV directory to the machine where IBPM is setup.This is further referenced as <CERTIFICATE_PATH>
3. Import the root CA certificate copied in the step above to a keystore (which gets created) usingthe following command: keytool -import -trustcacerts -alias <key name> -file<CERTIFICATE_PATH>\<certificate name> -keystore <keyStoreFile>.Here, <keyStoreFile> is the full path including the name of the keystore file to be created.Example on Windows: keytool -import -trustcacerts -alias mykey -file C:\example.cer-keystore C:\java\jdk1.7.0_80\jre\lib\security\mystore.keystore
Example on UNIX: keytool -import -trustcacerts -alias mykey -file /tmp/example.cer-keystore /usr/java/jdk1.7.0_80/jre/lib/security/mystore.keystore
Ensure that all security certificates related to IBPM are added to the same keystore file.Note:
4. Add the following property in the configuration file exported in step 1: WebDAVKeyStore=<keystorepath>.Example on Windows:WebDAVKeyStore=C:\java\jdk1.7.0_80\jre\lib\security\mystore.keystore
Example on UNIX:WebDAVKeyStore=/usr/java/jdk1.7.0_80/jre/lib/security/mystore.keystore
5. In order for your changes to take effect, import the updated configuration file into the database.For information on importing the configuration file, refer Using the Configuration Export and ImportScripts on page 78. After import is complete, for security reasons, delete the configuration file.
6. Restart the Interstage BPM Server.7. Configure the truststore for Interstage BPM by adding the truststore's path to the run.conf file
on a UNIX machine or the run.conf.bat file in Windows environment, as follows. These filesare located at <JBoss Installation Directory>/jboss-as/bin/ directory.
Interstage BPM Server and Console Installation Guide (JBoss Application Server) 86
Appendix A: Security

set JAVA_OPTS= -Djavax.net.ssl.trustStore=”<path to truststore file>” %JAVA_OPTS%
Example on Windows: set JAVA_OPTS=-Djavax.net.ssl.trustStore=”C:\java\jdk1.7.0_80\jre\lib\security\mystore.keystore”%JAVA_OPTS%
Example on UNIX: set JAVA_OPTS=-Djavax.net.ssl.trustStore=”/usr/java/jdk1.7.0_80/jre/lib/security/mystore.keystore”%JAVA_OPTS%
If you configure the JAVA_OPTS variable at any other place, it might prevent the setting of certainJava VM options which are necessary for server startup.
Interstage BPM Server and Console Installation Guide (JBoss Application Server) 87
Appendix A: Security
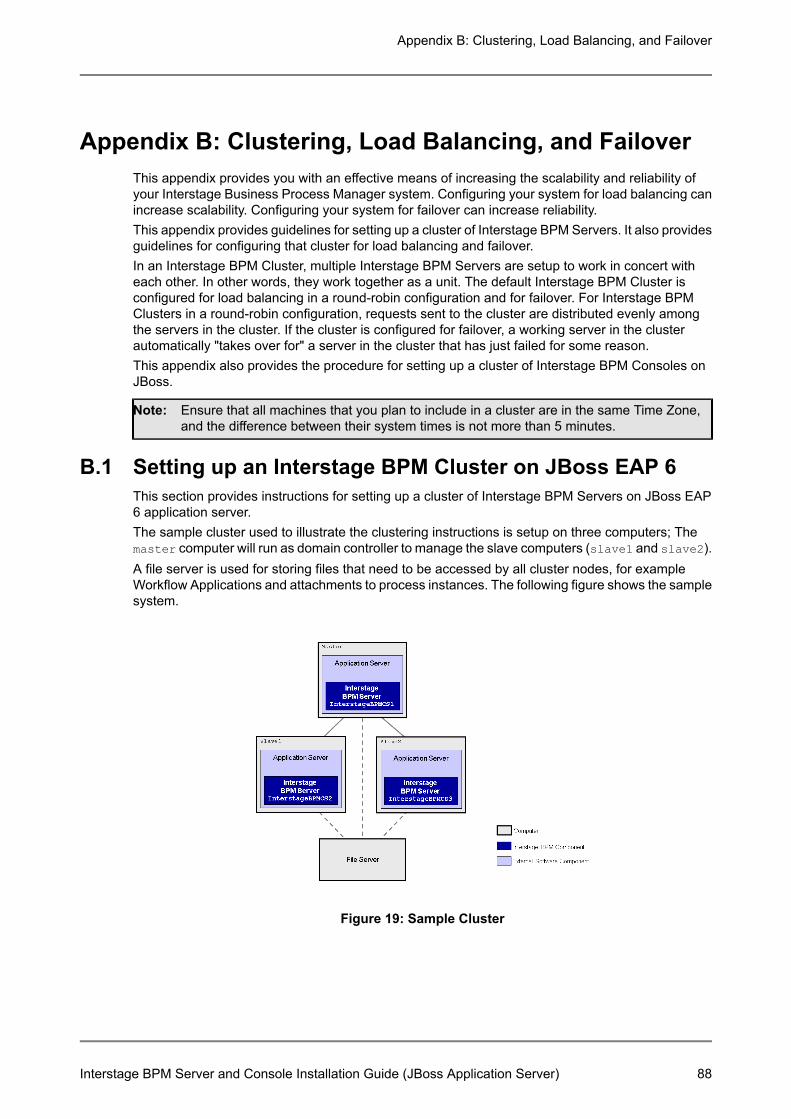
Appendix B: Clustering, Load Balancing, and FailoverThis appendix provides you with an effective means of increasing the scalability and reliability ofyour Interstage Business Process Manager system. Configuring your system for load balancing canincrease scalability. Configuring your system for failover can increase reliability.This appendix provides guidelines for setting up a cluster of Interstage BPM Servers. It also providesguidelines for configuring that cluster for load balancing and failover.In an Interstage BPM Cluster, multiple Interstage BPM Servers are setup to work in concert witheach other. In other words, they work together as a unit. The default Interstage BPM Cluster isconfigured for load balancing in a round-robin configuration and for failover. For Interstage BPMClusters in a round-robin configuration, requests sent to the cluster are distributed evenly amongthe servers in the cluster. If the cluster is configured for failover, a working server in the clusterautomatically "takes over for" a server in the cluster that has just failed for some reason.This appendix also provides the procedure for setting up a cluster of Interstage BPM Consoles onJBoss.
Ensure that all machines that you plan to include in a cluster are in the same Time Zone,and the difference between their system times is not more than 5 minutes.
Note:
B.1 Setting up an Interstage BPM Cluster on JBoss EAP 6This section provides instructions for setting up a cluster of Interstage BPM Servers on JBoss EAP6 application server.The sample cluster used to illustrate the clustering instructions is setup on three computers; Themaster computer will run as domain controller to manage the slave computers (slave1 and slave2).A file server is used for storing files that need to be accessed by all cluster nodes, for exampleWorkflow Applications and attachments to process instances. The following figure shows the samplesystem.
Figure 19: Sample Cluster
Interstage BPM Server and Console Installation Guide (JBoss Application Server) 88
Appendix B: Clustering, Load Balancing, and Failover
Setting up the cluster consists of the following steps:1. Pre-Setup operations:
a) Prepare the cluster as follows:1. Verifying the multicast connectivity according to the instructions in Verifying the Multicast
Connectivity on page 89.2. Prepare the database system as explained in Database Server Preparation on page 14.3. On all cluster nodes, prepare the application server according to the instructions in
Application Server Preparation on page 16.4. Configure the Shared Resource Root according to instructions in Configuring the Shared
Resource Root.
b) Additional configurations for JBoss EAP 61. Configure domain as explained inConfiguring JBoss EAP 6 Domain for Cluster Environment
on page 91.2. Configure domain security as explained in Configuring JBoss Domain Security for Cluster
Environment on page 93.
2. Setup operations:a) Setup Interstage BPM for JBoss on master machine. Use the instructions in Cluster Setup
Operations on page 95.
3. Post-Setup operations:a) Copy all the contents of <engine directory> from the master machine to <engine
directory> on all the slave machines. Note that the path of engine directory should be sameon all the machines.
b) On all machines, configure the environment variables according to the instructions inConfiguringEnvironment Variables on page 95.
c) Make sure that JBoss EAP 6 application server is stopped on all the machines. Refer to StartingInterstage BPM Server on page 35.
d) On all machines, switch on Java Security according to the instructions in Switching on JavaSecurity on page 32.
e) Encrypt the password for datasource on master machine. Refer to section Encrypting thePassword for Datasource on page 33.
f) Start the Interstage BPM Server Cluster. Refer to Starting and Stopping the Cluster on page96.
B.2 Pre-Setup Operations for Cluster Setup
B.2.1 Verifying the Multicast ConnectivityCheck the default settings for the multicast group. A multicast group is used to distribute informationamong the Interstage BPM Servers in a cluster. These are the default settings used by the InterstageBPM Servers:• Multicast port number: 5000• Multicast group address: 225.4.5.6A multicast group address is an IP address in the range 224.0.0.0 to 239.255.255.255, inclusive.
Interstage BPM Server and Console Installation Guide (JBoss Application Server) 89
Appendix B: Clustering, Load Balancing, and Failover
It is used to identify the members of a multicast group. Each member of the group uses the samemulticast group address. The address 224.0.0.0 is reserved and must not be used.1. Create a directory on your machines that you want to include as nodes in your cluster setup and
copy the engine directory from Interstage BPM product media to the directory created on yourmachines.
that the path of engine directory should be same on all the machinesNote:
2. On each node, check and if require update the value for JAVA_HOME parameter in thesetIBPMJava.bat / setIBPMJava.sh script located at <enginedirectory>/server/deployment/bin/.
3. On each server node, run the startMulticastReceiver script located at <enginedirectory>/server/deployment/bin/ directory, as follows:<startMulticastReceiver script> <address> <port>
The address that you use here must be different from the value of multicast-address thatyou have specified in domain.xml file located in <JBoss InstallationDirectory>/domain/configuration/. Refer to the section Configuring JBoss EAP 6Domain on page 18.
Note:
For example:On Windows: startMulticastReceiver.bat 225.4.5.6 5000
On UNIX: startMulticastReceiver.sh 225.4.5.6 5000
4. Run the startMulticastSender script on one of the server nodes and check whether all servernodes are receiving the multicasts. Use the following format:<startMulticastSender script> <address> <port>
This script is located at <engine directory>/server/deployment/bin/ directory.
With the startMulticastSender script, use the same address-port pair as used with thestartMulticastReceiver script in step 3.
Note:
For example:On Windows: startMulticastSender.bat 225.4.5.6 5000
On UNIX: startMulticastSender.sh 225.4.5.6 5000
5. Stop the execution of the multicast sender script. If there are any remaining nodes that were nottested, repeat step 4 for them.
6. If you find that nodes are not receiving multicasts, repeat the multicast tests (step 3, 4, 5) withother ports and/or addresses. In case of any problems, contact your network administrator tomake sure that the network is IP multicast enabled.
7. Once you know for which port and address (default or otherwise) the nodes are able to reacheach other via IP multicast, note these values to update the parameters in the configuration filelater.
B.2.2 Configuring the Shared Resource RootThe ResourceRoot is a directory on a central server containing resources (such as workflowapplications, file listeners, shared classes, and so on).
Interstage BPM Server and Console Installation Guide (JBoss Application Server) 90
Appendix B: Clustering, Load Balancing, and Failover
In a load-balancing system, the ResourceRoot directory must be located on a central server that canbe accessed by all server nodes; all server nodes must use the same ResourceRoot directory.Each server node must be configured to access the ResourceRoot directory on that central server.The server nodes are allowed to map those directories to different physical paths as long as theyuse the same symbolic name for the directory.
If anonymous user access is not available to shared resource root, then make sure thatuser who is starting the Server (each cluster server) have the following permissions toaccess the configured shared resource root.
Note:
• For Windows:• Directory, Sub-directories, and All files: Full control.
• For UNIX:• Directory and Sub-directories: 'Read', 'Write' and 'Execute' permissions.• All files: 'Read' and 'Write' permissions.
To configure your ResourceRoot:On a central server, create a ResourceRoot directory.Example: In the sample system, a file server is used to host the ResourceRoot directory. You couldcreate a directory named InterstageBPMShared.
B.2.3 Configuring JBoss EAP 6 Domain for Cluster EnvironmentPre-requisites: You have installed the JBoss EAP 6 application server on all computers that youwant to include in your cluster.
On each slave machine, update the following in the host.xml located at: <JBoss InstallationDirectory>/domain/configuration
1. Specify any unique host-controller name for slave as shown below:Existing setting:
<host name="master" xmlns="urn:jboss:domain:[version]">
Change to:
<host name="<Unique name for Slave>" xmlns="urn:jboss:domain:[version]">
Example:
<host name="slave1" xmlns="urn:jboss:domain:[version]">
Make sure that you specify unique host-controller name on each slave machine. Also, notedown these unique host controller names and the corresponding machine names becauseyou will need to specify these as the value of appserver_nodes_address parameter in theconfiguration files later.
Note:
2. In the <domain-controller> section, delete or comment out the <local/> tag and remove thecomments for the <remote> tag. Also specify the IP address of the master machine, as shownbelow:
Interstage BPM Server and Console Installation Guide (JBoss Application Server) 91
Appendix B: Clustering, Load Balancing, and Failover
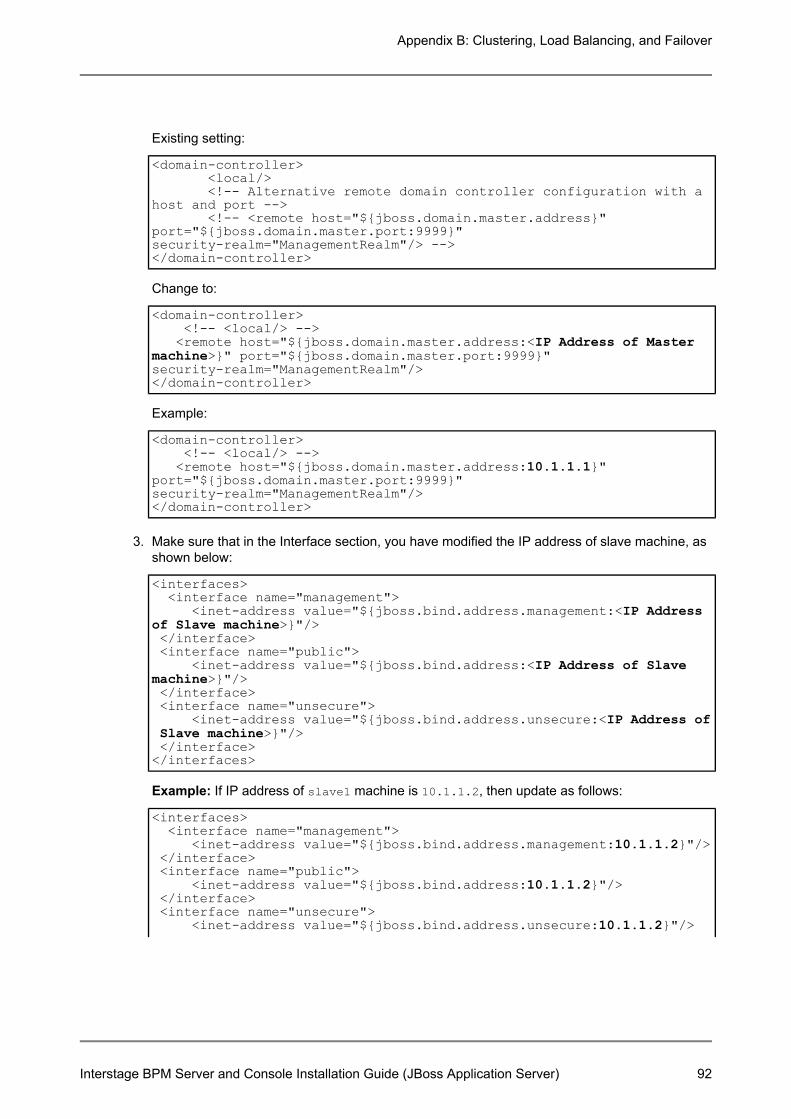
Existing setting:
<domain-controller><local/><!-- Alternative remote domain controller configuration with a
host and port --><!-- <remote host="${jboss.domain.master.address}"
port="${jboss.domain.master.port:9999}"security-realm="ManagementRealm"/> --></domain-controller>
Change to:
<domain-controller><!-- <local/> --><remote host="${jboss.domain.master.address:<IP Address of Master
machine>}" port="${jboss.domain.master.port:9999}"security-realm="ManagementRealm"/></domain-controller>
Example:
<domain-controller><!-- <local/> --><remote host="${jboss.domain.master.address:10.1.1.1}"
port="${jboss.domain.master.port:9999}"security-realm="ManagementRealm"/></domain-controller>
3. Make sure that in the Interface section, you have modified the IP address of slave machine, asshown below:
<interfaces><interface name="management">
<inet-address value="${jboss.bind.address.management:<IP Addressof Slave machine>}"/></interface><interface name="public">
<inet-address value="${jboss.bind.address:<IP Address of Slavemachine>}"/></interface><interface name="unsecure">
<inet-address value="${jboss.bind.address.unsecure:<IP Address ofSlave machine>}"/></interface></interfaces>
Example: If IP address of slave1 machine is 10.1.1.2, then update as follows:
<interfaces><interface name="management">
<inet-address value="${jboss.bind.address.management:10.1.1.2}"/></interface><interface name="public">
<inet-address value="${jboss.bind.address:10.1.1.2}"/></interface><interface name="unsecure">
<inet-address value="${jboss.bind.address.unsecure:10.1.1.2}"/>
Interstage BPM Server and Console Installation Guide (JBoss Application Server) 92
Appendix B: Clustering, Load Balancing, and Failover

</interface></interfaces>
B.2.4 Configuring JBoss Domain Security for Cluster EnvironmentTo configure User Authentication:1. On master machine, execute the add-user.bat / add-user.sh located at <JBoss Installation
Directory>/bin/. This will prompt you to enter user details, as shown in the following example:For more information, refer to the JBoss documentation.
Password should contain alphabets, number and special character. You need to note downthe <secret value> for each machine that is displayed on the screen. It will be used laterfor security configurations.
Note:
D:\jboss-eap-6.4\bin>add-user.bat
What type of user do you wish to add?a) Management User (mgmt-users.properties)b) Application User (application-users.properties)(a): a
Enter the details of the new user to add.Using realm 'ManagementRealm' as discovered from the existing propertyfiles.Username : @dm1n1stratorPassword requirements are listed below. To modify these restrictionsedit the add-user.properties configuration file.- The password must not be one of the following restricted values {root,admin, administrator}- The password must contain at least 8 characters, 1 alphabeticcharacter(s), 1 digit(s), 1 non-alphanumeric symbol(s)- The password must be different from the usernamePassword :Re-enter Password :What groups do you want this user to belong to? (Please enter a commaseparated list, or leave blank for none)[ ]:About to add user '@dm1n1strator' for realm 'ManagementRealm'Is this correct yes/no? yesAdded user '@dm1n1strator' to file'D:\jboss-eap-6.4\standalone\configuration\mgmt-users.properties'Added user '@dm1n1strator' to file'D:\jboss-eap-6.4\domain\configuration\mgmt-users.properties'Is this new user going to be used for one AS process to connect toanother AS process?e.g. for a slave host controller connecting to the master or for aRemoting connection for server to server EJB calls.yes/no? yesTo represent the user add the following to the server-identitiesdefinition <secret value="SW5mb3N5c0AxMjM=" />Press any key to continue . . .
2. Repeat the above step on each of the slave machines to add users. For example, add user slave1on slave host1, slave2 on slave host2.Note down the secret values for each machine that is displayed on the screen.
Interstage BPM Server and Console Installation Guide (JBoss Application Server) 93
Appendix B: Clustering, Load Balancing, and Failover
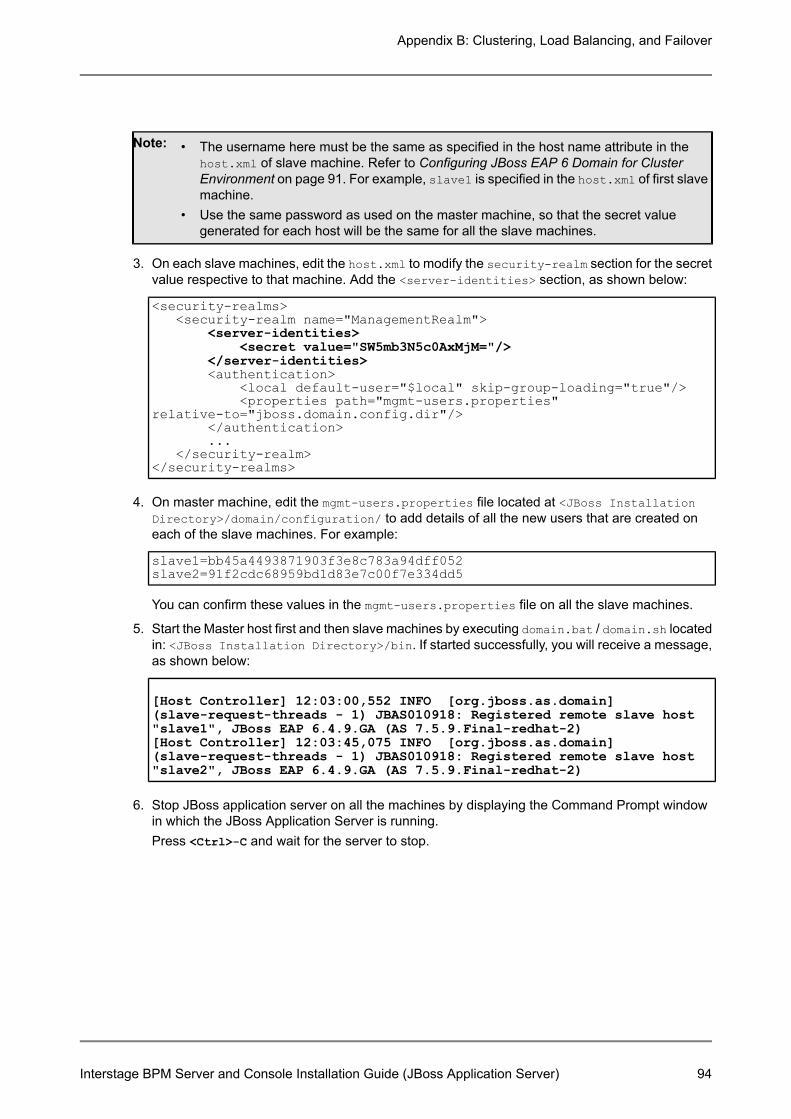
Note: • The username here must be the same as specified in the host name attribute in thehost.xml of slave machine. Refer to Configuring JBoss EAP 6 Domain for ClusterEnvironment on page 91. For example, slave1 is specified in the host.xml of first slavemachine.
• Use the same password as used on the master machine, so that the secret valuegenerated for each host will be the same for all the slave machines.
3. On each slave machines, edit the host.xml to modify the security-realm section for the secretvalue respective to that machine. Add the <server-identities> section, as shown below:
<security-realms><security-realm name="ManagementRealm">
<server-identities><secret value="SW5mb3N5c0AxMjM="/>
</server-identities><authentication>
<local default-user="$local" skip-group-loading="true"/><properties path="mgmt-users.properties"
relative-to="jboss.domain.config.dir"/></authentication>...
</security-realm></security-realms>
4. On master machine, edit the mgmt-users.properties file located at <JBoss InstallationDirectory>/domain/configuration/ to add details of all the new users that are created oneach of the slave machines. For example:
slave1=bb45a4493871903f3e8c783a94dff052slave2=91f2cdc68959bd1d83e7c00f7e334dd5
You can confirm these values in the mgmt-users.properties file on all the slave machines.
5. Start the Master host first and then slave machines by executing domain.bat / domain.sh locatedin: <JBoss Installation Directory>/bin. If started successfully, you will receive a message,as shown below:
[Host Controller] 12:03:00,552 INFO [org.jboss.as.domain](slave-request-threads - 1) JBAS010918: Registered remote slave host"slave1", JBoss EAP 6.4.9.GA (AS 7.5.9.Final-redhat-2)[Host Controller] 12:03:45,075 INFO [org.jboss.as.domain](slave-request-threads - 1) JBAS010918: Registered remote slave host"slave2", JBoss EAP 6.4.9.GA (AS 7.5.9.Final-redhat-2)
6. Stop JBoss application server on all the machines by displaying the Command Prompt windowin which the JBoss Application Server is running.Press <Ctrl>-C and wait for the server to stop.
Interstage BPM Server and Console Installation Guide (JBoss Application Server) 94
Appendix B: Clustering, Load Balancing, and Failover

Note: • Do not stop the JBoss Application Server by closing the Command Prompt window inwhich the server is running.
• Some components may not stop properly and you may not be able to start the JBossApplication Server again.
B.3 Cluster Setup OperationsFollow these steps:1. Copy the database directory specific to the database that you are using. Refer to Copy database
setup directory to database machine on page 28.2. Update and run the database setup script on the machine where database is installed according
to the instructions in Updating the database setup script on the database machine on page 29.
Even if you intend to setup database and Interstage BPM on the same machine, first youneed to setup database separately as mentioned in Step-2 and then execute setup ofInterstage BPM Server with parameter set as -database_creation_selection=1
Note:
3. Update the configuration parameters as described in the setup.config file. Refer to Update theconfiguration file on Interstage BPM Server machine on page 30.
4. On all cluster nodes, start the application server according to the instructions in Starting InterstageBPM Server on page 35.
5. Run setup script according to the instructions in Running the Interstage BPM Setup Script onpage 26.If any error occurs in the script execution, you need to check the configuration file updated in step4 and then re-execute the setup script. However, if an error caused due to pre-existing componentsof Interstage BPM, then you need to un-setup the Interstage BPM and again execute this setupscript. Refer to Un-setup Interstage BPM Server and Console on page 58.
Before running the setup script, make sure the following:Note:• Specify the value for console_shared_root parameter in configuration file during setup.
Please ensure that the path specified in the value for this parameter is accessible fromall cluster member nodes.
6. Stop the JBoss EAP 6 application server on all machines as explained in Starting Interstage BPMServer on page 35.
B.4 Post Setup configurations in cluster environment
B.4.1 Configuring Environment VariablesTo configure the required environment variables:1. On each cluster node, confirm the following in the setIBPMEnv.cmd / setIBPMEnv.sh script
located at <engine directory>/server/deployment/bin.Make sure that you have set the value of JDBCPATH parameter to the path of the JDBC jar filethat you have copied in the drive where you have extracted JBoss6 application server.
Interstage BPM Server and Console Installation Guide (JBoss Application Server) 95
Appendix B: Clustering, Load Balancing, and Failover
While editing this script, ensure you use only forward slashes ("/") with any paths in thescript.
Note:
2. On each cluster node, update the value for JAVA_HOME parameter in the setIBPMJava.bat /setIBPMJava.sh script located at <engine directory>/server/deployment/bin/.
B.4.2 Starting and Stopping the ClusterStart the JBoss Application Server on each cluster node. You must start the master server instancesfirst and then start other slave machines.
To Start the JBoss EAP 6 application server:1. Start the master server first by executing domain.bat / domain.sh located in: <JBoss
Installation Directory>/bin.2. Repeat the above step on all slave machines.
If master and all slave machines started successfully, you will receive a message, as shown below:
[Host Controller] 12:03:00,552 INFO [org.jboss.as.domain](slave-request-threads - 1) JBAS010918: Registered remote slave host"slave1", JBoss EAP 6.4.9.GA (AS 7.5.9.Final-redhat-2)[Host Controller] 12:03:45,075 INFO [org.jboss.as.domain](slave-request-threads - 1) JBAS010918: Registered remote slave host"slave2", JBoss EAP 6.4.9.GA (AS 7.5.9.Final-redhat-2)
To Stop the JBoss EAP 6 application server:Press <Ctrl>-C and wait for the server to stop.
Note: • Do not stop the JBoss Application Server by closing the Command Prompt window inwhich the server is running.
• Some components may not stop properly and you may not be able to start the JBossApplication Server again.
B.5 Automated Failover SettingsDuring operation, events are created and written to the database by each server node. Events aretied to the server node that created them and will be processed by this server node. If a server nodegoes down, and no failover is used, remaining events tied to this node will not be processed, andthe processing of such events will resume only when the server node is available again.Automated failover (which is enabled by default) ensures that events that cannot be processed areautomatically transferred to other server nodes in the load-balancing system. Automated failoversettings are controlled using the following server properties:• The ClusterAutomateFailoverEnabled server property. By default, this is true, which enables
automated failover.• The ClusterHeartbeatInterval property (which specifies how often the status of all nodes will
be checked) and the ClusterInterceptEvents property (which specifies, in case a node fails,how many of unhandled events will be handled by the active nodes at a time).
Interstage BPM Server and Console Installation Guide (JBoss Application Server) 96
Appendix B: Clustering, Load Balancing, and Failover

For details about these properties and how to change them, refer the Interstage BPM ServerAdministration Guide.
If the ClusterAutomateFailoverEnabled server property is set to 'true' before you startall nodes in a cluster, the following behavior may occur (depending on the value of theClusterHeartbeatInterval property, and how long start-up of each node takes):As you start nodes, each started node may begin handling any unhandled events of theremaining, to-be-started nodes; this 'failover' will continue until all nodes have been started.This is normal and expected behavior.
Note:
During failover, the order of transfer of unhandled events is as follows: first history events,then timer events, and then events of process scheduler.
Note:
ExampleThis example demonstrates the processing of events in case one of two server nodes fails.A sample load-balancing system with two server nodes has been set up. While all of the server nodesare up and running, events are created and written to the database by each server node.
Figure 20: All Server Nodes are Up and Running
Interstage BPM Server and Console Installation Guide (JBoss Application Server) 97
Appendix B: Clustering, Load Balancing, and Failover
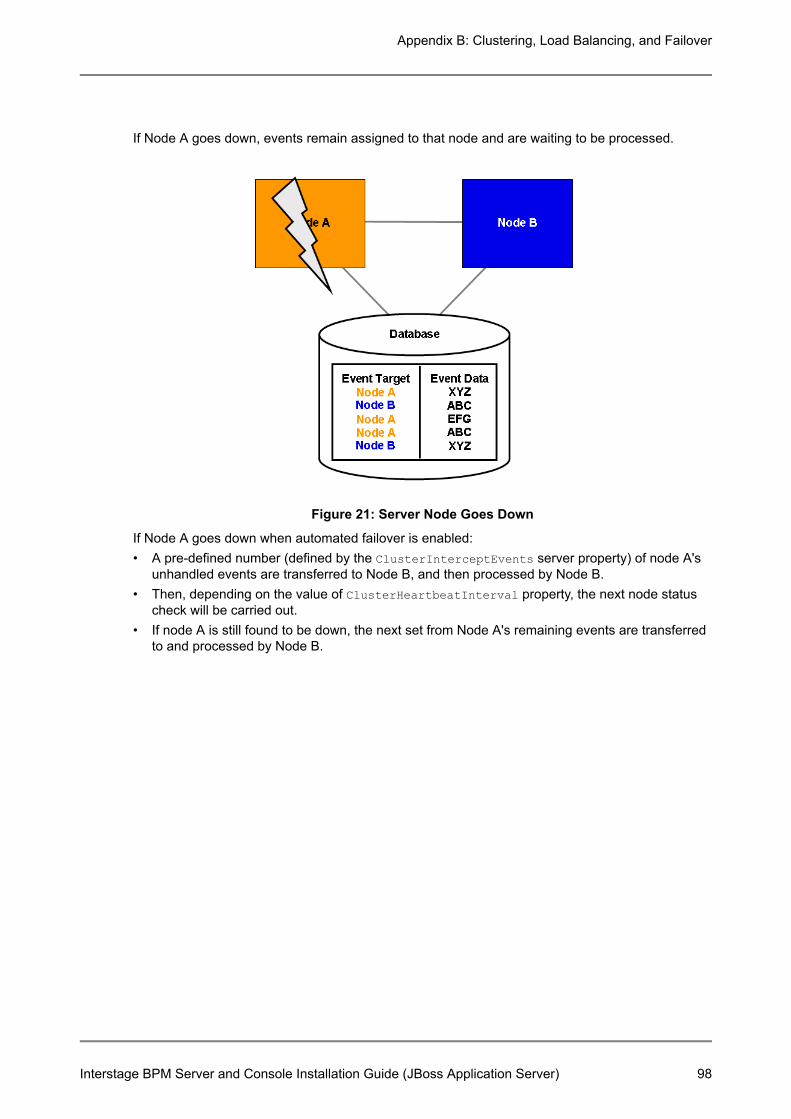
If Node A goes down, events remain assigned to that node and are waiting to be processed.
Figure 21: Server Node Goes Down
If Node A goes down when automated failover is enabled:• A pre-defined number (defined by the ClusterInterceptEvents server property) of node A's
unhandled events are transferred to Node B, and then processed by Node B.• Then, depending on the value of ClusterHeartbeatInterval property, the next node status
check will be carried out.• If node A is still found to be down, the next set from Node A's remaining events are transferred
to and processed by Node B.
Interstage BPM Server and Console Installation Guide (JBoss Application Server) 98
Appendix B: Clustering, Load Balancing, and Failover

If node A continues to be down, the process described above continues until all of Node A's unhandledevents (one set at a time) have been transferred to and processed by Node B.
Figure 22: Events are Transferred to Another Node
Interstage BPM Server and Console Installation Guide (JBoss Application Server) 99
Appendix B: Clustering, Load Balancing, and Failover

Appendix C: Overview of NTLM Authentication ProtocolWhat is NTLM Authentication Protocol?It is one of the security protocols used to authenticate users present in Windows AD network. Theusers can login into the AD network via local or remote Windows workstations present within the ADnetwork. For more details regarding this protocol refer to Microsoft® documentation on NTLM.Enabling NTLM Authentication Protocol for Interstage BPM ConsoleIf you are accessing Interstage BPM Console on Windows, you can enable NTLM (NT LAN Manager)Version1 authentication protocol for Interstage BPM Console.Enabling this protocol allows Integrated Windows Authentication for Interstage BPM Console usersin a Microsoft AD network. For instance, if NTLM has been enabled for a tenant of Interstage BPMand any user within that tenant successfully logs on to Windows desktop, then on accessing anyInterstage BPM Console URL of that tenant, user will be automatically logged in to Interstage BPMConsole without having to login to it explicitly; the Interstage BPM Console login screen will notappear. However, login screen will always be displayed for Interstage BPM tenants who are notconfigured for NTLM Authentication.You can also enable NTLM based SSO Authentication by configuring IBPM tenant with OpenIDProvider module. For more details regarding this please refer the section Overview of SSOAuthentication on page 103.Limitations:• NTLM cannot be enabled for super users accessing the Interstage BPM Tenant Management
Console.• NTLM authentication will only work if the machine on which Interstage BPM is being accessed
is on Microsoft AD network.• Only NTLM Version1 is supported. NTLM Version 2 is not supported. (For NTLM authentication
via OpenID Provider NTLM Version 2 is also supported).Prerequisites:• Network: Machines being used for Interstage BPM Server and Console setup, and machines
being used to access the Interstage Console URL are present within the AD network.• For all machines (Domain Controller, AD Clients, and Interstage BPM Server and Console
machine): Set Local Security Policy as described below:Note: You must log on to Windows desktop using the Administrator's user ID.1. Navigate to Start > Run, type gpedit.msc, click OK.2. In the Local Group Policy Editor screen, go to Local Computer Policy > Computer
Configuration >WindowsSettings > Security Settings > Local Policies > Security Options3. Update policies as mentioned below and click OK.
• Set policy Network security: LAN Manager authentication Level to Send NTLMResponse Only (for NTLM Version 1) or to Send NTLMv2 Response Only (for NTLMVersion 2, in case of NTLM via OpenID Provider).
Also, it is recommended to update following policies (if present) as mentioned below:• Set policy Network security: Restrict NTLM: Incoming NTLM traffic to Allow all.• Set policy Network security: Restrict NTLM: NTLM authentication in this domain to
Disable.• Set policy Network security: Restrict NTLM: Outgoing NTLM traffic to remote servers
to Allow all.
Interstage BPM Server and Console Installation Guide (JBoss Application Server) 100
Appendix C: Overview of NTLM Authentication Protocol

4. To apply these settings, navigate to Start > Run, type gpupdate, click OK.
• Setup: Interstage BPM Server and Console have been setup.• AD Client Browser Setting: Enable Automatic logon in the Browser on Interstage BPM client
machine, as described below:1. In the Web browser, navigate to Tools > Internet Options > Security > Internet > Custom
Level > User Authentication.2. Select the Automatic Logon with current user name and password radio button to enable
this option.3. Click OK.
If this option is not enabled, user will be prompted to enter the username and password. Toavoid this issue, in the browser, add the Interstage BPM Console address to local intranetzone in Tools > Internet Option > Security > Local Intranet Zone > Sites.
Note:
C.1 Setup NTLM Authentication Protocol for Interstage BPMConsoleYou have prepared the system environment as instructed in sectionOverview of NTLM AuthenticationProtocol on page 100.
To setup NTLM Authentication Protocol, follow these steps:For the steps to setup OpenID Provider for NTLM Authentication, refer the section Overview of SSOAuthentication on page 103.Navigate to <Console Shared Root>/console/conf and add the following parameters (and theirvalues) to console.conf:Here, <Console Shared Root> is the value of console_shared_root parameter set in theconfiguration file during setup.• SSONTLMTenants=<value1,value2>- this is a comma separated list of tenants for which you
want to enable NTLM.Note: If you are specifying value in the SSONTLMTenants parameter, following parameters (exceptSSOUserPassKey) are mandatory and should not be left blank. If you leave any of these parametersblank, Interstage BPM Console will not start and an error will be logged in the Application Serverlog file.
• SSOIP=<value> -the value is IP address of the domain controller (AD Server). This is a mandatoryparameter and should not be left blank.
• SSOPreAuthDomain=<value> -the value is the Domain Name (NETBIOS Name). This is amandatory parameter and should not be left blank.
• SSOPreAuthUser=<value> -the value is the Username of the Domain defined in SSOPreAuthDomainparameter. This is a mandatory parameter and should not be left blank.
• SSOPreAuthPass=<value> -the value is the encrypted Password of the Domain user. This is amandatory parameter and should not be left blank.
Interstage BPM Server and Console Installation Guide (JBoss Application Server) 101
Appendix C: Overview of NTLM Authentication Protocol

To encrypt the password, use the EncryptPassword.bat located in <enginedirectory>/client/samples/configuration with the encryption key defined in theSSOUserPassKey parameter. If no key is defined, then this script will use a default key toencrypt the password.For detailed information about encrypting passwords, please refer the section PasswordEncryption on page 75.
Note:
• SSOUserPassKey=<value> -the value is the key to encrypt the password of the Domain user.This is an optional parameter. If you do not specify, a default key will be used to encrypt thepassword. This key should be 24 characters long.
The SSONTLMTenants parameter is dynamically reloadable, so if you add/modify/removethis parameter, then you must log out and again login to the Interstage BPM Console forthe change to take effect. You do not need to restart the Interstage BPM Console.However, if you add/modify/remove other parameters (i.e. SSOIP, SSOPreAuthDomain,SSOPreAuthUser, SSOPreAuthPass, and SSOUserPassKey), then you must restart theInterstage BPM Console.
Note:
For details about the Interstage BPM Console configuration file (console.conf) refer the InterstageBPM Console Online Help.
When a machine's local user has logged-in into the AD Client machine and is trying toaccess an NTLM Authentication enabled tenant, then the login screen will be displayed.While providing credentials, if this user has clicked the Remember my password option,the user name and password are stored in the Stored Username and Password utility ofthe Windows. If any new user logs into the system and access the same URL, it willautomatically login with the previously stored user credentials. To solve this problem, youneed to remove the entry from the Windows utility as follows:
Note:
• For Windows Server 2008 and Windows Vista, remove the entry from:Control Panel > User Accounts > Manage your network passwords > Stored User Namesand Passwords
• For Windows Server 2008 R2, Windows Server 2012, Windows Server 2012 R2,Windows 7, Windows 8, Windows 8.1, remove the entry from:Control Panel > All Control Panel Items > Credential Manager > Windows Vault/WindowsCredentials
Note: You must login as the Administrator user to complete this procedure.
Interstage BPM Server and Console Installation Guide (JBoss Application Server) 102
Appendix C: Overview of NTLM Authentication Protocol
Appendix D: Overview of SSO AuthenticationThe SSO authentication process allows the user to log in once and gain access to multiple (SSOenabled) applications without having to login again in each application during that session.In this SSO authentication process, the authentication is performed by a single module referred toas OpenID Provider application. Any application can leverage this SSO authentication process byintegrating with OpenID Provider. As a result, usage of a single authentication module removes theoverhead of authentication from each application & provides a centralized authentication mechanisminto which any number of applications can be integrated.The OpenID Provider application makes use of the OpenID Authentication 2.0 protocol toauthenticate the users present in Microsoft Active Directory servers and Oracle Directory ServerEnterprise Edition. It is the central system where user authentication will be done for all web basedapplications. You can configure this application for authentication of users in a particular directoryserver.The setup of OpenID Provider application is done automatically along with the setup of InterstageBPM Server and Console for default tenant, if this tenant uses any directory server. If this tenantuses Local User Management then OpenID Provider application will only be deployed but notconfigured with any directory server, because OpenID Provider application does not support LocalUser Management.OpenID Provider Authentication Modes:There are two types of authentication mechanisms supported by OpenID Provider. The type isdecided by OpenID Provider configuration property AuthType. Following are the authenticationmodes:• Authentication using Directory Server (LDAP): If AuthType configuration property value is
not NTLM (i.e. any value other than NTLM) then OpenID Provider will authenticate user usingLDAP protocol with help of other LDAP Configuration properties defined in OpenID Providerconfiguration.
• Authentication using NTLM Protocol: If AuthType configuration property value is NTLM(case-insensitive) then OpenID Provider will authenticate user using NTLM protocol. In this caseNTLM V1 or NTLM V2 is supported as an authentication protocol. For more details regardingNTLM Protocol refer to the section Overview of NTLM Authentication Protocol on page 100.
Enabling SSO Authentication for Interstage BPM ConsoleIf SSO authentication is enabled and you access the Console URL:• If OpenID Provider is configured to use LDAP Protocol for authentication and you are accessing
the URL in a new session, the SSO login screen appears.• If OpenID Provider is configured to use NTLM Protocol for authentication and you are accessing
the URL in a new session, then SSO login screen will not appear and you will be automaticallylogged in to the Interstage BPM Console application.
• If you are already logged into an application that is pre-authenticated by SSO authenticationprocess, you will be automatically logged in to the Interstage BPM Console application in thesame session. The SSO Login screen will not appear. The Log Out link displayed in the headerof the Interstage BPM Console web page will also not appear. To log out, please close all thebrowser windows.
For more information about enabling SSO authentication, refer to the sectionSetup SSOAuthenticationfor Interstage BPM Console on page 104.
Interstage BPM Server and Console Installation Guide (JBoss Application Server) 103
Appendix D: Overview of SSO Authentication
D.1 Setup SSO Authentication for Interstage BPM ConsolePre-requisites:• Interstage BPM OpenID Provider application is started.• The tenant uses Microsoft Active Directory servers or Oracle Directory Server Enterprise Edition.
(The DirectoryService property of Interstage BPM Server Tenant must be set to 1 or 3).• The OpenID Provider application and tenant both have the same LDAP configuration.To use SSO authentication, follow these steps:
If you meet any of the following conditions, then before updating the SSO authentication itis mandatory to update the OpenID Provider Configuration according to the instructionsgiven in the section Updating the OpenID Provider Configuration on page 104:
Note:
• If you specify the Local User Management during the setup of Interstage BPM.• If the OpenID Provider application and tenant both have different LDAP configuration.• If OpenID Provider needs to be configured to use NTLM authentication.
You can update the SSO authentication in following ways:• Using the Interstage BPM Tenant Management Console: Select the tenant for which you want
to enable\disable the SSO authentication and update the SSOAuthentication property. For detailinstructions, refer to the SSOAuthentication section of Interstage BPM Server AdministrationGuide.
D.2 Updating the OpenID Provider ConfigurationTo update OpenID Provider configuration, follow these steps:
If you use Built-in SSO authentication, do not include any forwardslash "/" or backslash '\'characters in the user ID that you create.
Note:
1. Open the config.properties file located in the <Console Shared Root>/ssofi/provider/<context-root-name>/ directory.Here,• <Console Shared Root>- is the value of console_shared_root parameter set in the
configuration file during setup.• <context-root-name> - is the context-root name of the OpenID Provider application. Its value
is openid if you are using the OpenID provider application that is setup by the Interstage BPMsetup script.
2. Update the following parameters in this configuration file.
Any backslashes "\", colons ":" or equal signs "=" used in parameter values inside theconfiguration file must be escaped by backslashes.For example: C\:\\Program Files
Note:
Interstage BPM Server and Console Installation Guide (JBoss Application Server) 104
Appendix D: Overview of SSO Authentication

DescriptionMandatory?Parameter
The property decides which authenticationmechanism will be used by OpenID Provider(either LDAP protocol or NTLM protocol).• For LDAP Protocol AuthType=LDAP• For NTLM Protocol AuthType=NTLMThis property is case-insensitive i.e. NTLM orntlm or nTLm is valid for NTLM Protocol. If thereis any other value then by default LDAPprotocol will be used for authentication. In caseof NTLM protocol, configuration propertiesrelated to Directory Server are ignored (i.e. notrequired).
YesAuthType
This parameter specifies the name of theattribute that identifies the user ID within anLDAP login string. The value of this parametercan be any of the following:• For Oracle Directory Server Enterprise
Edition: LDAPuid=uid
• For Microsoft Active Directory: LDAPuid=CN
YesLDAPuid
This parameter specifies the LDAP organizationunit to be used for searching users. Its valuewill be:For users stored in the Directory Service:LDAPPeople=ou\=People
YesLDAPPeople
This parameter specifies the directory sub-treein the Directory Service where groups and usersto be used are stored. For example:LDAPDBSuffix=dc\=xxx,dc\=fujitsu,dc\=com
The users will be searched under theorganization unit specified as the value ofLDAPPeople parameter.
YesLDAPDBSuffix
Interstage BPM Server and Console Installation Guide (JBoss Application Server) 105
Appendix D: Overview of SSO Authentication
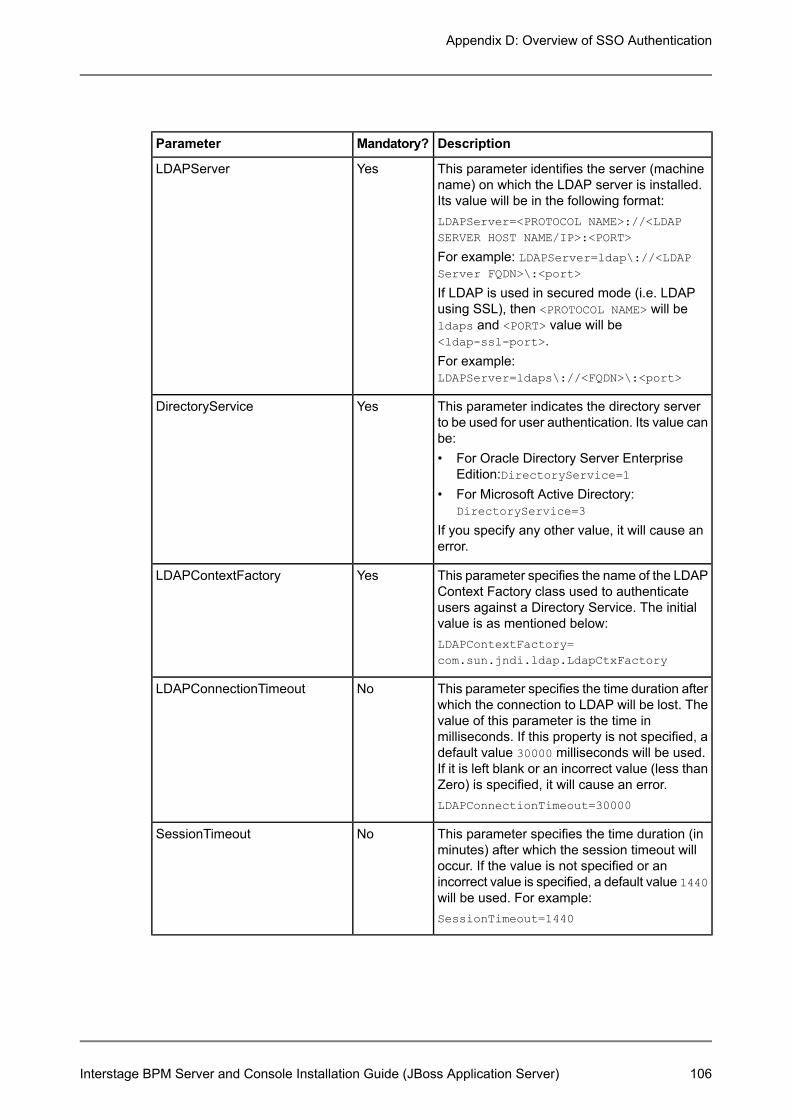
DescriptionMandatory?Parameter
This parameter identifies the server (machinename) on which the LDAP server is installed.Its value will be in the following format:LDAPServer=<PROTOCOL NAME>://<LDAPSERVER HOST NAME/IP>:<PORT>
For example: LDAPServer=ldap\://<LDAPServer FQDN>\:<port>
If LDAP is used in secured mode (i.e. LDAPusing SSL), then <PROTOCOL NAME> will beldaps and <PORT> value will be<ldap-ssl-port>.For example:LDAPServer=ldaps\://<FQDN>\:<port>
YesLDAPServer
This parameter indicates the directory serverto be used for user authentication. Its value canbe:• For Oracle Directory Server Enterprise
Edition:DirectoryService=1• For Microsoft Active Directory:
DirectoryService=3
If you specify any other value, it will cause anerror.
YesDirectoryService
This parameter specifies the name of the LDAPContext Factory class used to authenticateusers against a Directory Service. The initialvalue is as mentioned below:LDAPContextFactory=com.sun.jndi.ldap.LdapCtxFactory
YesLDAPContextFactory
This parameter specifies the time duration afterwhich the connection to LDAP will be lost. Thevalue of this parameter is the time inmilliseconds. If this property is not specified, adefault value 30000 milliseconds will be used.If it is left blank or an incorrect value (less thanZero) is specified, it will cause an error.LDAPConnectionTimeout=30000
NoLDAPConnectionTimeout
This parameter specifies the time duration (inminutes) after which the session timeout willoccur. If the value is not specified or anincorrect value is specified, a default value 1440will be used. For example:SessionTimeout=1440
NoSessionTimeout
Interstage BPM Server and Console Installation Guide (JBoss Application Server) 106
Appendix D: Overview of SSO Authentication
3. Restart the Interstage BPM OpenID Provider for the configuration property changes to take effect.
D.3 Configuration for SSLSSO Authentication configuration in secured mode:1. Open the config.properties file located in the <Console Shared
Root>/ssofi/provider/<context-root-name>/ directory.Here,• <Console Shared Root> - is the value of console_shared_root parameter set in the
configuration file during setup.• <context-root-name> - is the context-root name of the OpenID Provider application. Its value
is openid if you are using the OpenID provider application that is setup by the Interstage BPMsetup script.
2. Update the following parameters in this configuration file:
DescriptionMandatory?Parameter
For implementing SSL, use the https protocol.For example: OpenIDPattern=https\://{FQDN}/{provider-root-context}/id/{id}
YesOpenIDPattern
Restart the Interstage BPM OpenID Provider for the configuration property changes to takeeffect. For details, refer the section Starting Interstage BPM OpenID Provider.
Note:
3. Login to the Interstage BPM Tenant Management Console and update the value of OpenIDProvider URL in the SSOAuthentication property.Use the https protocol instead of http.For example: https://<FQDN>:<port>/openid/id/
After updating the configuration parameters you must log out and again login to the InterstageBPM Console for these changes to take effect.
Note:
Interstage BPM Server and Console Installation Guide (JBoss Application Server) 107
Appendix D: Overview of SSO Authentication

Appendix E: TroubleshootingE.1 Log File Information
For details about Log Files, refer the Configuring Log Files topic in the Interstage BPM ServerAdministration Guide.
E.2 Resolving Specific Error Situations
E.2.1 Interstage BPM Server Fails to StartCheck the Error.log file in the <engine directory>/server/instance/default/logs directory.
What to doLook for
Check if the database is running. Also check thatyou can access the database from the machinewhere the Interstage BPM Server is setup in casethe database is running on a different machine.You can use telnet <Database ServerHostname> <Port> from the server host machineto check that the connection to the databasehost/port can be established.
DbService : setConnection: Connection todatabase server failed. Is the databaseserver running and reachable through thenetwork? {ORA-01089: immediate shutdownin progress - no operations arepermitted.
Ensure that the user name/password as specifiedin the LDAPAccessUserID /LDAPAccessUserPassword parameters of theInterstage BPM Server are correct and you canlogin to your Directory Server using the aboveuser name/password.
LdapBroker : getContext: Could not createthe directory services. {[LDAP: errorcode 49 - Invalid Credentials]}
LdapBroker : getGroupMembersByDN: Couldnot retrieve the user groups. {Could notcreate the directory services. {[LDAP:error code 49 - Invalid Credentials]}}
LdapBroker : Could not retrieve the usergroups. {Could not create the directoryservices. {[LDAP: error code 49 - InvalidCredentials]}}
Ensure that the LDAP Server is running on theport as specified in the LDAPServer parameterof the Interstage BPM Server. You can usetelnet ldapServerHostName port from theserver host machine to check that the connectionto the host/port can be established.
getContext: Could not create thedirectory services.
LdapBroker : getGroupMembersByDN: Couldnot retrieve the user groups. {Could notcreate the directory services.
LdapBroker : Could not retrieve the usergroups. {Could not create the directoryservices.
Interstage BPM Server and Console Installation Guide (JBoss Application Server) 108
Appendix E: Troubleshooting
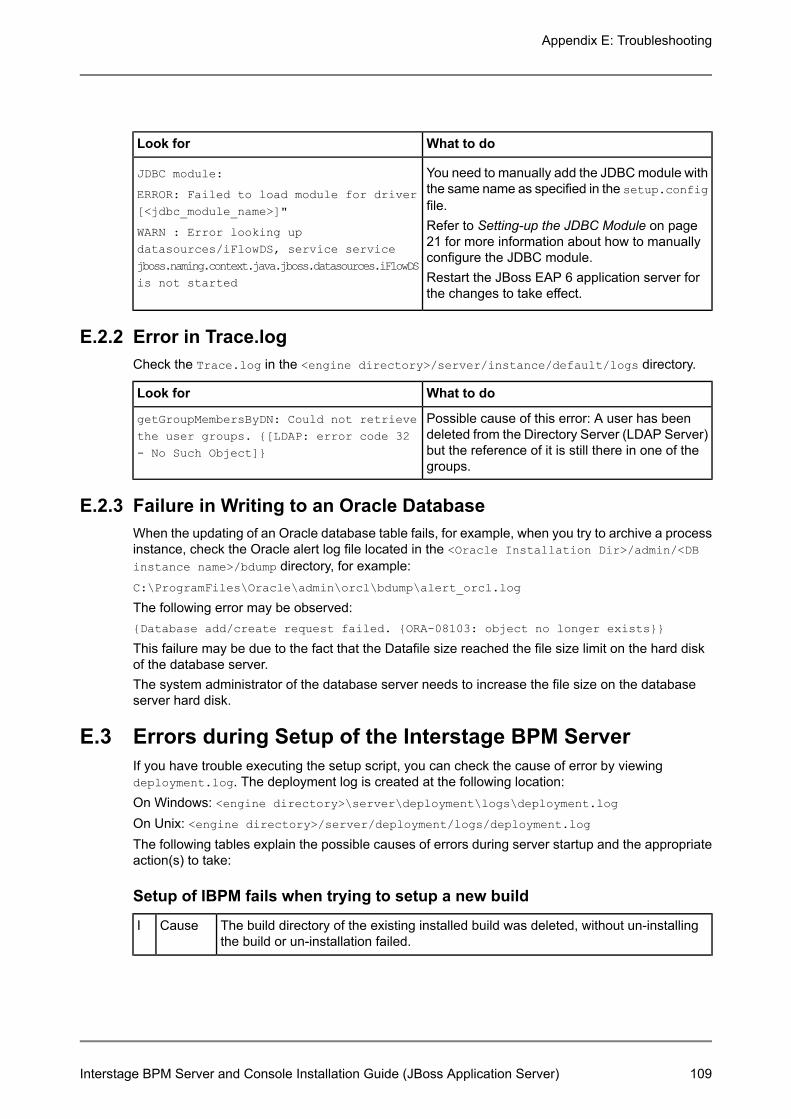
What to doLook for
You need to manually add the JDBC module withthe same name as specified in the setup.configfile.Refer to Setting-up the JDBC Module on page21 for more information about how to manuallyconfigure the JDBC module.Restart the JBoss EAP 6 application server forthe changes to take effect.
JDBC module:
ERROR: Failed to load module for driver[<jdbc_module_name>]"
WARN : Error looking updatasources/iFlowDS, service servicejboss.naming.context.java.jboss.datasources.iFlowDSis not started
E.2.2 Error in Trace.logCheck the Trace.log in the <engine directory>/server/instance/default/logs directory.
What to doLook for
Possible cause of this error: A user has beendeleted from the Directory Server (LDAP Server)but the reference of it is still there in one of thegroups.
getGroupMembersByDN: Could not retrievethe user groups. {[LDAP: error code 32- No Such Object]}
E.2.3 Failure in Writing to an Oracle DatabaseWhen the updating of an Oracle database table fails, for example, when you try to archive a processinstance, check the Oracle alert log file located in the <Oracle Installation Dir>/admin/<DBinstance name>/bdump directory, for example:C:\ProgramFiles\Oracle\admin\orcl\bdump\alert_orcl.log
The following error may be observed:{Database add/create request failed. {ORA-08103: object no longer exists}}
This failure may be due to the fact that the Datafile size reached the file size limit on the hard diskof the database server.The system administrator of the database server needs to increase the file size on the databaseserver hard disk.
E.3 Errors during Setup of the Interstage BPM ServerIf you have trouble executing the setup script, you can check the cause of error by viewingdeployment.log. The deployment log is created at the following location:On Windows: <engine directory>\server\deployment\logs\deployment.log
On Unix: <engine directory>/server/deployment/logs/deployment.log
The following tables explain the possible causes of errors during server startup and the appropriateaction(s) to take:
Setup of IBPM fails when trying to setup a new build
The build directory of the existing installed build was deleted, without un-installingthe build or un-installation failed.
CauseI
Interstage BPM Server and Console Installation Guide (JBoss Application Server) 109
Appendix E: Troubleshooting

Manually delete the earlier build's registry-entry, as follows:1. Go to Start > Run, type regedit, click OK.2. In the Registry Editor screen, go to below path.
• 32bit OS: HKEY_LOCAL_MACHINE > SOFTWARE > Fujitsu > Install >Interstage BPM Server
• 64bit OS: HKEY_LOCAL_MACHINE > Wow6432Node > SOFTWARE >Fujitsu > Install > Interstage BPM Server
3. Delete the Interstage BPM Server registry entry under Install key.4. Go to below path.
• 32bit OS: HKEY_LOCAL_MACHINE > SOFTWARE >Microsoft >Windows> CurrentVersion > Fujitsu > Interstage BPM Server
• 64bit OS: HKEY_LOCAL_MACHINE > Wow6432Node > SOFTWARE >Microsoft >Windows > CurrentVersion > Fujitsu > Interstage BPMServer
5. Delete the Interstage BPM Server registry entry under Fujitsu key. This willensure complete deletion of the registry entry for Windows platform.
6. Go to below path.• 32bit OS: HKEY_LOCAL_MACHINE > SOFTWARE >Microsoft >Windows
> CurrentVersion > Uninstall >DFC70E37-68E7-469C-A253-9ED7BB3BCD23
• 64bit OS: HKEY_LOCAL_MACHINE > Wow6432Node > SOFTWARE >Microsoft > Windows > CurrentVersion > Uninstall >DFC70E37-68E7-469C-A253-9ED7BB3BCD23
7. Delete the Interstage Business Process Manager xx.x registry entry underUninstall key. This will ensure complete deletion of the registry entry for Windowsplatform.
Action(ForWindows)
Manually delete the Solaris package information, as follows:1. Open the Command Prompt window and run the command pkginfo -l FJSVibpm
from any location of the Solaris machine, to check if the Solaris packageinformation still exists.
2. If the Solaris package information is displayed, then delete the package informationusing the following steps:a. Create a file named ibpm.uninst under the /tmp location.b. Run the command pkgrm FJSVibpm to delete the Solaris package.c. Run the command pkginfo -l FJSVibpm once more, to ensure that the
Solaris package has been deleted successfully. If no information is displayed,then it confirms that the Solaris package has been completely deleted fromthe Solaris platform.
Action(ForSolaris)
Interstage BPM Server and Console Installation Guide (JBoss Application Server) 110
Appendix E: Troubleshooting

Manually delete the RPM package information, as follows:1. Open the Command Prompt window and run the command rpm -qi FJSVibpm
from any location of the Linux machine, to check if the RPM package still exists.2. If the RPM package information is displayed, then delete the package information
using the command rpm -e FJSVibpm.3. Run the command rpm -qi FJSVibpm once more to ensure that the RPM package
has been deleted successfully. If no information is displayed, then it confirms thatthe RPM package has been completely deleted from the Linux platform.
Action(ForLinux)
An error occurred during Interstage BPM database creation/update
One of the following values provided during setup were wrong:• Database Administrator user name• Database Administrator password
CauseI
Restore the database from the backup of the database made before setting upInterstage BPM.Update the setup.config file and run the setup script again.
Action
One of the following values provided during setup were wrong:• Host name of the database server• Database SID (database instance name)• Database port
CauseII
Restore the database from the backup of the database made before setting upInterstage BPM.Update the setup.config file and run the setup script again.
Action
Database server is not running.CauseIII
Start the database server.Update the setup.config file and run the setup script again.
Action
Errors caused by JDBC Connection
The SQLRecoverableException occurs. This is caused by Oacle Bug 6485149.CauseI
Please contact Oracle Technical Support team for further instructions.Action
Errors caused by JDK Version
The version of JDK specified during setup does not match the version required forthis application server.
CauseI
Interstage BPM Server and Console Installation Guide (JBoss Application Server) 111
Appendix E: Troubleshooting
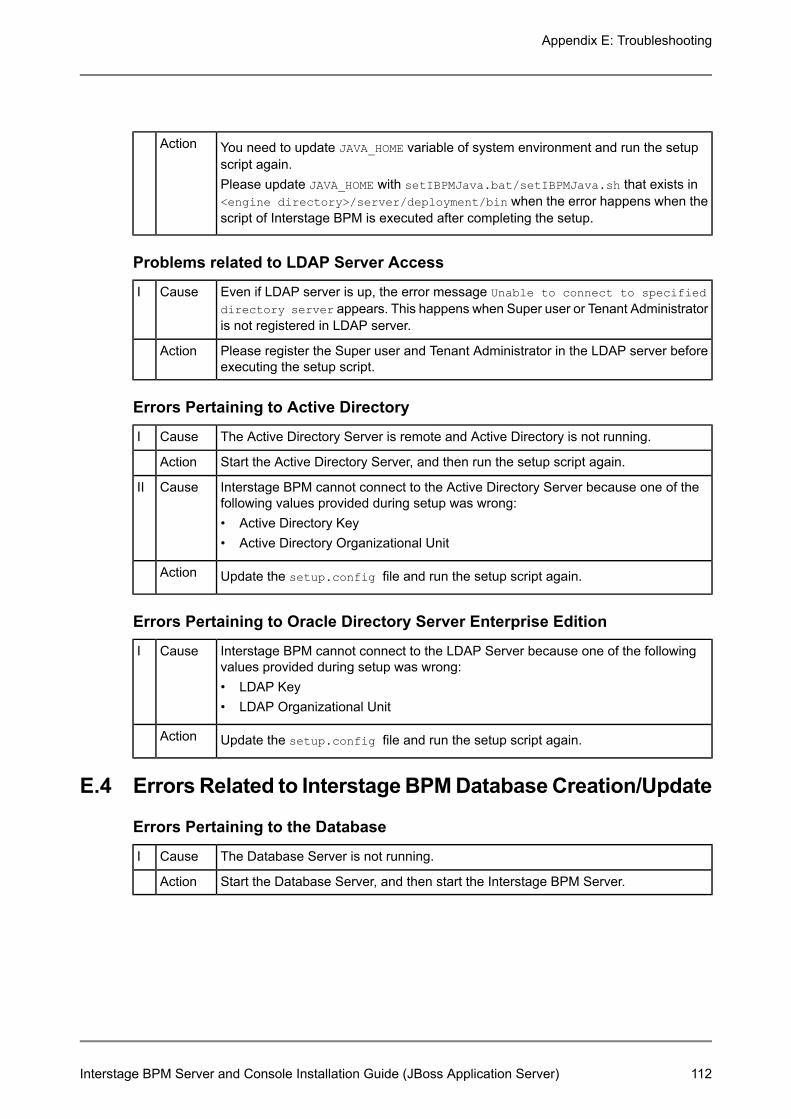
You need to update JAVA_HOME variable of system environment and run the setupscript again.Please update JAVA_HOME with setIBPMJava.bat/setIBPMJava.sh that exists in<engine directory>/server/deployment/bin when the error happens when thescript of Interstage BPM is executed after completing the setup.
Action
Problems related to LDAP Server Access
Even if LDAP server is up, the error message Unable to connect to specifieddirectory server appears. This happens when Super user or Tenant Administratoris not registered in LDAP server.
CauseI
Please register the Super user and Tenant Administrator in the LDAP server beforeexecuting the setup script.
Action
Errors Pertaining to Active Directory
The Active Directory Server is remote and Active Directory is not running.CauseI
Start the Active Directory Server, and then run the setup script again.Action
Interstage BPM cannot connect to the Active Directory Server because one of thefollowing values provided during setup was wrong:• Active Directory Key• Active Directory Organizational Unit
CauseII
Update the setup.config file and run the setup script again.Action
Errors Pertaining to Oracle Directory Server Enterprise Edition
Interstage BPM cannot connect to the LDAP Server because one of the followingvalues provided during setup was wrong:• LDAP Key• LDAP Organizational Unit
CauseI
Update the setup.config file and run the setup script again.Action
E.4 Errors Related to InterstageBPMDatabaseCreation/Update
Errors Pertaining to the Database
The Database Server is not running.CauseI
Start the Database Server, and then start the Interstage BPM Server.Action
Interstage BPM Server and Console Installation Guide (JBoss Application Server) 112
Appendix E: Troubleshooting
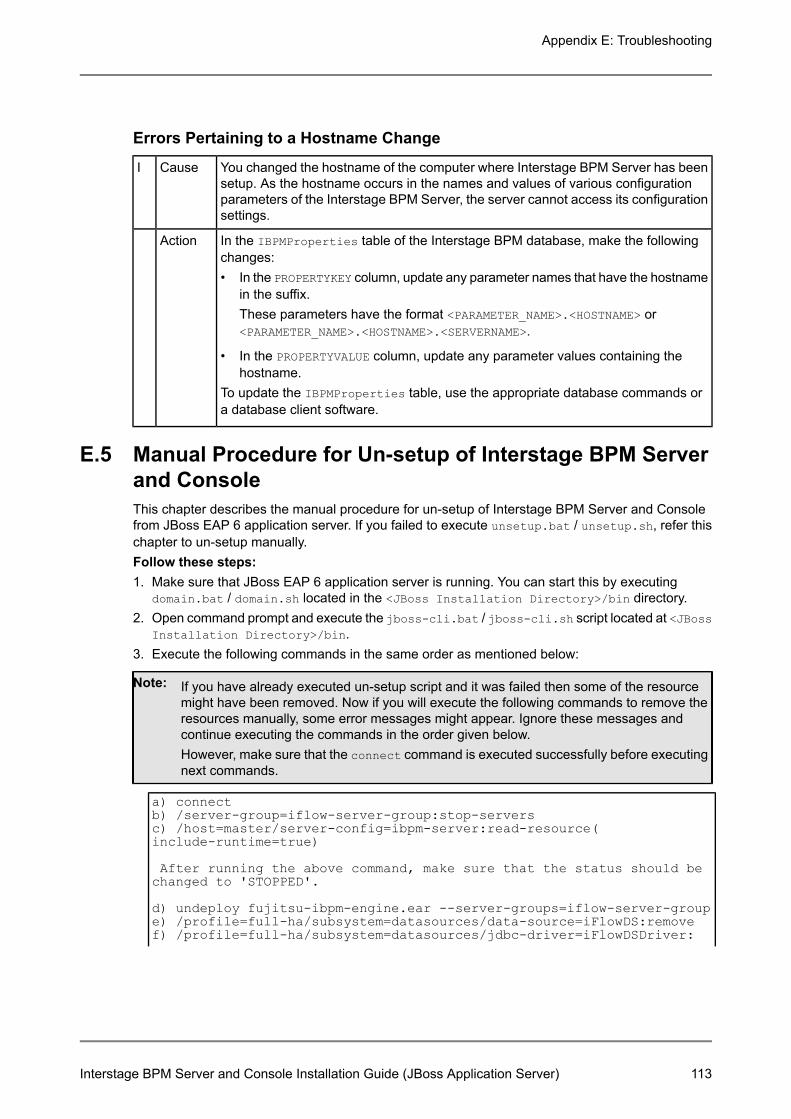
Errors Pertaining to a Hostname Change
You changed the hostname of the computer where Interstage BPM Server has beensetup. As the hostname occurs in the names and values of various configurationparameters of the Interstage BPM Server, the server cannot access its configurationsettings.
CauseI
In the IBPMProperties table of the Interstage BPM database, make the followingchanges:• In the PROPERTYKEY column, update any parameter names that have the hostname
in the suffix.These parameters have the format <PARAMETER_NAME>.<HOSTNAME> or<PARAMETER_NAME>.<HOSTNAME>.<SERVERNAME>.
• In the PROPERTYVALUE column, update any parameter values containing thehostname.
To update the IBPMProperties table, use the appropriate database commands ora database client software.
Action
E.5 Manual Procedure for Un-setup of Interstage BPM Serverand ConsoleThis chapter describes the manual procedure for un-setup of Interstage BPM Server and Consolefrom JBoss EAP 6 application server. If you failed to execute unsetup.bat / unsetup.sh, refer thischapter to un-setup manually.Follow these steps:1. Make sure that JBoss EAP 6 application server is running. You can start this by executing
domain.bat / domain.sh located in the <JBoss Installation Directory>/bin directory.2. Open command prompt and execute the jboss-cli.bat / jboss-cli.sh script located at <JBoss
Installation Directory>/bin.3. Execute the following commands in the same order as mentioned below:
If you have already executed un-setup script and it was failed then some of the resourcemight have been removed. Now if you will execute the following commands to remove theresources manually, some error messages might appear. Ignore these messages andcontinue executing the commands in the order given below.However, make sure that the connect command is executed successfully before executingnext commands.
Note:
a) connectb) /server-group=iflow-server-group:stop-serversc) /host=master/server-config=ibpm-server:read-resource(include-runtime=true)
After running the above command, make sure that the status should bechanged to 'STOPPED'.
d) undeploy fujitsu-ibpm-engine.ear --server-groups=iflow-server-groupe) /profile=full-ha/subsystem=datasources/data-source=iFlowDS:removef) /profile=full-ha/subsystem=datasources/jdbc-driver=iFlowDSDriver:
Interstage BPM Server and Console Installation Guide (JBoss Application Server) 113
Appendix E: Troubleshooting

removeg) /profile=full-ha/subsystem=messaging/hornetq-server=default/jms-topic=NotificationTopic/:removeh) /profile=full-ha/subsystem=messaging/hornetq-server=default/jms-topic=SQNotificationTopic/:removei) /profile=full-ha/subsystem=messaging/hornetq-server=default/jms-topic=EnactmentTopic/:removej) /profile=full-ha/subsystem=messaging/hornetq-server=default/jms-topic=EmailNotificationTopic/:removek) /profile=full-ha/subsystem=messaging/hornetq-server=default/jms-topic=ActionAgentTopic/:removel) /profile=full-ha/subsystem=messaging/hornetq-server=default/jms-topic=TimerTaskTopic/:removem) /profile=full-ha/subsystem=messaging/hornetq-server=default/jms-topic=CommandTopic/:removen) /profile=full-ha/subsystem=messaging/hornetq-server=default/jms-topic=ResponseTopic/:removeo) /profile=full-ha/subsystem=messaging/hornetq-server=default/connection-factory=iFlowConnectionFactory/:removep) /profile=full-ha/subsystem=messaging/hornetq-server=default/connection-factory=iFlowServerConnectionFactory/:removeq) /profile=full-ha/subsystem=messaging/hornetq-server=default/:undefine-attribute(name=security-enabled)r) /profile=full-ha/subsystem=ejb3/:undefine-attribute(name=default-entity-bean-instance-pool)s) /profile=full-ha/subsystem=ejb3/strict-max-bean-instance-pool=entity-strict-max-pool/:removet) /profile=full-ha/subsystem=ejb3/:undefine-attribute(name=default-entity-bean-optimistic-locking)u) /system-property=org.apache.catalina.connector.USE_BODY_ENCODING_FOR_QUERY_STRING/:removev) /system-property=ConsoleSharedRoot/:removew) undeploy console.war --server-groups=iflow-server-groupx) undeploy openid.war --server-groups=iflow-server-groupy) /host=master/server-config=ibpm-server:removez) /server-group=iflow-server-group:removeaa) quit
4. In case of cluster environment, remove the server configuration as mentioned below:On each slave machine, update the host.xml present at <JBoss InstallationDirectory>/domain/configuration/ to remove the server configuration in the <servers>section:Existing:
<servers><server name="<server_name>" group="iflow-server-group"auto-start="true"><system-properties><property name="message.selector" value="<ServerName>"
boot-time="true"/><property name="ibpm.nodename" value="<ServerName>"
boot-time="true"/></system-properties>
</server></servers>
Interstage BPM Server and Console Installation Guide (JBoss Application Server) 114
Appendix E: Troubleshooting

Changed to:
<servers></servers>
5. Delete Interstage BPM Console and OpenID Provider:a) Delete <engine directory>/client/console directoryb) Delete <engine directory>/client/openid directory
The un-setup of Interstage BPM Server and Console is completed successfully
You need to manually delete the registry-entry/RPM package/package information asdescribed in Errors during Setup of the Interstage BPM Server on page 109, topic (Setupof IBPM fails when trying to setup a new build on page 109).
Note:
E.6 Contacting Your Local Fujitsu Support OrganizationIf you are unable to troubleshoot your problem:1. Replicate the actions that caused the error.2. Contact your local Fujitsu Support organization and provide the following information:
General Information• Operating System• Directory Service (type and version)• Database server (type and version)• JDK version• Application server (type and version)• Interstage BPM edition, version and build number• Major problem area• Priority of the issue• Environment in which the problem occursConfiguration Information• The configuration file that you exported from the Interstage BPM ServerLog Files• All log files from <engine directory>/server/instance/default/logs
• Setup log file from <engine directory>/server/deployment/logs/deployment.log
OS System Logs• The Windows event log that you obtain using the Windows Event Viewer• Linux system logs stored in /var/log/messages
• Solaris system logs stored in /var/adm/messages
Problem Description• Description of the steps you performed before the problem occurred• Frequency with which the problem occursProblem Details• The application program and its source code that caused the error
Interstage BPM Server and Console Installation Guide (JBoss Application Server) 115
Appendix E: Troubleshooting

• The XPDL file of the process definition that caused the error• Information about Java Actions, Timers and Agents defined in the process definition• Screenshot of the process instance history if the process instance goes into error state• Stack trace if any exception is displayed
You can obtain the stack trace by clicking Details on the error page displayed in the InterstageBPM Console.
• Screenshot of the exception wherever it is displayed• Screenshot of the process instance (graphical view) if the process instance goes into error
state or into an unexpected state• Calendar files (*.cal) if timers are used• The agentsConfig.xml file if agents are used
Interstage BPM Server and Console Installation Guide (JBoss Application Server) 116
Appendix E: Troubleshooting

Index
A
About this manual, 7Automated Failover, 96
C
Cluster, 88Configuration export script, 78Configuration import script, 78Configuring Interstage BPM server, 86
D
Databaseconfiguring, 29preparation, 14Server, 14
Database Upgrade Script, 61Demo Mode, 77Directory Service
Setup, 38, 49Users and Groups, 42
DMS, 86
F
Failover, 88
G
Group Caching, 56Groups, 31
H
Hardware requirements, 13
I
Interstage BPMdocumentation list, 8removing, 58upgrading from a previous version, 61
Interstage BPM ConsoleOverview, 12starting, 36
Interstage BPM OpenID Providerstarting, 37
Interstage BPM Serveroverview, 10Setup script, 10
J
JBossStarting Interstage BPM Console, 36Starting Interstage BPM OpenID Provider,37
L
LDAPSetup, 38Users and Groups, 42
Load balancing, 88
M
Microsoft® Active Directory, 38Minimum configuration
Server, 10
O
Oraclepreparing, 15
Oracle Directory Server Enterprise Edition, 49
P
Passwordsencryption, 75
R
Remote database, 11Removing
Interstage BPM, 58Roles, 31
S
secure communication, 86Security features, 74
Interstage BPM Server and Console Installation Guide (JBoss Application Server) 117
Index

Security Mode, 77Server System configuration
Minimum configuration, 10Remote database, 11
Server System configurations, 10Setup procedure overview, 23SSO, 103Starting
Interstage BPM Console, 36Interstage BPM OpenID Provider, 37
System requirements, 13
T
TCP/IP, 14
TroubleshootingInterstage BPM Server startup, 109
U
Un-setup Interstage BPM, 58Upgrade, 61Upgrade from a previous version, 61User
Assign to LDAP Group, 42User accounts, 31User groups, 31
W
WebDAV, 86
Interstage BPM Server and Console Installation Guide (JBoss Application Server) 118
Index