home-dzine online · and tell us more about your favourite craft or hobby. ... it’s important to...
TRANSCRIPT

Home-Dzineonline
It’s all about caring for and improving your home
undercover officeantique luxury
sun loungergarden shed
expert paint tipsa touch of glamourquick and easydremel craft project
designer mirrorbig little kitchen
We hope you enjoy the new format magazine! Now you can easily print, save and file your copies for easy reference.
May Issue 1

Home-Dzineonline
It’s all about caring for and improving your home
To make sure that you enjoy the new format, please read this page carefully so that you don’t miss out on important information that will make your viewing so much easier.
Our new format meansthat you can easily scroll through the pages
And you can view at any resolution
We’ve also added active text and and a directory of advertisers and sponsors (on page 24) should you want to visit a website, send an email or find out moreinformation.
As you hover over active elements you simply have to click with your mouse.
To win this handy Bosch XEO Universal Cutter - send us an email at
[email protected] tell us more about your favourite craft or hobby.

Planning to redecorate? Here are a few tips from Prominent Paints to help you choose the right paint...
paint tips from the experts!How do I make sure I’m using the right colour before I start?Before finally selecting a paint colour bear in mind that paint does not always look thesame on the wall as it does on the paint swatch. It is not always possible to reproduce exact paint colours onto the swatches. There are also factors that affect colour; you probably selected the colour by looking at it under a different type or intensity of light than what’s in your room. Sunlight, daylight, fluorescent light, halogen light, andincandescent light affect colours differently. It’s important to take the sample card home and view it in the room you intend to paint, viewing it several times during the day to see how the colour looks at different times of the day and in natural and artificial light beforemaking a final decision.
To help make choosing colour easier, use the Prominent Virtual Painter to give you a visual indication of how colours work together in a room.
How do I select the best paint finish - matt,satin or sheen?The difference between matt, satin and sheen is the amount of light reflection off the painted surface,which simply means how much the paint shines. Prominent offer matt, satin and sheen paints in the Ultramat and Premium ranges.
Home-Dzineonline 3
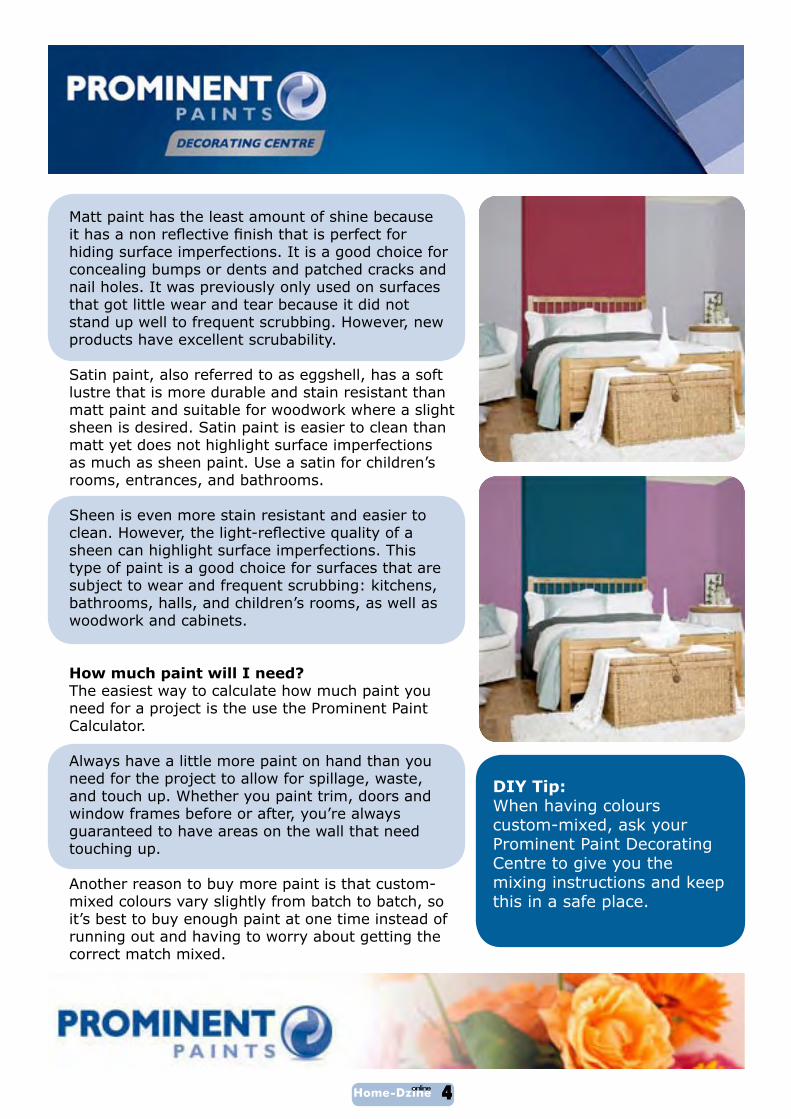
Matt paint has the least amount of shine because it has a non reflective finish that is perfect forhiding surface imperfections. It is a good choice for concealing bumps or dents and patched cracks and nail holes. It was previously only used on surfaces that got little wear and tear because it did not stand up well to frequent scrubbing. However, new products have excellent scrubability.
Satin paint, also referred to as eggshell, has a soft lustre that is more durable and stain resistant than matt paint and suitable for woodwork where a slight sheen is desired. Satin paint is easier to clean than matt yet does not highlight surface imperfections as much as sheen paint. Use a satin for children’s rooms, entrances, and bathrooms.
Sheen is even more stain resistant and easier to clean. However, the light-reflective quality of asheen can highlight surface imperfections. This type of paint is a good choice for surfaces that are subject to wear and frequent scrubbing: kitchens, bathrooms, halls, and children’s rooms, as well as woodwork and cabinets.
How much paint will I need? The easiest way to calculate how much paint you need for a project is the use the Prominent Paint Calculator.
Always have a little more paint on hand than you need for the project to allow for spillage, waste, and touch up. Whether you paint trim, doors and window frames before or after, you’re always guaranteed to have areas on the wall that need touching up.
Another reason to buy more paint is that custom-mixed colours vary slightly from batch to batch, so it’s best to buy enough paint at one time instead of running out and having to worry about getting the correct match mixed.
DIY Tip:When having colours custom-mixed, ask your Prominent Paint Decorating Centre to give you the mixing instructions and keep this in a safe place.
Home-Dzineonline 4

products we love The value of a Jetmaster has transcended concept and design and today it has a generic value that encompasses all fireplaces.
With winter just around the corner, and the possibility of being left in the cold as a result of Eskom’s load shedding, many homeowners will be looking at new ways to heat their home.
Since 1951 Jetmaster has been manufacturing fireplacesof distinction, bringing warmth to homes. The patented convection heating design increases the heating capacity of normal brick fireplaces by as much as 5 times. Theconvection heating system allows the room to be heated in two ways, firstly from radiated heat directly off the fireplaceitself and secondly convected heat from the air that is heated as it travels through the convection chamber.
Open or Closed FlameOnce experienced, the ambience of an open fireplaceand glowing coals is not easily forgotten. And you don’t even need a brick chimney, because Jetmaster has a fireplace to suit every home.
Jetmaster’s slow combustion stoves are imported from Norway and manufactured by Jotul who have been designing and manufacturing stoves for almost 150 years. The quality of manufacturing has become the cornerstone of their success and their ability to craft both modern and classical stoves have gained them an international reputation. The stoves are made out of cast iron and the iron allows the stove to retain and reflect heat for a long period even after the fire hasdied out.
Jetmaster has launched two new Slow Combustion Fireplaces, The models range in design from free standing to built-in with a staggering average heat output of 6.5 kw. The large ceramic glass window displays a mesmerising flame pattern, which isregulated through a single lever control mechanism.
For more information on the Jetmaster range, visit: www.jetmaster.co.za
advertise your product hereClick here to find out more
Home-Dzineonline 5

Glamour is back! It’s out with bland, boring rooms and in with drama, glitz and glamour!
Tailored DrapesClean lines and thoughtful detailing set these panels apart from humdrum store-bought curtains. Though this look can be created from expensive designer fabrics, even budget-friendly fabric choices can look elegant with such detail. Shop around for specials on damask, faux silk or brocade in plain, neutral shades.
Damask fabrics are reversible and are characterised by satin and sateen weaves. The design motifs are typically distinguished by contrasting lustre.
Brocades are typically ornate, jacquard-woven fabrics. The pattern is usually emphasised by contrasting surfaces and colours, and appears on the face of the fabric.
Add a dash of gold with elegant rods and finials and sweepback with stylishly plain matching tie backs.
ChandeliersWhether you hang a chandelier in the entry, dining room, bedroom, or bath, sparkling crystals whisper romance and catch the light. Previously considered items for the rich and famous, chandeliers are now featured in many other homes.
A chandelier is a ceiling-mounted fixture with two or more armsbearing lights. Modern chandeliers are often very ornate, containing dozens of lamps and complex array of glass shapes to illuminate the room in many intricate patterns.
From contemporary to rustic, you will find chandeliers inwire, wrought iron, stainless steel, and even plastic.
HardwareFrom vintage glass doorknobs to sophisticated handles for a cabinet, beautiful hardware speaks volumes about style. Adding this detail to your home can be a low-cost fix withhigh style points. With a visit to secondhand and antique shops you may uncover a treasure.
MouldingTake a cue from the French and apply wall moulding in a dining area, hallway, or other room. Once you master the art of mitred corners and careful measuring, the job can be a fairly easy way to add elegance.
so glamorous!
bette
r hom
es an
d gar
dens
mag
azine
Home-Dzineonline 6

designer mirror I recently saw a framed mirror that I really liked, but the price tag was just to rich for my tastes - so I made my own!
Here’s how:1. Use a pencil to draw the shapes that you want to cut out. Drill a 10mm
hole in the shapes and use a fret saw blade in the Jigsaw (narrower blade). Move slowly, gently pushing the Jigsaw around curves.
2. Use your mirror as a template to draw the outline in the centre of the frame, equal distance from the top and sides. Now measure in 10mm all around this line.
3. Drill four 10mm holes in each corner of inner square, insert the jigsaw blade and continue to cut out this square.
4. Prepare the Rust-Oleum American Accents Rust Kit according to the instructions. You will need a sponge and a lint-free cloth. Spray on the base coat and apply the top coat as recommended, using a sponge, and immediately wipe off with a cloth or paper towels.
5. Insert the mirror from the back of the frame and fasten into place with brackets. Attach the picture hanging mountings.
You will need:- 12mm PG Bison Supawood 500 x 800mm.
Have your boards cut to size at your local Timbercity.
- Mirror tile 300 x 300mm- Brackets to hold mirror in position- Picture mounting brackets- 240-grit sandpaper- Rust-Oleum American Accents Rust Kit
Rust-Oleum products are available at Mica, Mega Mica and selected hardware stores countrywide.
Or visit: www.kama.co.za for more information.
janice
ande
rssen
- diy
diva
s
Home-Dzineonline 7

A one-of-a-kind bureau or dresser can be used to make a unique bathroom vanity, and can cost substantially less than custom-made cabinetry, especially if you are lucky enough to come across a secondhand bargain or be given a hand-me-down.
Ideally, you should select the piece before installing the plumbing to allow for drain and supply connection installation to fit the dresser, rather than requiring modificationslater on. It is also a good idea to choose a sink to suit both the size and shape of the dresser or bureau top. Drop-in, undermount, and top-mount sinks are all suitable for conversions.
Because the existing veneer on most older pieces isn’t intended for wet locations, you will need to strip off the old finish and give the piece several coats ofexterior-grade polyurethane. Alternatively, make a template of the top of the dresser and have a custom-cut piece or granite, or Surinno top made to fit.
Any sink or bowl can be installed into the top of the dresser, but a drop-in style will hide any imperfections in the cutout. In some cases it may be necessary to support the filled-weight of a bowl and a 19mmplywood subtop positioned underneath the dresser top with glue and screws will surfice.
See the image on the next page that explains in more detail the procedure involved in cutting out and fittinga bowl or sink.
To make the project even easier, make cardboard templates of the existing drawers and use a trial and error process to scribe the sides and bottom panel precisely around any obstructions. Once the cardboard template fits, cut the drawers to match and reinforcethem with partitions.
antique luxury Inspiration and careful planning transform a reproduction dresser into a classy bathroom fixture.
taunto
n pre
ss
Home-Dzineonline 8

Home-Dzineonline 9

crafting with dremel
Create unique picture frames with the Dremel Stylus 1100-15 cordless.
You will need:• Plain, painted picture frame • Dremel Stylus 1100-15• Carving tool 191 (included accessory)• Carving tool 7104 (smaller tip for intricate carving)• Clamp• Gold craft paint and small stencil brush• Clean cloth• Freehand design and carbon paper (or stencil)
Here’s how:1. Outline the shape of your picture frame onto a piece of clean,
white paper. Draw your freehand design within the frame area, or position your stencil within the border and outline the shape with a pencil. Put a piece of carbon paper between the paper and frame and transfer the design onto the frame.
2. Clamp the frame to a flat, steady surface and start to carveout the design. Start by outlining the design to be carved out, removing the larger area once you have completely outlined the entire design.
TIP: Don’t press too hard to start with. For the first passapply a light stroking motion - the second stroke can be heavier for deeper carving. If you are unsure before you start, practice on a small area at the back of the frame.
3. As you move around the frame - move the frame to a more comfortable position, and clamp securely.
4. Once all carving is complete, use a small stiff, stencil brush and apply gold craft paint to the carved area, wiping the top of the frame clean before the paint dries.
Buy Dremel Tools at select hardware stores countrywide.
janice
ande
rssen
- diy
diva
Home-Dzineonline10

a new lifeSometimes items you were ready to toss out can be used again - in a completely different way!
Nifty Room DividerThis nifty divider neatly organises living room space into a hardworking entry.
Start with three ready-to-assemble, unfinished cabinetunits. Two identical units with glass upper doors and solid lower doors provide hideaway storage and display space for the living room, while their backs serve as hanging space in the entry for peg racks made using cabinet knobs. The centre bookcase unit offers storage in the entry behind solid upper doors and in baskets on the lower shelf. The back of this unit provides display space for artwork in the living room. It also would make a great spot for a flat-panel television.
Stacked Bench BookcaseA clever colourful bookcase fashioned from stacked benches.
Start by buying picnic-style benches that arrive unfinished but assembled. Choose graduated sizes thatfit the space you have in mind. Stain or paint the threebenches as desired, then add a clear top coat following manufacturer’s instructions. Centre the benches on top of one another and use wood glue to secure. When the glue is dry, securely fasten the benches together using a drill and screws.
Free Drawer SpaceMove those office supplies from a cramped, dark deskdrawers to easily reached wall space. Screw a sturdy mesh or stainless steel grill-design flatware organiser tothe wall and fill it with lightweight office supplies you usemost often. This solution is perfect for crafts rooms or kids’ art rooms.
Hanger Coat RackCreate a customized coat rack for your entry with pretty wood hangers in three short steps. Shorten 4 new or vintage wood hangers, cutting a straight edge that will fittight against a pine backer board. Attach the shortened hangers to the board by screwing them in from behind. Add heavy-duty picture hangers to the back of the board so you can mount the unit on the wall.
bette
r hom
es an
d gar
dens
mag
azine
- low
es
Home-Dzineonline11

old doors never die Garden sheds can be large, obtrusive and unattractive. With a creative approach, and smart recycling of old doors, you can build this striking shed that will serve as a feature, and the perfect place to store your tools.
Here’s how:1. The ideal configuration for the doors is to have the back door fit between 2 side doors, with
the front door wide enough to butt against the front edges of the side doors. Cut the 3 front doors to the same height. The back door is shorter to allow for the roof slope to the back.
2. Measure 70mm down the back of the front and side doors, draw in an angled line for the roof sloop, and cut along the line. Cut the back door down to this height.
3. Join the front and side doors using steel angle brackets. To make this job easier, start with the top brackets to hold the doors together.
4. Check that the structure is centred on the slab, but at the back to allow for a front step. Mark the position of the fixing holes on the slab surface. Use a 6mm masonry bit to drill holes intothe concrete.
5. Screw galvanised steel brackets down to the concrete on the inside of the doors. Fix with suitable fixings, using a galvanised steel washer under each head, and drive them in with asocket.
You will need:- Concrete mix for slab- Four standard size doors- [6] 100mm brackets- [6] Concrete anchors- 30mm hex head screws and washers - [2] 70 x 35 x 1450mm pine rafters- [3] 35 x 70 x 1200mm pine battens- Acrylic corrugated roofing- Roofing screws and neoprene washers- Pine, treated 70 x 19mm for roof trim- [2] T-hinges, 150mm- Fasteners, screws and paint
Home-Dzineonline12
6. Screw the sides of the bracket to the doors. Repeat steps 6 and 7 on the back of the doors.
7. Cut the roof rafters to overhang the front of the structure by about 400mm and the back by 100mm. As the roof is sloped, cut the ends to match the roof angle. Mark a line, centred along the inside edge of each rafter. Clamp the rafter to one of the side doors, aligning the line with the top door edge. Screw the rafter to the door. Repeat on the other side.
8. Cut the battens to overhang each side equally by about 150mm, then screw to the front, back and centre of the rafters. This is essential, not just to fix the roofingsheets, but to make the structure rigid. Paint the timber at this stage, as it is easier than when the roof is attached.
9. Screw roofing to battens with roofingscrews and neoprene washers, after predrilling slightly oversized holes to allow for expansion and contraction of the roof sheeting.
10. Cut the front fascia and cap to a length of 1238mm, then screw the cap to the fascia to form an L-shape. Screw this to the front batten with an equal 19mm overhang at each end, and with the cap sitting on top of the corrugations of the roof sheeting.
11. Similarly, screw the barge capping to the barge that runs down the slope, but stop the cap 70mm from the front. This will fitinto the ‘L’ of the fascia assembly. Screw this to the ends of the battens and fascia, leaving the back open to allow for water drainage. Paint the fascia, barge and capping.
Where to find old doors: Visitsalvage yards and online salvage experts.
View Directory on back page for more information.
sour
ce: b
etter
home
s and
gard
ens
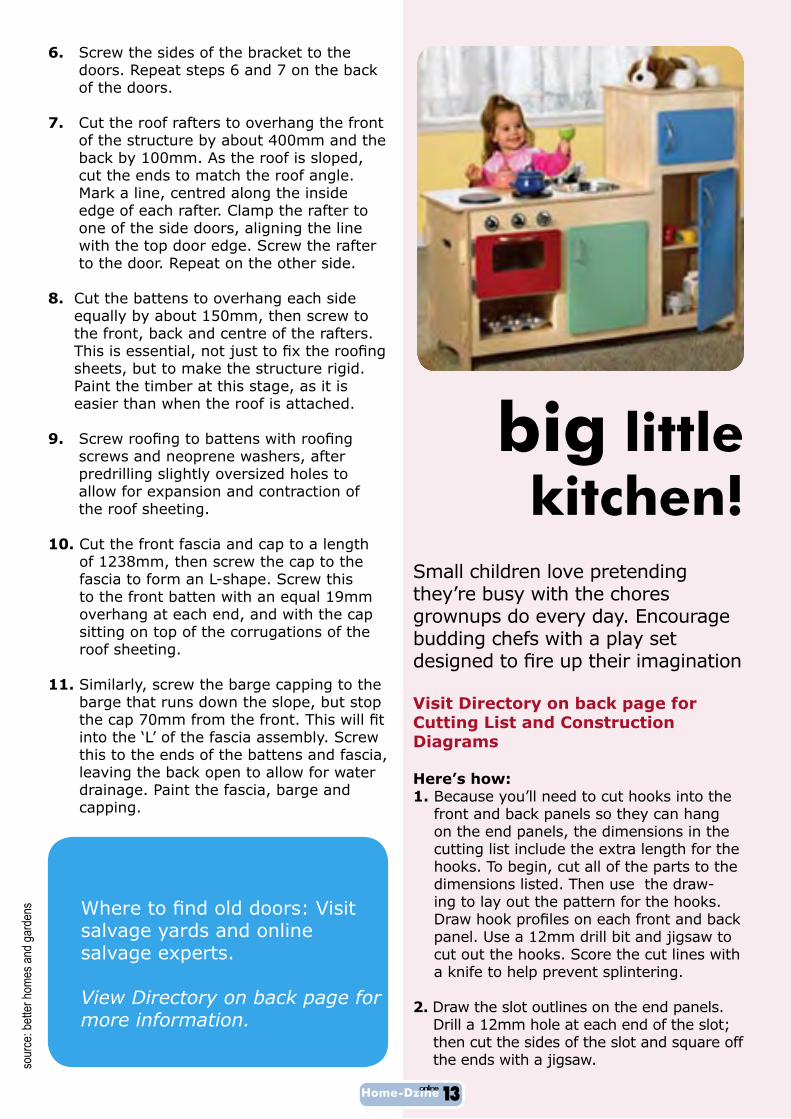
big little kitchen!
Small children love pretending they’re busy with the chores grownups do every day. Encourage budding chefs with a play set designed to fire up their imagination
Visit Directory on back page for Cutting List and Construction Diagrams
Here’s how:1. Because you’ll need to cut hooks into the
front and back panels so they can hang on the end panels, the dimensions in the cutting list include the extra length for the hooks. To begin, cut all of the parts to the dimensions listed. Then use the draw-ing to lay out the pattern for the hooks. Draw hook profiles on each front and backpanel. Use a 12mm drill bit and jigsaw to cut out the hooks. Score the cut lines with a knife to help prevent splintering.
2. Draw the slot outlines on the end panels. Drill a 12mm hole at each end of the slot; then cut the sides of the slot and square off the ends with a jigsaw.
Home-Dzineonline13

3. Attach vertical divider tracks and all cleats to front, back, ends and dividers with glue and 25mm long brad nails.
4. Drill 6mm holes through the centre of each stove knob valve-stem fitting and through the front panel at eachknob position. Thread the bolts into the fittings and pressthe knobs onto the fittings.
5. Instead of the screws provided with the hinges, use shorter 12mm wood screws to fasten the hinges to the doors and front panel.
6. Mark the centre point of the sash locks on the mating cleats. Attach the part of the sash lock that features the locking mechanism to the wide cleats that are on the panels and attach the other part of the sash lock to the cleats that are on the tops.
The partsThe sink is made of a 150mm stainless steel mixing bowl. Trace perimeter of bowl on countertop and measure in the width of the lip to mark the sink cutout line. Cut the bottom profile and hand holes out of the ends and the openings inthe front panel, countertop and oven door with a jigsaw.
Use a spade bit to drill holes for the faucet. To prevent the bit from splintering the stock, drill halfway through; then flip the top and finish the hole from the other side.The stoveburners are made of 150mm dia. plywood circles cut out with a jigsaw.
FinishingPaint all doors and burner circles with a water-based enamel and use one colour for the rest of the front, back, ends, tops and shelves. Install the faucet in the two faucet holes you drilled in the countertop and secure with the nuts included with the faucet.
To attach the knobs, drill a hole in the centre of three of the fittings. The fittings are made of soft plastic that the boltthreads easily cut through. Attach the fittings and knobs tothe front panel with bolts.
The doors and tops are the only pieces attached with mechanical fasteners. Use free-swinging hinges to prevent the doors from closing on little fingers. Fasten the hingesto the doors and front panel. Then attach the small cabinet handles to the freezer and undersink doors, and attach the large handles to the refrigerator and oven doors.
The tops keep the front and back panels seated in the end slots and are secured to the front, back and end panels with windowsash locks. Attach the sash locks with the screws provided, being careful to position the parts so they align when the top is in place.
Diagrams and Drawings are located in the back page Directory for easy reference.
sour
ce: d
an ca
ry
Home-Dzineonline14

undercover home office A simple sliding panel moves aside to reveal a contemporary and stylish office space.
Fronted by a sliding door, this cosy-but-contemporary office tucks away when notin use. A sliding door installed on a track doesn’t take up much floor space - or requiremajor wall surgery.
Here are some tips for installation success:
• Use a sliding-door kit: Available at select hardware stores or building centres.
• Give yourself some space: Plan enough uninterrupted space on one side of the doorway to slide the door out of the way.
• Be flexible: If your kit doesn’t come with stoppers in the ends of the metal track, for example, you can improvise by installing screws through the track to prevent the door from zooming off.
• Think light: Light-weight doors are easier to move. Consider building a hollow-panel door by sandwiching strips of timber between 6mm plywood.
Shelved awayFloating shelves mounted on the walls of our undercover office provide a decorativestorage option, yet don’t give the room a cluttered look.
Don’t forget to personalise your home office spacewith a favourite art piece.
OfficeCubbyholeYou can even use the sliding door to hide a smaller office space.
Use the panel as a blank canvas on which to paint or draw, or to affix memorabilia. Weattached painted sections of 3mm plywood, vintage crate labels, and wood rulers.
Home-Dzineonline15

Designer garden lounger Teak loungers: nice to look at, but you might want to take a seat when you check the price. We offer you an economical alternative: a stylish lounger made from pine.
The lounger, courtesy of Bosch Power Tools, is assembled in two stages. In the first stage, assemblethe base frame with legs and rollers. In the second, assemble the lounger section as a slatted frame. Note that pine, even once sealed, is less weather-resistant than other types of timber. If you want to be certain of weather resistance, choose teak or meranti.
The following assembly instructions apply to 18mm PG Bison laminated pine. You must adapt the list of materials accordingly if you opt for other materials or thicknesses. Ask your local Timbercity to cut the required boards to size.
DIY TIPAdd a splash of colour to your garden. Paint
your sun lounge in bright, garden shades of
green.
Remember to use a paint suitable for exterior use, such as Prominent Paints
Gloss Enamel.
sun-filled leisure
You will need:- Bosch Jigsaw- Bosch Multi-Sander or Orbital Sander - Bosch Drill/Driver - Adjustable seat back supports- Set of wood drill bits and countersink bit - 40mm Forstner bit- 4x60mm/3x17mm/4x30mm flat-head wood screws- Folding rule, soft pencil, rubber, pencil sharpener- Woodoc 35 Exterior Polywax Sealer - Meranti- Woodoc SteelWool- Quality, long bristle brush- Sanding pads and paper, 120 to 240 grit
Home-Dzineonline16

1. Base frame: Cut out the handle openingUsing a pencil, trace the outline of the opening on one of the short sides. Mark drilling points for positioning the Forstner bit, each at 20 mm inside the pencil outline. Start with the four corner holes to round off the opening and always place the centring tip of the Forstner bit precisely on the drilling point. Now place the jigsaw in one of the holes while it is switched off. Saw along the longitudinal axis, always remaining within the pencil markings, until you reach the next hole and continue until the handle opening is complete with rounded edges.
2. Base frame: Mount the legs and square timbersPredrill the long lounger legs and the long side panels in preparation for assembly. Refer to the illustration for the exact position. Attach the legs using a cordless screwdriver and flat head screws.
Referring to the details in the illustration, predrill the square timbers that will later support the slatted frame and mount them using a cordless screwdriver and flat head screws. Thenscrew the short legs to the sides from above through the square timbers using the flat head screws.
3. Base frame: Fit bed joints to long and short side panelsBed joints are screw brackets with short arm lengths (in this case, 22 and 28 mm) and a large overall height (in this case, 127 mm). The bed joints are used to combine the short sides and the long sides of the lounger together so that they form a single frame. The short sides are enclosed by the long sides in this frame. The metal fittings are positioned so that the longarm is screwed together to the short side and the short arm is screwed together to the long side. Refer to the illustration for the precise location of the bed joints. Use a cordless screwdriver (3x17) and flat head screws to complete assembly.
4. Base frame: Mount the rollersCentre the fixed castors on the short legs and secure them inposition using a cordless screwdriver and round head screws (4x30). If necessary, use washers with the screws.
5. Fasten slatted frame parts - connect with piano hingeThe slatted frame comprises two sections: the long section to lie on and the short section that can be adjusted upright. Both sections are constructed similarly and based on the same design. Place the first and last slat with the best side facingdownwards on your workbench. Attach the connection boards using a cordless screwdriver and two flat head screws (4x30)for each side. Fasten the remaining slats with screws in the same way. The distance between slats is 10 mm; ideally, you should use spacer planks to ensure the gaps are even. Now fit the two slatted frame sections together using the cordlessscrewdriver, piano hinge and the screws supplied.
6. Fasten seat back supports and simultaneously fit attachment strip.The attachment strip is positioned accurately at the same time as you are assembling the seat back supports. To do this, screw the seat back supports with 4 flat head screws (3x17) to the secondslat in the head section. Now determine the precise position of the attachment strip and screw this in place with 4 flat headscrews (4x60) to the short legs. Mount the seat back supports on the attachment strip and screw them in place with 4 flat headscrews (3x17).
Home-Dzineonline17

7. Join the slatted frame and the base frame togetherOptional: Stick a rubber weatherproofing strip to the squaretimbers as a base for the slatted frame. Then insert the slatted frame in the base frame and screw it in place from below using a cordless screwdriver and screws (4 x 60 mm).
8. Sand wood surfacesTake time to prepare the surfaces so they are in the best working condition possible before starting assembly. Chamfer all edges with sanding paper with a grit of 120 or 180 at a 45° angle to create a small bevel. Use your sander to sand all visible surfaces in the direction of the wood grain, first with 120-, 180-and then with 240-grit sandpaper. Wipe off the dust. The wood is now ready for surface treatment.
9. Seal the surfacesWoodoc 35 Exterior Polywax Sealer provides a low gloss finish,with enhanced UV exclusion levels and is tinted in Meranti for enhance the natural colour and provide an even colour finish.First read the safety and handling instructions thoroughly. Always make sure that the wood is completely dry before applying the sealer. Saturate a brush with sealer and allow any excess to drip from the brush. Apply the first coat liberally,touching up sports that become dull within 10 minutes. If the wood is dry and porous, keep applying the first coat until thesurface remains evenly wet for 10 minutes. It is recommended that three good coats of Woodoc Sealer are applied to achieve the best finish and protection of the wood. Before applying asecond coat, sand the surface with Woodoc SteelWool, always in the direction of the wood grain.
bosc
hThe versatile cordless multi-sander with lithium-ion technology • The flexible solution for sanding and polishing, even
in hard-to-reach areas and on small surfaces
• The latest lithium-ion battery technology for full power at low weight
• No memory effect, no self-discharge: always ready for use thanks to lithium-ion technology
• Two-piece sanding plate: for optimum utilisation of
the sanding paper, the delta tip of the sanding paper and of the sanding plate can be effortlessly detached and rotated
PRIO - the first cordless multi-sander from Bosch: Take “cable” out of your vocabulary!
Home-Dzineonline18

One lucky subscriber stands a chance to
WIN a new BOSCH XEO Universal Cutter
Cuts anything, anytime
Decoration materials, cardboard or carpet: the cordless universal cutters from Bosch enable you to effortlessly and quickly cut all different kinds of flexible materials at any time – without a cable.
To win this handy Bosch XEO Universal Cutter - send us an email at [email protected]
and tell us more about your favourite craft or hobby.
Do you want to make a project but don’t know where to start? Or perhaps you want to tackle home repairs but are scared of doing it
the wrong way?
Home-Dzine.co.za, Janice Anderssen, Nancy Muchangwa and Jenny Tomlinson
bring you DIY Divas
DIY Divas offers practical training and hands-on sessions that will empower you with the confidence, knowledge and skills
required to undertake your own home repairs, improvements, renovations or
DIY projects with safety in mind, and the confidence of knowing and understandingthe basic tools and techniques required.
To ultimately have the satisfaction of knowing that you “Did It Yourself!”
Visit DIY-Divas for more information on courses for
Power Tools, Basic Woodworking Techniques, and Home Repairs
Home-Dzineonline19

Bulb Inspiration Autumn’s cooler days herald the time for planting bulbs, bulbs that will flower in spring. Instinct tells me that thisis the year for bulb planting, many parts of the country have received large amounts of rain and with all the moisture in the ground bulbs will have the best start ever!
Autumn is the perfect time to prepare your soil for bulb planting. In order to achieve the best results the soil should be prepared correctly. This ensures the best use of water and sufficient nutrients for the bulbs. The soilshould first be loosened to a spade depth. Then addabout half a bag of compost per m2. To this area, add 2 scooped handfuls of super phosphate and 4 scooped handfuls of 2:3:2. Alternately, you can scatter 200g of Hadeco Bulb food over the area. Work the fertiliser in well and water the area to settle the soil. Leave the ground to dry out slightly. You can now plant out your bulbs.
When the area has been planted, water it well. It is essential that bulbs be planted at the correct time for optimal flowering. Mass plant your bulbs to give agood show of colour. Any bulbs that are to be planted in pots should be planted in potting soil. Whether planting in pots or into the ground, use Hadeco bulb food when planting as this food contains all the nutrients that bulbs need.
Availability of Spring Flowering Bulbs are available from March until May. They include Dutch Iris, Freesia, Hyacinths, Daffodils, Ixia, Sparaxis, Anemones, Ranunculus, Waterblommetjies, Leucojums, Muscari, Chinchirinchees, Tritonias and Tulbachia. Tulips become available in April.
Look out for new extended range of Muscari’s from Hadeco, Muscari - Dainty White (small white) and Muscari - Blue Pearl (large blue). They will be available for planting this autumn. Buy Muscari bulb packets for R39.95.
Visit www.gardenshop.co.za to download the latest issue of GardenTalk

tranquil garden pondIf you’ve always wanted a garden pond, you’re not alone. With the growing popularity of “water gardening,” many people look at their ponds as an interesting, ongoing project.
The average pond measures about 2.5 x 2 metres, but it can be built to virtually any size. In some designs, water trickles down a long, meandering stream before emptying into the pond. Many smaller ponds, like the kidney-shaped one shown here, have water running over a large flat rock and spilling directly intothe pond. This style is easier to build and can fitinto the smallest gardens.
Digging ItOnce you’ve chosen a location for the pond, lay out the perimeter using rope or a garden hose. Next, mark the outline with ground limestone and start digging. Excavate to a depth of 40cm, piling the dirt at the rear of the pond, where the waterfall will be located. In the centre of the pond, dig down another 20cm to form a pit where the pump will go. Now, line the hole and the pit with fine sand and rake it smooth.
Laying RubberFold the rubber liner lengthwise, centre it over the hole and unfold it. The liner should overlap equally on all sides. Using your hands and bare feet, carefully press the liner into the hole. Then, use a garden hose to fill the centre pitwith water to hold the liner in place.
Stone SurroundStart stacking stones on the pond floor, alsocalled the plant shelf (to differentiate it from the pump pit). Lay the stones in a 30cm wide layer along the wall. Overlap the stones between courses and use smaller stones to fillany sizable gaps.
Position the PumpNext, set the pump’s hose in position so that it extends from the centre pit to the top of the hole. Carefully lay stone directly over the hose. Continue stacking stones until they’re even with
Home-Dzineonline21

the ground. Set a single layer of flat stonesalong the plant shelf, aligning them flushwith the edge of the centre pit. Then, place one flat rock in the bottom of the pit toserve as a base for the pump.
Set large, flat rocks - called coping stones-around the perimeter. Stack stones at the rear of the hole to form the waterfall. A good rule of thumb is to build it to about 40cm above the water level. Set the waterfall weir in place atop a large, flat rock(the spillway stone) that is tipped forward slightly. Connect the weir’s hose to the pump’s hose coming out of the pond. Trim the rubber pond liner to match the waterfall opening at the front of the weir, then attach the liner to the weir using its screw-on faceplate. Backfill around the weir with dirtand continue piling up rocks around the waterfall area. Conceal the weir by placing a rock on top of it.
Plugging InFill the spaces between the stones on the pond floor with small river rock. Then,take a hose and wash down the stonework around the entire pond. Pump or bail the dirty water from the pit.
Connect the pump to its hose and set the pump on a flat stone in the bottom of thepit. Check with an electrician to ensure a safe installation of your pump and power cord. Use a hose to fill the pond to within10cm of the coping stones.
Once the pond is filled, plug in the pump. Ina few seconds, water will gently spill out of the weir.
Pond Safety Ponds, especially those stocked with
fish and frogs, are inviting to smallchildren and can constitute a drowning hazard. Incorporate safety features in your original design. A pond that is adjacent to a path also can pose a tripping hazard, especially at night. In such an area, the path should be illuminated with low-voltage lights.
If you are going to be using large, heavy stones around the pond, be sure the nursery or supplier delivers the stone directly to the pond site.
popu
lar m
echa
nic
Home-Dzineonline22

Home-Dzineonline23
COMING SOON!
Painting and Decorating Courses
Full range of courses in CAPE TOWN

Links to advertisers and sponsors within this issue
Bosch Power Tools for DIY
Decorating Centre
Dremel MultiTools
Garden Shop
Jetmaster
Prominent Paints
Rust-Oleum
Salvage Experts
Woodoc
Download Technical Drawings and Instructions
BIG Little KitchenInstructions and Cutting ListConstruction Diagram
Sun-filled Leisure - Sun LoungerDesign Drawing for Cutting List
Need a back-issue of Home-Dzine Online?CLICK HERE
Want to subscribe?CLICK HERE
Need to send us an email?CLICK HERE
We provide a complete all-in-one decorating and home improvement service to homeowners. Our inhouse DIY service can create unique one-of-a-kind decor
accessories for your home - without the price tag!
Home-Dzineonline24
directory