educ 215 final- how to guide
TRANSCRIPT

SketchUp! A brief How-To GuideBy Sabah Memon
May 8, 2014 EDUC 215- Professor SayreFinal Project- Part Two

Here’s What it will look like when you start

Pick a template to use…Pay attention to the
units of measurement and
Start with something basic:
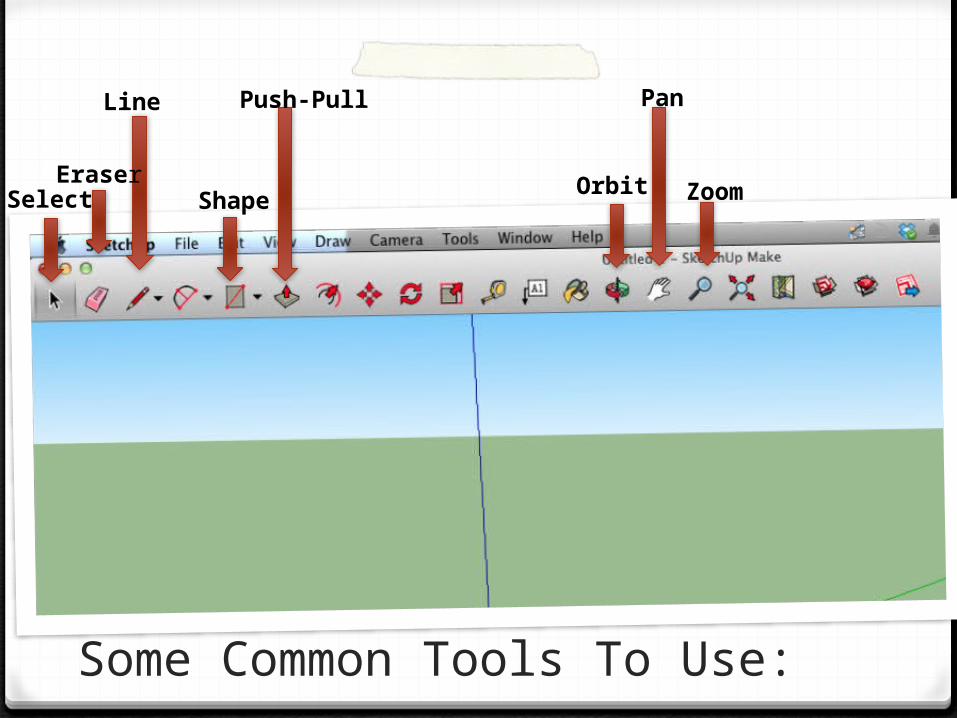
Some Common Tools To Use:
SelectEraser
Line
Shape
Push-Pull
ZoomOrbit
Pan

Click on the shapes tool to start with a shape on the screen we can manipulate.
Click the down arrow and select rectangle

Click once to start the shape and click again to release when you have decided on your shape and size.

Your rectangle should look like this!
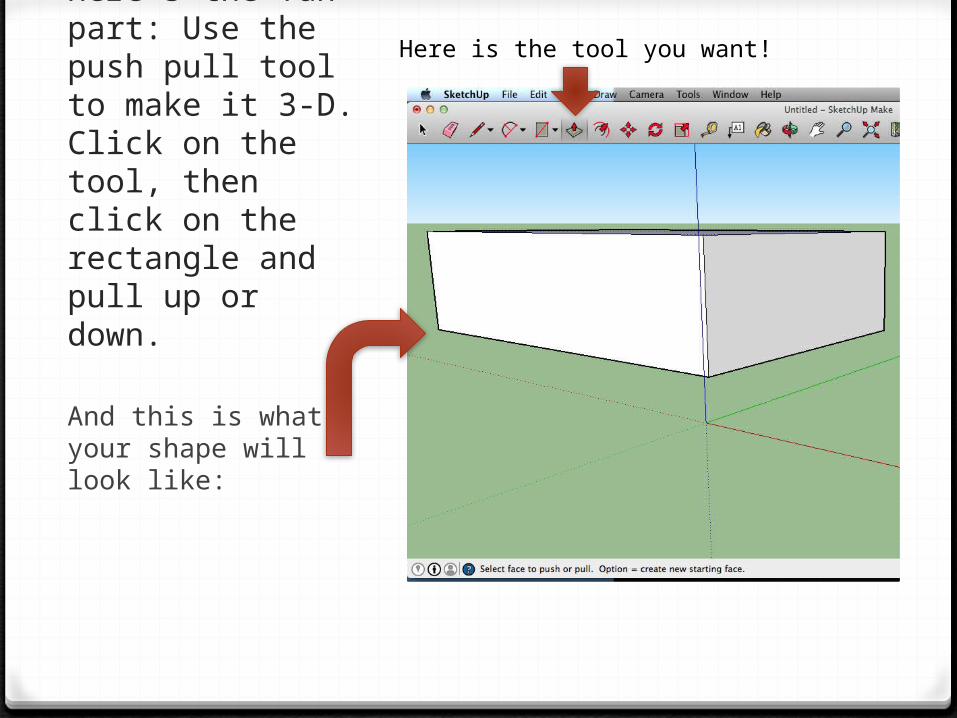
Here’s the fun part: Use the push pull tool to make it 3-D. Click on the tool, then click on the rectangle and pull up or down.
And this is what your shape will look like:
Here is the tool you want!

Edit this shape in a variety of ways! Try drawing a shape on top of your 3-D rectangle to manipulate.Try clicking on the shapes tool again and draw some circles! It will say “On face” to indicate that you are drawing on a surface of your original rectangle

Use the push-pull tool again to manipulate the circles. Push one in and one out. Your result will look like this:
Here’s the tool, again!
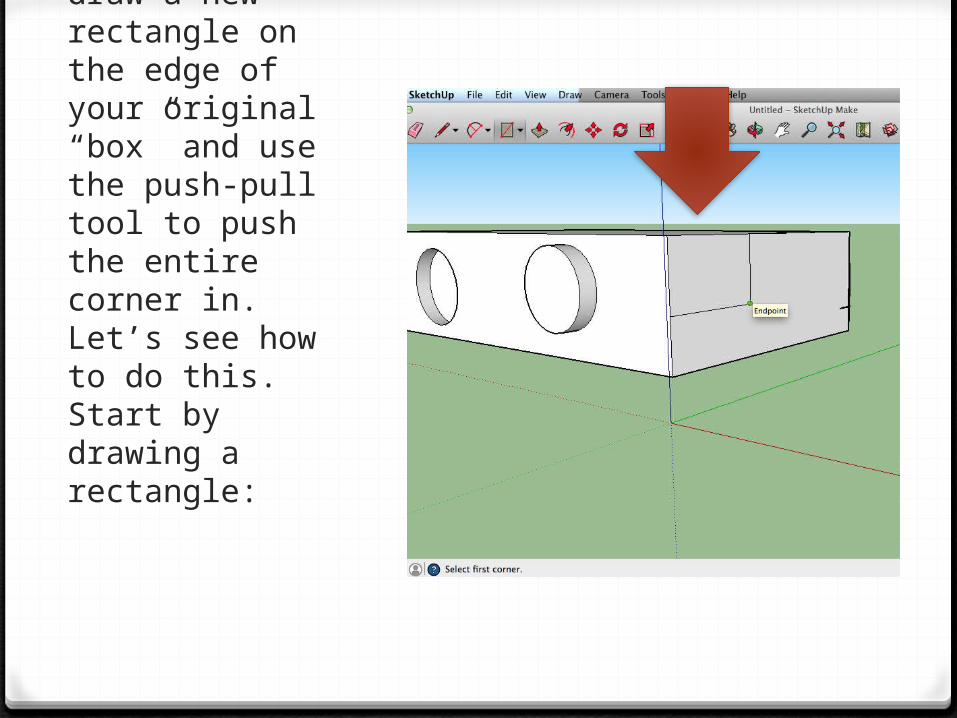
You can even draw a new rectangle on the edge of your original “box” and use the push-pull tool to push the entire corner in. Let’s see how to do this. Start by drawing a rectangle:
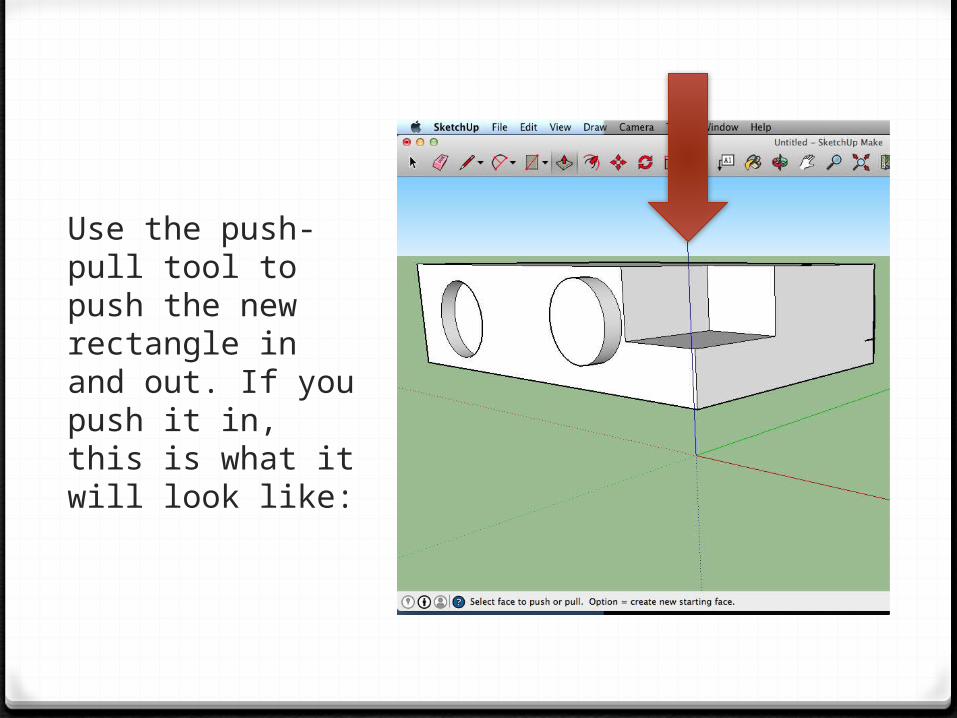
Use the push-pull tool to push the new rectangle in and out. If you push it in, this is what it will look like:

Let’s pay attention to some points that SketchUp has added to so we can make our images as accurate as we want: Notice the little dots that appear when you hover over the edge with your line tool. The red dot means you are about to draw a line on an edge…
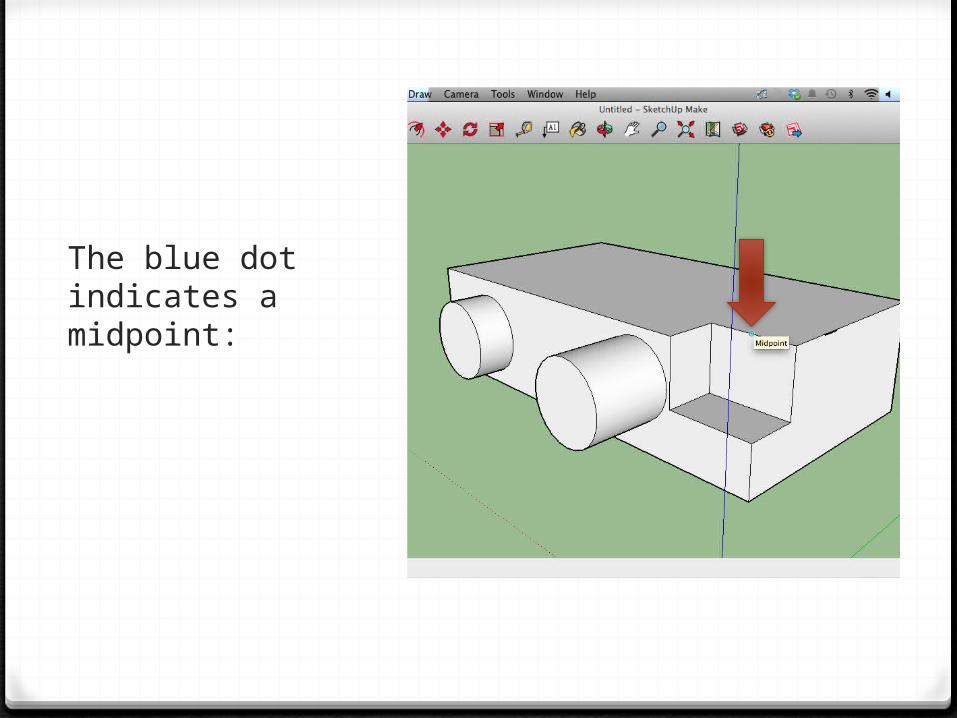
The blue dot indicates a midpoint:

The green dot is an endpoint: You can manipulate the lines drawn on these edges to make various effects.

There are also a few different ways to view what you have created. Let’s take a look at some: The first is the orbit tool. Click on it and then click on your image. Turn the screen all around in any direction you want!
The Orbit Tool!
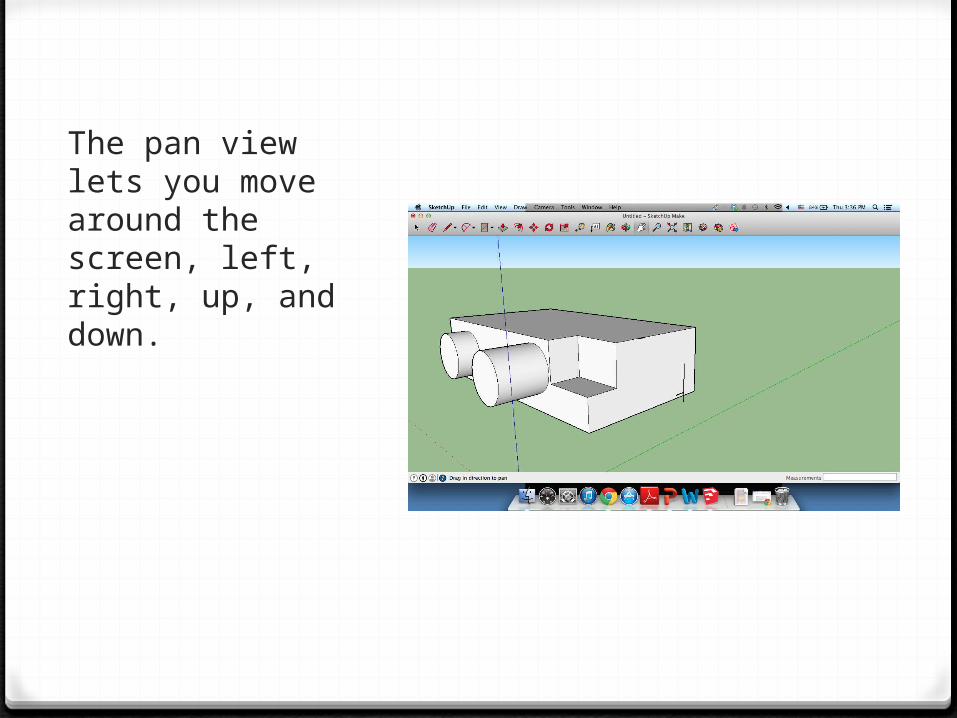
The pan view lets you move around the screen, left, right, up, and down.

The zoom feature lets you do just that! Zoom in and out…

You can use some other tools to help you fix anything
you want to edit. The Select Tool will help you move things around.
The Eraser tool will erase any edges you don’t want.

But there is so much more to SketchUp. This was just the
basics. Explore and Play around even more to find out
how to manipulate dimensions, scale, colors, add
models, and more!