the possibilities of blendspace - wordpress.com
TRANSCRIPT
The Possibilities of Blendspace Wednesday, February 19, 2014
V. Waxman 2014 1
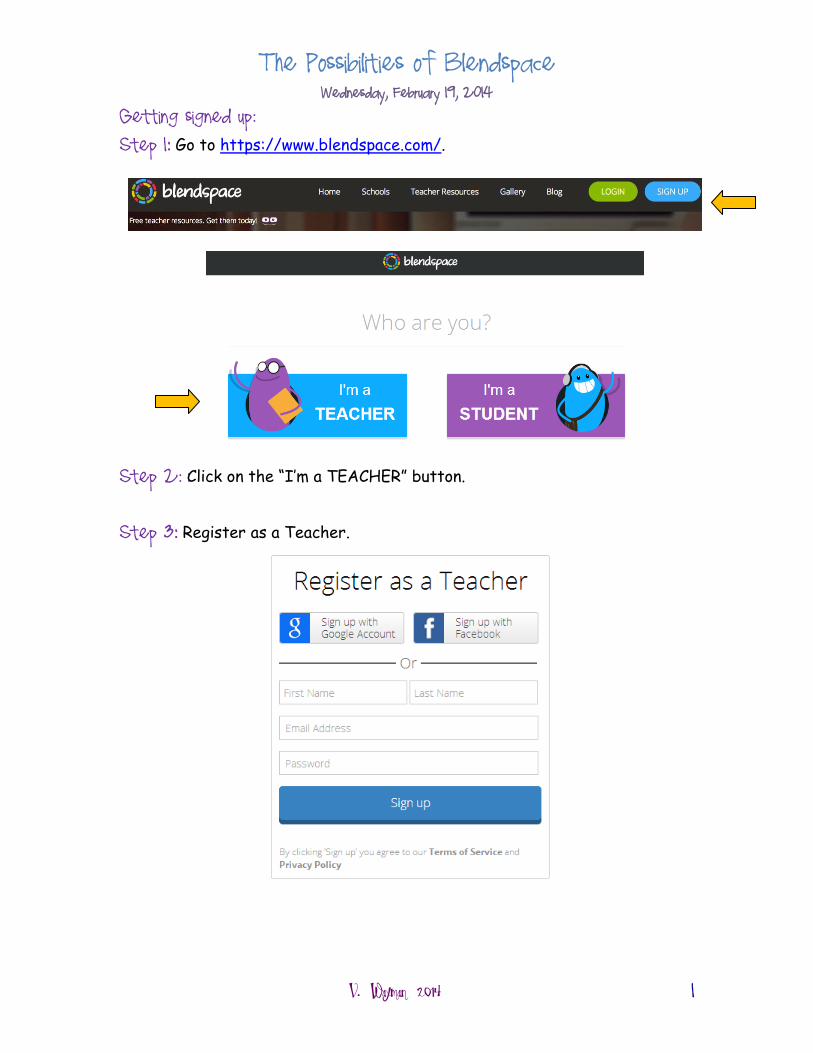
Getting signed up:
Step 1:: Go to https://www.blendspace.com/. Step 2: :Click on the “I’m a TEACHER” button. Step 3:: Register as a Teacher.
The Possibilities of Blendspace Wednesday, February 19, 2014
V. Waxman 2014 2
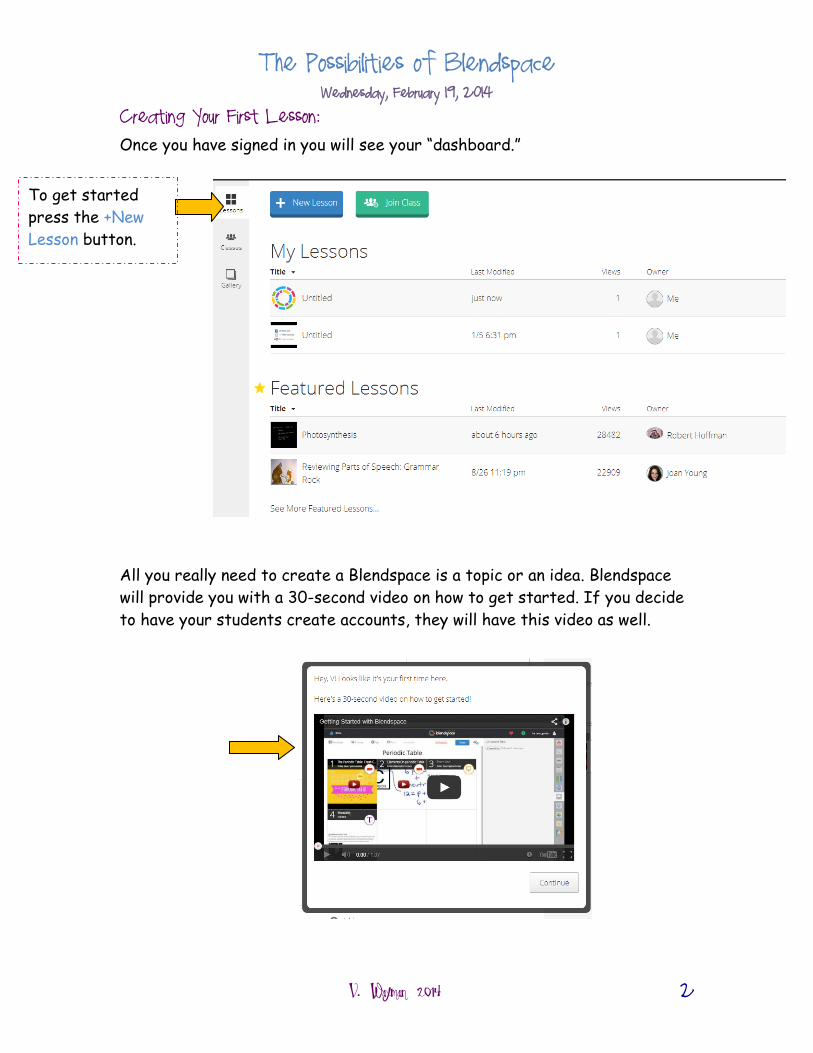
Creating Your First Lesson:
Once you have signed in you will see your “dashboard.”
All you really need to create a Blendspace is a topic or an idea. Blendspace
will provide you with a 30-second video on how to get started. If you decide
to have your students create accounts, they will have this video as well.
To get started
press the +New
Lesson button.
The Possibilities of Blendspace Wednesday, February 19, 2014
V. Waxman 2014 3
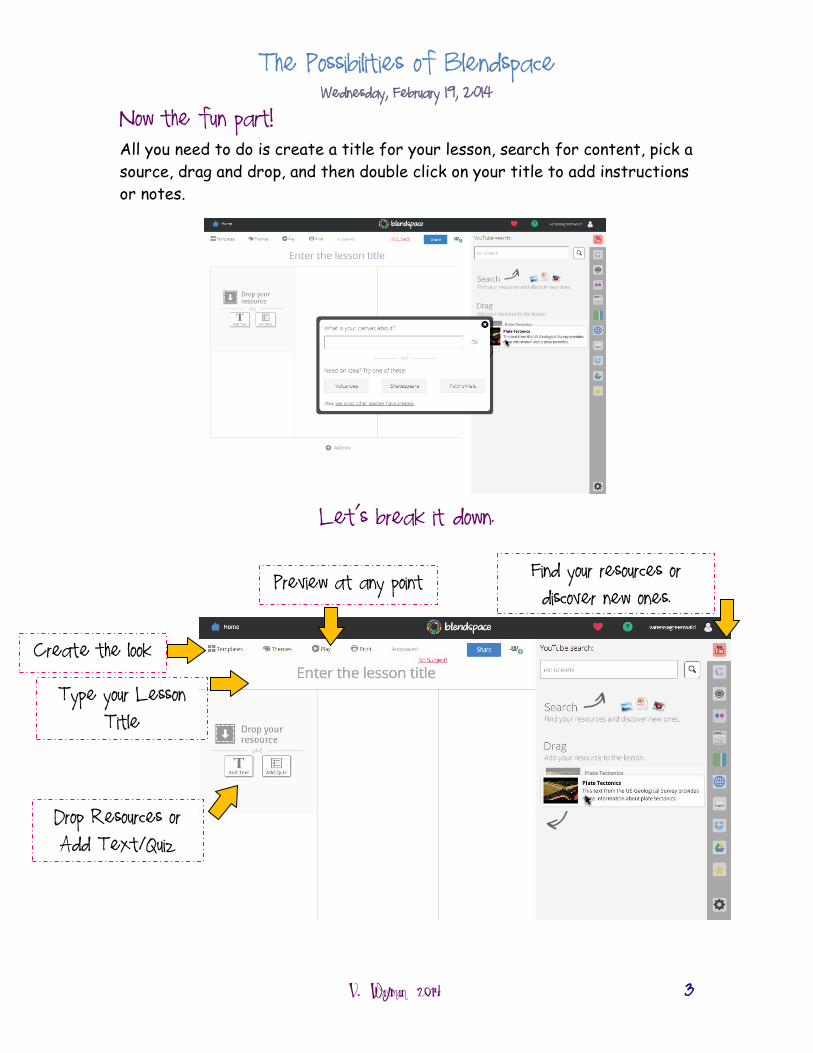
Now the fun part! All you need to do is create a title for your lesson, search for content, pick a
source, drag and drop, and then double click on your title to add instructions
or notes.
Let’s break it down.
**
Type your Lesson Title
Find your resources or discover new ones.
Create the look
Drop Resources or Add Text/Quiz
Preview at any point
The Possibilities of Blendspace Wednesday, February 19, 2014
V. Waxman 2014 4
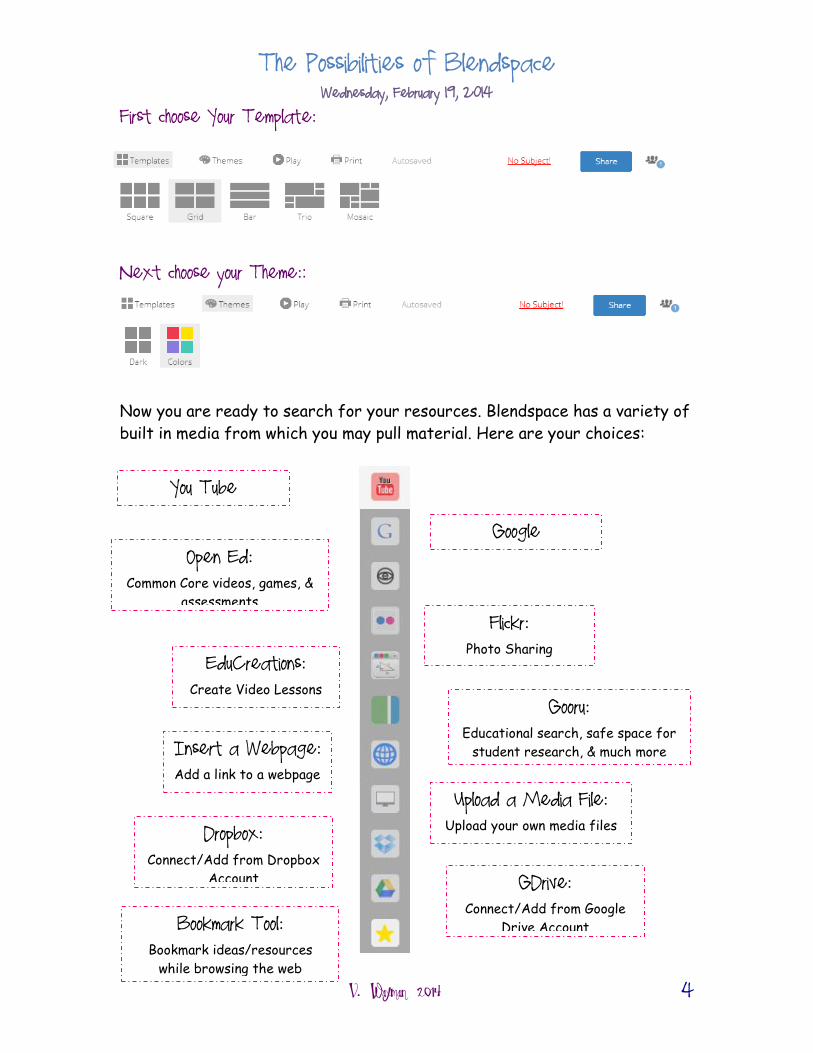
First choose Your Template:
Next choose your Theme::
Now you are ready to search for your resources. Blendspace has a variety of
built in media from which you may pull material. Here are your choices:
You Tube
Google Open Ed:
Common Core videos, games, &
assessments
Flickr: Photo Sharing
EduCreations:
Create Video Lessons Gooru:
Educational search, safe space for
student research, & much more Insert a Webpage:
Add a link to a webpage
Upload a Media File:
Upload your own media files Dropbox:
Connect/Add from Dropbox
Account GDrive:
Connect/Add from Google
Drive Account Bookmark Tool: Bookmark ideas/resources
while browsing the web
The Possibilities of Blendspace Wednesday, February 19, 2014
V. Waxman 2014 5
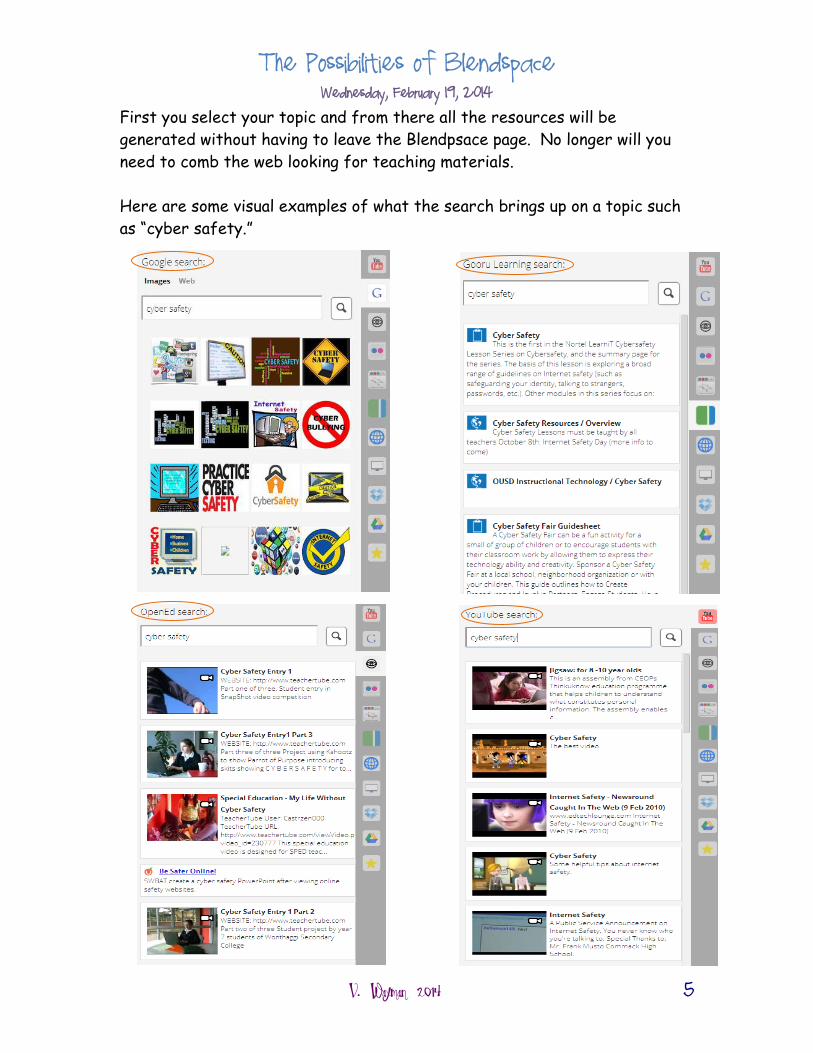
First you select your topic and from there all the resources will be
generated without having to leave the Blendpsace page. No longer will you
need to comb the web looking for teaching materials.
Here are some visual examples of what the search brings up on a topic such
as “cyber safety.”
The Possibilities of Blendspace Wednesday, February 19, 2014
V. Waxman 2014 6
Adding Resources:: See the screenshot on page 3. In each template you can add any type of
resource you would like: files, websites, links, and images. Or you can add
text or create a quiz.
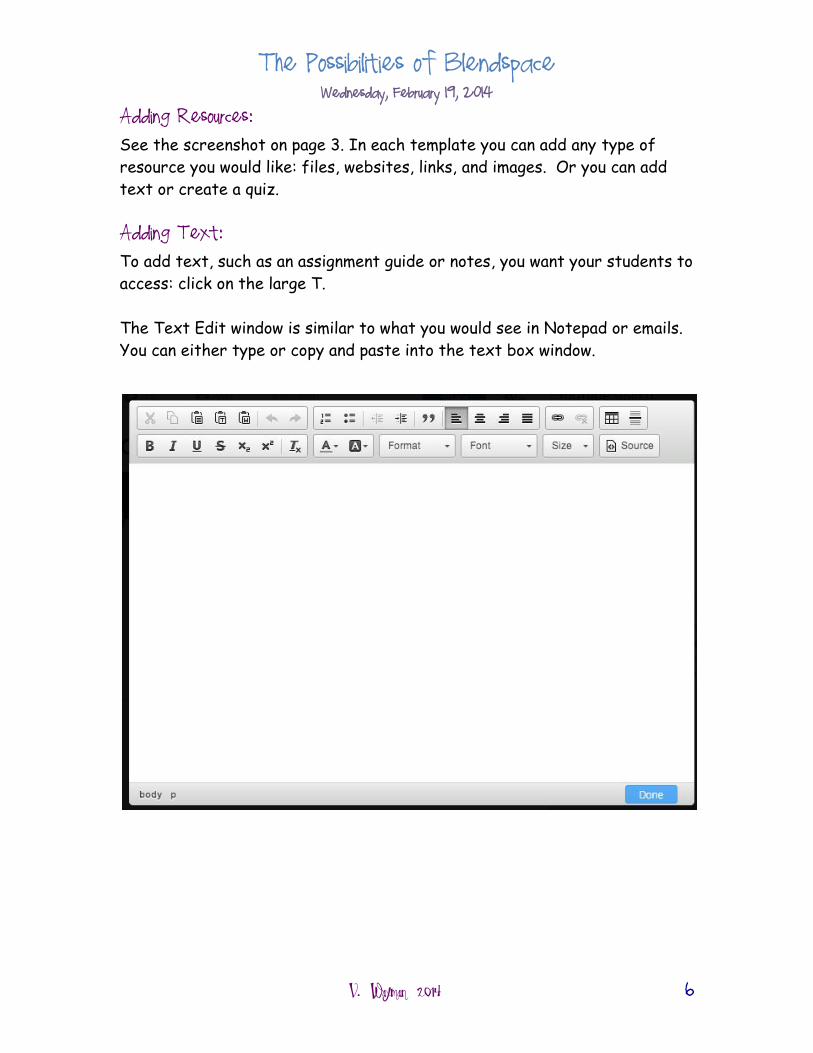
Adding Text::
To add text, such as an assignment guide or notes, you want your students to
access: click on the large T.
The Text Edit window is similar to what you would see in Notepad or emails.
You can either type or copy and paste into the text box window.
The Possibilities of Blendspace Wednesday, February 19, 2014
V. Waxman 2014 7
Adding a Quiz:
Adding a quiz is simple.
1. Type your question.
2. Type the answer choices.
3. Identify the correct answer by clicking on the radial button next to
that answer.
4. Repeat until you are done.
Note: If you have your student set up accounts, you will be able to gather
data to see areas of strengths and weaknesses on your topic from the
settings menu.
(For a quick tutorial go
here:https://www.youtube.com/watch?v=aXVi0XoL9SU)
The Possibilities of Blendspace Wednesday, February 19, 2014
V. Waxman 2014 8
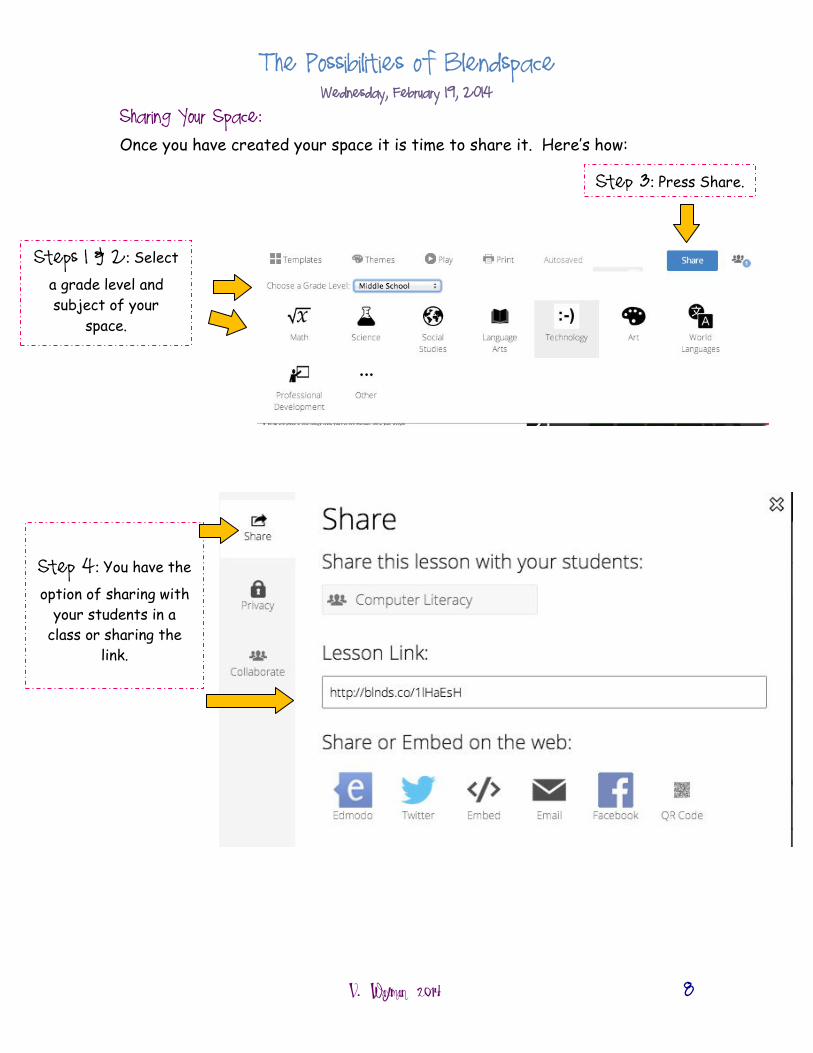
Sharing Your Space:
Once you have created your space it is time to share it. Here’s how:
Steps 1 & 2: Select
a grade level and
subject of your
space.
Step 4: You have the
option of sharing with
your students in a
class or sharing the
link.
Step 3: Press Share.
The Possibilities of Blendspace Wednesday, February 19, 2014
V. Waxman 2014 9
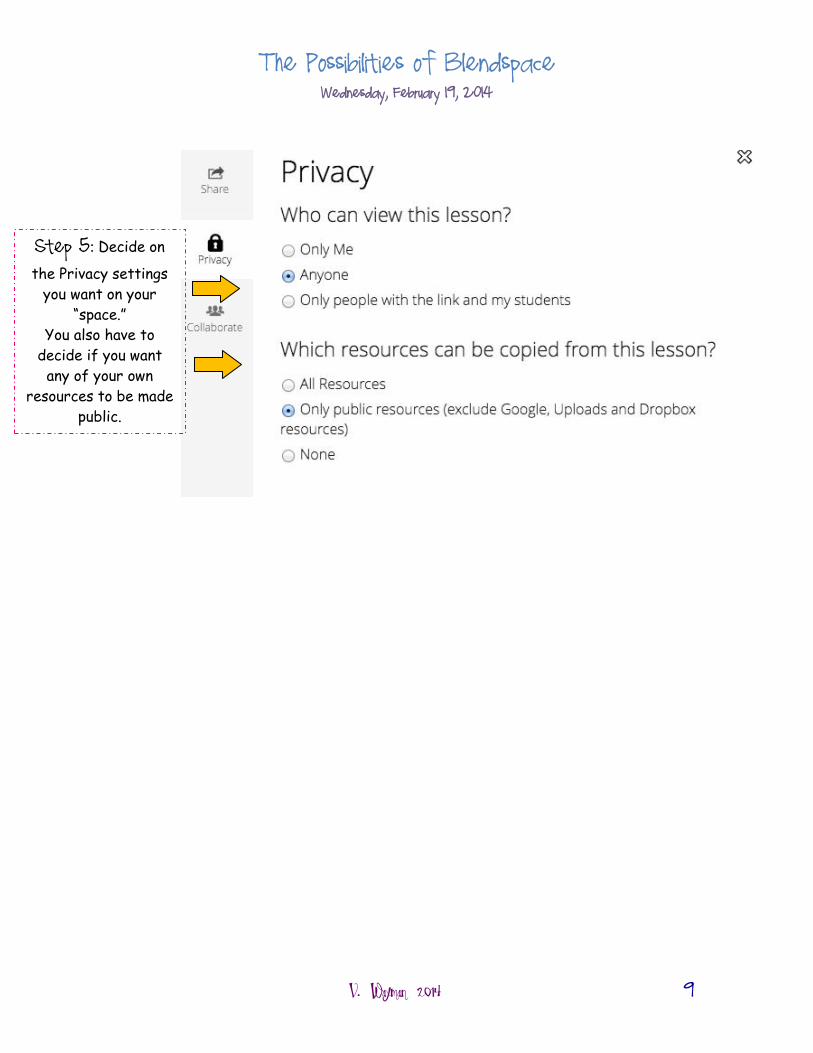
Step 5: Decide on
the Privacy settings
you want on your
“space.”
You also have to
decide if you want
any of your own
resources to be made
public.
The Possibilities of Blendspace Wednesday, February 19, 2014
V. Waxman 2014 10
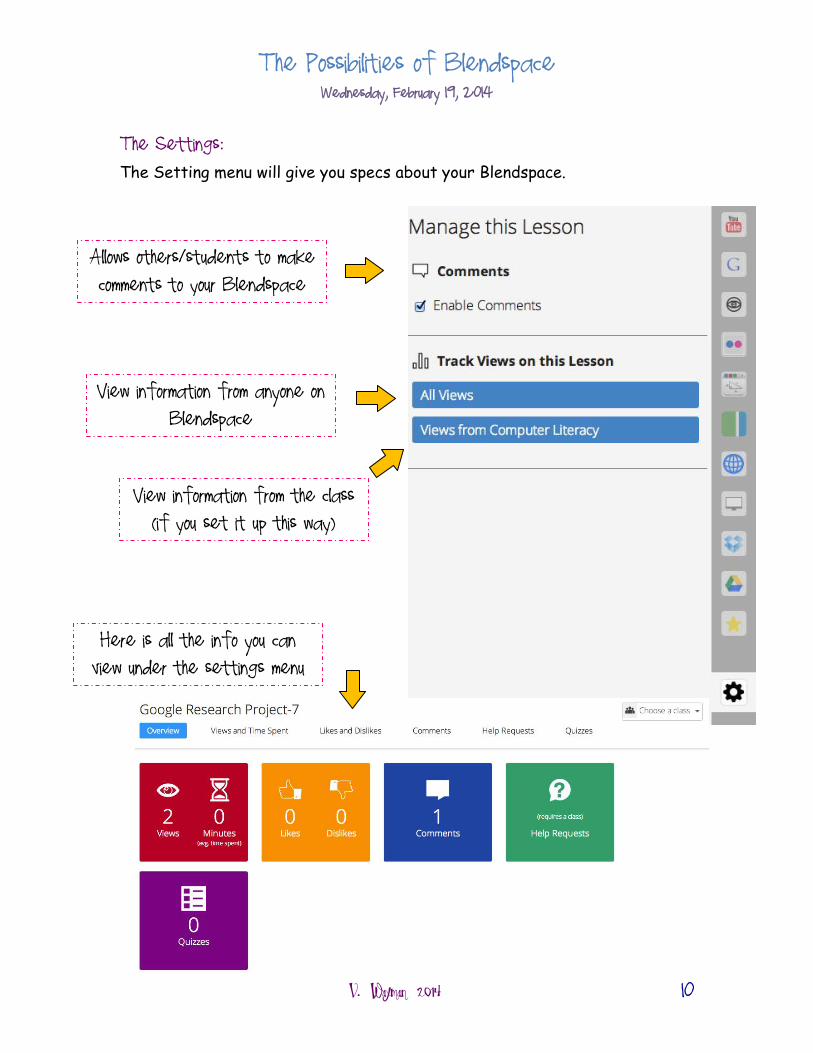
The Settings: The Setting menu will give you specs about your Blendspace.
Allows others/students to make comments to your Blendspace
View information from anyone on Blendspace
View information from the class (if you set it up this way)
0)
Here is all the info you can view under the settings menu
The Possibilities of Blendspace Wednesday, February 19, 2014
V. Waxman 2014 11
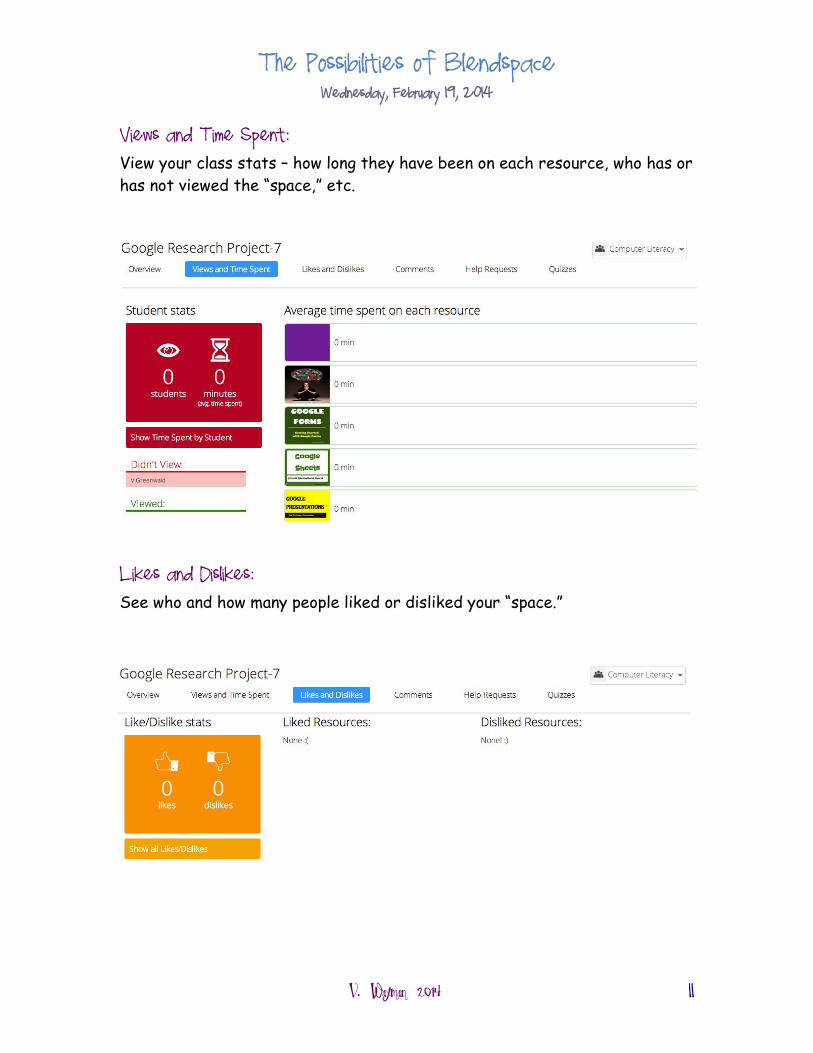
Views and Time Spent:
View your class stats – how long they have been on each resource, who has or
has not viewed the “space,” etc.
Likes and Dislikes: See who and how many people liked or disliked your “space.”
The Possibilities of Blendspace Wednesday, February 19, 2014
V. Waxman 2014 12
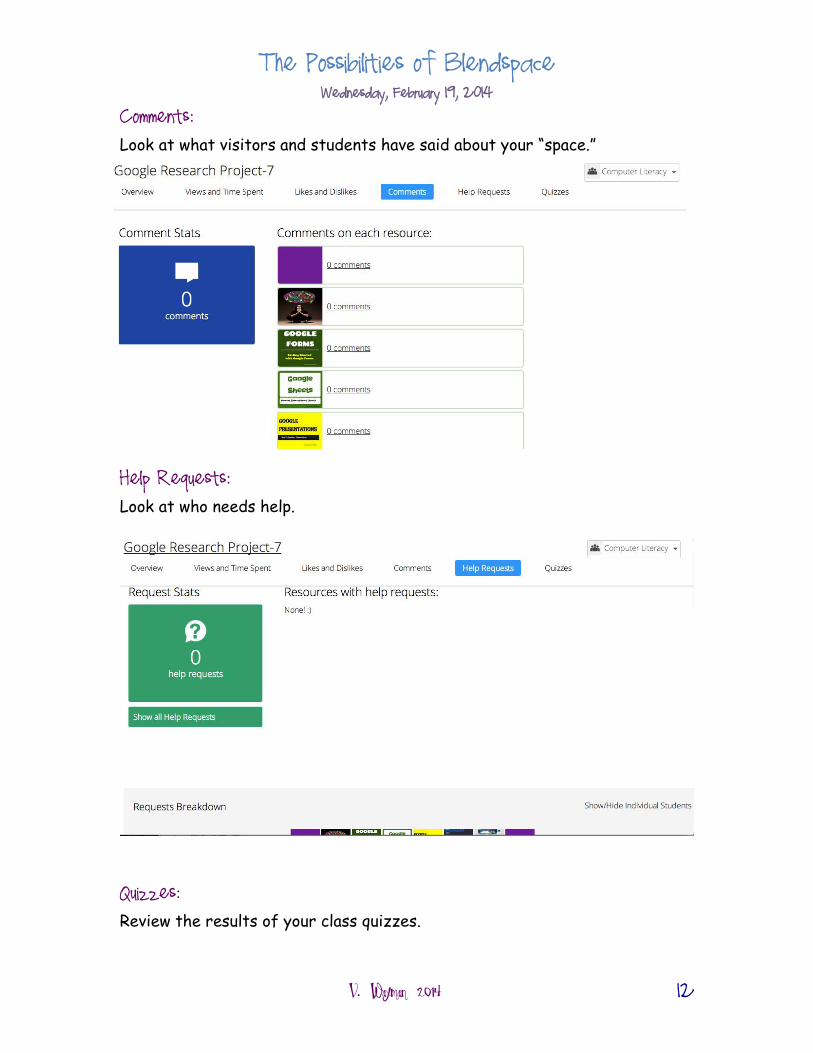
Comments:
Look at what visitors and students have said about your “space.”
Help Requests: Look at who needs help.
Quizzes: Review the results of your class quizzes.
The Possibilities of Blendspace Wednesday, February 19, 2014
V. Waxman 2014 13
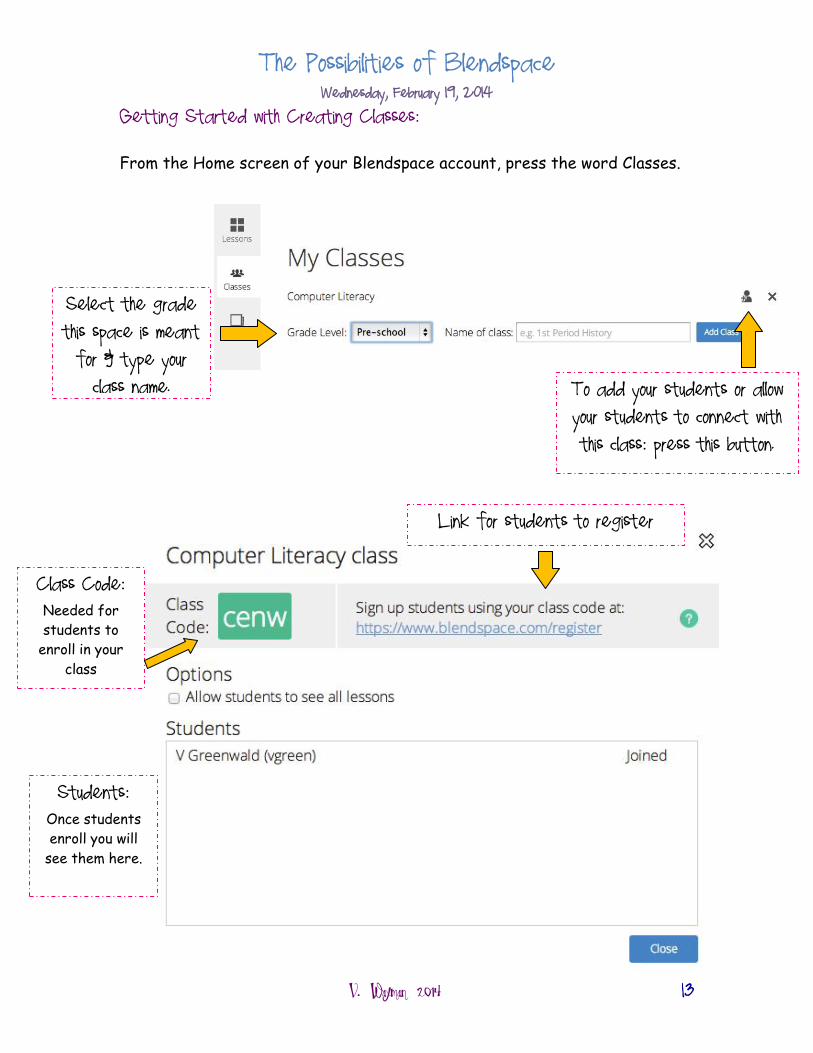
Getting Started with Creating Classes:
From the Home screen of your Blendspace account, press the word Classes.
Select the grade this space is meant for & type your
class name. To add your students or allow your students to connect with this class: press this button.
Class Code:
Needed for
students to
enroll in your
class
Link for students to register
Students:
Once students
enroll you will
see them here.

The Possibilities of Blendspace Wednesday, February 19, 2014
V. Waxman 2014 14
As your student accounts are created and connected to your classes, you will
be able to edit their accounts if needed. Looking for some inspiration – Check out The Gallery!
Select a subject or type a topic into the search bar and get ready to be
inspired.