thank you for purchasing qwizdom remotes. - puyallup
TRANSCRIPT
Thank you for purchasing Qwizdom Remotes.
Now that you’ve received your set, you’re probably thinking, “What do I do now?”
We have prepared this quick-start guide to help you get up and running with your remotes as soon as possible.
Over the next few pages, Qwizdom will take you through a step-by-step process, from installing the software to running a presentation.
Minimum System Requirements
• Windows XP Service Pack 2, Vista, or later • Microsoft PowerPoint® 2003 or later (registered version) • Microsoft Excel® 2003 or later (registered version) • Microsoft .NET Framework 3.5 (included in installer) • Microsoft .NET Framework 3.5 SP1 (included in installer) • Intel Pentium 233-MHZ or faster processor (Pentium III recommended) • 1G of RAM • 5 GB of disk space • CD-ROM drive • Open USB Port
Table of Contents
1 Checking the Remote Set
2 Installing Qwizdom® Connect
3 Opening Connect / Connect Toolbar
4 Setting Up Remotes
5 Installing State Standards
6 Creating Classes
7 Importing Activities from Connect Online
8 Creating New Activities
9 Presenting Activities
10 Reporting
11 Help and Support

1 CHECKING THE REMOTE SET
You should have the following items:
Q6i or Q7 Instructor Device Qwizdom Remotes
http://qwizdom.com/support/qwizdom-connect/#Downloads
USB Host Connect Software Link Batteries, Screws, and Screwdriver
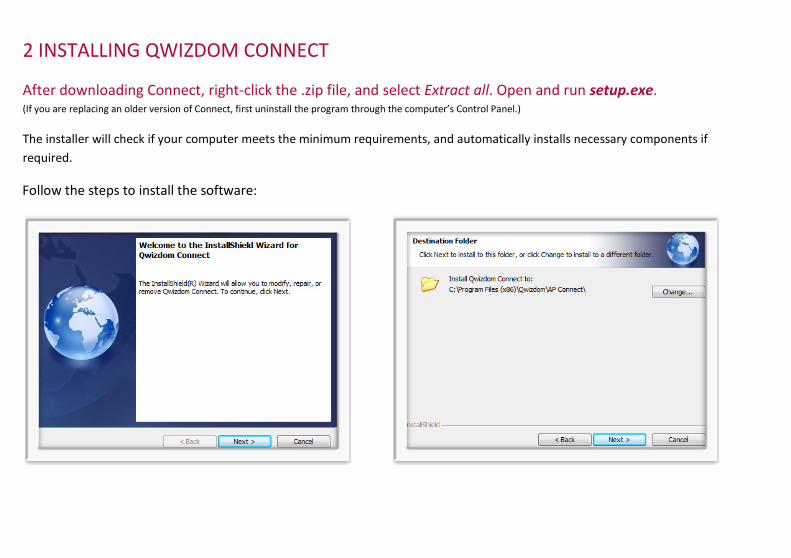
2 INSTALLING QWIZDOM CONNECT
After downloading Connect, right-click the .zip file, and select Extract all. Open and run setup.exe. (If you are replacing an older version of Connect, first uninstall the program through the computer’s Control Panel.)
The installer will check if your computer meets the minimum requirements, and automatically installs necessary components if required.
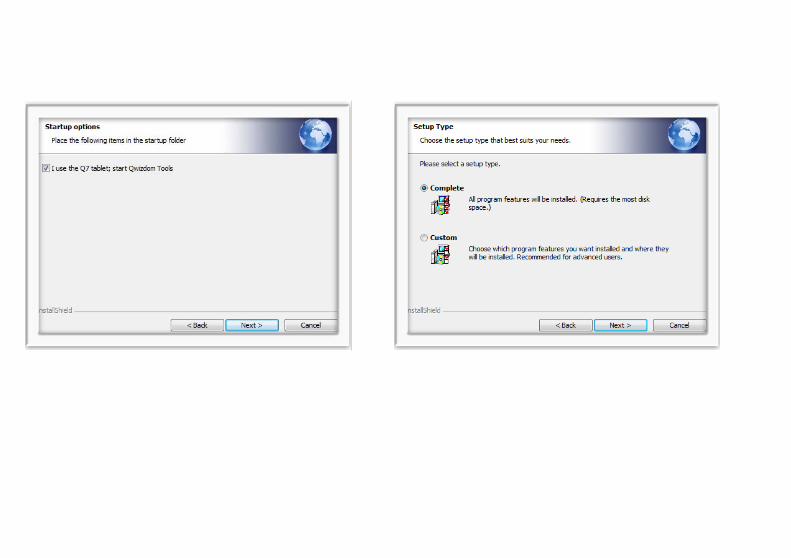
Follow the steps to install the software:
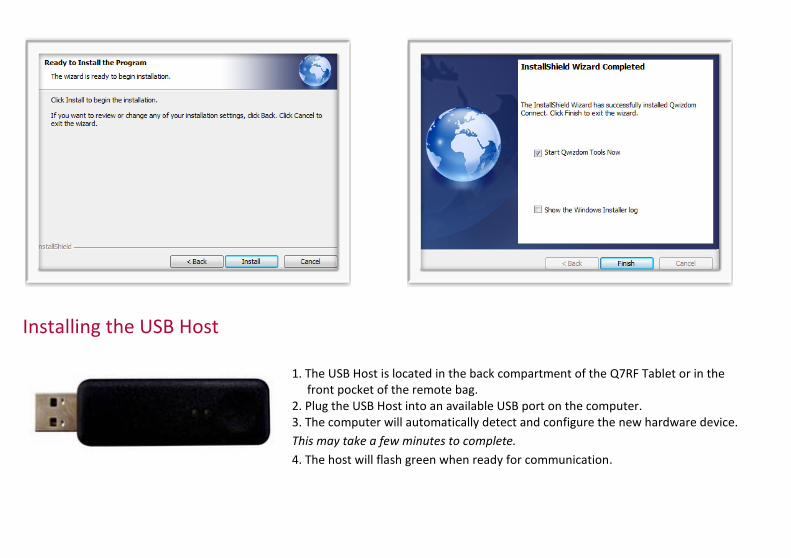
Installing the USB Host
1. The USB Host is located in the back compartment of the Q7RF Tablet or in the front pocket of the remote bag. 2. Plug the USB Host into an available USB port on the computer. 3. The computer will automatically detect and configure the new hardware device. This may take a few minutes to complete. 4. The host will flash green when ready for communication.
3 OPENING CONNECT
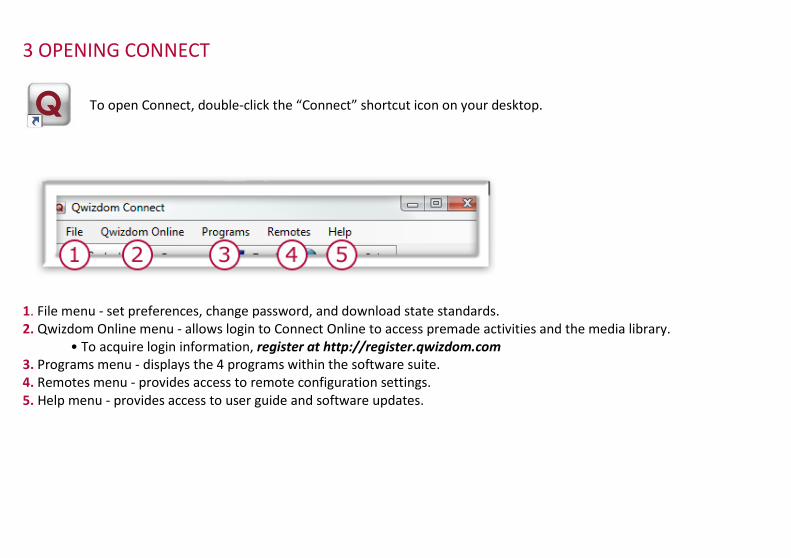
To open Connect, double-click the “Connect” shortcut icon on your desktop.
1. File menu - set preferences, change password, and download state standards. 2. Qwizdom Online menu - allows login to Connect Online to access premade activities and the media library.
• To acquire login information, register at http://register.qwizdom.com 3. Programs menu - displays the 4 programs within the software suite. 4. Remotes menu - provides access to remote configuration settings. 5. Help menu - provides access to user guide and software updates.
4 SETTING UP REMOTES
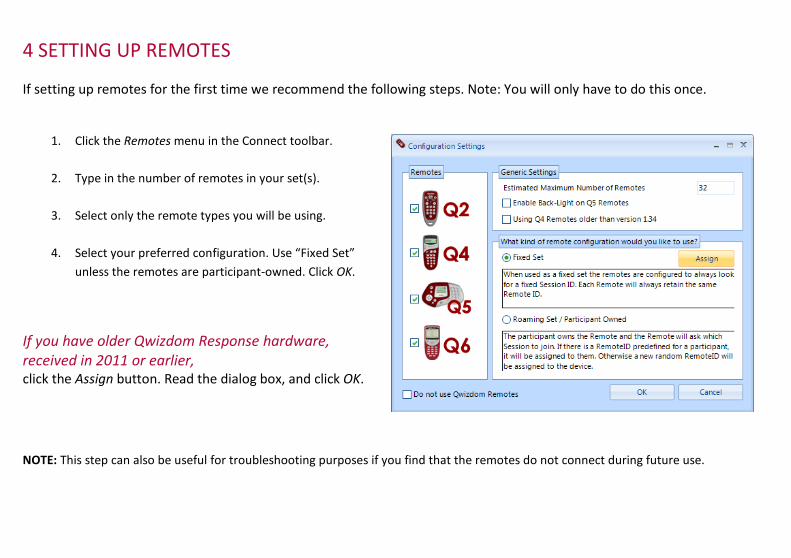
If setting up remotes for the first time we recommend the following steps. Note: You will only have to do this once.
1. Click the Remotes menu in the Connect toolbar. 2. Type in the number of remotes in your set(s).
3. Select only the remote types you will be using. 4. Select your preferred configuration. Use “Fixed Set”
unless the remotes are participant-owned. Click OK.
If you have older Qwizdom Response hardware, received in 2011 or earlier, click the Assign button. Read the dialog box, and click OK.
NOTE: This step can also be useful for troubleshooting purposes if you find that the remotes do not connect during future use.
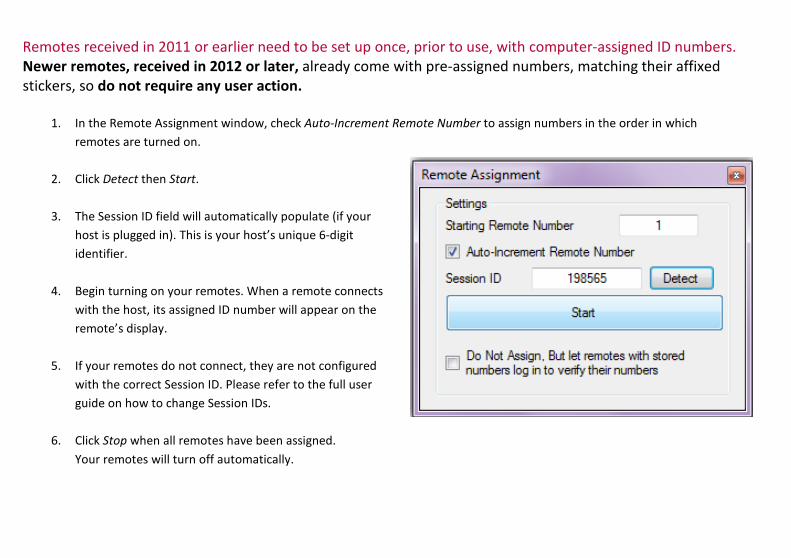
Remotes received in 2011 or earlier need to be set up once, prior to use, with computer-assigned ID numbers. Newer remotes, received in 2012 or later, already come with pre-assigned numbers, matching their affixed stickers, so do not require any user action.
1. In the Remote Assignment window, check Auto-Increment Remote Number to assign numbers in the order in which remotes are turned on.
2. Click Detect then Start.
3. The Session ID field will automatically populate (if your
host is plugged in). This is your host’s unique 6-digit identifier.
4. Begin turning on your remotes. When a remote connects
with the host, its assigned ID number will appear on the remote’s display.
5. If your remotes do not connect, they are not configured with the correct Session ID. Please refer to the full user guide on how to change Session IDs.
6. Click Stop when all remotes have been assigned. Your remotes will turn off automatically.
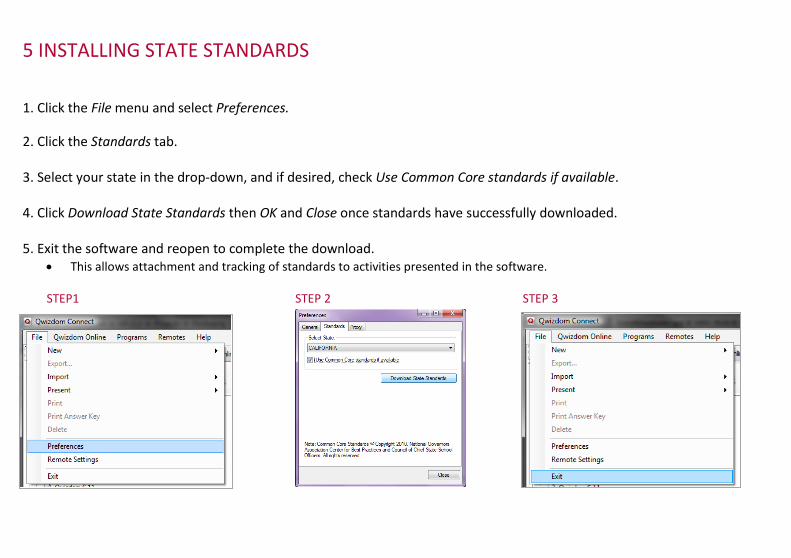
5 INSTALLING STATE STANDARDS
1. Click the File menu and select Preferences.
2. Click the Standards tab. 3. Select your state in the drop-down, and if desired, check Use Common Core standards if available. 4. Click Download State Standards then OK and Close once standards have successfully downloaded. 5. Exit the software and reopen to complete the download.
• This allows attachment and tracking of standards to activities presented in the software.
STEP1 STEP 2 STEP 3
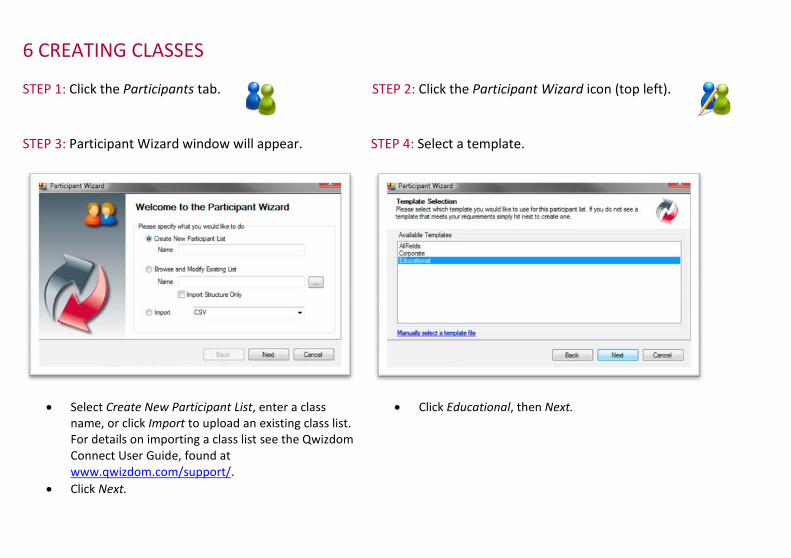
6 CREATING CLASSES
STEP 1: Click the Participants tab. STEP 2: Click the Participant Wizard icon (top left).
STEP 3: Participant Wizard window will appear.
• Select Create New Participant List, enter a class name, or click Import to upload an existing class list. For details on importing a class list see the Qwizdom Connect User Guide, found at www.qwizdom.com/support/.
• Click Next.
STEP 4: Select a template.
• Click Educational, then Next.
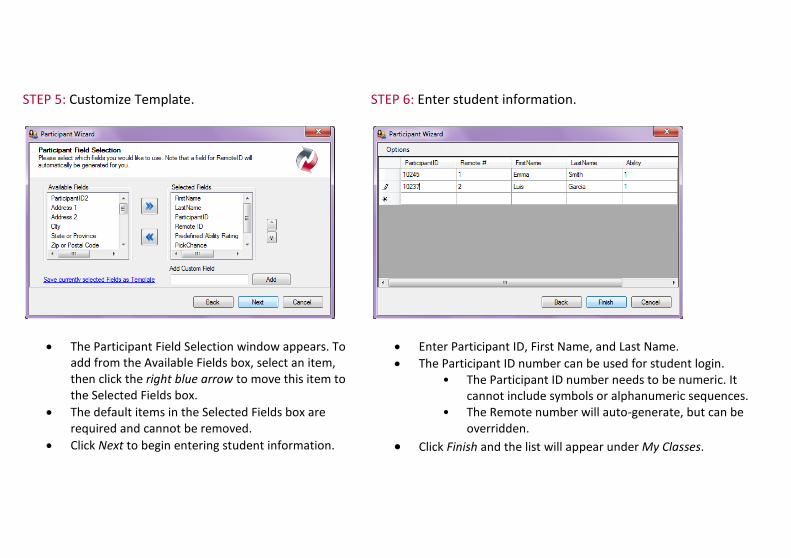
STEP 5: Customize Template.
• The Participant Field Selection window appears. To add from the Available Fields box, select an item, then click the right blue arrow to move this item to the Selected Fields box.
• The default items in the Selected Fields box are required and cannot be removed.
• Click Next to begin entering student information.
STEP 6: Enter student information.
• Enter Participant ID, First Name, and Last Name. • The Participant ID number can be used for student login.
• The Participant ID number needs to be numeric. It cannot include symbols or alphanumeric sequences.
• The Remote number will auto-generate, but can be overridden.
• Click Finish and the list will appear under My Classes.
7 IMPORTING ACTIVITIES FROM CONNECT ONLINE
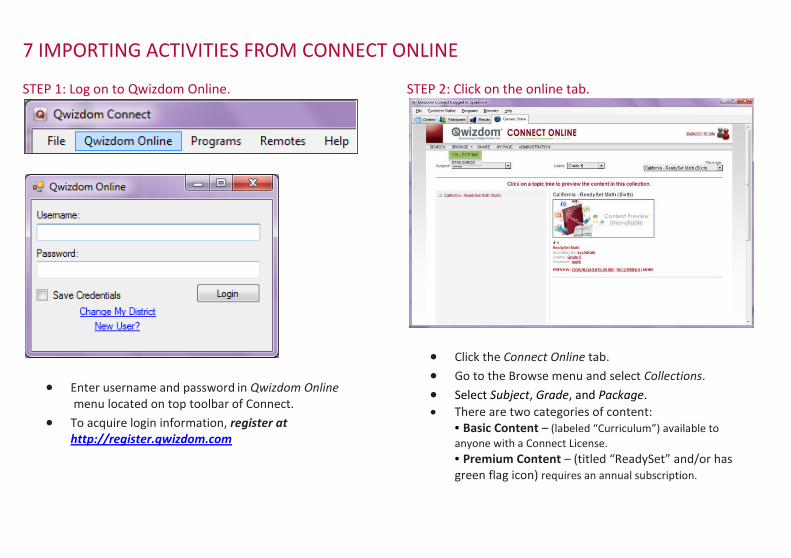
STEP 1: Log on to Qwizdom Online.
• Enter username and password in Qwizdom Online
menu located on top toolbar of Connect. • To acquire login information, register at
http://register.qwizdom.com
STEP 2: Click on the online tab.
• Click the Connect Online tab. • Go to the Browse menu and select Collections. • Select Subject, Grade, and Package. • There are two categories of content:
• Basic Content – (labeled “Curriculum”) available to anyone with a Connect License. • Premium Content – (titled “ReadySet” and/or has green flag icon) requires an annual subscription.

STEP 3: Preview Content
• Click on the (+) to expand tree. Select an activity or group of activities and then click Preview.
• Prior to downloading, all lessons may be previewed regardless of licensing.
STEP 4: Download Content
• You can download an entire package, or a single activity.
• Highlight the title and click Download. • Your package
or lesson will be in the Content tab.

8 CREATING NEW ACTIVITIES
1. Click the Content tab. 2. Click Add Live Editor Activity in the toolbar.
3. Enter a name for your new activity and click OK.
4. The new activity title is added to the content tree and a single blank slide appears.
5. Click the Edit activity icon in the toolbar to access the editing section and begin creating the slide set. To learn more about creating custom activities please see the full user guide located at www.qwizdom.com/support/.
9 PRESENTING ACTIVITIES
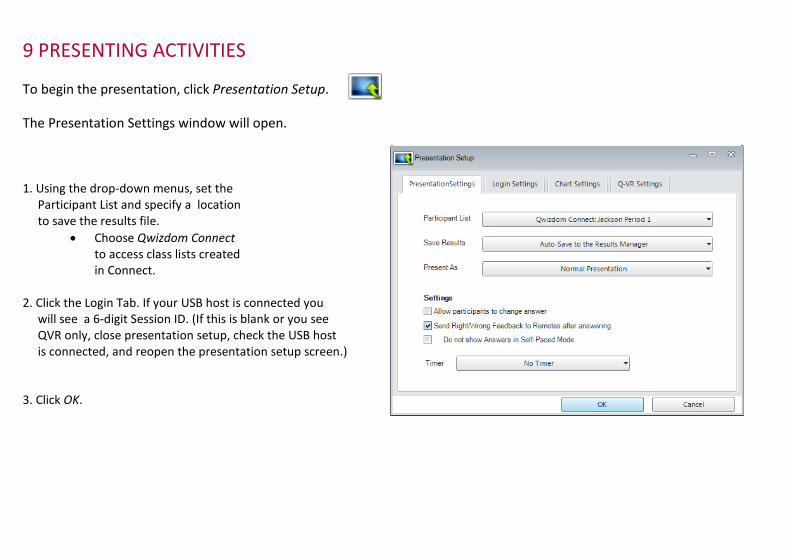
To begin the presentation, click Presentation Setup.
The Presentation Settings window will open.
1. Using the drop-down menus, set the Participant List and specify a location to save the results file.
• Choose Qwizdom Connect to access class lists created in Connect.
2. Click the Login Tab. If your USB host is connected you will see a 6-digit Session ID. (If this is blank or you see QVR only, close presentation setup, check the USB host is connected, and reopen the presentation setup screen.)
3. Click OK.
For further information on building and importing participant lists, presenting with Qwizdom games, QVR (Qwizdom Virtual Remote), and in-presentation graphs, please see the full user guide.
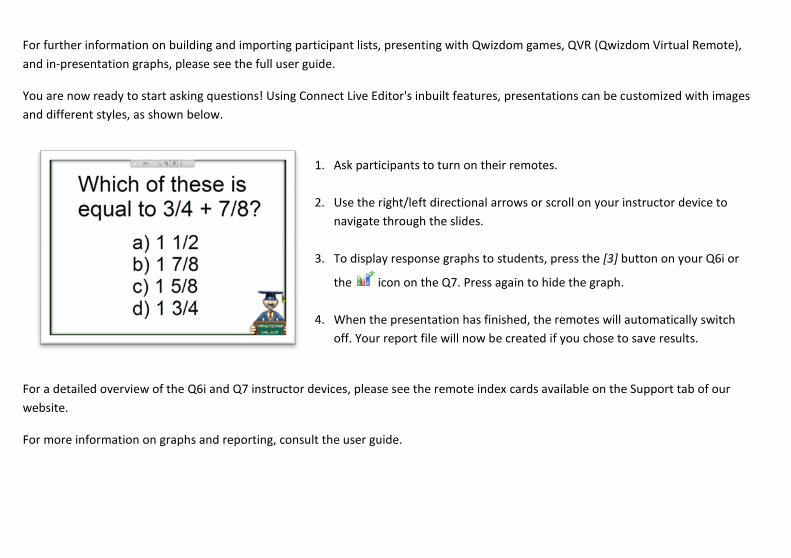
You are now ready to start asking questions! Using Connect Live Editor's inbuilt features, presentations can be customized with images and different styles, as shown below.
1. Ask participants to turn on their remotes.
2. Use the right/left directional arrows or scroll on your instructor device to navigate through the slides.
3. To display response graphs to students, press the [3] button on your Q6i or
the icon on the Q7. Press again to hide the graph.
4. When the presentation has finished, the remotes will automatically switch off. Your report file will now be created if you chose to save results.
For a detailed overview of the Q6i and Q7 instructor devices, please see the remote index cards available on the Support tab of our website.
For more information on graphs and reporting, consult the user guide.
THE FEEDBACK INDICATOR
1 2 3 4 5 6
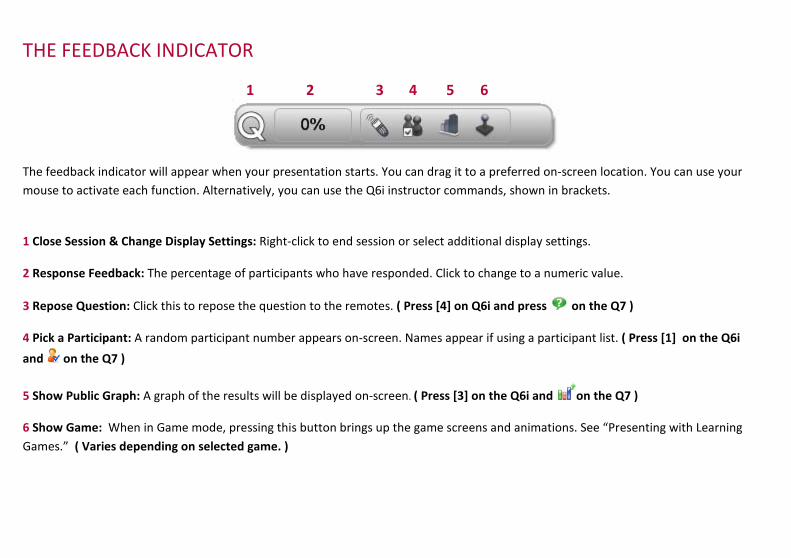
The feedback indicator will appear when your presentation starts. You can drag it to a preferred on-screen location. You can use your mouse to activate each function. Alternatively, you can use the Q6i instructor commands, shown in brackets.
1 Close Session & Change Display Settings: Right-click to end session or select additional display settings.
2 Response Feedback: The percentage of participants who have responded. Click to change to a numeric value.
3 Repose Question: Click this to repose the question to the remotes. ( Press [4] on Q6i and press on the Q7 )
4 Pick a Participant: A random participant number appears on-screen. Names appear if using a participant list. ( Press [1] on the Q6i
and on the Q7 )
5 Show Public Graph: A graph of the results will be displayed on-screen. ( Press [3] on the Q6i and on the Q7 )
6 Show Game: When in Game mode, pressing this button brings up the game screens and animations. See “Presenting with Learning Games.” ( Varies depending on selected game. )
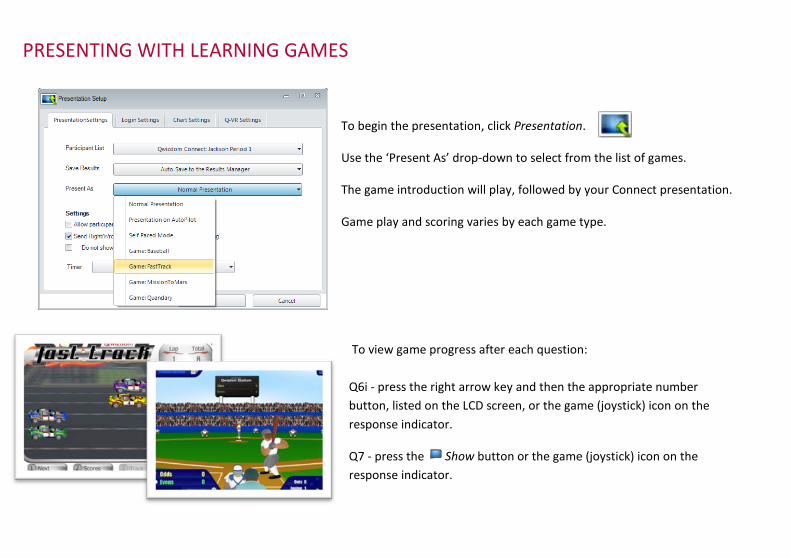
PRESENTING WITH LEARNING GAMES
To begin the presentation, click Presentation.
Use the ‘Present As’ drop-down to select from the list of games.
The game introduction will play, followed by your Connect presentation.
Game play and scoring varies by each game type.
To view game progress after each question: Q6i - press the right arrow key and then the appropriate number button, listed on the LCD screen, or the game (joystick) icon on the response indicator.
Q7 - press the Show button or the game (joystick) icon on the response indicator.
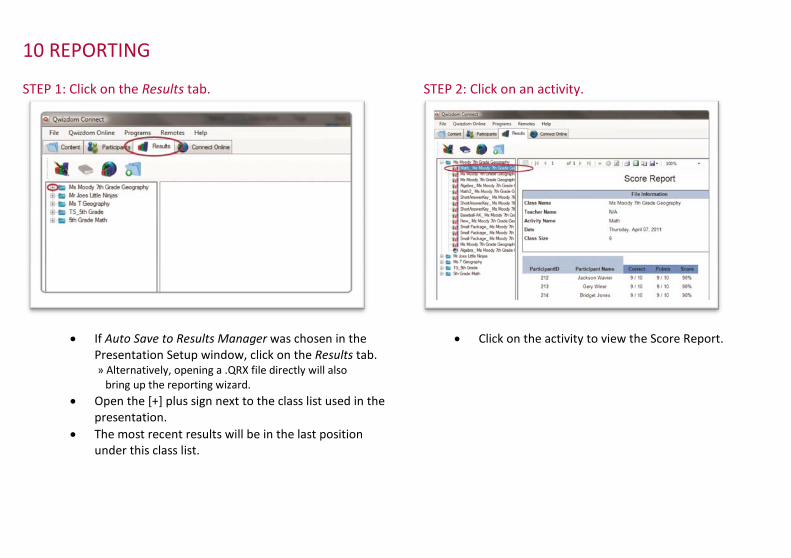
10 REPORTING
STEP 1: Click on the Results tab.
• If Auto Save to Results Manager was chosen in the
Presentation Setup window, click on the Results tab. » Alternatively, opening a .QRX file directly will also bring up the reporting wizard.
• Open the [+] plus sign next to the class list used in the presentation.
• The most recent results will be in the last position under this class list.
STEP 2: Click on an activity.
• Click on the activity to view the Score Report.
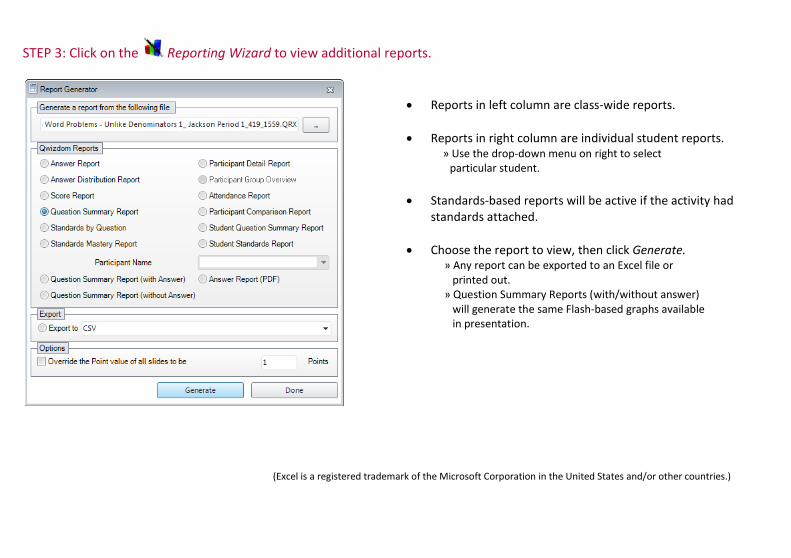
STEP 3: Click on the Reporting Wizard to view additional reports.
• Reports in left column are class-wide reports.
• Reports in right column are individual student reports.
» Use the drop-down menu on right to select particular student.
• Standards-based reports will be active if the activity had standards attached.
• Choose the report to view, then click Generate. » Any report can be exported to an Excel file or printed out. » Question Summary Reports (with/without answer) will generate the same Flash-based graphs available in presentation.
(Excel is a registered trademark of the Microsoft Corporation in the United States and/or other countries.)
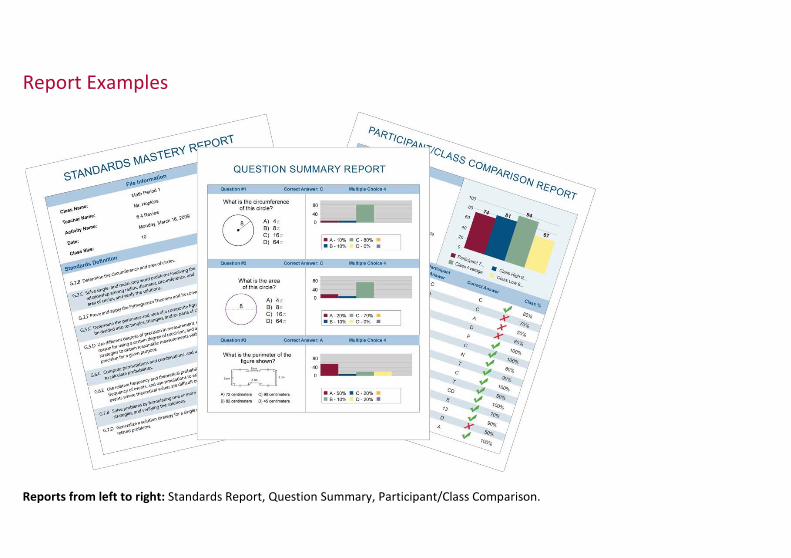
Report Examples
Reports from left to right: Standards Report, Question Summary, Participant/Class Comparison.
11 HELP AND SUPPORT
Go to (www.qwizdom.com/support/) for full user guides, video tutorials, software updates, and more useful information on using Qwizdom products.
If you need further assistance…
Email Support: [email protected]
Common Qwizdom Terminology
Host: The USB device used to communicate with your Qwizdom remotes.
Participant ID: Participant ID is the student’s unique identification number. We recommend using a school/district ID number, if one is available. Session ID: The unique 6-digit number assigned to your Host. This is the number which should be entered into the remotes.
.QRX: The file format of results / report files.
.QPL: The file format for Qwizdom participant lists.