sureshot armament group svd dragunov freefloat chassis
TRANSCRIPT
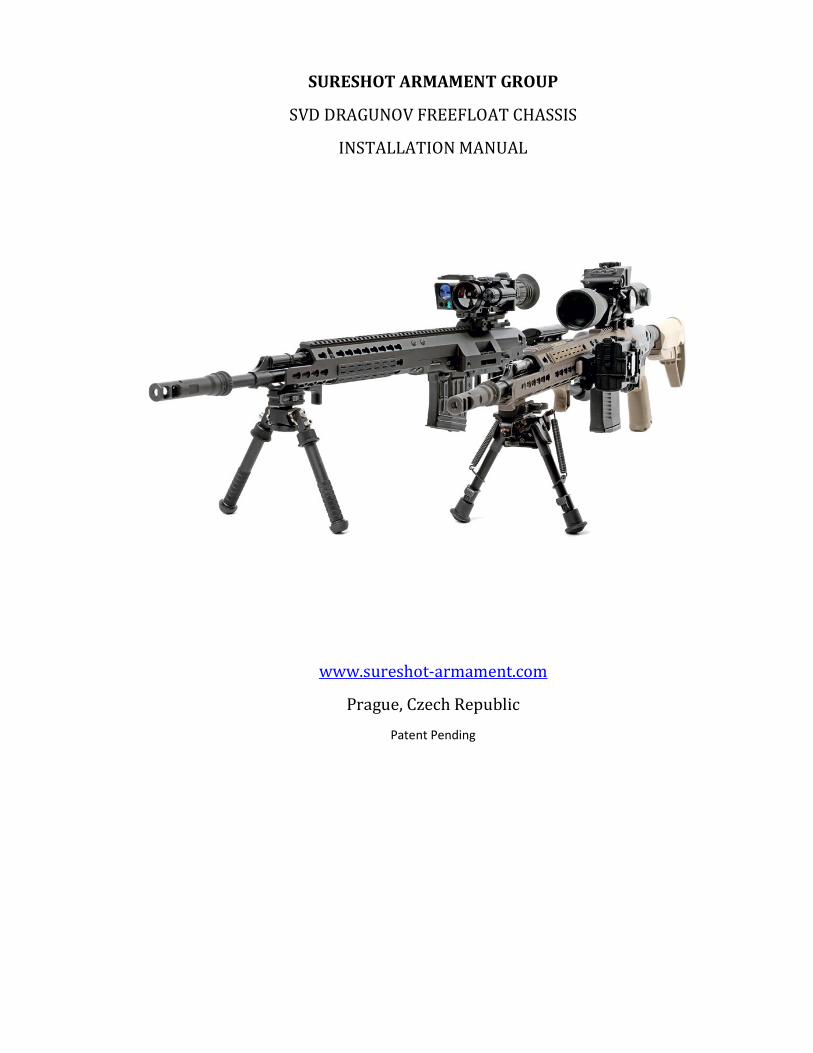
SURESHOT ARMAMENT GROUP
SVD DRAGUNOV FREEFLOAT CHASSIS
INSTALLATION MANUAL
www.sureshot-armament.com
Prague, Czech Republic
Patent Pending
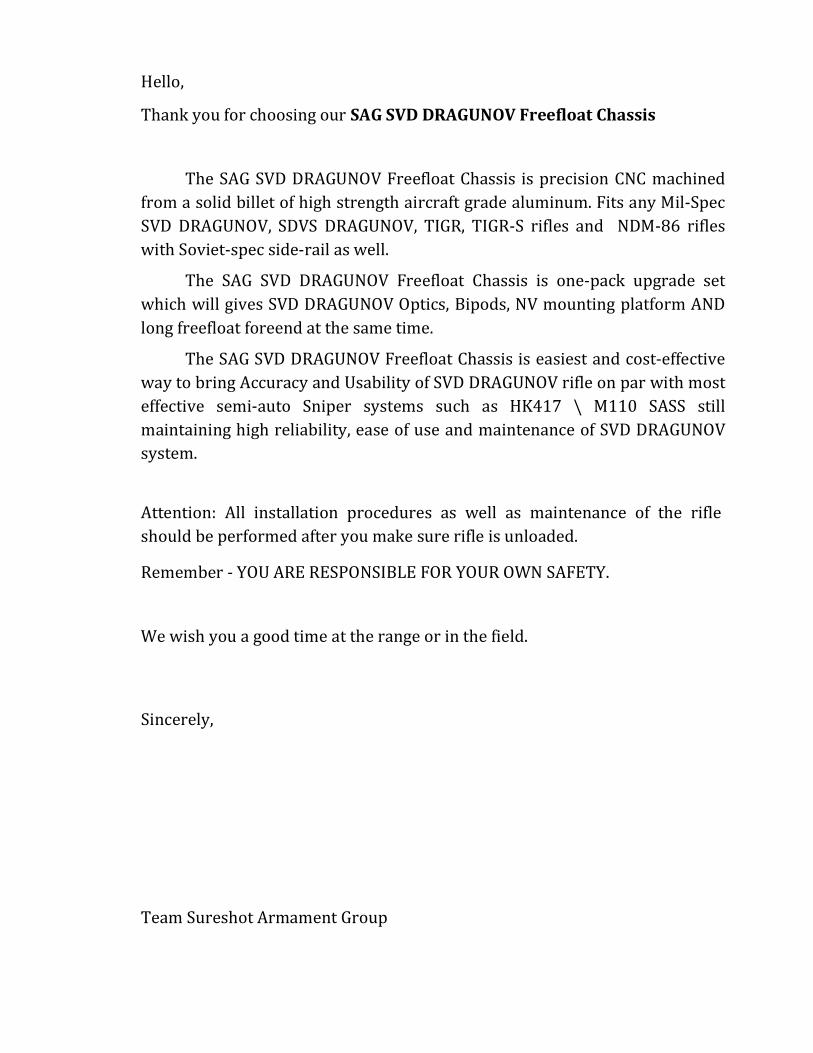
Hello,
Thank you for choosing our SAG SVD DRAGUNOV Freefloat Chassis
The SAG SVD DRAGUNOV Freefloat Chassis is precision CNC machined from a solid billet of high strength aircraft grade aluminum. Fits any Mil-Spec SVD DRAGUNOV, SDVS DRAGUNOV, TIGR, TIGR-S rifles and NDM-86 rifles with Soviet-spec side-rail as well.
The SAG SVD DRAGUNOV Freefloat Chassis is one-pack upgrade set which will gives SVD DRAGUNOV Optics, Bipods, NV mounting platform AND long freefloat foreend at the same time.
The SAG SVD DRAGUNOV Freefloat Chassis is easiest and cost-effective way to bring Accuracy and Usability of SVD DRAGUNOV rifle on par with most effective semi-auto Sniper systems such as HK417 \ M110 SASS still maintaining high reliability, ease of use and maintenance of SVD DRAGUNOV system.
Attention: All installation procedures as well as maintenance of the rifle should be performed after you make sure rifle is unloaded.
Remember - YOU ARE RESPONSIBLE FOR YOUR OWN SAFETY.
We wish you a good time at the range or in the field.
Sincerely,
Team Sureshot Armament Group
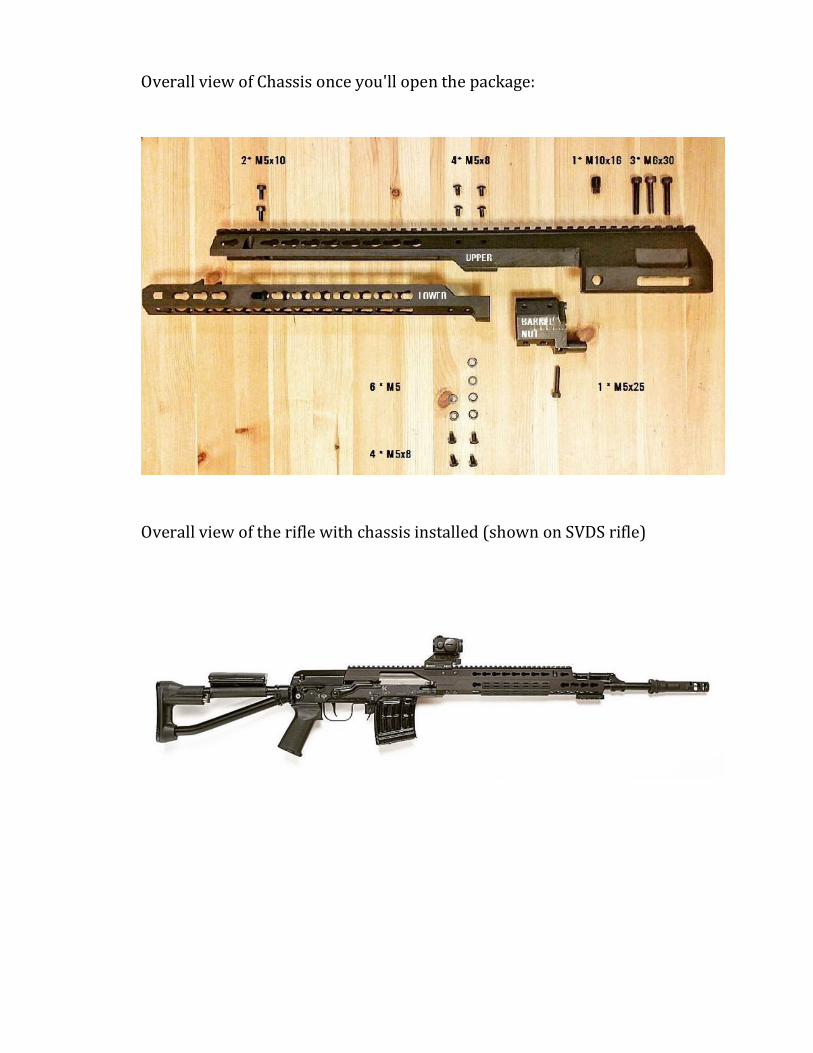
Overall view of Chassis once you'll open the package:
Overall view of the rifle with chassis installed (shown on SVDS rifle)
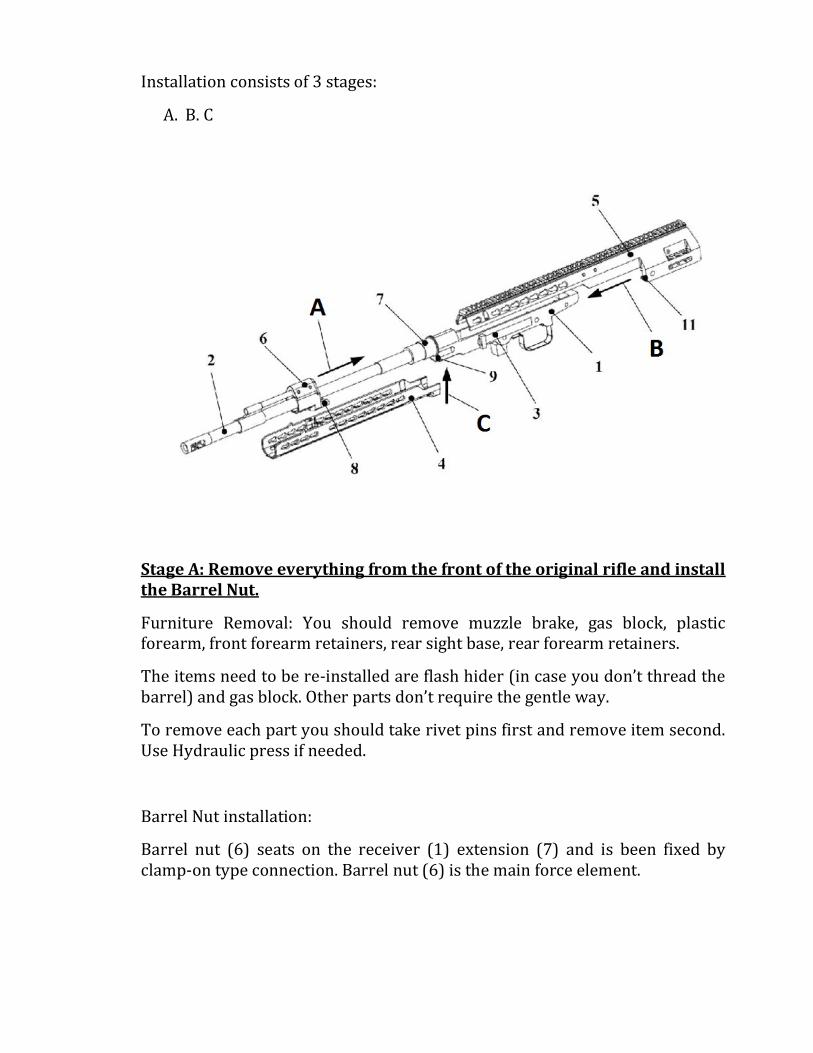
Installation consists of 3 stages:
A. B. C
Stage A: Remove everything from the front of the original rifle and install the Barrel Nut.
Furniture Removal: You should remove muzzle brake, gas block, plastic forearm, front forearm retainers, rear sight base, rear forearm retainers.
The items need to be re-installed are flash hider (in case you don’t thread the barrel) and gas block. Other parts don’t require the gentle way.
To remove each part you should take rivet pins first and remove item second. Use Hydraulic press if needed.
Barrel Nut installation:
Barrel nut (6) seats on the receiver (1) extension (7) and is been fixed by clamp-on type connection. Barrel nut (6) is the main force element.
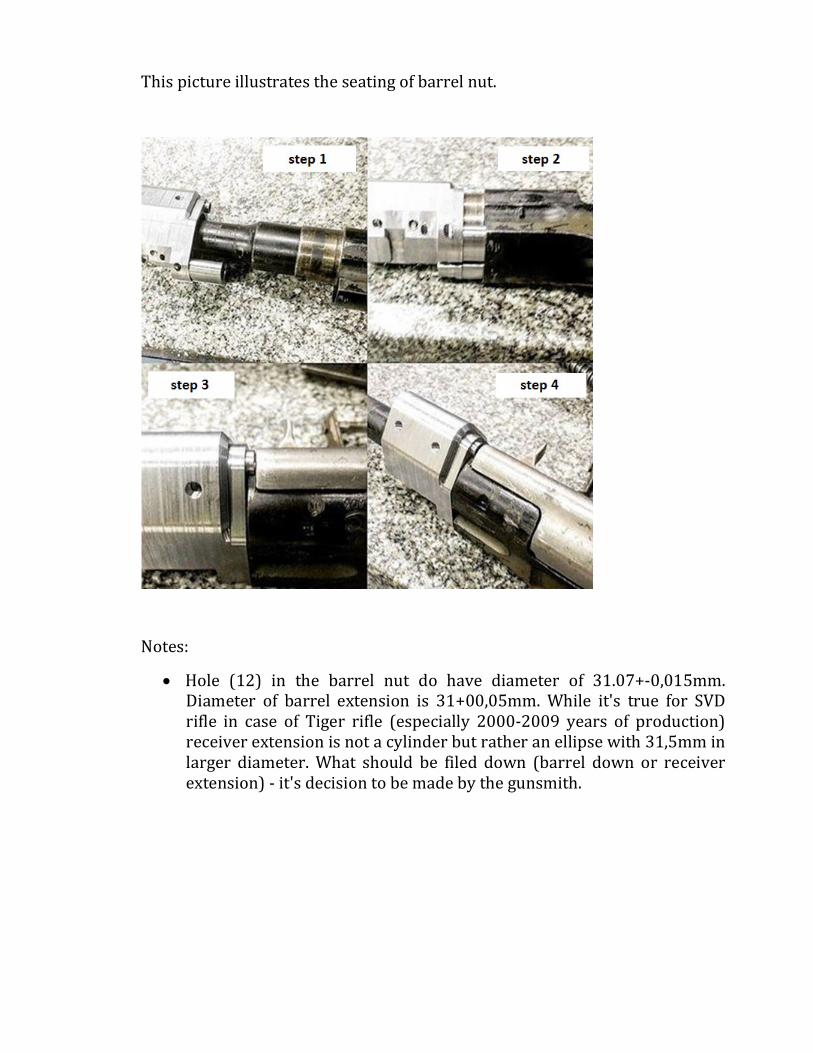
This picture illustrates the seating of barrel nut.
Notes:
Hole (12) in the barrel nut do have diameter of 31.07+-0,015mm. Diameter of barrel extension is 31+00,05mm. While it's true for SVD rifle in case of Tiger rifle (especially 2000-2009 years of production) receiver extension is not a cylinder but rather an ellipse with 31,5mm in larger diameter. What should be filed down (barrel down or receiver extension) - it's decision to be made by the gunsmith.
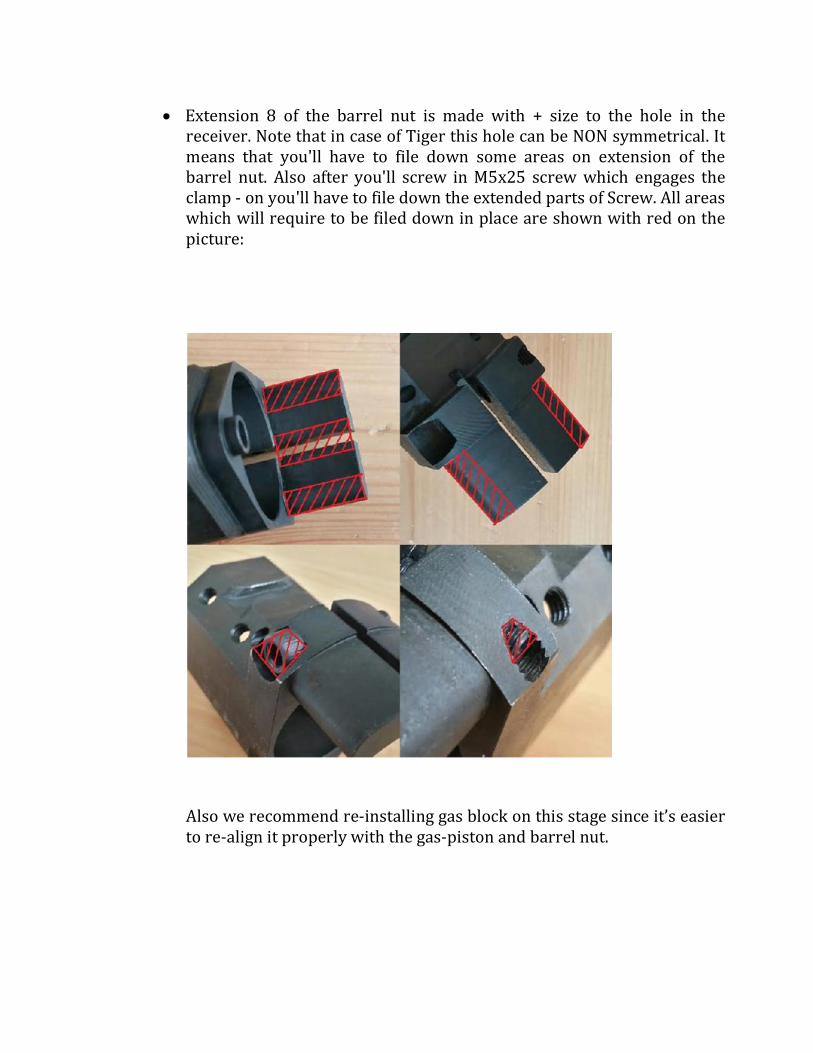
Extension 8 of the barrel nut is made with + size to the hole in the receiver. Note that in case of Tiger this hole can be NON symmetrical. It means that you'll have to file down some areas on extension of the barrel nut. Also after you'll screw in M5x25 screw which engages the clamp - on you'll have to file down the extended parts of Screw. All areas which will require to be filed down in place are shown with red on the picture:
Also we recommend re-installing gas block on this stage since it’s easier to re-align it properly with the gas-piston and barrel nut.
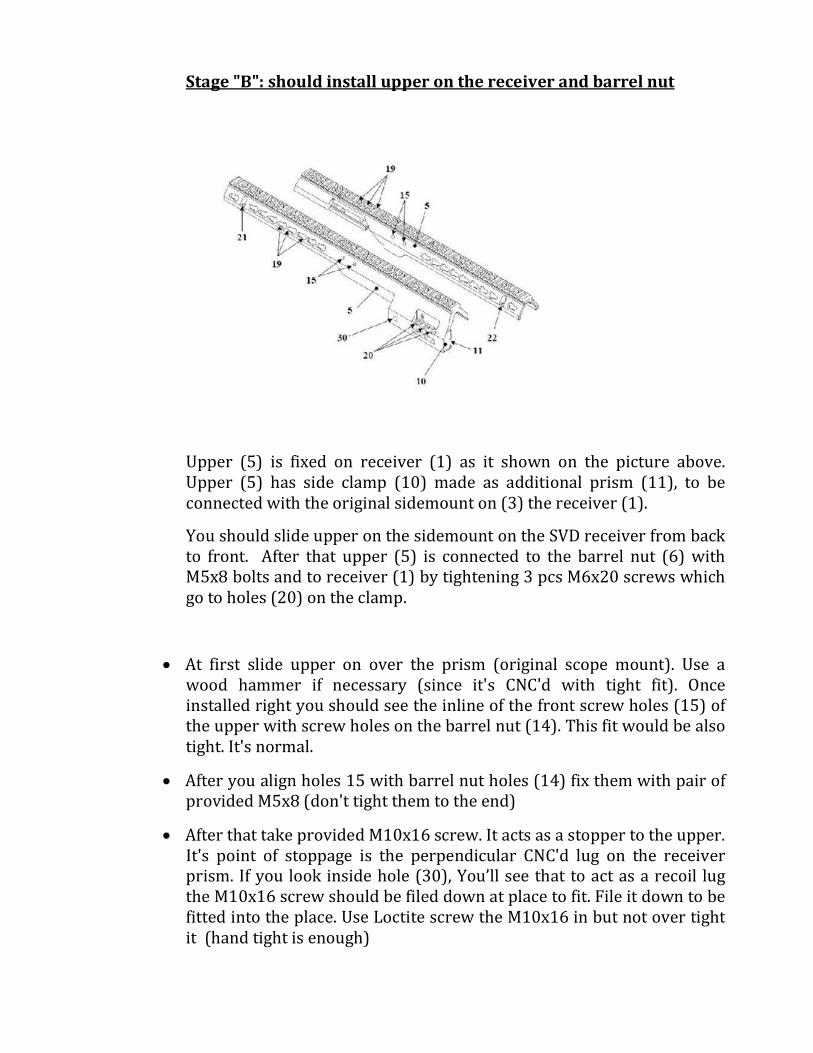
Stage "B": should install upper on the receiver and barrel nut
Upper (5) is fixed on receiver (1) as it shown on the picture above. Upper (5) has side clamp (10) made as additional prism (11), to be connected with the original sidemount on (3) the receiver (1).
You should slide upper on the sidemount on the SVD receiver from back to front. After that upper (5) is connected to the barrel nut (6) with M5x8 bolts and to receiver (1) by tightening 3 pcs M6x20 screws which go to holes (20) on the clamp.
At first slide upper on over the prism (original scope mount). Use a wood hammer if necessary (since it's CNC'd with tight fit). Once installed right you should see the inline of the front screw holes (15) of the upper with screw holes on the barrel nut (14). This fit would be also tight. It's normal.
After you align holes 15 with barrel nut holes (14) fix them with pair of provided M5x8 (don't tight them to the end)
After that take provided M10x16 screw. It acts as a stopper to the upper. It's point of stoppage is the perpendicular CNC'd lug on the receiver prism. If you look inside hole (30), You’ll see that to act as a recoil lug the M10x16 screw should be filed down at place to fit. File it down to be fitted into the place. Use Loctite screw the M10x16 in but not over tight it (hand tight is enough)
Tight down screws (15) into holes (14) with usage of Loctite with 65 Lbs.\inch of torque.
Use provided M6x30 screws to tight clamp -on over the receiver prism. You can use shorter screws but we recommend to tight in all of the screws to the first sights of deformation of the lower part of the clamp, mark the screws and cut them at these marks. Use Loctite. Tight them with 65lbs\inch of torque.
Corresponding picture:
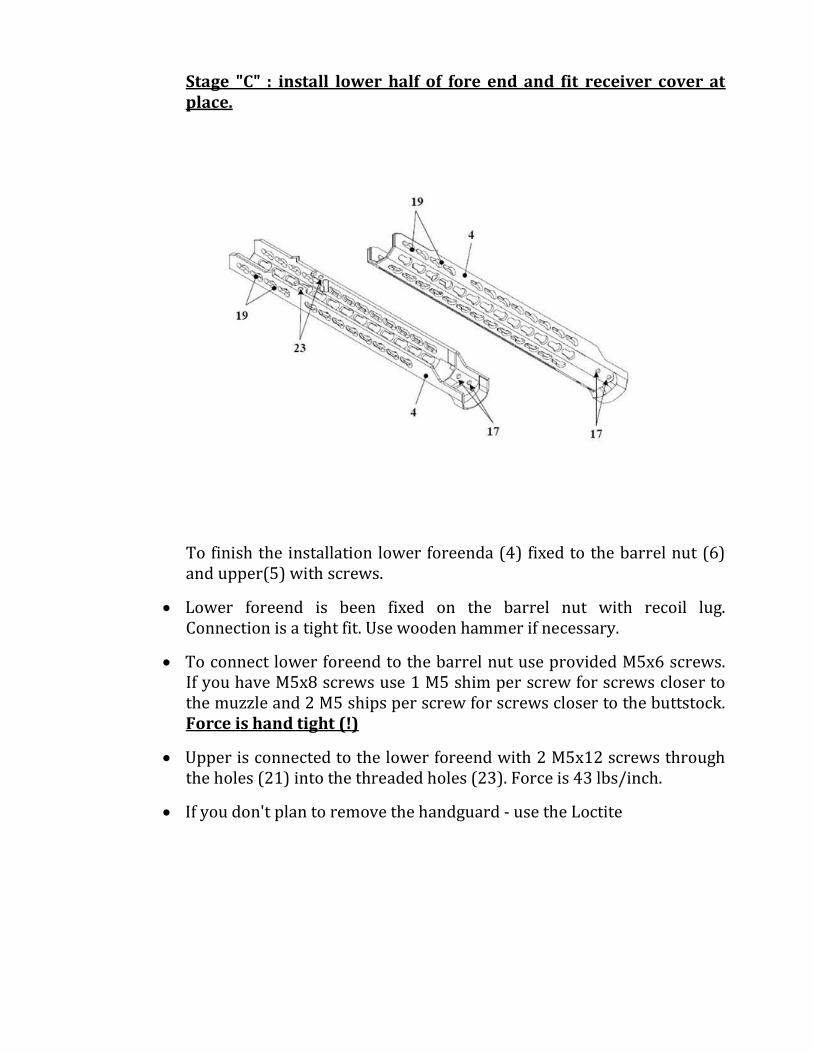
Stage "C" : install lower half of fore end and fit receiver cover at place.
To finish the installation lower foreendа (4) fixed to the barrel nut (6) and upper(5) with screws.
Lower foreend is been fixed on the barrel nut with recoil lug. Connection is a tight fit. Use wooden hammer if necessary.
To connect lower foreend to the barrel nut use provided M5x6 screws. If you have M5x8 screws use 1 M5 shim per screw for screws closer to the muzzle and 2 M5 ships per screw for screws closer to the buttstock. Force is hand tight (!)
Upper is connected to the lower foreend with 2 M5x12 screws through the holes (21) into the threaded holes (23). Force is 43 lbs/inch.
If you don't plan to remove the handguard - use the Loctite
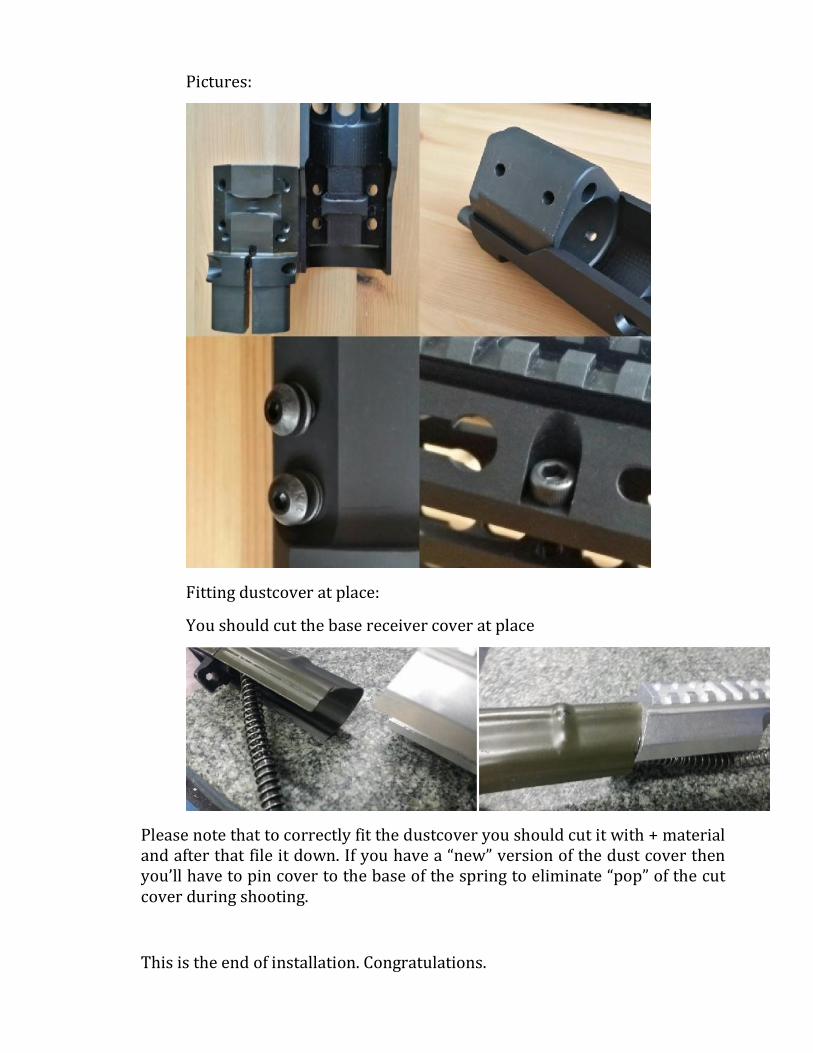
Pictures:
Fitting dustcover at place:
You should cut the base receiver cover at place
Please note that to correctly fit the dustcover you should cut it with + material and after that file it down. If you have a “new” version of the dust cover then you’ll have to pin cover to the base of the spring to eliminate “pop” of the cut cover during shooting.
This is the end of installation. Congratulations.
Final Notes:
1. Please check side screws which holds upper’s clamp-on to the receiver each 1000 shots to ensure they are not loose.
2. Please check screws which hold upper to the barrel nut each 1000 shots to ensure they are not loose.
3. To clean the gas system unscrew all system (gas regulator – piston – piston rod – return spring) from the gas block and remove it by sliding left (right) and forward. Reinstall in opposite sequence. Please note that you don’t have to remove any part of chassis to clean gas system or rifle.
Thank you one more time for your Purchase.
Should you have any questions – email us at [email protected]
Sincerely Yours
Sureshot Armament Team