sportplane builder: flight testing homebuilts - free
TRANSCRIPT
Tony Bingelis-
Stage One: Making Preparations For Flight Testing
During EAA Oshkosh '88 EAAand FAA signed a joint agreementto develop a multi-media programto alert pilots of amateur built air-craft to the need for special carein the first 40 hours of flight intheir new aircraft. This article byTony Bingelis is the first of threeinstallments on test flying a home-built and is part of EAA's partici-pation in the multi-media programwhich will ultimately include bothslide and video tape presentations.
Many builders have the mistaken no-tion that flight testing an amateur-builtaircraft must take place immediatelyafter the FAA certification inspectionand that it consists merely of that legen-dary first flight. Most are aware, how-ever, that the homebuilt will have to flyoff its 20 hour quarantine in an ap-proved flight test area. The minimum is40 hours for homebuilts with uncertifi-cated engines or propellers.
The idea prevails, too, that this man-datory time be flown off as quickly aspossible. The impatience is under-standable. After all, there's EAA Osh-kosh and so many other fly-ins to attendand awards to win. But reaching thattempting goal must never be at the ex-pense of a thorough testing of the newairplane. And for good reason, too.
FAA records show that 56% of thefatal accidents happen within the 40hour test phase.
Think about it. A thorough and realis-tic test program for your airplane is es-sential. Here are five good reasonswhy:
1. It leaves nothing to chance.2. It enables you to fine tune its flight
characteristics.3. It uncovers any problems needing
correcting.4. It helps instill confidence in your
new airplane.5. It reveals the full potential of your
new airplane.Unfortunately, in the past there has
been no test program guide for first timebuilders of amateur built aircraft. Notthat there has been a lack of information
on test flying an aircraft - far from it.Actually, a number of articles on the
general aspects of testing have ap-peared in our own SPORT AVIATIONmagazine and in other EAA publica-tions. But, this sort of information is dif-ficult to recall, much less to locate againby anyone who suddenly realizes heneeds it right now. Even after one findsa reference or two on the subject, it maynot be all he had hoped for. There mightbe a lack of uniformity in the materialfound and it seems in many instancesthat the information is either incompleteor, perhaps, contains a number of rec-ommended flight test procedures andobjectives that may be unnecessary,too advanced or far too sophisticated tobe practical for most of us. This sort ofconclusion is enough to frustrate mostany conscientious would-be test pilotwith more information and data than heneeds - or, for that matter, would knowhow to use during those anxiety induc-ing moments that engulf most firstflights.
Hopefully, all that will be changedwhen the proposed FAA Advisory Cir-cular being prepared jointly by the EAAand FAA is released. In the meantime,
let's see if we can simplify and betterorganize the basic test flying informa-tion many of us have been using . . . bydividing it into the following three steps:
STAGE ONE: MAKING PREPARA-TIONS FOR FLIGHT TESTING
STAGE TWO: MAKING THE INITIALFLIGHT TEST
STAGE THREE: EXPANDING THEFLIGHT ENVELOPE
Note: In order to establish a commonstarting point, the assumption is that theFAA certification requirements havebeen met and the aircraft has just beenissued an Airworthiness Certificate inthe Experimental Category (AmateurBuilt). Let's begin our flight test programat that point.
Incidentally, this is not Intendedas a Primer on "How To Fly" - thetest pilot selected should alreadyknow how, and should be familiarwith basic flight maneuvers.
Stage One: Making Preparations ForFlight Testing
1. SELECT A GOOD AIRPORT - Ifyour airplane is not yet at an airport,select the best airport in your area hav-
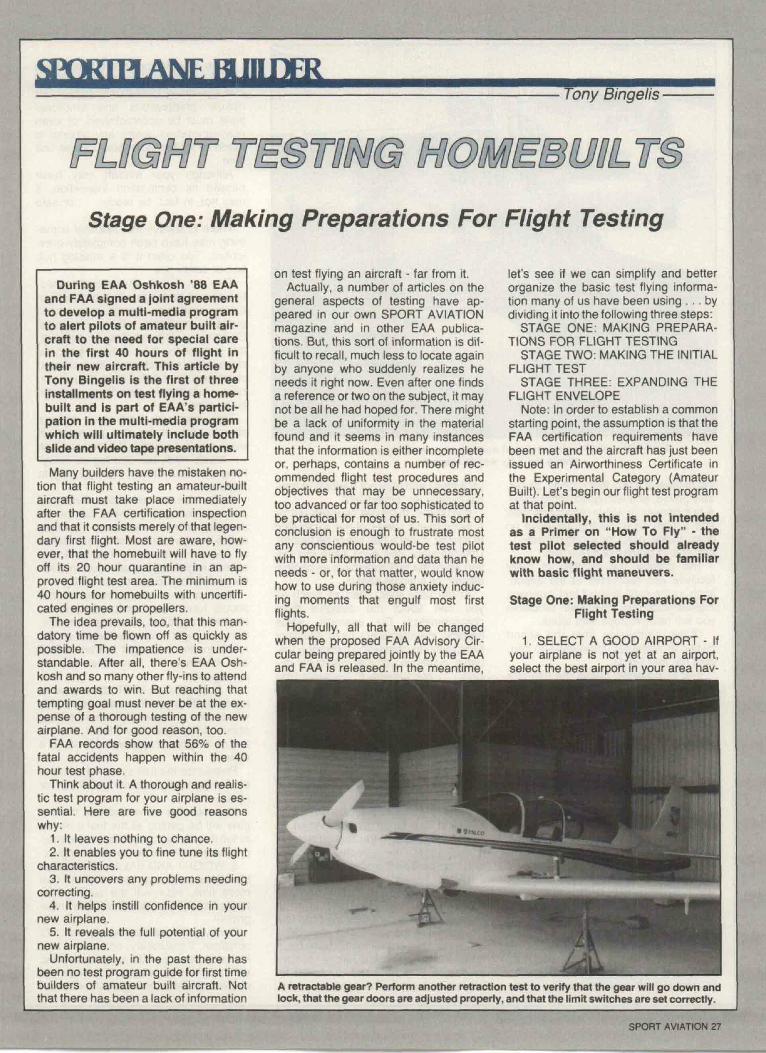
A retractable gear? Perform another retraction test to verify that the gear will go down andlock, that the gear doors are adjusted properly, and that the limit switches are set correctly.
SPORT AVIATION 27
Don't just look. Touch, twist, pull and tug on everything you check -that's the only way to inspect.
ing at least a 3,000 foot runway, prefer-ably paved, and with good approaches.A fast homebuilt with a retractable gearand a high wing loading will have aneven greater need for a long runway . . .say one in excess of 4,000 feet.
The greater the number of otherfacilities and resources at the airport,such as the availability of fuel, hangars,maintenance, etc., the fewer problemsyou will have to cope with alone.
Obtain permission from the airportowner or manager beforehand to con-duct the test flights.
If at all possible, obtain the use of ahangar during the testing activities atthe airport. Hangar space is scarce atmost airports but often arrangementscan be made to share a hangar tem-porarily.
2. SELECT THE TEST PILOT - Itdoesn't have to be the builder. If you donot have the experience and currentqualifications to make the first flight, findsomeone who is willing and capable ofperforming it for you.
Don't let your emotions and foolishpride override your better judgment.You spent years and a lot of moneybuilding the airplane and too much is atstake to risk EVERYTHING now.
Talk with or correspond with otherswho have flown this kind of aircraft. Youcan learn much from them regarding theflight and handling characteristics of theairplane. Remember though, you mayhave modified your airplane "slightly",or your aircraft may be much heavier
(or lighter) and may not perform or han-dle exactly as "advertised".
If possible, try to get checked out bya sympathetic owner of the same kindof aircraft. Even a ride would be helpful.Unfortunately, you don't have this op-tion when the test airplane is an originaldesign, or a single seater.
At the very least, read as much asyou can about the design's flightcharacteristics. For example, somekitplane manufacturers have excellentflight manuals containing extremely val-uable guidance for that particular de-sign . . . don't ignore it. (Sequoia nowhas a Flight Testing Manual and evenan Advanced Flight Testing guide fortheir Falco builders.)
Aviation magazines are anothersource for flight reports covering numer-ous homebuilt types. These are fairlygood general sources of information.Still, if possible, get your informationfrom more than one such source.
Be sure the pilot you choose is cur-rent and has flown aircraft similar toyours. Obviously, if the test airplane isa taildragger, the selected test pilotmust be proficient and experienced inthe type.
3. COMPLETE A LAST MINUTEREADINESS INSPECTION - Notanother inspection?? Yes! You can't betoo careful at this point. Not when 38%of the accidents or incidents have beenattributed to mechanical failure - primar-ily due to engine failure, propeller tipfailures and to poor fuel system installa-
tions.Even though your aircraft has been
issued its FAA Airworthiness Certificateand Operating Limitations, certain lastminute preparations and functionaltests must be accomplished, or evenreaccomplished before any attempt ismade to fly the homebuilt for the firsttime.
Although your aircraft may havepassed its certification inspection, itmay not, in fact, be ready . . . or safeto fly.
There is always that risk that some-thing may have been completely over-looked. Too often it is a missing nut,bolt or cotter pin.
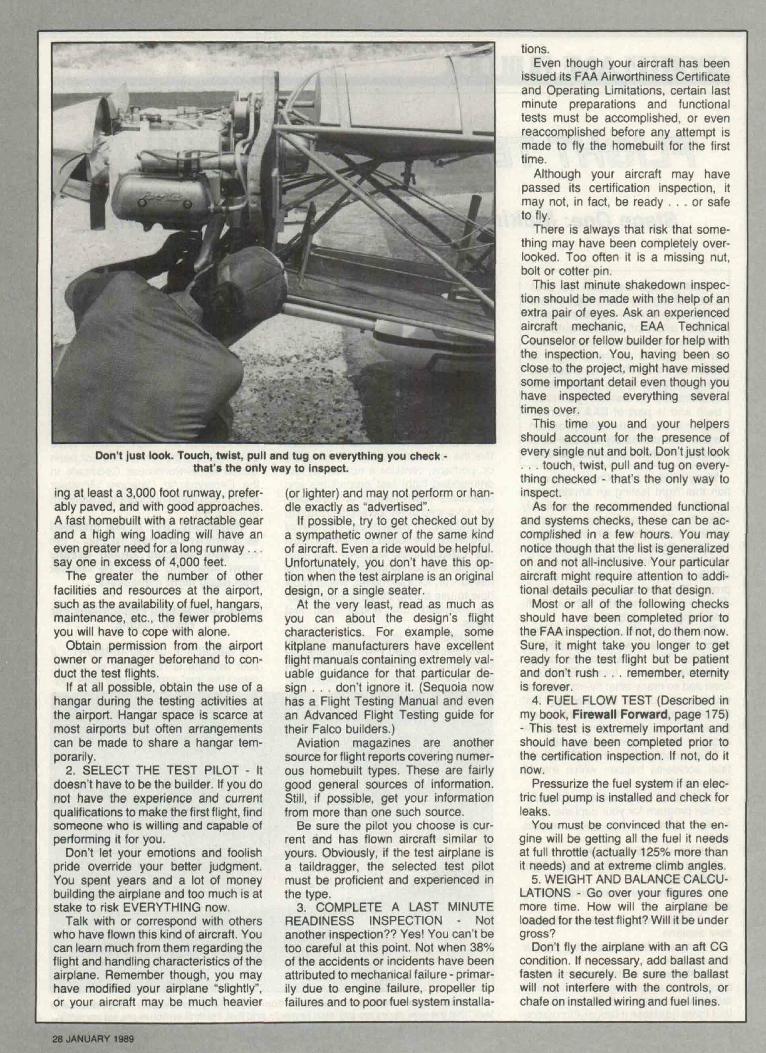
This last minute shakedown inspec-tion should be made with the help of anextra pair of eyes. Ask an experiencedaircraft mechanic, EAA TechnicalCounselor or fellow builder for help withthe inspection. You, having been soclose to the project, might have missedsome important detail even though youhave inspected everything severaltimes over.
This time you and your helpersshould account for the presence ofevery single nut and bolt. Don't just look. . . touch, twist, pull and tug on every-thing checked - that's the only way toinspect.
As for the recommended functionaland systems checks, these can be ac-complished in a few hours. You maynotice though that the list is generalizedon and not all-inclusive. Your particularaircraft might require attention to addi-tional details peculiar to that design.
Most or all of the following checksshould have been completed prior tothe FAA inspection. If not, do them now.Sure, it might take you longer to getready for the test flight but be patientand don't rush . . . remember, eternityis forever.
4. FUEL FLOW TEST (Described inmy book, Firewall Forward, page 175)- This test is extremely important andshould have been completed prior tothe certification inspection. If not, do itnow.
Pressurize the fuel system if an elec-tric fuel pump is installed and check forleaks.
You must be convinced that the en-gine will be getting all the fuel it needsat full throttle (actually 125% more thanit needs) and at extreme climb angles.
5. WEIGHT AND BALANCE CALCU-LATIONS - Go over your figures onemore time. How will the airplane beloaded for the test flight? Will it be undergross?
Don't fly the airplane with an aft CGcondition. If necessary, add ballast andfasten it securely. Be sure the ballastwill not interfere with the controls, orchafe on installed wiring and fuel lines.
28 JANUARY 1989

Carry plenty of fuel for the first flightbut limit it to no more than half your fuelsupply.
If you distrust your calculations, useactual weights and remeasure the mo-ment arms.
6. RECHECK THE WHEEL ALIGN-MENT - Toe-in or a cocked wheel couldlead to dangerous runway control prob-lems. Strive for a zero toe-in/toe-out, ora neutral alignment. If you have to de-viate slightly - opt for a bit of toe-outrather than toe-in.
7. THE BRAKE SYSTEM - Check itfor positive pedal pressures, leaks andthe fluid level. In the case of mechanicalbrakes, the security and correct routingof the cables, especially at the wheels,should be verified. Locked brakes canspell real trouble.
New brake pucks have to be burned-in properly, otherwise continuous heavybrake applications can carbonize andruin the brake pads.
8. FLAP OPERATION - If installed,activate them. They must functionsmoothly, and the control handle or flapswitch must be easy to reach andshould operate in the logical direction.
The maximum deployment angleshould be limited. Could a safe go-around be initiated with full flaps?
9. ENGINE OPERATION - With thecowling removed, look the engine com-partment over. Look for possible chaf-ing of wiring, hoses, as well as fuel andoil cooler lines. Secure all wiring andlines that need to be kept away from theexhaust pipes.
Operate the engine briefly through fullpower (not more than 30 seconds - oras permitted by the engine manufac-turer) to assure yourself that the accel-eration and power is there.
Make magneto check for both mags.Momentarily switch the ignition switchoff (at idle rpm) to be sure the magnetoground connections are good and thatthe engine will stop.
If necessary, adjust the idle rpm tothat recommended for your engine. Youdon't want it to quit on throttling backfor landing. On the other hand, if idle istoo high, you may not be able to reducethe rpm enough to land.
When shutting the engine down withthe mixture control, you should get aslight rise in rpm as the mixture controlis moved to the idle cut-off position.Otherwise, the mixture should be read-justed.
If the engine exhibits fluctuating fuelpressure, excessively high oil tempera-tures or cylinder head temperaturesduring ground operations, do not at-tempt to fly without correcting the prob-lem. They will only become worse withthe high power settings, and the rela-tively low speeds encountered duringtake-off and climb.
Finally, with the cowling and propeller
spinner reinstalled, make a full powercheck to be sure the engine will acceler-ate and run smoothly at full throttle.Keep the airplane pointed into the windto take advantage of the cooling air.And, of course, the aircraft should bechocked. It wouldn't hurt to tie it downeither during engine operations.
NOTE - A serious engine break-inproblem faces some amateur buildersfor which there has been little guidance.For example, a newly overhauled en-gine with chromed cylinders, or even anew engine, must be broken in properly.That is, the engine needs to be oper-ated at high rpm and the temperatureskept low or the rings will never seat.Unfortunatley, this means that the en-gine temperatures during initial groundoperation will be critical, and often theengine operations must be severely li-mited. This usually precludes prolongedtaxi testing and high speed runwaytests. Such a limitation, unfortunately,coupled with an untested airplane,creates a dilemma that begs for a solu-tion.
It's ironical but this is a situation thatgives all the initial advantages to thebuilder who has had to install a usedengine in his airplane without overhaul-ing it. He may not have a fresh overhaul,but neither does he have an enginebreak-in problem to worry about. In ad-dition, he can, ordinarily, perform all thetaxi tests he feels he needs, concentrat-ing on testing the airplane and not theengine.
An untested engine in an untestedairplane doubles the potential for theunexpected happening.
You must . . . whatever the status ofyour engine . . . operate it in strict con-formance with the manufacturer's rec-ommendations. To do otherwise will re-sult in serious engine damage or anengine that, at the very least, will alwaysburn a lot of oil because the rings failedto seat.
10. RETRACTABLE LANDINGGEAR - If installed, perform another re-traction test to verify that the gear goesdown and locks, that the gear doors areadjusted properly and that the limitswitches are set correctly.
Extend the gear with the emergencycrank (or system). No need to manuallycrank it up, really, unless the entire re-traction system is strictly manual.
Do your warning and gear positionlight indicators work?
11. TAXI TESTS - Unless you havealready done so, try a number of slowtaxi tests (no faster than a fast walk) tofamiliarize yourself with the steeringand braking effectiveness, and to be-come proficient in handling the aircrafton the ground. Learn how much runwayor taxiway width is needed to turn theairplane around.
12. HIGH SPEED TAXI TESTS - The
real purpose for high speed taxi testingis to learn how the airplane feels andbehaves just before reaching lift offspeed.
For safety's sake, select an abort ref-erence point (marker) about halfwaydown the runway. You should be ableto cut your power when you reach thatpoint and still have sufficient runway leftfor a safe stop without burning up thebrakes and tires.
High speed runs down the runwaymust be limited to approximately 10mph below anticipated lift-off speed.
Control effectiveness can be readilydetermined within that speed limitation.All flight controls, even the ailerons, nor-mally become effective at relatively lowspeeds. You should, therefore, be ableto work the controls to determinewhether or not they are operating prop-erly . . . and do so without trying one ofthose kamikaze lift-offs.
"Controlled lift-offs", particularly downa runway that is less than 5000 feetlong, are dangerous and should not beattempted by inexperienced test pilots.
High speed taxi runs can also behelpful in verifying your weight and bal-ance estimates. For example, if the tailis difficult to raise (taildragger) at mod-erate runway speeds, you probablyhave a tail heavy (aft CG) weight andbalance situation. Return to the rampand recheck the weight distribution andyour figures again. Correct the problem.
Similarly, with a tricycle gear airplane,try raising the nosewheel after theelevator becomes effective. If you can'tpick up the nosewheel at a fairly hightaxi speed, you may likewise have aweight and balance problem . . . a for-ward CG condition. The propertechnique is to get up to speed (10 mphbelow estimated take-off speed) - cutthe throttle and check for rotation. Thiswill save you the embarrassment of anaccidental kangaroo take-off.
Make a couple of runs with and with-out a partial deployment of flaps. Isthere a noticeable difference?
Pay attention to the amount of rudderinput that is necessary to counteract en-gine torque and to keep the airplanestraight on the runway. Watch out forfast applications of throttle at lowspeeds.
VW engines generally rotate oppositeto the Lycomings and Continentals sobe prepared to use left rudder on take-off for torque correction.
Glance at your airspeed indicator dur-ing the high speed runs to see that it isworking.
Monitor fuel and oil pressures, oiltemperature and, also, the cylinderhead temperature. If any of the indica-tions are suspect, return to the rampimmediately.
Keep the tailwheel on the ground,with stick back pressure, at low runway
SPORT AVIATION 29

speeds (taildraggers) until rudder effec-tiveness is obtained (about 30 mph)...especially in crosswind conditions.Likewise be very careful when the throt-tle is reduced after a high speed tail hightaxi run and the tail starts to settle. Inad-vertent back pressure on the controlstick (too soon and too quick) mightcause a surprise lift-off and difficult run-way control problems.
NOTE - Complete each of the follow-ing component and system checkseven if you know you have previouslyaccomplished them prior to certification.
13. THE CONTROL SYSTEM - Yourcontrol system is vital to safe flight andrequires very close scrutiny.
Operate the rudder, elevator and aile-ron controls through their maximumtravel.
Assure yourself that ALL the controlsare connected, secured and safetied -and that they ALL OPERATESMOOTHLY AND IN THE CORRECTDIRECTION.
No play should be permitted in thecontrol hinges . . . sloppiness may in-duce flutter. Likewise the trim tabs, ifinstalled, must be free of play.
Do your control stops allow sufficientcontrol travel?
The control balance weights must besecure and must not interfere with thecontrol travel.
14. THE FUEL SELECTOR VALVEHANDLE - Some types can be installedin any of four positions. Is yours cor-rectly positioned? Labeled? It mustfunction easily with a definite click ineach tank position.
Verify that the engine will continue torun in each tank position selected (ex-cept OFF, naturally).
15. TAILWHEEL - If one is installed,examine it to see that its pivot axis isvertical or, preferably, slopes backslightly (trails). Difficult runway handlingoften results when the tailwheel pivotaxis is raked forward and the tire con-tacts the ground ahead of the imaginaryprojected pivot axis.
Be sure the linkage and springs on asteerable tailwheel are tight (slightlytensioned).
16. PROPELLER - Retorque and re-safety the propeller bolts - especially ifa wood prop is installed.
Track the propeller and check thespinner for run-out.
17. FUEL CONNECTIONS - Smellfuel in the cockpit? Check the connec-tions for each fuel line. A fuel leak can-not be tolerated.
Are your vent lines open (are yousure?) and properly exited outside theaircraft? Protect vent openings withaluminum screen wire to keep bugs out.
18. ENGINE CONTROLS - Verify di-rection of movement and security of at-tachment at the engine. This meanssomebody needs to check the move-
The last minute shakedown inspection should be made withthe help of an extra pair of eyes.
ment at the carburetor . . . takes twopeople to do it.
Beware of possible spring-back or in-advertent locking in the linkage whenany engine control (throttle, mixture,prop, carburetor heat, etc.) is moved toits extreme position.
19. COCKPIT PLACARDS ANDCHECKLISTS - No excuses, you needthem. Review them for accuracy, com-pleteness and ready access.
20. IGNITION SWITCH - Will it killthe engine when turned off (goodground connections)? Is it mountedsecurely and is the wiring behindadequately protected and separatedbehind the panel?
21. RADIOS OPERATIONAL?22. SAFETY BELTS AND SHOUL-
DER HARNESSES - Check them good.Are the attachment ends secured andsafetied?
23. CANOPY LATCH - Be sure itworks and is easily reached. What pro-vision do you have for a rapid escapein an emergency? In a nose over? Foran inflight bail out?
24. COWLING - It has to be secure.All fasteners in place?
25. CARBURETOR HEAT - Is it con-nected and functioning properly? withthe engine running and warm, applica-tion of carburetor heat should cause adefinite drop in rpm.
26. ELECTRICAL SYSTEM - Checkthe functioning of all installed electricalgages and units. If it is there (installed),it must work. Be sure the battery is se-cure and correctly vented.
27. CORRECT ALL DISCREPAN-CIES FOUND.
28. OTHER IMPORTANT PREPA-RATIONS - Try to plan and prepare forall possible contingencies. Assure your-self that your standby crew knowswhere the nearest phone is located -and that they have the EMS and FireStation phone numbers.
A car should be available and yourstandby crew (one or two dependablegents) should have a few tools, a fireextinguisher and first aid kit onboard -
and, possibly, a hand held radio to per-mit two-way communications.
A chase plane would be comfortingto have, especially if a retractable gearor pusher type aircraft is being tested.Be sure both pilots know the radio fre-quency to be used (122.750).
A pusher pilot would have no earlywarning of an engine compartment fireunless reported by a chase plane.
Similarly, a pilot of a retractable mayneed to know if his gear is down in theevent of some system failure.
A Final Note
All preparations are now completedand you know the airplane is in tip-topmechanical condition.
Service the airplane with sufficientfuel and oil for the scheduled test flight.Put the airplane away for today and gohome and relax knowing your airplaneis ready to fly.
Don't allow yourself to be rushed nowafter years of hard work.
Wait until tomorrow, or the next daywhen you are physically and mentallyrested.
Next month, Stage Two - Making theInitial Flight Test
If you wish to contact the authorof this column, Sportplane Builder,for additional information, pleasewrite to Tony Bingelis, 8509 Green-flint Lane, Austin, TX 78759.
30 JANUARY 1989
SPQRTPLANF RUILDFRTony Bingelis •
Stage Two: Making The Initial Flight TestToday is the day!The aircraft has been thoroughly
checked, operated and taxied as de-scribed last month, and you know it is,mechanically, as near perfect as it willever be. So, if all goes as planned, yourhomebuilt will, at last, fly for the veryfirst time.
THE TEST FLIGHT SCENARIO
There are several different scenariosthat could categorize a particular initialflight test.
The worst possible case scenariowould be one featuring A LOW TIMEBUILDER-PILOT with little or NO TAIL-DRAGGER EXPERIENCE who insistson testing his newly completed ORIGI-NAL DESIGN homebuilt which is fittedwith a CONVERTED AUTO ENGINEand A HOMEMADE PROPELLER . . .and trying to do it from a SHORT DIRTSTRIP on a WINDY DAY.
Here he is confronted with many un-knowns - hoping that everything willwork right and prove to be airworthy ...all in a single test flight! This couldprove to be very dangerous.
Obviously, he should minimize therisks by limiting the number of un-knowns for the initial flight test. For onething, at the very least (as explained lastmonth), an experienced pilot should beallowed to perform the initial flight test.
How many other risk factors does hehave control over?
Unfortunately, in the case of a newhomebuilt equipped with a newly over-hauled engine, or an unproven auto en-gine conversion, that increased risk fac-tor has to be accepted.
At any rate, regardless of the numberof unknowns to which any test flight willbe subjected, the safest initial flight testwill be one that is carefully thought outand planned before hand. The test flightmust then be flown according to thatplan ... doing no more and no less thancalled for in the plan.
Develop your initial flight test plansalong these lines:
WEATHER
I'm sure you tried to pick an ideal dayfor the flight. We all know that the best
time to fly is during the early morninghours or late afternoon. That's wheneverybody makes their best landings.
The wind should be calm or light anddown the runway. Although conditionsare seldom ideal, don't be so eager tofly that you accept gusty or crosswindconditions for that most important firstflight.
If the winds are gusty, high or quarter-ing across the runway - postpone theflight until another time. Remind your-self that it took years of patient work toget to this point, so don't get impatientnow.
EMERGENCY PLANSAND PROCEDURES
On the way to the airport, and afteryou get there, review your emergencyplans, procedures and ground supportneeds.
1. Know what your ground supportwill do and can do.
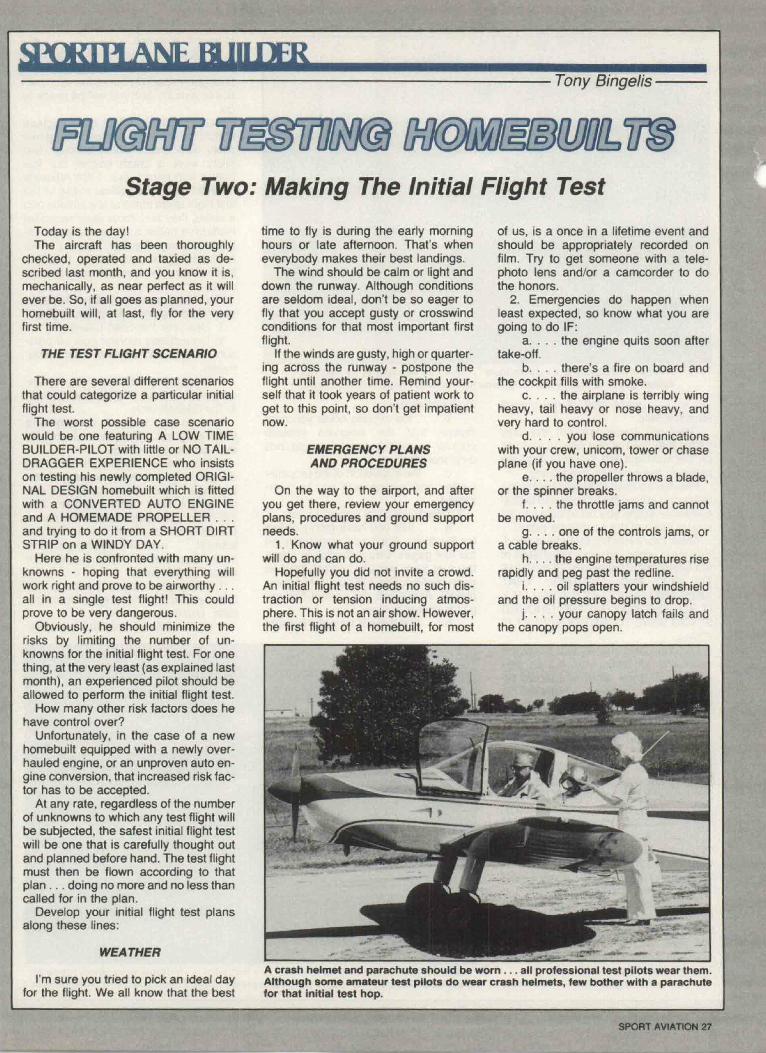
Hopefully you did not invite a crowd.An initial flight test needs no such dis-traction or tension inducing atmos-phere. This is not an air show. However,the first flight of a homebuilt, for most
of us, is a once in a lifetime event andshould be appropriately recorded onfilm. Try to get someone with a tele-photo lens and/or a camcorder to dothe honors.
2. Emergencies do happen whenleast expected, so know what you aregoing to do IF:
a. ... the engine quits soon aftertake-off.
b. . . . there's a fire on board andthe cockpit fills with smoke.
c. . . . the airplane is terribly wingheavy, tail heavy or nose heavy, andvery hard to control.
d. . . . you lose communicationswith your crew, unicorn, tower or chaseplane (if you have one).
e. . . . the propeller throws a blade,or the spinner breaks.
f. . . . the throttle jams and cannotbe moved.
g. . . . one of the controls jams, ora cable breaks.
h. . . . the engine temperatures riserapidly and peg past the redline.
i. . . . oil splatters your windshieldand the oil pressure begins to drop.
j. . . . your canopy latch fails andthe canopy pops open.
A crash helmet and parachute should be worn . . . all professional test pilots wear them.Although some amateur test pilots do wear crash helmets, few bother with a parachutefor that initial test hop.
SPORT AVIATION 27

m^^
Weather conditions are seldom ideal... don't be so eager to fly that youaccept gusty or crosswind conditions for that most important first flight.
k. . . . some part of the aircraftstructure fails.
Obviously these are not the onlythings that can happen without warningon that first flight test, however, they areprobably the most life threatening.
Prepare yourself mentally, before theflight, and review the options and logicalcorrective action you could take shouldone or more of the conditions occur.
Keep this essential thought in mind.You must, when airborne, regardless ofthe emergency that arises, CONTINUETO FLY AND CONTROL THATAIRPLANE! DON'T LET IT STALL. FLYIT ALL THE WAY TO THE GROUNDIF YOU HAVE TO, BUT DON'T LET ITSTALL.
Of course, it is unlikely that any of theconditions will befall you, but be pre-pared, and know what you would do(could do) if something unexpected didhappen.
PERFORM A PREFLIGHT CHECK
You already know your airplane hasbeen checked and rechecked (we co-vered all that last month), and is in per-fect condition. But, remember, accord-ing to regulations you are still requiredto perform a preflight check before youfly it today. Make it a good preflight. Usea prepared preflight checklist - at leastfor this occasion. Here are some impor-tant items you should not overlook:
1. The first, of course, is to see thatthe ignition switch is OFF, that the throt-tle is retarded and that the wheels arechocked.
2. Pull the prop through five blades.This will assure you that:
a. ... the engine has compression
in all cylinders.b. . . . the clicking noise you hear
means that the magneto impulsecoupler is working - and that portendsa normal start.
c . . . . the inspection of the propellerblades and spinner will not be over-looked.
3. Check your fuel and oil to see:a. ... that you have plenty of fuel
for the flight. Don't rely completely onthe fuel gages. Use a dipstick to checkthe fuel level visually against the fuelgage reading. Don't fill your tanks com-pletely. About half the normal fuel ca-pacity should suffice.
b.... that there is no water present
in your fuel sumps.4. Clean your windshield, complete
the other recommended walk-aroundpreflight inspection items for your par-ticular aircraft, and you will be ready togo.
NOTE: A crash helmet and parachuteshould be worn ... all professional testpilots wear them. Some amateur testpilots wear a crash helmet but fewbother with parachutes. Their rationalefor that? The most critical phase of thetest flight takes place at low altitude anda chute, they feel, most likely would beineffective below a thousand feet of al-titude anyway. Besides that, no struc-tural testing is planned for that firstflight. Now, the decision is yours tomake.
Give last minute instructions toyour standby crew. Start the engine.
1. Use your Pre-Start Checklist.2. Immediately monitor your oil pres-
sure. Check and set the other instru-ments.
3. Switch fuel tanks and run the en-gine on each tank. Set the fuel selectorto the take-off tank.
Taxi to the take-off runway andhold position. Complete your pre-take-off cockpit check.
NOTE: A small 4 cylinder Continentalor Lycoming aircraft engine, at full throt-tle, should yield at least 2,000 rpm, sta-tic, with a fixed pitch propeller. Thisminimum rpm requirement will at leastassure you of sufficient power for thetake-off . . . even if it doesn't prove tobe the ideal cruise or climb propeller forthat aircraft engine.
1. Make your engine run-up as re-commended by the engine manufac-turer. Using your checklist:
a . . . . cycle the prop (if a controlla-
What the ideal airport would look like to a test pilot... multiple long paved runways,paved taxiways, little or no air traffic and plenty of wide open spaces in all directions.
28 FEBRUARY 1989
Don't pull it oft. Guard against an exces-sive nose high attitude. Some airplaneswill get off quickly only to settle back tothe ground after climbing out of groundeffect.
6. Should you notice a vibration justbefore and immediately after take-off,apply brake pressure to stop the wheelrotation . . . your tires may be out ofbalance.
7. Immediately feel out the controls. . . but gently. Do not overcontrol. Mosthomebuilts are quite sensitive to evensmall control inputs.
NOTE: If excessive pressure is re-quired in any control, or if anything isamiss, abort the take-off immediately.However, if you must do so, don't chopthe throttle suddenly. Retard itsmoothly, otherwise you may encountersevere controllability problems. Land onthe remaining runway, or straight
IMPORTANT POINTS OF YOUR PREFLIGHT.REMOVE CHOCKS . . .
ble propeller is installed.)b. . . . make your magneto check.
Be sure you return the ignition switch tothe BOTH position. If you have beendoing a lot of taxiing, or have been idlingthe engine for quite awhile, the sparkplugs may have become a bit oil fouledand, consequently, your magneto dropcould be a bit high. Run the enginebriefly at a higher rpm and re-check themags.
c. . . . check the carburetor heatand other items on your checklist.
d. ... do not attempt a take-off ifthe cylinder head temperature (CHT) isnear or at the limit. The engine couldfail. If this occurs return to the ramp andcorrect the problem.
2. If appropriate, turn on your electricfuel pump and deploy whatever amountof flaps is recommended for take-off.
THE TAKE-OFF
1. Without further delay, clear thearea (don't forget to look down the run-way, too).
2. Announce your intentions to thelocal traffic, or if appropriate, call thetower for clearance. Align the airplanewith the runway centerline and startyour take-off roll.
3. Advance the throttle smoothly toFULL throttle. Glance at the tachometerto see that you are getting take-off rpm.If yours is a taildragger, keep the tail-wheel firmly on the ground (with stickback pressure) until the rudder be-comes effective (about 30 mph).
4. If you are not airborne by mid-field,abort the flight.
5. Allow the airplane to fly itself off.
ahead. This same rule applies to an en-gine failure immediately after take-off.Land straight ahead. Don't allow theairplane to stall. Maintain flying speedall the way down.
8. A quick glance at the airspeed indi-cator at lift-off will provide you with theknowledge that the airspeed indicatoris working, and this will, also, give youa rough idea of what your landing speedmay be later. If you have a retractable
throttle or changing any engine controlsettings unless the engine redline rpmis being exceeded. Many engine relatedtake-off failures seem to coincide withthe initial power reduction.
11. If you used a fuel booster pumpfor take-off, you can turn it off now.
12. Glance at the oil pressure, oiltemperature and cylinder head temper-ature gage (if installed). If any indica-tions are excessive, discontinue yourclimb and expedite a landing. Other-wise, continue to 3,000 feet and leveloff. Continue making gentle turns tostay over the airport.
13. Adjust engine power and trim tocruise flight. Be on the alert for any un-usual vibrations, strange noises or bind-ing in any of the controls. Keep monitor-ing the engine gages. All O. K.? If not,immediately return and land.
14. If everything is O. K., look aroundand relax . . . great, isn't it? If you havea chase plane, allow the pilot to pull upand look you over. You could also usethe opportunity to compare indicatedairspeeds.
PRE-LANDING AIRWOPK
If everything is quite manageable,clear your area and make a few power-on and power-off approaches to stalls.Complete (deep) stalls are not neces-sary. Merely slow the airplane to thepoint where the controls get mushy anda slight tail buffet becomes apparent.Careful. Some airplanes can stall/spinwithout much warning. Note your ap-proach-to-stall airspeed indications andmake a mental comparison of thesewith your take-off speed . . . assumingyou remembered to look at it.
Everything may be going so good thatyou are tempted to try something else.DON'T! You'll have plenty of time for allthat in follow-on flights. Stick to youroriginal flight test plan.
Keep your flight short . . . say, 30 to45 minutes.
LANDING
1. Run through your Pre-Landing
PULL THE PROP THROUGH FIVE BLADES . . .
gear, leave it down and locked for thefirst flight. A retracted gear would onlyadd to your problems should anemergency develop.
9. Climb out in a shallow climb angleat full throttle. If you used flaps for take-off, you can milk them up now. Start agentle turn after passing through 500feet AGL so you won't get too far fromthe airport. Continue climbing as youturn downwind.
10. Do not even think of retarding the
Checklist, or at the very least gothrough that ol' reliable GUMP check:
G = GasU = UndercarriageM = MixtureP = Prop2. Announce your intentions to land,
and enter traffic. You may want to makea practice approach to landing. If so,use a power approach and don't get toolow and too slow.
3. If you have flaps, use them but
SPORT AVIATION 29

bit, but you can, later, as you becomemore proficient in the airplane, reduceyour approach speeds to suit.
4. Be prepared to make a go-aroundif you are not satisfied with the ap-proach, or are too "hot", and find youare overcontrolling and leveling off toohigh.
5. Homebuilts with their smaller wingareas characteristically have steeperdescent angles than do commerciallyproduced aircraft. It is, therefore, wiseto use some power all the way to touchdown.
6. On touch down, concentrate on
BE CERTAIN YOUR WINDSHIELD IS CLEAN.
watch that airspeed. Make your final ap-proach at a speed at least 1.5 timeshigher than your earlier noted approachto stall speed. This is probably a bit highand may cause the airplane to float a
keeping the airplane straight and let itroll out. Stay off the brakes if you can.Be gentle with them if you do have touse them.
7. Clear the runway and taxi back to
the flight line and to the congratulationsthat you have earned and deserve. It'sO. K. to grin and wave at your friendsnow.
Next month, Stage Three: Expand-ing the Flight Envelope.
If you wish to contact the authorof this column, Sportplane Builder,for additional information, pleasewrite to Tony Bingelis, 8509 Green-flint Lane, Austin, TX 78759.
BOOK REVIEWS by Dennis Parks, Library/Archives Director
THE AIRCRAFTMUSEUMS ANDCOLLECTIONSOF NORTHAMERICA
THE AIRCRAFT MUSEUMS ANDCOLLECTIONS OF NORTHAMERICA by Robert Ogden. The Avia-tion Hobby Shop; 1988. 223 pgs. Over100 black and white photographs,bound with color covers.
Bob Ogden, author of severalmuseum guide books (including Euro-pean Aviation Museums, Fly Past,1985; British Aviation Museums andCollections, Fly Past, 1986; Great Air-craft Collections of the World, GalleryBooks, 1986), again has a new publica-tion. This new volume covers the avia-tion museums, public and private col-lections of aircraft in the U. S. andCanada.
In all, some 435 museums are in-cluded along with listings of their hold-ings which amount to a coverage ofover 5,700 aircraft. Each museum islisted by its State or Province. Eachentry provides the address, admissionhours, location and telephone numberfor the museum. Also provided is a nar-rative history for each of the collections.
Of special interest is the detailed list-ing of aircraft in each museum. The air-craft entries include: make, model, se-rial/registration numbers, constructionnumber, previous identities and an indi-cation of viewing status.
There is also a 16 page index of theaircraft by make and model which liststhe collections having copies. The indexitself makes for interesting reading,from the Abernathy Streaker to theZephyer ZAL.
The volume represents a lot of re-search and is a valuable referencework. Bob Ogden is to be commendedon his continuing efforts of keepingtrack of aviation museums and their col-lections - no easy task.
The volume sells for 6.95 pounds inEngland and can be ordered from theAviation Hobby Shop, Dept. FS88, 4Horton Parade, Horton Road, WestDrayton Middx, UB7 SEA, England,telephone West Drayton (0895)442123.
THE SMITHSONIAN BOOK OFFLIGHT FOR YOUNG PEOPLE byWalter J. Boyne. Aladdin Books, Mac-millan Publishing Co.; 1988. 127 pgs.Softbound, illustrated with hundreds ofblack and white and color photographs.(Available from EAA for $9.95. OrderNo. 21-37888)
This volume, a pictorial and text his-tory of aviation, is a condensation of theearlier SMITHSONIAN BOOK OFFLIGHT published in 1987. All of thephotographs and illustrations in the cur-
rent volume appeared in the earlier one.Although the organization of the bookis the same, the text is newly written forthe young reader.
Walter J. Boyne, former Director ofthe National Air and Space Museum,has worked with the NASM and otherphoto collections and has produced,written and illustrated a sweepingchronicle of the evolution of flight fromthe Montgolfier balloons to the round-the-world success of the Voyager crew.
As the author of over 300 articles andseveral books on aviation history,Boyne is able in a very easy style tobring the grand sweep of aviation his-tory into a clear and concise text. De-spite the broad scope in a short book,he is able to present many interestingdetails both personal and technical.
Though written for an audience ofyounger readers, junior high and up, thetext is interesting and detailed enoughfor a quick read by an adult audience.The large number of interesting photo-graphs and illustrations alone justify theprice of admission.
30 FEBRUARY 1989
Tony Bingelis •
Stage Three: Expanding the Flight Envelope
During EAA Oshkosh '88 EAAand FAA signed a joint agreementto develop a multi-media programto alert pilots of amateur built air-craft to the need for special carein the first 40 hours of flight intheir new aircraft. This article byTony Bingelis is the last of threeinstallments on test flying a home-built and is part of EAA's partici-pation in the multi-media programwhich will ultimately include bothslide and video tape presentations.
Sometime after that memorable initialtest flight, and before you fly yourairplane again, check conditions insidethe engine compartment. You can't betoo careful at this early operationalstage. Remove the cowling and look forfuel and oil leaks, loose clamps, wiringproblems, and the security of all in-stalled components. It might, also, beadvisable to remove all inspection coversand take a look inside.
Incidentally, you should plan to makea similar inspection of the airplane afterit has been flown about 10 hours - justto reassure yourself that everything isO.K.
What Lies Ahead
Your flying for the next 25 to 40 hourswill have to be within the limits of yourassigned flight test area. This could bevery monotonous if you were to merelybore holes in the sky with no particularobjective other than flying off the man-datory hours in ever decreasing con-centric circles like the mythical "KikiBird". But, this need not be.
That initial test flight proved yourairplane will fly and that it is reasonablycontrollable. Now you will have to proveto yourself that it can perform safelyunder a variety of service conditions.
This means you should now begin togradually, and carefully, expand itsflight envelope. After all, there's stillmuch you don't know about the airplaneand a lot of questions need answers.
For example, your initial flight wasprobably made with only half the fuelcapacity and with a minimum payload.But how will the airplane behave withfull fuel, and at gross weight . . . andwhat effect will that have on the CG?Will it remain safely within design limits?
Although you may have been pleasedwith the controllability and flight charac-teristics exhibited on that first flight, berealistic and accept that you may yethave to face up to some quirks that arenot so good.
At this early stage, it's normal to ex-perience a degree of anxiety and doubtregarding the homebuilt's controllabilityin the high speed ranges, and most ofall regarding its freedom from flutter.These particular evaluations are con-sidered critical and are potentially themost dangerous characteristics toexplore.
The only way to get all the answersyou want is by working the airplanethrough a variety of flight conditionswhile gradually working up to themaximum performance limits you hopeto establish for the airplane. This is whatis meant by "expanding the flight en-velope".
Start your evaluation tests by sys-tematically performing all the ordinarymaneuvers normally encountered inflight. We all know what these are.There's nothing complicated aboutthem. They should include at least thefollowing:
- Climb performance tests- Establish service ceiling and abso-
lute ceiling
- Slow flight maneuvers- Gliding tests- Stall tests- Stability tests- Landing/take-off trialsThe following evaluations and on-
going tests can be worked in as you likethroughout the entire test period:
- Airspeed calibration tests (as soonas possible)
- Engine cooling evaluation- Fuel consumption calculations- Propeller evaluation- CG loadings- Performance checksNOTE: The more potentially danger-
ous test evaluations, such as the follow-ing, should be deferred to sometimemuch later in your test program:
- Structural flight testing- Flight flutter tests- Spin tests- Inverted flight- AerobaticsEach new maneuver and test you
perform will reveal more and moreabout the airplane. In addition, perform-ing these test maneuvers will help shar:pen your skills for handling the newairplane as well.
Repeat tests, if necessary, until youare satisfied with the airplane's respon-siveness, and your ability to performthem precisely . . . after all, you're notgoing anywhere for the next 25 (40)hours, anyway.
Don't slight any of the simple easy-to-do tests because you feel you shouldconcentrate on others you believe to bemore important.
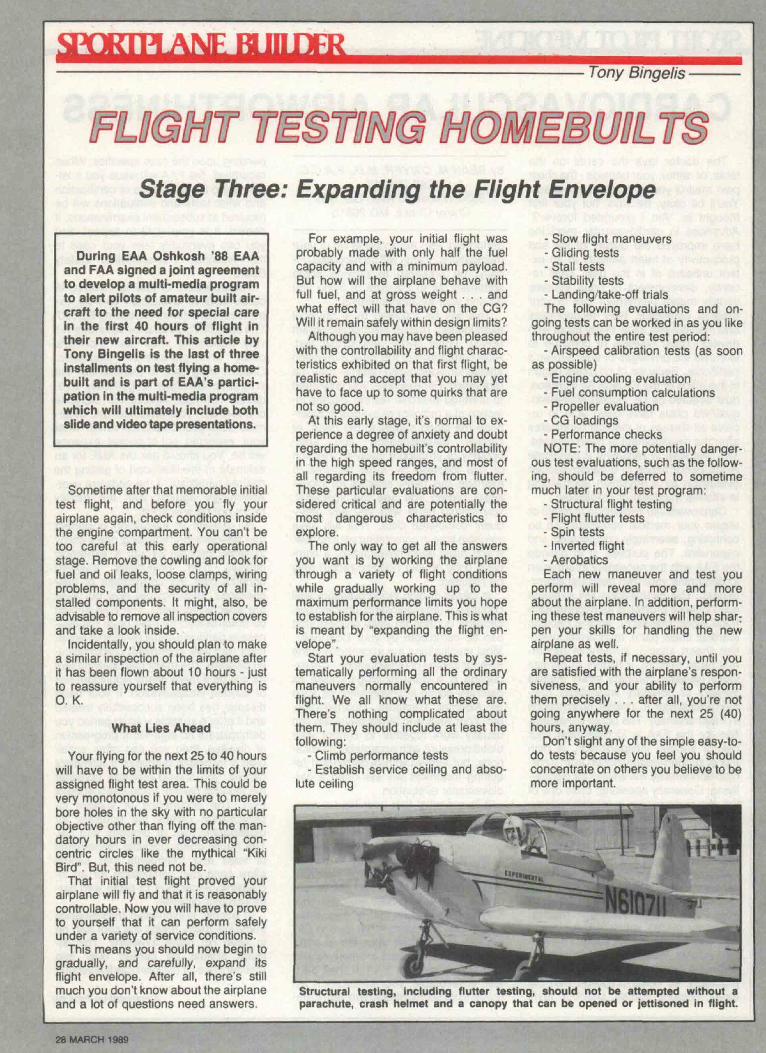
Structural testing, including flutter testing, should not be attempted without aparachute, crash helmet and a canopy that can be opened or jettisoned in flight.
28 MARCH 1989
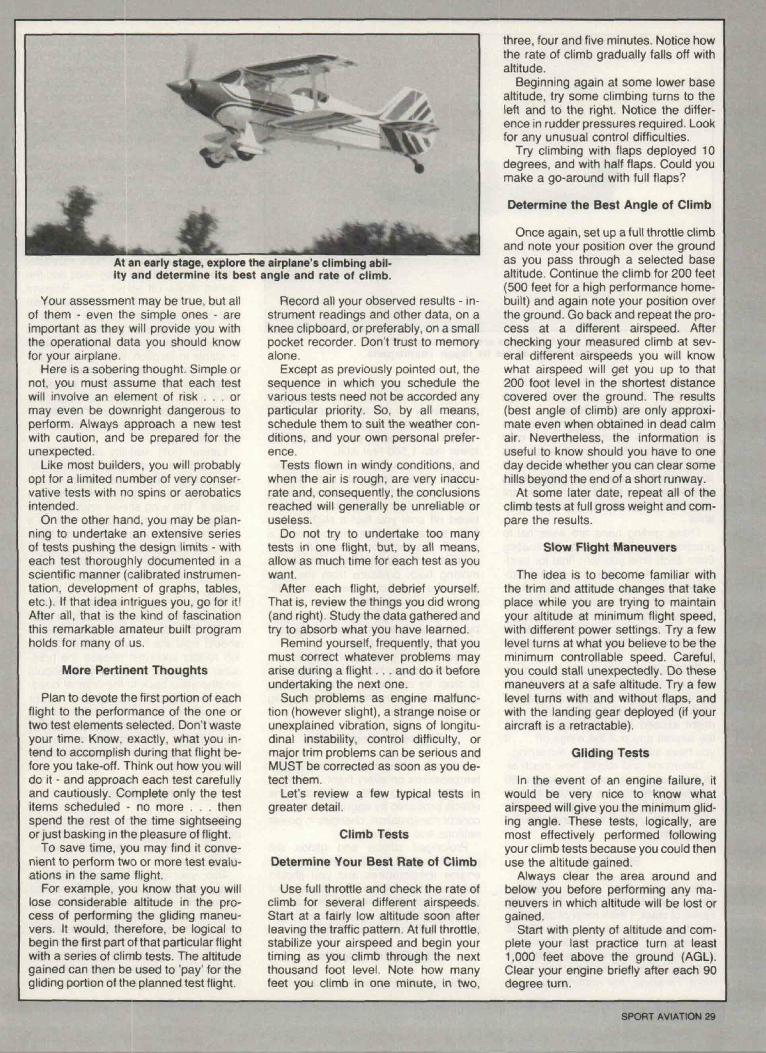
At an early stage, explore the airplane's climbing abil-ity and determine its best angle and rate of climb.
Your assessment may be true, but allof them - even the simple ones - areimportant as they will provide you withthe operational data you should knowfor your airplane.
Here is a sobering thought. Simple ornot, you must assume that each testwill involve an element of risk . . . ormay even be downright dangerous toperform. Always approach a new testwith caution, and be prepared for theunexpected.
Like most builders, you will probablyopt for a limited number of very conser-vative tests with no spins or aerobaticsintended.
On the other hand, you may be plan-ning to undertake an extensive seriesof tests pushing the design limits - witheach test thoroughly documented in ascientific manner (calibrated instrumen-tation, development of graphs, tables,etc.). If that idea intrigues you, go for it!After all, that is the kind of fascinationthis remarkable amateur built programholds for many of us.
More Pertinent Thoughts
Plan to devote the first portion of eachflight to the performance of the one ortwo test elements selected. Don't wasteyour time. Know, exactly, what you in-tend to accomplish during that flight be-fore you take-off. Think out how you willdo it - and approach each test carefullyand cautiously. Complete only the testitems scheduled - no more . . . thenspend the rest of the time sightseeingor just basking in the pleasure of flight.
To save time, you may find it conve-nient to perform two or more test evalu-ations in the same flight.
For example, you know that you willlose considerable altitude in the pro-cess of performing the gliding maneu-vers. It would, therefore, be logical tobegin the first part of that particular flightwith a series of climb tests. The altitudegained can then be used to 'pay' for thegliding portion of the planned test flight.
Record all your observed results - in-strument readings and other data, on aknee clipboard, or preferably, on a smallpocket recorder. Don't trust to memoryalone.
Except as previously pointed out, thesequence in which you schedule thevarious tests need not be accorded anyparticular priority. So, by all means,schedule them to suit the weather con-ditions, and your own personal prefer-ence.
Tests flown in windy conditions, andwhen the air is rough, are very inaccu-rate and, consequently, the conclusionsreached will generally be unreliable oruseless.
Do not try to undertake too manytests in one flight, but, by all means,allow as much time for each test as youwant.
After each flight, debrief yourself.That is, review the things you did wrong(and right). Study the data gathered andtry to absorb what you have learned.
Remind yourself, frequently, that youmust correct whatever problems mayarise during a flight. . . and do it beforeundertaking the next one.
Such problems as engine malfunc-tion (however slight), a strange noise orunexplained vibration, signs of longitu-dinal instability, control difficulty, ormajor trim problems can be serious andMUST be corrected as soon as you de-tect them.
Let's review a few typical tests ingreater detail.
Climb Tests
Determine Your Best Rate of Climb
Use full throttle and check the rate ofclimb for several different airspeeds.Start at a fairly low altitude soon afterleaving the traffic pattern. At full throttle,stabilize your airspeed and begin yourtiming as you climb through the nextthousand foot level. Note how manyfeet you climb in one minute, in two,
three, four and five minutes. Notice howthe rate of climb gradually falls off withaltitude.
Beginning again at some lower basealtitude, try some climbing turns to theleft and to the right. Notice the differ-ence in rudder pressures required. Lookfor any unusual control difficulties.
Try climbing with flaps deployed 10degrees, and with half flaps. Could youmake a go-around with full flaps?
Determine the Best Angle of Climb
Once again, set up a full throttle climband note your position over the groundas you pass through a selected basealtitude. Continue the climb for 200 feet(500 feet for a high performance home-built) and again note your position overthe ground. Go back and repeat the pro-cess at a different airspeed. Afterchecking your measured climb at sev-eral different airspeeds you will knowwhat airspeed will get you up to that200 foot level in the shortest distancecovered over the ground. The results(best angle of climb) are only approxi-mate even when obtained in dead calmair. Nevertheless, the information isuseful to know should you have to oneday decide whether you can clear somehills beyond the end of a short runway.
At some later date, repeat all of theclimb tests at full gross weight and com-pare the results.
Slow Flight Maneuvers
The idea is to become familiar withthe trim and attitude changes that takeplace while you are trying to maintainyour altitude at minimum flight speed,with different power settings. Try a fewlevel turns at what you believe to be theminimum controllable speed. Careful,you could stall unexpectedly. Do thesemaneuvers at a safe altitude. Try a fewlevel turns with and without flaps, andwith the landing gear deployed (if youraircraft is a retractable).
Gliding Tests
In the event of an engine failure, itwould be very nice to know whatairspeed will give you the minimum glid-ing angle. These tests, logically, aremost effectively performed followingyour climb tests because you could thenuse the altitude gained.
Always clear the area around andbelow you before performing any ma-neuvers in which altitude will be lost orgained.
Start with plenty of altitude and com-plete your last practice turn at least1,000 feet above the ground (AGL).Clear your engine briefly after each 90degree turn.
SPORT AVIATION 29
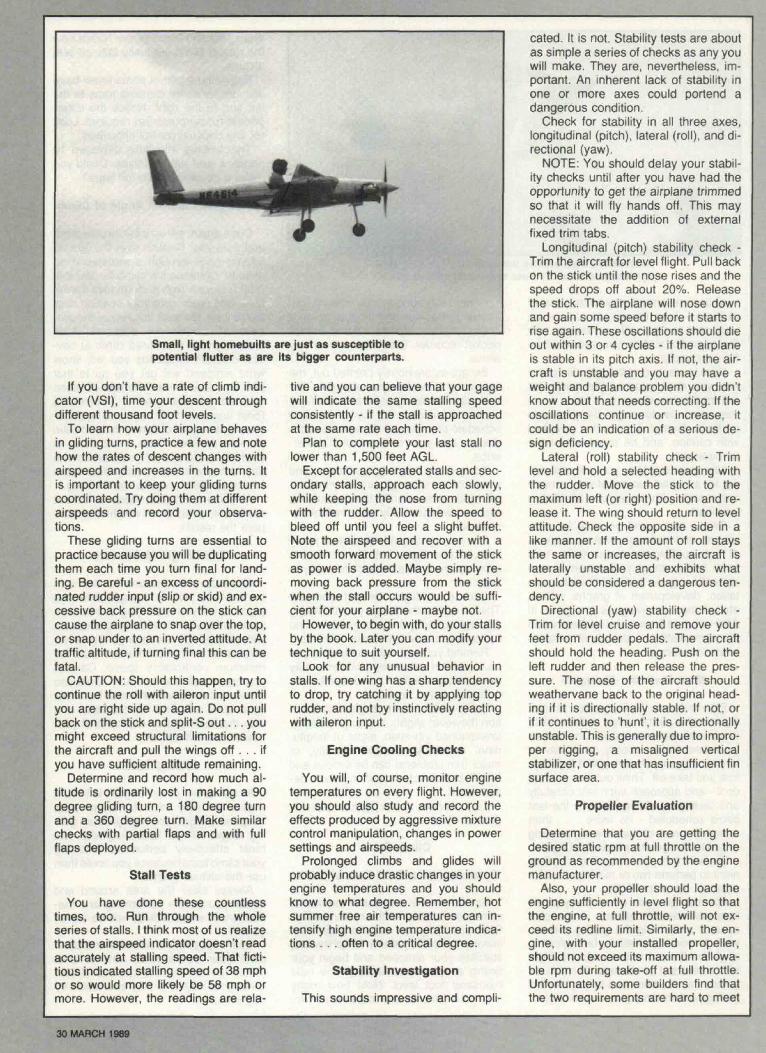
Small, light homebuilts are just as susceptible topotential flutter as are its bigger counterparts.
If you don't have a rate of climb indi-cator (VSI), time your descent throughdifferent thousand foot levels.
To learn how your airplane behavesin gliding turns, practice a few and notehow the rates of descent changes withairspeed and increases in the turns. Itis important to keep your gliding turnscoordinated. Try doing them at differentairspeeds and record your observa-tions.
These gliding turns are essential topractice because you will be duplicatingthem each time you turn final for land-ing. Be careful - an excess of uncoordi-nated rudder input (slip or skid) and ex-cessive back pressure on the stick cancause the airplane to snap over the top,or snap under to an inverted attitude. Attraffic altitude, if turning final this can befatal.
CAUTION: Should this happen, try tocontinue the roll with aileron input untilyou are right side up again. Do not pullback on the stick and split-S out. . . youmight exceed structural limitations forthe aircraft and pull the wings o f f . . . ifyou have sufficient altitude remaining.
Determine and record how much al-titude is ordinarily lost in making a 90degree gliding turn, a 180 degree turnand a 360 degree turn. Make similarchecks with partial flaps and with fullflaps deployed.
Stall Tests
You have done these countlesstimes, too. Run through the wholeseries of stalls. I think most of us realizethat the airspeed indicator doesn't readaccurately at stalling speed. That ficti-tious indicated stalling speed of 38 mphor so would more likely be 58 mph ormore. However, the readings are rela-
tive and you can believe that your gagewill indicate the same stalling speedconsistently - if the stall is approachedat the same rate each time.
Plan to complete your last stall nolower than 1,500 feet AGL.
Except for accelerated stalls and sec-ondary stalls, approach each slowly,while keeping the nose from turningwith the rudder. Allow the speed tobleed off until you feel a slight buffet.Note the airspeed and recover with asmooth forward movement of the stickas power is added. Maybe simply re-moving back pressure from the stickwhen the stall occurs would be suffi-cient for your airplane - maybe not.
However, to begin with, do your stallsby the book. Later you can modify yourtechnique to suit yourself.
Look for any unusual behavior installs. If one wing has a sharp tendencyto drop, try catching it by applying toprudder, and not by instinctively reactingwith aileron input.
Engine Cooling Checks
You will, of course, monitor enginetemperatures on every flight. However,you should also study and record theeffects produced by aggressive mixturecontrol manipulation, changes in powersettings and airspeeds.
Prolonged climbs and glides willprobably induce drastic changes in yourengine temperatures and you shouldknow to what degree. Remember, hotsummer free air temperatures can in-tensify high engine temperature indica-tions . . . often to a critical degree.
Stability Investigation
This sounds impressive and compli-
cated. It is not. Stability tests are aboutas simple a series of checks as any youwill make. They are, nevertheless, im-portant. An inherent lack of stability inone or more axes could portend adangerous condition.
Check for stability in all three axes,longitudinal (pitch), lateral (roll), and di-rectional (yaw).
NOTE: You should delay your stabil-ity checks until after you have had theopportunity to get the airplane trimmedso that it will fly hands off. This maynecessitate the addition of externalfixed trim tabs.
Longitudinal (pitch) stability check -Trim the aircraft for level flight. Pull backon the stick until the nose rises and thespeed drops off about 20%. Releasethe stick. The airplane will nose downand gain some speed before it starts torise again. These oscillations should dieout within 3 or 4 cycles - if the airplaneis stable in its pitch axis. If not, the air-craft is unstable and you may have aweight and balance problem you didn'tknow about that needs correcting. If theoscillations continue or increase, itcould be an indication of a serious de-sign deficiency.
Lateral (roll) stability check - Trimlevel and hold a selected heading withthe rudder. Move the stick to themaximum left (or right) position and re-lease it. The wing should return to levelattitude. Check the opposite side in alike manner. If the amount of roll staysthe same or increases, the aircraft islaterally unstable and exhibits whatshould be considered a dangerous ten-dency.
Directional (yaw) stability check -Trim for level cruise and remove yourfeet from rudder pedals. The aircraftshould hold the heading. Push on theleft rudder and then release the pres-sure. The nose of the aircraft shouldweathervane back to the original head-ing if it is directionally stable. If not, orif it continues to 'hunt', it is directionallyunstable. This is generally due to impro-per rigging, a misaligned verticalstabilizer, or one that has insufficient finsurface area.
Propeller Evaluation
Determine that you are getting thedesired static rpm at full throttle on theground as recommended by the enginemanufacturer.
Also, your propeller should load theengine sufficiently in level flight so thatthe engine, at full throttle, will not ex-ceed its redline limit. Similarly, the en-gine, with your installed propeller,should not exceed its maximum allowa-ble rpm during take-off at full throttle.Unfortunately, some builders find thatthe two requirements are hard to meet
30 MARCH 1989

in the same prop.If you believe you do have a perfor-
mance problem due to an inadequatepropeller, you should seek help from apropeller professional in selecting thecorrect one for your airplane. On theother hand, your propeller performancemay be as good as you can expect.When it comes to propeller efficiencyand performance, some people lie a lot.
Structural Flight Testing
Do not test your airplane to higherstructural load limits than those you ex-pect to encounter in the type of flyingyou will be doing.
Perform your high speed evaluationswith a forward CG only.
For these tests, try to borrow an ac-celerometer (G meter) if you don't al-ready have one installed. Since it is aself-contained unit with no connectionsrequired, obtaining the temporary useof one for your structural flight testingmakes good sense. You won't need itafter the testing is over.
Testing to a modest 3 G limit shouldbe sufficient for most non-aerobaticlightplanes. (Commercial categoriesare 3.8 Gs and 4.4 Gs for the Utilitycategory, while a 6 G capability is ex-pected for aerobatic aircraft.)
In essence, the tests usually consistof a series of dives and pull-ups to im-pose the desired G loads. These pull-ups are performed at gradually in-creased speed increments. Carefully in-spect the structure after each major in-crement of loading for signs of skinwrinkling, deformity or loose wires andfittings.
I believe the safest way to imposeflight loads (Gs) gradually, and with thegreatest control, is with steep turns -not by making Hollywood style speeddives and pull-ups.
Flight Flutter Testing
Flight flutter testing, like structuralflight testing, requires the airplane to beflown at high speeds. This series oftests is the most dangerous. Unfortu-nately, these tests are essential to theestablishment of the aircraft's freedomfrom flutter up to its red line (Vne ornever exceed) speed. This speed isgenerally established to be about 10%higher than the maximum cruise speedyou would expect to fly.
All aircraft will experience flutter atsome speed ... so, keep your goal con-servative.
Conduct your flutter tests at high al-titude, wear a parachute and be pre-pared to use it. If flutter develops, itsintensity increases so rapidly that struc-tural disintegration can occur before thepilot can react.
Even if you have had aerobatic training, attempting low level aerobat-ics during the early testing phase of your homebuilt could be suicidal.
Make your first flutter investigation ata low speed (cruise) trimmed for levelflight. Excite only one control at a timebeginning with the elevator.
Slap the control stick in an aft direc-tion. If there is no indication of stick os-cillations, repeat the test at a slightlyhigher indicated airspeed (about 5mph). This means that you will have todive the airplane to pick up the higherspeed.
However, do not slap the control untilyou have caused the nose of the aircraftto begin to rise, and the speed beginsto bleed off. If flutter should developthen, the airplane will already be slow-ing down and the control flutter may bedampened in time.
Test the ailerons and the rudder inthe same manner - by striking the stickon the side (or kicking the rudder). Besure you never slap (excite) any controluntil the nose is coming up and theairspeed is bleeding off.
Continue the testing cycles for theelevator, ailerons and rudder at in-creased 5 mph speed increments untilyou have tested the airplane to themaximum speed you want. Usually thisis up to the figure established by theaircraft's designer, or when a speed10% over the redline (Vne speed youwant to placard) has been reached. Allsurfaces must be free from flutter up tothat speed. But be very cautious in at-tempting to reach that speed. Fluttercan destroy the structure in the blink ofan eye.
Spin Tests
For all practical purposes, spin test-ing is considered to be unnecessary forthe average low performance aircraft.
Do not attempt spin entry and recov-
ery tests without a parachute, and areasonable provision for exiting the air-craft if you do have to use it. Do notattempt to perform spins with a knownaft CG condition.
It is generally believed that anyairplane with a reasonable CG will eas-ily recover from a one-turn spin. How-ever, as the number of turns is in-creased before recovery is attempted,the greater the risk that the spin mightbecome flat and difficult to impossiblefrom which to recover.
The original military spin recoverytechnique, and the most reliable one, Ithink, is essentially as follows:
a. To recover - slam in full oppositerudder (against the spin). The stick isstill back.
b. To recover - slam in full oppositerudder (against the spin). The stick isstill back.
c. Wait a half turn.d. Briskly shove the stick forward
(down elevator). Be alert. As soon asthe spin stops, ease off on the elevatorforward pressure before you go beyondthat normally steep dive to one that isnear vertical, or inverted.
e. Pull up from the dive gradually(without pulling off the wings). Addpower as the nose comes up throughthe horizon.
One or two other spin recoverymethods have their advocates and maybe equally effective for some aircraft de-signs.
You may prefer to placard your air-craft, "SPINS PROHIBITED".
Inverted Flight and Aerobatics
Inverted flight without an inverted
(Continued on Page 66)
SPORT AVIATION 31

^ Land in ourvB| luxury Lincoln!
'-• ' iHSraBsEK •
JQ per day.
JUI LOW option $10.99 per day.Unlimited Mileage.
FLY-IN and rent a low-priced luxury car fromBudget the official car rental company of Sun
-n- Fun. Convenient rental locations in-terminalat Lakeland airport and campgrounds. You'll
enjoy all the Sun -n- Fun of the Bay Area whileyou're here. For reservations call: (813)
682-0178, or toll free: 800-527-7000.
Budgetront Q ror ^^rentacar
Advance reservations required. Cars subject to availability. Offer available in Lakeland area locations only. Refueling services,taxes and optional items are additional. Normal rental requirements apply. Offer expires 4/30/89.
(Continued from Page 27)
airworthiness. The basic steps are tolimit or discontinue tobacco usage,achieve proper body weight, follow adiet low in saturated fats and choles-terol, and maintain a regular exerciseprogram. By achieving cardiovascularfitness you may be able to delay thedevelopment of heart disease and, if es-tablished, hopefully decrease the sev-erity. In any health maintenance pro-gram blood cholesterol and triglyceride
levels should be checked at leastyearly. Outside of the cardiovascularevaluation, your family physician mayadvise you concerning the performanceof an exercise stress test as part of yourroutine examinations. Early detection ofcardiac problems is key to preventingor limiting damage to the heart muscle.More important than a continued flyingstatus is reduction in the loss of life, lossof income and disruption of family sta-bility associated with heart disease. Iencourage the EAA members to workwith their family physicians and AMEs
to help us provide a safe flying member-ship.
Sport Pilot Medicine is written byvarious medical doctors on subjectsof interest to EAA members. Theabove article has been written by Dr.Sean M. Dwyer, a member of the EAAAeromedical Advisory Panel. If addi-tional information is needed, the authorcan be contacted at the addresslisted at the beginning of the article.
JTORTPIANF HIIIDFR(Continued from Page 31)
system (fuel and oil) is impossible forany length of time, so why try it?
Aerobatics should not be performedunless your aircraft is designed with thisin mind. If your aircraft is capable ofdoing some aerobatic maneuvers, re-cord those that you have successfullyaccomplished and you should be ableto get your Operating Limitations issuedto reflect approval for those maneuvers.
Summary
The scope of foregoing tests is quitebroad and should prove sufficient forany aircraft regardless of its intendeduse.
The limits to which any of the tests is
carried is strictly up to each individualtest pilot. He should, however, alwaysbe aware that he must complete eachtest at a safe altitude.
Test the airplane only to the degreeneeded, and then placard it so that thelimits you safely met and establishedwill not be inadvertently exceeded byyourself and others. This applies, in par-ticular, to the aircraft's "redline" or neverexceed speed.
Recommended Reading
SPORT AVIATION, April 1988 (page27), "After That Test Flight" (a candidoverview of flight test attitudes).
PILOT REPORTS & FLIGHT TEST-ING, EAA "How-To" Series Manual. Acollection of flight test reports and arti-cles from SPORT AVIATION datingfrom 1960-1970.
FAA ADVISORY CIRCULAR (soonto be issued). A joint effort by EAA andFAA on flight testing homebuilt aircraft.This should become the ultimate gui-dance for amateur test pilots for yearsto come.
If you wish to contact the authorof this column, Sportplane Builder,for additional information, pleasewrite to Tony Bingelis, 8509 Green-flint Lane, Austin, TX 78759.
66 MARCH 1989