remote access from home
TRANSCRIPT
1
Remote Access from Home
Please follow this guide to log you into the remote access server from home.
Windows 10 & Windows 7 Setup guides from pages 1 to 10
For Mac you will need to download an app ‘Microsoft Remote Desktop’ – RDP. Instructions are from Page 11
Please note: Do not copy and then paste the server address in to the remote desktop connection
computer name – Please TYPE it out.
Windows 10 – Remote access from Home
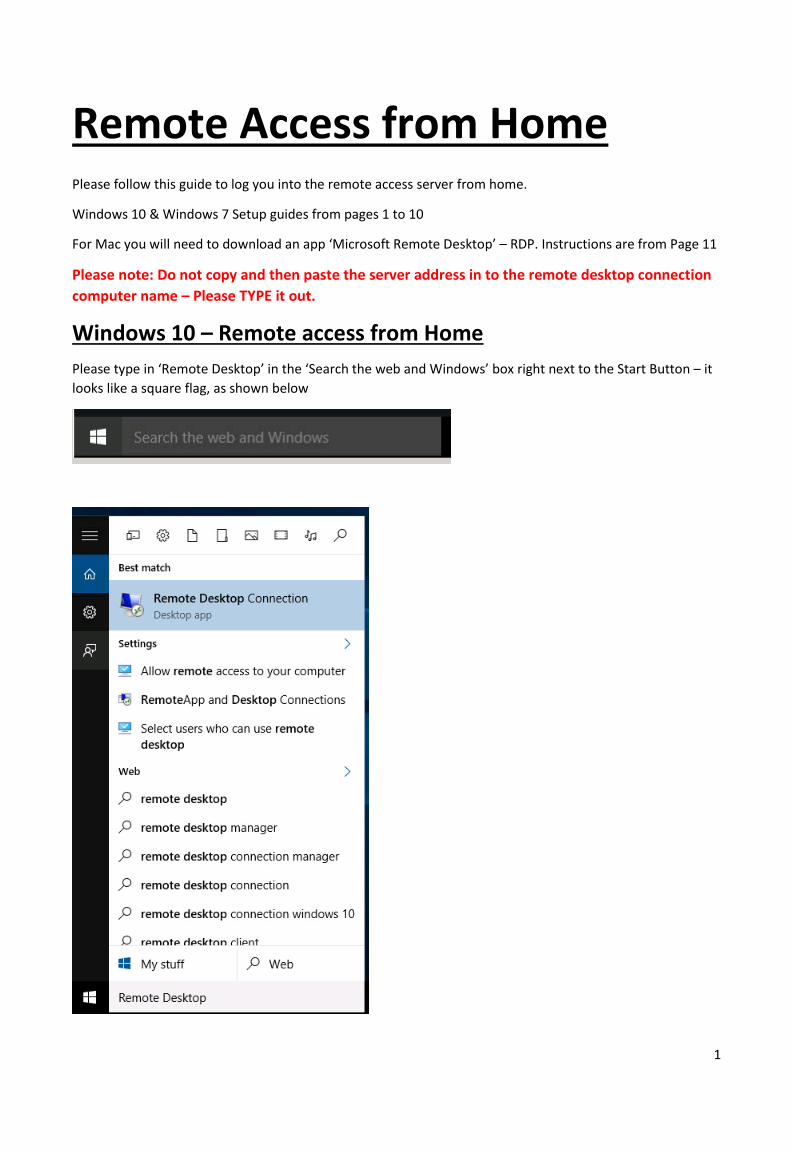
Please type in ‘Remote Desktop’ in the ‘Search the web and Windows’ box right next to the Start Button – it
looks like a square flag, as shown below
2
Click on the ‘Best Match’ being the ‘Remote Desktop Connection’ icon
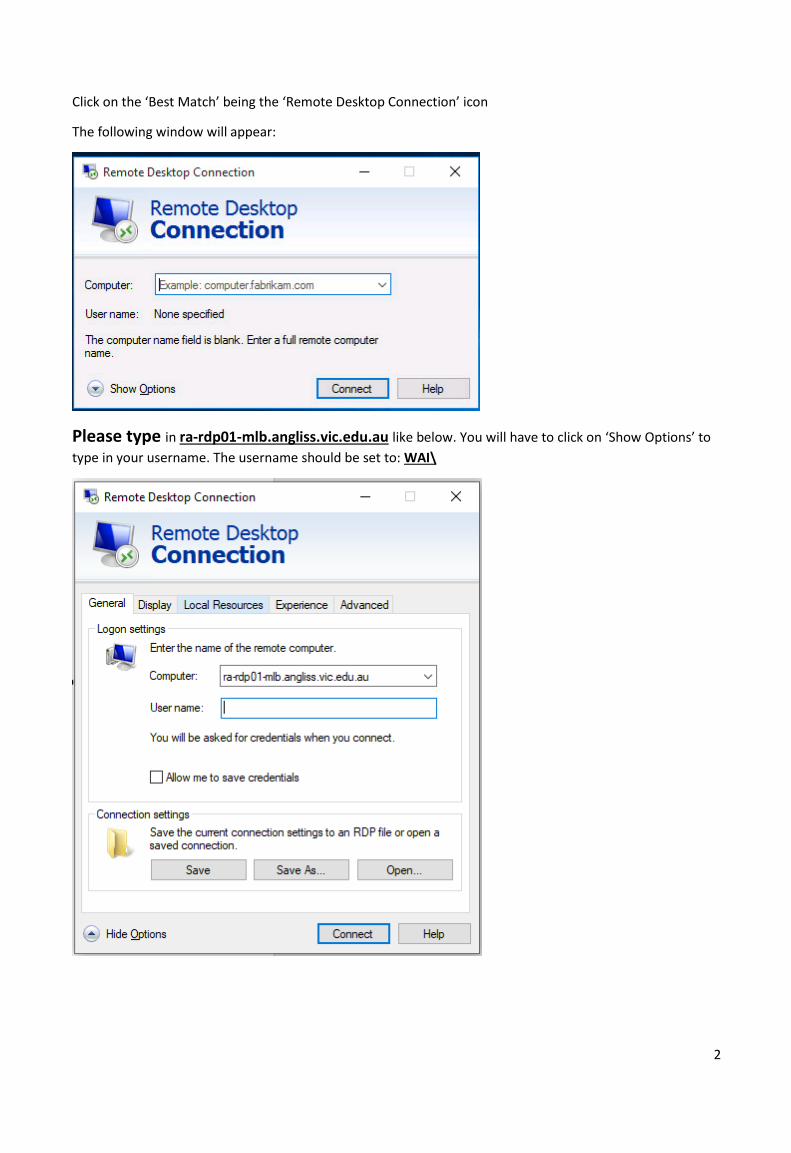
The following window will appear:
Please type in ra-rdp01-mlb.angliss.vic.edu.au like below. You will have to click on ‘Show Options’ to
type in your username. The username should be set to: WAI\
3
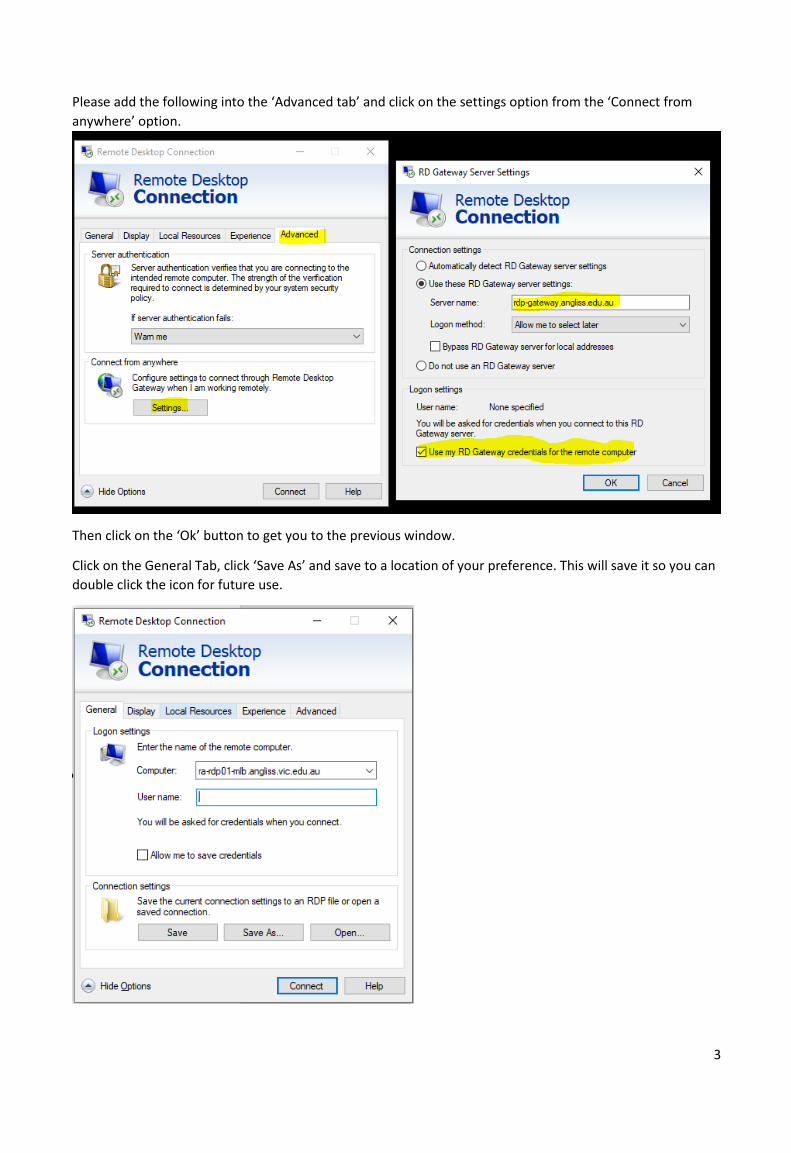
Please add the following into the ‘Advanced tab’ and click on the settings option from the ‘Connect from
anywhere’ option.
Then click on the ‘Ok’ button to get you to the previous window.
Click on the General Tab, click ‘Save As’ and save to a location of your preference. This will save it so you can
double click the icon for future use.
4
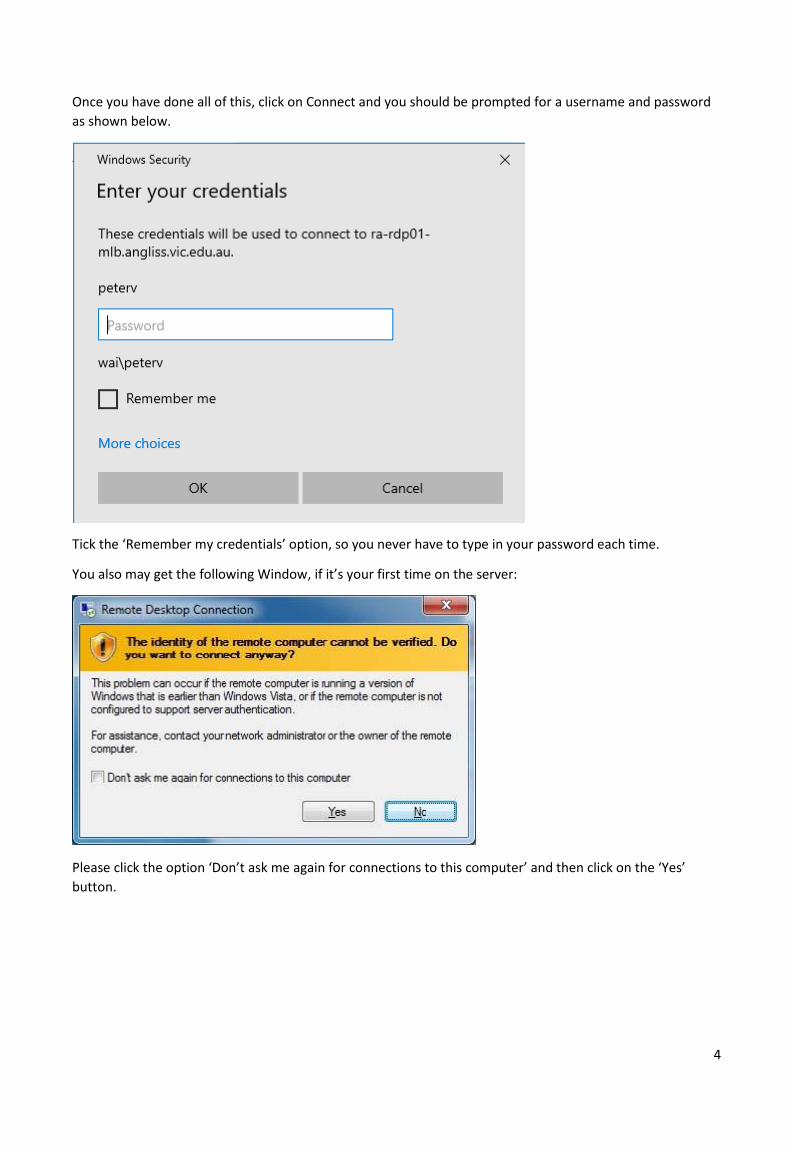
Once you have done all of this, click on Connect and you should be prompted for a username and password
as shown below.
Tick the ‘Remember my credentials’ option, so you never have to type in your password each time.
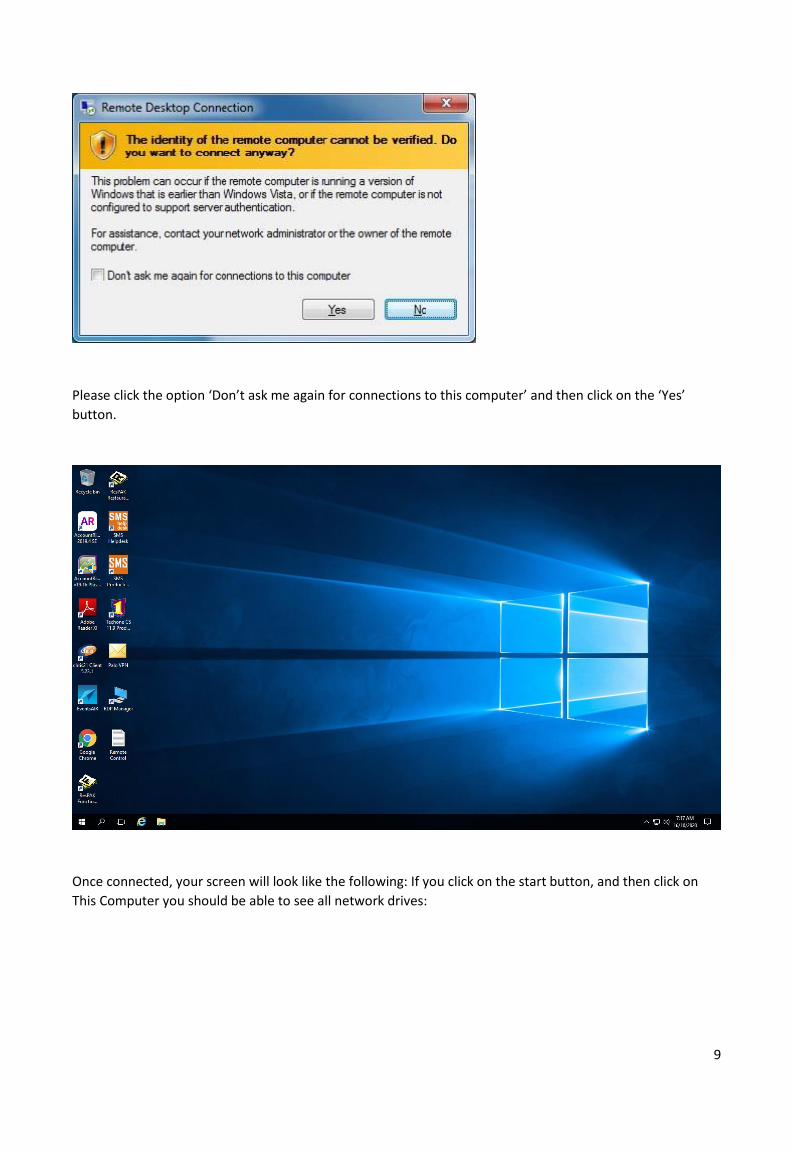
You also may get the following Window, if it’s your first time on the server:
Please click the option ‘Don’t ask me again for connections to this computer’ and then click on the ‘Yes’
button.
5
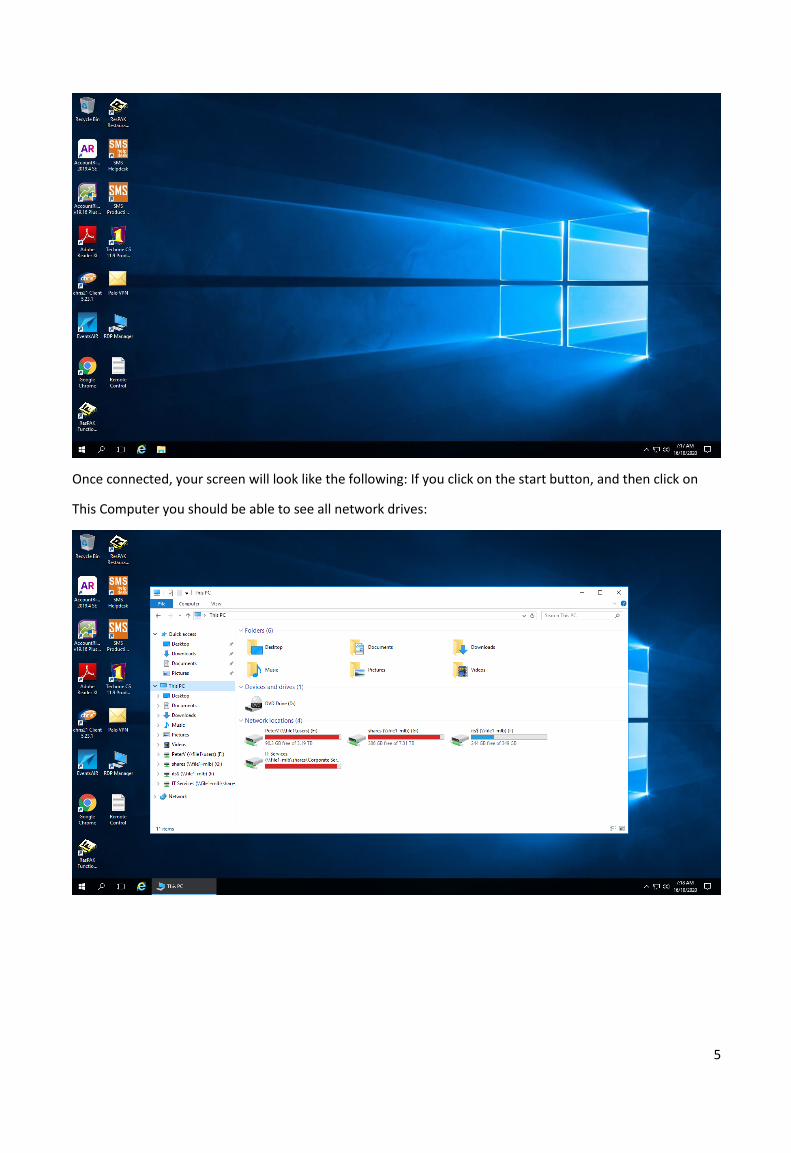
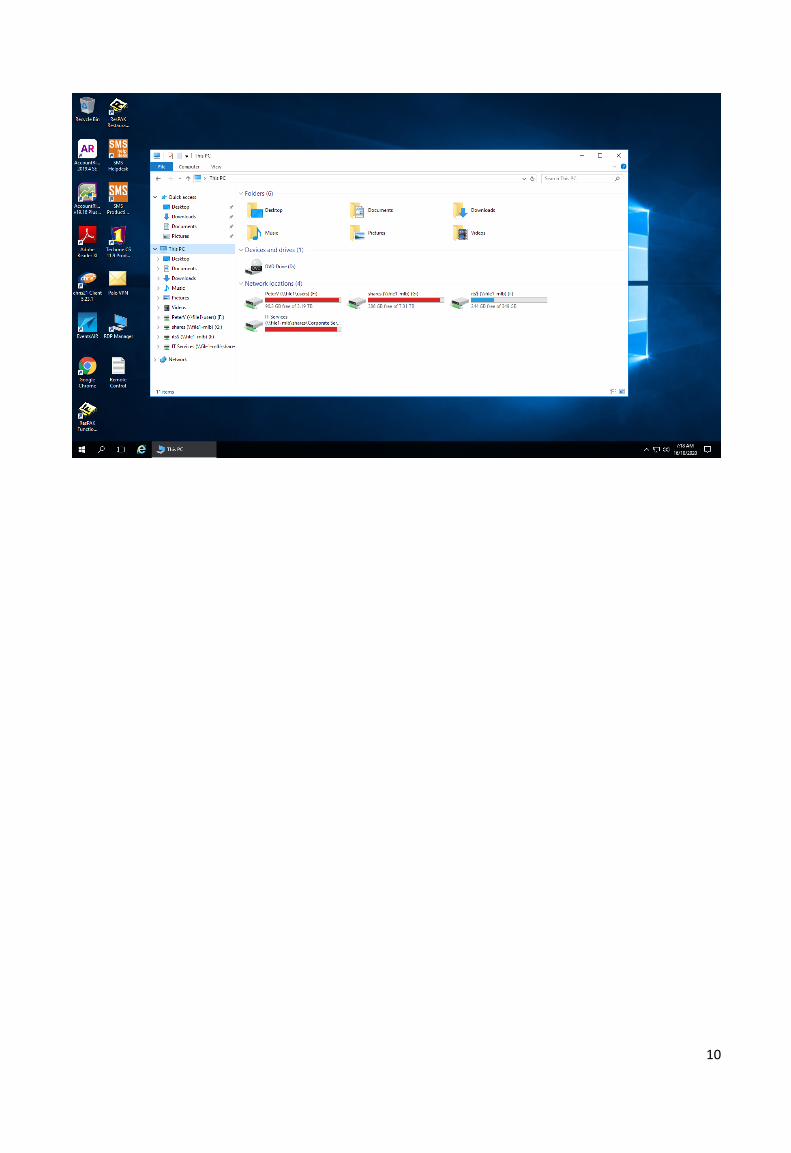
Once connected, your screen will look like the following: If you click on the start button, and then click on
This Computer you should be able to see all network drives:
6
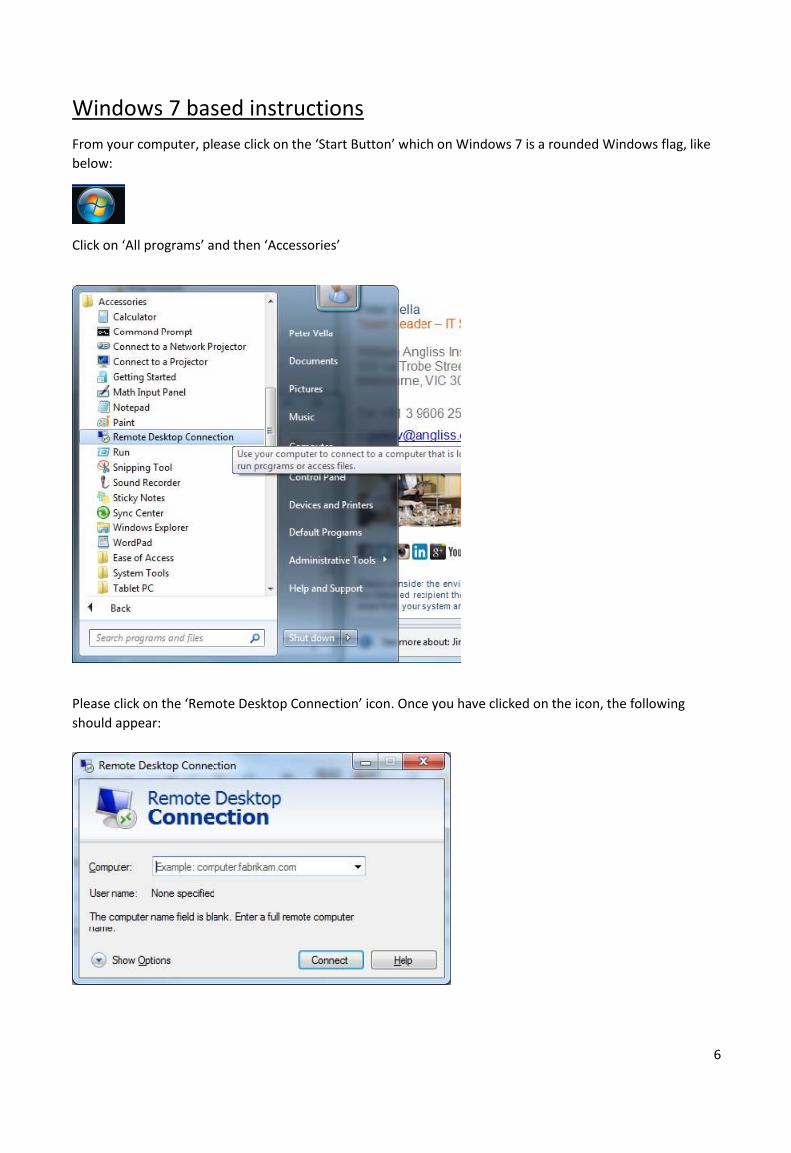
Windows 7 based instructions
From your computer, please click on the ‘Start Button’ which on Windows 7 is a rounded Windows flag, like
below:
Click on ‘All programs’ and then ‘Accessories’
Please click on the ‘Remote Desktop Connection’ icon. Once you have clicked on the icon, the following
should appear:
7
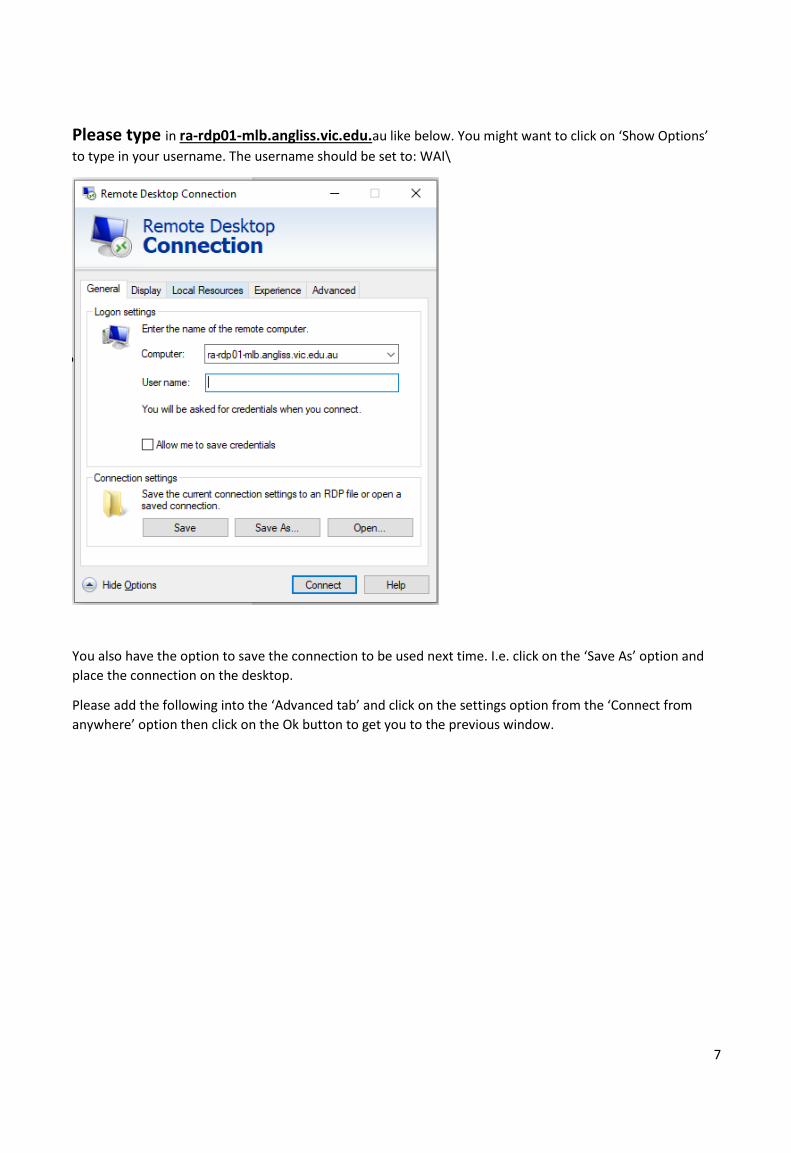
Please type in ra-rdp01-mlb.angliss.vic.edu.au like below. You might want to click on ‘Show Options’
to type in your username. The username should be set to: WAI\
You also have the option to save the connection to be used next time. I.e. click on the ‘Save As’ option and
place the connection on the desktop.
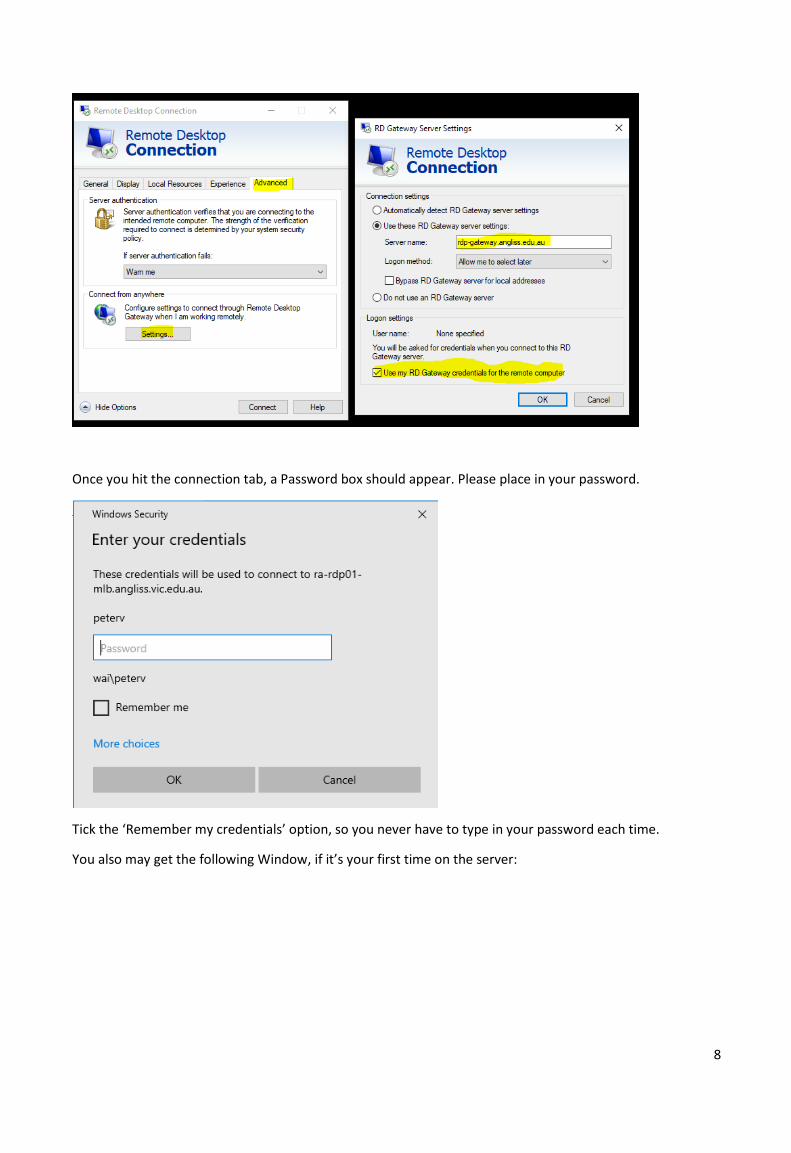
Please add the following into the ‘Advanced tab’ and click on the settings option from the ‘Connect from
anywhere’ option then click on the Ok button to get you to the previous window.
8
Once you hit the connection tab, a Password box should appear. Please place in your password.
Tick the ‘Remember my credentials’ option, so you never have to type in your password each time.
You also may get the following Window, if it’s your first time on the server:
9
Please click the option ‘Don’t ask me again for connections to this computer’ and then click on the ‘Yes’
button.
Once connected, your screen will look like the following: If you click on the start button, and then click on
This Computer you should be able to see all network drives:
10
11
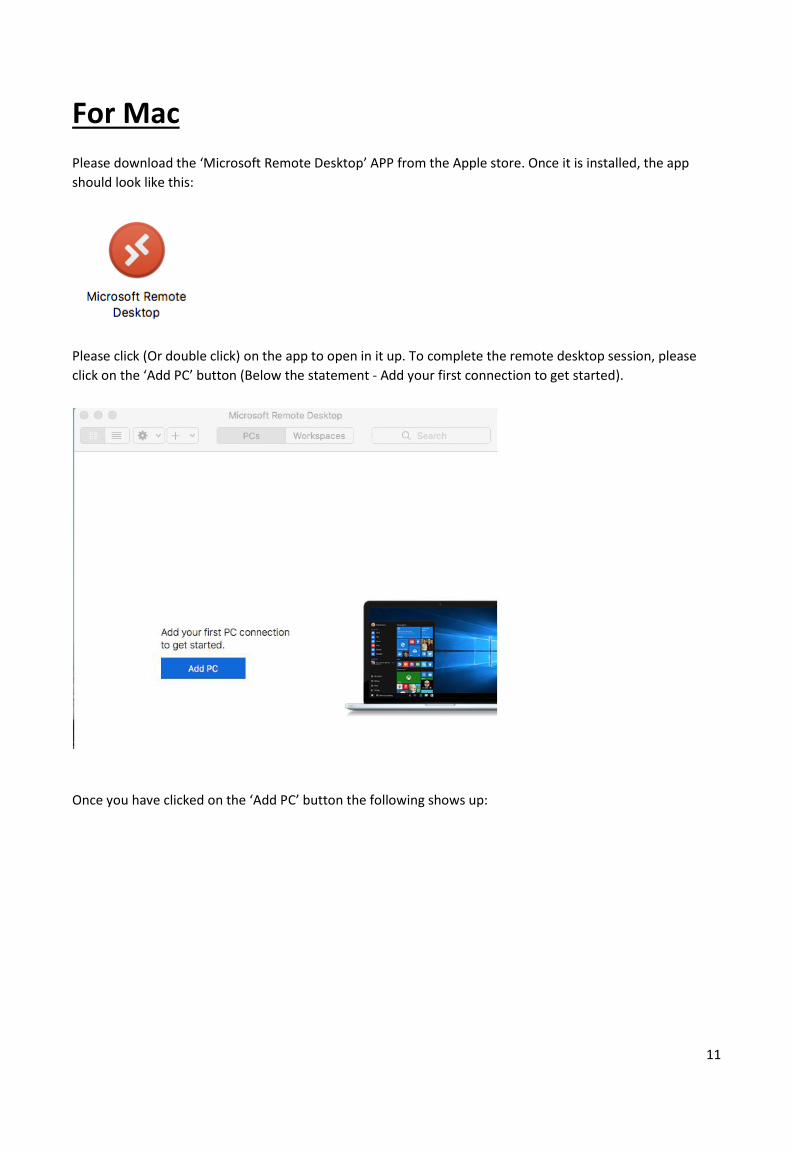
For Mac Please download the ‘Microsoft Remote Desktop’ APP from the Apple store. Once it is installed, the app
should look like this:
Please click (Or double click) on the app to open in it up. To complete the remote desktop session, please
click on the ‘Add PC’ button (Below the statement - Add your first connection to get started).
Once you have clicked on the ‘Add PC’ button the following shows up:
12
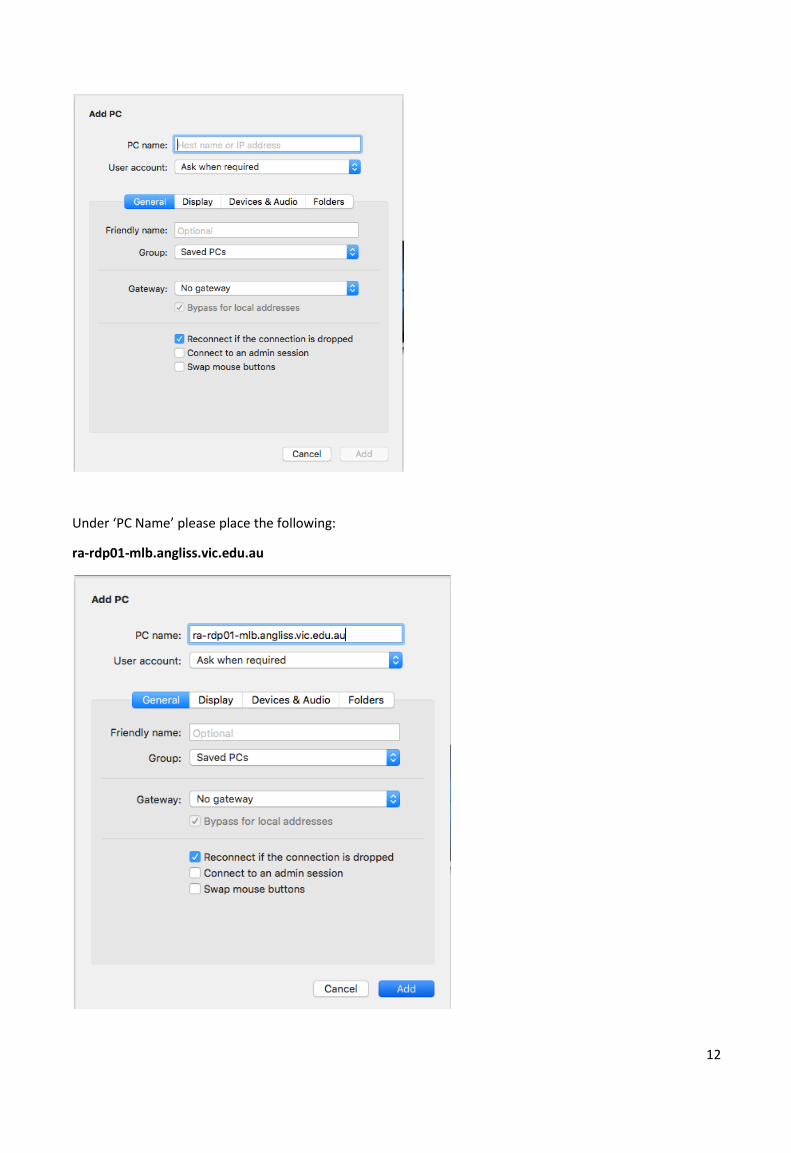
Under ‘PC Name’ please place the following:
ra-rdp01-mlb.angliss.vic.edu.au
13
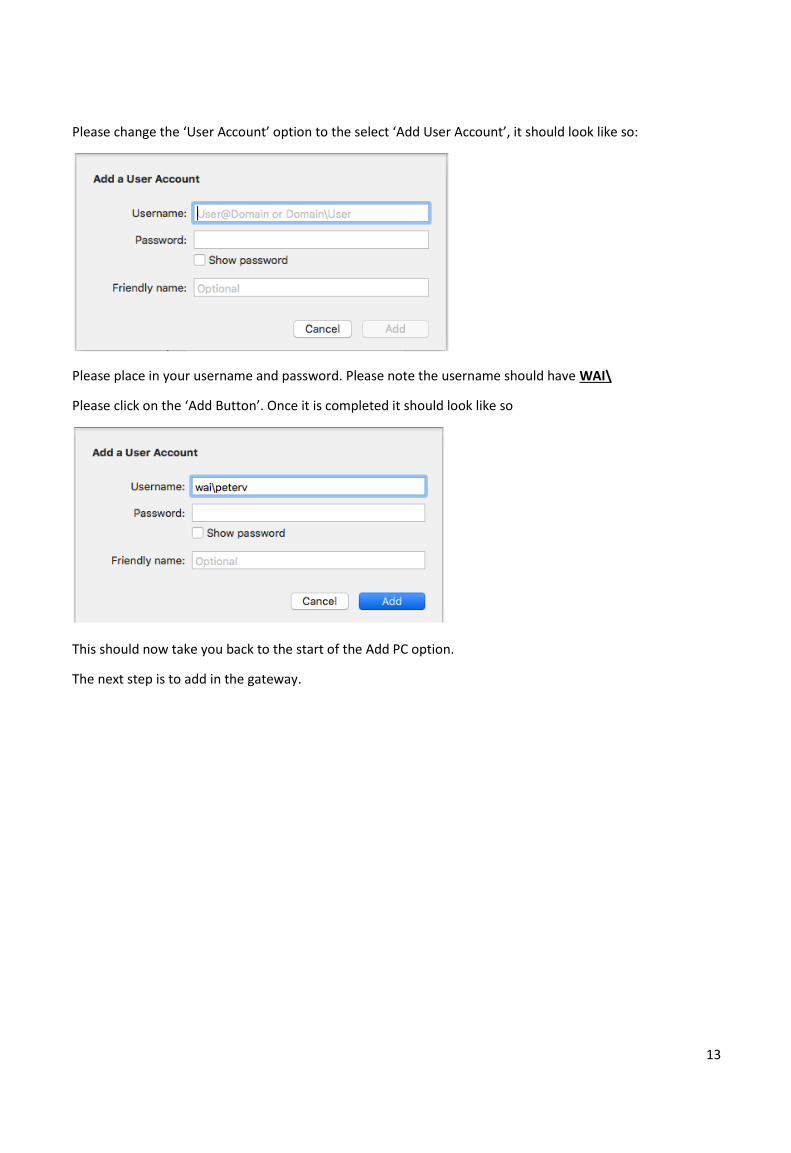
Please change the ‘User Account’ option to the select ‘Add User Account’, it should look like so:
Please place in your username and password. Please note the username should have WAI\
Please click on the ‘Add Button’. Once it is completed it should look like so
This should now take you back to the start of the Add PC option.
The next step is to add in the gateway.
14
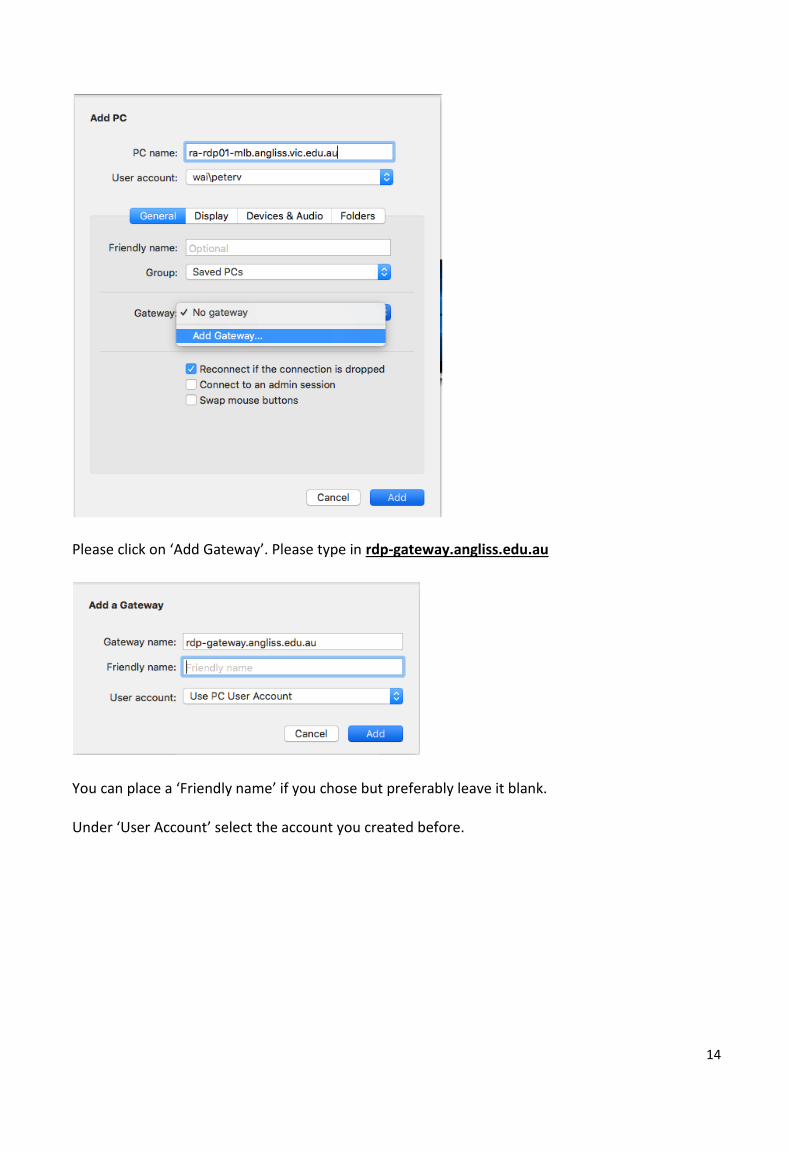
Please click on ‘Add Gateway’. Please type in rdp-gateway.angliss.edu.au
You can place a ‘Friendly name’ if you chose but preferably leave it blank. Under ‘User Account’ select the account you created before.
15
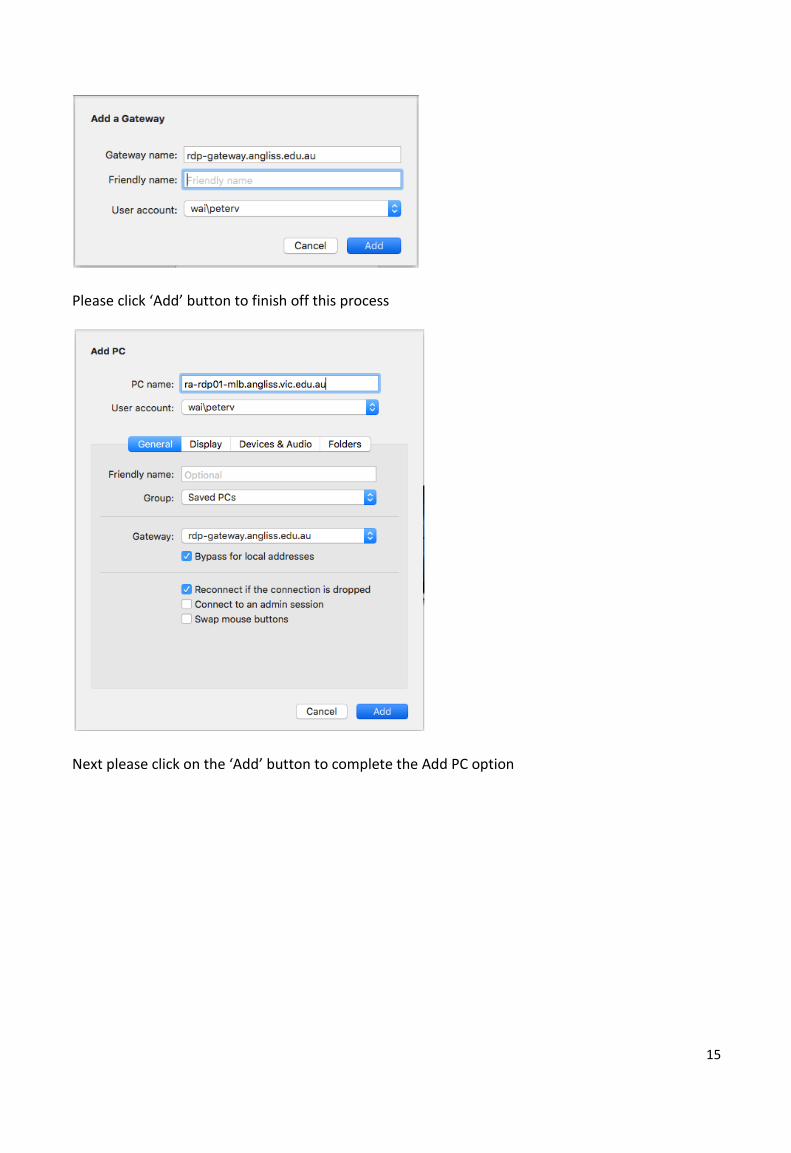
Please click ‘Add’ button to finish off this process
Next please click on the ‘Add’ button to complete the Add PC option
16
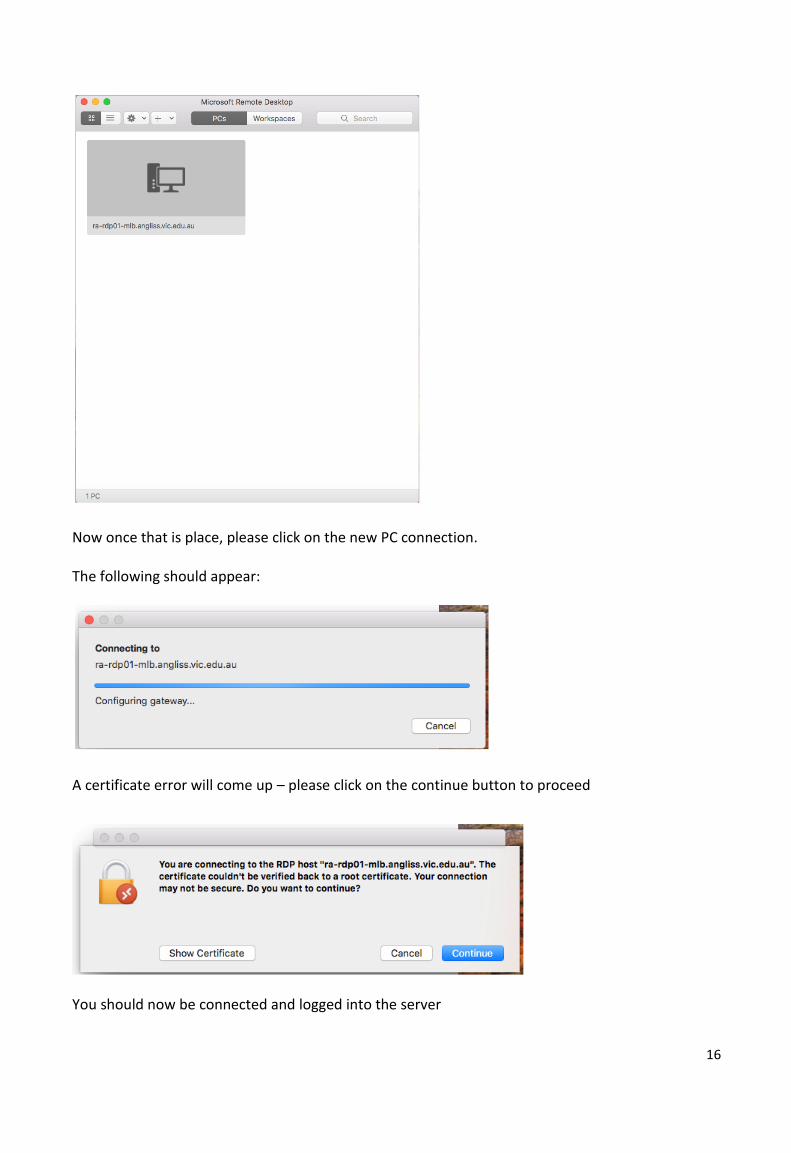
Now once that is place, please click on the new PC connection. The following should appear:
A certificate error will come up – please click on the continue button to proceed
You should now be connected and logged into the server
17
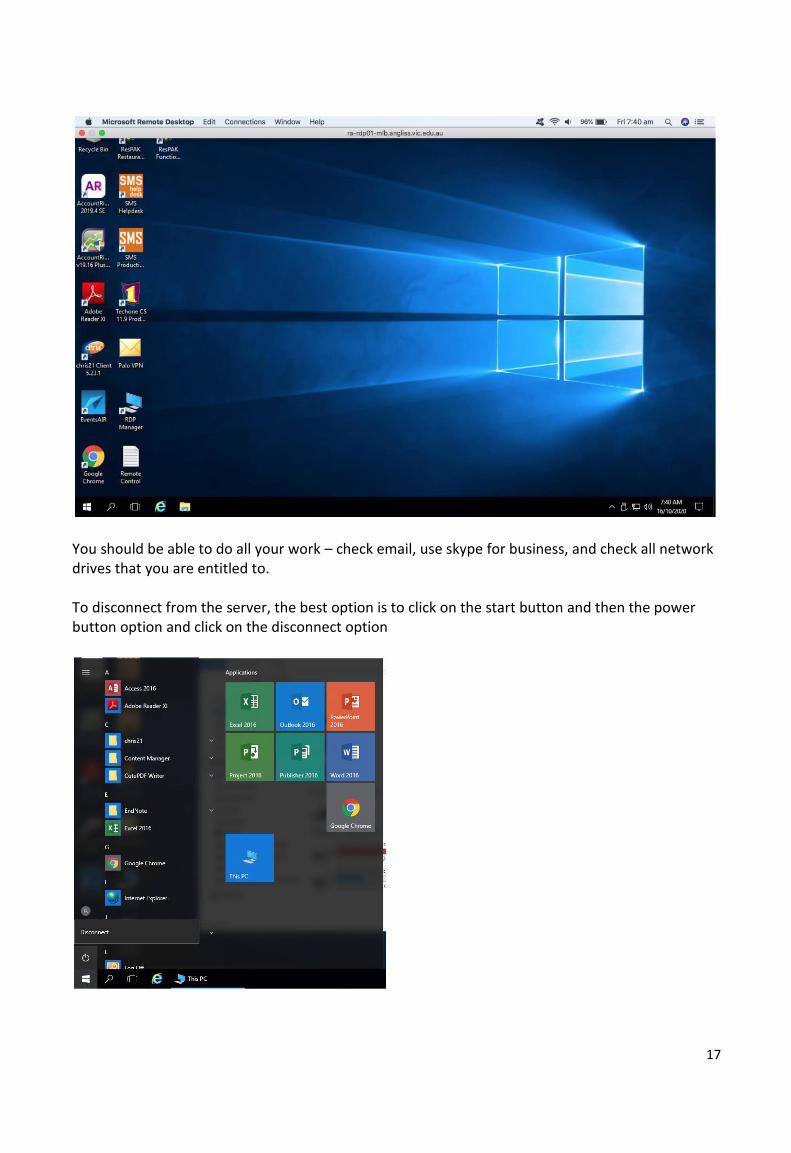
You should be able to do all your work – check email, use skype for business, and check all network drives that you are entitled to. To disconnect from the server, the best option is to click on the start button and then the power button option and click on the disconnect option
18
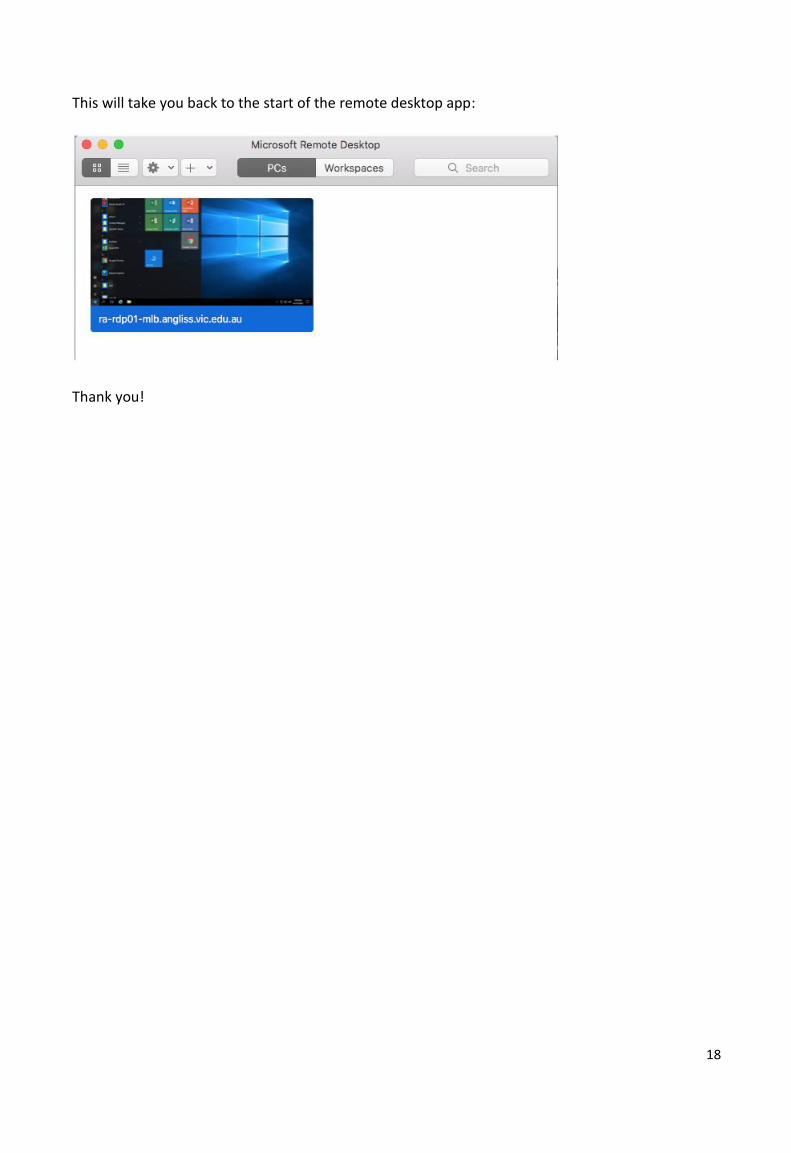
This will take you back to the start of the remote desktop app:
Thank you!