quick start cooking guide with recipes
TRANSCRIPT
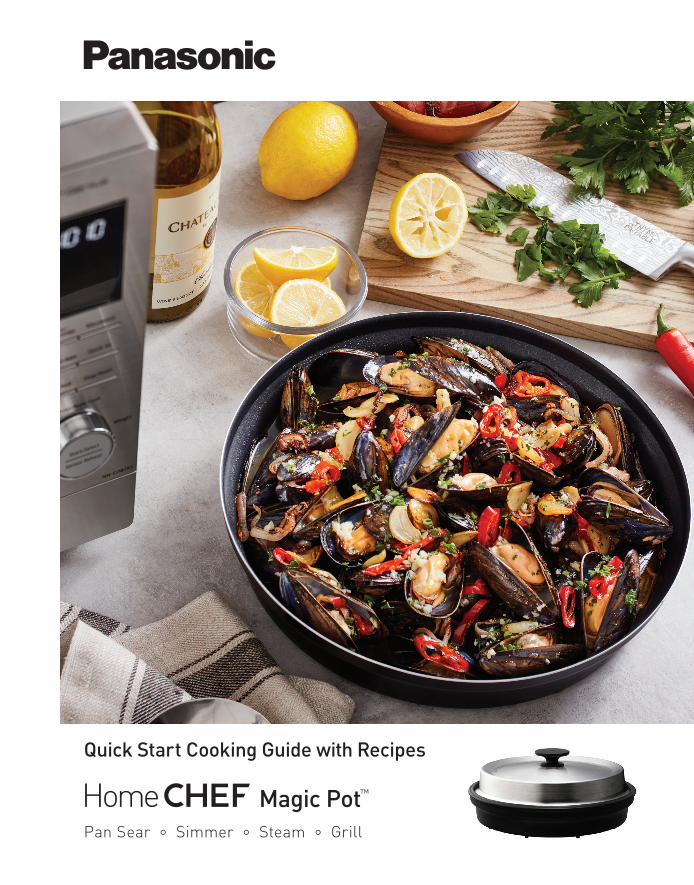
Pan Sear ° Simmer ° Steam ° Grill
Quick Start Cooking Guide with Recipes
3
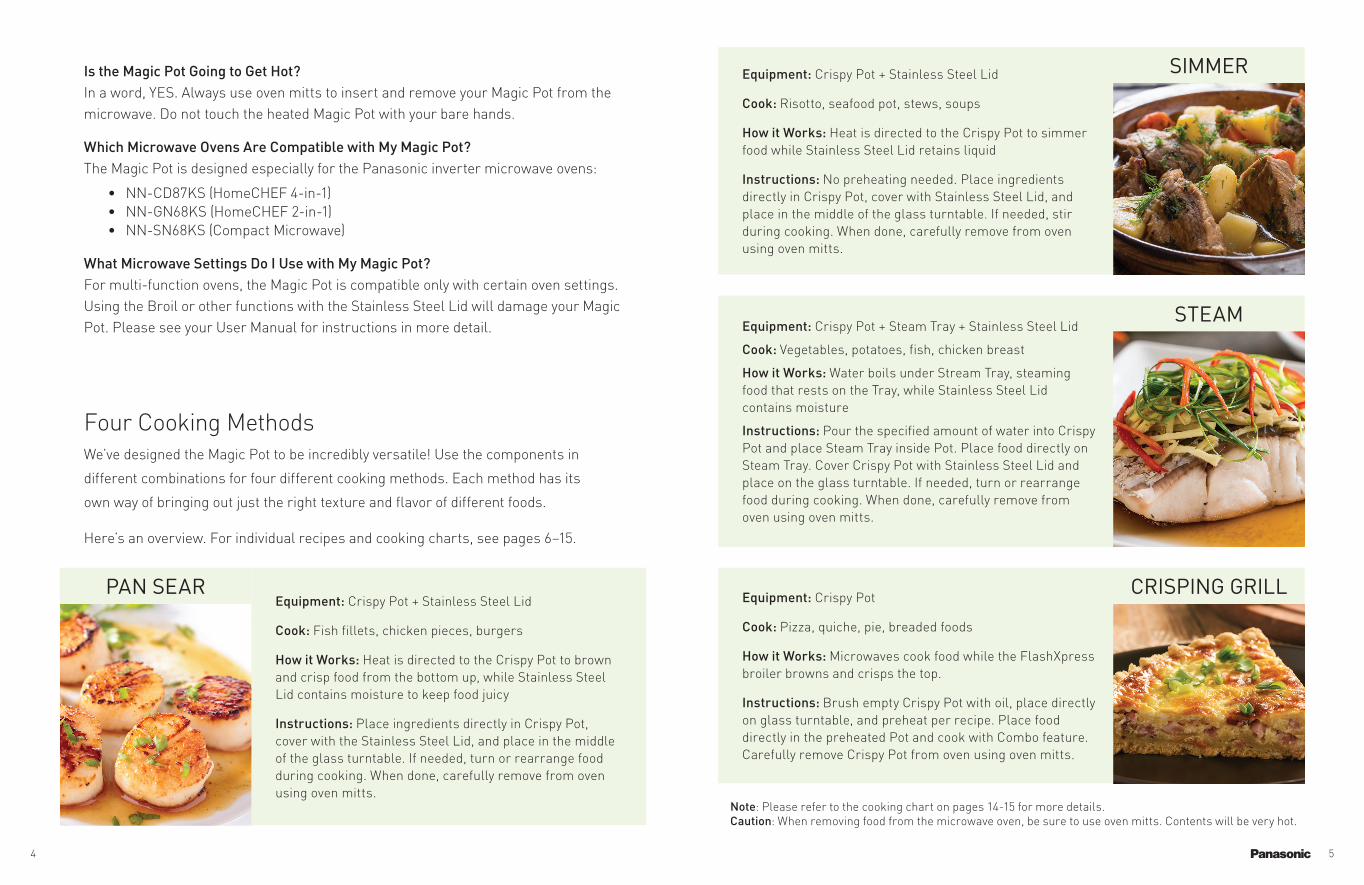
We were taught never to place anything metallic in a microwave oven—but the Magic Pot is microwave safe. How is that true?
Panasonic designed this pot with silicone, rubber, stainless steel, and aluminum in all the right places to create a safe, optimal cooking experience. When the Magic Pot is placed correctly in the center of the microwave oven, the metal deflects heat and the rubber base absorbs it, conducting the heat only to the bottom and sides of the Crispy
Pot. Please see below (and your User Manual) for correct placement of the pot in the microwave.
How Do I Place the Magic Pot Correctly in the Microwave?The pot should be placed in the center of the microwave turntable. NEVER let the Magic Pot touch the walls of the microwave, as it will cause arcing (sparks). If arcing occurs, immediately stop the microwave cooking and center the Magic Pot.
The Panasonic HomeCHEF Magic Pot™ is your simple, 4-in-1 solution for
perfecting your favorite dishes. The Magic Pot helps you prepare food quickly
and easily in the microwave oven using 4 cooking methods—sear, simmer,
steam, and grill—for the perfect flavor and texture every time.
Safe, easy to use, and easy to clean, the Magic Pot is a trusted companion for
preparing your favorite dishes in record time, with exceptional flavor and texture.
Say Hello to the Magic Pot™!
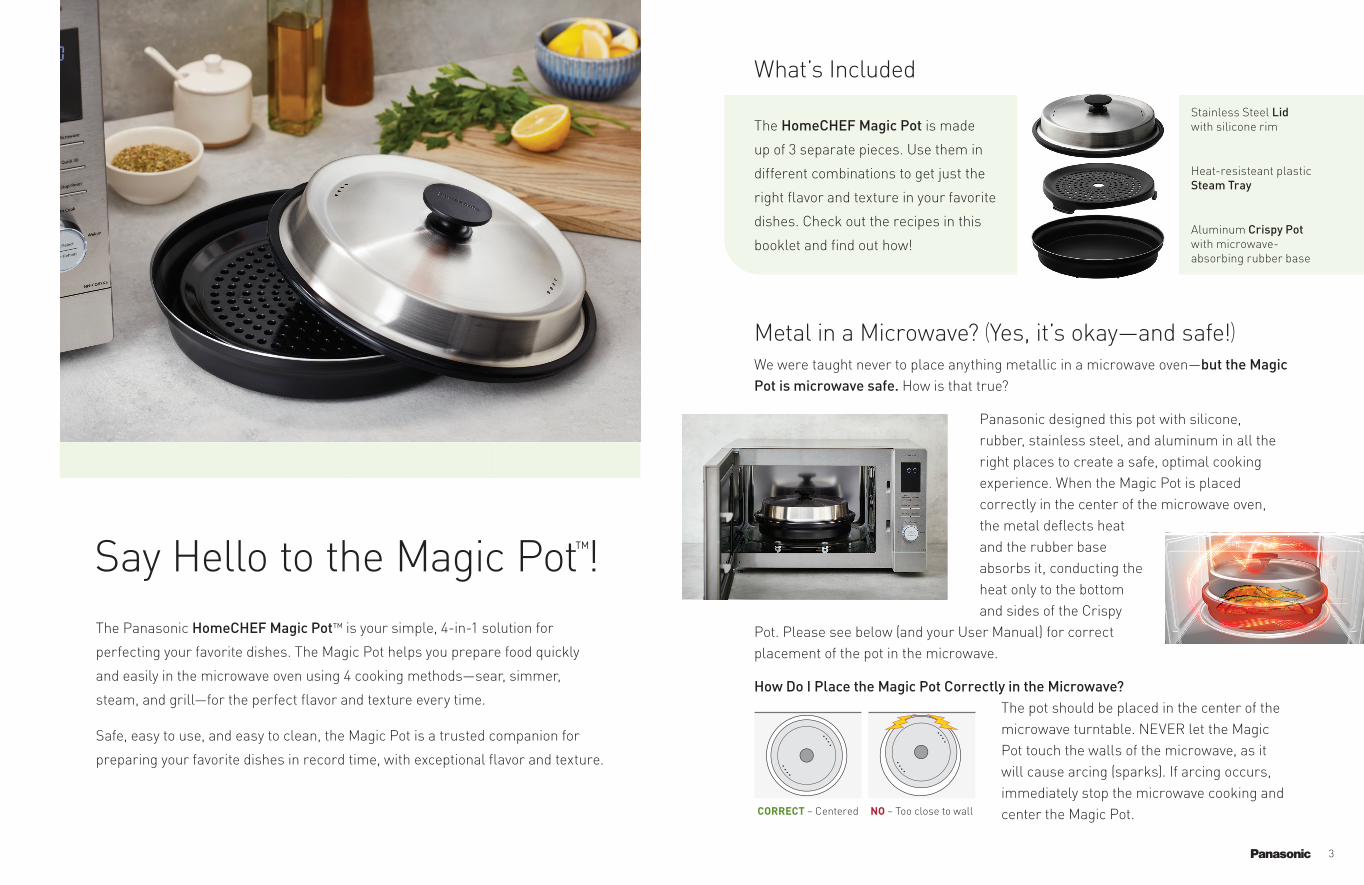
The HomeCHEF Magic Pot is made
up of 3 separate pieces. Use them in
different combinations to get just the
right flavor and texture in your favorite
dishes. Check out the recipes in this
booklet and find out how!
Stainless Steel Lidwith silicone rim
Heat-resisteant plastic Steam Tray
Aluminum Crispy Potwith microwave-absorbing rubber base
Metal in a Microwave? (Yes, it’s okay—and safe!)
What’s Included
CORRECT – Centered NO – Too close to wall
54
Four Cooking Methods
Equipment: Crispy Pot + Stainless Steel Lid
Cook: Fish fillets, chicken pieces, burgers
How it Works: Heat is directed to the Crispy Pot to brown and crisp food from the bottom up, while Stainless Steel Lid contains moisture to keep food juicy
Instructions: Place ingredients directly in Crispy Pot, cover with the Stainless Steel Lid, and place in the middle of the glass turntable. If needed, turn or rearrange food during cooking. When done, carefully remove from oven using oven mitts.
Equipment: Crispy Pot + Steam Tray + Stainless Steel Lid
Cook: Vegetables, potatoes, fish, chicken breast
How it Works: Water boils under Stream Tray, steaming food that rests on the Tray, while Stainless Steel Lid contains moisture
Instructions: Pour the specified amount of water into Crispy Pot and place Steam Tray inside Pot. Place food directly on Steam Tray. Cover Crispy Pot with Stainless Steel Lid and place on the glass turntable. If needed, turn or rearrange food during cooking. When done, carefully remove from oven using oven mitts.
Equipment: Crispy Pot
Cook: Pizza, quiche, pie, breaded foods
How it Works: Microwaves cook food while the FlashXpress broiler browns and crisps the top.
Instructions: Brush empty Crispy Pot with oil, place directly on glass turntable, and preheat per recipe. Place food directly in the preheated Pot and cook with Combo feature. Carefully remove Crispy Pot from oven using oven mitts.
Equipment: Crispy Pot + Stainless Steel Lid
Cook: Risotto, seafood pot, stews, soups
How it Works: Heat is directed to the Crispy Pot to simmer food while Stainless Steel Lid retains liquid
Instructions: No preheating needed. Place ingredients directly in Crispy Pot, cover with Stainless Steel Lid, and place in the middle of the glass turntable. If needed, stir during cooking. When done, carefully remove from oven using oven mitts.
STEAM
CRISPING GRILL
We’ve designed the Magic Pot to be incredibly versatile! Use the components in
different combinations for four different cooking methods. Each method has its
own way of bringing out just the right texture and flavor of different foods.
Here’s an overview. For individual recipes and cooking charts, see pages 6–15.
Note: Please refer to the cooking chart on pages 14-15 for more details. Caution: When removing food from the microwave oven, be sure to use oven mitts. Contents will be very hot.
PAN SEAR
SIMMERIs the Magic Pot Going to Get Hot? In a word, YES. Always use oven mitts to insert and remove your Magic Pot from the microwave. Do not touch the heated Magic Pot with your bare hands.
Which Microwave Ovens Are Compatible with My Magic Pot? The Magic Pot is designed especially for the Panasonic inverter microwave ovens:
• NN-CD87KS (HomeCHEF 4-in-1)• NN-GN68KS (HomeCHEF 2-in-1)• NN-SN68KS (Compact Microwave)
What Microwave Settings Do I Use with My Magic Pot? For multi-function ovens, the Magic Pot is compatible only with certain oven settings. Using the Broil or other functions with the Stainless Steel Lid will damage your Magic Pot. Please see your User Manual for instructions in more detail.
76
PAN
SEA
RPA
N SE
AR
Ingredients
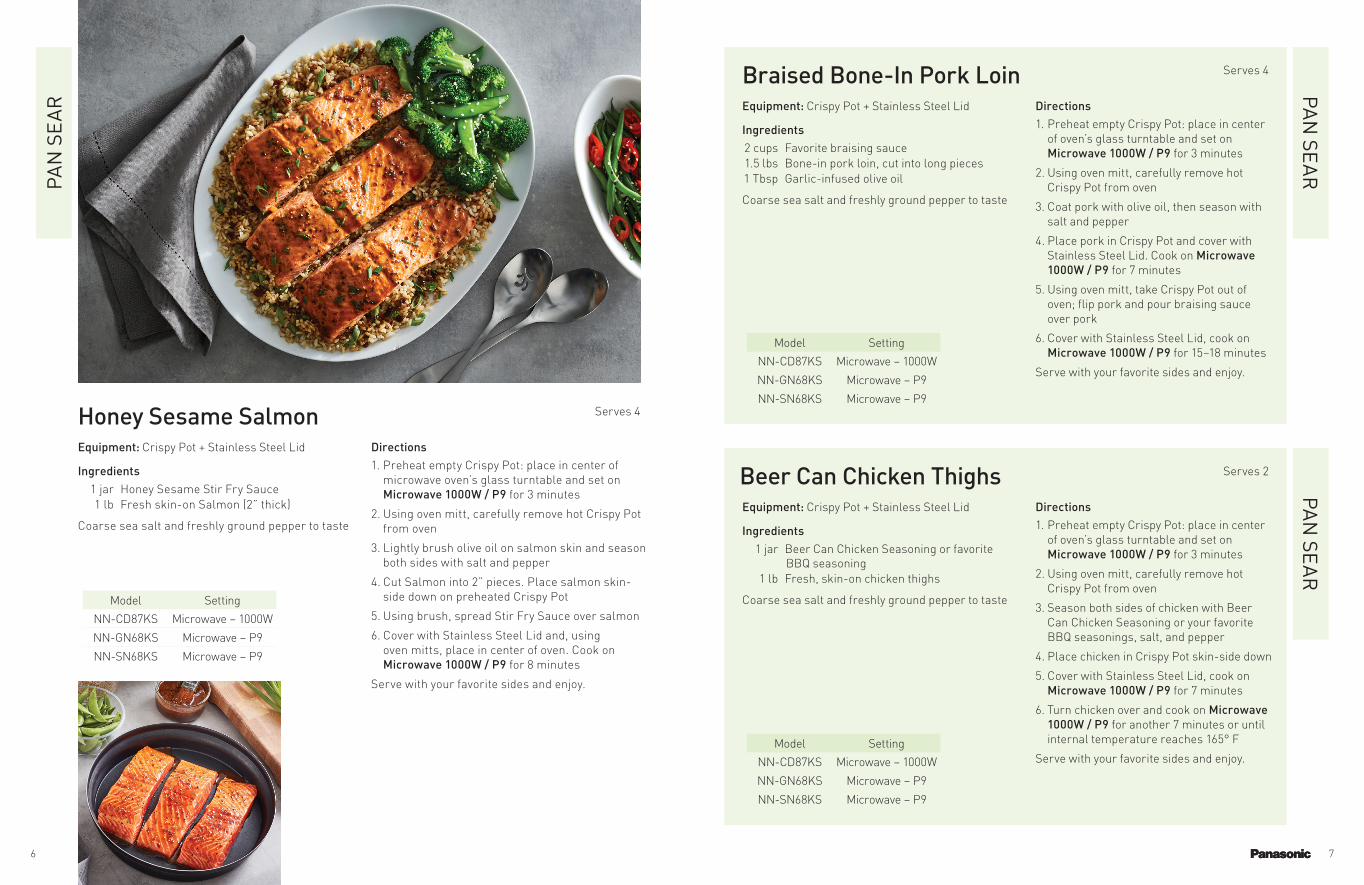
Equipment: Crispy Pot + Stainless Steel Lid
1 jar Honey Sesame Stir Fry Sauce 1 lb Fresh skin-on Salmon (2” thick)
Coarse sea salt and freshly ground pepper to taste
Directions1. Preheat empty Crispy Pot: place in center of
microwave oven’s glass turntable and set on Microwave 1000W / P9 for 3 minutes
2. Using oven mitt, carefully remove hot Crispy Pot from oven
3. Lightly brush olive oil on salmon skin and season both sides with salt and pepper
4. Cut Salmon into 2” pieces. Place salmon skin-side down on preheated Crispy Pot
5. Using brush, spread Stir Fry Sauce over salmon
6. Cover with Stainless Steel Lid and, using oven mitts, place in center of oven. Cook on Microwave 1000W / P9 for 8 minutes
Serve with your favorite sides and enjoy.
Honey Sesame Salmon Serves 4
Model Setting
NN-CD87KS Microwave – 1000W
NN-GN68KS Microwave – P9
NN-SN68KS Microwave – P9
PAN
SE
AR
Equipment: Crispy Pot + Stainless Steel Lid
1 jar Beer Can Chicken Seasoning or favorite BBQ seasoning
1 lb Fresh, skin-on chicken thighs
Coarse sea salt and freshly ground pepper to taste
1. Preheat empty Crispy Pot: place in center of oven’s glass turntable and set on Microwave 1000W / P9 for 3 minutes
2. Using oven mitt, carefully remove hot Crispy Pot from oven
3. Season both sides of chicken with Beer Can Chicken Seasoning or your favorite BBQ seasonings, salt, and pepper
4. Place chicken in Crispy Pot skin-side down
5. Cover with Stainless Steel Lid, cook on Microwave 1000W / P9 for 7 minutes
6. Turn chicken over and cook on Microwave 1000W / P9 for another 7 minutes or until internal temperature reaches 165° F
Serve with your favorite sides and enjoy.
Beer Can Chicken Thighs
Serves 4
Serves 2
Ingredients
Ingredients
Equipment: Crispy Pot + Stainless Steel Lid
2 cups Favorite braising sauce 1.5 lbs Bone-in pork loin, cut into long pieces 1 Tbsp Garlic-infused olive oil
Coarse sea salt and freshly ground pepper to taste
Directions
Directions
1. Preheat empty Crispy Pot: place in center of oven’s glass turntable and set on Microwave 1000W / P9 for 3 minutes
2. Using oven mitt, carefully remove hot Crispy Pot from oven
3. Coat pork with olive oil, then season with salt and pepper
4. Place pork in Crispy Pot and cover with Stainless Steel Lid. Cook on Microwave 1000W / P9 for 7 minutes
5. Using oven mitt, take Crispy Pot out of oven; flip pork and pour braising sauce over pork
6. Cover with Stainless Steel Lid, cook on Microwave 1000W / P9 for 15–18 minutes
Serve with your favorite sides and enjoy.
Braised Bone-In Pork Loin
Model Setting
NN-CD87KS Microwave – 1000W
NN-GN68KS Microwave – P9
NN-SN68KS Microwave – P9
Model Setting
NN-CD87KS Microwave – 1000W
NN-GN68KS Microwave – P9
NN-SN68KS Microwave – P9

98
PAN
SE
AR
Serves 2
Ingredients for burgers
Equipment: Crispy Pot + Stainless Steel Lid
1 lb Lean ground beef (80/20)
Coarse sea salt and freshly ground pepper to taste
for mushroom sauce 1 cup Sliced fresh shitake mushroom 1 cup Sliced cremini mushroom ¼ cup Thinly sliced shallots ¼ cup Bourbon 1 Tbsp Salted butter
Directions for burgers
for mushroom sauce
1. Preheat empty Crispy Pot: place in center of microwave oven’s glass turntable and set on Microwave 1000W / P9 for 3 minutes
2. While preheating, form 2 patties from ground beef and season both sides with salt and pepper Note: Make sure each patty is 1.5” thick and weighs 8 oz—or else cooking result will vary
3. Using oven mitt, remove hot Crispy Pot from oven
4. Press 2 patties into Crispy Pot, cover with lid, cook on Microwave 1000W / P9 for 7 minutes
5. Remove Crispy Pot from oven using oven mitts and turn burger over. Cover with Stainless Steel Lid and place back in oven and cook on Microwave 1000W / P9 for additional 7 minutes
6. Using oven mitts, remove Crispy Pot from oven; place burgers on plate and cover
1. Drain excess grease from Crispy Pot, leaving some drippings from burger
2. Add mushrooms, shallots, bourbon, and salt and pepper to Crispy Pot; cover with lid and cook on Microwave 1000W / P9 for 5 Minutes
3. When mushroom mixture is done, take Crispy Pot out of oven and stir in butter to thicken sauce
Pour mushroom sauce over burger, serve with your favorite sides, and enjoy.
Pan-Seared Burger
SIMM
ER
Model Setting
NN-CD87KS Microwave – 1000W
NN-GN68KS Microwave – P9
NN-SN68KS Microwave – P9
Ingredients
Equipment: Crispy Pot + Stainless Steel Lid
1 can Chicken piccata pan sauce 1 lb Fresh skin-on chicken thighs 2 tbsp All-purpose flour 1/2 Lemon (sliced) 1 Tbsp Capers
Coarse sea salt and freshly ground pepper to taste
Directions1. Mix flour, salt, and pepper well and dredge
both sides of chicken through the mixture
2. Preheat empty Crispy Pot: place in center of microwave oven’s glass turntable and set on Microwave 1000W / P9 for 3 minutes
3. Using oven mitt, carefully remove hot Crispy Pot from oven
4. Lightly spray olive oil on Crispy Pot, place chicken skin-side down, and cover
5. Cook on Microwave 1000W / P9 for 7 minutes
6. Turn chicken over and pour Picatta sauce on chicken; add capers and sliced lemon
7. Replace Stainless Steel Lid and cook for additional 7 minutes on Microwave 1000W / P9 or until internal temperature reaches 165°F
Serve over pasta or rice and enjoy.
Chicken Piccata Serves 2
Model Setting
NN-CD87KS Microwave – 1000W
NN-GN68KS Microwave – P9
NN-SN68KS Microwave – P9
1110
SIM
MER
Ingredients
Equipment: Crispy Pot + Stainless Steel Lid
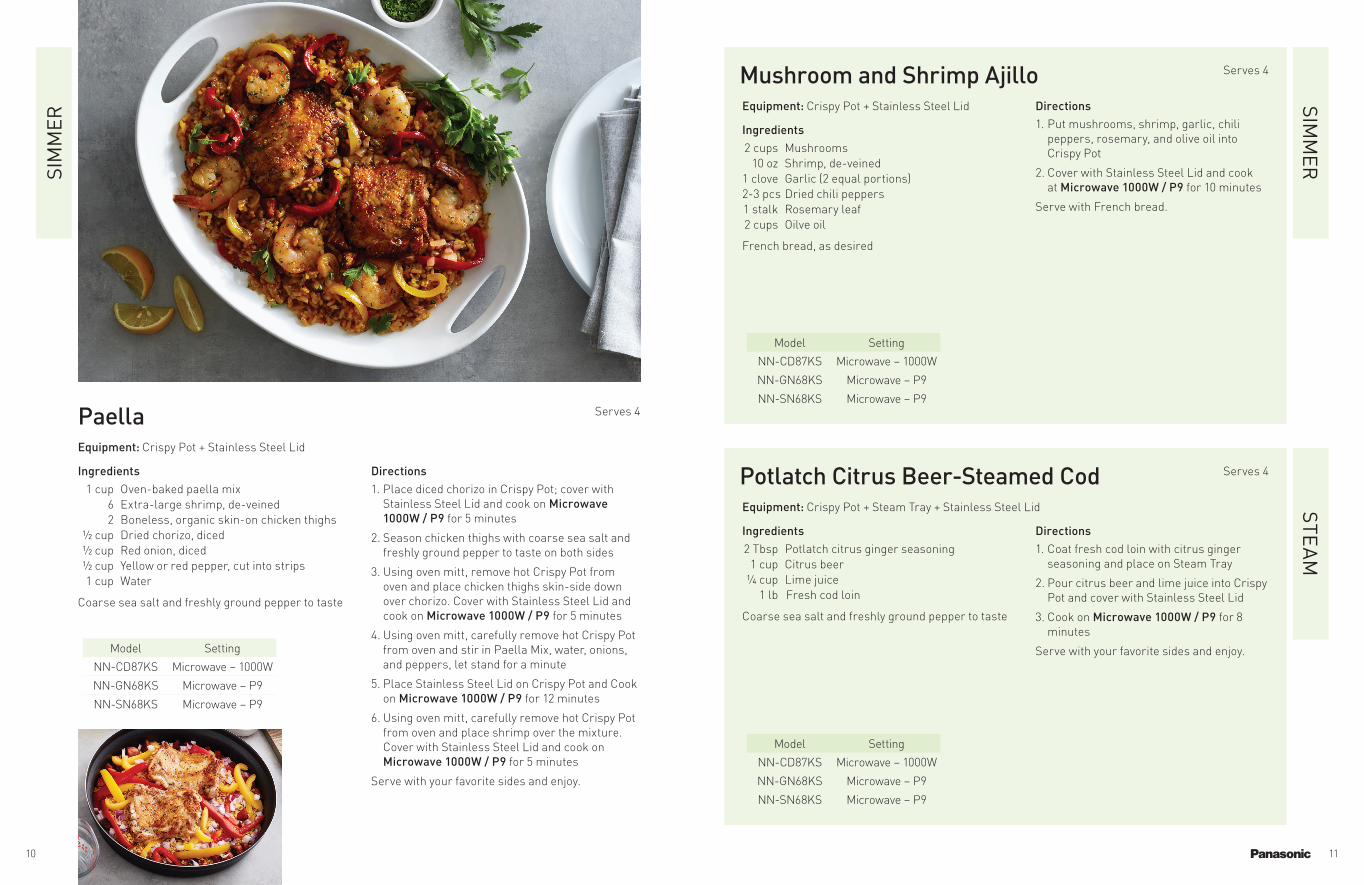
1 cup Oven-baked paella mix 6 Extra-large shrimp, de-veined 2 Boneless, organic skin-on chicken thighs ½ cup Dried chorizo, diced ½ cup Red onion, diced ½ cup Yellow or red pepper, cut into strips 1 cup Water
Coarse sea salt and freshly ground pepper to taste
Directions1. Place diced chorizo in Crispy Pot; cover with
Stainless Steel Lid and cook on Microwave 1000W / P9 for 5 minutes
2. Season chicken thighs with coarse sea salt and freshly ground pepper to taste on both sides
3. Using oven mitt, remove hot Crispy Pot from oven and place chicken thighs skin-side down over chorizo. Cover with Stainless Steel Lid and cook on Microwave 1000W / P9 for 5 minutes
4. Using oven mitt, carefully remove hot Crispy Pot from oven and stir in Paella Mix, water, onions, and peppers, let stand for a minute
5. Place Stainless Steel Lid on Crispy Pot and Cook on Microwave 1000W / P9 for 12 minutes
6. Using oven mitt, carefully remove hot Crispy Pot from oven and place shrimp over the mixture. Cover with Stainless Steel Lid and cook on Microwave 1000W / P9 for 5 minutes
Serve with your favorite sides and enjoy.
Paella Serves 4
Model Setting
NN-CD87KS Microwave – 1000W
NN-GN68KS Microwave – P9
NN-SN68KS Microwave – P9
Equipment: Crispy Pot + Steam Tray + Stainless Steel Lid
2 Tbsp Potlatch citrus ginger seasoning 1 cup Citrus beer ¼ cup Lime juice 1 lb Fresh cod loin
Coarse sea salt and freshly ground pepper to taste
1. Coat fresh cod loin with citrus ginger seasoning and place on Steam Tray
2. Pour citrus beer and lime juice into Crispy Pot and cover with Stainless Steel Lid
3. Cook on Microwave 1000W / P9 for 8 minutes
Serve with your favorite sides and enjoy.
Potlatch Citrus Beer-Steamed Cod
Serves 4
Serves 4
Ingredients
Ingredients
Equipment: Crispy Pot + Stainless Steel Lid
2 cups Mushrooms 10 oz Shrimp, de-veined 1 clove Garlic (2 equal portions)2-3 pcs Dried chili peppers 1 stalk Rosemary leaf 2 cups Oilve oil
French bread, as desired
Directions
Directions
1. Put mushrooms, shrimp, garlic, chili peppers, rosemary, and olive oil into Crispy Pot
2. Cover with Stainless Steel Lid and cook at Microwave 1000W / P9 for 10 minutes
Serve with French bread.
Mushroom and Shrimp AjilloSIM
MER
STEA
M
Model Setting
NN-CD87KS Microwave – 1000W
NN-GN68KS Microwave – P9
NN-SN68KS Microwave – P9
Model Setting
NN-CD87KS Microwave – 1000W
NN-GN68KS Microwave – P9
NN-SN68KS Microwave – P9
1312
CR
ISPIN
G G
RILL
STE
AM
Ingredients
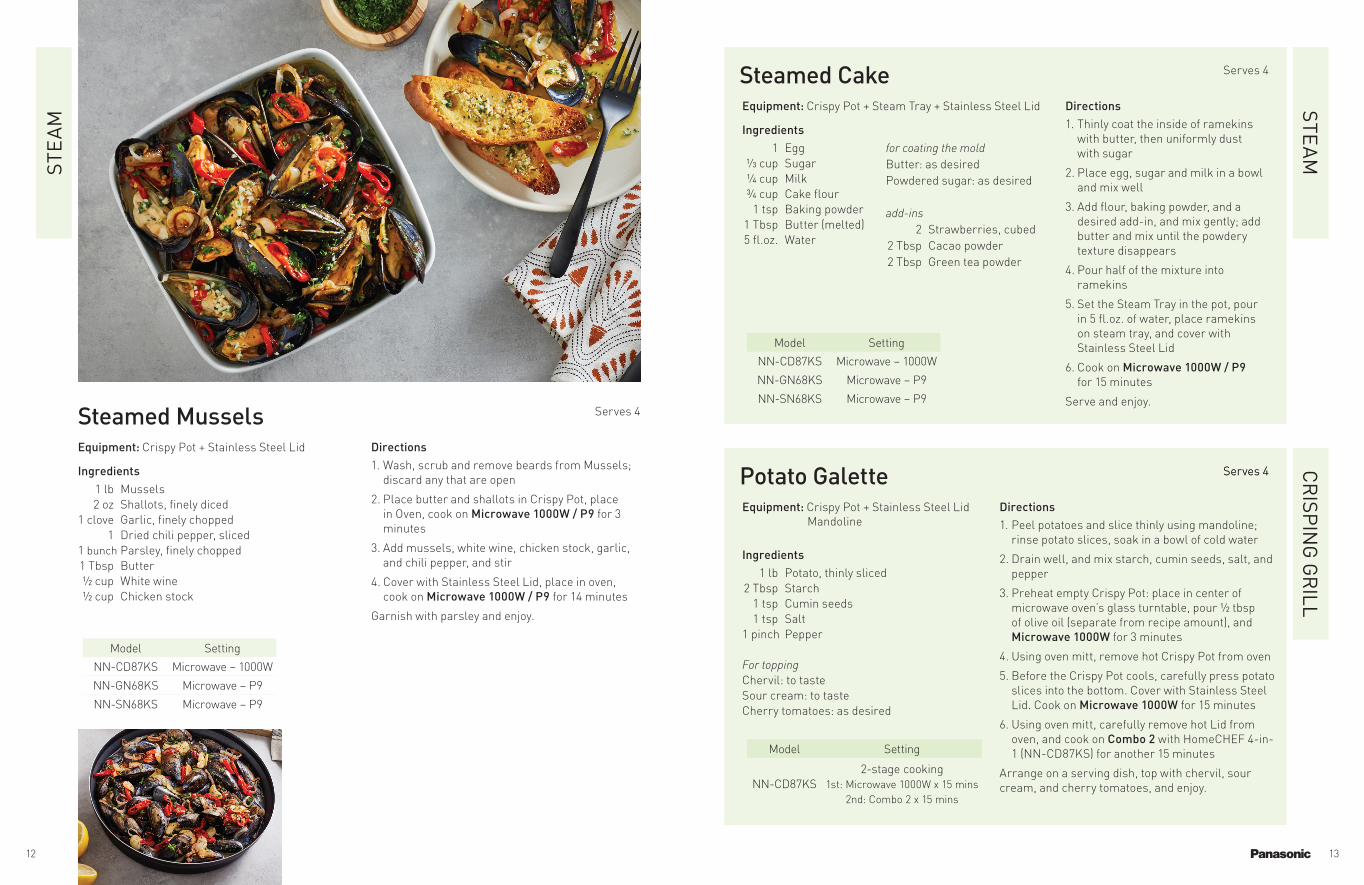
Equipment: Crispy Pot + Stainless Steel Lid
1 lb Mussels 2 oz Shallots, finely diced 1 clove Garlic, finely chopped 1 Dried chili pepper, sliced 1 bunch Parsley, finely chopped 1 Tbsp Butter ½ cup White wine ½ cup Chicken stock
Directions1. Wash, scrub and remove beards from Mussels;
discard any that are open
2. Place butter and shallots in Crispy Pot, place in Oven, cook on Microwave 1000W / P9 for 3 minutes
3. Add mussels, white wine, chicken stock, garlic, and chili pepper, and stir
4. Cover with Stainless Steel Lid, place in oven, cook on Microwave 1000W / P9 for 14 minutes
Garnish with parsley and enjoy.
Steamed Mussels Serves 4
Model Setting
NN-CD87KS Microwave – 1000W
NN-GN68KS Microwave – P9
NN-SN68KS Microwave – P9
Serves 4
Serves 4Serves 4
Ingredients
Ingredients
Equipment: Crispy Pot + Steam Tray + Stainless Steel Lid
Equipment: Crispy Pot + Stainless Steel Lid Mandoline
1 Egg 1⁄3 cup Sugar ¼ cup Milk ¾ cup Cake flour 1 tsp Baking powder 1 Tbsp Butter (melted) 5 fl.oz. Water
1 lb Potato, thinly sliced 2 Tbsp Starch 1 tsp Cumin seeds 1 tsp Salt1 pinch Pepper
For toppingChervil: to tasteSour cream: to tasteCherry tomatoes: as desired
for coating the moldButter: as desiredPowdered sugar: as desired
add-ins 2 Strawberries, cubed 2 Tbsp Cacao powder 2 Tbsp Green tea powder
Directions
Directions
1. Thinly coat the inside of ramekins with butter, then uniformly dust with sugar
2. Place egg, sugar and milk in a bowl and mix well
3. Add flour, baking powder, and a desired add-in, and mix gently; add butter and mix until the powdery texture disappears
4. Pour half of the mixture into ramekins
5. Set the Steam Tray in the pot, pour in 5 fl.oz. of water, place ramekins on steam tray, and cover with Stainless Steel Lid
6. Cook on Microwave 1000W / P9 for 15 minutes
Serve and enjoy.
1. Peel potatoes and slice thinly using mandoline; rinse potato slices, soak in a bowl of cold water
2. Drain well, and mix starch, cumin seeds, salt, and pepper
3. Preheat empty Crispy Pot: place in center of microwave oven’s glass turntable, pour ½ tbsp of olive oil (separate from recipe amount), and Microwave 1000W for 3 minutes
4. Using oven mitt, remove hot Crispy Pot from oven
5. Before the Crispy Pot cools, carefully press potato slices into the bottom. Cover with Stainless Steel Lid. Cook on Microwave 1000W for 15 minutes
6. Using oven mitt, carefully remove hot Lid from oven, and cook on Combo 2 with HomeCHEF 4-in-1 (NN-CD87KS) for another 15 minutes
Arrange on a serving dish, top with chervil, sour cream, and cherry tomatoes, and enjoy.
Steamed Cake
Potato Galette
STEA
M
Model Setting
NN-CD87KS Microwave – 1000W
NN-GN68KS Microwave – P9
NN-SN68KS Microwave – P9
Model Setting
NN-CD87KS2-stage cooking
1st: Microwave 1000W x 15 mins2nd: Combo 2 x 15 mins

1514
FoodWeight
Quantity
Fresh Frozen
CD87 GN68 / SN68 CD87 GN68 / SN68
Salmon 1,3 2 pcs 10oz
1000 W 9-11 mins
P108-10 mins – –
Sea bass 1,3 2 pcs 6oz
1000 W 7-9 mins
P10 5-7 mins – –
Chicken thighs with skin 1,2,3 4 pcs 17oz
1000 W 20-22 mins
P10 12-14 mins – –
Chicken breast with skin 1,2,3 2 pcs 11oz
1000 W 19-21 mins
P10 11-13 mins – –
Breaded fish 1 2 pcs 10oz
1000 W 12-14 mins
P10 9-11 mins – –
Fish fingers 1 8 pcs 8oz – – 1000 W
13-15 mins P10
9-11 mins
FoodWeight
Quantity
Fresh Frozen
CD87 GN68 CD87 GN68
Chicken nuggets P, 1 8 pcs3oz – – Combo 2
7-9 mins Combination 1
6-8 mins
Chilled Quiche P, 2 1 pc 5oz
Combo 29-11 mins
Combination 1 8-10 mins – –
Cheese croissant P
1 pc2oz
Combo 22-3 mins
Combination 1 2-3 min
Combo 23-4 mins
Combination 1 3-4 mins
2 pcs5oz
Combo 23-4 mins
Combination 1 3-4 mins
Combo 25-6 mins
Combination 1 7-8 mins
Breaded fish fillets P, 1
1 pc5oz
Combo 214-16 mins
Combination 110-12 mins
Combo 215-17 mins
Combination 1 13-15 mins
2 pcs10oz
Combo 216-18 mins
Combination 1 16-18 mins
Combo 217-19 mins
Combination 1 18-20 mins
Pizza P 9 inch – – Combo 215-17 mins
Combination 1 16-18 mins"
Galettes / Vegetables P, 1 4 pcs5oz – – Combo 2
7-9 minsCombination 1
6-8 mins
Meat / Sausage roll P, 1 2 pcs 6oz
Combo 27-9 mins
Combination 1 6-8 mins
Combo 210-12 mins
Combination 1 10-12 mins
Quiche, onion P, 2 1 pc 5oz
Combo 29-11 mins
Combination 1 8-10 mins
Combo 213-15 mins
Combination 1 11-13 mins
Quiche, spinach P, 2 1 pc 14oz
Combo 214-16 mins
Combination 1 12-14 mins
Combo 224-26 mins
Combination 1 22-24 mins
Pancakes stuffed, rolls P, 1 4 pcs 8oz
Combo 24-6 mins
Combination 1 3-5 mins
Combo 26-8 mins
Combination 1 4-6 mins
Meat pies P, 1
1 pc 2oz
Combo 25-7 mins
Combination 1 4-6 mins
Combo 28-10 mins
Combination 1 5-7 mins
2 pcs 5oz
Combo 28-10 mins
Combination 1 6-8 mins
Combo 210-12 mins
Combination 1 9-11 mins
Samosas P, 1 4 pcs 8oz
Combo 29-11 mins
Combination 1 8-10 mins
Combo 215-17 mins
Combination 1 13-15 mins
Tortilla P, 1
2 pcs 8oz
Combo 28-10 mins
Combination 1 6-8 mins
Combo 214-16 mins
Combination 1 11-13 mins
4 pcs 16oz
Combo 211-13 mins
Combination 1 11-13 mins
Combo 215-17 mins
Combination 1 16-18 mins
Sausage, raw, thick P, 1 4 pcs 7oz
Combo 210-12 mins
Combination 1 8-10 mins – –
Sausage, raw, thin 4 pcs 5oz
Combo 27-9 mins
Combination 1 6-8 mins – –
FoodWeight
Quantity
Fresh
CD87 GN68 / SN68
Broccoli 10oz 1000 W 10-12 mins
P6 9-11mins
Carrots 9oz 1000 W 12-14 mins
P6 12-14mins
Corn 8 pcs 18oz
1000W 14-16 mins
P6 12-14mins
Potatoes 12pcs 14oz
1000W 14-16 mins
P6 15-17mins
Fish Fillet 1 pc 8oz
1000 W 8-10 mins
P6 9-11mins
Chicken Breasts 2 2 pcs 10oz
1000 W 22-24 mins
P6 19-21 mins
Shrimp 12oz 1000 W 13-15 mins
P6 14-16 mins
Whole mackerel 2 pcs 7oz
1000 W 15-17 mins
P6 15-17 mins
Whole sea bream 2 2 pcs 10oz
1000 W 18-20 mins
P618-20 mins
PAN
SE
AR
Coo
king
Cha
rtST
EA
M C
ooki
ng C
hart
CR
ISPIN
G G
RILL C
ooking Chart
NOTES:(1) turn or stir at 2/3 time. (2) standing 2-3 mins (3) skin side down(P) place on preheated Crispy Pot (3 min on 1000W/P10), greased if necessaryAlways add 5 fl.oz tap water into the crispy pot before using steam menu.
PLEASE REFER TO THE OPERATION MANUAL FOR FULL INSTRUCTIONS AND SAFETY DETAILS.
Use Crispy Pot + Steam Tray + Stainless Steel Lid—pour 5 fl.oz. water in the Crispy Pot
Use Crispy PotUse Crispy Pot + Stainless Steel Lid
MAGIC POT CARE:• Never cut pizza, quiche, or any other food directly in the Crispy Pot—this will damage the non-stick surface.• After use, wash the Magic Pot in hot soapy water and rinse in hot water. Do not use any abrasive cleaning
substances or scouring pads as this will damage the surface of the Crispy Pot.PLEASE REFER TO THE OPERATION MANUAL FOR FULL INSTRUCTIONS AND SAFETY DETAILS.

Panasonic’s collaboration with Drop, the leading smart kitchen platform, simplifies the lives
of home cooks using their appliances. With customized navigation tailored specifically to
the Panasonic Home Chef Magic Pot, users can access several advanced features designed
to complement every cooking style. From helpful functions like resizing recipes or offering
substitutions for missing ingredients, to recommending the exact length of heating time for perfect
results, the integration with Drop was launched with home cooks in mind.
For more information, visit https://drop.recipes/panasonic-usa or scan below.
PanasonicTwo Riverfront Plaza
Newark, NJ 07102
Actual product may vary slightly from photographs.*By scanning this QR code, you acknowledge that you understand that Personally Identifiable Information (“PII”) like Advertising Identifier, IP Address, Country Code and Geolocation Information may be shared with Drop, a Panasonic business partner, and mobile technology software provider Branch. Drop Privacy policies: https://getdrop.com/privacy-policy and https://branch.io/discovery-policies/#privacyPlease be advised that Panasonic will not collect or have access to any of your PII, including but not limited to the PII that is collected by Drop. By using the Drop Recipe app, you accept and acknowledge that the Drop Recipe app as well as other third party websites and apps are not under Panasonic’s control and are not subject to Panasonic’s Privacy Policy (https://na.panasonic.com/us/privacy-policy). The Drop Recipe app (and any other third party website/app) has its own privacy policy(ies), including those indicated in this book. Panasonic has no responsibility for any such third party apps or websites, including the Drop Recipe app, and provide this book solely for your convenience. You acknowledge your use and access of the Drop app is solely at your own risk. It is your responsibility to check Drop Privacy policies to see how they treat your PII.