learn to drive manual cars for dummies - licence ready
TRANSCRIPT
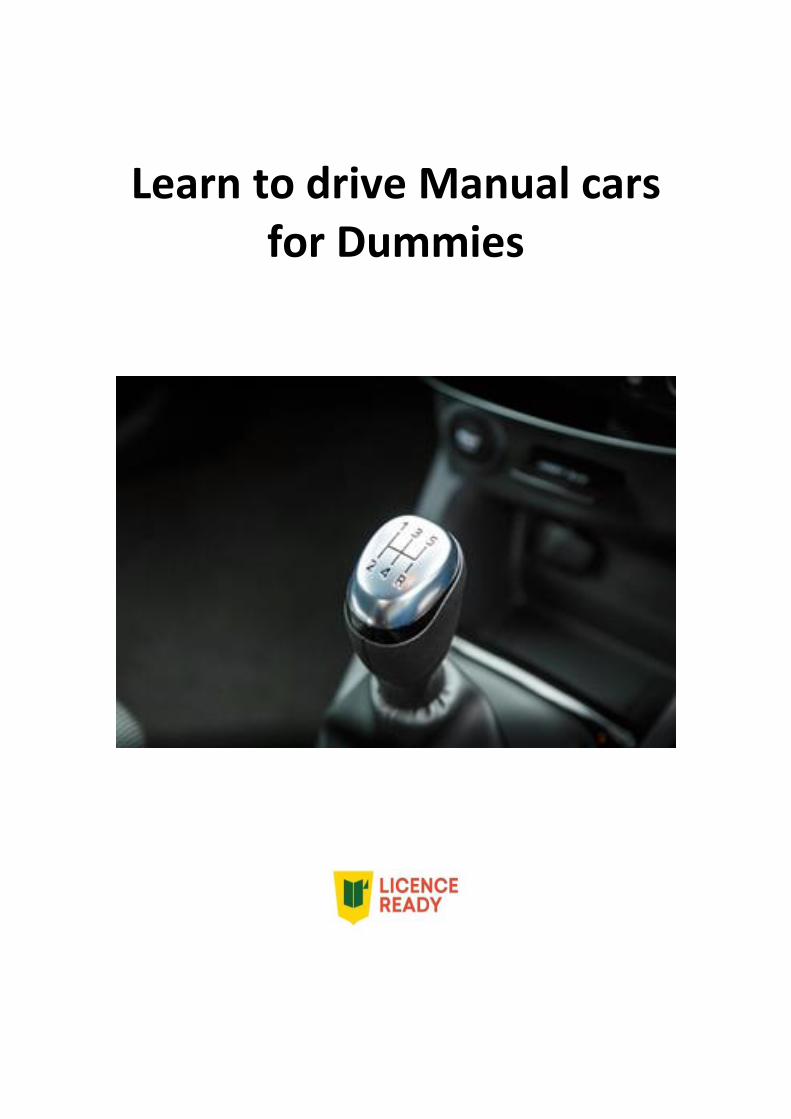
Learn to drive Manual cars
for Dummies

Learn to drive manual cars for dummies 2 COPYRIGHT © 2020 Licence Ready Pty Ltd
Blank page
Learn to drive manual cars for dummies 3 COPYRIGHT © 2020 Licence Ready Pty Ltd
Version 1.0
Date: 26/07/2020
Copyright notice:
All rights reserved. No part of this publication may be reproduced, stored or transmitted in
any form, whether electronic, mechanical, photocopied or otherwise without the prior
written consent of Licence Ready Pty Ltd.
Disclaimer notice:
Licence Ready Pty Ltd has prepared this guide to assist individuals interested in learning to
drive a manual car. This guide is not intended to take the place of professional training and
the Licence Ready Pty Ltd does not make any representation or warranty that any individual
who studies this guide will be successful in obtaining the desired license. Licence Ready Pty
Ltd is not responsible for any consequences that may result from the use of this guide.
Learn to drive manual cars for dummies 4 COPYRIGHT © 2020 Licence Ready Pty Ltd
Table of Contents 1. About this guide 5
2. Things you need to familiarise with 7
2.1 Speedometer and Tachometer 7
2.2 Foot controls 7
2.3 Gears and gear positions 8
2.4 Gears, power and speeds 9
3. The fun part – Driving 10
3.1 Stopping the car 10
3.2 Moving the car from stationary position 10
3.2.1 Exercise-1: Finding friction point and downhill start 11
3.2.2 Exercise-2: Flat road start 14
3.2.3 Exercise-3: Gentle Hill Start 15
3.2.4 Exercise-4: Hill Start 18
3.3 Exciting time - Changing gears 20
3.3.1 Up shifting gears to build up the speed 20
3.3.2 Downshifting gears for slowing down 21
4. Negotiating intersections 22
4.1 Turning at corners 22
4.2 Approaching Give Way intersections 22
4.3 Approaching Stop intersections: 23
4.4 Approaching Roundabouts: 23
4.5 Approaching red traffic lights 23
5. Initial drives in traffic 24
6. Do’s and Don’ts 25
6.1 Don’ts: 25
6.2 Do’s: 26
7. Quick guide for basic exercises 27
7.1 Exercise-1: Finding friction point & downhill start 27
7.2 Exercise-2: Flat road start 27
7.3 Exercise-3: Gentle hill start 27
7.4 Exercise-4: Hill start 27
Learn to drive manual cars for dummies 5 COPYRIGHT © 2020 Licence Ready Pty Ltd
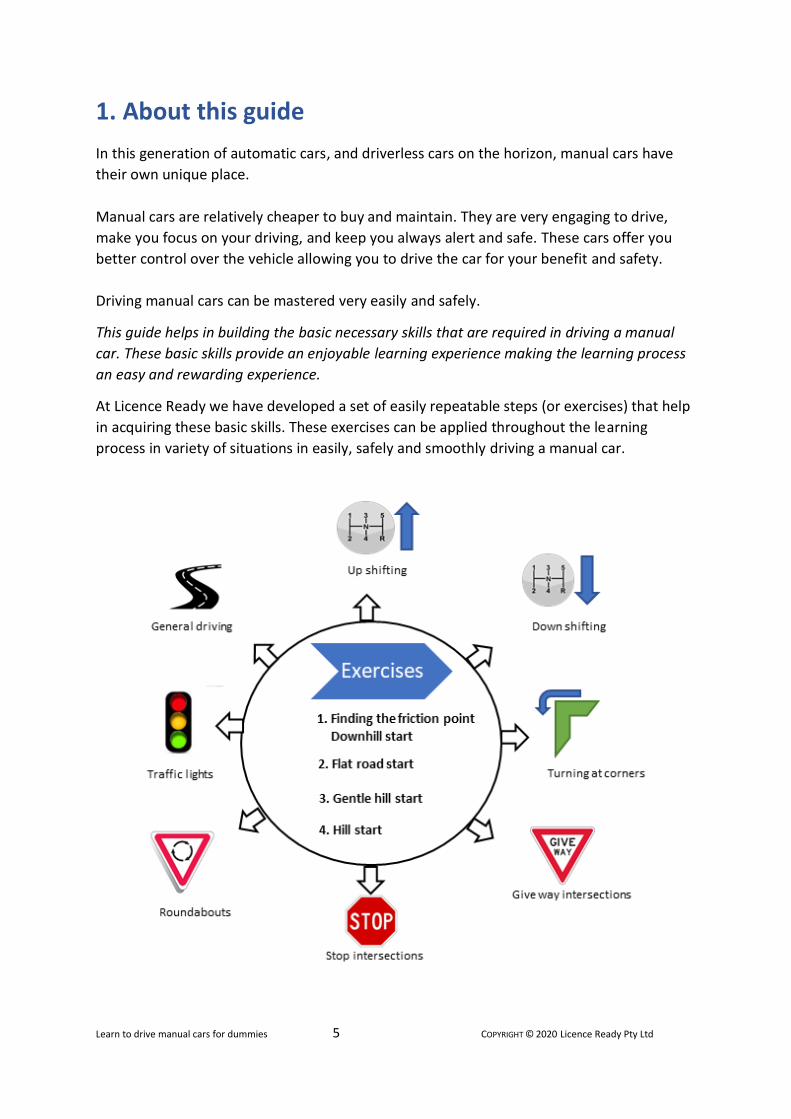
1. About this guide
In this generation of automatic cars, and driverless cars on the horizon, manual cars have
their own unique place.
Manual cars are relatively cheaper to buy and maintain. They are very engaging to drive,
make you focus on your driving, and keep you always alert and safe. These cars offer you
better control over the vehicle allowing you to drive the car for your benefit and safety.
Driving manual cars can be mastered very easily and safely.
This guide helps in building the basic necessary skills that are required in driving a manual
car. These basic skills provide an enjoyable learning experience making the learning process
an easy and rewarding experience.
At Licence Ready we have developed a set of easily repeatable steps (or exercises) that help
in acquiring these basic skills. These exercises can be applied throughout the learning
process in variety of situations in easily, safely and smoothly driving a manual car.
Learn to drive manual cars for dummies 6 COPYRIGHT © 2020 Licence Ready Pty Ltd
Please note that the traffic rules are not discussed in this guide, to be able to focus on the
manoeuvring aspects of a manual car.
Once reasonable competency is achieved in these basic manoeuvring skills, the rest of
learning to drive a manual car (such as traffic rules, driving test ready, solo ready and
behavioural aspects) may continue.
This guide provides an insight into how easily and safely driving the manual car can be
mastered.
You may refer to this guide for a better understanding of how the gears, clutch, brakes and
accelerator may be used in different situations in easily and safely driving a manual car.
This guide may be used as a learning resource prior to the driving lesson with professional
manual driving instructor and as a reference guide for the supervisors to maintain learner’s
continuity of learning in between the professional manual car driving lessons.
This guide may also be used by learner(s) and their supervisors in helping the learners build
their manual car driving kills.
NOTE: In this guide, a lot of technical details have been intentionally bypassed to make the
learning process easy.
Learn to drive manual cars for dummies 7 COPYRIGHT © 2020 Licence Ready Pty Ltd
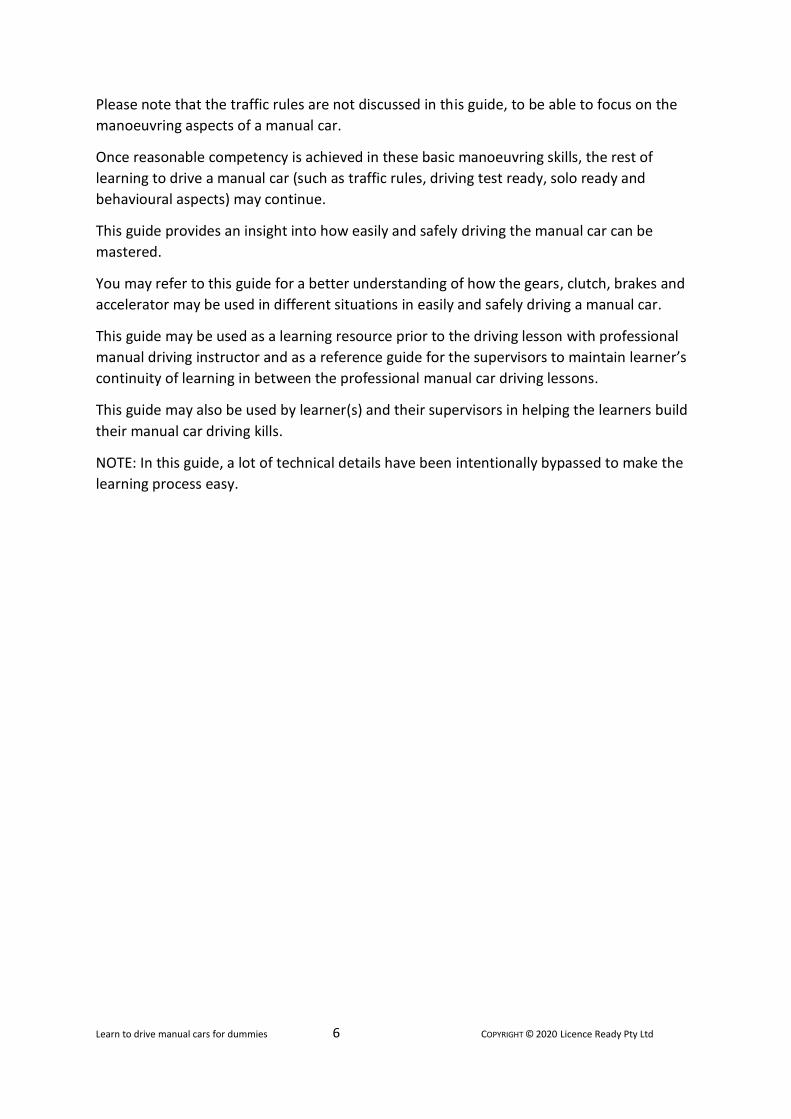
2. Things you need to familiarise with 2.1 Speedometer and Tachometer
Picture of speedometer (left) and Tachometer (right).
Tachometer shows how hard the engine is working in terms of thousand revolutions per
minute. 2,000 revolution per minute is an ideal workload that the engine is expected to run
at.
The speedometer shows the speed at which you are driving.
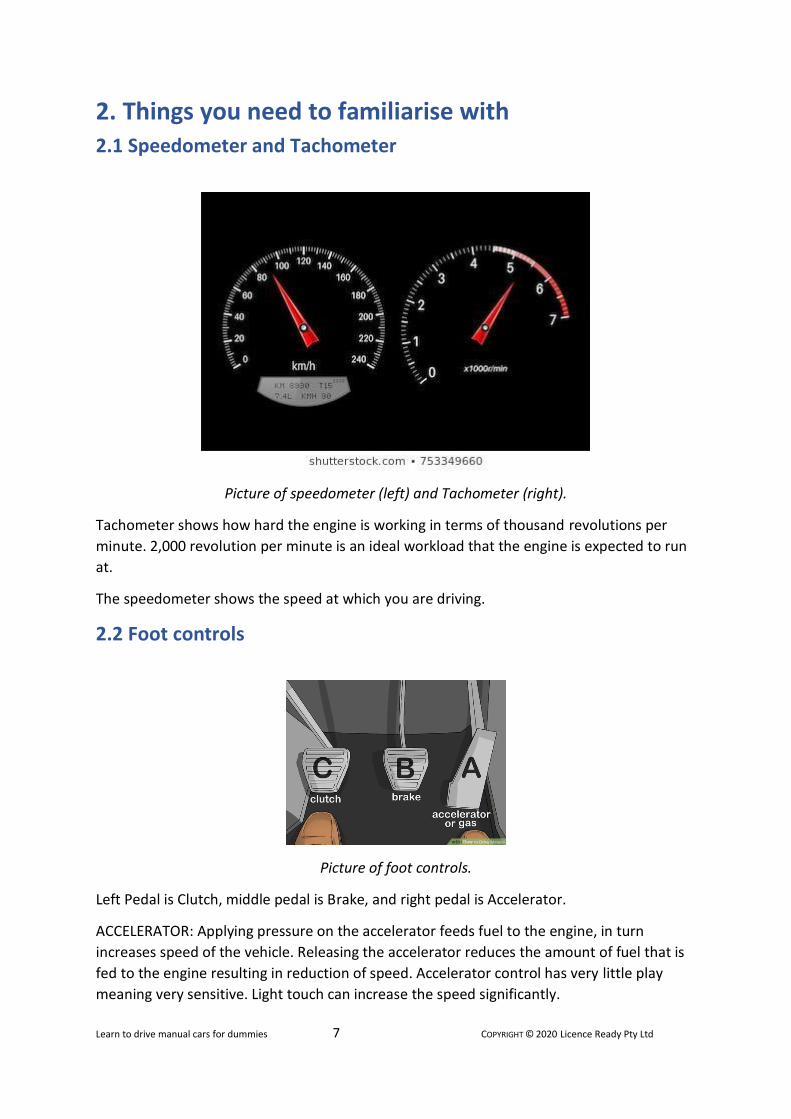
2.2 Foot controls
Picture of foot controls.
Left Pedal is Clutch, middle pedal is Brake, and right pedal is Accelerator.
ACCELERATOR: Applying pressure on the accelerator feeds fuel to the engine, in turn
increases speed of the vehicle. Releasing the accelerator reduces the amount of fuel that is
fed to the engine resulting in reduction of speed. Accelerator control has very little play
meaning very sensitive. Light touch can increase the speed significantly.
Learn to drive manual cars for dummies 8 COPYRIGHT © 2020 Licence Ready Pty Ltd
BRAKE: Applying pressure on the brake impedes movements of the wheels resulting in
reduction of the speed. In the modern cars, the braking mechanism is power assisted.
Meaning slight touch can exert significant pressure on the wheels resulting in reduction in
the speed.
CLUTCH: The clutch helps in changing the gears. When the engine is switched-off, gears can
be changed without the use of clutch. But when the engine is running, the clutch needs to
be used for changing the gears.
When the clutch is pressed to the floor, the engine is detached from the wheels allowing the
gear to be changed.
After the gear is changed, always release the clutch gradually to engage the gear to turn the
wheels.
The clutch has a lot of play (compared to the accelerator) between the floor position and
the top position there is a point called friction point often called biting point.
The friction point is the position of the clutch pedal where the engine begins to engage with
the gear box then turning the wheels to move the vehicle.
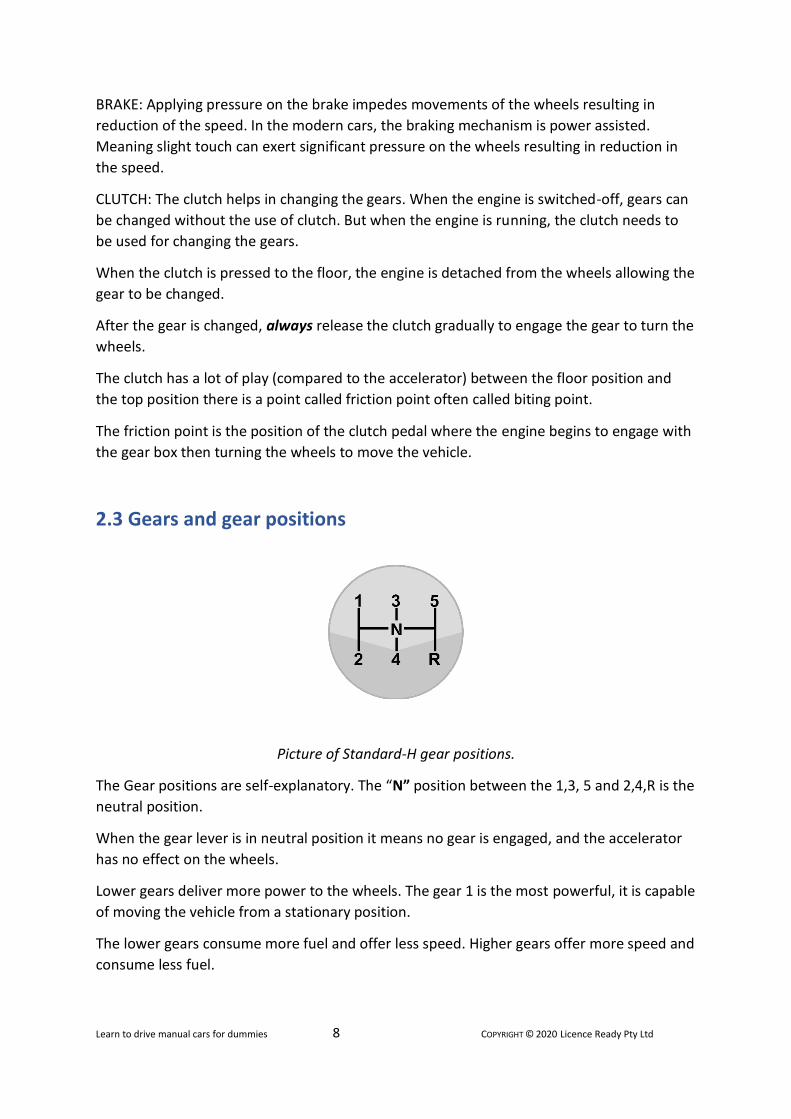
2.3 Gears and gear positions
Picture of Standard-H gear positions.
The Gear positions are self-explanatory. The “N” position between the 1,3, 5 and 2,4,R is the
neutral position.
When the gear lever is in neutral position it means no gear is engaged, and the accelerator
has no effect on the wheels.
Lower gears deliver more power to the wheels. The gear 1 is the most powerful, it is capable
of moving the vehicle from a stationary position.
The lower gears consume more fuel and offer less speed. Higher gears offer more speed and
consume less fuel.
Learn to drive manual cars for dummies 9 COPYRIGHT © 2020 Licence Ready Pty Ltd
As the lower gears can deliver more power to the wheels they get the engine to work
harder.
For example, to travel at 40 KMPH in gear 1, the engine works a lot harder and consumes
more petrol whereas to travel at 40 KMPH speed in gear 4, engine works a lot less and
consumes significantly lesser fuel.
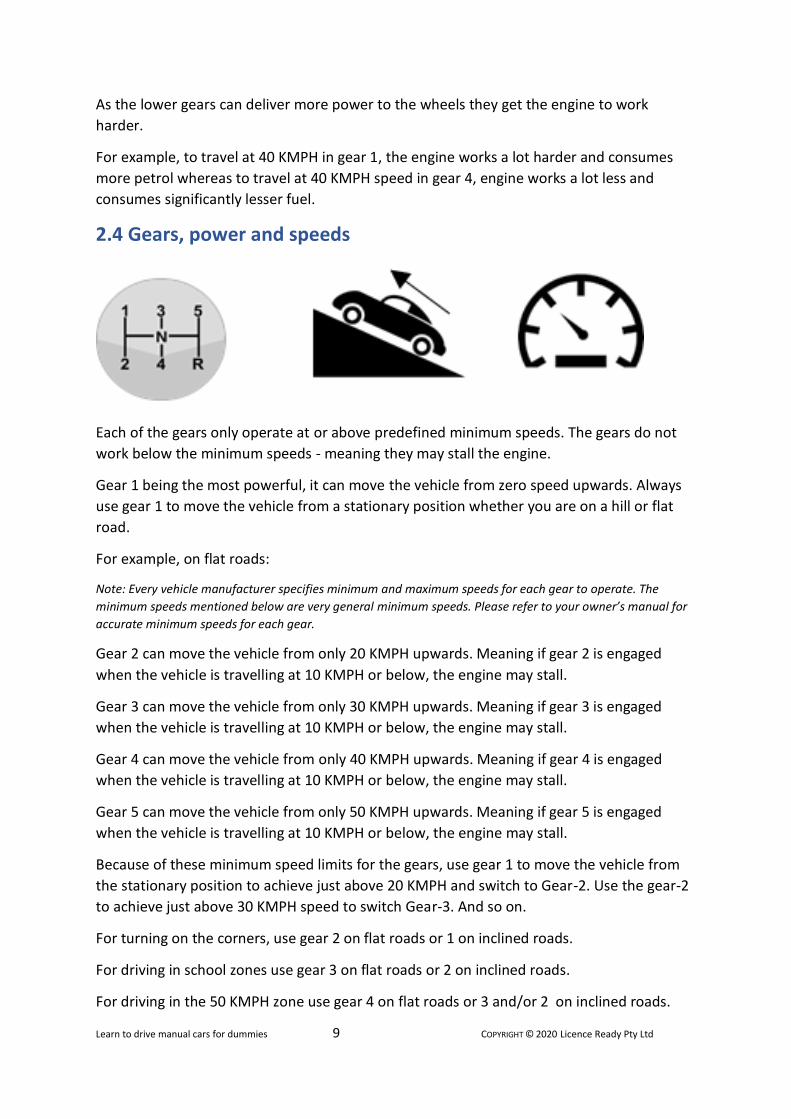
2.4 Gears, power and speeds
Each of the gears only operate at or above predefined minimum speeds. The gears do not
work below the minimum speeds - meaning they may stall the engine.
Gear 1 being the most powerful, it can move the vehicle from zero speed upwards. Always
use gear 1 to move the vehicle from a stationary position whether you are on a hill or flat
road.
For example, on flat roads:
Note: Every vehicle manufacturer specifies minimum and maximum speeds for each gear to operate. The
minimum speeds mentioned below are very general minimum speeds. Please refer to your owner’s manual for
accurate minimum speeds for each gear.
Gear 2 can move the vehicle from only 20 KMPH upwards. Meaning if gear 2 is engaged
when the vehicle is travelling at 10 KMPH or below, the engine may stall.
Gear 3 can move the vehicle from only 30 KMPH upwards. Meaning if gear 3 is engaged
when the vehicle is travelling at 10 KMPH or below, the engine may stall.
Gear 4 can move the vehicle from only 40 KMPH upwards. Meaning if gear 4 is engaged
when the vehicle is travelling at 10 KMPH or below, the engine may stall.
Gear 5 can move the vehicle from only 50 KMPH upwards. Meaning if gear 5 is engaged
when the vehicle is travelling at 10 KMPH or below, the engine may stall.
Because of these minimum speed limits for the gears, use gear 1 to move the vehicle from
the stationary position to achieve just above 20 KMPH and switch to Gear-2. Use the gear-2
to achieve just above 30 KMPH speed to switch Gear-3. And so on.
For turning on the corners, use gear 2 on flat roads or 1 on inclined roads.
For driving in school zones use gear 3 on flat roads or 2 on inclined roads.
For driving in the 50 KMPH zone use gear 4 on flat roads or 3 and/or 2 on inclined roads.
Learn to drive manual cars for dummies 10 COPYRIGHT © 2020 Licence Ready Pty Ltd
For driving in the 60 KMPH zone use gear 4 on flat roads or 3 on inclined roads.
For driving in the speed zones above 70 KMPH you may use gear 5 or lower gears on
inclined roads.
3. The fun part – Driving
3.1 Stopping the car
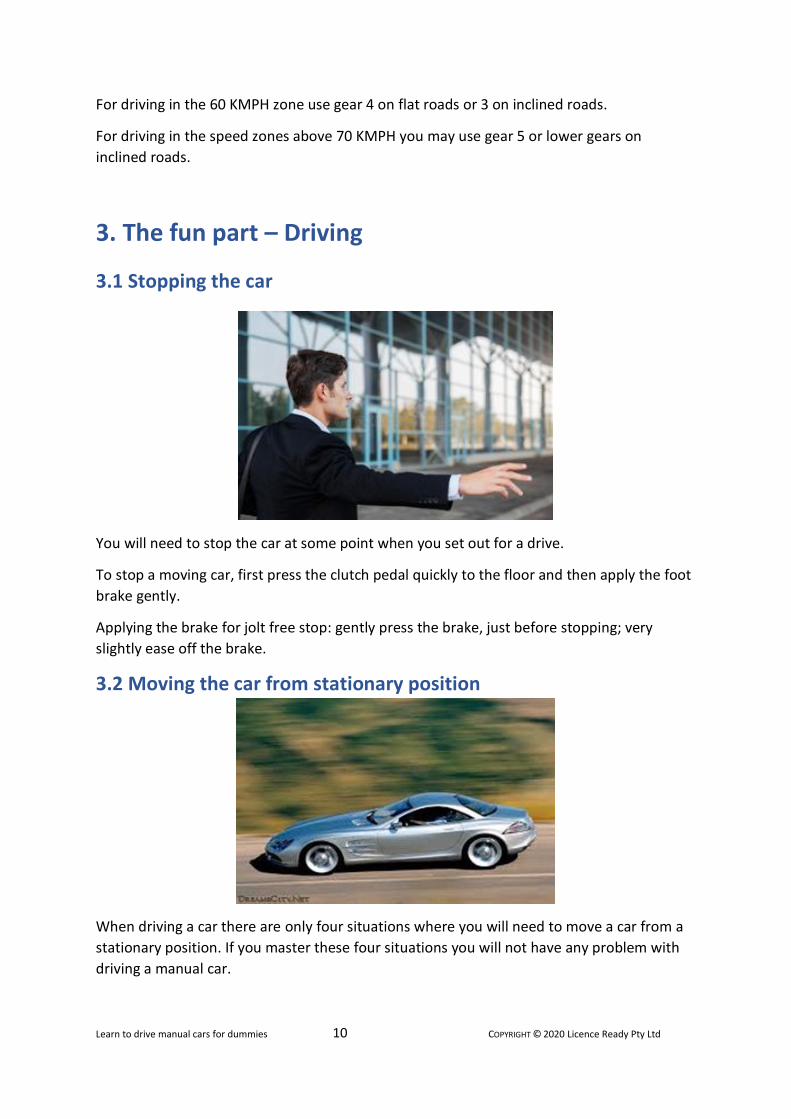
You will need to stop the car at some point when you set out for a drive.
To stop a moving car, first press the clutch pedal quickly to the floor and then apply the foot
brake gently.
Applying the brake for jolt free stop: gently press the brake, just before stopping; very
slightly ease off the brake.
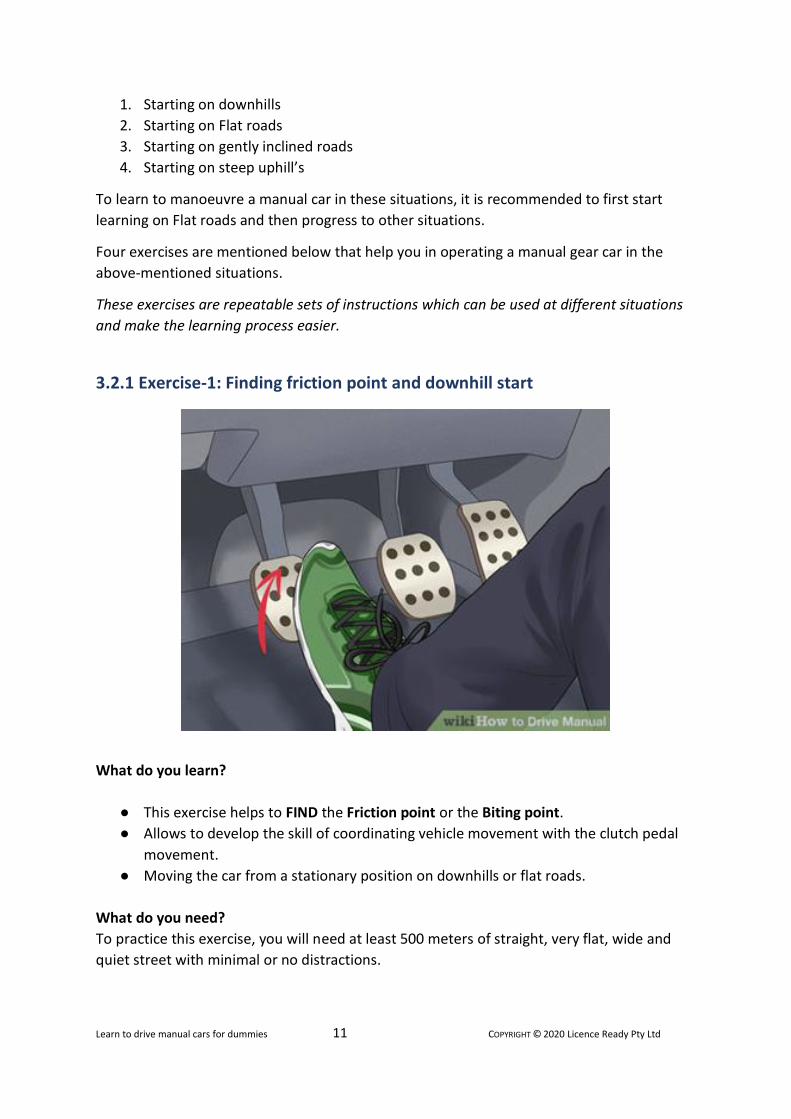
3.2 Moving the car from stationary position
When driving a car there are only four situations where you will need to move a car from a
stationary position. If you master these four situations you will not have any problem with
driving a manual car.
Learn to drive manual cars for dummies 11 COPYRIGHT © 2020 Licence Ready Pty Ltd
1. Starting on downhills
2. Starting on Flat roads
3. Starting on gently inclined roads
4. Starting on steep uphill’s
To learn to manoeuvre a manual car in these situations, it is recommended to first start
learning on Flat roads and then progress to other situations.
Four exercises are mentioned below that help you in operating a manual gear car in the
above-mentioned situations.
These exercises are repeatable sets of instructions which can be used at different situations
and make the learning process easier.
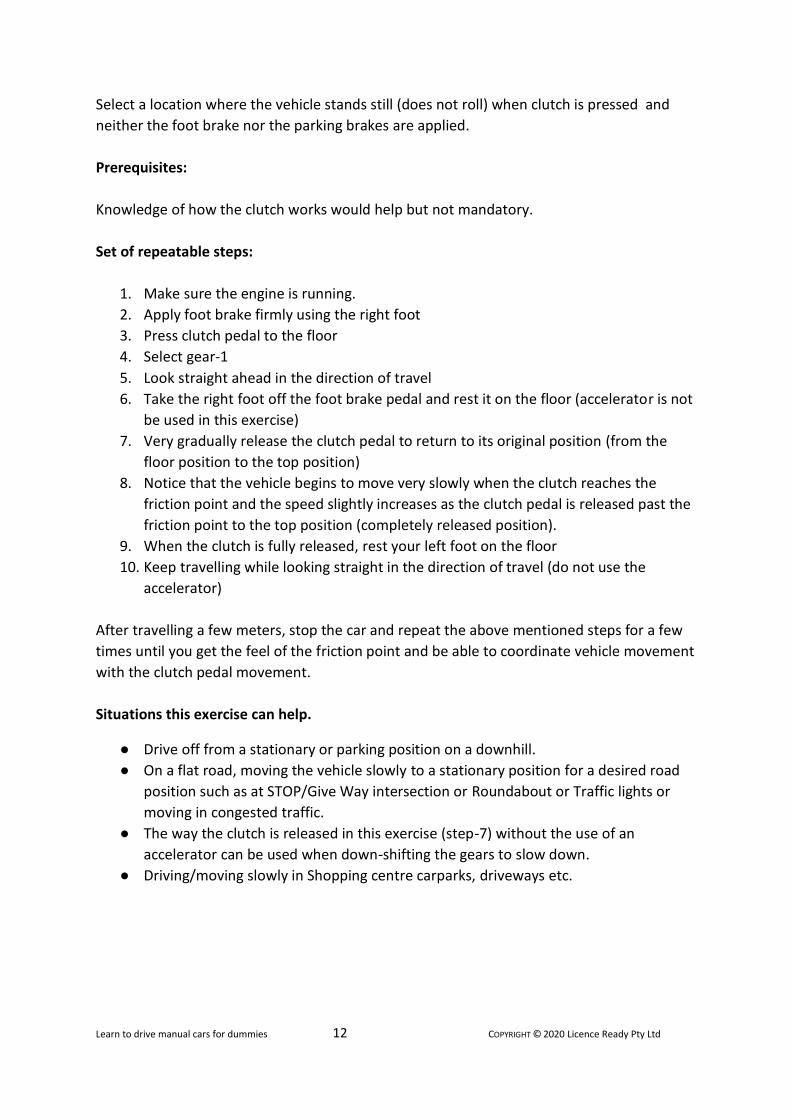
3.2.1 Exercise-1: Finding friction point and downhill start
What do you learn?
● This exercise helps to FIND the Friction point or the Biting point.
● Allows to develop the skill of coordinating vehicle movement with the clutch pedal
movement.
● Moving the car from a stationary position on downhills or flat roads.
What do you need?
To practice this exercise, you will need at least 500 meters of straight, very flat, wide and
quiet street with minimal or no distractions.
Learn to drive manual cars for dummies 12 COPYRIGHT © 2020 Licence Ready Pty Ltd
Select a location where the vehicle stands still (does not roll) when clutch is pressed and
neither the foot brake nor the parking brakes are applied.
Prerequisites:
Knowledge of how the clutch works would help but not mandatory.
Set of repeatable steps:
1. Make sure the engine is running.
2. Apply foot brake firmly using the right foot
3. Press clutch pedal to the floor
4. Select gear-1
5. Look straight ahead in the direction of travel
6. Take the right foot off the foot brake pedal and rest it on the floor (accelerator is not
be used in this exercise)
7. Very gradually release the clutch pedal to return to its original position (from the
floor position to the top position)
8. Notice that the vehicle begins to move very slowly when the clutch reaches the
friction point and the speed slightly increases as the clutch pedal is released past the
friction point to the top position (completely released position).
9. When the clutch is fully released, rest your left foot on the floor
10. Keep travelling while looking straight in the direction of travel (do not use the
accelerator)
After travelling a few meters, stop the car and repeat the above mentioned steps for a few
times until you get the feel of the friction point and be able to coordinate vehicle movement
with the clutch pedal movement.
Situations this exercise can help.
● Drive off from a stationary or parking position on a downhill.
● On a flat road, moving the vehicle slowly to a stationary position for a desired road
position such as at STOP/Give Way intersection or Roundabout or Traffic lights or
moving in congested traffic.
● The way the clutch is released in this exercise (step-7) without the use of an
accelerator can be used when down-shifting the gears to slow down.
● Driving/moving slowly in Shopping centre carparks, driveways etc.

Learn to drive manual cars for dummies 13 COPYRIGHT © 2020 Licence Ready Pty Ltd
Common problems
Problem:
Releasing the clutch too quickly and stalling the engine.
Fix:
Make sure the clutch is released very gradually.
Problem:
Unable to release the clutch gradually, stalling the engine every time trying to release the
clutch.
Fix:
Try “heel on the floor” rather than “heel off the floor” technique.
Brace yourself with your heel to the floor and use the “toe” part of the foot to press /
release the clutch pedal making the foot moment from the ankle.
Problem:
Taking time to move the vehicle as the clutch needs to be released gradually.
.
Fix:
That is OK at this stage! You are learning to find out where the friction point is. Once the
friction point is identified then, over time you will be able to release the clutch quickly
straight to the friction point and from there release the clutch gradually to get the vehicle
moving quickly.
Problem:
Moving the vehicle is stressful requiring extreme concentration and focus.
Fix:
Yes, driving a vehicle requires concentration and focus, over the period people will get
better at concentrating and focusing and feel at ease. This is a part of learning.
Learn to drive manual cars for dummies 14 COPYRIGHT © 2020 Licence Ready Pty Ltd
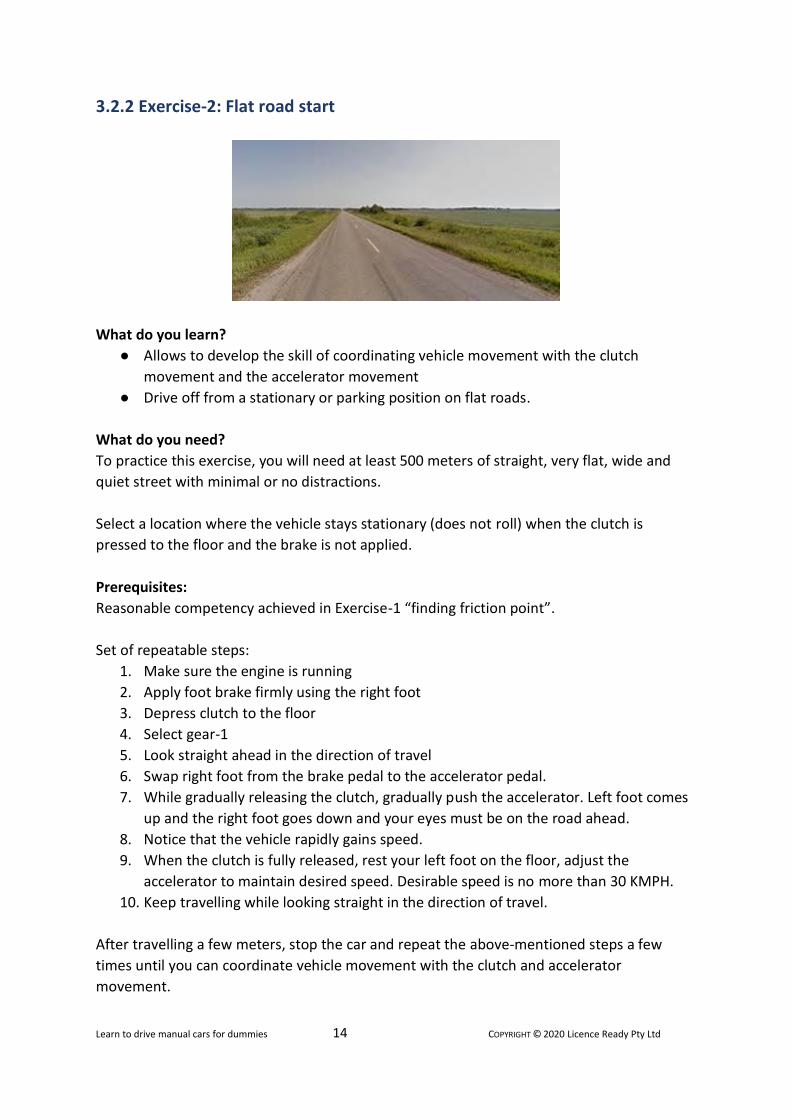
3.2.2 Exercise-2: Flat road start
What do you learn?
● Allows to develop the skill of coordinating vehicle movement with the clutch
movement and the accelerator movement
● Drive off from a stationary or parking position on flat roads.
What do you need?
To practice this exercise, you will need at least 500 meters of straight, very flat, wide and
quiet street with minimal or no distractions.
Select a location where the vehicle stays stationary (does not roll) when the clutch is
pressed to the floor and the brake is not applied.
Prerequisites:
Reasonable competency achieved in Exercise-1 “finding friction point”.
Set of repeatable steps:
1. Make sure the engine is running
2. Apply foot brake firmly using the right foot
3. Depress clutch to the floor
4. Select gear-1
5. Look straight ahead in the direction of travel
6. Swap right foot from the brake pedal to the accelerator pedal.
7. While gradually releasing the clutch, gradually push the accelerator. Left foot comes
up and the right foot goes down and your eyes must be on the road ahead.
8. Notice that the vehicle rapidly gains speed.
9. When the clutch is fully released, rest your left foot on the floor, adjust the
accelerator to maintain desired speed. Desirable speed is no more than 30 KMPH.
10. Keep travelling while looking straight in the direction of travel.
After travelling a few meters, stop the car and repeat the above-mentioned steps a few
times until you can coordinate vehicle movement with the clutch and accelerator
movement.
Learn to drive manual cars for dummies 15 COPYRIGHT © 2020 Licence Ready Pty Ltd
Other Situations this exercise can help:
● On flat roads, driving from a stationary position or parking position or at STOP/Give
Way intersection or Roundabout or Traffic lights.
● The way the clutch is released (step-7) while pressing the accelerator, can be used
when upshifting the gears to build up speed to a desired level.
Common problems:
Problem:
Releasing the clutch too quickly, stalling the engine.
Fix:
Repeat Exercise-1 “finding friction point” and then try to perform this exercise-2 “flat road
start”.
The reason people stall at this stage is due to the introduction of additional coordination
with the accelerator.
This problem also indicates the lack of FEEL of the friction point.
Problem:
Accelerating too fast.
Fix:
Initially the first few times this problem may occur as the accelerator is being used for the
first time. As the accelerator has relatively smaller play compared to the clutch, the
accelerator pedal needs to be pressed very gently to gain required speed.
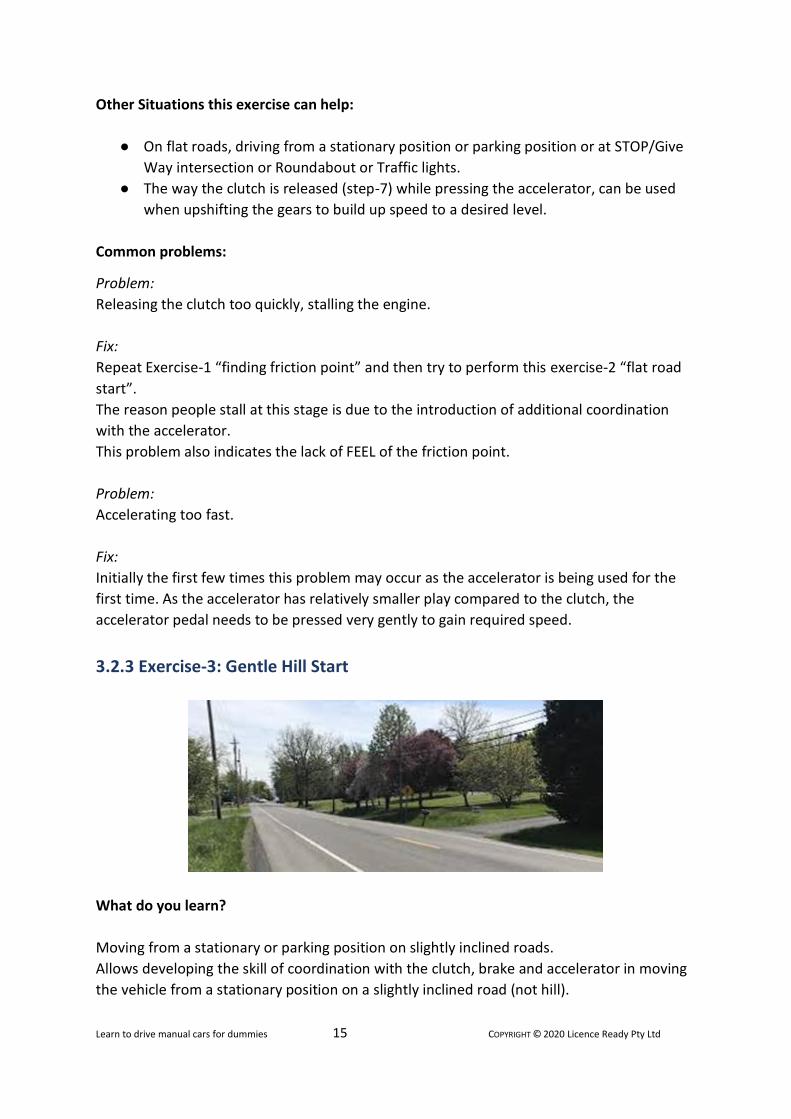
3.2.3 Exercise-3: Gentle Hill Start
What do you learn?
Moving from a stationary or parking position on slightly inclined roads.
Allows developing the skill of coordination with the clutch, brake and accelerator in moving
the vehicle from a stationary position on a slightly inclined road (not hill).
Learn to drive manual cars for dummies 16 COPYRIGHT © 2020 Licence Ready Pty Ltd
What do you need?
To practice this exercise, you will need a road which has flat sections and also has slightly
inclined sections on a wide and quiet street with minimal or no distractions.
Select a location where the vehicle slightly rolls back when the clutch is depressed to the
floor and the brake is not applied.
Prerequisites:
Reasonable competency achieved in exercise-1 “finding friction point” and exercise-2 “flat
road start”.
Set of repeatable steps:
1. Make sure the engine is running
2. Apply foot brake firmly
3. Press the clutch to the floor
4. Select gear-1
5. Look straight ahead in the direction of travel
6. While the foot brake is firmly applied, gradually release the clutch to the friction
point
7. Momentarily hold the clutch at the friction point (this will prevent the vehicle from
rolling back)
8. Swap the right foot (releasing the foot brake) to the accelerator
9. Apply gentle acceleration while gradually releasing the clutch from the friction point
as performed in Exercise-2 “flat road start”
10. Notice that the vehicle is moving initially slowly and then rapidly gaining the speed
11. When the clutch is fully released, rest your left foot on the floor, adjust the
accelerator to maintain desired speed. Desirable speed is no more than 30 KMPH
12. Keep travelling while looking straight in the direction of travel
After travelling a few meters, stop the car and repeat the above mentioned steps a few
times on slightly inclined roads and reasonably inclined roads (not hills) until you get the
vehicle moving slowly and gradually gaining desired speed and maintaining the speed at the
desired speed.
Situations this exercise can help.
On inclined roads, drive off from a stationary / parking position or at STOP/Give Way
intersection or Roundabout or Traffic lights or when crawling in congested traffic.
Learn to drive manual cars for dummies 17 COPYRIGHT © 2020 Licence Ready Pty Ltd
Common problems:
Problem:
Releasing the clutch too quickly stalling the engine.
Fix:
Repeat Exercise-1 “finding friction point” and Exercise-2 “flat road start” on flat sections of
the road and then try to perform this exercise-3 “gentle hill start” on an inclined section of
the road.
This problem indicates the lack of coordination skill in using clutch, brake and accelerator.
Problem:
The vehicle is rolling back before moving forward.
Fix:
Repeat Exercise-1 “finding friction point” and Exercise-2 “flat road start” on flat sections of
the road and then try to perform this exercise-3 “gentle hill start” on inclined sections of the
road.
This problem indicates the lack of FEEL of the friction point i.e. swapping the right foot to
the accelerator well before the clutch friction point is reached.
Learn to drive manual cars for dummies 18 COPYRIGHT © 2020 Licence Ready Pty Ltd
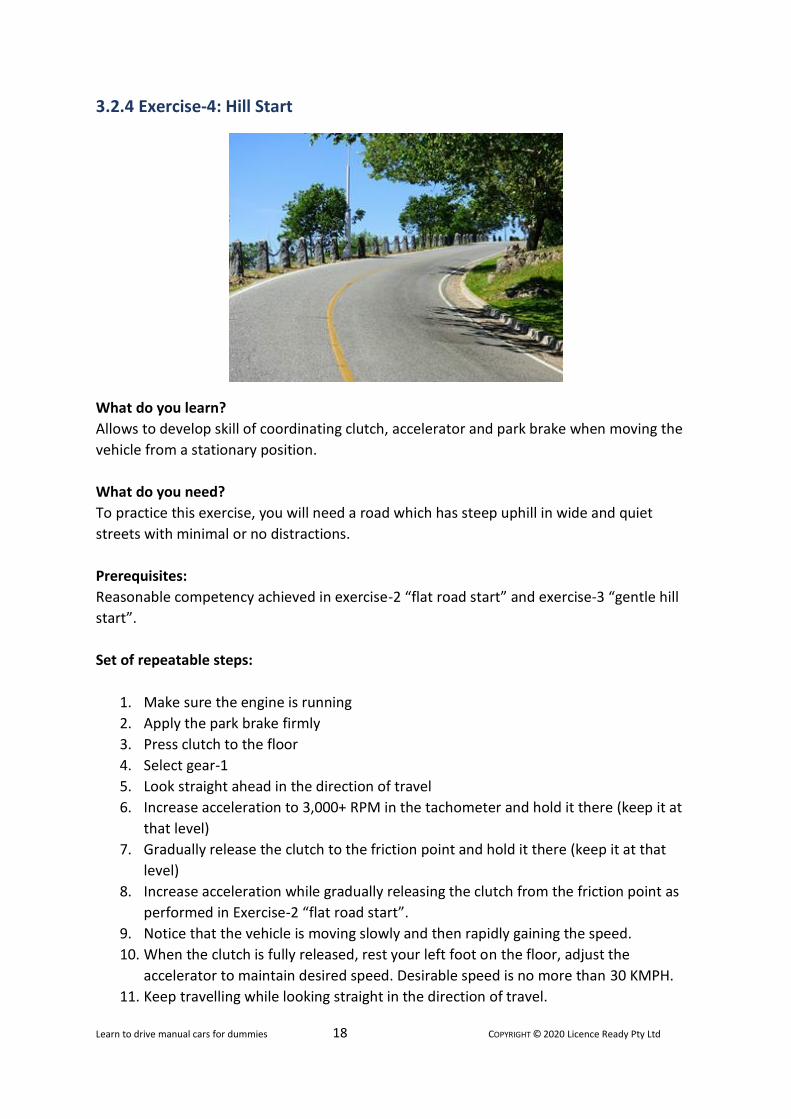
3.2.4 Exercise-4: Hill Start
What do you learn?
Allows to develop skill of coordinating clutch, accelerator and park brake when moving the
vehicle from a stationary position.
What do you need?
To practice this exercise, you will need a road which has steep uphill in wide and quiet
streets with minimal or no distractions.
Prerequisites:
Reasonable competency achieved in exercise-2 “flat road start” and exercise-3 “gentle hill
start”.
Set of repeatable steps:
1. Make sure the engine is running
2. Apply the park brake firmly
3. Press clutch to the floor
4. Select gear-1
5. Look straight ahead in the direction of travel
6. Increase acceleration to 3,000+ RPM in the tachometer and hold it there (keep it at
that level)
7. Gradually release the clutch to the friction point and hold it there (keep it at that
level)
8. Increase acceleration while gradually releasing the clutch from the friction point as
performed in Exercise-2 “flat road start”.
9. Notice that the vehicle is moving slowly and then rapidly gaining the speed.
10. When the clutch is fully released, rest your left foot on the floor, adjust the
accelerator to maintain desired speed. Desirable speed is no more than 30 KMPH.
11. Keep travelling while looking straight in the direction of travel.

Learn to drive manual cars for dummies 19 COPYRIGHT © 2020 Licence Ready Pty Ltd
After travelling a few meters, stop the car and repeat the above-mentioned steps a few
times on steep hills until you get the vehicle moving slowly and gradually gaining desired
speed and maintaining the speed at the desired speed.
Situations this exercise can help:
On hilly roads, drive off from a stationary / parking position or at STOP/Give Way
intersection or roundabout or Traffic lights.
Common problems:
Problem:
Releasing the clutch too quickly stalling the engine.
(While releasing the hand brake clutch was not released gradually)
Fix:
Repeat Exercise-3 “gentle hill start” on an inclined road and then try to perform this
exercise-4“hill start” on a hilly road.
This problem indicates the lack of coordination skill in using clutch, park brake and
accelerator.
Problem:
Stalling the engine due to lack of acceleration while releasing the clutch appropriately and
releasing park brake appropriately but failing to increase acceleration.
Fix:
Remember, when moving the car on hills from stationary position, significant acceleration is
required.
Repeat Exercise-3 “gentle hill start” on an inclined road and then try to perform this
exercise-4“hill start” on a hilly road.
This problem indicates the lack of coordination skill in using clutch, park brake and
accelerator. More focus on increasing the acceleration as uphill requires.
Problem:
The vehicle is rolling back before moving forward.
Park brake was released before the clutch was brought to the friction point.
Fix:
Repeat Exercise-3 “gentle hill start” on an inclined road and then try to perform this
exercise-4 “hill start” on a hilly road.
Learn to drive manual cars for dummies 20 COPYRIGHT © 2020 Licence Ready Pty Ltd
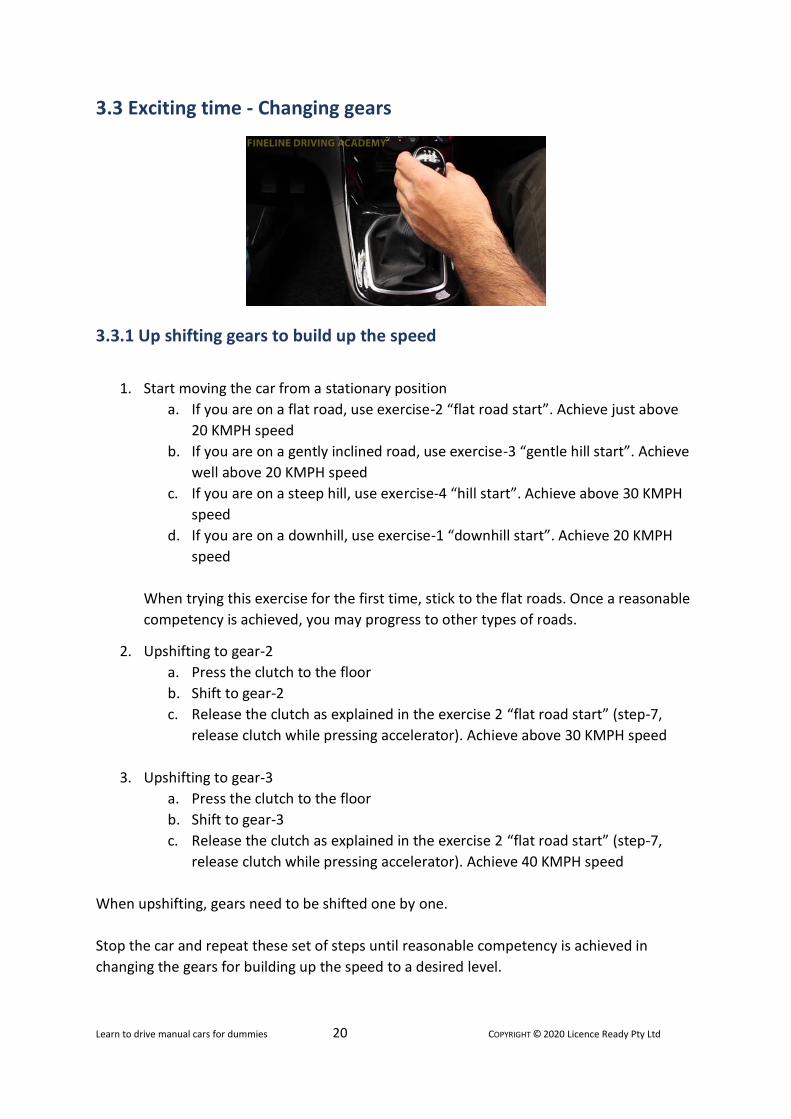
3.3 Exciting time - Changing gears
3.3.1 Up shifting gears to build up the speed
1. Start moving the car from a stationary position
a. If you are on a flat road, use exercise-2 “flat road start”. Achieve just above
20 KMPH speed
b. If you are on a gently inclined road, use exercise-3 “gentle hill start”. Achieve
well above 20 KMPH speed
c. If you are on a steep hill, use exercise-4 “hill start”. Achieve above 30 KMPH
speed
d. If you are on a downhill, use exercise-1 “downhill start”. Achieve 20 KMPH
speed
When trying this exercise for the first time, stick to the flat roads. Once a reasonable
competency is achieved, you may progress to other types of roads.
2. Upshifting to gear-2
a. Press the clutch to the floor
b. Shift to gear-2
c. Release the clutch as explained in the exercise 2 “flat road start” (step-7,
release clutch while pressing accelerator). Achieve above 30 KMPH speed
3. Upshifting to gear-3
a. Press the clutch to the floor
b. Shift to gear-3
c. Release the clutch as explained in the exercise 2 “flat road start” (step-7,
release clutch while pressing accelerator). Achieve 40 KMPH speed
When upshifting, gears need to be shifted one by one.
Stop the car and repeat these set of steps until reasonable competency is achieved in
changing the gears for building up the speed to a desired level.
Learn to drive manual cars for dummies 21 COPYRIGHT © 2020 Licence Ready Pty Ltd
3.3.2 Downshifting gears for slowing down 1. Release the accelerator (right foot off the accelerator)
2. Press the clutch to the floor
3. Downshift the gear
4. On flat roads and downhills, release the clutch as explained in the exercise 1
“downhill start” (step-7, release clutch without using the accelerator)
5. When going uphill, release the clutch as explained in the exercise 2 “flat road start”
(step-7, release clutch while pressing accelerator)
6. The speed will drop
7. Using the accelerator, maintain the speed at a desired level.
When downshifting gears, you may skip the gears (for example from 4 directly to 2). In such
situations apply slight foot brake (to reduce speed) simultaneously while depressing the
clutch.
Common Problems:
Problem:
When downshifting to Gear 1, you may experience bunny hops.
Fix:
Two things contribute to the bunny hops.
1. Releasing the clutch relatively quickly. If this is the case, release the clutch very gradually.
2. Your speed would have been way above 10 KMPH. If that is the case reduce speed while
downshifting.
3. You may have to perform abovementioned 1 and 2 steps i.e. reduce the speed as well as
release the clutch very gradually.
Learn to drive manual cars for dummies 22 COPYRIGHT © 2020 Licence Ready Pty Ltd
4. Negotiating intersections
4.1 Turning at corners
For taking turns at corners, ideally the car needs to be at 15 to 20 KMPH speed. Speed more
than 20 KMPH may result in an uncomfortable turn or breach of traffic rules or even a crash.
1. Well before you reach the corner, down shift to gear-2 on flat roads (gear-1 on
inclined roads)
2. Rest your left foot on the floor (Clutch is not to be used).
3. Use brakes and the accelerator for controlling the speed.
4. After the turn, build up the speed by upshifting the gears as required.
4.2 Approaching Give Way intersections
At a Give-Way intersections you must observe unconditional slowdown and must not stop if
there is no traffic or there is traffic but no chance of crash.
For this reason, suggested gear for approaching the give-way intersection is Gear-1 as it
gives the ability to slow down or stop if necessary or slowdown to roll and take-off.
Learn to drive manual cars for dummies 23 COPYRIGHT © 2020 Licence Ready Pty Ltd
4.3 Approaching Stop intersections:
At Stop intersections you must observe unconditional STOP and leave when it is safe to do
so.
For this reason, suggested gear for approaching the STOP line is Gear-2 on flat roads and
Gear-1 on inclined roads.
4.4 Approaching Roundabouts:
On flat roads most of roundabouts can be negotiated in Gear-2 but some roundabouts are
so small that you may need to use Gear-1.
When you have decided to use gear-2, be prepared to shift to Gear-1 to handle the hazards
if present.
Roundabouts on inclined roads require gear-1.
4.5 Approaching red traffic lights
When you are on higher gears and approaching a red traffic light, downshift gears one by
one until you get to gear-1 or 2 by the time you get the stop line to stop.
Every time you downshift a gear you must release the clutch completely before
downshifting again.
As you approach the RED traffic light by gradually downshifting the gears, if the situation
improves by the light turning GREEN, you may take off in the gear you are in.
Learn to drive manual cars for dummies 24 COPYRIGHT © 2020 Licence Ready Pty Ltd
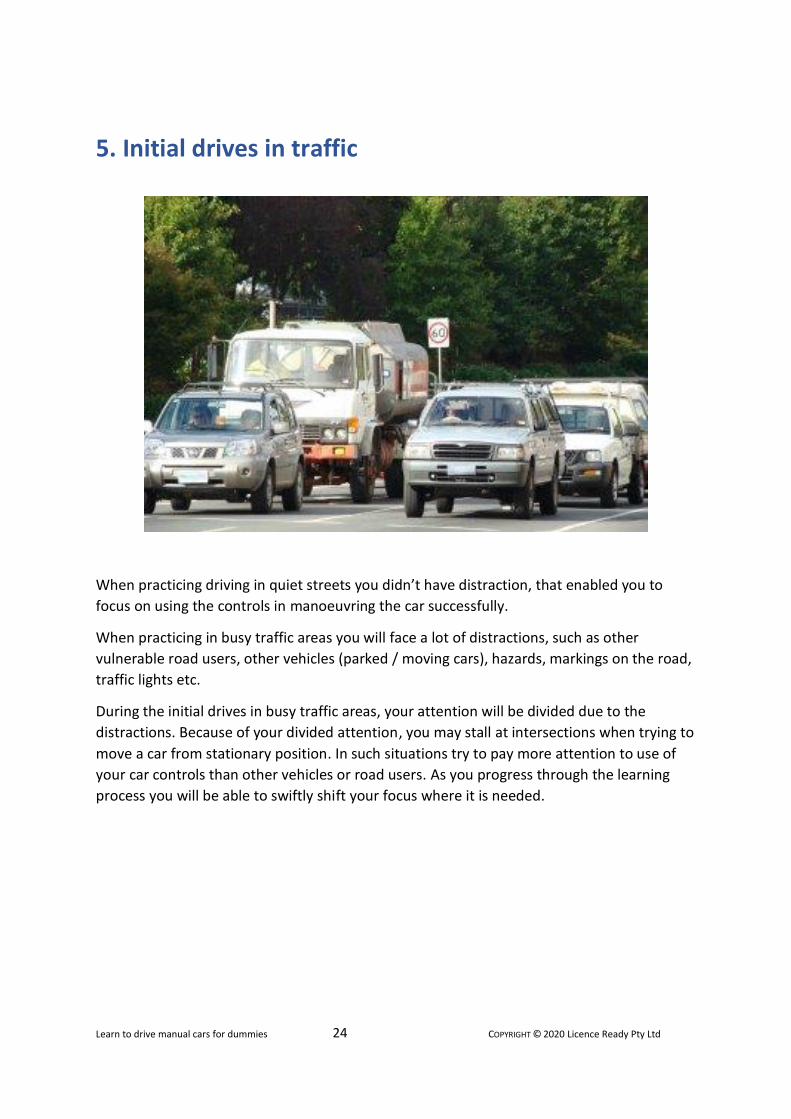
5. Initial drives in traffic
When practicing driving in quiet streets you didn’t have distraction, that enabled you to
focus on using the controls in manoeuvring the car successfully.
When practicing in busy traffic areas you will face a lot of distractions, such as other
vulnerable road users, other vehicles (parked / moving cars), hazards, markings on the road,
traffic lights etc.
During the initial drives in busy traffic areas, your attention will be divided due to the
distractions. Because of your divided attention, you may stall at intersections when trying to
move a car from stationary position. In such situations try to pay more attention to use of
your car controls than other vehicles or road users. As you progress through the learning
process you will be able to swiftly shift your focus where it is needed.
Learn to drive manual cars for dummies 25 COPYRIGHT © 2020 Licence Ready Pty Ltd
6. Do’s and Don’ts
GOLDEN RULE: When driving a manual car, the driver must always be in complete control
of the car.
When the clutch is pressed or in neutral gear, the engine has no effect on the wheels, hence
the driver will NOT be in complete control of the car.
6.1 Don’ts:
6.1.1 Clutch / neutral coasting
Sometimes people tend to use clutch / neutral coasting when approaching corners or
intersection or when approaching a red traffic light. In these situations, the driver will not be
in complete control of the car putting everybody at risk. Therefore do not coast on neutral /
clutch.
6.1.2 Neutral gear for parking position
Never leave the car in a parking position in neutral gear. In neutral position the car may roll.
6.1.3 Over revving
When changing gears ideally change the gears when the Tachometer is at or just above
2,000 RPM.
Refrain from unnecessary over revving as it does not offer any advantage.
When learning to drive people tend to over-rev (i.e. way above 2,000 RPM), this is not
recommended practice. Try making a habit to change the gear around 2,000 RPM.
6.1.4 Driving with one hand on the gear lever
After changing the gear, people tend to continue to drive with one hand on the gear lever
and another on the steering wheel.
To be in control of the car, always drive with both hands on the steering wheel except when
using other controls.
Learn to drive manual cars for dummies 26 COPYRIGHT © 2020 Licence Ready Pty Ltd
6.2 Do’s:
6.2.1 Appropriate gear
When driving a manual car you must always be in appropriate gear, to be able to be in
complete control of the car.
6.2.2 Gear positions for leaving the car in parking position
When leaving the car in a parking position, leave it in Gear-1 on flat roads or down hills and
in Reverse-gear on uphill. Of course, the park brake is to be applied when in the parking
position.
6.2.3 Clutch use for slow speed manoeuvring
When performing slow speed manoeuvres such as three-point turn or reverse parallel
parking or parallel parking, hold the clutch at friction point (i.e. hovering the clutch around
the friction point) to control the speed as fully released clutch might yield uncontrollable
speed for the conditions.
6.2.4 Using neutral when standing
When standing at red traffic lights or in congested traffic situations, you may consider using
neutral gear position and release the clutch to give your legs a bit of rest. Shifting to neutral
gear position is to be performed only when the car is completely stationary.
Learn to drive manual cars for dummies 27 COPYRIGHT © 2020 Licence Ready Pty Ltd
7. Quick guide for basic exercises
7.1 Exercise-1: Finding friction point & downhill start Select a flat road to practice.
1. Depress clutch to the floor
2. Select gear-1
3. Very gradually keep releasing the clutch all the way to the top position
4. The vehicle begins to move very slowly when the clutch reaches the friction
7.2 Exercise-2: Flat road start Select a flat road to practice.
1. Depress clutch to the floor
2. Select gear-1
3. While gradually releasing the clutch, gradually depress the accelerator. Left foot
comes up and the right foot goes down
4. The vehicle rapidly gains the speed
7.3 Exercise-3: Gentle hill start Select slightly inclined road to practice.
1. Depress the clutch to the floor
2. Select gear-1
3. While the foot brake is firmly applied, gradually release the clutch to the friction
point
4. Momentarily hold the clutch at the friction point. This will prevent the vehicle from
rolling back
5. Apply gentle acceleration while gradually releasing the clutch from the friction point
6. The vehicle moves slowly and then rapidly gains the speed
7.4 Exercise-4: Hill start Select a slight hill to practice.
1. Park brake on
2. Depress the clutch to the floor
3. Select gear-1
4. Increase the acceleration to 3,000+ RPM (in the tachometer) and hold it there
5. Gradually release the clutch to the friction point and hold it there
6. Increase acceleration while gradually releasing the clutch from the friction point
7. The vehicle moves slowly and gradually gains speed
Learn to drive manual cars for dummies 28 COPYRIGHT © 2020 Licence Ready Pty Ltd
Feel calm and in control
Drive safely
Learn more
Learn fast
Learn right

Learn to drive manual cars for dummies 29 COPYRIGHT © 2020 Licence Ready Pty Ltd