how to align individual scans - tutorials
TRANSCRIPT
TUTORIALSTUTORIALS
Transformation calculator
How to align individual scans
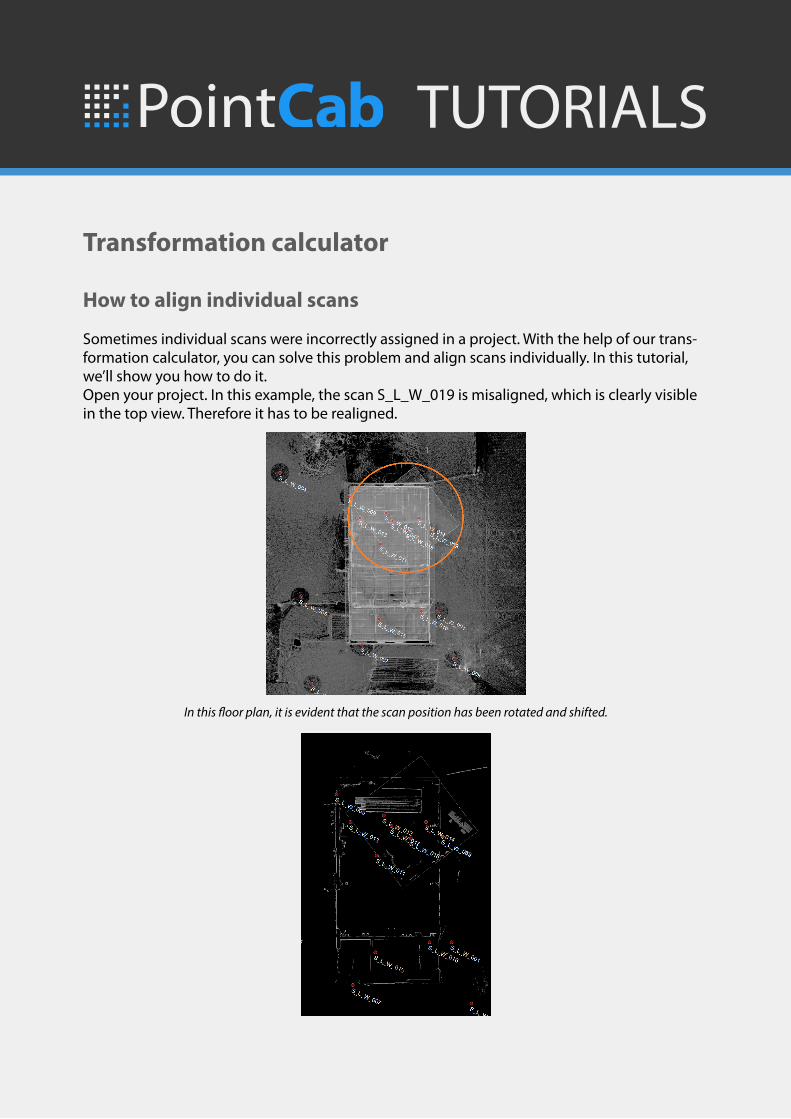
Sometimes individual scans were incorrectly assigned in a project. With the help of our trans-formation calculator, you can solve this problem and align scans individually. In this tutorial, we’ll show you how to do it. Open your project. In this example, the scan S_L_W_019 is misaligned, which is clearly visible in the top view. Therefore it has to be realigned.
In this floor plan, it is evident that the scan position has been rotated and shifted.
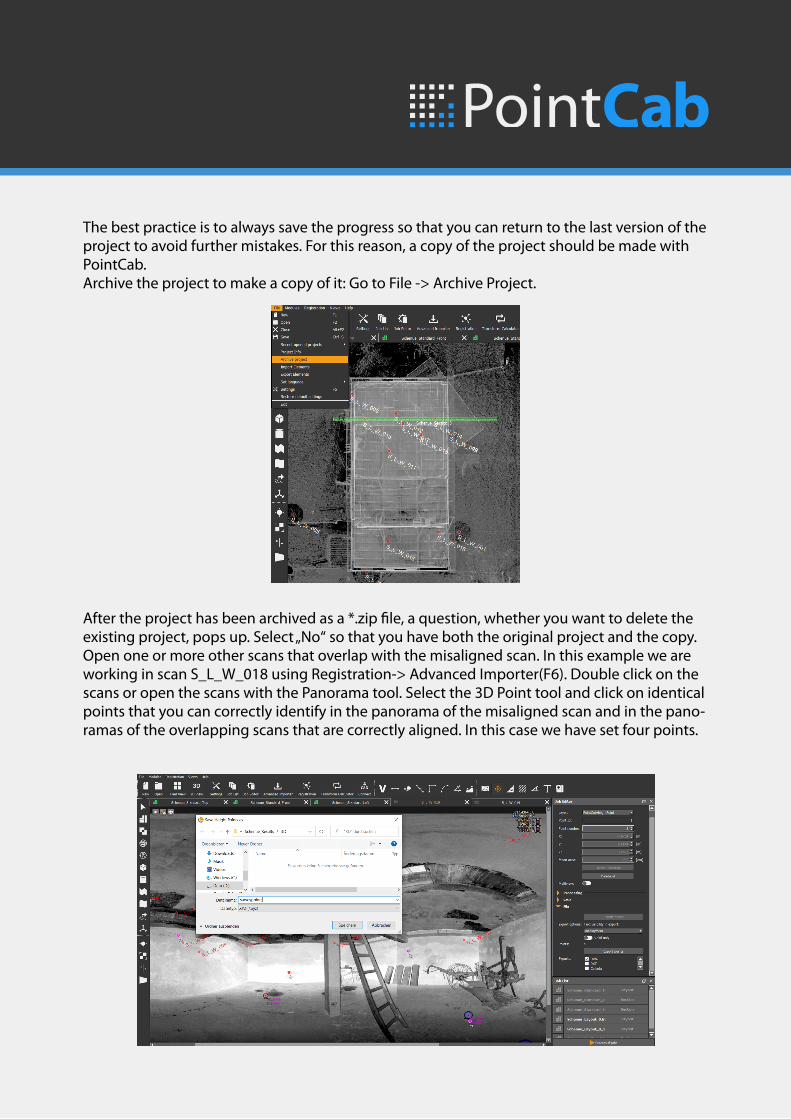
The best practice is to always save the progress so that you can return to the last version of the project to avoid further mistakes. For this reason, a copy of the project should be made with PointCab.Archive the project to make a copy of it: Go to File -> Archive Project.
After the project has been archived as a *.zip file, a question, whether you want to delete the existing project, pops up. Select „No“ so that you have both the original project and the copy.Open one or more other scans that overlap with the misaligned scan. In this example we are working in scan S_L_W_018 using Registration-> Advanced Importer(F6). Double click on the scans or open the scans with the Panorama tool. Select the 3D Point tool and click on identical points that you can correctly identify in the panorama of the misaligned scan and in the pano-ramas of the overlapping scans that are correctly aligned. In this case we have set four points.

After you have identified the points, select one of the 3D points and export it as a .*xyz file by selecting „Export points“ in the Job Editor. Give the *.xyz file a recognizable name and click on „Save“. The file is automatically saved in the 3D folder. This file will take on the role of a referen-ce system, which means we will transform the misaligned scans in this coordinate system in the further steps.
Now open the created copy of your project. Open the Advanced Importer and delete all the scans except the one that is not aligned. The quickest way to do this is to create a cluster for all the scans to be deleted, drag and drop the scans there and then delete the newly created cluster.
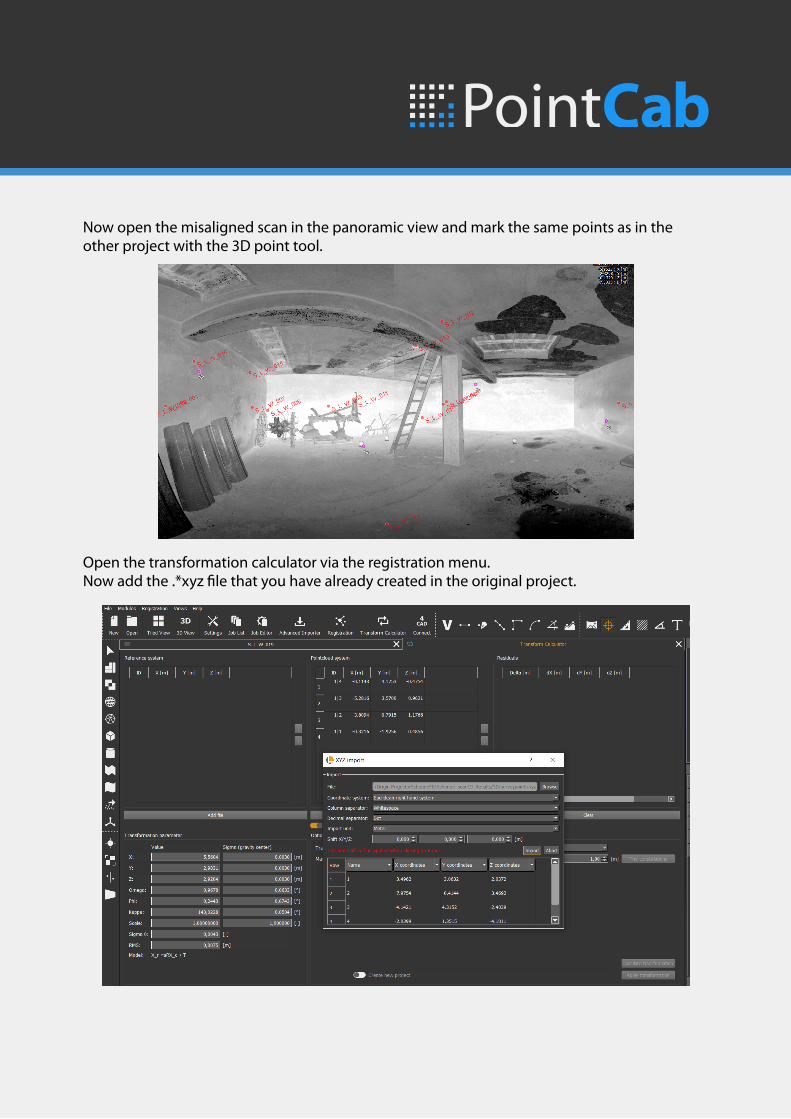
Now open the misaligned scan in the panoramic view and mark the same points as in the other project with the 3D point tool.
Open the transformation calculator via the registration menu.Now add the .*xyz file that you have already created in the original project.

Select „Find constellations“ so that the match is searched for automatically. Then check the sigmas. If they are close to zero, you can create the alignment.It is not necessary to recalculate the standard views. You can simply cancel all calculations. Under „File“ you can see the last opened projects. Now open the original project. Delete the scan that is misaligned, in the Advanced Importer. In this example we delete the scan S_L_W_019_0.
Then we add the transformed scan to the project. The scan can be added using the *.lsdx file from the transformed project. It is located in the _PointCloud folder.
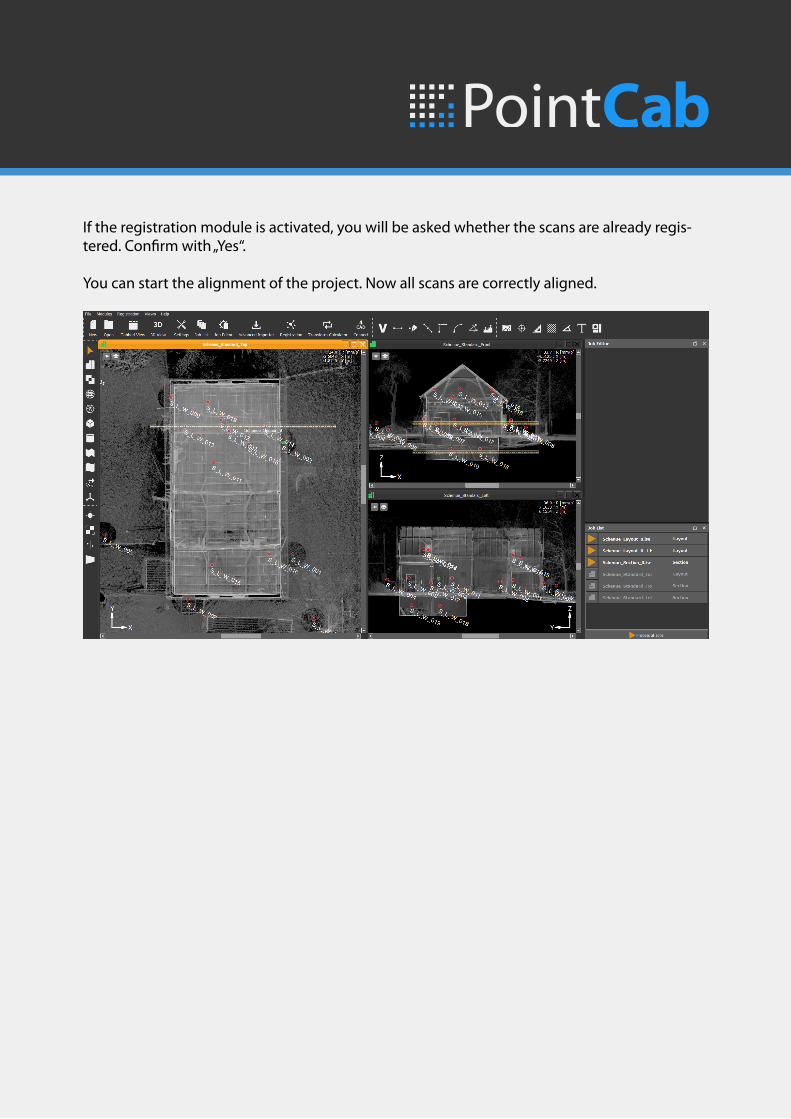
If the registration module is activated, you will be asked whether the scans are already regis-tered. Confirm with „Yes“.
You can start the alignment of the project. Now all scans are correctly aligned.