glass etching secrets
TRANSCRIPT
Copyright 2014 Eric Robert of http://www.glassetchingsecrets.com
1

Copyright 2014 Eric Robert of http://www.glassetchingsecrets.com
2
GGllaassss EEttcchhiinngg SSeeccrreettss
Eric Robert
Email: [email protected]
www.glassetchingsecrets.com
Glass Etching Secrets Copyright 2009, 2012, 2014. Eric Robert
Disclaimer: The author assumes no liability for damages or accidents from the use of the information contained herein. Glass etching can be harmful if precautions are not taken diligently. Although the author has made every reasonable attempt to achieve complete accuracy of the content in this Guide, he assumes no responsibility for errors or omissions. Also, you should use this information as you see fit, and at your own risk. Your particular situation may not be exactly suited to the examples illustrated here; in fact, it's likely that they won't be the same, and you should adjust your use of the information and recommendations accordingly.
Any trademarks, service marks, product names or named features are assumed to be the property of their respective owners, and are used only for reference. Also, use your own judgment. Nothing in this guide is intended to replace legal, medical or other professional advice, and is meant to inform and entertain the reader. So have fun with the tips and suggested resources, and get started etching glass. Finally, you may not reproduce information in this book without express written permission from the author; exceptions are made for brief excerpts used in published reviews. You may not distribute this e-book to any other person for sale or non-sales.
Thank you for purchasing the Glass Etching Secrets ebook manual. Since I started my website, it has been a delightful experience interacting with other likeminded people who gave me a lot of feedback and support. Also, people have asked me questions on just about every topic that relates to glass etching from stencil cutting machines, half tone etching, sandcarving, shading, to various equipment that can be used. This not only gave me support, but it also persuaded me to build a membership site with more information, videos, tutorials, low cost resources, and add a discussion area. Since I am limited to the way information can be presented in this ebook, I started a membership site to expand on this information at: http://www.glassetchingsecrets.com/member
If you haven’t already, get your special members only pricing for
only $4.95 * at http://www.glassetchingsecrets.com/member/about/home/area-signup/
*Price subject to change through time.
Welcome to one of the most advanced e-book’s on glass etching for the purposes of getting the coolest alternative methods that focus on saving you money starting up and in the long run. There is no doubt that glass etching can be an expensive hobby to start-up, whether it is sandblasting equipment or stencil making equipment. To think about it, etching equipment can help you create some fascinating art or personalized items permanently into the glass without too much effort. I thought to myself, does it really have to cost thousands of dollars to setup advanced sandblasting equipment & stenciling equipment? And the real answer is that you can start out with various items found on a small budget for a few hundred dollars which are actually sufficient for most people.
I will introduce you to my solutions to reduce start up costs
significantly, while explaining the fundamentals to this little known glass
Copyright 2014 Eric Robert of http://www.glassetchingsecrets.com
3
etching trade. So continue on and I will reveal these little known secrets. Some of these methods are little more known than others, but I am sure you will get a good use out of this resource as it helped me significantly upon discovery.
When I discovered the use of various inexpensive resources and
collectively put them into an operable system, I actually became more excited about this hobby and am now very satisfied that I found these secrets. One of the reasons I say this is because I was going to start-up a glass etching business. I was so dedicated to this business idea, even though I had no experience at the time, that I was about to spend about $10,000 to purchase a kit.
One of the etching supply companies that I was looking at appeared
(in my eyes) to have a special process. I began thinking; the only way to know how to etch glass was to buy the expensive equipment in order to get a glimpse of the processes. That company marketed their system very well since I was about to empty out my bank account without fully considering all the hard work and knowledge involved with a business. So in a nutshell, that is how thrilled I was at the time to learn all the processes of professional glass etching; by spending thousands of dollars for equipment without much knowledge on the subject.
On a further note, this all began when I was thinking about becoming
an entrepreneur and I started looking at entrepreneur magazines to satisfy my craving for creativity and independence. In one magazine, it listed a dozen or more niche businesses to startup, with “glass etching” being one of them. Here is where I discovered glass etching and it started entering my mind as a possibility.
Increasingly, I became interested in glass etching as a business idea
because you can create amazing custom works on almost anything without having high tech systems (in comparison to many manufacturing processes) and still have a business that doesn’t cost tens of thousands of dollars to startup.
Although a glass etching business was a significantly lower cost than
a lot of other niche business startups, it still had a fairly large price tag, considering I was still in college at the time and wasn’t sure if I would go through with the idea. So, I began aggressively looking for ways to jump
Copyright 2014 Eric Robert of http://www.glassetchingsecrets.com
4
into this niche cheaper and while offering more possibilities, whether I was going to actually do it for business or for a hobby. I just wanted to at least do it for a hobby since it appealed to be very interesting (and it definitely is an interesting field).
Then the discovery of Glass Etching Secrets was found. So, here I am
writing this book to share a collective source of interesting and advanced methods, techniques, and systems to help you succeed with a lot of possibilities for any art design without the large cost. For the Novice
If you are coming to this source with little known information about
glass etching, you will discover this is one of the funnest hobbies that can produce amazing elegant works. You just need to get the system set up and jump right in with the information provided throughout this resource. I almost guarantee that you will be hooked on this elegant hobby, even more so if you use my secret solutions for less frustration and cheaper startup costs. For the Omniscient
If you already know of this awesome hobby or are doing it for
business, this will help you find my secret, new and alternative methods to create any finished work with a quick solution to cut cost down and save you money while having more possibilities to expand. Some glass etchers are still hand cutting their stencil resists because automatic stencil methods are too expensive. Learn to do the stencil resist creating process quicker with any desired graphic and easily enlarge it without distortion at a fraction of the cost.
Ok, if you are excited like I am right now, let’s keep on reading and get the glass etching going with these alternative ways to find the equipment and methods cheaper, while having advanced etching possibilities.
Copyright 2014 Eric Robert of http://www.glassetchingsecrets.com
5
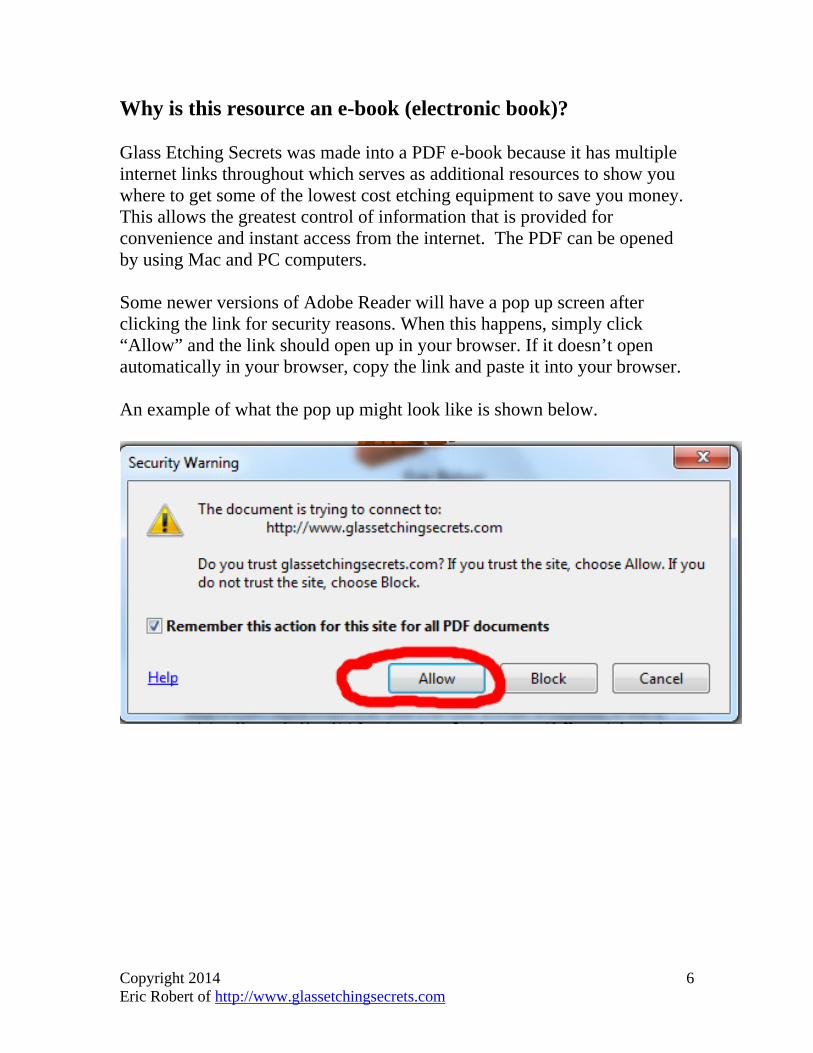
Why is this resource an e-book (electronic book)? Glass Etching Secrets was made into a PDF e-book because it has multiple internet links throughout which serves as additional resources to show you where to get some of the lowest cost etching equipment to save you money. This allows the greatest control of information that is provided for convenience and instant access from the internet. The PDF can be opened by using Mac and PC computers. Some newer versions of Adobe Reader will have a pop up screen after clicking the link for security reasons. When this happens, simply click “Allow” and the link should open up in your browser. If it doesn’t open automatically in your browser, copy the link and paste it into your browser. An example of what the pop up might look like is shown below.
Copyright 2014 Eric Robert of http://www.glassetchingsecrets.com
6

Introduction Glass Etching Glass etching has been around for centuries, where artisans have been
creating the most amazing works of elegant art with less advanced techniques such as using hydrofluoric acid or tools. Throughout history it took a lot of skill to create professional looking art on glass, but now even the most inexperienced person with no artistic abilities can make fine elegant art on glass or other materials easily with less time. Who can do this glass etching craft? Anyone can do this secret art, even those that aren’t artistic. All you have to do is use a traditional glass etching method or use Glass Etching Secrets system. Listed below are the basic overviews of the Glass Etching Secrets’ steps that I have been using:
1. Save a graphic to your computer from almost any resource (whether paid for or free).
2. Create a vector graphic with a few clicks on your computer. 3. Generate the stencil out of your computer system automatically. 4. Pull unwanted stencil areas off that need to be etched. 5. Apply the stencil on the glass and then the etching media. 6. Clean up and you’re done!
These are the basic steps outlined to create an etched glass design
easily that anyone can do when they follow along. You don’t have to be a professional artist. Having creative ideas is all it takes to etch or sandcarve glass.
By practicing and learning more advanced techniques, you will be
able to use your skills for advanced artistic etchings. With your talent, you can go above and beyond doing a simple technique that anyone can do by using a planned design with etched shading and multi-stage carving techniques. This is where glass etching becomes even more fun and a very interesting art form, but it does take a considerable amount of time. The weird thing about glass etching art is it’s not known as large as other forms of art, but yet it is one of the most phenomenon works of art creation.
Copyright 2014 Eric Robert of http://www.glassetchingsecrets.com
7
Glass Etching Secrets in Brief This resource will show you:
How to do this exciting art easily. Where to go for supplies at low cost & save thousands of $$$. How to do the processes by using this equipment. Where to get an automatic stencil making machine very cheap
with greater possibilities. Where to get an alternative & inexpensive stencil material What software is ideal for glass etching How you can “blow-up” or enlarge a graphic with a click of a
button without lose of detail And multiple other valuable informational topics
Glass Etching Secrets was designed to unfold the alternative ways to
do this fun and easy niche at a very low cost and show you how to etch glass with these alternative methods while explaining the traditional methods (with tips) for greater knowledge. The more knowledge you have about the different glass etching systems, the easier it is to decide which system will work best for a given project. Ultimately, Glass Etching Secrets was created to save you money while given you more possibilities. Why is Glass Etching so Interesting?
There are a variety of reasons people enjoy etching glass from either cream etching or abrasive etching. Here are some of the reasons that glass etching is so interesting for hobbyists or artists:
You can easily etch any glass, even curved such as glass mugs. You have a lot of control in your work. There are a lot of opportunities for elegant and unique artistic works. Glass etching equipment can be portable and used at places away
from your work station. There are a lot of cheap glass objects that you can etch to make them
more valuable. It’s a niche art form that is made up with nothing but glass and is a
unique style that will impress anyone. It can be easy to create amazing etched glass art products.
Copyright 2014 Eric Robert of http://www.glassetchingsecrets.com
8
The Basic Secrets of Glass Etching
Basically, glass etching is first done by creating a stencil out of a type of resistant material known as a resist, because it resists the etching of unwanted areas (to expose the design on the glass). A resist can be anything, but a rubber or vinyl material works best because it is flexible and can absorb energy easier if you use the sandblaster etching method.
To make a stencil, a design has to be cut out of the resist and peeled away to expose the area that will be etched. Once the stencil is created, it is placed on the glass surface smoothly with an adhesive holding it in place. Many times, it is actually easier to place the stencil onto the glass first, and then cut or pull away the areas to be etched.
After the stencil resist is securely placed on the glass piece, it is ready to be etched. To etch, it depends on the method that you are using, either one of the following:
Cream Etching - For cream etching, you just need to apply the etching cream over the exposed stencil part, wait to dry (time depending on the manufacturer that you buy it from), wash, and peel the resist off.
Sandblast Etching (Abrasive Etching) - For sandblast etching, you need to blast abrasives on the exposed area to etch the design out of the glass using a sandblaster. Once the glass is evenly etched, peel the stencil off, and clean up abrasive dust or leftover adhesive.
Acid Etching- Acid etching is another method, but it is less popular today. It’s an extremely dangerous acid because it involves strong chemicals known as hydrofluoric acid. It can penetrate through your skin and deteriorate parts of your bones or organs. Since this isn’t a widely used method, I won’t be discussing it here.
Creative List of Ideas to Etch with Some Examples Here is a list of some of the interesting items you can easily personalize without the need for expensive equipment. It is a great start to help you think of interesting items to etch.
Copyright 2014 Eric Robert of http://www.glassetchingsecrets.com
9
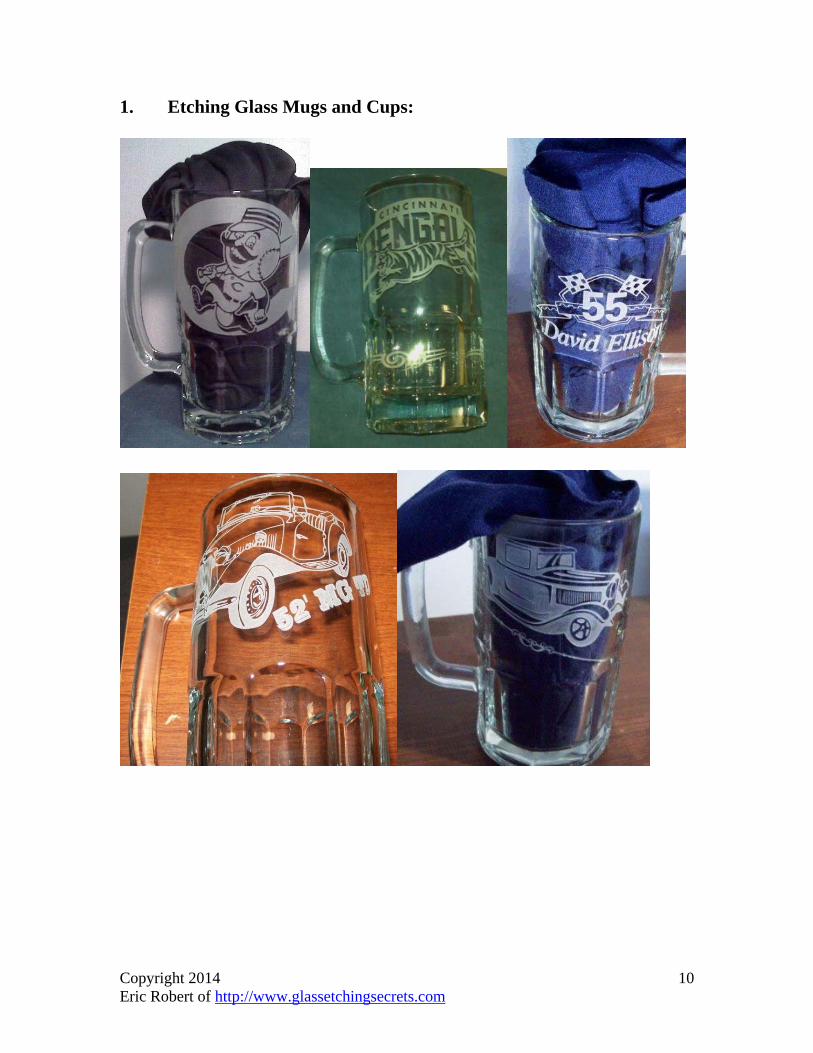
1. Etching Glass Mugs and Cups:
Copyright 2014 Eric Robert of http://www.glassetchingsecrets.com
10
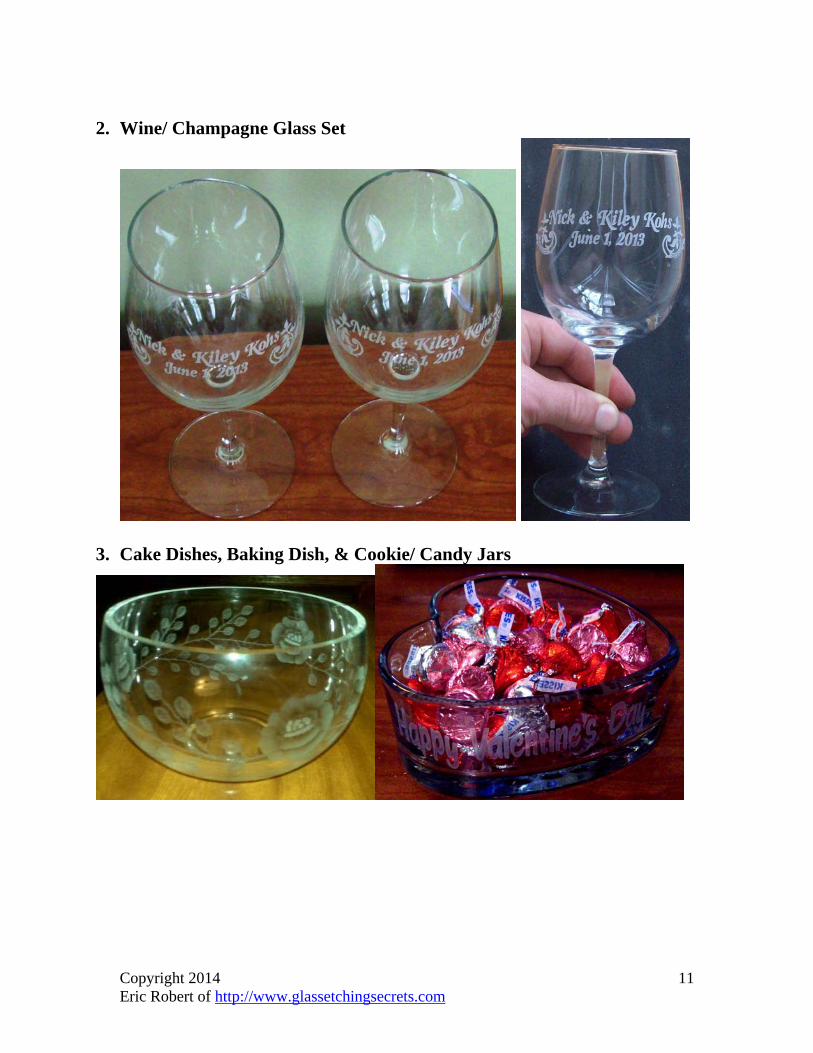
2. Wine/ Champagne Glass Set
3. Cake Dishes, Baking Dish, & Cookie/ Candy Jars
Copyright 2014 Eric Robert of http://www.glassetchingsecrets.com
11
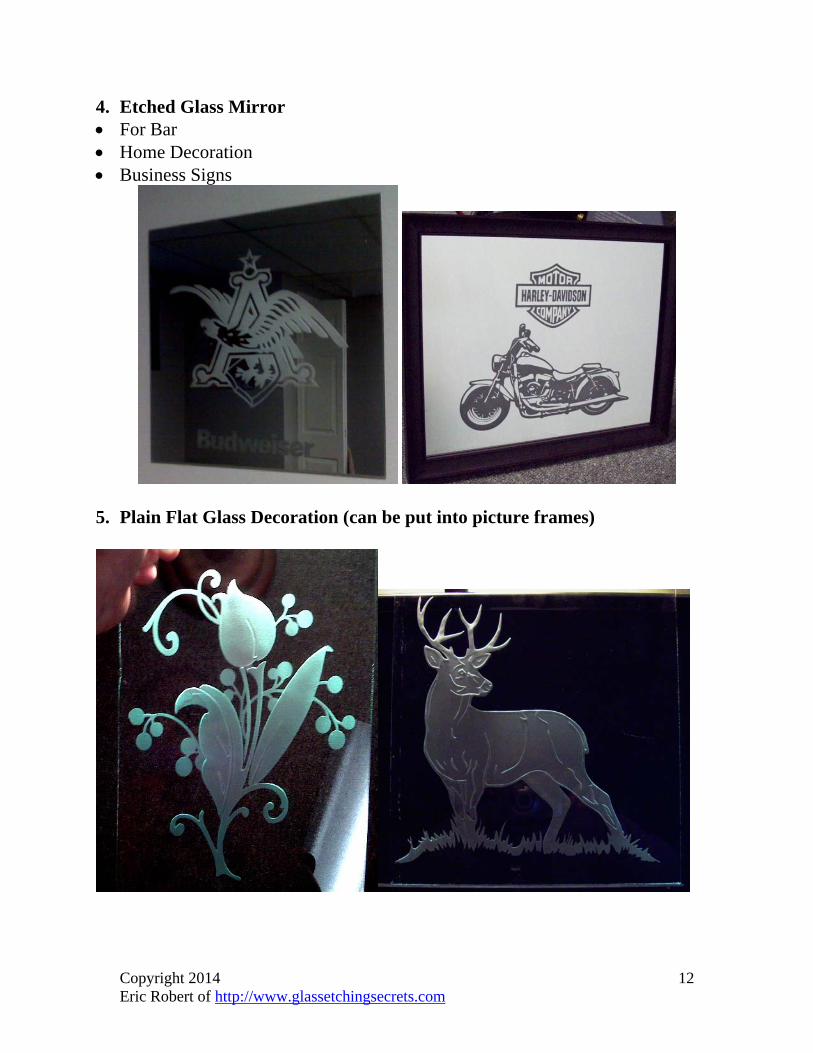
4. Etched Glass Mirror For Bar Home Decoration Business Signs
5. Plain Flat Glass Decoration (can be put into picture frames)
Copyright 2014 Eric Robert of http://www.glassetchingsecrets.com
12
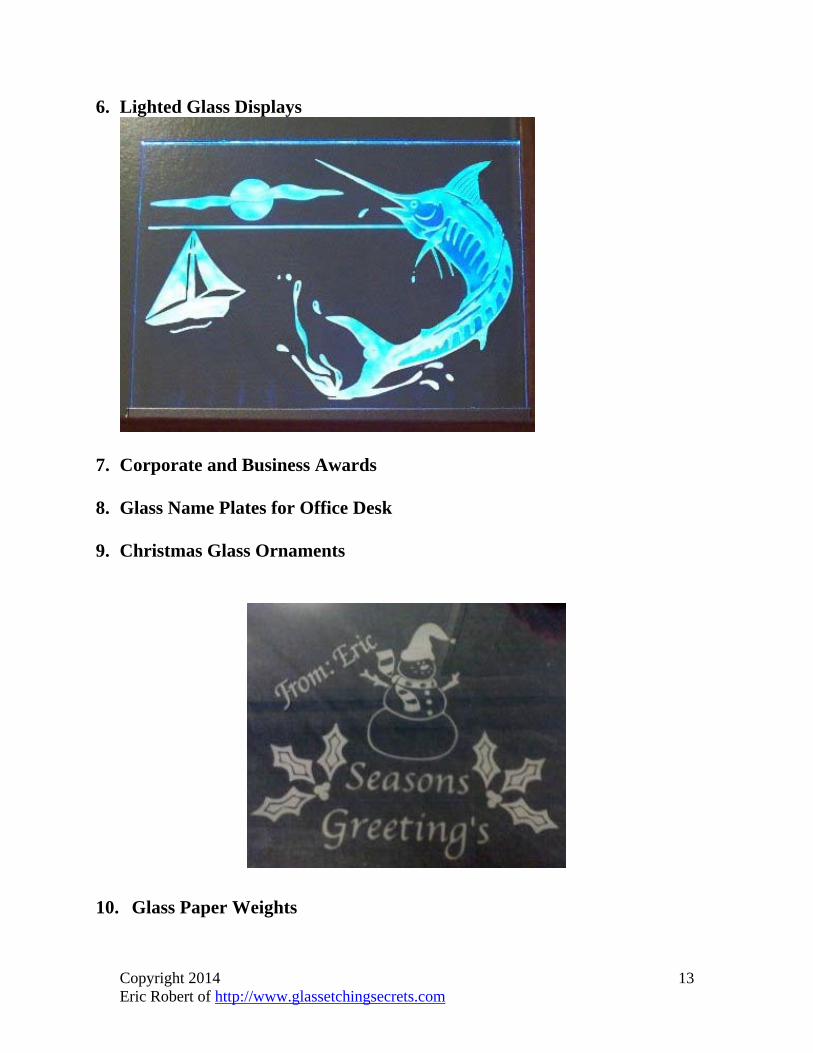
6. Lighted Glass Displays
7. Corporate and Business Awards
8. Glass Name Plates for Office Desk
9. Christmas Glass Ornaments
10. Glass Paper Weights
Copyright 2014 Eric Robert of http://www.glassetchingsecrets.com
13
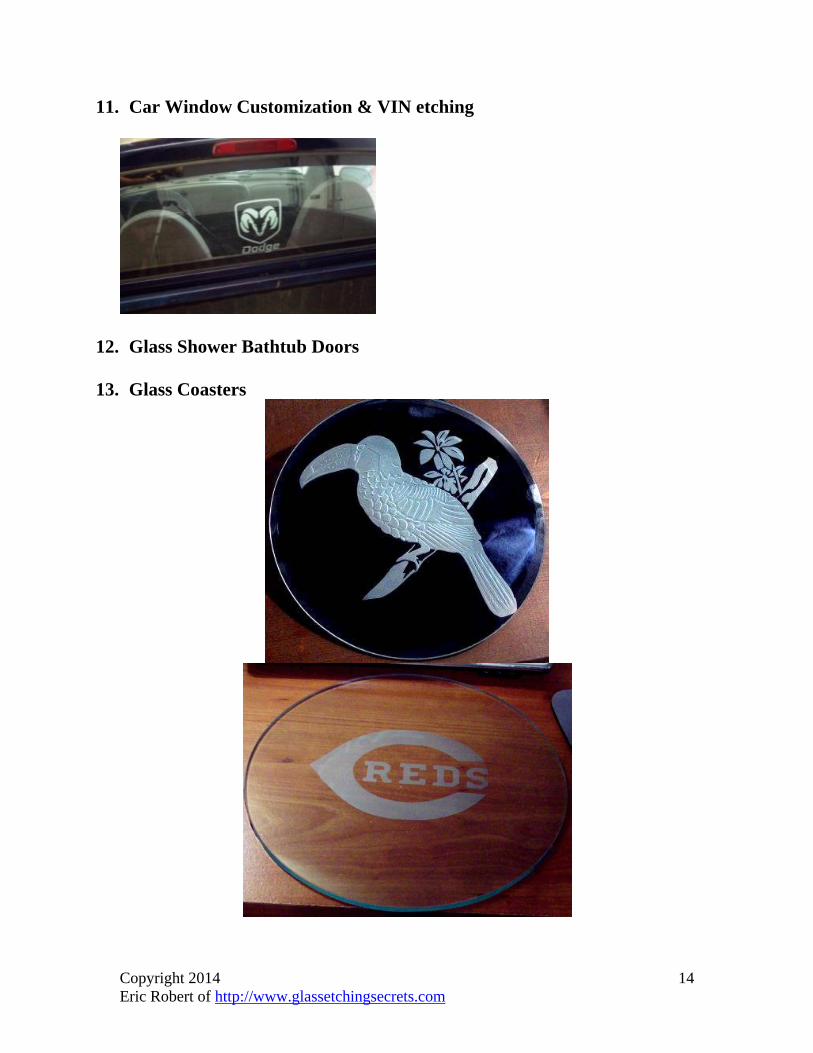
11. Car Window Customization & VIN etching
12. Glass Shower Bathtub Doors
13. Glass Coasters
Copyright 2014 Eric Robert of http://www.glassetchingsecrets.com
14
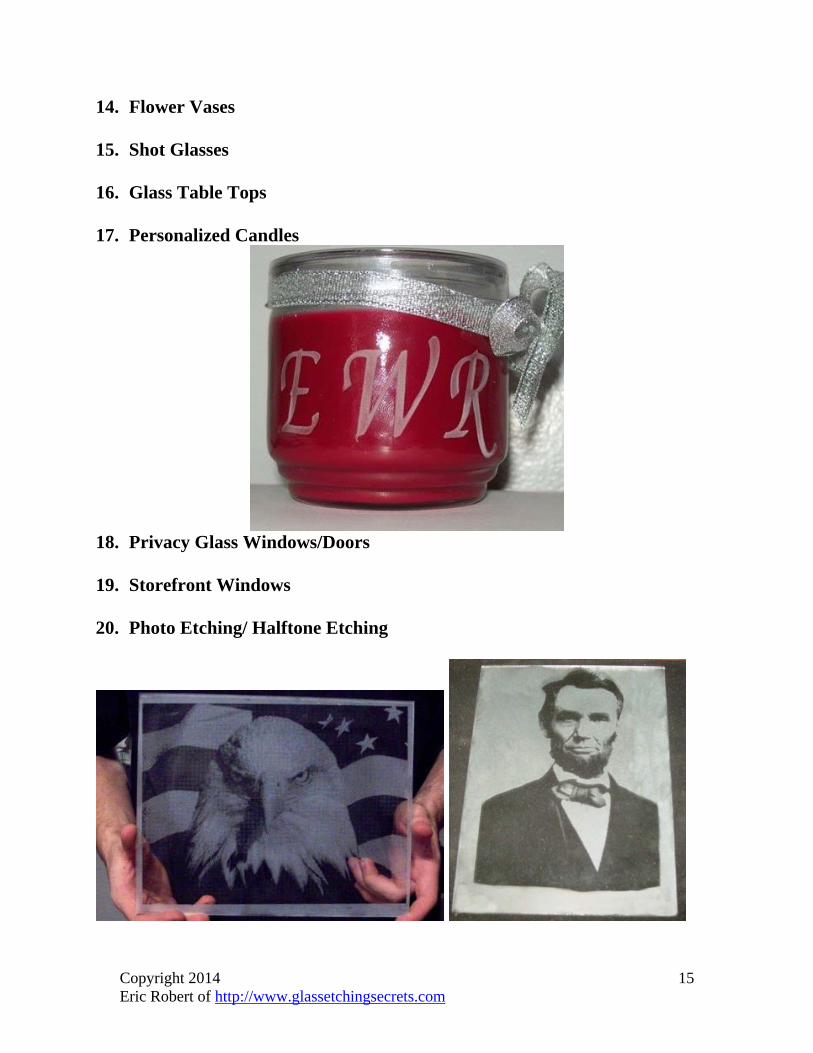
14. Flower Vases
15. Shot Glasses
16. Glass Table Tops
17. Personalized Candles
18. Privacy Glass Windows/Doors
19. Storefront Windows
20. Photo Etching/ Halftone Etching
Copyright 2014 Eric Robert of http://www.glassetchingsecrets.com
15

21. Wine Bottle Gift Great for Wedding Present, Anniversary Present, or Birthday Gift
Copyright 2014 Eric Robert of http://www.glassetchingsecrets.com
16
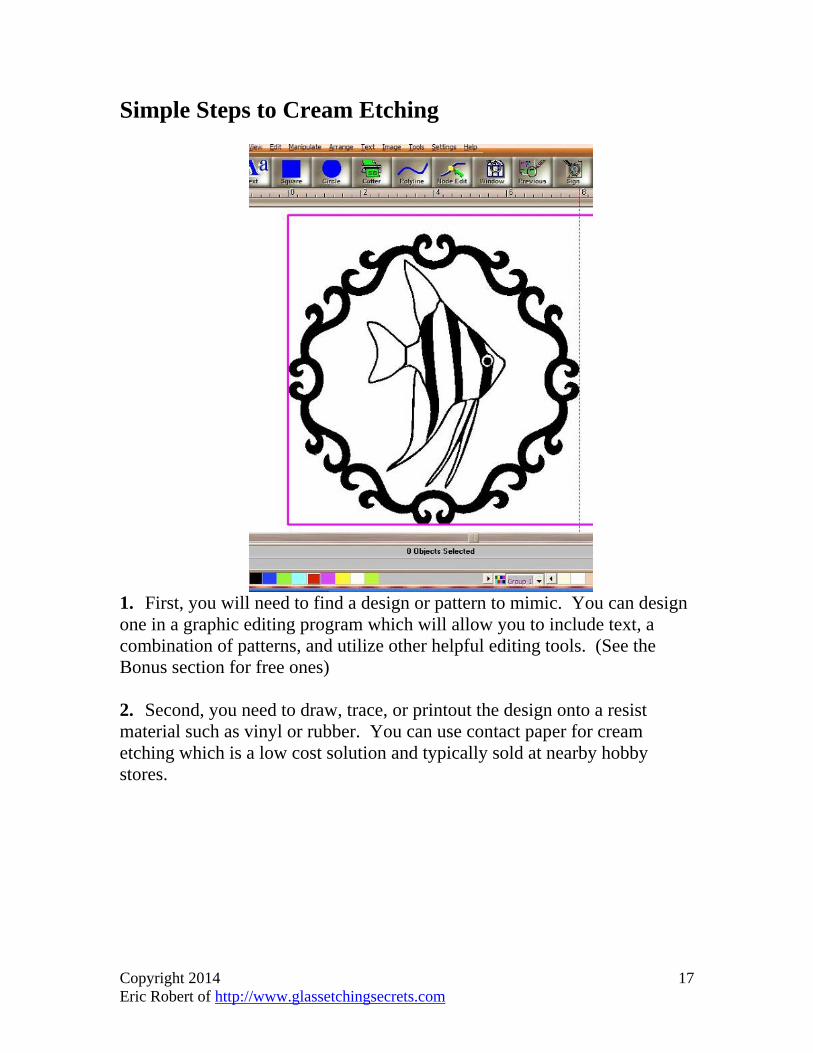
Simple Steps to Cream Etching
1. First, you will need to find a design or pattern to mimic. You can design one in a graphic editing program which will allow you to include text, a combination of patterns, and utilize other helpful editing tools. (See the Bonus section for free ones) 2. Second, you need to draw, trace, or printout the design onto a resist material such as vinyl or rubber. You can use contact paper for cream etching which is a low cost solution and typically sold at nearby hobby stores.
Copyright 2014 Eric Robert of http://www.glassetchingsecrets.com
17
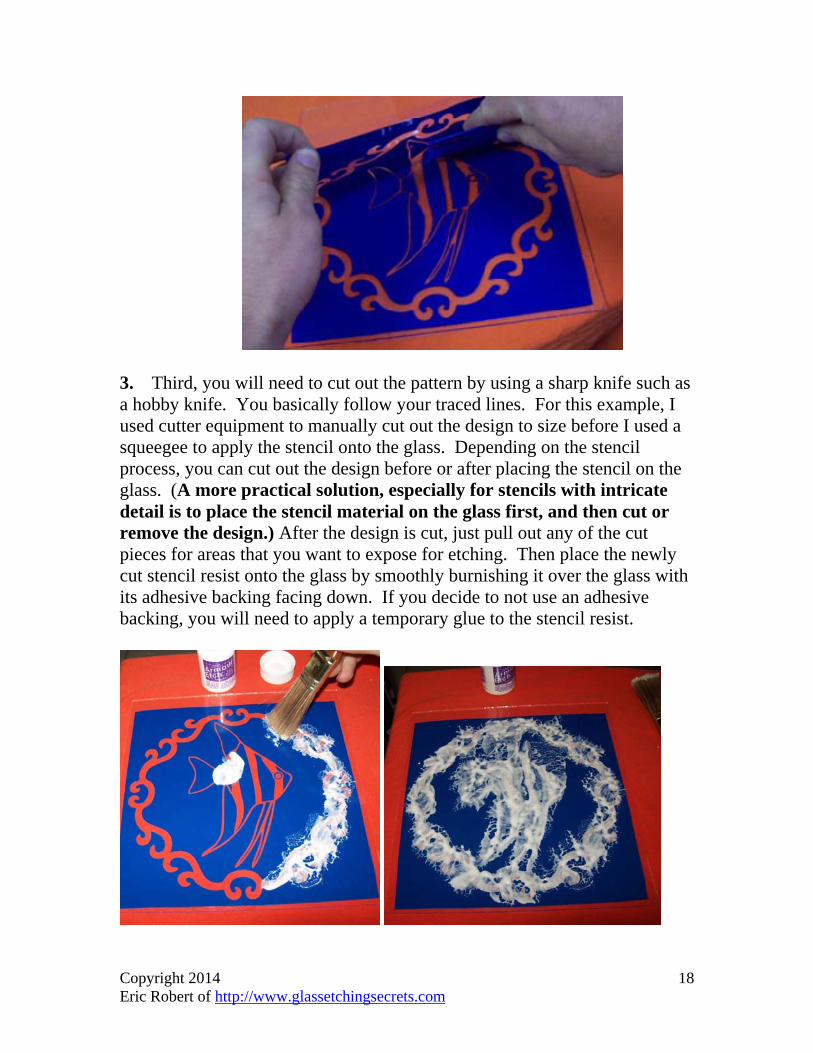
3. Third, you will need to cut out the pattern by using a sharp knife such as a hobby knife. You basically follow your traced lines. For this example, I used cutter equipment to manually cut out the design to size before I used a squeegee to apply the stencil onto the glass. Depending on the stencil process, you can cut out the design before or after placing the stencil on the glass. (A more practical solution, especially for stencils with intricate detail is to place the stencil material on the glass first, and then cut or remove the design.) After the design is cut, just pull out any of the cut pieces for areas that you want to expose for etching. Then place the newly cut stencil resist onto the glass by smoothly burnishing it over the glass with its adhesive backing facing down. If you decide to not use an adhesive backing, you will need to apply a temporary glue to the stencil resist.
Copyright 2014 Eric Robert of http://www.glassetchingsecrets.com
18

4. Once in place, you’re ready for etching. Take the etching cream and evenly spread over the stencil. Lately, I have been finding that a flat like spatula tool works best at creating an evenly smooth coating. I just cut out a piece of cardstock to apply the cream on.
5. Wait an about 10- 20 minutes to allow cream to etch. (Additional Tip: I believe that redistributing the cream over the stencil halfway through helps ensure every part is etched and is even.) Then peel the resist stencil off and clean up. Many people don’t know it, but this cream can be reused multiple times. As a cost effective tip, scrap the cream back into your bottle and reuse in the future. This tip alone will save you a lot of money.
6. And that is all it takes to etch glass with acid cream. Using etching cream is probably the easiest way to etch glass, but it is also hard to see at times. It is not my favorite method, but there are some ways to improve it and I will be showing you one of my methods next.
Copyright 2014 Eric Robert of http://www.glassetchingsecrets.com
19
How to Make Your Cream Etching Stand Out This section discusses one method to making your cream etching stand out. I list other ways that are more natural in the membership site. Other than my tips mentioned in the previous tutorial, there are some additional ways to improve the visibility of the cream etched areas and establish a more quality looking etching. One of my ways is to use this rub on type paint called “Rub N’ Buff” which you can get on Amazon here: http://amzn.to/TeTVZo I don’t particularly like the idea of painting an etching because in my opinion having art made up of nothing but the glass itself is very elegant. But this stuff is an exception, and if you do it the way I use it, people probably won’t be able to see that it is covered in paint. Also, the company sells a few different colors which you can experiment with here: http://amzn.to/SPHvgY To make it look most like an etched glass finish, I suggest you stick with the white color only. Also, the Rub N’ Buff is actually considered a “wax metallic finish”, so it’s not necessarily considered a paint. My Methods As I stated, you want the glass to look like it is etched with no other additives. In order to do that, I suggest that you rub on a very light coating of the Rub N’ Buff. You can do this through one of the methods described below or use a combination of both:
Dilute the Rub N’ Buff- By diluting the finish, you will make it look less obvious that an additional substance is on the etching, and it will still allow light to show through which is a characteristic of professionally etched glass. This is also known as thinning, and the company recommends that you thin it by using Mineral Spirits. This is a typical chemical found in the painting & chemical section at home improvement stores.
Apply Small Amounts & Rub Out Most- The other way is to simply
apply a small amount to the etching and rub out as much as possible.
Copyright 2014 Eric Robert of http://www.glassetchingsecrets.com
20
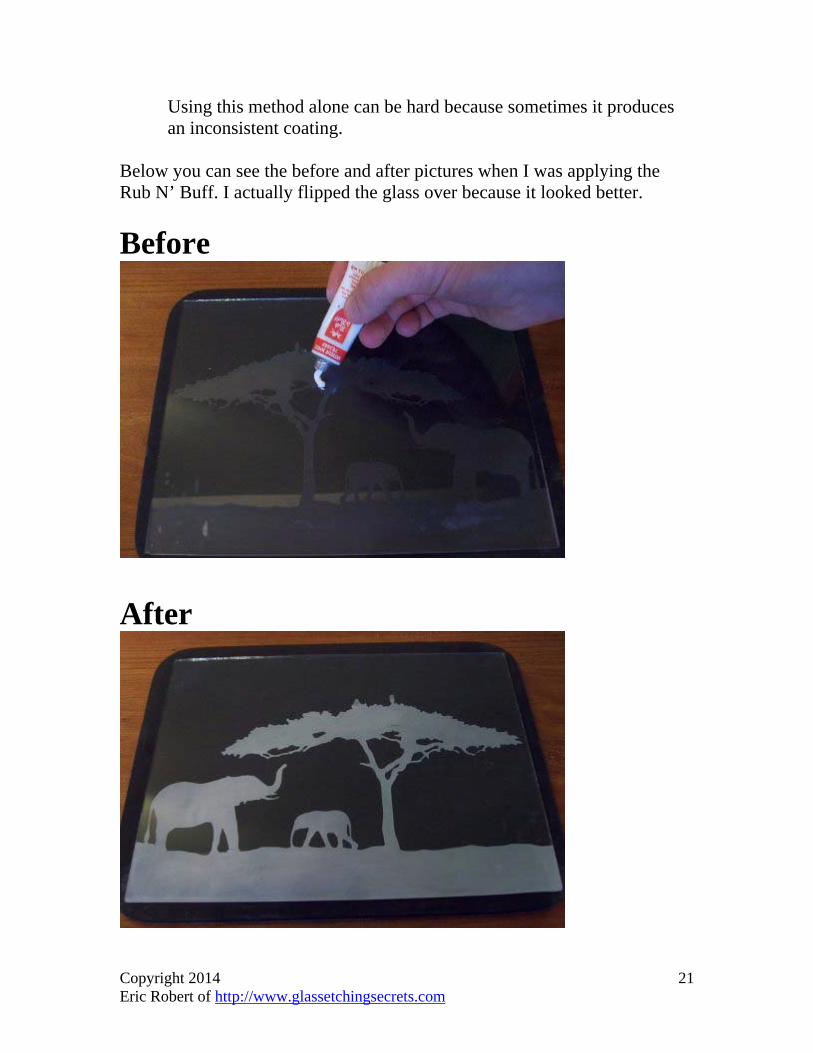
Using this method alone can be hard because sometimes it produces an inconsistent coating.
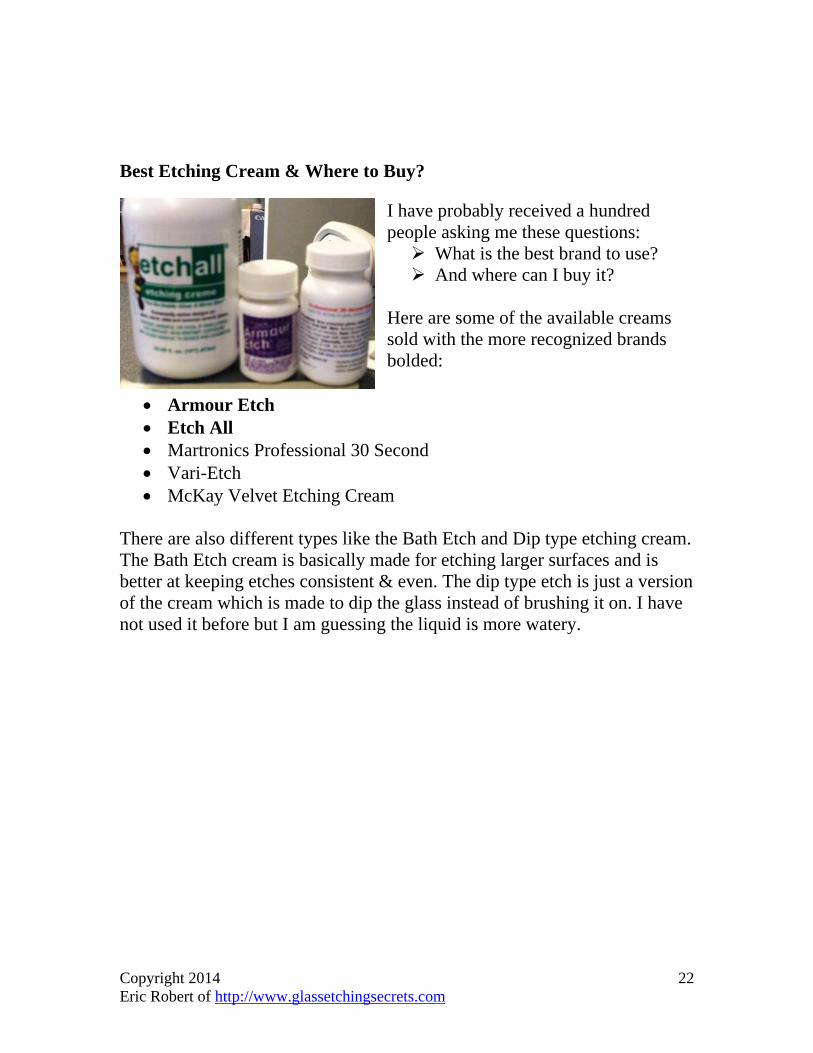
Below you can see the before and after pictures when I was applying the Rub N’ Buff. I actually flipped the glass over because it looked better.
Before
After
Copyright 2014 Eric Robert of http://www.glassetchingsecrets.com
21
Best Etching Cream & Where to Buy?
I have probably received a hundred people asking me these questions: What is the best brand to use? And where can I buy it?
Here are some of the available creams sold with the more recognized brands bolded:
Armour Etch Etch All Martronics Professional 30 Second Vari-Etch McKay Velvet Etching Cream
There are also different types like the Bath Etch and Dip type etching cream. The Bath Etch cream is basically made for etching larger surfaces and is better at keeping etches consistent & even. The dip type etch is just a version of the cream which is made to dip the glass instead of brushing it on. I have not used it before but I am guessing the liquid is more watery.
Copyright 2014 Eric Robert of http://www.glassetchingsecrets.com
22
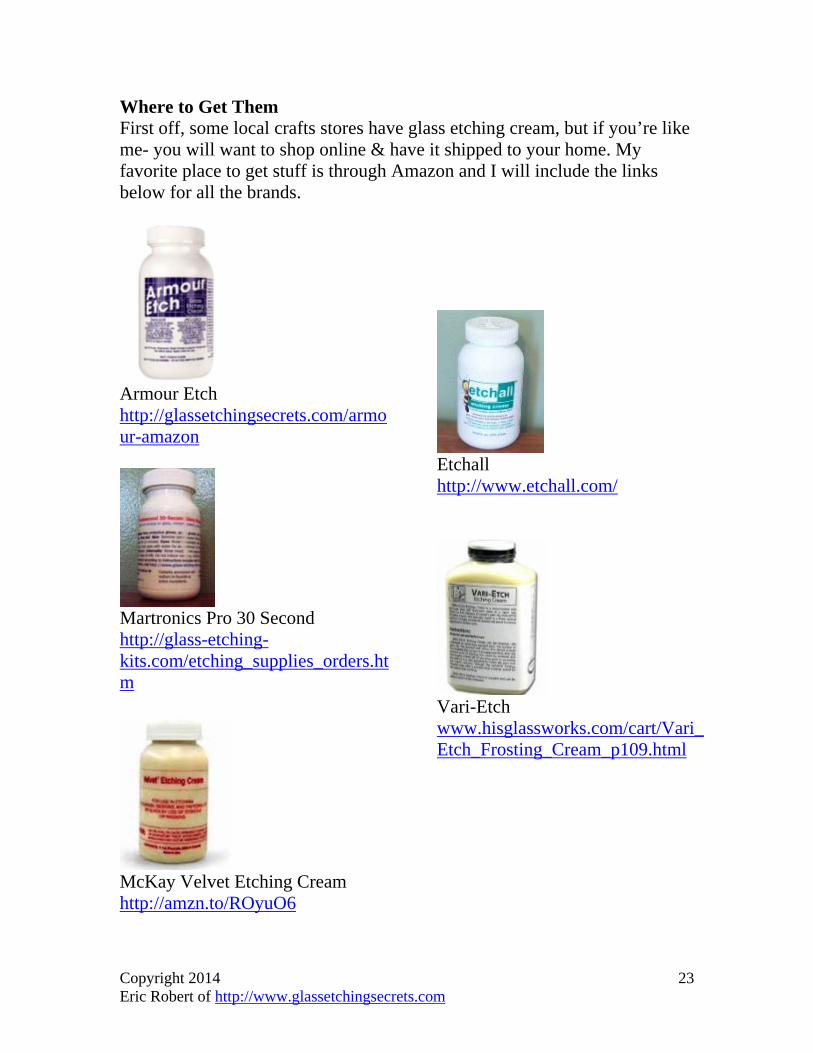
Where to Get Them First off, some local crafts stores have glass etching cream, but if you’re like me- you will want to shop online & have it shipped to your home. My favorite place to get stuff is through Amazon and I will include the links below for all the brands.
Armour Etch http://glassetchingsecrets.com/armour-amazon
Martronics Pro 30 Second http://glass-etching-kits.com/etching_supplies_orders.htm
McKay Velvet Etching Cream http://amzn.to/ROyuO6
Etchall http://www.etchall.com/
Vari-Etch www.hisglassworks.com/cart/Vari_Etch_Frosting_Cream_p109.html
Copyright 2014 Eric Robert of http://www.glassetchingsecrets.com
23
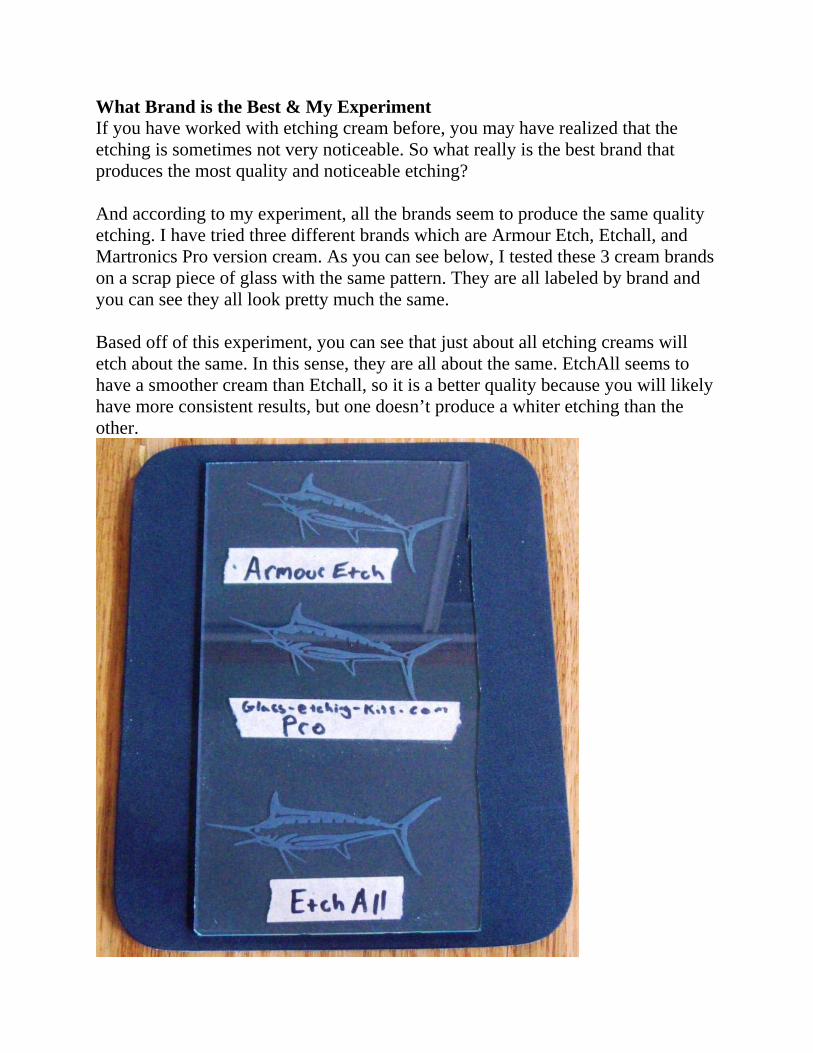
What Brand is the Best & My Experiment If you have worked with etching cream before, you may have realized that the etching is sometimes not very noticeable. So what really is the best brand that produces the most quality and noticeable etching? And according to my experiment, all the brands seem to produce the same quality etching. I have tried three different brands which are Armour Etch, Etchall, and Martronics Pro version cream. As you can see below, I tested these 3 cream brands on a scrap piece of glass with the same pattern. They are all labeled by brand and you can see they all look pretty much the same. Based off of this experiment, you can see that just about all etching creams will etch about the same. In this sense, they are all about the same. EtchAll seems to have a smoother cream than Etchall, so it is a better quality because you will likely have more consistent results, but one doesn’t produce a whiter etching than the other.
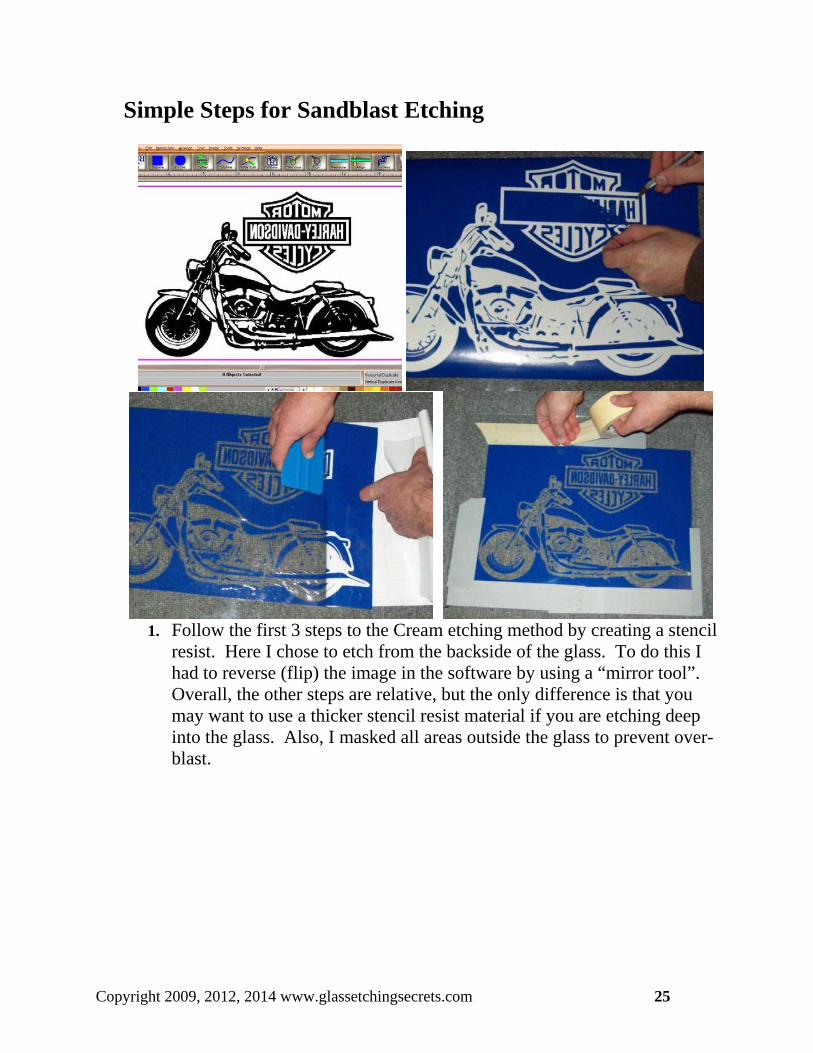
Simple Steps for Sandblast Etching
1. Follow the first 3 steps to the Cream etching method by creating a stencil
resist. Here I chose to etch from the backside of the glass. To do this I had to reverse (flip) the image in the software by using a “mirror tool”. Overall, the other steps are relative, but the only difference is that you may want to use a thicker stencil resist material if you are etching deep into the glass. Also, I masked all areas outside the glass to prevent over-blast.
Copyright 2009, 2012, 2014 www.glassetchingsecrets.com 25
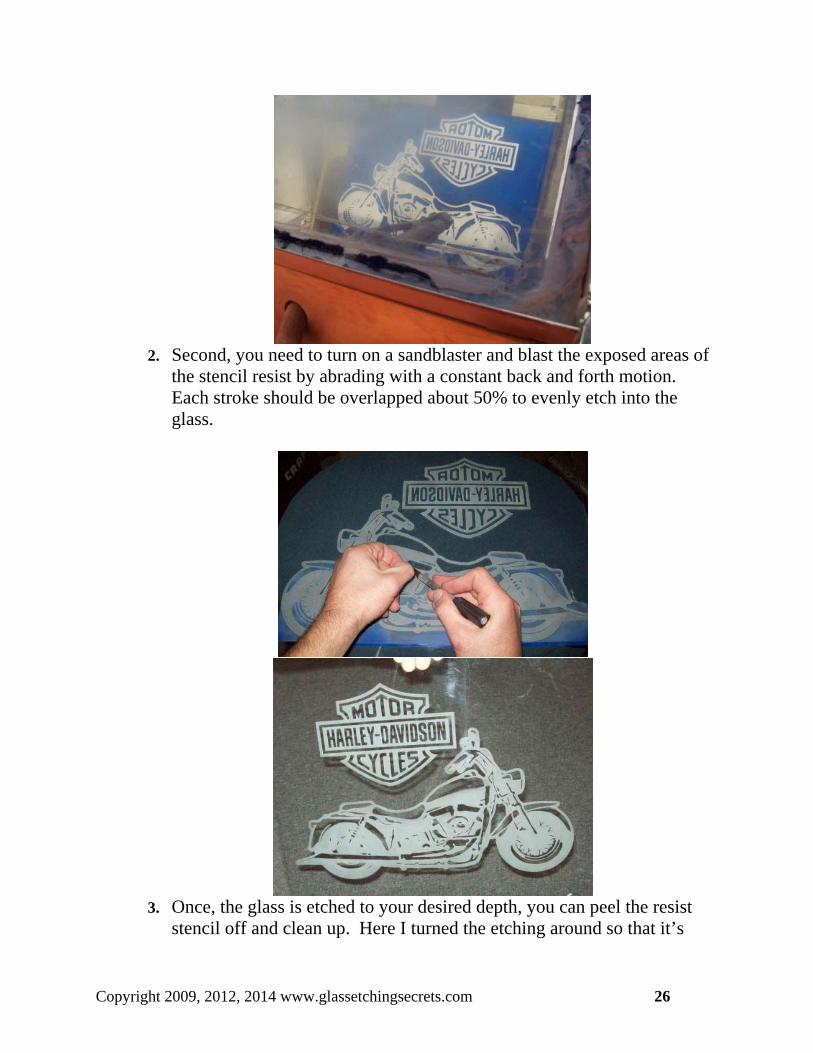
2. Second, you need to turn on a sandblaster and blast the exposed areas of
the stencil resist by abrading with a constant back and forth motion. Each stroke should be overlapped about 50% to evenly etch into the glass.
3. Once, the glass is etched to your desired depth, you can peel the resist
stencil off and clean up. Here I turned the etching around so that it’s
Copyright 2009, 2012, 2014 www.glassetchingsecrets.com 26
looked at from the other side. You can choose to etch on either side, but you have to remember to “mirror” the design first in your software for reverse etchings. If you’re sandcarving, it typically looks best to etch the glass with the reverse method, as I have done here.
Advanced Steps
The steps above were just a quick overview showing how to etch glass with
simple surface etching techniques, but there is so much more you can do with both processes.
Advanced Cream- Most of the more advanced ways to use cream are more
focused on the stencil creating part of it such as making a photoresist stencil to etch “photograph-like” designs onto the glass. But I have been testing out a process involved with the actual etching technique which can allow you to create 2 shades in your etching as explained here: http://www.glassetchingsecrets.com/blog/2-shades-etching-cream
Advanced Sandblasting- More importantly, sandblasting has more
advanced techniques that can be done and is much more professional. These techniques are:
Shade Blasting- allows you to create various shades onto your glass by lightly sandblasting. You can create photo like images with this technique.
Stage Blasting- this is also known as sandcarving. It allows you to create dimensional etchings deep into the glass, often in various stages of depth which is best viewed when looking at it through the opposite side of the glass.
I have now included a bonus section which discusses advanced sandblasting
processes a little more. For now, the following chapters reveal some of my secrets about equipment
and the different types of methods that can be used. It covers different sandblasters, sandblasting cabinets, sandblasting abrasive, stencil resist creating, graphic designs & patterns. Some of my steps released may seem complicated at first, but once you follow my steps and try it a few times you should get the hang of it right away. You will begin to see how simple it is and the more possibilities it will give you quickly.
Copyright 2009, 2012, 2014 www.glassetchingsecrets.com 27
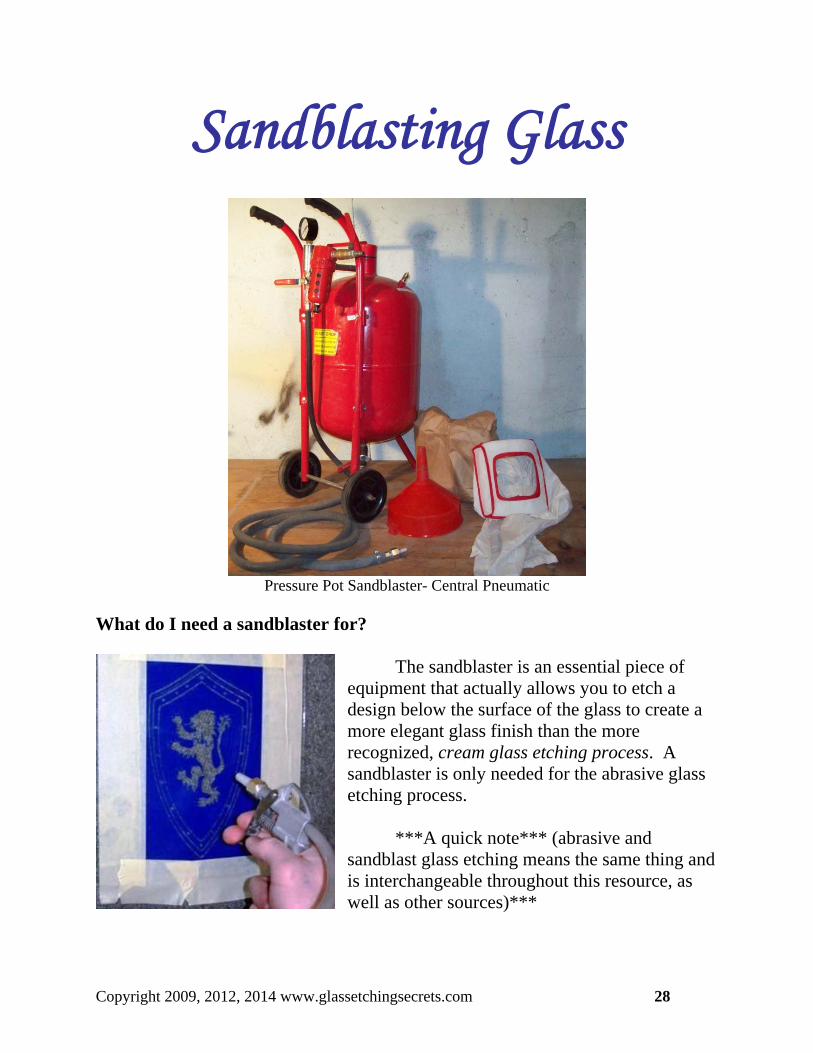
Sandblasting Glass
Pressure Pot Sandblaster- Central Pneumatic
What do I need a sandblaster for?
The sandblaster is an essential piece of
equipment that actually allows you to etch a design below the surface of the glass to create a more elegant glass finish than the more recognized, cream glass etching process. A sandblaster is only needed for the abrasive glass etching process.
***A quick note*** (abrasive and
sandblast glass etching means the same thing and is interchangeable throughout this resource, as well as other sources)***
Copyright 2009, 2012, 2014 www.glassetchingsecrets.com 28

Although this item is commonly named a “sandblaster”, it is meant to use only approved abrasive media for the industry. Sand is not encouraged, nor recommended for any type of sandblasting. It is extremely dangerous to your health. The recommended abrasive media is discussed later.
In the past, the sandblaster was typically a very expensive piece of equipment because it was mostly used in commercial environments. Many people tend to lean toward the cheaper “cream glass etching process” because of the high prices.
Today there are a lot of inexpensive sandblasters and I will show you how to get sandblast etching equipment inexpensively through alternative routes. This will allow you to have a low startup cost and achieve the interesting desired look of abrasive etching that shows people who you are, an elegantly skilled glass etcher.
A lot of people think you have to buy a very expensive sandblasting system; when you could actually get it fairly cheap. So, the following will show you how to get the right sandblaster to fit your needs, while getting it at a low cost for a hobby or business. How the Sandblaster Works & Types Available
First off, a sandblaster functions by spraying a fast moving stream of abrasive particles out of a nozzle, all powered or forced by a source of compressed air. An air compressor is needed to supply the compressed air to the sandblaster. To explain, an air compressor is connected to the sandblaster setup by an air hose to supply the system with the force to blast the abrasive media.
Depending on the sandblaster type, the setup is configured by a specific holding tank for the abrasive particles and another hose connects it to the nozzle. The air compressor is configured to the system a certain way to provide the power but it depends on the sandblaster type. There are a few different types, but the two categories used for etching are:
Siphon Sandblaster Pressure Pot Sandblaster
Sandblaster Selection: Siphon vs. Pressure Pot
Basically, these types of sandblasters can both be used for glass etching with different positive and negative characteristics. You may desire either one or maybe even both, as most glass artisans would enjoy. I will show you a solution where you can acquire both sandblaster types together later on. But for now, here are the characteristics for both sandblaster types:
Copyright 2009, 2012, 2014 www.glassetchingsecrets.com 29
1. Siphon sandblaster- The siphon sandblaster setup has an air hose that connects the air compressor straight into the nozzle configuration. Another hose is connected to the same nozzle which carries the abrasive particles. It basically works by siphoning the abrasive out of a container and thrusting it out the nozzle. Positive Characteristics: This is the cheapest sand blaster setup.
The major advantage is that some are manufactured with a nicer nozzle setup that allows better control to do advanced artistic techniques such as shading. The nozzle allows a variable flow of abrasive and air mixture with a slight move of your fingers on the trigger. Not all siphon sandblaster nozzles have the variable pressure feature, but isn’t necessarily needed for basic etching.
Negative Characteristics: The siphon setup doesn’t have as much blasting power, takes a longer time to etch the glass, limits the possibilities of multi-staging & sandcarving, and uses more compressed air to operate because it’s less efficient which usually requires a bigger, more expensive air compressor.
2. Pressure Pot sandblaster- The pressure pot setup is configured so that an air
hose connects the air compressor to the top of a sealed abrasive holding tank. Then the tank gets pressurized with the mixture of compressed air and abrasive particles. There is another hose connected from the bottom of the tank to the nozzle that carries the pressurized abrasive and air mixture. This nozzle is what you will hold and aim to etch glass. Positive Characteristics: First, it has more blasting power,
allowing you to do 3 dimensional works (known as sand carving and multi-staging) and finish artwork quicker so you won’t feel frustrated. Second, it uses less air, which may allow you to buy a smaller, less expensive air compressor & have less wear and tear on it.
Negative Characteristics: This is generally a very expensive sandblaster setup (but I will show you where to get some inexpensively and save you a lot of money). Also, the pressure pot systems typically don’t have a trigger feature which is very convenient.
Copyright 2009, 2012, 2014 www.glassetchingsecrets.com 30

Sandblaster Types in Depth To explain the types within each category further, I created a more in depth list below which also discusses all the subcategories available within these 2 main category types. Links are included to a few sources also.
Siphon Sandblaster- o Hand Held Gun- This type has a hopper below the nozzle which holds the
abrasive and is siphoned out when blasting. These are convenient & fairly inexpensive, but it’s only ideal for smaller etching projects. If you want a hand held sandblaster like this, I encourage you to get the next type.
Source: http://amzn.to/1fu4mDF
o Gravity Feed Gun- I prefer this hand held sandblaster gun more because it has
all the benefits as the previous, but it has better flow of abrasive and may have more power. The hopper is located on top of the nozzle which allows gravity to force the abrasive down into the nozzle rather than using up all its air pressure to siphon out the abrasive. With gravity feed sandblasters you are also less likely to have abrasive flow problems because the abrasive is contained better toward the point of exit. Most of these are handheld units but you can also place a large hopper above and connect the nozzle to it with a hose. You can get creative with this idea and rig something up.
Source: http://amzn.to/UMosEH
Copyright 2009, 2012, 2014 www.glassetchingsecrets.com 31
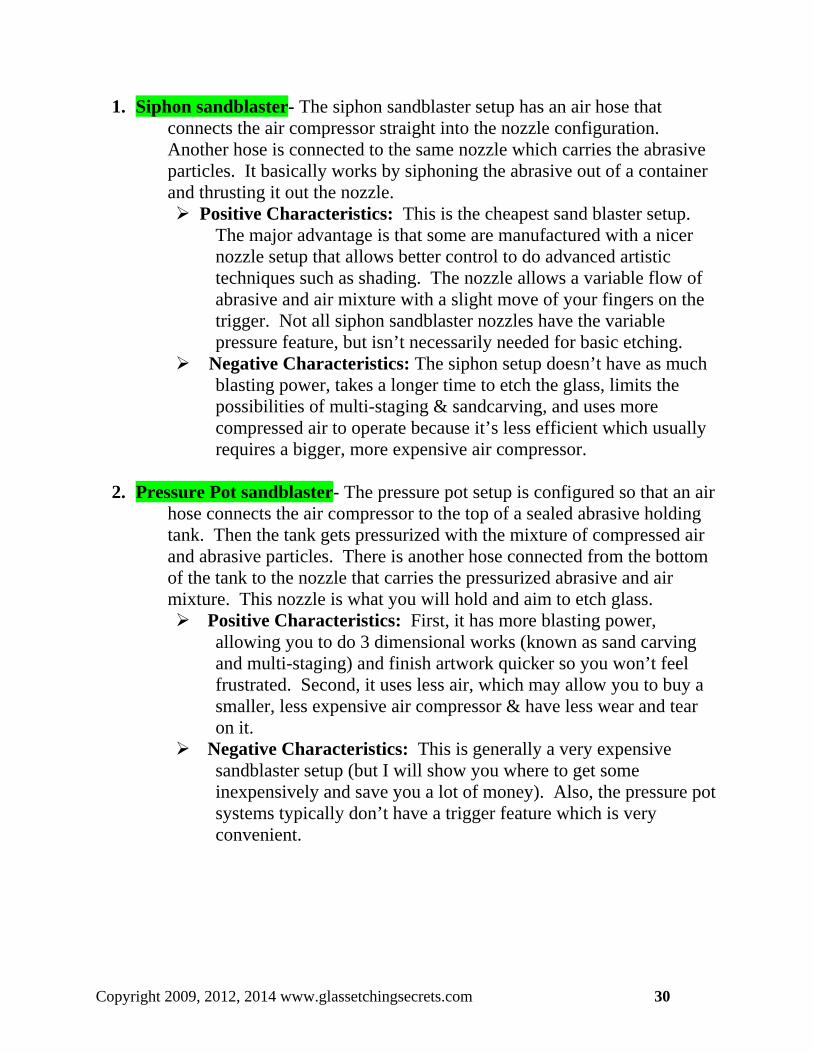
o Pickup Tube Gun- This is a very basic type which has the nozzle with a pickup
tube connected at the end of the hose. The pickup tube is meant to be jabbed into a pile or bag of abrasive which is siphoned out and delivered to the nozzle. These are the cheapest types, but I don’t recommend them. They are too much of a hassle to work with. If you want something like this, at least get the next type.
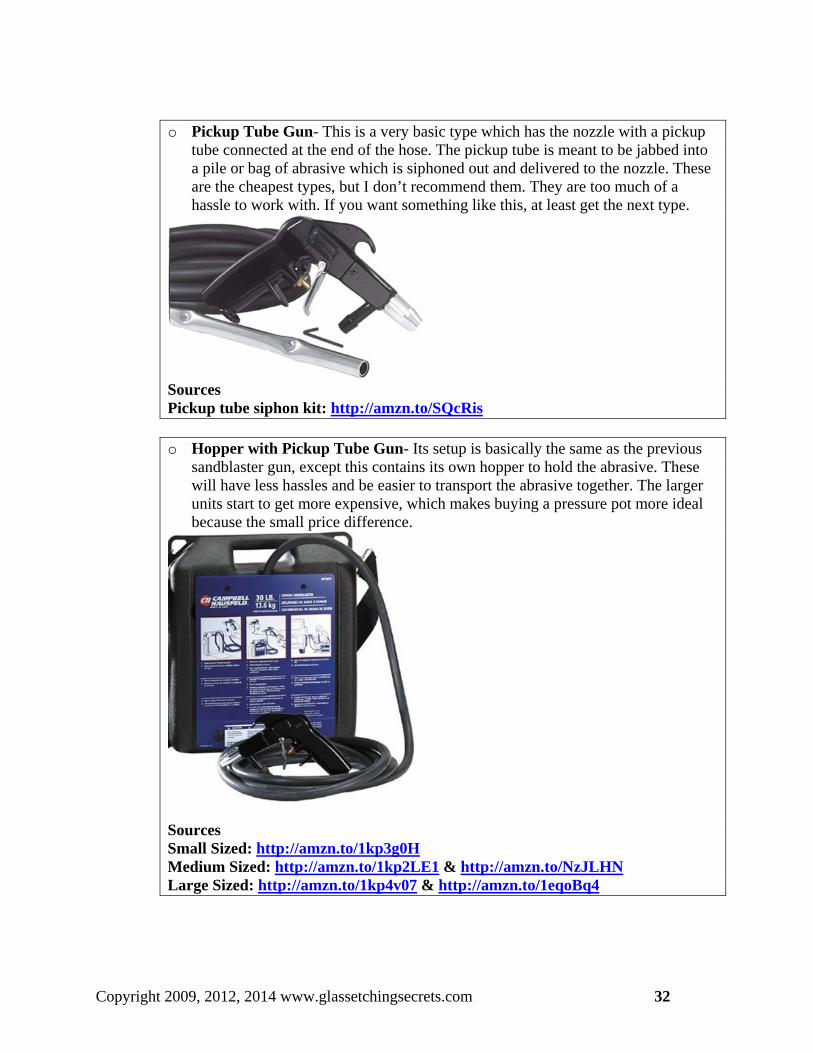
Sources Pickup tube siphon kit: http://amzn.to/SQcRis o Hopper with Pickup Tube Gun- Its setup is basically the same as the previous
sandblaster gun, except this contains its own hopper to hold the abrasive. These will have less hassles and be easier to transport the abrasive together. The larger units start to get more expensive, which makes buying a pressure pot more ideal because the small price difference.
Sources Small Sized: http://amzn.to/1kp3g0H Medium Sized: http://amzn.to/1kp2LE1 & http://amzn.to/NzJLHN Large Sized: http://amzn.to/1kp4v07 & http://amzn.to/1eqoBq4
Copyright 2009, 2012, 2014 www.glassetchingsecrets.com 32
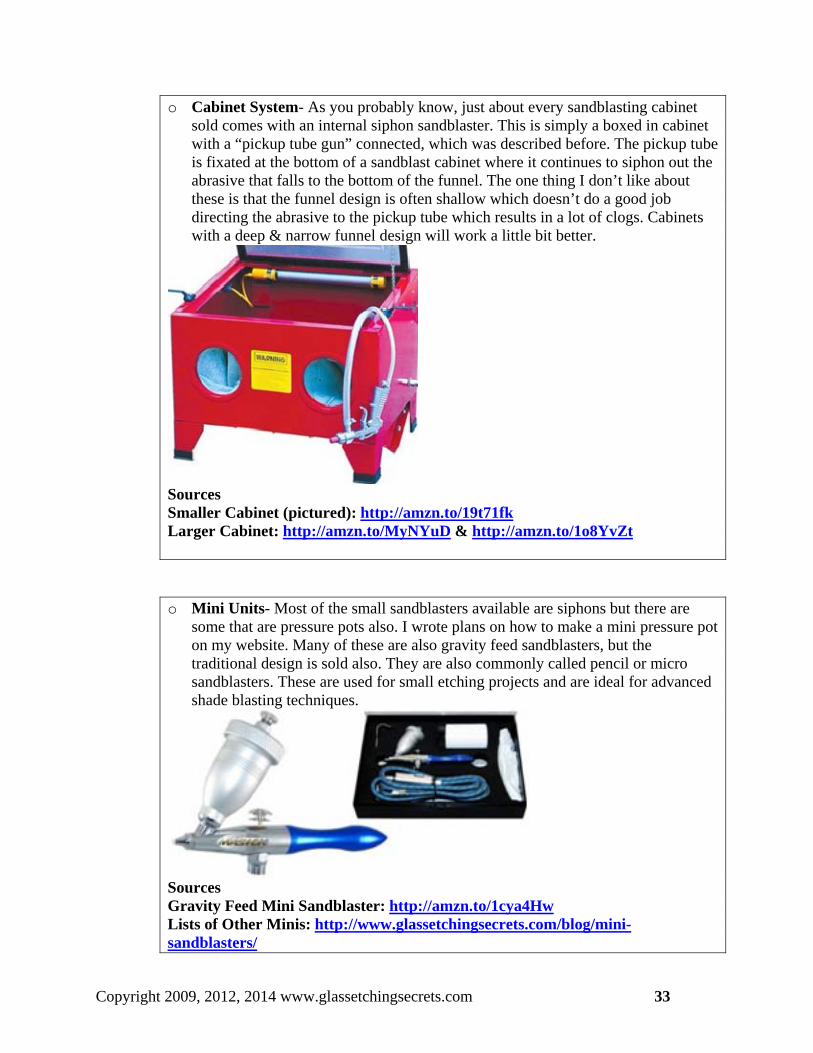
o Cabinet System- As you probably know, just about every sandblasting cabinet sold comes with an internal siphon sandblaster. This is simply a boxed in cabinet with a “pickup tube gun” connected, which was described before. The pickup tube is fixated at the bottom of a sandblast cabinet where it continues to siphon out the abrasive that falls to the bottom of the funnel. The one thing I don’t like about these is that the funnel design is often shallow which doesn’t do a good job directing the abrasive to the pickup tube which results in a lot of clogs. Cabinets with a deep & narrow funnel design will work a little bit better.
Sources Smaller Cabinet (pictured): http://amzn.to/19t71fk Larger Cabinet: http://amzn.to/MyNYuD & http://amzn.to/1o8YvZt
o Mini Units- Most of the small sandblasters available are siphons but there are
some that are pressure pots also. I wrote plans on how to make a mini pressure pot on my website. Many of these are also gravity feed sandblasters, but the traditional design is sold also. They are also commonly called pencil or micro sandblasters. These are used for small etching projects and are ideal for advanced shade blasting techniques.
Sources Gravity Feed Mini Sandblaster: http://amzn.to/1cya4Hw Lists of Other Minis: http://www.glassetchingsecrets.com/blog/mini-sandblasters/
Copyright 2009, 2012, 2014 www.glassetchingsecrets.com 33
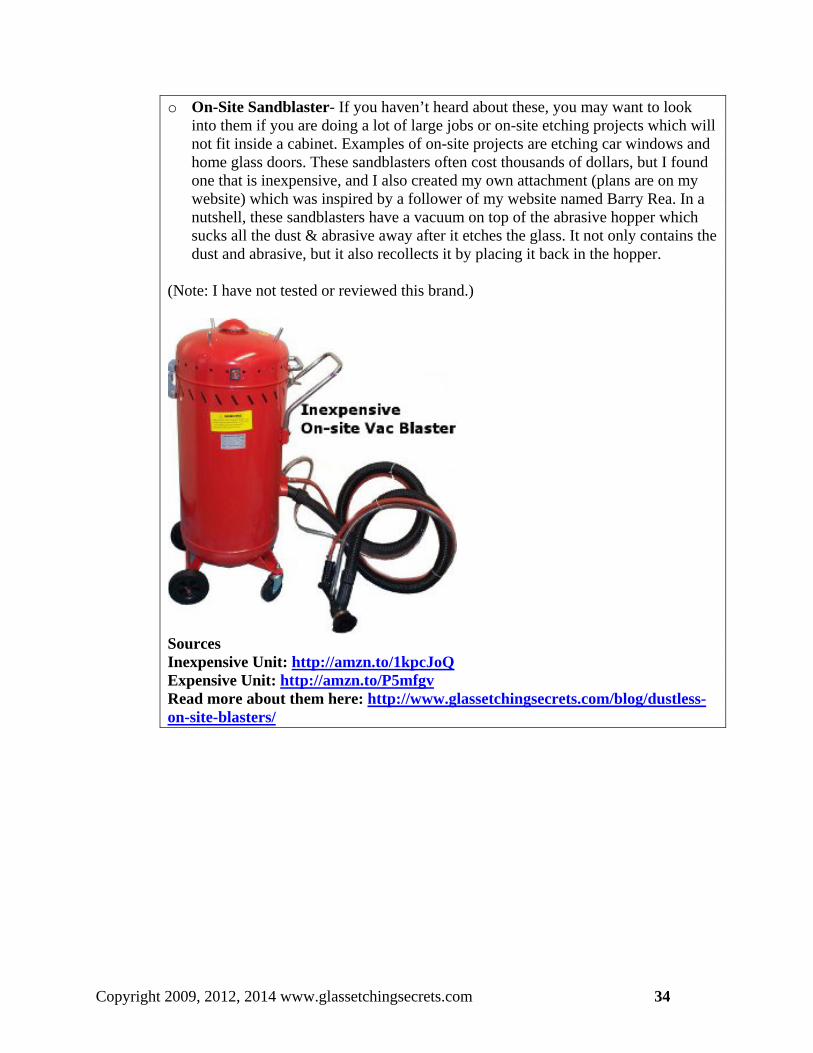
o On-Site Sandblaster- If you haven’t heard about these, you may want to look into them if you are doing a lot of large jobs or on-site etching projects which will not fit inside a cabinet. Examples of on-site projects are etching car windows and home glass doors. These sandblasters often cost thousands of dollars, but I found one that is inexpensive, and I also created my own attachment (plans are on my website) which was inspired by a follower of my website named Barry Rea. In a nutshell, these sandblasters have a vacuum on top of the abrasive hopper which sucks all the dust & abrasive away after it etches the glass. It not only contains the dust and abrasive, but it also recollects it by placing it back in the hopper.
(Note: I have not tested or reviewed this brand.)
Sources Inexpensive Unit: http://amzn.to/1kpcJoQ Expensive Unit: http://amzn.to/P5mfgv Read more about them here: http://www.glassetchingsecrets.com/blog/dustless-on-site-blasters/
Copyright 2009, 2012, 2014 www.glassetchingsecrets.com 34

Pressure Pot Sandblaster- o Shop Sized- Essentially the main difference between these pressure pots are the
sizes available. The typical shop sized ones used are the 20 lb, 40 lb, or 110 lb tanks which indicate how much abrasive it can hold by weight. Some retailers will list it by gallons.
Source 20 lb Pressure Pot: http://amzn.to/19gK2cy 40 lb Pressure Pot: http://amzn.to/19t9wOw & http://amzn.to/1dj2vGB Larger sizes: http://amzn.to/1eaErUJ , http://amzn.to/1evbDo0 , http://amzn.to/T5hrwc o Large Sized- You can buy larger industrial sizes or even make them from larger
propane tanks. A lot of people that sandblast for a living will have these large sandblasters attached to a trailer with there own large air compressor run by a gasoline powered car engine.
Copyright 2009, 2012, 2014 www.glassetchingsecrets.com 35
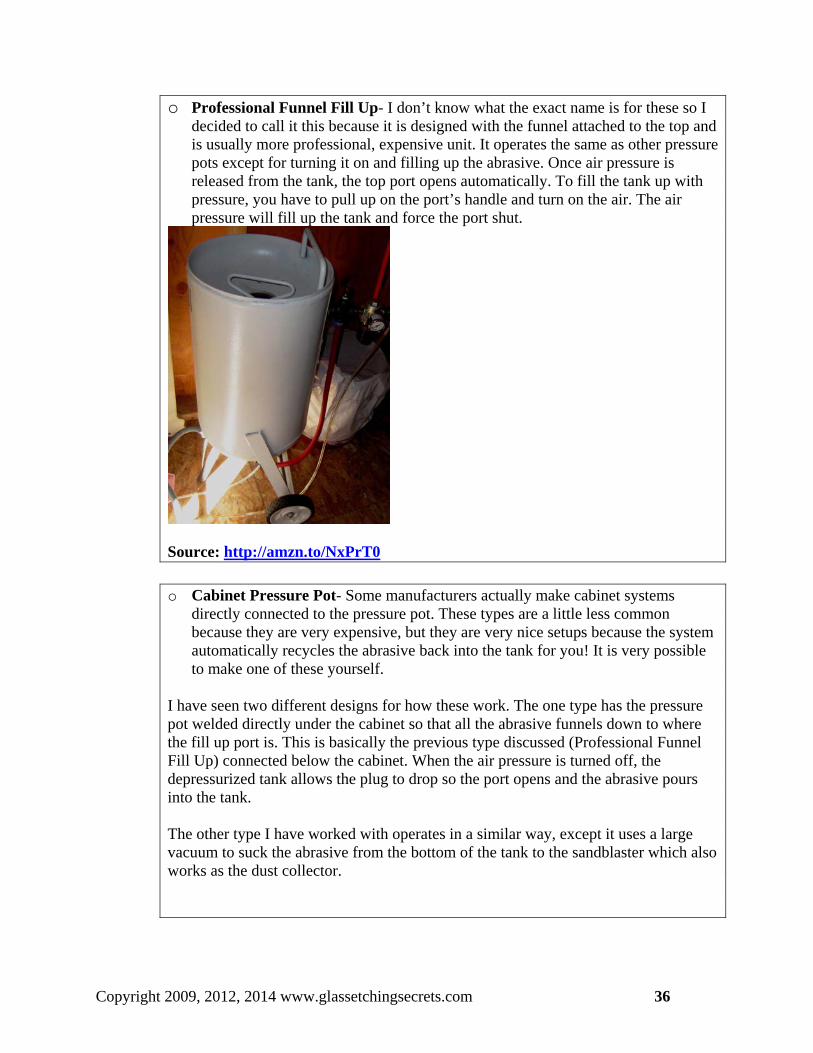
o Professional Funnel Fill Up- I don’t know what the exact name is for these so I decided to call it this because it is designed with the funnel attached to the top and is usually more professional, expensive unit. It operates the same as other pressure pots except for turning it on and filling up the abrasive. Once air pressure is released from the tank, the top port opens automatically. To fill the tank up with pressure, you have to pull up on the port’s handle and turn on the air. The air pressure will fill up the tank and force the port shut.
Source: http://amzn.to/NxPrT0
o Cabinet Pressure Pot- Some manufacturers actually make cabinet systems
directly connected to the pressure pot. These types are a little less common because they are very expensive, but they are very nice setups because the system automatically recycles the abrasive back into the tank for you! It is very possible to make one of these yourself.
I have seen two different designs for how these work. The one type has the pressure pot welded directly under the cabinet so that all the abrasive funnels down to where the fill up port is. This is basically the previous type discussed (Professional Funnel Fill Up) connected below the cabinet. When the air pressure is turned off, the depressurized tank allows the plug to drop so the port opens and the abrasive pours into the tank. The other type I have worked with operates in a similar way, except it uses a large vacuum to suck the abrasive from the bottom of the tank to the sandblaster which also works as the dust collector.
Copyright 2009, 2012, 2014 www.glassetchingsecrets.com 36
Cost Effective Sandblaster Solutions Although glass etching with sandblasters looks much more noticeable and
professional, it can get expensive. One of the reasons for this manual is to help you save money. I included a lot of links above to places with most of them having fair prices.
For the most part, all siphon systems are a lower price, but many pressure pot systems are in the price range of $500 – up to a few thousand dollars. There are a very few systems that are less than $500. When I originally wrote this ebook, I have been suggesting people to get them through a company called Harbor Freight Tools because many of them cost less than $100. They sell them under the brand name of “Central Pneumatic”, but lately I have realized many other brands with similar prices which look almost the same. These companies selling the lower priced pressure pots are usually all the same. I believe companies are buying private label rights to these sandblasters which are mass produced from a China manufacturer and sold under the retailer’s name. So you can expect similar quality when buying and shopping around for prices. Central Pneumatic Pressure Pot
This pressure pot sandblaster system which I mentioned previously is the unit I currently use under the brand “Central Pneumatic”. I purchased the 40 lb pressure pot sandblaster for $80 from a Harbor Freight Tools store on sale when it had a regular price of around $100.
If you have a Harbor Freight Store near you, I recommend going to it instead of their website because the physical stores usually have better deals, more chances for sales on products, and you won’t have to pay for the shipping costs.
Here is the link for the website with a list of a few different inexpensive
pressure pot sizes: http://www.harborfreight.com/garage-shop/abrasive-blasters.html
Other Low Cost Pressure Pot Sandblasters
In addition to the links I provided in the earlier sections, I created this additional list to help you shop around. As I stated before, most of these are either the same in quality or very similar. Generic Sandblaster Brand 10 Gallon listing
Copyright 2009, 2012, 2014 www.glassetchingsecrets.com 37
20 Gallon listing Professional 20 gallon listing King 20 Gallon: http://amzn.to/yJYy0o
Eastwood Sandblaster Brand 100 LB Portable Sandblaster
Buffalo Tools Sandblaster Brand 10 Gallon Portable Sandblaster
ATD Tools Sandblaster Brand 40 LB Portable Sandblaster 90 LB Portable Sandblaster
The web is constantly changing, so at times these links may be unavailable. If that is the case, search through all sorts of low cost sandblasters & parts here: http://www.glassetchingsecrets.com/sandblaster-lists (Link will redirect to my favorite shopping site, Amazon)
Copyright 2009, 2012, 2014 www.glassetchingsecrets.com 38
Pressure Pot Sizes & Recommendation The 40 lb pressure pot which I use is a pretty good size for a hobbyist or a
small business that allows a fairly decent capacity at a relatively smaller size so it won’t take up a lot of room. If you’re looking to sandblast small objects inside your sandblaster cabinet, then the 20 lb may be large enough. The 40 lb allows more abrasive in the holding tank so you don’t have to refill it as often. I recommend getting a 40 lb or larger even if you only have smaller projects so you don’t have to stop and refill as often.
Most 40 lb pressure pots also have other perks in comparison to the 20 lb blaster. Although these additional items aren’t expensive and can be easily added to the 20 lb blaster, they are ideal to have from the get-go which are:
Pressure gauge- it allows you to monitor the pressure and adjust the air pressure setting for the desired glass etching power. (A pressure gauge isn’t expensive and can be connected later if desired, but not necessarily required.) Air/water filter (a.k.a. air separators)- these extract moisture and contaminants from the compressed air before being placed in the pressure pot. This should definitely be used to prevent moisture from getting mixed into the abrasive which causes it to harden. If this happens the abrasive will need to be removed from the container and dried. (Decent air filters are also fairly inexpensive, as low as $10 and can be connected anytime.)
Downfall to Inexpensive Pressure Pots The only bad thing that I have noticed about these inexpensive pressure pot brands are their inability to keep a consistent flow. This is due to having an imperfect design and the abrasive media being exposed to moisture from the supplied air causing the abrasive to clump up. I usually have to tilt the pot sideways slightly to make sure all the abrasive gets funneled down while sandblasting. I recommend refilling the container each time it goes below 1/3 of the capacity because it has a poor funnel design. Eventually, I will be talking more about abrasive flow solutions in later modules of the member’s area here: http://www.glassetchingsecrets.com/member
Overall, these pressure pot sandblasters are a great inexpensive, alternate for hobbyist to use or for small businesses starting out. It will get the job done and have the high blasting power for multi-stage glass etching, but with some inconsistent flow characteristics if not operated correctly.
In the next few sections I will explain getting a sandblaster cabinet at a low cost and shown you the configurations of either the portable siphon or pressure pot sandblaster systems.
Copyright 2009, 2012, 2014 www.glassetchingsecrets.com 39

Sandblaster Cabinet
A sandblaster cabinet is a recommended item that allows the abrasive to be
kept in the concealed area to be reused over and over. This is very cost effective way to etch glass because the boxed in area collects the abrasive being sprayed out of the sandblaster and is recycled multiple times.
The sandblaster cabinet is also great because it is safer. It protects you from
abrasive being sprayed in your eyes, on your skin, and away from your nearby valuables. It also prevents you from breathing in dust which can cause silicosis.
These cabinets are designed with a viewing window to allow the operator to
see and a pair of movable gloves to allow the operator to hold the sandblaster nozzle for aiming at the project. The sandblaster cabinet can be expensive, but I will show you how to get one that works great for very low prices with either the siphon or pressure pot sandblaster systems.
Copyright 2009, 2012, 2014 www.glassetchingsecrets.com 40
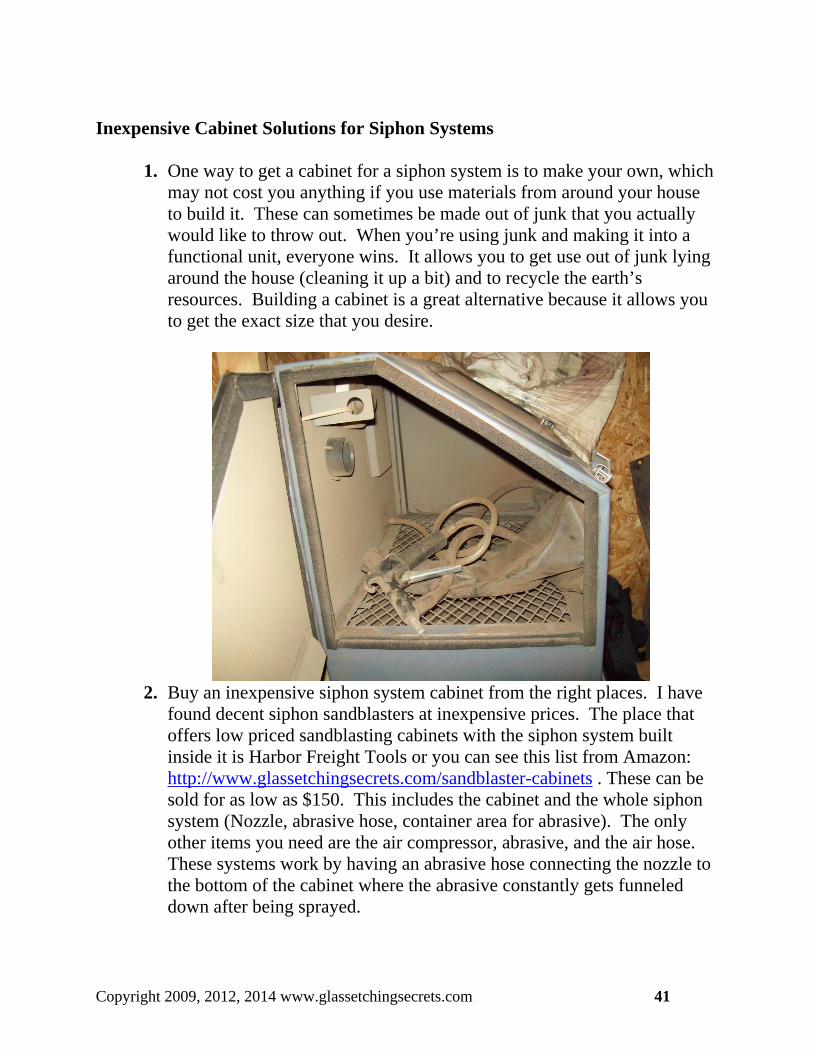
Inexpensive Cabinet Solutions for Siphon Systems
1. One way to get a cabinet for a siphon system is to make your own, which
may not cost you anything if you use materials from around your house to build it. These can sometimes be made out of junk that you actually would like to throw out. When you’re using junk and making it into a functional unit, everyone wins. It allows you to get use out of junk lying around the house (cleaning it up a bit) and to recycle the earth’s resources. Building a cabinet is a great alternative because it allows you to get the exact size that you desire.
2. Buy an inexpensive siphon system cabinet from the right places. I have
found decent siphon sandblasters at inexpensive prices. The place that offers low priced sandblasting cabinets with the siphon system built inside it is Harbor Freight Tools or you can see this list from Amazon: http://www.glassetchingsecrets.com/sandblaster-cabinets . These can be sold for as low as $150. This includes the cabinet and the whole siphon system (Nozzle, abrasive hose, container area for abrasive). The only other items you need are the air compressor, abrasive, and the air hose. These systems work by having an abrasive hose connecting the nozzle to the bottom of the cabinet where the abrasive constantly gets funneled down after being sprayed.
Copyright 2009, 2012, 2014 www.glassetchingsecrets.com 41

3. A Third way to get one cheap is to buy a used one. Occasionally, I will find a few people trying to sell their sandblaster cabinet. Check your local newspaper in the classifieds section or any other publication, and check Craigslist at www.craigslist.com. Last time I checked Craigslist for sandblaster cabinets in my area, I saw a few that were cheap and actually very nice. One was around 40 dollars and in good condition according to the description and photo.
Inexpensive Cabinet Solutions for Pressure Pot Systems
Some companies market pressure pot systems that are permanently combined to the sandblasting cabinet. These are extremely expensive; up to a few thousand dollars.
I think the best way is to buy a cheaper portable one and hook it up to a
stationary cabinet. Although those other cabinets are nice, there is an advantage by configuring a portable pressure pot system to a stationary cabinet. This will allow you to use the system interchangeably within the cabinet for stationary purposes and away from the cabinet for portable purposes. It’s like your getting two systems for the price of one. All you have to do is place the sandblaster hose in a drilled hole of the cabinet (it may have to be sealed up if the gap is too large).
The only disadvantage of this is that you have to physically recollect the
abrasive media and place it back inside the pressure pot container. It really isn’t too much of a hassle because it is neither hard to do or time consuming. My recommendation is to try and rig up a valve at the bottom of the cabinet that can be opened to easily empty the abrasive into a bucket.
Listed below are some of the alternative ways to get an inexpensive cabinet
for a pressure pot system:
Copyright 2009, 2012, 2014 www.glassetchingsecrets.com 42
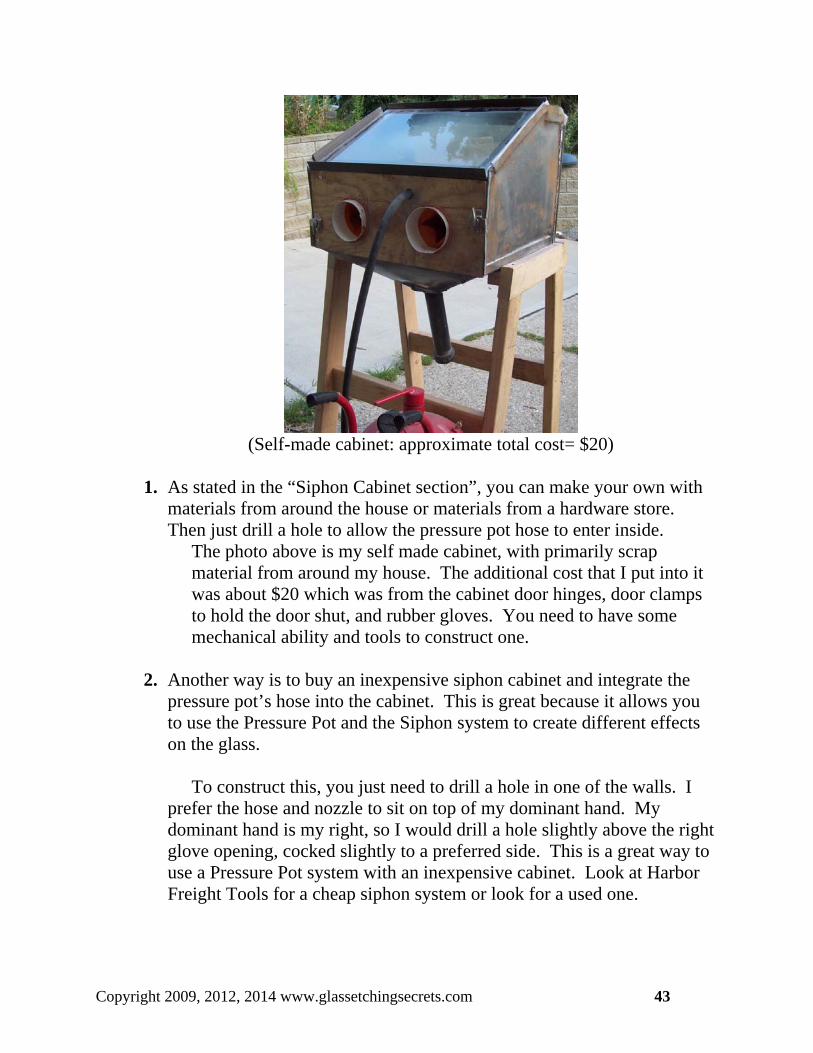
(Self-made cabinet: approximate total cost= $20)
1. As stated in the “Siphon Cabinet section”, you can make your own with
materials from around the house or materials from a hardware store. Then just drill a hole to allow the pressure pot hose to enter inside.
The photo above is my self made cabinet, with primarily scrap material from around my house. The additional cost that I put into it was about $20 which was from the cabinet door hinges, door clamps to hold the door shut, and rubber gloves. You need to have some mechanical ability and tools to construct one.
2. Another way is to buy an inexpensive siphon cabinet and integrate the
pressure pot’s hose into the cabinet. This is great because it allows you to use the Pressure Pot and the Siphon system to create different effects on the glass.
To construct this, you just need to drill a hole in one of the walls. I
prefer the hose and nozzle to sit on top of my dominant hand. My dominant hand is my right, so I would drill a hole slightly above the right glove opening, cocked slightly to a preferred side. This is a great way to use a Pressure Pot system with an inexpensive cabinet. Look at Harbor Freight Tools for a cheap siphon system or look for a used one.
Copyright 2009, 2012, 2014 www.glassetchingsecrets.com 43
How Can I Make My Cabinet More Visible?
A lot of people have trouble seeing what they’re etching due to abrasive dust clouding up inside and/or from inadequate light (too dark). This can be overcome by using a combination of different tactics. Listed below are some tactics to help you see what you’re etching better:
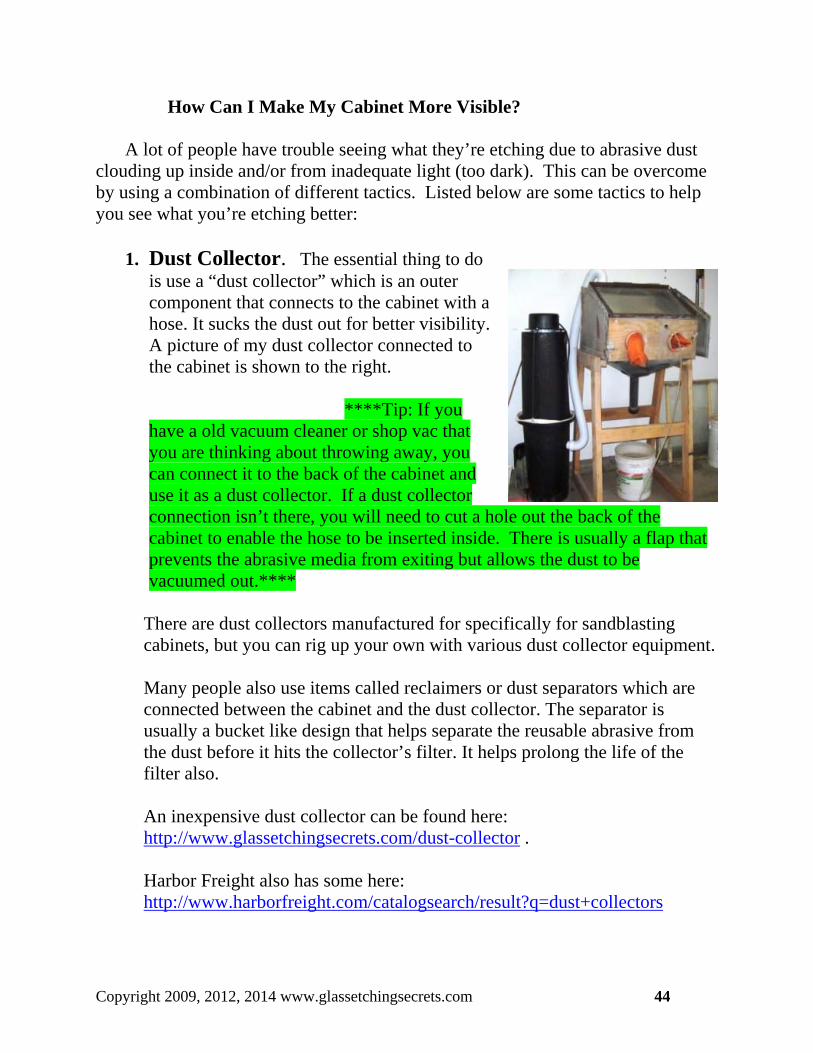
1. Dust Collector. The essential thing to do is use a “dust collector” which is an outer component that connects to the cabinet with a hose. It sucks the dust out for better visibility. A picture of my dust collector connected to the cabinet is shown to the right. ****Tip: If you have a old vacuum cleaner or shop vac that you are thinking about throwing away, you can connect it to the back of the cabinet and use it as a dust collector. If a dust collector connection isn’t there, you will need to cut a hole out the back of the cabinet to enable the hose to be inserted inside. There is usually a flap that prevents the abrasive media from exiting but allows the dust to be vacuumed out.****
There are dust collectors manufactured for specifically for sandblasting cabinets, but you can rig up your own with various dust collector equipment. Many people also use items called reclaimers or dust separators which are connected between the cabinet and the dust collector. The separator is usually a bucket like design that helps separate the reusable abrasive from the dust before it hits the collector’s filter. It helps prolong the life of the filter also. An inexpensive dust collector can be found here: http://www.glassetchingsecrets.com/dust-collector . Harbor Freight also has some here: http://www.harborfreight.com/catalogsearch/result?q=dust+collectors
Copyright 2009, 2012, 2014 www.glassetchingsecrets.com 44
2. Transparent Walls. Another tactic is to make the walls transparent by cutting out some of the opaque (usually metal) walls and rigging a transparent material in its place such as glass. This way more light can enter inside the cabinet without additional light sources being placed inside. In order for this to work, the main frame should still be in place (possibly the outer edges) and the transparent material will need to be sealed tight to prevent abrasives from escaping the cabinet. A strong sealant may work to properly seal the transparent material to the cabinet frame.
3. Additional Light. You can place additional or stronger light sources
inside or outside the cabinet to improve visibility. It is really easy to set up a light system outside the cabinet and not be damaged from abrasive if you use the 2nd step with transparent walls. The transparent walls allow an outside light bulb to light up the inside of the cabinet.
4. Polarized Sunglasses. Often you will get a film of abrasive dust on the
inside of your viewing glass. Polarized sunglasses will sometimes help cut through the glare when blasting outside in the sun.
Copyright 2009, 2012, 2014 www.glassetchingsecrets.com 45
Air Compressor
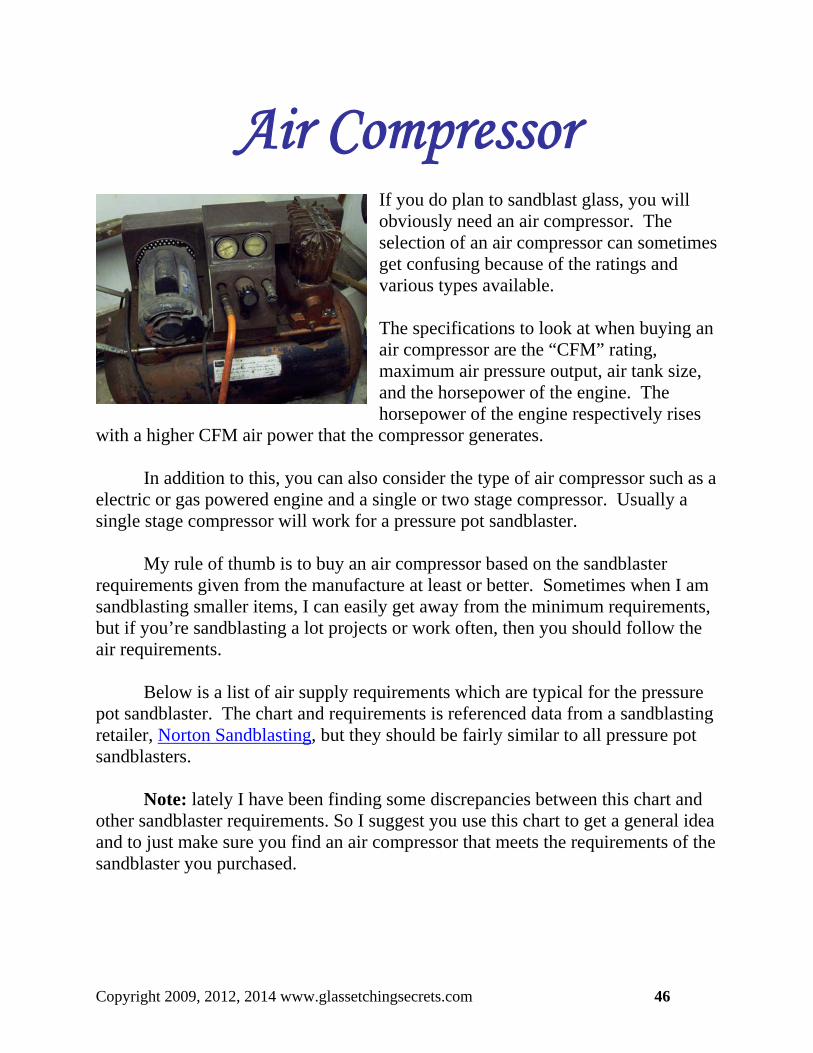
If you do plan to sandblast glass, you will obviously need an air compressor. The selection of an air compressor can sometimes get confusing because of the ratings and various types available. The specifications to look at when buying an air compressor are the “CFM” rating, maximum air pressure output, air tank size, and the horsepower of the engine. The horsepower of the engine respectively rises
with a higher CFM air power that the compressor generates. In addition to this, you can also consider the type of air compressor such as a
electric or gas powered engine and a single or two stage compressor. Usually a single stage compressor will work for a pressure pot sandblaster.
My rule of thumb is to buy an air compressor based on the sandblaster
requirements given from the manufacture at least or better. Sometimes when I am sandblasting smaller items, I can easily get away from the minimum requirements, but if you’re sandblasting a lot projects or work often, then you should follow the air requirements.
Below is a list of air supply requirements which are typical for the pressure
pot sandblaster. The chart and requirements is referenced data from a sandblasting retailer, Norton Sandblasting, but they should be fairly similar to all pressure pot sandblasters.
Note: lately I have been finding some discrepancies between this chart and
other sandblaster requirements. So I suggest you use this chart to get a general idea and to just make sure you find an air compressor that meets the requirements of the sandblaster you purchased.
Copyright 2009, 2012, 2014 www.glassetchingsecrets.com 46
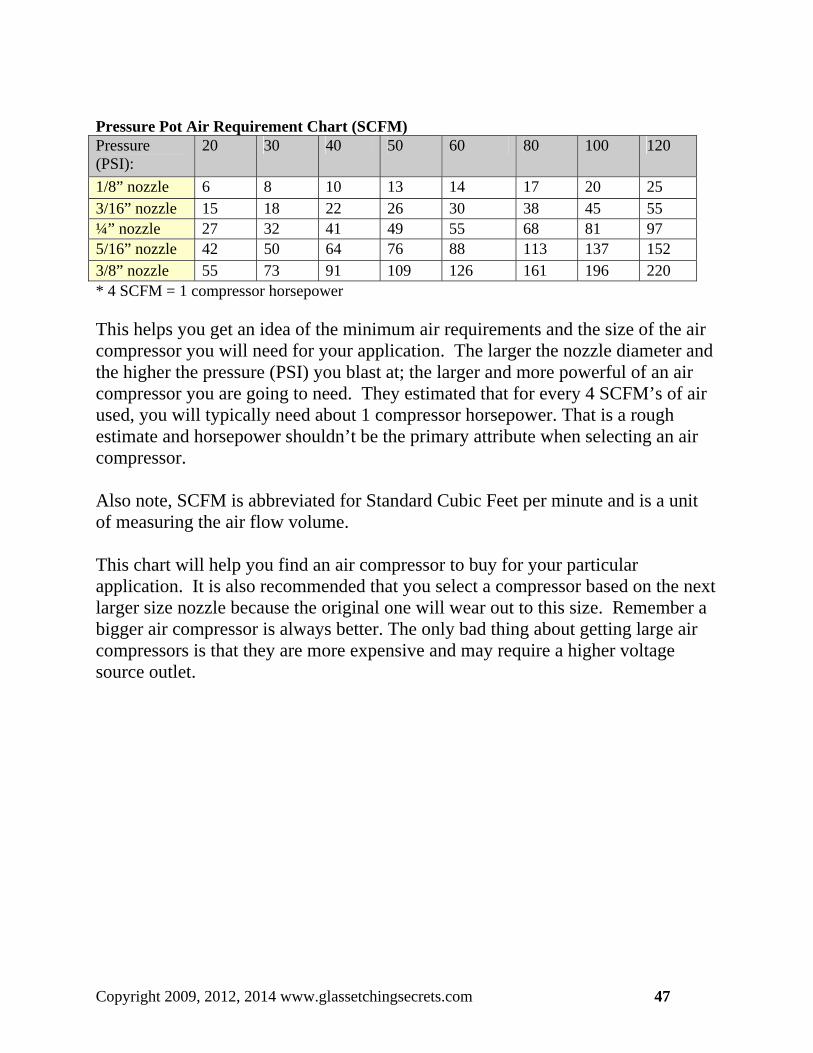
Pressure Pot Air Requirement Chart (SCFM) Pressure (PSI):
20 30 40 50 60 80 100 120
1/8” nozzle 6 8 10 13 14 17 20 25 3/16” nozzle 15 18 22 26 30 38 45 55 ¼” nozzle 27 32 41 49 55 68 81 97 5/16” nozzle 42 50 64 76 88 113 137 152 3/8” nozzle 55 73 91 109 126 161 196 220 * 4 SCFM = 1 compressor horsepower This helps you get an idea of the minimum air requirements and the size of the air compressor you will need for your application. The larger the nozzle diameter and the higher the pressure (PSI) you blast at; the larger and more powerful of an air compressor you are going to need. They estimated that for every 4 SCFM’s of air used, you will typically need about 1 compressor horsepower. That is a rough estimate and horsepower shouldn’t be the primary attribute when selecting an air compressor. Also note, SCFM is abbreviated for Standard Cubic Feet per minute and is a unit of measuring the air flow volume. This chart will help you find an air compressor to buy for your particular application. It is also recommended that you select a compressor based on the next larger size nozzle because the original one will wear out to this size. Remember a bigger air compressor is always better. The only bad thing about getting large air compressors is that they are more expensive and may require a higher voltage source outlet.
Copyright 2009, 2012, 2014 www.glassetchingsecrets.com 47
Sandblaster Nozzles There are a few different types of nozzle configurations that you can use to
sandblast your glass but these operate completely different for the siphon and pressure pot sandblasters. So the nozzles discussed are not interchangeable between the 2 sandblaster categories. I list the nozzle types by category below.
Siphon Sandblaster Nozzles If you’re using the siphon sandblaster, they are all fairly similar and are the
main part of the sandblaster when you buy it, so there aren’t many add-on parts needed unless you want to use a foot operated pedal. Below are the types used for siphon systems:
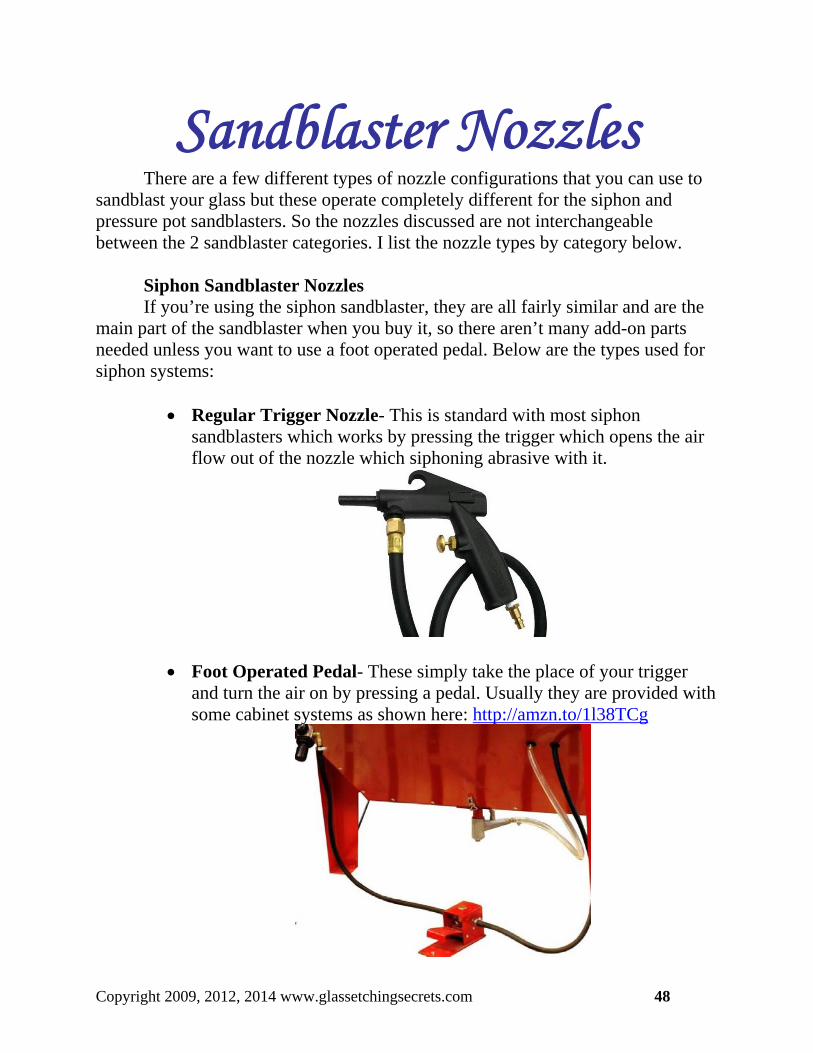
Regular Trigger Nozzle- This is standard with most siphon
sandblasters which works by pressing the trigger which opens the air flow out of the nozzle which siphoning abrasive with it.
Foot Operated Pedal- These simply take the place of your trigger and turn the air on by pressing a pedal. Usually they are provided with some cabinet systems as shown here: http://amzn.to/1l38TCg
Copyright 2009, 2012, 2014 www.glassetchingsecrets.com 48
Pressure Pot Sandblaster Nozzles On the other hand, the pressure pot sandblaster has a few different setup
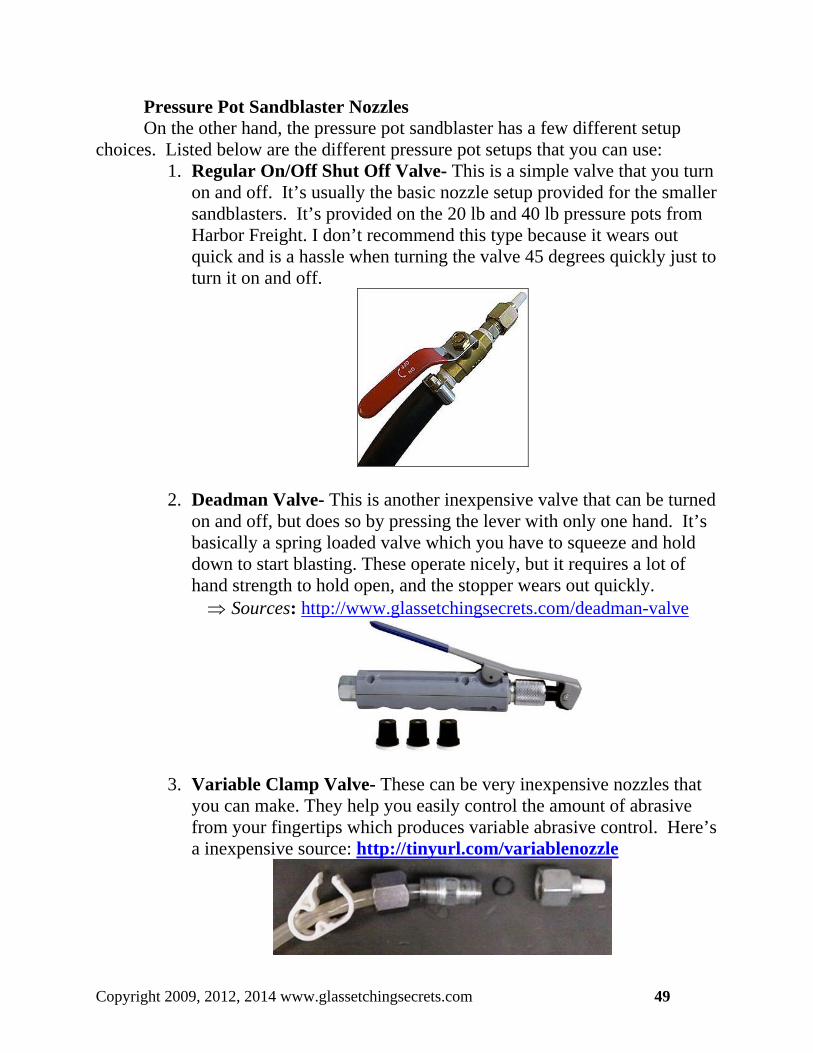
choices. Listed below are the different pressure pot setups that you can use: 1. Regular On/Off Shut Off Valve- This is a simple valve that you turn
on and off. It’s usually the basic nozzle setup provided for the smaller sandblasters. It’s provided on the 20 lb and 40 lb pressure pots from Harbor Freight. I don’t recommend this type because it wears out quick and is a hassle when turning the valve 45 degrees quickly just to turn it on and off.
2. Deadman Valve- This is another inexpensive valve that can be turned
on and off, but does so by pressing the lever with only one hand. It’s basically a spring loaded valve which you have to squeeze and hold down to start blasting. These operate nicely, but it requires a lot of hand strength to hold open, and the stopper wears out quickly. Sources: http://www.glassetchingsecrets.com/deadman-valve
3. Variable Clamp Valve- These can be very inexpensive nozzles that you can make. They help you easily control the amount of abrasive from your fingertips which produces variable abrasive control. Here’s a inexpensive source: http://tinyurl.com/variablenozzle
Copyright 2009, 2012, 2014 www.glassetchingsecrets.com 49
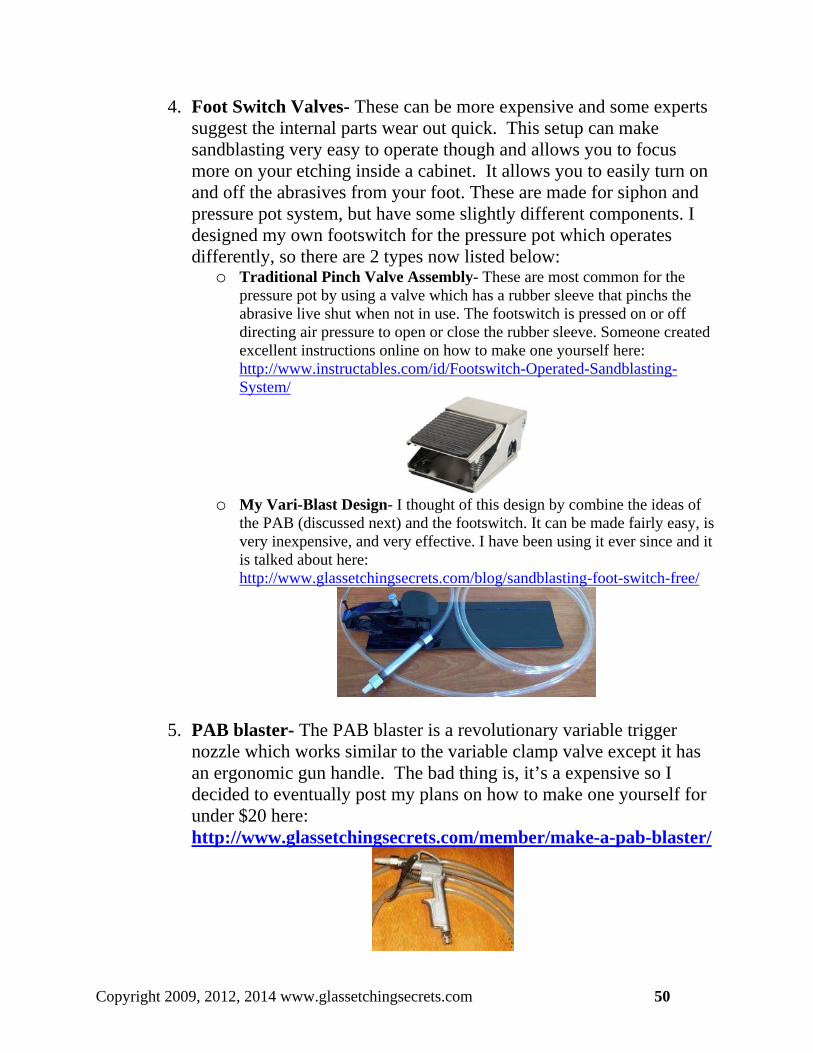
4. Foot Switch Valves- These can be more expensive and some experts suggest the internal parts wear out quick. This setup can make sandblasting very easy to operate though and allows you to focus more on your etching inside a cabinet. It allows you to easily turn on and off the abrasives from your foot. These are made for siphon and pressure pot system, but have some slightly different components. I designed my own footswitch for the pressure pot which operates differently, so there are 2 types now listed below:
o Traditional Pinch Valve Assembly- These are most common for the pressure pot by using a valve which has a rubber sleeve that pinchs the abrasive live shut when not in use. The footswitch is pressed on or off directing air pressure to open or close the rubber sleeve. Someone created excellent instructions online on how to make one yourself here: http://www.instructables.com/id/Footswitch-Operated-Sandblasting-System/
o My Vari-Blast Design- I thought of this design by combine the ideas of
the PAB (discussed next) and the footswitch. It can be made fairly easy, is very inexpensive, and very effective. I have been using it ever since and it is talked about here: http://www.glassetchingsecrets.com/blog/sandblasting-foot-switch-free/
5. PAB blaster- The PAB blaster is a revolutionary variable trigger nozzle which works similar to the variable clamp valve except it has an ergonomic gun handle. The bad thing is, it’s a expensive so I decided to eventually post my plans on how to make one yourself for under $20 here: http://www.glassetchingsecrets.com/member/make-a-pab-blaster/
Copyright 2009, 2012, 2014 www.glassetchingsecrets.com 50
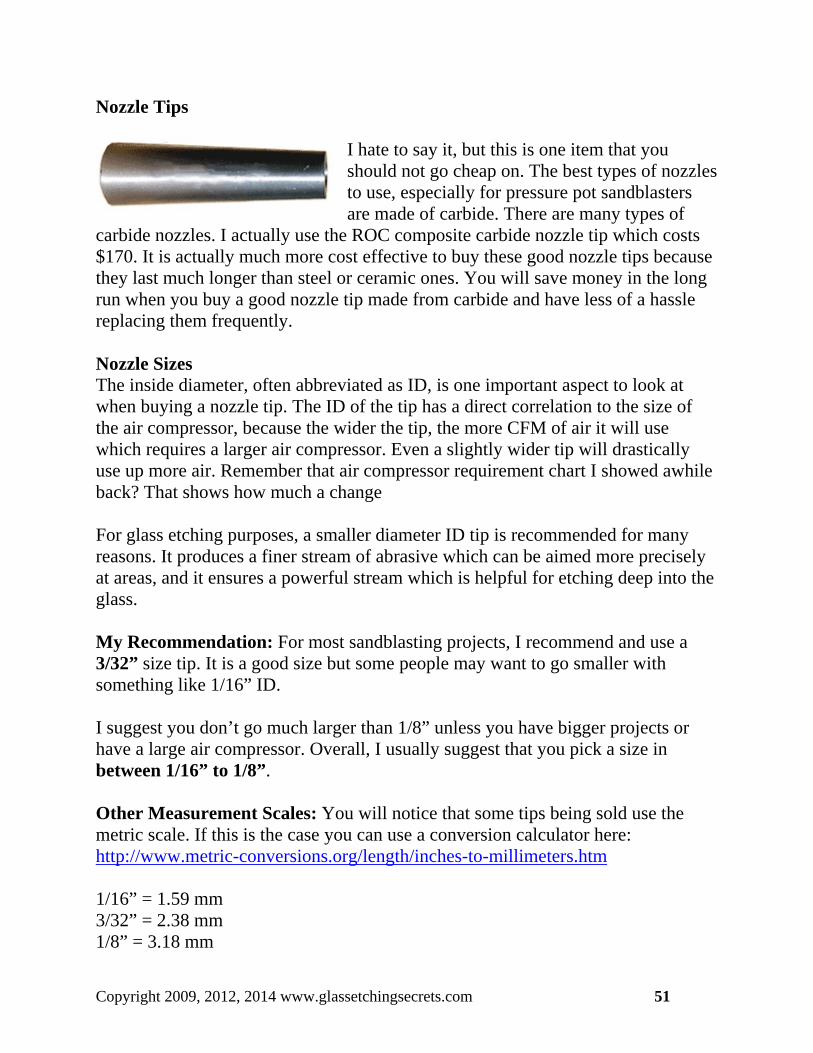
Nozzle Tips
I hate to say it, but this is one item that you should not go cheap on. The best types of nozzlesto use, especially for pressure pot sandblasters are made of carbide. There are many types o
carbide nozzles. I actually use the ROC composite carbide nozzle tip which costs $170. It is actually much more cost effective to buy these good nozzle tips because they last much longer than steel or ceramic ones. You will save money in the long run when you buy a good nozzle tip made from carbide and have less of a hassle replacing them fre
f
quently. Nozzle Sizes The inside diameter, often abbreviated as ID, is one important aspect to look at when buying a nozzle tip. The ID of the tip has a direct correlation to the size of the air compressor, because the wider the tip, the more CFM of air it will use which requires a larger air compressor. Even a slightly wider tip will drastically use up more air. Remember that air compressor requirement chart I showed awhile back? That shows how much a change For glass etching purposes, a smaller diameter ID tip is recommended for many reasons. It produces a finer stream of abrasive which can be aimed more precisely at areas, and it ensures a powerful stream which is helpful for etching deep into the glass. My Recommendation: For most sandblasting projects, I recommend and use a 3/32” size tip. It is a good size but some people may want to go smaller with something like 1/16” ID. I suggest you don’t go much larger than 1/8” unless you have bigger projects or have a large air compressor. Overall, I usually suggest that you pick a size in between 1/16” to 1/8”. Other Measurement Scales: You will notice that some tips being sold use the metric scale. If this is the case you can use a conversion calculator here: http://www.metric-conversions.org/length/inches-to-millimeters.htm 1/16” = 1.59 mm 3/32” = 2.38 mm 1/8” = 3.18 mm
Copyright 2009, 2012, 2014 www.glassetchingsecrets.com 51
Sandblaster Media
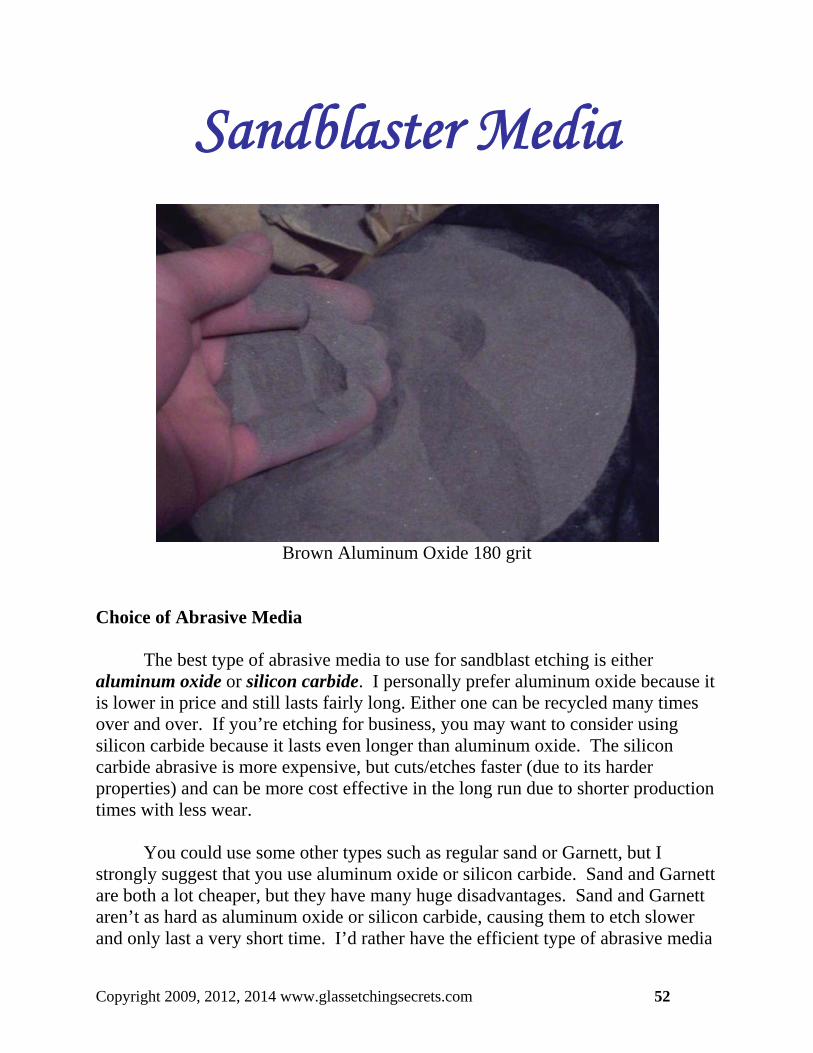
Brown Aluminum Oxide 180 grit
Choice of Abrasive Media The best type of abrasive media to use for sandblast etching is either aluminum oxide or silicon carbide. I personally prefer aluminum oxide because it is lower in price and still lasts fairly long. Either one can be recycled many times over and over. If you’re etching for business, you may want to consider using silicon carbide because it lasts even longer than aluminum oxide. The silicon carbide abrasive is more expensive, but cuts/etches faster (due to its harder properties) and can be more cost effective in the long run due to shorter production times with less wear.
You could use some other types such as regular sand or Garnett, but I strongly suggest that you use aluminum oxide or silicon carbide. Sand and Garnett are both a lot cheaper, but they have many huge disadvantages. Sand and Garnett aren’t as hard as aluminum oxide or silicon carbide, causing them to etch slower and only last a very short time. I’d rather have the efficient type of abrasive media
Copyright 2009, 2012, 2014 www.glassetchingsecrets.com 52
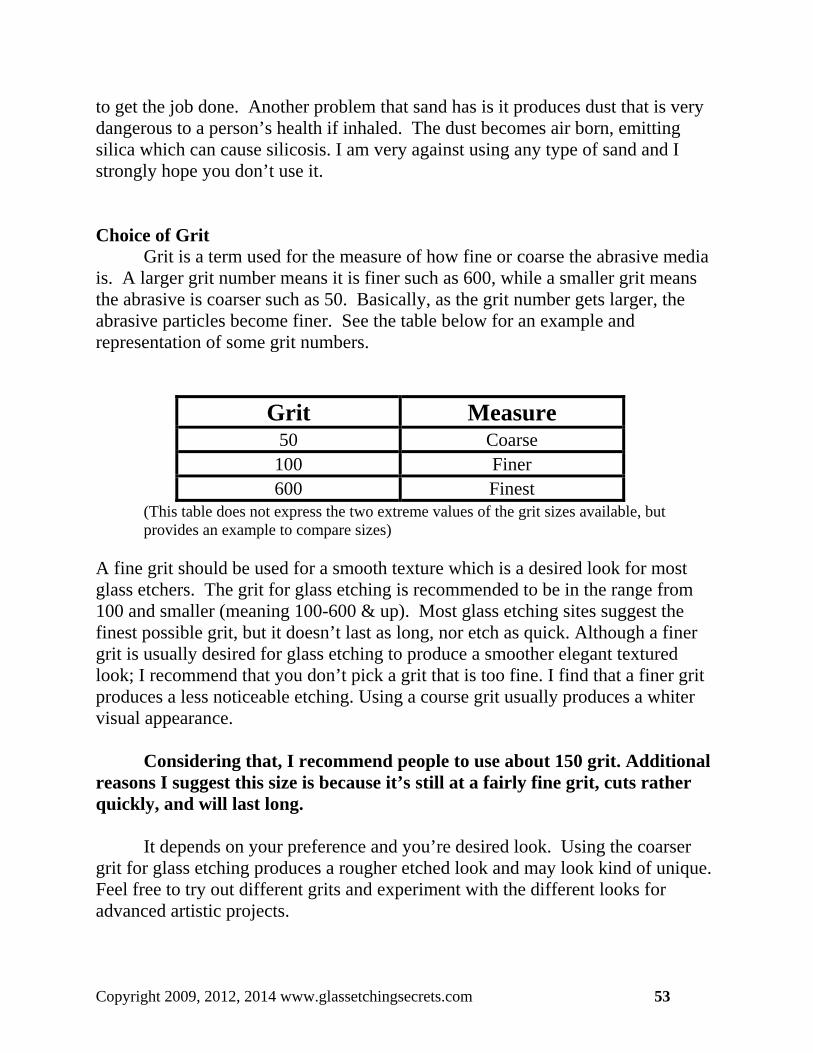
to get the job done. Another problem that sand has is it produces dust that is very dangerous to a person’s health if inhaled. The dust becomes air born, emitting silica which can cause silicosis. I am very against using any type of sand and I strongly hope you don’t use it. Choice of Grit Grit is a term used for the measure of how fine or coarse the abrasive media is. A larger grit number means it is finer such as 600, while a smaller grit means the abrasive is coarser such as 50. Basically, as the grit number gets larger, the abrasive particles become finer. See the table below for an example and representation of some grit numbers.
Grit Measure 50 Coarse
100 Finer 600 Finest
(This table does not express the two extreme values of the grit sizes available, but provides an example to compare sizes)
A fine grit should be used for a smooth texture which is a desired look for most glass etchers. The grit for glass etching is recommended to be in the range from 100 and smaller (meaning 100-600 & up). Most glass etching sites suggest the finest possible grit, but it doesn’t last as long, nor etch as quick. Although a finer grit is usually desired for glass etching to produce a smoother elegant textured look; I recommend that you don’t pick a grit that is too fine. I find that a finer grit produces a less noticeable etching. Using a course grit usually produces a whiter visual appearance.
Considering that, I recommend people to use about 150 grit. Additional
reasons I suggest this size is because it’s still at a fairly fine grit, cuts rather quickly, and will last long.
It depends on your preference and you’re desired look. Using the coarser
grit for glass etching produces a rougher etched look and may look kind of unique. Feel free to try out different grits and experiment with the different looks for advanced artistic projects.
Copyright 2009, 2012, 2014 www.glassetchingsecrets.com 53
Connection between Grit Size & Stencil Thickness Although a fine grit size is usually more expensive than a coarse grit size, it can save you money when buying stencils. The finer the grit size, the thinner the stencil can be used. Thick stencils are required for high pressure sandblasting which can cost a lot of money, but you can often use inexpensive thin stencils when you are blasting with fine abrasives. I have sandblasted into glass fairly deep when using 180 grit abrasive and a thin 3 mil stencil. Cost Effective Abrasive Media Solution I have realized that glass etching sites online price their abrasive very high. This might be because it is a niche area and customers think that you have to get abrasives specialized for glass etching specifically at those sites. Or it may be due to the glass etching sites inability to stock up on low wholesale rates. Either way, I advise you to look around your city for shops that sell abrasives, specialized for other types of sand blasting industries (it can be used for glass etching too) because it will be a lot cheaper. This way you can pick it up that day, have no shipping cost, and buy it cheaper. I bought a 50 lb bag of aluminum oxide 180 grit for about $45. That’s a fairly good deal, considering it would be as high as $100 and almost $20 to ship if you bought it online somewhere, while having to wait a week or two to receive it.
I usually buy one bag each time from the abrasive company that I found nearby, and it would be even cheaper if you bought more bags or in bulk. For a tip, if you’re looking to frequently etch glass or doing it for business, you could reduce cost by buying in bulk from abrasive companies because they give you a price break for higher quantities. Do remember that aluminum oxide and silicon carbide can go a long way because they can be recycled over 70 times, so you may not need to buy more than a few bags. In the end, you don’t need to buy from glass etching sites for a special type of abrasive at high prices.
Guide to search for sandblasting abrasive near you (This resource is primarily for the United States area. If you live elsewhere, please search similar directories near you)
Look in the following sources for sandblasting media to find local distributors in your area. Once you find a few sources, call and ask them if they
Copyright 2009, 2012, 2014 www.glassetchingsecrets.com 54
have the type of abrasive you want for glass etching (Grit size and type) and ask about for their rates.
Also be sure to ask if you can make a local pickup. You will be more likely
to find distributors in a large city, than in a small town. If you can’t find a distributor nearby, you may need to have the abrasive shipped anyway. In this case, it usually will still be cheaper to buy from a sandblasting distributor than a glass etching company.
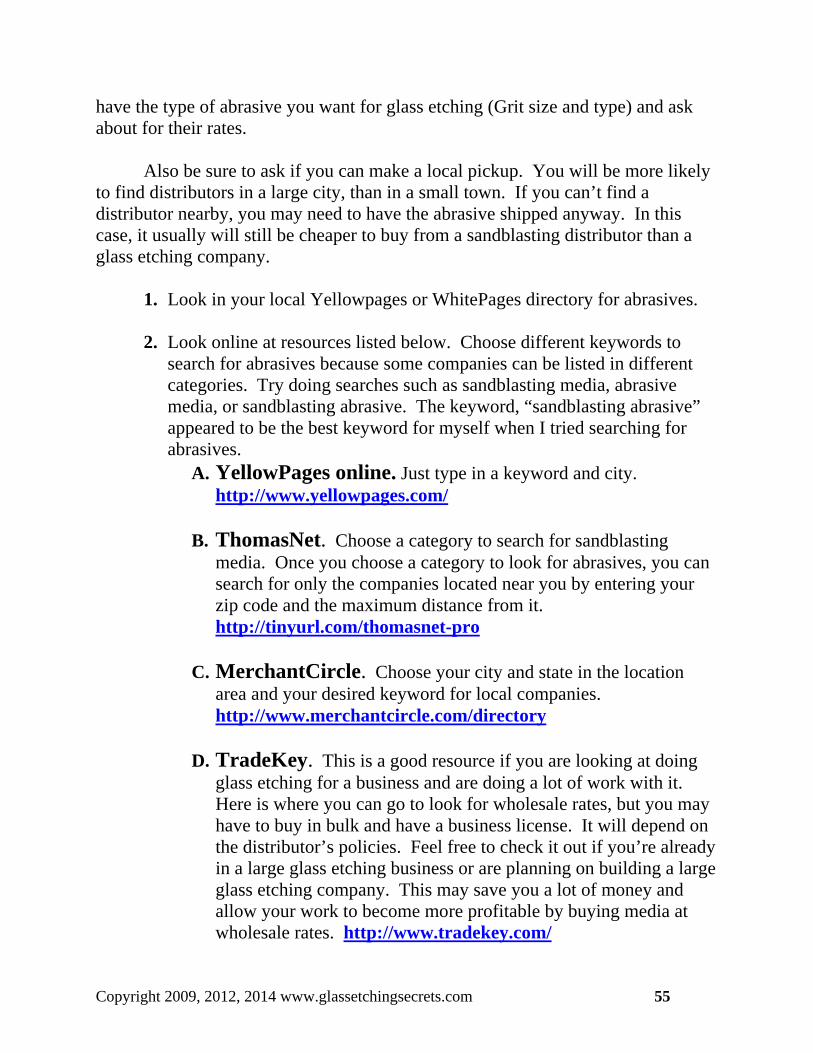
1. Look in your local Yellowpages or WhitePages directory for abrasives. 2. Look online at resources listed below. Choose different keywords to
search for abrasives because some companies can be listed in different categories. Try doing searches such as sandblasting media, abrasive media, or sandblasting abrasive. The keyword, “sandblasting abrasive” appeared to be the best keyword for myself when I tried searching for abrasives.
A. YellowPages online. Just type in a keyword and city. http://www.yellowpages.com/
B. ThomasNet. Choose a category to search for sandblasting
media. Once you choose a category to look for abrasives, you can search for only the companies located near you by entering your zip code and the maximum distance from it. http://tinyurl.com/thomasnet-pro
C. MerchantCircle. Choose your city and state in the location
area and your desired keyword for local companies. http://www.merchantcircle.com/directory
D. TradeKey. This is a good resource if you are looking at doing
glass etching for a business and are doing a lot of work with it. Here is where you can go to look for wholesale rates, but you may have to buy in bulk and have a business license. It will depend on the distributor’s policies. Feel free to check it out if you’re already in a large glass etching business or are planning on building a large glass etching company. This may save you a lot of money and allow your work to become more profitable by buying media at wholesale rates. http://www.tradekey.com/
Copyright 2009, 2012, 2014 www.glassetchingsecrets.com 55
Software for Designing Stencils
The main foundation to creating the unique work of art is creating a good
looking stencil resist. In order to have a lot of flexibility when creating a resist desired for the finished etched piece, you need software tools to easily alter the design.
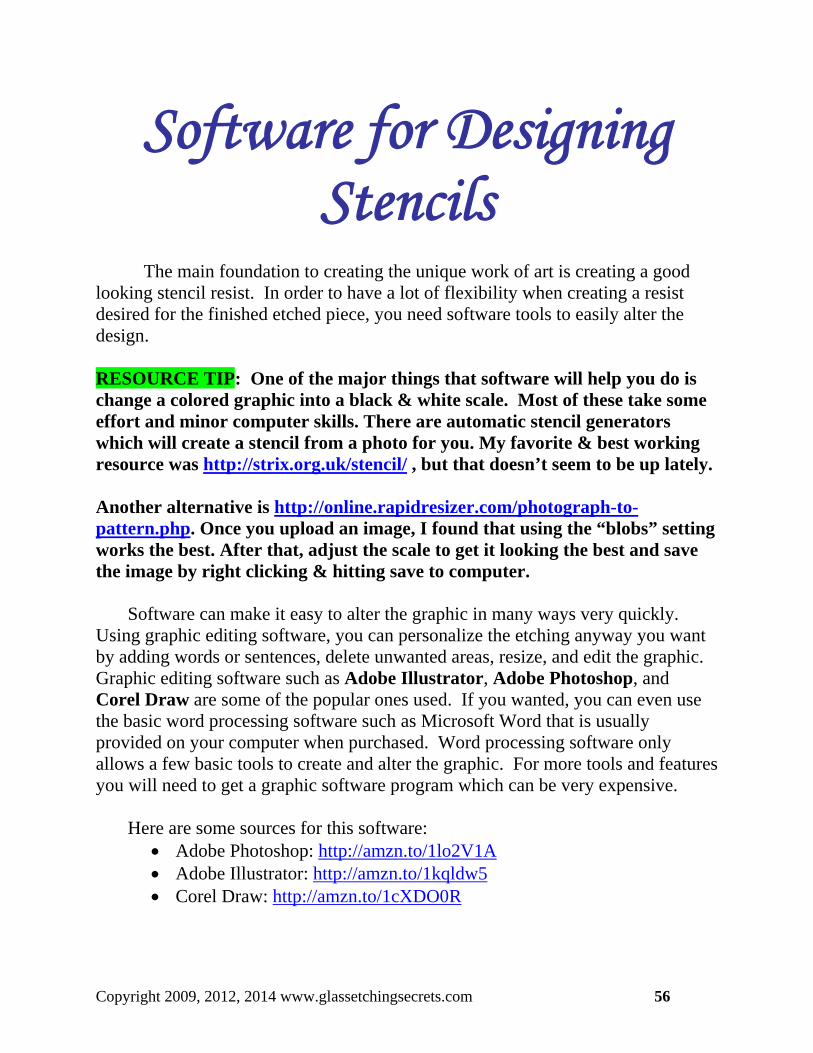
RESOURCE TIP: One of the major things that software will help you do is change a colored graphic into a black & white scale. Most of these take some effort and minor computer skills. There are automatic stencil generators which will create a stencil from a photo for you. My favorite & best working resource was http://strix.org.uk/stencil/ , but that doesn’t seem to be up lately. Another alternative is http://online.rapidresizer.com/photograph-to-pattern.php. Once you upload an image, I found that using the “blobs” setting works the best. After that, adjust the scale to get it looking the best and save the image by right clicking & hitting save to computer.
Software can make it easy to alter the graphic in many ways very quickly. Using graphic editing software, you can personalize the etching anyway you want by adding words or sentences, delete unwanted areas, resize, and edit the graphic. Graphic editing software such as Adobe Illustrator, Adobe Photoshop, and Corel Draw are some of the popular ones used. If you wanted, you can even use the basic word processing software such as Microsoft Word that is usually provided on your computer when purchased. Word processing software only allows a few basic tools to create and alter the graphic. For more tools and features you will need to get a graphic software program which can be very expensive.
Here are some sources for this software:
Adobe Photoshop: http://amzn.to/1lo2V1A Adobe Illustrator: http://amzn.to/1kqldw5 Corel Draw: http://amzn.to/1cXDO0R
Copyright 2009, 2012, 2014 www.glassetchingsecrets.com 56
You can actually get a free graphic software program and save hundreds of dollars. I have now included a guide for you to get my secret suggested free program in the Bonus section. This will help you have advanced control over your designs and save a lot of money. The best part of this program is it can be downloaded off the internet instantly right this second.
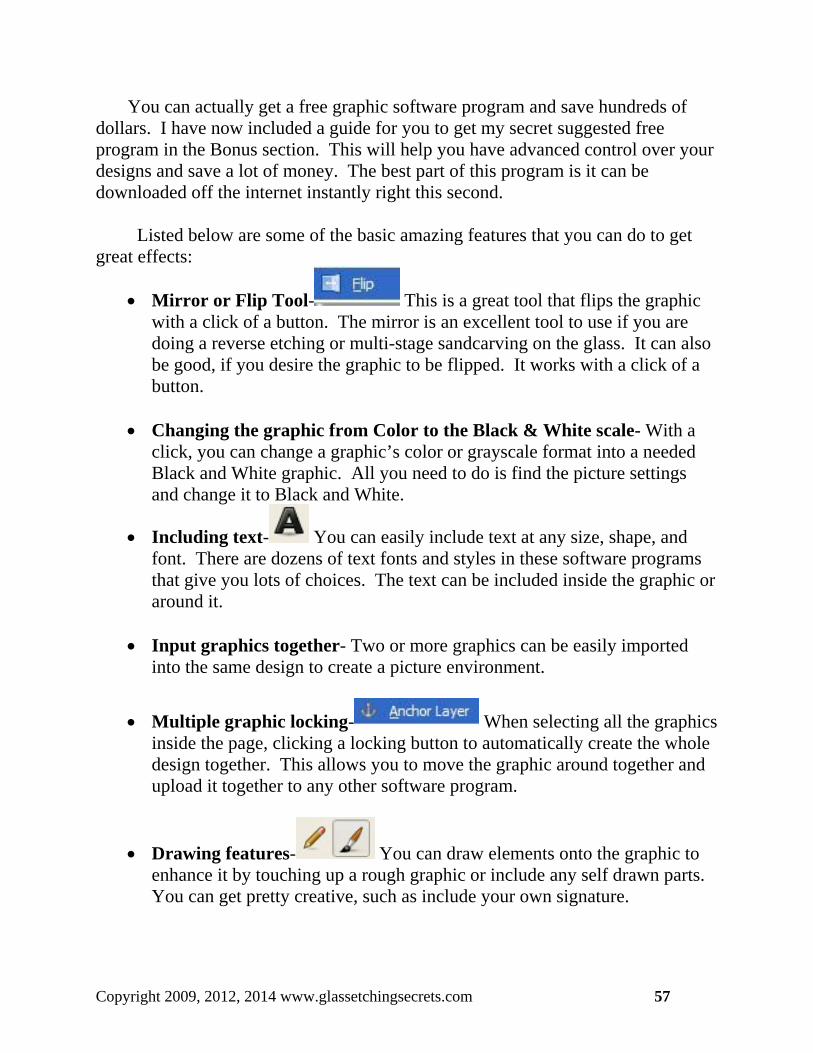
Listed below are some of the basic amazing features that you can do to get
great effects:
Mirror or Flip Tool- This is a great tool that flips the graphic with a click of a button. The mirror is an excellent tool to use if you are doing a reverse etching or multi-stage sandcarving on the glass. It can also be good, if you desire the graphic to be flipped. It works with a click of a button.
Changing the graphic from Color to the Black & White scale- With a
click, you can change a graphic’s color or grayscale format into a needed Black and White graphic. All you need to do is find the picture settings and change it to Black and White.
Including text- You can easily include text at any size, shape, and font. There are dozens of text fonts and styles in these software programs that give you lots of choices. The text can be included inside the graphic or around it.
Input graphics together- Two or more graphics can be easily imported
into the same design to create a picture environment.
Multiple graphic locking- When selecting all the graphics inside the page, clicking a locking button to automatically create the whole design together. This allows you to move the graphic around together and upload it together to any other software program.
Drawing features- You can draw elements onto the graphic to enhance it by touching up a rough graphic or include any self drawn parts. You can get pretty creative, such as include your own signature.
Copyright 2009, 2012, 2014 www.glassetchingsecrets.com 57
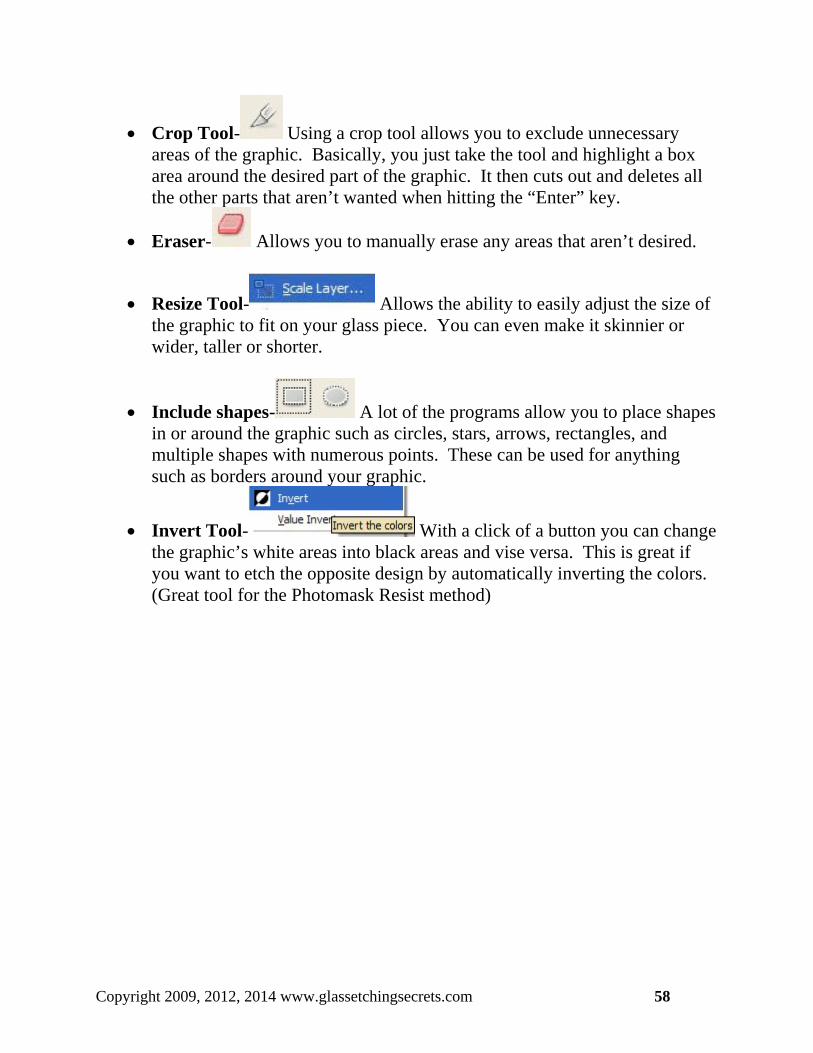
Crop Tool- Using a crop tool allows you to exclude unnecessary areas of the graphic. Basically, you just take the tool and highlight a box area around the desired part of the graphic. It then cuts out and deletes all the other parts that aren’t wanted when hitting the “Enter” key.
Eraser- Allows you to manually erase any areas that aren’t desired.
Resize Tool- Allows the ability to easily adjust the size of the graphic to fit on your glass piece. You can even make it skinnier or wider, taller or shorter.
Include shapes- A lot of the programs allow you to place shapes in or around the graphic such as circles, stars, arrows, rectangles, and multiple shapes with numerous points. These can be used for anything such as borders around your graphic.
Invert Tool- With a click of a button you can change the graphic’s white areas into black areas and vise versa. This is great if you want to etch the opposite design by automatically inverting the colors. (Great tool for the Photomask Resist method)
Copyright 2009, 2012, 2014 www.glassetchingsecrets.com 58

Stencil Resist Creating
Now you have reached one of my favorite areas of this book and that is creating the stencil resist for cream or abrasive etching. Creating the stencil resist is the first process of etching glass art products. This is the main foundation for your glass etched work and can take a lot of time to get the desired look on a resist.
I truly enjoy revealing this part of the Glass Etching Secrets process,
because it can easily be done quickly and solves the traditional problem when cutting out the stencil by hand which can be hard and time consuming. I will explain all the ways to create a stencil and my favorite secret solution to producing stencil resists easily, quickly and inexpensively.
The following three chapters will explain in depth the different ways to
create a stencil resist which are: Hands-On Traditional way Photo Resist way (Professional) Vinyl Cutter way (Professional)
Creating the stencil resists can be one of the most expensive parts of ongoing costs for glass etching projects or jobs large and small. Keep reading to become knowledgeable of all the ways to make these resists and to get a automatic stencil maker at a low cost.
Copyright 2009, 2012, 2014 www.glassetchingsecrets.com 59
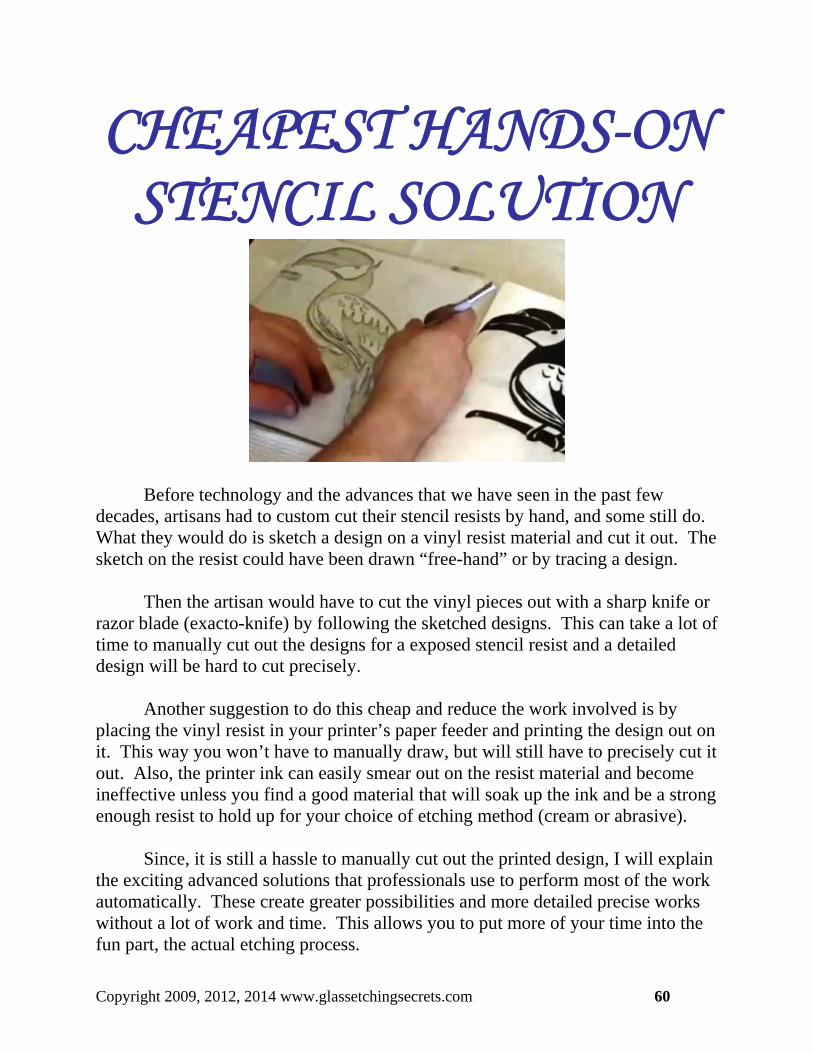
CHEAPEST HANDS-ON STENCIL SOLUTION
Before technology and the advances that we have seen in the past few
decades, artisans had to custom cut their stencil resists by hand, and some still do. What they would do is sketch a design on a vinyl resist material and cut it out. The sketch on the resist could have been drawn “free-hand” or by tracing a design.
Then the artisan would have to cut the vinyl pieces out with a sharp knife or
razor blade (exacto-knife) by following the sketched designs. This can take a lot of time to manually cut out the designs for a exposed stencil resist and a detailed design will be hard to cut precisely.
Another suggestion to do this cheap and reduce the work involved is by placing the vinyl resist in your printer’s paper feeder and printing the design out on it. This way you won’t have to manually draw, but will still have to precisely cut it out. Also, the printer ink can easily smear out on the resist material and become ineffective unless you find a good material that will soak up the ink and be a strong enough resist to hold up for your choice of etching method (cream or abrasive).
Since, it is still a hassle to manually cut out the printed design, I will explain
the exciting advanced solutions that professionals use to perform most of the work automatically. These create greater possibilities and more detailed precise works without a lot of work and time. This allows you to put more of your time into the fun part, the actual etching process.
Copyright 2009, 2012, 2014 www.glassetchingsecrets.com 60
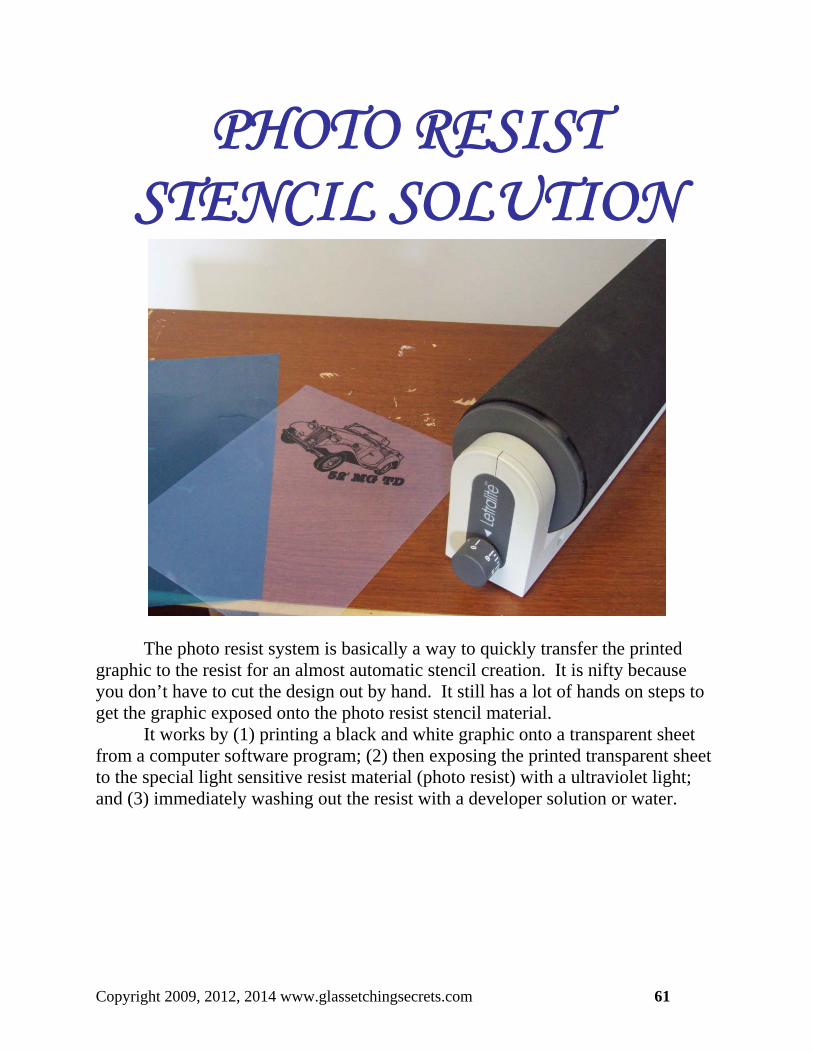
PHOTO RESIST STENCIL SOLUTION
The photo resist system is basically a way to quickly transfer the printed
graphic to the resist for an almost automatic stencil creation. It is nifty because you don’t have to cut the design out by hand. It still has a lot of hands on steps to get the graphic exposed onto the photo resist stencil material.
It works by (1) printing a black and white graphic onto a transparent sheet from a computer software program; (2) then exposing the printed transparent sheet to the special light sensitive resist material (photo resist) with a ultraviolet light; and (3) immediately washing out the resist with a developer solution or water.
Copyright 2009, 2012, 2014 www.glassetchingsecrets.com 61
Photos Resist Advantages The photo resist has some great advantages as well as disadvantages. Here is a list of advantages that the photo resist solution has for creating a resist stencil:
Producing very fine detail. The photo resist is capable of producing stencil
resists from graphics that have very fine detail, even on smaller glass objects. You can even produce stencils from photographs which leads me to my next advantage.
Photo Etching Capabilities. It is also capable of producing photograph stencils for etching onto your glass by changing the picture into a black and white halftone image. This is known as photo or halftone etching and will be discussed in great detail in the membership site.
Easy Graphic Transfer. You can easily transfer a graphic that is printed on a transparent sheet to the photo resist with an ultraviolet light. The areas for etching can then easily be exposed just by washing it off instead of “weeding” out the cut areas like other stencil creating methods.
Template Can Be Used Over & Over. The photo resist is great for projects that require you to make many of the exact same stencil for multiple etchings. It is quick to make many stencils by creating a sheet of multiple templates of 4, 6, 12, or however many you can fit on the transparent sheet.
Fairly Quick Process. The photo resist solution is relatively quicker than other hands-on solutions.
Easy Removal. The resist material is usually very easy to remove after the glass is etched simply by rubbing it off with warm water.
Photo Resist Disadvantages
Most of the advantages are better than other methods when your graphic has fine detail at a small scale, but a graphic with a fair amount of detail can also be possible with my suggested low cost vinyl cutter solution as long as it’s not extremely small. Here are some of the disadvantages to using the photoresist:
Expensive start-up costs. The photo resist solution usually requires a few expensive materials to produce only small resists. A small kit costs nearly $500 and is just a basic starter kit.
Expensive on-going costs. The photo resist solution has expensive resists and transparent printing materials that will need to be continuously purchased. Although it isn’t as common today, some systems require additional materials such as developer solution and a special adhesive.
Copyright 2009, 2012, 2014 www.glassetchingsecrets.com 62
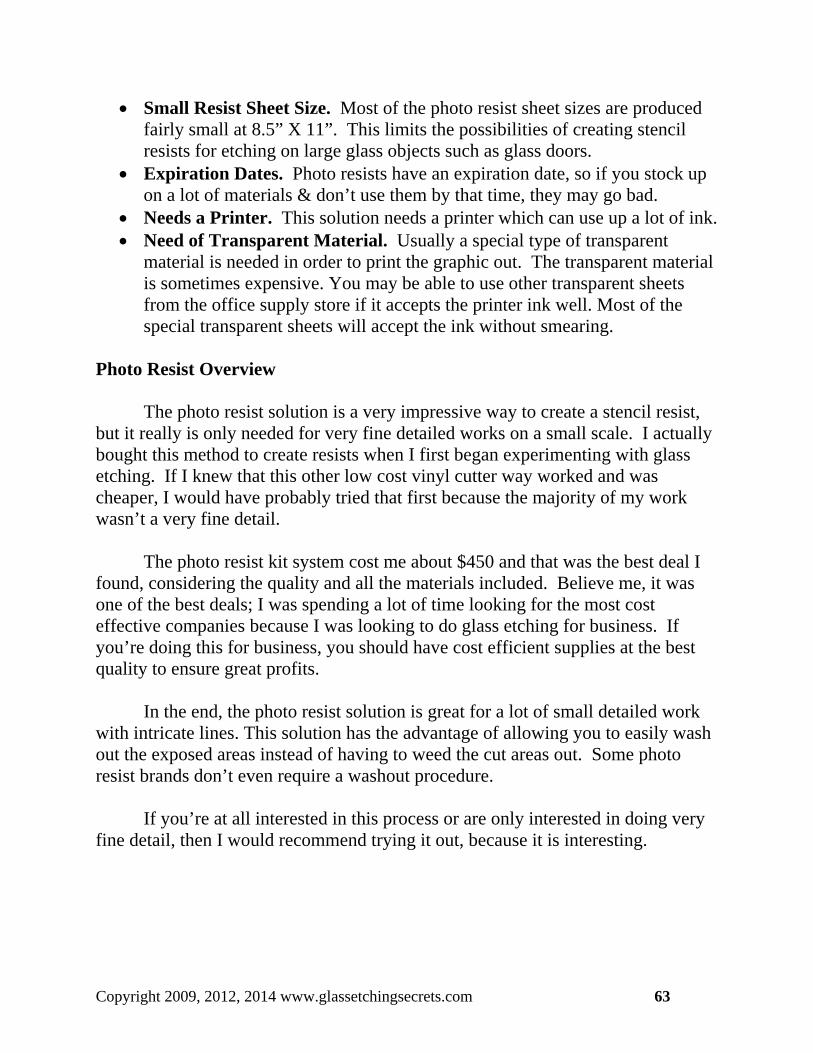
Small Resist Sheet Size. Most of the photo resist sheet sizes are produced fairly small at 8.5” X 11”. This limits the possibilities of creating stencil resists for etching on large glass objects such as glass doors.
Expiration Dates. Photo resists have an expiration date, so if you stock up on a lot of materials & don’t use them by that time, they may go bad.
Needs a Printer. This solution needs a printer which can use up a lot of ink. Need of Transparent Material. Usually a special type of transparent
material is needed in order to print the graphic out. The transparent material is sometimes expensive. You may be able to use other transparent sheets from the office supply store if it accepts the printer ink well. Most of the special transparent sheets will accept the ink without smearing.
Photo Resist Overview
The photo resist solution is a very impressive way to create a stencil resist, but it really is only needed for very fine detailed works on a small scale. I actually bought this method to create resists when I first began experimenting with glass etching. If I knew that this other low cost vinyl cutter way worked and was cheaper, I would have probably tried that first because the majority of my work wasn’t a very fine detail.
The photo resist kit system cost me about $450 and that was the best deal I
found, considering the quality and all the materials included. Believe me, it was one of the best deals; I was spending a lot of time looking for the most cost effective companies because I was looking to do glass etching for business. If you’re doing this for business, you should have cost efficient supplies at the best quality to ensure great profits.
In the end, the photo resist solution is great for a lot of small detailed work with intricate lines. This solution has the advantage of allowing you to easily wash out the exposed areas instead of having to weed the cut areas out. Some photo resist brands don’t even require a washout procedure.
If you’re at all interested in this process or are only interested in doing very
fine detail, then I would recommend trying it out, because it is interesting.
Copyright 2009, 2012, 2014 www.glassetchingsecrets.com 63

How the Photo Resist System Works – Step by Step
Listed below shows you the steps of how the Photo Resist system works:
1. Find or create your graphic on the computer to make sure it is in a black and
white scale. You can work on your desired graphic in graphic editing software (I will discuss later) such as Adobe Photoshop or Adobe Illustrator or just use a plain old simple Microsoft Word. Although, Photoshop and Illustrator are very impressive and desirable software programs, they both are expensive into the $100-$700 range. (Look at my BONUS section for free programs to use that work just as well.)
2. Open your graphic from one of these programs to adjust the characteristics
of your graphic. This is were you would resize the graphic to the desired dimensions (height & width), change a colored graphic to the Black & White scale, and would allow you to add anything you would like to personalize it such as draw in effects or add words such as your name.
Copyright 2009, 2012, 2014 www.glassetchingsecrets.com 64
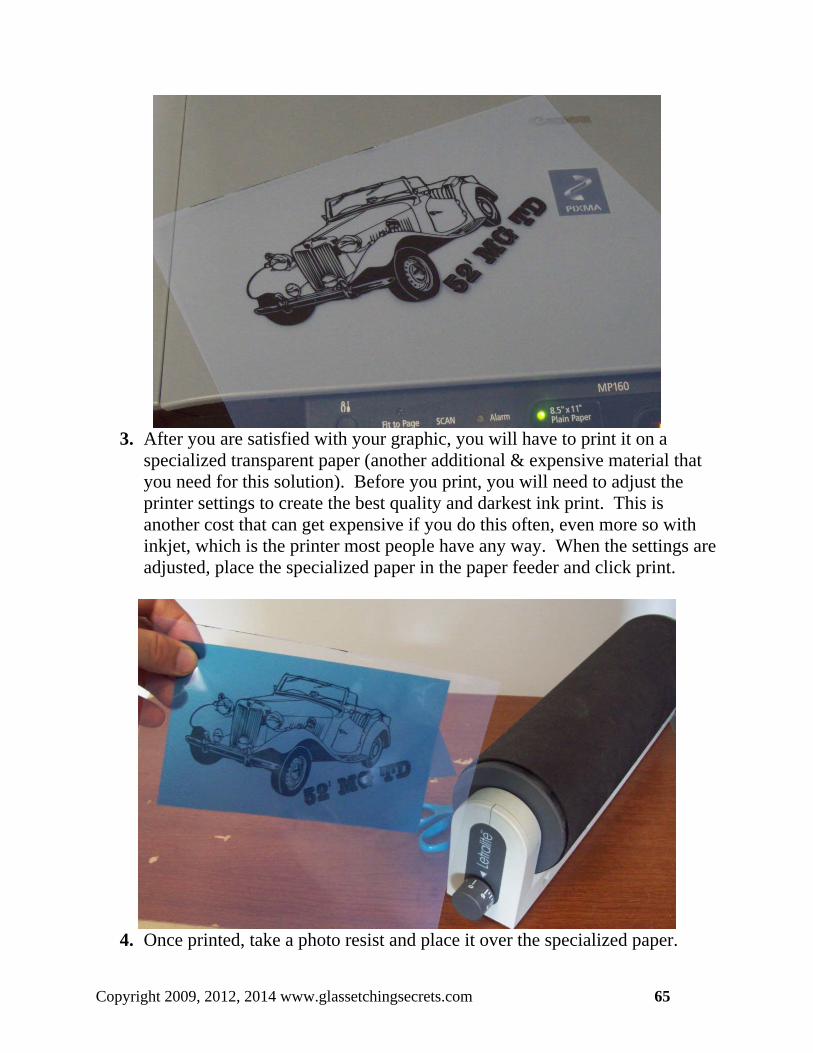
3. After you are satisfied with your graphic, you will have to print it on a
specialized transparent paper (another additional & expensive material that you need for this solution). Before you print, you will need to adjust the printer settings to create the best quality and darkest ink print. This is another cost that can get expensive if you do this often, even more so with inkjet, which is the printer most people have any way. When the settings are adjusted, place the specialized paper in the paper feeder and click print.
4. Once printed, take a photo resist and place it over the specialized paper.
Copyright 2009, 2012, 2014 www.glassetchingsecrets.com 65
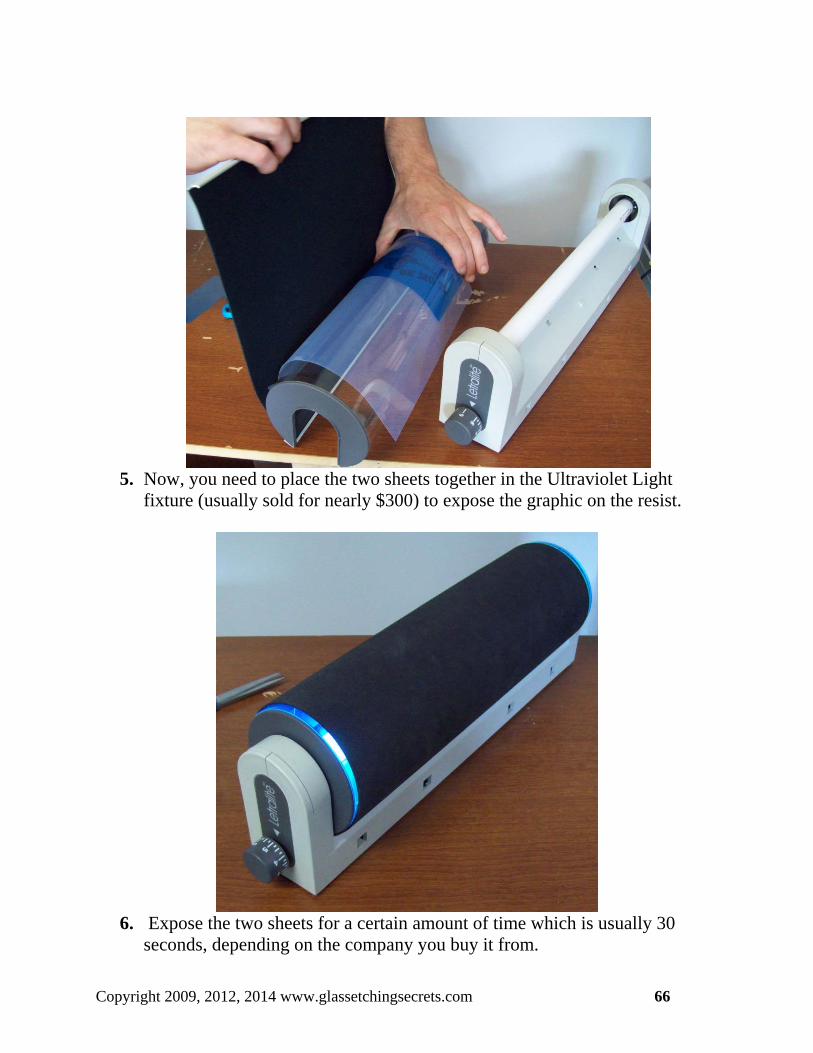
5. Now, you need to place the two sheets together in the Ultraviolet Light
fixture (usually sold for nearly $300) to expose the graphic on the resist.
6. Expose the two sheets for a certain amount of time which is usually 30
seconds, depending on the company you buy it from.
Copyright 2009, 2012, 2014 www.glassetchingsecrets.com 66

7. Remove the resist quickly from exposure unit and spray with slightly
pressurized warm water until graphic is shown.
8. Now allow the resist to dry and place on the glass with a squeegee. Tear the
back plastic sheeting off.
Copyright 2009, 2012, 2014 www.glassetchingsecrets.com 67

9. With outside areas masked off, it is ready to be sandblasted, at around 30 psi
for a 3 mil photoresist. Here are the final pictures of what it looks like after being sandblasted. It was just a basic design with surface etching. Showing an etching on a mug of my fathers classic 1952 MG-TD.
Copyright 2009, 2012, 2014 www.glassetchingsecrets.com 68
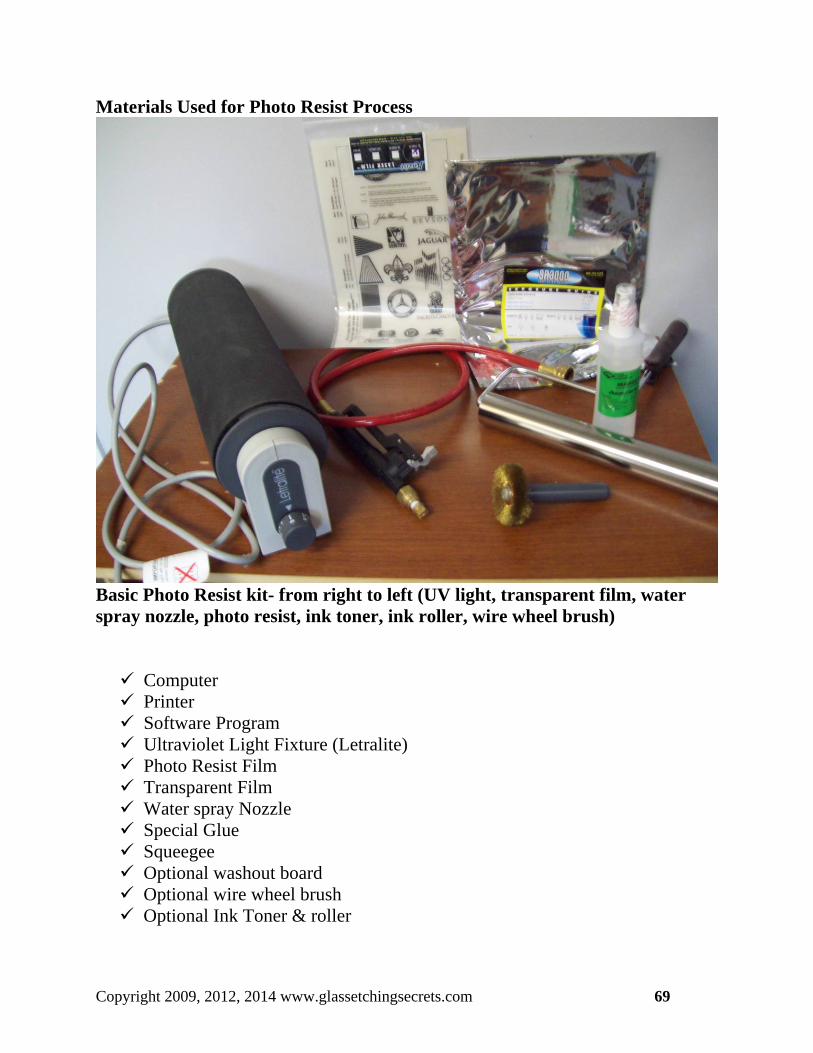
Materials Used for Photo Resist Process
Basic Photo Resist kit- from right to left (UV light, transparent film, water spray nozzle, photo resist, ink toner, ink roller, wire wheel brush) Computer Printer Software Program Ultraviolet Light Fixture (Letralite) Photo Resist Film Transparent Film Water spray Nozzle Special Glue Squeegee Optional washout board Optional wire wheel brush Optional Ink Toner & roller
Copyright 2009, 2012, 2014 www.glassetchingsecrets.com 69
Tips & Best Practices When Using the Photo Resist Method Some people forget or just don’t know the simple steps to creating the best photo resist result. This is particularly needed if you are producing a graphic with very fine detail at a small scale. To create a precise photo resist, you will need to take special care to get great results. Follow the tips for each of the areas suggested below:
Spray nozzle practices The spray nozzle is the washout process of the exposed resist, but other brands use a liquid solution to develop the stencil (and one other brand doesn’t even need a washout). It is important to set the right water temperature to wash the resist out. It should not be very hot or very cold, so try to set it at a warm temperature. A slightly hot or water temperature will allow for the best washout result of the desired etching areas because it will be warm enough to quickly remove the etching areas without being too hot to severely softening the non-etching areas.
Also, there should be a pressure that isn’t very high or very low. The water pressure should be at an intermediate setting and the water nozzle included in photoresist kits is ideal.
Dark as possible ink setting with printer Printing the design on the transparent sheet at the darkest possible setting is a
vital tip, especially for very fine detail. To do this, you first need to make sure that the graphic on the computer is in a black and white format. You can easily change a color or gray graphic into a black and white format by using the computer settings. Almost all computer programs have this feature.
If you’re in Microsoft Word, go into the picture toolbar and then click on the
Black & White under the color button. After the graphic is in a Black and White format, you have to adjust the printer settings to the darkest possible (whichever is present). To set the settings, it is a little different for each printer, but all are very similar. Click print, then click Properties, and try to find a quality or dark setting. Set the quality setting to high and a dark setting to the darkest. After that is done, you can click print. Some glass etching companies sell a optional “Ink Toner & Roller” to darken the printed graphics generated from laser printers for superior results.
Copyright 2009, 2012, 2014 www.glassetchingsecrets.com 70
When exposing resist, place printed side of transparent film on exposure side of photoresist to ensure tightness and quality
With the printed side of the transparent film facing the exposure side of the photoresist will more precisely produce quality results. This prevents the light from going around the design because the printed side faces the exposure side for a tighter connection. This tip may not matter for a basic design, but it would definitely be ideal for a detailed design. Either way, I suggest to always expose it the right way to ensure best results.
When exposing make sure the graphic is tight against resist and doesn’t move
This tip goes alone with the previous one, because it ensures that no light will get around the printed design. If the graphic sheet and the resist move while the UV light is exposing the image, the resist may become damaged. Make sure nothing moves while exposing.
Expose at right duration of time- shorter if very fine detail Make sure to follow the manufacturer’s suggestions for the correct amount of
exposure time. Exposing too long over the recommended time may produce a stencil that doesn’t washout all the way; while exposing the design less may produce a result that washes out incorrectly. Also, instructions may recommend reducing the exposure time if the graphic is very detailed. Cost Effective Solutions for using the Photo Resist Solution If you’re curious about trying this solution or want to reduce the cost of using it, these tactics may be helpful for different equipment used with the Photo resist process. Laser Printer & Cartridge Refill
The first suggestion is to use a laser printer instead of an inkjet printer because the laser printer’s ink is cheaper and lasts longer. This may be a good option if you are planning to use this process a lot, because ink will be used up quicker than you think with inkjet printers. A bad thing about the laser printer is it may require an Ink Toner to darken the ink.
Another tip is to have your cartridge refilled and reused, instead of
purchasing a new cartridge when it becomes empty. There are businesses that primarily refill old ink cartridges for people that are seeking a cost effective
Copyright 2009, 2012, 2014 www.glassetchingsecrets.com 71
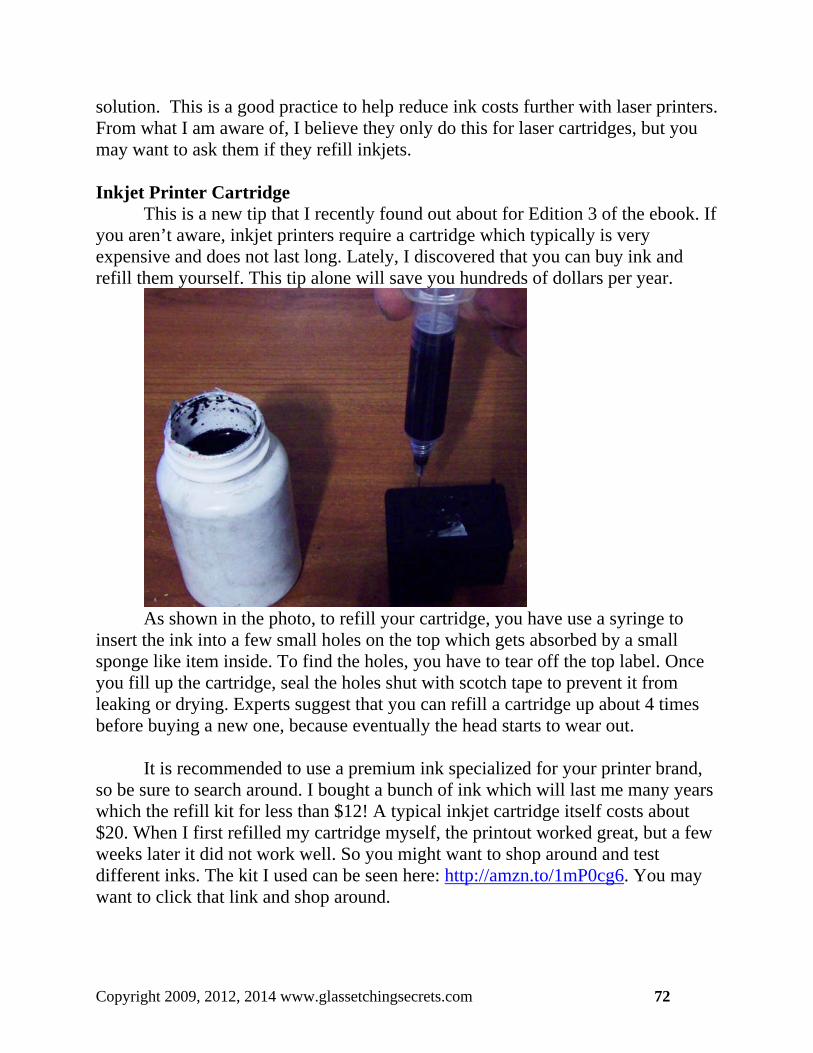
solution. This is a good practice to help reduce ink costs further with laser printers. From what I am aware of, I believe they only do this for laser cartridges, but you may want to ask them if they refill inkjets.
Inkjet Printer Cartridge
This is a new tip that I recently found out about for Edition 3 of the ebook. If you aren’t aware, inkjet printers require a cartridge which typically is very expensive and does not last long. Lately, I discovered that you can buy ink and refill them yourself. This tip alone will save you hundreds of dollars per year.
As shown in the photo, to refill your cartridge, you have use a syringe to
insert the ink into a few small holes on the top which gets absorbed by a small sponge like item inside. To find the holes, you have to tear off the top label. Once you fill up the cartridge, seal the holes shut with scotch tape to prevent it from leaking or drying. Experts suggest that you can refill a cartridge up about 4 times before buying a new one, because eventually the head starts to wear out.
It is recommended to use a premium ink specialized for your printer brand,
so be sure to search around. I bought a bunch of ink which will last me many years which the refill kit for less than $12! A typical inkjet cartridge itself costs about $20. When I first refilled my cartridge myself, the printout worked great, but a few weeks later it did not work well. So you might want to shop around and test different inks. The kit I used can be seen here: http://amzn.to/1mP0cg6. You may want to click that link and shop around.
Copyright 2009, 2012, 2014 www.glassetchingsecrets.com 72
Ultraviolet Light Third, you could buy a regular ultraviolet light instead of the exposure lamp
fixtures which photoresist supply businesses sell for nearly $300. A good ultraviolet light lamp could be purchased for under $100. The standard Letralite brand’s exposure light shown in previous images comes with the GE 15 Watt fluorescent black light bulb called F15T8-BL shown here: http://amzn.to/xTnwTc
It can be used with this fixture: http://www.buylightfixtures.com/F15T8-
fluorescent-single-strip-light-fixture.aspx Spray Nozzle
Fourth, you don’t have to buy the water spray nozzle most supply companies sell for the photo resist washout process because it can easily be made out of materials from a hardware store. You could possibly use a garden hose nozzle as long as there is a lighter setting. If the pressure is too high, it may damage the resist. So be sure to choose an intermediate pressure setting, because you do want some pressure.
Cheapest Route
Fourth, if you are curious about this solution and want to get your feet wet a little before you spend a lot of money on this method, you could just buy a few sheets of the photo resist materials and expose the graphic from regular sunlight. This will allow you to see the Photo resist solution’s amazing capabilities without the need to buy an expensive UV exposure lamp. You would have to pick a very sunny day and the winter season probably won’t be an ideal time to try it. I would suggest getting an ultraviolet lamp if you’re going to be doing this a lot though.
Copyright 2009, 2012, 2014 www.glassetchingsecrets.com 73
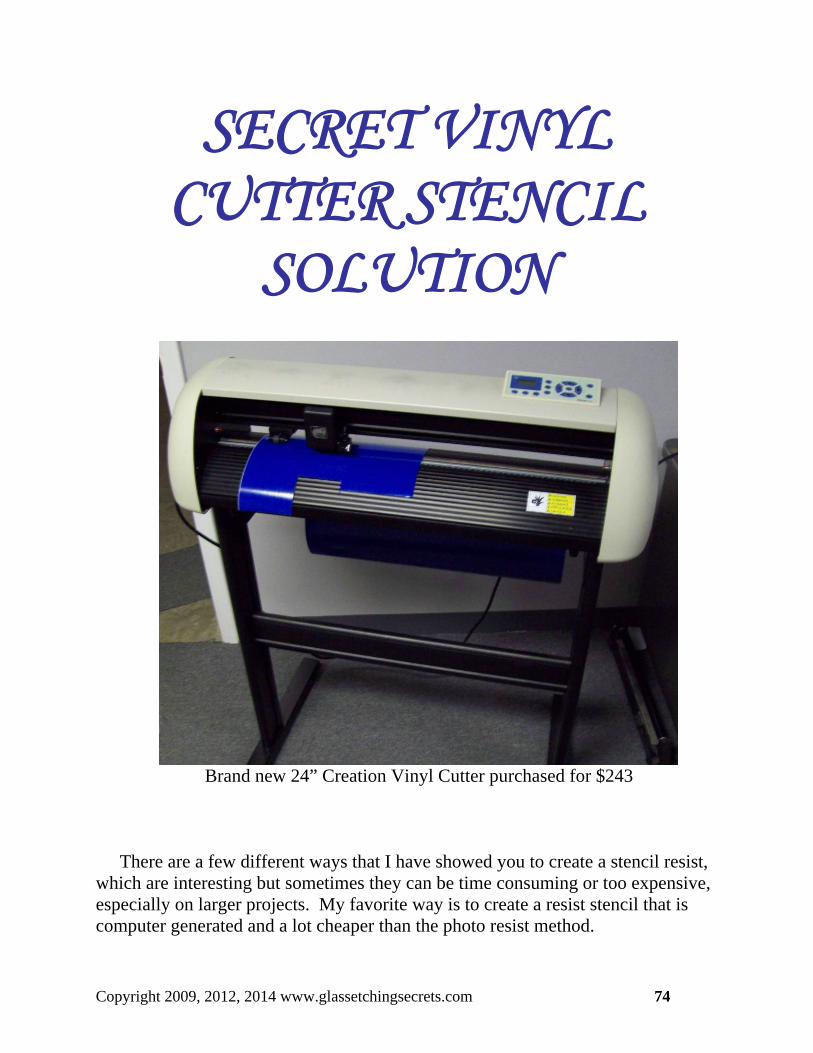
SECRET VINYL CUTTER STENCIL
SOLUTION
Brand new 24” Creation Vinyl Cutter purchased for $243
There are a few different ways that I have showed you to create a stencil resist,
which are interesting but sometimes they can be time consuming or too expensive, especially on larger projects. My favorite way is to create a resist stencil that is computer generated and a lot cheaper than the photo resist method.
Copyright 2009, 2012, 2014 www.glassetchingsecrets.com 74
The reason I call this one of the secrets revealed in this book is because it isn’t known very well for many novice glass etchers and isn’t marketed to the casual glass etcher due to the extremely high prices, causing low demand. The second part of this secret is where to find the vinyl cutter brand new and at a cheap price that includes the vinyl cutter software free. The third part of the secret is my tips to get this equipment at the lowest price possible.
Vinyl Cutter Secret is to use a piece of machinery or computer driven piece of equipment for
creating stencil resists that is used from another industry. This amazing piece of machinery is called a vinyl cutter, used in the sign making industry.
Basically, a vinyl cutter cuts graphics out of vinyl fairly quickly without any
hands on cutting. The computer just takes the electronic graphic from the sign software, cuts out the design on a vinyl resist, and spits out a stencil with its own adhesive backing.
The only physical part of this process is to pull out all the loose pieces that you
want exposed for etching. This is known as “weeding” which reveals the desired image. Even if you already knew about this equipment being used for creating resists for etching, this e-book will explain where to get this equipment cheap with tips to maximize your cost saving. Here are some further benefits of the suggested vinyl cutter and this ebook:
Vinyl cutter- the great thing about this vinyl cutter is that it can produce
stencil resists 24” wide (or larger depending on the cutter purchased) and can create them many yards long. This allows you to produce resists large enough for store front windows, house windows, or whatever large glass you need to etch without having the high cost of the Photo Resist process. The vinyl cutter allows you to cut the resist out without having all the processes of the photographic way. On top of that, you can use it to make small stencils for smaller glass objects such as glass cups or glass ornaments. It doesn’t matter what size you need a stencil; just scale the graphic to a desired size in your vinyl cutter software.
Vinyl cutter software- most companies that sell these vinyl cutters are
higher priced than my suggested company and other companies require you to also buy the software to go with the vinyl cutter for additional cost. This software ranges up to the thousands of dollars. If you buy it
Copyright 2009, 2012, 2014 www.glassetchingsecrets.com 75
through my favorite company, you can get it free. I show you how in the next few sections below.
Using the Vinyl Cutter system- I’ll show you how to use this system so
you can be up and running sooner.
Where Do I Get a Large Vinyl Cutter for Under $250? When I first wrote Glass Etching Secrets in 2009, a company called USCutter
was listing their Creation vinyl cutters at extremely low starting bid prices on ebay.com. Many bid prices started at less than one dollar and eventually went up drastically near the end of the auction. But you could still get at a surprisingly low price. I personally won a 24 inch wide vinyl cutter with a stand for about 245 dollars. The average winning bid price for this equipment is usually around $300, which is still very low. I’ve seen winning bids for this equipment to be as low as $190 and all the way up to $400 +. A usual price for this brand of vinyl cutters are sold retail for $430- $550 on their website. While other vinyl cutter brands are costing thousands of dollars.
The key to getting a low price was to place your initial bid at the last 15 seconds
before auctions end. Unfortunately, today they haven't been listing them at low bid prices the last
few times I checked. But from time to time, they might list them at lower bid starting prices which you can check here: http://stores.ebay.com/USCutter-for-Vinyl-Cutters-etc
How Great of a Deal is it?
This equipment seems like it would be worth at least a thousand dollars. And my winning bid price of $245 included:
24’’ wide Creation vinyl cutter machine (obviously) Stand & vinyl roll holder (which is usually sold separately for up to $100) Vinyl cutter software (which is usually sold for hundreds of dollars) Computer connection cables (provides two different possibilities) Blade holder 3 cutting blades Pen plotter
Copyright 2009, 2012, 2014 www.glassetchingsecrets.com 76
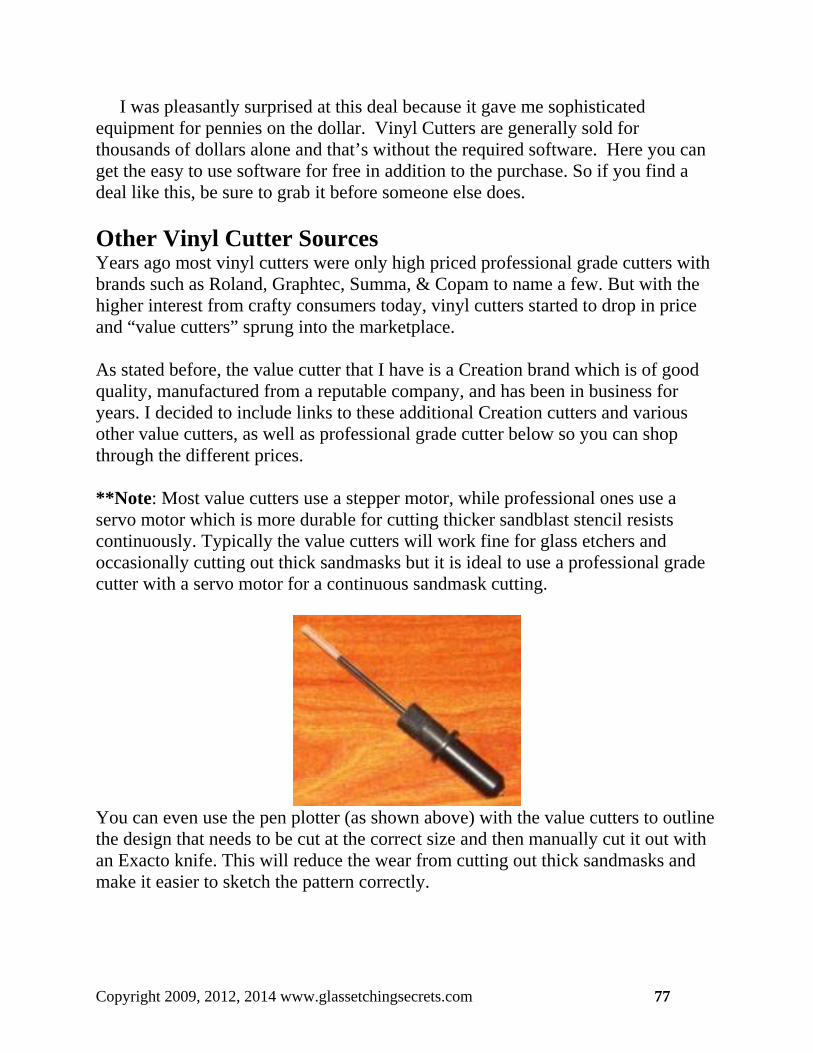
I was pleasantly surprised at this deal because it gave me sophisticated equipment for pennies on the dollar. Vinyl Cutters are generally sold for thousands of dollars alone and that’s without the required software. Here you can get the easy to use software for free in addition to the purchase. So if you find a deal like this, be sure to grab it before someone else does.
Other Vinyl Cutter Sources Years ago most vinyl cutters were only high priced professional grade cutters with brands such as Roland, Graphtec, Summa, & Copam to name a few. But with the higher interest from crafty consumers today, vinyl cutters started to drop in price and “value cutters” sprung into the marketplace. As stated before, the value cutter that I have is a Creation brand which is of good quality, manufactured from a reputable company, and has been in business for years. I decided to include links to these additional Creation cutters and various other value cutters, as well as professional grade cutter below so you can shop through the different prices. **Note: Most value cutters use a stepper motor, while professional ones use a servo motor which is more durable for cutting thicker sandblast stencil resists continuously. Typically the value cutters will work fine for glass etchers and occasionally cutting out thick sandmasks but it is ideal to use a professional grade cutter with a servo motor for a continuous sandmask cutting.
You can even use the pen plotter (as shown above) with the value cutters to outline the design that needs to be cut at the correct size and then manually cut it out with an Exacto knife. This will reduce the wear from cutting out thick sandmasks and make it easier to sketch the pattern correctly.
Copyright 2009, 2012, 2014 www.glassetchingsecrets.com 77
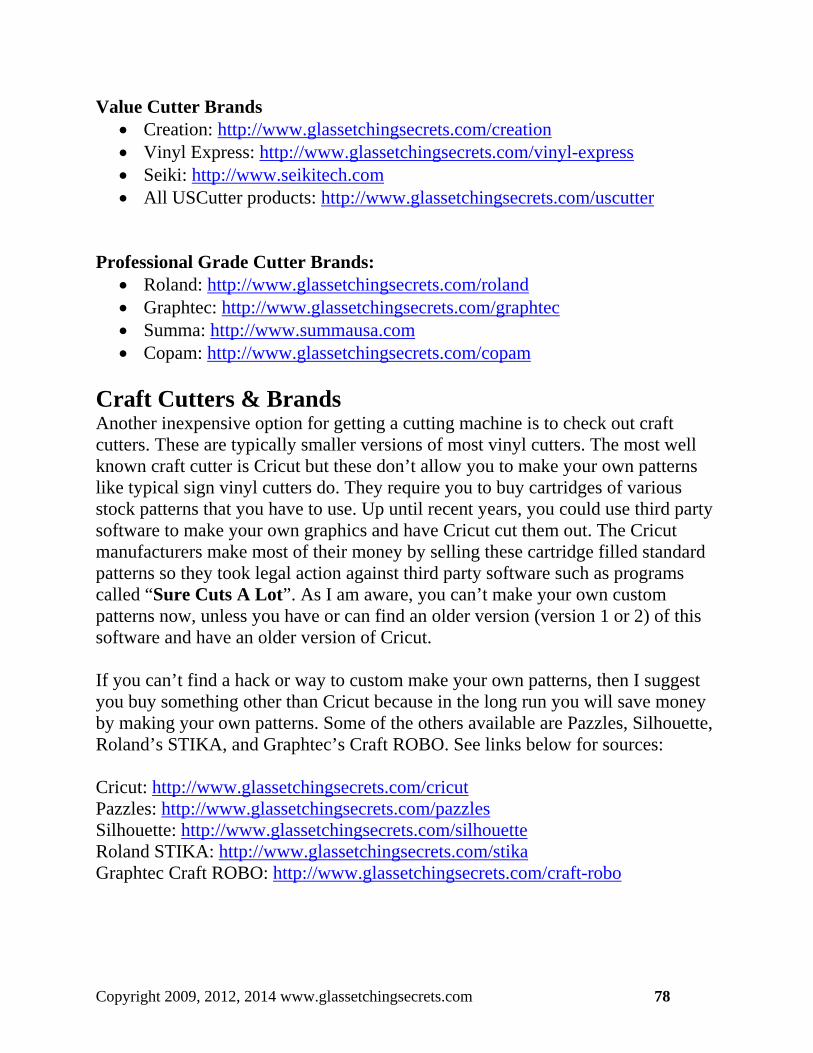
Value Cutter Brands Creation: http://www.glassetchingsecrets.com/creation Vinyl Express: http://www.glassetchingsecrets.com/vinyl-express Seiki: http://www.seikitech.com All USCutter products: http://www.glassetchingsecrets.com/uscutter
Professional Grade Cutter Brands:
Roland: http://www.glassetchingsecrets.com/roland Graphtec: http://www.glassetchingsecrets.com/graphtec Summa: http://www.summausa.com Copam: http://www.glassetchingsecrets.com/copam
Craft Cutters & Brands Another inexpensive option for getting a cutting machine is to check out craft cutters. These are typically smaller versions of most vinyl cutters. The most well known craft cutter is Cricut but these don’t allow you to make your own patterns like typical sign vinyl cutters do. They require you to buy cartridges of various stock patterns that you have to use. Up until recent years, you could use third party software to make your own graphics and have Cricut cut them out. The Cricut manufacturers make most of their money by selling these cartridge filled standard patterns so they took legal action against third party software such as programs called “Sure Cuts A Lot”. As I am aware, you can’t make your own custom patterns now, unless you have or can find an older version (version 1 or 2) of this software and have an older version of Cricut. If you can’t find a hack or way to custom make your own patterns, then I suggest you buy something other than Cricut because in the long run you will save money by making your own patterns. Some of the others available are Pazzles, Silhouette, Roland’s STIKA, and Graphtec’s Craft ROBO. See links below for sources: Cricut: http://www.glassetchingsecrets.com/cricut Pazzles: http://www.glassetchingsecrets.com/pazzles Silhouette: http://www.glassetchingsecrets.com/silhouette Roland STIKA: http://www.glassetchingsecrets.com/stika Graphtec Craft ROBO: http://www.glassetchingsecrets.com/craft-robo
Copyright 2009, 2012, 2014 www.glassetchingsecrets.com 78
Materials Needed for Vinyl Cutter Stencil Solution Computer Vinyl Cutter Equipment Sign Software Program Vinyl Resist Sheet Weeding Tool (can use a sharp knife or razor blade) Vector Graphic Transfer tape (also known as Application Tape) Squeegee
Ways to Reduce Vinyl Resist Waste due to Faulty Setup
You can use a pen plotter to get a quick printout of how the cutter will cut the design to show you how it will look. Use some cheap paper or cardboard instead of the vinyl to make sure that the design is really what you want. Sometimes I will cut out the graphic on vinyl and realize that I want it switched around so that I can see the etching from the backside of the glass. This can become a big waste of vinyl and I always like to prevent mistakes. Once you become familiar with using the whole vinyl cutter process, you most likely won’t have to use the pen plotter but it still gives you the insight of what the cuts will look like before you actually use up vinyl or expensive sandmask material. It allows you to see the cuts and make necessary graphic design changes before actually cutting the vinyl.
Copyright 2009, 2012, 2014 www.glassetchingsecrets.com 79
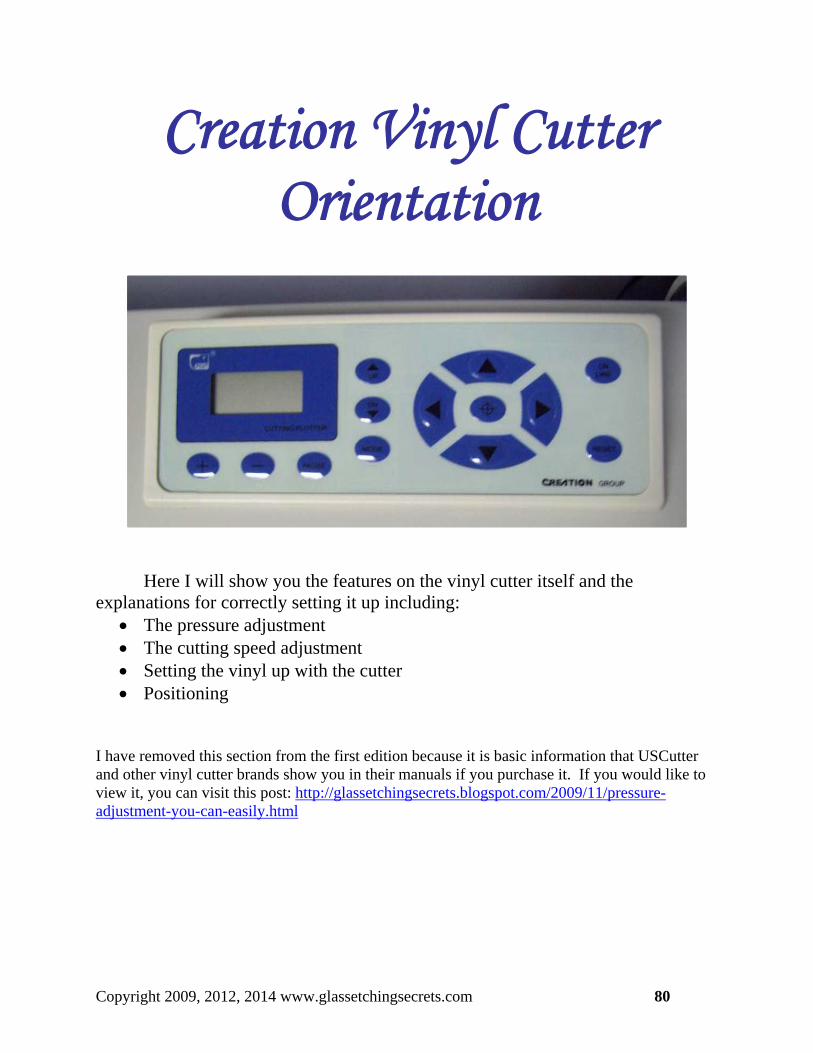
Creation Vinyl Cutter Orientation
Here I will show you the features on the vinyl cutter itself and the explanations for correctly setting it up including:
The pressure adjustment The cutting speed adjustment Setting the vinyl up with the cutter Positioning
I have removed this section from the first edition because it is basic information that USCutter and other vinyl cutter brands show you in their manuals if you purchase it. If you would like to view it, you can visit this post: http://glassetchingsecrets.blogspot.com/2009/11/pressure-adjustment-you-can-easily.html
Copyright 2009, 2012, 2014 www.glassetchingsecrets.com 80
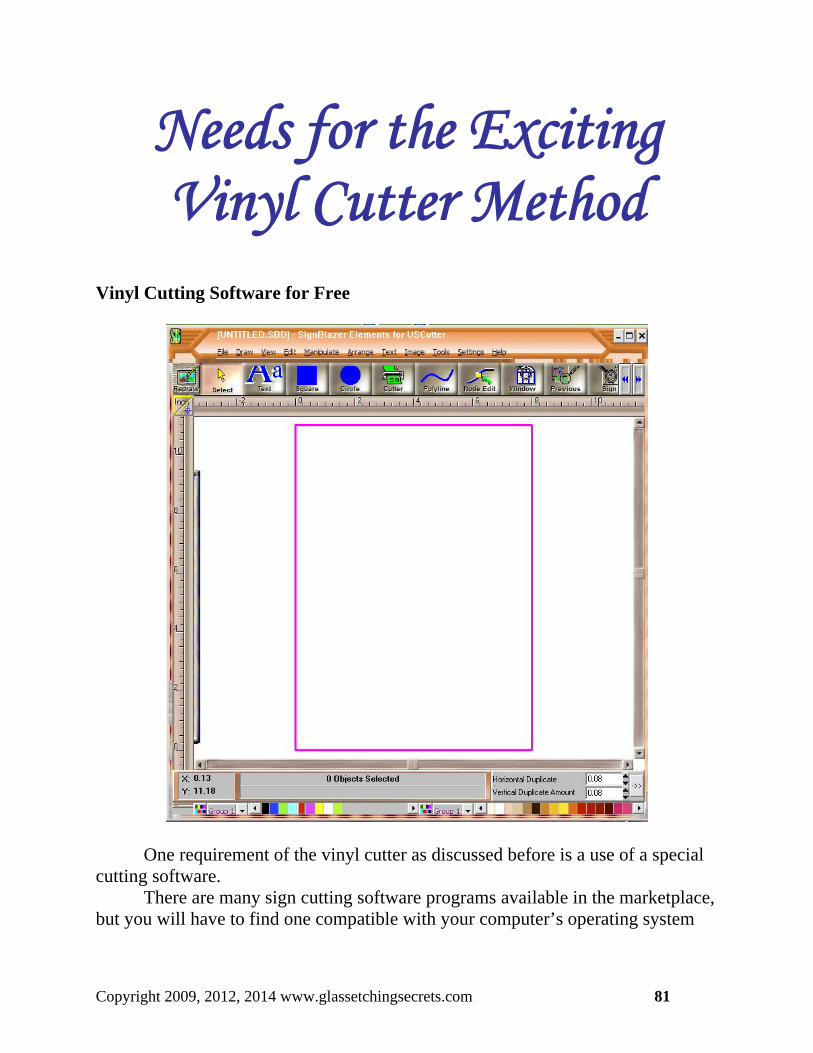
Needs for the Exciting Vinyl Cutter Method
Vinyl Cutting Software for Free
One requirement of the vinyl cutter as discussed before is a use of a special
cutting software. There are many sign cutting software programs available in the marketplace,
but you will have to find one compatible with your computer’s operating system
Copyright 2009, 2012, 2014 www.glassetchingsecrets.com 81
and vinyl cutter model. Most vinyl cutters include the software with the purchase, but make sure you check when comparing prices.
Some vinyl cutters allow you to cut directly from the vector conversion
software such as Corel Draw & Adobe Illustrator, eliminating the need for additional cutting software. If this is not possible with your brand, you will have to buy a compatible cutting software program.
1. If you follow my route and get a Creation brand cutter, you can use the free
software called SignBlazer Elements. It’s free in the trial version, but is only available for Windows computers and the company is not existent today. The cool thing about the free trial provided is it doesn’t expire like other trial versions do and it functions the same. In the past, the free software required you to click through a few steps to get into the functional program, but the company, USCutter has written an update which bypasses the steps users had to go through in the past. A link to the updated version can be downloaded below.
***You can Download the SignBlazer Elements Software now by clicking the link below to connect online ***: http://support.uscutter.com/index.php?/Knowledgebase/Article/GetAttachment/190/24198
Note: The SignBlazer Elements Software can also work with other vinyl cutter brands. So if you chose to get a vinyl cutter other than the Creation brand suggested, ask customer service if it is compatible with SignBlazer Elements.
Copyright 2009, 2012, 2014 www.glassetchingsecrets.com 82
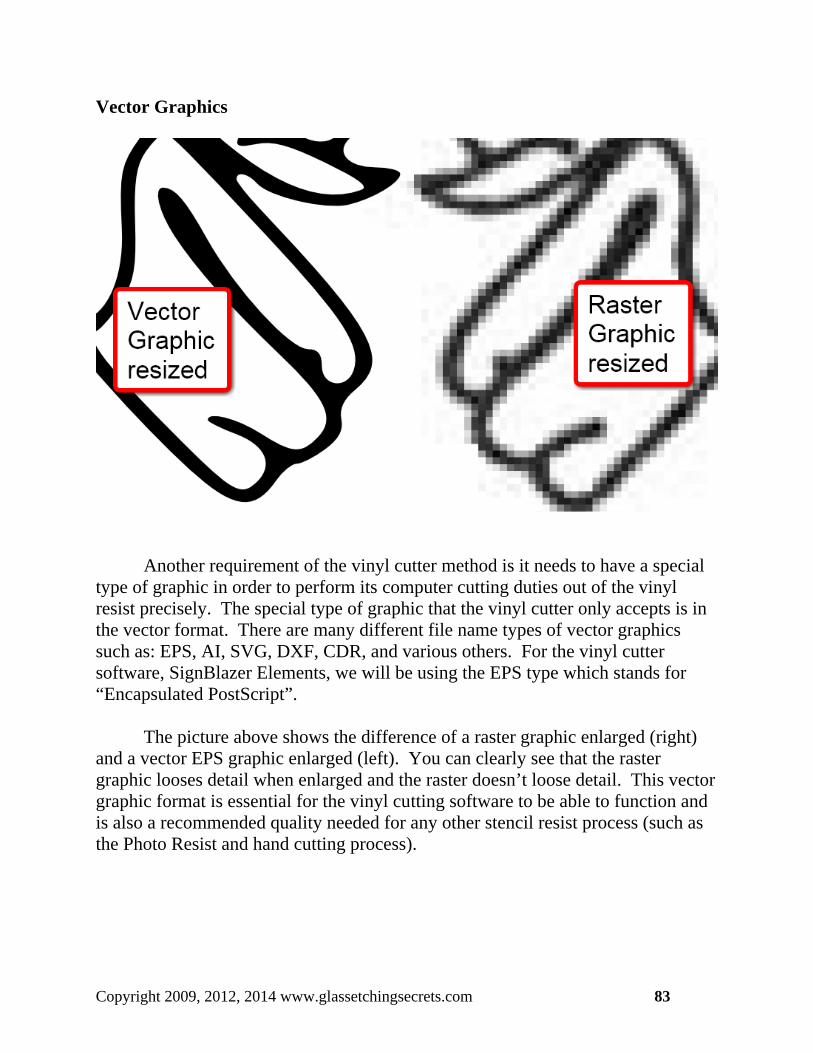
Vector Graphics
Another requirement of the vinyl cutter method is it needs to have a special type of graphic in order to perform its computer cutting duties out of the vinyl resist precisely. The special type of graphic that the vinyl cutter only accepts is in the vector format. There are many different file name types of vector graphics such as: EPS, AI, SVG, DXF, CDR, and various others. For the vinyl cutter software, SignBlazer Elements, we will be using the EPS type which stands for “Encapsulated PostScript”.
The picture above shows the difference of a raster graphic enlarged (right)
and a vector EPS graphic enlarged (left). You can clearly see that the raster graphic looses detail when enlarged and the raster doesn’t loose detail. This vector graphic format is essential for the vinyl cutting software to be able to function and is also a recommended quality needed for any other stencil resist process (such as the Photo Resist and hand cutting process).
Copyright 2009, 2012, 2014 www.glassetchingsecrets.com 83

Glass Etching With the Vector vs. Raster Format
The vector is a special graphic format that isn’t made of pixels, but rather comprised of geometric primitives. The vinyl cutting software bases the cuts off these more defined primitives in order to be automatically machine driven.
Some people may think it’s a big downfall to using the vinyl cutter method
because of the required vector graphic format. But I think otherwise and so will you when my method is followed.
Graphics everywhere are based off of the raster or pixel format and the
vector format is less abundant. That is the negative aspect to my method that people see, but in my eyes it is the total opposite. For me it gives more possibilities for expansion and precise looks for your resist and in the end, a great glass etched piece. It will give you these advanced and easy possibilities as long as you follow my system.
After you review the benefits and try it out for yourself, you will want to
convert some of your raster graphics into the Vector Graphic format even for the Photo Resist stencil method.
Copyright 2009, 2012, 2014 www.glassetchingsecrets.com 84
Vector Graphic Benefits Listed below are the benefits to working with the vector format:
1. Vector Graphics can be resized without being distorted. Since the vector format doesn’t have pixels which fad out, the size can be enlarged as big as you wanted with the quality never changing. This is by far the most amazingly advanced aspect of using the vector format. This way you can create precise stencil resists many feet large from the same graphic that is very small. Hypothetically, if you tried to resize a 1 inch wide Raster graphic into 2 feet, you most likely wouldn’t be able to even realize what the graphic represents. In other words, a enlarged Raster graphic would look like a big blur and that’s not good for any stencil resist process.
2. Vector Graphics are more precisely detailed. They have defined edges
and curves. This is exactly why I sometimes use vector graphics for the Photo resist method also. The vector format would be great for the Photo resist method because its photographic process depends on quality detailed graphics with clean and crisp edges.
3. Ability to be machine automated. Most importantly, vector graphics can
be cut automatically from machines through the use of graphics in the vector format. In this case, the machine is a vinyl cutter.
4. Use less computer space. For the amount of precise quality and detailed
information, vector graphics use less space in comparison to Raster graphics. So they will use less hard drive space on your computer or space on your removable storage drive.
****I have now included a BONUS section**** This will show you where
to easily get a variety of vector graphics free, how to make vector graphics free easily from a raster graphic, and will show you alternative places where you can get amazing cool graphics at a reasonable price.
Copyright 2009, 2012, 2014 www.glassetchingsecrets.com 85
How to Make Your Own Vector Graphics
This is my favorite method to get vector graphics because you can use unique custom made patterns that are not mass produced for the industry to use. Today, there are programs that allow a consumer to take an ordinary Raster graphic and convert it into a Vector graphic with a click of a button. In other programs, you have to actually trace the whole graphic yourself, which is very tedious and time consuming.
Some software programs can convert Raster graphics into vector graphics
easily by the use of a vector converter program, which can be a hefty purchase for someone to do as a hobby.
One of the programs that has a vectorization tool built in is Adobe
Illustrator, which costs about $600 for the new version. (Some of the older versions can be found at around $100 - $200) Also, there are other vector convertor programs sold which are specifically used to only convert graphics into the vector format.
These programs are very interesting to use, but they cost money. I have figured out another method to produce these vector graphics absolutely free. Since this is my preferred method, this is what I will be primarily talking about. The guide to getting your FREE vectorization tool software is now provided for you in the BONUS section as well as another inexpensive program.
Copyright 2009, 2012, 2014 www.glassetchingsecrets.com 86
Resist Material for Cutter & Hand Cut Method
Here I will show you how you can create a lower ongoing cost when buying the resist material which can be used for both the vinyl cutter & hand cutting method. Since the vinyl cutter uses a computer to precisely cut the graphics, the resist will be a lot cheaper than the photo resist method’s special light sensitive material.
If you’re using the suggested value vinyl cutter method for glass etching, it will allow for an amazingly cheaper, larger, and just as amazing stencil resist. There are companies that actually make vinyl resists that are specially used for glass etching which are still a lot cheaper than a photo resist. But these resists still appeared a little pricey, so I found a cost effective solution for you to produce these resist stencils on a large scale.
This will list vinyl materials to use for creating cream, light sandblasting, &
sandcarve etched glass.
Inexpensive Solution for Glass Etching Resist Material
When you have large surfaces to etch such as a glass door, the cost for the resist can become expensive with photo resists, so I expanded the possibilities by finding a material that is an extremely inexpensive material while still being able to produce results at a large scale. This allows large jobs or small crafts to only cost a few pennies on the dollar for enhanced cost saving.
Cream Etching Stencil Resists If you are cream etching, essentially you can use any thickness or type as long as it has adhesive backing. The adhesive prevents etching cream from getting under the stencil and messing up the etched pattern design.
Copyright 2009, 2012, 2014 www.glassetchingsecrets.com 87
With this in mind, you can typically create stencils fairly cheap. A lot of people use contact paper for this. Some contact paper brands have a very tacky adhesive which makes it hard to remove from the glass. If this happens, run hot water over the stencil after etching. I found that cheaper generic brands usually have less tacky adhesive which may work best for you. I bought this roll of 18 inches wide by 9 foot long for about $2.50 at a nearby dollar store shown below.
Sandblasting Stencil Resists The thickness & type of the stencil depends on the blasting pressure, grit size, and how long you’re blasting over it (in other terms, how deep of an etching). A thick stencil resist such as a sandcarving mask (also known as a sandmask), may be required when you either have a higher pressure, a larger abrasive grit size, or longer blasting duration. ** Sandmasks cost a considerable amount more money than typical adhesive backed vinyl products. So I found some cost effective solutions to get around these high priced sandmasks required for deeper sandblast etchings. You can use either of these two methods or a combination of both:
1. Use finer abrasive on thinner inexpensive vinyl. With my experimentation, I personally use 180 grit fine abrasive to blast over a 3 mil vinyl. And I have actually carved about 1/8 inch deep into the glass without the stencil deteriorating.
Since the abrasive is finer, it has a smaller mass which is less likely to penetrate through the thin vinyl. But the abrasive is still hard enough to etch the glass effectively.
2. Double layer the inexpensive vinyl resists. Although this will save you
money, it will take more time to set up. If you are a business & time is money, you might want to consider your options to see if it’s worth doing.
Copyright 2009, 2012, 2014 www.glassetchingsecrets.com 88

But for people that etch or sandcarve for fun, this is a great method for further cost saving. All you do is squeegee a second layer over the top before cutting the design out. It’s fairly easy but make sure there are no air bubbles and the layers are fully intact.
If you are wondering what vinyl I use or recommend for further cost saving, here are some resources to choose. My first suggestion is to look for a sign vinyl that has a light, non-permanent water based adhesive so it can be removed easily such as:
Oracal 631 Removable: This is the vinyl I have personally been using and the link below is the lowest price I have found online.
o http://tinyurl.com/oracal631
Oracal 811 Paint Mask: You can also try the Oracal 651 or 813. These paint masks and others have been suggested for etching as well.
o http://tinyurl.com/oracal811 Other Sandblasting Resist Materials For producing a stencil resist more suitable for sandcarving etchings, you can use the websites below. These resists are more professional, allow for deep carving, and are easier to remove but they are a little more pricey. Some are meant to be cut by hand and not for cutter machines. Hartco Resist Products:
o http://www.hartcoservice.com/sandmask
3M Resists
o Buttercut 45 mil: http://amzn.to/1muALn2
o All others:
http://www.shop3m.com/catalogsearch/result/?q=Sandblast+stenc
il
Copyright 2009, 2012, 2014 www.glassetchingsecrets.com 89
Edco Resists
o 8 Mil (12"x 12"): http://amzn.to/1c3zuJM
o 8 Mil (12"x 48"): http://amzn.to/1jROFxL
o 8 Mil (12"x 60"): http://amzn.to/18SnjiY
o 18 Mil (18" X 648"): http://amzn.to/1giUPBC
Anchor Resists
o 18 Mil (25” X 36”): http://amzn.to/1giUnmX
o 18 Mil (25” X 48”): http://amzn.to/1nP59nH
CR Laurence
o 8 Mil (6" X 60 Foot): http://amzn.to/1nP5XZL
o 4 Mil (24" X 60 Foot): http://amzn.to/1gXULJk
Inexpensive Transfer Application Tape
After your vinyl resist has been cut and weeded, you will need to transfer it to your glass piece with a transfer material. USCutter has some great deals on transfer application tape in the link below: http://www.uscutter.com/Application-Tape-14 Amazon’s Application Tape: http://tinyurl.com/application-tape
Copyright 2009, 2012, 2014 www.glassetchingsecrets.com 90
Steps for Vinyl Cutter Stencil Solution
Discussed throughout this chapter are the steps to creating your glass etching
stencil with the vinyl cutter from US Cutter and its free cutter software, “SignBlazer Elements”. Here is the step by step process:
1. First, you will need to get your graphic (pattern, design, self made
drawing, or whatever you want) converted into an EPS vector file or just buy vector designs.
2. After you find the graphic that you want to etch and save it to your computer, open the SignBlazer Elements sign software.
3. Click “File” and “Import” to import your vector graphic into the program. Just find the vector graphic and double click on it. It will then place it on the drawing area.
4. Click on the graphic to select it, which pops the resize boxes on the corners.
5. Select a corner and resize the graphic to the desired dimensions in reference to the ruler bars on the top and left side.
6. Once the graphic is dimensioned to your desired size, then click the “Cutter” button on the top toolbar.
7. Make sure all of the graphic shows up on the viewing area. If it doesn’t all show up, click on the colors needed on the left tool area to include them into the viewing area.
8. Then click on the “Cut” button on the top toolbar. A page will pop up, so just click “Cut Tile” and the cutter will automatically create your stencil. (Make sure the cutter is on and set up prior to this)
9. Weed out all the cut areas that you want to etch into the glass. 10. Place transfer application tape on top of the vinyl by using a
squeegee. 11. Peel the stencil with the application tape attached while removing the
backing. 12. Now you can apply the stencil to your glass with a squeegee and
remove the transfer tape.
Copyright 2009, 2012, 2014 www.glassetchingsecrets.com 91
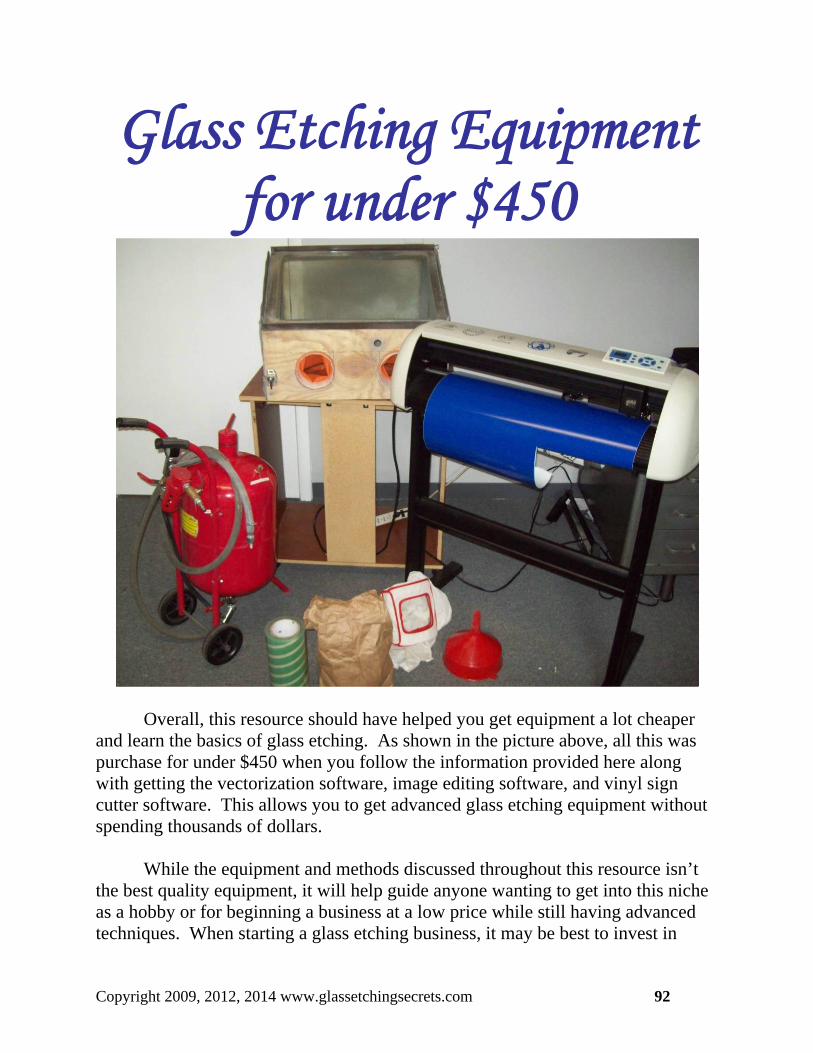
Glass Etching Equipment for under $450
Overall, this resource should have helped you get equipment a lot cheaper and learn the basics of glass etching. As shown in the picture above, all this was purchase for under $450 when you follow the information provided here along with getting the vectorization software, image editing software, and vinyl sign cutter software. This allows you to get advanced glass etching equipment without spending thousands of dollars.
While the equipment and methods discussed throughout this resource isn’t
the best quality equipment, it will help guide anyone wanting to get into this niche as a hobby or for beginning a business at a low price while still having advanced techniques. When starting a glass etching business, it may be best to invest in
Copyright 2009, 2012, 2014 www.glassetchingsecrets.com 92
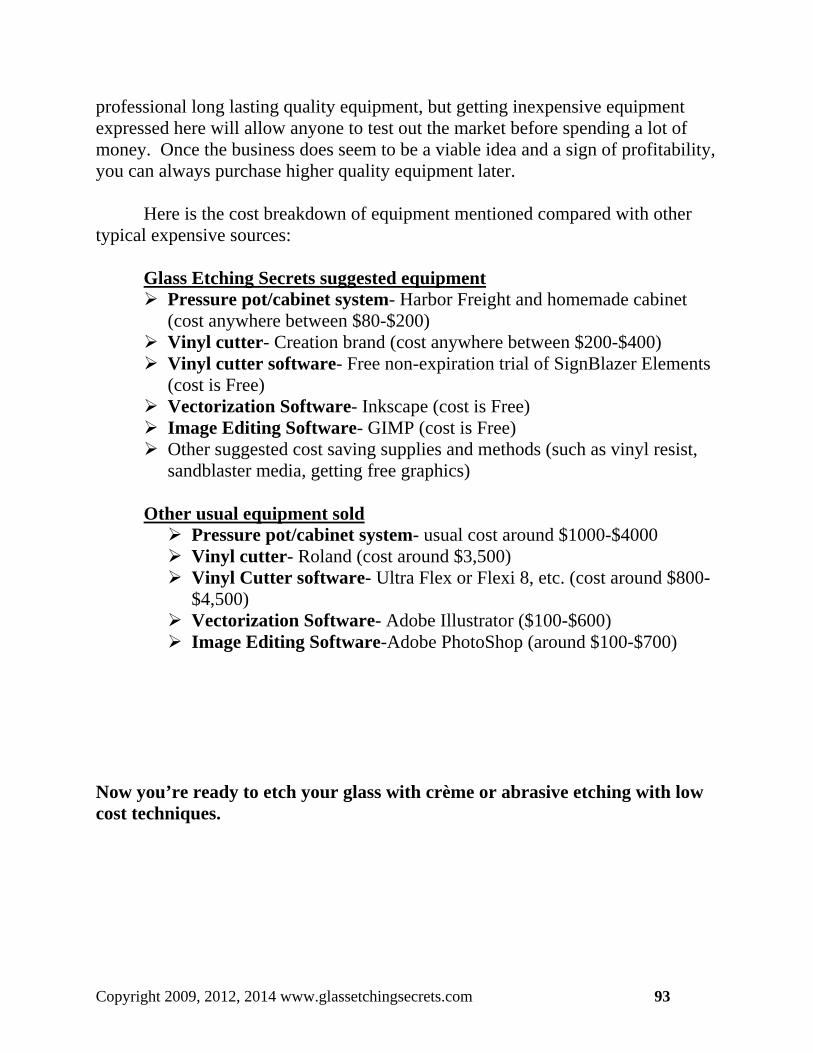
professional long lasting quality equipment, but getting inexpensive equipment expressed here will allow anyone to test out the market before spending a lot of money. Once the business does seem to be a viable idea and a sign of profitability, you can always purchase higher quality equipment later.
Here is the cost breakdown of equipment mentioned compared with other
typical expensive sources: Glass Etching Secrets suggested equipment Pressure pot/cabinet system- Harbor Freight and homemade cabinet
(cost anywhere between $80-$200) Vinyl cutter- Creation brand (cost anywhere between $200-$400) Vinyl cutter software- Free non-expiration trial of SignBlazer Elements
(cost is Free) Vectorization Software- Inkscape (cost is Free) Image Editing Software- GIMP (cost is Free) Other suggested cost saving supplies and methods (such as vinyl resist,
sandblaster media, getting free graphics)
Other usual equipment sold Pressure pot/cabinet system- usual cost around $1000-$4000 Vinyl cutter- Roland (cost around $3,500) Vinyl Cutter software- Ultra Flex or Flexi 8, etc. (cost around $800-
$4,500) Vectorization Software- Adobe Illustrator ($100-$600) Image Editing Software-Adobe PhotoShop (around $100-$700)
Now you’re ready to etch your glass with crème or abrasive etching with low cost techniques.
Copyright 2009, 2012, 2014 www.glassetchingsecrets.com 93

Bonuses
Copyright 2009, 2012, 2014 www.glassetchingsecrets.com 94

Bonus 1:
Advanced Techniques & Strategies
The cool aspect of glass etching in contrast to laser etching is its ability to really create elegant works of art. Glass etching by using the abrasive method is what can turn a basic design into a wonderful etching to amaze anyone’s eye. With the use of advanced glass etching techniques and strategies, a glass etcher can turn an ordinary piece of glass into a masterpiece. This guide explains all the different etching methods that you can try which are:
Surface etching Single-stage sandcarving Two-stage sandcarving Multi-stage sandcarving Shading To help distinguish the various glass etching methods, see the graph below.
Copyright 2009, 2012, 2014 www.glassetchingsecrets.com 95
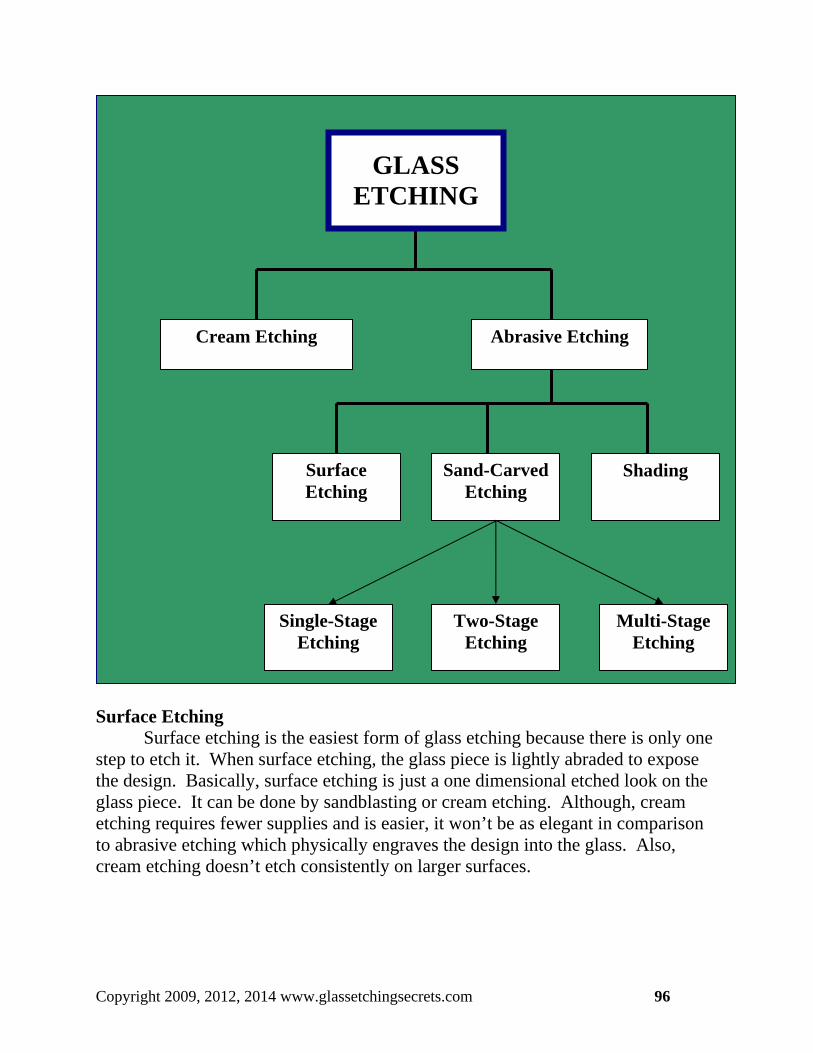
Cream Etching
Single-Stage Etching
Surface Etching
Sand-Carved Etching
Shading
Abrasive Etching
Two-Stage Etching
GLASS ETCHING
Multi-Stage Etching
Surface Etching Surface etching is the easiest form of glass etching because there is only one step to etch it. When surface etching, the glass piece is lightly abraded to expose the design. Basically, surface etching is just a one dimensional etched look on the glass piece. It can be done by sandblasting or cream etching. Although, cream etching requires fewer supplies and is easier, it won’t be as elegant in comparison to abrasive etching which physically engraves the design into the glass. Also, cream etching doesn’t etch consistently on larger surfaces.
Copyright 2009, 2012, 2014 www.glassetchingsecrets.com 96
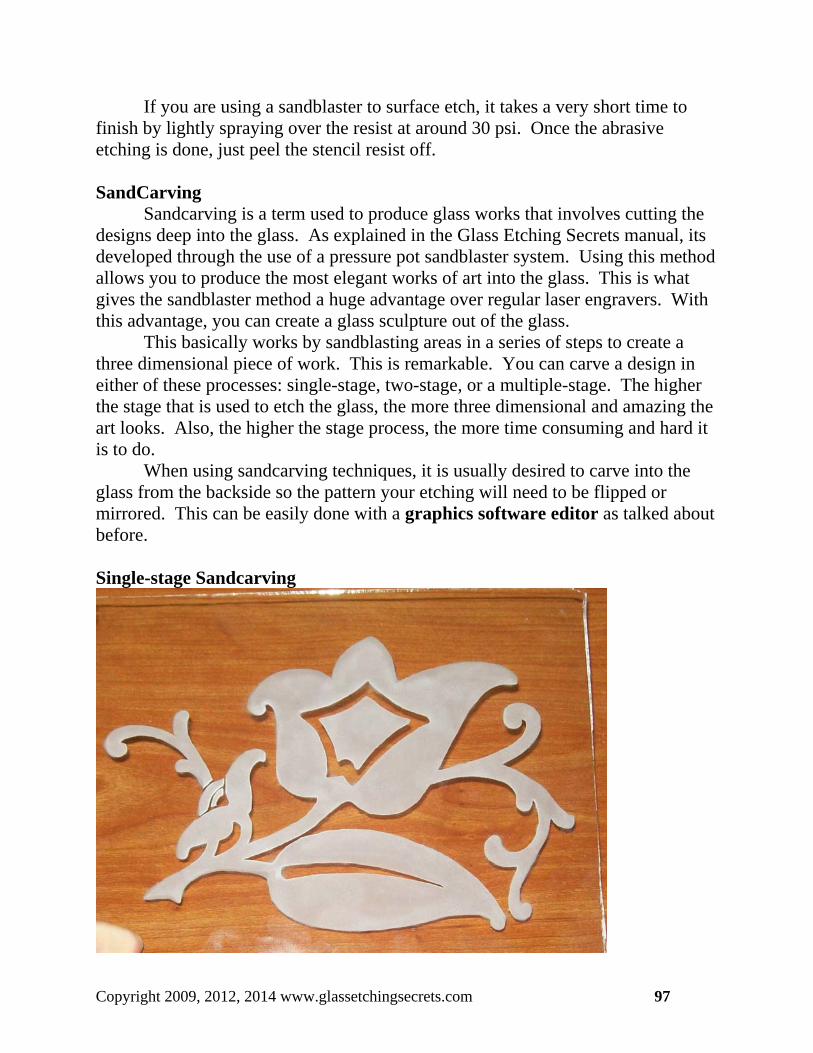
If you are using a sandblaster to surface etch, it takes a very short time to finish by lightly spraying over the resist at around 30 psi. Once the abrasive etching is done, just peel the stencil resist off. SandCarving Sandcarving is a term used to produce glass works that involves cutting the designs deep into the glass. As explained in the Glass Etching Secrets manual, its developed through the use of a pressure pot sandblaster system. Using this method allows you to produce the most elegant works of art into the glass. This is what gives the sandblaster method a huge advantage over regular laser engravers. With this advantage, you can create a glass sculpture out of the glass.
This basically works by sandblasting areas in a series of steps to create a three dimensional piece of work. This is remarkable. You can carve a design in either of these processes: single-stage, two-stage, or a multiple-stage. The higher the stage that is used to etch the glass, the more three dimensional and amazing the art looks. Also, the higher the stage process, the more time consuming and hard it is to do. When using sandcarving techniques, it is usually desired to carve into the glass from the backside so the pattern your etching will need to be flipped or mirrored. This can be easily done with a graphics software editor as talked about before. Single-stage Sandcarving
Copyright 2009, 2012, 2014 www.glassetchingsecrets.com 97
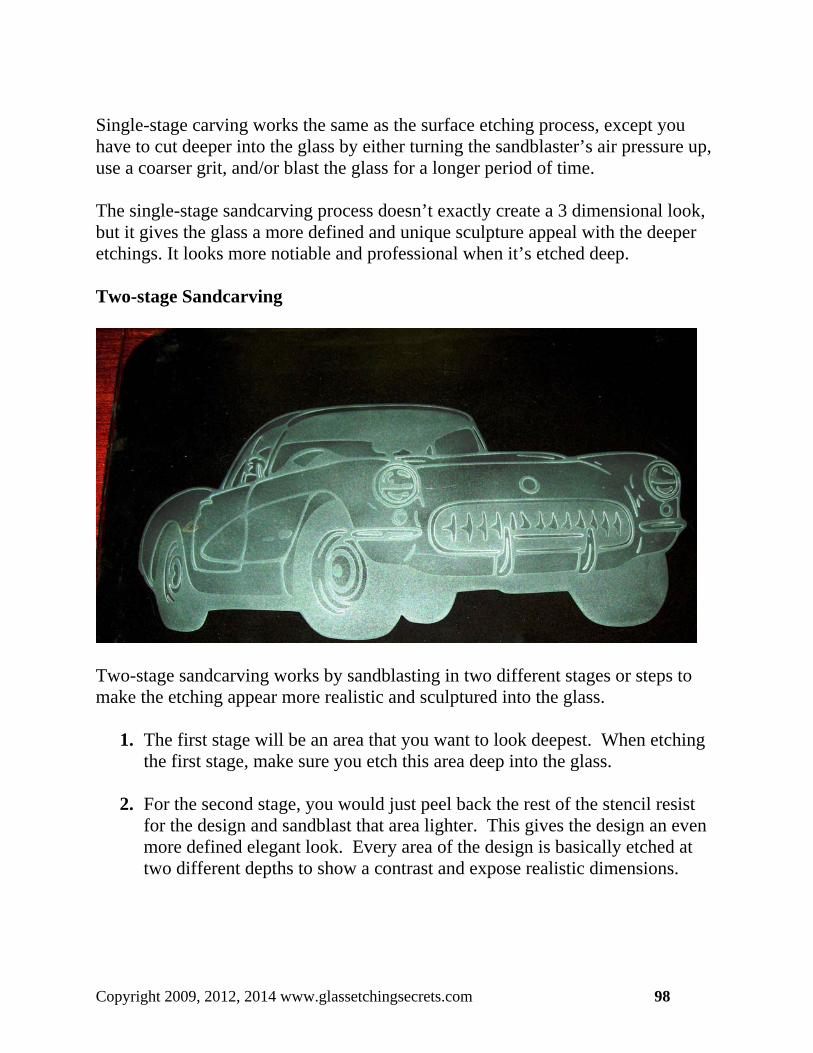
Single-stage carving works the same as the surface etching process, except you have to cut deeper into the glass by either turning the sandblaster’s air pressure up, use a coarser grit, and/or blast the glass for a longer period of time. The single-stage sandcarving process doesn’t exactly create a 3 dimensional look, but it gives the glass a more defined and unique sculpture appeal with the deeper etchings. It looks more notiable and professional when it’s etched deep. Two-stage Sandcarving
Two-stage sandcarving works by sandblasting in two different stages or steps to make the etching appear more realistic and sculptured into the glass.
1. The first stage will be an area that you want to look deepest. When etching the first stage, make sure you etch this area deep into the glass.
2. For the second stage, you would just peel back the rest of the stencil resist
for the design and sandblast that area lighter. This gives the design an even more defined elegant look. Every area of the design is basically etched at two different depths to show a contrast and expose realistic dimensions.
Copyright 2009, 2012, 2014 www.glassetchingsecrets.com 98
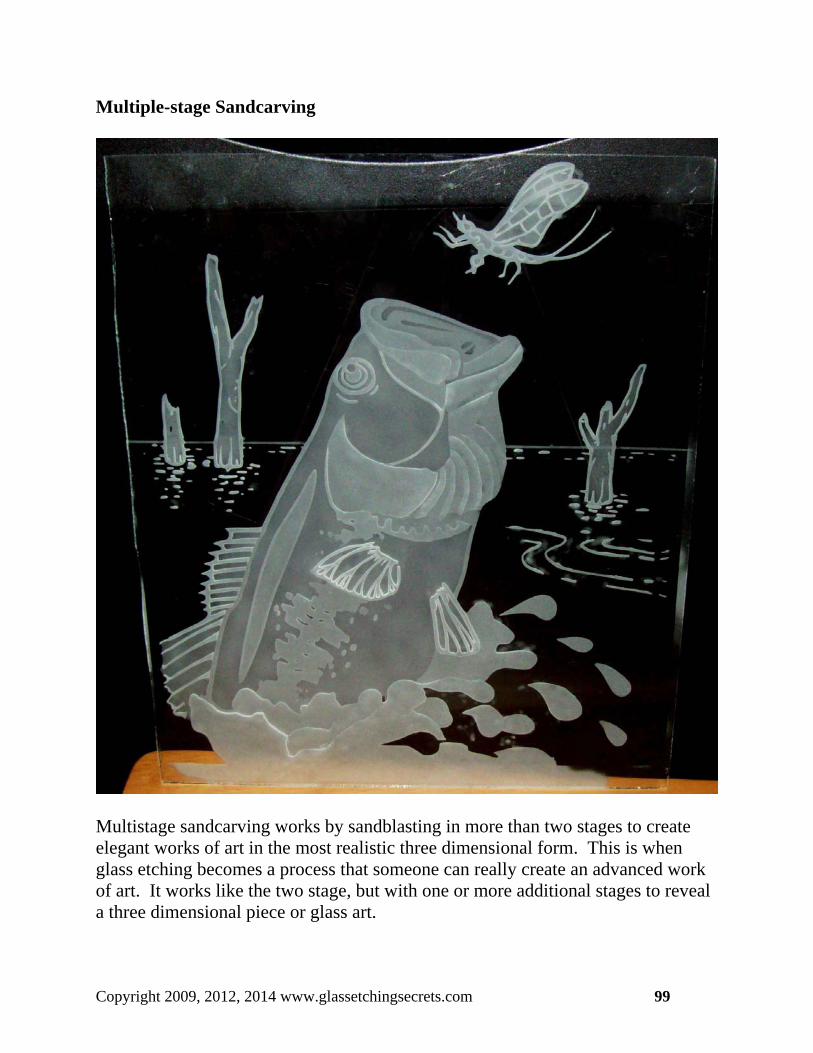
Multiple-stage Sandcarving
Multistage sandcarving works by sandblasting in more than two stages to create elegant works of art in the most realistic three dimensional form. This is when glass etching becomes a process that someone can really create an advanced work of art. It works like the two stage, but with one or more additional stages to reveal a three dimensional piece or glass art.
Copyright 2009, 2012, 2014 www.glassetchingsecrets.com 99
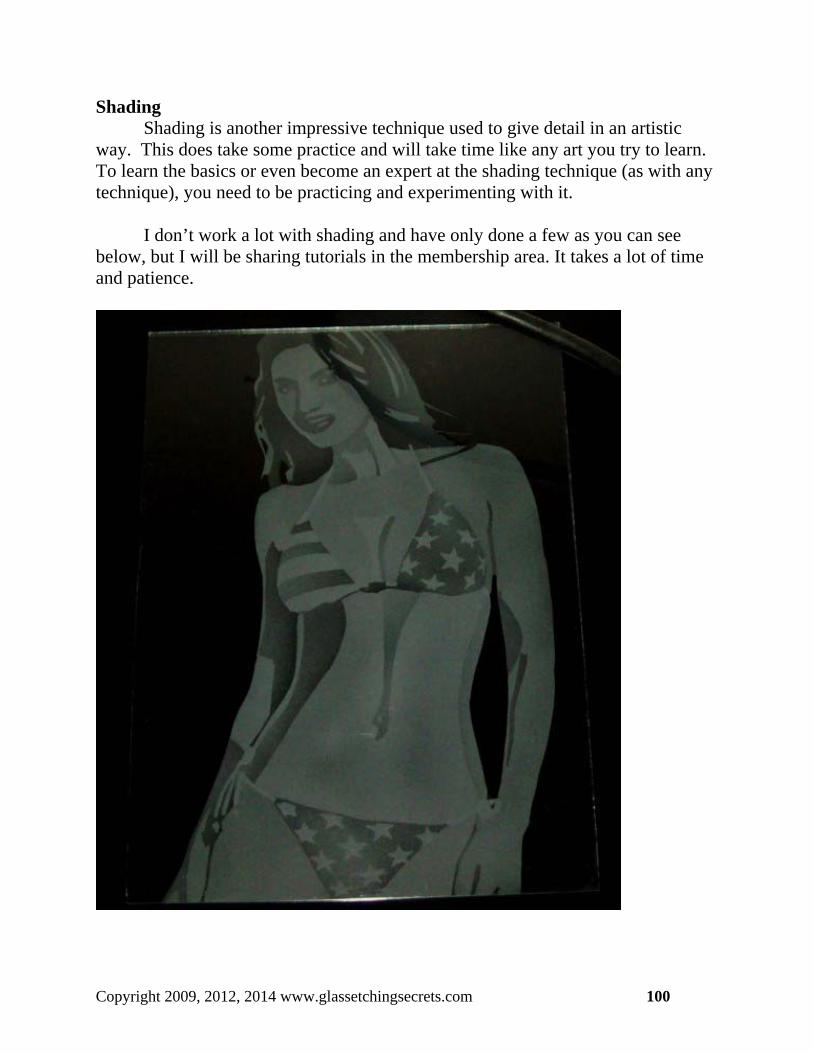
Shading Shading is another impressive technique used to give detail in an artistic way. This does take some practice and will take time like any art you try to learn. To learn the basics or even become an expert at the shading technique (as with any technique), you need to be practicing and experimenting with it.
I don’t work a lot with shading and have only done a few as you can see below, but I will be sharing tutorials in the membership area. It takes a lot of time and patience.
Copyright 2009, 2012, 2014 www.glassetchingsecrets.com 100

The key to shading is to first select a fine grit at about 220 or finer and use a mini sandblaster. The stencil is usually hand cut piece by piece away from the glass while blasting in stages. Every different layer has to be a slightly different shade. Tip: I found that it is easiest to create a stencil by converting an image to a grayscale and printing it out onto adhesive backed paper. If you signed up for the membership are, I will be showing tutorials in more detail on how to do this. When shading the glass, you need to adjust the pressure of your sandblaster to a low setting and figure out in your head what areas need shaded. You need to also vary up the amount of time your abrading certain areas. Basically, anything that you what to make appear white, you etch. Areas that you want to be gray, then you have to shade lighter. The really cool aspect about shading is its ability to create grayscale effects and to etch photos onto glass in a way which is more unique/ artistic than the photoresist halftone process.
Copyright 2009, 2012, 2014 www.glassetchingsecrets.com 101
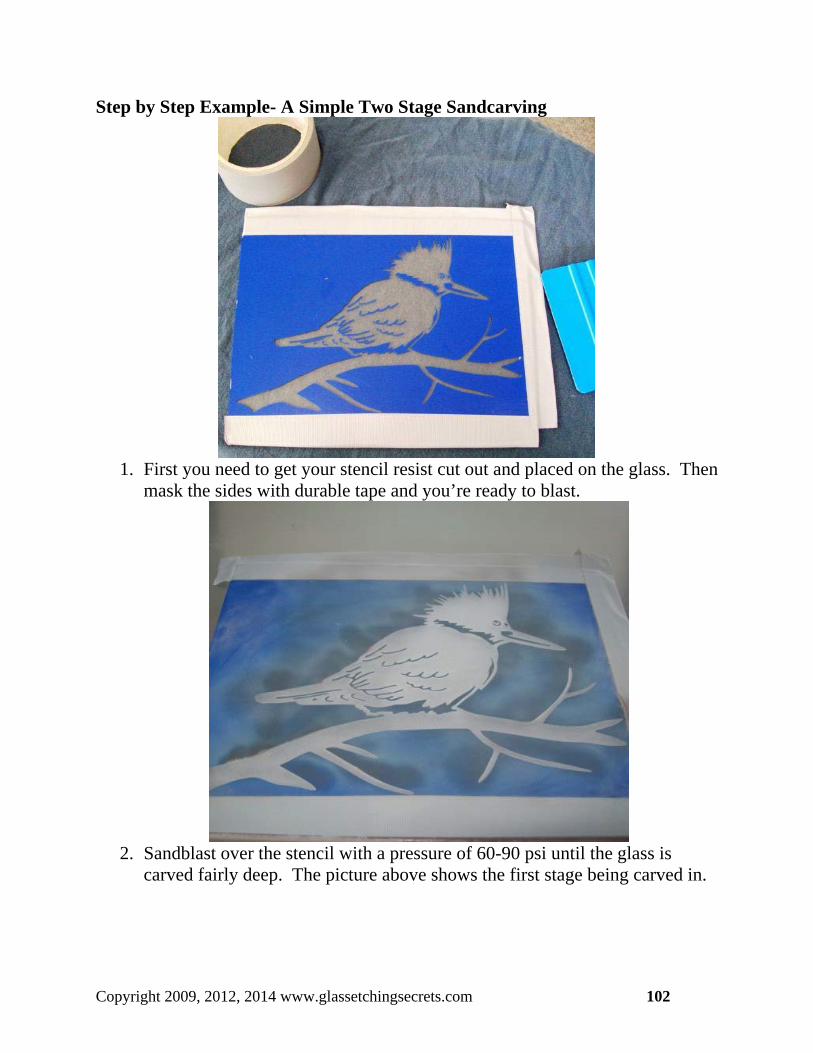
Step by Step Example- A Simple Two Stage Sandcarving
1. First you need to get your stencil resist cut out and placed on the glass. Then
mask the sides with durable tape and you’re ready to blast.
2. Sandblast over the stencil with a pressure of 60-90 psi until the glass is
carved fairly deep. The picture above shows the first stage being carved in.
Copyright 2009, 2012, 2014 www.glassetchingsecrets.com 102
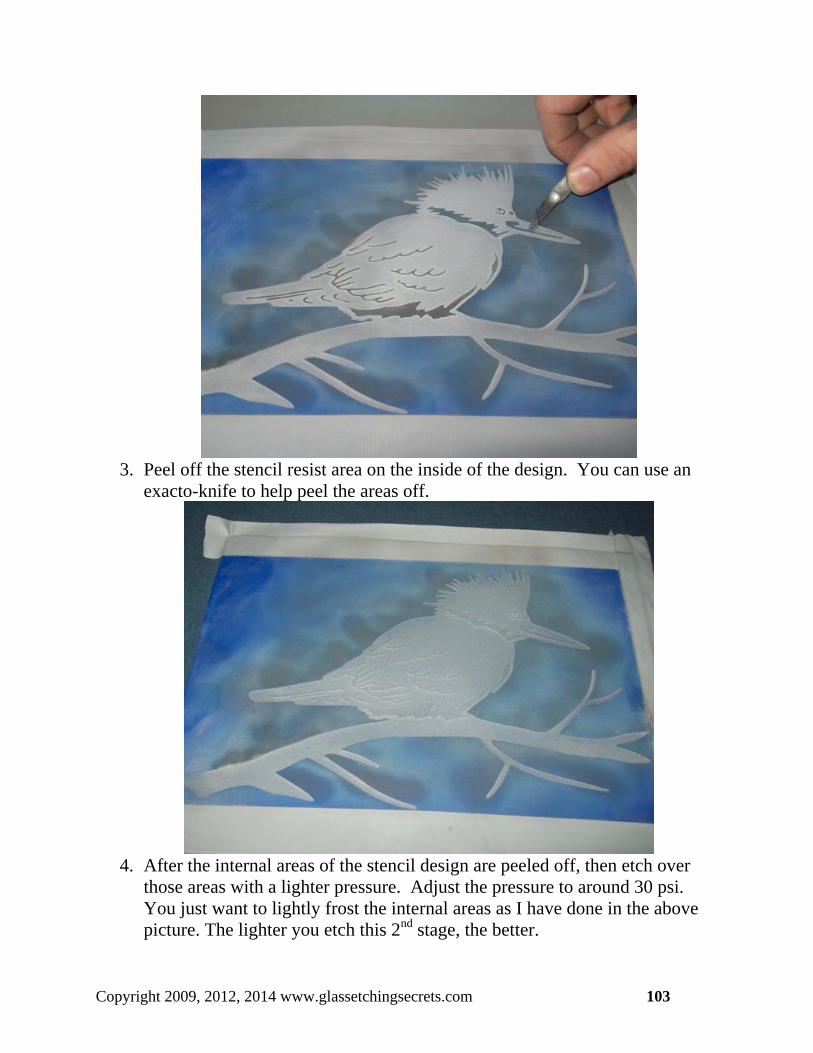
3. Peel off the stencil resist area on the inside of the design. You can use an
exacto-knife to help peel the areas off.
4. After the internal areas of the stencil design are peeled off, then etch over
those areas with a lighter pressure. Adjust the pressure to around 30 psi. You just want to lightly frost the internal areas as I have done in the above picture. The lighter you etch this 2nd stage, the better.
Copyright 2009, 2012, 2014 www.glassetchingsecrets.com 103
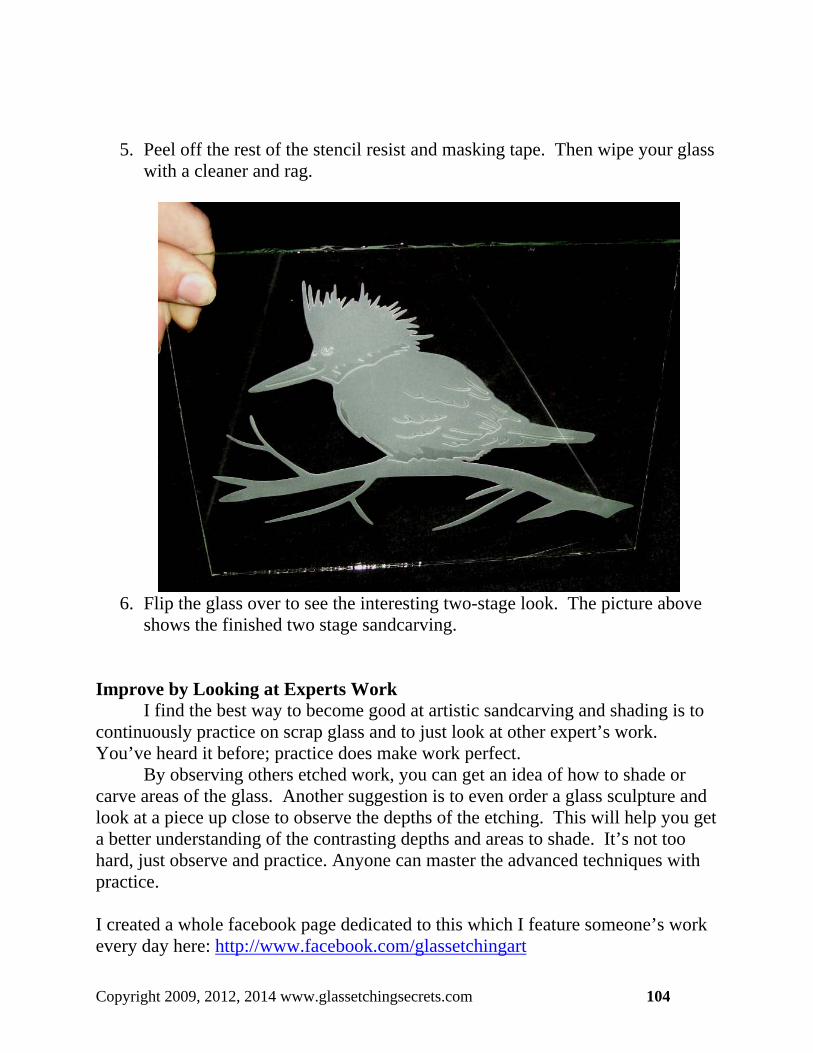
5. Peel off the rest of the stencil resist and masking tape. Then wipe your glass with a cleaner and rag.
6. Flip the glass over to see the interesting two-stage look. The picture above
shows the finished two stage sandcarving.
Improve by Looking at Experts Work I find the best way to become good at artistic sandcarving and shading is to continuously practice on scrap glass and to just look at other expert’s work. You’ve heard it before; practice does make work perfect.
By observing others etched work, you can get an idea of how to shade or carve areas of the glass. Another suggestion is to even order a glass sculpture and look at a piece up close to observe the depths of the etching. This will help you get a better understanding of the contrasting depths and areas to shade. It’s not too hard, just observe and practice. Anyone can master the advanced techniques with practice. I created a whole facebook page dedicated to this which I feature someone’s work every day here: http://www.facebook.com/glassetchingart
Copyright 2009, 2012, 2014 www.glassetchingsecrets.com 104

Bonus 2: Photo Editing
Software Free Guide
Copyright 2009, 2012, 2014 www.glassetchingsecrets.com 105
People are paying hundreds of dollars for photo editing software to alter and personalize their glass etching designs before they make a stencil resist out of it. For example, the popular Adobe Photoshop photo editing software costs about $700 if you buy the new version (although older versions only cost about $100-$150). The amazing thing is that you can get this software for free and save $700. The free program is called GIMP and is actually a generic version of Photoshop. A lot of the functions and tools in GIMP are very similar to the ones in Photoshop. The newest Photoshop programs may very well be a little more advanced than the Free GIMP program, but all of these advances aren’t needed or used for creating glass etching stencil designs.
So you can get the free GIMP software and save hundreds of dollars by following the link specifically for your computer below and click on the Download link. Sometimes after clicking on the download button your computer may block it from downloading. If this happens, you will have to enable the download. For Windows http://gimp.org/downloads/ For Mac OS X http://gimp.lisanet.de/Website/Overview.html For UNIX http://gimp.org/unix/
Copyright 2009, 2012, 2014 www.glassetchingsecrets.com 106
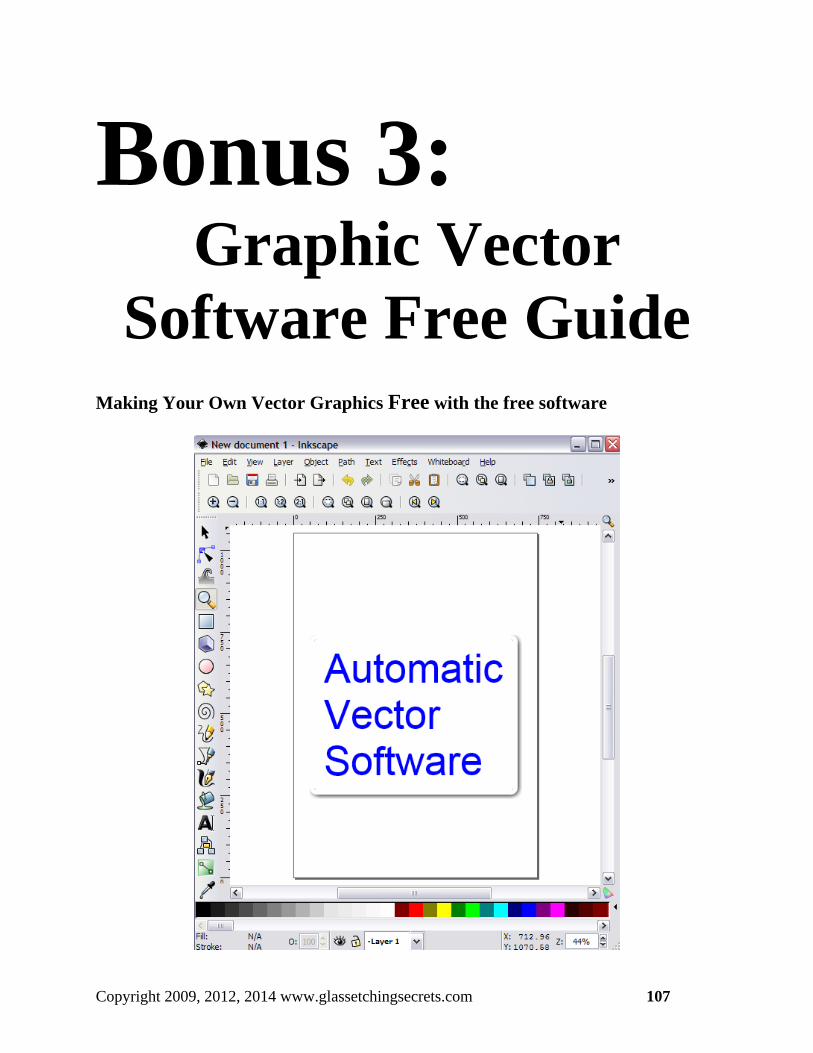
Bonus 3: Graphic Vector
Software Free Guide
Making Your Own Vector Graphics Free with the free software
Copyright 2009, 2012, 2014 www.glassetchingsecrets.com 107
Here is another secret solution that I have been using to produce cheaper and/or free vector graphics for creating stencils for automatic stencil cutting machines. Utilizing the Inkscape program, you can import Raster graphics into the program and with a click of a button it changes into a Vector graphic.
People pay hundreds of dollars for vector editing software to automatically
create a vector graphic from the usual raster graphic, without having to do any work. This makes it quick and easy, so now you can enlarge your design without loosing quality in a flash!
For example, the popular Adobe Illustrator program costs nearly $600 if you
buy the new version (older versions are a little less expensive). The amazing thing is that you can get this software program for free and save $600. The free program called Inkscape is a generic version of Illustrator.
Get the free Inkscape software and save hundreds of dollars by following the link provided and downloading it Free to your computer. After following the link, click on the Download link. Sometimes after clicking on the download button your computer may block it from downloading. If this happens, you will have to enable the download.
To get this free graphics vectorizor, download the Inkscape program to
your computer at this website: http://www.inkscape.org/download/?lang=en
This program will give your graphic a vector encoding to enable a vinyl cutter to mechanically cut the design out of vinyl.
If you don’t use a vinyl cutter, you can also use the vector it creates for the
Photo Resist or traditional (aka: hands on) stencil resist processes for larger projects and to produce a less pixelated graphic. Since the vector graphic does not depreciate in quality at any size it is scaled to, it can be enlarged and printed out onto a stencil. You can not do this with the typical raster type pattern.
Making a vector graphic from a raster graphic is actually fairly easy and
simple to do. And the best part is it is free to produce these results.
Copyright 2009, 2012, 2014 www.glassetchingsecrets.com 108
Follow these steps to convert a raster graphic into a vector graphic with Inkscsape:
1. Open the Raster graphic into the Inkscape program 2. Click on the graphic to activate it inside the program 3. Select the Path button in the toolbar 4. Select and click Trace Raster 5. When the window opens, select OK to automatically vectorize your
graphic. Sometimes it will take a minute or two if there is a lot of detail. When it is finished vectorizing, it will leave the raster image there still, with the converted vector image on top of each other.
6. Select the top image and move it over to display both of the images. Find out which one is the Vector and which is the Raster. (if its hard to tell, zoom in to see. The pixel graphic is the raster that needs to be deleted.)
7. Delete the Raster image and move the Vector back onto the page. Now you will have to save this as a vector file.
8. Select File - Save As – and select .EPS as the file extension. Make sure it is saved as .eps at the end of name. If it isn’t, then just type in “.eps”.
9. That’s it. You can now open it from a vinyl cutter and create a stencil without hand cutting.
Copyright 2009, 2012, 2014 www.glassetchingsecrets.com 109
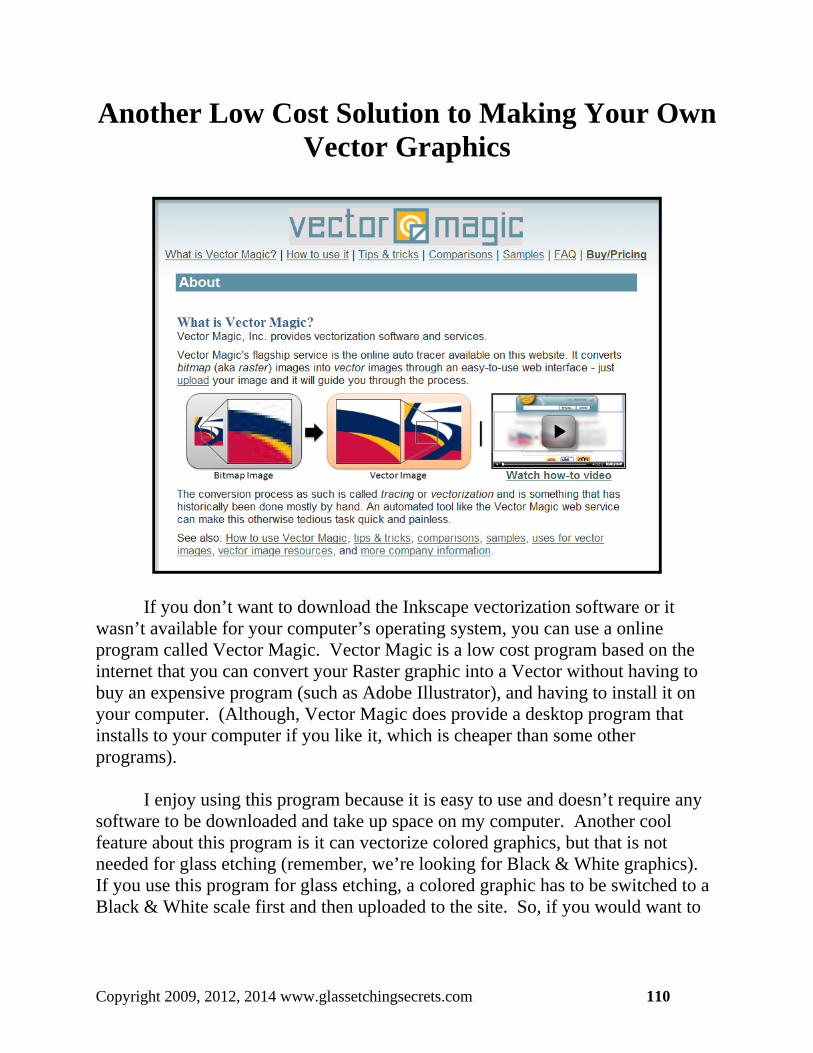
Another Low Cost Solution to Making Your Own Vector Graphics
If you don’t want to download the Inkscape vectorization software or it wasn’t available for your computer’s operating system, you can use a online program called Vector Magic. Vector Magic is a low cost program based on the internet that you can convert your Raster graphic into a Vector without having to buy an expensive program (such as Adobe Illustrator), and having to install it on your computer. (Although, Vector Magic does provide a desktop program that installs to your computer if you like it, which is cheaper than some other programs).
I enjoy using this program because it is easy to use and doesn’t require any
software to be downloaded and take up space on my computer. Another cool feature about this program is it can vectorize colored graphics, but that is not needed for glass etching (remember, we’re looking for Black & White graphics). If you use this program for glass etching, a colored graphic has to be switched to a Black & White scale first and then uploaded to the site. So, if you would want to
Copyright 2009, 2012, 2014 www.glassetchingsecrets.com 110

resize a colored graphic for purposes other than glass etching, you could easily vectorize it with Vector Magic.
By all means, the internet version of Vector Magic isn’t expensive and is
very easy to use with a step by step feature. If you would rather create these vector graphics for less than a dollar without having to download software on your computer, I recommend this method.
You can sign up for this online vectorizer and be able to vectorize the first
few graphics free. You just need to include your email address to sign up, so feel free to try it out and get your first few graphics for free. It has easy step by step method with tutorials that show you how to work the program.
Click here to connect to the website and convert your own graphic for a
low cost. www.Vectormagic.com
Copyright 2009, 2012, 2014 www.glassetchingsecrets.com 111
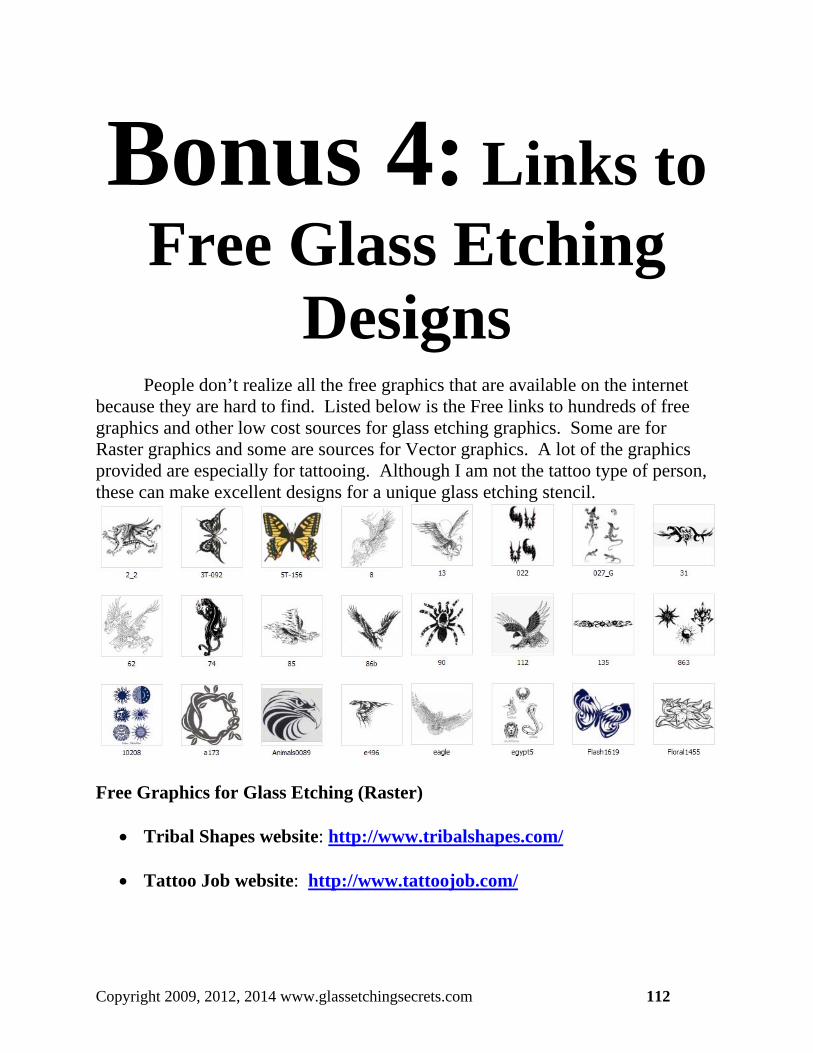
Bonus 4: Links to Free Glass Etching
Designs
People don’t realize all the free graphics that are available on the internet because they are hard to find. Listed below is the Free links to hundreds of free graphics and other low cost sources for glass etching graphics. Some are for Raster graphics and some are sources for Vector graphics. A lot of the graphics provided are especially for tattooing. Although I am not the tattoo type of person, these can make excellent designs for a unique glass etching stencil.
Free Graphics for Glass Etching (Raster)
Tribal Shapes website: http://www.tribalshapes.com/
Tattoo Job website: http://www.tattoojob.com/
Copyright 2009, 2012, 2014 www.glassetchingsecrets.com 112
Other Low Cost Sources for Glass Etching Graphics (Raster)
TattooMeNow: http://tinyurl.com/tattomenow TattooFever: http://tinyurl.com/tattoofever
Where to get vector graphics at an inexpensive price
If you’re just starting out, you may have realized that even the glass etching graphics are expensive and most of them offered are only sold in the Raster format, meaning they can’t be enlarged with out loosing quality. Realizing that Raster graphics for glass etching projects are expensive may cause you to assume the advanced vector format will be even more expensive. This can be true, but I will save you a lot of time and money if you follow me here to get these graphics even cheaper than Raster graphics.
First off, you can take low cost Raster graphics and quickly change them
into Vector graphics with the Free Inkscape program or the inexpensive Vector Magic program as stated before. Second, you can purchase graphics that are already in the vector format at a fairly low price from the suggested sources stated below.
On another note, people don’t realize that you can get graphics at places rather than a glass etching site. You can look at graphics produced for the sign industry which are almost always vector graphics because that is what is needed for vinyl cutters.
Graphics produced for the sign industry and tattoo industry are usually cheaper and unique. These are generally created on a CD package or a downloadable file for a low price. The graphics usually range from many different topics, which is kind of cool because you can add graphics together to create a artistic scene.
Copyright 2009, 2012, 2014 www.glassetchingsecrets.com 113
Here are some of them I found that were priced cheap and have a fair amount of quality:
Ultimate Clipart Design: http://clipart-design.com/products.htm Here is a bunch of their Free Samples: http://www.clipart-
design.com/freeclipart.htm SignTorch Realistic Series: http://signtorch.com/store/home.php
(the Pro Realistic pack is the best range of graphics)
This source below has some of my favorite graphics for glass etching and sand carving. A lot of them work well by copying and using the Inkscape program to make your own free vector graphics. This can save you a lot of money but be advised that it is infringing on copyright laws.
http://expressclipart.com/
Copyright 2009, 2012, 2014 www.glassetchingsecrets.com 114

Tips to Copying an Image -Copying off the internet
Save as feature: You can save an image by saving it to your computer with the “save as” feature.
Print screen feature: The print screen feature allows your computer to make a copy of a graphic you are viewing on your computer. The unwanted areas will have to be cropped (cut out) with a software program. If you can open a larger file on the internet, do so for more quality.
Basic Download feature: Some graphic websites may have a basic download feature to save it as a file on your computer.
-Copying out of a book
Scan designs or patterns into a computer with a scanner. You can scan from a stencil design book, your own drawing, and anything that is or could be transferred into a black and white graphic. Try scanning at a high resolution for best quality. After the design is scanned into the computer, you just save it as a file. These designs can then be altered anyway with a graphical software program and be converted into a Vector graphic to enlarge it or use it with the vinyl cutter.
-Copying out of a PDF document PDF files don’t allow you to use a “save as” feature with a particular graphic but there are two other ways. Some of the tattoo design e-books have their graphics in the PDF file format and need to use these tips to copy the desired graphic for etching.
Use the snapshot feature- You can use the snapshot feature (the icon looks like a small camera) to select a area of the document to copy such as a desired graphic. Then you will have to save it as a different file.
Can also use the print screen feature- The “print screen” feature also
works for PDF’s as well as anything being viewed on your computer screen. It will just need to be saved as a different file.
Copyright 2009, 2012, 2014 www.glassetchingsecrets.com 115
Bonus 5: Links to Thousands of
Resizable Vector Logos
I have listed below sources for thousands of various vector graphics for free. These can be imported into your vinyl cutter software and automatically cut a stencil resist to use for glass etching. If you are using the SignBlazer Elements software discussed throughout Glass Etching Secrets, you will have to download the graphics that are in the “EPS” file format in order to work. Most of the logos listed in these websites are in the “EPS” format but others are in different vector formats. Also, the vector logos provided on these websites are usually colored graphics. These can still be cut, but you will have to make sure the colors are selected to cut in the vinyl cutter software prior to cutting. I was actually charged a small fee for some one to tell me about these secret websites. The reason I paid someone for these secret links is because it saved me a lot of money and these websites are hard to find online. There are companies that sell a collection of vector logos on a CD for hundreds of dollars to use for a vinyl cutter. These websites saved me about $100 and I got them nearly free. All you have to do is type in a keyword for a vector graphic in the search box and it finds the vector graphics available to download for free. I was definitely willing to pay a small fee for the links to these secret websites to be able to get thousands of vector graphics for free to use on my vinyl cutter for a glass etching stencil. Now I am sharing them with you!
Copyright 2009, 2012, 2014 www.glassetchingsecrets.com 116

FREE
Brands of the world (Logo): http://www.brandsoftheworld.com/ Logotypes101 (Logo): http://www.logotypes101.com/
Vector portal: http://www.vectorportal.com/
Copyright 2009, 2012, 2014 www.glassetchingsecrets.com 117
Bonus 6: Sandblasting with
Different Glass Types Guide
Sandblasting is definitely very unique that offers a lot of possibilities to
generate beautiful works of art. Sandblasting allows you to do light surface etching and deep sandcarving into the glass. By varying the techniques you can create elegant finishes that stand out. But you have to know what techniques you can do on certain glass types. Since glass is fragile and has different forms, it is vital that you know what kind you’re working with. Some glass can’t hold up for certain types and may cause you to destroy it. The two main categories of glass are safety glass and annealed glass. Annealed glass is looked at as regular glass that is brittle and breaks into sharp large pieces. This glass can be very dangerous if it breaks around you, so safety glass was developed to protect people from receiving injuries from broken glass. Safety glass is glass annealed glass that is altered during the manufacturing process. The safety glass is implemented in areas that are vulnerable to being broken, causing harm to people. In some cases safety glass is used for areas that have a lot of stress, since some safety glass is many times stronger than annealed glass. So let’s go over the types of glass and what sandblasting techniques can be used with them. Here is a quick guide to prepare you for the glass types. Annealed Glass Annealed glass is very brittle and can cause serious injuries if broken because of its sharp shrouds. This type of glass can be sandblasted with any of the techniques to create miraculous works of art. These include surface etching, single
Copyright 2009, 2012, 2014 www.glassetchingsecrets.com 118

stage sand carving, double stage sand carving, multi-stage sand carving, and shading techniques. All of these techniques can be used in conjunction with each other on the same piece of glass, giving you a lot of possibilities. The only thing that you have to look out for when sandblasting annealed glass is the thickness of it. You do not want to carve too deep if the glass isn’t very thick to begin with. As a rule of thumb, you should only carve or etch glass at a maximum of 30% to 50% of the way through. Also, you should consider the stress that the glass will have to hold and how large the panel is, which may require a carving of less than 50%. Glass receives the most stress when the panel is large and when it has a load on it. Loads can be from wind as well as anything else. You don’t want to weaken the glass too much for a given situation. Consult a glass professional if a very large or very thin piece of glass is desired to be etched. Safety Glass As stated before, safety glass is a different type to provide safety when broken when it has a greater chance of being broken. The two main types of safety glass are tempered and laminated. These are completely different in composition, but both developed for safety. You can sometimes tell which type of safety glass by looking at a corner of the glass for a marking. This marking will sometimes indicate its type. Automobiles use both types of safety glass since car accidents are likely to happen and break. The windshields are usually laminated glass, while the side and back windows are usually tempered. The front windshield is made of laminated glass to prevent any glass from falling out of the window. It is very important that you determine if a glass is safety or annealed because safety glass doesn’t allow you to do deep sandcarving. Tempered Glass Tempered safety glass is actually many times stronger than annealed glass. It is manufactured by changing the annealed glass from a special heating and cooling process. Another way manufacturers generate tempered glass is through a special chemical process. These processes basically create stresses inside the glass causing it to become significantly stronger. When tempered glass is struck, it breaks into tiny little pieces without the sharp edges. Now this can’t be sand carved because it can break under these deep etches. The sandblasting techniques you can use are light surface etching and shading since they both only roughen up the surface and don’t damage the internal strength of the glass. Even when surface etching and shading tempered glass, you should take other precautions such as using fine grit (about 120 & finer) and use light pressure
Copyright 2009, 2012, 2014 www.glassetchingsecrets.com 119
or blast from a far distance. The use of a finer grit is better than a coarse grit for etching tempered glass because it doesn’t cause as much rigid areas. The finer grit causes the etched area to be smooth for less stress on the glass. Laminated Glass Laminated glass is manufactured in a unique way to provide safety. It is designed two panes together with a type of plastic sheeting placed in between to hold them. The middle clear plastic sheeting holds up the glass when broken to prevent any glass from being released. This type of glass shouldn’t be sand carved either because it only has a thin glass piece that you could easily sandblast through. The pane overall may be fairly thick but each piece is usually thin. The majority of the two panes that are placed together are only 1/8” thick on each
side, so they should only be surfaced etched or shaded. If the panes are a lot thicker, then you could etch deeper. Seek a glass professional for more
information on the thickness of your glass if you would want to sand carve it.
Mixing the Glass Arts A lot of glass artists and crafters like to mix up different glass arts together to get very creative. Here are some other great books to read about glass painting and stained glass. Glass Painting Techniques & Stained Glass: http://tinyurl.com/glasspainting Packed with videos and illustrations. By: Williams & Byrne
Copyright 2009, 2012, 2014 www.glassetchingsecrets.com 120
Copyright 2009, 2012, 2014 www.glassetchingsecrets.com 121
In the End
I sincerely hoped this resource provided you some valuable information to
help you get advanced techniques for glass etching and helping you save a lot of money and time. I know it has saved me thousands of dollars.
I would like to hear from you about your success stories and to see how your
glass etching projects turned out. If any of the links go down, please let me know and I can redirect you. Email: [email protected]
Become a Member! I am a big believer of building a community around glass etching & sandcarving, so I started a membership site packed with additional videos, etching technique tutorials, and more cost saving information. For being a great customer and ordering this Glass Etching Secrets manual, you can still register today for only $4.95 * at: http://www.glassetchingsecrets.com/member/about/home/area-signup/ * Price is subject to change through time. Original price is $24.00 per month so sign up today! If that doesn’t fit within your budget, we also have a great community sharing pictures of their work on the Facebook group: Glass etching, Sandcarving, and Creative Arts & Crafts Group at http://www.facebook.com/glassetchingart
Please Like Us on Facebook!