bakery science book
TRANSCRIPT
Bakery Science “The art and science of baking” Ph.no.09996000499
Ingredients, techniques, andrecipes for successful baking in
your kitchen
1
Bakery Science“The Art and Science of Baking”
Bakery Science “The art and science of baking” Ph.no.09996000499
BY:-
SUNIL KUMARResearch Scholar
IHTM, MDU ROHTAKDEDICATIONS
This book is dedicated to my wife and family and also to entire facultyteam of hotel management
About AuthorDespite spending his professional life cooking, Sunil Kumar has alwaysenjoyed baking and cake decorator. A naturally talented chef and baker’s, he has many year experience in baking and cooking. His enthusiasm for teaching students, together with his natural warmth, has endeared his to a generation of students and has ensured her a permanent place in their affections.Sunil’s tremendous energy is now being channeled into bringing his skills to the widest possible audience. Sunil Kumar, have done B.Sc. in hotel and hospitality administration form institute of hotel management (I.H.M.) Gwalior, M.P. I have attended various International Seminars in Bakery and confectionary, which enriched me. I am teaching bakery and food production at I.H.M. Gwalior last one year and have a great passion for teaching the bakery and food production subject.
2
Bakery Science “The art and science of baking” Ph.no.09996000499
Book Contents
Chapter 1Flour—the Basic Ingredient and How to Use it for the Best Baked Goods
Chapter 2The Wonderful World of Eggs
Chapter 3How to Make Bread and Pastries with Yeast
Chapter 4The Secrets of Using Chemical Leaveners—Baking Powder and Baking Soda
Chapter 5Fresh from the Dairy—Dairy Products and How to Use Them
3
Bakery Science “The art and science of baking” Ph.no.09996000499
Chapter 6Butter, Shortening, and Oil—The Fats We Bake With
Chapter 7How Sweet it is—How to Use the Family of Sweeteners
Chapter 8Chocolate! How to Make the Best Desserts
Chapter 1
Flour—the Basic Ingredient and How to Use it for the Best Baked GoodsBook Contents.................................................3
Chapter 2..............................................................................................................................7
The Wonderful World of Eggs.............................................................................................7
Chapter 3..............................................................................................................................8
Yeast and How it Works.......................................................................................................8
Chapter 4................................................................................................................. 9The Secrets of Using Chemical Leaveners............................................................9
Part 1: Types of Wheat.......................................10Components of the Wheat Kernel.......................................................................11
Part 2: Flour Types..........................................13The Role of Gluten.............................................13
The White Flours................................................................................................... 13
4
Bakery Science “The art and science of baking” Ph.no.09996000499
Bleached or Unbleached?........................................14Bromated or Unbromated?........................................14Bread, All-Purpose, Self-Rising, Pastry, or Cake Flour?........14So what flour should I buy?....................................15
Whole Wheat Flour...............................................................................................16What flours do we use in our mixes?............................16
Other Flours.......................................................................................................... 17Cornmeal.......................................................17Potato flour...................................................17
Chewy or Tender—How do we Control the Texture..........................................18Flour Blends.......................................................................................................... 19Other Flour Additives...........................................................................................20Conditioners...................................................20
Storing Your Flour................................................................................................ 20Part 3: Recipes—Applying What You Learned....................21
Sweet Buttermilk Cornbread...............................................................................21Quit pouring buttermilk down the drain!........................22
Texas Chili Corn Bread......................................................................................... 23What pan should you use for skillet cornbread?.................24
European Soft Peasant Bread.............................................................................25100% Whole Wheat Bread Recipe.......................................................................27Consider Bread Helpers™........................................28
California Golden Raisin Muffins........................................................................29American Rye Bread Recipe.................................................................................30Deli Rye Bread Recipe........................................................................................... 32To make this easier, consider a dough press....................................................35How to Make Pitas................................................................................................ 36Frosted Cinnamon Raisin Bread Recipe..........................................................................38
October Pumpkin Bread Recipe.......................................................................................41
Old-Fashioned Caramel Cake Recipe...............................................................................42
Chapter 2............................................................................................................................43
The Wonderful World of Eggs...........................................................................................43
The Mechanics of Eggs......................................................................................... 43The Three Parts of the Egg..................................................................................44Fresh, Safe Eggs.................................................................................................... 44
Part 2: Techniques for Using Eggs............................46How to Make Meringue for Pies..........................................................................46
5
Bakery Science “The art and science of baking” Ph.no.09996000499
How to Make Angel Food Cakes..........................................................................48Consider Pie Weights for that Pre-baked Crust.................................................51How to Make Soufflés........................................................................................... 52How to Make Strata and Baked French Toast...................................................53How to Build a Frittata......................................................................................... 54How to Make Custards......................................................................................... 55How to Make Pannekoeken.................................................................................57
How to Make Aebleskiver......................................59Aebleskiver (pronounced “eebull-skeever”) is a Danish filled pastry made on the stovetop. They can be either sweet with luscious creams or pastry fillings, or savory with meat and cheese...........59A holiday in Denmark often begins with a breakfast of these puffy little pastries that are traditionally made with an apple filling or served with applesauce (hence their name). Like other great pastries,wonderful variations have evolved. We like them with pastry fillings,jams, chocolate, cheese and even frosting....................59To Make the Batter...........................................59Aebleskivers are made with a simple batter, but the key is in the eggs. Separate the eggs, and then set the egg whites aside. Add the yolks to the flour and other ingredients, and stir until combined..............................................................59Next, whip the egg whites until light and soft peaks form. This couldtake a while, but this is the trick to perfect, fluffy aebleskivers. Gently fold the egg whites into the batter...................59How to Make Cream Puffs......................................61Cream puffs are similar to aebleskiver, but instead of cooked on the stove, these hollow pastries are baked in the oven...........61Cream puffs consist of three parts: the outer shell, the filling, andthe chocolate topping (or frosting). The crisp shell against the silky filling creates a melt-in-your-mouth effect. Here’s a step-by-step guide:..................................................61Part 3: Recipes—Applying What You Learned....................61
“Meringue that Does Not Weep” Recipe.............................................................64Easy Oven-Baked Frittata....................................................................................65Classic Quiche Lorraine.......................................................................................66Cinnamon Ripple Angel Food Cake Recipe........................................................67Spinach, Bacon, and Swiss Quiche.....................................................................69Easy Baked Omelet............................................................................................... 70
6

Bakery Science “The art and science of baking” Ph.no.09996000499
Chocolate Malt Pudding......................................................................................71Southern Chess Pie............................................................................................... 72Traditional Dutch Pannekoeken.........................................................................73This recipe also works well for mini pannekoeken made in jumbo muffin pans. They make perfect single serving breakfasts, or dessert cups..................................73Apple and Bacon Pannekoeken..........................................................................74Cinnamon Vanilla Sugar Overnight Baked French Toast..............................................75
Apple Custard Pie with Streusel Topping........................................................................77
Great Grandma’s Danish Aebleskiver..............................................................................78
Cream Puffs........................................................................................................... 80Chapter 3............................................................................................................................81
Yeast and How it Works....................................................................................................81
Part 1: Yeast and How it Works........................................................................................81
Creating the Right Environment for Yeast.........................................................83Part 2: Using Yeast to Make Great Breads......................................................................85
How Long Should My Bread Rise?.......................................................................85Why do We Need to Knead?.................................................................................86Does it Matter What Flour I Use?........................................................................86The Secrets of Great Breads................................................................................87Is Brown Bread Better?........................................................................................89High Altitude Breads............................................................................................90Part 3—Recipes: Applying What You Learned................................................................91
Using Yeast Successfully: Hamburger or Sandwhich Buns..............................91Retarding the Growth of Yeast: Italian Herbed Focaccia.................................94Adding Cheese to Your Bread: Cheesy Dinner Rolls and Loaves......................97Dilly Cheese Bread................................................................................................ 98Adding Grains to Your Bread: Teton Valley Whole Grain Bread....................100Adding Vegetables to Your Bread: Summer Zucchini and Carrot Bread......102Using Cornmeal in Your Bread: Southern Cornbread (Yeast).......................104Adding Fruit to Your Bread: Yeasted Banana Nut Bread...............................105Creating a Sourdough Starter with Yeast: Easy Sourdough Bread...............106How to Bake Bread on the Grill........................................................................110Chapter 4..........................................................................................................................112
The Secrets of Using Chemical Leaveners........................................................112
7
Bakery Science “The art and science of baking” Ph.no.09996000499
The Secrets of Using Chemical Leaveners........................................................112Part 1: Chemical Leaveners and How They Work........................................................112
Baking Soda........................................................................................................ 112Baking Powder................................................................................................... 113Cream of Tartar.................................................................................................. 114Other Leaveners................................................................................................. 114Part 2: Using Chemical Leaveners.................................................................................115
The Muffin Method............................................................................................. 115Busy morning tomorrow? Use the muffin method..................115
The Creaming Method.......................................................................................116The Biscuit Method............................................................................................. 116Why use a pastry blender?.....................................117
Part 3: Learning to Bake with Leaveners......................................................................118
How to Bake Quick Breads................................................................................118Pointers for Success with Quick Breads..................................119Troubleshooting Tips for Quick Breads..................................119Pointers for Success with Muffins......................................121
How to Make Biscuits.........................................................................................123Pointers for Success with Biscuits......................................124
How to Make Scones..........................................................................................124Pointers for Success with Scones.......................................125More Ideas for Your Scones..........................................125Pointers for Success with Cornbread....................................126
Part 4: Recipes—Applying What You Learned..............................................................128
The Muffin Method—Blueberry Corn Muffins.................................................128The Perfect Banana Muffin Recipe....................................................................130Toppings for Your Muffins.................................................................................130Brown Sugar and Nut Streusel Topping..........................131Cinnamon-Sugar Topping........................................131Orange Nut Streusel Topping...................................131Cream Cheese Topping..........................................132
The Creaming Method—New England Hermits..............................................135Macadamia White Chocolate Cookies with Raspberry Chips.........................136The Biscuit Method—Frosted Lemon Poppy Seed Scones..............................137Sweet and Savory—Explore a New World of Biscuits!....................................140Easiest Buttermilk Biscuits.................................................................................141Cranberry Nut Biscuits....................................................................................... 142
8

Bakery Science “The art and science of baking” Ph.no.09996000499
Cheddar Cheese Biscuits....................................................................................143
9
Bakery Science “The art and science of baking” Ph.no.09996000499
Chapter 2
The Wonderful World of Eggs
Chapter 2..............................................................................................................................7
The Wonderful World of Eggs.............................................................................................7
Part 1: Types of Wheat........................................8Components of the Wheat Kernel.......................................................................11
Part 2: Flour Types..........................................12The White Flours................................................................................................... 13Whole Wheat Flour...............................................................................................16Other Flours.......................................................................................................... 17Chewy or Tender—How do we Control the Texture..........................................18Flour Blends.......................................................................................................... 19Other Flour Additives...........................................................................................20Storing Your Flour................................................................................................ 20
Part 3: Recipes—Applying What You Learned....................21Sweet Buttermilk Cornbread...............................................................................21Texas Chili Corn Bread......................................................................................... 23European Soft Peasant Bread.............................................................................24100% Whole Wheat Bread Recipe.......................................................................27California Golden Raisin Muffins........................................................................28American Rye Bread Recipe.................................................................................30Deli Rye Bread Recipe........................................................................................... 31To make this easier, consider a dough press....................................................35How to Make Pitas................................................................................................ 36Teton Valley Multi Grain Bread Recipe............................................................................37
Frosted Cinnamon Raisin Bread Recipe..........................................................................38
October Pumpkin Bread Recipe.......................................................................................41
Old-Fashioned Caramel Cake Recipe...............................................................................42
10
Bakery Science “The art and science of baking” Ph.no.09996000499
Chapter 3
Yeast and How it Works
Book Contents.................................................3Chapter 2..............................................................................................................................7
The Wonderful World of Eggs.............................................................................................7
Chapter 3..............................................................................................................................8
Yeast and How it Works.......................................................................................................8
Chapter 4.............................................................................................................. 12The Secrets of Using Chemical Leaveners..........................................................12
Part 1: Types of Wheat.......................................13Components of the Wheat Kernel.......................................................................14
Part 2: Flour Types..........................................15The White Flours................................................................................................... 15Whole Wheat Flour...............................................................................................18Other Flours.......................................................................................................... 19Chewy or Tender—How do we Control the Texture..........................................20Flour Blends.......................................................................................................... 21Other Flour Additives...........................................................................................22Storing Your Flour................................................................................................ 22
Part 3: Recipes—Applying What You Learned....................23Sweet Buttermilk Cornbread...............................................................................23Texas Chili Corn Bread......................................................................................... 25European Soft Peasant Bread.............................................................................27100% Whole Wheat Bread Recipe.......................................................................29California Golden Raisin Muffins........................................................................31American Rye Bread Recipe.................................................................................32
11
Bakery Science “The art and science of baking” Ph.no.09996000499
Deli Rye Bread Recipe........................................................................................... 34To make this easier, consider a dough press....................................................37How to Make Pitas................................................................................................ 38Frosted Cinnamon Raisin Bread Recipe..........................................................................40
October Pumpkin Bread Recipe.......................................................................................43
Old-Fashioned Caramel Cake Recipe...............................................................................44
Chapter 2............................................................................................................................45
The Wonderful World of Eggs...........................................................................................45
The Mechanics of Eggs......................................................................................... 45The Three Parts of the Egg..................................................................................46Fresh, Safe Eggs.................................................................................................... 46
Part 2: Techniques for Using Eggs............................48How to Make Meringue for Pies..........................................................................48How to Make Angel Food Cakes..........................................................................50Consider Pie Weights for that Pre-baked Crust.................................................53How to Make Soufflés........................................................................................... 54How to Make Strata and Baked French Toast...................................................55How to Build a Frittata......................................................................................... 56How to Make Custards......................................................................................... 57How to Make Pannekoeken.................................................................................59
How to Make Aebleskiver......................................61Aebleskiver (pronounced “eebull-skeever”) is a Danish filled pastry made on the stovetop. They can be either sweet with luscious creams or pastry fillings, or savory with meat and cheese...........61A holiday in Denmark often begins with a breakfast of these puffy little pastries that are traditionally made with an apple filling or served with applesauce (hence their name). Like other great pastries,wonderful variations have evolved. We like them with pastry fillings,jams, chocolate, cheese and even frosting....................61To Make the Batter...........................................61Aebleskivers are made with a simple batter, but the key is in the eggs. Separate the eggs, and then set the egg whites aside. Add the yolks to the flour and other ingredients, and stir until combined..............................................................61
12
Bakery Science “The art and science of baking” Ph.no.09996000499
Next, whip the egg whites until light and soft peaks form. This couldtake a while, but this is the trick to perfect, fluffy aebleskivers. Gently fold the egg whites into the batter...................61How to Make Cream Puffs......................................63Cream puffs are similar to aebleskiver, but instead of cooked on the stove, these hollow pastries are baked in the oven...........63Cream puffs consist of three parts: the outer shell, the filling, andthe chocolate topping (or frosting). The crisp shell against the silky filling creates a melt-in-your-mouth effect. Here’s a step-by-step guide:..................................................63Part 3: Recipes—Applying What You Learned....................63
“Meringue that Does Not Weep” Recipe.............................................................66Easy Oven-Baked Frittata....................................................................................67Classic Quiche Lorraine.......................................................................................68Cinnamon Ripple Angel Food Cake Recipe........................................................69Spinach, Bacon, and Swiss Quiche.....................................................................71Easy Baked Omelet............................................................................................... 72Chocolate Malt Pudding......................................................................................73Southern Chess Pie............................................................................................... 74Traditional Dutch Pannekoeken.........................................................................75This recipe also works well for mini pannekoeken made in jumbo muffin pans. They make perfect single serving breakfasts, or dessert cups..................................75Apple and Bacon Pannekoeken..........................................................................76Cinnamon Vanilla Sugar Overnight Baked French Toast..............................................77
Apple Custard Pie with Streusel Topping........................................................................79
Great Grandma’s Danish Aebleskiver..............................................................................80
Cream Puffs........................................................................................................... 82Chapter 3............................................................................................................................83
Yeast and How it Works....................................................................................................83
Part 1: Yeast and How it Works........................................................................................83
Creating the Right Environment for Yeast.........................................................85Part 2: Using Yeast to Make Great Breads......................................................................87
How Long Should My Bread Rise?.......................................................................87Why do We Need to Knead?.................................................................................88Does it Matter What Flour I Use?........................................................................88
13
Bakery Science “The art and science of baking” Ph.no.09996000499
The Secrets of Great Breads................................................................................89Is Brown Bread Better?........................................................................................91High Altitude Breads............................................................................................92Part 3—Recipes: Applying What You Learned................................................................93
Using Yeast Successfully: Hamburger or Sandwhich Buns..............................93Retarding the Growth of Yeast: Italian Herbed Focaccia.................................96Adding Cheese to Your Bread: Cheesy Dinner Rolls and Loaves......................99Dilly Cheese Bread.............................................................................................. 100Adding Grains to Your Bread: Teton Valley Whole Grain Bread....................102Adding Vegetables to Your Bread: Summer Zucchini and Carrot Bread......104Using Cornmeal in Your Bread: Southern Cornbread (Yeast).......................106Adding Fruit to Your Bread: Yeasted Banana Nut Bread...............................107Creating a Sourdough Starter with Yeast: Easy Sourdough Bread...............108How to Bake Bread on the Grill........................................................................112Chapter 4..........................................................................................................................114
The Secrets of Using Chemical Leaveners........................................................114The Secrets of Using Chemical Leaveners........................................................114Part 1: Chemical Leaveners and How They Work........................................................114
Baking Soda........................................................................................................ 114Baking Powder................................................................................................... 115Cream of Tartar.................................................................................................. 116Other Leaveners................................................................................................. 116Part 2: Using Chemical Leaveners.................................................................................117
The Muffin Method............................................................................................. 117The Creaming Method.......................................................................................118The Biscuit Method............................................................................................. 118Part 3: Learning to Bake with Leaveners......................................................................120
How to Bake Quick Breads................................................................................120How to Make Biscuits.........................................................................................125How to Make Scones..........................................................................................126Part 4: Recipes—Applying What You Learned..............................................................130
The Muffin Method—Blueberry Corn Muffins.................................................130The Perfect Banana Muffin Recipe....................................................................132Toppings for Your Muffins.................................................................................132The Creaming Method—New England Hermits..............................................137Macadamia White Chocolate Cookies with Raspberry Chips.........................138
14
Bakery Science “The art and science of baking” Ph.no.09996000499
The Biscuit Method—Frosted Lemon Poppy Seed Scones..............................139Sweet and Savory—Explore a New World of Biscuits!....................................142Easiest Buttermilk Biscuits.................................................................................143Cranberry Nut Biscuits....................................................................................... 144Cheddar Cheese Biscuits....................................................................................145
Chapter 4
The Secrets of Using Chemical LeavenersBaking Powder and Baking Soda
Part 1: Chemical Leaveners and How They Work........................................................125
Baking Soda........................................................................................................ 125Baking Powder................................................................................................... 126Cream of Tartar.................................................................................................. 127Other Leaveners................................................................................................. 127Part 2: Using Chemical Leaveners.................................................................................128
The Muffin Method............................................................................................. 128The Creaming Method.......................................................................................129The Biscuit Method............................................................................................. 130Part 3: Learning to Bake with Leaveners......................................................................132
How to Bake Quick Breads................................................................................132How to Bake Muffins.......................................................................................... 136How to Make Biscuits.........................................................................................139How to Make Scones..........................................................................................141How to Make Cornbread...................................................................................143Part 4: Recipes—Applying What You Learned..............................................................145
The Muffin Method—Blueberry Corn Muffins.................................................145Toppings for Your Muffins.................................................................................149The Creaming Method—New England Hermits..............................................154The Biscuit Method—Frosted Lemon Poppy Seed Scones..............................157Cheddar and Bacon Cornbread........................................................................152Sweet and Savory—Explore a New World of Biscuits!....................................160Easiest Buttermilk Biscuits.................................................................................162
15
Bakery Science “The art and science of baking” Ph.no.09996000499
Cranberry Nut Biscuits....................................................................................... 163Cheddar Cheese Biscuits....................................................................................164
Part 1: Types of Wheat
To understand baking, you must understand flour. It helps to know alittle about flour, so we’ll begin this chapter with a shortdiscussion about wheat.
Wheat has three characteristics by which it is classified: itshardness—hard or soft, its color—red or white, and its growing season—winter or spring. These characteristics determine the properties ofthe wheat and the flour from which it is derived.
Hardness refers to the protein content of the kernel. A hard wheat hasa high protein content and the proteins in wheat are what forms thegluten in bread dough that gives bread its chewiness. A flour madefrom hard wheat is referred to as a strong wheat. Flours made fromhard wheat are ideal for bread making. Soft flours, made from softwheat, are more suitable for cakes, cookies, and muffins wheretenderness, not chewiness, is important.
Red wheat has a red pigment in the hull of the kernels. This redpigment has a slight bitter taste but red wheat usually is high inprotein and makes a wonderfully structured bread. White wheat tends tobe sweeter, less bitter, but with less protein. White wheat has ahigher mineral content (which is noted in the flour specification asthe ash content). Though it has a lower protein content, white wheatis used for bread making, especially for artisan and European-typebreads.
Wheat is grown either in the winter or spring. Winter wheat is plantedin the fall, it sprouts, grows for a short period, and then becomes
16
Bakery Science “The art and science of baking” Ph.no.09996000499
dormant through the winter months. In the spring, it begins growingagain. Spring wheat is planted in the spring. Spring wheat is usuallyhigher in protein than winter wheat.
In the United States, there are five primary types of wheat grown:hard red winter wheat, hard red spring wheat, soft red winter wheat,hard white wheat, and soft white wheat.
Flour mills produce flour to certain specifications with designatedtolerances. They are reliant on the availability of wheat types forstock. The larger producers do a marvelous job of producing floursthat meet particular specifications reflecting their access to avariety of wheat stocks. Consistency of specification is essential forthe commercial bakery and should be important to the home baker.
I grew up in the rural West where hard red winter wheat was common. Mygrandmothers and my mother made homemade bread weekly. Whole wheatbread tended to be full, hearty loaves but slightly bitter. We maskedthat bitterness with lots of butter and honey or jam. It was not untilI understood wheat and flour that I understood where that bitternesscame from. Today, I temper that with a flour blend made with somewhite wheat and a higher ash content. Later in this chapter, we’lltell you how to remove some of that bitterness by soaking the wheatflour.
Components of the Wheat Kernel
There are three major components to the wheat kernel: the bran, theendosperm, and the germ. The bran consists of the protective outercovering, the hull of the kernel. Most of the fiber is in the bran.The germ is the embryonic portion of the kernel and is high inprotein, minerals, and sugars. The endosperm is the starchy innerportion that provides the food for the growing germ much as an eggwhite does in an egg.
In the milling process, the kernels are ground into powder. To makewhite flour, the powder is sifted to remove most of the branparticles. Whole wheat flour contains bran. (In many operations, thebran is removed and then added back for whole wheat flour.) With theremoval of the bran, some flavor and nutritional content is lost. Bylaw, in the United States, white flours must be enriched with vitamins
17

Bakery Science “The art and science of baking” Ph.no.09996000499
and minerals to approximate the nutritional value of whole wheatflour.
18
Bakery Science “The art and science of baking” Ph.no.09996000499
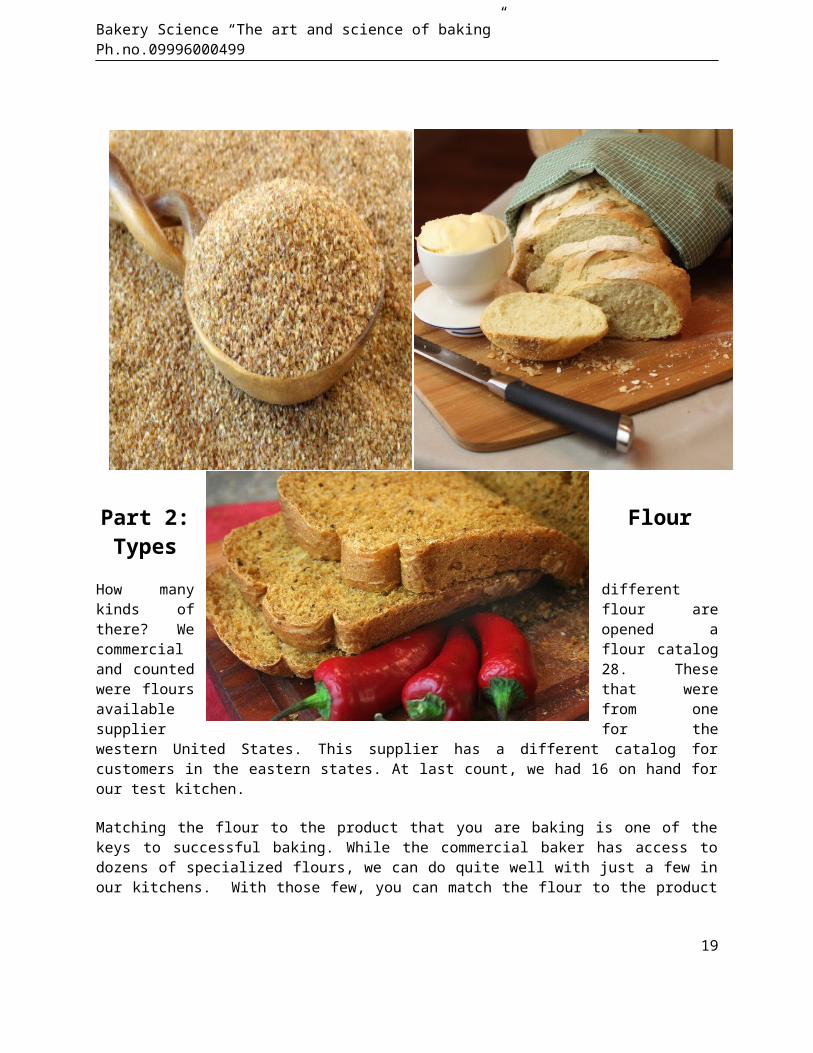
Part 2: FlourTypes
How many differentkinds of flour arethere? We opened acommercial flour catalogand counted 28. Thesewere flours that wereavailable from onesupplier for thewestern United States. This supplier has a different catalog forcustomers in the eastern states. At last count, we had 16 on hand forour test kitchen.
Matching the flour to the product that you are baking is one of thekeys to successful baking. While the commercial baker has access todozens of specialized flours, we can do quite well with just a few inour kitchens. With those few, you can match the flour to the product
19
Bakery Science “The art and science of baking” Ph.no.09996000499
you are baking and create your own blends for the effect that youwant.
The Role of Gluten
Before we begin to examine types of flour, let’s understand gluten.Gluten is made of the proteins found in wheat flour and gives breadits structure, strength, and texture. Without these marvelous littleproteins, bread would not be bread. It also explains why it is so hardto make bread from rice, potato, rye, or oat flour and why wheat flourhas to be added to these to make bread—only wheat has enough proteinto make bread. The gluten makes the bread.
Gluten is developed in the dough when two types of proteins absorbwater and are pulled and stretched in the kneading process. When wateris mixed with flour, the protein in the flour absorbs moisture. Whendough is worked by mixing or kneading, these two types of protein cometogether into strands—tiny ropes of gluten. As the yeast producesgases in the dough, mostly carbon dioxide, these strands trap the gasbubbles and the dough expands.
A high protein content is necessary for great bread and a low proteincontent is required for the tender crumb we love in cakes. Duringbaking, this protein coagulates just as the proteins in an eggcoagulate in the heat of a frying pan. It’s this coagulated proteinthat gives bread its chewiness. In a cake, we don’t want chewiness sowe use a low protein content flour. Furthermore, we use a shortening(commercial shortening, butter, margarine, or oil) to lubricate andshorten the gluten strands. (Hence the descriptive name “shortening”.)
You can see how much protein is in flour by comparing ingredientlabels. Bread flours will have as much as 14% protein. All-purposeflour is usually in the eight to ten percent range and cake flour isless than that.
A typical bread flour (this one happens to be a General Mills flour)has 12% protein, 75% carbohydrates, one percent fat, less than onepercent ash, and 14% moisture. (If exposed to air, the moisturecontent will change and affect the baker’s formulation.)
20
Bakery Science “The art and science of baking” Ph.no.09996000499
The White Flours
By far, the western world consumes more white flour than any other. Wecan buy bleached or unbleached, bread, all-purpose, self-rising, cake,and pastry. We can buy flour made with soft Southern wheat or hardwinter wheat. They are all different, each with an intended purpose.The choice of flour will make a profound difference in most bakedgoods.
Bleached or Unbleached?
Should you use bleached or unbleached flour? Chlorine is the commonbleaching agent used to whiten flour (though some millers use benzoylperoxide). Many store breads use bleached flour to obtain thewhiteness that we associate with commercial white bread. While theFDA has approved the use of chlorine in flour, you may prefer to avoidthe additives and use flour that has not been bleached.
Chlorine tends to damage the proteins in flour and therefore weakenthe gluten structure in bread.
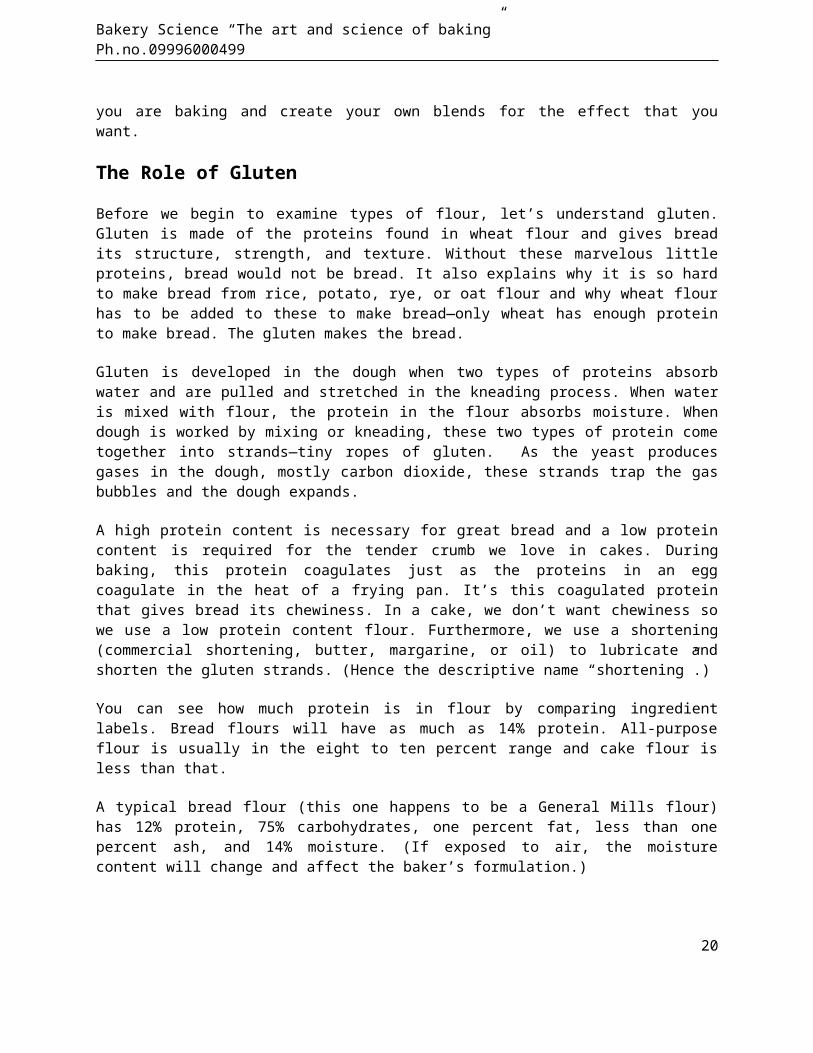
The natural tone of unbleachedwheat flour is cream-colored.If you don’t mind the ivory orcream color of products madewith unbleached flour, by allmeans use that. The onlybleached flour that we use isbleached cake flour when wewant to obtain the pure whitetexture we prefer in whitecakes. In yellow cakes orchocolate cakes, we useunbleached pastry flour. Ifyou switch from bleached tounbleached flour in your breadrecipes, be aware that the two flours may exhibit differentperformance characteristics and you may need to make minor changes inthe recipe.
21
Bakery Science “The art and science of baking” Ph.no.09996000499
Bromated or Unbromated?
In your grocery store, you may find either bromated flour or flourthat has not been bromated. Bread flours have to age or oxidize beforethey perform well. The time and expense of natural oxidation is notpractical in commercial operations and the results are not oftenuniform. So the industry has explored means of speeding the processalong and using bromates is one of them. The FDA has ruled bromates tobe safe and legal (though California outlawed bromates in 1991 as apossible carcinogen and most of Europe will not allow bromates). Ifyou are not comfortable with bromates, look for flour that has beentreated with ascorbic acid (Vitamin C) or other chemicals instead ofbromates.
Bread, All-Purpose, Self-Rising, Pastry, or Cake Flour?
Dominant on grocery store shelves are bread flours, all-purposeflours, and cake and pastry flours. Bread flours have a high proteincontent--10% to 14%--necessary to give bread the chewy texture andopen “crumb” appearance that we cherish in our breads. (We’ll talkabout how protein works in just a moment.) Cake and pastry flourshave a low protein content to create the soft, crumbly, melt-in-your-mouth texture that we prefer in our desserts.
All-purpose flour is a compromise between the protein content in breadflours and the protein in pastry flours. All-purpose flours makeacceptable bread and pastries but more specialized products are morereliable performers in either spectrum. That’s why you will rarely seeall-purpose flour in a commercial bakery.
22
Bakery Science “The art and science of baking” Ph.no.09996000499
Self-rising flours have saltand leaveners added. Becausewe cannot control the amountor type of leavener used orthe amount of salt in theflour, we rarely use self-rising flour. Some bakers useself-rising flour for theirfavorite biscuits.
Cake flour is almost alwaysbleached; pastry flours areusually unbleached. Don’thesitate to use unbleachedpastry flour for cakes.Unbleached pastry flours makewonderful cakes but whitecakes will be ivory, ratherthan white, in color. Ofcourse, with a yellow orchocolate cake, it will notmake a difference.
So what flour should I buy?
Buy flours for their intendeduses—bread flour for breadsand pastry flours for pastries plus all-purpose flours for gravies andother general uses. Keep in mind that most recipes—except breadrecipes--were developed with all-purpose flour since that is what iscommon in nearly all kitchens. You may wish to use all-purpose flourfor a new recipe and then switch to a specialty flour after you becomefamiliar with the recipe.
23
Bakery Science “The art and science of baking” Ph.no.09996000499
We recommend that you try different brands—there is a surprisingdifference in performance between brands--and then stick with whatworks for you. In our experience, name brands tend to consistentlyhold to a specification where less expensive brands tend to vary fromseason to season and sometimes, even lot to lot. If you really want tobroaden your selection, make friends with a baker since he or she hasavailable a vast array of flours each with its own specification. Buya bag or two of flour from your baker and try it. Flour is inexpensiveand your baker will be able to supply you with a detailedspecification so that you can see what you are getting.
Whole Wheat Flour
The wheat kernel is composed of three parts: the bran which forms thehard outer coating of the kernel, the smaller germ which is theembryonic portion of the kernel as the yolk is to an egg, and thestarchy endosperm. In the milling of white flour, the bran is crackedfrom the kernel and discarded and most of the germ is removed leavingthe endosperm.
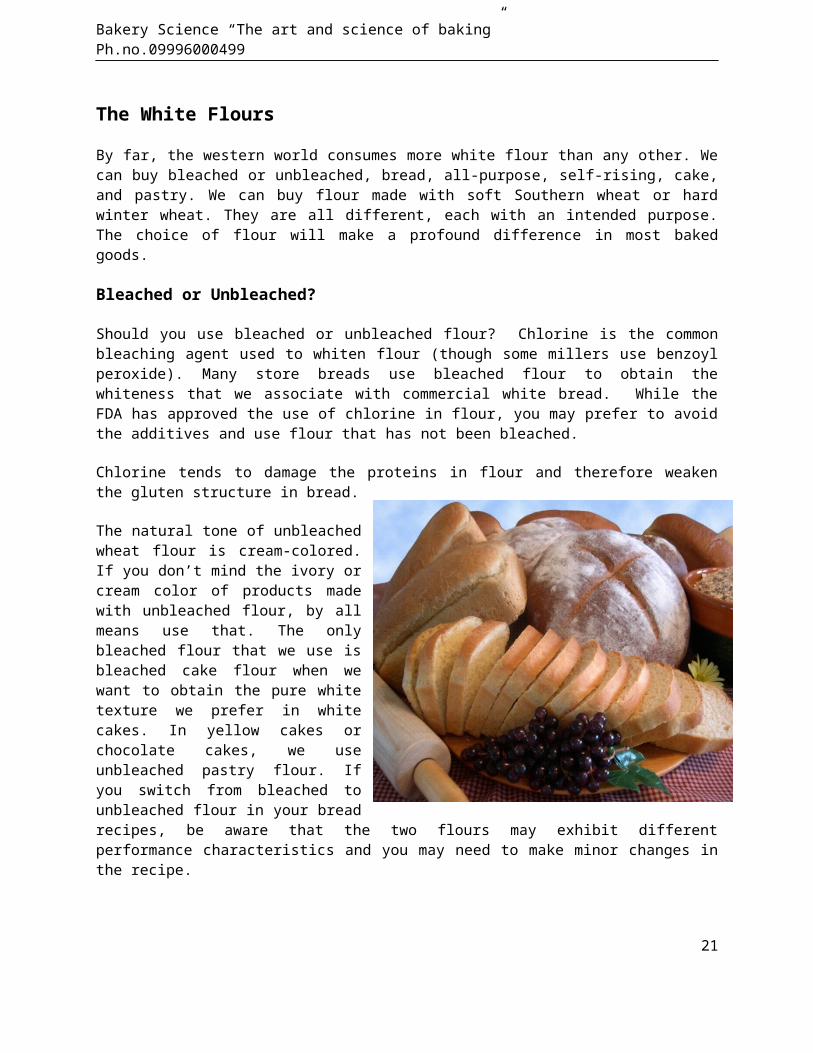
In whole wheat flour, both the bran and the germ are left with theflour. Since the germ has a high fat content and fat can go rancid,whole wheat flours are much more likely to spoil. Also, since theflour is composed of the entire wheat kernel, whole wheat flour is notenriched with vitamin additives as white flour is. (The federalgovernment specifies the addition of vitamins to white flour. See thenutritional comparison of enriched white flour to whole wheat flour inthis chapter.) Whole wheat flour can be purchased in either a fineground or coarse ground texture.
Most but not all of the “brown” breads produced commercially are madefrom a blend of white bread flour and fine ground whole wheat withabout 40% of the flour being whole wheat. The white flour tempers thewhole wheat providing a slightly milder taste without the bitternessthat whole wheat sometimes carries. The white flour also creates astronger gluten structure since bread flour typically has a higherprotein content than whole wheat alone. Additionally, the bran inwhole wheat has sharp edges that cut gluten strands as it is kneaded.
24
Bakery Science “The art and science of baking” Ph.no.09996000499
Graham flour is whole wheat flour. One day in the office we had anengaged debate as to just what graham flour was—a whole wheat flourwith extra bran, whole wheat flour from soft wheat, or a more coarselyground whole wheat. We contacted Technical Services at General Mills.They quoted chapter and verse: FDA’s Code of Federal Regulationsallows any whole wheat flour to be called graham flour. So it depends
onthe
miller. Read the package carefully to see just what you are getting.
Other Flours
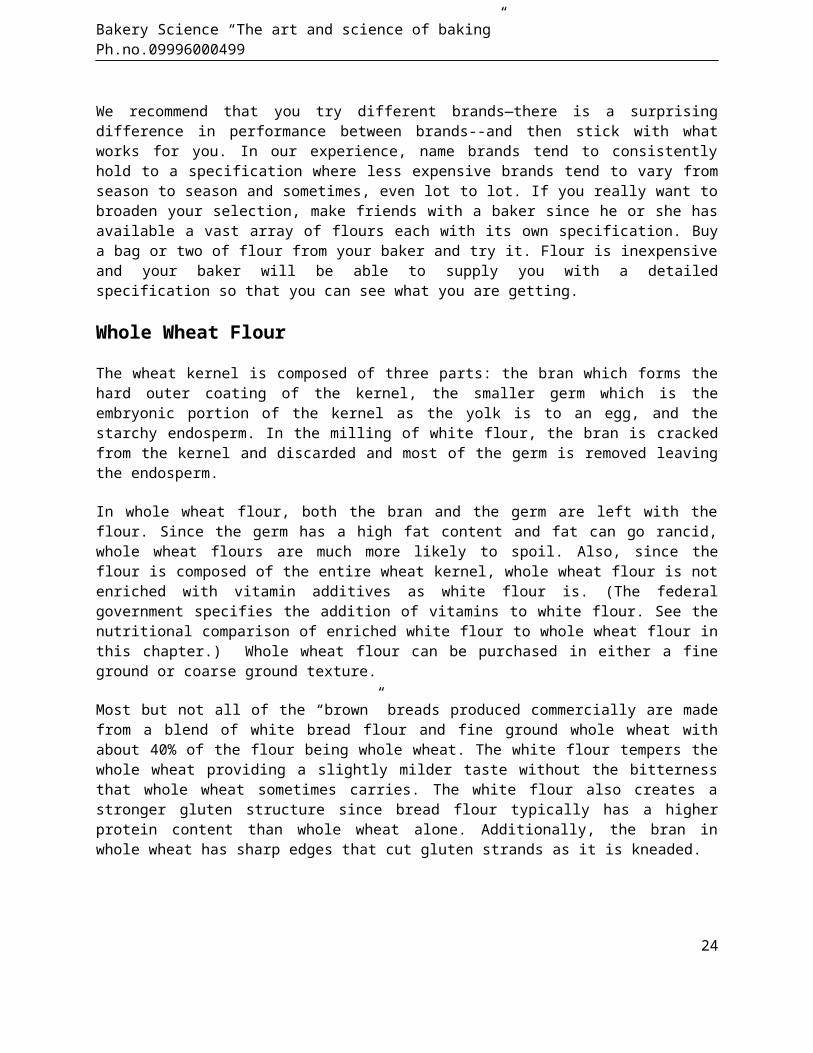
Cornmeal, like wheat flour, can be purchased with or without thegerm and in a fine or a coarse ground form. For cornmeal with the germremoved, look for the term “degerminated” on the label. Degerminatedcornmeal keeps longer--since the fatty germ is removed--but is not asnutritionally complete as cornmeal with the germ.
25
What flours do we use in our mixes?
We produce bread mixes and we produce cookie and pastry mixes.For bread mixes, we use General Mills Harvest King white breadflour and a fine stone ground whole wheat flour almostexclusively. We settled on Harvest King after hundreds oftrials with dozens of flours.
Harvest King has a high protein content and is unbleached. Whenwe want a softer flour but not a pastry flour, rather thanswitching to another flour, we add white rye flour. The whiterye flour lowers the protein percentage and adds just a bit ofa sourdough-like taste that we find desirable. All of our pizzacrust mixes have rye flour added.
Harvest King has almost a cult following. Avid bread makers goto great lengths to get their hands on Harvest King. It makesterrific bread and is held to a very tight speciation.
For tender cookies, we use an unbleached pastry flour often
Bakery Science “The art and science of baking” Ph.no.09996000499
The word “meal” refers to products that are notas finely ground as flour. Both cornmeal andcorn flour are available. Polenta is usuallycoarsely ground.
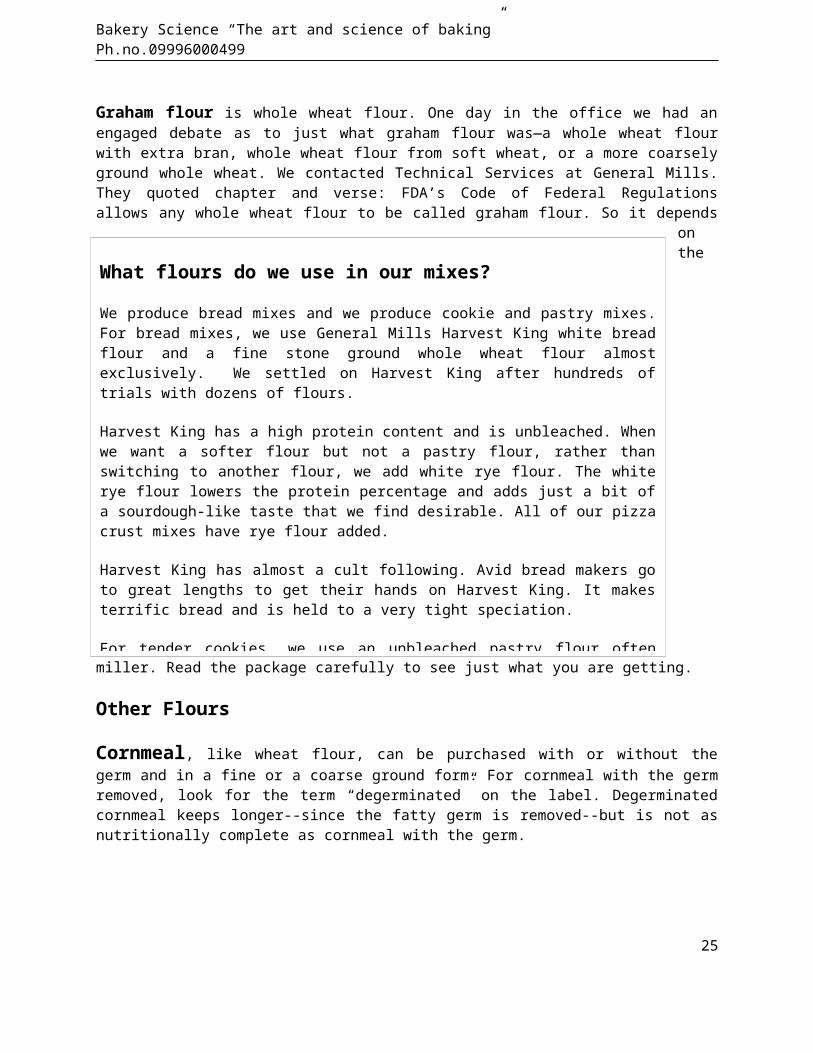
Rye flouris used extensively in pumpernickel and rye breads. It canbe purchased in light rye, medium rye, and darkrye flours. White rye is especially prized by thebakers of artisan loaves and creates a mild,uniquely-flavored bread with a taste that isdescribed as being sourdough-like.
Because rye proteins do not form the glutenstrands necessary to create structure, bread madewith rye flour alone is heavy and dense. Accordingly, when makingbreads with rye flour, add two to three times asmuch high protein content bread flour as ryeflour. Often extra wheat gluten is added.
The flavor most of us associate with rye breadcomes from the caraway seeds in the bread. Ifyour family says they don’t like rye bread, makeit without the caraway seeds. They will probablyfind your bread very good. At the end of thislesson, you will find a recipe calling for rye flour and no carawayseeds.
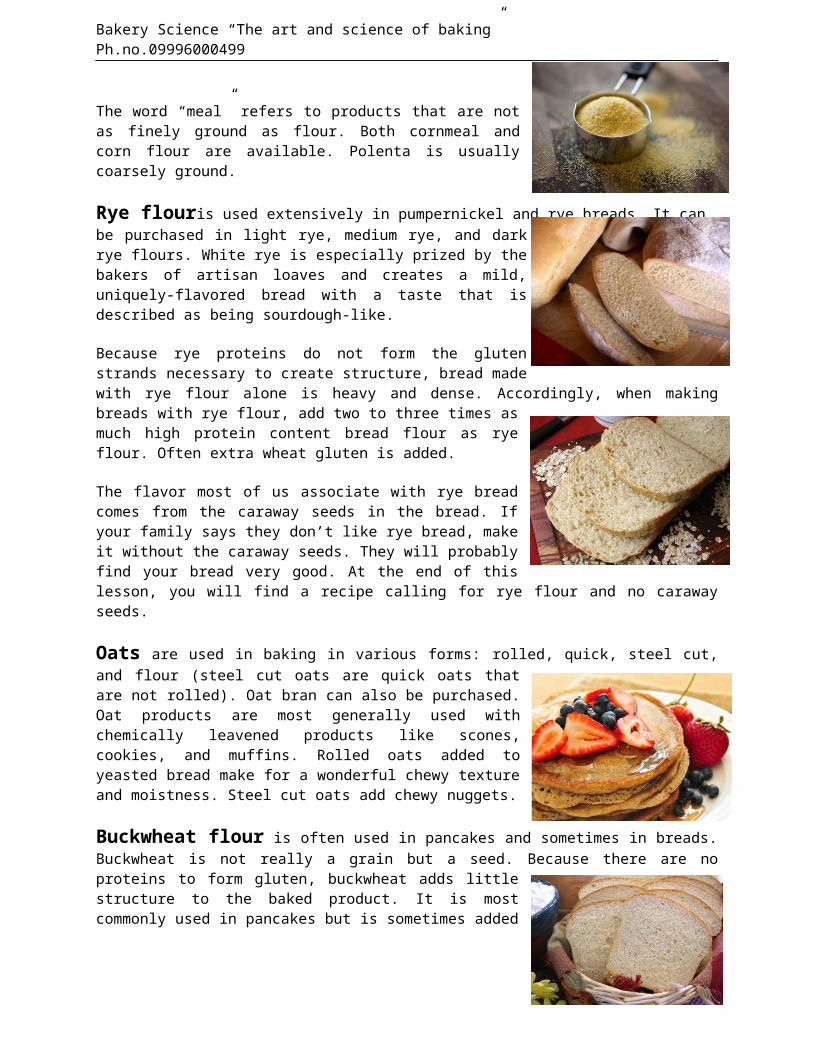
Oats are used in baking in various forms: rolled, quick, steel cut,and flour (steel cut oats are quick oats thatare not rolled). Oat bran can also be purchased.Oat products are most generally used withchemically leavened products like scones,cookies, and muffins. Rolled oats added toyeasted bread make for a wonderful chewy textureand moistness. Steel cut oats add chewy nuggets.
Buckwheat flour is often used in pancakes and sometimes in breads.Buckwheat is not really a grain but a seed. Because there are noproteins to form gluten, buckwheat adds littlestructure to the baked product. It is mostcommonly used in pancakes but is sometimes added
26
Bakery Science “The art and science of baking” Ph.no.09996000499
to breads and muffins. Buckwheat flours is used primarily for itsunique taste.
Potato flour is an important component in the baker’s arsenal.Unlike wheat flour, it is hygroscopic—that is, it attracts waterinstead of drying out. So the staling process in breads is retarded orslowed. One tablespoon of potato flour to two cups of wheat flour willextend the life of your bread and keep it moist. Adding more potatoflour will add a nice taste to the bread. We use potato floursextensively in our breads.
Chewy or Tender—How do we Control the Texture
How is it that we can use flour to make both a tender cake and firmchewy French bread? The gluten makes the difference. In a cake, wewant little gluten development. In a chewy bread, we want a highpercentage of well-developed gluten. We can control this texture inour baked goods by changing four conditions:
1. Selection of flours: Cake flours are “weak” or “soft” and have alow protein content, probably around 8%. Bread flours and high-gluten flours are “strong” and usually have a protein content of12 to 14%.
2. Amount of shortening: Any fat is referred to as a shorteningbecause it shortens the gluten strands. It does so by lubricatingthe fibers so they cannot stick together. The more shortening inthe dough, the more tender and less chewy the product will be.
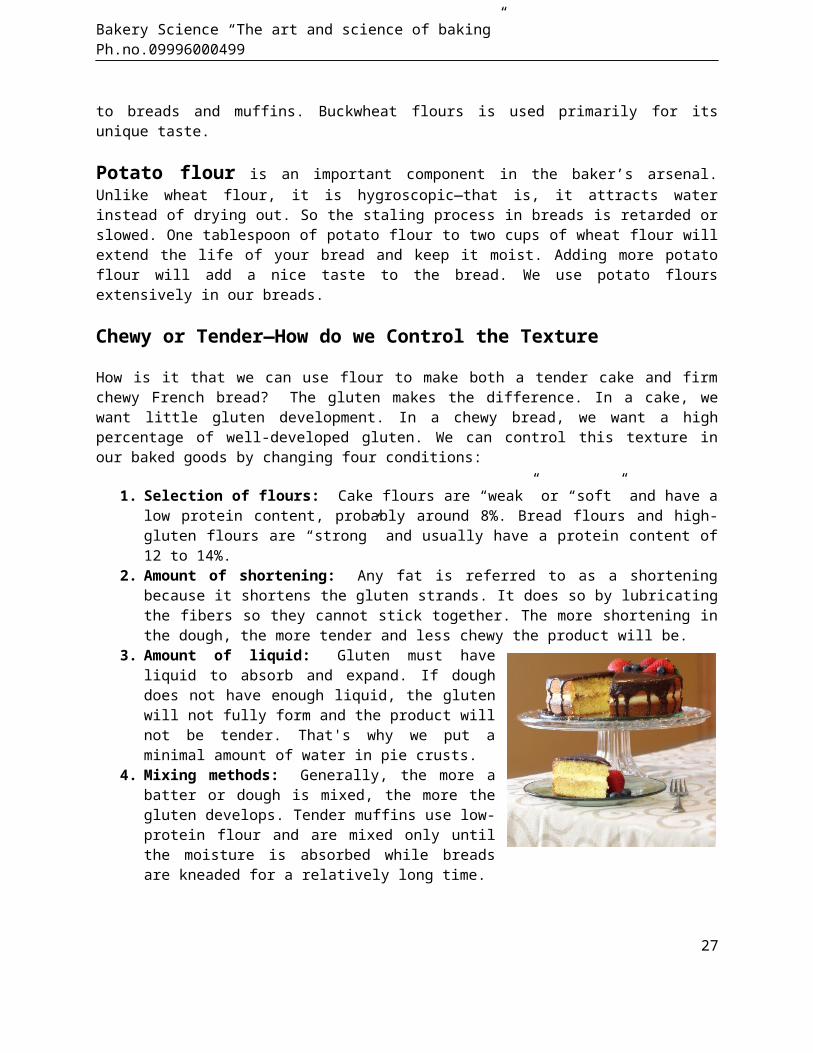
3. Amount of liquid: Gluten must haveliquid to absorb and expand. If doughdoes not have enough liquid, the glutenwill not fully form and the product willnot be tender. That's why we put aminimal amount of water in pie crusts.
4. Mixing methods: Generally, the more abatter or dough is mixed, the more thegluten develops. Tender muffins use low-protein flour and are mixed only untilthe moisture is absorbed while breadsare kneaded for a relatively long time.
27
Bakery Science “The art and science of baking” Ph.no.09996000499
How Much Does That Flour Weigh?
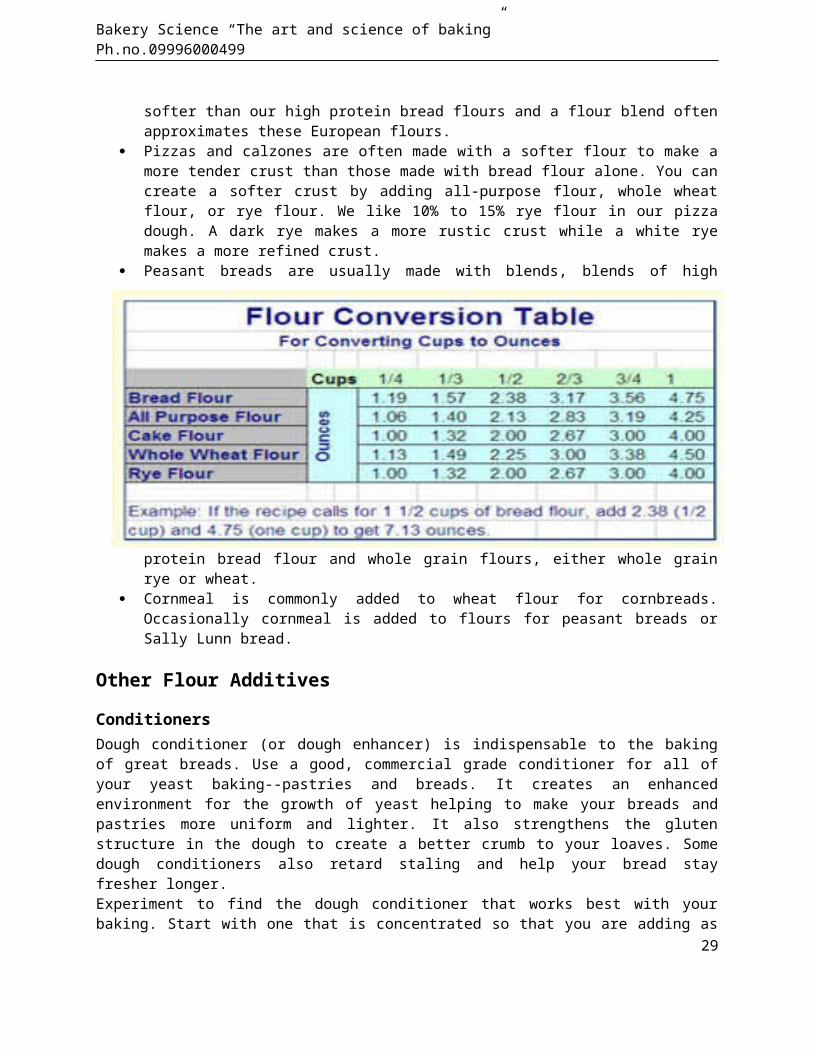
For consistent results, we always weigh flour. It's very difficult toget consistent weights using a measuring cup. (We've tried bymeasuring series of ten cups and weighing each. As close as we can getis plus or minus ten percent.) So, we convert the flour called forin a recipe to ounces before beginning.
The following table can be used for converting cups of flour to ouncesof flour so that you can weigh it with your scale and get the sameamount of flour in your recipe each time. Be aware that differentflours have different weights for the same volume.
Once you find a flour that works well for you (and a conversion ratiothat works), stick with it. While there is some variation in flourfrom season to season (and from batch to batch), there is lessvariation than between brands.
Flour Blends
A common way of controlling texture is by blending flours. A baker maywish a little softer flour for a hearth bread or pizza crust andchoose to obtain that result by mixing two different flours. Or abaker may choose to make a bread more rustic or with more fiber byadding a whole grain flour to a white flour.
Here are some common blends:
Whole wheat breads are commonly made with 40% to 60% whole wheatflour with the remaining flour being high protein bread flour.Because whole wheat flour is often lower in protein than highprotein bread flours and because the bran in whole wheat flourcan damage proteins, many bakers add wheat gluten to the blend tomake it more comparable to their favorite bread flours.
Rye breads are made with a combination of wheat and rye floursand often gluten is added. The rye content should not exceed 40%of the total.
Hearth breads are often made with a combination of high proteinbread flours and all-purpose flour. Though designated with anumerical system not used in the US, most European flours are
28
Bakery Science “The art and science of baking” Ph.no.09996000499
softer than our high protein bread flours and a flour blend oftenapproximates these European flours.
Pizzas and calzones are often made with a softer flour to make amore tender crust than those made with bread flour alone. You cancreate a softer crust by adding all-purpose flour, whole wheatflour, or rye flour. We like 10% to 15% rye flour in our pizzadough. A dark rye makes a more rustic crust while a white ryemakes a more refined crust.
Peasant breads are usually made with blends, blends of high
protein bread flour and whole grain flours, either whole grainrye or wheat.
Cornmeal is commonly added to wheat flour for cornbreads.Occasionally cornmeal is added to flours for peasant breads orSally Lunn bread.
Other Flour Additives
ConditionersDough conditioner (or dough enhancer) is indispensable to the bakingof great breads. Use a good, commercial grade conditioner for all ofyour yeast baking--pastries and breads. It creates an enhancedenvironment for the growth of yeast helping to make your breads andpastries more uniform and lighter. It also strengthens the glutenstructure in the dough to create a better crumb to your loaves. Somedough conditioners also retard staling and help your bread stayfresher longer. Experiment to find the dough conditioner that works best with yourbaking. Start with one that is concentrated so that you are adding as
29
Bakery Science “The art and science of baking” Ph.no.09996000499
little as possible to your recipe. A good dough conditioner will callfor as little as one-half teaspoon per loaf. Many inexpensiveconditioners found in stores will call for much more than that.Potato FlourPotato flour is used by professional bakers to improve breads andpastries by making them moister and retarding staling. As mentionedelsewhere, potato flour is hygroscopic, that is, it attracts moisturerather than drying out and keeps your breads moister longer. Add itto your flour when mixing, about one tablespoon per loaf. More can beadded for flavor if you prefer. Though you won’t taste it in smallamounts, potato flour has a slight, almost sourdough-like flavor ingreater concentrations.
Storing Your Flour
Keep you flour tightly covered so that it neither dries out norabsorbs moisture and store it in a cool location. Some millers statethat if tightly covered and in a cool location, white flours will lastindefinitely. We prefer to use all white flours within two years.
Because whole wheat still has the fatty germ included, it will notstore as well. As with all fats, storage temperature and oxygengreatly affect shelf life. In an airtight container at a cooltemperature, whole wheat flours will last a year. Unfortunately, whenbuying whole wheat flours at the store, we don’t know how long thoseflours have been on the shelf or in a warehouse unless we can find amilling date. Buy from a reputable, high-volume grocer. Considerasking the manager howold his or her whole wheatflours are.
30
Bakery Science “The art and science of baking” Ph.no.09996000499
Part 3: Recipes—Applying What You Learned
The following recipes were chosen to give you the opportunity to makesome very good baked goods while working with different types offlour. You’ll work with different wheat flours, rye flour, blends, andcornmeal. These are some of our favorite recipes and think they willbecome yours also.
Sweet Buttermilk Cornbread
I love cornbread—all kinds of cornbread. I’m always looking for morecornbread ideas and Debbie and Merri Ann are always proclaiming, “Nomore cornbread recipes.” Still you ought to visit our website andcheck out our cornbread recipes.
This recipe calls for cornmeal soaked overnight in buttermilk and isan excellent opportunity to experiment with different grinds ofcornmeal. This is Yankee cornbread, sweetened with honey and brownsugar. We think you will love it.
We classify cornbreads as two types: Rich cornbreads made withoutflour that use eggs to bind the bread and temper the cornmeal and morebread-like cornbreads with a high flour content. Most of the lattercornbreads have about equal amounts of cornmeal and flour. This recipebelongs in that group. What makes this skillet cornbread recipedifferent is the overnight soaking of cornmeal to plump the grains ofcorn.
We invite you to try different grinds of cornmeal in this recipe. Welike it with a coarser grind. If you can find some cornmeal with thegerm in it, by all means try that.
Ingredients
31
Bakery Science “The art and science of baking” Ph.no.09996000499
1 1/2 cups cornmeal2 cups buttermilk
1 1/2 cups all-purpose flour1 teaspoon salt1/2 teaspoon baking soda1 tablespoon baking powder
3 large eggs1/2 cup brown sugar2 tablespoons honey3 tablespoons melted butter1 16-ounce whole kernel corn, drained
Directions
1. The night before, mix the cornmeal and buttermilk together in amedium bowl. Let it sit overnight in the refrigerator.
2. Preheat the oven to 350 degrees. In another bowl, mix the flour,salt, baking soda, and baking powder together.
3. In a third bowl, whisk the eggs and then add the sugar. Stiruntil combined and syrupy. Add the honey, melted butter, and cornand mix well.
4. Add the wet mixture to the cornmeal and buttermilk mixture. Addthe dry ingredients one-third at a time and mix until moistened.The batter should be pourable like a cake batter. Becausedifferent grinds of cornmeal absorb moisture differently andbecause the drained corn may carry different moisture levels, youmay need to adjust the batter slightly with additional milk orflour.
5. On the stovetop, melt two tablespoons of vegetable shortening inan oven-proof 11 to 12-inch skillet until very hot. Pour thebatter into the pan. Place the pan in the oven and bake for 35minutes or until the top is browned and firm and springy. (This
32
Quit pouring buttermilk down the drain!
Most of the time, I don’t do enough baking at home to justifykeeping fresh buttermilk in the refrigerator. Before it getsused, it separates and curdles. Instead I use dry buttermilk inplace of fresh. You can’t tell the difference in your recipes,you don’t take up room in the refrigerator, and you save money.
It’s handy to use dry buttermilk. The package will tell you howmuch water to add to reconstitute the dry buttermilk. I don’t

Bakery Science “The art and science of baking” Ph.no.09996000499
is a moist cornbread and needs to be well-cooked.) Cool in thepan.
33
Bakery Science “The art and science of baking” Ph.no.09996000499
Texas Chili Corn Bread
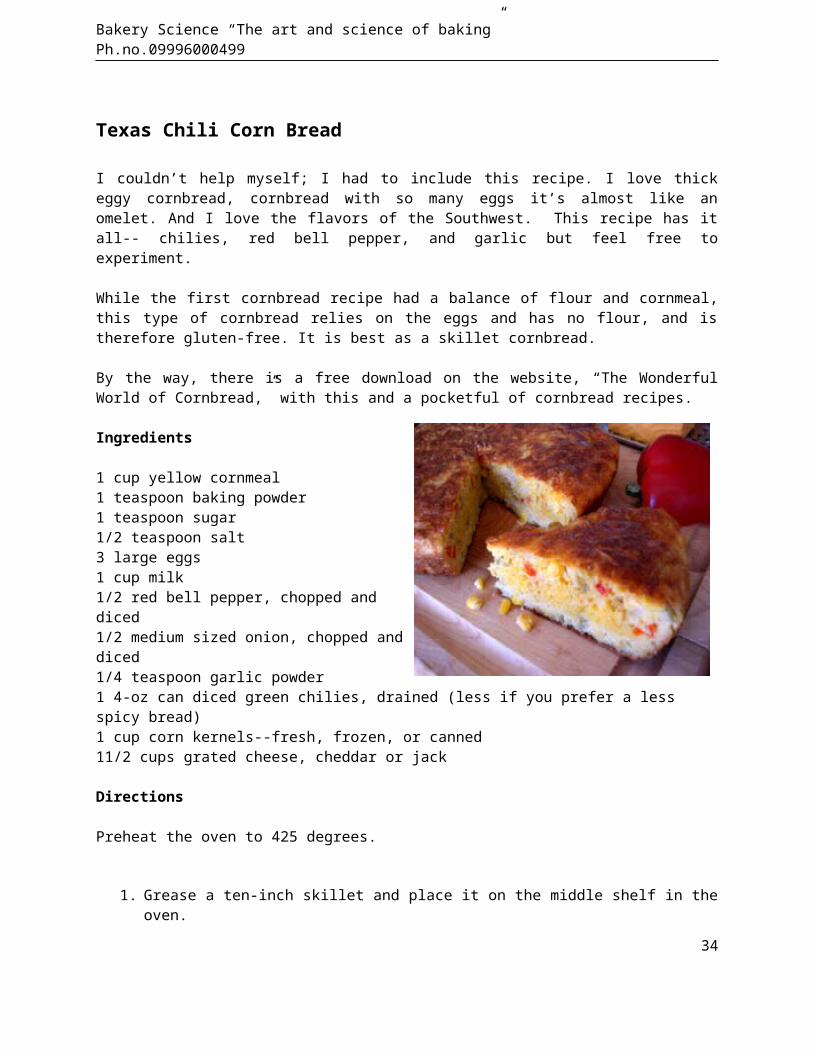
I couldn’t help myself; I had to include this recipe. I love thickeggy cornbread, cornbread with so many eggs it’s almost like anomelet. And I love the flavors of the Southwest. This recipe has itall-- chilies, red bell pepper, and garlic but feel free toexperiment.
While the first cornbread recipe had a balance of flour and cornmeal,this type of cornbread relies on the eggs and has no flour, and istherefore gluten-free. It is best as a skillet cornbread.
By the way, there is a free download on the website, “The WonderfulWorld of Cornbread,” with this and a pocketful of cornbread recipes.
Ingredients
1 cup yellow cornmeal1 teaspoon baking powder1 teaspoon sugar1/2 teaspoon salt3 large eggs1 cup milk1/2 red bell pepper, chopped anddiced1/2 medium sized onion, chopped anddiced1/4 teaspoon garlic powder1 4-oz can diced green chilies, drained (less if you prefer a less spicy bread)1 cup corn kernels--fresh, frozen, or canned11/2 cups grated cheese, cheddar or jack
Directions
Preheat the oven to 425 degrees.
1. Grease a ten-inch skillet and place it on the middle shelf in theoven.
34
Bakery Science “The art and science of baking” Ph.no.09996000499
2. In a large bowl, stir together the cornmeal, baking powder,sugar, and salt. In a medium bowl, whisk the eggs and stir inthe rest of the ingredients, reserving 1/2 cup of the gratedcheese.
3. Form a well in the dry ingredients and pour the wet ingredientsinto the dry ingredients. Mix with a spatula until well combined.Do not overmix.
4. Carefully remove the hot pan from the oven and immediately pourthe batter into the pan. Sprinkle the remaining cheese on top andreturn to the oven.
5. Let the cornbread bake for 20 minutes or until a toothpickinserted in the center of the pan comes out clean. The top willbe a rich, golden brown. Let cool for ten minutes beforeunmolding.
35
What pan should you use for skillet cornbread?
You can use a nonstick pan or a stainless pan. A nonstick panis handy because it releases so easily.
During our cooking classes, we sometimes have the occasion tobake in a skillet. There are always some in the class that aresurprised when we stick a nonstick pan with hard black handlein the hot oven. “Is that really ovenproof?” The nonstickfrying pans that we sell are and I think most others are aswell.
Once you discover that your frying pans are ovenproof and can

Bakery Science “The art and science of baking” Ph.no.09996000499
European Soft Peasant Bread
Sometimes we take the easyway out. We love hearthbreads—the texture, the heft,even how they look.Somewhere along the way, welearned that we can makean easy “mock” hearthbread with a nine-inch piepan. The pan makes formingthe loaf easy and holds theloaf in shape resulting ina taller loaf than if bakedon a flat sheet. Because itwas easy to do, we evendesigned our Irish Potato Wheat and White Bread mixes to be baked inpie pans.
European peasant bread is usually made with whole flours, often coarseflours, but they have a goodness and charm about them that make themendearing. The challenge is to work with these flours, to make a breadthat is refined enough that it is pleasant to the pallet. Thisvariation gives you a chance to explore whole wheat flours and darkrye flour. In combination, they make a great hearty bread. In thisbread, you will soak part of the flour overnight to soften the branand temper the bread.
This is a whole grain recipe but by soaking some of the flourovernight, the bran is softened and absorbs moisture resulting in asofter bread than many peasant breads. The recipe makes two largeloaves.
Baker’s notes: This recipe calls for a soft crust. This bread can properly be made as an artisanbread with a hard, chewy crust. To do so, follow the baking directions for Easy SourdoughBread which follows.
36
Bakery Science “The art and science of baking” Ph.no.09996000499
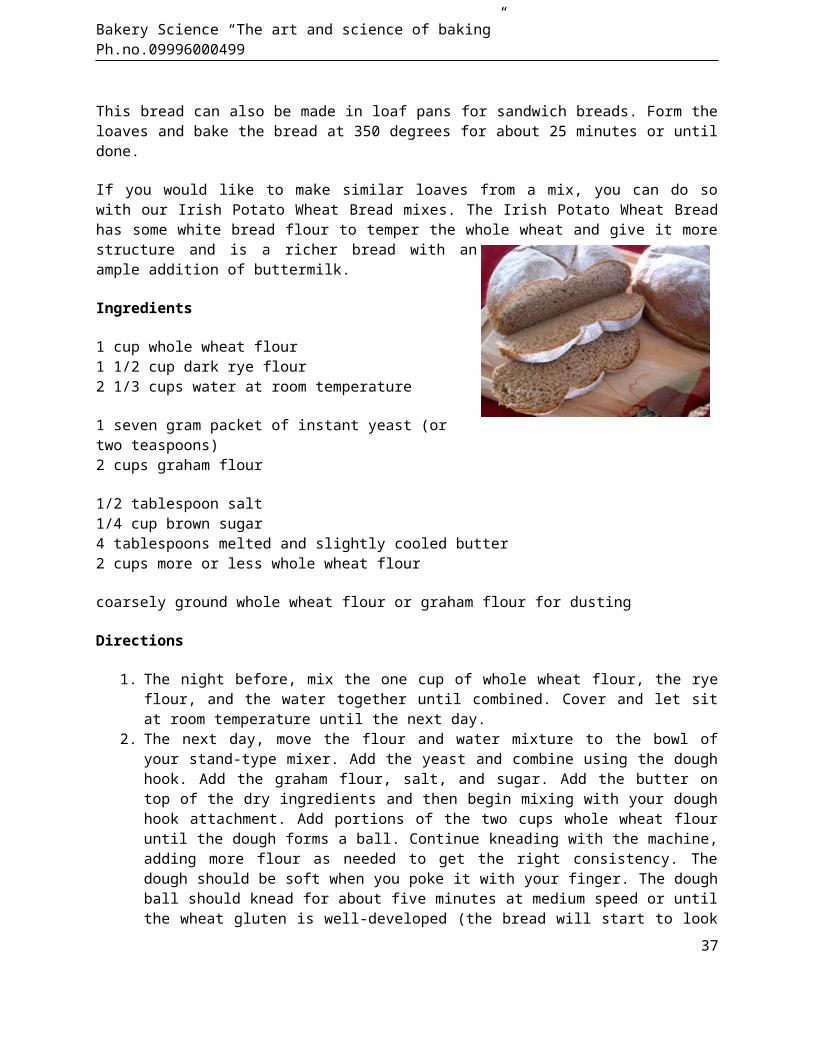
This bread can also be made in loaf pans for sandwich breads. Form theloaves and bake the bread at 350 degrees for about 25 minutes or untildone.
If you would like to make similar loaves from a mix, you can do sowith our Irish Potato Wheat Bread mixes. The Irish Potato Wheat Breadhas some white bread flour to temper the whole wheat and give it morestructure and is a richer bread with anample addition of buttermilk.
Ingredients
1 cup whole wheat flour1 1/2 cup dark rye flour2 1/3 cups water at room temperature
1 seven gram packet of instant yeast (ortwo teaspoons)2 cups graham flour
1/2 tablespoon salt1/4 cup brown sugar4 tablespoons melted and slightly cooled butter2 cups more or less whole wheat flour
coarsely ground whole wheat flour or graham flour for dusting
Directions
1. The night before, mix the one cup of whole wheat flour, the ryeflour, and the water together until combined. Cover and let sitat room temperature until the next day.
2. The next day, move the flour and water mixture to the bowl ofyour stand-type mixer. Add the yeast and combine using the doughhook. Add the graham flour, salt, and sugar. Add the butter ontop of the dry ingredients and then begin mixing with your doughhook attachment. Add portions of the two cups whole wheat flouruntil the dough forms a ball. Continue kneading with the machine,adding more flour as needed to get the right consistency. Thedough should be soft when you poke it with your finger. The doughball should knead for about five minutes at medium speed or untilthe wheat gluten is well-developed (the bread will start to look
37
Bakery Science “The art and science of baking” Ph.no.09996000499
a little stringy when stretched). Remove the dough to a greasedbowl, turn once, and cover with plastic wrap. Let rise untildoubled.
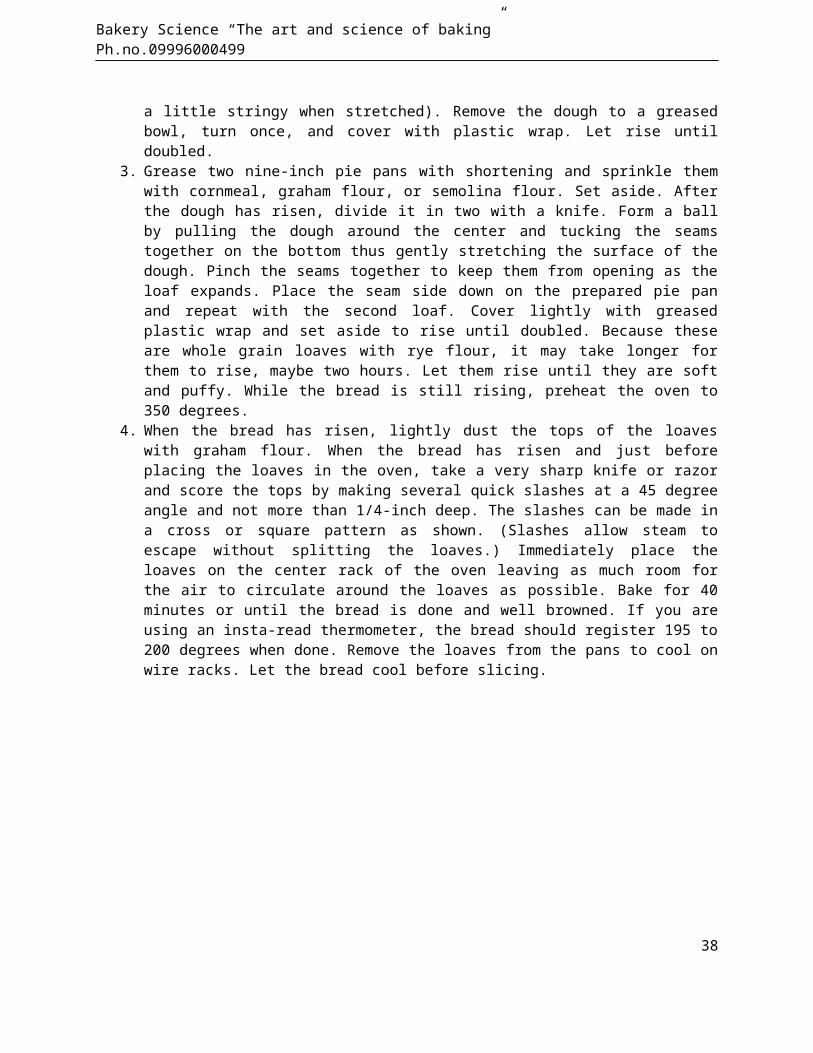
3. Grease two nine-inch pie pans with shortening and sprinkle themwith cornmeal, graham flour, or semolina flour. Set aside. Afterthe dough has risen, divide it in two with a knife. Form a ballby pulling the dough around the center and tucking the seamstogether on the bottom thus gently stretching the surface of thedough. Pinch the seams together to keep them from opening as theloaf expands. Place the seam side down on the prepared pie panand repeat with the second loaf. Cover lightly with greasedplastic wrap and set aside to rise until doubled. Because theseare whole grain loaves with rye flour, it may take longer forthem to rise, maybe two hours. Let them rise until they are softand puffy. While the bread is still rising, preheat the oven to350 degrees.
4. When the bread has risen, lightly dust the tops of the loaveswith graham flour. When the bread has risen and just beforeplacing the loaves in the oven, take a very sharp knife or razorand score the tops by making several quick slashes at a 45 degreeangle and not more than 1/4-inch deep. The slashes can be made ina cross or square pattern as shown. (Slashes allow steam toescape without splitting the loaves.) Immediately place theloaves on the center rack of the oven leaving as much room forthe air to circulate around the loaves as possible. Bake for 40minutes or until the bread is done and well browned. If you areusing an insta-read thermometer, the bread should register 195 to200 degrees when done. Remove the loaves from the pans to cool onwire racks. Let the bread cool before slicing.
38
Bakery Science “The art and science of baking” Ph.no.09996000499
100% Whole Wheat Bread Recipe
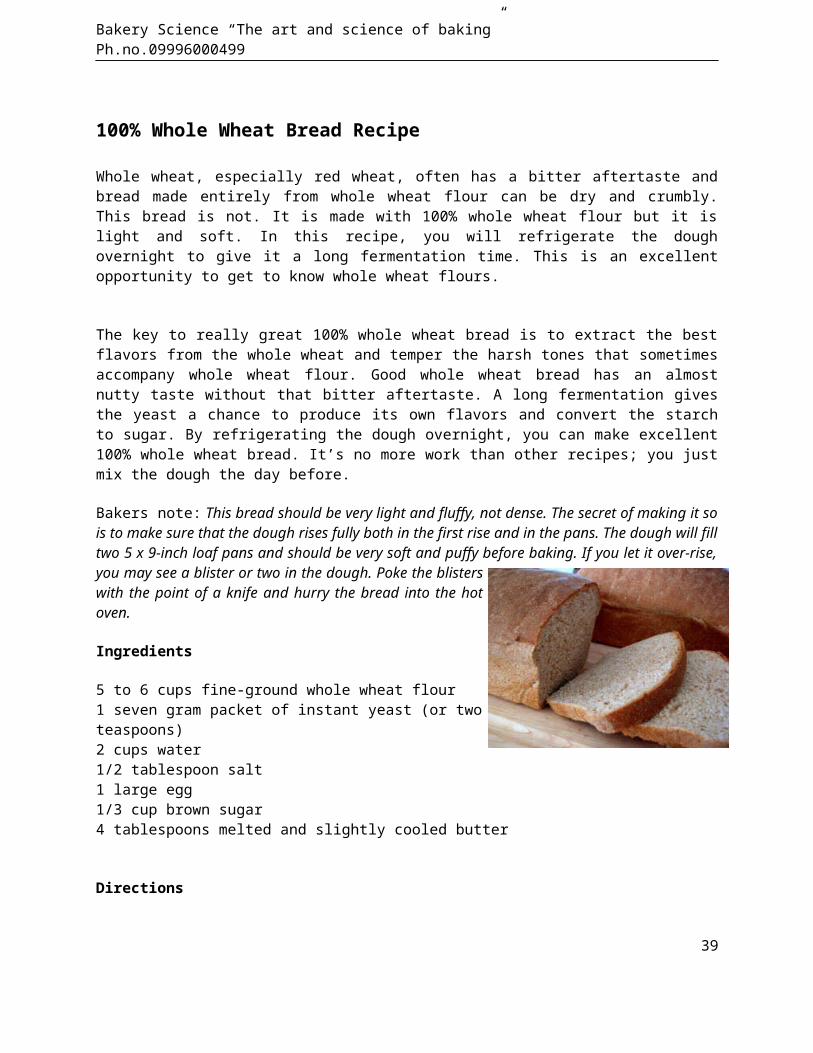
Whole wheat, especially red wheat, often has a bitter aftertaste andbread made entirely from whole wheat flour can be dry and crumbly.This bread is not. It is made with 100% whole wheat flour but it islight and soft. In this recipe, you will refrigerate the doughovernight to give it a long fermentation time. This is an excellentopportunity to get to know whole wheat flours.
The key to really great 100% whole wheat bread is to extract the bestflavors from the whole wheat and temper the harsh tones that sometimesaccompany whole wheat flour. Good whole wheat bread has an almostnutty taste without that bitter aftertaste. A long fermentation givesthe yeast a chance to produce its own flavors and convert the starchto sugar. By refrigerating the dough overnight, you can make excellent100% whole wheat bread. It’s no more work than other recipes; you justmix the dough the day before.
Bakers note: This bread should be very light and fluffy, not dense. The secret of making it sois to make sure that the dough rises fully both in the first rise and in the pans. The dough will filltwo 5 x 9-inch loaf pans and should be very soft and puffy before baking. If you let it over-rise,you may see a blister or two in the dough. Poke the blisterswith the point of a knife and hurry the bread into the hotoven.
Ingredients
5 to 6 cups fine-ground whole wheat flour1 seven gram packet of instant yeast (or twoteaspoons)2 cups water1/2 tablespoon salt1 large egg1/3 cup brown sugar4 tablespoons melted and slightly cooled butter
Directions
39
Bakery Science “The art and science of baking” Ph.no.09996000499
1. Place about three cups of the flour in the bowl of your stand-type mixer. Add the yeast. Carefully measure 2 cups roomtemperature (80 degrees) water. The water should feel cool to thetouch. Mix the water with the flour with a dough hook for 30seconds or until the yeast is dissolved and the ingredients beginto combine.
2. Add the salt, egg, sugar, and butter and continue mixing. Addmost of the remaining flour and continue mixing at a medium speedfor at least four minutes adding more flour as needed to reach asoft dough consistency. (It is important that the dough be mixedfor at least four minutes to develop the gluten.) The doughshould clear the sides of the bowl but will be soft, not firm, tothe touch.
3. Once the dough is mixed, place it in a large greased bowl,turning once to coat both sides, and cover with plastic wrap.Refrigerate overnight or for up to three days.
4. On the day that you would like to bake your bread, remove thedough from the refrigerator and let it warm to room temperature--about three hours. The dough should rise to nearly double insize.
5. Once the dough has risen, form the loaves. Coat your hands withflour and gently form a loaf by pulling the dough around itselfto create a slightly stretched skin. You may need to coat yourhands several times if the dough is sticky. If necessary, pinchthe seams together on the bottom of the loaf. Lay the loaf gentlyin a well-greased loaf pan and cover with plastic wrap. Repeatwith the second loaf. Let double again in size, about 11/2 hours.
6. Preheat the oven to 350 degrees. Once the dough has doubled (theloaf should be very puffy), place the two loaves on a shelf inthe top half of the oven, well-spaced so that air can circulatebetween the loaves. Bake for thirty minutes or until done. Theinterior of the loaves should register at least 185 degrees whenan insta-read thermometer is inserted through the bottom crust.Remove the bread from the pans and cool on wire racks. Let itcool completely before cutting.
40
Bakery Science “The art and science of baking” Ph.no.09996000499
41
Consider Bread Helpers™
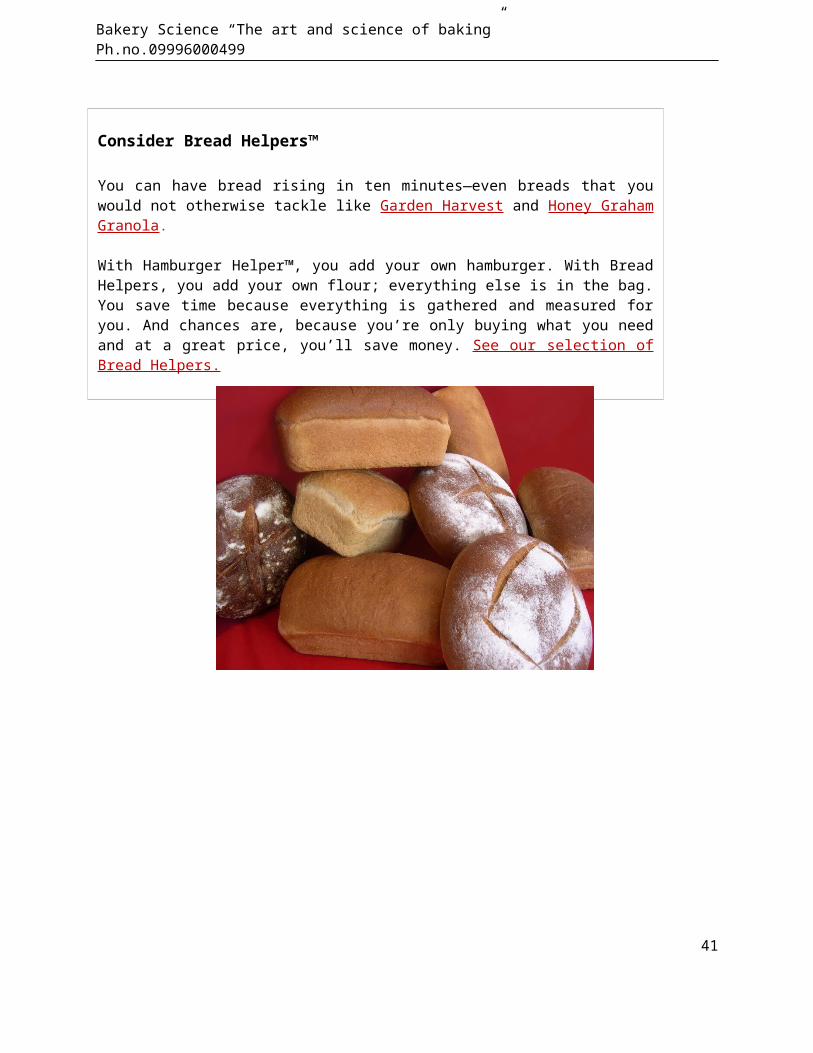
You can have bread rising in ten minutes—even breads that youwould not otherwise tackle like Garden Harvest and Honey GrahamGranola.
With Hamburger Helper™, you add your own hamburger. With BreadHelpers, you add your own flour; everything else is in the bag.You save time because everything is gathered and measured foryou. And chances are, because you’re only buying what you needand at a great price, you’ll save money. See our selection ofBread Helpers.
Bakery Science “The art and science of baking” Ph.no.09996000499
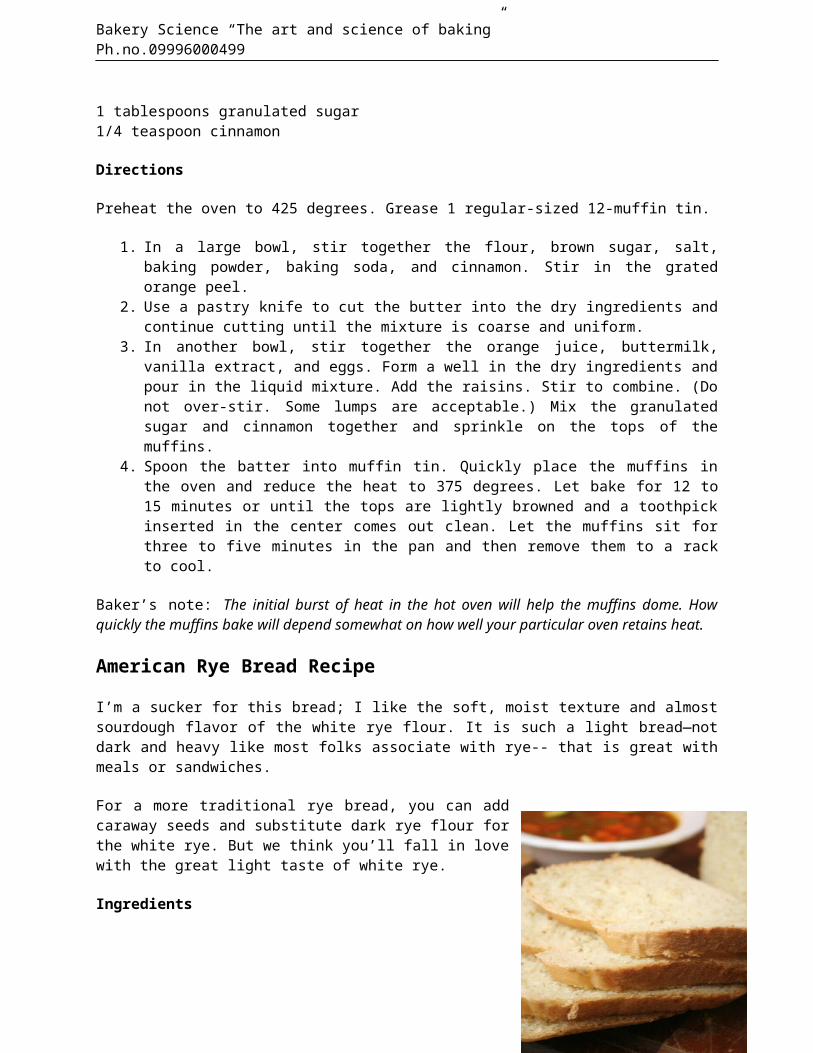
California Golden Raisin Muffins
The first time that I made these, I gave some to my neighbors. Theywent nuts over these muffins—and announced far and wide that thesewere the best muffins that they had ever had. I don’t know about thatbut they are very good, one of our favorite muffins.
We included these muffins in this section because of the flours. Therecipe calls for a blend of all-purpose and whole wheat or rye flours.If you choose rye—without any gluten in the rye flour, you’ll have anunbelievably tender muffin. If you use dark rye, you’ll have a rustic,fruity muffin. If you choose white rye, it will be a much more refinedmuffin. (Most of the time, I’ll prefer the white.)
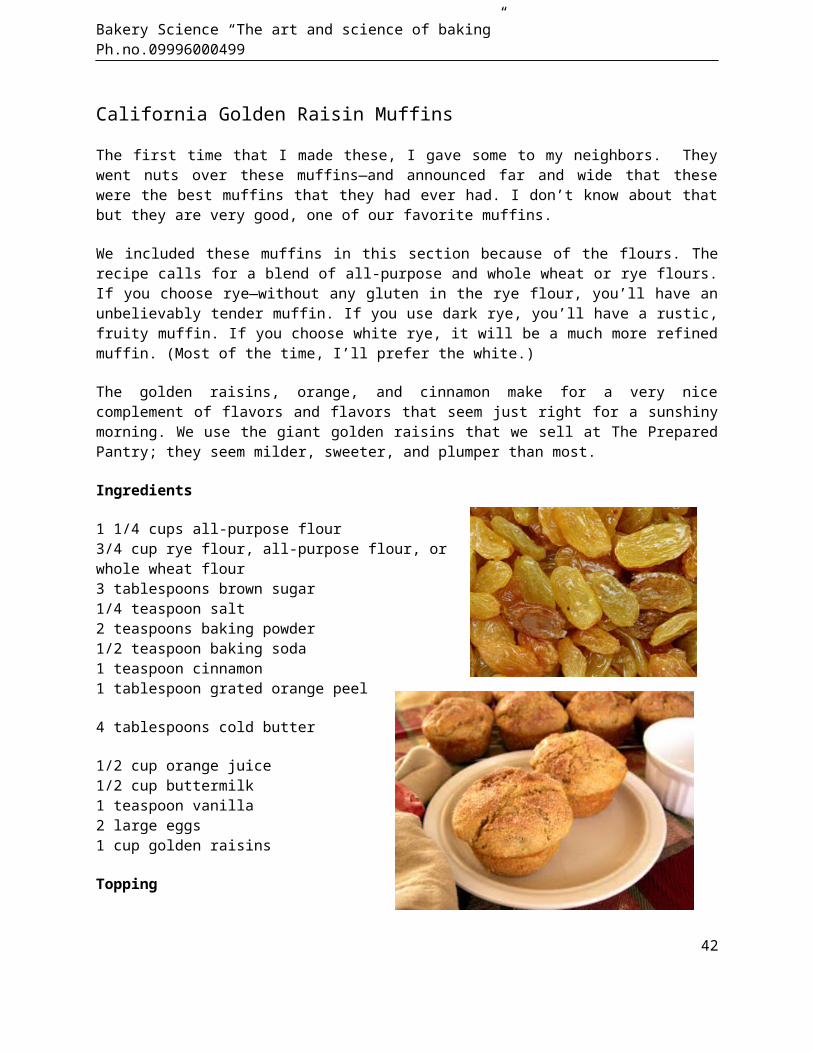
The golden raisins, orange, and cinnamon make for a very nicecomplement of flavors and flavors that seem just right for a sunshinymorning. We use the giant golden raisins that we sell at The PreparedPantry; they seem milder, sweeter, and plumper than most.
Ingredients
1 1/4 cups all-purpose flour3/4 cup rye flour, all-purpose flour, orwhole wheat flour3 tablespoons brown sugar1/4 teaspoon salt2 teaspoons baking powder1/2 teaspoon baking soda1 teaspoon cinnamon1 tablespoon grated orange peel
4 tablespoons cold butter
1/2 cup orange juice1/2 cup buttermilk1 teaspoon vanilla2 large eggs1 cup golden raisins
Topping
42
Bakery Science “The art and science of baking” Ph.no.09996000499
1 tablespoons granulated sugar1/4 teaspoon cinnamon
Directions
Preheat the oven to 425 degrees. Grease 1 regular-sized 12-muffin tin.
1. In a large bowl, stir together the flour, brown sugar, salt,baking powder, baking soda, and cinnamon. Stir in the gratedorange peel.
2. Use a pastry knife to cut the butter into the dry ingredients andcontinue cutting until the mixture is coarse and uniform.
3. In another bowl, stir together the orange juice, buttermilk,vanilla extract, and eggs. Form a well in the dry ingredients andpour in the liquid mixture. Add the raisins. Stir to combine. (Donot over-stir. Some lumps are acceptable.) Mix the granulatedsugar and cinnamon together and sprinkle on the tops of themuffins.
4. Spoon the batter into muffin tin. Quickly place the muffins inthe oven and reduce the heat to 375 degrees. Let bake for 12 to15 minutes or until the tops are lightly browned and a toothpickinserted in the center comes out clean. Let the muffins sit forthree to five minutes in the pan and then remove them to a rackto cool.
Baker’s note: The initial burst of heat in the hot oven will help the muffins dome. Howquickly the muffins bake will depend somewhat on how well your particular oven retains heat.
American Rye Bread Recipe
I’m a sucker for this bread; I like the soft, moist texture and almostsourdough flavor of the white rye flour. It is such a light bread—notdark and heavy like most folks associate with rye-- that is great withmeals or sandwiches.
For a more traditional rye bread, you can addcaraway seeds and substitute dark rye flour forthe white rye. But we think you’ll fall in lovewith the great light taste of white rye.
Ingredients
43
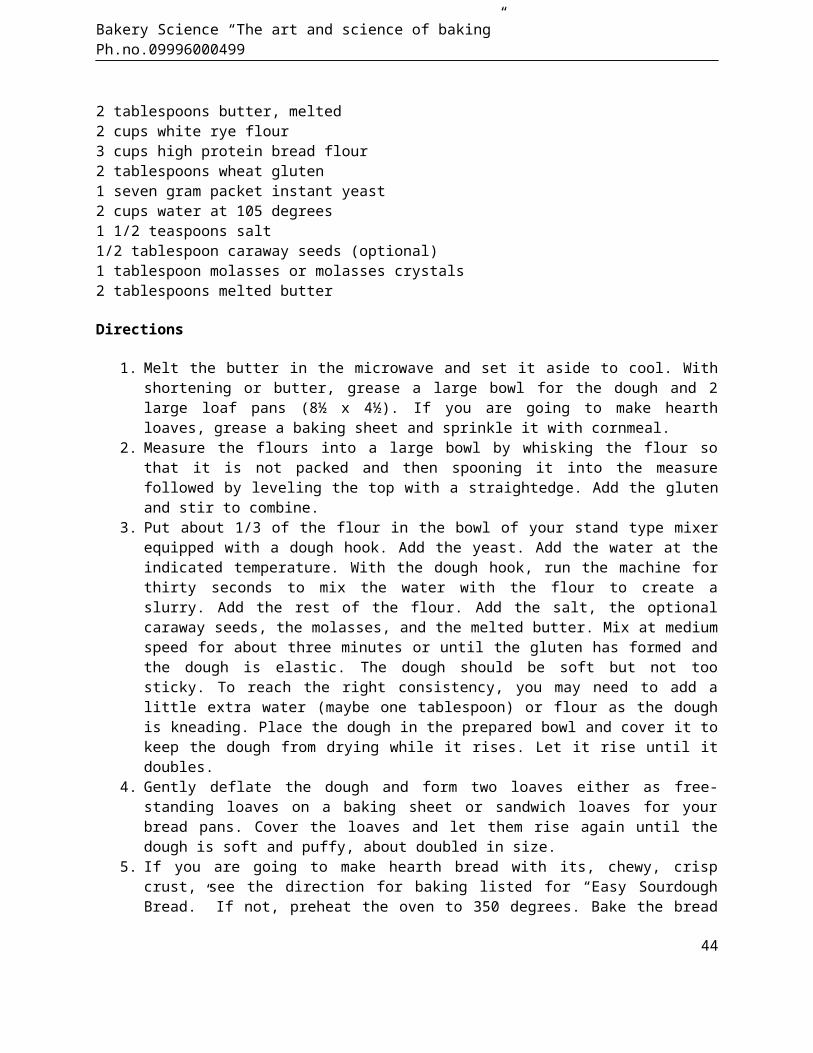
Bakery Science “The art and science of baking” Ph.no.09996000499
2 tablespoons butter, melted2 cups white rye flour3 cups high protein bread flour2 tablespoons wheat gluten1 seven gram packet instant yeast2 cups water at 105 degrees1 1/2 teaspoons salt1/2 tablespoon caraway seeds (optional)1 tablespoon molasses or molasses crystals2 tablespoons melted butter
Directions
1. Melt the butter in the microwave and set it aside to cool. Withshortening or butter, grease a large bowl for the dough and 2large loaf pans (8½ x 4½). If you are going to make hearthloaves, grease a baking sheet and sprinkle it with cornmeal.
2. Measure the flours into a large bowl by whisking the flour sothat it is not packed and then spooning it into the measurefollowed by leveling the top with a straightedge. Add the glutenand stir to combine.
3. Put about 1/3 of the flour in the bowl of your stand type mixerequipped with a dough hook. Add the yeast. Add the water at theindicated temperature. With the dough hook, run the machine forthirty seconds to mix the water with the flour to create aslurry. Add the rest of the flour. Add the salt, the optionalcaraway seeds, the molasses, and the melted butter. Mix at mediumspeed for about three minutes or until the gluten has formed andthe dough is elastic. The dough should be soft but not toosticky. To reach the right consistency, you may need to add alittle extra water (maybe one tablespoon) or flour as the doughis kneading. Place the dough in the prepared bowl and cover it tokeep the dough from drying while it rises. Let it rise until itdoubles.
4. Gently deflate the dough and form two loaves either as free-standing loaves on a baking sheet or sandwich loaves for yourbread pans. Cover the loaves and let them rise again until thedough is soft and puffy, about doubled in size.
5. If you are going to make hearth bread with its, chewy, crispcrust, see the direction for baking listed for “Easy SourdoughBread.” If not, preheat the oven to 350 degrees. Bake the bread
44
Bakery Science “The art and science of baking” Ph.no.09996000499
for about 35 minutes. The time will vary depending on yourloaves, the pans, and your oven. The bread should make a hollowsound when thumped on the bottom. The internal temperature of theloaves should be 190 degrees.
6. Remove the loaves from the pans and let them cool on a wire rack.Cool completely, or nearly so, before slicing.
This rye bread is made with white rye and bread flours with thebread flour providing the required gluten. The bread is moist andlight and very mild-flavored. For a taste more reminiscent ofcommercial rye breads, caraway seeds can be added. This is anexcellent opportunity to get to know white rye flour.
45
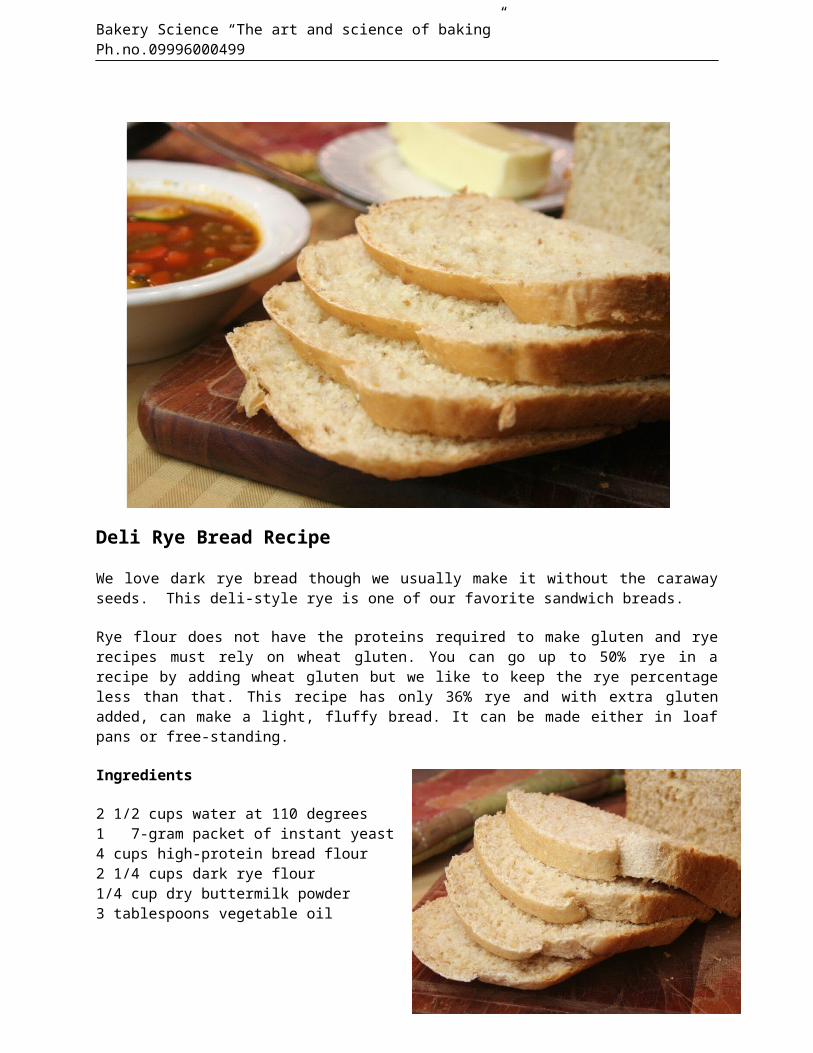
Bakery Science “The art and science of baking” Ph.no.09996000499
Deli Rye Bread Recipe
We love dark rye bread though we usually make it without the carawayseeds. This deli-style rye is one of our favorite sandwich breads.
Rye flour does not have the proteins required to make gluten and ryerecipes must rely on wheat gluten. You can go up to 50% rye in arecipe by adding wheat gluten but we like to keep the rye percentageless than that. This recipe has only 36% rye and with extra glutenadded, can make a light, fluffy bread. It can be made either in loafpans or free-standing.
Ingredients
2 1/2 cups water at 110 degrees1 7-gram packet of instant yeast4 cups high-protein bread flour2 1/4 cups dark rye flour1/4 cup dry buttermilk powder3 tablespoons vegetable oil
46
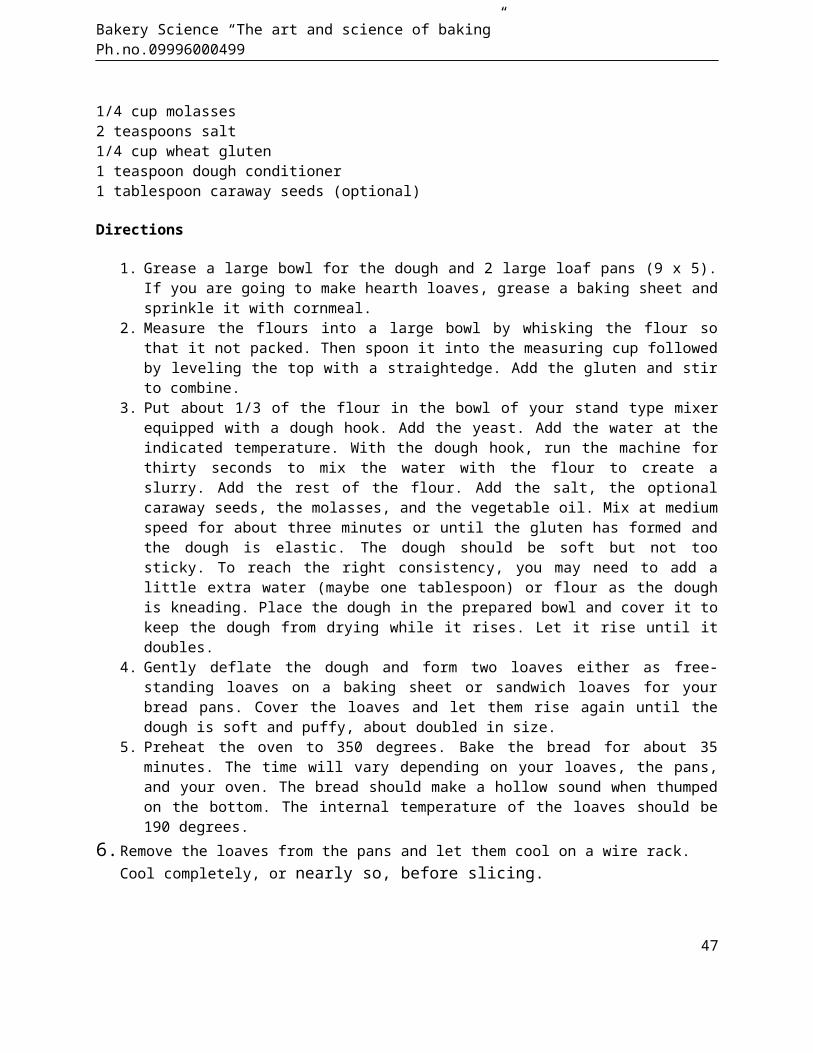
Bakery Science “The art and science of baking” Ph.no.09996000499
1/4 cup molasses2 teaspoons salt1/4 cup wheat gluten1 teaspoon dough conditioner1 tablespoon caraway seeds (optional)
Directions
1. Grease a large bowl for the dough and 2 large loaf pans (9 x 5).If you are going to make hearth loaves, grease a baking sheet andsprinkle it with cornmeal.
2. Measure the flours into a large bowl by whisking the flour sothat it not packed. Then spoon it into the measuring cup followedby leveling the top with a straightedge. Add the gluten and stirto combine.
3. Put about 1/3 of the flour in the bowl of your stand type mixerequipped with a dough hook. Add the yeast. Add the water at theindicated temperature. With the dough hook, run the machine forthirty seconds to mix the water with the flour to create aslurry. Add the rest of the flour. Add the salt, the optionalcaraway seeds, the molasses, and the vegetable oil. Mix at mediumspeed for about three minutes or until the gluten has formed andthe dough is elastic. The dough should be soft but not toosticky. To reach the right consistency, you may need to add alittle extra water (maybe one tablespoon) or flour as the doughis kneading. Place the dough in the prepared bowl and cover it tokeep the dough from drying while it rises. Let it rise until itdoubles.
4. Gently deflate the dough and form two loaves either as free-standing loaves on a baking sheet or sandwich loaves for yourbread pans. Cover the loaves and let them rise again until thedough is soft and puffy, about doubled in size.
5. Preheat the oven to 350 degrees. Bake the bread for about 35minutes. The time will vary depending on your loaves, the pans,and your oven. The bread should make a hollow sound when thumpedon the bottom. The internal temperature of the loaves should be190 degrees.
6.Remove the loaves from the pans and let them cool on a wire rack. Cool completely, or nearly so, before slicing.
47
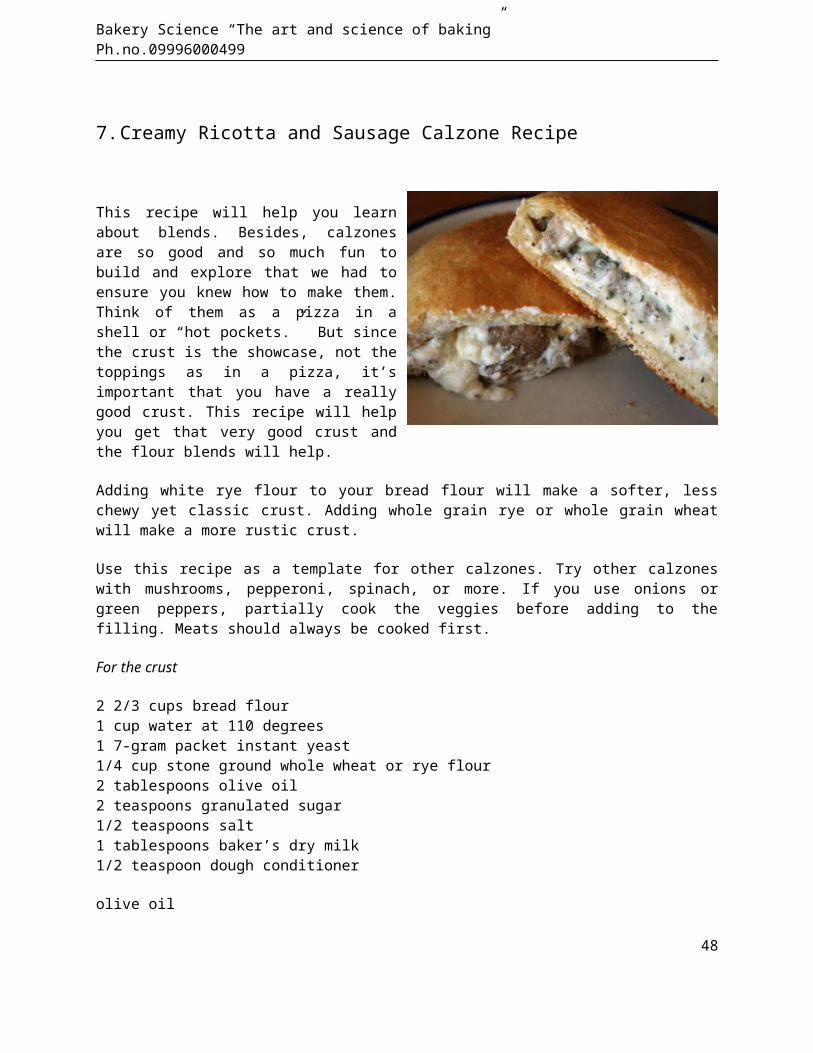
Bakery Science “The art and science of baking” Ph.no.09996000499
7.Creamy Ricotta and Sausage Calzone Recipe
This recipe will help you learnabout blends. Besides, calzonesare so good and so much fun tobuild and explore that we had toensure you knew how to make them.Think of them as a pizza in ashell or “hot pockets.” But sincethe crust is the showcase, not thetoppings as in a pizza, it’simportant that you have a reallygood crust. This recipe will helpyou get that very good crust andthe flour blends will help.
Adding white rye flour to your bread flour will make a softer, lesschewy yet classic crust. Adding whole grain rye or whole grain wheatwill make a more rustic crust.
Use this recipe as a template for other calzones. Try other calzoneswith mushrooms, pepperoni, spinach, or more. If you use onions orgreen peppers, partially cook the veggies before adding to thefilling. Meats should always be cooked first.
For the crust
2 2/3 cups bread flour1 cup water at 110 degrees1 7-gram packet instant yeast1/4 cup stone ground whole wheat or rye flour2 tablespoons olive oil2 teaspoons granulated sugar1/2 teaspoons salt1 tablespoons baker’s dry milk1/2 teaspoon dough conditioner
olive oil
48

Bakery Science “The art and science of baking” Ph.no.09996000499
For the filling
3/4 pound mild Italian sausage1 small onion, diced1/4 cup chopped fresh basil or 1 tablespoon dried basil1 1/4 to 1 1/2 cups grated mozzarella cheese1 1/2 to 2 cups whole milk ricotta2 tablespoons grated parmesan cheesesalt and pepper (optional)
Baker’s note: “Springback,” the tendency of yeasted doughs to pull back and shrink asyou try to form thin crusts for pizzas and calzones, can be eliminated with a dough relaxer. Adough relaxer will make the dough soft and easy to form.
Directions for the crust
1. Place about two-thirds of the bread flour in the bowl of yourstand-type mixer. Add the water and yeast. Mix with the dough hook forabout one minute to hydrate the instant yeast. 2. Add the rest of the bread flour, the whole grain flour, olive oil,sugar, salt, dry milk, and dough conditioner. Mix for about fourminutes at medium speed or until the gluten is formed. 3. Remove the dough to a large greased bowl. Cover and let the doughrise until doubled.
For the filling
1. Sauté the sausage and onion together until cooked but not over-cooked. (The meat will cook just a bit more in the heat of the oven.)Stir in the basil. Crumble the meat into smaller pieces.
Putting the calzone together
49
To make this easier, consider a dough press.
A dough press makes calzones easier. The back of the press is acutter to cut perfect circles. Place a dough circle in thepress. Its bowl shape creates a cradle for the filling. Thehinged top closes to press the edges together. A dough press isnot expensive, usually around $6.00. See this video on how adough press works.
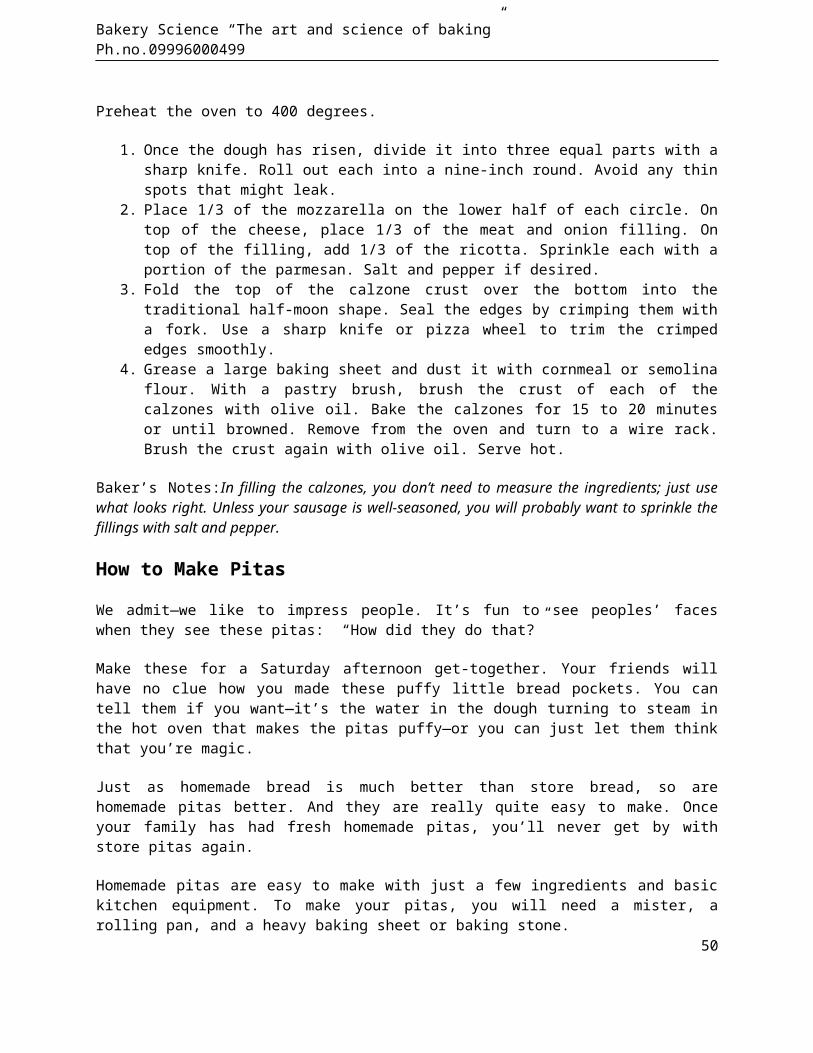
Bakery Science “The art and science of baking” Ph.no.09996000499
Preheat the oven to 400 degrees.
1. Once the dough has risen, divide it into three equal parts with asharp knife. Roll out each into a nine-inch round. Avoid any thinspots that might leak.
2. Place 1/3 of the mozzarella on the lower half of each circle. Ontop of the cheese, place 1/3 of the meat and onion filling. Ontop of the filling, add 1/3 of the ricotta. Sprinkle each with aportion of the parmesan. Salt and pepper if desired.
3. Fold the top of the calzone crust over the bottom into thetraditional half-moon shape. Seal the edges by crimping them witha fork. Use a sharp knife or pizza wheel to trim the crimpededges smoothly.
4. Grease a large baking sheet and dust it with cornmeal or semolinaflour. With a pastry brush, brush the crust of each of thecalzones with olive oil. Bake the calzones for 15 to 20 minutesor until browned. Remove from the oven and turn to a wire rack.Brush the crust again with olive oil. Serve hot.
Baker’s Notes:In filling the calzones, you don’t need to measure the ingredients; just usewhat looks right. Unless your sausage is well-seasoned, you will probably want to sprinkle thefillings with salt and pepper.
How to Make Pitas
We admit—we like to impress people. It’s fun to see peoples’ faceswhen they see these pitas: “How did they do that?”
Make these for a Saturday afternoon get-together. Your friends willhave no clue how you made these puffy little bread pockets. You cantell them if you want—it’s the water in the dough turning to steam inthe hot oven that makes the pitas puffy—or you can just let them thinkthat you’re magic.
Just as homemade bread is much better than store bread, so arehomemade pitas better. And they are really quite easy to make. Onceyour family has had fresh homemade pitas, you’ll never get by withstore pitas again.
Homemade pitas are easy to make with just a few ingredients and basickitchen equipment. To make your pitas, you will need a mister, arolling pan, and a heavy baking sheet or baking stone.
50
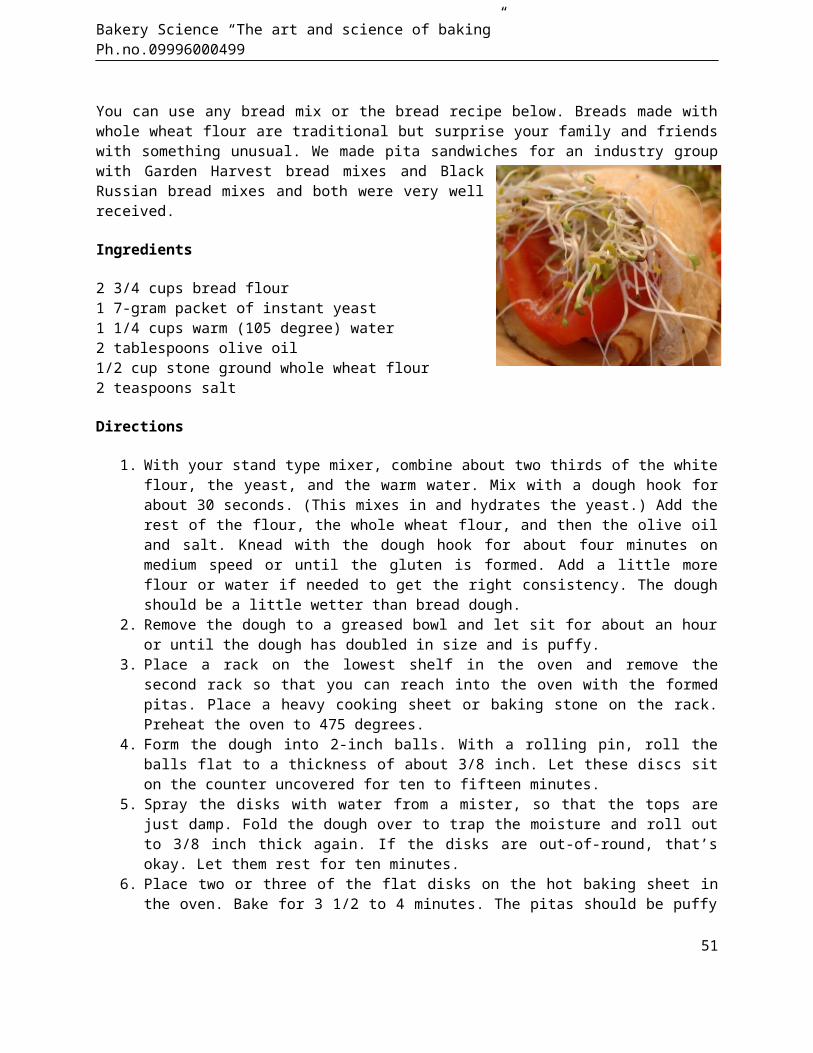
Bakery Science “The art and science of baking” Ph.no.09996000499
You can use any bread mix or the bread recipe below. Breads made withwhole wheat flour are traditional but surprise your family and friendswith something unusual. We made pita sandwiches for an industry groupwith Garden Harvest bread mixes and BlackRussian bread mixes and both were very wellreceived.
Ingredients
2 3/4 cups bread flour1 7-gram packet of instant yeast1 1/4 cups warm (105 degree) water2 tablespoons olive oil1/2 cup stone ground whole wheat flour2 teaspoons salt
Directions
1. With your stand type mixer, combine about two thirds of the whiteflour, the yeast, and the warm water. Mix with a dough hook forabout 30 seconds. (This mixes in and hydrates the yeast.) Add therest of the flour, the whole wheat flour, and then the olive oiland salt. Knead with the dough hook for about four minutes onmedium speed or until the gluten is formed. Add a little moreflour or water if needed to get the right consistency. The doughshould be a little wetter than bread dough.
2. Remove the dough to a greased bowl and let sit for about an houror until the dough has doubled in size and is puffy.
3. Place a rack on the lowest shelf in the oven and remove thesecond rack so that you can reach into the oven with the formedpitas. Place a heavy cooking sheet or baking stone on the rack.Preheat the oven to 475 degrees.
4. Form the dough into 2-inch balls. With a rolling pin, roll theballs flat to a thickness of about 3/8 inch. Let these discs siton the counter uncovered for ten to fifteen minutes.
5. Spray the disks with water from a mister, so that the tops arejust damp. Fold the dough over to trap the moisture and roll outto 3/8 inch thick again. If the disks are out-of-round, that’sokay. Let them rest for ten minutes.
6. Place two or three of the flat disks on the hot baking sheet inthe oven. Bake for 3 1/2 to 4 minutes. The pitas should be puffy
51
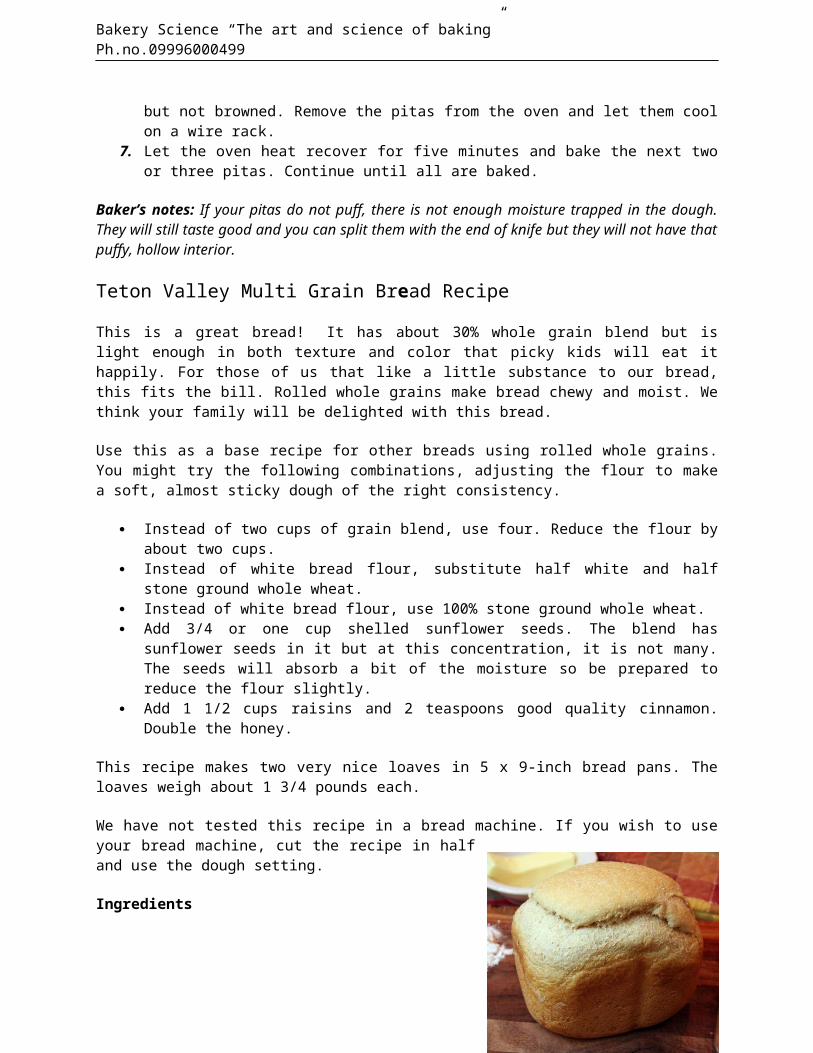
Bakery Science “The art and science of baking” Ph.no.09996000499
but not browned. Remove the pitas from the oven and let them coolon a wire rack.
7. Let the oven heat recover for five minutes and bake the next twoor three pitas. Continue until all are baked.
Baker’s notes: If your pitas do not puff, there is not enough moisture trapped in the dough.They will still taste good and you can split them with the end of knife but they will not have thatpuffy, hollow interior.
Teton Valley Multi Grain Bread Recipe
This is a great bread! It has about 30% whole grain blend but islight enough in both texture and color that picky kids will eat ithappily. For those of us that like a little substance to our bread,this fits the bill. Rolled whole grains make bread chewy and moist. Wethink your family will be delighted with this bread.
Use this as a base recipe for other breads using rolled whole grains.You might try the following combinations, adjusting the flour to makea soft, almost sticky dough of the right consistency.
Instead of two cups of grain blend, use four. Reduce the flour byabout two cups.
Instead of white bread flour, substitute half white and halfstone ground whole wheat.
Instead of white bread flour, use 100% stone ground whole wheat. Add 3/4 or one cup shelled sunflower seeds. The blend has
sunflower seeds in it but at this concentration, it is not many.The seeds will absorb a bit of the moisture so be prepared toreduce the flour slightly.
Add 1 1/2 cups raisins and 2 teaspoons good quality cinnamon.Double the honey.
This recipe makes two very nice loaves in 5 x 9-inch bread pans. Theloaves weigh about 1 3/4 pounds each.
We have not tested this recipe in a bread machine. If you wish to useyour bread machine, cut the recipe in halfand use the dough setting.
Ingredients
52
Bakery Science “The art and science of baking” Ph.no.09996000499
2 1/3 cups water at 105 degrees2 cups Mountain Harvest Grain Blend1 7-gram packet of instant yeast, SAF or equal3 tablespoons honey1/2 cup Baker’s Dry Milk5 cups high protein bread flour, more or less2 tablespoons butter, softened
1
teaspoon salt1 teaspoon Professional Bread Dough Conditioner
Directions
Prepare two bread pans by greasing the inside of the pans including the rims.
1. Combine the grain blend, the water, and the yeast in the bowl ofyour stand-type mixer. Add the honey and the dry milk. Add abouthalf of the flour and combine with the dough hook until the doughstarts to come together. Add the butter and salt. Add more flourin several additions, beating after each, until a soft dough ballhas formed. You should use about five cups of flour. Beat withthe dough hook for four minutes at medium speed or until thegluten is developed. The dough should be soft (but not too stickyto handle), smooth, and elastic. Water absorption may varydepending on environmental conditions and the flour you use.
2. Place the dough in a large greased bowl and turn once to oil allsides. Cover the bowl with plastic and let the dough rise untildoubled, about one hour.
53
What’s Baker’s Dry Milk?
Milk has an enzyme in it that impedes the growth of yeast.Commercial bakeries use a high-heat treated dry milk, Baker’sDry Milk, that has been processed at a high temperature todestroy the enzyme. As a result, the bread rises faster for afuller loaf.
You can use nonfat instant dry milk in your bread but high heattreated dry milk works better.
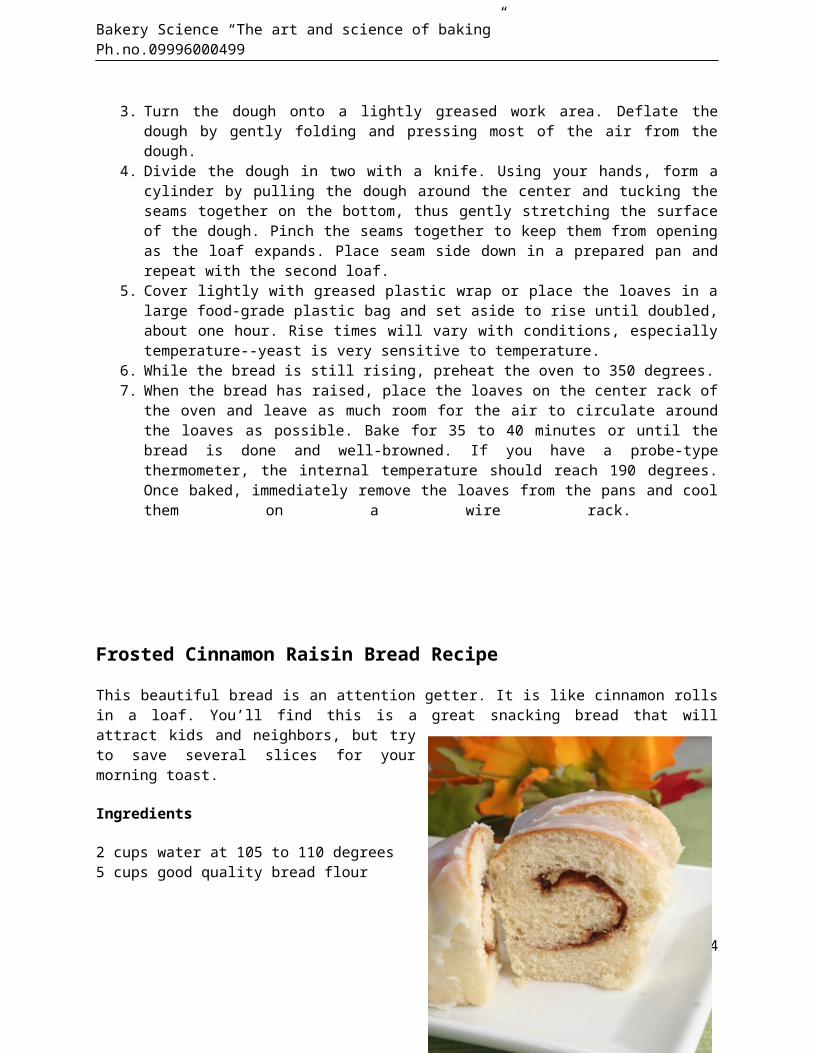
Bakery Science “The art and science of baking” Ph.no.09996000499
3. Turn the dough onto a lightly greased work area. Deflate thedough by gently folding and pressing most of the air from thedough.
4. Divide the dough in two with a knife. Using your hands, form acylinder by pulling the dough around the center and tucking theseams together on the bottom, thus gently stretching the surfaceof the dough. Pinch the seams together to keep them from openingas the loaf expands. Place seam side down in a prepared pan andrepeat with the second loaf.
5. Cover lightly with greased plastic wrap or place the loaves in alarge food-grade plastic bag and set aside to rise until doubled,about one hour. Rise times will vary with conditions, especiallytemperature--yeast is very sensitive to temperature.
6. While the bread is still rising, preheat the oven to 350 degrees.7. When the bread has raised, place the loaves on the center rack of
the oven and leave as much room for the air to circulate aroundthe loaves as possible. Bake for 35 to 40 minutes or until thebread is done and well-browned. If you have a probe-typethermometer, the internal temperature should reach 190 degrees.Once baked, immediately remove the loaves from the pans and coolthem on a wire rack.
Frosted Cinnamon Raisin Bread Recipe
This beautiful bread is an attention getter. It is like cinnamon rollsin a loaf. You’ll find this is a great snacking bread that willattract kids and neighbors, but tryto save several slices for yourmorning toast.
Ingredients
2 cups water at 105 to 110 degrees5 cups good quality bread flour
54
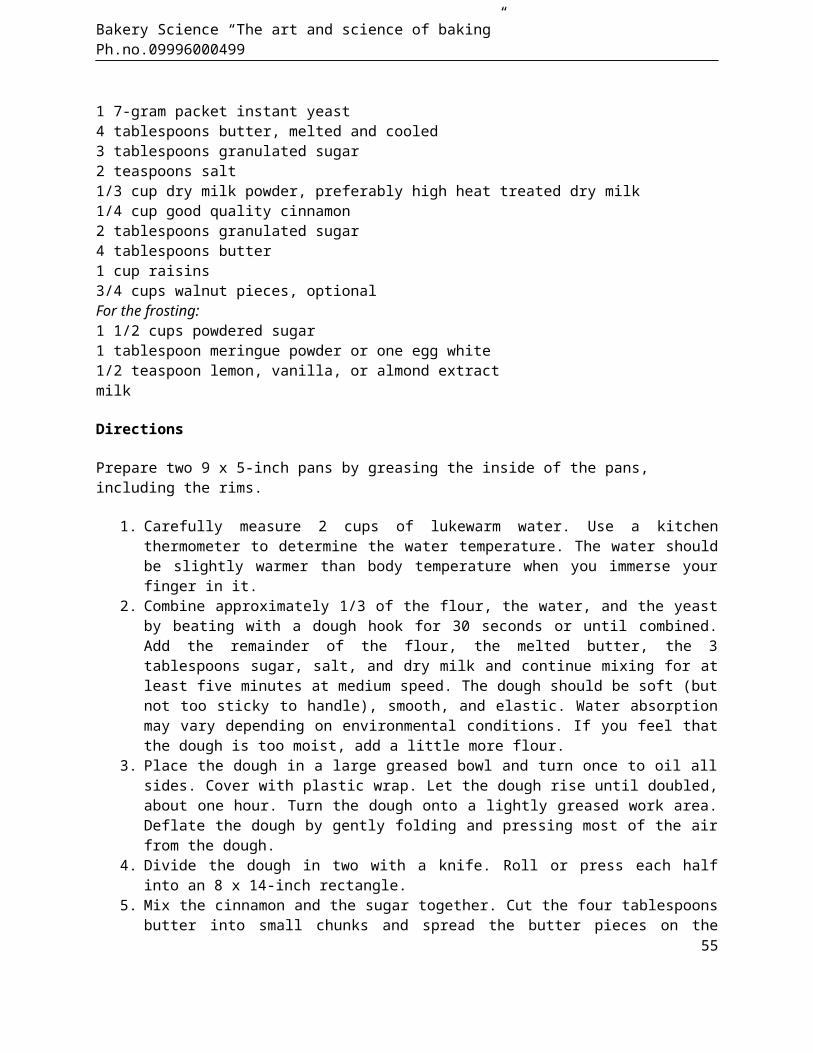
Bakery Science “The art and science of baking” Ph.no.09996000499
1 7-gram packet instant yeast4 tablespoons butter, melted and cooled3 tablespoons granulated sugar2 teaspoons salt1/3 cup dry milk powder, preferably high heat treated dry milk1/4 cup good quality cinnamon2 tablespoons granulated sugar4 tablespoons butter1 cup raisins3/4 cups walnut pieces, optionalFor the frosting:1 1/2 cups powdered sugar1 tablespoon meringue powder or one egg white1/2 teaspoon lemon, vanilla, or almond extractmilk
Directions
Prepare two 9 x 5-inch pans by greasing the inside of the pans, including the rims.
1. Carefully measure 2 cups of lukewarm water. Use a kitchenthermometer to determine the water temperature. The water shouldbe slightly warmer than body temperature when you immerse yourfinger in it.
2. Combine approximately 1/3 of the flour, the water, and the yeastby beating with a dough hook for 30 seconds or until combined.Add the remainder of the flour, the melted butter, the 3tablespoons sugar, salt, and dry milk and continue mixing for atleast five minutes at medium speed. The dough should be soft (butnot too sticky to handle), smooth, and elastic. Water absorptionmay vary depending on environmental conditions. If you feel thatthe dough is too moist, add a little more flour.
3. Place the dough in a large greased bowl and turn once to oil allsides. Cover with plastic wrap. Let the dough rise until doubled,about one hour. Turn the dough onto a lightly greased work area.Deflate the dough by gently folding and pressing most of the airfrom the dough.
4. Divide the dough in two with a knife. Roll or press each halfinto an 8 x 14-inch rectangle.
5. Mix the cinnamon and the sugar together. Cut the four tablespoonsbutter into small chunks and spread the butter pieces on the
55
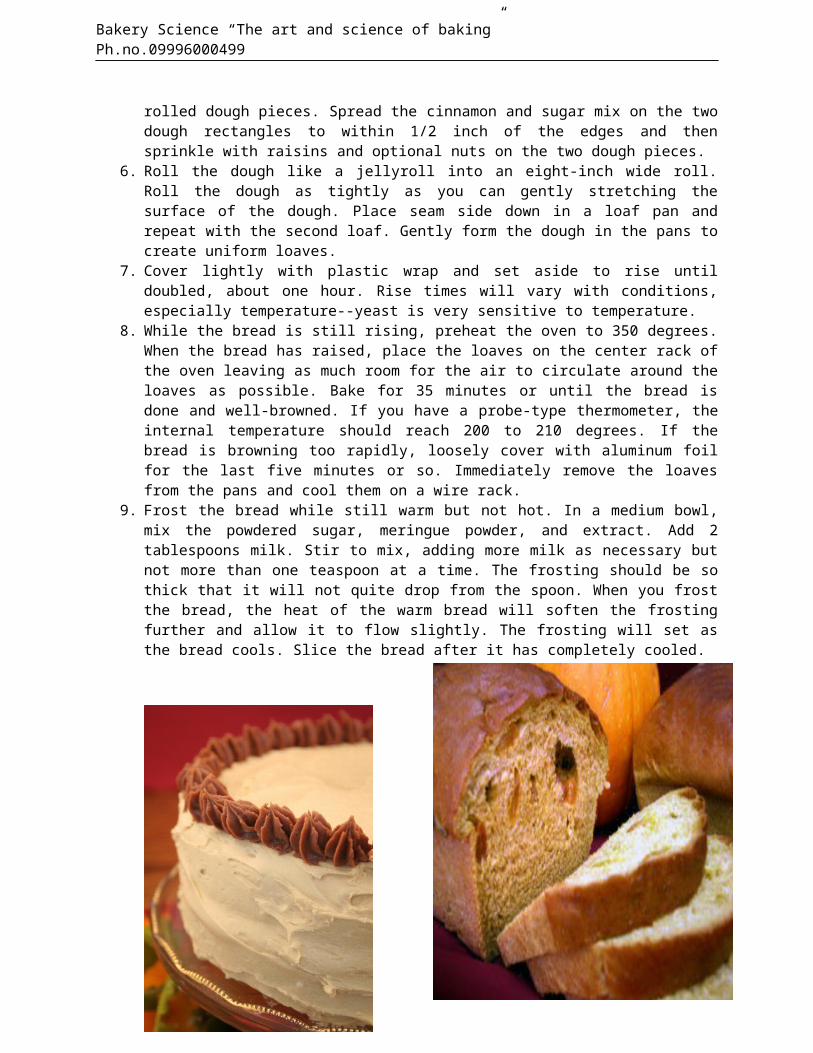
Bakery Science “The art and science of baking” Ph.no.09996000499
rolled dough pieces. Spread the cinnamon and sugar mix on the twodough rectangles to within 1/2 inch of the edges and thensprinkle with raisins and optional nuts on the two dough pieces.
6. Roll the dough like a jellyroll into an eight-inch wide roll.Roll the dough as tightly as you can gently stretching thesurface of the dough. Place seam side down in a loaf pan andrepeat with the second loaf. Gently form the dough in the pans tocreate uniform loaves.
7. Cover lightly with plastic wrap and set aside to rise untildoubled, about one hour. Rise times will vary with conditions,especially temperature--yeast is very sensitive to temperature.
8. While the bread is still rising, preheat the oven to 350 degrees.When the bread has raised, place the loaves on the center rack ofthe oven leaving as much room for the air to circulate around theloaves as possible. Bake for 35 minutes or until the bread isdone and well-browned. If you have a probe-type thermometer, theinternal temperature should reach 200 to 210 degrees. If thebread is browning too rapidly, loosely cover with aluminum foilfor the last five minutes or so. Immediately remove the loavesfrom the pans and cool them on a wire rack.
9. Frost the bread while still warm but not hot. In a medium bowl,mix the powdered sugar, meringue powder, and extract. Add 2tablespoons milk. Stir to mix, adding more milk as necessary butnot more than one teaspoon at a time. The frosting should be sothick that it will not quite drop from the spoon. When you frostthe bread, the heat of the warm bread will soften the frostingfurther and allow it to flow slightly. The frosting will set asthe bread cools. Slice the bread after it has completely cooled.
56
Bakery Science “The art and science of baking” Ph.no.09996000499
October Pumpkin Bread RecipePumpkin makes a wonderful addition to bread, adding color, nutrition,and flavor. There are two ways to add pumpkin: grated or pureed. Ifyou add grated pumpkin, you will have flecks of deep orange color andthe bits of pumpkin tend to give the bread a chewier texture. Theother way is to add pumpkin purée. The following recipe uses pumpkinpurée. This is wonderful bread. Be prepared to adjust the amount of flourthat you use to accommodate different moisture contents of the pumpkinpurée. If you like, you can substitute up to three cups of whole wheatflour for the white bread flour. (The picture is of bread with wholewheat flour.) We like golden raisins in this bread but suit your owntaste. This bread is not sweet like a dessert bread. You can add more sugarif you like. You can also add one cup of chopped walnuts. And if yourkids don’t like raisins (like ours), you can leave them out. Ingredients5 1/2 to 6 1/2 cups white bread flour (you can substitute up to 3 cupswhole wheat flour)1/4 cup brown sugar1 seven-gram packet of instant yeast1 1/3 cup warm water, 110 degrees1/2 tablespoon cinnamon1/4 teaspoon ground cloves1/2 teaspoon ground ginger1 cup puréed pumpkin or canned pumpkin1/2 tablespoon salt6 tablespoons melted butter1 1/2 cups raisins, golden raisins, or currentsDirections
1. Place half the bread flour, sugar, and yeast in the bowl of yourstand-type mixer. Add the warm water and beat with a dough hookuntil it is partially mixed (the purpose of this mixing is tohydrate the yeast).
2. Add the rest of the flour, the spices, the pumpkin, the salt, andthe butter. Knead with the dough hook at medium speed for fourminutes. When the dough comes together, add the raisins andcontinue beating for the remainder of the four minutes or untilthe gluten is developed. You will likely need to adjust themoisture level either by adding flour or water. Place the dough
57

Bakery Science “The art and science of baking” Ph.no.09996000499
in a greased bowl, turn once, and cover. Set the bowl in a warmplace and allow it to double in size.
3. Grease two 9 x 5-inch loaf pans. Form two loaves, cover them, andlet them rise until doubled and puffy.
4. Bake at 350 degrees for 25 minutes or until done. The internaltemperature should be at 190 to 200 degrees. Remove the loavesfrom the pans and let the bread cool on a wire rack.
Baker’s Note: The pumpkin in this bread makes it very moist. Pumpkin has a very mild flavorand acts as background for the spices and this has a mild bread combination of spices. Addmore spices if you like. Old-Fashioned Caramel Cake RecipeThis vintage recipe uses caramel syrup. It makes an attractive straw-colored cake with an unusual flavor. IngredientsFor the frosting1 large egg1/3 cup hot caramel syrup2 tablespoons whipping cream1 teaspoon vanilla extract6 tablespoons butter4 cups powdered sugar, more or lessDirections
1. Whisk the egg in a medium bowl. Drizzle the hot caramel syrupthrough the egg while continuing to whisk. It is important thatthe syrup be right-off-the-stove hot to temper but not cook theegg. The desired temperature is to be more than 140 degrees tokill any bacteria in the egg and less than 160 degrees so thatthe egg does not cook. (The frosting has enough sugar to inhibitany bacterial growth.) Stir in the extract and whipping cream.Set aside in the refrigerator.
2. When you are ready to frost the cake, beat in the butter with onecup powdered sugar. Then add the caramel syrup from therefrigerator and the rest of the powdered sugar. Beat together.Add more cream or powdered sugar to get the desired consistency.When the frosting is smooth and fluffy, it is ready to use.
For the cakeIngredients2 1/4 cups all-purpose flour1 tablespoon baking powder1 teaspoon salt
58
Bakery Science “The art and science of baking” Ph.no.09996000499
3/4 cup brown sugar1/2 cup shortening2 large eggs1 1/2 teaspoon vanilla extract1 cup milk2/3 cup caramel syrup
1. Mix the flour, baking powder, and salt together.2. Cream brown sugar and shortening together. Add the eggs one at a
time, beating after each. Add the extract. Beat until the mixtureis light and fluffy.
3. Add one-third of the flour mixture, then the milk, then anotherthird of the flour, then the syrup, and then the remaining flour.Beat until well combined. Scrape the batter into two 8-inch layercake pans.
4. Bake at 350 for 25 to 30 minutes or until it tests done. Let thecakes cool in the pans for several minutes and then remove themfrom the pans and let cool on wire racks. Let them coolcompletely before frosting.
Baker’s note: We made a variation of this with almond extract instead of vanilla. It was very good.
59
Bakery Science “The art and science of baking” Ph.no.09996000499
Chapter 2The Wonderful World of Eggs
Part 1: Eggs and How They WorkThe Mechanics of Eggs
Eggs are wonderful. They are used in so many products and so manyways. Most of our cakes are not possible without eggs and cookies arevery difficult to make without eggs.
We know of nine different functions of eggs in baking:
Structure—As eggs cook, the protein coagulates and providesstructure to the product.
Leaving—Eggs help leaven certain products by trapping air cellsin whipped eggs or egg whites. Angel food and chiffon cakes areoften entirely leavened with eggs.
Tenderizing—The fat in the egg yolk shortens gluten strands inbatters and dough to tenderize the product.
Moisture—Since eggs are mostly water, they moisten the productsto which they are added.
Wash—Eggs, egg whites, and yolks, are used as washes on breadloaves to give them a glossy finish and hold sesame seeds andother accoutrements in place.
Emulsifying—Eggs are natural emulsifiers that help make ourbatters smooth.
Flavor—They add flavor. Color—Most lemon meringue pie recipes rely entirely on egg yolks
for color.
60

Bakery Science “The art and science of baking” Ph.no.09996000499
Nutrition—They add nutritional value such as protein, Vitamin D,and choline (an important nutrient for the brain, nervous system,and cardiovascular system).
The Three Parts of the Egg
The egg is composed of three main parts plus membranes and two whitestrands called chalazae that hold the yolk to the center of the white.
The shell contains the egg. It is fragile and porous. It is importantto remember that eggs will absorb flavors and odors through the shelland therefore must be protected from strong smelling substances andunsanitary surfaces. When baking, make sure that your eggs are odorfree. A tainted egg will spoil your product.
The yolk is high in both fat and protein and is a natural emulsifier.It is rich in vitamins and minerals and contains cholesterol. Thecolor of the yolk varies depending on the diet of the chicken butcolor is not an indicator of food value or quality.
The white is primarily albumin protein. It is clear and soluble beforeit is cooked. It contains sulfur and becomes odorous when old.
Brown eggs are not more nutritious than white eggs. Blood spots arenot a cause for alarm; for baking, you do not need to remove them.
When you add eggs to a batter you add a great deal of water to theproduct; about 3/4’s of the egg by weight is water. The remainingportion is nearly equal parts fat and protein. For those of you usingkitchen scales, a large egg weighs 1 2/3 ounce without the shell withthe yolk weighing two-thirds of an ounce and the white, one ounce.
Fresh, Safe Eggs
The egg industry is conscientious and regulated and it is very rare tofind an inferior or rotten egg in a carton from commercial sources. Itis not rare to find broken or cracked shells. When you open a cartonand find a cracked egg, discard it since a crack creates an easyavenue for bacteria to enter.
61
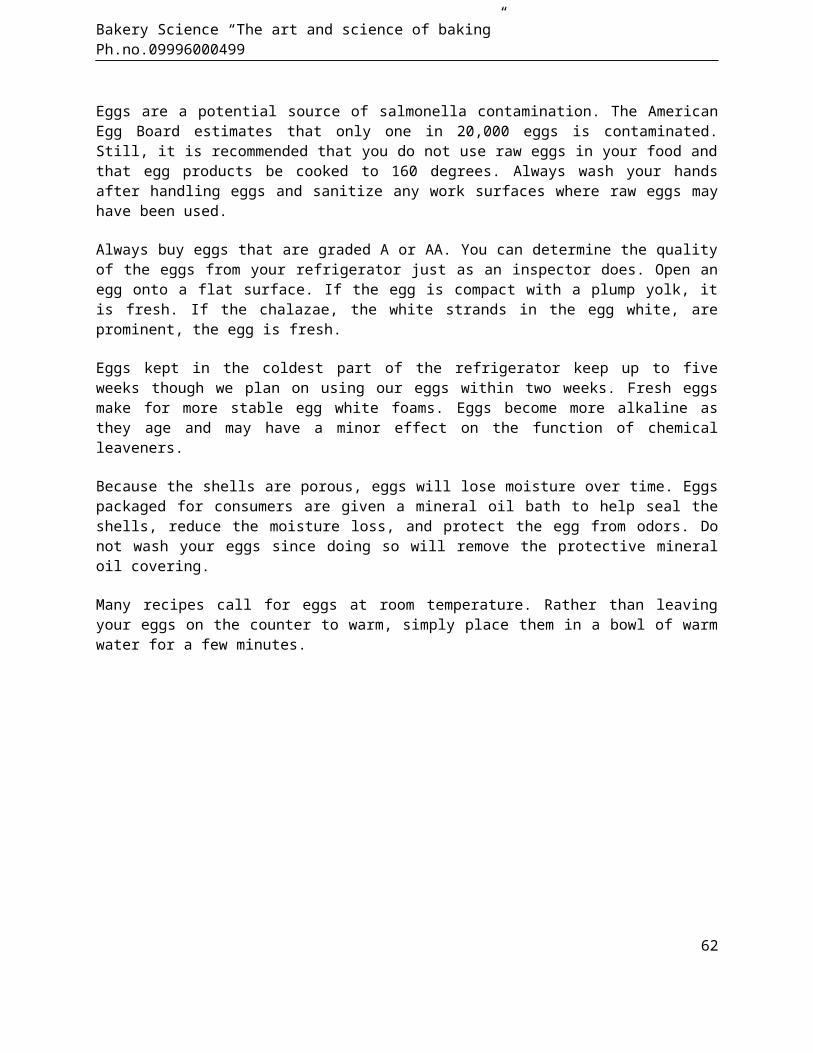
Bakery Science “The art and science of baking” Ph.no.09996000499
Eggs are a potential source of salmonella contamination. The AmericanEgg Board estimates that only one in 20,000 eggs is contaminated.Still, it is recommended that you do not use raw eggs in your food andthat egg products be cooked to 160 degrees. Always wash your handsafter handling eggs and sanitize any work surfaces where raw eggs mayhave been used.
Always buy eggs that are graded A or AA. You can determine the qualityof the eggs from your refrigerator just as an inspector does. Open anegg onto a flat surface. If the egg is compact with a plump yolk, itis fresh. If the chalazae, the white strands in the egg white, areprominent, the egg is fresh.
Eggs kept in the coldest part of the refrigerator keep up to fiveweeks though we plan on using our eggs within two weeks. Fresh eggsmake for more stable egg white foams. Eggs become more alkaline asthey age and may have a minor effect on the function of chemicalleaveners.
Because the shells are porous, eggs will lose moisture over time. Eggspackaged for consumers are given a mineral oil bath to help seal theshells, reduce the moisture loss, and protect the egg from odors. Donot wash your eggs since doing so will remove the protective mineraloil covering.
Many recipes call for eggs at room temperature. Rather than leavingyour eggs on the counter to warm, simply place them in a bowl of warmwater for a few minutes.
62
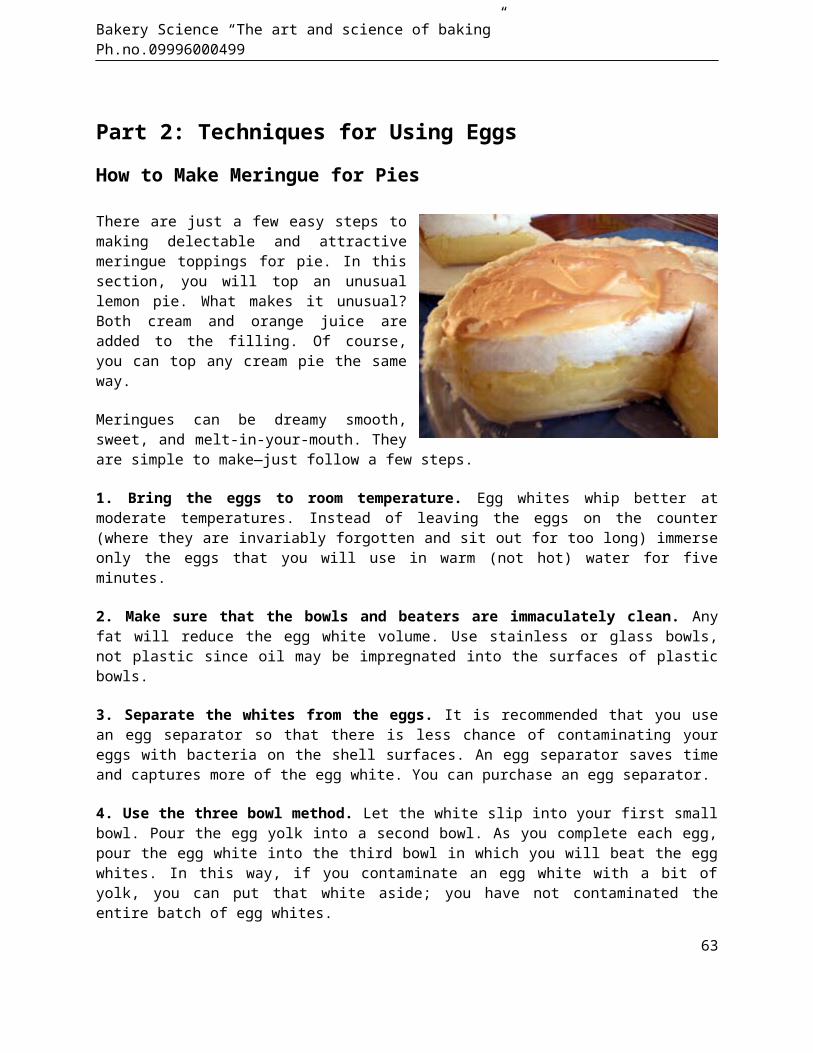
Bakery Science “The art and science of baking” Ph.no.09996000499
Part 2: Techniques for Using EggsHow to Make Meringue for Pies
There are just a few easy steps tomaking delectable and attractivemeringue toppings for pie. In thissection, you will top an unusuallemon pie. What makes it unusual?Both cream and orange juice areadded to the filling. Of course,you can top any cream pie the sameway.
Meringues can be dreamy smooth,sweet, and melt-in-your-mouth. Theyare simple to make—just follow a few steps.
1. Bring the eggs to room temperature. Egg whites whip better atmoderate temperatures. Instead of leaving the eggs on the counter(where they are invariably forgotten and sit out for too long) immerseonly the eggs that you will use in warm (not hot) water for fiveminutes.
2. Make sure that the bowls and beaters are immaculately clean. Anyfat will reduce the egg white volume. Use stainless or glass bowls,not plastic since oil may be impregnated into the surfaces of plasticbowls.
3. Separate the whites from the eggs. It is recommended that you usean egg separator so that there is less chance of contaminating youreggs with bacteria on the shell surfaces. An egg separator saves timeand captures more of the egg white. You can purchase an egg separator.
4. Use the three bowl method. Let the white slip into your first smallbowl. Pour the egg yolk into a second bowl. As you complete each egg,pour the egg white into the third bowl in which you will beat the eggwhites. In this way, if you contaminate an egg white with a bit ofyolk, you can put that white aside; you have not contaminated theentire batch of egg whites.
63
Bakery Science “The art and science of baking” Ph.no.09996000499
5. Add 1/2 teaspoon cream of tartar for every three or four largeeggs. The cream of tartar helps to stabilize the eggs and should beadded when the eggs are frothy. Beat the eggs at medium speed untilsoft peaks form, about one minute. Do not beat past this stage. At asoft peak stage, the tips of the soft peaks will bend over.
6. Drizzle the sugar into the egg whiteswith the beaters at slow speed. The sugarwill now help stabilize the egg whitesmore firmly. We prefer to use superfinesugar since it dissolves easier in the eggwhites. Continue at medium speed untilstiff peaks form. At this stage, themeringue should be glossy and the tipsshould stand straight up. Rub a little eggwhite between your fingers to make surethat the sugar has dissolved.
7. Gently fold in the vanilla extract.
8. Spread the meringue over the piefilling. Make sure the meringue is pressedagainst the crust so that it adheres andis less likely to shrink during baking.
9. Bake the meringue at 350 degrees for 15 minutes or until goldenbrown. When baked at higher temperatures, the meringue may not bebaked through. (Placing the meringue on a hot filling helps it bake.)Partially baked meringue is more prone to weeping, as is the personbaking it.
How to Avoid Weeping Meringues
Weeping meringues aren’t very pretty. The meringue pulls back from thecrust, moisture beads on the topping, and a clear liquid forms belowthe crust. It doesn’t hurt the pie but it’s not presentable.
Most weeping seems to be caused by one of two conditions, either thesugar isn’t completely dissolved or the egg whites are not fullycooked.
Here are our suggestions:64
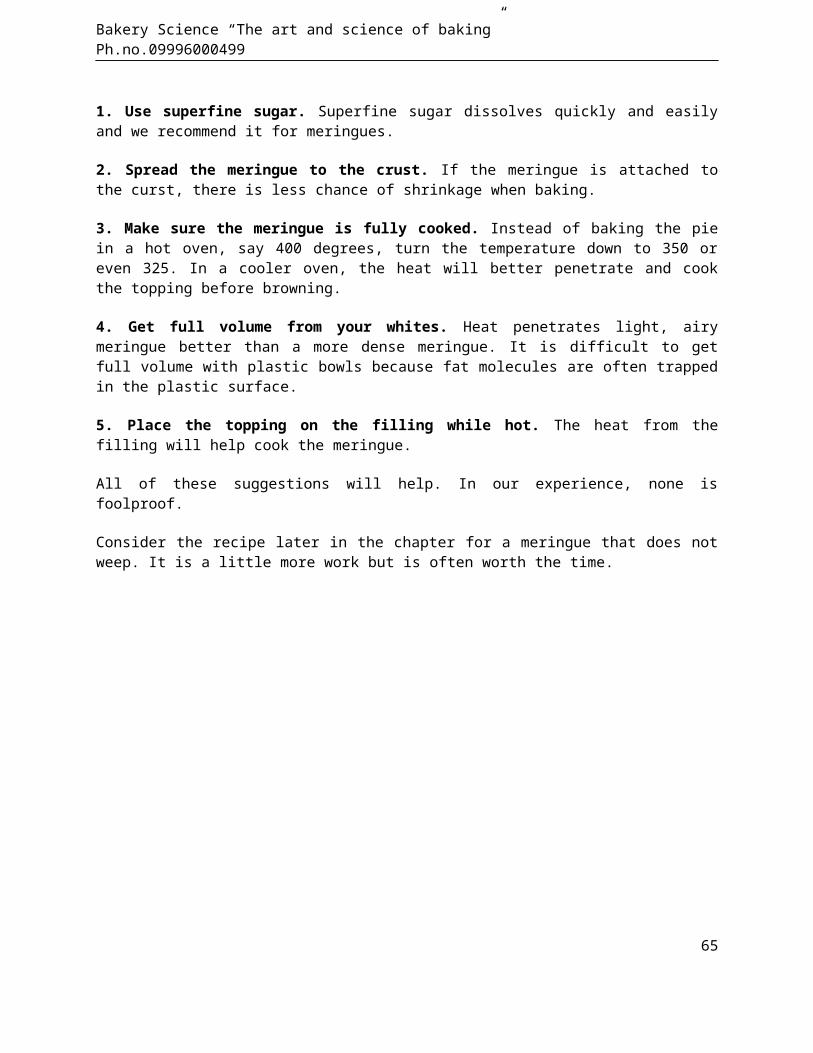
Bakery Science “The art and science of baking” Ph.no.09996000499
1. Use superfine sugar. Superfine sugar dissolves quickly and easilyand we recommend it for meringues.
2. Spread the meringue to the crust. If the meringue is attached tothe curst, there is less chance of shrinkage when baking.
3. Make sure the meringue is fully cooked. Instead of baking the piein a hot oven, say 400 degrees, turn the temperature down to 350 oreven 325. In a cooler oven, the heat will better penetrate and cookthe topping before browning.
4. Get full volume from your whites. Heat penetrates light, airymeringue better than a more dense meringue. It is difficult to getfull volume with plastic bowls because fat molecules are often trappedin the plastic surface.
5. Place the topping on the filling while hot. The heat from thefilling will help cook the meringue.
All of these suggestions will help. In our experience, none isfoolproof.
Consider the recipe later in the chapter for a meringue that does notweep. It is a little more work but is often worth the time.
65
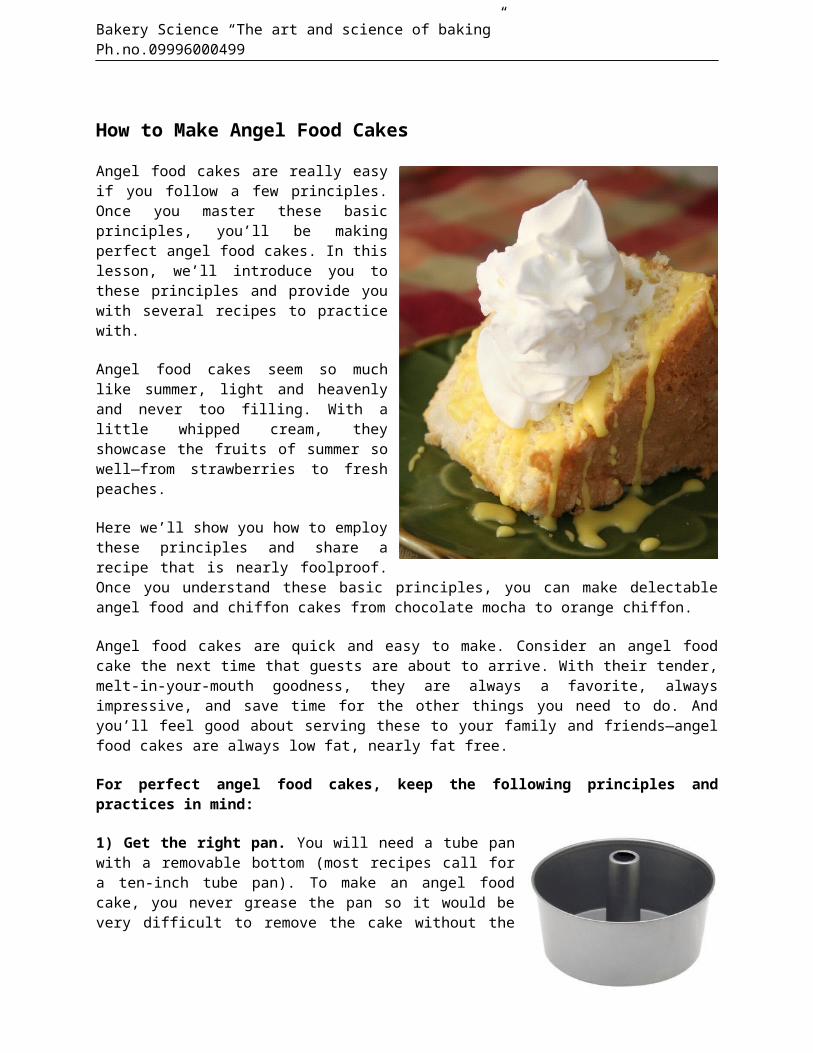
Bakery Science “The art and science of baking” Ph.no.09996000499
How to Make Angel Food Cakes
Angel food cakes are really easyif you follow a few principles.Once you master these basicprinciples, you’ll be makingperfect angel food cakes. In thislesson, we’ll introduce you tothese principles and provide youwith several recipes to practicewith.
Angel food cakes seem so muchlike summer, light and heavenlyand never too filling. With alittle whipped cream, theyshowcase the fruits of summer sowell—from strawberries to freshpeaches.
Here we’ll show you how to employthese principles and share arecipe that is nearly foolproof.Once you understand these basic principles, you can make delectableangel food and chiffon cakes from chocolate mocha to orange chiffon.
Angel food cakes are quick and easy to make. Consider an angel foodcake the next time that guests are about to arrive. With their tender,melt-in-your-mouth goodness, they are always a favorite, alwaysimpressive, and save time for the other things you need to do. Andyou’ll feel good about serving these to your family and friends—angelfood cakes are always low fat, nearly fat free.
For perfect angel food cakes, keep the following principles andpractices in mind:
1) Get the right pan. You will need a tube panwith a removable bottom (most recipes call fora ten-inch tube pan). To make an angel foodcake, you never grease the pan so it would bevery difficult to remove the cake without the
66
Bakery Science “The art and science of baking” Ph.no.09996000499
removable bottom of the tube pan. If you have trouble slicing such alarge, light cake, you may want to try a mini angel food cake pan,which creates single servings.
2) Beat the egg whites right. The main ingredient in angel food cakesis the egg whites. They are beaten to a foam to provide the leavening;usually there is no baking powder called for in the recipe.
a)Make sure that no grease or fat touches the egg whites. Just atiny bit of fat interferes with the foam formation. Make surethat the pan, the beaters, the bowl, and any other utensils areclean, dry, and grease free. This is easier to achieve with aglass or stainless steel bowl instead of plastic.
b) Separate the whites from the yolks while the eggs are cold.Theeggs are thicker and easier to separate while cold. You may wantto use an egg separator.
c) Separate the eggs one at a time into a cup. If you get a bitof yolk in the white, set it aside. That white will fail toperform and if you mix it with the other whites, the whole batchwill fail. Continue with a clean cup. After each egg white issuccessfully separated, pour it into the bowl that will be usedfor beating.
d)Whip the whites until glossy peaks form. Start at medium speedwith your hand-held mixer. As the foam begins to develop,increase the speed. Fold in ingredients as called for in therecipe. Do not over whip. If the egg whites are beaten too long,they will become dry and gritty and will ruin the cake.
3) Add the sugar after the whites have begun to hold their shape. Ifyou add the sugar too soon, the whites will be soft and sticky. Addthe sugar in a slow stream, not all at once.
4) Fold the other ingredients gently into the egg whites. Use aspatula and gently reach to the bottom of the bowl and lift the eggwhites through the mixture in an up and down, folding motion. Do notover mix. The other ingredients need to be uniformly dispersed butover mixing will drive the entrained air from the mixture and causethe cake to lose volume.
67
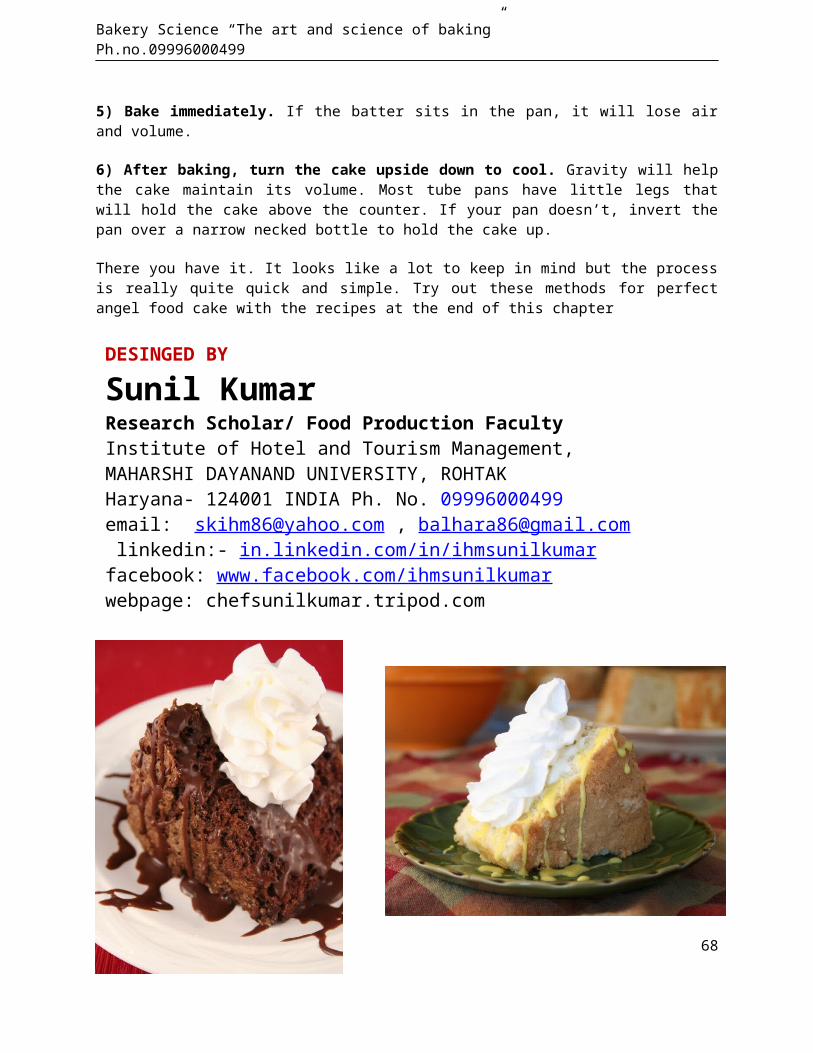
Bakery Science “The art and science of baking” Ph.no.09996000499
5) Bake immediately. If the batter sits in the pan, it will lose airand volume.
6) After baking, turn the cake upside down to cool. Gravity will helpthe cake maintain its volume. Most tube pans have little legs thatwill hold the cake above the counter. If your pan doesn’t, invert thepan over a narrow necked bottle to hold the cake up.
There you have it. It looks like a lot to keep in mind but the processis really quite quick and simple. Try out these methods for perfectangel food cake with the recipes at the end of this chapter
68
DESINGED BY
Sunil KumarResearch Scholar/ Food Production FacultyInstitute of Hotel and Tourism Management,MAHARSHI DAYANAND UNIVERSITY, ROHTAKHaryana- 124001 INDIA Ph. No. 09996000499email: [email protected] , [email protected] linkedin:- in.linkedin.com/in/ihmsunilkumarfacebook: www.facebook.com/ihmsunilkumar webpage: chefsunilkumar.tripod.com
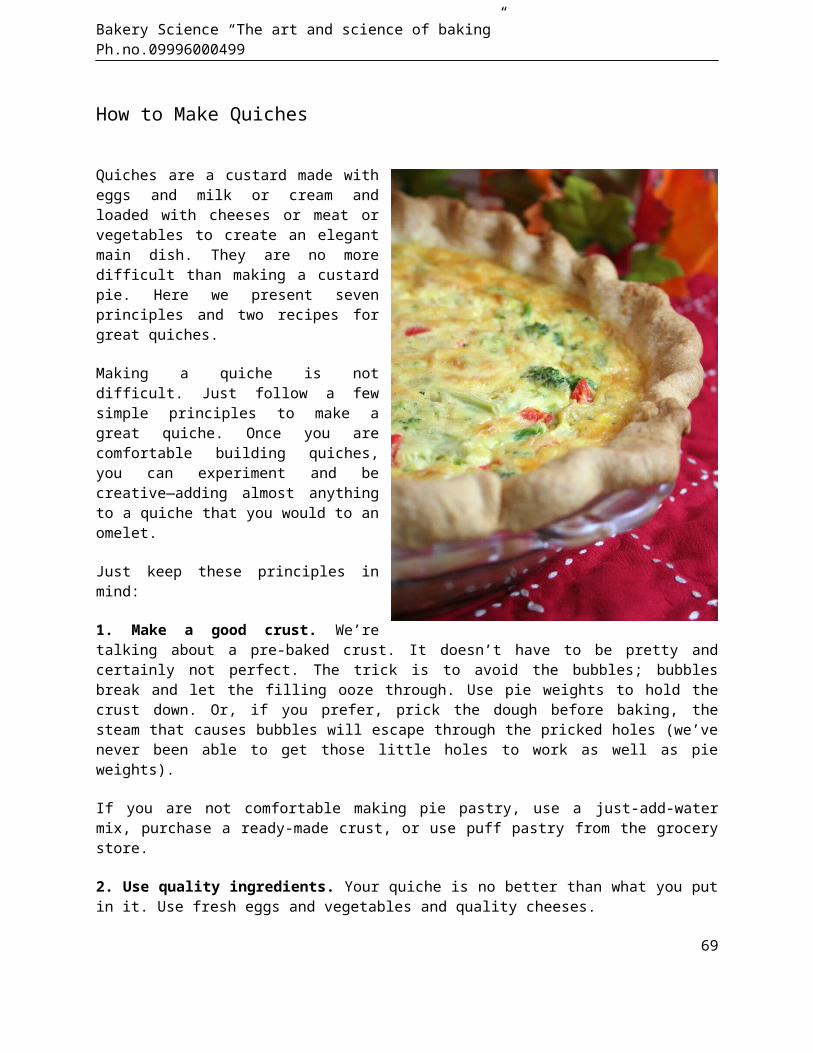
Bakery Science “The art and science of baking” Ph.no.09996000499
How to Make Quiches
Quiches are a custard made witheggs and milk or cream andloaded with cheeses or meat orvegetables to create an elegantmain dish. They are no moredifficult than making a custardpie. Here we present sevenprinciples and two recipes forgreat quiches.
Making a quiche is notdifficult. Just follow a fewsimple principles to make agreat quiche. Once you arecomfortable building quiches,you can experiment and becreative—adding almost anythingto a quiche that you would to anomelet.
Just keep these principles inmind:
1. Make a good crust. We’retalking about a pre-baked crust. It doesn’t have to be pretty andcertainly not perfect. The trick is to avoid the bubbles; bubblesbreak and let the filling ooze through. Use pie weights to hold thecrust down. Or, if you prefer, prick the dough before baking, thesteam that causes bubbles will escape through the pricked holes (we’venever been able to get those little holes to work as well as pieweights).
If you are not comfortable making pie pastry, use a just-add-watermix, purchase a ready-made crust, or use puff pastry from the grocerystore.
2. Use quality ingredients. Your quiche is no better than what you putin it. Use fresh eggs and vegetables and quality cheeses.
69

Bakery Science “The art and science of baking” Ph.no.09996000499
3. Chop the ingredients finely. Coarsely cut ingredients make it verydifficult to obtain attractive slices.
4. Get enough eggs. It’s the eggs that coagulate when baked to createa firm, clean quiche. The ratio of eggs to liquid has to be highenough. Make certain that there are at least two eggs for every onecup of liquid. This will keep your quiche from becoming too soggy.
5. Cook it right. Bake it at 325 degrees.Higher temperatures increase the risk ofover-cooking and curdling.
6. Cover the edges with foil. To get thequiche baked properly often requires enoughtime that the edges of the crust over-brown.Half way through the baking, cover the edgeswith foil or a pie shield so that you won’tover-brown the crusts.
7. Get it cooked. The center of the quichehas to reach at least 160 degrees for theprotein in the eggs to coagulate. But asimple test is to simply slip a knife blade into the center of thequiche. If cooked, it should come out clean. Your knife test is moreimportant than the number of minutes in the recipe.
Consider Pie Weights for that Pre-baked Crust
Pie crusts are made with water or milk and baked in a hot oven. In ahot oven, the liquid turns to steam and bubbles form in the crust.Where the bubbles collapse, the pie filling leaks through the crust.One way to avoid blisters is to prick the crust with the tines of afork to vent the steam but often, this is only partially effective.There is a better way—pie weights.
We use three different kinds of pieweights:
Beans or Rice: You don’t have to buyexpensive weights—beans or rice willdo. Line the shell with aluminum foiland then place the beans or rice in
70
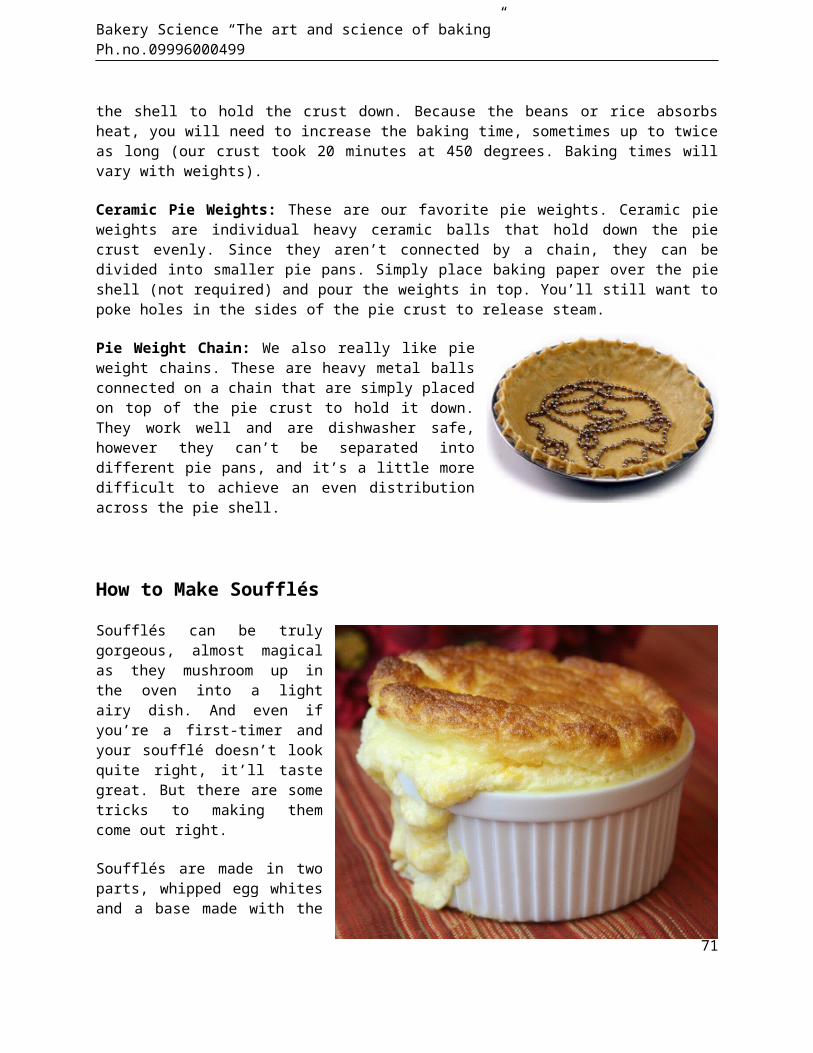
Bakery Science “The art and science of baking” Ph.no.09996000499
the shell to hold the crust down. Because the beans or rice absorbsheat, you will need to increase the baking time, sometimes up to twiceas long (our crust took 20 minutes at 450 degrees. Baking times willvary with weights).
Ceramic Pie Weights: These are our favorite pie weights. Ceramic pieweights are individual heavy ceramic balls that hold down the piecrust evenly. Since they aren’t connected by a chain, they can bedivided into smaller pie pans. Simply place baking paper over the pieshell (not required) and pour the weights in top. You’ll still want topoke holes in the sides of the pie crust to release steam.
Pie Weight Chain: We also really like pieweight chains. These are heavy metal ballsconnected on a chain that are simply placedon top of the pie crust to hold it down.They work well and are dishwasher safe,however they can’t be separated intodifferent pie pans, and it’s a little moredifficult to achieve an even distributionacross the pie shell.
How to Make Soufflés
Soufflés can be trulygorgeous, almost magicalas they mushroom up inthe oven into a lightairy dish. And even ifyou’re a first-timer andyour soufflé doesn’t lookquite right, it’ll tastegreat. But there are sometricks to making themcome out right.
Soufflés are made in twoparts, whipped egg whitesand a base made with the
71
Bakery Science “The art and science of baking” Ph.no.09996000499
other ingredients including such things as a cheese sauce orchocolate. Since the base holds the flavor, make the flavor intensebecause it will be diluted with the addition of the egg whites.
Beat the egg whites properly. It’s the air trapped in the egg whitesthat causes the dramatic expansion of the soufflé in the oven. Youwant the egg white to remain elastic. Beat the egg whites just untilsoft peaks form, add the sugar if the recipe calls for it, and thenbeat until stiff peaks form. Cream of tarter will help the egg whitesdevelop.
Fold the egg whites into the base carefully. Stir about a cup of theegg whites into the base to lighten the base then gradually fold inthe remaining egg whites. Use a spatula to cut through the whites andgently lift the base through the foam in an up and down motion onlyuntil the two parts are combined.
72
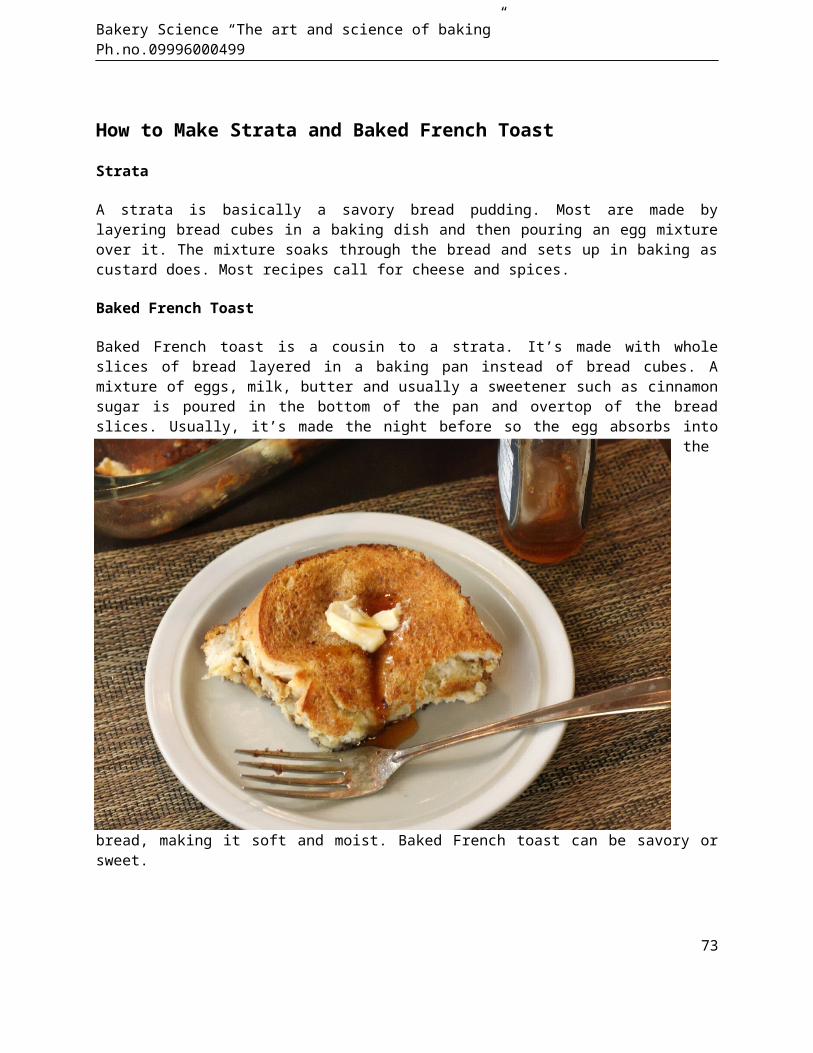
Bakery Science “The art and science of baking” Ph.no.09996000499
How to Make Strata and Baked French Toast
Strata
A strata is basically a savory bread pudding. Most are made bylayering bread cubes in a baking dish and then pouring an egg mixtureover it. The mixture soaks through the bread and sets up in baking ascustard does. Most recipes call for cheese and spices.
Baked French Toast
Baked French toast is a cousin to a strata. It’s made with wholeslices of bread layered in a baking pan instead of bread cubes. Amixture of eggs, milk, butter and usually a sweetener such as cinnamonsugar is poured in the bottom of the pan and overtop of the breadslices. Usually, it’s made the night before so the egg absorbs into
the
bread, making it soft and moist. Baked French toast can be savory orsweet.
73
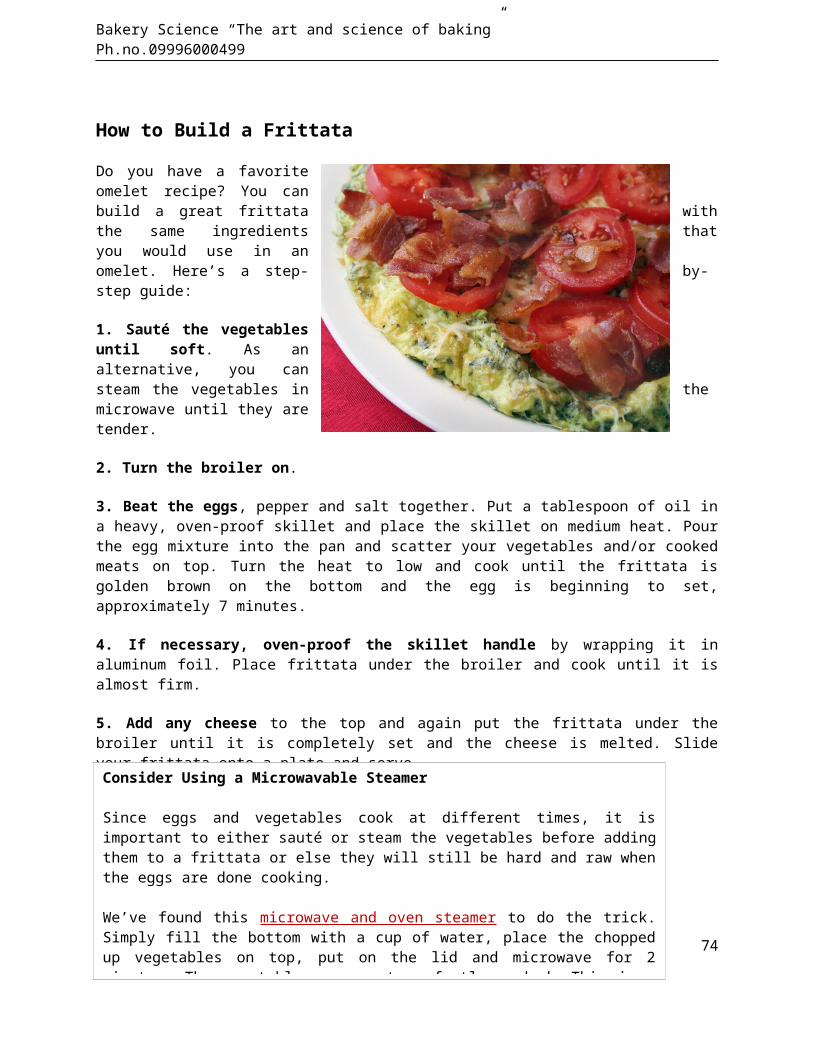
Bakery Science “The art and science of baking” Ph.no.09996000499
How to Build a Frittata
Do you have a favoriteomelet recipe? You canbuild a great frittata withthe same ingredients thatyou would use in anomelet. Here’s a step- by-step guide:
1. Sauté the vegetablesuntil soft. As analternative, you cansteam the vegetables in themicrowave until they aretender.
2. Turn the broiler on.
3. Beat the eggs, pepper and salt together. Put a tablespoon of oil ina heavy, oven-proof skillet and place the skillet on medium heat. Pourthe egg mixture into the pan and scatter your vegetables and/or cookedmeats on top. Turn the heat to low and cook until the frittata isgolden brown on the bottom and the egg is beginning to set,approximately 7 minutes.
4. If necessary, oven-proof the skillet handle by wrapping it inaluminum foil. Place frittata under the broiler and cook until it isalmost firm.
5. Add any cheese to the top and again put the frittata under thebroiler until it is completely set and the cheese is melted. Slideyour frittata onto a plate and serve.
74
Consider Using a Microwavable Steamer
Since eggs and vegetables cook at different times, it isimportant to either sauté or steam the vegetables before addingthem to a frittata or else they will still be hard and raw whenthe eggs are done cooking.
We’ve found this microwave and oven steamer to do the trick.Simply fill the bottom with a cup of water, place the choppedup vegetables on top, put on the lid and microwave for 2minutes. The vegetables come out perfectly cooked. This is a
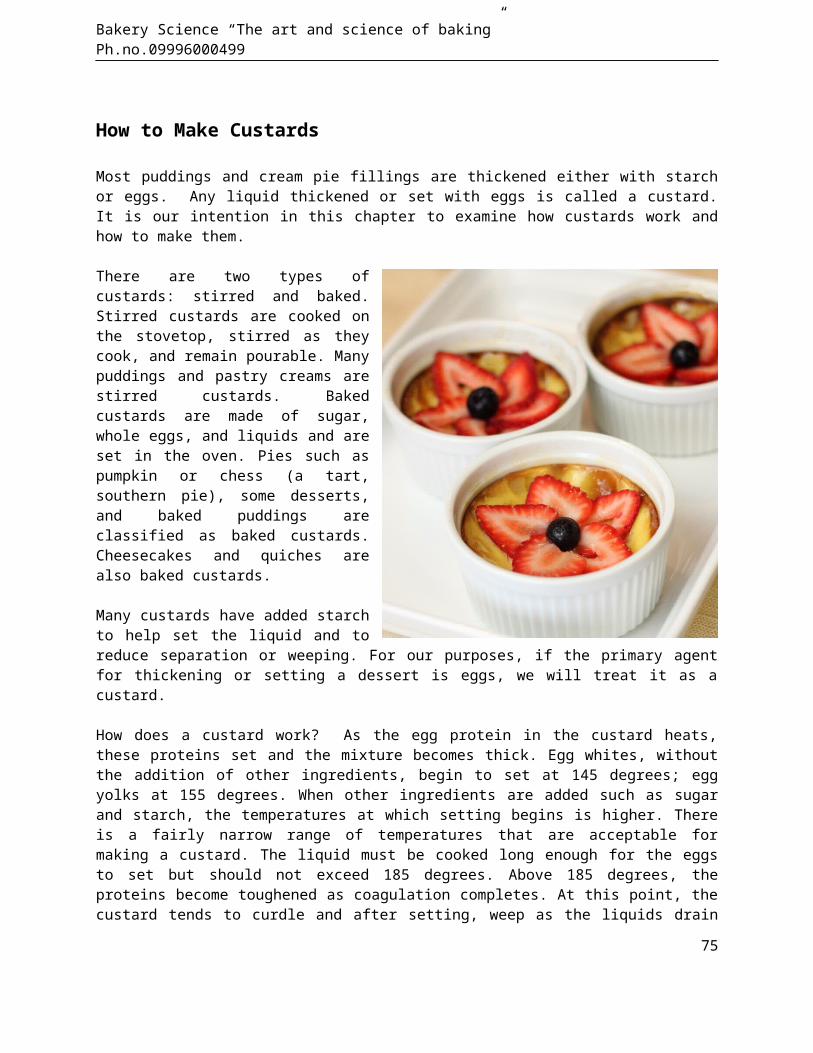
Bakery Science “The art and science of baking” Ph.no.09996000499
How to Make Custards
Most puddings and cream pie fillings are thickened either with starchor eggs. Any liquid thickened or set with eggs is called a custard.It is our intention in this chapter to examine how custards work andhow to make them.
There are two types ofcustards: stirred and baked.Stirred custards are cooked onthe stovetop, stirred as theycook, and remain pourable. Manypuddings and pastry creams arestirred custards. Bakedcustards are made of sugar,whole eggs, and liquids and areset in the oven. Pies such aspumpkin or chess (a tart,southern pie), some desserts,and baked puddings areclassified as baked custards.Cheesecakes and quiches arealso baked custards.
Many custards have added starchto help set the liquid and toreduce separation or weeping. For our purposes, if the primary agentfor thickening or setting a dessert is eggs, we will treat it as acustard.
How does a custard work? As the egg protein in the custard heats,these proteins set and the mixture becomes thick. Egg whites, withoutthe addition of other ingredients, begin to set at 145 degrees; eggyolks at 155 degrees. When other ingredients are added such as sugarand starch, the temperatures at which setting begins is higher. Thereis a fairly narrow range of temperatures that are acceptable formaking a custard. The liquid must be cooked long enough for the eggsto set but should not exceed 185 degrees. Above 185 degrees, theproteins become toughened as coagulation completes. At this point, thecustard tends to curdle and after setting, weep as the liquids drain
75
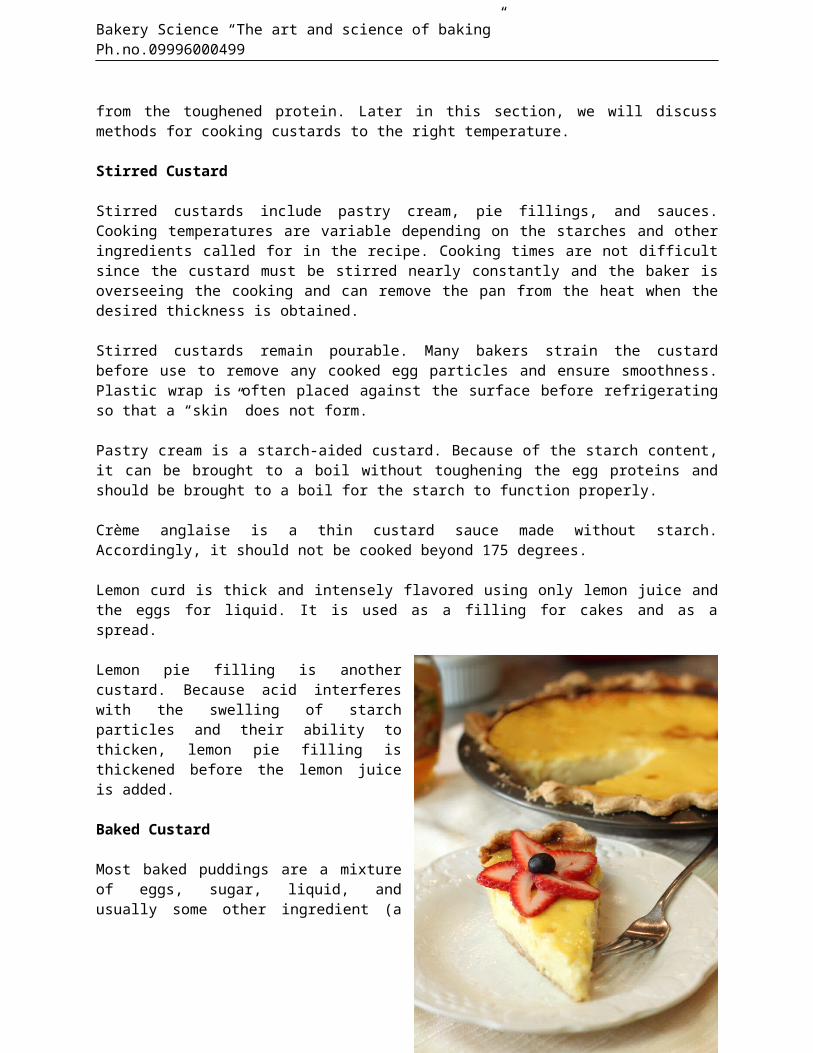
Bakery Science “The art and science of baking” Ph.no.09996000499
from the toughened protein. Later in this section, we will discussmethods for cooking custards to the right temperature.
Stirred Custard
Stirred custards include pastry cream, pie fillings, and sauces.Cooking temperatures are variable depending on the starches and otheringredients called for in the recipe. Cooking times are not difficultsince the custard must be stirred nearly constantly and the baker isoverseeing the cooking and can remove the pan from the heat when thedesired thickness is obtained.
Stirred custards remain pourable. Many bakers strain the custardbefore use to remove any cooked egg particles and ensure smoothness.Plastic wrap is often placed against the surface before refrigeratingso that a “skin” does not form.
Pastry cream is a starch-aided custard. Because of the starch content,it can be brought to a boil without toughening the egg proteins andshould be brought to a boil for the starch to function properly.
Crème anglaise is a thin custard sauce made without starch.Accordingly, it should not be cooked beyond 175 degrees.
Lemon curd is thick and intensely flavored using only lemon juice andthe eggs for liquid. It is used as a filling for cakes and as aspread.
Lemon pie filling is anothercustard. Because acid interfereswith the swelling of starchparticles and their ability tothicken, lemon pie filling isthickened before the lemon juiceis added.
Baked Custard
Most baked puddings are a mixtureof eggs, sugar, liquid, andusually some other ingredient (a
76
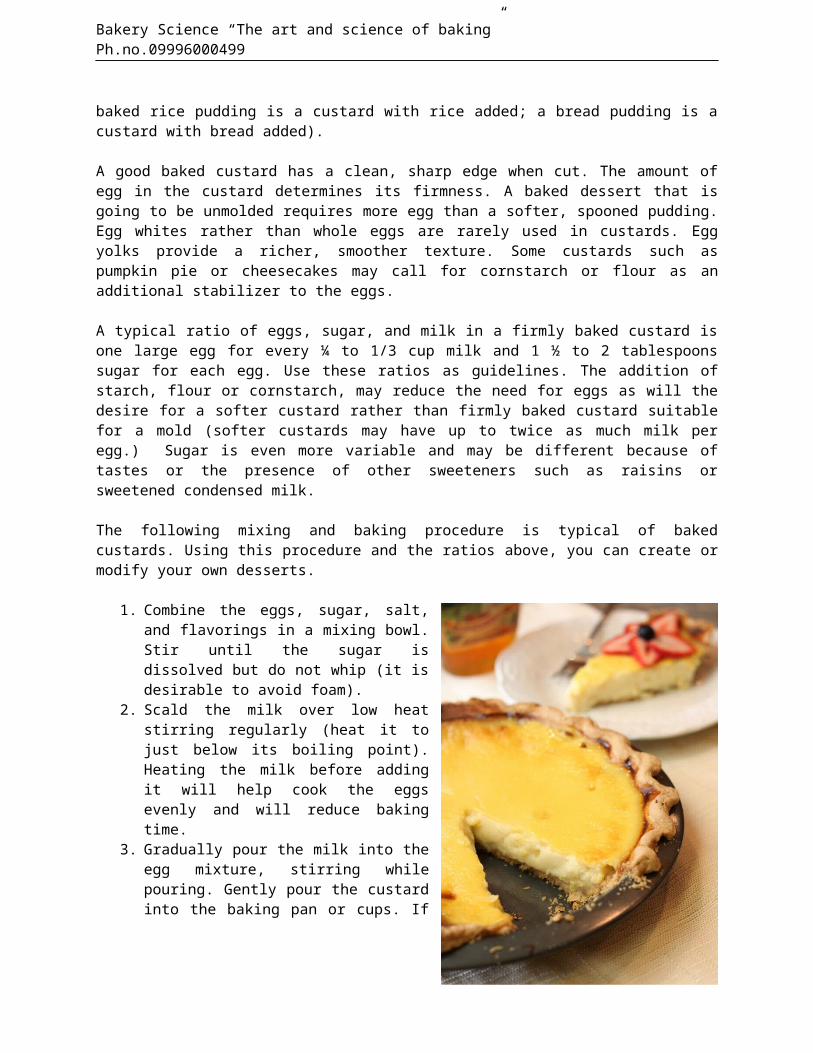
Bakery Science “The art and science of baking” Ph.no.09996000499
baked rice pudding is a custard with rice added; a bread pudding is acustard with bread added).
A good baked custard has a clean, sharp edge when cut. The amount ofegg in the custard determines its firmness. A baked dessert that isgoing to be unmolded requires more egg than a softer, spooned pudding.Egg whites rather than whole eggs are rarely used in custards. Eggyolks provide a richer, smoother texture. Some custards such aspumpkin pie or cheesecakes may call for cornstarch or flour as anadditional stabilizer to the eggs.
A typical ratio of eggs, sugar, and milk in a firmly baked custard isone large egg for every ¼ to 1/3 cup milk and 1 ½ to 2 tablespoonssugar for each egg. Use these ratios as guidelines. The addition ofstarch, flour or cornstarch, may reduce the need for eggs as will thedesire for a softer custard rather than firmly baked custard suitablefor a mold (softer custards may have up to twice as much milk peregg.) Sugar is even more variable and may be different because oftastes or the presence of other sweeteners such as raisins orsweetened condensed milk.
The following mixing and baking procedure is typical of bakedcustards. Using this procedure and the ratios above, you can create ormodify your own desserts.
1. Combine the eggs, sugar, salt,and flavorings in a mixing bowl.Stir until the sugar isdissolved but do not whip (it isdesirable to avoid foam).
2. Scald the milk over low heatstirring regularly (heat it tojust below its boiling point).Heating the milk before addingit will help cook the eggsevenly and will reduce bakingtime.
3. Gradually pour the milk into theegg mixture, stirring whilepouring. Gently pour the custardinto the baking pan or cups. If
77
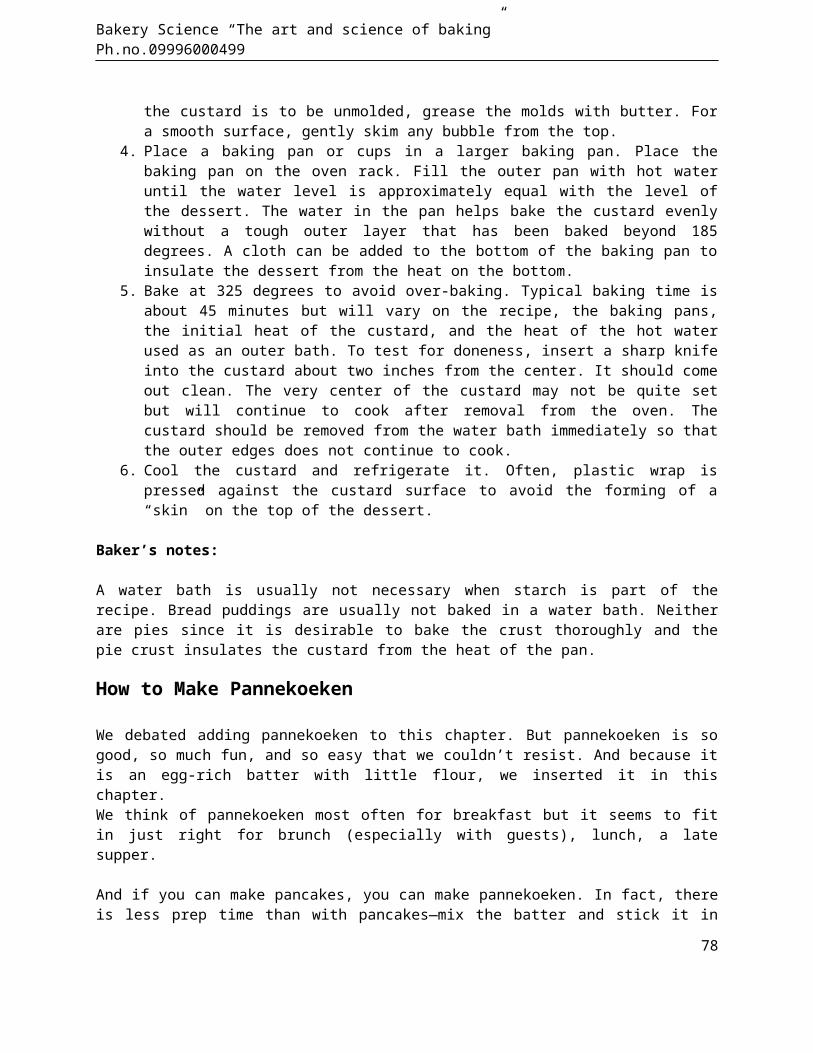
Bakery Science “The art and science of baking” Ph.no.09996000499
the custard is to be unmolded, grease the molds with butter. Fora smooth surface, gently skim any bubble from the top.
4. Place a baking pan or cups in a larger baking pan. Place thebaking pan on the oven rack. Fill the outer pan with hot wateruntil the water level is approximately equal with the level ofthe dessert. The water in the pan helps bake the custard evenlywithout a tough outer layer that has been baked beyond 185degrees. A cloth can be added to the bottom of the baking pan toinsulate the dessert from the heat on the bottom.
5. Bake at 325 degrees to avoid over-baking. Typical baking time isabout 45 minutes but will vary on the recipe, the baking pans,the initial heat of the custard, and the heat of the hot waterused as an outer bath. To test for doneness, insert a sharp knifeinto the custard about two inches from the center. It should comeout clean. The very center of the custard may not be quite setbut will continue to cook after removal from the oven. Thecustard should be removed from the water bath immediately so thatthe outer edges does not continue to cook.
6. Cool the custard and refrigerate it. Often, plastic wrap ispressed against the custard surface to avoid the forming of a“skin” on the top of the dessert.
Baker’s notes:
A water bath is usually not necessary when starch is part of therecipe. Bread puddings are usually not baked in a water bath. Neitherare pies since it is desirable to bake the crust thoroughly and thepie crust insulates the custard from the heat of the pan.
How to Make Pannekoeken
We debated adding pannekoeken to this chapter. But pannekoeken is sogood, so much fun, and so easy that we couldn’t resist. And because itis an egg-rich batter with little flour, we inserted it in thischapter. We think of pannekoeken most often for breakfast but it seems to fitin just right for brunch (especially with guests), lunch, a latesupper.
And if you can make pancakes, you can make pannekoeken. In fact, thereis less prep time than with pancakes—mix the batter and stick it in
78

Bakery Science “The art and science of baking” Ph.no.09996000499
the oven. (In our test kitchen with the ingredients sitting on thecounter, we were 2 1/2 minutes to the oven.) They are great withouttoppings and sublime with toppings.
Here are the steps to making easy pannekoeken:
1. Place one-half cube of butter in a pannekoeken (Dutch Baby) panor an ovenproof skillet with rounded sides. (You can make a finepannekoeken with an ovenproof skillet; it’s a little easier witha pannekoeken pan. You can purchase one on our site.)
2. Pannekoeken puffs up in a hot oven. Preheat your oven to 400 or425 degrees depending on the recipe. Put the rack in the center,not the top, shelf. When you turn the oven on, place the pan withthe butter in the oven. When the oven reaches 250 degrees thebutter should be melted. Remove the pan from the oven.
3. Whisk the eggs and the salt in a medium bowl. Add the milk. Whiskin the flour until nearly smooth (a whisk makes mixing easierthan a spoon). Your batter is now ready.
4. Pour the batter into the pan. Cover with toppings if desired.Bake. Serve hot.
Pannekoeken makes an excellent canvas for your imagination. When welived in Minnesota there was a chain of pannekoeken restaurants. Theyserved these Dutch pancakes with all types of toppings, some cookedinto the batter but often used as toppings after the pancake is baked.
Apples are the classic complement to pannekoeken. They can be cookedin the batter, sautéed, made into a compote (a French dessertconsisting of fruit in sugar syrup), or simply sliced thinly and usedas a topping. But meats, cheeses, andvegetables work also, especially for a dinneror lunch dish. When made with meats orvegetables, leave them as they are or drizzlethem with a white sauce, a cheese sauce, orsyrup. Here are some suggestions to get you started.
Traditional Pannekoeken Apple and Bacon Pannekoeken Sausage, pears, and dried cherries Sautéed apples in brown sugar and cinnamon
79

Bakery Science “The art and science of baking” Ph.no.09996000499
Apples and sausage Blueberries and cottage cheese Bananas and pecans Peaches and honey raisin sauce
Let your imagination reign. You will find recipes for the first twosuggestions at the end of this chapter, or you can always try using aPannekoeken mix.
80
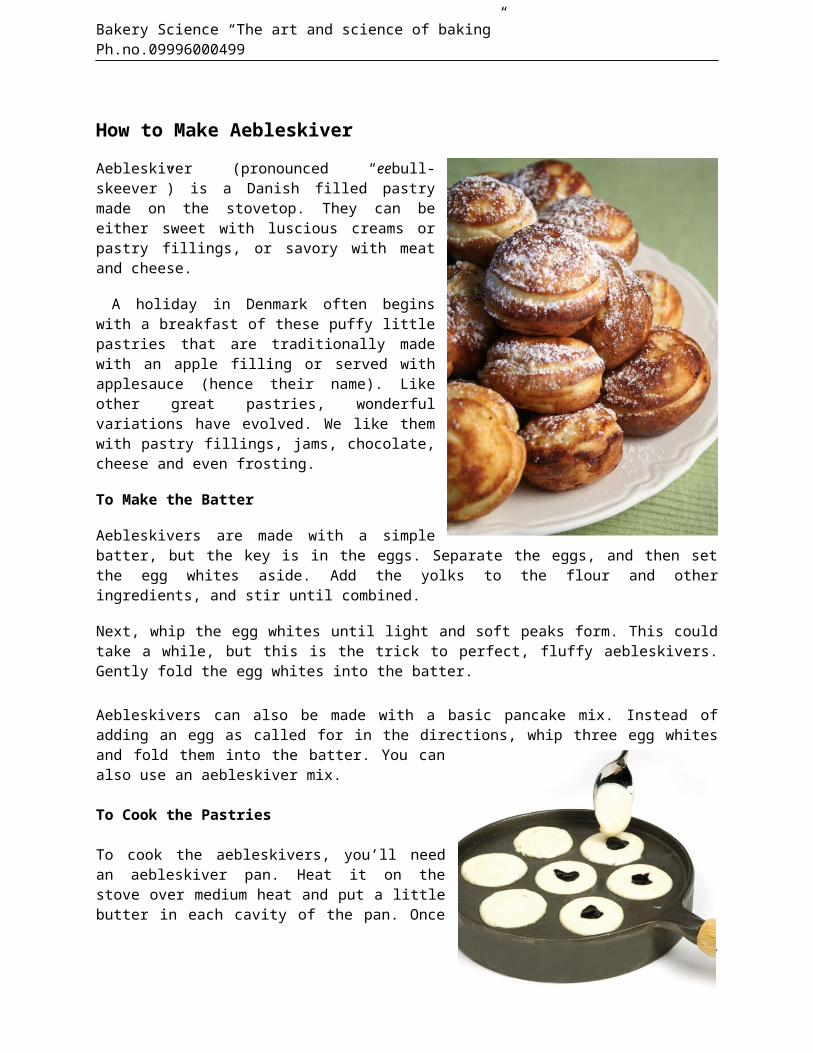
Bakery Science “The art and science of baking” Ph.no.09996000499
How to Make AebleskiverAebleskiver (pronounced “eebull-skeever”) is a Danish filled pastrymade on the stovetop. They can beeither sweet with luscious creams orpastry fillings, or savory with meatand cheese.
A holiday in Denmark often beginswith a breakfast of these puffy littlepastries that are traditionally madewith an apple filling or served withapplesauce (hence their name). Likeother great pastries, wonderfulvariations have evolved. We like themwith pastry fillings, jams, chocolate,cheese and even frosting.
To Make the Batter
Aebleskivers are made with a simplebatter, but the key is in the eggs. Separate the eggs, and then setthe egg whites aside. Add the yolks to the flour and otheringredients, and stir until combined.
Next, whip the egg whites until light and soft peaks form. This couldtake a while, but this is the trick to perfect, fluffy aebleskivers.Gently fold the egg whites into the batter.
Aebleskivers can also be made with a basic pancake mix. Instead ofadding an egg as called for in the directions, whip three egg whitesand fold them into the batter. You canalso use an aebleskiver mix.
To Cook the Pastries
To cook the aebleskivers, you’ll needan aebleskiver pan. Heat it on thestove over medium heat and put a littlebutter in each cavity of the pan. Once
81
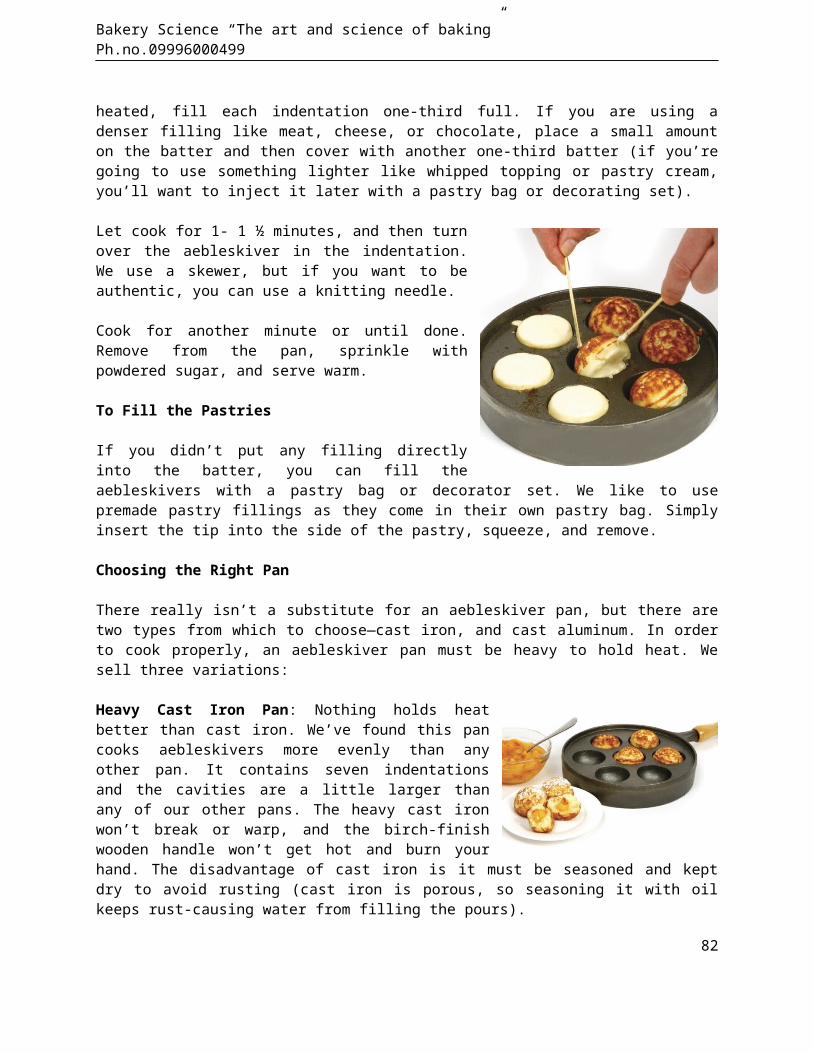
Bakery Science “The art and science of baking” Ph.no.09996000499
heated, fill each indentation one-third full. If you are using adenser filling like meat, cheese, or chocolate, place a small amounton the batter and then cover with another one-third batter (if you’regoing to use something lighter like whipped topping or pastry cream,you’ll want to inject it later with a pastry bag or decorating set).
Let cook for 1- 1 ½ minutes, and then turnover the aebleskiver in the indentation.We use a skewer, but if you want to beauthentic, you can use a knitting needle.
Cook for another minute or until done.Remove from the pan, sprinkle withpowdered sugar, and serve warm.
To Fill the Pastries
If you didn’t put any filling directlyinto the batter, you can fill theaebleskivers with a pastry bag or decorator set. We like to usepremade pastry fillings as they come in their own pastry bag. Simplyinsert the tip into the side of the pastry, squeeze, and remove.
Choosing the Right Pan
There really isn’t a substitute for an aebleskiver pan, but there aretwo types from which to choose—cast iron, and cast aluminum. In orderto cook properly, an aebleskiver pan must be heavy to hold heat. Wesell three variations:
Heavy Cast Iron Pan: Nothing holds heatbetter than cast iron. We’ve found this pancooks aebleskivers more evenly than anyother pan. It contains seven indentationsand the cavities are a little larger thanany of our other pans. The heavy cast ironwon’t break or warp, and the birch-finishwooden handle won’t get hot and burn yourhand. The disadvantage of cast iron is it must be seasoned and keptdry to avoid rusting (cast iron is porous, so seasoning it with oilkeeps rust-causing water from filling the pours).
82
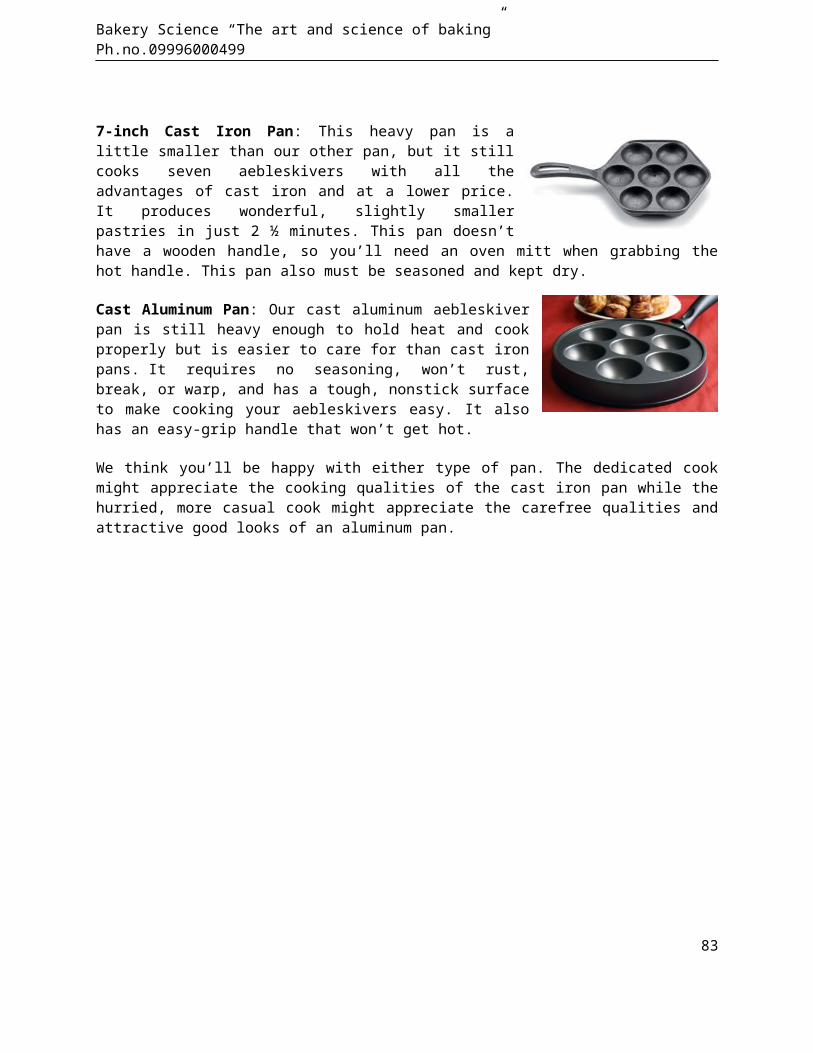
Bakery Science “The art and science of baking” Ph.no.09996000499
7-inch Cast Iron Pan: This heavy pan is alittle smaller than our other pan, but it stillcooks seven aebleskivers with all theadvantages of cast iron and at a lower price.It produces wonderful, slightly smallerpastries in just 2 ½ minutes. This pan doesn’thave a wooden handle, so you’ll need an oven mitt when grabbing thehot handle. This pan also must be seasoned and kept dry.
Cast Aluminum Pan: Our cast aluminum aebleskiverpan is still heavy enough to hold heat and cookproperly but is easier to care for than cast ironpans. It requires no seasoning, won’t rust,break, or warp, and has a tough, nonstick surfaceto make cooking your aebleskivers easy. It alsohas an easy-grip handle that won’t get hot.
We think you’ll be happy with either type of pan. The dedicated cookmight appreciate the cooking qualities of the cast iron pan while thehurried, more casual cook might appreciate the carefree qualities andattractive good looks of an aluminum pan.
83
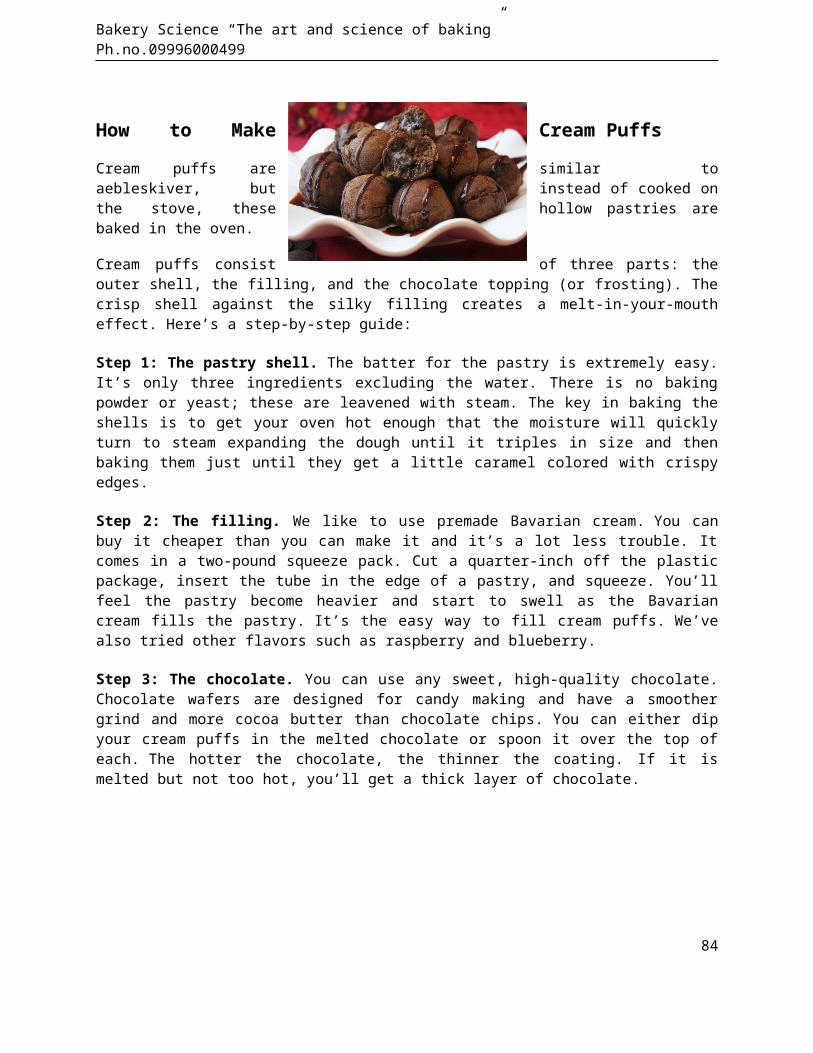
Bakery Science “The art and science of baking” Ph.no.09996000499
How to Make Cream PuffsCream puffs are similar toaebleskiver, but instead of cooked onthe stove, these hollow pastries arebaked in the oven.
Cream puffs consist of three parts: theouter shell, the filling, and the chocolate topping (or frosting). Thecrisp shell against the silky filling creates a melt-in-your-moutheffect. Here’s a step-by-step guide:
Step 1: The pastry shell. The batter for the pastry is extremely easy.It’s only three ingredients excluding the water. There is no bakingpowder or yeast; these are leavened with steam. The key in baking theshells is to get your oven hot enough that the moisture will quicklyturn to steam expanding the dough until it triples in size and thenbaking them just until they get a little caramel colored with crispyedges.
Step 2: The filling. We like to use premade Bavarian cream. You canbuy it cheaper than you can make it and it’s a lot less trouble. Itcomes in a two-pound squeeze pack. Cut a quarter-inch off the plasticpackage, insert the tube in the edge of a pastry, and squeeze. You’llfeel the pastry become heavier and start to swell as the Bavariancream fills the pastry. It’s the easy way to fill cream puffs. We’vealso tried other flavors such as raspberry and blueberry.
Step 3: The chocolate. You can use any sweet, high-quality chocolate.Chocolate wafers are designed for candy making and have a smoothergrind and more cocoa butter than chocolate chips. You can either dipyour cream puffs in the melted chocolate or spoon it over the top ofeach. The hotter the chocolate, the thinner the coating. If it ismelted but not too hot, you’ll get a thick layer of chocolate.
84
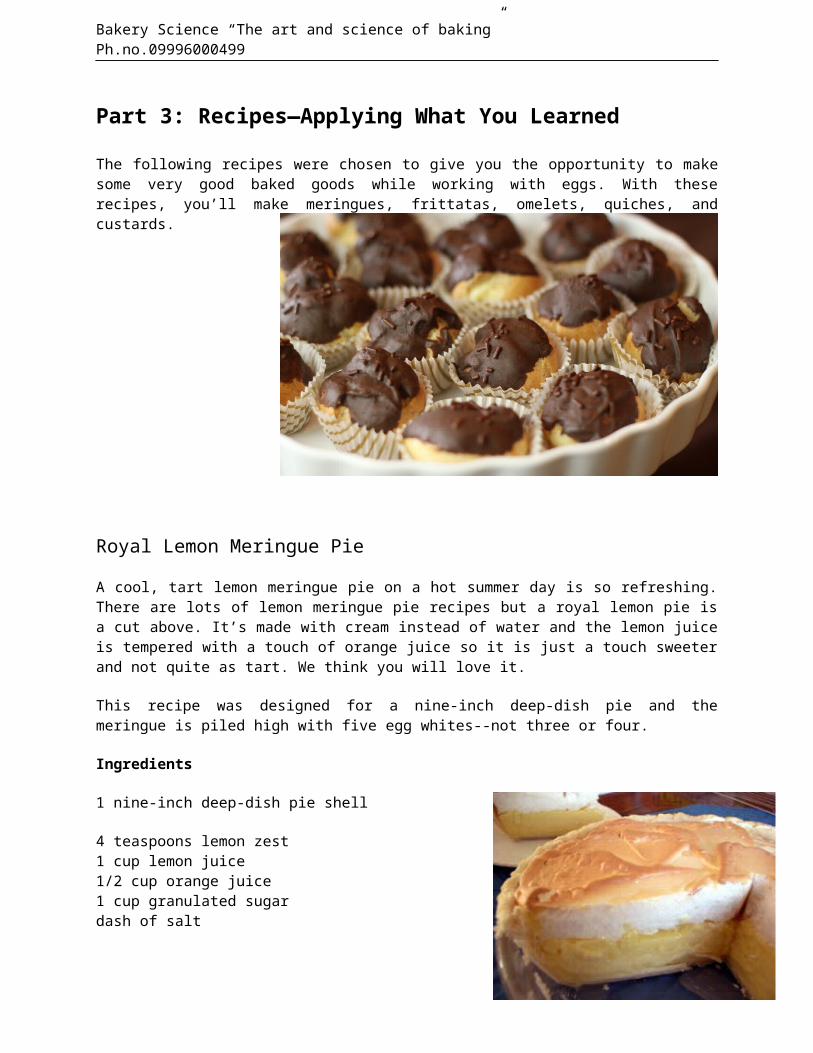
Bakery Science “The art and science of baking” Ph.no.09996000499
Part 3: Recipes—Applying What You Learned
The following recipes were chosen to give you the opportunity to makesome very good baked goods while working with eggs. With theserecipes, you’ll make meringues, frittatas, omelets, quiches, andcustards.
Royal Lemon Meringue Pie
A cool, tart lemon meringue pie on a hot summer day is so refreshing.There are lots of lemon meringue pie recipes but a royal lemon pie isa cut above. It’s made with cream instead of water and the lemon juiceis tempered with a touch of orange juice so it is just a touch sweeterand not quite as tart. We think you will love it.
This recipe was designed for a nine-inch deep-dish pie and themeringue is piled high with five egg whites--not three or four.
Ingredients
1 nine-inch deep-dish pie shell
4 teaspoons lemon zest1 cup lemon juice1/2 cup orange juice1 cup granulated sugar dash of salt
85
Bakery Science “The art and science of baking” Ph.no.09996000499
1/3 cup cornstarch1 cup whipping cream3 large eggs, whisked5 large egg yolks
1/4 cup butter
5 large egg whites1/2 teaspoon cream of tartar1/2 cup granulated sugar, preferably superfine1 teaspoon vanilla extract
Directions
1. Bake the pie shell at 450 degrees for about ten minutes or untilit just starts to turn brown on the edges. It will help the pieshell keep its shape during baking if you line the shell withaluminum foil and then place beans, rice, or pie shell weights inthe shell to hold the crust down.
2. Grate the zest from one large lemon or two small lemons. Avoidthe white, pithy part of the peel for it is bitter. Add the zestto a saucepan with the lemon juice, orange juice, sugar, andsalt. Stir and heat until it just starts to boil.
3. While the filling is beginning to heat, mix the cornstarch withthe whipping cream, Add the eggs and egg yolks and mix untilsmooth.
4. Drizzle the hot lemon mixture into the egg mixture while stirringconstantly. Return the combined mixture to the stove and heatuntil it thickens and starts to boil. Add the butter and stiruntil melted. Scrape the filling into the pie shell.
5. Preheat the oven to 350 degrees. 6. In a medium metal or ceramic bowl, beat the egg whites and cream
of tartar together. When soft peaks are formed, drizzle in thesugar while beating. Continue beating until stiff peaks areformed. Fold in the vanilla.
7. With a spatula, spread the meringue topping on the filling. Pressthe topping against the crust so that the meringue will adhere tothe crust during baking.
8. Bake for 15 minutes at 350 degrees or until the top is a goldenbrown. Let cool for an hour on the counter and then two hours inthe refrigerator.
86

Bakery Science “The art and science of baking” Ph.no.09996000499
87
Bakery Science “The art and science of baking” Ph.no.09996000499
“Meringue that Does Not Weep” Recipe
Ingredients
4 large egg whites1/2 teaspoon cream of tartar6 tablespoons sugar, preferably superfine1 tablespoon cornstarch1/2 cup water1 teaspoon vanilla extract
Directions
1. In a medium metal or ceramic bowl, beat the egg whites and creamof tarter together. When soft peaks are formed, drizzle in thesugar while beating. Continue beating until stiff peaks areformed.
2. In a saucepan, dissolve the cornstarch in water. Heat and stiruntil it is bubbling and thickened. Drizzle the hot syrup intothe egg whites while beating slowly with the electric mixer. Addthe vanilla. Continue beating until the egg whites are at fullvolume and stiff peaks are formed.
3. With a spatula, spread the meringue topping on the filling. Pressthe topping against the crust so that the meringue will adhere tothe crust during baking.
4. Bake for 15 minutes at 350 degrees or until the top is a goldenbrown.
Let cool for an hour on the counter and then two hours in therefrigerator.
Baker’s notes: Why does this work? The cornstarch acts as astabilizer; the hot syrup facilitates the cooking of the egg whites.
88
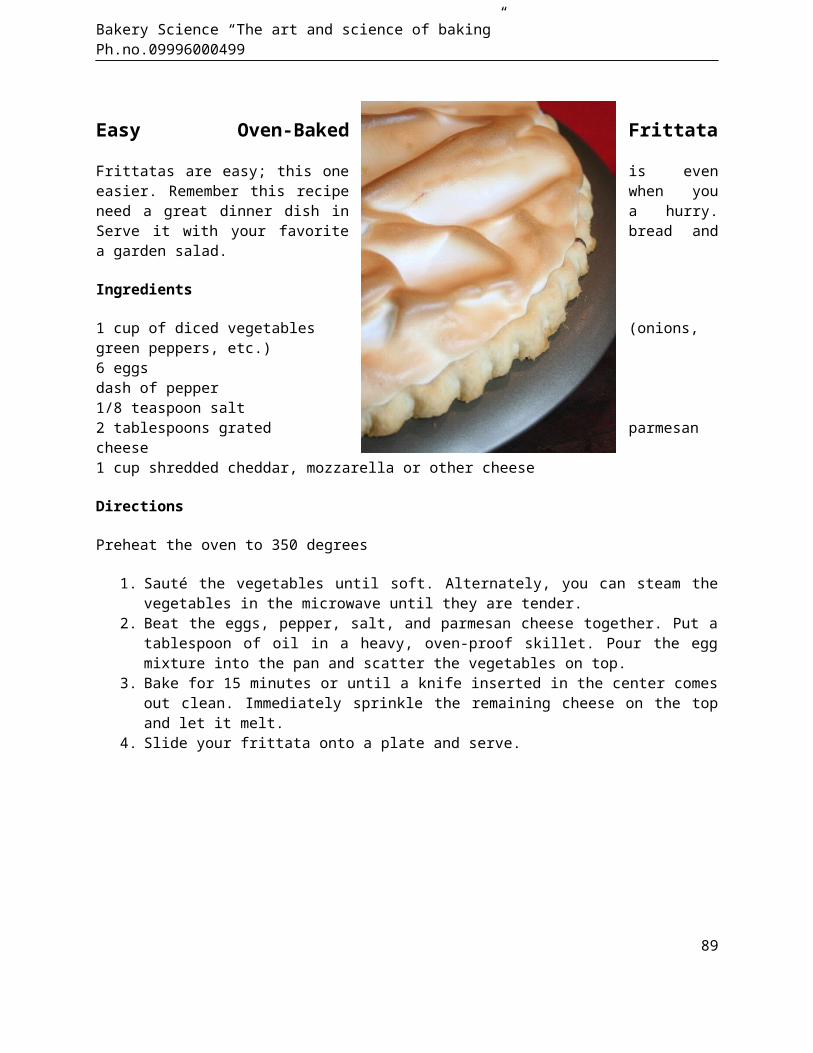
Bakery Science “The art and science of baking” Ph.no.09996000499
Easy Oven-Baked Frittata
Frittatas are easy; this one is eveneasier. Remember this recipe when youneed a great dinner dish in a hurry.Serve it with your favorite bread anda garden salad.
Ingredients
1 cup of diced vegetables (onions, green peppers, etc.)6 eggsdash of pepper1/8 teaspoon salt2 tablespoons grated parmesan cheese1 cup shredded cheddar, mozzarella or other cheese
Directions
Preheat the oven to 350 degrees
1. Sauté the vegetables until soft. Alternately, you can steam thevegetables in the microwave until they are tender.
2. Beat the eggs, pepper, salt, and parmesan cheese together. Put atablespoon of oil in a heavy, oven-proof skillet. Pour the eggmixture into the pan and scatter the vegetables on top.
3. Bake for 15 minutes or until a knife inserted in the center comesout clean. Immediately sprinkle the remaining cheese on the topand let it melt.
4. Slide your frittata onto a plate and serve.
89
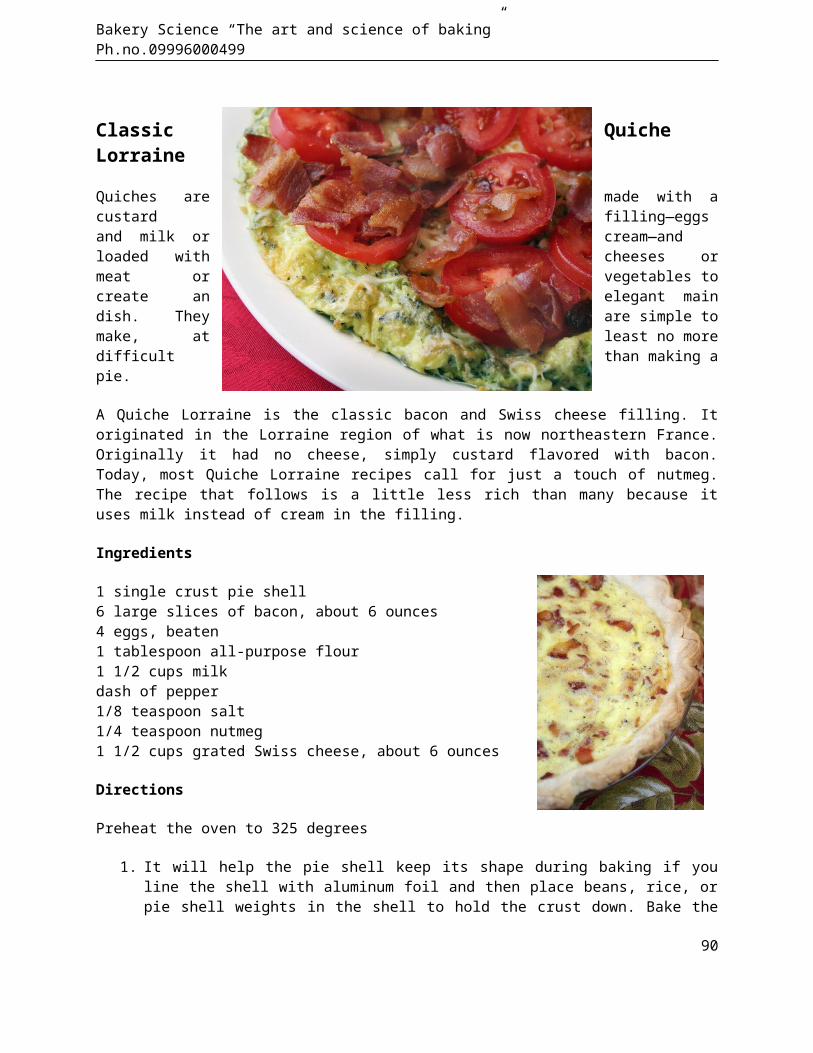
Bakery Science “The art and science of baking” Ph.no.09996000499
Classic QuicheLorraine
Quiches are made with acustard filling—eggsand milk or cream—andloaded with cheeses ormeat or vegetables tocreate an elegant maindish. They are simple tomake, at least no moredifficult than making apie.
A Quiche Lorraine is the classic bacon and Swiss cheese filling. Itoriginated in the Lorraine region of what is now northeastern France.Originally it had no cheese, simply custard flavored with bacon.Today, most Quiche Lorraine recipes call for just a touch of nutmeg.The recipe that follows is a little less rich than many because ituses milk instead of cream in the filling.
Ingredients
1 single crust pie shell6 large slices of bacon, about 6 ounces4 eggs, beaten1 tablespoon all-purpose flour1 1/2 cups milkdash of pepper1/8 teaspoon salt1/4 teaspoon nutmeg1 1/2 cups grated Swiss cheese, about 6 ounces
Directions
Preheat the oven to 325 degrees
1. It will help the pie shell keep its shape during baking if youline the shell with aluminum foil and then place beans, rice, orpie shell weights in the shell to hold the crust down. Bake the
90
Bakery Science “The art and science of baking” Ph.no.09996000499
pie shell at 450 degrees for about ten minutes or until it juststarts to turn brown on the edges.
2. While the pie shell is baking, cook the bacon in the microwaveoven until crisp. Cut the bacon into small chunks.
3. In a medium bowl, mix the eggs and flour together. Add theremaining ingredients, including the bacon. Pour the mixtureinto the hot pie shell.
4. Bake for 40 to 45 minutes or until a knife inserted in the centercomes out clean. If the shell starts to brown too quickly, coverthe edges with aluminum foil or a pie shield.
91
Bakery Science “The art and science of baking” Ph.no.09996000499
Cinnamon Ripple Angel Food Cake Recipe
Ingredients
1 1/2 cups egg whites (about 12 to 14 large eggs)1 cup plus one tablespoons sifted cake flour1 1/2 cup sugar divided1/4 teaspoons salt3/4 teaspoon cream of tartar1 teaspoon vanilla extract3 to 4 teaspoons ground cinnamon
Directions
Preheat the oven to 350 degrees (after step 1).
1. Separate the eggs before heating the oven (see tips), adding thewhites to a liquid measuring cup until you have 1 1/2 cups. Itwill take about 12 large eggs.
2. Sift the flour before measuring. If you do not have a sifter, usea whisk to fluff the flour before measuring. Add about half thesugar to the flour and sift again.
3. Beat the egg whites in a large bowl, adding the salt and thecream of tartar to the whites as soon as they become foamy.Continue beating. As soft peaks begin to form, add the remainingsugar and extracts. Beat until peaks form.
4. Using a spatula, gently fold the flour and sugar mixture into theegg white foam with “over and up” motions. Be sure to scrape thebottom of the bowl or the flour mixture will sink. Mix only untilthe flour is moistened. Working the batter longer tends to drivethe air bubbles from the foam and reduces the cake's volume.
5. Scrape 1/3 of the batter into a ten-inch tube pan. Sprinkle thecinnamon through a fine sieve onto the batter. Repeat layers twoor three more times, but don’t sprinkle cinnamon on top. Bakeimmediately. Bake for 45 minutes or until the cake is done.
6. When the cake is removed from the oven, immediately invert thetube pan on the counter. Many tube pans have legs for thispurpose. If the tube pan does not have legs, invert the pan overa narrow-necked bottle inserted into the tube.
92
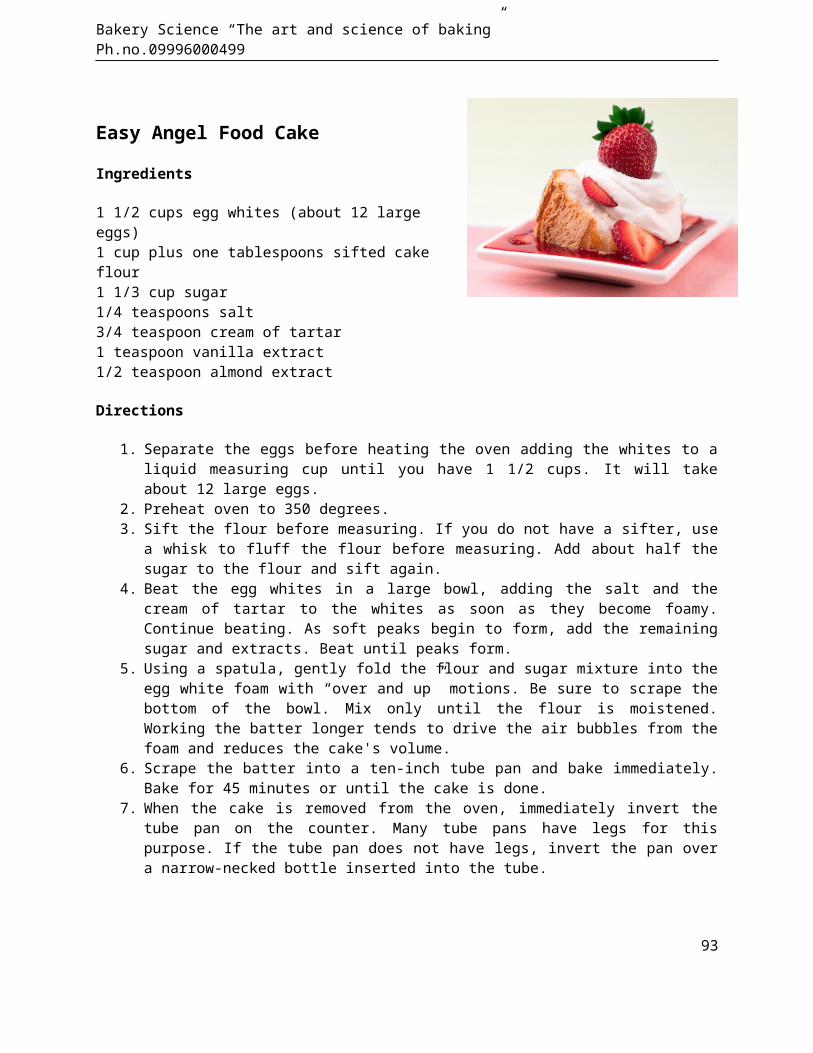
Bakery Science “The art and science of baking” Ph.no.09996000499
Easy Angel Food Cake
Ingredients
1 1/2 cups egg whites (about 12 largeeggs)1 cup plus one tablespoons sifted cakeflour1 1/3 cup sugar1/4 teaspoons salt3/4 teaspoon cream of tartar1 teaspoon vanilla extract1/2 teaspoon almond extract
Directions
1. Separate the eggs before heating the oven adding the whites to aliquid measuring cup until you have 1 1/2 cups. It will takeabout 12 large eggs.
2. Preheat oven to 350 degrees.3. Sift the flour before measuring. If you do not have a sifter, use
a whisk to fluff the flour before measuring. Add about half thesugar to the flour and sift again.
4. Beat the egg whites in a large bowl, adding the salt and thecream of tartar to the whites as soon as they become foamy.Continue beating. As soft peaks begin to form, add the remainingsugar and extracts. Beat until peaks form.
5. Using a spatula, gently fold the flour and sugar mixture into theegg white foam with “over and up” motions. Be sure to scrape thebottom of the bowl. Mix only until the flour is moistened.Working the batter longer tends to drive the air bubbles from thefoam and reduces the cake's volume.
6. Scrape the batter into a ten-inch tube pan and bake immediately.Bake for 45 minutes or until the cake is done.
7. When the cake is removed from the oven, immediately invert thetube pan on the counter. Many tube pans have legs for thispurpose. If the tube pan does not have legs, invert the pan overa narrow-necked bottle inserted into the tube.
93
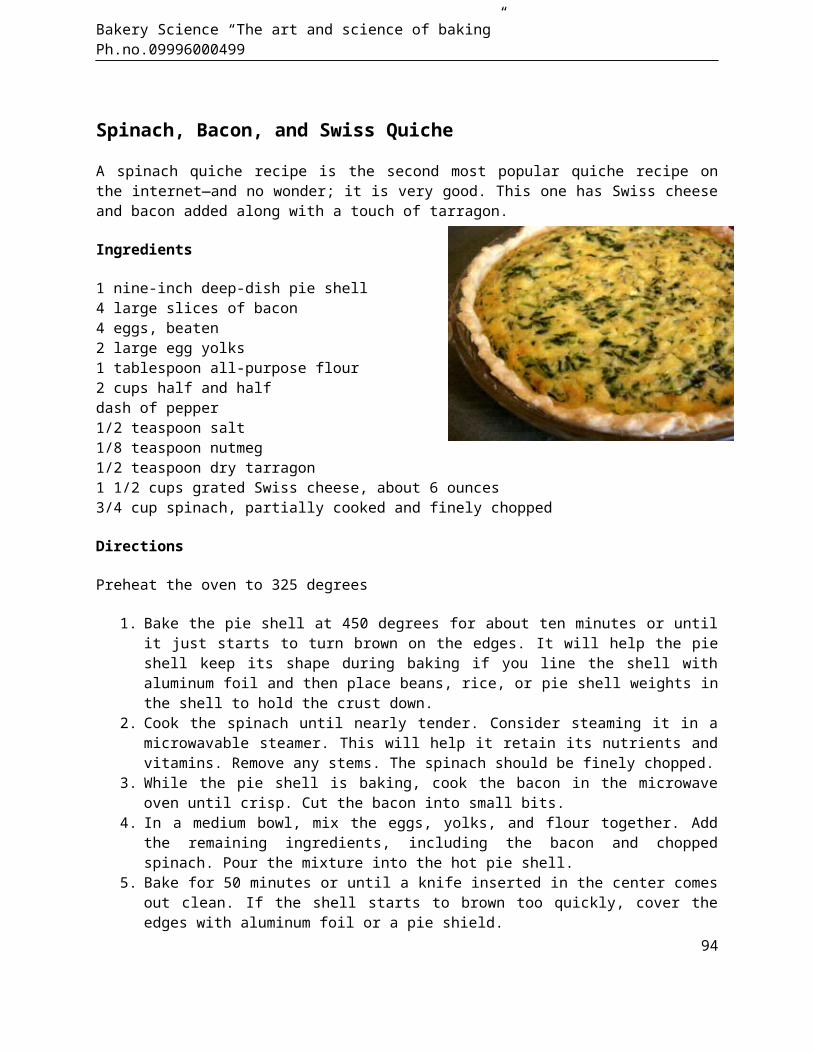
Bakery Science “The art and science of baking” Ph.no.09996000499
Spinach, Bacon, and Swiss Quiche
A spinach quiche recipe is the second most popular quiche recipe onthe internet—and no wonder; it is very good. This one has Swiss cheeseand bacon added along with a touch of tarragon.
Ingredients
1 nine-inch deep-dish pie shell4 large slices of bacon4 eggs, beaten2 large egg yolks1 tablespoon all-purpose flour2 cups half and halfdash of pepper1/2 teaspoon salt1/8 teaspoon nutmeg1/2 teaspoon dry tarragon1 1/2 cups grated Swiss cheese, about 6 ounces3/4 cup spinach, partially cooked and finely chopped
Directions
Preheat the oven to 325 degrees
1. Bake the pie shell at 450 degrees for about ten minutes or untilit just starts to turn brown on the edges. It will help the pieshell keep its shape during baking if you line the shell withaluminum foil and then place beans, rice, or pie shell weights inthe shell to hold the crust down.
2. Cook the spinach until nearly tender. Consider steaming it in amicrowavable steamer. This will help it retain its nutrients andvitamins. Remove any stems. The spinach should be finely chopped.
3. While the pie shell is baking, cook the bacon in the microwaveoven until crisp. Cut the bacon into small bits.
4. In a medium bowl, mix the eggs, yolks, and flour together. Addthe remaining ingredients, including the bacon and choppedspinach. Pour the mixture into the hot pie shell.
5. Bake for 50 minutes or until a knife inserted in the center comesout clean. If the shell starts to brown too quickly, cover theedges with aluminum foil or a pie shield.
94
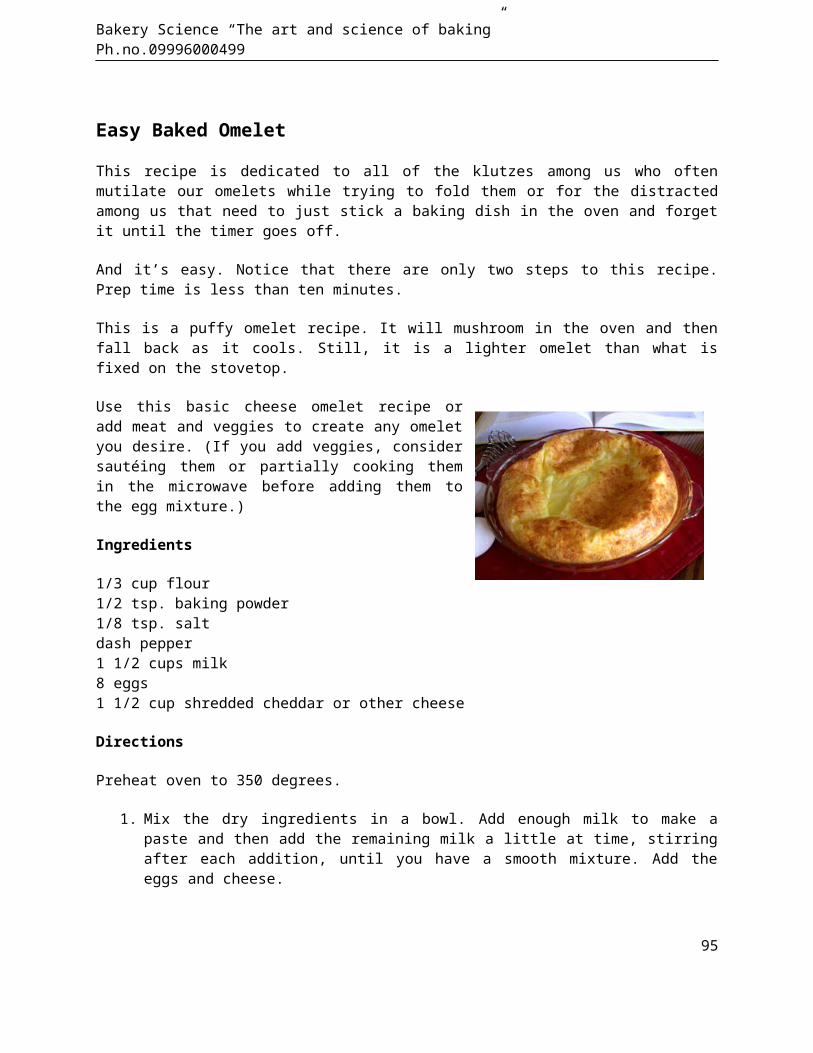
Bakery Science “The art and science of baking” Ph.no.09996000499
Easy Baked Omelet
This recipe is dedicated to all of the klutzes among us who oftenmutilate our omelets while trying to fold them or for the distractedamong us that need to just stick a baking dish in the oven and forgetit until the timer goes off.
And it’s easy. Notice that there are only two steps to this recipe.Prep time is less than ten minutes.
This is a puffy omelet recipe. It will mushroom in the oven and thenfall back as it cools. Still, it is a lighter omelet than what isfixed on the stovetop.
Use this basic cheese omelet recipe oradd meat and veggies to create any omeletyou desire. (If you add veggies, considersautéing them or partially cooking themin the microwave before adding them tothe egg mixture.)
Ingredients
1/3 cup flour1/2 tsp. baking powder1/8 tsp. saltdash pepper1 1/2 cups milk8 eggs1 1/2 cup shredded cheddar or other cheese
Directions
Preheat oven to 350 degrees.
1. Mix the dry ingredients in a bowl. Add enough milk to make apaste and then add the remaining milk a little at time, stirringafter each addition, until you have a smooth mixture. Add theeggs and cheese.
95
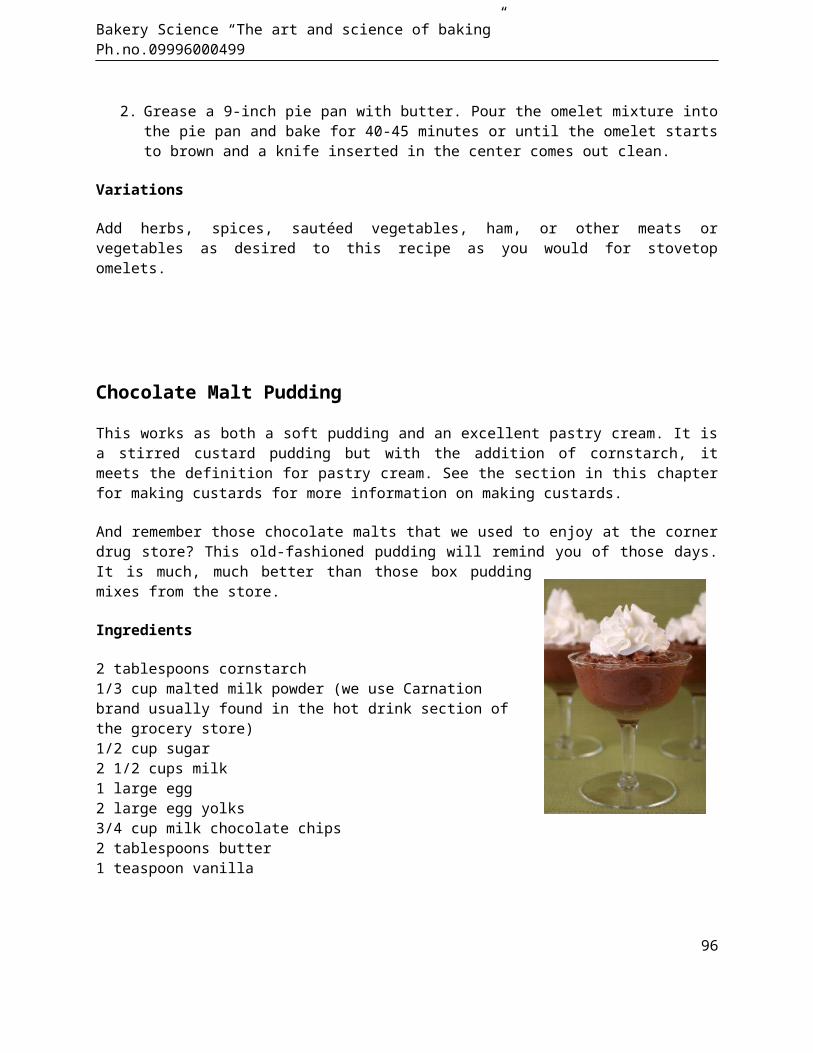
Bakery Science “The art and science of baking” Ph.no.09996000499
2. Grease a 9-inch pie pan with butter. Pour the omelet mixture intothe pie pan and bake for 40-45 minutes or until the omelet startsto brown and a knife inserted in the center comes out clean.
Variations
Add herbs, spices, sautéed vegetables, ham, or other meats orvegetables as desired to this recipe as you would for stovetopomelets.
Chocolate Malt Pudding
This works as both a soft pudding and an excellent pastry cream. It isa stirred custard pudding but with the addition of cornstarch, itmeets the definition for pastry cream. See the section in this chapterfor making custards for more information on making custards.
And remember those chocolate malts that we used to enjoy at the cornerdrug store? This old-fashioned pudding will remind you of those days.It is much, much better than those box puddingmixes from the store.
Ingredients
2 tablespoons cornstarch1/3 cup malted milk powder (we use Carnationbrand usually found in the hot drink section ofthe grocery store)1/2 cup sugar2 1/2 cups milk1 large egg2 large egg yolks3/4 cup milk chocolate chips2 tablespoons butter1 teaspoon vanilla
96
Bakery Science “The art and science of baking” Ph.no.09996000499
Directions
1. Combine the cornstarch, malted milk powder, half of the sugarwith 1/2 cup of the milk. Stir to dissolve the sugar. Add the eggand egg yolks and whisk until smooth.
2. In a heavy saucepan, cook the remaining 2 cups of milk and theremaining sugar until it boils for several minutes.
3. Slowly pour the egg mixture into the hot milk while whisking themixture to keep it smooth. Cook until bubbles rise through theliquid and it just starts to boil. Remove from the heat.
4. Melt the chocolate chips and the butter in the microwave. Stirthe melted chocolate into the hot pudding. Add the vanilla.
5. Pour the pudding into serving dishes or a casserole dish. Coverthe pudding surface with waxed paper placed directly on thepudding. Let cool for one hour and then place in the refrigeratorto chill.
97
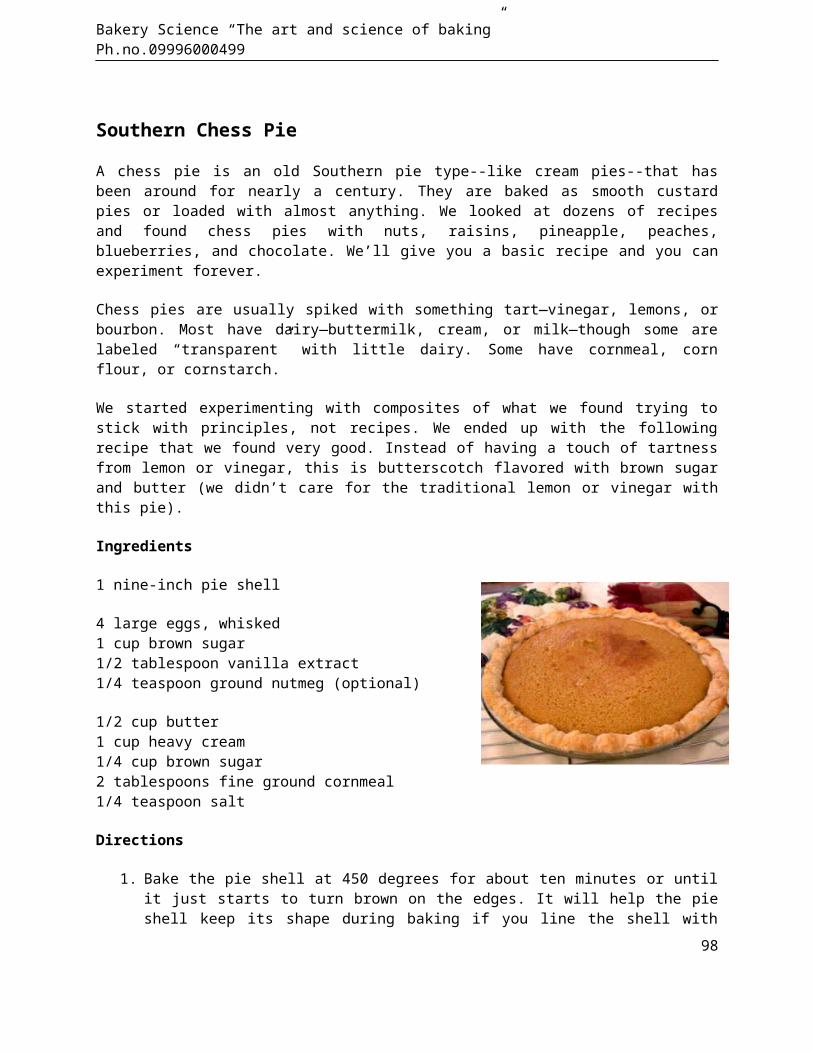
Bakery Science “The art and science of baking” Ph.no.09996000499
Southern Chess Pie
A chess pie is an old Southern pie type--like cream pies--that hasbeen around for nearly a century. They are baked as smooth custardpies or loaded with almost anything. We looked at dozens of recipesand found chess pies with nuts, raisins, pineapple, peaches,blueberries, and chocolate. We’ll give you a basic recipe and you canexperiment forever.
Chess pies are usually spiked with something tart—vinegar, lemons, orbourbon. Most have dairy—buttermilk, cream, or milk—though some arelabeled “transparent” with little dairy. Some have cornmeal, cornflour, or cornstarch.
We started experimenting with composites of what we found trying tostick with principles, not recipes. We ended up with the followingrecipe that we found very good. Instead of having a touch of tartnessfrom lemon or vinegar, this is butterscotch flavored with brown sugarand butter (we didn’t care for the traditional lemon or vinegar withthis pie).
Ingredients
1 nine-inch pie shell
4 large eggs, whisked1 cup brown sugar1/2 tablespoon vanilla extract1/4 teaspoon ground nutmeg (optional)
1/2 cup butter1 cup heavy cream1/4 cup brown sugar2 tablespoons fine ground cornmeal1/4 teaspoon salt
Directions
1. Bake the pie shell at 450 degrees for about ten minutes or untilit just starts to turn brown on the edges. It will help the pieshell keep its shape during baking if you line the shell with
98

Bakery Science “The art and science of baking” Ph.no.09996000499
aluminum foil and then place beans, rice, or pie shell weights inthe shell to hold the crust down. If you do so, the weights willact as heat sinks and you will need to bake the shell longer.
2. Whip the eggs and brown sugar together until the sugar dissolved.Add the vanilla extract and optional nutmeg.
3. In a saucepan, melt the butter. Stir in the cream, 1/4-cup brownsugar, cornmeal, and salt. Heat, stirring constantly, until itthickens and just starts to bubble.
4. Dribble the hot cream mixture into the egg mixture while stirringconstantly. Whisk the mixture until it is smooth. Pour thefilling into the pie shell.
5. Bake the pie for 40 to 45 minutes at 325 degrees or until ittests done when the blade of a knife is inserted in the fillingone inch from the center.
Let cool on a wire rack and then refrigerate.
Serve with ice cream or whipped cream.
Baker’s notes:
1. This pie was made with brown sugar. It can also be made withhoney crystals or molasses crystals for some interestingrenditions.
2. Feel at liberty to experiment. Many chess pies are light in colorwhile this one is caramel-colored from the brown sugar and eggyolks. For a lighter-colored pie, substitute granulated sugar forthe brown sugar and four egg whites plus two large eggs for theeggs. The pie will then be more vanilla flavored. The pie madewith honey crystals will be lighter colored also and honey andvanilla is a wonderful combination. Molasses crystals will make amore traditional pie.
3. Any fine-ground cornmeal will work or even corn flour. We usedNavajo ground corn and it worked perfectly.
Traditional Dutch Pannekoeken
This is the basic pannekoeken. It is designed for an 11 to 12-inchpannekoeken pan or a skillet with rounded sides. This is a fiveingredient-five step recipe that really goestogether quickly.
99
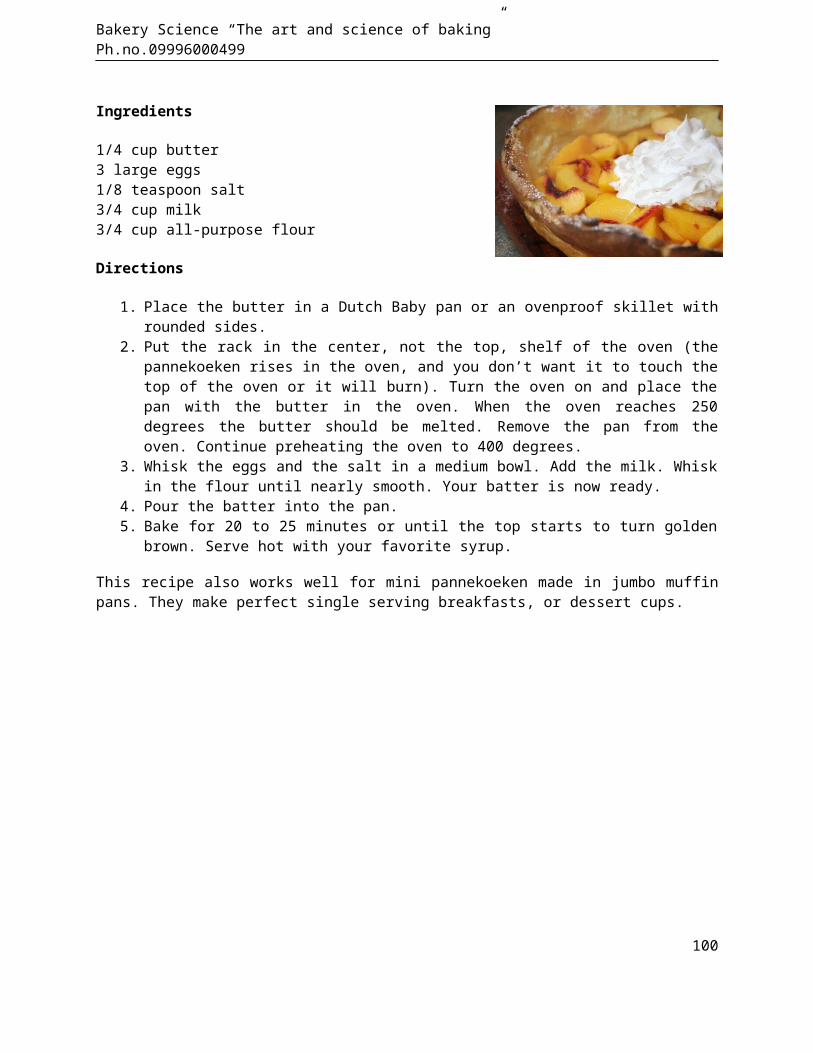
Bakery Science “The art and science of baking” Ph.no.09996000499
Ingredients
1/4 cup butter3 large eggs1/8 teaspoon salt3/4 cup milk3/4 cup all-purpose flour
Directions
1. Place the butter in a Dutch Baby pan or an ovenproof skillet withrounded sides.
2. Put the rack in the center, not the top, shelf of the oven (thepannekoeken rises in the oven, and you don’t want it to touch thetop of the oven or it will burn). Turn the oven on and place thepan with the butter in the oven. When the oven reaches 250degrees the butter should be melted. Remove the pan from theoven. Continue preheating the oven to 400 degrees.
3. Whisk the eggs and the salt in a medium bowl. Add the milk. Whiskin the flour until nearly smooth. Your batter is now ready.
4. Pour the batter into the pan. 5. Bake for 20 to 25 minutes or until the top starts to turn golden
brown. Serve hot with your favorite syrup.
This recipe also works well for mini pannekoeken made in jumbo muffinpans. They make perfect single serving breakfasts, or dessert cups.
100

Bakery Science “The art and science of baking” Ph.no.09996000499
Apple and Bacon Pannekoeken
This is a traditional pannekoeken with ingredients added. You can usethis as template for other pannekoeken recipes.
Ingredients
6 ounces of bacon fried crisply 1 apple, peeled and cored 1/2 red bell pepper (optional)1/4 cup butter3 large eggs1/8 teaspoon salt3/4 cup milk3/4 cup all-purpose flour
Directions
1. Snip the bacon into 3/4-inch pieces. Slice the apple thinly. Dicethe red pepper and steam it in the microwave for a minute to makethe dices crisp-tender.
2. Place the butter in a Dutch Baby pan or an ovenproof skillet withrounded sides.
3. Put the rack in the center, not the top, shelf of the oven (thepannekoeken rises in the oven, and you don’t want it to touch thetop of the oven or it will burn). Turn the oven on and place thepan with the butter in the oven. When the oven reaches 250degrees the butter should be melted. Remove the pan from theoven. Continue preheating the oven to 400 degrees.
4. Whisk the eggs and the salt in a medium bowl. Add the milk. Whiskin the flour until nearly smooth. Your batter is now ready.
5. Pour the batter into the pan. Sprinkle the toppings over thebatter.
6. Bake for 20 to 25 minutes or until the top starts to turn goldenbrown. Serve hot with maple syrup.
101
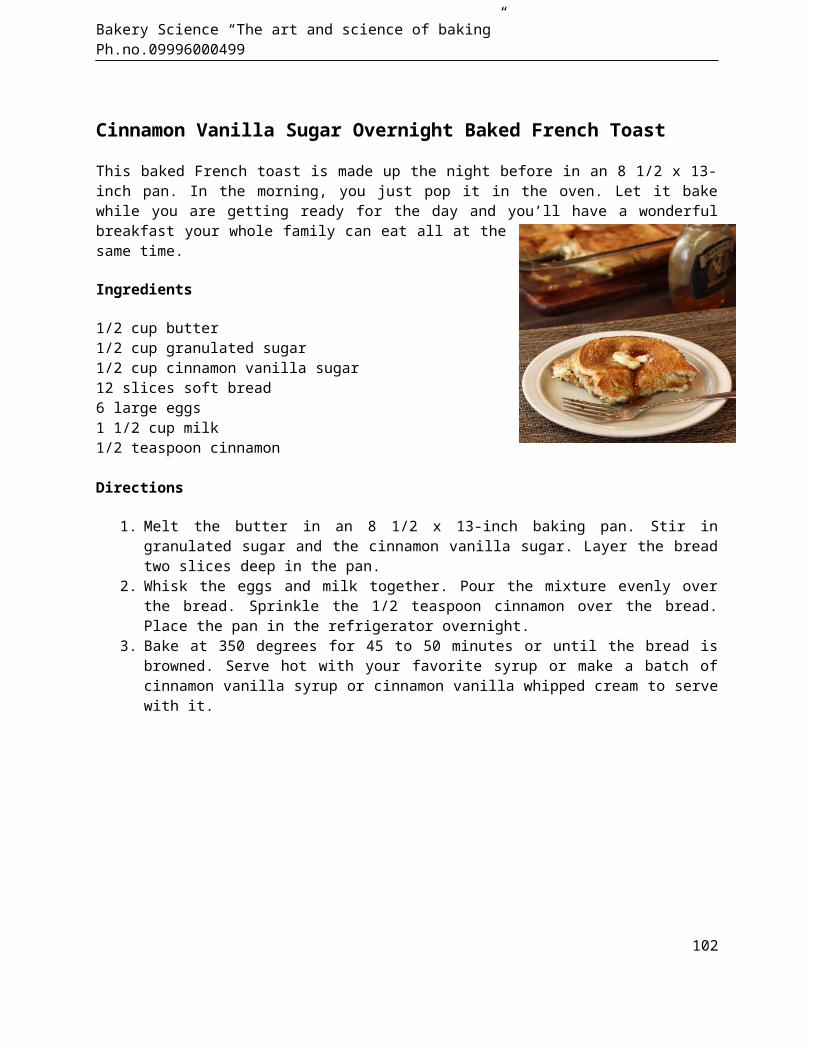
Bakery Science “The art and science of baking” Ph.no.09996000499
Cinnamon Vanilla Sugar Overnight Baked French Toast
This baked French toast is made up the night before in an 8 1/2 x 13-inch pan. In the morning, you just pop it in the oven. Let it bakewhile you are getting ready for the day and you’ll have a wonderfulbreakfast your whole family can eat all at thesame time.
Ingredients
1/2 cup butter1/2 cup granulated sugar1/2 cup cinnamon vanilla sugar12 slices soft bread6 large eggs1 1/2 cup milk1/2 teaspoon cinnamon
Directions
1. Melt the butter in an 8 1/2 x 13-inch baking pan. Stir ingranulated sugar and the cinnamon vanilla sugar. Layer the breadtwo slices deep in the pan.
2. Whisk the eggs and milk together. Pour the mixture evenly overthe bread. Sprinkle the 1/2 teaspoon cinnamon over the bread.Place the pan in the refrigerator overnight.
3. Bake at 350 degrees for 45 to 50 minutes or until the bread isbrowned. Serve hot with your favorite syrup or make a batch ofcinnamon vanilla syrup or cinnamon vanilla whipped cream to servewith it.
102
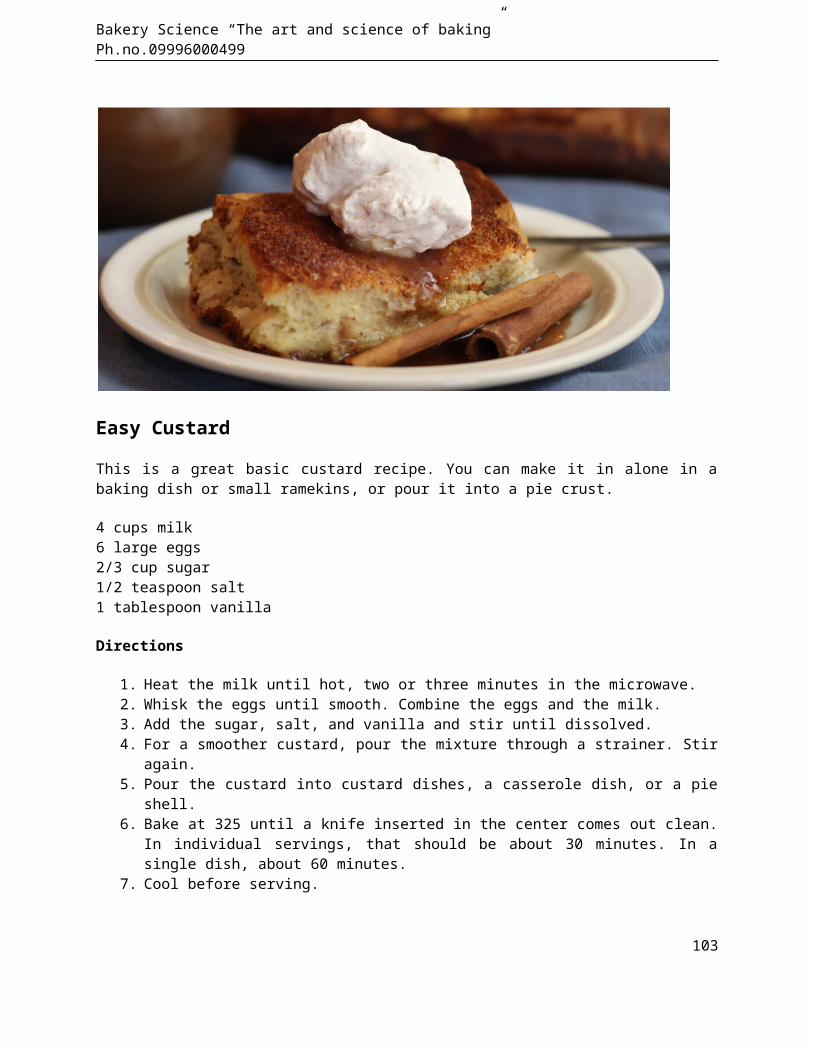
Bakery Science “The art and science of baking” Ph.no.09996000499
Easy Custard
This is a great basic custard recipe. You can make it in alone in abaking dish or small ramekins, or pour it into a pie crust.
4 cups milk6 large eggs2/3 cup sugar1/2 teaspoon salt1 tablespoon vanilla
Directions
1. Heat the milk until hot, two or three minutes in the microwave.2. Whisk the eggs until smooth. Combine the eggs and the milk.3. Add the sugar, salt, and vanilla and stir until dissolved.4. For a smoother custard, pour the mixture through a strainer. Stir
again.5. Pour the custard into custard dishes, a casserole dish, or a pie
shell.6. Bake at 325 until a knife inserted in the center comes out clean.
In individual servings, that should be about 30 minutes. In asingle dish, about 60 minutes.
7. Cool before serving.
103

Bakery Science “The art and science of baking” Ph.no.09996000499
Traditionally, custards are served with caramel sauce. Slicedstrawberries or fresh blueberries doused in a gourmet fruit syrup alsowork well with custard.
104
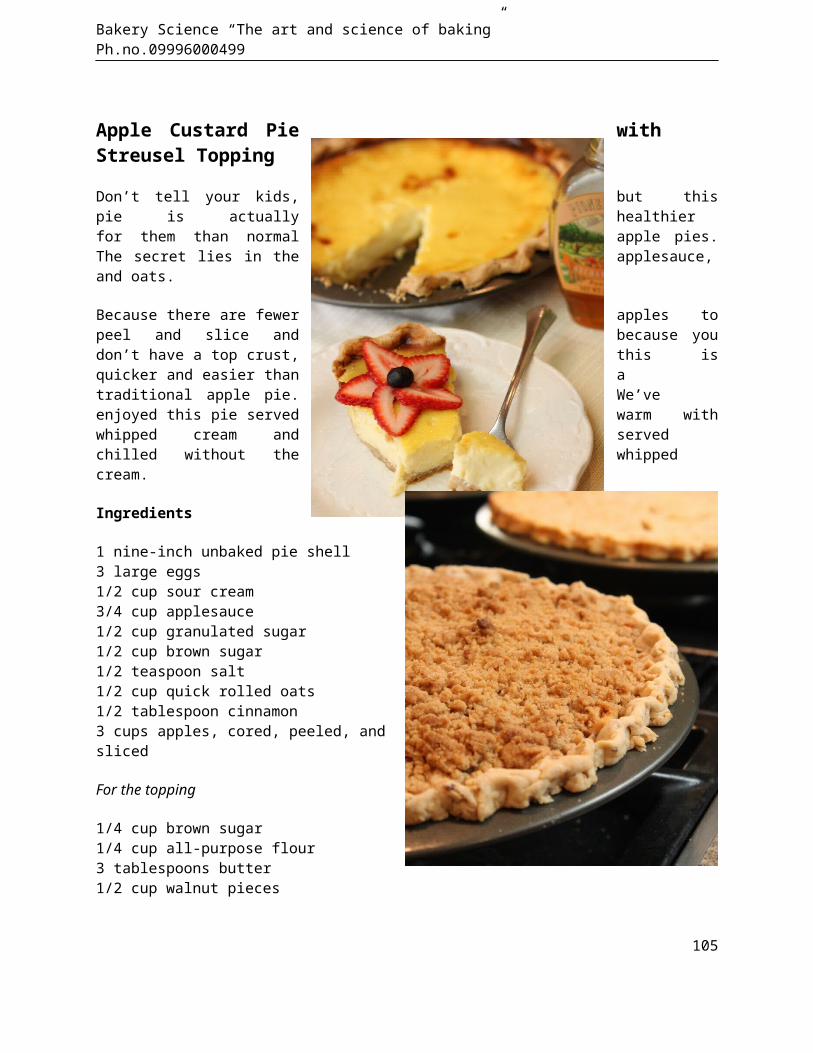
Bakery Science “The art and science of baking” Ph.no.09996000499
Apple Custard Pie withStreusel Topping
Don’t tell your kids, but thispie is actually healthierfor them than normal apple pies.The secret lies in the applesauce,and oats.
Because there are fewer apples topeel and slice and because youdon’t have a top crust, this isquicker and easier than atraditional apple pie. We’veenjoyed this pie served warm withwhipped cream and servedchilled without the whippedcream.
Ingredients
1 nine-inch unbaked pie shell3 large eggs1/2 cup sour cream3/4 cup applesauce1/2 cup granulated sugar1/2 cup brown sugar1/2 teaspoon salt1/2 cup quick rolled oats1/2 tablespoon cinnamon3 cups apples, cored, peeled, andsliced
For the topping
1/4 cup brown sugar1/4 cup all-purpose flour3 tablespoons butter1/2 cup walnut pieces
105
Bakery Science “The art and science of baking” Ph.no.09996000499
Directions
Preheat the oven to 350 degrees.
1. Mix the eggs, sour cream, applesauce, sugars, salt, rolled oats, and cinnamon together. Stir the apple slices in. Set aside.
2. With a pastry blender, mix the 1/4-cup brown sugar, flour, butter, and walnut pieces in a small bowl to make the topping. Set aside.
3. Pour the filling mixture into the pie shell. Spoon the toppingover the filling.
4. Cover the edges of the pie shell with aluminum foil or a pieshield. Bake for 30 minutes. Uncover the edges and bake foranother 30 minutes or until done.
Baker’s note: As with most fruit pies, the secret of getting a crisp bottom crust is heat. Set the shelf for the bottom half of the oven closer to the heating element. Use a dark metal pie pan so that the pan absorbs, rather than reflects, heat.
106
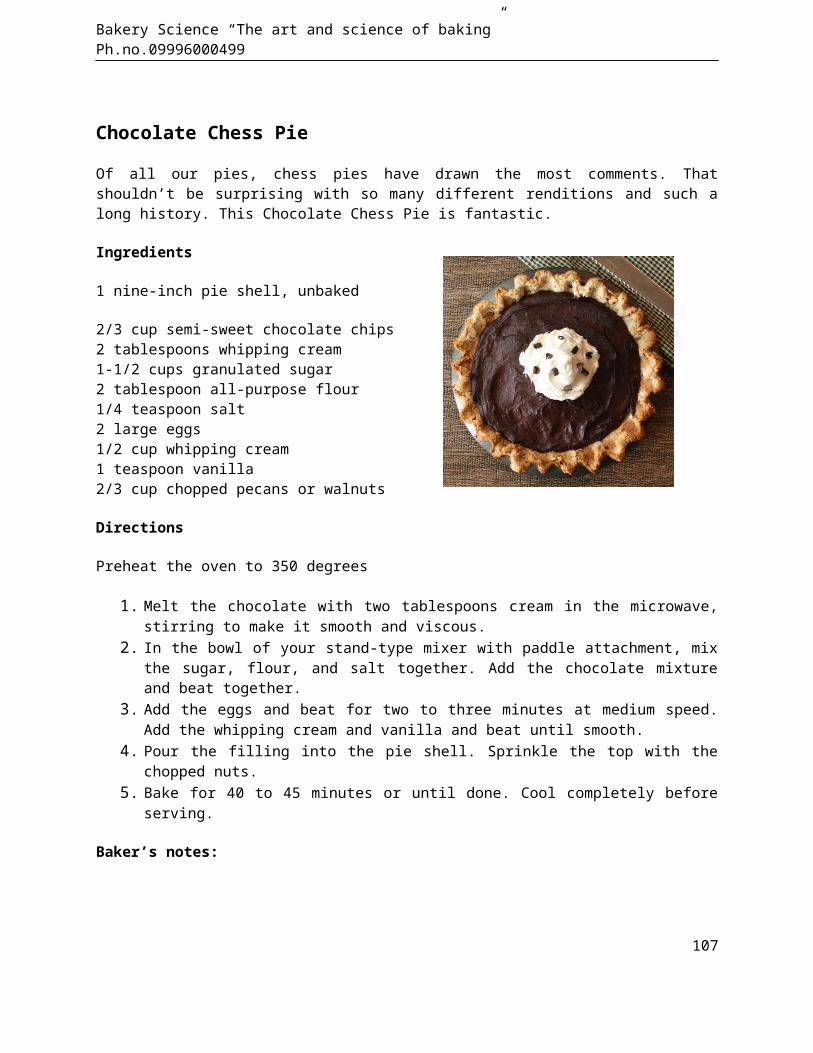
Bakery Science “The art and science of baking” Ph.no.09996000499
Chocolate Chess Pie
Of all our pies, chess pies have drawn the most comments. Thatshouldn’t be surprising with so many different renditions and such along history. This Chocolate Chess Pie is fantastic.
Ingredients
1 nine-inch pie shell, unbaked
2/3 cup semi-sweet chocolate chips2 tablespoons whipping cream 1-1/2 cups granulated sugar2 tablespoon all-purpose flour1/4 teaspoon salt2 large eggs1/2 cup whipping cream1 teaspoon vanilla2/3 cup chopped pecans or walnuts
Directions
Preheat the oven to 350 degrees
1. Melt the chocolate with two tablespoons cream in the microwave,stirring to make it smooth and viscous.
2. In the bowl of your stand-type mixer with paddle attachment, mixthe sugar, flour, and salt together. Add the chocolate mixtureand beat together.
3. Add the eggs and beat for two to three minutes at medium speed.Add the whipping cream and vanilla and beat until smooth.
4. Pour the filling into the pie shell. Sprinkle the top with thechopped nuts.
5. Bake for 40 to 45 minutes or until done. Cool completely beforeserving.
Baker’s notes:
107
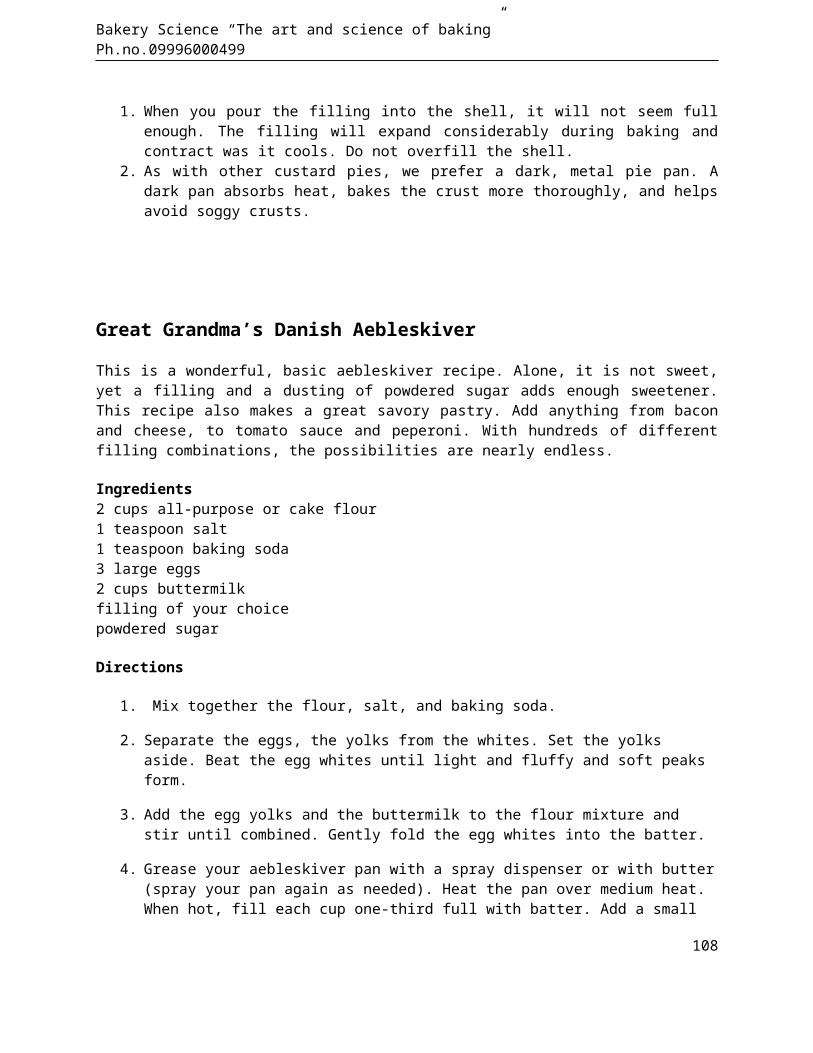
Bakery Science “The art and science of baking” Ph.no.09996000499
1. When you pour the filling into the shell, it will not seem fullenough. The filling will expand considerably during baking andcontract was it cools. Do not overfill the shell.
2. As with other custard pies, we prefer a dark, metal pie pan. Adark pan absorbs heat, bakes the crust more thoroughly, and helpsavoid soggy crusts.
Great Grandma’s Danish Aebleskiver
This is a wonderful, basic aebleskiver recipe. Alone, it is not sweet,yet a filling and a dusting of powdered sugar adds enough sweetener.This recipe also makes a great savory pastry. Add anything from baconand cheese, to tomato sauce and peperoni. With hundreds of differentfilling combinations, the possibilities are nearly endless.
Ingredients2 cups all-purpose or cake flour1 teaspoon salt1 teaspoon baking soda3 large eggs2 cups buttermilkfilling of your choicepowdered sugar
Directions
1. Mix together the flour, salt, and baking soda.
2. Separate the eggs, the yolks from the whites. Set the yolks aside. Beat the egg whites until light and fluffy and soft peaks form.
3. Add the egg yolks and the buttermilk to the flour mixture and stir until combined. Gently fold the egg whites into the batter.
4. Grease your aebleskiver pan with a spray dispenser or with butter(spray your pan again as needed). Heat the pan over medium heat. When hot, fill each cup one-third full with batter. Add a small
108
Bakery Science “The art and science of baking” Ph.no.09996000499
amount of filling to each. Cover with an additional one-third batter (try using our Medium Quick Release Scoop to cleanly drop the batter into the cups).
5. Cook for one to one and one-half minutes before turning (you canturn your aebleskiver with a toothpick or skewer). Cook foranother minute or until done. Remove to a plate and sprinkle withpowdered sugar (a powdered sugar shaker works really well forthis). Serve warm.
109

Bakery Science “The art and science of baking” Ph.no.09996000499
Cream Puffs
This is the recipe fortraditional cream puffs madewith Bavarian creamand chocolate. Youcould substitute anypastry filling, andflavored frosting forthe chocolate. Simplyadd a half a teaspoonof flavor to two cupspowdered sugar. Addfood coloring asdesired.
Ingredients
1 cup water1/2 cup butter (one cube)1 cup all-purpose flour4 large eggsBavarian pastry creamChocolate wafers or other good quality melting chocolate
Directions
1. Mix the dough. In a medium saucepan on medium-high heat, placeone cup of water and one stick (1/2 cup) of butter. After thebutter is melted, turn off heat and add one cup all-purpose flourall at once. Stir until the dough forms a ball and flour isabsorbed.
2. Place dough ball in your stand-type mixer with the paddleattachment and mix on low speed until the dough starts to cool, 1to 2 minutes. Add the eggs all at once and mix on low speed untilthe dough absorbs the eggs and the dough becomes very sticky.This will take about 8 to10 minutes.
3. Bake the cream puffs. With a large ice cream scoop (1/4 cup),spoon mounds of evenly spaced dough onto a greased cookie sheet.Bake at 400 degrees for 20 minutes and then turn the oven down to350 degrees for another 10 minutes. You can also use a small
110
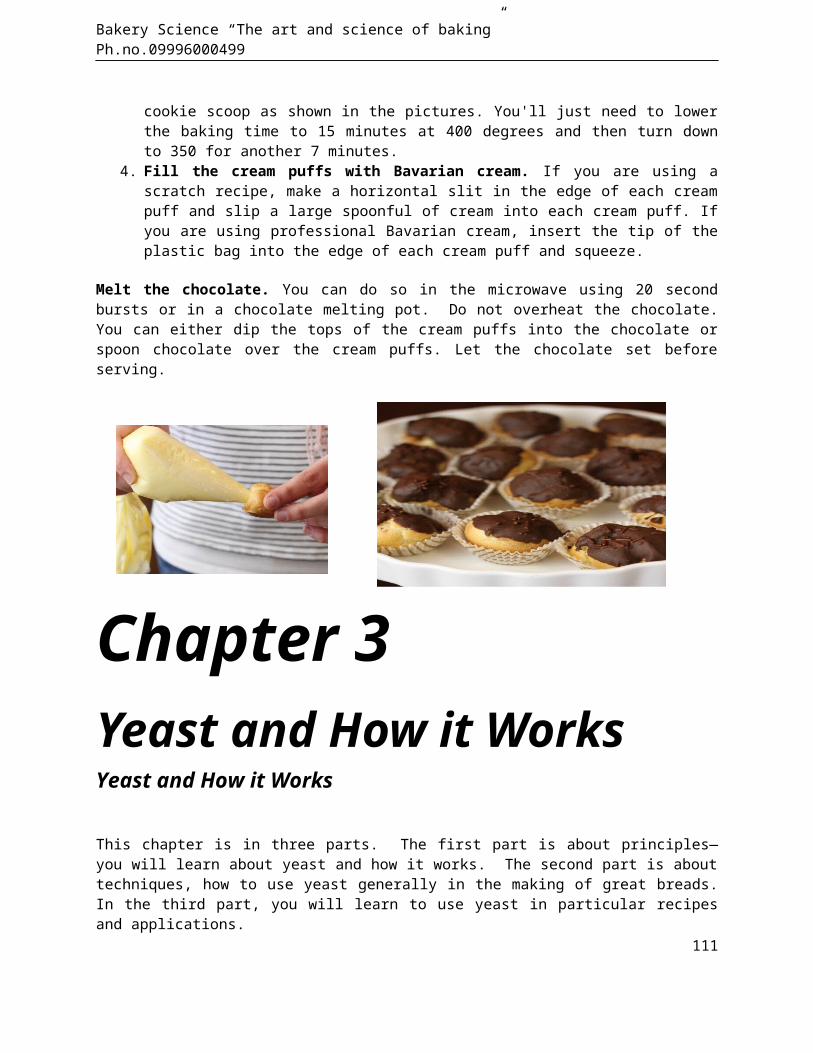
Bakery Science “The art and science of baking” Ph.no.09996000499
cookie scoop as shown in the pictures. You'll just need to lowerthe baking time to 15 minutes at 400 degrees and then turn downto 350 for another 7 minutes.
4. Fill the cream puffs with Bavarian cream. If you are using ascratch recipe, make a horizontal slit in the edge of each creampuff and slip a large spoonful of cream into each cream puff. Ifyou are using professional Bavarian cream, insert the tip of theplastic bag into the edge of each cream puff and squeeze.
Melt the chocolate. You can do so in the microwave using 20 secondbursts or in a chocolate melting pot. Do not overheat the chocolate.You can either dip the tops of the cream puffs into the chocolate orspoon chocolate over the cream puffs. Let the chocolate set beforeserving.
Chapter 3Yeast and How it WorksYeast and How it Works
This chapter is in three parts. The first part is about principles—you will learn about yeast and how it works. The second part is abouttechniques, how to use yeast generally in the making of great breads.In the third part, you will learn to use yeast in particular recipesand applications.
111
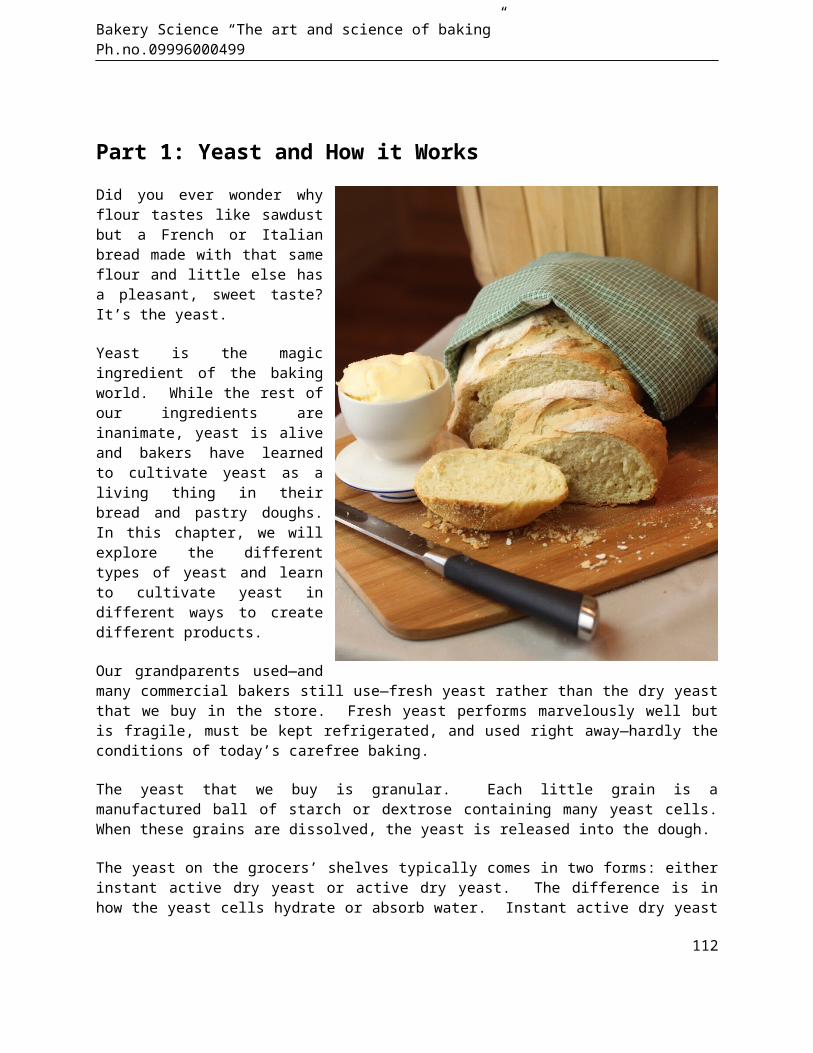
Bakery Science “The art and science of baking” Ph.no.09996000499
Part 1: Yeast and How it WorksDid you ever wonder whyflour tastes like sawdustbut a French or Italianbread made with that sameflour and little else hasa pleasant, sweet taste?It’s the yeast.
Yeast is the magicingredient of the bakingworld. While the rest ofour ingredients areinanimate, yeast is aliveand bakers have learnedto cultivate yeast as aliving thing in theirbread and pastry doughs.In this chapter, we willexplore the differenttypes of yeast and learnto cultivate yeast indifferent ways to createdifferent products.
Our grandparents used—andmany commercial bakers still use—fresh yeast rather than the dry yeastthat we buy in the store. Fresh yeast performs marvelously well butis fragile, must be kept refrigerated, and used right away—hardly theconditions of today’s carefree baking.
The yeast that we buy is granular. Each little grain is amanufactured ball of starch or dextrose containing many yeast cells.When these grains are dissolved, the yeast is released into the dough.
The yeast on the grocers’ shelves typically comes in two forms: eitherinstant active dry yeast or active dry yeast. The difference is inhow the yeast cells hydrate or absorb water. Instant active dry yeast
112
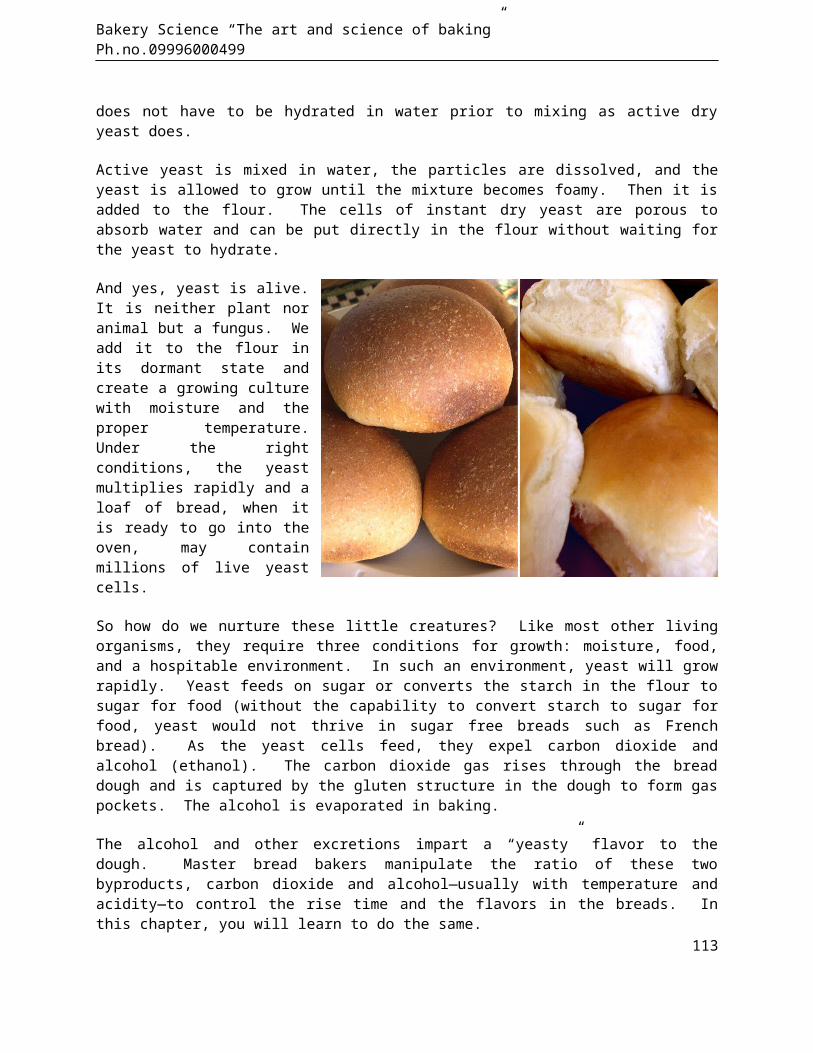
Bakery Science “The art and science of baking” Ph.no.09996000499
does not have to be hydrated in water prior to mixing as active dryyeast does.
Active yeast is mixed in water, the particles are dissolved, and theyeast is allowed to grow until the mixture becomes foamy. Then it isadded to the flour. The cells of instant dry yeast are porous toabsorb water and can be put directly in the flour without waiting forthe yeast to hydrate.
And yes, yeast is alive.It is neither plant noranimal but a fungus. Weadd it to the flour inits dormant state andcreate a growing culturewith moisture and theproper temperature.Under the rightconditions, the yeastmultiplies rapidly and aloaf of bread, when itis ready to go into theoven, may containmillions of live yeastcells.
So how do we nurture these little creatures? Like most other livingorganisms, they require three conditions for growth: moisture, food,and a hospitable environment. In such an environment, yeast will growrapidly. Yeast feeds on sugar or converts the starch in the flour tosugar for food (without the capability to convert starch to sugar forfood, yeast would not thrive in sugar free breads such as Frenchbread). As the yeast cells feed, they expel carbon dioxide andalcohol (ethanol). The carbon dioxide gas rises through the breaddough and is captured by the gluten structure in the dough to form gaspockets. The alcohol is evaporated in baking.
The alcohol and other excretions impart a “yeasty” flavor to thedough. Master bread bakers manipulate the ratio of these twobyproducts, carbon dioxide and alcohol—usually with temperature andacidity—to control the rise time and the flavors in the breads. Inthis chapter, you will learn to do the same.
113
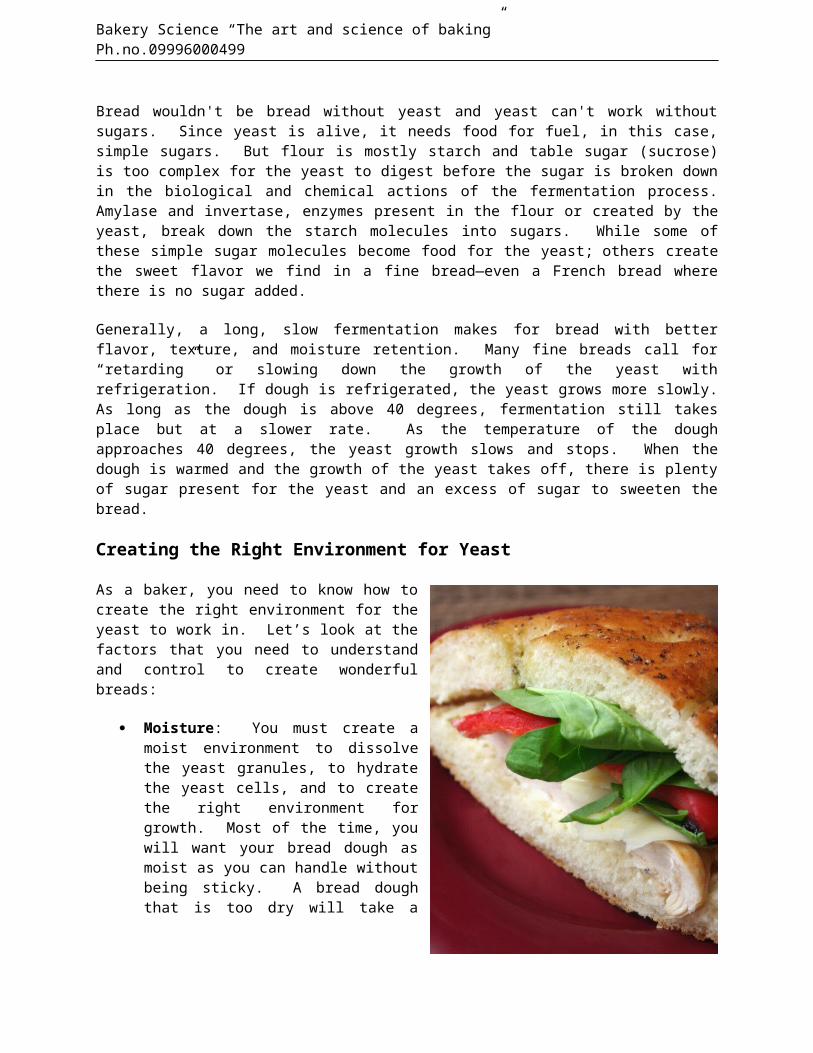
Bakery Science “The art and science of baking” Ph.no.09996000499
Bread wouldn't be bread without yeast and yeast can't work withoutsugars. Since yeast is alive, it needs food for fuel, in this case,simple sugars. But flour is mostly starch and table sugar (sucrose)is too complex for the yeast to digest before the sugar is broken downin the biological and chemical actions of the fermentation process.Amylase and invertase, enzymes present in the flour or created by theyeast, break down the starch molecules into sugars. While some ofthese simple sugar molecules become food for the yeast; others createthe sweet flavor we find in a fine bread—even a French bread wherethere is no sugar added.
Generally, a long, slow fermentation makes for bread with betterflavor, texture, and moisture retention. Many fine breads call for“retarding” or slowing down the growth of the yeast withrefrigeration. If dough is refrigerated, the yeast grows more slowly.As long as the dough is above 40 degrees, fermentation still takesplace but at a slower rate. As the temperature of the doughapproaches 40 degrees, the yeast growth slows and stops. When thedough is warmed and the growth of the yeast takes off, there is plentyof sugar present for the yeast and an excess of sugar to sweeten thebread.
Creating the Right Environment for Yeast
As a baker, you need to know how tocreate the right environment for theyeast to work in. Let’s look at thefactors that you need to understandand control to create wonderfulbreads:
Moisture: You must create amoist environment to dissolvethe yeast granules, to hydratethe yeast cells, and to createthe right environment forgrowth. Most of the time, youwill want your bread dough asmoist as you can handle withoutbeing sticky. A bread doughthat is too dry will take a
114
Bakery Science “The art and science of baking” Ph.no.09996000499
long time to rise because the yeast will not multiply as rapidlyand because the dry dough is stronger and more difficult to lift.Especially with a bread machine, it is important to measure theamount of water carefully with an accurate measuring cup.
Acidity: Yeast prefers a slightly acidic environment. Ourgrandmothers discovered they could create that with a tablespoonor two of lemon juice. We recommend that you do the same with adough conditioner (a dough conditioner has other conditioningroles). Try several conditioners until you find the one thatworks best for you.
Saltiness: Salt impedes the growth of yeast and slows down therise. Measure salt carefully. An extra half teaspoon of saltwill significantly increase the time it takes the dough to rise.Conversely, you can speed up yeast growth with sugar.
Temperature: Yeast is very sensitive to temperature andtemperature is a major factor in how fast yeast multiples. As wediscussed earlier, yeast is dormant and will not grow at 40degrees and grows only slowly at 55 degrees. Yeast diesinstantly at 140 degrees. (We recommend not using water warmerthan 120 degrees to avoid accidentally killing the yeast. )Between 78 degrees and 80 degrees is an ideal environment foryeast growth.
A thermometer has been called the baker’s secret weapon. In allbreads, it is very useful to be able to measure the temperature of (1)the water used for mixing, (2) the dough, and (3) the bread as itcomes from the oven. If you do not already have one, we recommendthat you purchase a good insta-read thermometer either from ThePrepared Pantry or elsewhere.
Always add water at the temperature called for in the recipe or thedirections for the bread machine. In using a bread machineespecially, the exact water temperature is critical to a uniformoutcome. In all of our development work, we always chill or warm thewater to within one degree of the target. The flour and otheringredients should be at room temperature. Remember, unless we wantto retard the growth of the yeast to create more alcohol in the dough,the objective is to create a dough at 78 to 80 degrees. At highertemperatures, the dough may rise too quickly creating a crumbly
115
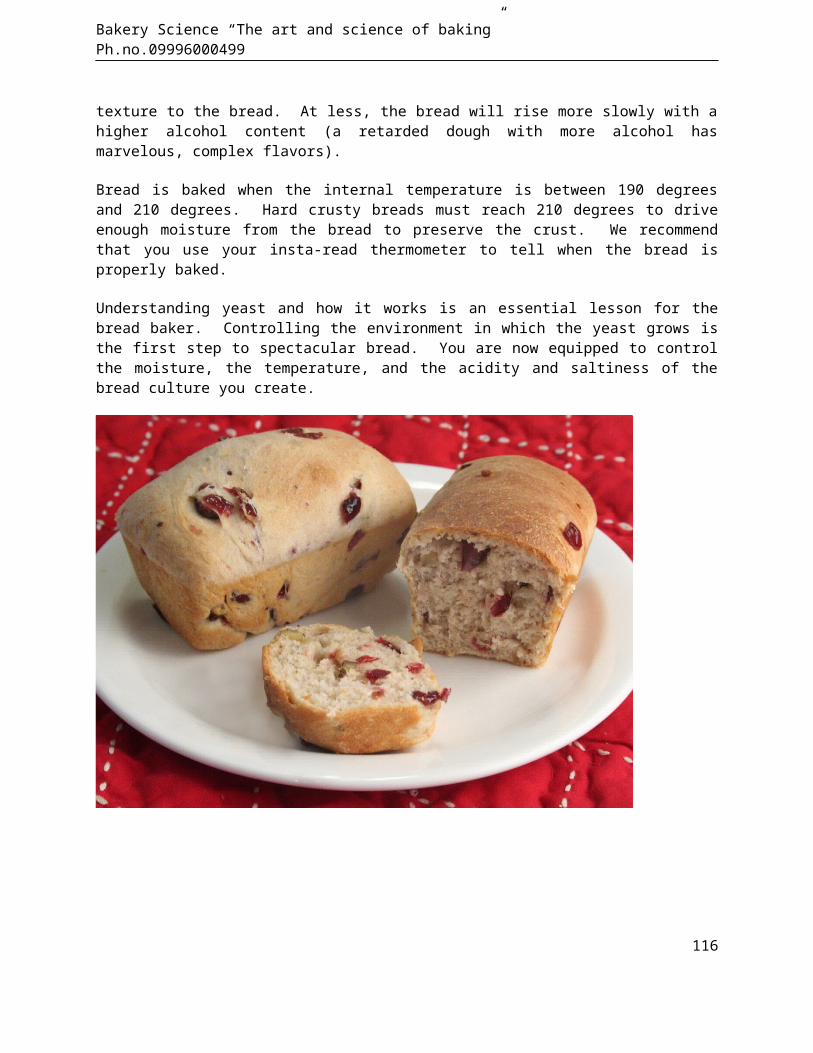
Bakery Science “The art and science of baking” Ph.no.09996000499
texture to the bread. At less, the bread will rise more slowly with ahigher alcohol content (a retarded dough with more alcohol hasmarvelous, complex flavors).
Bread is baked when the internal temperature is between 190 degreesand 210 degrees. Hard crusty breads must reach 210 degrees to driveenough moisture from the bread to preserve the crust. We recommendthat you use your insta-read thermometer to tell when the bread isproperly baked.
Understanding yeast and how it works is an essential lesson for thebread baker. Controlling the environment in which the yeast grows isthe first step to spectacular bread. You are now equipped to controlthe moisture, the temperature, and the acidity and saltiness of thebread culture you create.
116

Bakery Science “The art and science of baking” Ph.no.09996000499
Part 2: Using Yeast to Make Great Breads
How Long Should My Bread Rise?
It depends. The best wayto tell if the dough hasrisen enough is not by time—though it helps to set thetimer so you don’t forgetabout your dough—but bylook and feel. It willlook soft and bloated.When you touch the dough,it will be soft and yourfinger will leave anindentation when lightlypressed against the dough.If it is not ripe, thedough will tend to slowlyspring back.
If you want light, fluffybread, the dough shouldrise until it is puffy.The more gas incorporatedin the dough, the lighterit will be. Of course, iftoo much gas is captured inthe dough, it may collapse.The trick is to let thedough rise until you getjust to the edge of collapsing and then bake it. In most cases, thatmeans that the dough will double—or more—in volume. With a free-standing loaf, since the pan can’t support the loaf, you cannot letthe bread rise as much.
How long should it take? A lean, moist dough in a warm kitchen willprobably rise in 45 minutes or less. A firmer dough with lessmoisture will take longer to rise. Yeast is very sensitive totemperature; even a few degrees less in the kitchen can extend the
117
Bakery Science “The art and science of baking” Ph.no.09996000499
rise time significantly. A change of 17 degrees will cut the risetime in half.
It doesn’t hurt to let dough rise slowly. Bread that has risen slowlyhas a different flavor than fast risers, a more acidic flavor—hencethe sourdough flavors in slow rising breads. Conversely, bread thathas risen too quickly is not as flavorful and tends to have a crumblytexture.
While lean breads are deliberately retarded to enhance the flavors,rich doughs or doughs with ample sweeteners or flavors will gainlittle with an extend rise since the flavors and sugars tend to maskthe natural flavors of the yeast.
Why do We Need to Knead?
Bread dough needs to be elastic in order to capture the gases createdby the yeast, stretch as bubbles form in the dough, expand, and rise.Without that elasticity, bread would not have the open texture weenjoy nor would bread be chewy. But what creates that elasticity?
The endosperm of the wheat contains two important proteins, gluteninand gliadin. When wheat flour is mixed with water, these two proteinslink with the water molecules and crosslink with each other as theyare physically manipulated by kneading. It takes a certain amount ofphysical manipulation to bring these molecules into contact and createstrong links. As the kneading continues and these molecules createstronger bonds, gluten is formed. It is gluten that gives the doughelasticity.
If you watch the dough being mixed with the bread hook in yourstationary mixer, you will see changes occur in the dough as thekneading takes place. First the dough will stick to the sides of thebowl. As the bonds become stronger and the dough more elastic, itpulls away from the sides into a drier ball. The sides should becomeclean. Within four or five minutes at medium speed, the dough willchange even more and become elastic as the gluten is completelyformed. After you have watched this process a few times, you will beable to recognize the changes in the dough as the gluten forms. Ifyou pinch a portion of the dough and stretch it, it should pull to a
118
Bakery Science “The art and science of baking” Ph.no.09996000499
thin layer before it breaks. Without that elasticity, bread isn'tgood bread.
Does it Matter What Flour I Use?
As we just explained, gluten is a substance made up of the proteinsfound in wheat flour that gives bread its structure, strength, andtexture. Since all wheat flour (but not oat, barley, rye, or riceflours) contain the proteins to form gluten, how is it then that wecan use flour to make both a tender cake and firm chewy Frenchbread? The gluten makes the difference. In a cake, we want littlegluten development. In a chewy bread, we want a high percentage ofwell-developed gluten. We can control this texture in our baked goodsby changing four conditions:
Selection of flours: Cake flours are “weak” or “soft” and have alow protein content, probably around 8%. Bread flours and high-gluten flours are “strong” and usually have a protein content of12 to 14%.
Amount of shortening: Any fat is referred to as a shorteningbecause it shortens the gluten strands. It does so bylubricating the fibers so they cannot stick together. The moreshortening in the dough, the more tender and less chewy theproduct will be.
Amount of liquid: Gluten must have liquid to absorb and expand.If dough does not have enough liquid, the gluten will not fullyform and the product will not be tender. That's why we put aminimal amount of water in pie crusts.
Mixing methods: Generally, the more a batter or dough is mixed,the more the gluten develops. Tender muffins use low-proteinflour and are mixed only until the moisture is absorbed whilebreads are kneaded for a relatively long time.
119
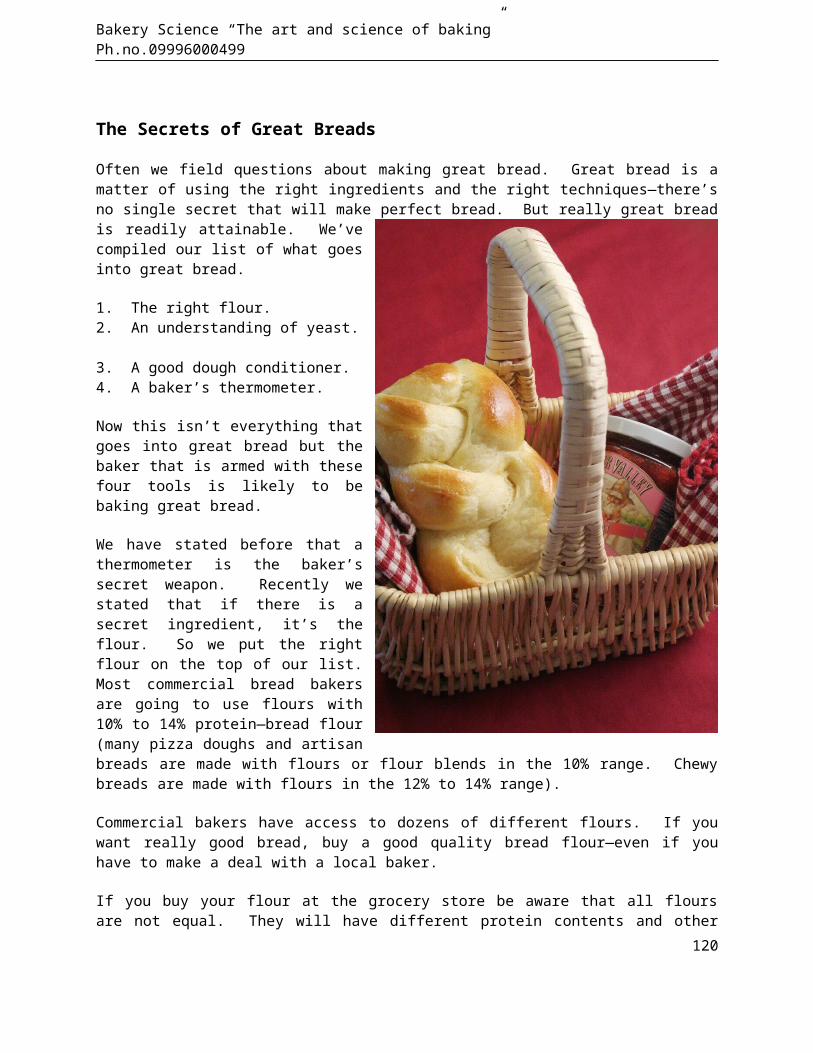
Bakery Science “The art and science of baking” Ph.no.09996000499
The Secrets of Great Breads
Often we field questions about making great bread. Great bread is amatter of using the right ingredients and the right techniques—there’sno single secret that will make perfect bread. But really great breadis readily attainable. We’vecompiled our list of what goesinto great bread.
1. The right flour. 2. An understanding of yeast.
3. A good dough conditioner. 4. A baker’s thermometer.
Now this isn’t everything thatgoes into great bread but thebaker that is armed with thesefour tools is likely to bebaking great bread.
We have stated before that athermometer is the baker’ssecret weapon. Recently westated that if there is asecret ingredient, it’s theflour. So we put the rightflour on the top of our list.Most commercial bread bakersare going to use flours with10% to 14% protein—bread flour(many pizza doughs and artisanbreads are made with flours or flour blends in the 10% range. Chewybreads are made with flours in the 12% to 14% range).
Commercial bakers have access to dozens of different flours. If youwant really good bread, buy a good quality bread flour—even if youhave to make a deal with a local baker.
If you buy your flour at the grocery store be aware that all floursare not equal. They will have different protein contents and other
120
Bakery Science “The art and science of baking” Ph.no.09996000499
characteristics. Name brands are likely to do a better job of holdingto a specification and will provide more consistent results.
You can get an idea of the protein content from the nutrition label.Divide the grams of protein by the grams in the serving size to getthe approximate percentage of protein in the flour (subject torounding error).
Yeast is a living organism. The gases expelled by the growing yeastare what leavens the bread. The skilled baker recognizes that withthe dough, he or she is culturing a living organism and that the yeastmust be growing in the right culture to create the gases to make lightairy bread. The right culture is primarily a function of moisture,temperature, and pH or the acidity level.
Dough conditioner alters the pH of the dough (among other things) sothat it enhances the growth of the yeast and it makes the dough moreextensible. All else being equal, dough conditioner can make a goodbread great.
You can buy dough conditioner (or dough enhancer as it is sometimescalled) in some grocery stores or you can get our dough conditioner.Ours is a commercial dough conditioner that we have found to be verygood.
We would not think of making bread without a thermometer. We use itto measure water temperature (when we use our bread machines, wemeasure the water temperature to exactly 80 degrees—not one degreeoff. When we make bread in our stand-type mixer or by hand, we usewater between 100 degrees and 110 degrees). We nearly always measurethe temperature of the bread when it comes from the oven. And you canuse a thermometer to measure the temperature of the dough to make surethat you have the right temperature for your yeast to grow in. Youcan buy an insta-read thermometer at most department stores and weoffer a larger-face baker’s thermometer on our site.
121
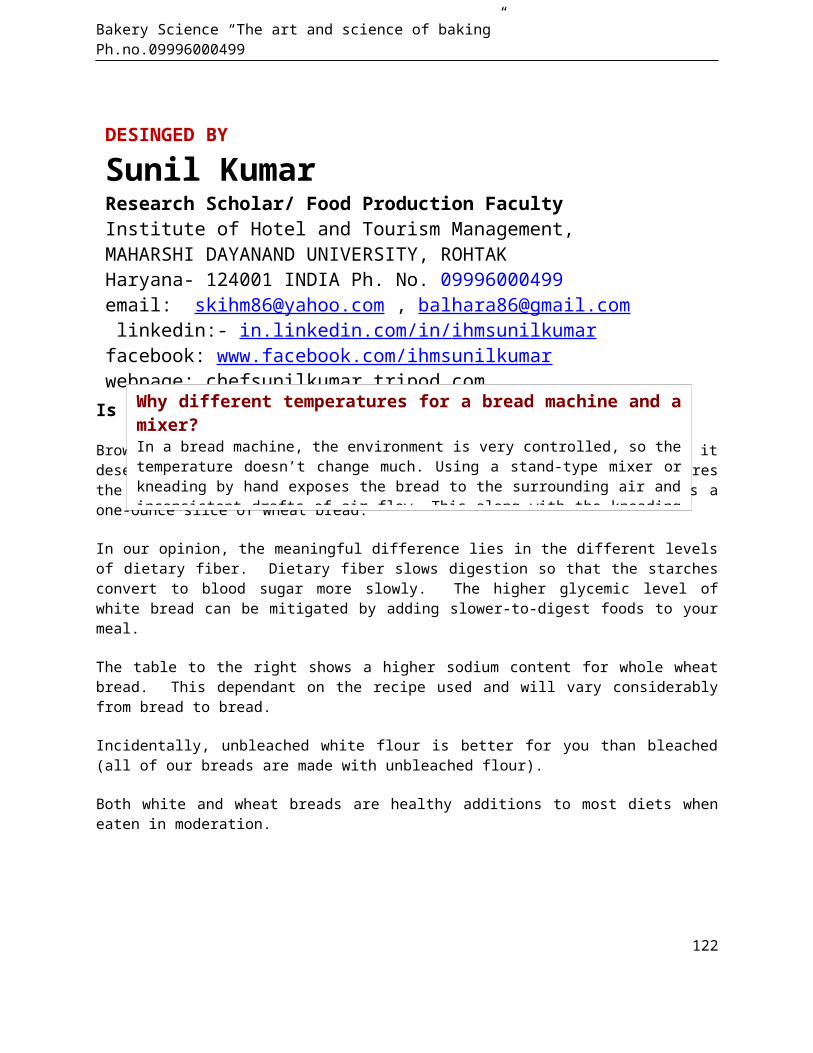
Bakery Science “The art and science of baking” Ph.no.09996000499
Is Brown Bread Better?
Brown (or whole wheat) bread is touted as the healthy choice. Does itdeserve its acclaim? You be the judge. The following table comparesthe nutritional content of a one-ounce slice of white bread versus aone-ounce slice of wheat bread.
In our opinion, the meaningful difference lies in the different levelsof dietary fiber. Dietary fiber slows digestion so that the starchesconvert to blood sugar more slowly. The higher glycemic level ofwhite bread can be mitigated by adding slower-to-digest foods to yourmeal.
The table to the right shows a higher sodium content for whole wheatbread. This dependant on the recipe used and will vary considerablyfrom bread to bread.
Incidentally, unbleached white flour is better for you than bleached(all of our breads are made with unbleached flour).
Both white and wheat breads are healthy additions to most diets wheneaten in moderation.
122
DESINGED BY
Sunil KumarResearch Scholar/ Food Production FacultyInstitute of Hotel and Tourism Management,MAHARSHI DAYANAND UNIVERSITY, ROHTAKHaryana- 124001 INDIA Ph. No. 09996000499email: [email protected] , [email protected] linkedin:- in.linkedin.com/in/ihmsunilkumarfacebook: www.facebook.com/ihmsunilkumar webpage: chefsunilkumar.tripod.com
Why different temperatures for a bread machine and amixer?In a bread machine, the environment is very controlled, so thetemperature doesn’t change much. Using a stand-type mixer orkneading by hand exposes the bread to the surrounding air andinconsistent drafts of air flow. This along with the kneading
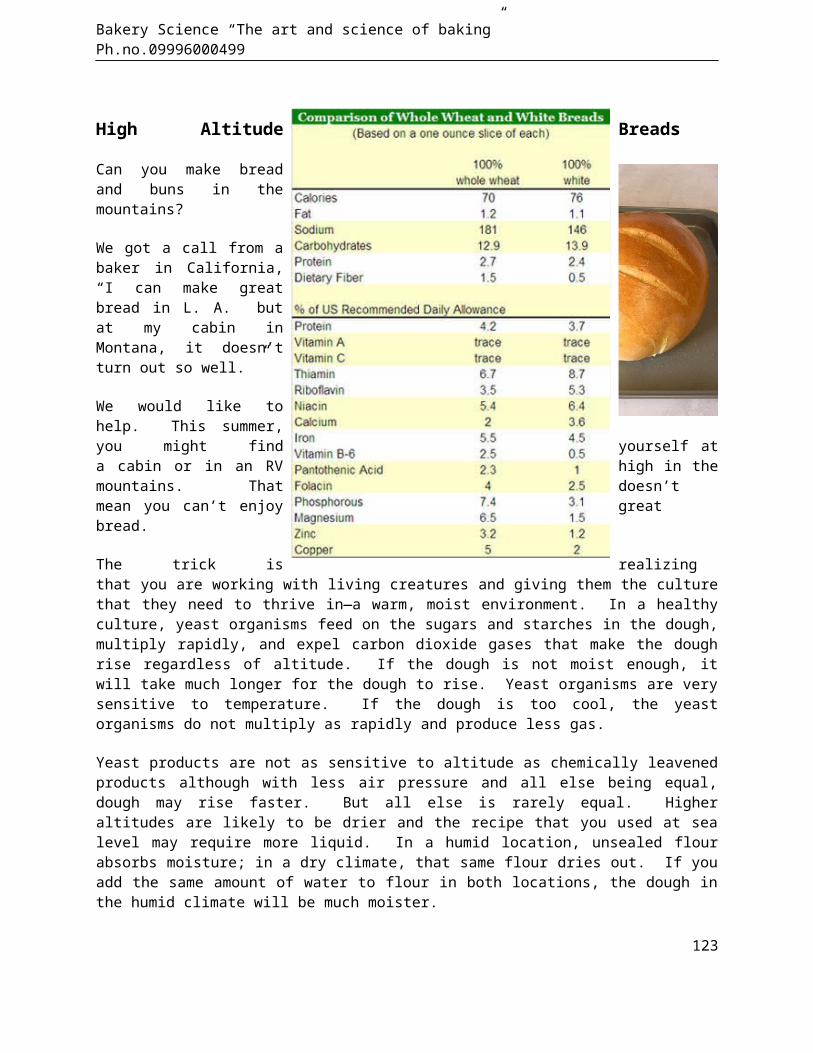
Bakery Science “The art and science of baking” Ph.no.09996000499
High Altitude Breads
Can you make breadand buns in themountains?
We got a call from abaker in California,“I can make greatbread in L. A. butat my cabin inMontana, it doesn’tturn out so well. ”
We would like tohelp. This summer,you might find yourself ata cabin or in an RV high in themountains. That doesn’tmean you can’t enjoy greatbread.
The trick is realizingthat you are working with living creatures and giving them the culturethat they need to thrive in—a warm, moist environment. In a healthyculture, yeast organisms feed on the sugars and starches in the dough,multiply rapidly, and expel carbon dioxide gases that make the doughrise regardless of altitude. If the dough is not moist enough, itwill take much longer for the dough to rise. Yeast organisms are verysensitive to temperature. If the dough is too cool, the yeastorganisms do not multiply as rapidly and produce less gas.
Yeast products are not as sensitive to altitude as chemically leavenedproducts although with less air pressure and all else being equal,dough may rise faster. But all else is rarely equal. Higheraltitudes are likely to be drier and the recipe that you used at sealevel may require more liquid. In a humid location, unsealed flourabsorbs moisture; in a dry climate, that same flour dries out. If youadd the same amount of water to flour in both locations, the dough inthe humid climate will be much moister.
123
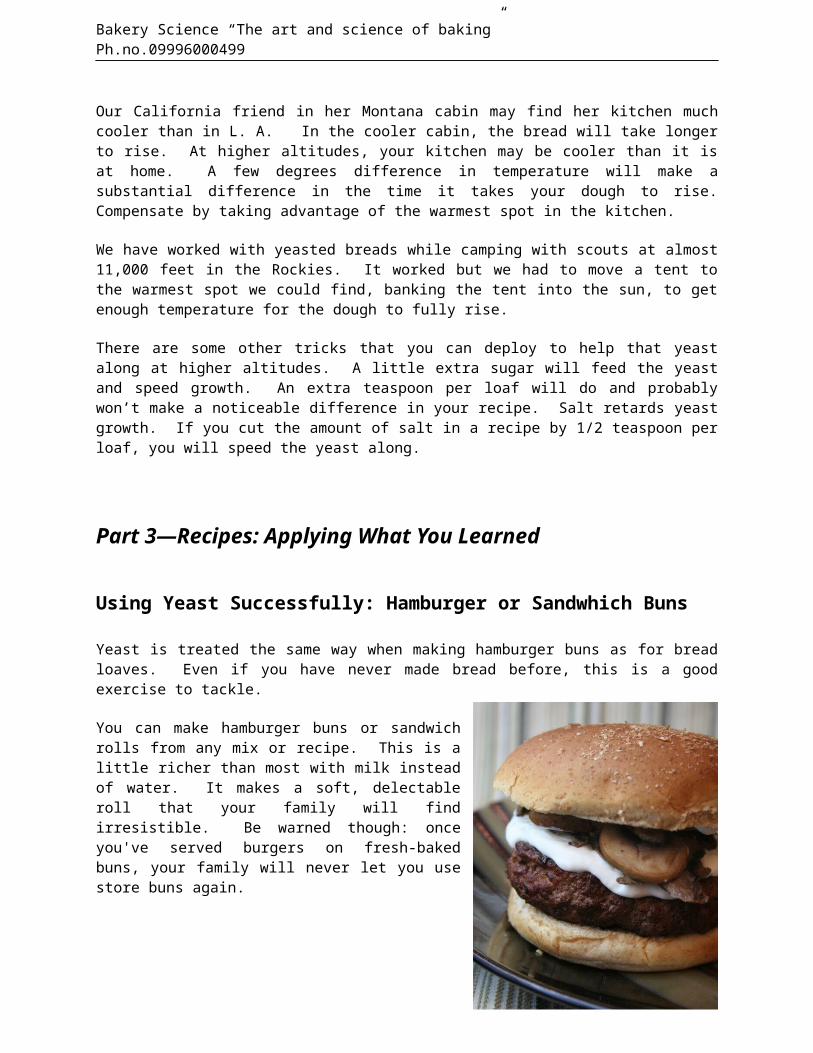
Bakery Science “The art and science of baking” Ph.no.09996000499
Our California friend in her Montana cabin may find her kitchen muchcooler than in L. A. In the cooler cabin, the bread will take longerto rise. At higher altitudes, your kitchen may be cooler than it isat home. A few degrees difference in temperature will make asubstantial difference in the time it takes your dough to rise.Compensate by taking advantage of the warmest spot in the kitchen.
We have worked with yeasted breads while camping with scouts at almost11,000 feet in the Rockies. It worked but we had to move a tent tothe warmest spot we could find, banking the tent into the sun, to getenough temperature for the dough to fully rise.
There are some other tricks that you can deploy to help that yeastalong at higher altitudes. A little extra sugar will feed the yeastand speed growth. An extra teaspoon per loaf will do and probablywon’t make a noticeable difference in your recipe. Salt retards yeastgrowth. If you cut the amount of salt in a recipe by 1/2 teaspoon perloaf, you will speed the yeast along.
Part 3—Recipes: Applying What You Learned
Using Yeast Successfully: Hamburger or Sandwhich Buns
Yeast is treated the same way when making hamburger buns as for breadloaves. Even if you have never made bread before, this is a goodexercise to tackle.
You can make hamburger buns or sandwichrolls from any mix or recipe. This is alittle richer than most with milk insteadof water. It makes a soft, delectableroll that your family will findirresistible. Be warned though: onceyou've served burgers on fresh-bakedbuns, your family will never let you usestore buns again.
124
Bakery Science “The art and science of baking” Ph.no.09996000499
American Hamburger Buns
Ingredients
5 1/2 cups plus of high-gluten bread flour, divided1 seven-gram packet instant yeast or two teaspoons2 tablespoons sugar 1 tablespoon salt 1 teaspoon dough conditioner2 cups milk1 egg, warmed to room temperature4 tablespoons butter, melted and slightly cooled
Note: Warm the egg to room temperature by placing the unbroken egg in a cup of warm water for ten minutes.
Directions
1. Place about one cup of flour in the bowl of your stand-type mixerequipped with a dough hook. Heat the milk in the microwave to105 degrees. Add the yeast and milk to the flour. Mix with thedough hook for 30 seconds or until the yeast is dissolved and theingredients begin to combine.
2. Add the rest of the 5 1/2 cups of flour, the sugar, salt, doughconditioner, melted butter, and egg and continue mixing at amedium speed for at least four minutes (it is important that thedough be mixed for at least four minutes to develop the gluten).The dough should clear the sides of the bowl but stick to thebottom. The dough should be soft but just dry enough that it canbe handled without being too sticky. If you feel that the doughis too moist, add one or two tablespoons of additional flour(with our flour and kitchen conditions, we need to add fouradditional tablespoons of flour to get the right consistency).Once the dough is mixed, move the dough to a large greased bowl,turn once to coat both sides, and cover with plastic wrap. Letstand until the dough is doubled and very puffy. Depending onhow warm your kitchen is, that may take an hour to an hour andone-half.
125
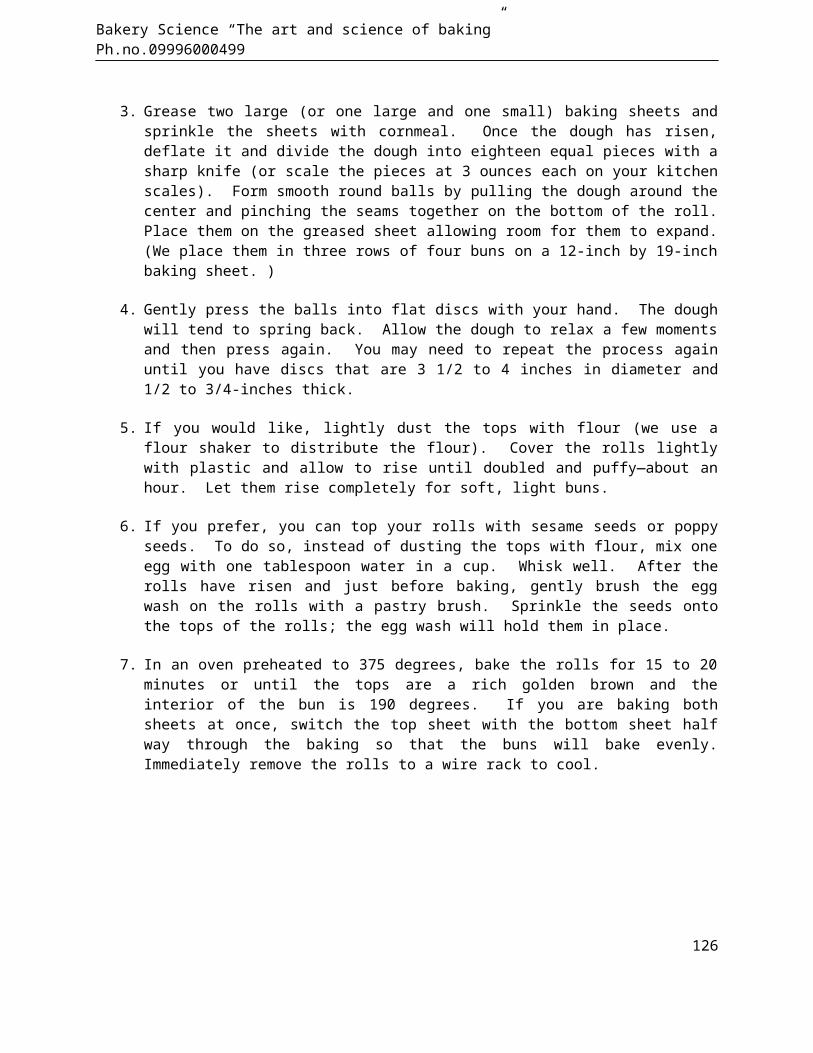
Bakery Science “The art and science of baking” Ph.no.09996000499
3. Grease two large (or one large and one small) baking sheets andsprinkle the sheets with cornmeal. Once the dough has risen,deflate it and divide the dough into eighteen equal pieces with asharp knife (or scale the pieces at 3 ounces each on your kitchenscales). Form smooth round balls by pulling the dough around thecenter and pinching the seams together on the bottom of the roll.Place them on the greased sheet allowing room for them to expand.(We place them in three rows of four buns on a 12-inch by 19-inchbaking sheet. )
4. Gently press the balls into flat discs with your hand. The doughwill tend to spring back. Allow the dough to relax a few momentsand then press again. You may need to repeat the process againuntil you have discs that are 3 1/2 to 4 inches in diameter and1/2 to 3/4-inches thick.
5. If you would like, lightly dust the tops with flour (we use aflour shaker to distribute the flour). Cover the rolls lightlywith plastic and allow to rise until doubled and puffy—about anhour. Let them rise completely for soft, light buns.
6. If you prefer, you can top your rolls with sesame seeds or poppyseeds. To do so, instead of dusting the tops with flour, mix oneegg with one tablespoon water in a cup. Whisk well. After therolls have risen and just before baking, gently brush the eggwash on the rolls with a pastry brush. Sprinkle the seeds ontothe tops of the rolls; the egg wash will hold them in place.
7. In an oven preheated to 375 degrees, bake the rolls for 15 to 20minutes or until the tops are a rich golden brown and theinterior of the bun is 190 degrees. If you are baking bothsheets at once, switch the top sheet with the bottom sheet halfway through the baking so that the buns will bake evenly.Immediately remove the rolls to a wire rack to cool.
126
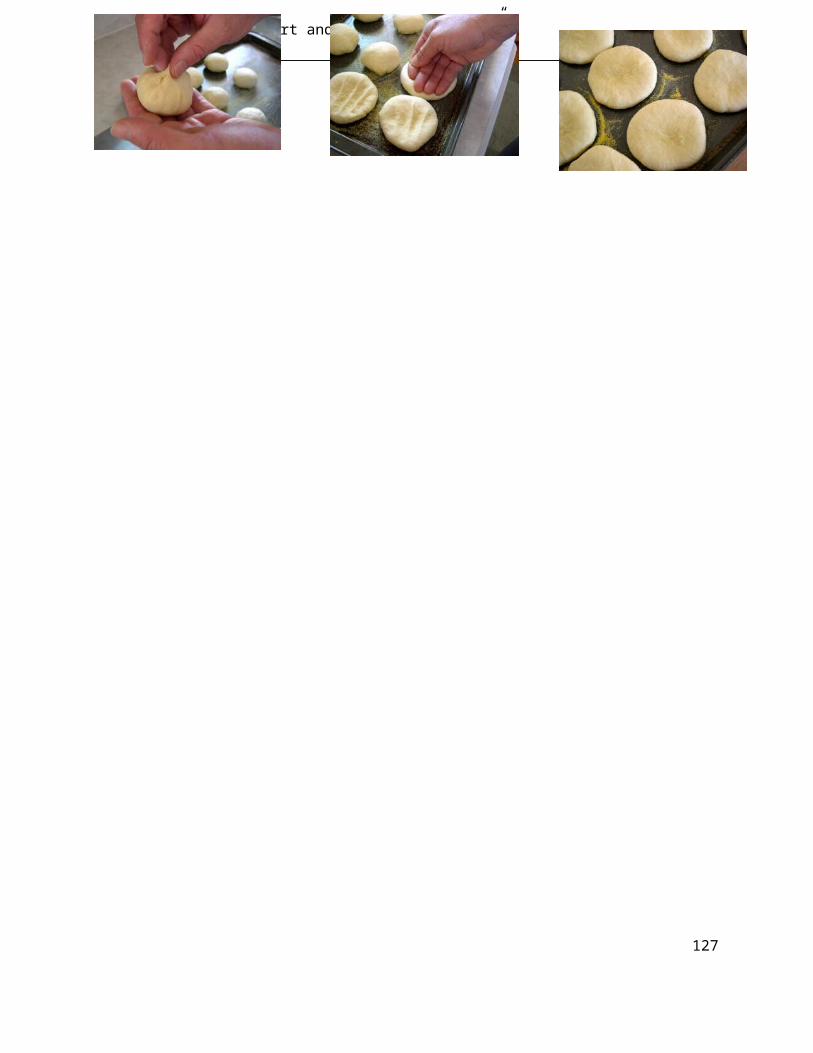
Bakery Science “The art and science of baking” Ph.no.09996000499
127
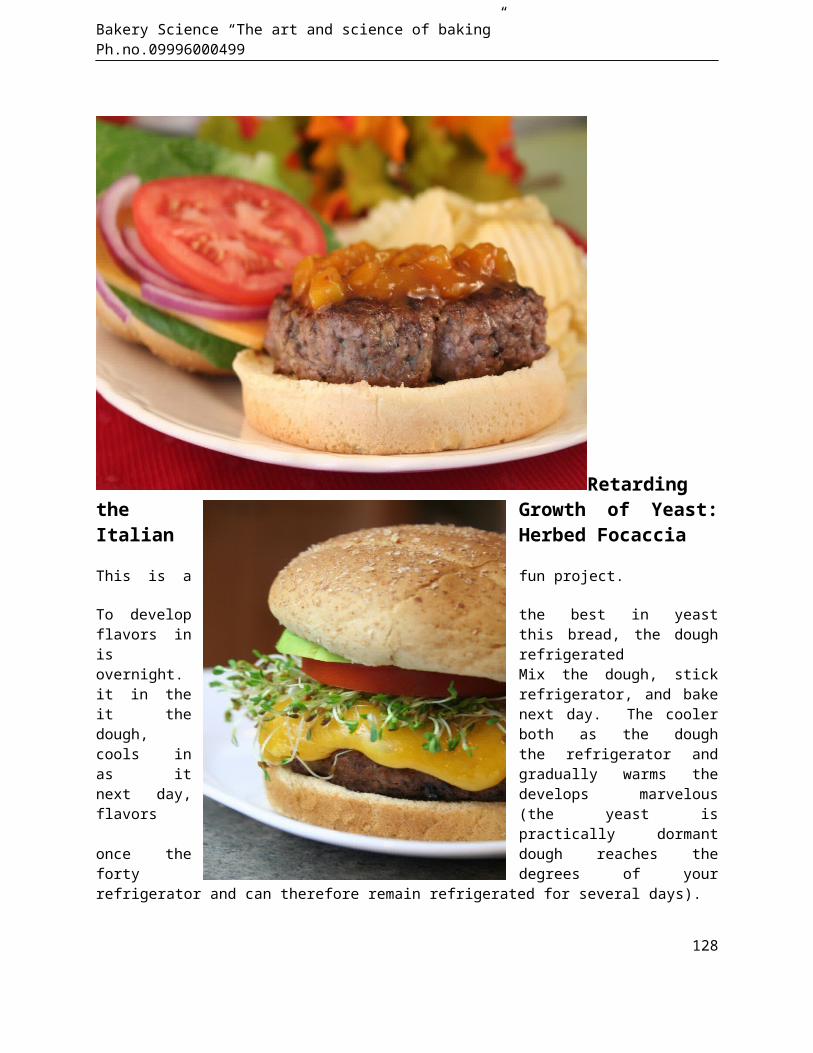
Bakery Science “The art and science of baking” Ph.no.09996000499
Retardingthe Growth of Yeast:Italian Herbed Focaccia
This is a fun project.
To develop the best in yeastflavors in this bread, the doughis refrigeratedovernight. Mix the dough, stickit in the refrigerator, and bakeit the next day. The coolerdough, both as the doughcools in the refrigerator andas it gradually warms thenext day, develops marvelousflavors (the yeast is
practically dormantonce the dough reaches theforty degrees of yourrefrigerator and can therefore remain refrigerated for several days).
128
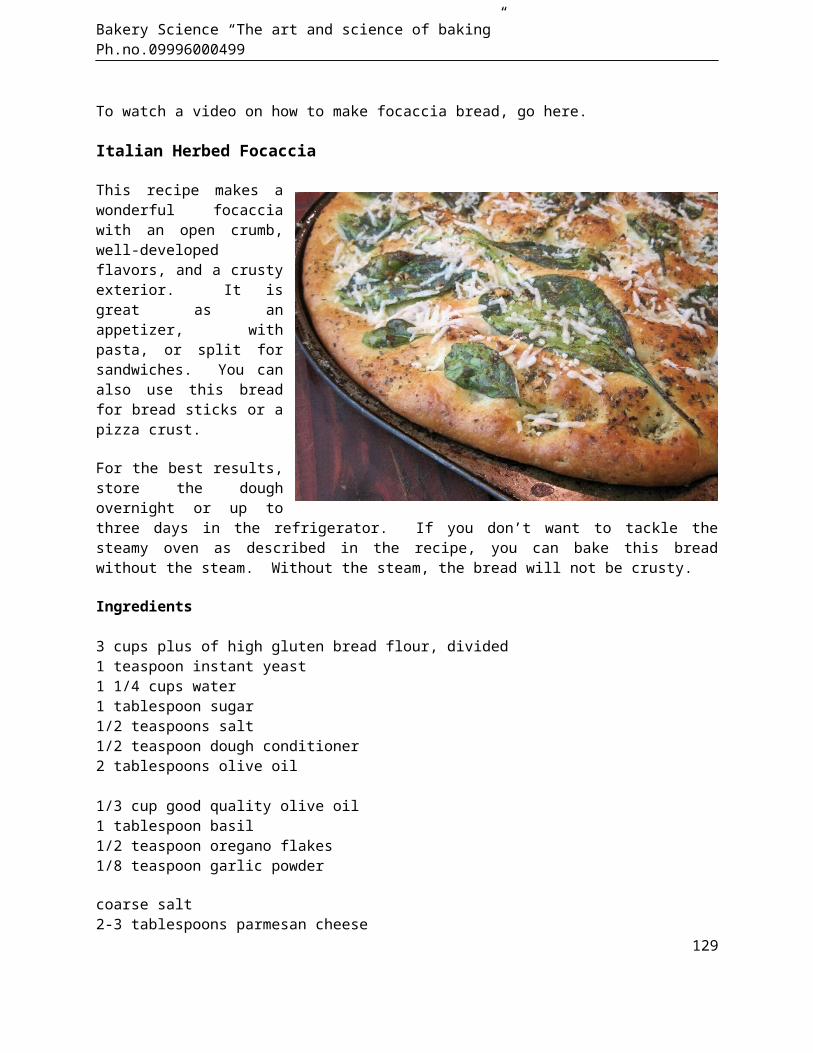
Bakery Science “The art and science of baking” Ph.no.09996000499
To watch a video on how to make focaccia bread, go here.
Italian Herbed Focaccia
This recipe makes awonderful focacciawith an open crumb,well-developedflavors, and a crustyexterior. It isgreat as anappetizer, withpasta, or split forsandwiches. You canalso use this breadfor bread sticks or apizza crust.
For the best results,store the doughovernight or up tothree days in the refrigerator. If you don’t want to tackle thesteamy oven as described in the recipe, you can bake this breadwithout the steam. Without the steam, the bread will not be crusty.
Ingredients
3 cups plus of high gluten bread flour, divided1 teaspoon instant yeast1 1/4 cups water1 tablespoon sugar 1/2 teaspoons salt 1/2 teaspoon dough conditioner2 tablespoons olive oil
1/3 cup good quality olive oil 1 tablespoon basil1/2 teaspoon oregano flakes1/8 teaspoon garlic powder
coarse salt 2-3 tablespoons parmesan cheese
129
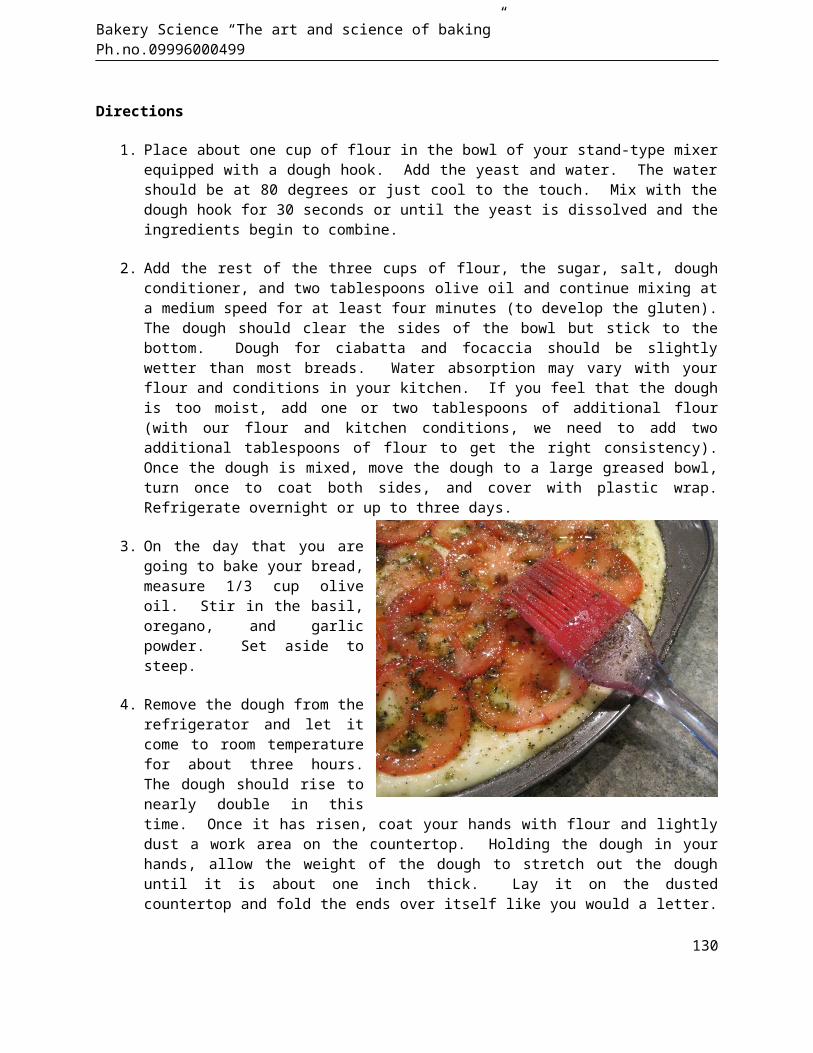
Bakery Science “The art and science of baking” Ph.no.09996000499
Directions
1. Place about one cup of flour in the bowl of your stand-type mixerequipped with a dough hook. Add the yeast and water. The watershould be at 80 degrees or just cool to the touch. Mix with thedough hook for 30 seconds or until the yeast is dissolved and theingredients begin to combine.
2. Add the rest of the three cups of flour, the sugar, salt, doughconditioner, and two tablespoons olive oil and continue mixing ata medium speed for at least four minutes (to develop the gluten).The dough should clear the sides of the bowl but stick to thebottom. Dough for ciabatta and focaccia should be slightlywetter than most breads. Water absorption may vary with yourflour and conditions in your kitchen. If you feel that the doughis too moist, add one or two tablespoons of additional flour(with our flour and kitchen conditions, we need to add twoadditional tablespoons of flour to get the right consistency).Once the dough is mixed, move the dough to a large greased bowl,turn once to coat both sides, and cover with plastic wrap.Refrigerate overnight or up to three days.
3. On the day that you aregoing to bake your bread,measure 1/3 cup oliveoil. Stir in the basil,oregano, and garlicpowder. Set aside tosteep.
4. Remove the dough from therefrigerator and let itcome to room temperaturefor about three hours.The dough should rise tonearly double in thistime. Once it has risen, coat your hands with flour and lightlydust a work area on the countertop. Holding the dough in yourhands, allow the weight of the dough to stretch out the doughuntil it is about one inch thick. Lay it on the dustedcountertop and fold the ends over itself like you would a letter.
130
Bakery Science “The art and science of baking” Ph.no.09996000499
Lightly dust the top with flour and cover with plastic wrap. Letdouble again in size, about one hour.
5. Prepare a 15-inch pizza pan or a baking sheet by greasing thesurface and dusting it with cornmeal. Once the dough hasdoubled, move it to the prepared pan. Using your fingertips,dimple and spread the dough as shown, spooning the oil and herbmixture over the dough as you spread it. The oil should run downinto the dimples and some may get under the dough. If the doughis too stiff to spread, allow it to rest a few minutes beforeresuming. The dough does not have to cover the entire pan. Oncethe dough is spread to cover most of the pan, sprinkle withcoarse salt, cover again loosely with plastic wrap, and let riseuntil doubled—about one hour.
6. Preheat the oven to 425 degrees. Place a large, flat metal panon the bottom rack of the oven to be used to hold water and withwhich to create steam and condition the crust (since high heatmay distort the pan, the pan should not be expensive—an oldbaking sheet is perfect. ) Do not use a glass or ceramic pan.
7. Immediately before placing the bread in the oven, mist the sidesof the oven with water using a spray mister and then pour twocups of very hot water into the steam pan. Be very careful—steamcan burn badly. To avoid rising steam, pour the water in withoutholding your hand directly over the pan. Wear a glove and turnyour face away from the escaping steam both when you pour thewater into the hot pan and later when you open the oven.
8. Immediately place the bread in the hot oven and quickly close thedoor to retain the steam. Turn the heat down to 400 degrees andbake for fifteen minutes opening the oven after about five andten minutes to mist the walls again. Continue baking at 350degrees for another 10 minutes or until the crust is golden brownand the bread tests done. The interior of the bread should reach210 degrees. Immediately remove the bread from the pan to coolon a wire rack. Sprinkle with parmesan cheese while the bread isstill hot. Unused focaccia should be stored in a paper bag atroom temperature.
131
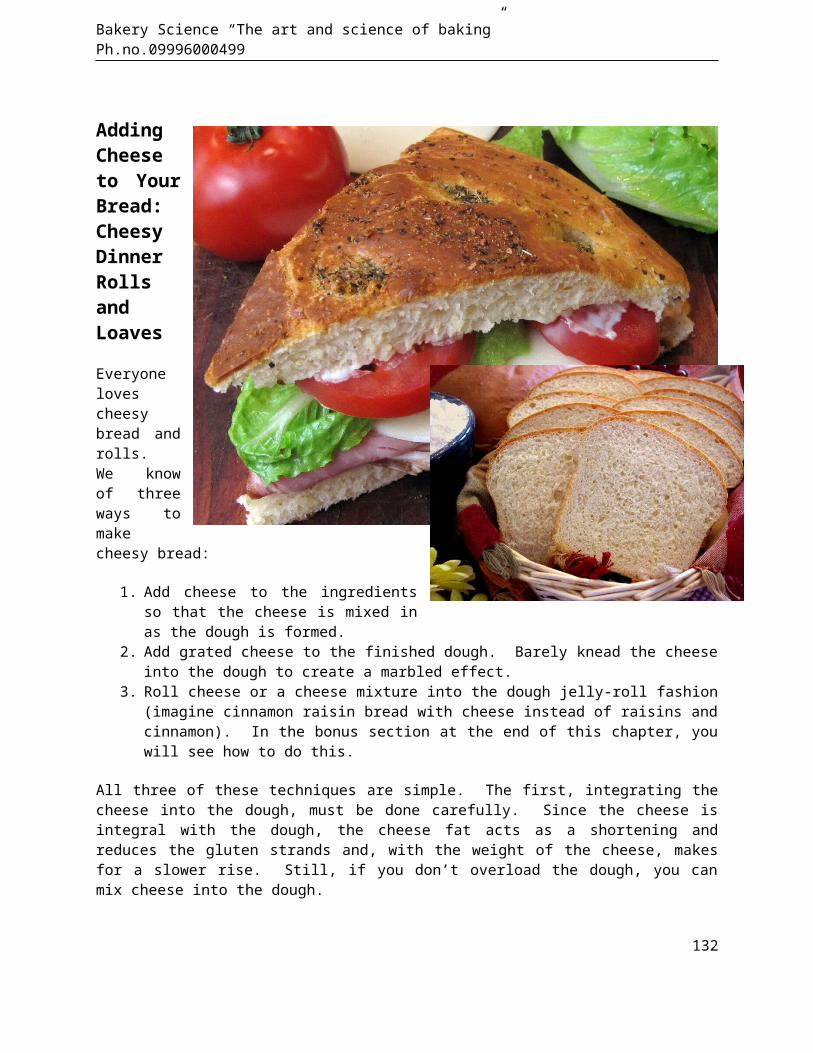
Bakery Science “The art and science of baking” Ph.no.09996000499
AddingCheeseto YourBread:CheesyDinnerRollsandLoaves
Everyonelovescheesybread androlls.We knowof threeways tomakecheesy bread:
1. Add cheese to the ingredientsso that the cheese is mixed inas the dough is formed.
2. Add grated cheese to the finished dough. Barely knead the cheeseinto the dough to create a marbled effect.
3. Roll cheese or a cheese mixture into the dough jelly-roll fashion(imagine cinnamon raisin bread with cheese instead of raisins andcinnamon). In the bonus section at the end of this chapter, youwill see how to do this.
All three of these techniques are simple. The first, integrating thecheese into the dough, must be done carefully. Since the cheese isintegral with the dough, the cheese fat acts as a shortening andreduces the gluten strands and, with the weight of the cheese, makesfor a slower rise. Still, if you don’t overload the dough, you canmix cheese into the dough.
132
Bakery Science “The art and science of baking” Ph.no.09996000499
The following pointers will help make that loaf of bread or batch ofrolls a booming success.
• Try 1/2 cup grated cheese for every one cup of flour in the recipe.Remember, if you get too much cheese in the dough, you’ll overwhelmthe yeast and the dough will not rise properly.
• For the best flavor, use a sharp cheese. Sharp cheddar works wellbut any sharp cheese will work.
• Since you’re trying to maximize the cheese flavor, there’s no reasonto add other fats to the mix to bog down the yeast. If the recipecalls for butter or oil, leave it out—there’s more room for cheese.
• If you want to give the rolls a little extra zip, add 1/4 teaspoonwhite pepper or 1/2 teaspoon ground dry mustard to the ingredients.No one will ever know it’s there and you’ll accent the flavor.
• The cheese will slow down the rise. Be patient. If it takes twiceas long to rise, that’s okay. Let it get nice and puffy.
• The cheese may increase the baking time by five minutes. Thelactose in the cheese will accentuate the browning of the rolls. Letthe rolls get to a rich golden brown color or use your thermometer.The internal temperature should be at least 190 degrees.
Dilly Cheese Bread
This is a great cheddar bread with the cheese incorporated into thedough. This recipe includes sharp cheddar and parmesan. There is alimit to how much cheese you can add to bread dough before you weighit down. When there is too much cheese, it takes much longer to rise.It can still make a fine bread but it takes patience (there is a pointwhere the cheese will just overcome the ability of the yeast). Thisbread will still rise quickly.
The recipe calls for dill weed. Feel free to substitute basil or theherb of your choice. The two tablespoons dill weed in this reciperesults in a mildly dilly bread. If you want more dill flavor, trythree or even four tablespoons of dill.
133
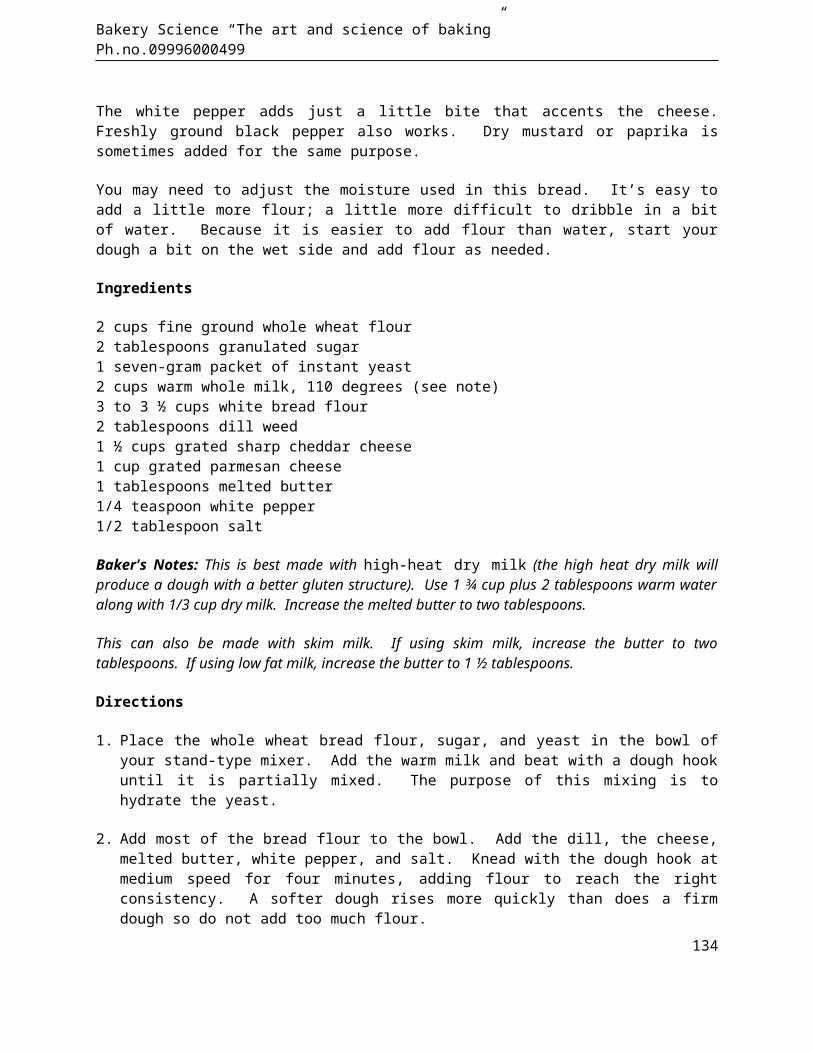
Bakery Science “The art and science of baking” Ph.no.09996000499
The white pepper adds just a little bite that accents the cheese.Freshly ground black pepper also works. Dry mustard or paprika issometimes added for the same purpose.
You may need to adjust the moisture used in this bread. It’s easy toadd a little more flour; a little more difficult to dribble in a bitof water. Because it is easier to add flour than water, start yourdough a bit on the wet side and add flour as needed.
Ingredients
2 cups fine ground whole wheat flour2 tablespoons granulated sugar1 seven-gram packet of instant yeast2 cups warm whole milk, 110 degrees (see note)3 to 3 ½ cups white bread flour2 tablespoons dill weed1 ½ cups grated sharp cheddar cheese1 cup grated parmesan cheese1 tablespoons melted butter1/4 teaspoon white pepper1/2 tablespoon salt
Baker's Notes: This is best made with high-heat dry milk (the high heat dry milk willproduce a dough with a better gluten structure). Use 1 ¾ cup plus 2 tablespoons warm wateralong with 1/3 cup dry milk. Increase the melted butter to two tablespoons.
This can also be made with skim milk. If using skim milk, increase the butter to twotablespoons. If using low fat milk, increase the butter to 1 ½ tablespoons.
Directions
1. Place the whole wheat bread flour, sugar, and yeast in the bowl ofyour stand-type mixer. Add the warm milk and beat with a dough hookuntil it is partially mixed. The purpose of this mixing is tohydrate the yeast.
2. Add most of the bread flour to the bowl. Add the dill, the cheese,melted butter, white pepper, and salt. Knead with the dough hook atmedium speed for four minutes, adding flour to reach the rightconsistency. A softer dough rises more quickly than does a firmdough so do not add too much flour.
134
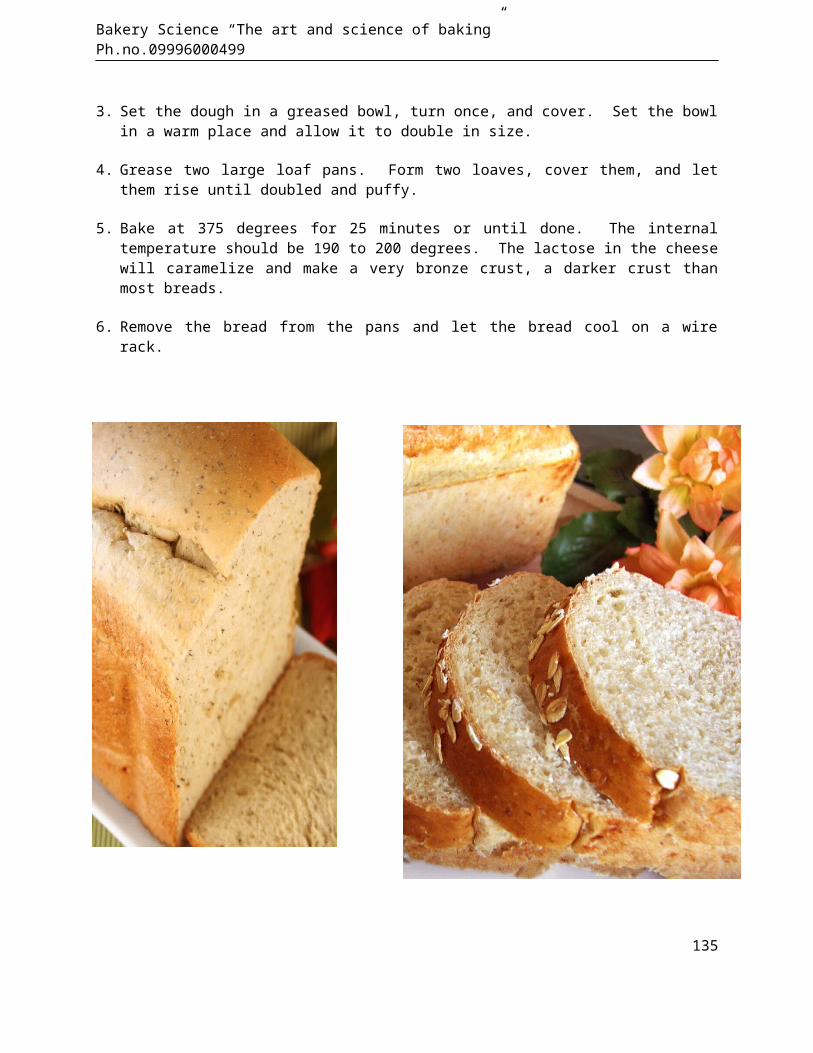
Bakery Science “The art and science of baking” Ph.no.09996000499
3. Set the dough in a greased bowl, turn once, and cover. Set the bowlin a warm place and allow it to double in size.
4. Grease two large loaf pans. Form two loaves, cover them, and letthem rise until doubled and puffy.
5. Bake at 375 degrees for 25 minutes or until done. The internaltemperature should be 190 to 200 degrees. The lactose in the cheesewill caramelize and make a very bronze crust, a darker crust thanmost breads.
6. Remove the bread from the pans and let the bread cool on a wirerack.
135

Bakery Science “The art and science of baking” Ph.no.09996000499
Adding Grains to Your Bread: Teton Valley Whole GrainBread
Adding a cereal mix or cracked wheatmakes great bread. You can addcereal to most recipes. Because different grain mixes and differentgrain sizes absorb water differently, be prepared to adjust the waterto flour ratio in your recipe.
This recipe uses our whole grain cereal mix. You can certainly useother cereals (with our flours and cereal, in our kitchen, this isexactly the right water to flour ratio).
Ingredients
¾ cup Teton Valley whole grain cereal or other cereal or cracked wheat1 ½ cups hot water
6 tablespoons butter 3 cups good quality bread flour3 cups whole wheat flour2 tablespoons wheat gluten1 teaspoon dough conditioner
¼ cup granulated sugar 2 teaspoons salt ¼ cup baker’s high heat dry milk
1 7-gram packet of instant yeast
1 cup warm water at 105 to 110 degrees
Directions
1. Mix the cereal with the 1 ½ cups hot water. Set aside for twohours to absorb the water and soften.
2. Melt the butter in the microwave and set it aside to cool. Withshortening or butter, grease a large bowl for the dough and 2large loaf pans (9 x 5-inch). If you are going to make hearthloaves, grease a baking sheet and sprinkle it with cornmeal.
3. Measure the flours into a large bowl by whisking the flour sothat it’s not packed and then spooning it into the measuring cup
136
Bakery Science “The art and science of baking” Ph.no.09996000499
followed by leveling the top with a straightedge. Add the glutenand conditioner and stir to combine. Stir in the sugar, salt,and dry milk.
4. Put about 1/3 of the flour mixture in the bowl of your stand typemixer equipped with a dough hook. Add the yeast. Add the 1 cupwater at the indicated temperature. With the dough hook, run themachine for thirty seconds to mix the water with the flour tocreate a slurry. Add cereal and water mixture and the rest ofthe flour mixture (the cereal and water mixture should be 105 to110 degrees. If it has cooled beyond that, reheat it in themicrowave). Add the melted butter.
5. Mix at medium speed for about four minutes or until the glutenhas formed and the dough is elastic. The dough should be softbut not too sticky. To reach the right consistency, you may needto dribble a little extra water (maybe one tablespoon) or flouras the dough is kneading. Place the dough in the prepared bowland cover it to keep the dough from drying while it rises. Letit rise until it doubles.
6. Gently deflate the dough and form two loaves either as free-standing loaves on a baking sheet or sandwich loaves for yourbread pans. Cover the loaves and let them rise again until thedough is soft and puffy, about doubled in size.
7. If you are going to make hearth bread with its chewy, crispcrust, see the direction for baking listed for “Easy SourdoughBread” in the last section of this chapter. If not, preheat theoven to 350 degrees. Bake the bread for about 35 minutes. Thetime will vary depending on your loaves, the pans, and your oven.The bread should make a hollow sound when thumped on the bottom.The internal temperature of the loaves should be 190 degrees.
8. Remove the loaves form the pans and let them cool on a wire rack.Cool completely, or nearly so, before slicing.
137

Bakery Science “The art and science of baking” Ph.no.09996000499
AddingVegetablesto YourBread:SummerZucchiniand CarrotBread
When thefirstvegetables ofthe summerare on, welike to addthem to our breads.You’ll find that youcan use many of thevegetables from thegarden in your baking—adding color, flavor,and nutrition.
Any time that you addvegetables to yourbread, be prepared to adjust the amount of flour that you use.Vegetables will add moisture to your bread, and how they are grated orpureed along with the type of vegetables will determine the moistureadded. But it’s easy to add a little more flour; a little moredifficult to dribble in a bit of water. Because it is easier to addflour than water, start your dough a bit on the wet side and add flouras needed.
Here is a wonderful bread recipe for all that zucchini squash thatseems to overwhelm us each summer. Some fresh carrots are added forcolor and nutrition. Unlike the quick bread recipes for zucchinisquash, this is a yeasted recipe.
138
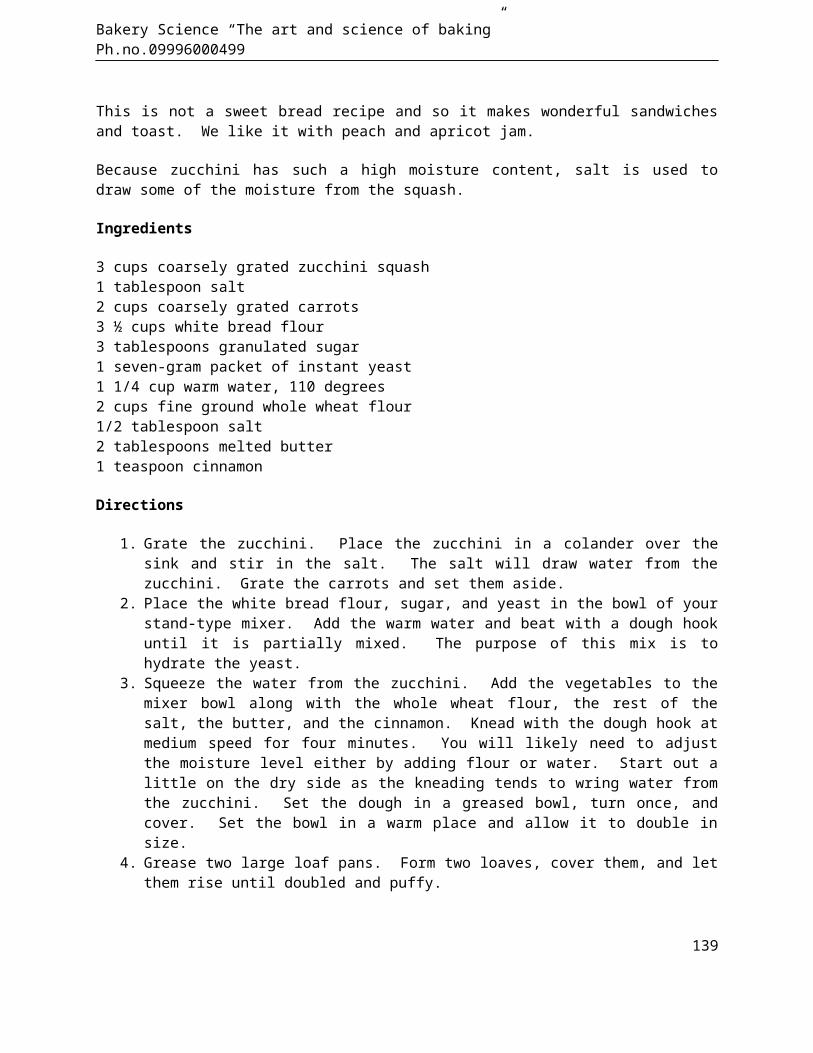
Bakery Science “The art and science of baking” Ph.no.09996000499
This is not a sweet bread recipe and so it makes wonderful sandwichesand toast. We like it with peach and apricot jam.
Because zucchini has such a high moisture content, salt is used todraw some of the moisture from the squash.
Ingredients
3 cups coarsely grated zucchini squash1 tablespoon salt2 cups coarsely grated carrots 3 ½ cups white bread flour3 tablespoons granulated sugar1 seven-gram packet of instant yeast1 1/4 cup warm water, 110 degrees2 cups fine ground whole wheat flour1/2 tablespoon salt2 tablespoons melted butter1 teaspoon cinnamon
Directions
1. Grate the zucchini. Place the zucchini in a colander over thesink and stir in the salt. The salt will draw water from thezucchini. Grate the carrots and set them aside.
2. Place the white bread flour, sugar, and yeast in the bowl of yourstand-type mixer. Add the warm water and beat with a dough hookuntil it is partially mixed. The purpose of this mix is tohydrate the yeast.
3. Squeeze the water from the zucchini. Add the vegetables to themixer bowl along with the whole wheat flour, the rest of thesalt, the butter, and the cinnamon. Knead with the dough hook atmedium speed for four minutes. You will likely need to adjustthe moisture level either by adding flour or water. Start out alittle on the dry side as the kneading tends to wring water fromthe zucchini. Set the dough in a greased bowl, turn once, andcover. Set the bowl in a warm place and allow it to double insize.
4. Grease two large loaf pans. Form two loaves, cover them, and letthem rise until doubled and puffy.
139
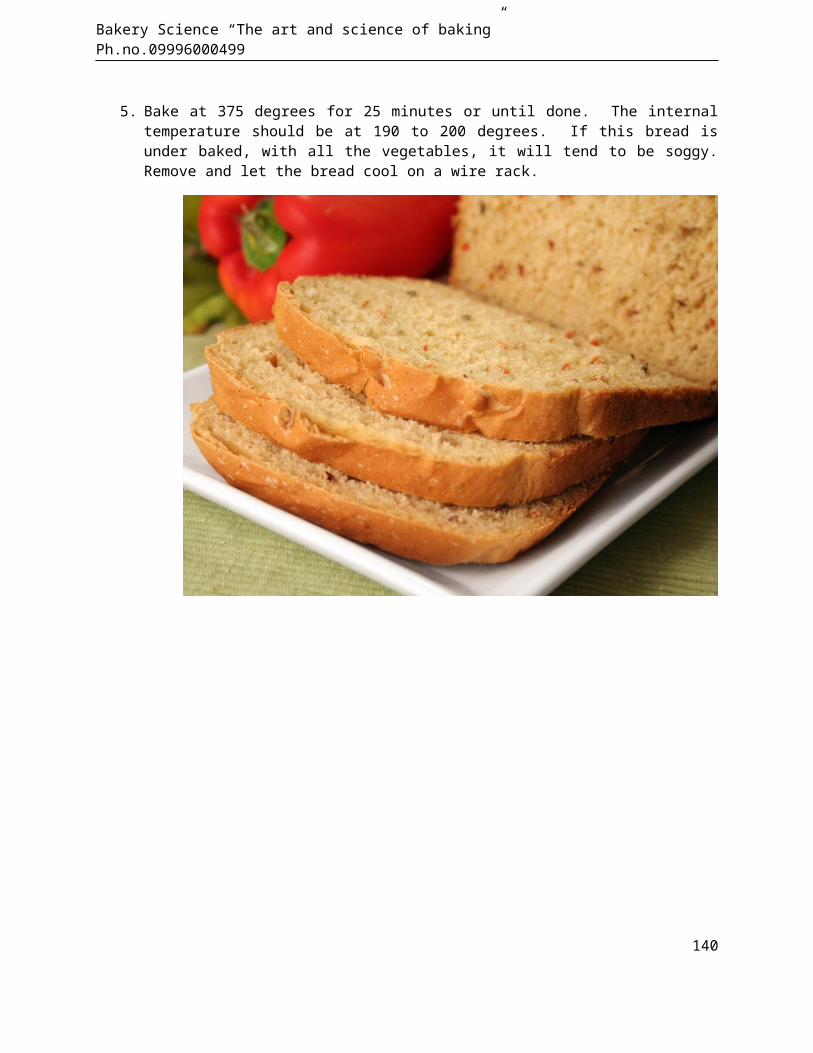
Bakery Science “The art and science of baking” Ph.no.09996000499
5. Bake at 375 degrees for 25 minutes or until done. The internaltemperature should be at 190 to 200 degrees. If this bread isunder baked, with all the vegetables, it will tend to be soggy.Remove and let the bread cool on a wire rack.
140

Bakery Science “The art and science of baking” Ph.no.09996000499
Using Cornmeal in Your Bread: Southern Cornbread(Yeast)
We find cornmeal in bread recipes from time to time and love thecrunchy goodness it adds. Hearty peasant, artisan, and whole grainbreads have cornmeal added. Anadama bread has cornmeal in it and isone of our favorite breads for morning toast. Though not popular,there are cornbreads made with yeast (they deserve to be popular).
A yeasted cornbread is different. Because the kneading develops thegluten, it is more bread-like and less crumbly than traditionalcornbread. Oh, and this bread makes great Thanksgiving dressing.
Ingredients
1 (7 gram) package active dry yeast1 cups warm water (100 to 110 degrees)4 1/3 cups all-purpose or bread flour (more orless)1 teaspoon salt 1 2/3 cup cornmeal4 tablespoons melted butter 1/4 cup honey 2 large eggs 1 can whole kernel corn, drained2 tablespoons cornmeal1 egg for egg wash (optional)
Directions
1. In the bowl of a stand-type mixer, dissolve the yeast in the warmwater.
2. Add half of the flour and mix with a dough hook. Add the salt,cornmeal, butter, honey, two eggs, and drained corn and continuemixing.
3. While continuing to mix, add the flour needed to bring the doughto a bread-dough type consistency. The amount of flour neededwill vary largely on how well-drained the corn was.
141
Bakery Science “The art and science of baking” Ph.no.09996000499
4. Knead as you would for other yeast breads and then remove thedough to a greased bowl. Turn once to oil both sides. Coverwith plastic wrap and let rise until doubled.
5. Once doubled, divide the dough into two equal parts for twoloaves. Form the loaves. If you are going to make free standingartisan loaves, grease a baking sheet and sprinkle the sheet withpart of the remaining cornmeal. Place the loaves on the sheet.If you are making sandwich loaves, grease the baking pans well—the bread tends to stick to the pans—and sprinkle cornmeal in thepans. Let the bread rise until doubled again.
6. Preheat the oven to 375 degrees. If you choose, just beforebaking, whisk the remaining egg with one tablespoon water andbrush the egg wash on the loaf. Sprinkle the loaf with cornmeal.Bake the bread for about 30 minutes or until the bread is goldenbrown and tests done. Remove the bread from the pans and cool onracks. Freeze any extra bread or save the bread for croutons orstuffing.
142
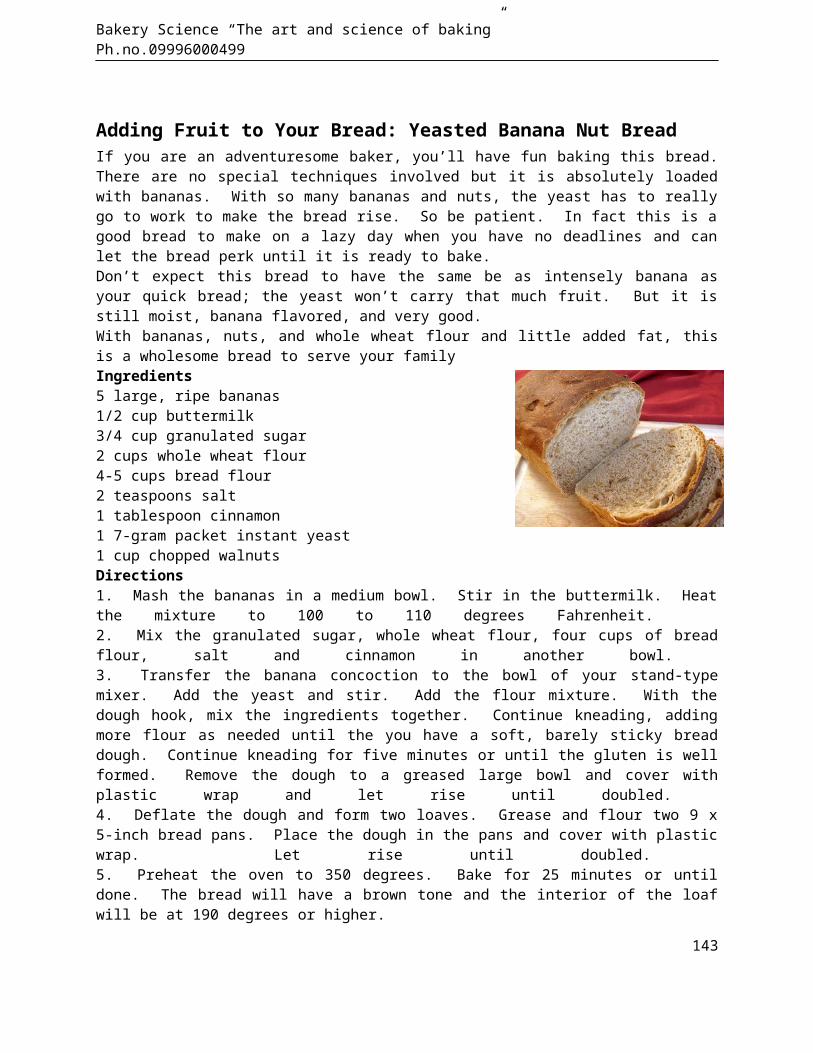
Bakery Science “The art and science of baking” Ph.no.09996000499
Adding Fruit to Your Bread: Yeasted Banana Nut BreadIf you are an adventuresome baker, you’ll have fun baking this bread.There are no special techniques involved but it is absolutely loadedwith bananas. With so many bananas and nuts, the yeast has to reallygo to work to make the bread rise. So be patient. In fact this is agood bread to make on a lazy day when you have no deadlines and canlet the bread perk until it is ready to bake. Don’t expect this bread to have the same be as intensely banana asyour quick bread; the yeast won’t carry that much fruit. But it isstill moist, banana flavored, and very good. With bananas, nuts, and whole wheat flour and little added fat, thisis a wholesome bread to serve your familyIngredients5 large, ripe bananas1/2 cup buttermilk 3/4 cup granulated sugar2 cups whole wheat flour4-5 cups bread flour2 teaspoons salt1 tablespoon cinnamon1 7-gram packet instant yeast1 cup chopped walnutsDirections1. Mash the bananas in a medium bowl. Stir in the buttermilk. Heatthe mixture to 100 to 110 degrees Fahrenheit. 2. Mix the granulated sugar, whole wheat flour, four cups of breadflour, salt and cinnamon in another bowl. 3. Transfer the banana concoction to the bowl of your stand-typemixer. Add the yeast and stir. Add the flour mixture. With thedough hook, mix the ingredients together. Continue kneading, addingmore flour as needed until the you have a soft, barely sticky breaddough. Continue kneading for five minutes or until the gluten is wellformed. Remove the dough to a greased large bowl and cover withplastic wrap and let rise until doubled. 4. Deflate the dough and form two loaves. Grease and flour two 9 x5-inch bread pans. Place the dough in the pans and cover with plasticwrap. Let rise until doubled. 5. Preheat the oven to 350 degrees. Bake for 25 minutes or untildone. The bread will have a brown tone and the interior of the loafwill be at 190 degrees or higher.
143
Bakery Science “The art and science of baking” Ph.no.09996000499
Baker’s notes: 1. Depending on the size of the bananas used, you will need to adjustthe amount of flour in the recipe. 2. Allow plenty of time for the bread to rise. It may take a couple hours to double in volume. 3. The sugar in this recipe will cause the bread to brown more rapidly than in most recipes. Do not under bake. 4. The sugar and bananas in this recipe seem to make the loaves stickmore aggressively to the pans than most breads. Grease the pans well and dust them with flour. Non-stick pans help.
144
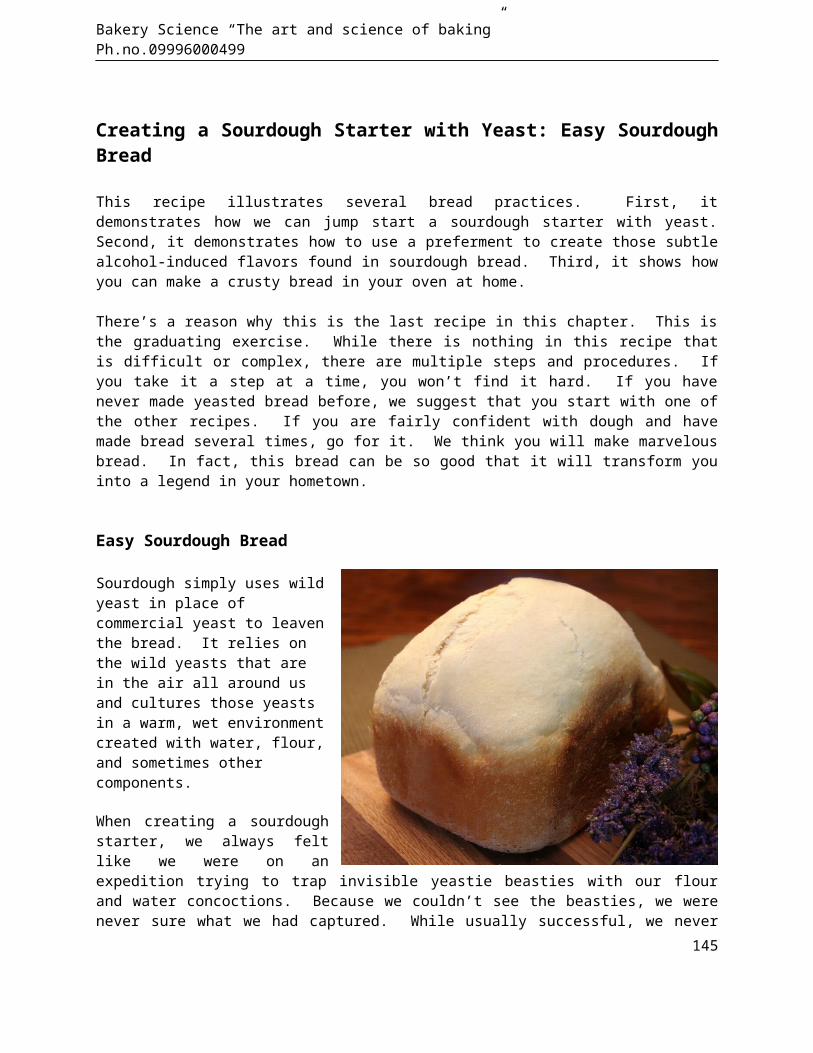
Bakery Science “The art and science of baking” Ph.no.09996000499
Creating a Sourdough Starter with Yeast: Easy SourdoughBread
This recipe illustrates several bread practices. First, itdemonstrates how we can jump start a sourdough starter with yeast.Second, it demonstrates how to use a preferment to create those subtlealcohol-induced flavors found in sourdough bread. Third, it shows howyou can make a crusty bread in your oven at home.
There’s a reason why this is the last recipe in this chapter. This isthe graduating exercise. While there is nothing in this recipe thatis difficult or complex, there are multiple steps and procedures. Ifyou take it a step at a time, you won’t find it hard. If you havenever made yeasted bread before, we suggest that you start with one ofthe other recipes. If you are fairly confident with dough and havemade bread several times, go for it. We think you will make marvelousbread. In fact, this bread can be so good that it will transform youinto a legend in your hometown.
Easy Sourdough Bread
Sourdough simply uses wildyeast in place ofcommercial yeast to leaventhe bread. It relies onthe wild yeasts that arein the air all around usand cultures those yeastsin a warm, wet environmentcreated with water, flour,and sometimes othercomponents.
When creating a sourdoughstarter, we always feltlike we were on anexpedition trying to trap invisible yeastie beasties with our flourand water concoctions. Because we couldn’t see the beasties, we werenever sure what we had captured. While usually successful, we never
145
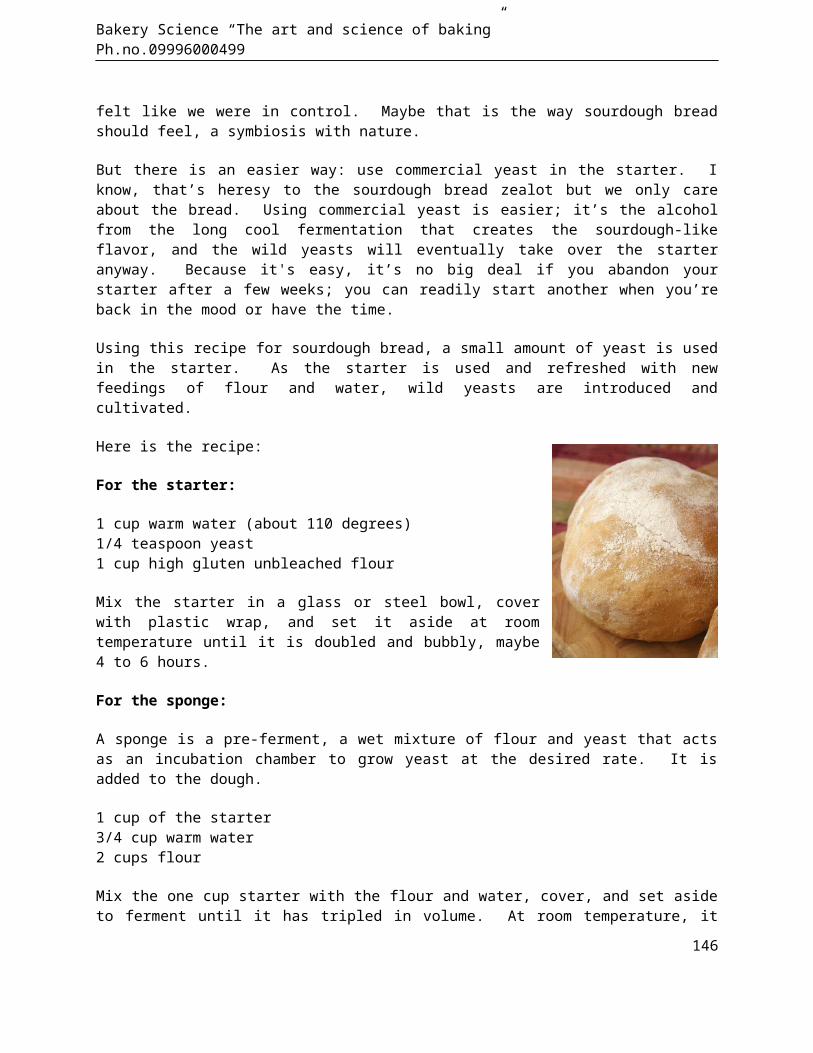
Bakery Science “The art and science of baking” Ph.no.09996000499
felt like we were in control. Maybe that is the way sourdough breadshould feel, a symbiosis with nature.
But there is an easier way: use commercial yeast in the starter. Iknow, that’s heresy to the sourdough bread zealot but we only careabout the bread. Using commercial yeast is easier; it’s the alcoholfrom the long cool fermentation that creates the sourdough-likeflavor, and the wild yeasts will eventually take over the starteranyway. Because it's easy, it’s no big deal if you abandon yourstarter after a few weeks; you can readily start another when you’reback in the mood or have the time.
Using this recipe for sourdough bread, a small amount of yeast is usedin the starter. As the starter is used and refreshed with newfeedings of flour and water, wild yeasts are introduced andcultivated.
Here is the recipe:
For the starter:
1 cup warm water (about 110 degrees)1/4 teaspoon yeast1 cup high gluten unbleached flour
Mix the starter in a glass or steel bowl, coverwith plastic wrap, and set it aside at roomtemperature until it is doubled and bubbly, maybe4 to 6 hours.
For the sponge:
A sponge is a pre-ferment, a wet mixture of flour and yeast that actsas an incubation chamber to grow yeast at the desired rate. It isadded to the dough.
1 cup of the starter3/4 cup warm water2 cups flour
Mix the one cup starter with the flour and water, cover, and set asideto ferment until it has tripled in volume. At room temperature, it
146
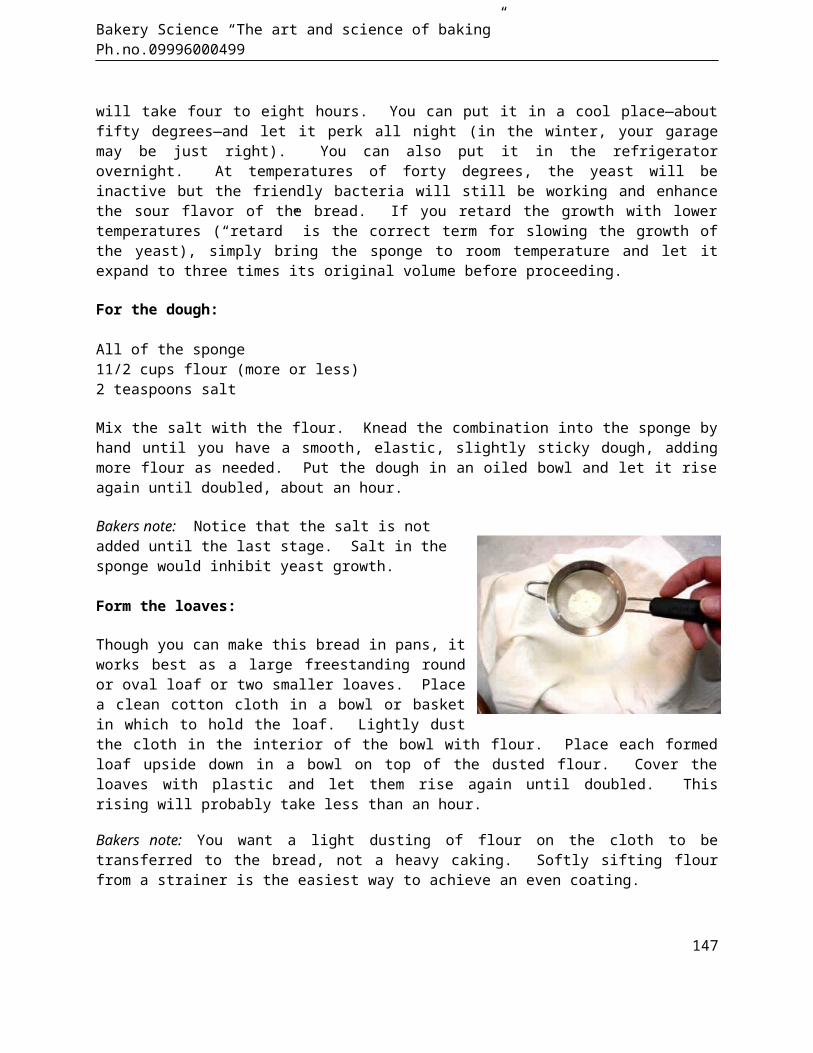
Bakery Science “The art and science of baking” Ph.no.09996000499
will take four to eight hours. You can put it in a cool place—aboutfifty degrees—and let it perk all night (in the winter, your garagemay be just right). You can also put it in the refrigeratorovernight. At temperatures of forty degrees, the yeast will beinactive but the friendly bacteria will still be working and enhancethe sour flavor of the bread. If you retard the growth with lowertemperatures (“retard” is the correct term for slowing the growth ofthe yeast), simply bring the sponge to room temperature and let itexpand to three times its original volume before proceeding.
For the dough: All of the sponge11/2 cups flour (more or less)2 teaspoons salt
Mix the salt with the flour. Knead the combination into the sponge byhand until you have a smooth, elastic, slightly sticky dough, addingmore flour as needed. Put the dough in an oiled bowl and let it riseagain until doubled, about an hour.
Bakers note: Notice that the salt is notadded until the last stage. Salt in thesponge would inhibit yeast growth. Form the loaves:
Though you can make this bread in pans, itworks best as a large freestanding roundor oval loaf or two smaller loaves. Placea clean cotton cloth in a bowl or basketin which to hold the loaf. Lightly dustthe cloth in the interior of the bowl with flour. Place each formedloaf upside down in a bowl on top of the dusted flour. Cover theloaves with plastic and let them rise again until doubled. Thisrising will probably take less than an hour.
Bakers note: You want a light dusting of flour on the cloth to betransferred to the bread, not a heavy caking. Softly sifting flourfrom a strainer is the easiest way to achieve an even coating.
147
Bakery Science “The art and science of baking” Ph.no.09996000499
If you choose to bake the bread in pans, omit this step. Instead, letthe dough rise in a greased bowl covered with plastic until doubled.Form the loaves for pans, place the loaves in greased pans, and letrise until well-expanded and puffy. Bake at 350 degrees until done,about 30 minutes.
To bake crusty bread:
To form the thick, chewy crust that is typical of artisan breads,place a large, shallow, metal pan in the oven on the lowest shelf.You will pour hot water in this pan to create steam in the oven.(High heat is hard on pans so don't use one of your better pans, anddon’t use a glass or ceramic pan which might shatter. ) An old sheetpan is ideal. Fill a spray bottle with water. You will use this tospray water into the oven to create even more steam.
Preheat the oven to 425 degrees. When the oven is hot and the breadis fully risen and is soft and puffy—being very careful not to burnyourself with the rising steam and with a mitted hand—turn your headaway and pour two or three cups of very hot water in the pan in theoven. Quickly close the oven door to capture the steam. With spraybottle in hand, open the door and quickly spray the oven walls tocreate more steam and close the door. The oven is now ready for theloaves.
Work quickly to get the bread in the oven before the steam subsides.Gently invert the loaf or loaves onto a slightly greased non-insulatedbaking sheet on which a little cornmeal has been dusted. With yoursharpest knife, quickly make two or three slashes ¼-inch deep acrossthe top of each loaf. This will vent the steam in the bread and allowthe bread to expand properly. Immediately, put the bread in thesteamy oven. After a few moments, open the door and spray the wallsagain to recharge the steam. Do this twice more during the firstfifteen minutes of baking. This steamy environment will create thechewy crust prized in artisan breads.
Let the bread bake at 425 degrees for fifteen minutes in the hotsteamy oven. Then reduce the temperature to 375 degrees and bake fora total of 35 to 40 minutes. Check on the bread ten minutes beforethe baking should be complete. If the top is browning too quickly,tent the loaf with aluminum foil for the remainder of the baking tokeep it from burning. The bread is done when the crust turns a dark
148

Bakery Science “The art and science of baking” Ph.no.09996000499
golden brown and the internal temperature reaches 210 degrees. It isimportant that the bread is well-baked to drive moisture from theloaf. If the bread is under baked, the excess moisture will migrateto the crust and you will no longer have the dry chewy crust of agreat artisan loaf.
This sourdough bread is to die for. The prolonged rising gives theyeast plenty of time to convert the starch to sugars and the friendlybacteria a chance to impart their nut-like flavors.
Storing your crusty bread:
Unused crusty bread should be stored in a paper bag at roomtemperature. If the bread is stored in a plastic bag, the crust willbecome soft.
149
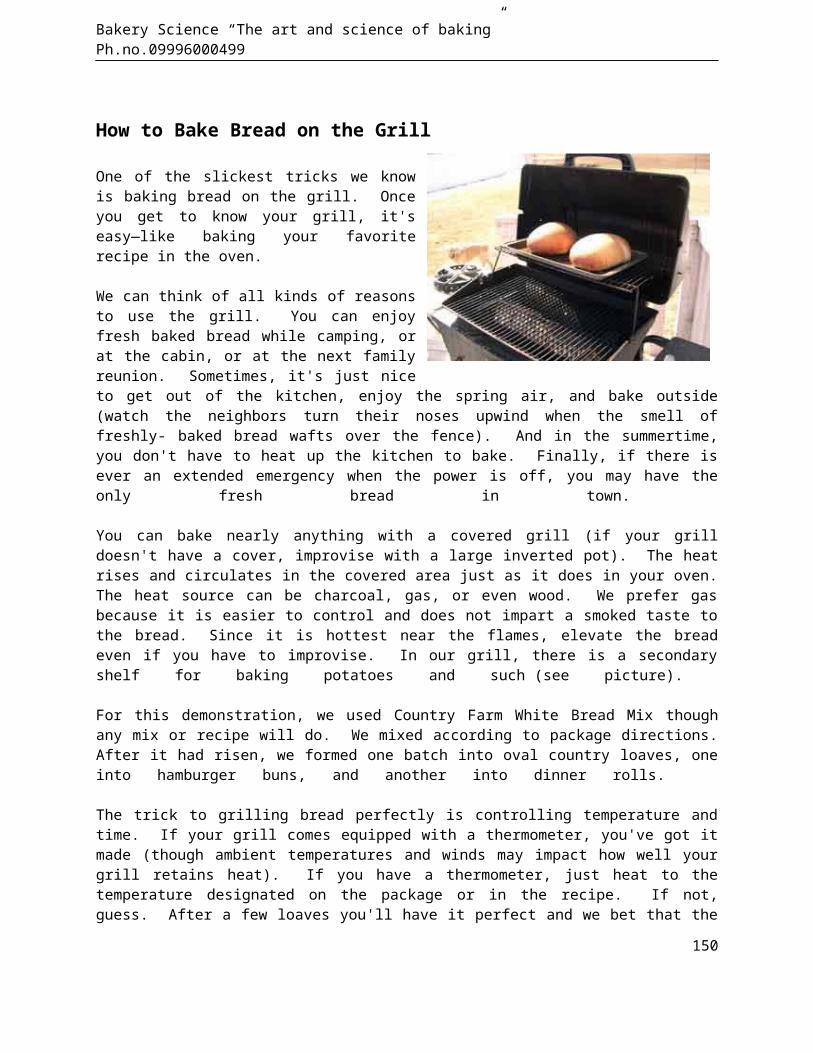
Bakery Science “The art and science of baking” Ph.no.09996000499
How to Bake Bread on the Grill
One of the slickest tricks we knowis baking bread on the grill. Onceyou get to know your grill, it'seasy—like baking your favoriterecipe in the oven.
We can think of all kinds of reasonsto use the grill. You can enjoyfresh baked bread while camping, orat the cabin, or at the next familyreunion. Sometimes, it's just niceto get out of the kitchen, enjoy the spring air, and bake outside(watch the neighbors turn their noses upwind when the smell offreshly- baked bread wafts over the fence). And in the summertime,you don't have to heat up the kitchen to bake. Finally, if there isever an extended emergency when the power is off, you may have theonly fresh bread in town. You can bake nearly anything with a covered grill (if your grilldoesn't have a cover, improvise with a large inverted pot). The heatrises and circulates in the covered area just as it does in your oven.The heat source can be charcoal, gas, or even wood. We prefer gasbecause it is easier to control and does not impart a smoked taste tothe bread. Since it is hottest near the flames, elevate the breadeven if you have to improvise. In our grill, there is a secondaryshelf for baking potatoes and such (see picture).
For this demonstration, we used Country Farm White Bread Mix thoughany mix or recipe will do. We mixed according to package directions.After it had risen, we formed one batch into oval country loaves, oneinto hamburger buns, and another into dinner rolls. The trick to grilling bread perfectly is controlling temperature andtime. If your grill comes equipped with a thermometer, you've got itmade (though ambient temperatures and winds may impact how well yourgrill retains heat). If you have a thermometer, just heat to thetemperature designated on the package or in the recipe. If not,guess. After a few loaves you'll have it perfect and we bet that the
150
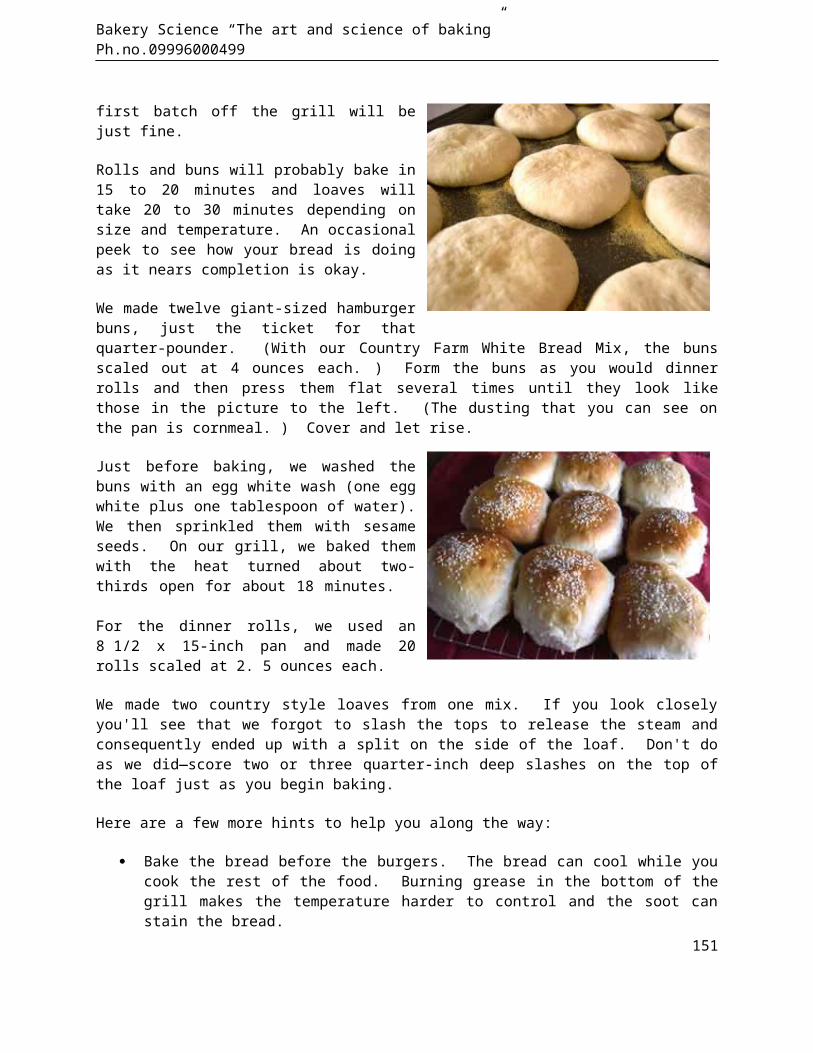
Bakery Science “The art and science of baking” Ph.no.09996000499
first batch off the grill will bejust fine.
Rolls and buns will probably bake in15 to 20 minutes and loaves willtake 20 to 30 minutes depending onsize and temperature. An occasionalpeek to see how your bread is doingas it nears completion is okay.
We made twelve giant-sized hamburgerbuns, just the ticket for thatquarter-pounder. (With our Country Farm White Bread Mix, the bunsscaled out at 4 ounces each. ) Form the buns as you would dinnerrolls and then press them flat several times until they look likethose in the picture to the left. (The dusting that you can see onthe pan is cornmeal. ) Cover and let rise.
Just before baking, we washed thebuns with an egg white wash (one eggwhite plus one tablespoon of water).We then sprinkled them with sesameseeds. On our grill, we baked themwith the heat turned about two-thirds open for about 18 minutes.
For the dinner rolls, we used an8 1/2 x 15-inch pan and made 20rolls scaled at 2. 5 ounces each.
We made two country style loaves from one mix. If you look closelyyou'll see that we forgot to slash the tops to release the steam andconsequently ended up with a split on the side of the loaf. Don't doas we did—score two or three quarter-inch deep slashes on the top ofthe loaf just as you begin baking.
Here are a few more hints to help you along the way:
Bake the bread before the burgers. The bread can cool while youcook the rest of the food. Burning grease in the bottom of thegrill makes the temperature harder to control and the soot canstain the bread.
151
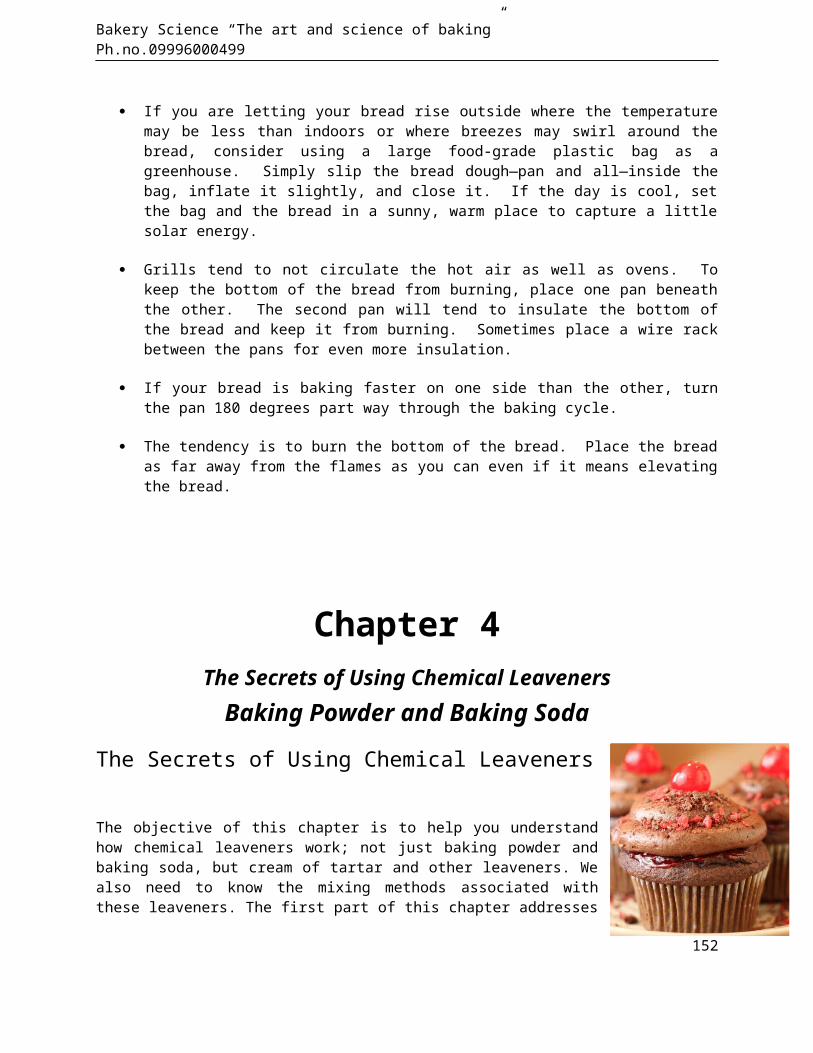
Bakery Science “The art and science of baking” Ph.no.09996000499
If you are letting your bread rise outside where the temperaturemay be less than indoors or where breezes may swirl around thebread, consider using a large food-grade plastic bag as agreenhouse. Simply slip the bread dough—pan and all—inside thebag, inflate it slightly, and close it. If the day is cool, setthe bag and the bread in a sunny, warm place to capture a littlesolar energy.
Grills tend to not circulate the hot air as well as ovens. Tokeep the bottom of the bread from burning, place one pan beneaththe other. The second pan will tend to insulate the bottom ofthe bread and keep it from burning. Sometimes place a wire rackbetween the pans for even more insulation.
If your bread is baking faster on one side than the other, turnthe pan 180 degrees part way through the baking cycle.
The tendency is to burn the bottom of the bread. Place the breadas far away from the flames as you can even if it means elevatingthe bread.
Chapter 4The Secrets of Using Chemical Leaveners
Baking Powder and Baking Soda
The Secrets of Using Chemical Leaveners
The objective of this chapter is to help you understandhow chemical leaveners work; not just baking powder andbaking soda, but cream of tartar and other leaveners. Wealso need to know the mixing methods associated withthese leaveners. The first part of this chapter addresses
152
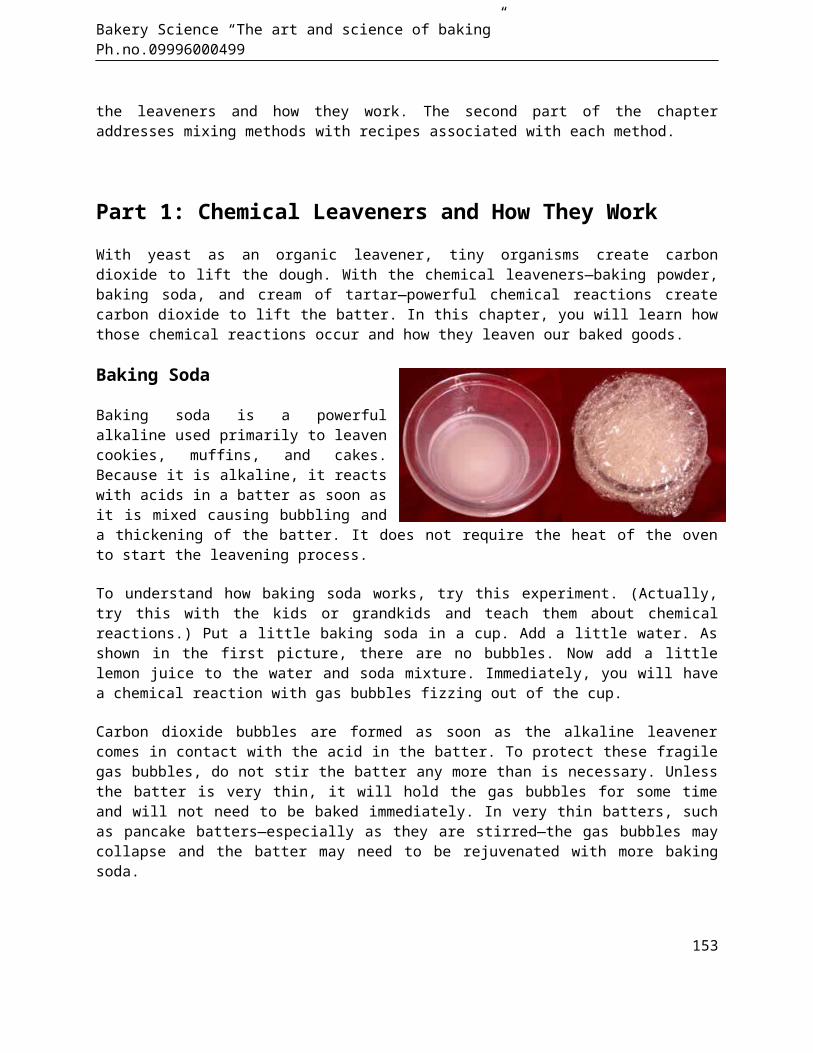
Bakery Science “The art and science of baking” Ph.no.09996000499
the leaveners and how they work. The second part of the chapteraddresses mixing methods with recipes associated with each method.
Part 1: Chemical Leaveners and How They WorkWith yeast as an organic leavener, tiny organisms create carbondioxide to lift the dough. With the chemical leaveners—baking powder,baking soda, and cream of tartar—powerful chemical reactions createcarbon dioxide to lift the batter. In this chapter, you will learn howthose chemical reactions occur and how they leaven our baked goods.
Baking Soda
Baking soda is a powerfulalkaline used primarily to leavencookies, muffins, and cakes.Because it is alkaline, it reactswith acids in a batter as soon asit is mixed causing bubbling anda thickening of the batter. It does not require the heat of the ovento start the leavening process.
To understand how baking soda works, try this experiment. (Actually,try this with the kids or grandkids and teach them about chemicalreactions.) Put a little baking soda in a cup. Add a little water. Asshown in the first picture, there are no bubbles. Now add a littlelemon juice to the water and soda mixture. Immediately, you will havea chemical reaction with gas bubbles fizzing out of the cup.
Carbon dioxide bubbles are formed as soon as the alkaline leavenercomes in contact with the acid in the batter. To protect these fragilegas bubbles, do not stir the batter any more than is necessary. Unlessthe batter is very thin, it will hold the gas bubbles for some timeand will not need to be baked immediately. In very thin batters, suchas pancake batters—especially as they are stirred—the gas bubbles maycollapse and the batter may need to be rejuvenated with more bakingsoda.
153
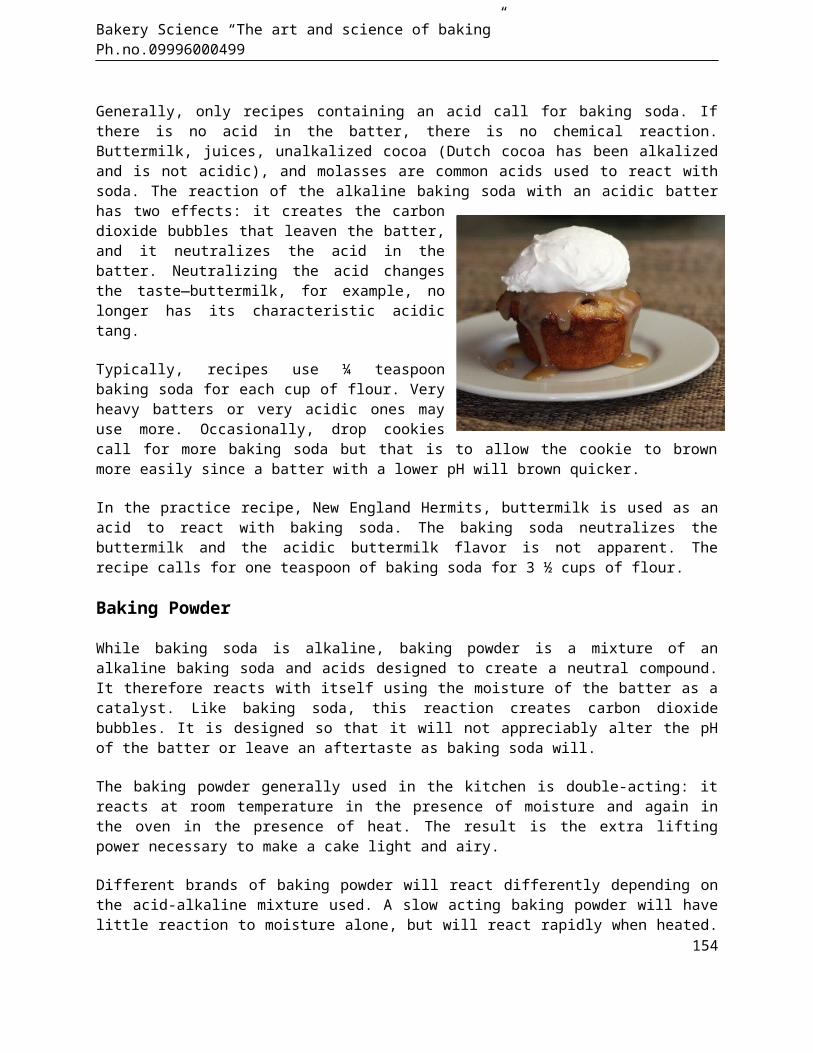
Bakery Science “The art and science of baking” Ph.no.09996000499
Generally, only recipes containing an acid call for baking soda. Ifthere is no acid in the batter, there is no chemical reaction.Buttermilk, juices, unalkalized cocoa (Dutch cocoa has been alkalizedand is not acidic), and molasses are common acids used to react withsoda. The reaction of the alkaline baking soda with an acidic batterhas two effects: it creates the carbondioxide bubbles that leaven the batter,and it neutralizes the acid in thebatter. Neutralizing the acid changesthe taste—buttermilk, for example, nolonger has its characteristic acidictang.
Typically, recipes use ¼ teaspoonbaking soda for each cup of flour. Veryheavy batters or very acidic ones mayuse more. Occasionally, drop cookiescall for more baking soda but that is to allow the cookie to brownmore easily since a batter with a lower pH will brown quicker.
In the practice recipe, New England Hermits, buttermilk is used as anacid to react with baking soda. The baking soda neutralizes thebuttermilk and the acidic buttermilk flavor is not apparent. Therecipe calls for one teaspoon of baking soda for 3 ½ cups of flour.
Baking Powder
While baking soda is alkaline, baking powder is a mixture of analkaline baking soda and acids designed to create a neutral compound.It therefore reacts with itself using the moisture of the batter as acatalyst. Like baking soda, this reaction creates carbon dioxidebubbles. It is designed so that it will not appreciably alter the pHof the batter or leave an aftertaste as baking soda will.
The baking powder generally used in the kitchen is double-acting: itreacts at room temperature in the presence of moisture and again inthe oven in the presence of heat. The result is the extra liftingpower necessary to make a cake light and airy.
Different brands of baking powder will react differently depending onthe acid-alkaline mixture used. A slow acting baking powder will havelittle reaction to moisture alone, but will react rapidly when heated.
154
Bakery Science “The art and science of baking” Ph.no.09996000499
A fast-acting baking powder will react significantly as soon as it ismixed with water.
Again, try an experiment. Add cool water to baking powder. If you getonly a few bubbles, you have a slow acting baking soda. Now put yourbaking powder solution in the microwave. As it heats up, you will seea very rapid expansion of bubbles.
(Incidentally, with the baking powders that we experimented with, wegot some reaction with a very strong acid like lemon juice but notnearly the reaction that we found with baking soda.)
Often a weakly acidic recipe will call for both baking soda and bakingpowder. The baking soda will react with the acid in the batter but thereaction will not be strong enough and is bolstered with the extrabaking powder.
Cream of Tartar
Cream of tartar is a by-product of the wine-making industry and isderived from tartaric acid. As an acid, it is the counterpart tobaking soda and when the two are combined in the presence of water,they create a chemical reaction which produces carbon dioxide.Therefore, most recipes that call for cream of tartar also call forbaking soda. In some recipes, cream of tartar is used to increase theacidity in the batter to preserve the tang of buttermilk or the tasteof an acidic juice used in conjunction with baking soda.
Other Leaveners
There are other chemical leaveners, though they are rarely used intoday's kitchens. In addition, mechanical means are used forleavening. Creaming butter and sugar together entrains air in thebatter. Steam is used to lift products. Egg whites are whipped tocapture tiny air pockets and thereby lighten products.
155
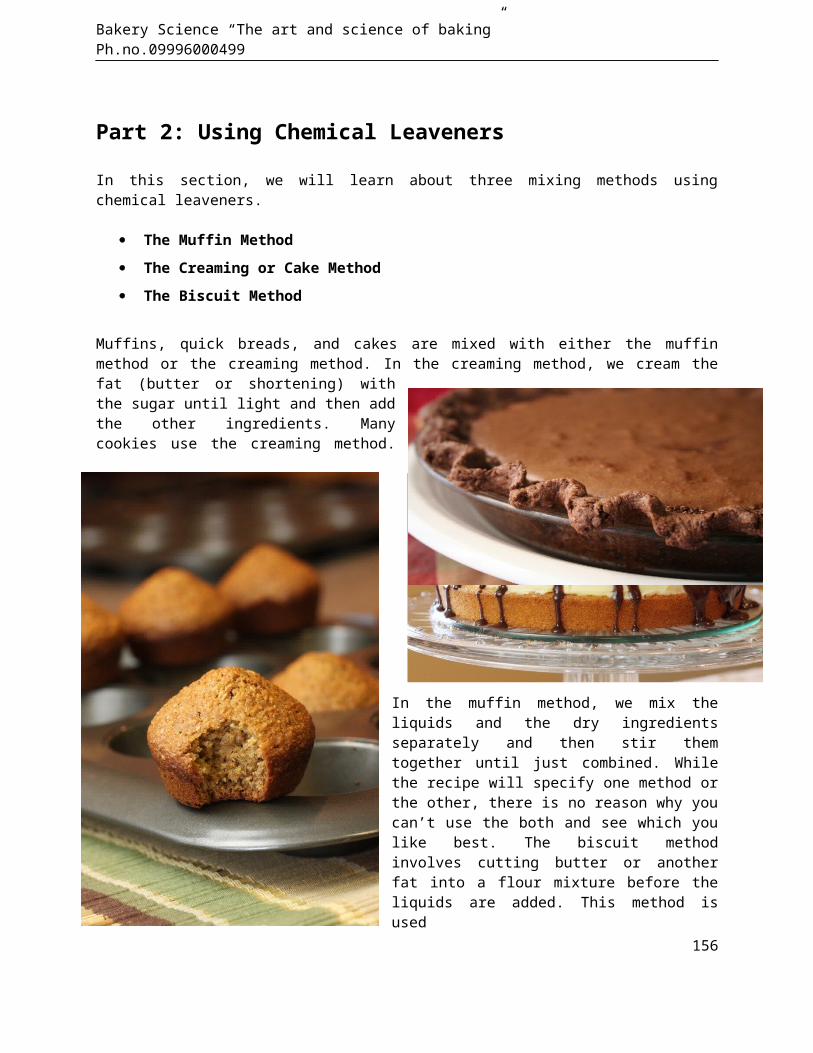
Bakery Science “The art and science of baking” Ph.no.09996000499
Part 2: Using Chemical Leaveners
In this section, we will learn about three mixing methods usingchemical leaveners.
The Muffin Method The Creaming or Cake Method The Biscuit Method
Muffins, quick breads, and cakes are mixed with either the muffinmethod or the creaming method. In the creaming method, we cream thefat (butter or shortening) withthe sugar until light and then addthe other ingredients. Manycookies use the creaming method.
In the muffin method, we mix theliquids and the dry ingredientsseparately and then stir themtogether until just combined. Whilethe recipe will specify one method orthe other, there is no reason why youcan’t use the both and see which youlike best. The biscuit methodinvolves cutting butter or anotherfat into a flour mixture before theliquids are added. This method isused
156
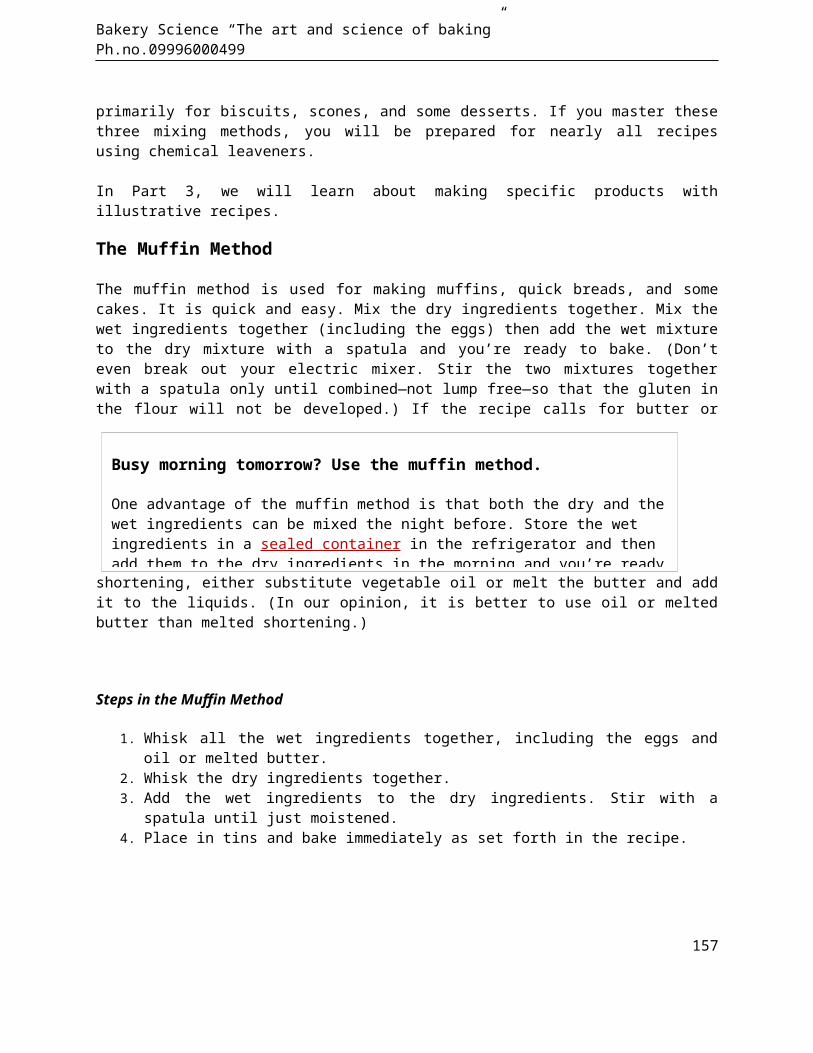
Bakery Science “The art and science of baking” Ph.no.09996000499
primarily for biscuits, scones, and some desserts. If you master thesethree mixing methods, you will be prepared for nearly all recipesusing chemical leaveners.
In Part 3, we will learn about making specific products withillustrative recipes.
The Muffin Method
The muffin method is used for making muffins, quick breads, and somecakes. It is quick and easy. Mix the dry ingredients together. Mix thewet ingredients together (including the eggs) then add the wet mixtureto the dry mixture with a spatula and you’re ready to bake. (Don’teven break out your electric mixer. Stir the two mixtures togetherwith a spatula only until combined—not lump free—so that the gluten inthe flour will not be developed.) If the recipe calls for butter or
shortening, either substitute vegetable oil or melt the butter and addit to the liquids. (In our opinion, it is better to use oil or meltedbutter than melted shortening.)
Steps in the Muffin Method
1. Whisk all the wet ingredients together, including the eggs andoil or melted butter.
2. Whisk the dry ingredients together.3. Add the wet ingredients to the dry ingredients. Stir with a
spatula until just moistened.4. Place in tins and bake immediately as set forth in the recipe.
157
Busy morning tomorrow? Use the muffin method.
One advantage of the muffin method is that both the dry and thewet ingredients can be mixed the night before. Store the wet ingredients in a sealed container in the refrigerator and then add them to the dry ingredients in the morning and you’re ready
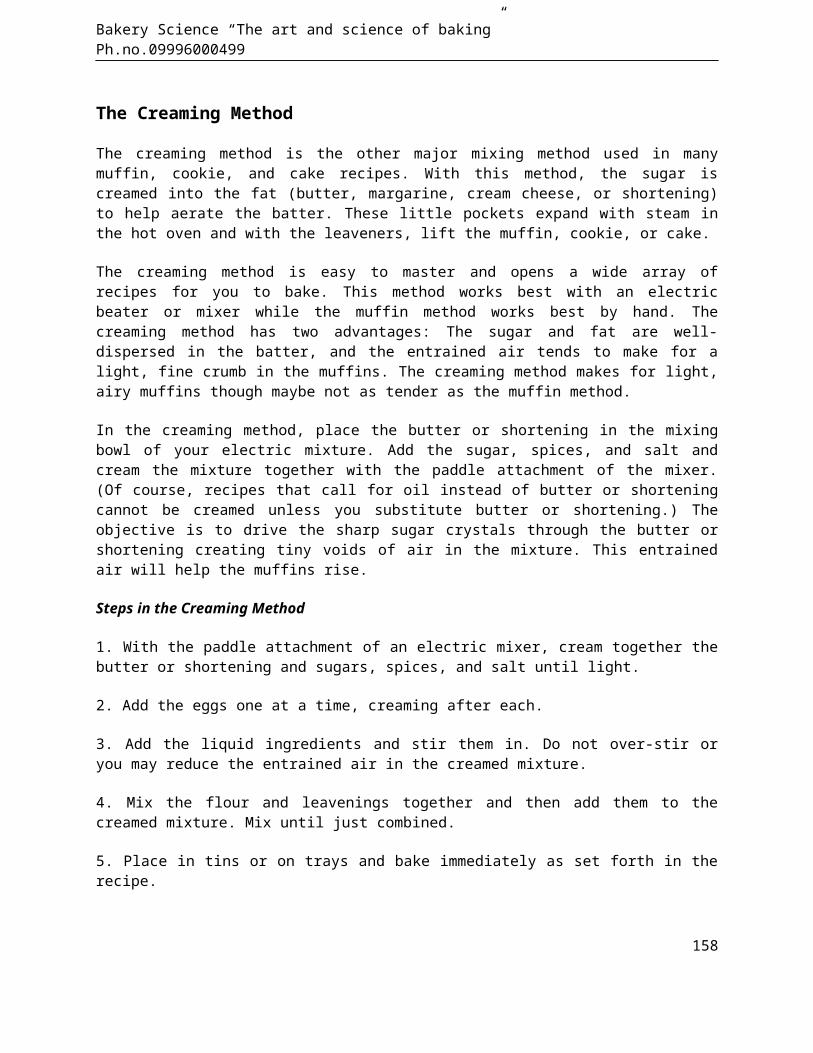
Bakery Science “The art and science of baking” Ph.no.09996000499
The Creaming Method
The creaming method is the other major mixing method used in manymuffin, cookie, and cake recipes. With this method, the sugar iscreamed into the fat (butter, margarine, cream cheese, or shortening)to help aerate the batter. These little pockets expand with steam inthe hot oven and with the leaveners, lift the muffin, cookie, or cake.
The creaming method is easy to master and opens a wide array ofrecipes for you to bake. This method works best with an electricbeater or mixer while the muffin method works best by hand. Thecreaming method has two advantages: The sugar and fat are well-dispersed in the batter, and the entrained air tends to make for alight, fine crumb in the muffins. The creaming method makes for light,airy muffins though maybe not as tender as the muffin method.
In the creaming method, place the butter or shortening in the mixingbowl of your electric mixture. Add the sugar, spices, and salt andcream the mixture together with the paddle attachment of the mixer.(Of course, recipes that call for oil instead of butter or shorteningcannot be creamed unless you substitute butter or shortening.) Theobjective is to drive the sharp sugar crystals through the butter orshortening creating tiny voids of air in the mixture. This entrainedair will help the muffins rise.
Steps in the Creaming Method
1. With the paddle attachment of an electric mixer, cream together thebutter or shortening and sugars, spices, and salt until light.
2. Add the eggs one at a time, creaming after each.
3. Add the liquid ingredients and stir them in. Do not over-stir oryou may reduce the entrained air in the creamed mixture.
4. Mix the flour and leavenings together and then add them to thecreamed mixture. Mix until just combined.
5. Place in tins or on trays and bake immediately as set forth in therecipe.
158

Bakery Science “The art and science of baking” Ph.no.09996000499
The Biscuit Method
The biscuit method is used in most scone and biscuit recipes plus manydessert and pastry recipes. It is sometimes called the pastry methodbecause it incorporates the same technique as for mixing pie dough.(There are some biscuit recipes that call for using the creamingmethod but those biscuits turn out to be more cake-like.)
With this method, the butter or shortening is cut into the flourmixture with a pastry knife and then the liquids are mixed in justuntil combined. In the heat of the oven, the butter melts, the waterin the butter creates steam, and the product rises into flaky layers.
You will need a pastry blender (sometimes called a pastry knife) orfood processor to mix this. (Many recipes indicate that you may cutthe butter in to the flour with two knives. Maybe I lack dexterity butI have trouble doing so.)
Steps in the Biscuit Method
1. Measure the dry ingredients into a medium-sized bowl. Whisk themthoroughly to evenly disperse the ingredients.
2. Cut in the shortening, margarine, or butter with a pastry blenderuntil the mixture is granular with particles no larger than kernels ofgrain. It is important to keep the butter cold so it isn’tincorporated into the flour too early. You’ll want the butter to meltin the oven so the steam can create light, flaky biscuits.
3. Combine the liquid ingredients in another bowl.
4. Add the liquids to the dry ingredients. Stir the mixture togetherwith a fork until the dough begins to agglomerate.
5. Remove the dough to a counter lightly dusted with flour. Knead itby patting the dough flat and folding it in half. Turn it ninetydegrees and repeat the process. Continue doing this for a couple dozentimes until the mixture is kneaded together. Do not over knead.
159
Why use a pastry blender?
You can’t make baked goods such as biscuits, scones, pie crusts, and muffins without a pastry blender—at least you can’tdo so easily. If there is a key to success with the biscuit method, it is this: cut the butter in thoroughly—the mixture should look granular with no large particles—and use very cold butter. Generally, the best way to truly incorporate the butterwithout mashing it into oblivion is by using a pastry

Bakery Science “The art and science of baking” Ph.no.09996000499
6. Cut the scones or biscuits to shape and bake.
160
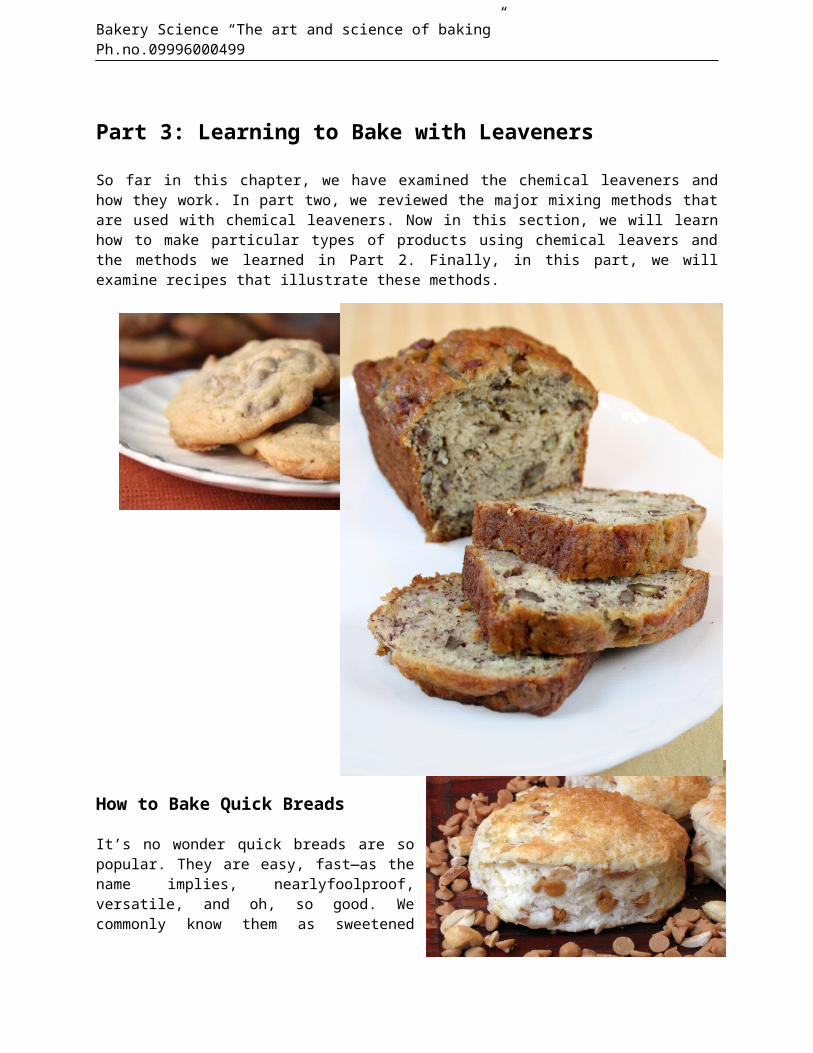
Bakery Science “The art and science of baking” Ph.no.09996000499
Part 3: Learning to Bake with Leaveners
So far in this chapter, we have examined the chemical leaveners andhow they work. In part two, we reviewed the major mixing methods thatare used with chemical leaveners. Now in this section, we will learnhow to make particular types of products using chemical leavers andthe methods we learned in Part 2. Finally, in this part, we willexamine recipes that illustrate these methods.
How to Bake Quick Breads
It’s no wonder quick breads are sopopular. They are easy, fast—as thename implies, nearlyfoolproof,versatile, and oh, so good. Wecommonly know them as sweetened
161
Bakery Science “The art and science of baking” Ph.no.09996000499
loaves with fruit or nuts, somewhere between yeast breads and cakes intexture and sweetness. They are leavened with baking powder and bakingsoda. Banana bread and date nut bread are typical though some bookslist recipes for savory varieties.
Quick breads have less sugar and less fat than cakes. The nuts oftenfound in quick breads add to the fat content. The fruit adds to themoisture as well as the flavor. Because quick breads tend to be drierthan cakes, they are often spread with butter, cream cheese, or jam.Peanut butter is one of our favorite toppings.
Quick breads tend to be more dense and moist than muffins though thebatter for quick breads can be baked in muffin tins. Generally, muffinbatter is thinner than quick bread batter.
Quick breads are wonderfully versatile, appropriate whenever therichness of a cake is undesirable. They are often served at breakfastand brunch, for snacks, and they finish a meal well in place of asweeter dessert. When used for a dessert, they can be topped with icecream or a syrup. Slices can be toasted or dipped in eggs and made asFrench toast. They make great sandwiches—though a bit fragile unless“stuck” together with cream cheese or peanut butter. Try a fruitfilled quick bread topped with shavings of ham or turkey.
There are two methods for mixing quick breads: the creaming method andthe muffin method, both of which were covered in the previous part ofthis chapter. If you need to review those methods, you can do so here.In review, with the creaming method, sugar and fat (butter, margarine,or shortening) are beat together to entrain air in the mixture andprovide added lift to the batter. With the muffin method, the liquidsare combined in one bowl, the dry ingredients in another, and then thetwo are mixed together. The creaming method tends to make a more cake-like bread.
Pointers for Success with Quick Breads
1. Do not over mix. Over mixing will develop the gluten and make thebread tough instead of tender.
2. Choose low gluten flour, either pastry or all-purpose flour.Bread flour will make a tough loaf.
3. Do not scoop the flour. Sift or whisk the flour to make it lightand fluffy, not packed, then spoon it into the measuring cup.
162
Bakery Science “The art and science of baking” Ph.no.09996000499
4. The creaming method produces a more cake-like product and iswell-suited for those recipes that have a high fat or sugarcontent. Consider the creaming method for those recipes that callfor more than four tablespoons of butter per loaf.
5. Bake soon after mixing before the effect of the leavenings beginsto dissipate.
6. If you use dry milk in your recipe, add it to liquid ingredientsso that it can be stirred and thoroughly dissolved.
7. Commercial muffins tend to be very high in fat and sugar—morelike a tea cake than a bread. Your quick bread should be morebread-like, and not as rich as commercial muffins.
8. Grease pans thoroughly and consider dusting the pans with flouras well. (If you use butter, always dust your pans to absorb thewater in the butter.) With the high sugar content, the loavestend to stick in the pans. Non-stick pans are helpful.
9. Breads are easier to remove from the pan if they set for five orten minutes before removing the bread.
10. Test for doneness by inserting a toothpick into a crack inthe center of the loaf. If the bread is done, the toothpickshould come out clean.
11. Quick breads are best if they are tightly wrapped and storedin the refrigerator overnight. After the bread has completelycooled, wrap it tightly in plastic or foil. As the bread chills,both the flavor and the moisture permeate the bread. The breadcan be stored in the refrigerator for five to seven days.
12. Quick breads can also be frozen. Place the wrapped breads infreezer-grade plastic bags and freeze them for up to threemonths. When ready to use, thaw the loaves in the refrigeratorwhile still wrapped.
Troubleshooting Tips for Quick Breads
1. Cracked top: A cracked top is desirable and not a fault.
2. Tunnels and voids: Tunnels and voids in the bread are a symptomof over mixing. Mix only until the dry ingredients are moistened.Some lumps may remain.
3. Tough texture: A tough texture instead of a tender texture isanother symptom of over mixing. Occasionally, too high of bakingtemperature will cause toughness.
163
Bakery Science “The art and science of baking” Ph.no.09996000499
4. Soggy texture: If the batter is left for too long before baking,it may be soggy or sunk in the middle. If the there is too muchliquid or not enough leavening, the bread may be soggy.
5. Coarse, crumbly texture: The bread should be moist and dense. Toomuch fat or too much leavening will cause the bread to becrumbly.
6. Bitter, soapy aftertaste: Too much baking soda or baking powderwill create an aftertaste.
7. Too thick or too brown of a crust: A tough thick crust may becaused by having your oven temperature too high or too much sugarin the recipe.
8. Greasy crumb: Too much fat will create a greasy texture.
9. Crisp edges: Too much fat or too much fat and sugar will create
crisp edges.
164
The importance of sifted flour
Sifting the flour aerates it and carries some air into the recipe. More importantly, a cup of sifted flour weighs much less than a cup of scooped flour, maybe 20 to 30% less. If you scoop flour before you level your cup, you will add too much flour to your recipe.
You can also whisk the flour until it is light and then spoon
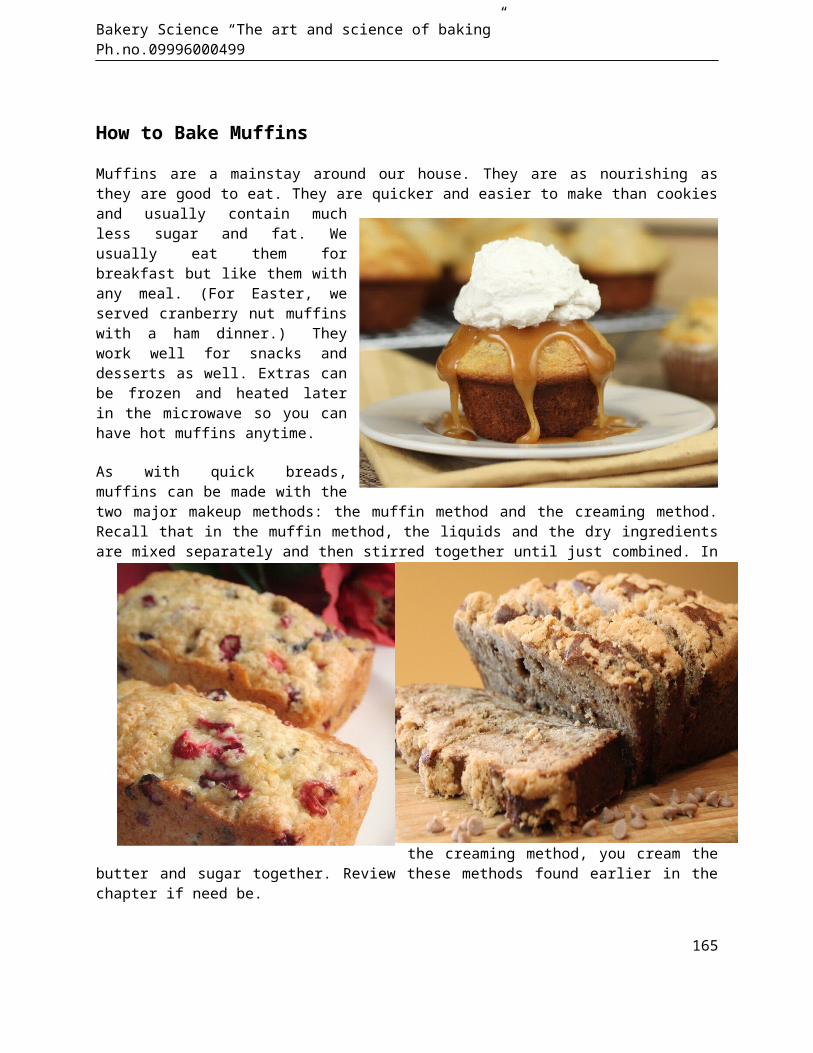
Bakery Science “The art and science of baking” Ph.no.09996000499
How to Bake Muffins
Muffins are a mainstay around our house. They are as nourishing asthey are good to eat. They are quicker and easier to make than cookiesand usually contain muchless sugar and fat. Weusually eat them forbreakfast but like them withany meal. (For Easter, weserved cranberry nut muffinswith a ham dinner.) Theywork well for snacks anddesserts as well. Extras canbe frozen and heated laterin the microwave so you canhave hot muffins anytime.
As with quick breads,muffins can be made with thetwo major makeup methods: the muffin method and the creaming method.Recall that in the muffin method, the liquids and the dry ingredientsare mixed separately and then stirred together until just combined. In
the creaming method, you cream thebutter and sugar together. Review these methods found earlier in thechapter if need be.
165
Bakery Science “The art and science of baking” Ph.no.09996000499
Pointers for Success with Muffins
To make perfect muffins, employ the techniques outlined here alongwith the techniques described in the mixing methods:
1. In preparation, grease the muffin tins. We like the spray oils froman aerosol can to reach the corners of the tins. Be sure to coverthe top edges where the muffins will flow when baking. (You can usepaper liners but since the batter adheres slightly to the paper, youwill have slightly less volume to the muffins.)
2. Set the oven to preheat. Temperature is one of the secrets to thosenicely domed muffins that you find in the better bake shops.Commercial ovens use precise heat settings and timers. In thekitchen, we can approximate those results by:
a. Making sure that the oven is completely heated before baking.We like to let the oven sit at full temperature for at least tenminutes before baking so that the heat is well-absorbed into thestructure of the oven.
b. Closing the door as quickly as possible to keep the heattrapped.
c. Setting the temperature at a higher initial setting andlowering the temperature later. The higher heat creates a burstof steam that lifts the batter.
d. Placing the muffins in the upper third of the oven where ittends to be hotter and the heat more constant.
3. Always measure flour precisely using a scale if you have one. Muffinrecipes are sensitive to the ratio of flour to liquid. Too muchflour and the muffin will not rise properly and will be dry. Toolittle flour and the muffin will flow over the edges of the muffincup rather than dome nicely. If you need to fine tune your favoriterecipe, change the flour by a tablespoon or two.
166
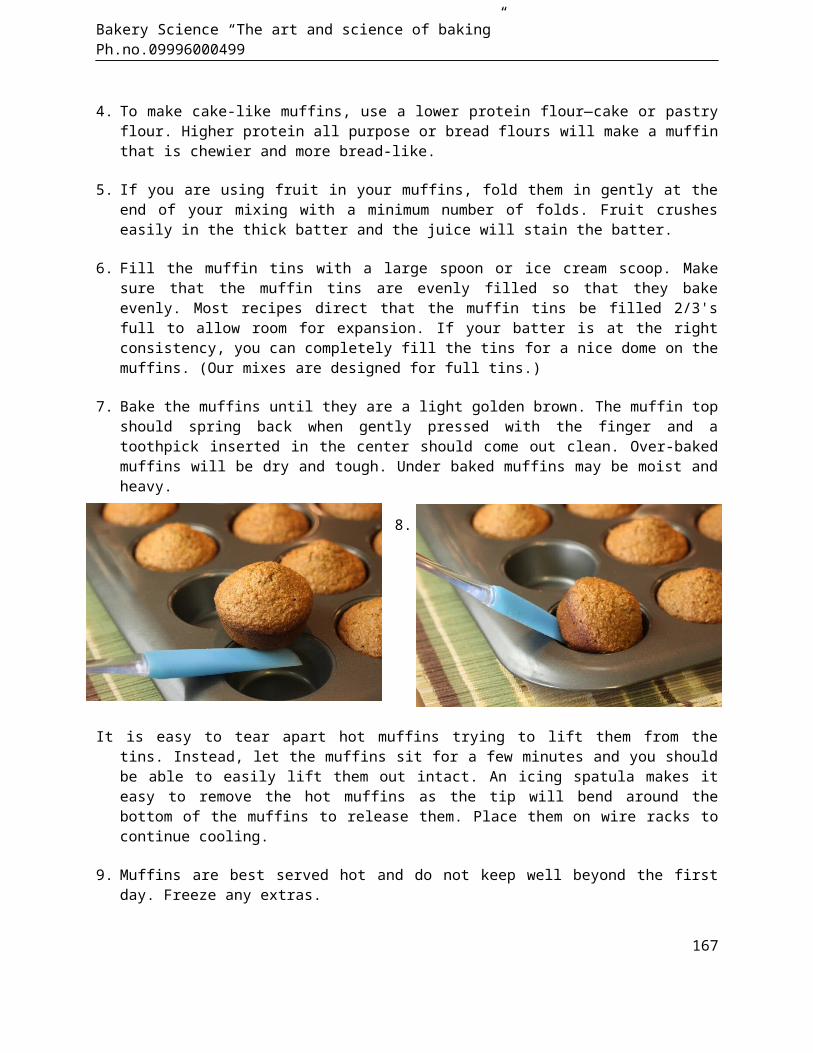
Bakery Science “The art and science of baking” Ph.no.09996000499
4. To make cake-like muffins, use a lower protein flour—cake or pastryflour. Higher protein all purpose or bread flours will make a muffinthat is chewier and more bread-like.
5. If you are using fruit in your muffins, fold them in gently at theend of your mixing with a minimum number of folds. Fruit crusheseasily in the thick batter and the juice will stain the batter.
6. Fill the muffin tins with a large spoon or ice cream scoop. Makesure that the muffin tins are evenly filled so that they bakeevenly. Most recipes direct that the muffin tins be filled 2/3'sfull to allow room for expansion. If your batter is at the rightconsistency, you can completely fill the tins for a nice dome on themuffins. (Our mixes are designed for full tins.)
7. Bake the muffins until they are a light golden brown. The muffin topshould spring back when gently pressed with the finger and atoothpick inserted in the center should come out clean. Over-bakedmuffins will be dry and tough. Under baked muffins may be moist andheavy.
8.
It is easy to tear apart hot muffins trying to lift them from thetins. Instead, let the muffins sit for a few minutes and you shouldbe able to easily lift them out intact. An icing spatula makes iteasy to remove the hot muffins as the tip will bend around thebottom of the muffins to release them. Place them on wire racks tocontinue cooling.
9. Muffins are best served hot and do not keep well beyond the firstday. Freeze any extras.
167
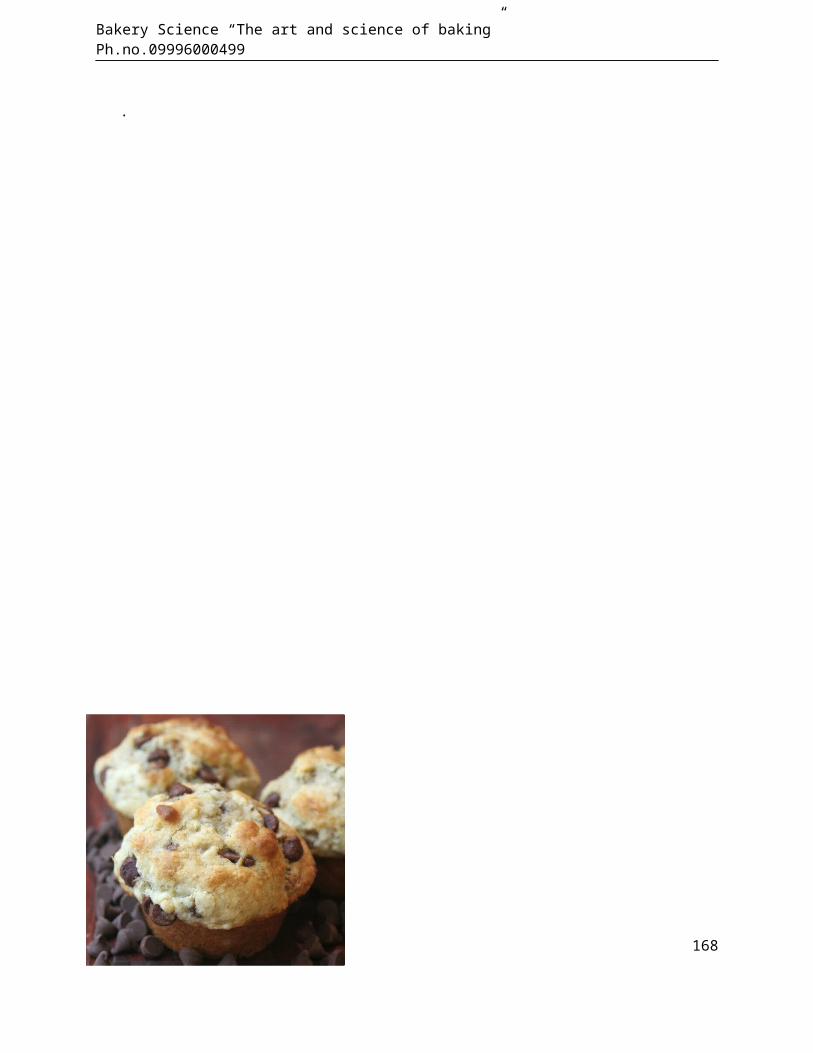
Bakery Science “The art and science of baking” Ph.no.09996000499
.
168
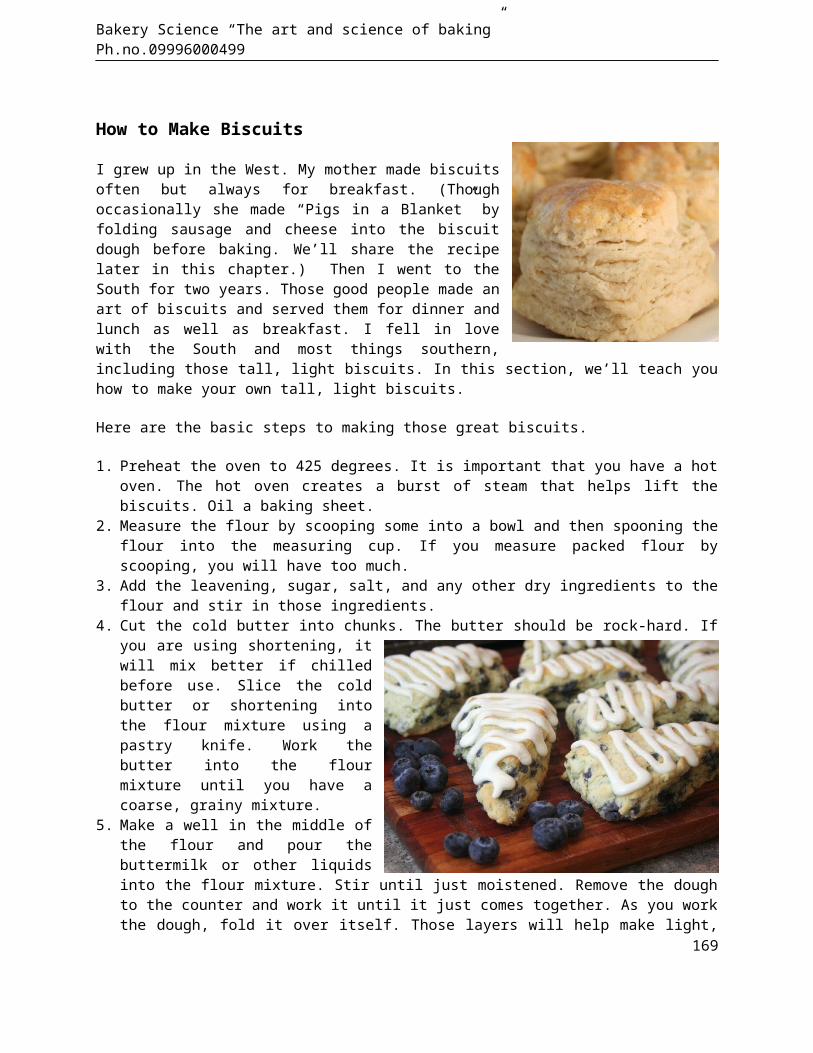
Bakery Science “The art and science of baking” Ph.no.09996000499
How to Make Biscuits
I grew up in the West. My mother made biscuitsoften but always for breakfast. (Thoughoccasionally she made “Pigs in a Blanket” byfolding sausage and cheese into the biscuitdough before baking. We’ll share the recipelater in this chapter.) Then I went to theSouth for two years. Those good people made anart of biscuits and served them for dinner andlunch as well as breakfast. I fell in lovewith the South and most things southern,including those tall, light biscuits. In this section, we’ll teach youhow to make your own tall, light biscuits.
Here are the basic steps to making those great biscuits.
1. Preheat the oven to 425 degrees. It is important that you have a hotoven. The hot oven creates a burst of steam that helps lift thebiscuits. Oil a baking sheet.
2. Measure the flour by scooping some into a bowl and then spooning theflour into the measuring cup. If you measure packed flour byscooping, you will have too much.
3. Add the leavening, sugar, salt, and any other dry ingredients to theflour and stir in those ingredients.
4. Cut the cold butter into chunks. The butter should be rock-hard. Ifyou are using shortening, itwill mix better if chilledbefore use. Slice the coldbutter or shortening intothe flour mixture using apastry knife. Work thebutter into the flourmixture until you have acoarse, grainy mixture.
5. Make a well in the middle ofthe flour and pour thebuttermilk or other liquidsinto the flour mixture. Stir until just moistened. Remove the doughto the counter and work it until it just comes together. As you workthe dough, fold it over itself. Those layers will help make light,
169
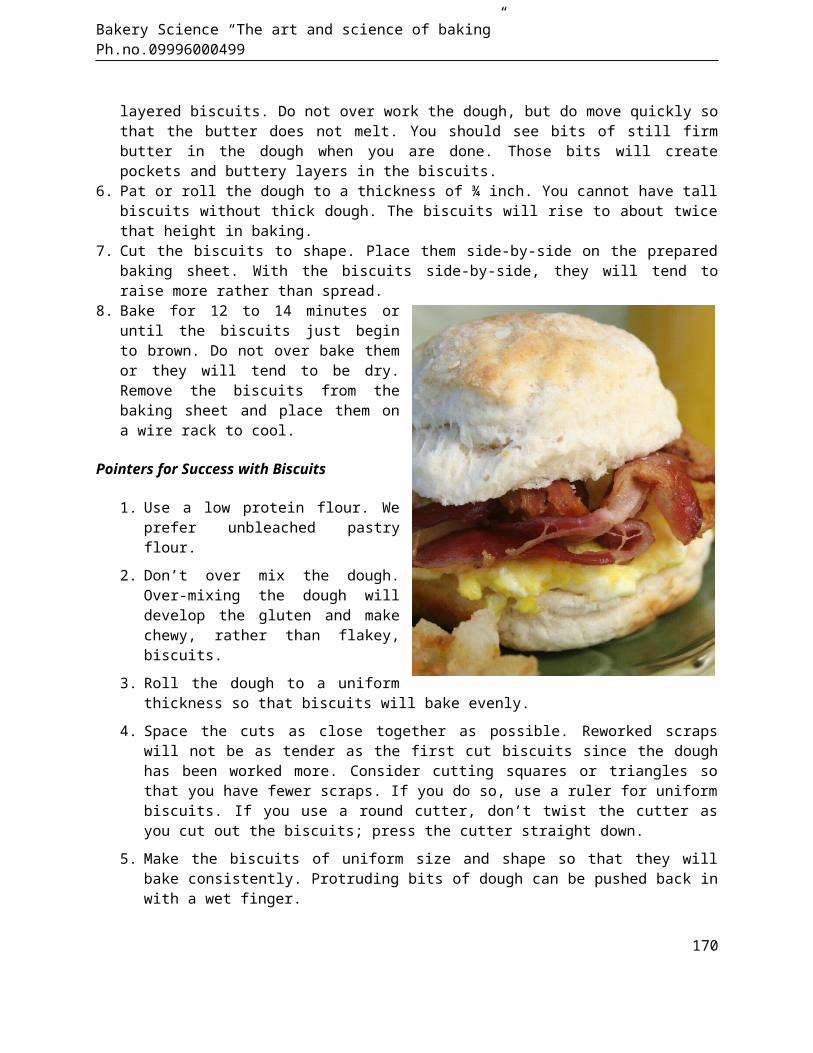
Bakery Science “The art and science of baking” Ph.no.09996000499
layered biscuits. Do not over work the dough, but do move quickly sothat the butter does not melt. You should see bits of still firmbutter in the dough when you are done. Those bits will createpockets and buttery layers in the biscuits.
6. Pat or roll the dough to a thickness of ¾ inch. You cannot have tallbiscuits without thick dough. The biscuits will rise to about twicethat height in baking.
7. Cut the biscuits to shape. Place them side-by-side on the preparedbaking sheet. With the biscuits side-by-side, they will tend toraise more rather than spread.
8. Bake for 12 to 14 minutes oruntil the biscuits just beginto brown. Do not over bake themor they will tend to be dry.Remove the biscuits from thebaking sheet and place them ona wire rack to cool.
Pointers for Success with Biscuits
1. Use a low protein flour. Weprefer unbleached pastryflour.
2. Don’t over mix the dough.Over-mixing the dough willdevelop the gluten and makechewy, rather than flakey,biscuits.
3. Roll the dough to a uniformthickness so that biscuits will bake evenly.
4. Space the cuts as close together as possible. Reworked scrapswill not be as tender as the first cut biscuits since the doughhas been worked more. Consider cutting squares or triangles sothat you have fewer scraps. If you do so, use a ruler for uniformbiscuits. If you use a round cutter, don’t twist the cutter asyou cut out the biscuits; press the cutter straight down.
5. Make the biscuits of uniform size and shape so that they willbake consistently. Protruding bits of dough can be pushed back inwith a wet finger.
170
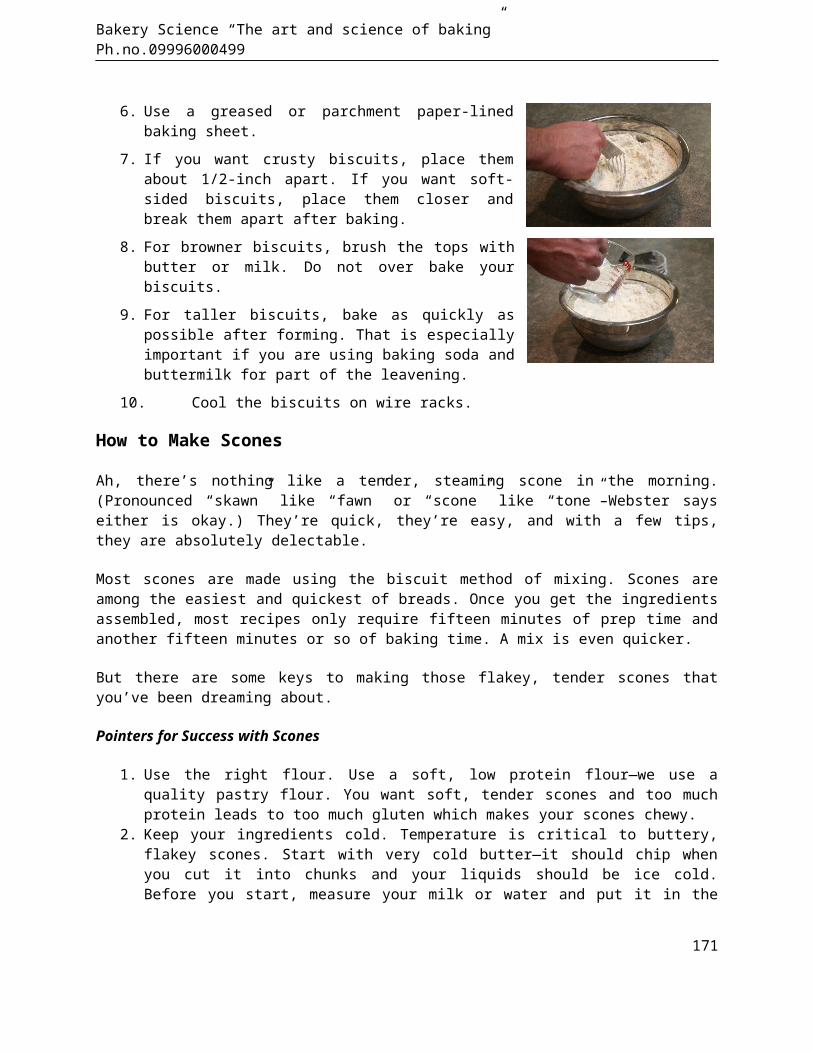
Bakery Science “The art and science of baking” Ph.no.09996000499
6. Use a greased or parchment paper-linedbaking sheet.
7. If you want crusty biscuits, place themabout 1/2-inch apart. If you want soft-sided biscuits, place them closer andbreak them apart after baking.
8. For browner biscuits, brush the tops withbutter or milk. Do not over bake yourbiscuits.
9. For taller biscuits, bake as quickly aspossible after forming. That is especiallyimportant if you are using baking soda andbuttermilk for part of the leavening.
10. Cool the biscuits on wire racks.
How to Make Scones
Ah, there’s nothing like a tender, steaming scone in the morning.(Pronounced “skawn” like “fawn” or “scone” like “tone”–Webster sayseither is okay.) They’re quick, they’re easy, and with a few tips,they are absolutely delectable.
Most scones are made using the biscuit method of mixing. Scones areamong the easiest and quickest of breads. Once you get the ingredientsassembled, most recipes only require fifteen minutes of prep time andanother fifteen minutes or so of baking time. A mix is even quicker.
But there are some keys to making those flakey, tender scones thatyou’ve been dreaming about.
Pointers for Success with Scones
1. Use the right flour. Use a soft, low protein flour—we use aquality pastry flour. You want soft, tender scones and too muchprotein leads to too much gluten which makes your scones chewy.
2. Keep your ingredients cold. Temperature is critical to buttery,flakey scones. Start with very cold butter—it should chip whenyou cut it into chunks and your liquids should be ice cold.Before you start, measure your milk or water and put it in the
171
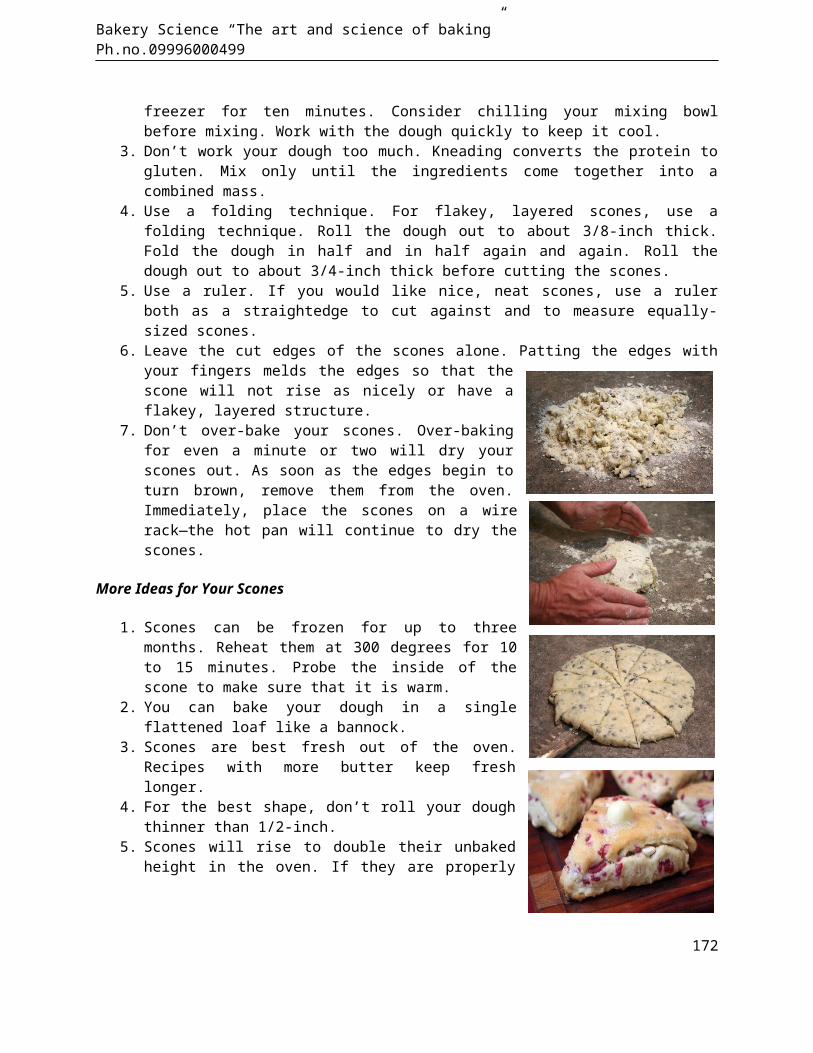
Bakery Science “The art and science of baking” Ph.no.09996000499
freezer for ten minutes. Consider chilling your mixing bowlbefore mixing. Work with the dough quickly to keep it cool.
3. Don’t work your dough too much. Kneading converts the protein togluten. Mix only until the ingredients come together into acombined mass.
4. Use a folding technique. For flakey, layered scones, use afolding technique. Roll the dough out to about 3/8-inch thick.Fold the dough in half and in half again and again. Roll thedough out to about 3/4-inch thick before cutting the scones.
5. Use a ruler. If you would like nice, neat scones, use a rulerboth as a straightedge to cut against and to measure equally-sized scones.
6. Leave the cut edges of the scones alone. Patting the edges withyour fingers melds the edges so that thescone will not rise as nicely or have aflakey, layered structure.
7. Don’t over-bake your scones. Over-bakingfor even a minute or two will dry yourscones out. As soon as the edges begin toturn brown, remove them from the oven.Immediately, place the scones on a wirerack—the hot pan will continue to dry thescones.
More Ideas for Your Scones
1. Scones can be frozen for up to threemonths. Reheat them at 300 degrees for 10to 15 minutes. Probe the inside of thescone to make sure that it is warm.
2. You can bake your dough in a singleflattened loaf like a bannock.
3. Scones are best fresh out of the oven.Recipes with more butter keep freshlonger.
4. For the best shape, don’t roll your doughthinner than 1/2-inch.
5. Scones will rise to double their unbakedheight in the oven. If they are properly
172
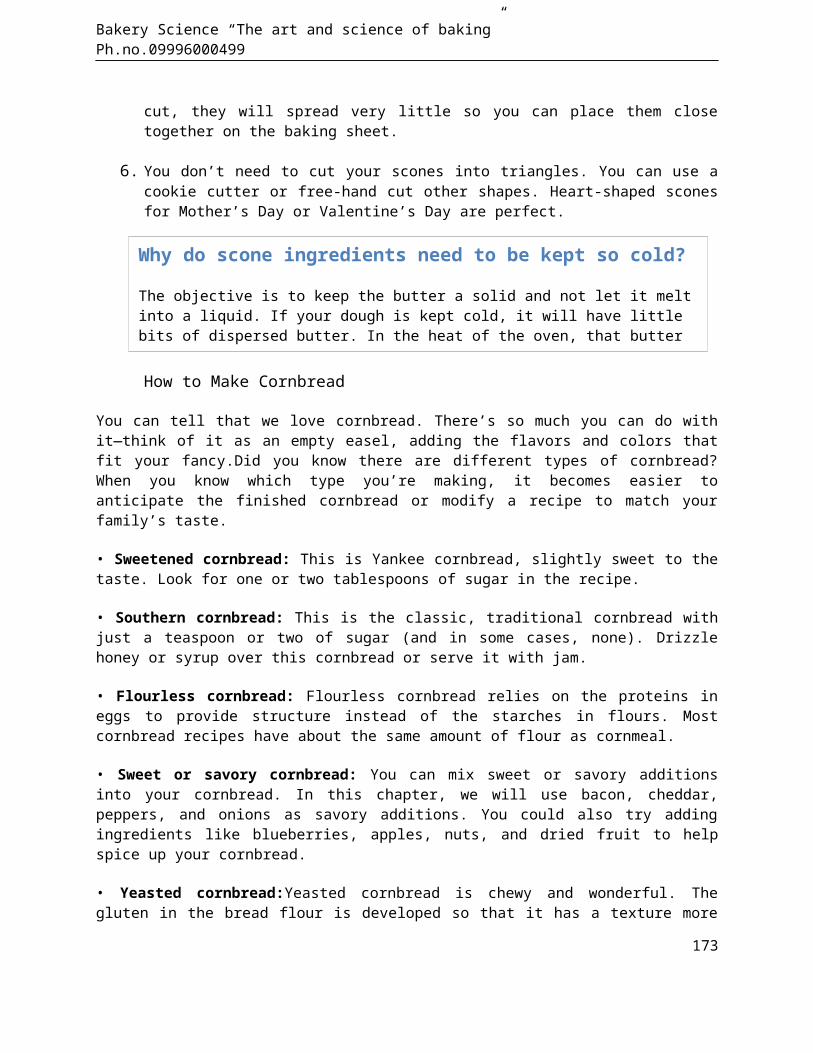
Bakery Science “The art and science of baking” Ph.no.09996000499
cut, they will spread very little so you can place them closetogether on the baking sheet.
6. You don’t need to cut your scones into triangles. You can use acookie cutter or free-hand cut other shapes. Heart-shaped sconesfor Mother’s Day or Valentine’s Day are perfect.
How to Make Cornbread
You can tell that we love cornbread. There’s so much you can do withit—think of it as an empty easel, adding the flavors and colors thatfit your fancy.Did you know there are different types of cornbread?When you know which type you’re making, it becomes easier toanticipate the finished cornbread or modify a recipe to match yourfamily’s taste.
• Sweetened cornbread: This is Yankee cornbread, slightly sweet to thetaste. Look for one or two tablespoons of sugar in the recipe.
• Southern cornbread: This is the classic, traditional cornbread withjust a teaspoon or two of sugar (and in some cases, none). Drizzlehoney or syrup over this cornbread or serve it with jam.
• Flourless cornbread: Flourless cornbread relies on the proteins ineggs to provide structure instead of the starches in flours. Mostcornbread recipes have about the same amount of flour as cornmeal.
• Sweet or savory cornbread: You can mix sweet or savory additionsinto your cornbread. In this chapter, we will use bacon, cheddar,peppers, and onions as savory additions. You could also try addingingredients like blueberries, apples, nuts, and dried fruit to helpspice up your cornbread.
• Yeasted cornbread:Yeasted cornbread is chewy and wonderful. Thegluten in the bread flour is developed so that it has a texture more
173
Why do scone ingredients need to be kept so cold?
The objective is to keep the butter a solid and not let it meltinto a liquid. If your dough is kept cold, it will have little bits of dispersed butter. In the heat of the oven, that butter melts into the dough but leaves pockets and layers in the
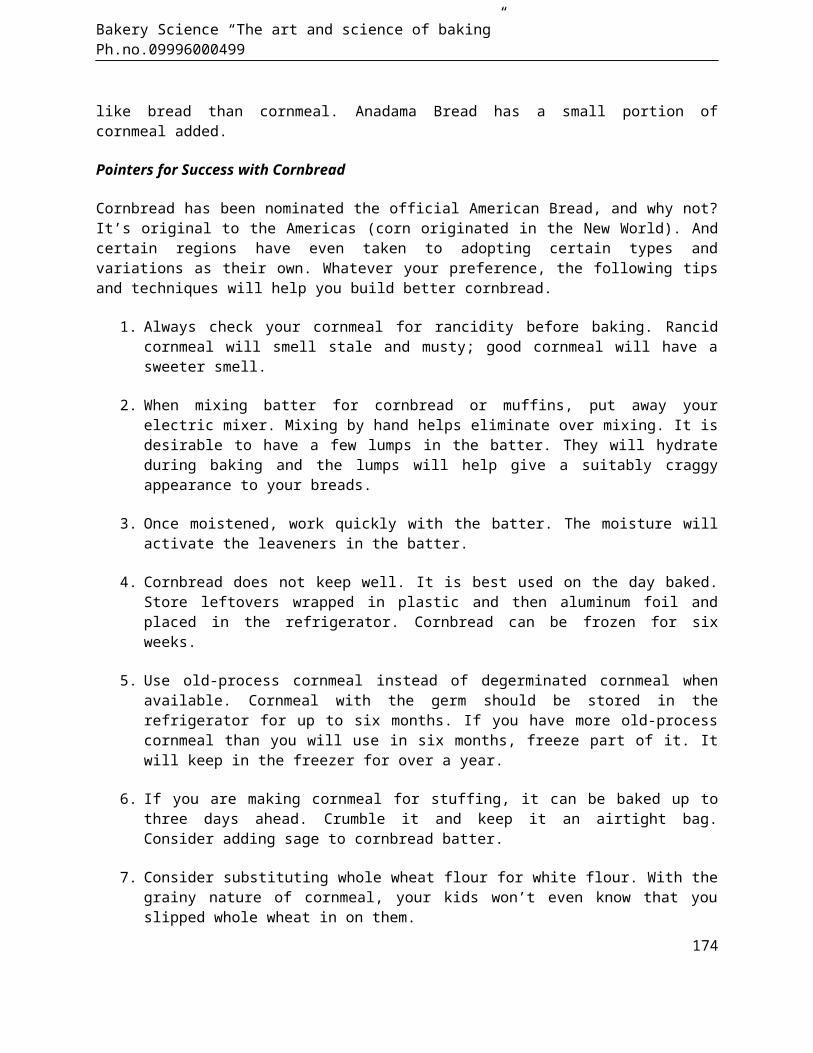
Bakery Science “The art and science of baking” Ph.no.09996000499
like bread than cornmeal. Anadama Bread has a small portion ofcornmeal added.
Pointers for Success with Cornbread
Cornbread has been nominated the official American Bread, and why not?It’s original to the Americas (corn originated in the New World). Andcertain regions have even taken to adopting certain types andvariations as their own. Whatever your preference, the following tipsand techniques will help you build better cornbread.
1. Always check your cornmeal for rancidity before baking. Rancidcornmeal will smell stale and musty; good cornmeal will have asweeter smell.
2. When mixing batter for cornbread or muffins, put away yourelectric mixer. Mixing by hand helps eliminate over mixing. It isdesirable to have a few lumps in the batter. They will hydrateduring baking and the lumps will help give a suitably craggyappearance to your breads.
3. Once moistened, work quickly with the batter. The moisture willactivate the leaveners in the batter.
4. Cornbread does not keep well. It is best used on the day baked.Store leftovers wrapped in plastic and then aluminum foil andplaced in the refrigerator. Cornbread can be frozen for sixweeks.
5. Use old-process cornmeal instead of degerminated cornmeal whenavailable. Cornmeal with the germ should be stored in therefrigerator for up to six months. If you have more old-processcornmeal than you will use in six months, freeze part of it. Itwill keep in the freezer for over a year.
6. If you are making cornmeal for stuffing, it can be baked up tothree days ahead. Crumble it and keep it an airtight bag.Consider adding sage to cornbread batter.
7. Consider substituting whole wheat flour for white flour. With thegrainy nature of cornmeal, your kids won’t even know that youslipped whole wheat in on them.
174
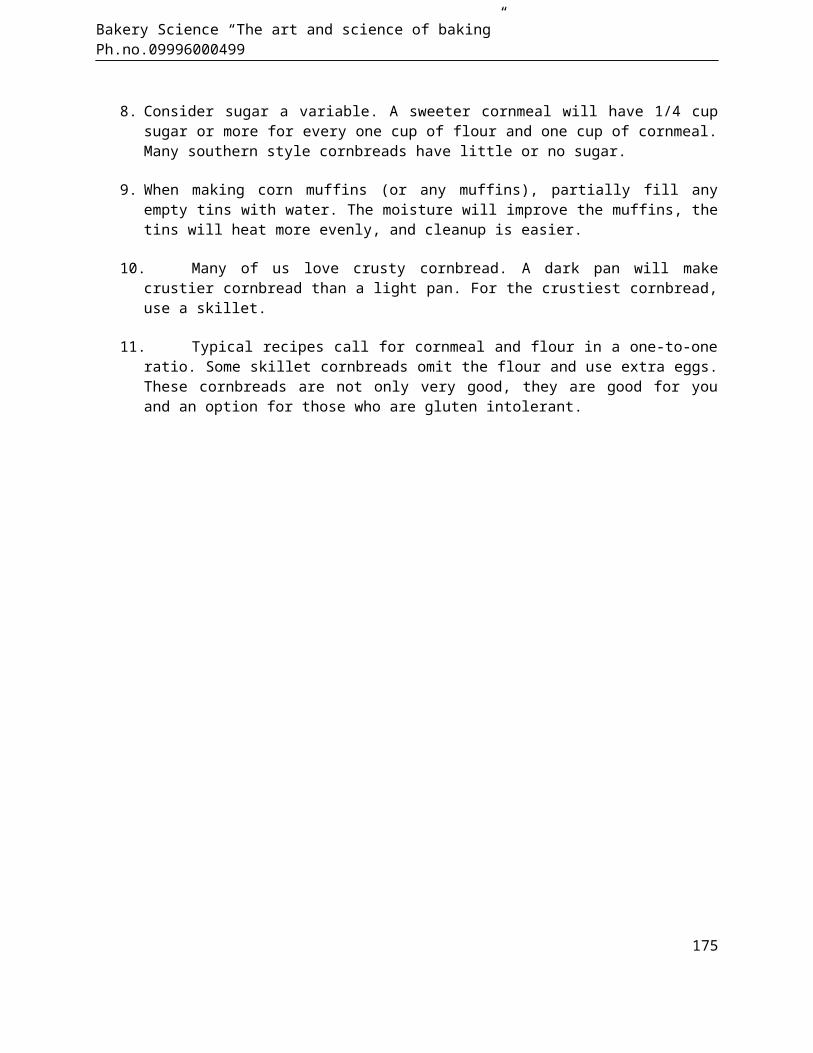
Bakery Science “The art and science of baking” Ph.no.09996000499
8. Consider sugar a variable. A sweeter cornmeal will have 1/4 cupsugar or more for every one cup of flour and one cup of cornmeal.Many southern style cornbreads have little or no sugar.
9. When making corn muffins (or any muffins), partially fill anyempty tins with water. The moisture will improve the muffins, thetins will heat more evenly, and cleanup is easier.
10. Many of us love crusty cornbread. A dark pan will makecrustier cornbread than a light pan. For the crustiest cornbread,use a skillet.
11. Typical recipes call for cornmeal and flour in a one-to-oneratio. Some skillet cornbreads omit the flour and use extra eggs.These cornbreads are not only very good, they are good for youand an option for those who are gluten intolerant.
175
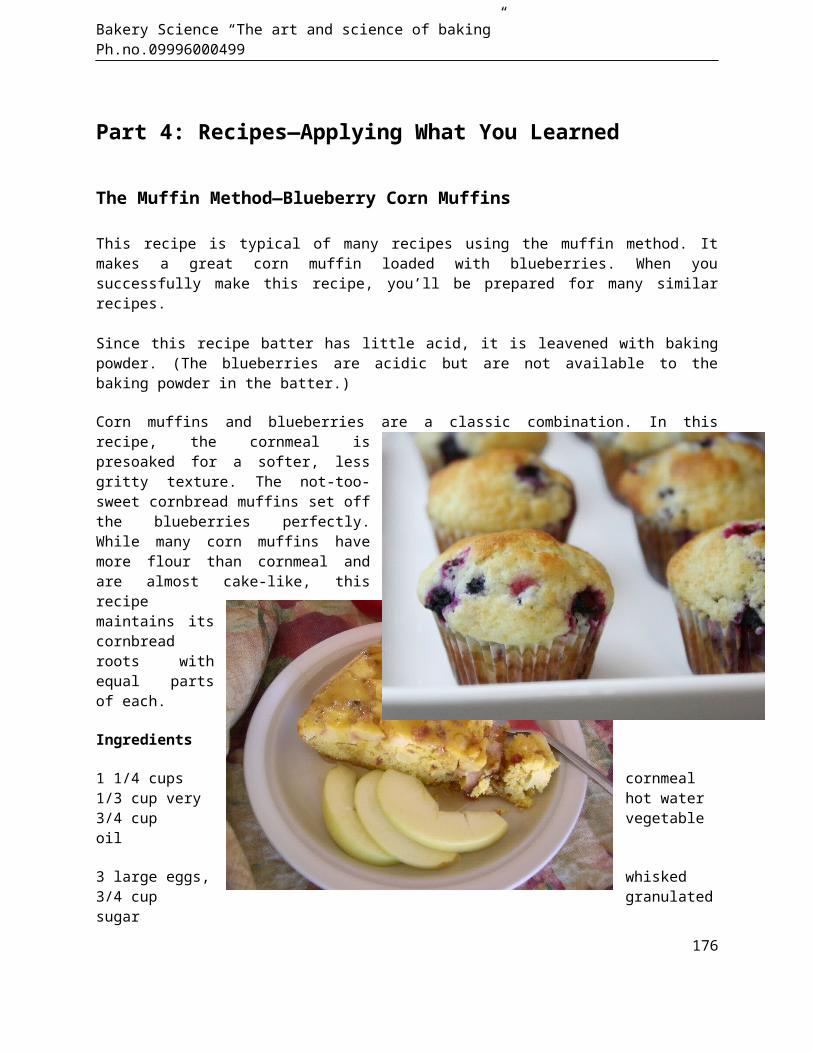
Bakery Science “The art and science of baking” Ph.no.09996000499
Part 4: Recipes—Applying What You Learned
The Muffin Method—Blueberry Corn Muffins
This recipe is typical of many recipes using the muffin method. Itmakes a great corn muffin loaded with blueberries. When yousuccessfully make this recipe, you’ll be prepared for many similarrecipes.
Since this recipe batter has little acid, it is leavened with bakingpowder. (The blueberries are acidic but are not available to thebaking powder in the batter.)
Corn muffins and blueberries are a classic combination. In thisrecipe, the cornmeal ispresoaked for a softer, lessgritty texture. The not-too-sweet cornbread muffins set offthe blueberries perfectly.While many corn muffins havemore flour than cornmeal andare almost cake-like, thisrecipemaintains itscornbreadroots withequal partsof each.
Ingredients
1 1/4 cups cornmeal1/3 cup very hot water3/4 cup vegetable oil
3 large eggs, whisked3/4 cup granulatedsugar
176
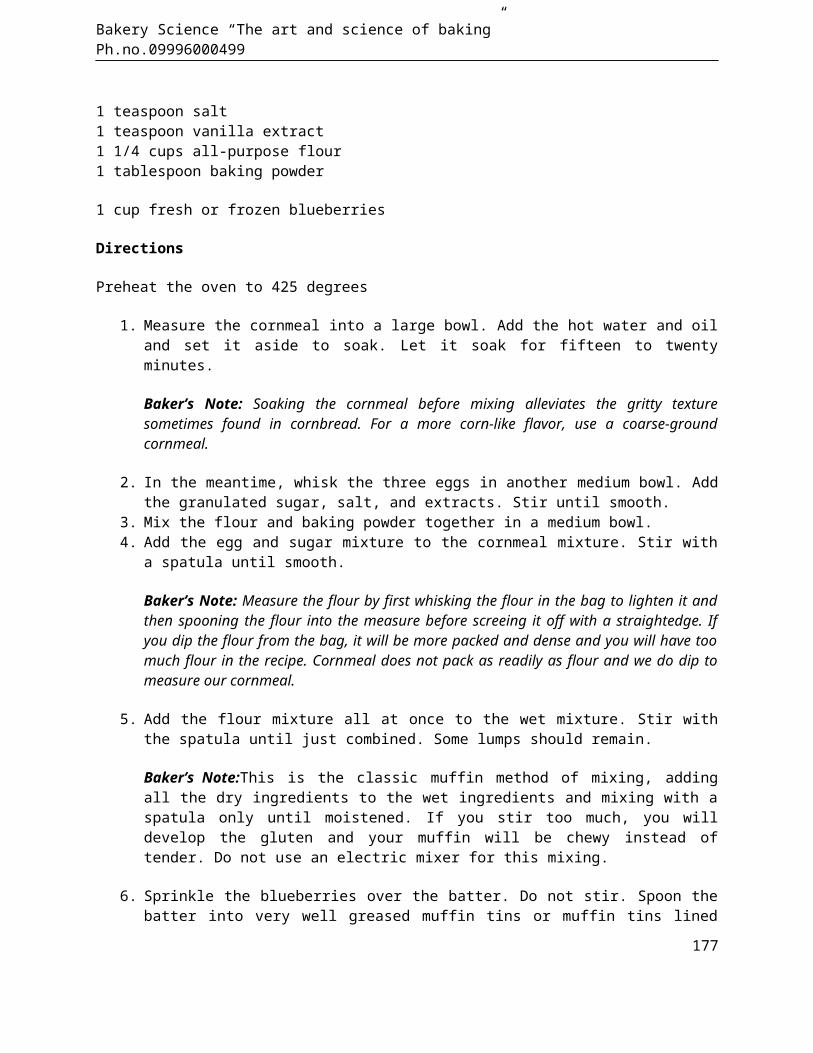
Bakery Science “The art and science of baking” Ph.no.09996000499
1 teaspoon salt1 teaspoon vanilla extract1 1/4 cups all-purpose flour1 tablespoon baking powder
1 cup fresh or frozen blueberries
Directions
Preheat the oven to 425 degrees
1. Measure the cornmeal into a large bowl. Add the hot water and oiland set it aside to soak. Let it soak for fifteen to twentyminutes.
Baker’s Note: Soaking the cornmeal before mixing alleviates the gritty texturesometimes found in cornbread. For a more corn-like flavor, use a coarse-groundcornmeal.
2. In the meantime, whisk the three eggs in another medium bowl. Addthe granulated sugar, salt, and extracts. Stir until smooth.
3. Mix the flour and baking powder together in a medium bowl. 4. Add the egg and sugar mixture to the cornmeal mixture. Stir with
a spatula until smooth.
Baker’s Note: Measure the flour by first whisking the flour in the bag to lighten it andthen spooning the flour into the measure before screeing it off with a straightedge. Ifyou dip the flour from the bag, it will be more packed and dense and you will have toomuch flour in the recipe. Cornmeal does not pack as readily as flour and we do dip tomeasure our cornmeal.
5. Add the flour mixture all at once to the wet mixture. Stir withthe spatula until just combined. Some lumps should remain.
Baker’s Note:This is the classic muffin method of mixing, addingall the dry ingredients to the wet ingredients and mixing with aspatula only until moistened. If you stir too much, you willdevelop the gluten and your muffin will be chewy instead oftender. Do not use an electric mixer for this mixing.
6. Sprinkle the blueberries over the batter. Do not stir. Spoon thebatter into very well greased muffin tins or muffin tins lined
177
Bakery Science “The art and science of baking” Ph.no.09996000499
with paper cups. Try to catch a few blueberries in each spoonfulof batter. Fill the cups until full or almost full.
Baker’s Note: As you stir the blueberries into the batter, especially with frozenblueberries, the juice stains the batter. If you sprinkle the blueberries on top and spoonblueberries with the batter, you will reduce the staining.
7. Filling the cups full will help the muffins dome. If thetemperature in the oven is hot enough and the sugar content isnot too high, your muffins should rise into domes and not spreadexcessively.
8. Bake for five minutes at 425 degrees and then lower thetemperature to 350 degrees. Bake for another 20 minutes or untilthe muffins just begin to brown. The baking time will varydepending on how well your oven retains heat after reducing thetemperature.
Baker’s Note: The initial hot oven creates oven spring which helpsthe muffins dome. Most of the oven spring is created by steam inthe batter.
9. If you are baking your muffins without liners, let the muffinssit in the tins for five to ten minutes before removing themuffins to finish cooling on wire racks.
Baker’s Note:Cornmeal muffins tend to be fragile. You may want toconsider paper liners. Because the batter sticks to paper liners,you will not get as much lift with paper liners.
178
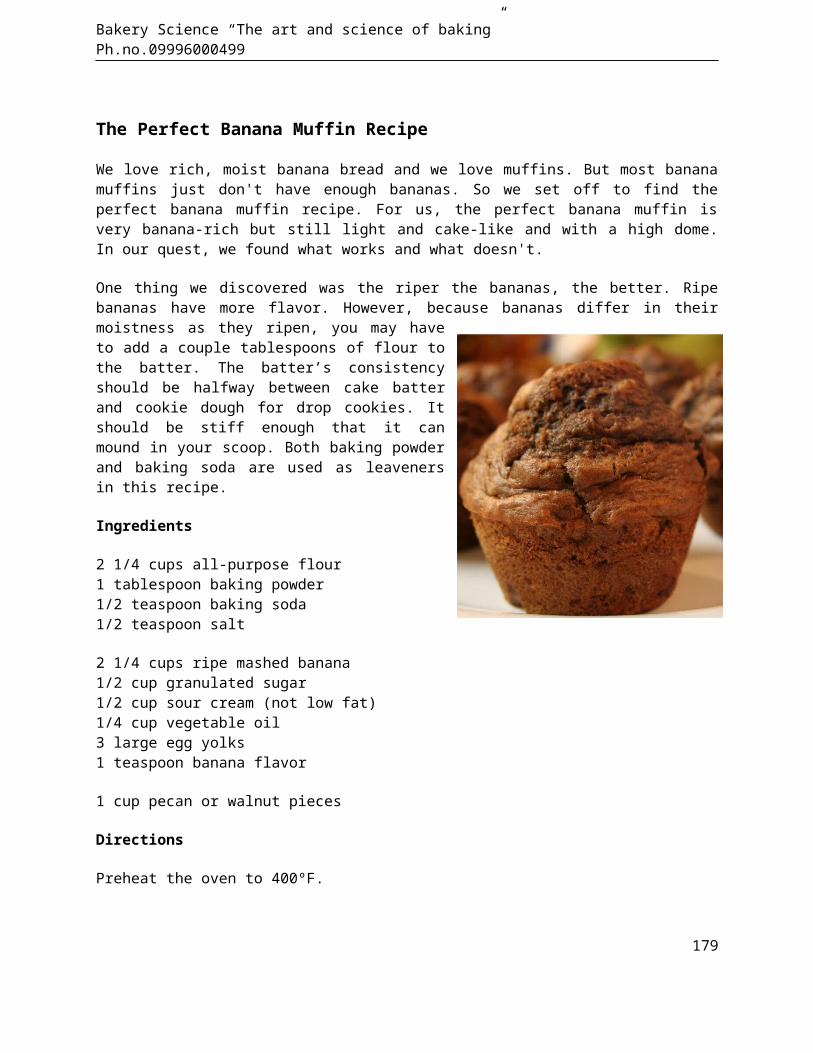
Bakery Science “The art and science of baking” Ph.no.09996000499
The Perfect Banana Muffin Recipe
We love rich, moist banana bread and we love muffins. But most bananamuffins just don't have enough bananas. So we set off to find theperfect banana muffin recipe. For us, the perfect banana muffin isvery banana-rich but still light and cake-like and with a high dome.In our quest, we found what works and what doesn't.
One thing we discovered was the riper the bananas, the better. Ripebananas have more flavor. However, because bananas differ in theirmoistness as they ripen, you may haveto add a couple tablespoons of flour tothe batter. The batter’s consistencyshould be halfway between cake batterand cookie dough for drop cookies. Itshould be stiff enough that it canmound in your scoop. Both baking powderand baking soda are used as leavenersin this recipe.
Ingredients
2 1/4 cups all-purpose flour1 tablespoon baking powder1/2 teaspoon baking soda1/2 teaspoon salt
2 1/4 cups ripe mashed banana1/2 cup granulated sugar1/2 cup sour cream (not low fat)1/4 cup vegetable oil3 large egg yolks1 teaspoon banana flavor
1 cup pecan or walnut pieces
Directions
Preheat the oven to 400ºF.
179
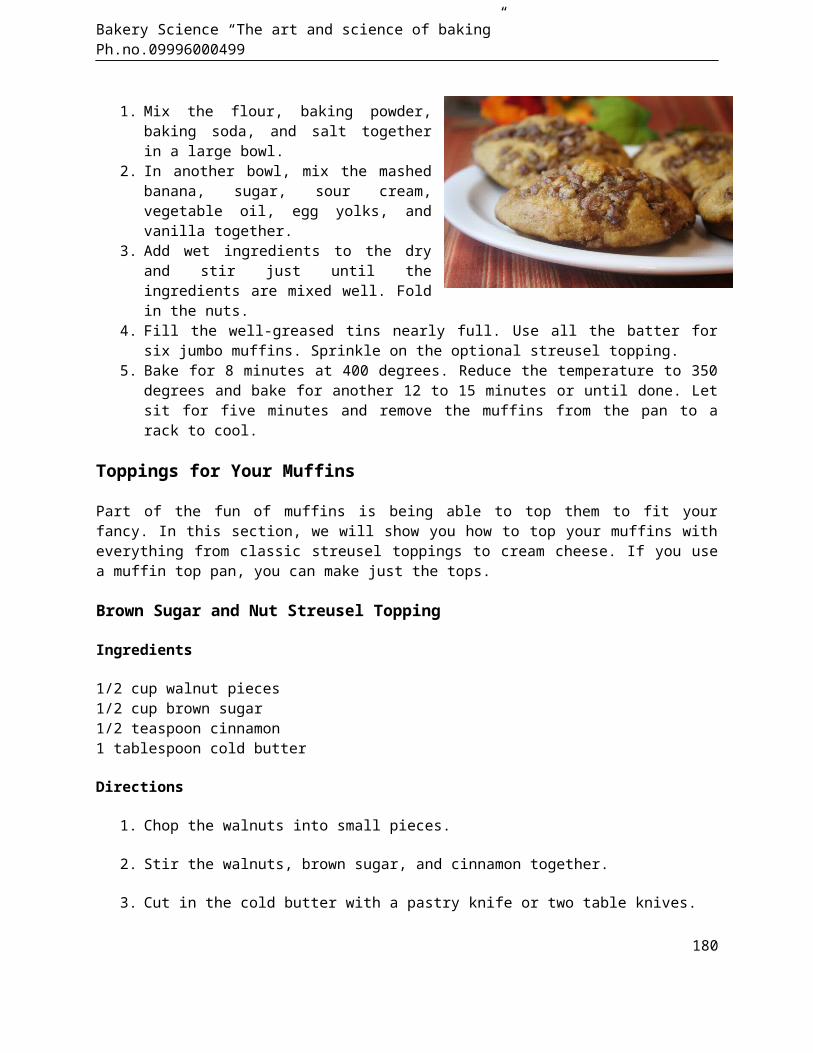
Bakery Science “The art and science of baking” Ph.no.09996000499
1. Mix the flour, baking powder,baking soda, and salt togetherin a large bowl.
2. In another bowl, mix the mashedbanana, sugar, sour cream,vegetable oil, egg yolks, andvanilla together.
3. Add wet ingredients to the dryand stir just until theingredients are mixed well. Foldin the nuts.
4. Fill the well-greased tins nearly full. Use all the batter forsix jumbo muffins. Sprinkle on the optional streusel topping.
5. Bake for 8 minutes at 400 degrees. Reduce the temperature to 350degrees and bake for another 12 to 15 minutes or until done. Letsit for five minutes and remove the muffins from the pan to arack to cool.
Toppings for Your Muffins
Part of the fun of muffins is being able to top them to fit yourfancy. In this section, we will show you how to top your muffins witheverything from classic streusel toppings to cream cheese. If you usea muffin top pan, you can make just the tops.
Brown Sugar and Nut Streusel Topping
Ingredients
1/2 cup walnut pieces1/2 cup brown sugar 1/2 teaspoon cinnamon 1 tablespoon cold butter
Directions
1. Chop the walnuts into small pieces.
2. Stir the walnuts, brown sugar, and cinnamon together.
3. Cut in the cold butter with a pastry knife or two table knives.
180

Bakery Science “The art and science of baking” Ph.no.09996000499
4. Spoon the streusel mixture over the muffin batter evenly beforebaking.
Cinnamon-Sugar Topping
Ingredients
1/2 cup granulated sugar1 teaspoon good quality cinnamon6 tablespoons butter, melted
Directions
Mix the cinnamon and sugar together in a bowl. When you remove themuffins from the tins, dip the still hot muffins in the butter andthen roll the tops in the cinnamon sugar mixture.
Orange Nut Streusel Topping
Ingredients
1/2 cup walnut pieces1/2 cup brown sugar 1/2 teaspoon cinnamon 2 tablespoon orange zest (the zest from onelarge orange)1 tablespoon cold butter
Directions
1. Chop the walnuts into small pieces.
2. Stir the walnuts, brown sugar, cinnamon,and orange zest together.
3. Cut in the cold butter with a pastryknife or two table knives.
181
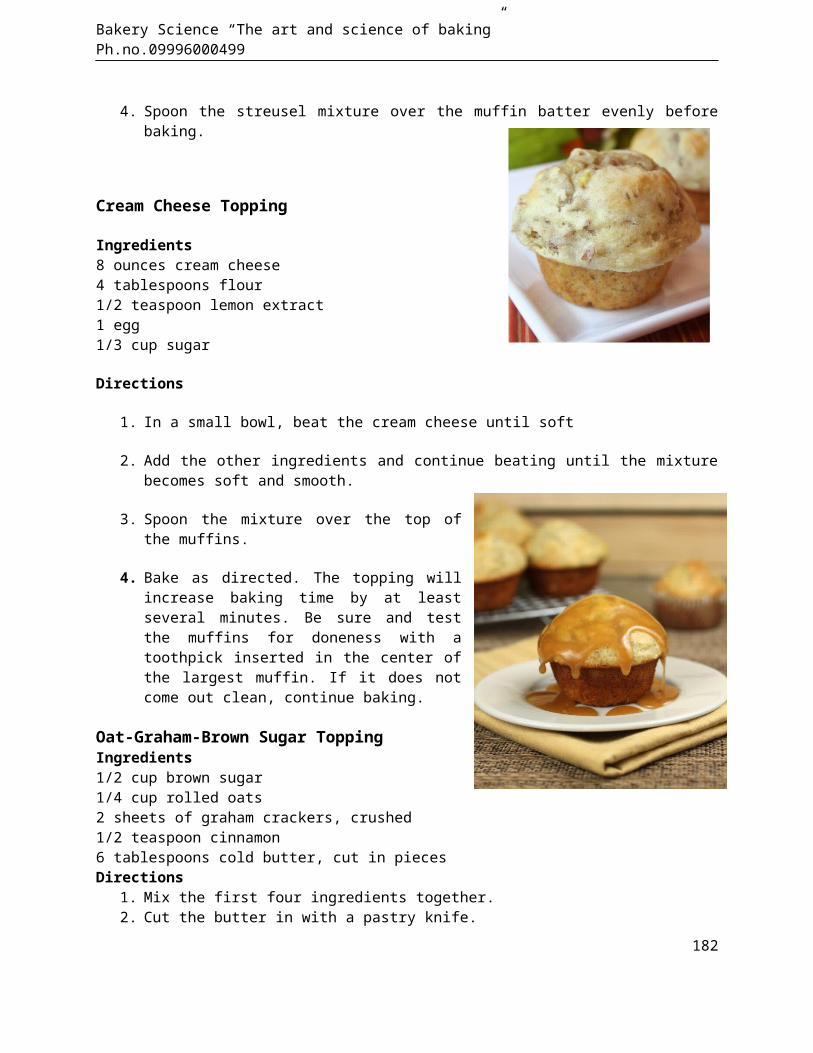
Bakery Science “The art and science of baking” Ph.no.09996000499
4. Spoon the streusel mixture over the muffin batter evenly beforebaking.
Cream Cheese Topping
Ingredients8 ounces cream cheese4 tablespoons flour1/2 teaspoon lemon extract1 egg1/3 cup sugar
Directions
1. In a small bowl, beat the cream cheese until soft
2. Add the other ingredients and continue beating until the mixturebecomes soft and smooth.
3. Spoon the mixture over the top ofthe muffins.
4. Bake as directed. The topping willincrease baking time by at leastseveral minutes. Be sure and testthe muffins for doneness with atoothpick inserted in the center ofthe largest muffin. If it does notcome out clean, continue baking.
Oat-Graham-Brown Sugar ToppingIngredients1/2 cup brown sugar1/4 cup rolled oats2 sheets of graham crackers, crushed1/2 teaspoon cinnamon6 tablespoons cold butter, cut in piecesDirections
1. Mix the first four ingredients together. 2. Cut the butter in with a pastry knife.
182
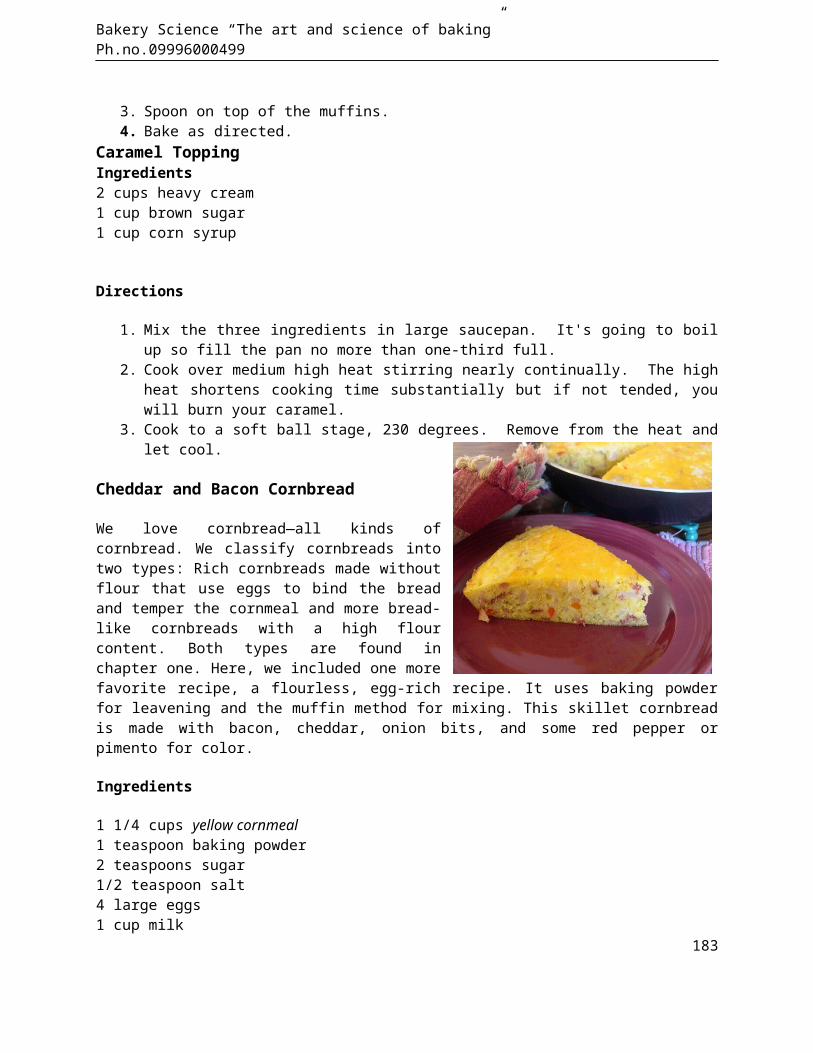
Bakery Science “The art and science of baking” Ph.no.09996000499
3. Spoon on top of the muffins. 4. Bake as directed.
Caramel ToppingIngredients2 cups heavy cream1 cup brown sugar1 cup corn syrup
Directions
1. Mix the three ingredients in large saucepan. It's going to boilup so fill the pan no more than one-third full.
2. Cook over medium high heat stirring nearly continually. The highheat shortens cooking time substantially but if not tended, youwill burn your caramel.
3. Cook to a soft ball stage, 230 degrees. Remove from the heat andlet cool.
Cheddar and Bacon Cornbread
We love cornbread—all kinds ofcornbread. We classify cornbreads intotwo types: Rich cornbreads made withoutflour that use eggs to bind the breadand temper the cornmeal and more bread-like cornbreads with a high flourcontent. Both types are found inchapter one. Here, we included one morefavorite recipe, a flourless, egg-rich recipe. It uses baking powderfor leavening and the muffin method for mixing. This skillet cornbreadis made with bacon, cheddar, onion bits, and some red pepper orpimento for color.
Ingredients
1 1/4 cups yellow cornmeal1 teaspoon baking powder2 teaspoons sugar1/2 teaspoon salt4 large eggs1 cup milk
183
Bakery Science “The art and science of baking” Ph.no.09996000499
1/2 pound bacon1/2 red bell pepper, chopped and diced1/2 medium sized onion, chopped and diced11/2 cups grated cheese, cheddar or jack
Directions
Preheat the oven to 375 degrees.
1. Fry the bacon to a crisp, pat the grease from the bacon withpaper towels, and crumble or chop the bacon.
2. In a large bowl, stir together the cornmeal, baking powder,sugar, and salt.
3. In a medium bowl, whisk the eggs then stir in the rest of theingredients plus the bacon, reserving 1/2 cup of the gratedcheese.
4. Form a well in the dry ingredients and pour the wet ingredientsinto the dry ingredients. Mix with a spatula until well combined.
5. Bake in a ten-inch, nonstick skillet for 20 minutes or until allbut the center of the cornbread is set. Remove the cornbread fromthe oven and immediately sprinkle the reserved cheese over thecornbread to melt. Serve hot with butter and maple syrup.
Baker’s note:Cornbread tends to be dry if over-baked. This is a flourlessrecipe and relies on the eggs for structure. This is very much likebaking a custard or a quiche. As it bakes it will set up with the centerbeing the last to set. It is time to remove the pan from the oven whenall but the center two inches is set. It will continue cooking in thehot pan after it comes from the oven.
184
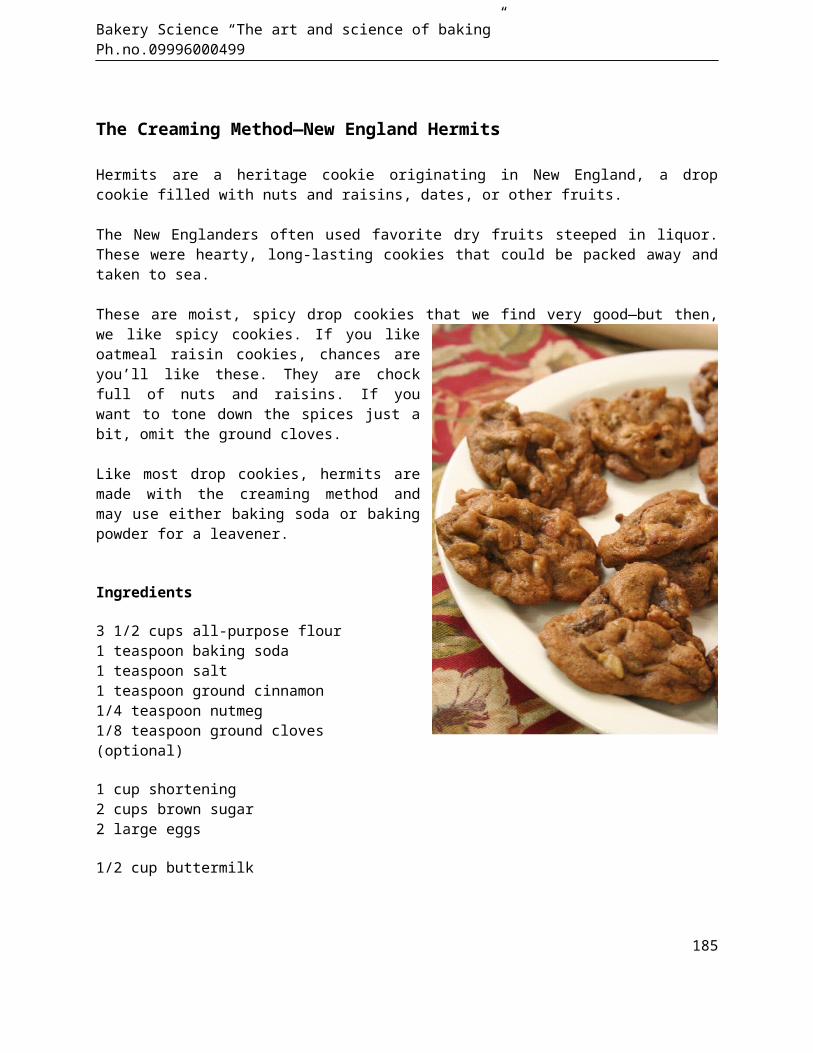
Bakery Science “The art and science of baking” Ph.no.09996000499
The Creaming Method—New England Hermits
Hermits are a heritage cookie originating in New England, a dropcookie filled with nuts and raisins, dates, or other fruits.
The New Englanders often used favorite dry fruits steeped in liquor.These were hearty, long-lasting cookies that could be packed away andtaken to sea.
These are moist, spicy drop cookies that we find very good—but then,we like spicy cookies. If you likeoatmeal raisin cookies, chances areyou’ll like these. They are chockfull of nuts and raisins. If youwant to tone down the spices just abit, omit the ground cloves.
Like most drop cookies, hermits aremade with the creaming method andmay use either baking soda or bakingpowder for a leavener.
Ingredients
3 1/2 cups all-purpose flour1 teaspoon baking soda1 teaspoon salt1 teaspoon ground cinnamon1/4 teaspoon nutmeg1/8 teaspoon ground cloves(optional)
1 cup shortening2 cups brown sugar2 large eggs
1/2 cup buttermilk
185

Bakery Science “The art and science of baking” Ph.no.09996000499
2 cups chopped walnuts1 1/2 cups raisins
Directions
Preheat the oven to 375ºF.
1. Measure the flour, baking soda, salt, and spices into a mediumbowl.
2. Using the paddle wheel attachment on your stand type mixer or anelectric handheld mixer, beat the shortening and brown sugartogether until light and fluffy. The mixture should be a lightbrown in color. Add the eggs, one at a time, beating after eachaddition. The mixture should be light and fluffy.
3. Add the flour mixture and the buttermilk in three separateadditions starting with the flour mixture, beating only untilcombined after each addition. Add the nuts and raisins.
4. Make golf-ball sized mounds on a greased cookie sheet. Bake foreight to ten minutes at 375 degrees or until the edges of thecookies just begin to brown. Do not over bake. Remove to a wirerack to cool.
186
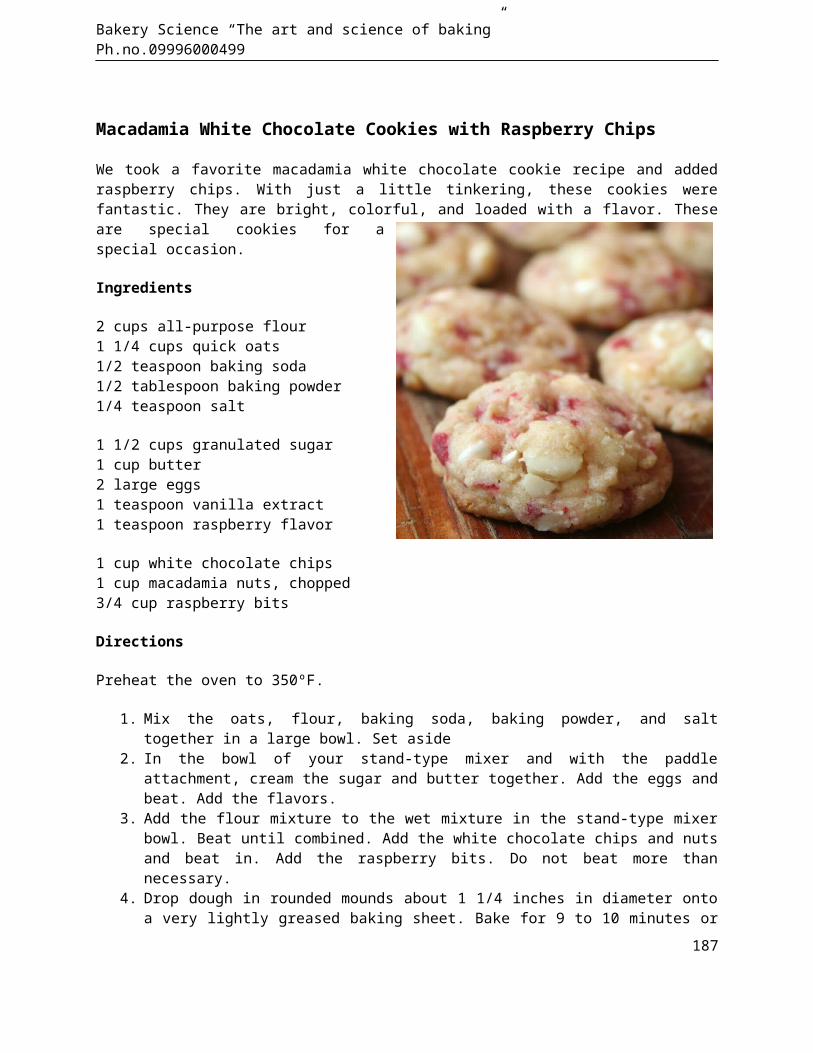
Bakery Science “The art and science of baking” Ph.no.09996000499
Macadamia White Chocolate Cookies with Raspberry Chips
We took a favorite macadamia white chocolate cookie recipe and addedraspberry chips. With just a little tinkering, these cookies werefantastic. They are bright, colorful, and loaded with a flavor. Theseare special cookies for aspecial occasion.
Ingredients
2 cups all-purpose flour1 1/4 cups quick oats1/2 teaspoon baking soda1/2 tablespoon baking powder1/4 teaspoon salt
1 1/2 cups granulated sugar1 cup butter2 large eggs1 teaspoon vanilla extract1 teaspoon raspberry flavor
1 cup white chocolate chips1 cup macadamia nuts, chopped3/4 cup raspberry bits
Directions
Preheat the oven to 350ºF.
1. Mix the oats, flour, baking soda, baking powder, and salttogether in a large bowl. Set aside
2. In the bowl of your stand-type mixer and with the paddleattachment, cream the sugar and butter together. Add the eggs andbeat. Add the flavors.
3. Add the flour mixture to the wet mixture in the stand-type mixerbowl. Beat until combined. Add the white chocolate chips and nutsand beat in. Add the raspberry bits. Do not beat more thannecessary.
4. Drop dough in rounded mounds about 1 1/4 inches in diameter ontoa very lightly greased baking sheet. Bake for 9 to 10 minutes or
187

Bakery Science “The art and science of baking” Ph.no.09996000499
until the cookies are set and the edges start to brown. Do notover bake—the centers will be soft. Remove immediately and letcool on a rack.
188
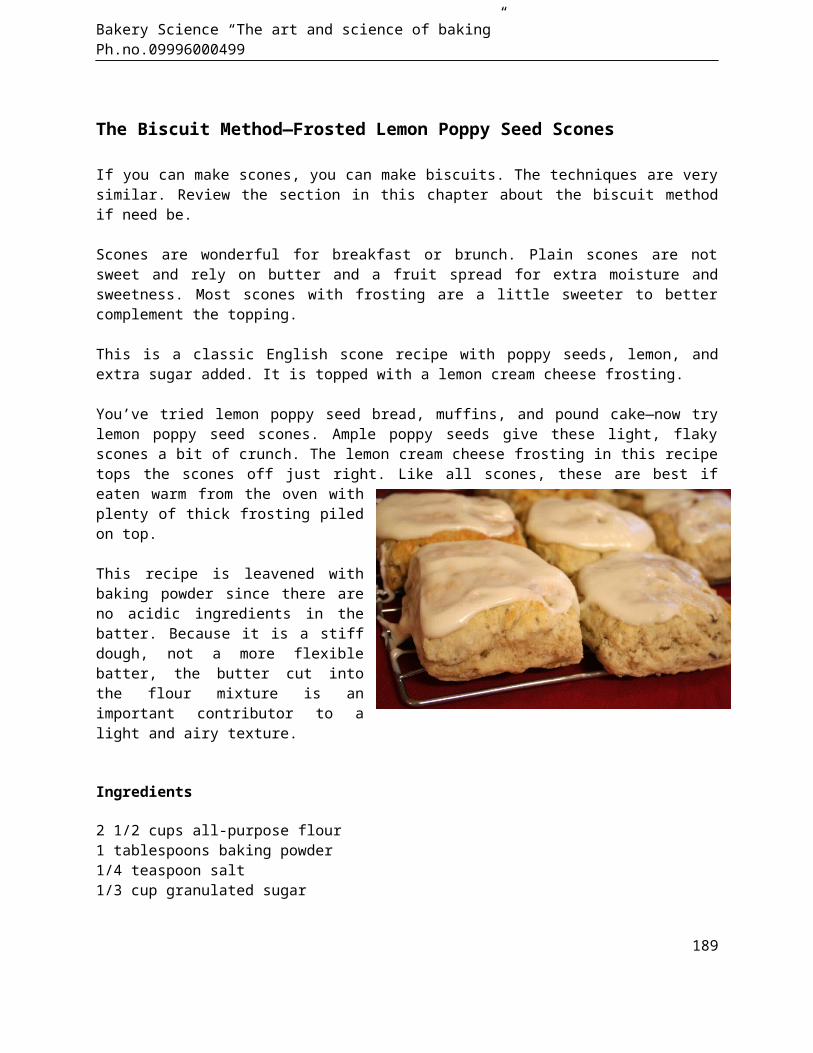
Bakery Science “The art and science of baking” Ph.no.09996000499
The Biscuit Method—Frosted Lemon Poppy Seed Scones
If you can make scones, you can make biscuits. The techniques are verysimilar. Review the section in this chapter about the biscuit methodif need be.
Scones are wonderful for breakfast or brunch. Plain scones are notsweet and rely on butter and a fruit spread for extra moisture andsweetness. Most scones with frosting are a little sweeter to bettercomplement the topping.
This is a classic English scone recipe with poppy seeds, lemon, andextra sugar added. It is topped with a lemon cream cheese frosting.
You’ve tried lemon poppy seed bread, muffins, and pound cake—now trylemon poppy seed scones. Ample poppy seeds give these light, flakyscones a bit of crunch. The lemon cream cheese frosting in this recipetops the scones off just right. Like all scones, these are best ifeaten warm from the oven withplenty of thick frosting piledon top.
This recipe is leavened withbaking powder since there areno acidic ingredients in thebatter. Because it is a stiffdough, not a more flexiblebatter, the butter cut intothe flour mixture is animportant contributor to alight and airy texture.
Ingredients
2 1/2 cups all-purpose flour1 tablespoons baking powder1/4 teaspoon salt1/3 cup granulated sugar
189
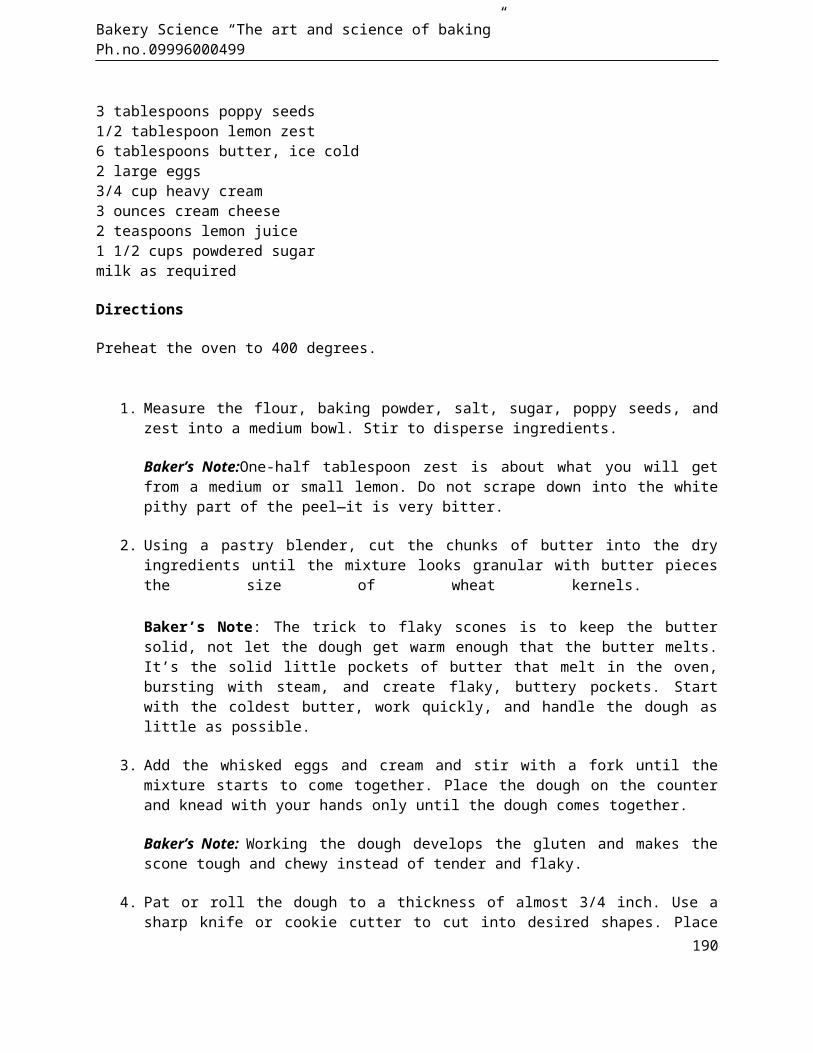
Bakery Science “The art and science of baking” Ph.no.09996000499
3 tablespoons poppy seeds1/2 tablespoon lemon zest6 tablespoons butter, ice cold2 large eggs3/4 cup heavy cream3 ounces cream cheese2 teaspoons lemon juice1 1/2 cups powdered sugarmilk as required
Directions
Preheat the oven to 400 degrees.
1. Measure the flour, baking powder, salt, sugar, poppy seeds, andzest into a medium bowl. Stir to disperse ingredients.
Baker’s Note:One-half tablespoon zest is about what you will getfrom a medium or small lemon. Do not scrape down into the whitepithy part of the peel—it is very bitter.
2. Using a pastry blender, cut the chunks of butter into the dryingredients until the mixture looks granular with butter piecesthe size of wheat kernels.
Baker’s Note: The trick to flaky scones is to keep the buttersolid, not let the dough get warm enough that the butter melts.It’s the solid little pockets of butter that melt in the oven,bursting with steam, and create flaky, buttery pockets. Startwith the coldest butter, work quickly, and handle the dough aslittle as possible.
3. Add the whisked eggs and cream and stir with a fork until themixture starts to come together. Place the dough on the counterand knead with your hands only until the dough comes together.
Baker’s Note: Working the dough develops the gluten and makes thescone tough and chewy instead of tender and flaky.
4. Pat or roll the dough to a thickness of almost 3/4 inch. Use asharp knife or cookie cutter to cut into desired shapes. Place
190
Bakery Science “The art and science of baking” Ph.no.09996000499
the scones on a greased baking sheet. Bake for 12 to 14 minutesof until the tops begin to brown. Immediately remove them fromthe sheet to cool on wire racks.
Baker’s Note:Do not pat the cut edges. The scone will rise inlayers if the edges are not molded.
5. In a small bowl with an electric mixer, mix the cream cheese,lemon juice, and powdered sugar until smooth. Frost the warmscones and serve immediately.
Baker’s Note: We made the frosting fairly thick so that we couldpile it on the scones. If you prefer a thinner layer, thin thefrosting to where it is just a bit runny. Drizzle it over thescones letting it drip down the sides.
191
DESINGED BY
Sunil KumarResearch Scholar/ Food Production FacultyInstitute of Hotel and Tourism Management,MAHARSHI DAYANAND UNIVERSITY, ROHTAKHaryana- 124001 INDIA Ph. No. 09996000499email: [email protected] , [email protected] linkedin:- in.linkedin.com/in/ihmsunilkumarfacebook: www.facebook.com/ihmsunilkumar webpage: chefsunilkumar.tripod.com
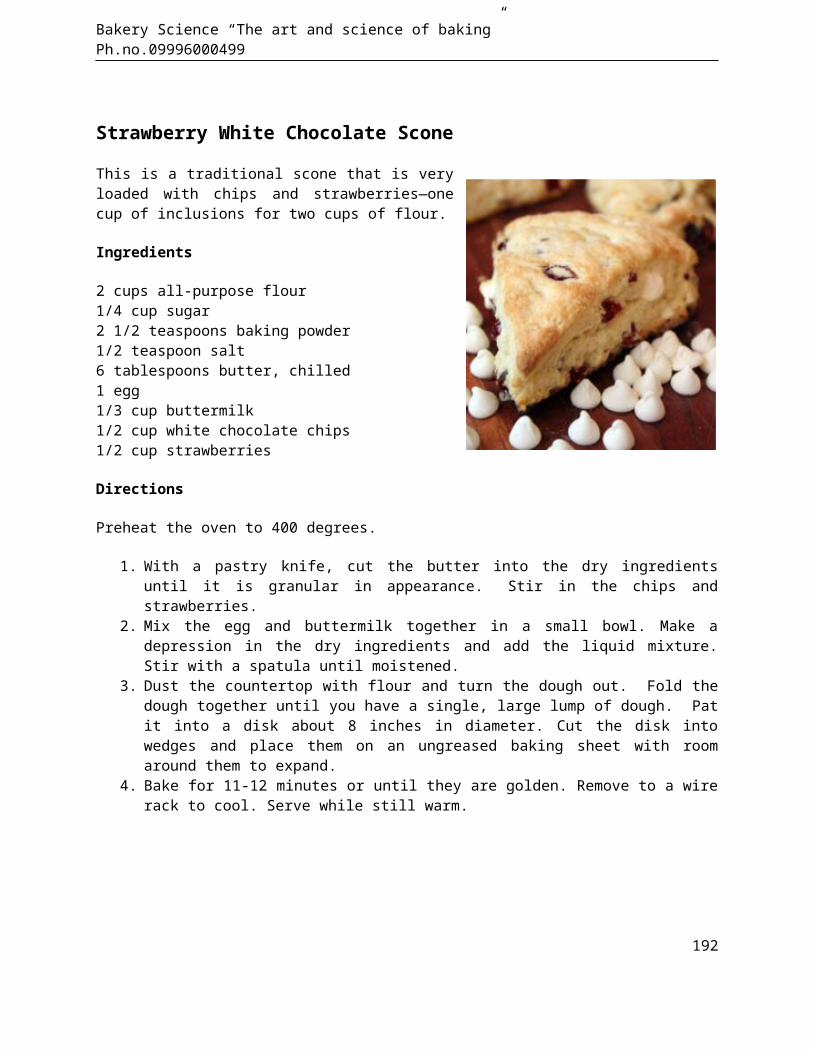
Bakery Science “The art and science of baking” Ph.no.09996000499
Strawberry White Chocolate Scone
This is a traditional scone that is veryloaded with chips and strawberries—onecup of inclusions for two cups of flour.
Ingredients
2 cups all-purpose flour1/4 cup sugar2 1/2 teaspoons baking powder1/2 teaspoon salt6 tablespoons butter, chilled1 egg1/3 cup buttermilk 1/2 cup white chocolate chips1/2 cup strawberries
Directions
Preheat the oven to 400 degrees.
1. With a pastry knife, cut the butter into the dry ingredientsuntil it is granular in appearance. Stir in the chips andstrawberries.
2. Mix the egg and buttermilk together in a small bowl. Make adepression in the dry ingredients and add the liquid mixture.Stir with a spatula until moistened.
3. Dust the countertop with flour and turn the dough out. Fold thedough together until you have a single, large lump of dough. Patit into a disk about 8 inches in diameter. Cut the disk intowedges and place them on an ungreased baking sheet with roomaround them to expand.
4. Bake for 11-12 minutes or until they are golden. Remove to a wirerack to cool. Serve while still warm.
192
Bakery Science “The art and science of baking” Ph.no.09996000499
Sweet and Savory—Explore a New World of Biscuits!
One of the joys of baking is the opportunity to experiment, to createour own sensations, what seems good to us and will please ourfamilies. We’ve probably all done that with muffins and scones, addingfruit or nuts, or toppings to make them ours. But biscuits? For somereason, when we think of biscuits, we think of classic buttermilkbiscuits, tall and hot and slathered with butter and a little honey.There is no reason that we can’t add to basic biscuits just like we doto scones. But then, what’s the difference between a biscuit andscone?
Biscuits are most often rolled out and cut, as scones are, but usuallyin round or square shapes. One of the attractions of biscuits is howquickly they can be made. Drop biscuits, biscuits made with a softbatter and spooned onto the baking sheet, save the steps of rollingand cutting. Drop biscuits are “fast food” from scratch.
The following three recipes are made with drop biscuits. The samevariations can be made with rolled and cut biscuits.
The first recipe is for a basic drop biscuit recipe. The next recipeis a sweet biscuit made with fruit and nuts. Use this as a templatefor your own creations. Use your favorite fresh or dried fruits,spices, and flavors. Drizzle the biscuits with a little glaze maybeflavored with extract, cream cheese, or syrup. You’ll transformeveryday biscuits into something fit for guests at the next brunch.
The second recipe demonstrates how fruit and nuts can be combined in abiscuit to create new and interesting flavors. Try experimenting withsubstituting your own favorite ingredients and you’ll be surprised byhow well it turns out.
The last recipe is a savory recipe. Sharp cheddar and sautéed redpepper bits are added. But onions, chilies, bacon bits, diced ham, oranything else you desire could be added.
Have fun creating your own world of biscuits.
193
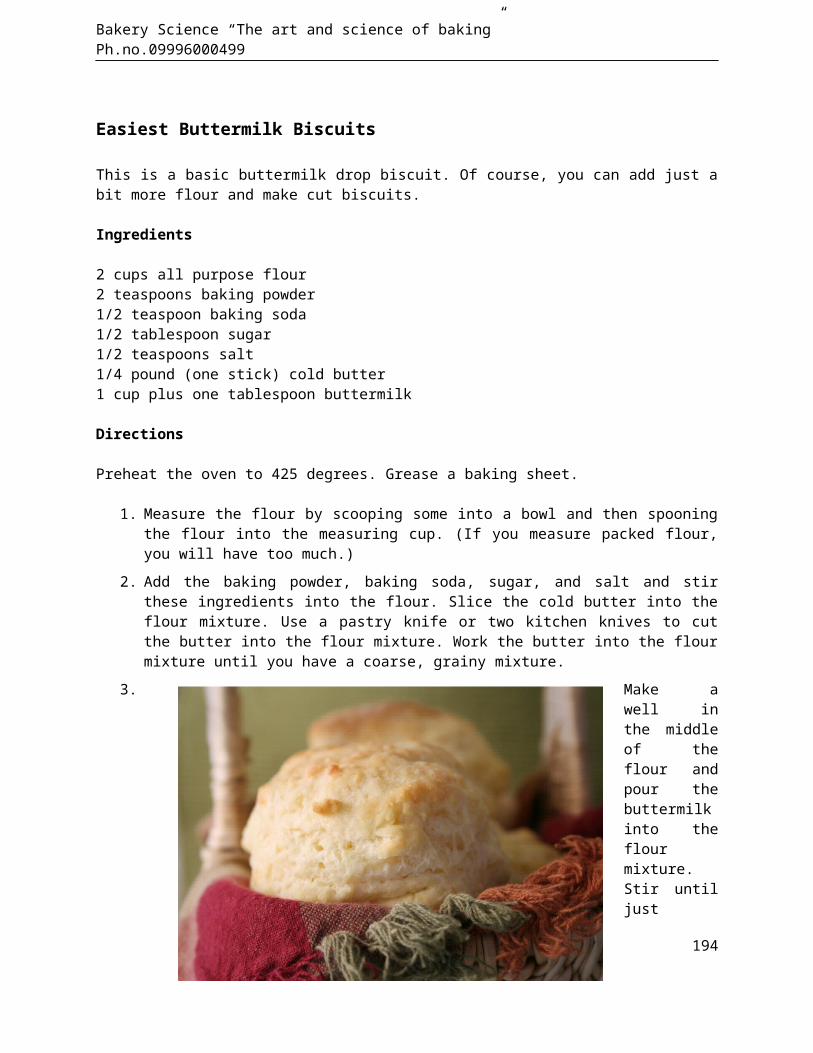
Bakery Science “The art and science of baking” Ph.no.09996000499
Easiest Buttermilk Biscuits
This is a basic buttermilk drop biscuit. Of course, you can add just abit more flour and make cut biscuits.
Ingredients
2 cups all purpose flour2 teaspoons baking powder1/2 teaspoon baking soda1/2 tablespoon sugar1/2 teaspoons salt1/4 pound (one stick) cold butter1 cup plus one tablespoon buttermilk
Directions
Preheat the oven to 425 degrees. Grease a baking sheet.
1. Measure the flour by scooping some into a bowl and then spooningthe flour into the measuring cup. (If you measure packed flour,you will have too much.)
2. Add the baking powder, baking soda, sugar, and salt and stirthese ingredients into the flour. Slice the cold butter into theflour mixture. Use a pastry knife or two kitchen knives to cutthe butter into the flour mixture. Work the butter into the flourmixture until you have a coarse, grainy mixture.
3. Make awell inthe middleof theflour andpour thebuttermilkinto theflourmixture.Stir untiljust
194

Bakery Science “The art and science of baking” Ph.no.09996000499
moistened. The dough should be of a consistency like drop cookiedough or just a bit stiffer. If it is not moist enough, addanother tablespoon of buttermilk.
4. Spoon the dough into twelve rounded mounds on the baking sheetleaving room for expansion.
5. Bake for 12 to 14 minutes or until the biscuits just begin tobrown. Remove the biscuits from the baking sheet and place themon a wire rack to cool.
195
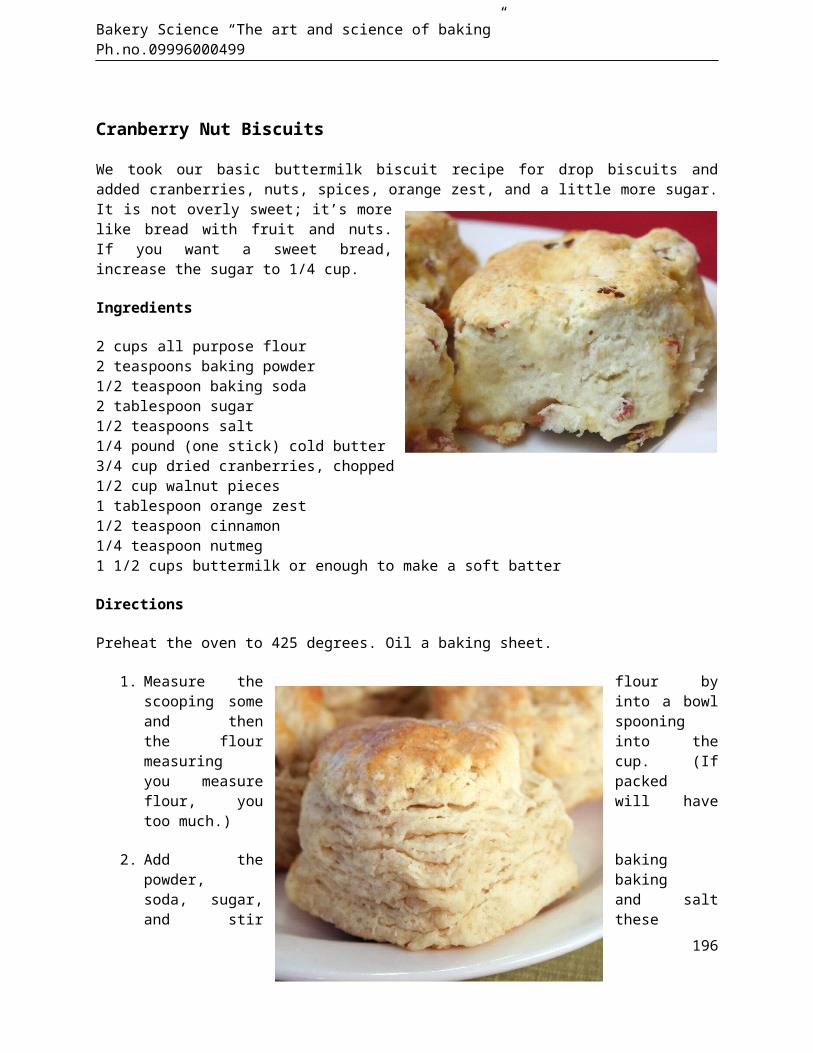
Bakery Science “The art and science of baking” Ph.no.09996000499
Cranberry Nut Biscuits
We took our basic buttermilk biscuit recipe for drop biscuits andadded cranberries, nuts, spices, orange zest, and a little more sugar.It is not overly sweet; it’s morelike bread with fruit and nuts.If you want a sweet bread,increase the sugar to 1/4 cup.
Ingredients
2 cups all purpose flour2 teaspoons baking powder1/2 teaspoon baking soda2 tablespoon sugar1/2 teaspoons salt1/4 pound (one stick) cold butter3/4 cup dried cranberries, chopped1/2 cup walnut pieces1 tablespoon orange zest1/2 teaspoon cinnamon1/4 teaspoon nutmeg1 1/2 cups buttermilk or enough to make a soft batter
Directions
Preheat the oven to 425 degrees. Oil a baking sheet.
1. Measure the flour byscooping some into a bowland then spooningthe flour into themeasuring cup. (Ifyou measure packedflour, you will havetoo much.)
2. Add the bakingpowder, bakingsoda, sugar, and saltand stir these
196
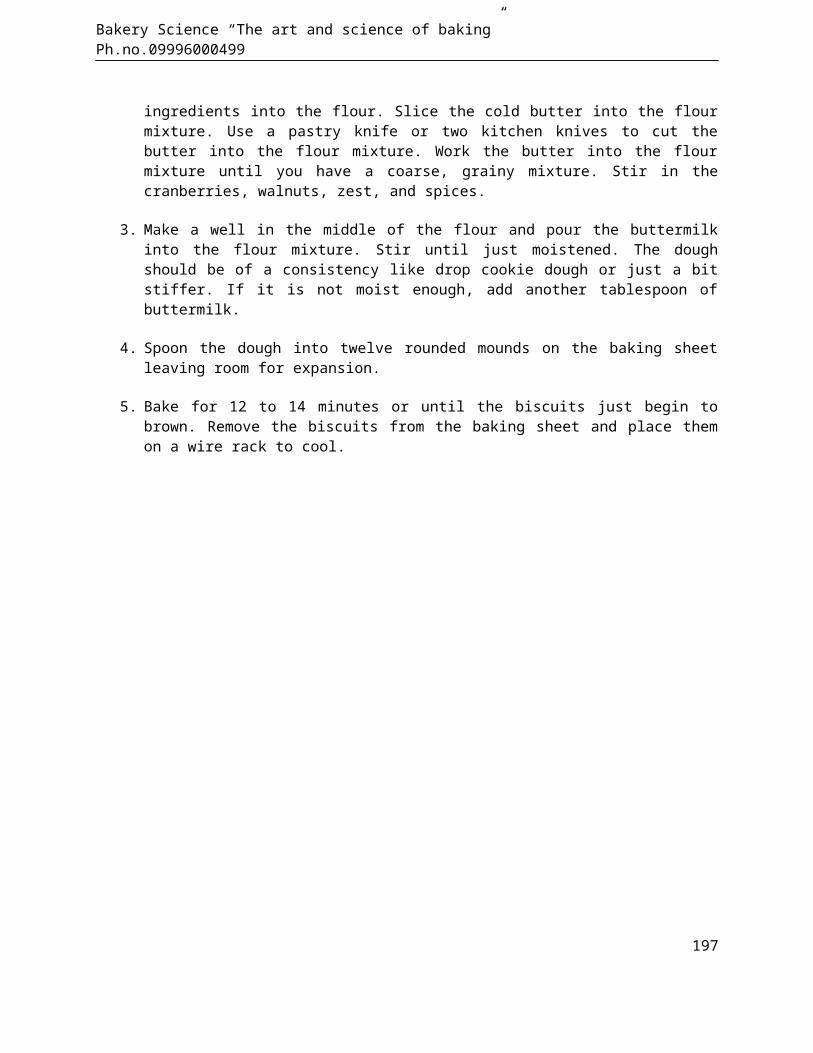
Bakery Science “The art and science of baking” Ph.no.09996000499
ingredients into the flour. Slice the cold butter into the flourmixture. Use a pastry knife or two kitchen knives to cut thebutter into the flour mixture. Work the butter into the flourmixture until you have a coarse, grainy mixture. Stir in thecranberries, walnuts, zest, and spices.
3. Make a well in the middle of the flour and pour the buttermilkinto the flour mixture. Stir until just moistened. The doughshould be of a consistency like drop cookie dough or just a bitstiffer. If it is not moist enough, add another tablespoon ofbuttermilk.
4. Spoon the dough into twelve rounded mounds on the baking sheetleaving room for expansion.
5. Bake for 12 to 14 minutes or until the biscuits just begin tobrown. Remove the biscuits from the baking sheet and place themon a wire rack to cool.
197
Bakery Science “The art and science of baking” Ph.no.09996000499
Cheddar Cheese Biscuits
These are great biscuits to go with a bowl of soup on a cold winterday and, in our humble opinion, we think these are better than thecheesy biscuits you’ll find served in the national chain restaurants.
We took the standard buttermilk biscuit recipe and added sharp cheddarcheese and reduced the butter by half since the cheese provides fat tothe recipe.
It’s hard to get enough cheese in a bread to make it really cheesywithout a little help. We accented the cheese with a touch of whitepepper, garlic, and mustard. The combination didn’t overwhelm thecheese and yet was piquant enough to not be bland.
Ingredients
2 cups all purpose flour2 teaspoons baking powder1/2 teaspoon baking soda1 tablespoon sugar1/2 teaspoons salt1/4 teaspoon white pepper1/4 teaspoon garlic powder1/2 teaspoon ground dry mustard4 tablespoons cold butter1 1/2 cups grated sharp cheddar cheese lightly pressed into the measure1/2 red bell pepper, diced and sautéed or steamed in the microwave until it is almost tender1 3/4 cups buttermilk or enough to make a soft batter
Directions
Preheat the oven to 425 degrees. Oil a baking sheet.
1. Measure the flour by scooping some into a bowl and then spooningthe flour into the measuring cup. (If you measure packed flour,you will have too much.)
198
Bakery Science “The art and science of baking” Ph.no.09996000499
2. Add the baking powder, baking soda, sugar, salt, pepper, garlic,and mustard and stir these ingredients into the flour. Slice thecold butter into the flour mixture. Use a pastry knife or twokitchen knives to cut the butter into the flour mixture. Work thebutter into the flour mixture until you have a coarse, grainymixture. (See picture.) Add the cheese and bell pepper.
3. Make a well in the middle of the flour and pour the buttermilkinto the flour mixture. Stir until just moistened. The doughshould be of a consistency like drop cookie dough or just a bitstiffer. If it is not moist enough, add another tablespoon ofbuttermilk.
4. Spoon the dough into twelve rounded mounds on the baking sheetleaving room for expansion.
5. Bake for 12 to 14 minutes or until the biscuits just begin tobrown. Remove the biscuits from the baking sheet and place themon a wire rack to cool.
199
Bakery Science “The art and science of baking” Ph.no.09996000499
200
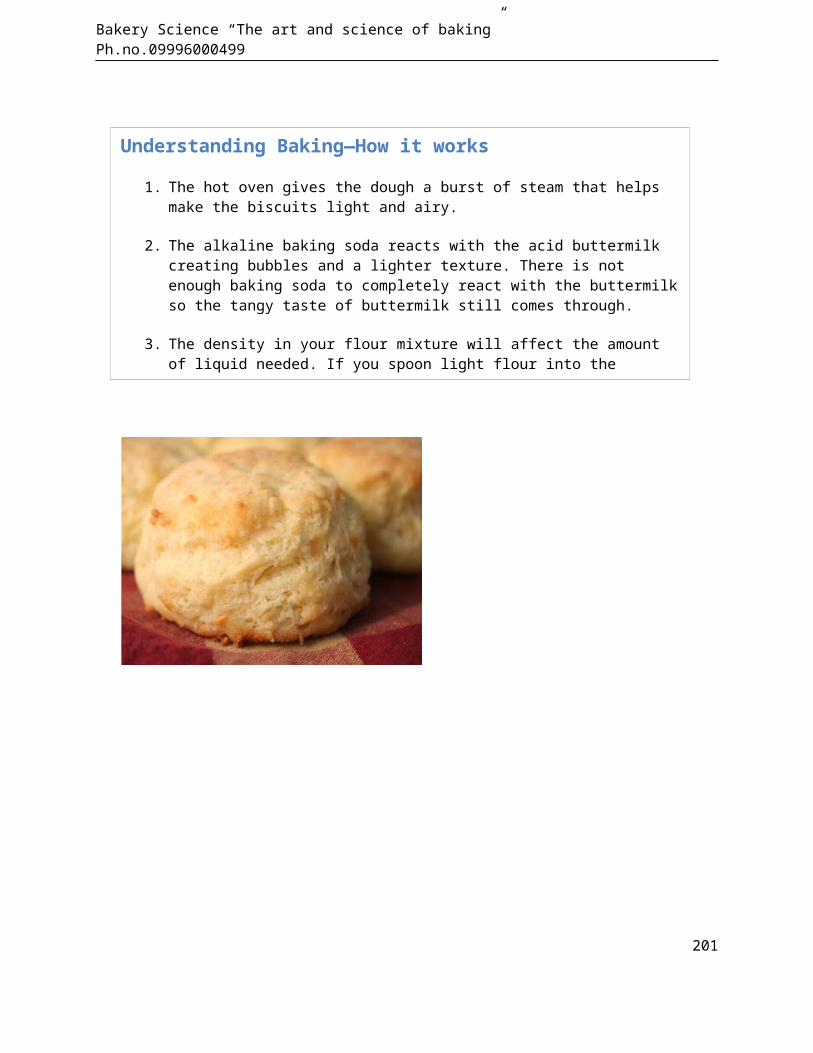
Bakery Science “The art and science of baking” Ph.no.09996000499
201
Understanding Baking—How it works
1. The hot oven gives the dough a burst of steam that helps make the biscuits light and airy.
2. The alkaline baking soda reacts with the acid buttermilk creating bubbles and a lighter texture. There is not enough baking soda to completely react with the buttermilkso the tangy taste of buttermilk still comes through.
3. The density in your flour mixture will affect the amount of liquid needed. If you spoon light flour into the measure, it should be about right for the liquid noted in