avaya contact center select 7.0.2.0
TRANSCRIPT
Avaya Contact Center Select
Release 7.0.2.0
Release Notes
This document contains information on software lineup, known issues and workarounds specific to this release of Avaya Contact Center Select.

Avaya Contact Center Select 7.0.2.0
Release Notes
Page 1
TABLE OF CONTENTS Purpose ................................................................................................................................................ 3
Publication History ............................................................................................................................... 3
Software Information ........................................................................................................................... 4
Hardware Appliance ......................................................................................................................... 4
Software Appliance .......................................................................................................................... 4
DVD Product Installation .................................................................................................................. 5
Release Pack Bundle ......................................................................................................................... 5
Additional Required Updates ........................................................................................................... 6
Additional Optional Updates ............................................................................................................ 7
Switch Software Support ..................................................................................................................... 9
Avaya IP Office Software .................................................................................................................. 9
Phone Compatibility updates with Avaya IP Office 10.0 .................................................................. 9
Platform Vendor Independence (PVI) ................................................................................................ 10
Hardware Requirements ................................................................................................................ 10
Network Adapter known issues ..................................................................................................... 10
Recommended Network Adapter .................................................................................................. 10
Operating System & Virtualization .................................................................................................... 11
Operating System ........................................................................................................................... 11
Microsoft Operating System Updates ............................................................................................ 13
Internet Explorer Support .............................................................................................................. 14
Windows Server 2012 RDS Support ............................................................................................... 14
VMware .......................................................................................................................................... 15
Deployment & Configuration Information ......................................................................................... 16
Pre-Installation Considerations ...................................................................................................... 16
Installation ...................................................................................................................................... 17
Post-Installation Configuration ...................................................................................................... 22
Security Information .......................................................................................................................... 23
Localization ........................................................................................................................................ 28
Overview of I18N and L10N Products & Components ................................................................... 28
Language specific support and configuration ................................................................................ 29
Start Localized AAD Client .............................................................................................................. 32
Troubleshooting ............................................................................................................................. 33
Known Issues ...................................................................................................................................... 34
Hardware Appliance ....................................................................................................................... 34
Software Appliance ........................................................................................................................ 34
Application\Features ...................................................................................................................... 35

Avaya Contact Center Select 7.0.2.0
Release Notes
Page 2
Localization issues .......................................................................................................................... 45
Appendix ............................................................................................................................................ 46
Appendix A – Issues Addressed in this release .............................................................................. 46
Appendix B – Additional Security Information ............................................................................... 49
Avaya Contact Center Select 7.0.2.0
Release Notes
Page 3
PURPOSE This document contains known issues, patches and workarounds specific to this build and does not constitute a quick install guide for Contact Centre components. Please refer to the information below to identify any issues relevant to the component(s) you are installing and then refer to the Avaya Contact Center Select Installation and Commissioning guides for full installation instructions
PUBLICATION HISTORY Issue Change Summary Author(s) Date
1.0 Launch of Avaya Aura Contact Center 7.0.2.0
Contact Center Release Engineering
November 20, 2017
Avaya Contact Center Select 7.0.2.0
Release Notes
Page 4
SOFTWARE INFORMATION
Hardware Appliance There are no software downloads associated with the Hardware Appliance deployment
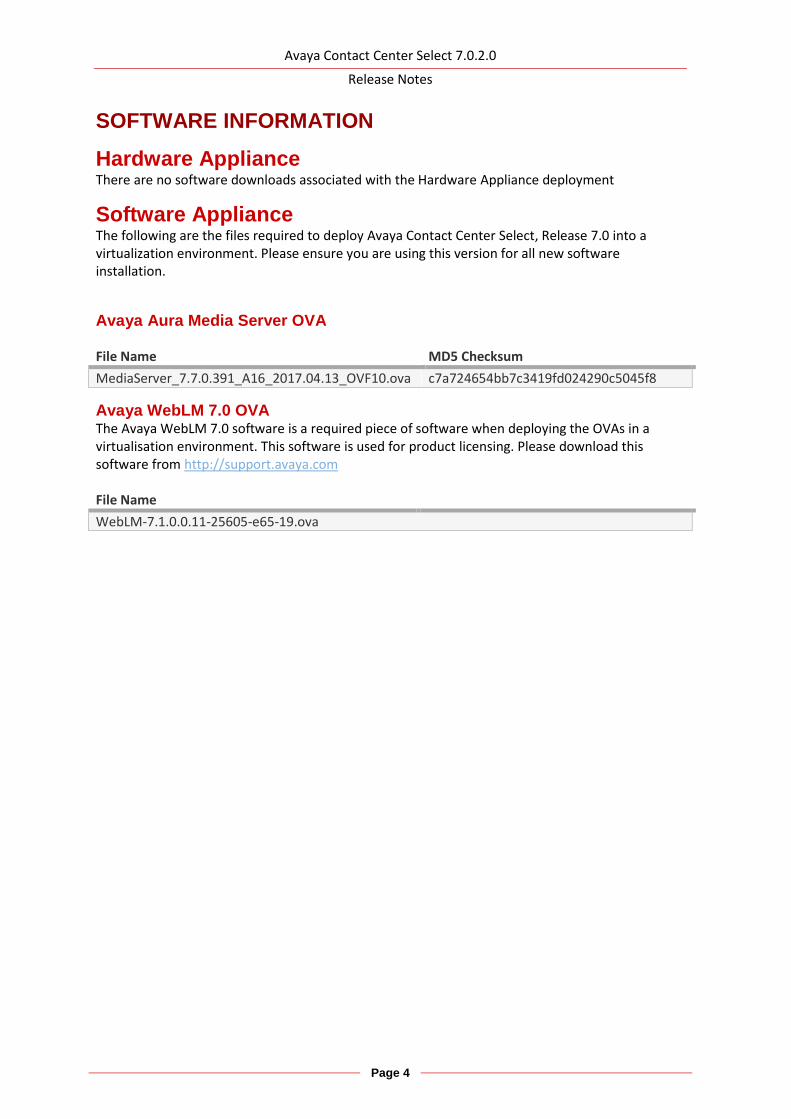
Software Appliance The following are the files required to deploy Avaya Contact Center Select, Release 7.0 into a virtualization environment. Please ensure you are using this version for all new software installation.
Avaya Aura Media Server OVA File Name MD5 Checksum
MediaServer_7.7.0.391_A16_2017.04.13_OVF10.ova c7a724654bb7c3419fd024290c5045f8
Avaya WebLM 7.0 OVA The Avaya WebLM 7.0 software is a required piece of software when deploying the OVAs in a virtualisation environment. This software is used for product licensing. Please download this software from http://support.avaya.com File Name
WebLM-7.1.0.0.11-25605-e65-19.ova
Avaya Contact Center Select 7.0.2.0
Release Notes
Page 5
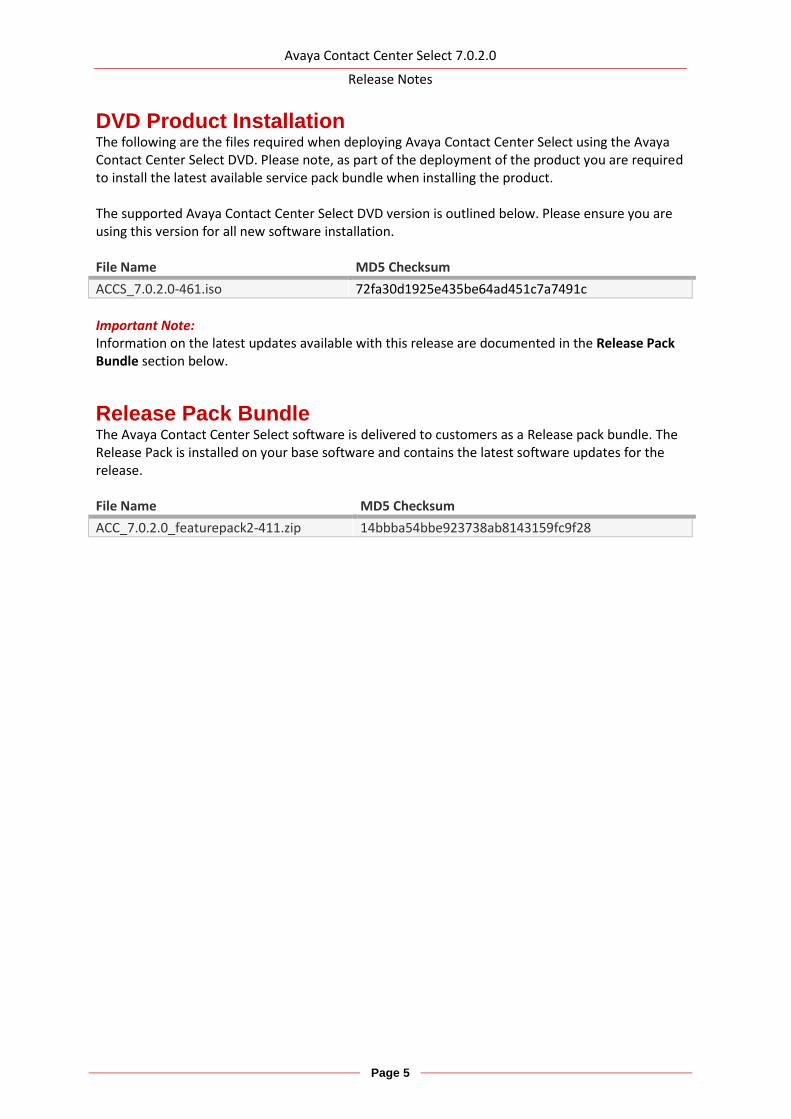
DVD Product Installation The following are the files required when deploying Avaya Contact Center Select using the Avaya Contact Center Select DVD. Please note, as part of the deployment of the product you are required to install the latest available service pack bundle when installing the product. The supported Avaya Contact Center Select DVD version is outlined below. Please ensure you are using this version for all new software installation. File Name MD5 Checksum
ACCS_7.0.2.0-461.iso 72fa30d1925e435be64ad451c7a7491c
Important Note: Information on the latest updates available with this release are documented in the Release Pack Bundle section below.
Release Pack Bundle The Avaya Contact Center Select software is delivered to customers as a Release pack bundle. The Release Pack is installed on your base software and contains the latest software updates for the release. File Name MD5 Checksum
ACC_7.0.2.0_featurepack2-411.zip 14bbba54bbe923738ab8143159fc9f28
Avaya Contact Center Select 7.0.2.0
Release Notes
Page 6
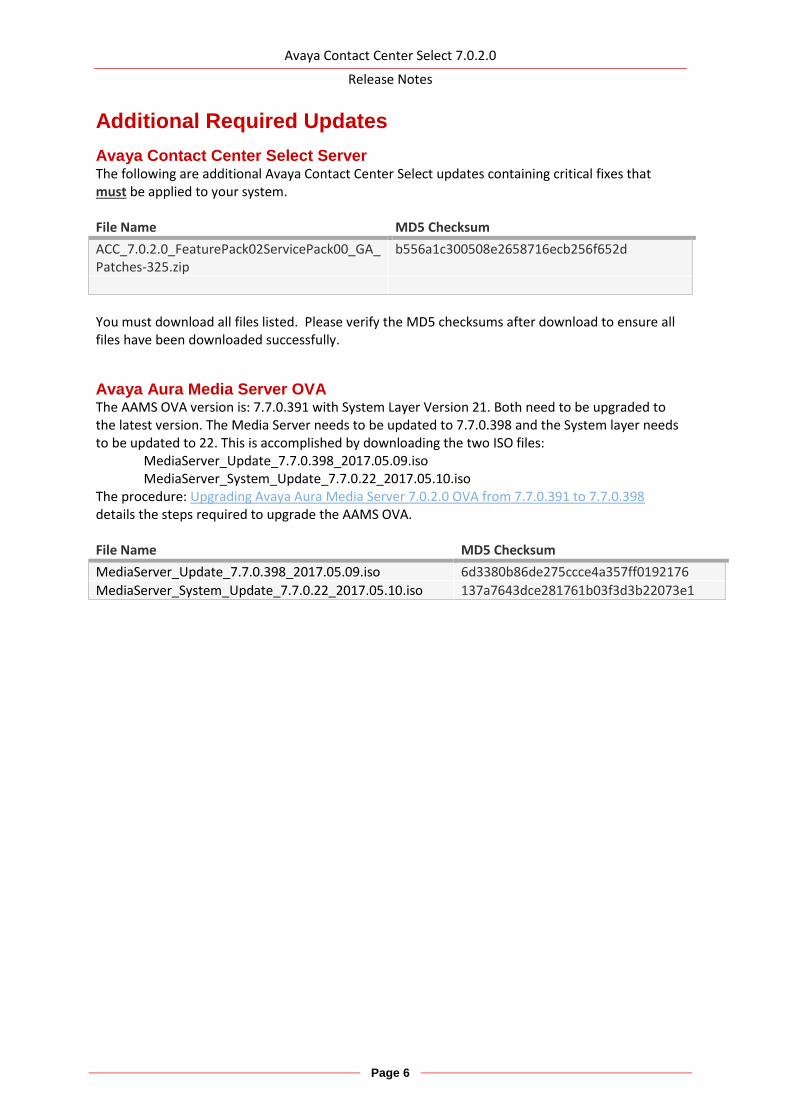
Additional Required Updates
Avaya Contact Center Select Server The following are additional Avaya Contact Center Select updates containing critical fixes that must be applied to your system. File Name MD5 Checksum
ACC_7.0.2.0_FeaturePack02ServicePack00_GA_Patches-325.zip
b556a1c300508e2658716ecb256f652d
You must download all files listed. Please verify the MD5 checksums after download to ensure all files have been downloaded successfully.
Avaya Aura Media Server OVA The AAMS OVA version is: 7.7.0.391 with System Layer Version 21. Both need to be upgraded to the latest version. The Media Server needs to be updated to 7.7.0.398 and the System layer needs to be updated to 22. This is accomplished by downloading the two ISO files:
MediaServer_Update_7.7.0.398_2017.05.09.iso MediaServer_System_Update_7.7.0.22_2017.05.10.iso
The procedure: Upgrading Avaya Aura Media Server 7.0.2.0 OVA from 7.7.0.391 to 7.7.0.398 details the steps required to upgrade the AAMS OVA. File Name MD5 Checksum
MediaServer_Update_7.7.0.398_2017.05.09.iso 6d3380b86de275ccce4a357ff0192176
MediaServer_System_Update_7.7.0.22_2017.05.10.iso 137a7643dce281761b03f3d3b22073e1
Avaya Contact Center Select 7.0.2.0
Release Notes
Page 7
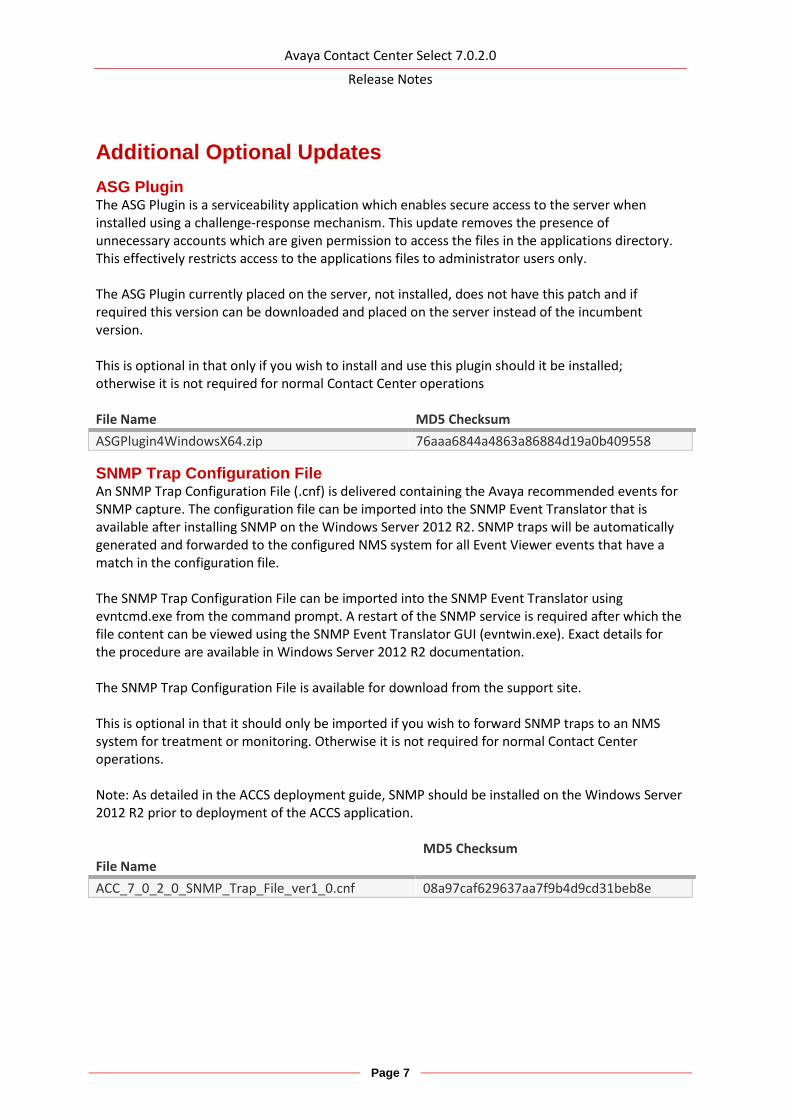
Additional Optional Updates
ASG Plugin The ASG Plugin is a serviceability application which enables secure access to the server when installed using a challenge-response mechanism. This update removes the presence of unnecessary accounts which are given permission to access the files in the applications directory. This effectively restricts access to the applications files to administrator users only. The ASG Plugin currently placed on the server, not installed, does not have this patch and if required this version can be downloaded and placed on the server instead of the incumbent version. This is optional in that only if you wish to install and use this plugin should it be installed; otherwise it is not required for normal Contact Center operations File Name MD5 Checksum
ASGPlugin4WindowsX64.zip 76aaa6844a4863a86884d19a0b409558
SNMP Trap Configuration File An SNMP Trap Configuration File (.cnf) is delivered containing the Avaya recommended events for SNMP capture. The configuration file can be imported into the SNMP Event Translator that is available after installing SNMP on the Windows Server 2012 R2. SNMP traps will be automatically generated and forwarded to the configured NMS system for all Event Viewer events that have a match in the configuration file. The SNMP Trap Configuration File can be imported into the SNMP Event Translator using evntcmd.exe from the command prompt. A restart of the SNMP service is required after which the file content can be viewed using the SNMP Event Translator GUI (evntwin.exe). Exact details for the procedure are available in Windows Server 2012 R2 documentation. The SNMP Trap Configuration File is available for download from the support site. This is optional in that it should only be imported if you wish to forward SNMP traps to an NMS system for treatment or monitoring. Otherwise it is not required for normal Contact Center operations. Note: As detailed in the ACCS deployment guide, SNMP should be installed on the Windows Server 2012 R2 prior to deployment of the ACCS application. File Name
MD5 Checksum
ACC_7_0_2_0_SNMP_Trap_File_ver1_0.cnf 08a97caf629637aa7f9b4d9cd31beb8e

Avaya Contact Center Select 7.0.2.0
Release Notes
Page 8
Patch Scanner This Patch Scanner utility is released with every Release Pack and Patch bundle from ACCS 6.4 SP13 onwards. If you are moving from an Avaya Contact Center Select 6.4 lineup to Avaya Contact Center Select 7.x you must use the version of the Patch Scanner published in the 7.x Release Notes document. This version of the tool can be used prior to moving to Avaya Contact Center Select 7.x. See readme with the application zip file for further information. File Name MD5 Checksum
PatchScanner_1.0.0.24.zip c2e7e7baf70f3f66ed8dbe78f6d883eb
Migration Tool for RCW Generated Reports This application is required when exporting Historical Reporting templates on an NES6/NES7/ACC
6.x server as part of a server migration. The most up to date version of the application is available
with the Service Pack from the ACCS lineup above.
The utility is available in: Install Software\CCMA\RCW_Migration_Utility
Avaya Contact Center Select 7.0.2.0
Release Notes
Page 9
SWITCH SOFTWARE SUPPORT
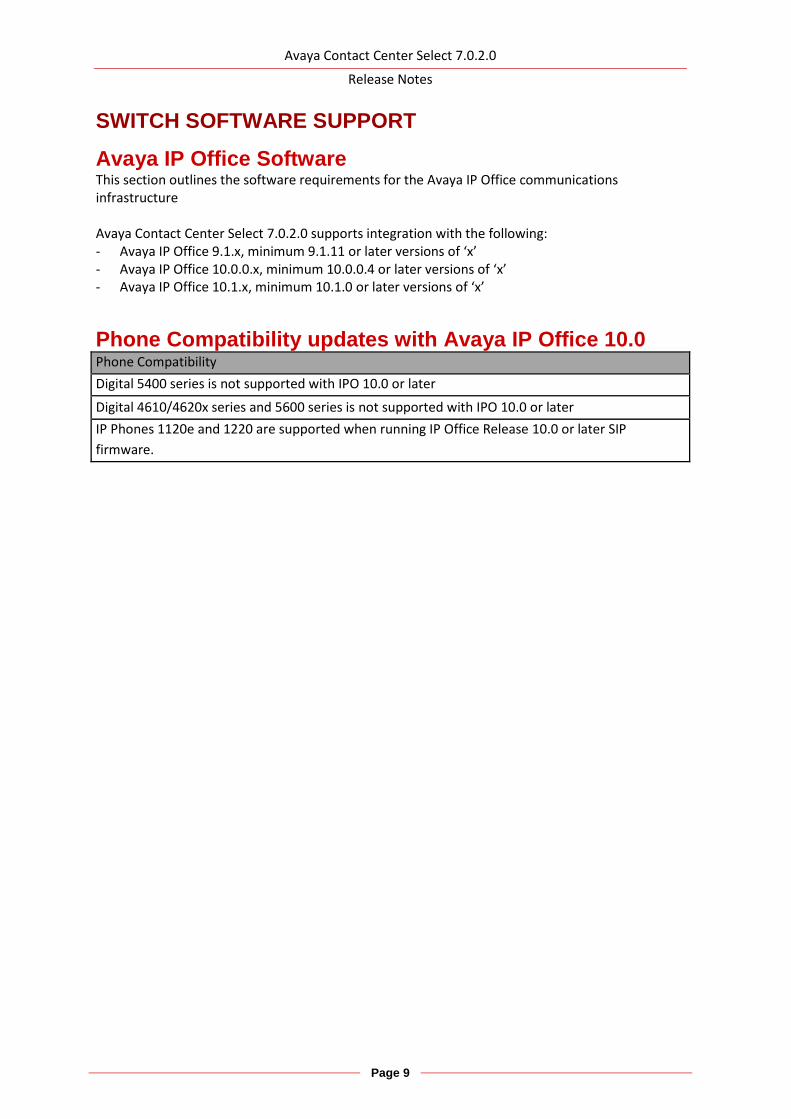
Avaya IP Office Software This section outlines the software requirements for the Avaya IP Office communications infrastructure Avaya Contact Center Select 7.0.2.0 supports integration with the following: - Avaya IP Office 9.1.x, minimum 9.1.11 or later versions of ‘x’ - Avaya IP Office 10.0.0.x, minimum 10.0.0.4 or later versions of ‘x’ - Avaya IP Office 10.1.x, minimum 10.1.0 or later versions of ‘x’
Phone Compatibility updates with Avaya IP Office 10.0 Phone Compatibility
Digital 5400 series is not supported with IPO 10.0 or later
Digital 4610/4620x series and 5600 series is not supported with IPO 10.0 or later
IP Phones 1120e and 1220 are supported when running IP Office Release 10.0 or later SIP
firmware.
Avaya Contact Center Select 7.0.2.0
Release Notes
Page 10
PLATFORM VENDOR INDEPENDENCE (PVI)
Hardware Requirements For Single Server deployments (Voice and Multimedia with Avaya Media Server on a physical platform) a Gigabit Network Adapter is required that supports Receive Side Scaling (RSS) with 4 RSS queues.
Network Adapter known issues There is currently an open issue with Microsoft Windows Server 2012 R2 with Broadcom NetXtreme Gigabit Ethernet Adapter (BCM5720) that can result in Windows OS kernel crash for Single Server deployments. The bug resides in Microsoft’s pacer.sys (QoS packet scheduler) and is exposed by the Broadcom NetXtreme Gigabit Network Adapter (BCM5720) when RSS is enabled and configured for more than 1 queue. This issue has only been found with Broadcom NetXtreme Gigabit Ethernet Adapter and (specifically the Broadcom 5720 Adapter). The issue has been accepted by Microsoft and they are working on a fix.
Recommended Network Adapter The following RSS capable Gigabit Network adapter has been tested successfully with Single Server deployments – Intel(R) Gigabit 4P I350-t Adapter

Avaya Contact Center Select 7.0.2.0
Release Notes
Page 11
OPERATING SYSTEM & VIRTUALIZATION
Operating System All Avaya Contact Center Select server applications are supported on the following operating systems:
Windows Server 2012 R2 Standard ( 64-bit Edition ) Windows Server 2012 R2 Data Center ( 64-bit Edition )
The Avaya Aura Media Server is supported installed co-resident with ACCSon a Windows Server 2012 R2 platform. AAMS installed on a standalone Windows Server 2012 R2 is not supported. AAMS is supported on Red Hat Enterprise Linux (RHEL) 6.x 64-bit OS. It is not supported 32-bit RHEL. It is not supported on any other version of Linux.
Microsoft Service Packs None.
Microsoft Hotfixes Before deploying any new Windows Security Patches and Hotfixes – you must confirm that any Windows patches are listed as supported in the Avaya Contact Center Select Security Hotfixes and Compatibility listing – published every month on support.avaya.com. Additionally, please install all required Microsoft Operating System update listed in the

Avaya Contact Center Select 7.0.2.0
Release Notes
Page 12
Microsoft Operating System Updates section of this document. Please ensure that you do not enable Automatic Updates on your Avaya Contact Center Select Server or Client PCs. All Windows Security patches and hotfixes must be manually deployed after consulting the supported Avaya Contact Center Select Security Hotfixes and Compatibility listing
Red Hat Enterprise Linux Updates AAMS is only supported on Red Hat Enterprise Linux (RHEL) 6.x 64-bit servers. For an AAMS installed on a customer installed RHEL 6.x 64-bit server, it is mandatory to register the RHEL OS with Red Hat Networks (RHN) and to apply all of the latest updates. AAMS is tested regularly against all the latest RHEL updates. The AAMS OVA AAMS ships with the most recent RHEL updates as of GA. Avaya are responsible for supplying any mandatory Red Hat updates for the OVA installed OS. This is supplied as an AAMS System Update ISO file that is uploaded via AAMS Element Manager and applied by logging into an SSH session using the same account to access AAMS Element Manager. The OVA does not need to be registered with Red Hat Networks.
Avaya Contact Center Select 7.0.2.0
Release Notes
Page 13
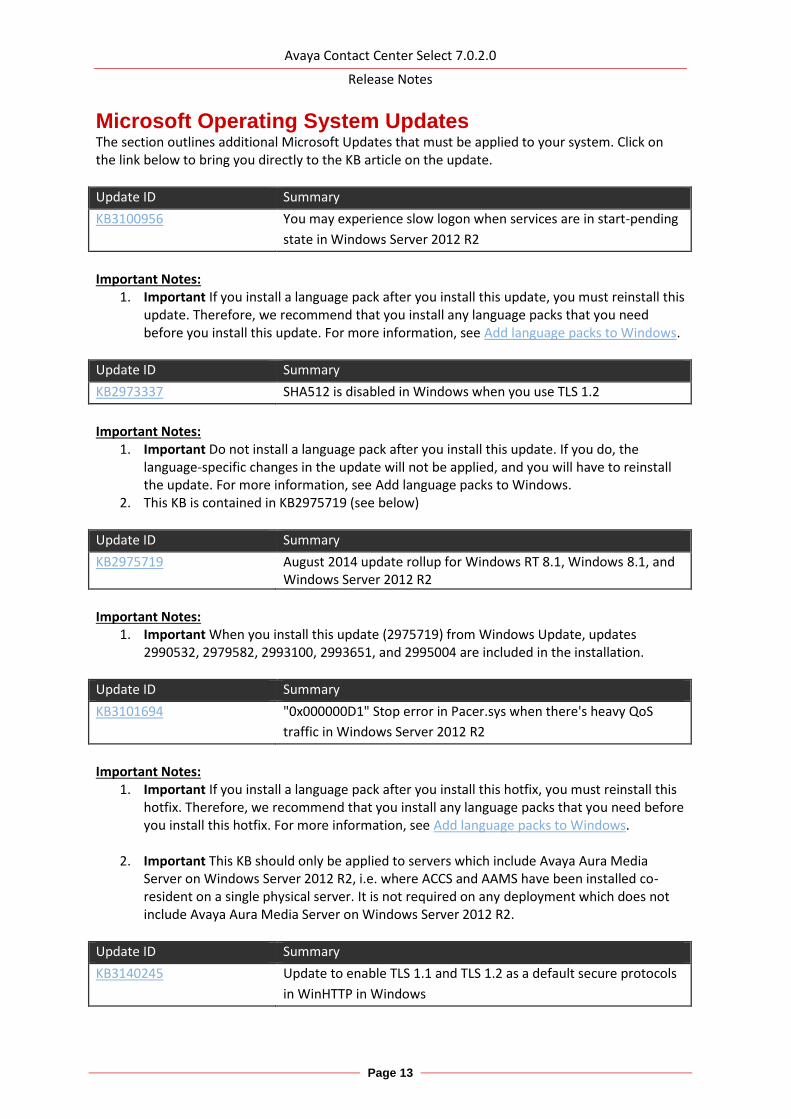
Microsoft Operating System Updates The section outlines additional Microsoft Updates that must be applied to your system. Click on the link below to bring you directly to the KB article on the update.
Update ID Summary
KB3100956 You may experience slow logon when services are in start-pending
state in Windows Server 2012 R2
Important Notes:
1. Important If you install a language pack after you install this update, you must reinstall this update. Therefore, we recommend that you install any language packs that you need before you install this update. For more information, see Add language packs to Windows.
Update ID Summary
KB2973337 SHA512 is disabled in Windows when you use TLS 1.2
Important Notes:
1. Important Do not install a language pack after you install this update. If you do, the language-specific changes in the update will not be applied, and you will have to reinstall the update. For more information, see Add language packs to Windows.
2. This KB is contained in KB2975719 (see below)
Update ID Summary
KB2975719 August 2014 update rollup for Windows RT 8.1, Windows 8.1, and Windows Server 2012 R2
Important Notes:
1. Important When you install this update (2975719) from Windows Update, updates 2990532, 2979582, 2993100, 2993651, and 2995004 are included in the installation.
Update ID Summary
KB3101694 "0x000000D1" Stop error in Pacer.sys when there's heavy QoS
traffic in Windows Server 2012 R2
Important Notes:
1. Important If you install a language pack after you install this hotfix, you must reinstall this hotfix. Therefore, we recommend that you install any language packs that you need before you install this hotfix. For more information, see Add language packs to Windows.
2. Important This KB should only be applied to servers which include Avaya Aura Media
Server on Windows Server 2012 R2, i.e. where ACCS and AAMS have been installed co-resident on a single physical server. It is not required on any deployment which does not include Avaya Aura Media Server on Windows Server 2012 R2.
Update ID Summary
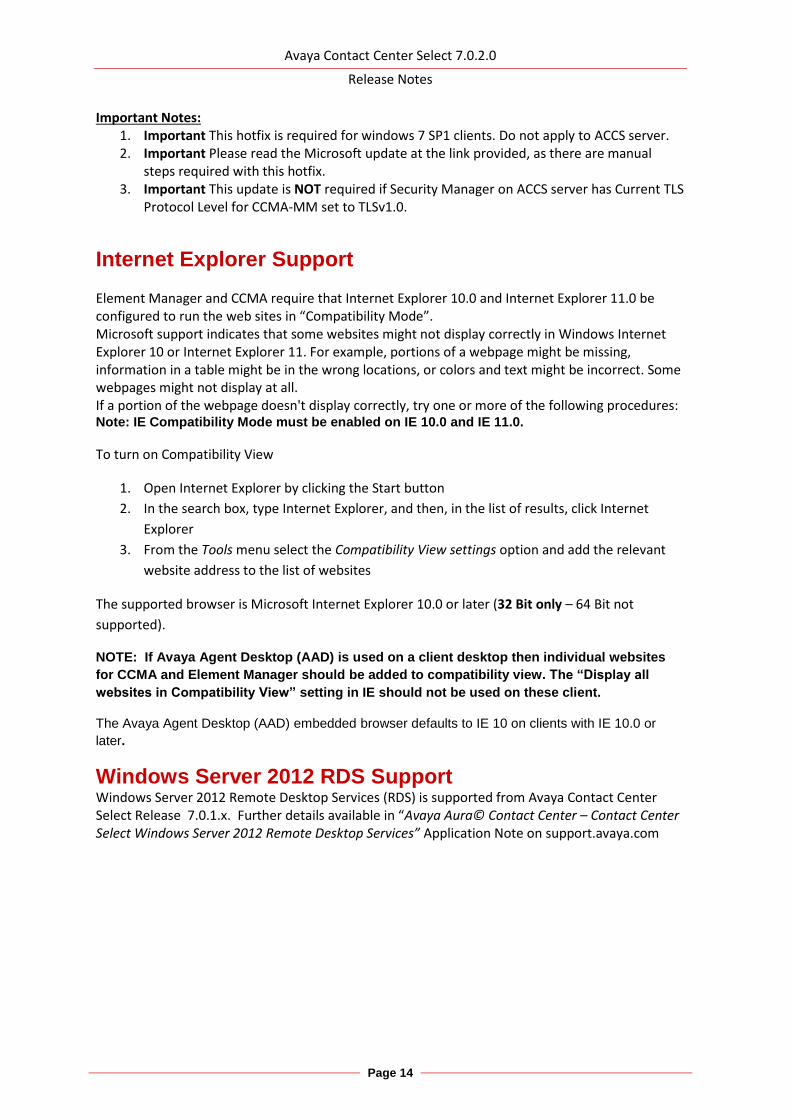
KB3140245 Update to enable TLS 1.1 and TLS 1.2 as a default secure protocols
in WinHTTP in Windows
Avaya Contact Center Select 7.0.2.0
Release Notes
Page 14
Important Notes: 1. Important This hotfix is required for windows 7 SP1 clients. Do not apply to ACCS server. 2. Important Please read the Microsoft update at the link provided, as there are manual
steps required with this hotfix. 3. Important This update is NOT required if Security Manager on ACCS server has Current TLS
Protocol Level for CCMA-MM set to TLSv1.0.
Internet Explorer Support Element Manager and CCMA require that Internet Explorer 10.0 and Internet Explorer 11.0 be configured to run the web sites in “Compatibility Mode”. Microsoft support indicates that some websites might not display correctly in Windows Internet Explorer 10 or Internet Explorer 11. For example, portions of a webpage might be missing, information in a table might be in the wrong locations, or colors and text might be incorrect. Some webpages might not display at all. If a portion of the webpage doesn't display correctly, try one or more of the following procedures: Note: IE Compatibility Mode must be enabled on IE 10.0 and IE 11.0.
To turn on Compatibility View
1. Open Internet Explorer by clicking the Start button
2. In the search box, type Internet Explorer, and then, in the list of results, click Internet
Explorer
3. From the Tools menu select the Compatibility View settings option and add the relevant
website address to the list of websites
The supported browser is Microsoft Internet Explorer 10.0 or later (32 Bit only – 64 Bit not
supported).
NOTE: If Avaya Agent Desktop (AAD) is used on a client desktop then individual websites
for CCMA and Element Manager should be added to compatibility view. The “Display all
websites in Compatibility View” setting in IE should not be used on these client.
The Avaya Agent Desktop (AAD) embedded browser defaults to IE 10 on clients with IE 10.0 or
later.
Windows Server 2012 RDS Support Windows Server 2012 Remote Desktop Services (RDS) is supported from Avaya Contact Center Select Release 7.0.1.x. Further details available in “Avaya Aura© Contact Center – Contact Center Select Windows Server 2012 Remote Desktop Services” Application Note on support.avaya.com
Avaya Contact Center Select 7.0.2.0
Release Notes
Page 15
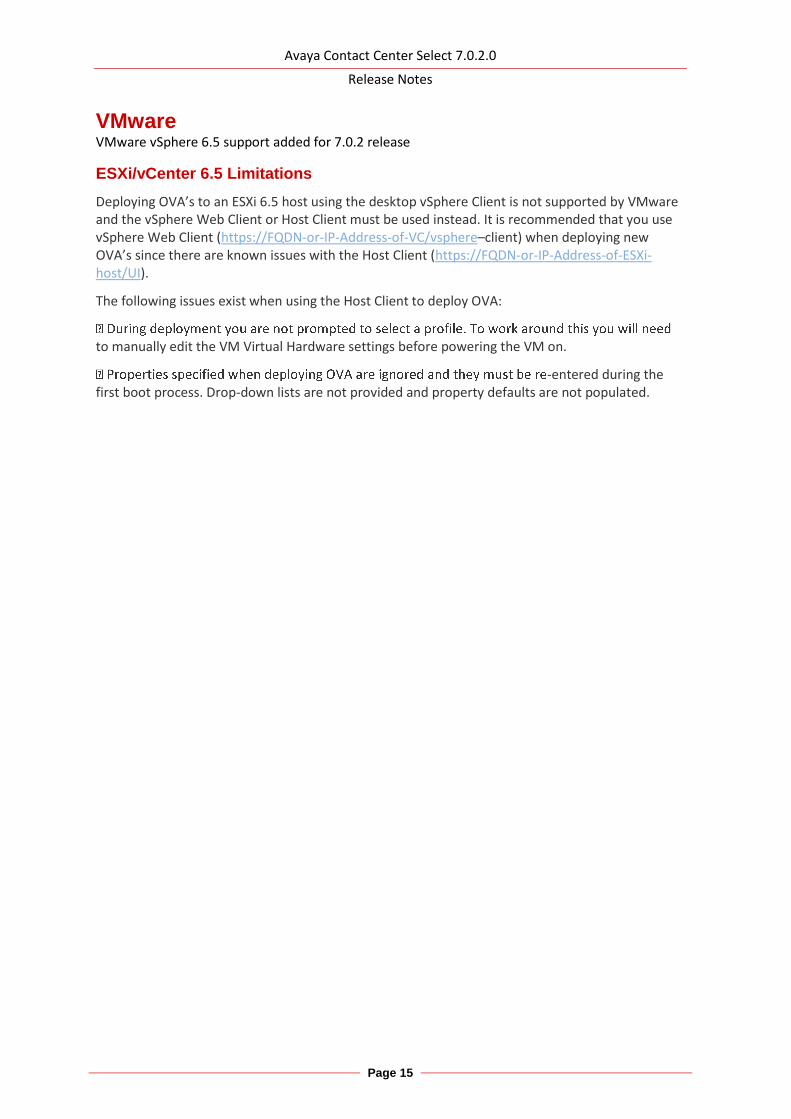
VMware VMware vSphere 6.5 support added for 7.0.2 release
ESXi/vCenter 6.5 Limitations
Deploying OVA’s to an ESXi 6.5 host using the desktop vSphere Client is not supported by VMware and the vSphere Web Client or Host Client must be used instead. It is recommended that you use vSphere Web Client (https://FQDN-or-IP-Address-of-VC/vsphere–client) when deploying new OVA’s since there are known issues with the Host Client (https://FQDN-or-IP-Address-of-ESXi-host/UI).
The following issues exist when using the Host Client to deploy OVA:
to manually edit the VM Virtual Hardware settings before powering the VM on.
-entered during the first boot process. Drop-down lists are not provided and property defaults are not populated.
Avaya Contact Center Select 7.0.2.0
Release Notes
Page 16
DEPLOYMENT & CONFIGURATION INFORMATION
Pre-Installation Considerations
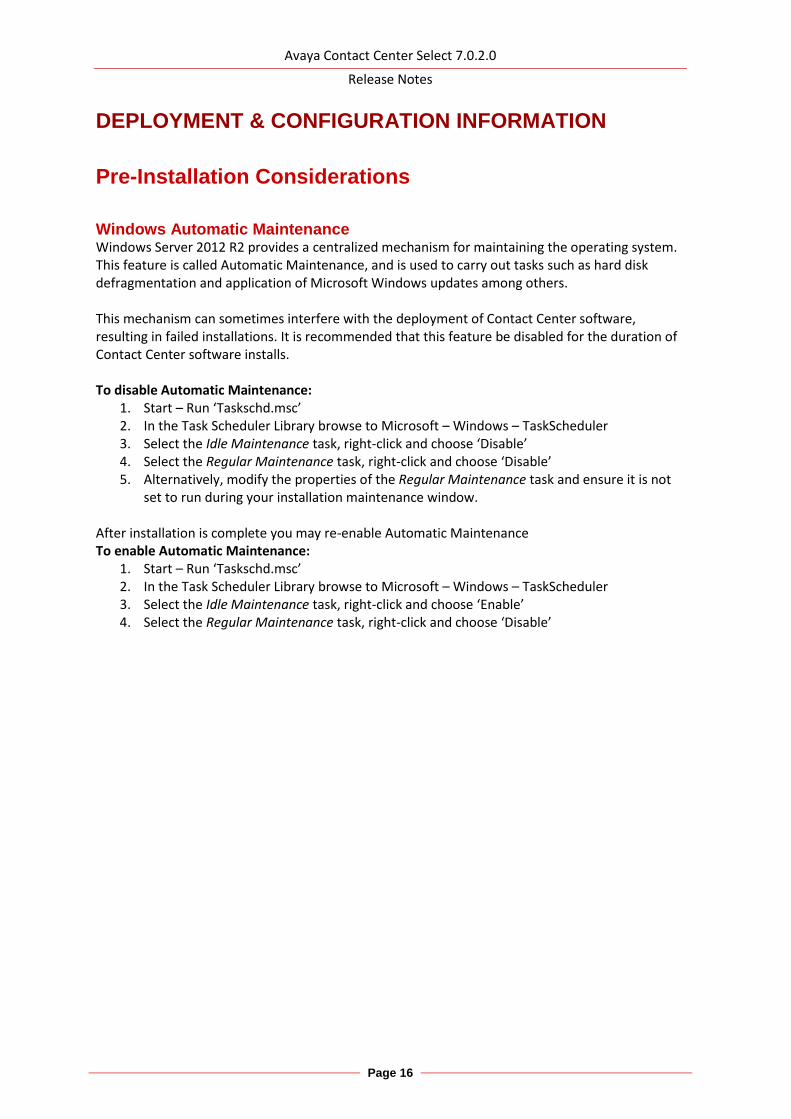
Windows Automatic Maintenance Windows Server 2012 R2 provides a centralized mechanism for maintaining the operating system. This feature is called Automatic Maintenance, and is used to carry out tasks such as hard disk defragmentation and application of Microsoft Windows updates among others. This mechanism can sometimes interfere with the deployment of Contact Center software, resulting in failed installations. It is recommended that this feature be disabled for the duration of Contact Center software installs. To disable Automatic Maintenance:
1. Start – Run ‘Taskschd.msc’ 2. In the Task Scheduler Library browse to Microsoft – Windows – TaskScheduler 3. Select the Idle Maintenance task, right-click and choose ‘Disable’ 4. Select the Regular Maintenance task, right-click and choose ‘Disable’ 5. Alternatively, modify the properties of the Regular Maintenance task and ensure it is not
set to run during your installation maintenance window.
After installation is complete you may re-enable Automatic Maintenance To enable Automatic Maintenance:
1. Start – Run ‘Taskschd.msc’ 2. In the Task Scheduler Library browse to Microsoft – Windows – TaskScheduler 3. Select the Idle Maintenance task, right-click and choose ‘Enable’ 4. Select the Regular Maintenance task, right-click and choose ‘Disable’
Avaya Contact Center Select 7.0.2.0
Release Notes
Page 17
Installation
New Installations
Install-time Patching Install-time patching is mandatory for Avaya Contact Center Select software deployments using the provided DVD media.
Mandatory Execution of Ignition Wizard – Patch Deployments After deployment of the ACCS software using the DVD installer, if the Ignition Wizard process is
deferred, it will not be possible to install Patches (DPs) either via Update Manager or manually
(double-clicking on the installer file). Successful execution of the Ignition Wizard prior to applying
Patches to the system is mandatory.
This does not affect the removal or reinstallation of ACCS Release Packs, only ACCS Patches (DPs).
System Backup after Ignition (IMPORTANT) A full ACCS backup must be taken after the ignition process has completed and before the system is commissioned or used. This is important for systems that will be used as migration targets. The CCMA data can only be migrated to a system that does not contain any customer data. The CCMA migration will fail if the system is found to contain data other than what was injected by the Ignition Wizard. If the CCMA migration fails in this way, the solution is to go back to the post-ignition backup or re-install the system.
Avaya Contact Center Select 7.0.2.0
Release Notes
Page 18
Upgrades
Avaya Release Pack Installer A new application is provided within the Avaya Aura® Contact Center Release Pack bundle called the Avaya Release Pack Installer (RPI). This application provides an automated method of updating existing Avaya Aura® Contact Center 7.x software and must be used when upgrading from to this software release. The application will perform the following actions
1. remove all installed ACCS 7.0.1.x Product Updates (Feature Pack/Service Packs and Patches)
2. remove all unwanted ACCS Third Party software 3. install required Third Party Software for the release 4. install the latest ACCS software from within the release pack bundle
Application Location: The Avaya Release Pack Installer is contained within the Release Pack bundle in folder ‘AvayaReleasePackInstaller’. The application supports the installation of Generally Available Patch bundle content. Please note, the Avaya Release Pack Installer is run via the setup.exe and NOT the AvayaReleasePackInstaller.exe. Generally Available Patch Bundle Installation When the setup.exe is launched, if you wish to install Generally Available Patch Bundle content, you should select the appropriate radio button option. If you choose to proceed without installing GA Patch content, the Update Manager application must be used to install this patch content at a later time. To install Patch bundle content using the Avaya Release Pack Installer application, the complete ProductUpdates folder from within the GA Patch bundle must be copied locally. The contents of this folder should not be modified e.g. the ReleasePackManifest.xml must not be moved to another location. Limited Patch Installation The Avaya Release Pack Installer application does not support the installation of limited patches. To deploy limited patches the Update Manager application must be used. Instructions:
1. Download the ACCS Release Pack Bundle to your local system and unzip 2. Download all available GA Patch Bundles for this release to your local system 3. Unzip each GA Patch bundle separately into a folder reflecting the patch bundle zip name 4. When all individual GA Patch Bundles are extracted into their respective folders, copy each
folder into a single parent folder called ‘GA Patch ProductUpdates’ 5. Launch the Avaya Release Pack Installer setup.exe from folder ‘AvayaReleasePackInstaller’
which is located within the Release Pack bundle extracted in step 1 above
Important: Direct upgrades from 7.0.0.0 and 7.0.0.1 to 7.0.2.0 are not supported.
You must upgrade from 7.0.0.x to 7.0.1.x first, before upgrading to 7.0.2.0
Avaya Contact Center Select 7.0.2.0
Release Notes
Page 19
6. When available, choose the option to install GA Patches and browse to the extracted Patch Bundle ‘GA Patch ProductUpdates’ folder from step 4 above
7. Continue installation… Note: If upgrading, the Avaya Contact Center Select Update Manager application resident on the system will fail to install the ACCS 7.0.2.0 Release Pack software. This is due to third party software changes between ACCS 7.0.1.x, and ACCS 7.0.2.0. Note: It is not possible to install Generally Available patch (DP) content until the Ignition Wizard has been run successfully.
Avaya Contact Center Select 7.0.2.0
Release Notes
Page 20
Upgrading Avaya Aura Media Server 7.0.2.0 OVA from 7.7.0.391 to 7.7.0.398 The ACCS 7.0.2.0 AAMS OVA comes with version 7.7.0.391 of the Media Server installed with System Layer Version 21. Both need to be upgraded to the latest version. The Media Server needs to be updated to 7.7.0.398 and the System layer needs to be updated to 22
1. Launch AAMS Element Manager and navigate to EM > Tools > Manage Software > Updates > Upload Updates.
2. Locate the System Layer Update ISO (available from the ftp site, please see section: Avaya Aura Media Server OVA ):
MediaServer_System_Update_7.7.0.22_2017.05.10.iso 3. Click “Choose File” and select this ISO file to be uploaded to the AAMS and then click
“Upload” Your browser shows a progress spinner until the upload completes. The web page refreshes when the update completes and displays the details of the update including the filename of the uploaded file.
4. Locate Media Server Update ISO (available from the ftp site, please see section: Avaya Aura Media Server OVA ):
MediaServer_Update_7.7.0.398_2017.05.09.iso 5. Click “Choose File” and select this ISO file to be uploaded to the AAMS and then click
“Upload” Your browser shows a progress spinner until the upload completes. The web page refreshes when the update completes and displays the details of the update including the filename of the uploaded file.
6. Click on “Install Updates”. Wait until upgrade completes. 7. Logon to AAMS Element Manager and go to System Status->Element Status and verify that
the AAMS version is 7.7.0.398 and Appliance version 22.
Upgrading Avaya Aura Media Server for ACCS 7.0.1.x to AAMS for ACCS 7.0.2.0 This section details the upgrade steps for all supported AAMS deployments to upgrade the AAMS to the version shipped with ACCS 7.0.2.0
Upgrading AAMS OVA from 7.0.1.x to 7.0.2.0 Refer to section: Upgrading Avaya Aura Media Server 7.0.2.0 OVA from 7.7.0.391 to 7.7.0.398 for instructions on how to upgrade the Avaya Aura Media Server OVA to version 7.7.0.398 and System Layer 22.
Upgrading AAMS on Windows 2012 Server (co-resident with ACCS) from 7.0.x to 7.0.1.1 This section provides instructions on how to upgrade the Avaya Aura Media Server on a Windows 2012 server that is co-resident with the ACCS installation.
1. Shutdown Contact Center using SMMC. 2. Open services.msc and stop “CC SMMC Daemon” and “CC SMMC service”. 3. Run InstallerMAS.exe 4. After installation, logon to AAMS Element Manager and go to System Status > Element
Status and verify that the AAMS version is 7.7.0.398.
Avaya Contact Center Select 7.0.2.0
Release Notes
Page 21
Downgrades
Avaya Release Pack Installer To downgrade to an earlier 7.0.1.x release, you must use the Avaya Release Pack Installer which accompanies that target release. E.g. if the downgrade target is release 7.0.1.1, you must download the complete 7.0.1.1 release bundle from the support site. Instructions: Refer to the Release Notes for the target Release for downgrade instructions.
High Availability Maintenance Utility After a downgrade, certain High Availability and Configuration information is lost. It is therefore necessary to run the High Availability Maintenance Utility to restore this information. This utility should be run after ARPI has been run for the downgrade, but before the Server has been rebooted. Application Location: The High Availability Maintenance Utility is installed with this release of the software and can be found in the following location: .:\Avaya\Contact Center\Common Components\HighAvailabilityMaintenance\HAMaintenance.exe Instructions:
1. Launch the HAMaintenance.exe from the above location. 2. Use the Browse button to select the correct file to import.
a. The correct file will be in the .:\Avaya\Cache\Cachesys folder and will be named SYSDataExport-YYYY-MM-DD-ttttt.xml where “YYYY-MM-DD-ttttt” are a date/time stamp of when the file was created.
b. If there are multiple files with this naming format then the newest one should be selected.
3. Once a file has been selected, click the Import button. 4. Progress will be indicated on the screen and a MsgBox will be presented to the user when
the import has completed. The Import should take no longer than 5 minutes.
Important: Direct downgrades from 7.0.2.0 to 7.0.0.0 or 7.0.0.1 are not supported.
You must downgrade from 7.0.2.0 to 7.0.1.x first, before downgrading to 7.0.0.x
Avaya Contact Center Select 7.0.2.0
Release Notes
Page 22
Post-Installation Configuration
Agent Controls Browser Application – Mandatory certificate with IOS 9 From IOS9 any IOS device running the Agent Controls Browser Application to connect to ACCS will be required to provide a certificate.
Agent Desktop Prerequisites
The following prerequisites are required for Agent Desktop on clients. Note: Administrative rights are required to install these prerequisites
Microsoft .NET Framework 4.5.2 (DotNetFX452)
Windows Installer 4.5 Redistributable (WindowsInstaller4_5)
Microsoft Visual C++ 2005 Service Pack 1 Redistributable Package ATL Security Update (vcredist_x86)
Microsoft Visual C++ 2008 Redistributable Package (x86) (vcredist90_x86)
These prerequisites are available on the ACCS server <Application Drive>:\Avaya\Contact Center\Multimedia Server\Agent Desktop
Note: Microsoft .NET Framework 4.5.2 to 4.7 are cumulative with 4.0 onwards i.e. 4.5.2 replaces 4.0- 4.5.1 similarly 4.7 replaces 4.0-4.6.2. In other words when you install .Net Framework 4.5.2 you also have 4.0, 4.5 and 4.5.1.
Multimedia Prerequisites for server migration
This is only applicable to users migrating to new servers and keeping the same server names:
In this scenario users must select the same Multimedia Database Drive during the ACCS 7.0 install as contained in Backup. If post install, users migrate a database backup from a previous version of AACS and the Multimedia Database drive defined in the backup does not match the Multimedia Database drive selected during the 7.0 install users will be unable to open attachments that were restored from the backup.
Avaya Contact Center Select 7.0.2.0
Release Notes
Page 23
SECURITY INFORMATION
Avaya Contact Center Select security certificate migration considerations Migrating security custom security certificates has caveats that require planning and consideration before beginning the process.
Migration from 6.4 to 7.x Due to the changes made in ACCS 7.x release regarding improved security stance, migration of the ACCS 6.4 certificate store to ACCS 7.x or higher is not possible. The only path available when moving to ACCS 7.x from ACCS 6.4 is the creation of a new store on the ACCS 7.x system, the signing of the certificate signing request (CSR) by a selected Certificate Authority and the importing of these new security certificates into the new store. No elements of the security store from ACCS 6.4 can be migrated to ACCS 7.x
Migrating ACCS Security Store for ACCS 7.0 to 7.x.x The following sections are applicable to migrations from 7.0 to later versions only. Note: ACCS 7.0 and ACCS 7.0.1 come with the default store as standard and as such does not need to be migrated from previous releases. Please be advised this default store is not to be used in a production environment and is designed to be used in a test/configuration only situation.
Name of Server is important When intending to reuse existing security certificates on a new system then the receiving system will have to have the exact name as the donor system otherwise the security certificate will not match the underlying server. If the security certificate and underlying server name do not match, then warnings and errors will be presented to the user, when attempting to use this security certificate to establish a secure connection. Note
The recommendation is that, if possible, new security certificates be generated for the new system rather than reuse security certificates from another system.
Restoring Certificate store to a new system If the decision to reuse the security certificates then the migration of security certificates is a manual process and requires that the security certificate store on the server be backed up using the Security Manager Backup feature. This will back up the necessary files required to be imported back in on the new system using the Security Manager Restore feature. The receiving system name must be the same as the donor system otherwise errors will occur when attempting to use the security certificates to establish a secure connection. Note
The backed up files will be modified if coming from a release prior to 7.0 during the restore process so it is recommended that you keep a copy of the original backed up files.
See Appendix C – Store Maintenance for details on backing up and restoring the certificate store.
Avaya Aura® Contact Center 7.0.2 fresh installations do not provide the Out of The Box (OTB) security store.
Avaya Contact Center Select 7.0.2.0
Release Notes
Page 24
From release 7.0.2.0 fresh installations of the solution will not provide the default security store with default security certificates.
Fresh installations For fresh installs the customer will have to create a custom security store for the server during the Ignition Wizard security configuration stage to enable the On by Default and secure the server and services as was provided automatically in previous releases. If the Ignition Wizard security configuration is not completed fully then upon completion of the Ignition Wizard phase and reboot of the server, the services will not be secure and if IPO has not been configured to communicate over TCP then the TAPID link to IPO will not be operational as it will expect a secure connection only. Ignition Wizard has been enhanced to allow the creation and population of the contact center security store during the configuration phase. If this is skipped then warnings will be given and Security Manager (previously Security Manager) can be used to complete the creation and/or population of the security store. The transport type for connection to IPO from ACCS can now be selected to use TCP, the default is TLS.
Upgrades There is no impact on upgrades, if the OTB store is being used and is on the server, it remains untouched.
TLS v1.2 as default level for TLS communication
Fresh installations On fresh installations only, the default TLSv1 level enforced is TLS v1.2. This means that TLS v1.0 and TLS v1.1 protocol levels are disabled and are not available to be used in the solution or on the underlying Windows 2012 R2 operating system.
Migrations Migrations can be considered in the same area as fresh installations in that the default TLSv1 level enforced is TLS v1.2.
Upgrades On an upgrade where the feature pack is applied on an existing 7.0 release then there is no enforcement of TLS v1.2 on the server. This is relevant only to the Windows operating system level support of TLS versions. For SIP traffic and Event Broker web services the enforcement of TLS v1.2 still applies and if these levels need to be modified then please refer to the section “Resetting TLSv1 Levels”.
Avaya Contact Center Select 7.0.2.0
Release Notes
Page 25
In 7.0.1 the default TLSv1 level enforced is TLS v1.2. This means that TLS v1.0 and TLS v1.1 protocol levels are disabled and are not available to be used in the solution or on the underlying Windows 2012 R2 operating system.
Resetting TLSv1 Levels For upgrades this new TLS v1.2 default setting may have an impact on any legacy applications that consume ACCS services that cannot support this level of TLSv1. To allow backward compatibility with older releases and applications that consume ACCS services the TLSv1 level can be lowered to reestablish functionality if found to be incompatible with the new TLSv1 level. The general rule when setting the TLSv1 levels is shown in the table below
TLS Level Set TLS v1.0 available TLS v1.1 available TLS v1.2 available
1.0 Yes Yes Yes
1.1 No Yes Yes
1.2 No No Yes
When the TLS v1 level is set the general rule is any level under that set level is disabled and any level above it is still available. It is configurable via Security Manager Security Configuration tab
How to change the TLSv1 levels The new TLSv1 level settings can all be changed in the Security Manager application which can be launched from the ACCS server. In the Security Configuration Tab of the Security Manager application there are three drop boxes which allow the user to lower the TLSv1 levels for the following application and services outlined in the next section.
Services and Applications covered by new TLSv1 setting The three main areas where this new setting covers are
Windows operating system
Web Traffic
SIP Traffic
Windows operating system This covers all of the windows operating system and any Microsoft based applications, such as IIS for example. This can be lowered to TLS v1.0 or TLS v1.1 if required via the Security Manager application. If TLS v1.0 is set as default for example, then TLS v1.1 and TLS v1.2 is still available.
Web Traffic
IIS This is covered with the changes made to the underlying Windows Operating system. Which is also the same setting configurable via the Security Manager Security Configuration tab.
Avaya Contact Center Select 7.0.2.0
Release Notes
Page 26
Tomcat This web server is set to use TLS v1.2 only. It is currently not configurable. All known applications that use Tomcat can operate at TLS v1.2 and thus no need to have an option to enable lower protocols.
Lightweight/framework web application servers Event Broker Web Service TLS v1 level can be set on the Security Manager application.
Avaya Contact Center Select 7.0.2.0
Release Notes
Page 27
SIP and CTI Traffic This covers all SIP and CTI traffic to and from the ACCS server. This is configurable via Security Manager Security Configuration tab.
For non-mandatory TLS SIP connections The servers that can make up the solution may be configured to secure their connection to the ACCS server and so below are the compatibility tables for the different versions that may be used in the solution.
IP Office releases See Appendix C – IP Office releases TLSv1 support
Avaya Aura Media Server See Appendix C – Avaya Aura Media Server releases and TLSv1 support
Known applications and services that cannot support TLS v1.2 There are applications and services which cannot support TLS v1.2 currently and a review of these applications and services should be made to determine the course of action prior to moving to 7.0.1. The table below lists all known application and services that cannot support TLS v1.2
HDX / DIW connection to databases See Appendix C – HDX/DIW connection to databases
Remote desktop See Appendix C – Remote Desktop
System Manager 7.0 See Appendix C – System Manager 7.0
SMB signing and Network-attached storage (NAS) devices In this release SMB signing has been implemented and as such all connecting devices and platforms will have to be able to support SMB signing otherwise access to devices that cannot support the level of SMB signing in place on the Contact Center Server may become inaccessible. This has been noted on older NAS devices where the current level of software cannot meet the SMB signing requirements and access to these devices has been shown not to be possible.
Avaya Contact Center Select 7.0.2.0
Release Notes
Page 28
LOCALIZATION Avaya Contact Center Select 7.0 Feature Pack 2 (7.0.2) Avaya Agent Desktop (AAD), Outbound Campaign Management Tool (OCMT), Contact Center Manager Administration (CCMA) and Web Agent Controls UI and online Help is localized into French, German, LA Spanish, Simplified Chinese, Brazilian Portuguese, Russian, Japanese, Korean and Italian.
Overview of I18N and L10N Products & Components Components that are used by Contact Center agents or by Contact Center supervisors performing non-specialized functions are localized. Interfaces to support administration or specialized functions (for example, creating routing applications) are not localized. All ACCS 7.0.2 products and components support Internationalization (I18n). The following table lists all ACCS 7.0.2 products and components that support Localization (L10n):
ACCS 7.0.2 Products Component
CCT Web Agent Controls
CCT Web Agent Controls online help
CCMA Contact Center Management
CCMA Access and Partition Management
CCMA Real-Time Reporting
CCMA Historical Reporting
CCMA Configuration
CCMA Emergency Help
CCMA Outbound
CCMA Historical Report Templates
CCMA Agent Desktop Display
CCMA Online Help
CCMM AAD Client
CCMM AAD online Help
CCMM OCMT Client
CCMM OCMT online Help
Refer to Chapter 24: Language support fundamentals in the Avaya Contact Center Select Advanced Administration guide for supported languages.
Localized Components (CCMA and CCMM) The following table lists the compatibility between the CCMA/CCMM language patches and the operating system language family. Only compatible languages can be enabled on the server. Supported Languages
CCMA CCMM
OS
Lan
guag
e
FR DE ES PT-BR IT ZH-CN JA RU KO English Y Y Y Y Y N N N N Y
Any 1 Latin1 language
Y Y Y Y Y N N N N Y
Simplified Chinese N N N N N Y N N N Y
Japanese N N N N N N Y N N Y
Russian N N N N N N N Y N Y
Korean N N N N N N N N Y Y
Avaya Contact Center Select 7.0.2.0
Release Notes
Page 29
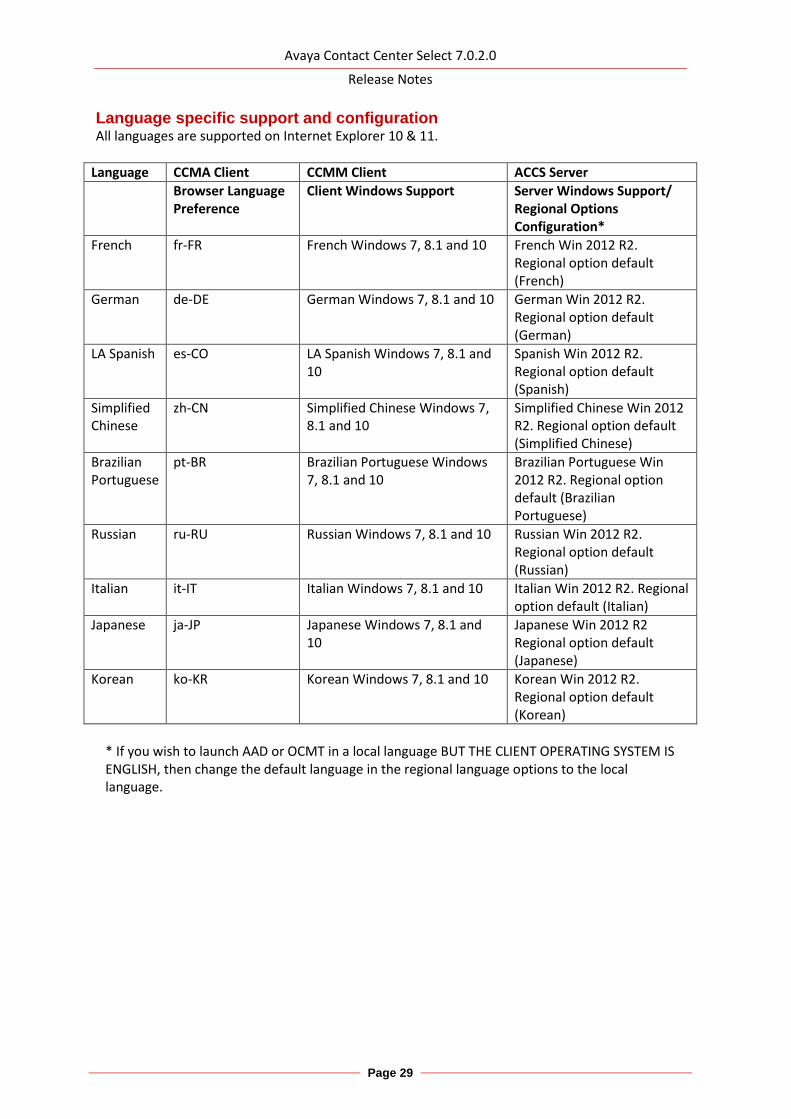
Language specific support and configuration All languages are supported on Internet Explorer 10 & 11.
Language CCMA Client CCMM Client ACCS Server
Browser Language Preference
Client Windows Support Server Windows Support/ Regional Options Configuration*
French fr-FR French Windows 7, 8.1 and 10 French Win 2012 R2. Regional option default (French)
German de-DE German Windows 7, 8.1 and 10 German Win 2012 R2. Regional option default (German)
LA Spanish es-CO LA Spanish Windows 7, 8.1 and 10
Spanish Win 2012 R2. Regional option default (Spanish)
Simplified Chinese
zh-CN Simplified Chinese Windows 7, 8.1 and 10
Simplified Chinese Win 2012 R2. Regional option default (Simplified Chinese)
Brazilian Portuguese
pt-BR Brazilian Portuguese Windows 7, 8.1 and 10
Brazilian Portuguese Win 2012 R2. Regional option default (Brazilian Portuguese)
Russian ru-RU Russian Windows 7, 8.1 and 10 Russian Win 2012 R2. Regional option default (Russian)
Italian it-IT Italian Windows 7, 8.1 and 10 Italian Win 2012 R2. Regional option default (Italian)
Japanese ja-JP Japanese Windows 7, 8.1 and 10
Japanese Win 2012 R2 Regional option default (Japanese)
Korean ko-KR Korean Windows 7, 8.1 and 10 Korean Win 2012 R2. Regional option default (Korean)
* If you wish to launch AAD or OCMT in a local language BUT THE CLIENT OPERATING SYSTEM IS ENGLISH, then change the default language in the regional language options to the local language.
Avaya Contact Center Select 7.0.2.0
Release Notes
Page 30
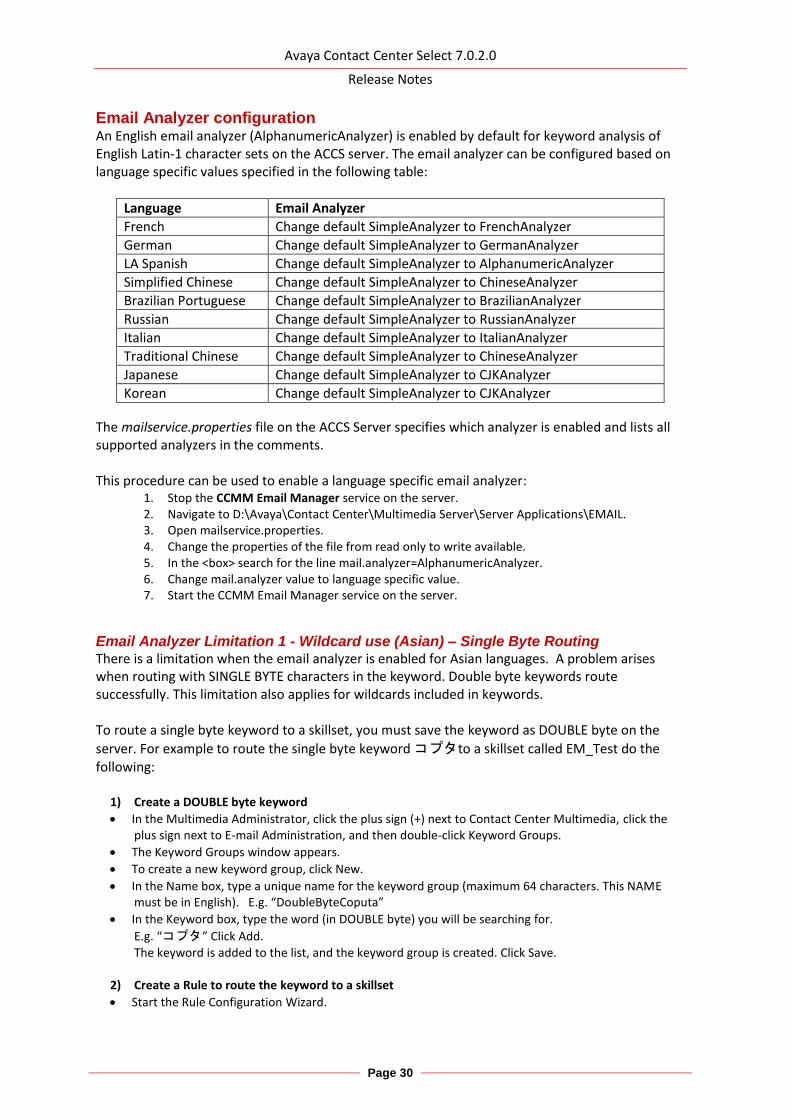
Email Analyzer configuration An English email analyzer (AlphanumericAnalyzer) is enabled by default for keyword analysis of English Latin-1 character sets on the ACCS server. The email analyzer can be configured based on language specific values specified in the following table:
Language Email Analyzer
French Change default SimpleAnalyzer to FrenchAnalyzer
German Change default SimpleAnalyzer to GermanAnalyzer
LA Spanish Change default SimpleAnalyzer to AlphanumericAnalyzer
Simplified Chinese Change default SimpleAnalyzer to ChineseAnalyzer
Brazilian Portuguese Change default SimpleAnalyzer to BrazilianAnalyzer
Russian Change default SimpleAnalyzer to RussianAnalyzer
Italian Change default SimpleAnalyzer to ItalianAnalyzer
Traditional Chinese Change default SimpleAnalyzer to ChineseAnalyzer
Japanese Change default SimpleAnalyzer to CJKAnalyzer
Korean Change default SimpleAnalyzer to CJKAnalyzer
The mailservice.properties file on the ACCS Server specifies which analyzer is enabled and lists all supported analyzers in the comments. This procedure can be used to enable a language specific email analyzer:
1. Stop the CCMM Email Manager service on the server. 2. Navigate to D:\Avaya\Contact Center\Multimedia Server\Server Applications\EMAIL. 3. Open mailservice.properties. 4. Change the properties of the file from read only to write available. 5. In the <box> search for the line mail.analyzer=AlphanumericAnalyzer. 6. Change mail.analyzer value to language specific value. 7. Start the CCMM Email Manager service on the server.
Email Analyzer Limitation 1 - Wildcard use (Asian) – Single Byte Routing There is a limitation when the email analyzer is enabled for Asian languages. A problem arises when routing with SINGLE BYTE characters in the keyword. Double byte keywords route successfully. This limitation also applies for wildcards included in keywords. To route a single byte keyword to a skillset, you must save the keyword as DOUBLE byte on the
server. For example to route the single byte keyword コプタto a skillset called EM_Test do the following:
1) Create a DOUBLE byte keyword
In the Multimedia Administrator, click the plus sign (+) next to Contact Center Multimedia, click the plus sign next to E-mail Administration, and then double-click Keyword Groups.
The Keyword Groups window appears.
To create a new keyword group, click New.
In the Name box, type a unique name for the keyword group (maximum 64 characters. This NAME must be in English). E.g. “DoubleByteCoputa”
In the Keyword box, type the word (in DOUBLE byte) you will be searching for.
E.g. “コプタ” Click Add. The keyword is added to the list, and the keyword group is created. Click Save.
2) Create a Rule to route the keyword to a skillset
Start the Rule Configuration Wizard.
Avaya Contact Center Select 7.0.2.0
Release Notes
Page 31
On the Rule Configuration Wizard – Input Criteria window, under Available Keyword Groups, select a keyword group you want to use for this rule. E.g. “DoubleByteCoputa”
Click the black arrow to insert the keyword group name into the selection box.
Click Next.
In the Rule box, type the name for your rule. E.g. “DoubleByteCoputaRule”
In the Skillset box, select a skillset for your rule. . E.g. “EM_Test”
Click Save.
Click Finish. Your rule is created with the keyword group. Note: This is a limitation of the 3
rd party creator of the analyzer, Lucene.
Email Analyzer Limitation 2 - Wildcard use (Asian) - Wildcard * and ? string position There is a limitation when the email analyzer is enabled for Asian languages. Wildcard ‘?’ or ‘*’ can only be used at the end of a keyword.
e.g. Wildcard use たば* is correct. Wildcard use た*た is not correct. Note: To route the wildcard keyword successfully, the ‘*’ can be entered in either full-width or half width. The ‘?’ can be entered in full-width only.
Avaya Contact Center Select 7.0.2.0
Release Notes
Page 32
Start Localized AAD Client
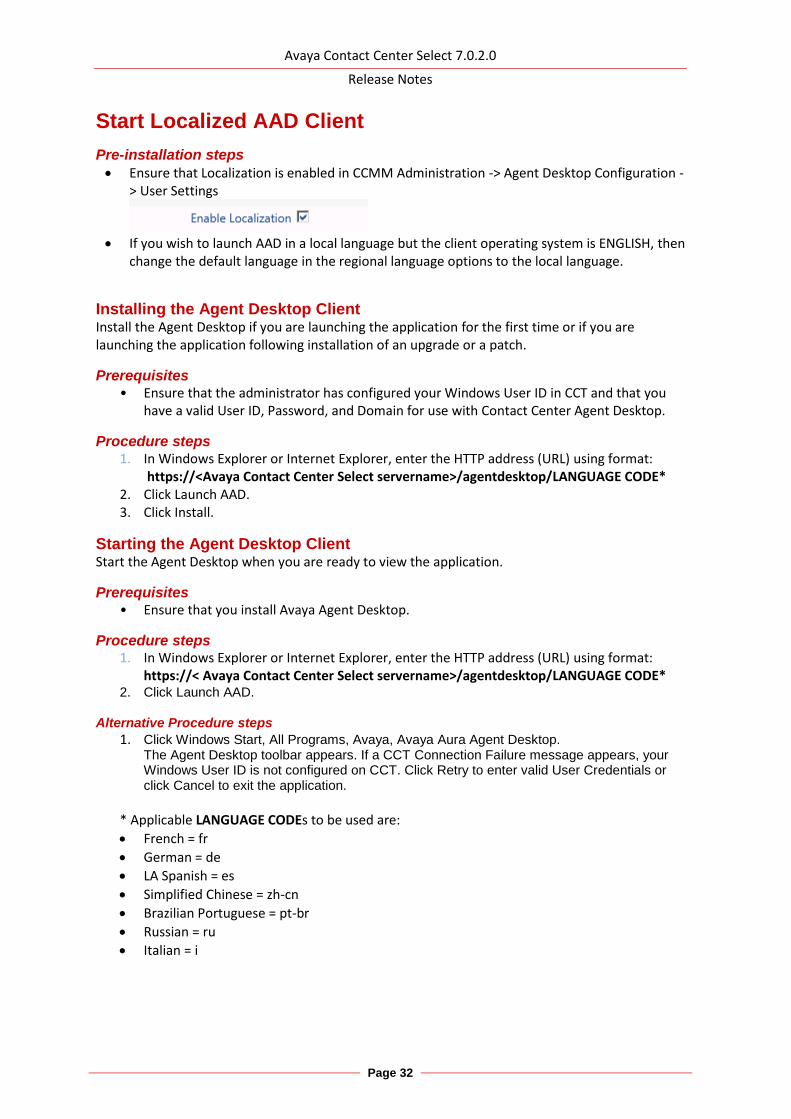
Pre-installation steps
Ensure that Localization is enabled in CCMM Administration -> Agent Desktop Configuration -> User Settings
If you wish to launch AAD in a local language but the client operating system is ENGLISH, then
change the default language in the regional language options to the local language.
Installing the Agent Desktop Client Install the Agent Desktop if you are launching the application for the first time or if you are launching the application following installation of an upgrade or a patch.
Prerequisites • Ensure that the administrator has configured your Windows User ID in CCT and that you
have a valid User ID, Password, and Domain for use with Contact Center Agent Desktop.
Procedure steps 1. In Windows Explorer or Internet Explorer, enter the HTTP address (URL) using format:
https://<Avaya Contact Center Select servername>/agentdesktop/LANGUAGE CODE*
2. Click Launch AAD. 3. Click Install.
Starting the Agent Desktop Client Start the Agent Desktop when you are ready to view the application.
Prerequisites • Ensure that you install Avaya Agent Desktop.
Procedure steps 1. In Windows Explorer or Internet Explorer, enter the HTTP address (URL) using format:
https://< Avaya Contact Center Select servername>/agentdesktop/LANGUAGE CODE*
2. Click Launch AAD.
Alternative Procedure steps
1. Click Windows Start, All Programs, Avaya, Avaya Aura Agent Desktop. The Agent Desktop toolbar appears. If a CCT Connection Failure message appears, your Windows User ID is not configured on CCT. Click Retry to enter valid User Credentials or click Cancel to exit the application.
* Applicable LANGUAGE CODEs to be used are:
French = fr
German = de
LA Spanish = es
Simplified Chinese = zh-cn
Brazilian Portuguese = pt-br
Russian = ru
Italian = i
Avaya Contact Center Select 7.0.2.0
Release Notes
Page 33
Troubleshooting
Detecting latest Language files In case that client runs the English AAD and OCMT applications and does not pick up the language files, then these files are now stored in the GAC (.Net cache) on the client PC. The .Net cache (GAC) therefore, needs to be emptied on the client PC so the latest English and language files can be taken from the server. Note: If you install an updated Service pack or Design patch, the client still runs applications with cached language files. The .Net cache (GAC) must be emptied, so the latest language files can be taken from the server.
Emptying the .Net cache on the client PC running AAD and OCMT Procedures such as uninstalling application and emptying the .Net cache require administrator rights.
1. Close AAD and OCMT. 2. Click Add/Remove Programs. 3. Remove Avaya/Avaya Agent Desktop. 4. Navigate to C:\Documents and Setting\USERNAME\local settings\apps\ . 5. Delete the 2.0 folder. 6. Note: This folder may be hidden. If so, open Windows Explorer and click on Tools, Folder
options. Choose the View tab. Under Files and folders or Hidden files and folders, choose to show hidden files and folders. Click Apply and click OK.
7. Start AAD to download the latest AAD files from the CCMM server. Start OCMT from CCMA to download the latest OCMT files from the CCMM server.
Avaya Contact Center Select 7.0.2.0
Release Notes
Page 34
KNOWN ISSUES
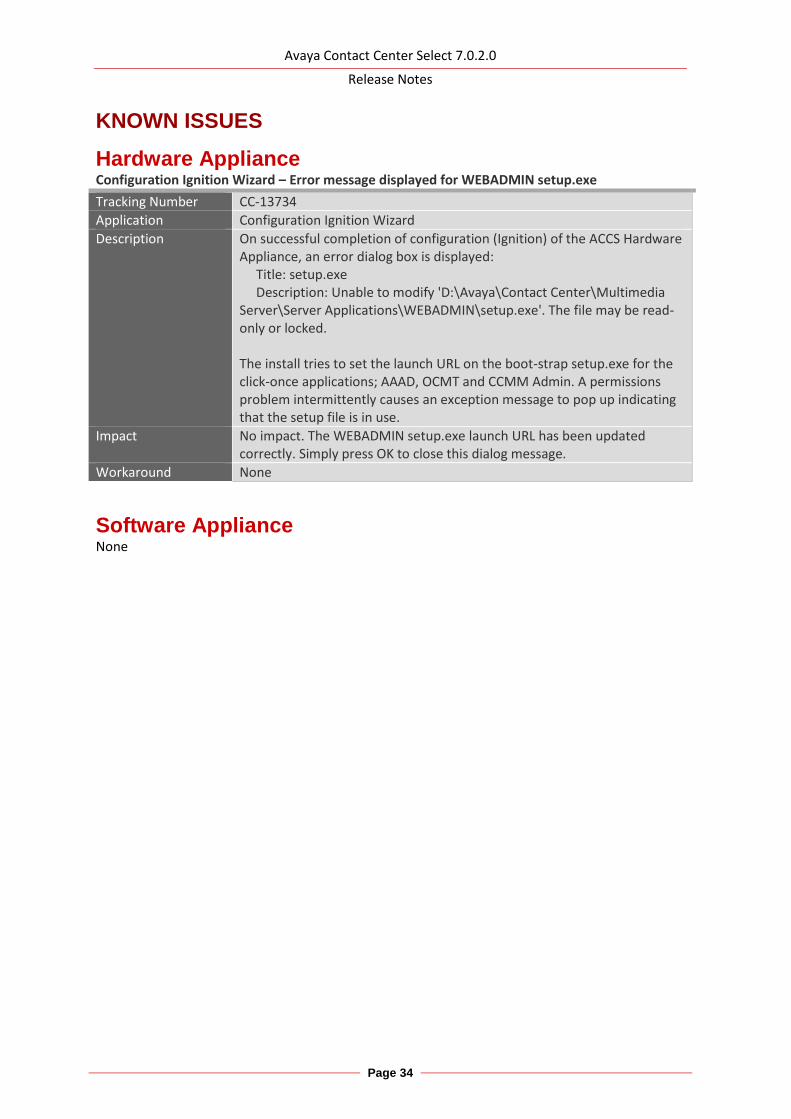
Hardware Appliance Configuration Ignition Wizard – Error message displayed for WEBADMIN setup.exe
Tracking Number CC-13734
Application Configuration Ignition Wizard
Description On successful completion of configuration (Ignition) of the ACCS Hardware Appliance, an error dialog box is displayed: Title: setup.exe Description: Unable to modify 'D:\Avaya\Contact Center\Multimedia Server\Server Applications\WEBADMIN\setup.exe'. The file may be read-only or locked. The install tries to set the launch URL on the boot-strap setup.exe for the click-once applications; AAAD, OCMT and CCMM Admin. A permissions problem intermittently causes an exception message to pop up indicating that the setup file is in use.
Impact No impact. The WEBADMIN setup.exe launch URL has been updated correctly. Simply press OK to close this dialog message.
Workaround None
Software Appliance None
Avaya Contact Center Select 7.0.2.0
Release Notes
Page 35
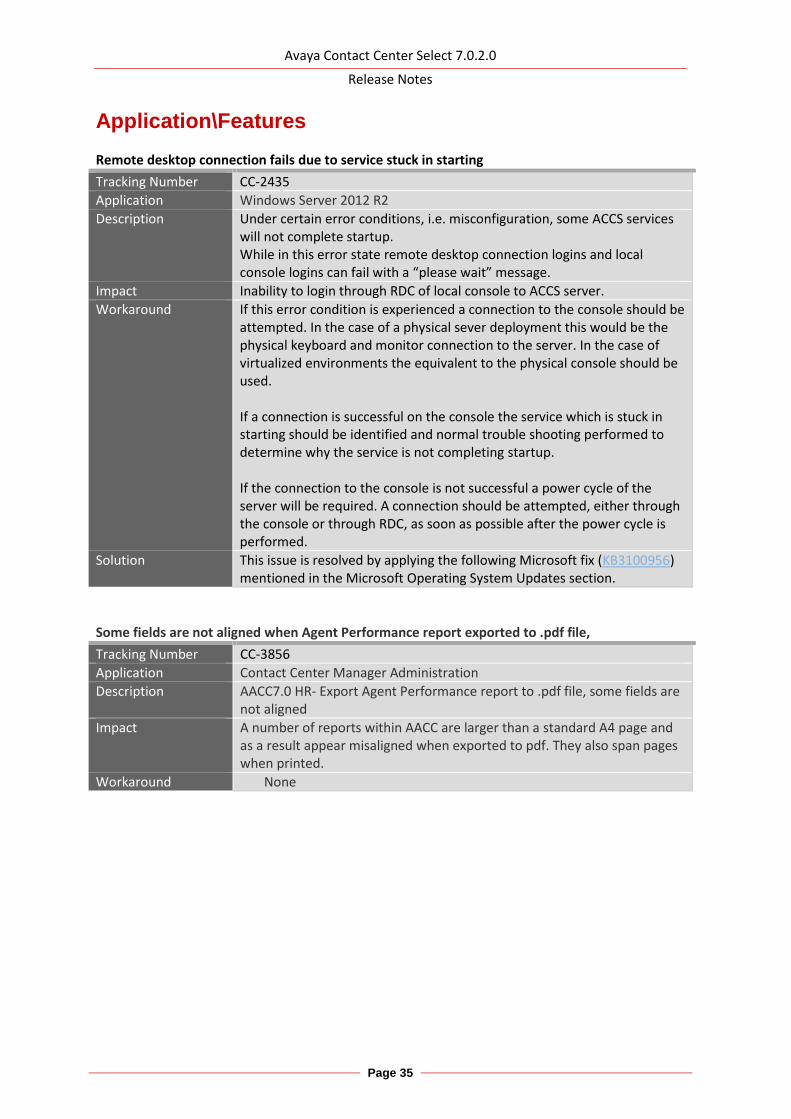
Application\Features Remote desktop connection fails due to service stuck in starting
Tracking Number CC-2435
Application Windows Server 2012 R2
Description Under certain error conditions, i.e. misconfiguration, some ACCS services will not complete startup. While in this error state remote desktop connection logins and local console logins can fail with a “please wait” message.
Impact Inability to login through RDC of local console to ACCS server.
Workaround If this error condition is experienced a connection to the console should be attempted. In the case of a physical sever deployment this would be the physical keyboard and monitor connection to the server. In the case of virtualized environments the equivalent to the physical console should be used. If a connection is successful on the console the service which is stuck in starting should be identified and normal trouble shooting performed to determine why the service is not completing startup. If the connection to the console is not successful a power cycle of the server will be required. A connection should be attempted, either through the console or through RDC, as soon as possible after the power cycle is performed.
Solution This issue is resolved by applying the following Microsoft fix (KB3100956) mentioned in the Microsoft Operating System Updates section.
Some fields are not aligned when Agent Performance report exported to .pdf file,
Tracking Number CC-3856
Application Contact Center Manager Administration
Description AACC7.0 HR- Export Agent Performance report to .pdf file, some fields are not aligned
Impact A number of reports within AACC are larger than a standard A4 page and as a result appear misaligned when exported to pdf. They also span pages when printed.
Workaround None
Avaya Contact Center Select 7.0.2.0
Release Notes
Page 36
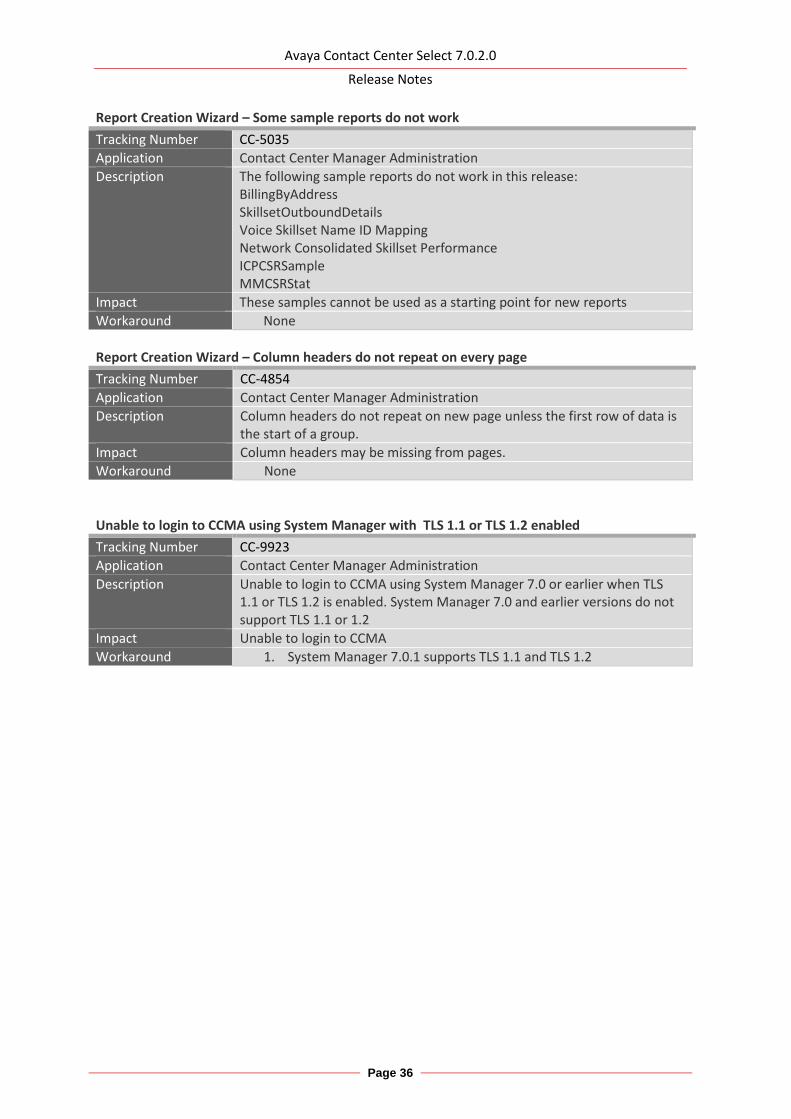
Report Creation Wizard – Some sample reports do not work
Tracking Number CC-5035
Application Contact Center Manager Administration
Description The following sample reports do not work in this release: BillingByAddress SkillsetOutboundDetails Voice Skillset Name ID Mapping Network Consolidated Skillset Performance ICPCSRSample MMCSRStat
Impact These samples cannot be used as a starting point for new reports
Workaround None
Report Creation Wizard – Column headers do not repeat on every page
Tracking Number CC-4854
Application Contact Center Manager Administration
Description Column headers do not repeat on new page unless the first row of data is the start of a group.
Impact Column headers may be missing from pages.
Workaround None
Unable to login to CCMA using System Manager with TLS 1.1 or TLS 1.2 enabled
Tracking Number CC-9923
Application Contact Center Manager Administration
Description Unable to login to CCMA using System Manager 7.0 or earlier when TLS 1.1 or TLS 1.2 is enabled. System Manager 7.0 and earlier versions do not support TLS 1.1 or 1.2
Impact Unable to login to CCMA
Workaround 1. System Manager 7.0.1 supports TLS 1.1 and TLS 1.2
Avaya Contact Center Select 7.0.2.0
Release Notes
Page 37
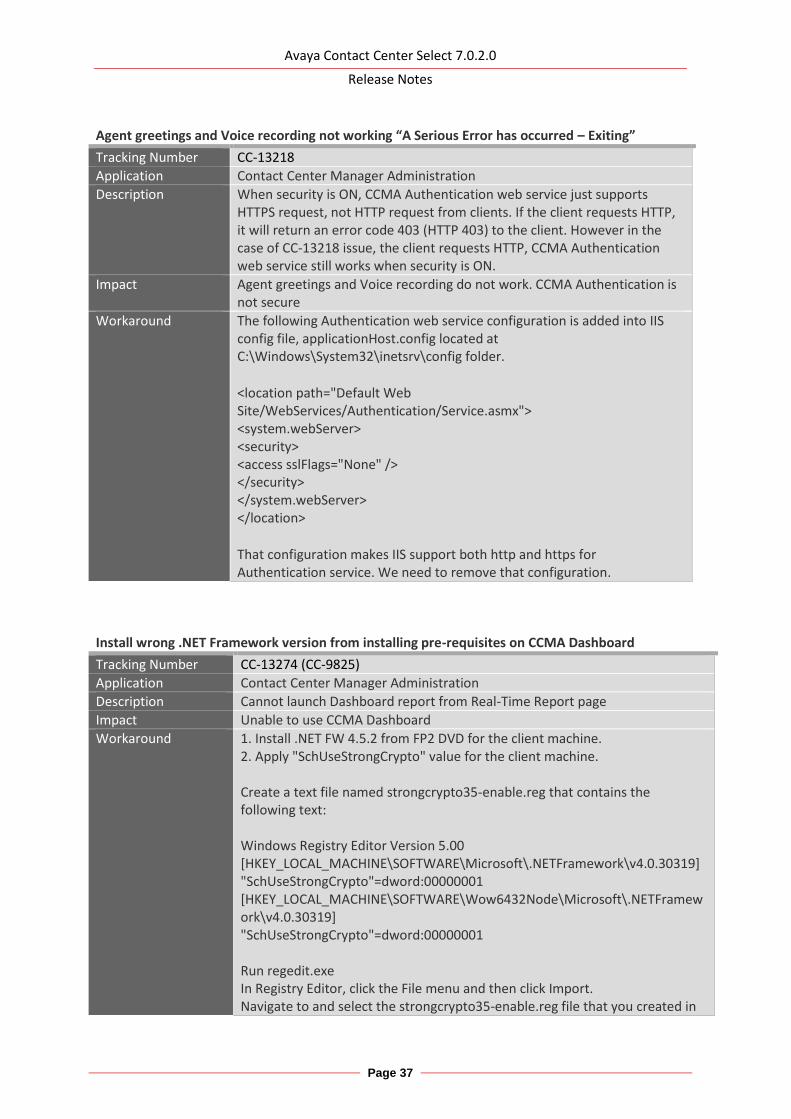
Agent greetings and Voice recording not working “A Serious Error has occurred – Exiting”
Tracking Number CC-13218
Application Contact Center Manager Administration
Description When security is ON, CCMA Authentication web service just supports HTTPS request, not HTTP request from clients. If the client requests HTTP, it will return an error code 403 (HTTP 403) to the client. However in the case of CC-13218 issue, the client requests HTTP, CCMA Authentication web service still works when security is ON.
Impact Agent greetings and Voice recording do not work. CCMA Authentication is not secure
Workaround The following Authentication web service configuration is added into IIS config file, applicationHost.config located at C:\Windows\System32\inetsrv\config folder.
<location path="Default Web Site/WebServices/Authentication/Service.asmx"> <system.webServer> <security> <access sslFlags="None" /> </security> </system.webServer> </location>
That configuration makes IIS support both http and https for Authentication service. We need to remove that configuration.
Install wrong .NET Framework version from installing pre-requisites on CCMA Dashboard
Tracking Number CC-13274 (CC-9825)
Application Contact Center Manager Administration
Description Cannot launch Dashboard report from Real-Time Report page
Impact Unable to use CCMA Dashboard
Workaround 1. Install .NET FW 4.5.2 from FP2 DVD for the client machine. 2. Apply "SchUseStrongCrypto" value for the client machine. Create a text file named strongcrypto35-enable.reg that contains the following text: Windows Registry Editor Version 5.00 [HKEY_LOCAL_MACHINE\SOFTWARE\Microsoft\.NETFramework\v4.0.30319] "SchUseStrongCrypto"=dword:00000001 [HKEY_LOCAL_MACHINE\SOFTWARE\Wow6432Node\Microsoft\.NETFramework\v4.0.30319] "SchUseStrongCrypto"=dword:00000001 Run regedit.exe In Registry Editor, click the File menu and then click Import. Navigate to and select the strongcrypto35-enable.reg file that you created in
Avaya Contact Center Select 7.0.2.0
Release Notes
Page 38
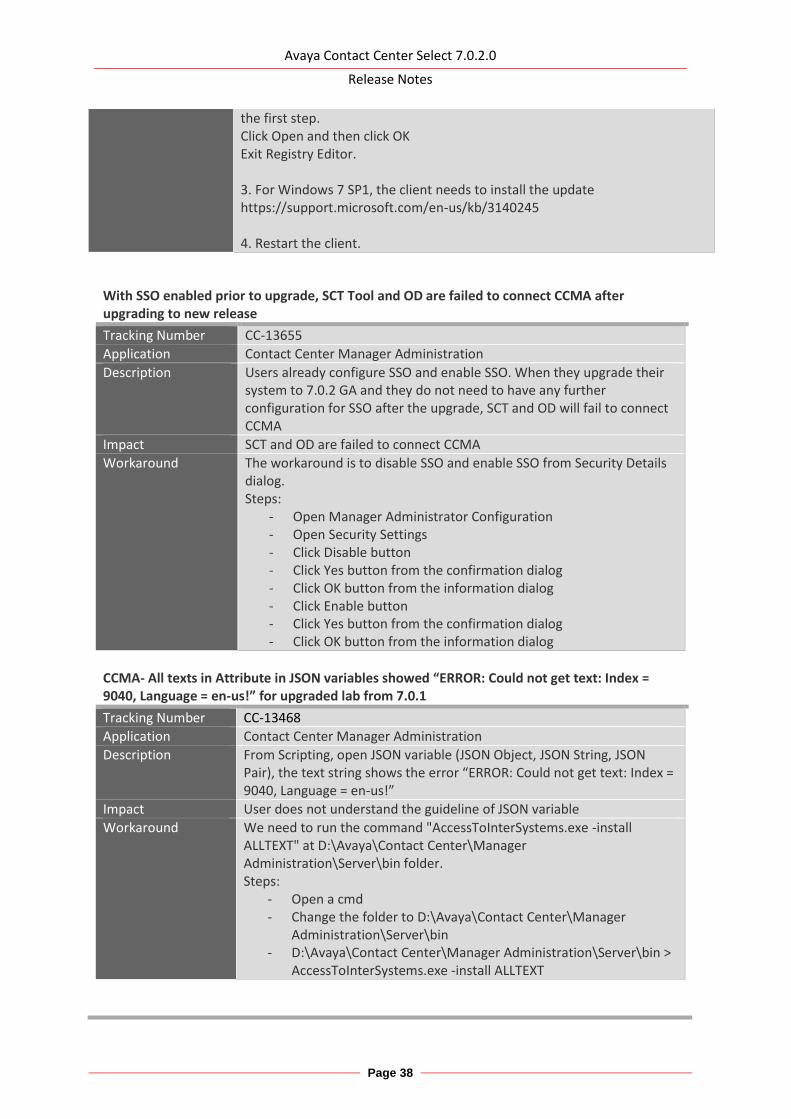
the first step. Click Open and then click OK Exit Registry Editor. 3. For Windows 7 SP1, the client needs to install the update https://support.microsoft.com/en-us/kb/3140245 4. Restart the client.
With SSO enabled prior to upgrade, SCT Tool and OD are failed to connect CCMA after upgrading to new release
Tracking Number CC-13655
Application Contact Center Manager Administration
Description Users already configure SSO and enable SSO. When they upgrade their system to 7.0.2 GA and they do not need to have any further configuration for SSO after the upgrade, SCT and OD will fail to connect CCMA
Impact SCT and OD are failed to connect CCMA
Workaround The workaround is to disable SSO and enable SSO from Security Details dialog. Steps:
- Open Manager Administrator Configuration - Open Security Settings - Click Disable button - Click Yes button from the confirmation dialog - Click OK button from the information dialog - Click Enable button - Click Yes button from the confirmation dialog - Click OK button from the information dialog
CCMA- All texts in Attribute in JSON variables showed “ERROR: Could not get text: Index = 9040, Language = en-us!” for upgraded lab from 7.0.1
Tracking Number CC-13468
Application Contact Center Manager Administration
Description From Scripting, open JSON variable (JSON Object, JSON String, JSON Pair), the text string shows the error “ERROR: Could not get text: Index = 9040, Language = en-us!”
Impact User does not understand the guideline of JSON variable
Workaround We need to run the command "AccessToInterSystems.exe -install ALLTEXT" at D:\Avaya\Contact Center\Manager Administration\Server\bin folder. Steps:
- Open a cmd - Change the folder to D:\Avaya\Contact Center\Manager
Administration\Server\bin - D:\Avaya\Contact Center\Manager Administration\Server\bin >
AccessToInterSystems.exe -install ALLTEXT
Avaya Contact Center Select 7.0.2.0
Release Notes
Page 39
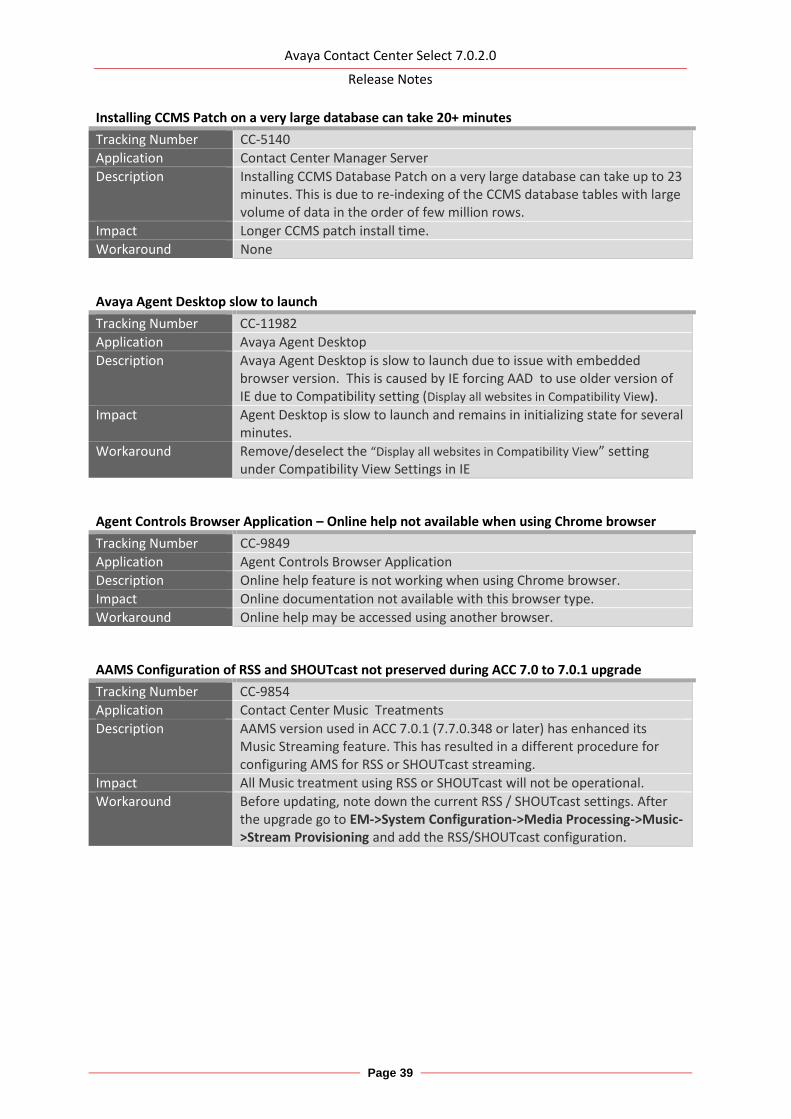
Installing CCMS Patch on a very large database can take 20+ minutes
Tracking Number CC-5140
Application Contact Center Manager Server
Description Installing CCMS Database Patch on a very large database can take up to 23 minutes. This is due to re-indexing of the CCMS database tables with large volume of data in the order of few million rows.
Impact Longer CCMS patch install time.
Workaround None
Avaya Agent Desktop slow to launch
Tracking Number CC-11982
Application Avaya Agent Desktop
Description Avaya Agent Desktop is slow to launch due to issue with embedded browser version. This is caused by IE forcing AAD to use older version of IE due to Compatibility setting (Display all websites in Compatibility View).
Impact Agent Desktop is slow to launch and remains in initializing state for several minutes.
Workaround Remove/deselect the “Display all websites in Compatibility View” setting under Compatibility View Settings in IE
Agent Controls Browser Application – Online help not available when using Chrome browser
Tracking Number CC-9849
Application Agent Controls Browser Application
Description Online help feature is not working when using Chrome browser.
Impact Online documentation not available with this browser type.
Workaround Online help may be accessed using another browser.
AAMS Configuration of RSS and SHOUTcast not preserved during ACC 7.0 to 7.0.1 upgrade
Tracking Number CC-9854
Application Contact Center Music Treatments
Description AAMS version used in ACC 7.0.1 (7.7.0.348 or later) has enhanced its Music Streaming feature. This has resulted in a different procedure for configuring AMS for RSS or SHOUTcast streaming.
Impact All Music treatment using RSS or SHOUTcast will not be operational.
Workaround Before updating, note down the current RSS / SHOUTcast settings. After the upgrade go to EM->System Configuration->Media Processing->Music->Stream Provisioning and add the RSS/SHOUTcast configuration.

Avaya Contact Center Select 7.0.2.0
Release Notes
Page 40
CCCC patch install failure due to locked database
Tracking Number CC-11375
Application Common Component Database
Description CCCC patch failing to install and cache console.log reporting that “Database is locked by another instance.
Impact CCCC patch cannot be installed
Workaround To allow the patch to install perform following steps: 1. Stop Cache 2. Delete the file: d:\avaya\cache\cachesys\mgr\cachelib\cache.lck 3. Start Cache 4. Run install again
Agent Controls not working in Firefox Browser
Tracking Number CC-11673
Application Agent Controls Application
Description The agent controls application will not connect to the Integration Portal web socket when launched from Mozilla Firefox browser.
Impact It is not possible to use Agent Controls Application with Mozilla Firefox browser.
Workaround Use another browser, for example Internet Explorer.
On one particular deployment CCMS IS_Service fails to start
Tracking Number CC-13554
Application Contact Center Manager Server
Description On one particular deployment CCMS IS_Service fails to start.
Impact Intrinsics in scripting do not have valid data.
Solution There is no workaround. However, the problem usually disappears after a server restart.
Avaya Contact Center Select 7.0.2.0
Release Notes
Page 41
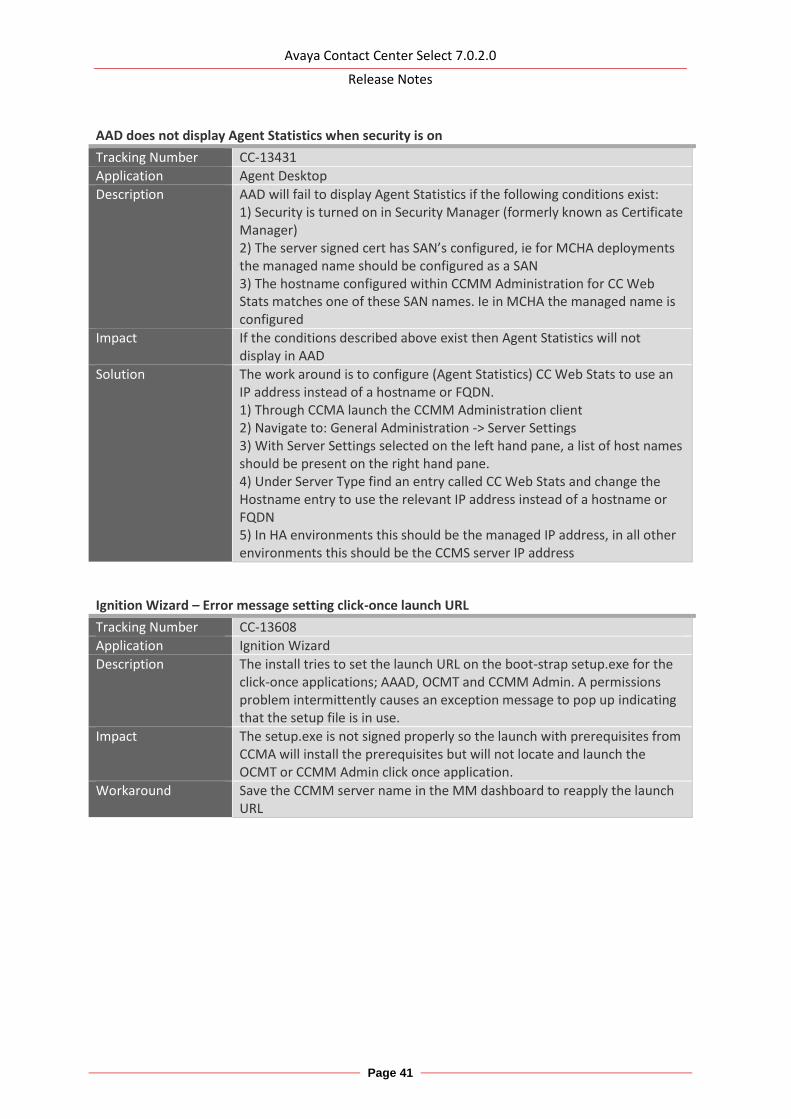
AAD does not display Agent Statistics when security is on
Tracking Number CC-13431
Application Agent Desktop
Description AAD will fail to display Agent Statistics if the following conditions exist: 1) Security is turned on in Security Manager (formerly known as Certificate Manager) 2) The server signed cert has SAN’s configured, ie for MCHA deployments the managed name should be configured as a SAN 3) The hostname configured within CCMM Administration for CC Web Stats matches one of these SAN names. Ie in MCHA the managed name is configured
Impact If the conditions described above exist then Agent Statistics will not display in AAD
Solution The work around is to configure (Agent Statistics) CC Web Stats to use an IP address instead of a hostname or FQDN. 1) Through CCMA launch the CCMM Administration client 2) Navigate to: General Administration -> Server Settings 3) With Server Settings selected on the left hand pane, a list of host names should be present on the right hand pane. 4) Under Server Type find an entry called CC Web Stats and change the Hostname entry to use the relevant IP address instead of a hostname or FQDN 5) In HA environments this should be the managed IP address, in all other environments this should be the CCMS server IP address
Ignition Wizard – Error message setting click-once launch URL
Tracking Number CC-13608
Application Ignition Wizard
Description The install tries to set the launch URL on the boot-strap setup.exe for the click-once applications; AAAD, OCMT and CCMM Admin. A permissions problem intermittently causes an exception message to pop up indicating that the setup file is in use.
Impact The setup.exe is not signed properly so the launch with prerequisites from CCMA will install the prerequisites but will not locate and launch the OCMT or CCMM Admin click once application.
Workaround Save the CCMM server name in the MM dashboard to reapply the launch URL
Avaya Contact Center Select 7.0.2.0
Release Notes
Page 42
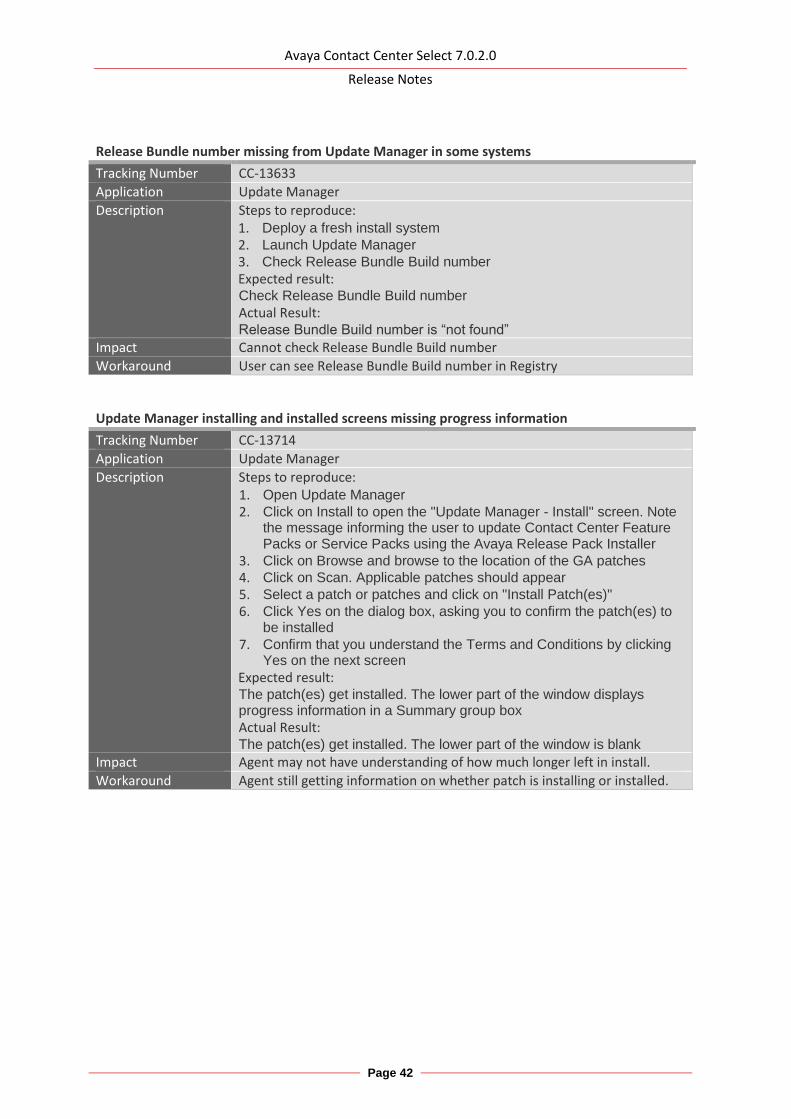
Release Bundle number missing from Update Manager in some systems
Tracking Number CC-13633
Application Update Manager
Description Steps to reproduce: 1. Deploy a fresh install system 2. Launch Update Manager 3. Check Release Bundle Build number
4. Expected result: Check Release Bundle Build number Actual Result: Release Bundle Build number is “not found”
Impact Cannot check Release Bundle Build number
Workaround User can see Release Bundle Build number in Registry
Update Manager installing and installed screens missing progress information
Tracking Number CC-13714
Application Update Manager
Description Steps to reproduce: 1. Open Update Manager 2. Click on Install to open the "Update Manager - Install" screen. Note
the message informing the user to update Contact Center Feature Packs or Service Packs using the Avaya Release Pack Installer
3. Click on Browse and browse to the location of the GA patches 4. Click on Scan. Applicable patches should appear 5. Select a patch or patches and click on "Install Patch(es)" 6. Click Yes on the dialog box, asking you to confirm the patch(es) to
be installed 7. Confirm that you understand the Terms and Conditions by clicking
Yes on the next screen Expected result: The patch(es) get installed. The lower part of the window displays progress information in a Summary group box Actual Result: The patch(es) get installed. The lower part of the window is blank
Impact Agent may not have understanding of how much longer left in install.
Workaround Agent still getting information on whether patch is installing or installed.
Avaya Contact Center Select 7.0.2.0
Release Notes
Page 43
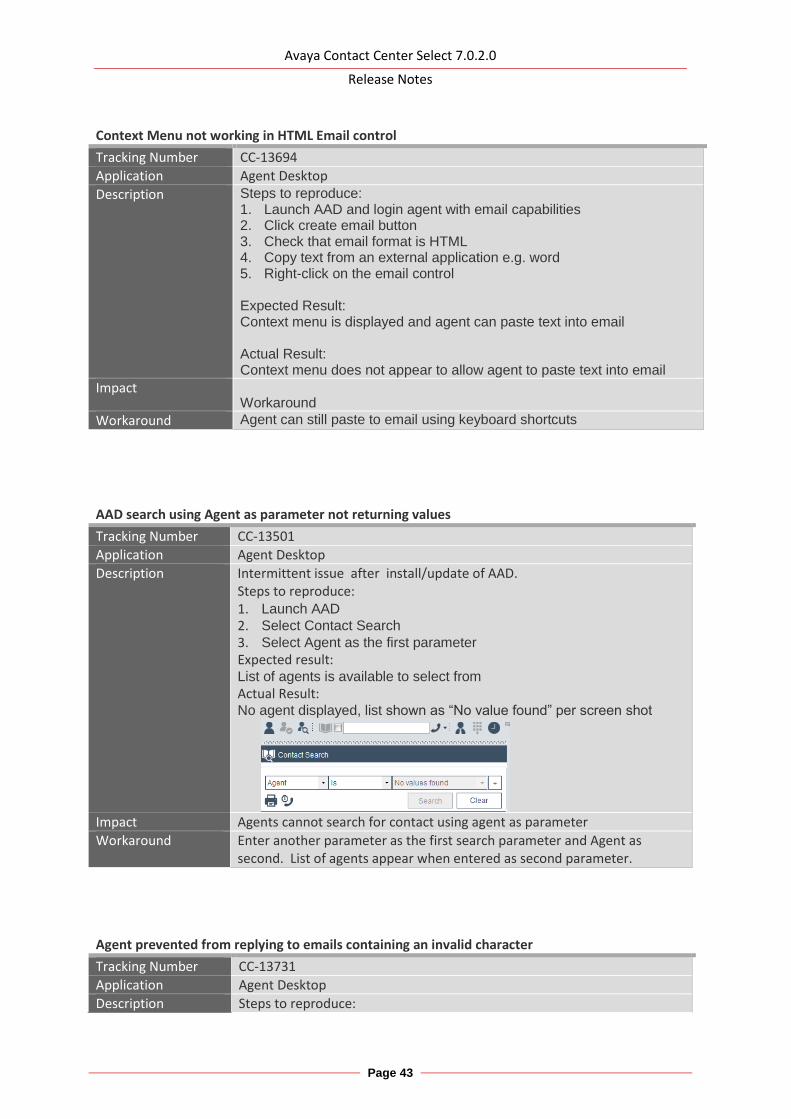
Context Menu not working in HTML Email control
Tracking Number CC-13694
Application Agent Desktop
Description Steps to reproduce: 1. Launch AAD and login agent with email capabilities 2. Click create email button 3. Check that email format is HTML 4. Copy text from an external application e.g. word 5. Right-click on the email control Expected Result: Context menu is displayed and agent can paste text into email Actual Result: Context menu does not appear to allow agent to paste text into email
Impact Workaround
Workaround Agent can still paste to email using keyboard shortcuts
AAD search using Agent as parameter not returning values
Tracking Number CC-13501
Application Agent Desktop
Description Intermittent issue after install/update of AAD. Steps to reproduce: 1. Launch AAD 2. Select Contact Search 3. Select Agent as the first parameter Expected result: List of agents is available to select from Actual Result: No agent displayed, list shown as “No value found” per screen shot
Impact Agents cannot search for contact using agent as parameter
Workaround Enter another parameter as the first search parameter and Agent as second. List of agents appear when entered as second parameter.
Agent prevented from replying to emails containing an invalid character
Tracking Number CC-13731
Application Agent Desktop
Description Steps to reproduce:
Avaya Contact Center Select 7.0.2.0
Release Notes
Page 44
1. Send an email into the contact center containing what is deemed an
invalid character e.g. 😊
2. Agent accepts email contact and clicks reply 3. Type reply message and click send
Expected result: Agent should be able to send email reply without popup
Actual Result: Agent receives a popup message re invalid character and is unable to send reply until they remove invalid character from reply. Note: If an Agent creates a new email and adds an invalid character
such as 😈, they should not be able to send the email, instead they will get the pop up message. This is correct operation. Issue is with respect to invalid character in email from customer.
Impact Agent is unable to reply if the original mail contains an invalid character without removing the invalid character.
Workaround Remove invalid character from email.
Avaya Contact Center Select 7.0.2.0
Release Notes
Page 45
Localization issues Internationalization issues or common across all languages and require a base fix The installation UI is in English instead of localized version
Tracking Number CC-6323
Application Avaya Agent Desktop
Description Steps to reproduce: 5. Open AAAD installer link:
https://aacc70zt.prgloc.avaya.com/agentdesktop/zh-tw/ 6. Click on Launch > Check the installation window Expected result: Installer is Traditional Chinese Actual Result: Installer in English
Impact Agent may not understand installation.
Workaround Agent needs to install application using English installation wizard.
Loading of agent from database failed
Tracking Number CC-13265
Application Contact Center Manager Server
Description Issue observed on one test server. OAM bridge on startup logs SQL exception and fails to add agents to CMF space. This caused "no devices mapped to session" error in RefClient, similar may be observed in AAAD.
Impact Agents unable to login or process calls
Solution Work around applied: 1) Create new agent using CCMA 2) Restart contact center
Avaya Contact Center Select 7.0.2.0
Release Notes
Page 46
APPENDIX
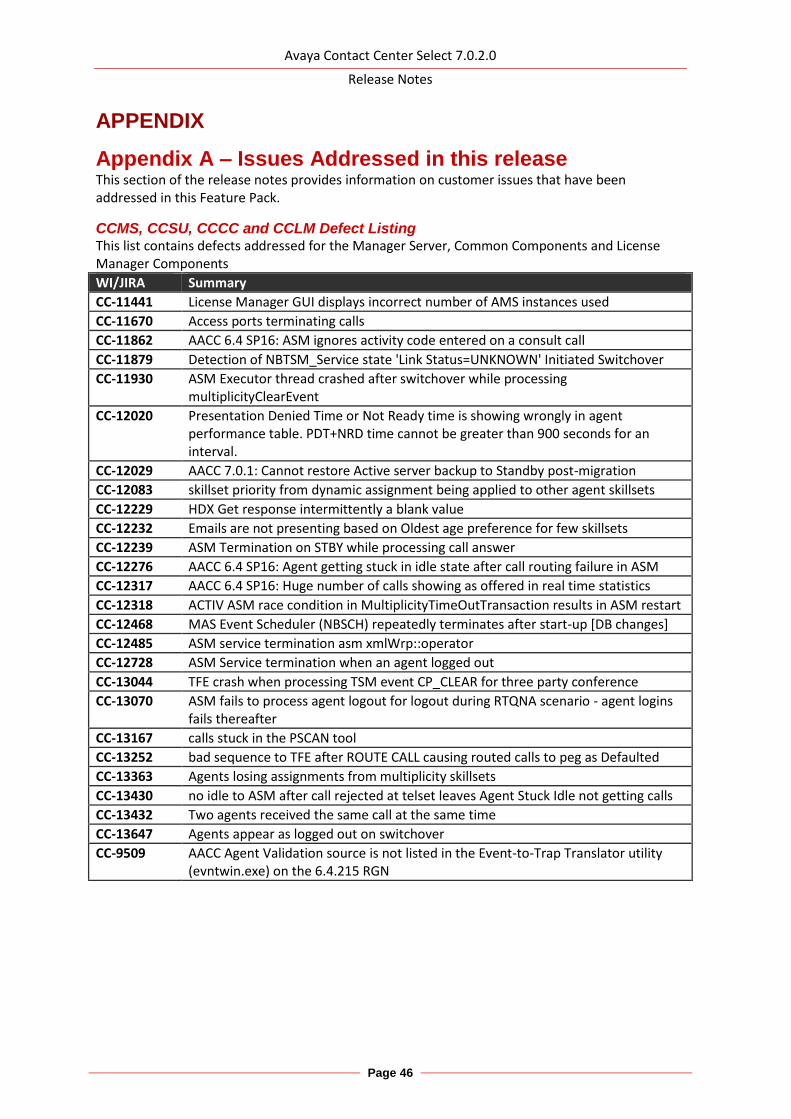
Appendix A – Issues Addressed in this release This section of the release notes provides information on customer issues that have been addressed in this Feature Pack.
CCMS, CCSU, CCCC and CCLM Defect Listing This list contains defects addressed for the Manager Server, Common Components and License Manager Components
WI/JIRA Summary
CC-11441 License Manager GUI displays incorrect number of AMS instances used
CC-11670 Access ports terminating calls
CC-11862 AACC 6.4 SP16: ASM ignores activity code entered on a consult call
CC-11879 Detection of NBTSM_Service state 'Link Status=UNKNOWN' Initiated Switchover
CC-11930 ASM Executor thread crashed after switchover while processing multiplicityClearEvent
CC-12020 Presentation Denied Time or Not Ready time is showing wrongly in agent performance table. PDT+NRD time cannot be greater than 900 seconds for an interval.
CC-12029 AACC 7.0.1: Cannot restore Active server backup to Standby post-migration
CC-12083 skillset priority from dynamic assignment being applied to other agent skillsets
CC-12229 HDX Get response intermittently a blank value
CC-12232 Emails are not presenting based on Oldest age preference for few skillsets
CC-12239 ASM Termination on STBY while processing call answer
CC-12276 AACC 6.4 SP16: Agent getting stuck in idle state after call routing failure in ASM
CC-12317 AACC 6.4 SP16: Huge number of calls showing as offered in real time statistics
CC-12318 ACTIV ASM race condition in MultiplicityTimeOutTransaction results in ASM restart
CC-12468 MAS Event Scheduler (NBSCH) repeatedly terminates after start-up [DB changes]
CC-12485 ASM service termination asm xmlWrp::operator
CC-12728 ASM Service termination when an agent logged out
CC-13044 TFE crash when processing TSM event CP_CLEAR for three party conference
CC-13070 ASM fails to process agent logout for logout during RTQNA scenario - agent logins fails thereafter
CC-13167 calls stuck in the PSCAN tool
CC-13252 bad sequence to TFE after ROUTE CALL causing routed calls to peg as Defaulted
CC-13363 Agents losing assignments from multiplicity skillsets
CC-13430 no idle to ASM after call rejected at telset leaves Agent Stuck Idle not getting calls
CC-13432 Two agents received the same call at the same time
CC-13647 Agents appear as logged out on switchover
CC-9509 AACC Agent Validation source is not listed in the Event-to-Trap Translator utility (evntwin.exe) on the 6.4.215 RGN
Avaya Contact Center Select 7.0.2.0
Release Notes
Page 47
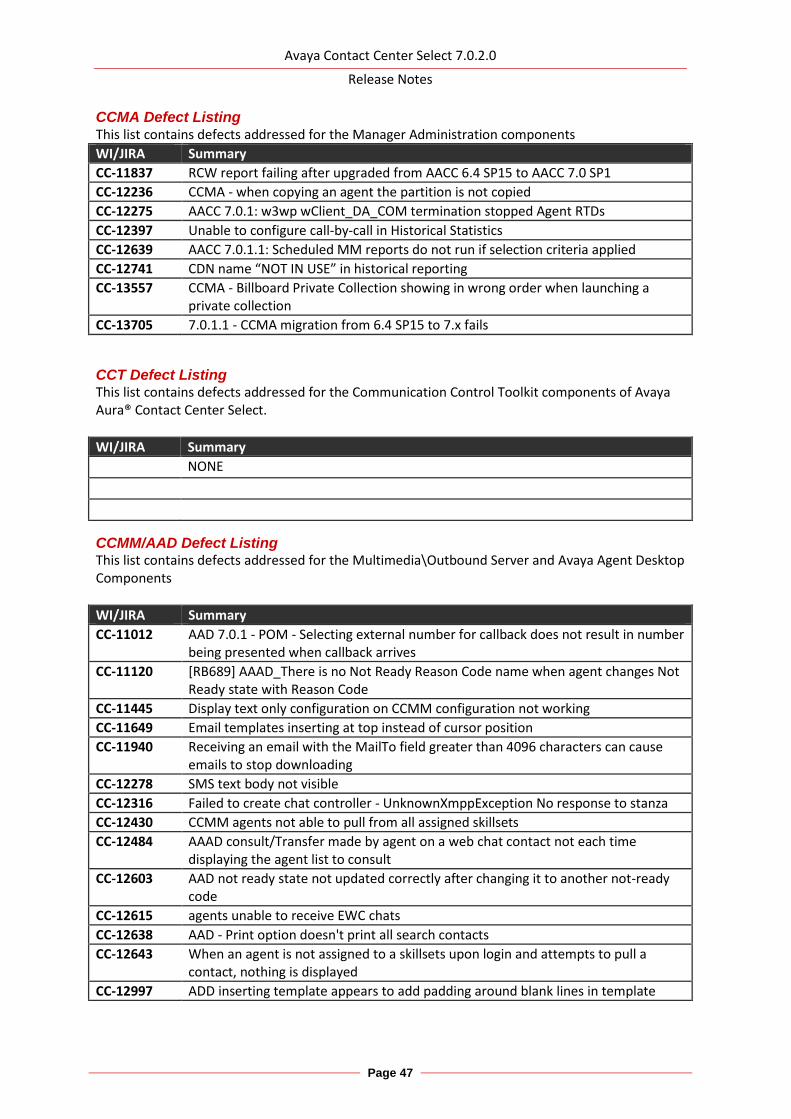
CCMA Defect Listing This list contains defects addressed for the Manager Administration components
WI/JIRA Summary
CC-11837 RCW report failing after upgraded from AACC 6.4 SP15 to AACC 7.0 SP1
CC-12236 CCMA - when copying an agent the partition is not copied
CC-12275 AACC 7.0.1: w3wp wClient_DA_COM termination stopped Agent RTDs
CC-12397 Unable to configure call-by-call in Historical Statistics
CC-12639 AACC 7.0.1.1: Scheduled MM reports do not run if selection criteria applied
CC-12741 CDN name “NOT IN USE” in historical reporting
CC-13557 CCMA - Billboard Private Collection showing in wrong order when launching a private collection
CC-13705 7.0.1.1 - CCMA migration from 6.4 SP15 to 7.x fails
CCT Defect Listing This list contains defects addressed for the Communication Control Toolkit components of Avaya Aura® Contact Center Select.
WI/JIRA Summary
NONE
CCMM/AAD Defect Listing This list contains defects addressed for the Multimedia\Outbound Server and Avaya Agent Desktop Components
WI/JIRA Summary
CC-11012 AAD 7.0.1 - POM - Selecting external number for callback does not result in number being presented when callback arrives
CC-11120 [RB689] AAAD_There is no Not Ready Reason Code name when agent changes Not Ready state with Reason Code
CC-11445 Display text only configuration on CCMM configuration not working
CC-11649 Email templates inserting at top instead of cursor position
CC-11940 Receiving an email with the MailTo field greater than 4096 characters can cause emails to stop downloading
CC-12278 SMS text body not visible
CC-12316 Failed to create chat controller - UnknownXmppException No response to stanza
CC-12430 CCMM agents not able to pull from all assigned skillsets
CC-12484 AAAD consult/Transfer made by agent on a web chat contact not each time displaying the agent list to consult
CC-12603 AAD not ready state not updated correctly after changing it to another not-ready code
CC-12615 agents unable to receive EWC chats
CC-12638 AAD - Print option doesn't print all search contacts
CC-12643 When an agent is not assigned to a skillsets upon login and attempts to pull a contact, nothing is displayed
CC-12997 ADD inserting template appears to add padding around blank lines in template
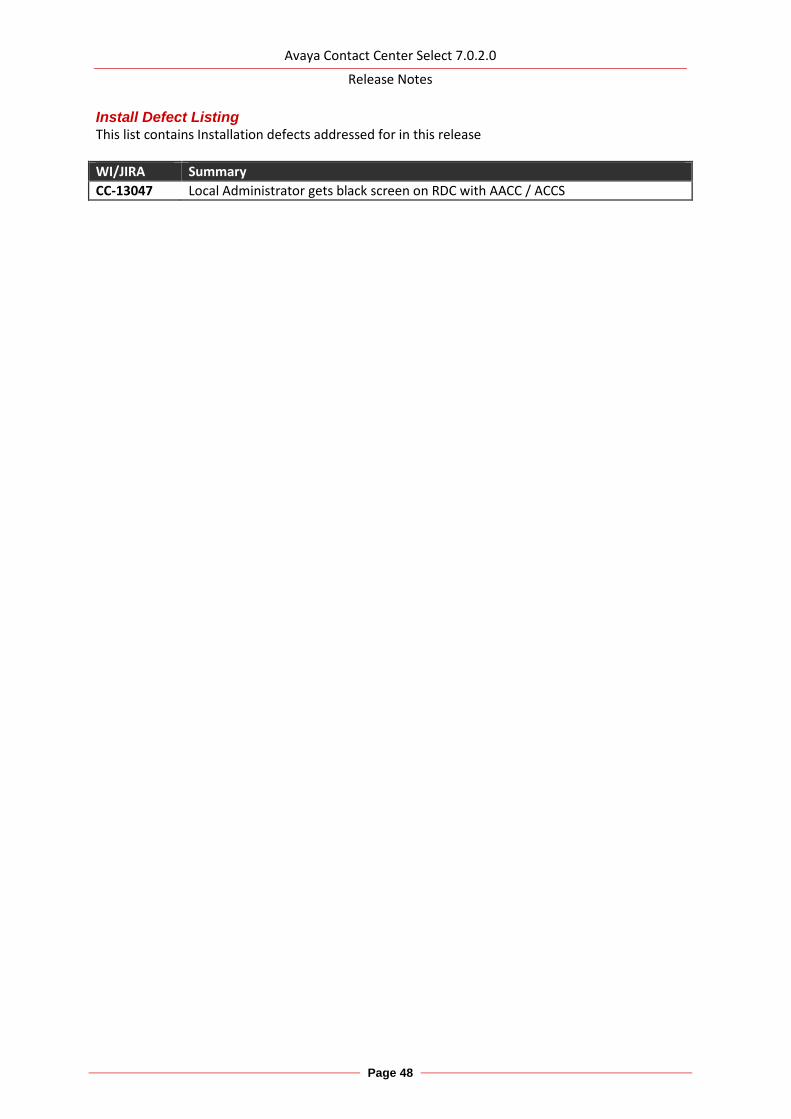
Avaya Contact Center Select 7.0.2.0
Release Notes
Page 48
Install Defect Listing This list contains Installation defects addressed for in this release
WI/JIRA Summary
CC-13047 Local Administrator gets black screen on RDC with AACC / ACCS

Avaya Contact Center Select 7.0.2.0
Release Notes
Page 49
CCMA ActiveX Control MSI – Content and Versions
File Name File Size (bytes) Version
ChartWrapperCtrl.ocx 64312 1.0.0.1
DTPWrapperCtrl.ocx 97080 8.0.0.0
hrctrl.dll 113464 8.0.0.4
iceemhlpcontrol.dll 129848 8.0.0.2
icertdcontrol.dll 854840 9.0.0.2
iemenu.ocx 65648 4.71.115.0
ntzlib.dll 65080 1.1.4.0
olch2x8.ocx 2102448 8.0.20051.51
rope.dll 248632 1.0.0.4
rsclientprint.dll 594432 2011.110.3128.0
sstree.ocx 337120 1.0.4.20
WSEColorText.ocx 179000 6.0.0.15
xerces-c_2_7.dll 1893832 12.5.0.1190
Appendix B – Additional Security Information
Store Maintenance – backup and restore
Backing up the Certificate Store 1) Ensure all services are stopped 2) Launch Security Manager 3) Go to Store Maintenance Tab 4) In the Backup and Restore Certificate Store section choose a location in which to create
the backups. NOTE: do not choose a Contact Center directory structure 5) Press the Backup button to back up the store and its associated files 6) Check your chosen backup location and verify the following files are present in the
directory: CCKeyStore.jks, signme.csr (optional), storeInformation.txt ,storePwdEncrypt.txt
Restoring the Certificate Store 1) Ensure all service are stopped 2) Launch Security Manager 3) Go to Store Maintenance Tab 4) Select the location where your backups are stored, in the Backup and Restore Certificate
Store section 5) Press Restore button to restore the store and associated files 6) Close Security Manager 7) Open Security Manager and confirm store has the correct content 8) Start Services
After restoring Certificate Store – Reset Security Level if previously set to ON If the certificate store has been restored onto a system that contained another store and had the security level set to ON then the following steps have to be followed to apply the new stores
Avaya Contact Center Select 7.0.2.0
Release Notes
Page 50
certificates to the various web servers otherwise the previous stores certificates will remain in effect. This procedure is only if the previous security setting was set to ON while using the previous store and the store has been restored.
1) Ensure all services are stopped. 2) Launch Security Manager. 3) Go to Security Configuration Tab. 4) Check Security level – If ON then turn OFF and then ON again. 5) Hit Apply button. This effectively will remove the previous configuration settings on the various web servers and apply the contents of the new store to web servers. Failure to follow this step will result in the various web servers using the certificates from the previous store regardless of the restore procedure.
Restoring a certificate store whose contents have been signed by another Certificate Authority If the certificate store has been restored to a system that used another certificate authority (CA) to sign the contents of the store used previously then, if not done already, the root certificate authority certificate will have to be deployed to the various clients that communicate with the server. If the restored certificate store has been signed by the same certificate authority then this is not required since the root CA certificates should have already been distributed.
Backing up the Certificate Store
1) Ensure all services are stopped 2) Launch Security Manager 3) Go to Store Maintenance Tab 4) In the Backup and Restore Certificate Store section choose a location in which to create
the backups. NOTE: do not choose a Contact Center directory structure 5) Press the Backup button to back up the store and its associated files 6) Check your chosen backup location and verify the following files are present in the
directory: CCKeyStore.jks, signme.csr (optional), storeInformation.txt ,storePwdEncrypt.txt
Restoring the Certificate Store
9) Ensure all service are stopped 10) Launch Security Manager 11) Go to Store Maintenance Tab 12) Select the location where your backups are stored, in the Backup and Restore Certificate
Store section 13) Press Restore button to restore the store and associated files

Avaya Contact Center Select 7.0.2.0
Release Notes
Page 51
14) Close Security Manager 15) Open Security Manager and confirm store has the correct content 16) Start Services
After restoring Certificate Store – Reset Security Level if previously set to ON If the certificate store has been restored onto a system that contained another store and had the security level set to ON then the following steps have to be followed to apply the new stores certificates to the various web servers otherwise the previous stores certificates will remain in effect. This procedure is only if the previous security setting was set to ON while using the previous store and the store has been restored.
1) Ensure all services are stopped. 2) Launch Security Manager. 3) Go to Security Configuration Tab. 4) Check Security level – If ON then turn OFF and then ON again. 5) Hit Apply button. This effectively will remove the previous configuration settings on the various web servers and apply the contents of the new store to web servers. Failure to follow this step will result in the various web servers using the certificates from the previous store regardless of the restore procedure.
Restoring a certificate store whose contents have been signed by another Certificate Authority If the certificate store has been restored to a system that used another certificate authority (CA) to sign the contents of the store used previously then, if not done already, the root certificate authority certificate will have to be deployed to the various clients that communicate with the server. If the restored certificate store has been signed by the same certificate authority then this is not required since the root CA certificates should have already been distributed.
TLS Information
For non-mandatory TLS SIP connections
IP Office releases TLSv1 support All supported IP Office releases currently provide support for TLSv1.0, TLSv1.1 and TLSv1.2.
Avaya Aura Media Server releases and TLSv1 support AAMS Release
TLS v1.0 support
TLS v1.1 support
TLS v1.2 support
Options
AAMS No No Yes Configurable (via Element Manager)
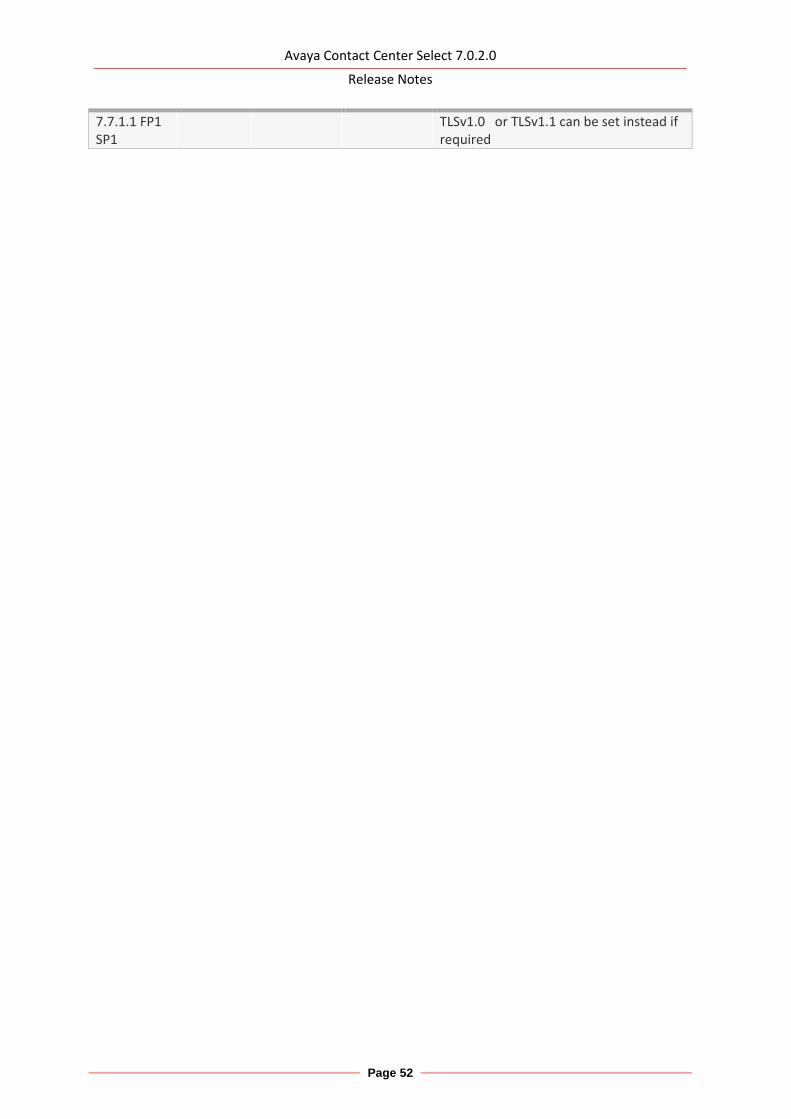
Avaya Contact Center Select 7.0.2.0
Release Notes
Page 52
7.7.1.1 FP1 SP1
TLSv1.0 or TLSv1.1 can be set instead if required
Avaya Contact Center Select 7.0.2.0
Release Notes
Page 53
Known applications and services that cannot support TLS v1.2
HDX / DIW connection to databases HDX / DIW can be used to connect to customer databases. HDX / DIW connect to a remote database using an ODBC Data Source Name (DSN). The DSN for the database connection must be manually created on ACCS using the ODBC Data Source Administrator. If connecting to older versions of Microsoft SQL Server, the DSN created will not connect successfully if TLS is set to higher than TLS v1.0. In this scenario, enable TLS v1.0 on Security Manager Security Configuration field “CCMA – Multimedia Web Service Level”.
Remote desktop Remote desktop connections can also be impacted on some client machines and requires a Microsoft KB required to remote into ACCS server when TLS v1.1 or higher is set due to RDC only supporting TLS v1.0. Disabling TLS 1.0 on the CCMA- Multimedia web services setting in Security Manager will break RDP under default settings on Windows 7 clients and Windows 2008 R2 Server. This setting covers the entire ACCS server and not only CCMA-MM WS and thus causes remote desktop connections to fail from Windows 7 and Windows 2008 R2 server due to the fact it cannot support TLS v1.1 or TLS v1.2. Please apply the following KB from Microsoft on your CLIENT or machine wishing to connect to CC server.
This update provides support for Transport Layer Security (TLS) 1.1 and TLS 1.2 in Windows 7 Service Pack 1 (SP1) or Windows Server 2008 R2 SP1 for Remote Desktop Services (RDS).
https://support.microsoft.com/en-us/kb/3080079
System Manager 7.0 System Manager 7.0 and earlier releases do not support TLS 1.1 and TLS 1.2 If implementing a Single Sign-On configuration using System Manager to login to CCMA then if TLS 1.1 or TLS 1.2 is enabled the System Manager login page will not be presented. System Manager 7.0.1 includes support for TLS 1.1 and TLS 1.2