diorama - north brisbane rc tank...
TRANSCRIPT
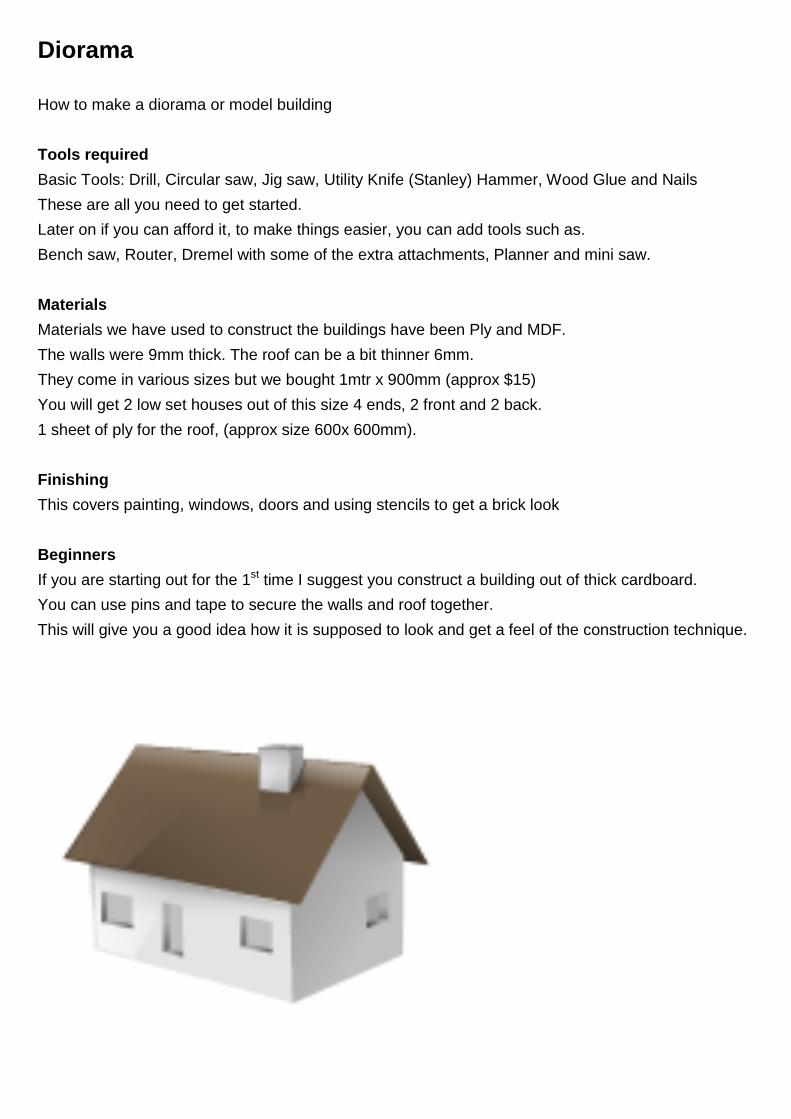
Diorama
How to make a diorama or model building
Tools required
Basic Tools: Drill, Circular saw, Jig saw, Utility Knife (Stanley) Hammer, Wood Glue and Nails
These are all you need to get started.
Later on if you can afford it, to make things easier, you can add tools such as.
Bench saw, Router, Dremel with some of the extra attachments, Planner and mini saw.
Materials
Materials we have used to construct the buildings have been Ply and MDF.
The walls were 9mm thick. The roof can be a bit thinner 6mm.
They come in various sizes but we bought 1mtr x 900mm (approx $15)
You will get 2 low set houses out of this size 4 ends, 2 front and 2 back.
1 sheet of ply for the roof, (approx size 600x 600mm).
Finishing
This covers painting, windows, doors and using stencils to get a brick look
Beginners
If you are starting out for the 1st time I suggest you construct a building out of thick cardboard.
You can use pins and tape to secure the walls and roof together.
This will give you a good idea how it is supposed to look and get a feel of the construction technique.
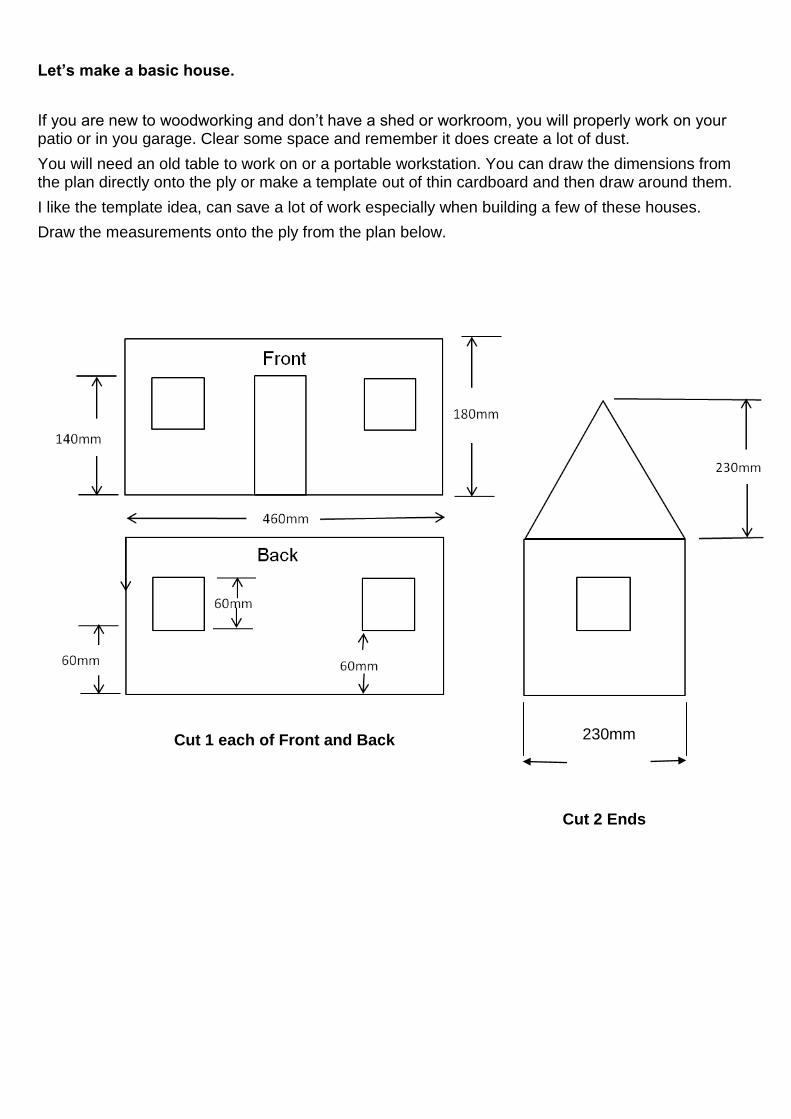
Let’s make a basic house.
If you are new to woodworking and don’t have a shed or workroom, you will properly work on your patio or in you garage. Clear some space and remember it does create a lot of dust.
You will need an old table to work on or a portable workstation. You can draw the dimensions from the plan directly onto the ply or make a template out of thin cardboard and then draw around them.
I like the template idea, can save a lot of work especially when building a few of these houses.
Draw the measurements onto the ply from the plan below.
230mm
Cut 2 Ends
Cut 1 each of Front and Back

Glue and nail the ends onto the front and Back panels
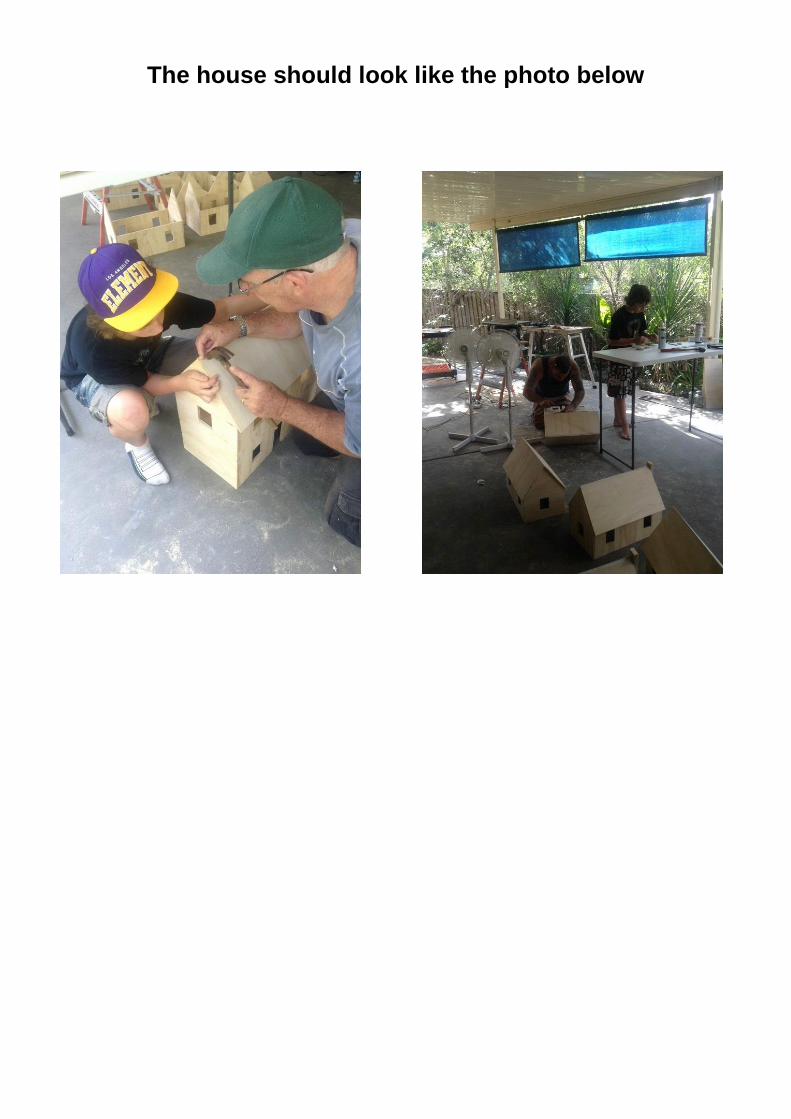
The house should look like the photo below
Back
END
Front
END
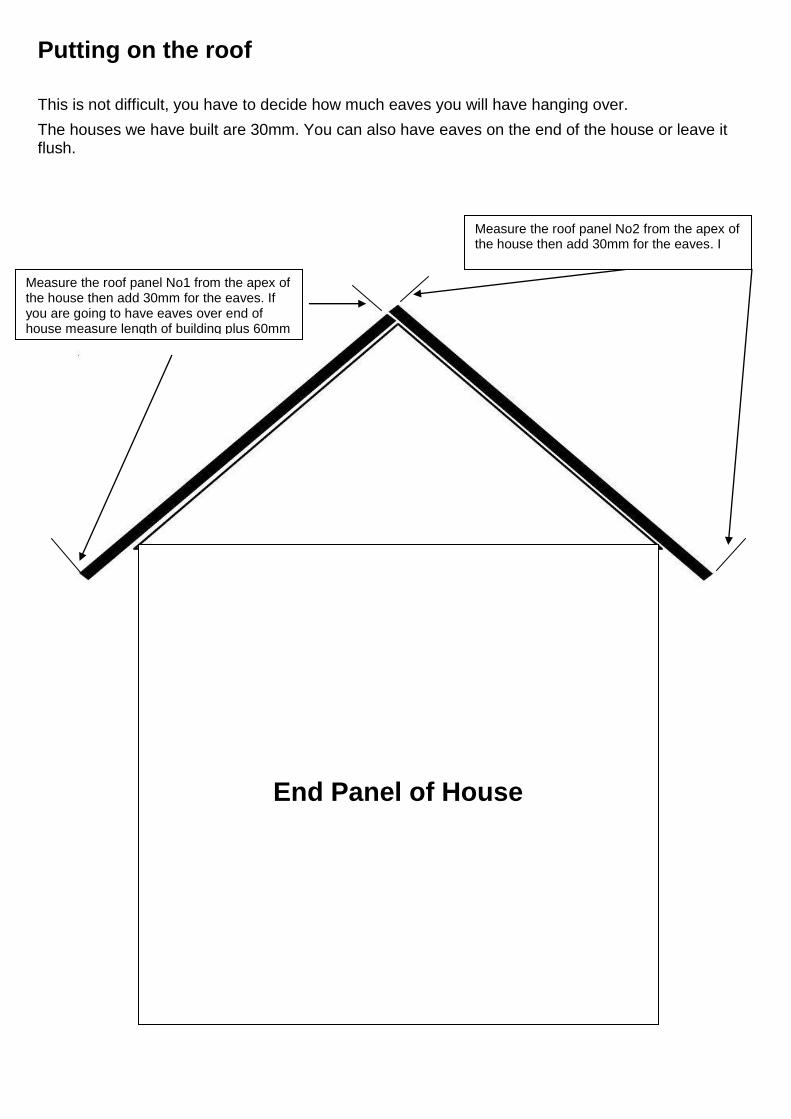
Putting on the roof
This is not difficult, you have to decide how much eaves you will have hanging over.
The houses we have built are 30mm. You can also have eaves on the end of the house or leave it flush.
Measure the roof panel No1 from the apex of the house then add 30mm for the eaves. If you are going to have eaves over end of house measure length of building plus 60mm
Measure the roof panel No2 from the apex of the house then add 30mm for the eaves. I
End Panel of House
The house should look like the photo below

Finishing
The next stage of the house construction is the finishing, which consists of
1. Painting: Matt or Gloss, Stucco, Stencils, Sponges
2. Adding doors: This can be achieved by using Balsa wood, MDF.
3. Window trims: This can be achieved by using Balsa wood, MDF or Air brushing.
4. Chimneys: Cutting a general shape out of thick timber and gluing onto building where you decide.
5. Damaged Building: This can be achieved by cutting a finished building, at the end or in the middle or just the roof.
This is an individual taste depending on what kind of town or village you decide on e.g., French, Italian or German
This has just touched the surface of how to finish your building. We would suggest looking at other sites to get ideas. We are open for any ideas that you may have used, to help in our finishing.
We can also give you more help by asking questions in the web site.
Damage House painted with stucco paint and the chimney with a sponge dipped in paint, to give a stony look.
The prototype house was a bought stencil and coloured grout spread over the stencil.
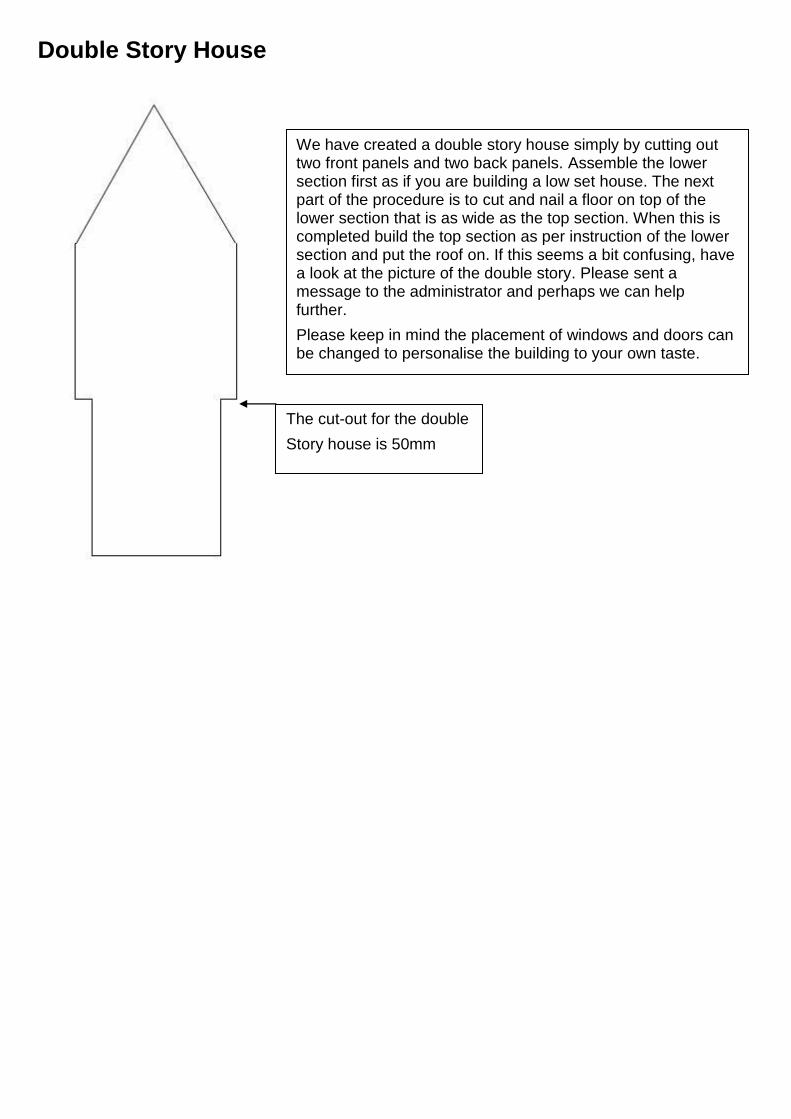
We have created a double story house simply by cutting out two front panels and two back panels. Assemble the lower section first as if you are building a low set house. The next part of the procedure is to cut and nail a floor on top of the lower section that is as wide as the top section. When this is completed build the top section as per instruction of the lower section and put the roof on. If this seems a bit confusing, have a look at the picture of the double story. Please sent a message to the administrator and perhaps we can help further.
Please keep in mind the placement of windows and doors can be changed to personalise the building to your own taste.
The cut-out for the double
Story house is 50mm
Double Story House

The Church

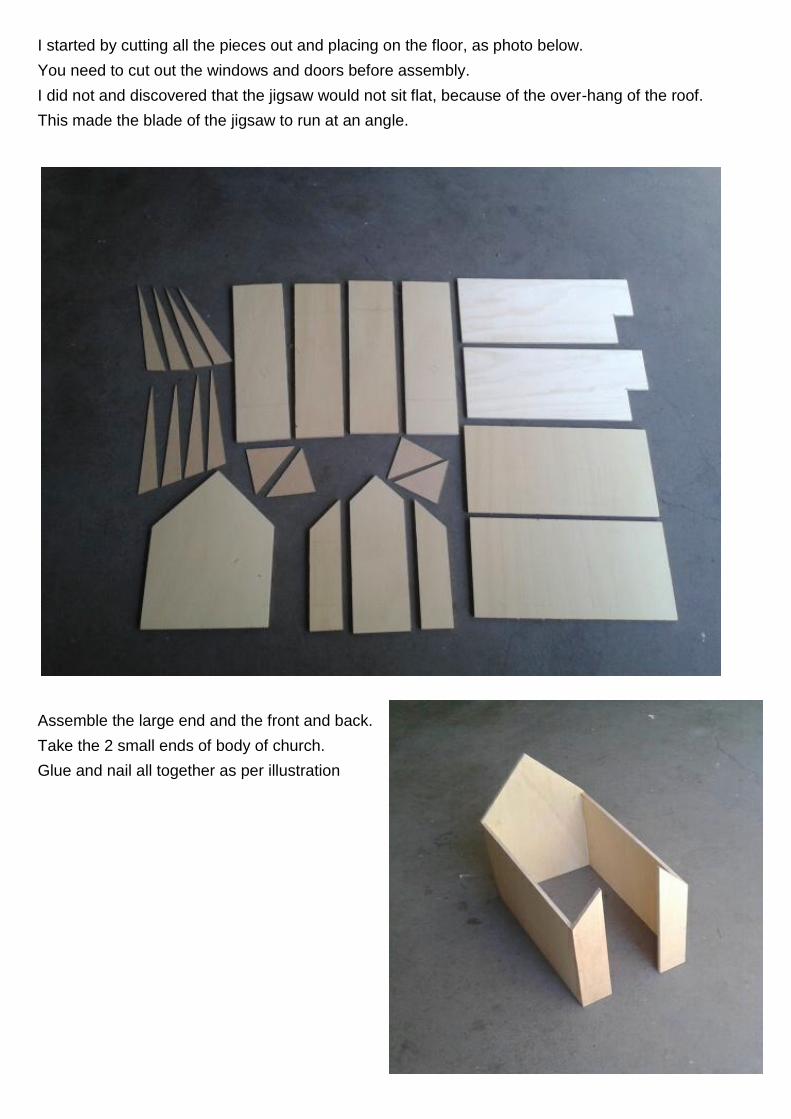
I started by cutting all the pieces out and placing on the floor, as photo below.
You need to cut out the windows and doors before assembly.
I did not and discovered that the jigsaw would not sit flat, because of the over-hang of the roof.
This made the blade of the jigsaw to run at an angle.
Assemble the large end and the front and back.
Take the 2 small ends of body of church.
Glue and nail all together as per illustration
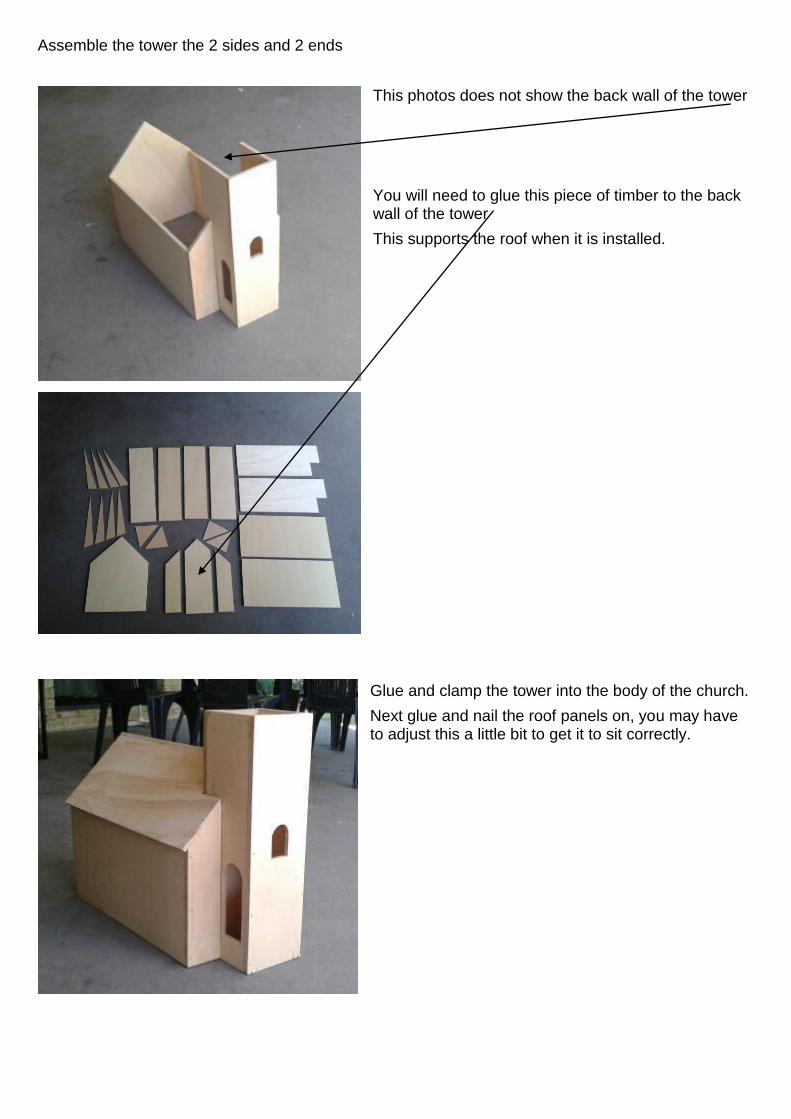
Assemble the tower the 2 sides and 2 ends
This photos does not show the back wall of the tower
You will need to glue this piece of timber to the back wall of the tower
This supports the roof when it is installed.
Glue and clamp the tower into the body of the church.
Next glue and nail the roof panels on, you may have to adjust this a little bit to get it to sit correctly.

The Last part of the church is the spire on top of the tower.
Lay out the eight parts as shown in diagram below.
Place gaffer tape or grey tape in three places to hold all pieces together
When gaffer tape is in place, fold spire so gaffer tape is on the inside and form the conical shape.
Glue the joins with liquid nails or some other strong glue.
You can strengthen cone by filling with expanding foam, be careful not to fill to top as the foam expands to three time its volume. Allow 24 hours to dry.
With the four triangular pieces create a pyramid and glue together. Allow 24 hours to dry.
Place spire on top of pyramid and glue together.
You don’t have to glue final spire onto the tower as the weight will keep it there.

Finished Church