chapter 3 installing and managing oracle. the oracle universal installer (1/4) to install oracle9i,...
TRANSCRIPT

Chapter 3
Installing and Managing Oracle

The Oracle Universal Installer (1/4)
• To install Oracle9i, you use the Oracle Universal Installer (OUI), a GUI-based Java tool that has the same look and functionality across all platforms. – On Windows platforms, you invoke the installer by running the execut
able setup.exe.
– On Unix platforms, you invoke the installer by running the script runInstaller.
• You can install new Oracle9i products or remove installed Oracle9i products by using the OUI.


The Oracle Universal Installer (2/4)
• The OUI accepts minimal user inputs for a typical installation, and you can choose the desired products by using the custom installation.
• OUI supports multiple Oracle homes in case you need to install different versions of Oracle under different Oracle homes.
• OUI resolves the dependencies among various Oracle products automatically.

The Oracle Universal Installer (3/4)
• OUI allows silent installation, which is especially useful for workstations that do not support a graphical interface. – You can capture the response to each installer question in a response
file and use the file for future installations.
• Installer activities and result statuses are logged into files that you can review after installation.

The Oracle Universal Installer (4/4)
• The installer can start other Oracle tools such as the Database Configuration Assistant to create a new database or the Oracle Net Configuration Assistant to configure the listener for the database.

Oracle Enterprise Manager (1/2)
• Oracle Enterprise Manager (OEM) is a graphical system management tool used to manage components of Oracle and to administer the databases from one session.
• OEM comprises a console and management utilities, a repository in which to save all the metadata information, and the actual nodes (databases and other components) that need to be managed.


Oracle Enterprise Manager (2/2)
• The basic components of the OEM are:– Console
– Management Server
– Common services
– DBA Tools

Oracle Enterprise Manager :The Console (1/5)
• The console is a client GUI tool that provides a single point of access to all the databases, network, and management tools.


Oracle Enterprise Manager :The Console (2/5)
• The Navigator pane displays a hierarchical view of all the databases, listeners, nodes, and other services in the network and their relationships.
• You can drill down the branches and see the database users, roles, groups, events, and so on.

Oracle Enterprise Manager :The Console (3/5)
• The Group branch enables you to graphically view and construct logical administrative groups of objects for more efficient management and administration.– You can group objects together based on any criteria, such as department,
geographical location, or function. – The Group branch is especially useful for managing environments that include
large numbers of databases and other services or for seeing the relative location of managed services.
– To create a group, you first name and register a group in the Group branch, and then you drag objects that you want to manage as a unit from the Navigator branch and drop them into the Group branch.
– Groups can consist of similar or dissimilar targets; for example, a group might have two database servers, a management server, and an application server.
– You can display these groups on top of a graphical image of your choice, such as a geographical map, a building blueprint, or an organization chart.
Oracle Enterprise Manager :The Console (4/5)
• The Jobs branch is the user interface to the Job Scheduling System, which you can use to automate repetitive tasks at specified times on one or multiple databases. – A job consists of one or more tasks.
– You can build dependencies within the tasks, and you can specify that certain tasks execute as a result of the outcome of another task.

Oracle Enterprise Manager :The Console (5/5)
• The Events branch is the user interface to the Event Management System, which monitors the network for problem events. – An event is made up of one or more tests that an Intelligent Agent
checks against one or more of its managed services in monitoring for critical occurrences.
– When the Intelligent Agent detects a problem on the services, it notifies the console and the appropriate DBA based on the permissions set up.
– The Intelligent Agents are local to a database node and are responsible for monitoring the databases and other services on the database node.

Oracle Enterprise Manager : The Management Server and Common Services
(1/2)• The Management Server is the middle tier between the console
GUI and managed nodes. – It processes all system management tasks and distributes these tasks to
Intelligent Agents on the nodes.
– You can use multiple Management Servers to balance workload and to improve performance.

Oracle Enterprise Manager : The Management Server and Common Services (2/2)
• The common services are the tools and systems that help the Management Server. The common services consist of the following:
– Repository The repository is a set of tables that store the information about the managed nodes and the Oracle management tools. You can create this data store in any Oracle database, but preferably on a node that does not contain a critical Oracle instance to be monitored.
– Service discovery OEM discovers all databases and listeners on a node, once the node is identified. The Intelligent Agent finds the services and reports them back to the Oracle Management Server. These discovered services are displayed in the Navigation pane of the console.
– Job Scheduling System Using the Job Scheduling System, you can schedule and execute routine or repetitive administrative tasks. You can set up the system to notify you upon completion, failure, or success of a job through e-mail or a pager.
– Event Management System The Event Management System in the OEM monitors the resource problems, loss of service, shortage of disk space, or any other problem detected on the node. You can set these occurrences up as events, and the Intelligent Agent tests periodically to monitor them.
– Notification system You can specify that the notification about the status of jobs or events can be sent to the console, via e-mail, or to a pager. You can select the notification procedures when you set up the job or event.
– Paging/e-mail blackout This feature prevents the administrator from receiving multiple e-mails or pages when a service is brought down for maintenance or for a scheduled period of downtime.
– Security Security parameters in OEM are defined for services, objects, and administrators. A super administrator is someone who creates and defines the permissions of all the repository’s administrators. The super administrator can access any object and control its security parameters, including objects owned by other administrators.

Oracle Enterprise Manager : DBA Tools (1/2)
• The DBA Tools are integrated with the OEM, which helps the administrators with their daily routine tasks. – These tools provide complete database administration using GUI tools
rather than using SQL*Plus.
– You access the tools in the left pane of the OEM console under each database instance.

Oracle Enterprise Manager : DBA Tools (2/2)
• Using the DBA Tools, you can administer the following:– Instance You can start up and shut down an instance; modify parameters; view
and change memory allocations, redo logs, and archival status; view user sessions and their SQL; see the execution plan of SQL; and manage resource allocations and long-running sessions.
– Schema You can create, alter, or drop any schema object, including advanced queues and Java-stored procedures. You can clone any object.
– Security You can change the security privileges for users and roles, and you can create and alter users, roles, and profiles.
– Storage You can manage tablespaces, data files, undo segments, redo log groups, and archive logs.
– SQL*Plus Worksheet You can issue SQL statements against any database, in a graphical environment that is much easier to use than the command line version of SQL*Plus.

Optimal Flexible Architecture (OFA) (1/3)
• The Optimal Flexible Architecture (OFA) is a set of guidelines specified by Oracle to better manage the Oracle software and the database. OFA enforces the following:– A consistent naming convention
– Separating Oracle software from the database
– Separating the Oracle software versions
– Separating the data files belonging to different databases
– Separating parameter files and database creation scripts from the database files and software
– Separating trace files, log files, and dump files from the database and software

Optimal Flexible Architecture (OFA) (2/3)
• The following figure shows the software installation and database files on a Windows 2000 platform conforming to the OFA. – Here the ORACLE_BASE directory is G:\oracle, which has four bran
ches—admin, ora90, ora91, and oradata. • The ora90 and ora91 folders are software installations.
– If you separate the versions, upgrading the database is easy.
• The admin and oradata folders have subfolders for each database on the server.
– In the figure, oradb01 and oradb02 are two databases. – Under the admin branch, for each database, are subfolders for administrative sc
ripts (adhoc), background dump files and the alert log file (bdump), core dump files (cdump), database creation scripts (create), export files (exp), parameter files (pfile), and a user dump folder (udump).
– The oradata folder has the data files, redo log files, and control files belonging to the database, separated at the database level by using subfolders.


Optimal Flexible Architecture (OFA) (3/3)
• For performance reasons, the OFA architecture can be slightly extended to include multiple disks and to spread out the data files. – The following figure shows such a layout, in which oradata01, orada
ta02, oradata03, oradata04, and so on can be on separate disks and can hold separate types of files (data files separate from redo log files) or different tablespaces (data tablespace separate from the index tablespace, and separate from the system tablespace).


Administrator Authentication Methods (1/2)
• You can allow administrators to connect to the database by using operating system authentication or password file authentication. – For remote or local database administration, you can use either method,
but you can use the operating system authentication method with remote administration only if you have a secured network connection.
• To use remote authentication of users through Remote Dial-In User Service (RADIUS—a standard lightweight protocol used for user authentication and authorization) with Oracle, you need Oracle9i Enterprise Edition with the Advanced Security option.

Administrator Authentication Methods (2/2)
• When you create a database, Oracle automatically creates two administrator login IDs—SYS and SYSTEM. – The initial password for SYS is CHANGE_ON_INSTALL, and the
initial password for SYSTEM is MANAGER.
– For security reasons, change these passwords as soon as you finish creating the database.
• Oracle recommends that you create at least one additional user to do the DBA tasks, rather than using the SYS or SYSTEM account.
• A predefined role, DBA, is created with all databases and has all database administrative privileges.

Administrator Authentication Methods: Operating System Authentication (1/4)
• Oracle can verify your operating system privileges and connect you to the database to perform database operations.
• To connect to the database by using operating system authentication, you must be a member of the OSDBA or OSOPER operating system group. – On most Unix systems, this is the dba group.
– You can specify the name of the OSDBA and OSOPER groups when you install Oracle by using the OUI.

Administrator Authentication Methods: Operating System Authentication (2/4)
• OSDBA and OSOPER are not Oracle privileges or roles that you grant through the Oracle database. – The operating system manages them.
– When you connect to the database by using the OSOPER privilege (or SYSOPER privilege), you can perform STARTUP, SHUTDOWN, ALTER DATABASE [OPEN/MOUNT], ALTER DATABASE BACKUP, ARCHIVE LOG, and RECOVER, and SYSOPER includes the RESTRICTED SESSION privilege.
– When you connect to the database by using the OSDBA privilege (or SYSDBA privilege), you have all system privileges with ADMIN OPTION, the OSOPER role, CREATE DATABASE, and time-based recovery.

Administrator Authentication Methods: Operating System Authentication (3/4)
• To use operating system authentication, set the REMOTE_LOGIN_PASSWORDFILE parameter to NONE, which is the default.
• Operating system authenticated users can connect to the database by using CONNECT / AS SYSDBA or CONNECT / AS SYSOPER. – You do not need a user created in the Oracle database to use operating
system authentication.

Administrator Authentication Methods: Operating System Authentication (4/4)
• Here is an example from a Windows platform, making a local operating system authentication connection to the database to perform administration operations:
– Microsoft(R) Windows DOS(C)Copyright Microsoft Corp 1990-1999.
E:\>sqlplus /nologSQL*Plus: Release 9.0.1.0.1 - Production on Tue Oct 220:53:08 2001
(c) Copyright 2001 Oracle Corporation. All rightsreserved.
SQL> connect / as sysdbaConnected.SQL> archive log listDatabase log mode No Archive ModeAutomatic archival DisabledArchive destination H:\Oracle9i\RDBMSOldest online log sequence 0Current log sequence 1SQL>

Administrator Authentication Methods: Password File Authentication (1/7)
• When using password file authentication, the user connects to the database by specifying a username and a password. – The user needs to have been granted the appropriate privileges in the
database.

Administrator Authentication Methods: Password File Authentication (2/7)
• To use password file authentication, follow these steps:– Using the ORAPWD utility, create a password file with the SYS
password. When you change the password in the database, the password in this file is automatically updated.
– Set the REMOTE_LOGIN_PASSWORDFILE parameter.
– Grant the appropriate users SYSDBA or SYSOPER privilege. When you grant this privilege, these users are added to the password file.

Administrator Authentication Methods: Password File Authentication (3/7)
• When you invoke the ORAPWD utility without any parameters, the syntax for creating the password file is displayed.– $ orapwd
Usage: orapwd file=<fname> password=<password> entries=<users> where file - name of password file (mand), password - password for SYS and INTERNAL (mand), entries - maximum number of distinct DBAs and OPERs (opt), There are no spaces around the equal-to (=) character.

Administrator Authentication Methods: Password File Authentication (4/7)
• The FILE parameter specifies the name of the parameter file. – Normally the file is created in the dbs directory under ORACLE_HO
ME (the directory where Oracle software is installed).
• The PASSWORD parameter specifies the SYS password, and ENTRIES specifies the maximum number of users you will be assigning the SYSOPER or SYSDBA privileges. – If you exceed this limit, you will need to re-create the password file.
– ENTRIES is an optional parameter.

Administrator Authentication Methods: Password File Authentication (5/7)
• You can set the parameter REMOTE_LOGIN_PASSWORDFILE to either EXCLUSIVE or SHARED. – If you set the parameter to EXCLUSIVE, the password file can be used
for only one database; you can add users other than SYS and INTERNAL to the password file.
– If you set the parameter to SHARED, the password file is shared among multiple databases, but you cannot add any user other than SYS or INTERNAL to the password file.
Administrator Authentication Methods: Password File Authentication (6/7)
• When you connect to the database by using the SYSDBA privilege, you are connected to the SYS schema, and when you connect by using the SYSOPER privilege, you are connected to the PUBLIC schema.

Administrator Authentication Methods: Password File Authentication (7/7)
• The view V$PWFILE_USERS has the information on all users granted either SYSDBA or SYSOPER privileges. – The view has the username and a value of TRUE in column SYSDBA
if the SYSDBA privilege is granted, or it has a value of TRUE in column SYSOPER if the SYSOPER privilege is granted.

Starting Up the Oracle Instance (1/11)
• To start or stop an Oracle instance, you must have the SYSDBA or SYSOPER privilege.
• To start up a database, you can use either the Instance branch of OEM or SQL*Plus to connect with a user account that has SYSDBA or SYSOPER privileges.
• The database start-up is done in three stages. – First, you start an instance associated with the database, then the
instance mounts the database, and finally you open the database for normal use.

Starting Up the Oracle Instance (2/11)
• The instance can start, but not mount, the database by using the STARTUP NOMOUNT command. – Normally you use this database state for creating a new database or for
creating new control files.
– When you start the instance, Oracle allocates the SGA and starts the background processes.

Starting Up the Oracle Instance (3/11)
• The instance can start and mount the database without opening it by using the STARTUP MOUNT command. – This state of the database is used mainly for performing specific
maintenance operations such as renaming data files, enabling or disabling archive logging, renaming, adding, or dropping redo log files, or for recovering a full database.
– When you mount the database, Oracle opens the control files associated with the database.
• Each control file contains the names and locations of database files and online redo log files.

Starting Up the Oracle Instance (4/11)
• You use STARTUP OPEN or STARTUP to start the instance, mount a database, and open the database for normal operations. – When you open the database, Oracle opens the online data files and
online redo log files.
– If any of the files are not available or are not in synch with the control file, Oracle returns an error.
– You may have to recover one of the files before you can open the database.

Starting Up the Oracle Instance (5/11)
• Issuing the ALTER DATABASE MOUNT command when the database is not mounted will mount the database in a previously started instance.
• ALTER DATABASE OPEN will open a closed database.
• You can open a database in read-only mode by using the ALTER DATABASE OPEN READ ONLY command.– When you start the database in read-only mode, no redo information is
generated because you cannot modify any data.

Starting Up the Oracle Instance (6/11)
• The following example shows how to start a database by using the SQL*Plus utility.– E:\>sqlplus /nolog
SQL*Plus: Release 9.0.1.0.1 - Production on Tue Oct 221:05:53 2001
(c) Copyright 2001 Oracle Corporation. All rightsreserved.
SQL> connect / as sysdbaConnected to an idle instance.SQL> startupORACLE instance started.
Total System Global Area 118255568 bytesFixed Size 282576 bytesVariable Size 83886080 bytesDatabase Buffers 33554432 bytesRedo Buffers 532480 bytesDatabase mounted.Database opened.SQL> exitDisconnected from Oracle9i Enterprise Edition Release9.0.1.1.1 – ProductionWith the Partitioning optionJServer Release 9.0.1.1.1 – Production
E:\>

Starting Up the Oracle Instance (7/11)
• Sometimes you may have problems starting up an instance. – In those cases, you can use STARTUP FORCE to start a database that
will not shut down or start up gracefully.
– Use this option only if you could not shut down the database properly; STARTUP FORCE shuts down the instance if it is already running and then restarts it.

Starting Up the Oracle Instance (8/11)
• You can restrict access to the database by using the command STARTUP RESTRICT to start the database in restricted mode. – Only users with the RESTRICTED SESSION system privilege can
connect to the database.
• You can also use ALTER SYSTEM [ENABLE/DISABLE] RESTRICTED SESSION to enable or disable restricted access after opening the database.
• Put the database in restricted mode if you want to make any major structure modifications or to get a consistent export.

Starting Up the Oracle Instance (9/11)
• You need to have the ALTER SYSTEM privilege to change the database availability by using the ALTER SYSTEM [ENABLE/DISABLE] RESTRICTED SESSION command.

Starting Up the Oracle Instance (10/11)
• You can start an Oracle instance with one of two types of parameter files: a text-based PFILE or a binary SPFILE. – The SPFILE parameter file is new in Oracle9i, which not only eases
the administration of parameter files, but also gives the DBA more flexibility when specifying the persistence of parameter values.

Starting Up the Oracle Instance (11/11)
• When an instance is started in the NOMOUNT state, you can access only the views that read data from the SGA. – V$PARAMETER, V$SGA, V$OPTION, V$PROCESS, V$SESSION,
V$VERSION, V$INSTANCE, and so on are dictionary views that read from the SGA.
• When the database is mounted, information can be read from the control file. – V$THREAD, V$CONTROLFILE, V$DATABASE, V$DATAFILE,
V$DATAFILE_HEADER, V$LOGFILE, and so on all read data from the control file.

Starting Up the Oracle Instance:The Parameter File: PFILE (1/3)
• Oracle uses a parameter file when starting up the database, either a text-based PFILE or a binary SPFILE (discussed in the next section).
• The PFILE is a text file containing the parameters and their values for configuring the database and instance. – The default location and name of the file depend on the operating system; on U
nix platforms, by default Oracle looks for the parameter file by the name init<SID>.ora (SID is the name of the instance) under the $ORACLE_HOME/dbs directory.
– You can specify the parameter file location and name when starting up the database by using the PFILE option of the STARTUP command.
– The following command starts up the database in restricted mode by using the parameter file initORADB01.ora under the /oracle/admin/ORADB01/pfile directory.
• STARTUP PFILE=/oracle/admin/ORADB01/pfile/initORADB01.ora RESTRICT

Starting Up the Oracle Instance:The Parameter File: PFILE (2/3)
• The parameter files tell Oracle the following when starting up an instance:– The name of the database and the location of the control files
– The location of the archived log files and whether to start the archival process
– The size of the SGA
– The location of the dump and trace files
– The parameters to set limits and that affect capacity

Starting Up the Oracle Instance:The Parameter File: PFILE (3/3)
• If you do not specify a parameter in the parameter file, Oracle assumes a default value for the parameter.
• You can structure a custom parameter file liberally, but certain syntax rules are enforced for the files. The syntax rules are:
– Precede comment lines with a pound sign (#).– All parameters are optional. When parameters are omitted, defaults will be applied.– Parameters and their values are generally not case sensitive. Parameter values that name
files can be case sensitive if the host operating system’s filenames are case sensitive.– You can list parameters in any order.– Parameters that accept multiple values, such as the CONTROL_FILES parameter, can list
the values in parentheses delimited by commas or with no parentheses delimited by spaces.
– The continuation character is the backslash character (\). Use the backslash when a parameter’s list of values must be continued on a separate line.
– Enclose parameter values that contain spaces in double quotes.– Use the equal sign (=) to delimit the parameter name and its associated value.

Starting Up the Oracle Instance: The Parameter File: SPFILE (1/3)
• The other type of parameter file that Oracle9i supports is a persistent parameter file, otherwise known as an SPFILE. – This file is located in the same directory as a PFILE, in the $ORACLE
_HOME/dbs directory.

Starting Up the Oracle Instance: The Parameter File: SPFILE (2/3)
• The SPFILE is a binary file and is not meant to be edited by a standard text editor; it is created from a standard PFILE and then modified by the ALTER SYSTEM command thereafter. – In the case of an SPFILE, the ALTER SYSTEM command can change
the value of an initialization parameter either for the life of the instance, or across a shutdown and restart, or both.

Starting Up the Oracle Instance: The Parameter File: SPFILE (3/3)
• To initially create an SPFILE, a PFILE must exist first; the following example creates an SPFILE in the default location from an initSID.ora PFILE that resides in the same default location:– SQL> CREATE SPFILE FROM PFILE;– The next time the instance is restarted, only the SPFILE will be used to
initialize the database.

Starting Up the Oracle Instance:Get Parameter Values (1/5)
• You can get the value of a parameter by using the SHOW PARAMETERS command.– When this command is used without any arguments, Oracle displays all
the parameters in alphabetic order and their values.
– To get the value for a specific parameter, use the SHOW PARAMETERS command with the parameter name as the argument.
• For example, to view the value of the DB_BLOCK_SIZE parameter, use the following:– SQL> show parameters db_block_size
NAME TYPE VALUE------------------------- --------- ---------------------db_block_size integer 8192SQL>

Starting Up the Oracle Instance:Get Parameter Values (2/5)
• The argument in the SHOW PARAMETERS command is a filter; you can specify any string, and Oracle displays the parameters that match the argument string anywhere in the parameter name. – The argument is not case sensitive.
– In the following example, all parameters with OS embedded somewhere in the name are shown.• SQL> show parameters OS
NAME TYPE VALUE------------------------- --------- ---------------------optimizer_index_cost_adj integer 100os_authent_prefix stringos_roles boolean FALSEremote_os_authent boolean FALSEremote_os_roles boolean FALSEtimed_os_statistics integer 0SQL>

Starting Up the Oracle Instance:Get Parameter Values (3/5)
• You can also get the parameter values by querying the V$PARAMETER view. – V$PARAMETER shows the parameter values for the current session.
– V$SYSTEM_PARAMETER has the same structure as the V$PARAMETER view, except that it shows the system parameters.


Starting Up the Oracle Instance:Get Parameter Values (4/5)
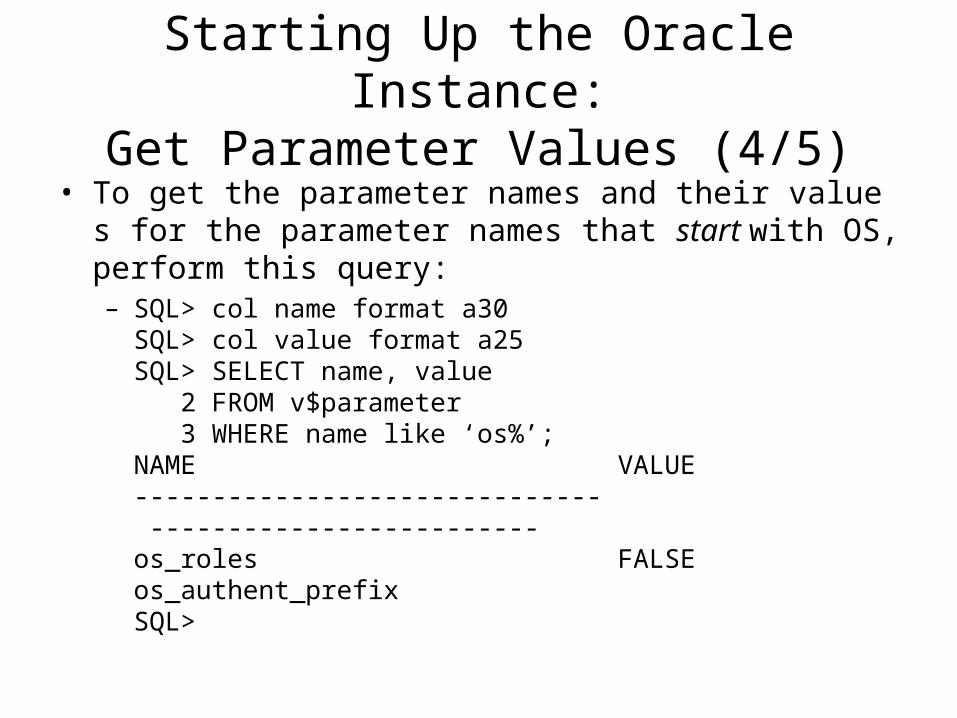
• To get the parameter names and their values for the parameter names that start with OS, perform this query:– SQL> col name format a30
SQL> col value format a25SQL> SELECT name, value 2 FROM v$parameter 3 WHERE name like ‘os%’;NAME VALUE------------------------------ -------------------------os_roles FALSEos_authent_prefixSQL>

Starting Up the Oracle Instance:Get Parameter Values (5/5)
• You can also use the GUI tool in OEM to see the values of parameters.– The description shown in this tool is more elaborate than the
description you would see in the V$PARAMETER view.

Starting Up the Oracle Instance: Set Parameter Values (1/5)
• When you start up the instance, Oracle reads the parameter file and sets the value for the parameter. – For the parameters that are not specified in the parameter file, Oracle a
ssigns a default value.
– The parameters that are modified at instance start-up can be displayed by querying the V$PARAMETER view for a FALSE value in the ISDEFAULT column.• SQL> SELECT name, value
2 FROM v$parameter 3 WHERE isdefault = ‘FALSE’;
Starting Up the Oracle Instance: Set Parameter Values (2/5)
• Certain parameters can be changed dynamically by using the ALTER SESSION or ALTER SYSTEM command. – To identify such parameters, query the view V$PARAMETER.

Starting Up the Oracle Instance: Set Parameter Values (3/5)
• You can change the value of a parameter system-wide by using the ALTER SYSTEM command. – A value of DEFERRED or IMMEDIATE in the ISSYS_MODIFIABLE colum
n shows that the parameter can be dynamically changed by using the command ALTER SYSTEM.
• DEFERRED indicates that the change you make does not take effect until a new session is started.
– The existing sessions will use the current value.
• IMMEDIATE indicates that as soon as you change the value of the parameter, it is available to all sessions in the instance.
– A session can be a job or a task that Oracle manages. When you log in to the database by using SQL*Plus or any client tool, you start a session.
– Here is an example of modifying a parameter by using ALTER SYSTEM.• SQL> ALTER SYSTEM SET log_archive_dest = ‘/oracle/archive/DB01’;
– The following example will set the TIMED_STATISTICS parameter to TRUE for all future sessions.
• SQL> ALTER SYSTEM SET timed_statistics = TRUE DEFERRED;

Starting Up the Oracle Instance: Set Parameter Values (4/5)
• A value of TRUE in the ISSES_MODIFIABLE column indicates that the parameter can be changed by using ALTER SESSION. – When you change a parameter by using ALTER SESSION, the value o
f the parameter is changed only for that session. • When you start the next session, the parameter will have the original value
(the Oracle default, the value set in the parameter file, or the value set by ALTER SYSTEM).
– Here is an example of modifying a parameter by using ALTER SESSION:
• SQL> ALTER SESSION SET nls_date_format = ‘MM-DD-YYYY’;

Starting Up the Oracle Instance: Set Parameter Values (5/5)
• Using an SPFILE, the DBA has more flexibility as to when the parameter takes effect in the instance: in effect for the current instance only, in effect only after the instance is restarted, or is both in effect immediately and after the instance is restarted.– The following example changes the value of
MAX_DUMP_FILE_SIZE; this new value will take effect only after the instance is shut down and restarted:
• SQL> ALTER SYSTEM SET MAX_DUMP_FILE_SIZE=20000 SCOPE=SPFILE;
– The other two options for the SCOPE clause are MEMORY (for the life of the current instance only) and BOTH (for the current instance and across shutdown and restart).
• The default is BOTH.

Managing Sessions (1/8)
• Oracle starts a session when a database connection is made. – The session is available as long as the user is connected to the
database.
– When a session is started, Oracle allocates a session ID to that session.
– To display the user sessions connected to a database, query the view V$SESSION.
• In V$SESSION, the session identifier (SID) and the serial number (SERIAL#) uniquely identify each session.
– The serial number guarantees that session-level commands are applied to the correct session objects if the session ends and another session begins with the same session ID.

Managing Sessions (2/8)
• The V$SESSION view contains a lot of information about a session. – The username, machine name, program name, status, and login time ar
e a few of the useful pieces of information in this view.
– For example, if you need to know which users are connected to the database and the program they are running, execute the following query.• SQL> SELECT username, program
2 FROM v$session;
Managing Sessions (3/8)
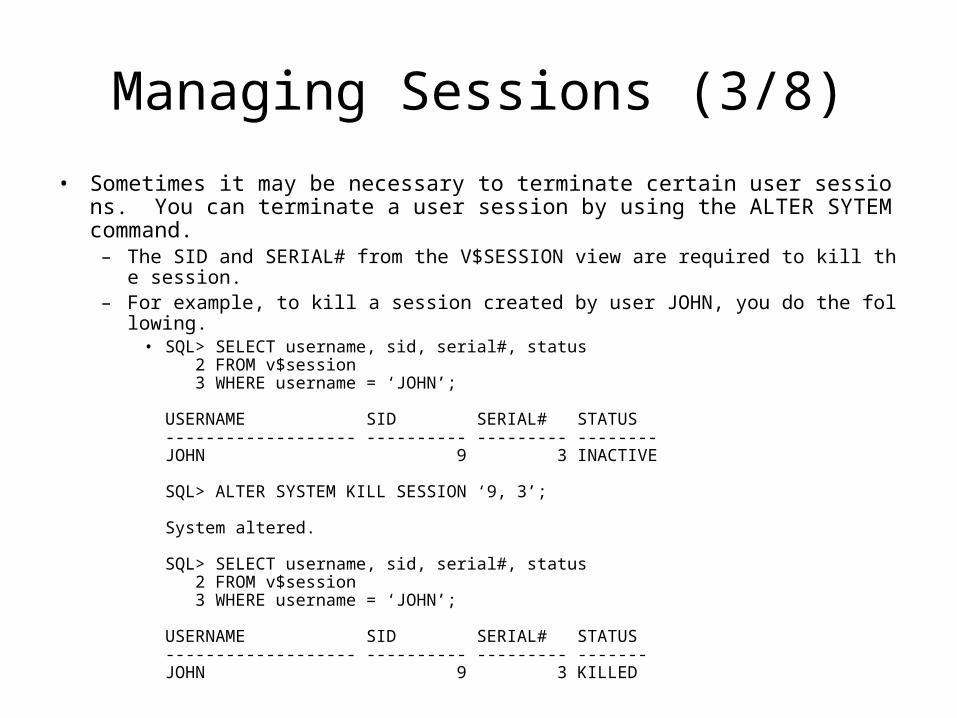
• Sometimes it may be necessary to terminate certain user sessions. You can terminate a user session by using the ALTER SYTEM command.
– The SID and SERIAL# from the V$SESSION view are required to kill the session. – For example, to kill a session created by user JOHN, you do the following.
• SQL> SELECT username, sid, serial#, status 2 FROM v$session 3 WHERE username = ‘JOHN’;
USERNAME SID SERIAL# STATUS------------------- ---------- --------- --------JOHN 9 3 INACTIVE
SQL> ALTER SYSTEM KILL SESSION ‘9, 3’;
System altered.
SQL> SELECT username, sid, serial#, status 2 FROM v$session 3 WHERE username = ‘JOHN’;
USERNAME SID SERIAL# STATUS------------------- ---------- --------- -------JOHN 9 3 KILLED

Managing Sessions (4/8)
• When you kill a session, first Oracle terminates the session to prevent the session from executing any more SQL statements. – If any SQL statement is in progress when the session is terminated, the
statement is terminated, and all changes are rolled back.
– The locks and other resources used by the session are also released.

Managing Sessions (5/8)
• If you kill an INACTIVE session, Oracle terminates the session and marks the status in the V$SESSION view as KILLED. – When the user subsequently tries to use the session, an error is returned
to the user, and the session information is removed from V$SESSION.

Managing Sessions (6/8)
• If you kill an ACTIVE session, Oracle terminates the session and issues an error message immediately to the user that the session is killed. – If Oracle cannot release the resources held by the session in 60
seconds, Oracle returns a message to the user that the session has been marked for kill. The status in the V$SESSION view will again show as KILLED.

Managing Sessions (7/8)
• If you want the user to complete the current transaction and then terminate their session, you can use the DISCONNECT SESSION option of the ALTER SYSTEM command. – If the session has no pending or active transactions, this command has
the same effect as KILL SESSION.
– Here is an example:• ALTER SYSTEM DISCONNECT SESSION ‘9,3’
POST_TRANSACTION;

Managing Sessions (8/8)
• You can also use the IMMEDIATE clause with the KILL SESSION or DISCONNECT SESSION to roll back ongoing transactions, release all session locks, recover the entire session state, and return control to you immediately.– Here are some examples:
• ALTER SYSTEM DISCONNECT SESSION ‘9,3’ IMMEDIATE;
• ALTER SYSTEM KILL SESSION ‘9,3’ IMMEDIATE;

Shutting Down the Oracle Instance (1/3)
• Similar to the stages in starting up a database, there are three stages to shutting down a database. – First, you close the database, then the instance dismounts the database,
and finally you shut down the instance.

Shutting Down the Oracle Instance (2/3)
• When closing the database, Oracle writes the redo buffer to the redo log files and the changed data in the database buffer cache to the data files, and closes the data files and redo log files. – The control file remains open, but the database is not available for normal
operations.
• After closing the database, the instance dismounts the database. – The control file is closed at this time. The memory allocated and the
background processes still remain.
• The final stage is the instance shutdown. – The SGA is removed from memory and the background processes are
terminated when the instance is shut down.

Shutting Down the Oracle Instance (3/3)
• To initiate a database shutdown, you can use the SHUTDOWN command in SQL*Plus or use the Instance branch of the OEM GUI tool. – You need to connect to the database by using a dedicated server
process with an account that has SYSDBA privileges to shut down the database.
– Once the shutdown process is initiated, no new user sessions are allowed to connect to the database.

Shutting Down the Oracle Instance: SHUTDOWN NORMAL
• When you use the SHUTDOWN command without any options, the default option is NORMAL.
• When you issue SHUTDOWN NORMAL, Oracle does the following:– Does not allow any new user connections.
– Waits for all users to disconnect from the database. All connected users can continue working.
– Closes the database, dismounts the instance, and shuts down the instance once all users are disconnected from the database.

Shutting Down the Oracle Instance: SHUTDOWN IMMEDIATE
• You use SHUTDOWN IMMEDIATE to bring down the database as quickly as possible.
• When you issue SHUTDOWN IMMEDIATE, Oracle does the following:– Does not allow any new user connections
– Terminates all user connections to the database
– Rolls back uncommitted transactions
– Closes the database, dismounts the instance, and shuts down the instance

Shutting Down the Oracle Instance: SHUTDOWN TRANSACTIONAL
• You use SHUTDOWN TRANSACTIONAL to bring down the database as soon as the users complete their current transaction. – This is a mode that fits between IMMEDIATE and NORMAL.
• When you issue SHUTDOWN TRANSACTIONAL, Oracle does the following:– Does not allow any new user connections.– Does not allow any new transactions in the database. When a user tries to
start a new transaction, the session is disconnected.
– Waits for the user to either roll back or commit any uncommitted transactions.
– Closes the database, dismounts the instance, and shuts down the instance once all transactions are complete.


Shutting Down the Oracle Instance: SHUTDOWN ABORT
• When any of the other three shutdown options does not work, you can bring down the database abruptly by using the SHUTDOWN ABORT command. – An instance recovery is needed when you start up the database next time.
• When you issue SHUTDOWN ABORT, Oracle does the following:– Terminates all current SQL statements that are being processed
– Disconnects all connected users
– Terminates the instance immediately
– Will not roll back uncommitted transactions
• When the database is started up after a SHUTDOWN ABORT, Oracle has to roll back the uncommitted transactions by using the online redo log files.

Instance Messages and Instance Alerts (1/4)
• Oracle writes informational messages and alerts to different files depending on the type of message. – These messages are useful when you’re troubleshooting a problem.
• Oracle writes to these files in locations that are specific to the operating system; you can specify the locations in the initialization parameters. – You alter these parameters by using the ALTER SYSTEM command.
Instance Messages and Instance Alerts (2/4)
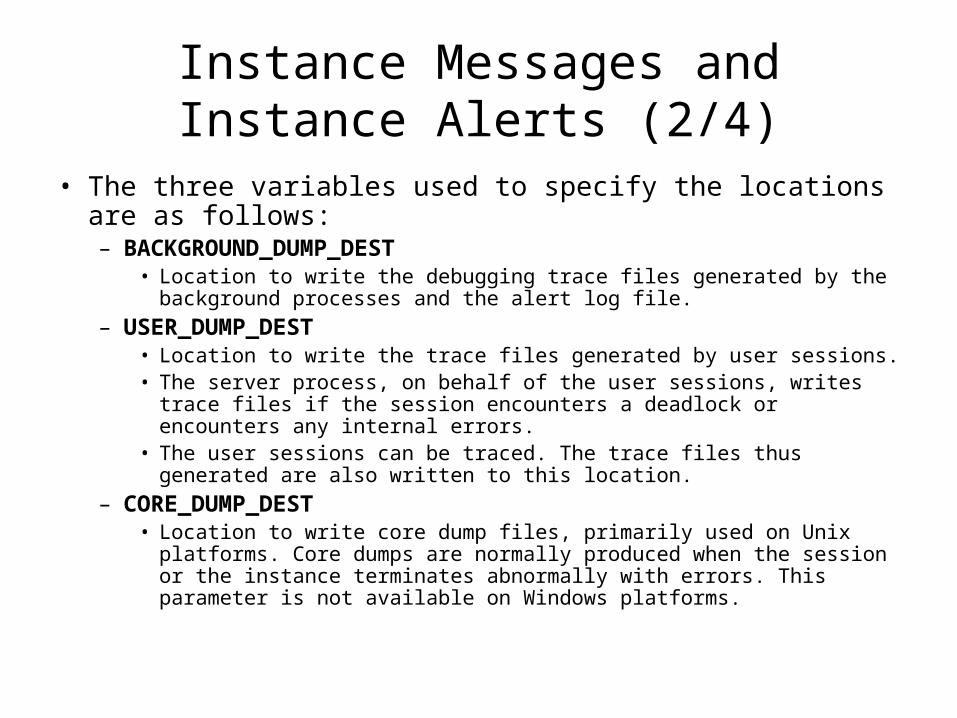
• The three variables used to specify the locations are as follows:– BACKGROUND_DUMP_DEST
• Location to write the debugging trace files generated by the background processes and the alert log file.
– USER_DUMP_DEST • Location to write the trace files generated by user sessions.• The server process, on behalf of the user sessions, writes trace files if the
session encounters a deadlock or encounters any internal errors. • The user sessions can be traced. The trace files thus generated are also
written to this location.
– CORE_DUMP_DEST • Location to write core dump files, primarily used on Unix platforms. Core
dumps are normally produced when the session or the instance terminates abnormally with errors. This parameter is not available on Windows platforms.

Instance Messages and Instance Alerts (3/4)
• All databases have an alert log file. – An alert log file in the directory specified by BACKGROUND_DUMP
_DEST logs significant database events and messages.
– The alert log stores information about block corruption errors, internal errors, and the non-default initialization parameters used at instance start-up.
– The alert log also records information about database start-up, shutdown, archiving, recovery, tablespace modifications, rollback segment modifications, and data file modifications.

Instance Messages and Instance Alerts (4/4)
• The alert log is a normal text file. Its filename depends on the operating system. – For Unix platforms, it takes the format alert_<SID>.log (SID is the
instance name).
• During the start-up of the database, if the alert log file is not available, Oracle creates one.
• This file grows slowly, but without limit, so you might want to delete or archive it periodically. – You can delete the file even when the database is running.

Oracle Managed Files (OMF) (1/5)
• In previous versions of the Oracle Server, maintaining the physical operating system files associated with logical database objects was problematic.– Dropping a logical database object (such as a tablespace) did not delete
the associated operating system file, and therefore an extra step was performed to manually delete the files formerly associated with database objects.

Oracle Managed Files (OMF) (2/5)
• The Oracle Managed Files (OMF) feature of Oracle9i addresses this issue.– You can use two new initialization parameters to define the location of
files in the operating system: DB_CREATE_FILE_DEST and DB_CREATE_ONLINE_LOG_DEST_n.

Oracle Managed Files (OMF) (3/5)
• The parameter DB_CREATE_FILE_DEST specifies the default location for new datafiles. – The actual operating system file is created with the prefix ora_ and a su
ffix of .dbf.
• If the CREATE DATABASE command (or any other commands that use the OMF initialization parameters) fails, the associated data files are removed from the server file system.

Oracle Managed Files (OMF) (4/5)
• The parameter DB_CREATE_ONLINE_LOG_DEST_n specifies as many as five locations for online redo log files and control files. – The online redo log files have a suffix of .log, and the control files hav
e a suffix of .ctl.
Oracle Managed Files (OMF) (5/5)
• You don’t have to use both parameters, and you can dynamically change the values of these parameters with the ALTER SYSTEM command.