broadband dsl quick start set up guide - lumos networks · 1 what’s in the box • 2 dsl filters...
TRANSCRIPT
Broadband DSL Quick Start Set Up Guide
Index
What’s in the box? . . . . . . . . . . . . . . . . . . . . . . . . . . . . . 1
Applying the DSL filters . . . . . . . . . . . . . . . . . . . . . . . . . 2
What devices must be filtered . . . . . . . . . . . . . . . . . . . . 3
Connecting the DSL modem . . . . . . . . . . . . . . . . . . . 3-7
Connecting a computer . . . . . . . . . . . . . . . . . . . . . . . . . 8
Setting up a computer . . . . . . . . . . . . . . . . . . . . . . . . 9-11
Troubleshooting . . . . . . . . . . . . . . . . . . . . . . . . . . . . 12-13
Notes . . . . . . . . . . . . . . . . . . . . . . . . . . . . . . . . . . . . . . . .14
1
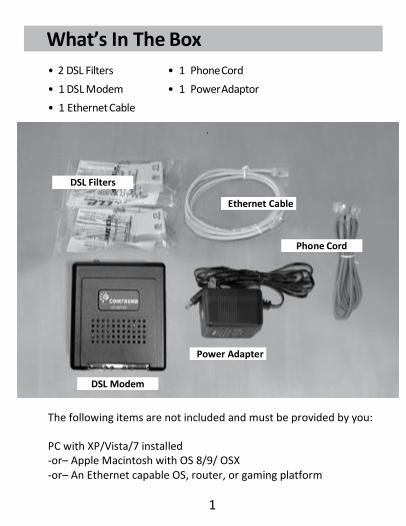
What’s In The Box
• 2 DSL Filters • 1 Phone Cord
• 1 DSL Modem • 1 Power Adaptor
• 1 Ethernet Cable
The following items are not included and must be provided by you:
PC with XP/Vista/7 installed -or– Apple Macintosh with OS 8/9/ OSX -or– An Ethernet capable OS, router, or gaming platform
.
DSL Filters
Ethernet Cable
Phone Cord
DSL Modem
Power Adapter
2
• Internet Browser (ie. Internet Explorer, Mozilla Firefox, Safari or Google Chrome)
• TCP/IP Installed
• An Ethernet card must be installed in your computer prior to DSL Modem installation and computer configuration unless you plan to use a USB connection. Please see section ‘Connecting a Computer’ for USB System requirements and installation instructions.
If you are missing any of the above items, please call Lumos Networks Customer Care at 888-553-6454
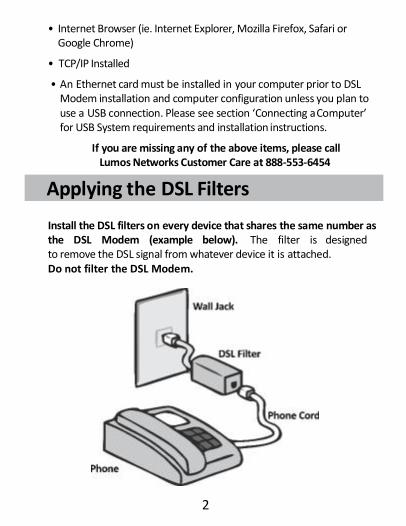
Applying the DSL Filters
Install the DSL filters on every device that shares the same number as the DSL Modem (example below). The filter is designed to remove the DSL signal from whatever device it is attached. Do not filter the DSL Modem.
3
What devices must be filtered?
Phones (*See below for wall phones) • Dial-up Modems • Cordless Phone Base Stations • Satellite TV/Tivo® Systems • Caller ID Units • Meter Readers • Answering Machines • All other devices that • Security System use the same number as • Fax Machines the DSL Modem
If you need a wall mount filter call Lumos Networks Customer Care at 888-553-6454.
The wall mount filter may need to be installed by security provider/professional.
Steps to install the DSL Filters. 1. Disconnect the phone cord from the wall jack 2. Connect the DSL filter to the wall jack 3. Connect the phone cord into the DSL filter 4. Repeat steps 1-3 for additional devices that must be filtered
(see above)
* DO NOT FILTER THE DSL MODEM *
If you need additional DSL filters call Lumos Networks Customer Care at 888-553-6454.
Connecting the DSL Modem
Connect the DSL Modem directly to a working wall jack on the DSL line using the phone cord included with the DSL Modem. Avoid us- ing a standard phone cord that is longer than 8 feet .
4
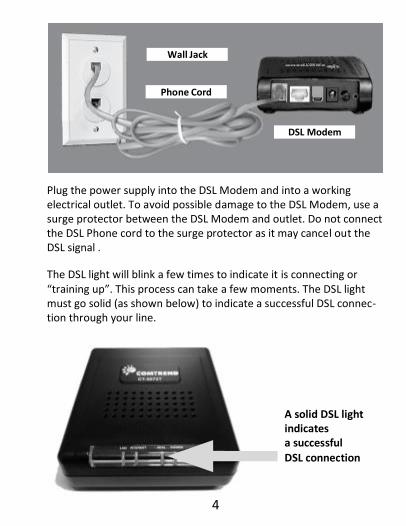
Plug the power supply into the DSL Modem and into a working electrical outlet. To avoid possible damage to the DSL Modem, use a surge protector between the DSL Modem and outlet. Do not connect the DSL Phone cord to the surge protector as it may cancel out the DSL signal .
The DSL light will blink a few times to indicate it is connecting or “training up”. This process can take a few moments. The DSL light must go solid (as shown below) to indicate a successful DSL connec- tion through your line.
Wall Jack
Phone Cord
DSL Modem
A solid DSL light indicates a successful
DSL connection
5
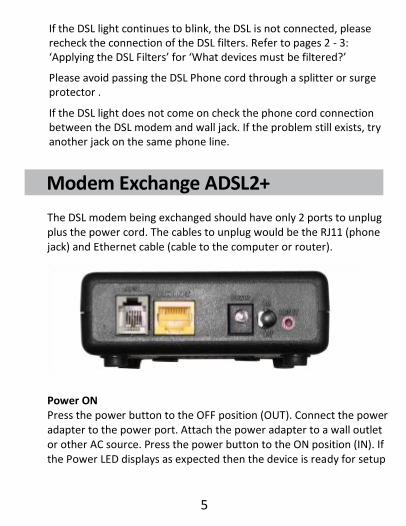
If the DSL light continues to blink, the DSL is not connected, please recheck the connection of the DSL filters. Refer to pages 2 - 3: ‘Applying the DSL Filters’ for ‘What devices must be filtered?’
Please avoid passing the DSL Phone cord through a splitter or surge protector .
If the DSL light does not come on check the phone cord connection between the DSL modem and wall jack. If the problem still exists, try another jack on the same phone line.
Modem Exchange ADSL2+ The DSL modem being exchanged should have only 2 ports to unplug plus the power cord. The cables to unplug would be the RJ11 (phone jack) and Ethernet cable (cable to the computer or router).
Power ON Press the power button to the OFF position (OUT). Connect the power adapter to the power port. Attach the power adapter to a wall outlet or other AC source. Press the power button to the ON position (IN). If the Power LED displays as expected then the device is ready for setup
6
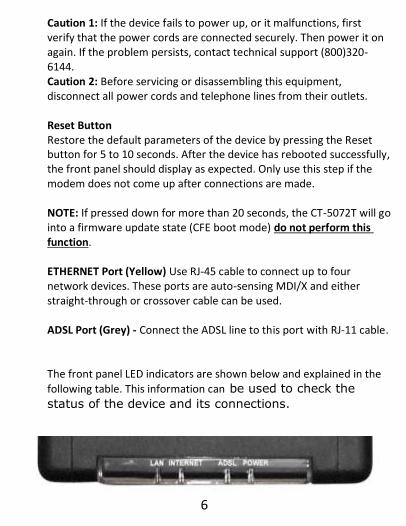
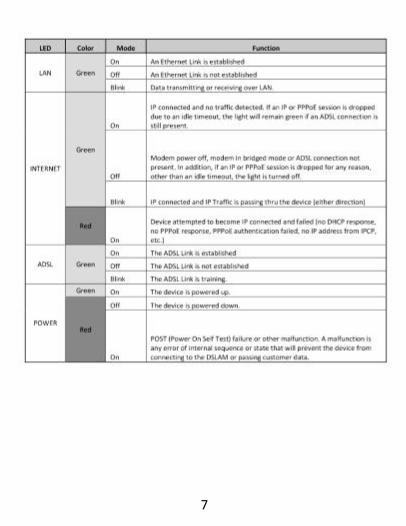
Caution 1: If the device fails to power up, or it malfunctions, first verify that the power cords are connected securely. Then power it on again. If the problem persists, contact technical support (800)320-6144. Caution 2: Before servicing or disassembling this equipment, disconnect all power cords and telephone lines from their outlets. Reset Button Restore the default parameters of the device by pressing the Reset button for 5 to 10 seconds. After the device has rebooted successfully, the front panel should display as expected. Only use this step if the modem does not come up after connections are made. NOTE: If pressed down for more than 20 seconds, the CT-5072T will go into a firmware update state (CFE boot mode) do not perform this function. ETHERNET Port (Yellow) Use RJ-45 cable to connect up to four network devices. These ports are auto-sensing MDI/X and either straight-through or crossover cable can be used. ADSL Port (Grey) - Connect the ADSL line to this port with RJ-11 cable. The front panel LED indicators are shown below and explained in the
following table. This information can be used to check the
status of the device and its connections.
7
8
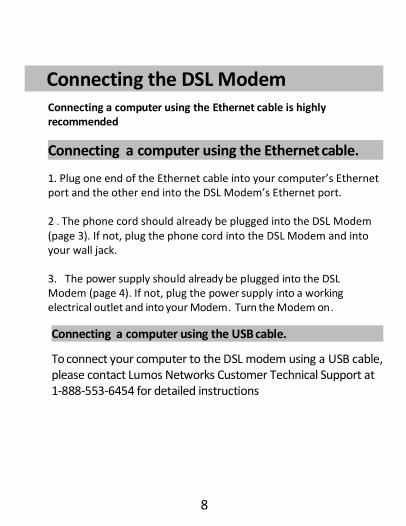
Connecting the DSL Modem Connecting a computer using the Ethernet cable is highly recommended
Connecting a computer using the Ethernet cable.
1. Plug one end of the Ethernet cable into your computer’s Ethernet port and the other end into the DSL Modem’s Ethernet port.
2 . The phone cord should already be plugged into the DSL Modem (page 3). If not, plug the phone cord into the DSL Modem and into your wall jack.
3. The power supply should already be plugged into the DSL Modem (page 4). If not, plug the power supply into a working electrical outlet and into your Modem . Turn the Modem on .
Connecting a computer using the USB cable.
To connect your computer to the DSL modem using a USB cable, please contact Lumos Networks Customer Technical Support at 1-888-553-6454 for detailed instructions
9
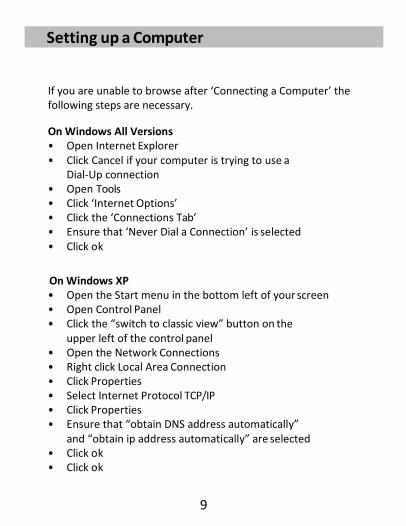
Setting up a Computer
If you are unable to browse after ‘Connecting a Computer’ the following steps are necessary.
On Windows All Versions • Open Internet Explorer • Click Cancel if your computer is trying to use a
Dial-Up connection • Open Tools • Click ‘Internet Options’ • Click the ‘Connections Tab’ • Ensure that ‘Never Dial a Connection’ is selected • Click ok
On Windows XP • Open the Start menu in the bottom left of your screen • Open Control Panel • Click the “switch to classic view” button on the
upper left of the control panel • Open the Network Connections • Right click Local Area Connection • Click Properties • Select Internet Protocol TCP/IP • Click Properties • Ensure that “obtain DNS address automatically”
and “obtain ip address automatically” are selected • Click ok • Click ok
10
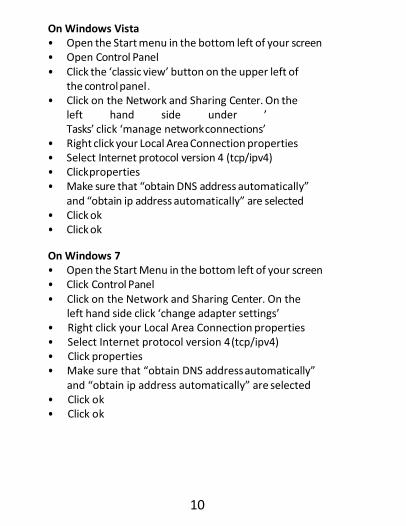
On Windows Vista • Open the Start menu in the bottom left of your screen • Open Control Panel • Click the ‘classic view’ button on the upper left of
the control panel . • Click on the Network and Sharing Center. On the
left hand side under ’ Tasks’ click ‘manage network connections’
• Right click your Local Area Connection properties • Select Internet protocol version 4 (tcp/ipv4) • Click properties • Make sure that “obtain DNS address automatically”
and “obtain ip address automatically” are selected • Click ok • Click ok
On Windows 7 • Open the Start Menu in the bottom left of your screen • Click Control Panel • Click on the Network and Sharing Center. On the
left hand side click ‘change adapter settings’ • Right click your Local Area Connection properties • Select Internet protocol version 4 (tcp/ipv4) • Click properties • Make sure that “obtain DNS address automatically”
and “obtain ip address automatically” are selected • Click ok • Click ok
11
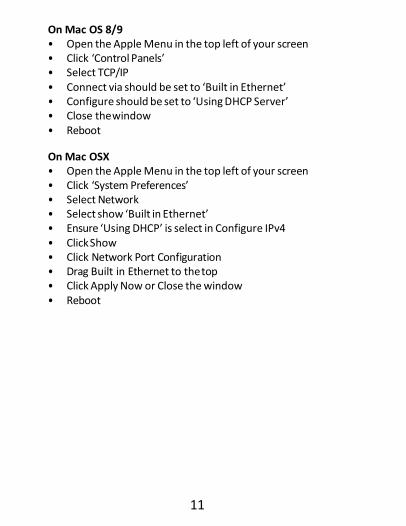
On Mac OS 8/9 • Open the Apple Menu in the top left of your screen • Click ‘Control Panels’ • Select TCP/IP • Connect via should be set to ‘Built in Ethernet’ • Configure should be set to ‘Using DHCP Server’ • Close the window • Reboot
On Mac OSX • Open the Apple Menu in the top left of your screen • Click ‘System Preferences’ • Select Network • Select show ‘Built in Ethernet’ • Ensure ‘Using DHCP’ is select in Configure IPv4 • Click Show • Click Network Port Configuration • Drag Built in Ethernet to the top • Click Apply Now or Close the window • Reboot
12
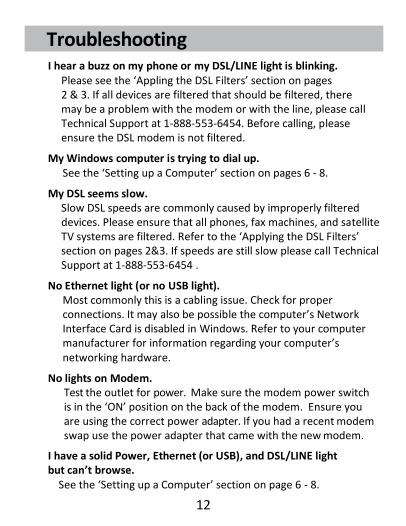
Troubleshooting I hear a buzz on my phone or my DSL/LINE light is blinking.
Please see the ‘Appling the DSL Filters’ section on pages 2 & 3. If all devices are filtered that should be filtered, there may be a problem with the modem or with the line, please call Technical Support at 1-888-553-6454. Before calling, please ensure the DSL modem is not filtered.
My Windows computer is trying to dial up. See the ‘Setting up a Computer’ section on pages 6 - 8.
My DSL seems slow. Slow DSL speeds are commonly caused by improperly filtered devices. Please ensure that all phones, fax machines, and satellite TV systems are filtered. Refer to the ‘Applying the DSL Filters’ section on pages 2&3. If speeds are still slow please call Technical Support at 1-888-553-6454 .
No Ethernet light (or no USB light). Most commonly this is a cabling issue. Check for proper connections. It may also be possible the computer’s Network Interface Card is disabled in Windows. Refer to your computer manufacturer for information regarding your computer’s networking hardware.
No lights on Modem. Test the outlet for power. Make sure the modem power switch is in the ‘ON’ position on the back of the modem. Ensure you are using the correct power adapter. If you had a recent modem swap use the power adapter that came with the new modem.
I have a solid Power, Ethernet (or USB), and DSL/LINE light but can’t browse.
See the ‘Setting up a Computer’ section on page 6 - 8.
13
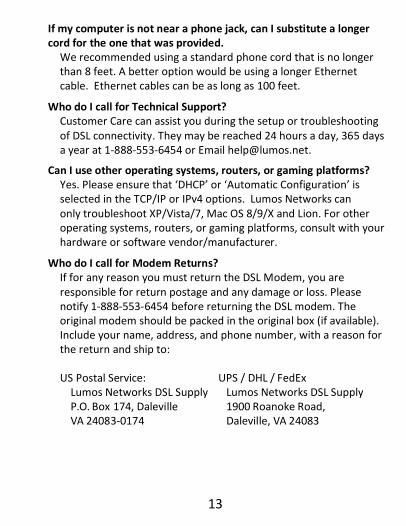
If my computer is not near a phone jack, can I substitute a longer cord for the one that was provided.
We recommended using a standard phone cord that is no longer than 8 feet. A better option would be using a longer Ethernet cable. Ethernet cables can be as long as 100 feet.
Who do I call for Technical Support? Customer Care can assist you during the setup or troubleshooting of DSL connectivity. They may be reached 24 hours a day, 365 days a year at 1-888-553-6454 or Email [email protected].
Can I use other operating systems, routers, or gaming platforms? Yes. Please ensure that ‘DHCP’ or ‘Automatic Configuration’ is selected in the TCP/IP or IPv4 options. Lumos Networks can only troubleshoot XP/Vista/7, Mac OS 8/9/X and Lion. For other operating systems, routers, or gaming platforms, consult with your hardware or software vendor/manufacturer.
Who do I call for Modem Returns? If for any reason you must return the DSL Modem, you are responsible for return postage and any damage or loss. Please notify 1-888-553-6454 before returning the DSL modem. The original modem should be packed in the original box (if available). Include your name, address, and phone number, with a reason for the return and ship to:
US Postal Service: UPS / DHL / FedEx Lumos Networks DSL Supply Lumos Networks DSL Supply P.O. Box 174, Daleville 1900 Roanoke Road, VA 24083-0174 Daleville, VA 24083
14
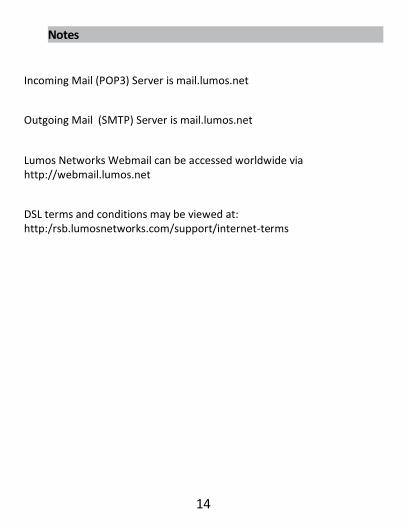
Notes
Incoming Mail (POP3) Server is mail.lumos.net
Outgoing Mail (SMTP) Server is mail.lumos.net
Lumos Networks Webmail can be accessed worldwide via http://webmail.lumos.net
DSL terms and conditions may be viewed at: http:/rsb.lumosnetworks.com/support/internet-terms