appendix h: city battles time of war: realm of the beasts ... · appendix h: city battles time of...
TRANSCRIPT

Appendix H: City Battles
Time of War: Realm of the Beasts & Shadow
Stormcast & Clan Pestilence Progressions
2
Not every battle takes place on a nice, tidy battlefield. Some battles take place inside of
the city walls, where the crowded streets and tight alleyways are things that you will have
to navigate in order to achieve victory.
When fighting in a city, the table will need to have a lot of terrain on it. Maneuvering
through a crowded city is not easy, and can also be a nuisance for gamers. However, you
will find that if you have the patience and the terrain to set a city battle up that it will be
one of the more challenging and visually rewarding games that you may ever do.
It Takes a City
(the following is paraphrased from the General’s Compendium, a supplement released by
Games Workshop in 2002)
Let’s face it. City sacking is an advanced game that requires a lot of terrain. There are probably very few players out there who have amassed the number of buildings required to build a single street – much less three or four! That makes this type of scenario ideal for a gaming group or club who can plan ahead and divvy up the workload. One well planned afternoon of putting together as many buildings as possible can turn a plain field into an urban city in a hurry.
Don’t overlook easy additions to your city like card buildings.
Additionally there are a host of modern companies today that produce fantasy or middle
ages styled buildings that you can add to your collection in a pinch, though those will cost
some money.
http://www.4ground.co.uk/
http://www.tabletop-world.com/
http://www.dwarvenforge.com/
http://www.warlordgames.com/

3
Using a City Fight
A city fight scenario could be played whenever you and your group find it appropriate to
have a battle within a city. A good time to do this may be after the city walls have fallen
during a siege, adding an additional game to taking the city. Another time to play one of
these scenarios would be if a city has been offered up as a tile and it is decided the walls
have fallen already, the gates are open, or there are no walls in the first place!
Really there is no hard and fast rule on when to fight within a city. The default situation
will be to add on to a siege of a city for after the walls have fallen to take the interior of the
city itself.
This could be expanded to cover multiple city scenarios as the invading force moves
within the city and culminates perhaps at a last stand in the town square, or even a
dungeon style battle within an important building between two heroes and their forces!
City battles feature key buildings on the table. These key buildings are what the
defenders are trying to preserve, while the attackers are trying to set them ablaze and/or
sack them!
Key Buildings - Military
The defender generates the buildings that are key and labels them appropriately by
rolling a D6.
Stables - 1
This is where riding beasts are kept and sheltered. Every three turns the defender may
generate a minimum sized cavalry unit from this building.
Barracks - 2
This is where troops sleep, eat, and gather. Every three turns the defender may generate a
minimum sized infantry unit of models from this building.
City Watch - 3
The night watch are quartered here. They are not as well equipped as regular infantry but
are still very useful in battle. Every three turns the defending player may generate a
minimum sized CORE unit. Refer to Azyr Comp for a list of CORE units.
City Keep - 4
If a city has a central keep, this is where the elite guard, monsters, and war machines are
kept.

4
Every three turns the defender may generate a monster or warmachine from this building.
Warehouse - 5
A warehouse is where goods and equipment are stored. Warehouses are often worth
bonus points if they are held, as their contents are vital to the war effort.
Player’s Choice – 6
Key Buildings – Rally Points
Tavern or Pub - 1
All defending units within 6” of the pub are immune to any form of morale penalty from
any of the attacker’s abilities. Additionally, when making Battleshock Tests within 6” of a
pub, the defending player may re-roll the result if they wish.
Armory - 2
This is where a good deal of arms and armor are stored. Any unit (defending or
attacking) that spends a full turn within 3” of the building and does nothing else that turn
(moving, shooting, fighting, spellcasting, etc) may take items from the armory.
The unit may choose one of the following effects (note units may only ever take one of
these)
Polearms – add 1” to the reach of their weapon
Additional hand weapon – add +1 attack to their weapon. May not use shield
bonuses that turn
Heavy armor – unit may add +1 to their save rolls for the duration of the game
Heater Shields – unit may re-roll any save results of a 1
Temple - 3
Temples are structures dedicated to the gods of the realms. They provide great morale
boosts to their people.
Any defending unit within 3” of their temple do not need to take Battleshock tests.
Additionally, if a defending unit spends an entire turn within 3” of a temple doing nothing
at all (moving, shooting, fighting, spellcasting, etc) then they will heal a wound on the roll
of a 4+. This can bring back dead warriors.
Monument - 4
Monuments of heroes, symbols of statehood, these provide inspiration and courage.
5
Any defending unit within 6” of a monument may re-roll any to-hit or to-wound rolls of a
1.
Brothel - 5
These stations of comfort provide inspiration to the soldiers, and enable them to fight
better just by being in the presence of such lovely creatures.
Any defending units within 6” of a brothel may add +1 to their To-Hit rolls.
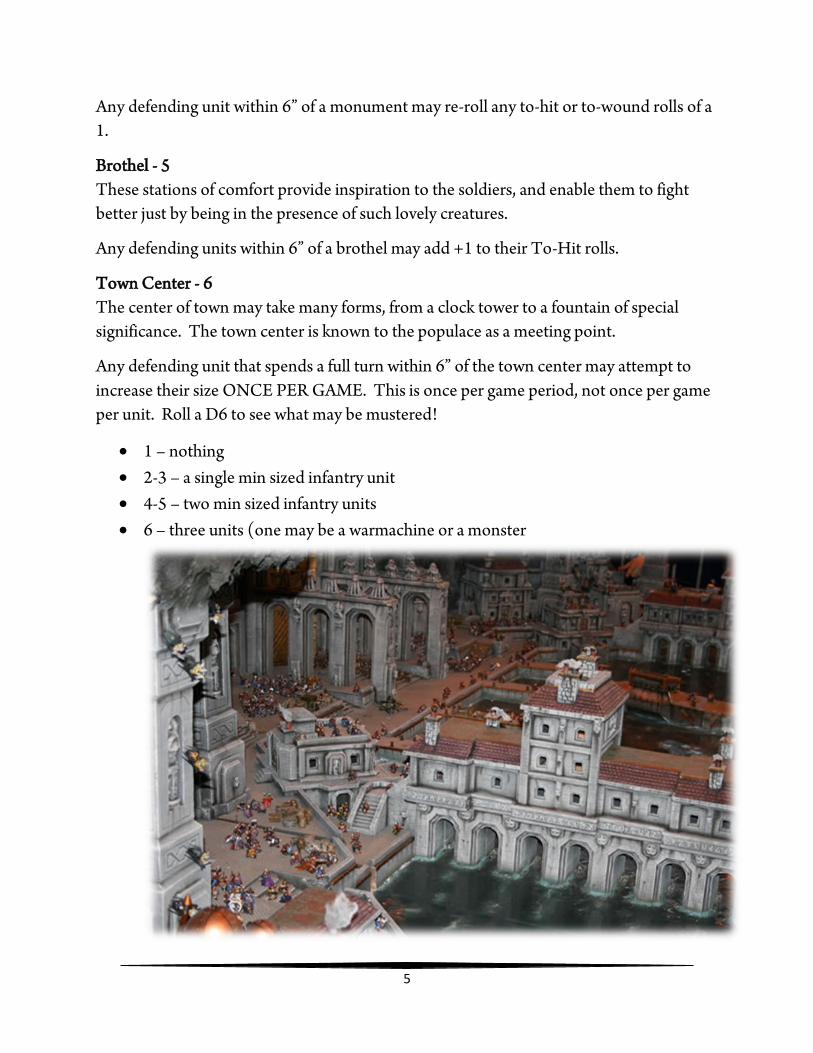
Town Center - 6
The center of town may take many forms, from a clock tower to a fountain of special
significance. The town center is known to the populace as a meeting point.
Any defending unit that spends a full turn within 6” of the town center may attempt to
increase their size ONCE PER GAME. This is once per game period, not once per game
per unit. Roll a D6 to see what may be mustered!
1 – nothing
2-3 – a single min sized infantry unit
4-5 – two min sized infantry units
6 – three units (one may be a warmachine or a monster

6
Battle in the Streets
This scenario describes a Warhammer battle in a large city. The attackers must choose between fighting the enemy or setting buildings ablaze, while the defenders must react before their city goes up in flames.
Objective
The attacking player’s objective is to destroy or set fire to as much of the city as possible.
Particularly the key buildings that the defender is using to gather and rally their defense!
In order to save the city from destruction, the defender must try to eliminate the attacker!
The Battlefield
The table is set up with streets and buildings. There should be a lot of terrain on the table
forming a city. All of the buildings have the same statistics (7 wounds and a 2+ save).
The defender nominates five of these buildings to represent key points (two military and
three rally points) – rolling them randomly.
Deployment
Troops from both sides stagger into the battle from other areas of the city.
First, the attacking player places up to three UNITS (not heroes, warmachines, or
monsters) in their deployment zone. Their deployment zone is a short table edge up to
6” in.
Second, the defender places any five units anywhere on the table (not heroes,
warmachines, or monsters) but not within 18” of the attacker.
Third, the attacking player may place ONE unit as scouts set up up to 18” in from their
table edge but not closer than 12” from an enemy unit.
The game then begins. At the start of each player’s turn they may bring in additional war
scrolls so long as they have them remaining on their army list. The attacker may bring up
to two units a turn and measure their movement starting from the board edge by their
deployment. The defender may bring in one unit at the start of their turn entering from
the opposite short table edge.
Special Rules
The attacker is attempting to set buildings on fire. All attacking units are armed with
torches. All attacking missile troops have flaming ammunition and all warmachines have
flaming ammunition.

7
It is possible to level a building in hand to hand combat but there is not a lot of time to do
such. Instead, torching the structures is quicker and much more thorough.
Any attack that normally uses flame to do damage sets a building on fire on a 4+
War machines that do not normally use flame to do damage will set a building on fire on a
5+.
Each flaming arrow or bolt will set a building on fire on the roll of a 6.
Torch armed models set a building on fire on the roll of a 6 (roll once for each torch
armed model in base contact with the structure)
Any model inside of a burning building takes a mortal wound on the roll of a 4+ during
both player’s Shooting Phases.
Buildings are either on fire or they are not on fire.
Quenching the Flames
Defenders may try to put out the flames. A model or unit that is attempting to put out
flames must be next to the structure and do nothing else that turn.
For every five models trying to put out the flames, roll a D6. The flames are extinguished
if any of the dice score a 6.
Buildings that are on fire need to be clearly marked. Buildings that are destroyed may be
moved across as if Dangerous Terrain.
Game Duration
10 turns
Victory Conditions
Divide the table into quarters. If a player has any models in a quarter and the other player
does not, that player scores a point. Slaying the enemy general is worth +1 point.
Attacker Only - Each building that has been destroyed or is on fire at the end of the game
is worth +1 point. Any of the Key Buildings are worth +2 points.
Defender Only – Each enemy unit destroyed is worth +1 point. Each Key Building that
survives the game and is not on fire at the end of the game is worth +2 points.
If the Defender wipes out the attacker completely, they win the scenario.

8
Time of War: Ghur, the Realm of Beasts
UNTAMED WILDS If you decide a game is taking place in Ghur, the Realm of Beasts, the following rules
apply:
Primal Fury
All monsters that fight within Ghur feel the compulsion to run wild and not heed the call
of any master. At the beginning of every HERO phase, the player whose turn it is must
make a Primal Fury roll for every monster in his force that is on the table. To make a
Primal Fury roll, the player rolls 2D6. If the total value equals or is less than the
BRAVERY score of the Monster, the check is passed. If the value exceeds the Bravery
score of the monster, then the monster has gone wild until the beginning of that player’s
next HERO phase.
9
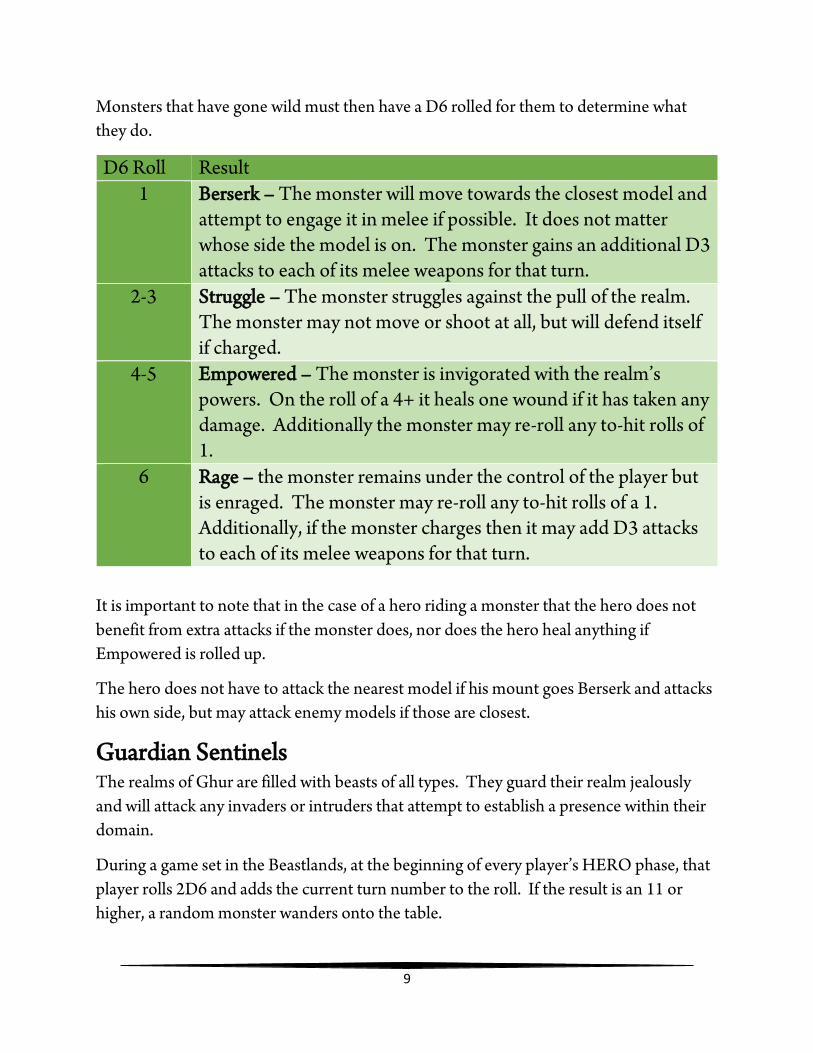
Monsters that have gone wild must then have a D6 rolled for them to determine what
they do.
D6 Roll Result 1 Berserk – The monster will move towards the closest model and
attempt to engage it in melee if possible. It does not matter whose side the model is on. The monster gains an additional D3 attacks to each of its melee weapons for that turn.
2-3 Struggle – The monster struggles against the pull of the realm. The monster may not move or shoot at all, but will defend itself if charged.
4-5 Empowered – The monster is invigorated with the realm’s powers. On the roll of a 4+ it heals one wound if it has taken any damage. Additionally the monster may re-roll any to-hit rolls of 1.
6 Rage – the monster remains under the control of the player but is enraged. The monster may re-roll any to-hit rolls of a 1. Additionally, if the monster charges then it may add D3 attacks to each of its melee weapons for that turn.
It is important to note that in the case of a hero riding a monster that the hero does not
benefit from extra attacks if the monster does, nor does the hero heal anything if
Empowered is rolled up.
The hero does not have to attack the nearest model if his mount goes Berserk and attacks
his own side, but may attack enemy models if those are closest.
Guardian Sentinels The realms of Ghur are filled with beasts of all types. They guard their realm jealously
and will attack any invaders or intruders that attempt to establish a presence within their
domain.
During a game set in the Beastlands, at the beginning of every player’s HERO phase, that
player rolls 2D6 and adds the current turn number to the roll. If the result is an 11 or
higher, a random monster wanders onto the table.
10
The player chooses a non-ridden monster from his collection. The monster will arrive
from a random board edge. Roll a D6. On a 1, the monster arrives from the player’s
deployment zone. On the roll of a 2-3 the monster arrives on the left edge next to the
player’s deployment zone. On the roll of a 4-5 the monster arrives on the right edge next
to the player’s deployment zone. On the roll of a 6 the monster arrives from the
opponent’s table edge.
The monster may attempt to charge on the turn it arrives.
The monster will always go after the closest model regardless of which side owns the
model.
Spells of Ghur Any wizard fighting in the realms of Ghur may add Charm Beast to their spell list. The spell may be used
on any neutral monster that has arrived on the table within 18” of the caster. The casting value of Charm
Beast is an 8+. This spell can be used by opposing wizards to steal control over a charmed monster as
well.
Any wizard fighting in the realms of Ghur may also add Transformation of Ghur to their spell list. This
spell may be used on the caster and is successful on the roll of a 7+. If successful, the caster is
transformed into an unridden monster. This spell lasts until the beginning of the caster’s next HERO
phase.
The caster takes on all characteristics of the monster and loses any of his own, to include enhanced
wounds. The caster may transform himself into a creature of up to 10 wounds.
If the caster rolls a 10+, then he may transform himself into a creature of up to 14 wounds.
However, if the caster takes more damage than his original wounds value would allow, then when the
spell expires the caster will also expire and be removed as a casualty.
Last, the wizard knows Amber Spear which has a casting value of 8+. An enemy unit is hit once for every
five models in the unit. Each hit inflicts D3 mortal wound on the roll of a 4+. If the wizard rolls a 10+
when casting this spell, the hits instead do D6 mortal wounds on the roll of a 4+.
Victorious Rewards
Players who are victorious within the Realm of Beasts may nominate a monster in their
force that survived the battle. That monster may re-roll all of their hits or wounds once in
their next game at the player’s discretion.

11
Time of War: Ulgu, the Realm of Shadow
THE DEEPENED GLOAM If you are fighting a battle within Ulgu, the Realm of Shadows, then you can use the
following Time of War rules to represent that dark and secret place.
Eternal Twilight
The lands of Ulgu are bathed in the shadows of perpetual dark, and the blackness makes
visibility a poor thing indeed.
At the beginning of each HERO phase, the controlling player rolls 4D6. The total value is
the maximum line of sight distance that any model in his army has for the duration of his
turn.
12
Additionally, any terrain feature provides a bonus +1 to saves in addition to any other
save bonuses that the terrain may offer.
Nightmare Landscapes
The folk that dwell amidst the nightmare landscapes of the Shadow Realms are exposed
to all manner of horrors. All Bravery scores are reduced by -1 while within Ulgu.
Divine Favor Priests know the prayer “Divine Favor”. The prayer may be cast as one of the prayers that
the priest already knows. The priest rolls a D6. On the roll of a 2+, any friendly unit
within 18” of him has their Bravery score restored to normal from the effects of the
Nightmare Landscapes as their god’s presence fills them with courage and fortitude. On
the roll of a 1 the priest is racked by nightmarish forces that steal away a part of his spirit.
The priest suffers a mortal wound and his to-hit and to-wound scores are increased by
one, to a maximum of 6+.
Spells of the Shadow Realm Wizards learn the following spells from the shadow realm. Casting these spells is not
without its dangers, however. A miscast while attempting to cast Shadow Magic will
lower the wizard’s movement, saves, and all to-hit and to-wound rolls by 1 (to a minimum
of 1” movement, 6+ save, and 6+ to-hit and to-wound)
Mystifying Miasma – cast on a 7+ - the target’s movement, to-hit, or to-wound stat is
worsened by D3 until the beginning of the caster’s next HERO phase. If cast on a 10+
then all of the stats listed above are affected.
Steed of Shadows – cast on a 5+ - a friendly model gains the FLY special rule and a
movement of 10” until the wizard’s next HERO phase.
Pit of Shades – cast on a 9+ - measure out 18”. All models under the line must make a
save or be removed as a casualty.
Victorious Rewards Commanders who win a battle on the Realm of Shadows may nominate one of their units
that participated in the battle that did not fall. That unit is immune to Battleshock in
their next battle, as they have overcome the terrors of the realm of shadows.
13
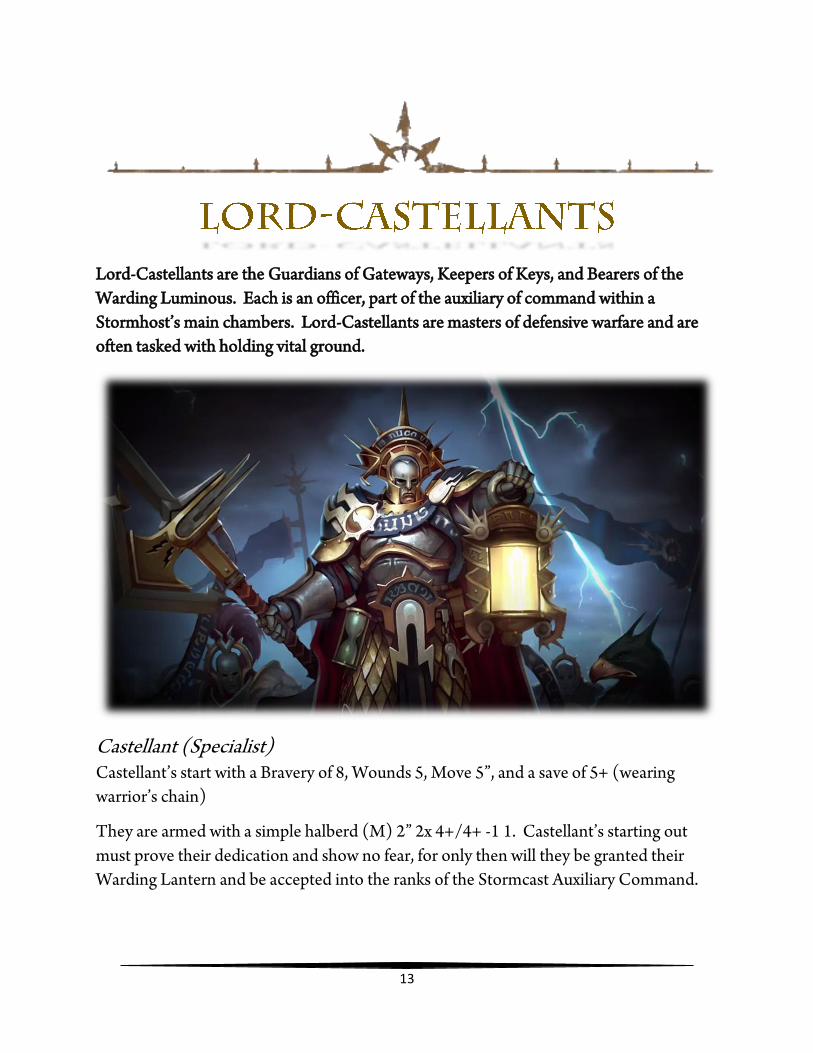
Lord-Castellants are the Guardians of Gateways, Keepers of Keys, and Bearers of the
Warding Luminous. Each is an officer, part of the auxiliary of command within a
Stormhost’s main chambers. Lord-Castellants are masters of defensive warfare and are
often tasked with holding vital ground.
Castellant (Specialist) Castellant’s start with a Bravery of 8, Wounds 5, Move 5”, and a save of 5+ (wearing
warrior’s chain)
They are armed with a simple halberd (M) 2” 2x 4+/4+ -1 1. Castellant’s starting out
must prove their dedication and show no fear, for only then will they be granted their
Warding Lantern and be accepted into the ranks of the Stormcast Auxiliary Command.
14
One-Star Castellant (Champion)
Champion Castellants may grant a +1 Bravery modifier to one unit within 3” of them at the start of the HERO phase
Gain +1 to-hit with halberd
Gain +1 to-wound with halberd
Gain 2 damage with halberd
Gain Inspiring Presence Command Ability
Gain warplate (4+ save)
Gain +1 Bravery (9)
Gain +1 melee attack with halberd (3x)
Two-Star Lord-Castellant (Hero)
Lord-Castellants are granted their Warding Lantern, granting them the ability from the warscroll.
Gain +1 wound (6)
Gain Sigmarite War Plate (3+ save)
Gain +1 melee attack with halberd (4x)
Gain a Gryph Hound companion
Gain Inspiring Beacon of Sigmar Command Ability – any friendly Stormcast
Eternal units within 12” of the model may re-roll Battleshock tests
Gain Guiding Hand of Sigmar Command Ability – all friendly Stormcast Eternal
units within 12” of the model. That unit may re-roll failed To-Hit rolls of 1.
Gain Sorcerous Unbinding ability. The Lord Castellant may unbind one enemy
spell per the rules for unbinding by shining forth his lantern upon an enemy
spellcaster.

15
Three-Star Lord-Castellant (Lord)
The Lord-Castellant’s Warding Lantern is imbued with greater power. At the beginning of the model’s HERO phase, on the roll of a 5+ the model may heal D3 wounds. This may not take the model’s wound total above their starting number of wounds.
Gain +1 wound (7)
Halberd upgraded to Sigmarite Halberd, same stats as the normal halberd except
that it does 3 damage against any model of CHAOS
Upgrade the Warding Lantern so that the Stormcast Eternal unit that is targeted
always heals one wound regardless of save roll
Uprade the Warding Lantern so that any CHAOS unit suffers D3 mortal wounds
Upgrade the Warding Lantern so that the Stormcast Eternal unit that is targeted
may ignore MORTAL WOUNDS on the roll of a 5+ (roll for each wound
separately)
Gain the Bindings of Sigmar Command Ability – a Stormcast Eternal unit within
12” may gain +1 to their saving rolls. The model may still choose a different unit
to use their Lantern on
Gain a second Gryph-Hound
Four-Star Lord-Castellant (Legend)
The Lord-Castellant is imbued with his faith and determination, gaining a permanent D3 wounds to his profile (giving him a total of 8-10 wounds on his profile).
May participate in the Lord-Castellant Quest Chain
Lord-Castellant Quest Chain Having obtained the bolstering of Sigmar, the Lord-Castellant now quests to obtain the
Warding Beacon – a much more powerful version of the Lantern capable of seering away
all sources of corruption wherever its light may touch!
Scenario 1 – Save the Gates – refer to the Save the Gates scenario in the main Azyr
Empires rulebook for Stormcast Eternals. The Victory and Failure conditions remain
identical.
16
The Crypts of the Dead Warrior Kings (****) Along a power nexus within the Realms of Metal lies an ancient place where warrior kings
of old were buried. Now the place is infested with the undead, led by a powerful vampire
named Sir David Mustang. Mustang was said to have fought alongside the Von Carsteins
in the World That Was.
This burial site is the resting place of a potent weapon against chaos, the Halberd known
as “The Punishment Due”; it was carried by a knightly champion known as the Duke of
Justice. It is this halberd that the Lord-Castellant is here to find.
Suggested Forces: 20 pts of Death models, led by a vampire lord representing Mustang.
If Death models are not available, any army can do in a pinch, just assume that a rival is
here to stop the Lord Castellant.
Setup & Victory: This battle uses the Dungeon Rules found in Azyr Empires.
Victory: If the Lord-Castellant is successful, he may wield The Punishment Due.
(M) 2” 2x 4+/4+ -1 3/D3+3
This Halberd radiates powerful magic and was crafted specifically to unbind daemons.
Just being in the presence of this weapon is enough to drive daemons away. The halberd
does 3 points of damage normally, but against DAEMONS it does D3+3 damage.
Additionally, at the beginning of the HERO phase any CHAOS model within 3” of the
model will suffer a MORTAL WOUND on the roll of a 4+.
Defeat: A defeat here will cause the Lord-Castellant’s lantern to be extinguished until he
successfully recovers this weapon.

17
The Forges of the God King (****) Nestled deep within a volcanic plateau lies the ancient Fyreslayer Hold known as Karan
Dunkar. From here it is said that the forge of the all fathers was created from the belly of
an ancient fyre wyrm and that its fire never dies.
This battle takes place atop one of the ancient forge sites of Karan Dunkar. Along a
standard six by four foot table, place five pieces of terrain that represent forges, no less
than 9” from a table edge and no less than 12” from each other.
These forges are the objectives of this game. At the beginning of the game they start off
cold. The Stormcast player must ignite them.
To ignite a forge, in the HERO phase, a stormcast HERO must be within 3” of a forge
and no other enemy model may be within 3” of it. If this condition is met, the forge is lit.
Once a forge is lit, the hero that ignited the forge is healed of D6 wounds.
Victory – The stormcast player wins the game if he can light three of the forges. If the
player is victorious then the Lord-Castellant may don the Obsidian Armor of Karan
Dunkar. This ancient armor flickers with the wrath of Sigmar and was forged by ancient
alliances generations past. The wearer has a 2+ save against any type of damage or mortal
wound. Additionally the armor ignores rending values of any kind.
Failure – Failing to relight the forges of Karan Dunkar will permanently lower the wounds
score of the Lord-Castellant by one for each failure.

18
The Depths of Chalmaren The Screaming Tower (****)
This scenario can only be undertaken if the Lord-Castellant has accomplished the
previous three missions.
The Screaming Tower of Chalmaren is a nightmare palace warped and twisted into being
by the greater demon of tzeentch known as Yu-nor the Loved. He earned his title after
claiming an entire realm for his own through the use of his magics, which have caused the
people of the realm to love him unconditionally. This is a trait that Yu-nor uses to his
fullest advantage.
The battle for Chalmaren features a normal table set within the realms of Metal. The key
point is the tower itself, set in the opposing player’s deployment zone.
The forces of Yu-nor are 40 Azyr points, and must include Yu-nor, who may use the
Kairos Fateweaver warscroll.
Yu-nor’s followers may be chosen from a combination of the mortal chaos warriors
faction, or the Free Peoples faction. Regardless of faction, all members of Yu-nor’s army
ignore Battleshock while Yu-nor lives, as their fierce love and devotion to their master is
the only thing that drives them to live.
The stormcast player is victorious if he is able to enter the tower of Chalmaren
unopposed and claim the Warding Beacon. Use the rules for taking towers found in Azyr
Empires. An enemy garrison can exist in the tower. If the player’s Lord-Castellant is
within the tower at the beginning of his HERO phase and no enemy is within 3” of the
tower, then he may claim the beacon and win.
If the Lord-Castellant is slain, the opposing player wins.
The Warding Beacon - this artefact of great power was stolen by Yu-nor and kept horded
locked away within the tower. The warding beacon functions similarly to a Warding
Lantern with the following exceptions:
The range is increased to 24”
Such is the bright light of the beacon that any unit within 3” of the target unit is
affected by the beacon
CHAOS units suffer D6 mortal wounds. Daemons suffer 2D6 mortal wounds.
Stormcast Eternal units add 1 to save rolls and ignore rending values of -1.
19
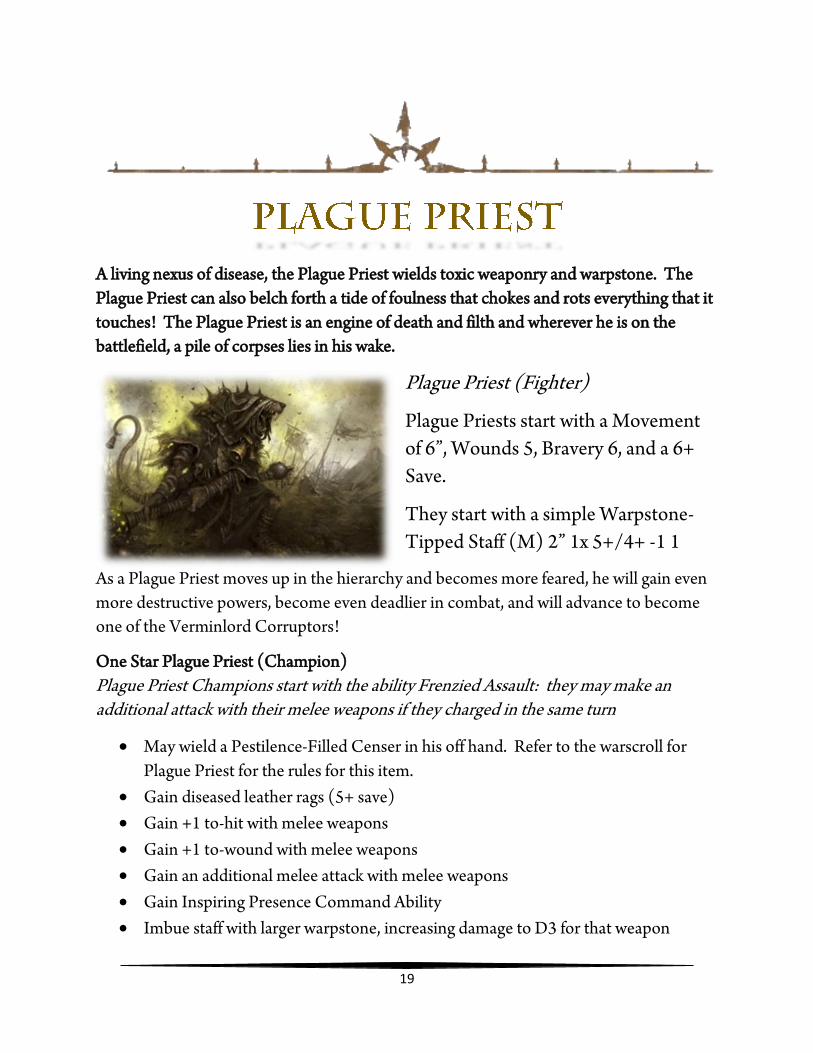
A living nexus of disease, the Plague Priest wields toxic weaponry and warpstone. The
Plague Priest can also belch forth a tide of foulness that chokes and rots everything that it
touches! The Plague Priest is an engine of death and filth and wherever he is on the
battlefield, a pile of corpses lies in his wake.
Plague Priest (Fighter)
Plague Priests start with a Movement
of 6”, Wounds 5, Bravery 6, and a 6+
Save.
They start with a simple Warpstone-
Tipped Staff (M) 2” 1x 5+/4+ -1 1
As a Plague Priest moves up in the hierarchy and becomes more feared, he will gain even
more destructive powers, become even deadlier in combat, and will advance to become
one of the Verminlord Corruptors!
One Star Plague Priest (Champion)
Plague Priest Champions start with the ability Frenzied Assault: they may make an additional attack with their melee weapons if they charged in the same turn
May wield a Pestilence-Filled Censer in his off hand. Refer to the warscroll for
Plague Priest for the rules for this item.
Gain diseased leather rags (5+ save)
Gain +1 to-hit with melee weapons
Gain +1 to-wound with melee weapons
Gain an additional melee attack with melee weapons
Gain Inspiring Presence Command Ability
Imbue staff with larger warpstone, increasing damage to D3 for that weapon

20
Two Star Plague Priest (Hero)
A two-star plague priest may commune with the Great Horned One and use the divine aid gained to help further lay waste to his enemies. The player may choose to know either the Pestilent Breath or the Wither prayer and gains the benefits of the Pestilent Prayers ability on the Plague Priest warscrolls
The player may choose to learn either Pestilent Breath or Wither prayer
Gain +1 wound (6)
Gain an additional attack with melee weapons
The player may swap out his staff for a Plague Censer (M) 2” 2x 5+/5+ -1 D3
The player obtains a Plague Tome. Refer to the warscroll for Plague Priests with
Plague Censer to see the rules for this.
Gain Enhanced Frenzied Assault – the player may make 2 additional attacks with
its melee weapon if it charged in that turn
Gain Pestilence Musk Command Ability – choose a friendly unit within 6” of the
priest. That unit may re-roll failed to-wound rolls until the beginning of the
priest’s next HERO phase
Three-Star Plague Priest (Lord)
The plague priest is growing in power. His prayers are more potent, and his abilities more deadly. The priest may attempt two prayers in his HERO phase instead of just the one.
Gain warpstone imbued robes (4+ save) – any saves in melee combat inflict a
MORTAL WOUND to the source of the wound on the roll of a 6+
Gain an additional attack with melee weapons
Enhance the Plague Censer with an even deadlier brew – the Plague Priest may re-
roll failed to-wound rolls of a 1
The plague-priest may be mounted atop a Plague Furnace. Doing so puts his
wounds at 12 per the Plague Furance Warscroll. Use the warscroll with the
exception of the warpstone-tipped staff entry and the prayers entry, as the player
will still need to obtain those powers or the weapon profile is not correct for what
the player is wielding
Gain the Rabid Fever prayer, found on the Plague Furance Warscroll
Gain the Bless with Filth prayer, found on the Plague Furance Warscroll
Gain +1 wound (7)

21
Four-Star Plague Priest (Legend)
The plague priest is filled with the stuff of chaos and disease. Any model that does not have the Nurgle keyword suffers a mortal wound if within 3” of the plague priest at the beginning of the plague priest’s HERO phase on a 4+
The player may understake Plague Priest quest chain
Plague-Priest Quest Chain The Plague Priest is now full of the pestilence and disease that the Great Horned One
could grant him. Now is the time to fulfil the final destiny – to advance and become a
Verminlord Corruptor!
Into the Underdark (***) This first quest utilizes the special Battleplan “Into the Underdark” which can be found in the Azyr Empires document. The player ventures forth into a place not touched since before the Age of Chaos to claim the glory of the Great Horned One. Victory – Should the Plague Priest be victorious in the Underdark, his prayers are successful on the roll of a 2+ instead of a 3+ and he is surrounded by an aura of divine energy granting him a special 5+ save against any mortal wounds inflicted on him. Defeat – The player is smote, losing a wound permanently Into the Fire (****) – the player discovers that an item of power lies at a power junction deep within the earth. This ancient crossing was once the hold of a Duardin king in times ancient past. This uses the Into the Fire special Battleplan which can be found in the main Azyr Empires document. Victory - The warpstone hooked daggers Bzur and Domir are an enhanced version that Verminlord Corruptors use. They have a 1” range, 4x 5+/5+ -1 2 damage. On any to-wound rolls of a 6 the wounds count as MORTAL WOUNDS. Once per game may inflict D6 MORTAL WOUNDS on a target model or unit before striking in combat. Any mortal wounds inflicted by Bznr or Domir will regenerate a wound to the player on
the roll of a 4+.
Defeat – The player’s force suffers a -1 drop in Bravery until this mission is successful.
22
The Seven Brides (****) – this scenario is an objective based one played on a 6x4 table.
Either side of the table has a 12” deployment zone spanning the entire six feet. The
middle 24” is an abyss that is impassable except for flying models.
Spanning the center of the table 12” wide is a bridge connecting the two sides. Along the
bridge are seven statues of women contorted in agonizing features. These are the seven
brides, who are actually Tomb Banshees.
There are three objectives. One objective is placed in either player’s deployment zone at
the end of the bridge, and the third objective is in the center of the bridge.
Players cannot claim the objective on their own side of the bridge. They can only claim
the objective in the center of the bridge and on the other side of the bridge.
The player with the most objectives wins the game.
The banshees activate as a third player at the end after both players have gone. They will
move toward the nearest unit and use their scream. Refer to the Tomb Banshee
warscroll.
The game lasts for six turns.
Victory - The Helm of Pestilence
This helm, fashioned to appear as a demonic fly head, melds with the wearer. It grants the
wearer a special 5+ save against MORTAL WOUNDS. Additionally once a game it
allows the wearer to vomit on an enemy model or unit within 13”. Units vomited on in
this way suffer 1D6 mortal wounds for every 10 models in the unit.
Defeat – The player’s model loses one wound permanently for every defeat here.
Additionally, before using any command abilities, the player must roll a 2+ or else the
ability fails. The command abilities are restored when this scenario is completed
successfully.
23
Defiling the Temple (****) – a rival’s temple has been opened to your forces. What better
time-opportunity than to defile it! The temple is ensorcelled with divine protection, so
this will be no easy task, but the reward-nice will be tremendous!
This scenario cannot be played until the first three have been completed successfully.
Opposing Army: Any
Setup & Victory – the opposing army has a 4x4 table to work with. The player has the
other 2x4 remaining. The opposing player may place a temple or fortification anywhere
in their deployment zone.
The player must destroy the temple. The temple has 15 wounds and has a save of 2+
which cannot be modified in any way by rending values due to sacramental oils and
blessings. The building itself is immune to MORTAL WOUNDS.
The player may nominate three of his models to be Bomb Carriers. These models are
carrying a powerful explosive device that can be placed and set off, killing the model and
anything near it.
The Bomb can be detonated in the HERO phase. Roll a D6. If the roll is a 1, the bomb is
a dud and nothing happens. If the Bomb goes off, it automatically hits and wounds on a
2+. Any unit or building takes D6 Damage which has a rend of -3. The rending value
from the bomb DOES affect the building.
The defending player gains a special prayer called “ONLY THE FAITHFUL” which may
be used on a 2+ in the HERO phase (counts as one of the player’s prayers cast). This
prayer will heal D3 wounds to the temple if successful. This may only be used once per
HERO phase. Additional priests may contribute, which also counts as them having cast a
prayer. Doing so adds +1 to the wounds restored.
The game lasts a random number of turns. After turn 5, roll a D6. On the roll of a 1-2,
the game ends. In turn 6, the game ends on the roll of a 1-3, and so on.
If the skaven player is able to destroy the temple by game’s end, they are the victor.
Victory - Transformation Into Glory
The player transforms into a verminlord, and assumes the Verminlord Corruptor
warscroll.

24
Plaguereapers profile is not used, the player uses the weapon of their choice from their
progression.
The player’s wounds are double the current wound that they carry now.
The player keeps all abilities and command abilities and spells and prayers that they had.
The player gains Prehensile Tail profile from the Verminlord Profile.
The player ignores the Plaguereapers ability in the Damage Table and instead uses his
weapon profile.
Defeat – a pall overhangs the army. All casting values on spells have their difficulty
increased by +1.