adding web url (like google.com, yahoo.com) in crm ui
DESCRIPTION
Adding Web URL (Like Google.com, Yahoo.com) in CRM UITRANSCRIPT

Adding Web URL (like google.com, yahoo.com) in CRM UI
By G.Vijayalakshmi, Accenture
Web URL (E.g. Google, Yahoo, etc) in CRM UI can be launched using transaction launcher
Step1:
Step1a: Call Transaction SM30. Enter the View name: CRMV_IC_LTX_URL
Step1b:
URL ID: ZGOOGLE (any name starting with Z)
Description: Google
Request Method: Get
Click radio-button for Non-BSP URL
URL: http://www.google.com

Save the entry.
Step2:
Step2a:
Call transaction CRMC_UI_ACTIONWZ
Or
IMG path CRM -> UI Framework -> Technical Role Definition -> Configure Transaction Launcher
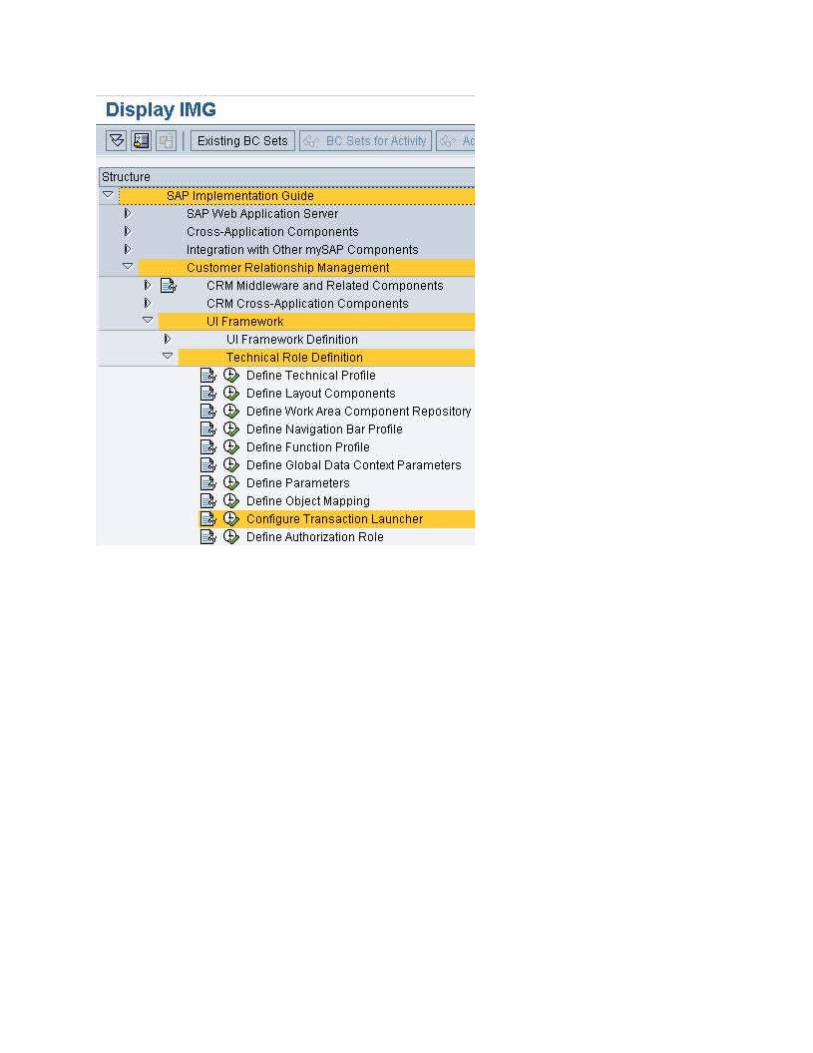

Step2b:
Launch Trans. ID : Zlaunch_google.(Any name starting with Z)
Component Set : ALL
Click on Continue.

Step2c:
Description : launch google
Class name : ZCL_CRM_LAUNCH_GOOGLE (Any class name starting with Z).
Activate checkbox for ‘Stateful’ to show the URL in a new window.
Be sure that the checkbox ‘Raise Veto’ is deactivated.
Click on Continue
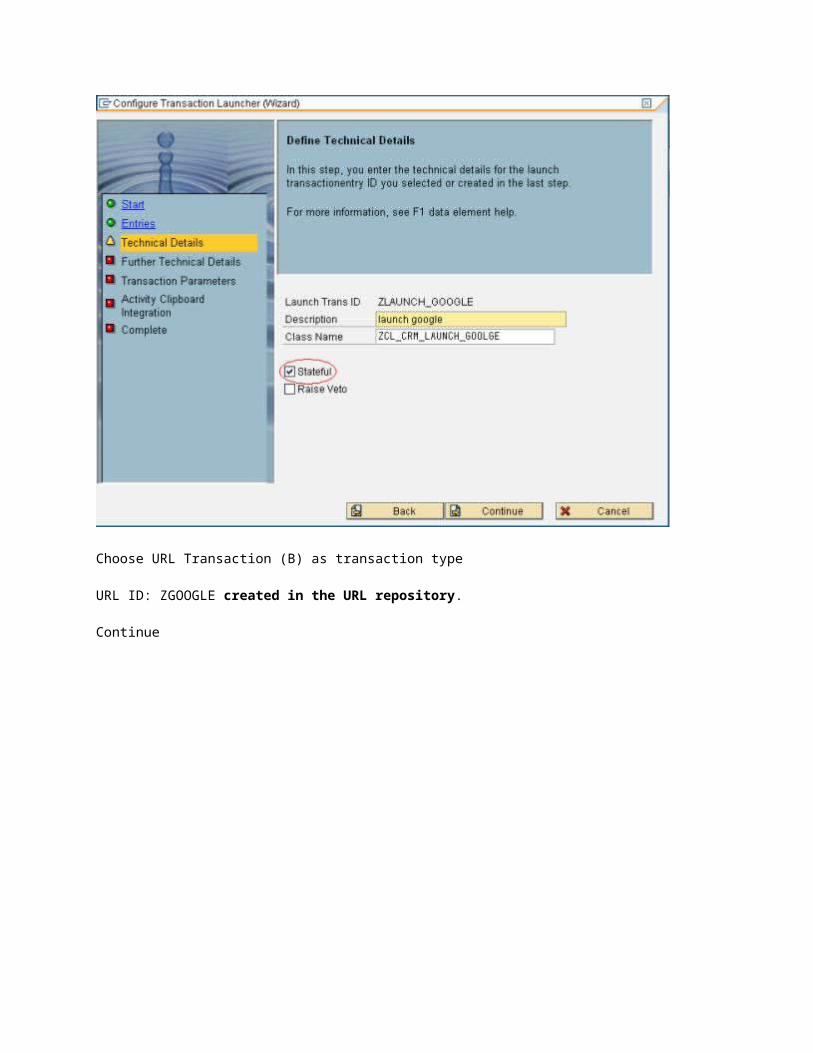
Choose URL Transaction (B) as transaction type
URL ID: ZGOOGLE created in the URL repository.
Continue
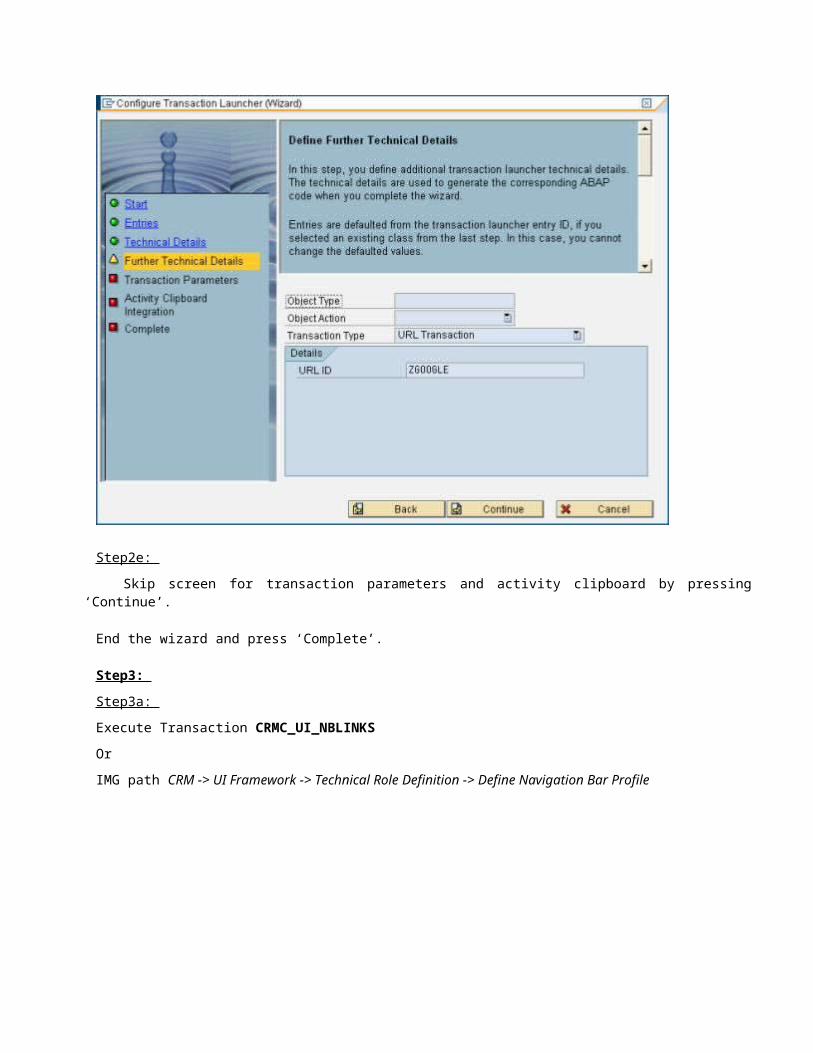
Step2e:
Skip screen for transaction parameters and activity clipboard by pressing ‘Continue’.
End the wizard and press ‘Complete’.
Step3:
Step3a:
Execute Transaction CRMC_UI_NBLINKS
Or
IMG path CRM -> UI Framework -> Technical Role Definition -> Define Navigation Bar Profile
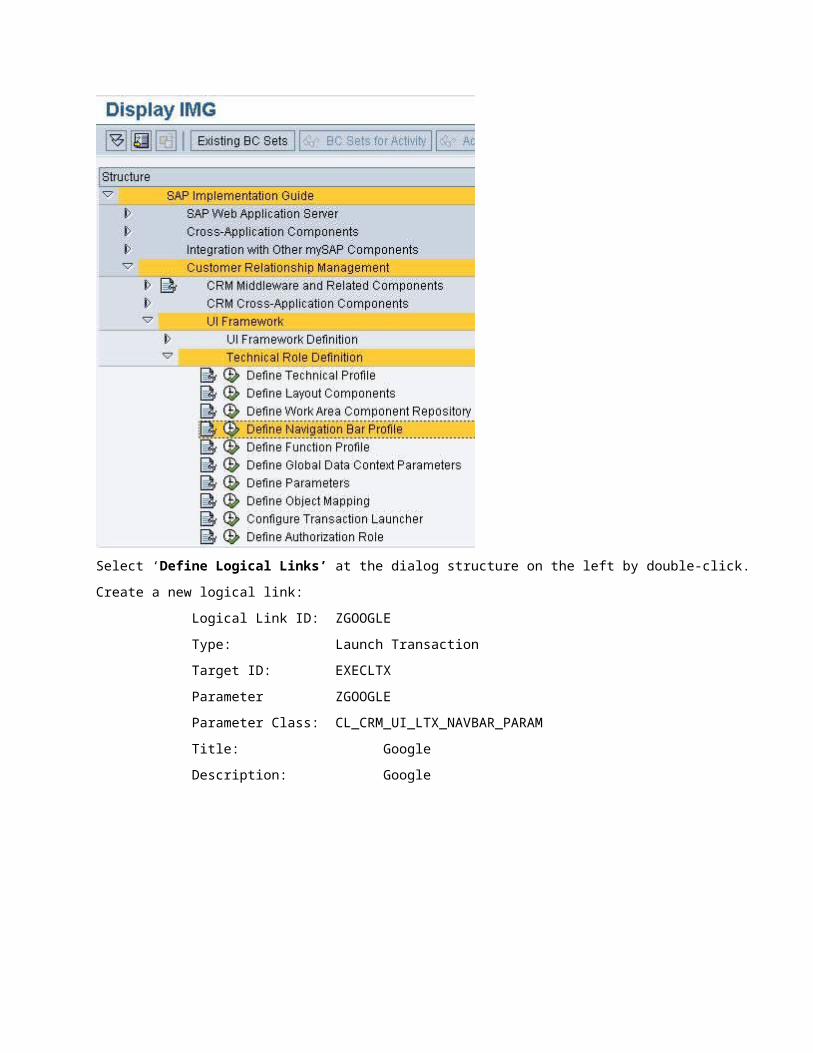
Select ‘Define Logical Links’ at the dialog structure on the left by double-click.
Create a new logical link:
Logical Link ID: ZGOOGLE
Type: Launch Transaction
Target ID: EXECLTX
Parameter ZGOOGLE
Parameter Class: CL_CRM_UI_LTX_NAVBAR_PARAM
Title: Google
Description: Google
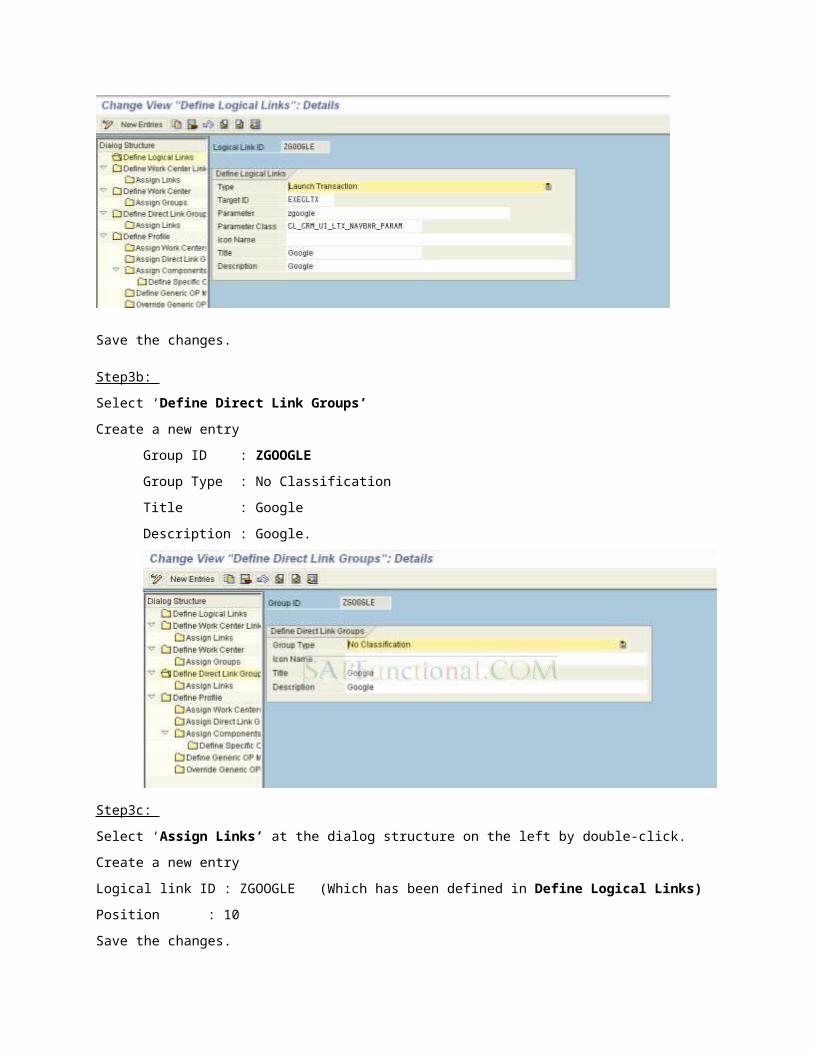
Save the changes.
Step3b:
Select ‘Define Direct Link Groups’
Create a new entry
Group ID : ZGOOGLE
Group Type : No Classification
Title : Google
Description : Google.
Step3c:
Select ‘Assign Links’ at the dialog structure on the left by double-click.
Create a new entry
Logical link ID : ZGOOGLE (Which has been defined in Define Logical Links)
Position : 10
Save the changes.
Add the link which was created in Define Logical Links.

Step3d:
Select ‘Define Profile’
Select profile corresponding to web UI
Click ‘Assign Direct Link Groups’ at the dialog structure on the left
Create a new entry
Group ID : ZGOOGLE
Position : 30 (any position).

Step4:
Execute Transaction CRMC_UI_PROFILE or go to IMG path CRM -> Business Roles -> Define Business Role.
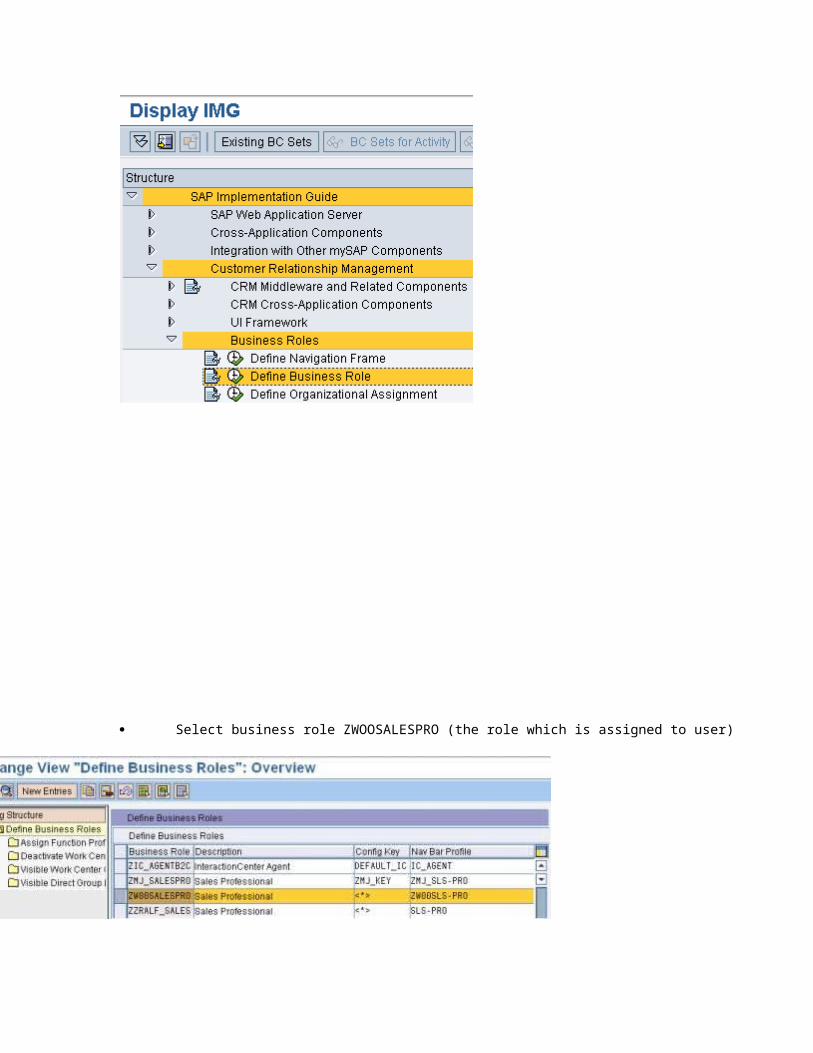
Select business role ZWOOSALESPRO (the role which is assigned to user)
Double-click on ‘Visible Direct Group Links’ at the dialog structure on the left.
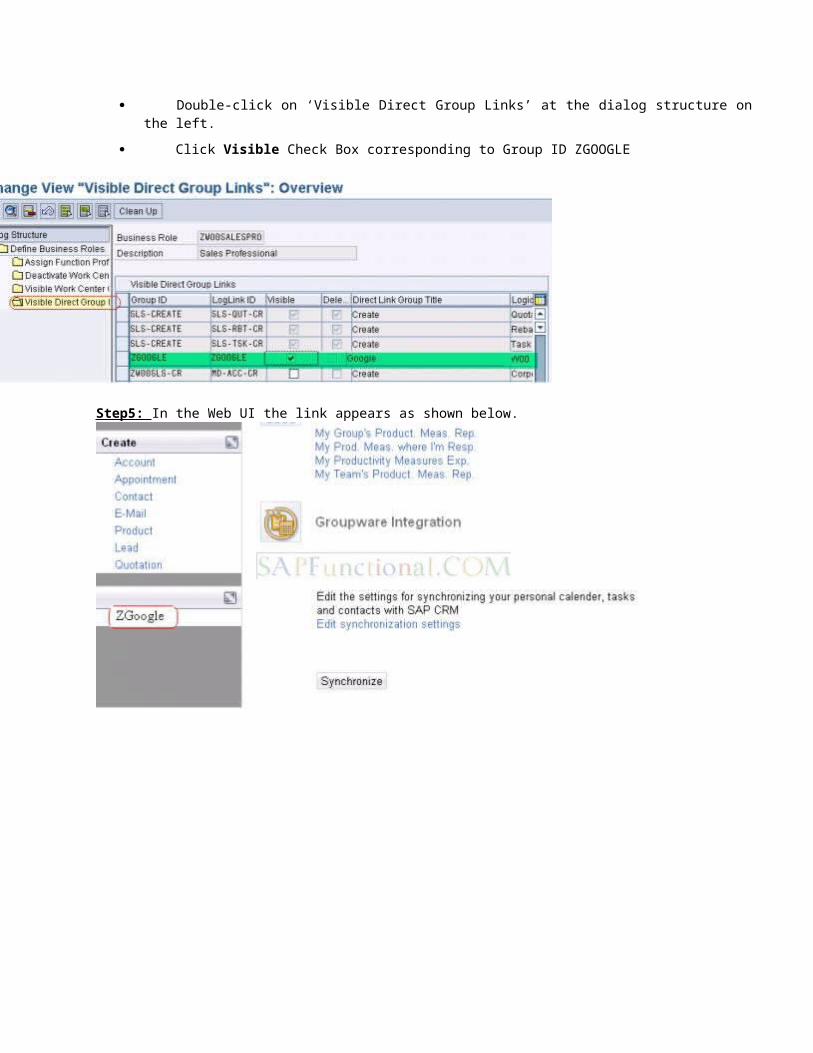
Click Visible Check Box corresponding to Group ID ZGOOGLE
Step5: In the Web UI the link appears as shown below.