24-hour ambulatory bp monitoring system
TRANSCRIPT

24-Hour Ambulatory BP Monitoring System
Page 1 of 79 80-0062-00-RevL 2020-9-14

1. User Manual
ChangesThis manual is identified as Part number: 80-0062-00. An updated version may be available for download from the SunTech Medical website. Should you notice errors or omissions in this manual, please notify us at:
SunTech Medical517 Airport Blvd, Morrisville, USA.
Tel: 919.654.2300800.421.8626
Fax: 919.654.2300
Email: [email protected]
Web: SunTechMed.com
This manual is for the Oscar 2, Ambulatory Blood Pressure Monitor (ABPM) System.
CAUTION: US Federal law restricts this device to sale by or on the order of a licensed practitioner
Copyright InformationAll content in this manual is the proprietary information of SunTech Medical and is provided solely for purposes of operation, maintenance or service of the Oscar 2 ABPM System. This manual and the Oscar 2 ABPM System described in it are protected under copyright law under which they may not be copied, in whole or in part, without written consent of SunTech Medical. SunTech and Bravo are registered trademarks of SunTech Medical, Inc. SphygmoCor is a registered trademark of AtCor Medical Pty. Ltd., Sydney Australia. All other trademark names are the trademarks of their respective holders. The information in this manual is furnished for guidance only, is subject to change without notice, and should not be construed as a commitment by SunTech Medical. SunTech Medical assumes no liability for errors or inaccuracies that may appear in this manual. © 2020 SunTech Medical. All rights reserved.
Manufacturer Information
SunTech Medical, Inc.507 Airport Blvd, #117Morrisville, NC 27560-8200Phone: 1-919-654-2300 1-800-421-8626Fax: 1-919-654-2301
EMERGO EuropePrinsessegracht 20 2514 AP The Hague The Netherlands
SunTech Medical (Shenzhen) Co., Ltd. 105 HuanGuan South Road, Suite 15 2~3/F DaHe Community Guanlan, LongHua District, Shenzhen GuangDong PRC 518110 Tel: + 86-755-29588810 + 86-755-29588986 (Sales) + 86-755-29588665 (Service) Fax: + 86-755-29588829
First registered June 2015
Page 2 of 79 80-0062-00-RevL 2020-9-14

Table of Contents1. User Manual ................................................................................................................................2
Changes ................................................................................................................................................................................................................. 2Copyright Information ......................................................................................................................................................................................... 2Manufacturer Information.................................................................................................................................................................................. 2
2. Introduction to Ambulatory Blood Pressure Monitoring ...............................................................53. Introduction to Central Blood Pressure Monitoring ......................................................................54. Symbols Used in Labeling ...........................................................................................................65. The Oscar 2 ABPM System .........................................................................................................7
Indications for Use .............................................................................................................................................................................................. 7Device Operation .................................................................................................................................................................................................. 7Products and Accessories ................................................................................................................................................................................. 8About AccuWin Pro 4 .......................................................................................................................................................................................... 8A Note About HIPAA ............................................................................................................................................................................................ 9Biocompatibility and Applied Parts .................................................................................................................................................................. 9Specifications ....................................................................................................................................................................................................... 9
6. Oscar 2 At a Glance ...................................................................................................................14Button Functionality ..........................................................................................................................................................................................15Setting Up The Oscar 2 System ......................................................................................................................................................................15Powering the Oscar 2 for Use .........................................................................................................................................................................15Installing AccuWin Pro 4 ..................................................................................................................................................................................16Communicating with the Oscar 2 ...................................................................................................................................................................16Wireless Communications ...............................................................................................................................................................................16True24 Mobile Application ...............................................................................................................................................................................17Logging in to AccuWin Pro 4 ...........................................................................................................................................................................18Changing Your Password .................................................................................................................................................................................18Changing the Current User ..............................................................................................................................................................................19
7. AccuWin Pro 4 Layout ...............................................................................................................20 Toolbar Buttons .................................................................................................................................................................................................20
8. Conducting an Ambulatory Blood Pressure Study ......................................................................21Programming the Oscar 2 for an ABP Study ................................................................................................................................................21Study Parameter Settings ................................................................................................................................................................................24Fitting a Patient with the Oscar 2 and ABPM Cuff ......................................................................................................................................26Preparing and Educating the Patient .............................................................................................................................................................27Starting the Study ..............................................................................................................................................................................................28Finishing the Study ............................................................................................................................................................................................28
9. Notes on Blood Pressure Data ...................................................................................................29Retrieving Data from the ABP Monitor ..........................................................................................................................................................29
10. Reviewing and Editing an ABP Study .........................................................................................29Opening A Patient File .......................................................................................................................................................................................29Patients, Studies and Orders ...........................................................................................................................................................................30Viewing an Ambulatory Blood Pressure Study ............................................................................................................................................31Reviewing an Ambulatory Blood Pressure Study ........................................................................................................................................33Entering Comments ..........................................................................................................................................................................................34Setting BP Threshold Limits ............................................................................................................................................................................36Setting Pediatric Threshold Limits .................................................................................................................................................................37Defining Time-Slice Periods .............................................................................................................................................................................38Editing Patient Info and Physician Info ..........................................................................................................................................................41Viewing Dose Response Statistics .................................................................................................................................................................44Viewing Hourly Averages ..................................................................................................................................................................................45Viewing the Interpretive Report Summary ....................................................................................................................................................46Comparing Two Studies ...................................................................................................................................................................................47
11. Creating Reports .......................................................................................................................48Configuring and Customizing the Report .....................................................................................................................................................48Previewing the Report .......................................................................................................................................................................................50Printing the Report.............................................................................................................................................................................................51
Page 3 of 79 80-0062-00-RevL 2020-9-14

Saving the Report as a PDF .............................................................................................................................................................................5112. Overview of AccuWin Pro 4 Report Symbols ..............................................................................5213. Managing Patient Studies .........................................................................................................53
Opening a Patient Study ...................................................................................................................................................................................53Exporting a Patient Study .................................................................................................................................................................................53Emailing a Patient Study ..................................................................................................................................................................................53Deleting a Patient Record ................................................................................................................................................................................54Importing a Patient Record ..............................................................................................................................................................................54Grouping Patient Records ................................................................................................................................................................................54
14. CustomizingandConfiguringAccuWinPro4 ............................................................................56Hardware Settings .............................................................................................................................................................................................56Customizing Export Templates .......................................................................................................................................................................56Data Settings ......................................................................................................................................................................................................57Display Settings..................................................................................................................................................................................................58Diary Comment Settings ..................................................................................................................................................................................59Email Settings .....................................................................................................................................................................................................61Report Settings ..................................................................................................................................................................................................61Export Settings ...................................................................................................................................................................................................62
15. Overview of Event Codes ...........................................................................................................65Event Code Definitions ......................................................................................................................................................................................65
16. Administrative Tools .................................................................................................................67Specifying Login Options .................................................................................................................................................................................67Adding User Accounts ......................................................................................................................................................................................68Changing User Level .........................................................................................................................................................................................68Deleting User Accounts ....................................................................................................................................................................................68Resetting User Passwords ...............................................................................................................................................................................69
17. Maintaining and Cleaning the Oscar 2 .......................................................................................69Cleaning After Use .............................................................................................................................................................................................69Maintenance and Repairs After Use ..............................................................................................................................................................70Calibration Verification Procedure ..................................................................................................................................................................70
18. Limited Warranty .......................................................................................................................71Oscar 2 Ambulatory Blood Pressure Monitoring System ..........................................................................................................................71
19. Technical Assistance ................................................................................................................7220. Radio Frequency Compliance Requirements..............................................................................7321. Electromagnetic Compatibility System Requirements ...............................................................7422. Product Disposal .......................................................................................................................77
Device ...................................................................................................................................................................................................................77Battery Disposal .................................................................................................................................................................................................77
23. References ...............................................................................................................................78
Page 4 of 79 80-0062-00-RevL 2020-9-14

2. Introduction to Ambulatory Blood Pressure MonitoringAmbulatory blood pressure monitoring (ABPM) is an accepted clinical tool for collecting multiple blood pres-sure measurements. ABPM data is intended to better assist clinicians with the diagnosis and management of hypertension by providing data related to: blood pressure variability, estimation of true blood pressure, overnight changes in blood pressure, blood pressure load, sleep blood pressure dipping, and morning surge in blood pressure . In-clinic and home blood pressure measurements cannot provide the same depth of in-formation that a 24-hour study provides. Several studies have shown that ambulatory blood pressure moni-toring, when compared to clinic or home blood pressure measurement, is superior in predicting target organ damage, morbid events, or cardiovascular risk.
The data obtained from ambulatory blood pressure monitors is accurate and useful for managing a wide variety of hypertensive situations including:
• White-coat hypertension • Resistant hypertension • Masked hypertension • Childhood hypertension • Efficacy of anti-hypertensive drug therapy on a 24-hour basis • Nocturnal hypertension • Episodic hypertension and/or anxiety disorders • Hypotensive symptoms • Changes in diet and daily routine designed to reduce hypertension
3. Introduction to Central Blood Pressure MonitoringCentral blood pressure measurement derives the central aortic pressure waveform from cuff pulsations recorded non-invasively at the brachial artery. Analysis of the waveform provides key parameters including central systolic pressure, central pulse pressure and indices of arterial stiffness such as augmentation pres-sure and augmentation index. Increased central systolic pressure and augmentation index have been shown to be markers of cardiovascular risk. Additionally, research has shown its significance as a biomarker for guiding assessment of drug safety and efficacy and, ultimately, patient treatment.
Page 5 of 79 80-0062-00-RevL 2020-9-14

4. Symbols Used in Labeling
Symbol Description Standard/Source
General Warning Sign ISO 7010-W001
Batch Code ISO 7000-2492
Caution ISO 7000-0434A
Refer to Instruction Manual ISO 7010-M002
Authorized representative in the European Community ISO 15223-1
USB Industry
Consult Instructions for Use ISO 7000-1641
This product meets the requirements of the applicable Directives EU Directive
Disposal in compliance with WEEE Directive WEEE Directive
Manufacturer ISO 7000-3082
Date of Manufacture ISO 7000-2497
Serial Number ISO 7000-2498
CAUTION: Federal (U.S.A.) law restricts this device to sale by or on the order of a physician FDA
Cuff index line must fall within range markings Manufacturer
Arrow should be placed over artery Manufacturer
Symbol indicating limb circumference Manufacturer
Index line Manufacturer
Not made with natural rubber latex Manufacturer
Not made with PVC Manufacturer
Reference Number ISO 7000-2493
This product is Type BF defibrillator protected IEC 60417-5334
Fragile, handle with care ISO 7000-0621
Page 6 of 79 80-0062-00-RevL 2020-9-14
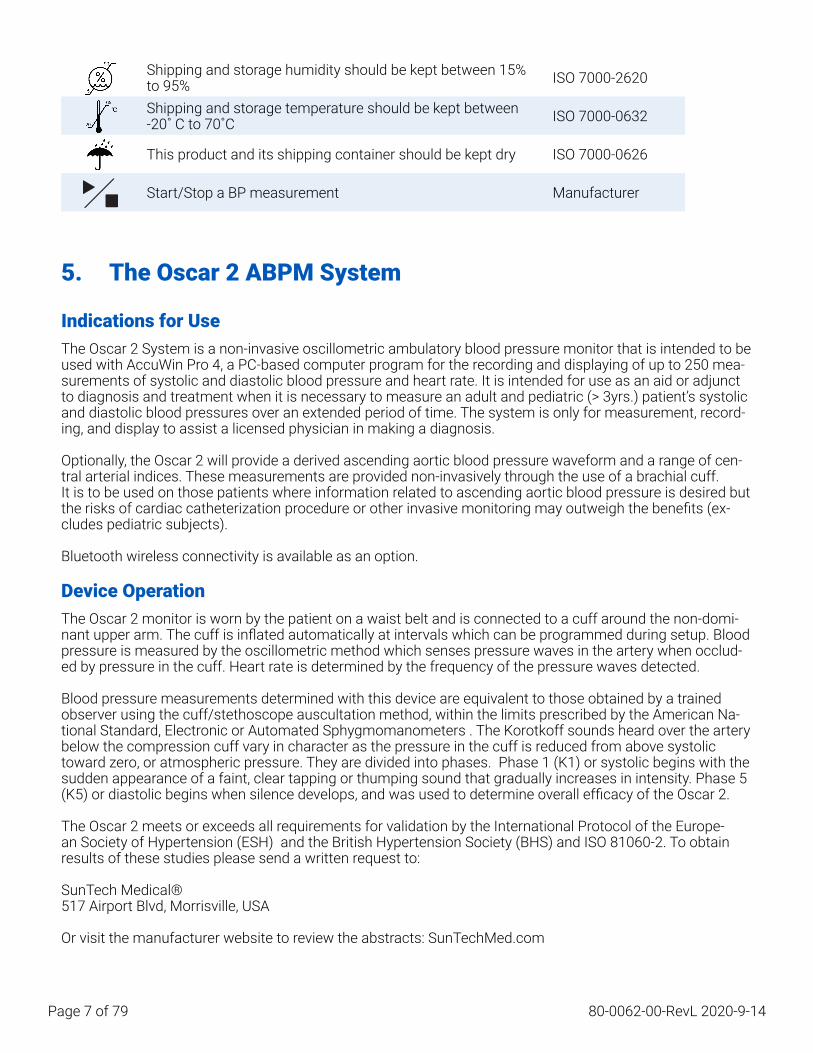
Shipping and storage humidity should be kept between 15% to 95% ISO 7000-2620
Shipping and storage temperature should be kept between -20˚ C to 70˚C ISO 7000-0632
This product and its shipping container should be kept dry ISO 7000-0626
Start/Stop a BP measurement Manufacturer
5. The Oscar 2 ABPM System
Indications for UseThe Oscar 2 System is a non-invasive oscillometric ambulatory blood pressure monitor that is intended to be used with AccuWin Pro 4, a PC-based computer program for the recording and displaying of up to 250 mea-surements of systolic and diastolic blood pressure and heart rate. It is intended for use as an aid or adjunct to diagnosis and treatment when it is necessary to measure an adult and pediatric (> 3yrs.) patient’s systolic and diastolic blood pressures over an extended period of time. The system is only for measurement, record-ing, and display to assist a licensed physician in making a diagnosis.
Optionally, the Oscar 2 will provide a derived ascending aortic blood pressure waveform and a range of cen-tral arterial indices. These measurements are provided non-invasively through the use of a brachial cuff.It is to be used on those patients where information related to ascending aortic blood pressure is desired but the risks of cardiac catheterization procedure or other invasive monitoring may outweigh the benefits (ex-cludes pediatric subjects).
Bluetooth wireless connectivity is available as an option.
Device OperationThe Oscar 2 monitor is worn by the patient on a waist belt and is connected to a cuff around the non-domi-nant upper arm. The cuff is inflated automatically at intervals which can be programmed during setup. Blood pressure is measured by the oscillometric method which senses pressure waves in the artery when occlud-ed by pressure in the cuff. Heart rate is determined by the frequency of the pressure waves detected.
Blood pressure measurements determined with this device are equivalent to those obtained by a trained observer using the cuff/stethoscope auscultation method, within the limits prescribed by the American Na-tional Standard, Electronic or Automated Sphygmomanometers . The Korotkoff sounds heard over the artery below the compression cuff vary in character as the pressure in the cuff is reduced from above systolic toward zero, or atmospheric pressure. They are divided into phases. Phase 1 (K1) or systolic begins with the sudden appearance of a faint, clear tapping or thumping sound that gradually increases in intensity. Phase 5 (K5) or diastolic begins when silence develops, and was used to determine overall efficacy of the Oscar 2.
The Oscar 2 meets or exceeds all requirements for validation by the International Protocol of the Europe-an Society of Hypertension (ESH) and the British Hypertension Society (BHS) and ISO 81060-2. To obtain results of these studies please send a written request to:
SunTech Medical®517 Airport Blvd, Morrisville, USA
Or visit the manufacturer website to review the abstracts: SunTechMed.com
Page 7 of 79 80-0062-00-RevL 2020-9-14

Products and AccessoriesThe Oscar 2 System should contain the following items. If you are missing any item, please contact SunTech Medical immediately (see Limited Warranty for contact information).
For additional information on how these accessories fit together consult the Oscar 2 Quick Start Guide (82-0403-00).
Oscar 2 ABPM System (Included Accessories)
Item Description Part NumberOscar 2 ABP Monitor 99-0133-00AccuWin Pro 4 27-0144-A1USB Cable 91-0143-00ABP Monitor Belt 98-0037-00ABP Monitor Shoulder Strap 98-0036-00Oscar 2 Pouch 98-1020-00Oscar 2 User Guide 80-0062-00Oscar 2 Quick Start Guide 82-0403-00ABPM Cuff, Size 2 (26cm-34cm) 98-0239-02ABPM Cuff, Size 3 (32cm-44cm) 98-0239-03
* See table “Oscar 2 ABPM System (Monitor Options)” to determine the part number and description for your Oscar 2 ABP Monitor.
Oscar 2 ABPM Optional Accessories Item Description Part NumberABPM Cuff Size 1 (18-26 cm) 98-0239-01ABPM Cuff, Size 4 (42cm-55cm) 98-0239-04
Oscar 2 ABPM System (*Monitor Options)
Item Description Part NumberOscar 2 Standard 99-0133-00Oscar 2 with Bluetooth 99-0133-01Oscar 2 with SphygmoCor 99-0133-02Oscar 2 with SphygmoCor and Bluetooth 99-0133-03
About AccuWin Pro 4AccuWin Pro 4 is a simple software application designed for exclusive use with the Oscar 2 monitor and which allows for maximum flexibility in the configuration, analysis, interpretation, and reporting of ABPM studies.
A personal computer is needed as an accessory but it is not provided. PC System Requirements:• Windows 7 or later• SVGA or compatible display adapter and monitor. Minimum 1280 x 1024 recommended resolution• One available USB port• Minimum 4GB of RAM
Page 8 of 79 80-0062-00-RevL 2020-9-14

• Minimum of 30GB of HDD space for patient database
A Note About HIPAAThe regulations set forth by the Health Insurance Portability and Accountability Act of 1996 (HIPAA) cover a number of topics, two of which present possible compliance issues for healthcare providers using a software application, such as AccuWin Pro 4: privacy and security.
Password-controlled user access and encrypted patient information capabilities of AccuWin Pro 4 assist health care providers in maintaining a HIPAA compliant environment. Since HIPAA compliancy is ultimately the responsibility of the provider, please be aware that report printouts, report PDF files, and exported data contain unencrypted patient information and should be handled appropriately.
Biocompatibility and Applied PartsThe ABPM cuff is the only Applied Part (AP) of the Oscar 2 system. All AP have been evaluated for biocom-patibility in conjunction with the applicable standards.
Specifications
Method of Measurement
Oscillometric with step deflation
Blood Pressure Range Systolic: 40-260 mmHg Diastolic: 25-200 mmHg
Heart Rate Range 40-200 bpmMaximum Inflate Pressure
280 mmHg
Accuracy Heart Rate accurate within +/-2% or +/-3 bpm, whichever is greater. Blood Pressure results meet or exceed ANSI/AAMI/ISO 81060-2:2013 standards for non-invasive accuracy: ±5 mmHg mean error & 8 mmHg standard deviation.
Validations Clinically validated to ANSI/AAMI/ISO 81060-2:2013, BHS (A/A), and ESH International Protocol.
Operating Conditions
Shipping/Storage Conditions
10°C (50°F) to 50°C (122°F) 20-95% RH non-condensing
-20°C (°F) to 70°C (°F) 15-95% RH non-condensing
Classification Continuous operation Power: Two (2) AA batteries, alkaline
Data Memory Flash memory stores up to 250 readingsCalibration Check Recommendation
Minimally, once every two years
Safety Systems Maximum inflation pressure limited to 300 mmHg; Auto safety release valve for power failure; Maximum measurement time limited to less than 140 seconds
Sampling Periods 24 independently programmable time periods (Time interval options: none, 5, 10, 15, 20, 30, 45, 60, 90, and 120 minutes)
Parameter Standard EU NormSafety AAMI/ANSI ES60601-1:2005/(R) 2012
+A1:2012EN 60601-1 :2006/A1:2013/ IEC 60601-1: 2005/A1:2012
Blood Pressure IEC 80601-2-30 :2009 + A1:2013 N/AUsability IEC 60601-1-6 :2013 Ed. 3.1
IEC 62366:2015 Ed. 1.0EN 60601-1-6 :2010EN 62366:2008
Page 9 of 79 80-0062-00-RevL 2020-9-14

EMC/EMI/ESD IEC60601-1-2:2014 EN 60601-1-2:2015Home Use IEC 60601-1-11:2015 Ed. 2.0 EN IEC 60601-1-11:2010Biocompatibility ISO 10993-1:2009/(R)2013
ISO 10993-5:2009ISO 10993-10:2010
EN ISO 10993-1:2009/AC:2010EN ISO 10993-5:2009 N/A
Software IEC 62304:2015 EN IEC 62304:2006/AC:2008Symbols ISO 15223-1:2016 EN ISO 15223-1:2016 Sphygmomanometers ANSI/AAMI/ISO 81060-2:2013 EN ISO 81060-1:2012Quality ISO 13485:2016 EN ISO 13485:2016Risk Management ISO 14971:2007 (Ed. 2) EN ISO 14971:2012Size Approximately 100 x 70 x 30 mmWeight Approximately 233 g, including batteriesStorage Conditions -20° C to +70° C, 15%-95% RH non-condensingData USB 2.0 (Micro USB)
Safety and Effectiveness Considerations
The following safety and effectiveness issues are to be considered prior to the usage of the Oscar 2 monitor.
NOTE: This device is defibrillator protected. No precautions specific to the Oscar 2 are required during defibrilla-tion, and defibrillation discharge has no effect on the Oscar 2.
• The monitor is intended for use following consultation and instruction by a physician. • The reliability of the device is dependent upon conformance with the operation and service instruc-
tions, as detailed in this manual. • This device has been designed for use on patients with normal sinus rhythms. • The interpretation of blood pressure measurements should only be made by a physician. The accura-
cy of any blood pressure recording may be affected by the position of the subject, his or her physical condition, and use outside the operating instructions detailed in this manual.
• Safety and effectiveness of central blood pressure measurements on children under the age of 18 years of age, pregnant women and neonates have not been tested.
Disposal
This symbol indicates that the monitor contains materials which may be hazardous to human health. This product complies with the WEEE Directive. Please return the Oscar 2 monitor to SunTech Medical for proper disposal. Please dispose of other materials according to local regulations.
Potential Adverse Reactions
Allergic exanthema (symptomatic eruption) in the area of the cuff may result, including the formation of urticaria (allergic reaction including raised edematous patches of skin or mucous membranes and intense itching) caused by the fabric material of the cuff.
Petechia (a minute reddish or purplish spot containing blood that appears in the skin) formation or Rum-ple-Leede phenomenon (multiple petechia) on the forearm following the application of the cuff, which may lead to idiopathic thrombocytopenia (spontaneous persistent decrease in the number of platelets associated with hemorrhagic conditions) or phlebitis (inflammation of a vein) may be observed.
Page 10 of 79 80-0062-00-RevL 2020-9-14

Cautions for Use
This monitor is designed to perform in conformity with the description thereof contained in this operation manual when operated, maintained and repaired in accordance with the instructions provided. The monitor should not be modified in any way. Ensure pressure compatibility for all patients. If any abnormality occurs in the monitor, suspend the operation immediately and disconnect it from the patient. If the monitor has been used or stored outside its acceptable range (see Specifications page), it may not meet performance specifi-cations. If the cuff fails to deflate, the patient should be instructed on its proper and safe removal.
Warnings
The general warning sign indicates a potentially hazardous situation which could result in serious injury.
WARNING: Do not use in the presence of flammable anesthetics; this could cause an explosion. This device is not suitable for use in an oxygen enriched environment.
WARNING: Do not immerse the monitor in any fluid, place fluids on top, or attempt to clean the monitor with any liquid detergents, cleaning agents, or solvents. This may cause an electrical hazard. Do not use the mon-itor if accidental wetting occurs; please return to SunTech Medical (see Limited Warranty). Refer to Maintain-ing and Cleaning the Oscar 2 ABP System, for care instructions.
WARNING: Too frequent measurements can cause injury to the patient due to blood flow interference.
WARNING: The cuff should not be applied over a wound as this can cause further injury.
WARNING: The cuff should not be placed on the arm on the side of a mastectomy. In the case of a double mastectomy use the side of the least dominant arm.
WARNING: Pressurization of the cuff can temporarily cause loss of function of simultaneously used monitor-ing equipment on the same limb.
WARNING: Do not use if device is dropped and/or is damaged. Have a qualified service representative check the monitor before using again.
WARNING: Do not attach the cuff to a limb being used for IV infusions or any other intravascular access, therapy or an arterio-venous (A-V) shunt. The cuff inflation can temporarily block blood flow, potentially caus-ing harm to the patient.
WARNING: Use only with the cuffs supplied by SunTech Medical. Different cuffs have not been validated with Oscar 2 and measurements with non-validated components may not be accurate
WARNING: Use of an ACCESSORY, transducer or cable with ME EQUIPMENT and ME SYSTEMS other than those specified may result in increased EMISSIONS or decreased IMMUNITY of ME EQUIPMENT or ME SYS-TEM.
WARNING: The Oscar 2 may be interfered with by other equipment even if the other equipment complies with CISPR Emission Requirements.
WARNING: Performance can be affected by extremes of temperature, humidity and altitude.
Page 11 of 79 80-0062-00-RevL 2020-9-14

WARNING: Do not use the monitor during magnetic resonance imaging (MRI) or in an MRI environment.
Cautions
The caution symbol indicates a potentially hazardous situation which may result in minor or moderate injury. It may also be used to alert against unsafe practices.
CAUTION: When downloading data from the monitor’s communications USB port, the device should not be in use with a patient.
CAUTION: Do not remove monitor covers, except to replace batteries. The monitor does not contain any user serviceable components. Return monitor if service is required.
CAUTION: Do not use on neonates, pediatric patients less than 3 years old, or patients known to be readily susceptible to bruising.
CAUTION: Do not use the monitor if it has failed its diagnostic self test, or if it displays a greater than zero pressure with no cuff attached. The values displayed by such a monitor may be inaccurate.
CAUTION: Substitution of a component different from that supplied may result in measurement error. Re-pairs should be undertaken only by personnel trained or authorized by SunTech Medical.
CAUTION: The Oscar 2 does not contain any user serviceable internal parts and should only be repaired by an authorized SunTech Medical service representative. Do not service the product while in use.
CAUTION: If cuff fails to deflate within two and a half minutes, instruct patient on manual removal of cuff.
CAUTION: Check that operation of the monitor does not result in prolonged impairment of the circulation of the patient.
CAUTION: Remove batteries when device is not in use for long periods of time to prevent possible battery leakage and product damage.
CAUTION: A compressed or kinked connection hose may cause continuous cuff pressure resulting in blood flow interference and potentially harmful injury to the patient.
CAUTION: Using an incorrect cuff size could result in erroneous and misleading blood pressure measure-ment results.
CAUTION: Do not machine wash the cuff bladder.
CAUTION: On hypotensive patients, the device should be used with caution.
Contraindications
The Oscar 2 ABPM system should be used in conjunction with all other available medical histories and di-agnostic test information about the patient. The following are reasons to withhold use of the Oscar 2 ABPM
Page 12 of 79 80-0062-00-RevL 2020-9-14

system from a patient:
CONTRAINDICATION: Do not use on patients with erratic, accelerated or mechanically controlled irregular heart rhythms, including patients with arrhythmias.
CONTRAINDICATION: Do not use on patients with carotid or aortic valve stenosis.
CONTRAINDICATION: The system is not applicable in generalized constriction or localized spasm of muscu-lar conduit arteries such as seen immediately after hypothermic cardiopulmonary bypass surgery or accom-panying Raynaud's phenomenon or intense cold.
CONTRAINDICATION: Do not use system on patients who have had a double mastectomy
CONTRAINDICATION: Do not use on the same arm of patients with a peripherally inserted central catheter (PICC) line, Intraveneous (IV) or arterial line.
Page 13 of 79 80-0062-00-RevL 2020-9-14

6. Oscar 2 At a GlanceDevice
1. Start/Stop ButtonTo Power On: Press the Start/Stop button.To Power Off: When not taking a reading, press and HOLD the Start/Stop button until you hear 8 beeps (approx. 5 seconds), then release.To Abort a Measurement: Press the Start/Stop button any time during a reading.To Start a Programmed ABP Study: When time is flashing, press the Start/Stop button to take 1st reading.To Start a Manual BP Reading: When clock is displayed, press the Start/Stop button.
2. Event Marker3. Day/Night Button
Display
4. Time - Shown when the monitor is not taking a reading.5. Battery - Indicates low battery; REPLACE BATTERIES.6. Clock - ABP study in progress.7. Sun - Indicates AWAKE portion of study.8. Moon - Indicates ASLEEP portion of the study.9. BP Reading - During a reading, displays the pressure of the cuff in mmHg or kPa. Immediately after a reading,
shows the BP results in mmHg or kPa followed by heart rate in beats per minute.10. Readings Symbol - Indicates number of BP readings in memory.11. Measurement unit - indicates the unit of the displayed value in mmHg or kPa (blood pressure) or beats per
minute (heart rate)
Page 14 of 79 80-0062-00-RevL 2020-9-14

Button Functionality
Buttons FunctionsStart/Stop TO POWER ON: Press the Start/Stop button.
TO POWER OFF: When the monitor is not taking a measurement, press and hold the Start/Stop button until you hear eight quick beeps, then release. TO STOP A MEASUREMENT IN PROGRESS: Press the Start/Stop button. TO START A PROGRAMMED STUDY: When the time is flashing, press the Start/Stop button. TO START A SINGLE BP READING: When the time is displayed, press the Start/Stop button.
Day/Night Toggles between day (AWAKE) mode and night (ASLEEP) mode.
Event Marks an event or starts a dose response sequence.
Display Symbols Description
Time 10:45 Indicates current time. When flashing, the monitor will turn off in 20 seconds unless an ABPM study is in progress.
Pressure 75 mmHg Indicates the pressure of the cuff in mmHg during a measurement.Reading Result
120/80 mmHg
Immediately after a measurement is complete, the display shows the results, if enabled. BP in mmHg is shown first, followed by HR in beats per minute.
Clock Denotes that a programmed ABP study is in progress.Sun Denotes the monitor is collecting readings according to the AWAKE program of the study.
Moon Denotes the monitor is collecting readings according to the ASLEEP program of the study.
Battery Indicates low battery voltage; BATTERIES NEED TO BE REPLACED.
Save Symbol Indicates the number displayed indicates the number of readings in memory.
CBP Check CBP Indicates the CBP measurement function is operating properly. This will only appear during the first 30 minutes of the study.
Setting Up The Oscar 2 SystemSetting up the Oscar 2 System involves powering the Oscar 2, installing AccuWin Pro 4 on a personal com-puter (PC), and connecting the Oscar 2 to the PC.
The Oscar 2 ABPM system is packaged with everything you need to start. See Product and Accessories for complete contents.
Powering the Oscar 2 for UseInstall two alkaline (2) AA batteries in the bay located at the back of the monitor. The bay shows the orien-tation in which the batteries should be placed. When batteries are properly loaded, the monitor’s display will show the following:
1. Incrementing dashes 2. Software and safety version of the monitor3. Battery voltage followed by three quick audible beeps 4. The number of BP readings in memory followed by one long audible beep5. Time flashing
The monitor is now ready to be used.
NOTE: Replace with fully charged batteries prior to the start of a new study.
NOTE: Ensure batteries are inserted with the correct polarity. Improper installation will prevent the monitor from functioning. Batteries are required for Oscar 2 use at all times including programming, scheduling and retriev-ing.
Page 15 of 79 80-0062-00-RevL 2020-9-14

NOTE: Install batteries before connecting Oscar 2 to PC via USB.
NOTE: Device will not re-charge batteries via USB connection.
CAUTION: Remove batteries when device is not in use for long periods of time to prevent possible battery leakage and product damage.
Installing AccuWin Pro 4A more detailed installation guide is available in the AccuWin Pro 4 Quick Start Guide (82-0403-00).
PC System Requirements • Windows 10, 8 or 7 SP1 (32 or 64 bit) • SVGA or compatible display adapter and monitor. Minimum 1280 x 1024 recommended resolution • One available USB A port • Minimum 4GB of RAM • Minimum of 30GB of disk space for patient database
NOTE: Install AccuWin Pro 4 before connecting the USB cable to the computer.
1. Connect the USB cable to the USB connector on the ABP monitor (Figure 1; part A).2. Connect the USB end of the cable to the USB port on your PC (Figure 1; part B).
Figure 1: Connecting the Oscar 2 to a PC
NOTE: The cable can be left connected when the PC is off and the monitor is not connected to a patient.
Communicating with the Oscar 2To successfully complete an ambulatory blood pressure (ABP) study: Connect the Oscar 2 to the PC then program the study in the downloaded application from your PC. When the patient returns you will again use the application on your computer to retrieve the collected data.
Wireless CommunicationsThe Oscar 2 may be equipped with an optional Bluetooth™ module, that will allow communications with wire-
A B
Page 16 of 79 80-0062-00-RevL 2020-9-14

less home network devices, mobile phones, and other appropriate devices. For details on how to connect to these devices, please contact your authorized SunTech Medical service representative.
True24 Mobile ApplicationThe True24 ABPM Patient Diary mobile app is designed to work with the SunTech Medical Oscar 2™ ambula-tory blood pressure monitor during a physician prescribed ABPM study. Following each daytime awake blood pressure measurement, the True24 mobile app prompts the patient to enter information about their activity, posture or any symptoms experienced while the BP measurement was taken. This diary information can assist the clinician with understanding the ambulatory blood pressure study data and making hypertension treatment decisions.The True24 Mobile Application works only with the Apple iOS platform, and must be downloaded by the phy-sician onto the patient’s phone from the iTunes App store using the search word ’True24’ After the mobile application has been downloaded, the physician can access training information that can be found on the application to learn how to: • Connect the phone to Oscar 2 • Use the True24 Home Screen • Use the True24 Diary Entries • Prepare the patient for Sleep • Tips for a Successful Study • Using the Oscar 2
Pairing Process
Once the True24 Application is downloaded from the Apple App Store, launch the application, and follow the instructions below to establish proper pairing.
To enter Bluetooth Pairing mode on the Oscar 2:
1. Simultaneously press the two buttons indicated in Figure 2 until the 5 long beep pattern is heard, and the LCD display shows “bt Pr”.
2. Upon successful pairing with a Bluetooth host, the Oscar 2 will emit one long beep, and the LCD Dis-play will briefly show “bt con”. The Oscar 2 will exit the pairing mode and connect to the paired Blue-tooth host.
3. The Oscar 2 will remain in pairing mode for approximately 3 minutes. • If no host is paired at the end of 3 minutes, the Oscar 2 will stop the process and exit pairing mode. • The pairing process may be restarted by performing step 1, above.
(The doctor has to train the user on the proper use of the app, including this next step.)
While using the mobile True24 app, if the app does not prompt the user for a diary entry after a BP reading is completed, it is suggested that the user check pairing using the instructions on the True24 Mobile App.
It is recommended that True24 mobile app is not used during dosage sequence due to interference with the dosage schedule.
Page 17 of 79 80-0062-00-RevL 2020-9-14

Figure 2: Press buttons indicated
Logging in to AccuWin Pro 4If your AccuWin Pro 4 administrator enables login security, you must enter a valid user name and password when you open AccuWin Pro 4 or change the current user. See Admin Tools for more information. If login security is not enabled, no login is necessary.
NOTE: The AccuWin Pro 4 administrator can program AccuWin Pro 4 to automatically log a user off after a specified time of inactivity elapses. If you are logged off, you must log back in again.
To log in enter a valid user name and password then click OK.
Changing Your PasswordIf you know your current password, you can change it. If you are logging in for the first time, you must change the default password assigned to you. You must be logged in under your name before you can change your password.
1. To change your password:2. From the Configure menu, select Admin Tools.3. Click Change Password.4. Enter your current password.5. Enter your new password. It can be alphanumeric and it must be at least 6 characters.6. Re-enter your new password to confirm it.7. Click OK.
NOTE: If you forget your password, you must ask the AccuWin Pro 4 administrator to reset it.
Page 18 of 79 80-0062-00-RevL 2020-9-14

Changing the Current UserTo change the current user:1. From the Configure menu, select Admin Tools.2. Click Change User.3. Enter a valid user name.4. Enter a valid password.5. Click Login.
Page 19 of 79 80-0062-00-RevL 2020-9-14

7. AccuWin Pro 4 LayoutAccuWin Pro 4 gives you the flexibility to program the ABP monitor the way you want and the simplicity to collect and retrieve important test data. The toolbar provides easy, one-click access to frequently used func-tions. The menu bar allows you to access all functions of the software.
Toolbar Buttons
Program: Opens the Program Monitor
Retrieve: Initiates data retrieval from the monitor
BP Data: Opens the Open ABP Study – Select Patient window
Print Preview: Previews a report for the open ABP study
Print: Prints a report for the open ABP study
Print Page: Prints the report page of the displayed data
PDF: Saves the report for the open ABP study in PDF format
Export: Exports the study in a format and location set by the user.
Settings: Opens the Configuration options window
Help: Opens the online help window
Exit: Closes AccuWin Pro 4
Languages: Enables the user to change the application language.
Page 20 of 79 80-0062-00-RevL 2020-9-14

8. Conducting an Ambulatory Blood Pressure Study
Programming the Oscar 2 for an ABP StudyPreparing the monitor for an ABP study involves filling out an on-screen form to set the parameters for your study to be programmed into the monitor. You can also use a template to fill out the form. Templates help to ensure consistent programming and adherence to specific protocols. AccuWin Pro 4 provides default templates, or you can create your own.
Figure 3: Programming the Oscar 2 (Standard Tab)
To program the monitor:
1. Click the Program button on the toolbar. Alternatively, from the Monitor menu, select Program study. 2. Optionally, complete the Patient Information to load patient information into the monitor for the study
and press Check for Patient. • If a Patient ID or Study Reference is entered, AccuWin Pro 4 will search the database for a
matching patient or order. • If a match is found, the patient and study details will be loaded into the window. Press Confirm
Match to continue. • If no match is found, continue to enter patient information as required.
Page 21 of 79 80-0062-00-RevL 2020-9-14

3. Enter the desired parameter settings in the Measurement Schedule (Figure 3). (See Parameter set-tings.) If the Oscar 2 has SphygmoCor Technology, central blood pressure readings can be turned on or off as desired.
4. Click one of the following: • Program to transfer the information to the Oscar 2. An indicator bar shows the progress and
disappears when programming is successfully completed. • Cancel to close the dialog box. • Help to start the online Help.
Figure 4: Programming the Oscar 2 (Patient Information Window)
To create a patient in the database before conducting a study:1. In the Programming Monitor window, click the button for Select/Create Patient.2. Click Create New Patient. 3. A new window Patient Information (Figure 4) will appear. Enter patient information.4. Click OK to save the patient information to be used on this programmed study. Click Cancel to close
the dialog box.
To add measurement periods:1. Click the Add special period button. 2. Select a start time, an end time, and intervals from the pull-down menus. You can add up to two (2)
Page 22 of 79 80-0062-00-RevL 2020-9-14

additional time periods. A pie chart shows the time periods created for the study. 3. Clicking the X will delete the time period from the list.
To program the monitor using a template:1. From the open Program Monitor window, click the Open Template button at the bottom of the Pro-
gram Monitor window. 2. From the Available Templates dialog box (Figure 5), select the template name, and then click Open.
The form automatically populates with the template's settings.3. Click one of the following:
• Program to transfer the information to the Oscar 2. An indicator bar shows the progress and disappears when programming is successfully completed.
• Cancel to close the dialog box. • Help to start the online Help.
Figure 5: Available Templates Window
To create a template:1. In the open Programming Monitor window, enter the desired parameter settings in the form. See
Parameter settings.2. Click the Save Template button at the bottom of the Programming Monitor window.3. In the Assign Template Name dialog box, type a name for the template and click Save.
To open a template:1. From the open Programming Monitor window, click the Open Template button at the bottom of the
Programming Monitor window. 2. From the Available Templates dialog box, select the template name, and then click Open.3. The template information will populate the corresponding information in the Programming Monitor
window.
To delete a template:1. From the Programming Monitor window, click the Open Template button at the bottom of the Pro-
gramming Monitor window.
Page 23 of 79 80-0062-00-RevL 2020-9-14

2. From the Available Templates dialog box, select the template name, and then click Delete.3. At the prompt, click Yes to confirm deletion.
To email a template:An email server must be specified before a Programming Template can be emailed. See Email Settings on page 61 for setup instructions.
1. From the File menu, select Email > Programming Template.2. The Programming Templates window opens. Select the template(s) you want to email and click OK.3. The Email dialog box will appear. Type in the recipient email address(es) with multiple email addresses
separated by a semi-colon, a subject for your message, and a message. 4. Click Send to email the files. Click Attach to change the files you want to email. Click Configure to
configure the email settings.
To export a template to disk:1. From the File menu, select Export > Programming Template.2. The Programming Templates window opens. Select the folder on the disk that to export to.3. Select the template(s) you want to export and click Export.
Study Parameter SettingsStudy parameter settings can be adjusted as follows:
Standard TabUI Item DescriptionPatient ID Patient ID for reporting and referencing data.Patient Name Enter patient name (first, middle, last).Patient Date of Birth
The date of birth for the patient
Study Reference A reference to an order or specific study. A patient in the database may have multiple orders.
Select/Create Patient
Click to open the Patient Information window. Use this window to use existing patient information or to create a new patient entry.
Measurement Schedule:
Specifies when and how often the monitor takes readings. For Awake time and Sleep time, select from the Hour pull-down menu to establish the start time for these periods. From the Brachial BP Interval and Central BP Interval pull-down menu, select the desired interval between readings (none, 5, 10, 15, 20, 30, 45, 60, 90 or 120 minutes). Please note that the available option for Central BP Intervals will only be multiples of the selected Brachial BP Interval.
Start study in 5 minutes:
Slider denotes that the study will start automatically after programming; unchecked denotes that the study will be started with the first press of the Start/Stop button when the monitor is powered ON.
Quality Control Shows the Quality Control tab that allows setting requirements for minimum readings in a study to pass Quality Control
Page 24 of 79 80-0062-00-RevL 2020-9-14

Advanced Tab
UI Item DescriptionMax Pressure Establishes the maximum inflation pressure for the monitor (options between 160
and 280 mmHg). Suggested setting is 30 mmHg above the highest expected systolic BP. NOTE: The ABP monitor will not inflate to Max Pressure with each reading; instead it inflates to 30 mmHg above the previous systolic reading.
Intervals Set interval type. Select Fixed to set the intervals to exact times. Select Standard for +/- 5 minutes around the selected intervals.
Display results When on, allows the patient to view the results immediately after a measurement.NOTE: Display Results is always on for the first 30 minutes of study. Only brachial BP results will be displayed.
Manual readings When on, allows the patient to take measurements outside of the scheduled program using the Start/Stop key.If manual readings are disabled/off, Start Study in 5 minutes MUST be enabled/on.If Start study in 5 minutes is enabled/on, user can elect to enable/on or disable/off manual readingsNOTE: Start study in 5 minutes requires the batteries to be inserted during programming.NOTE: Manual Readings is always ON for the first 30 minutes of the study.
Audible alerts Play an alert sound at the beginning and upon completion of each reading, during the awake period only.
Retry attempts The monitor will reattempt a measurement that initially fails.Note 1, Note 2 Enter up to 20 alphanumeric characters.Time zone difference
Adjust the monitor’s clock to the time zone that the patient is in relative to your time zone. (The PC Time and Monitor Time fields are populated automatically.)
Day/night button When on, enables the Day/Night button on the monitor, allowing the patient to start the Awake and Sleep periods according to their daily schedule. A period can be activated to four hours before the programmed period begins. The monitor will also record the time the day/night button is pressed.
Event marking When enabled, allows the patient to mark up to 30 events during the study. NOTE: If Event Marking is on, Dose Response Sequences is unavailable.
Dose Response Allows Dose Response Sequences to be created to provide greater measurement granularity after a drug dose is administered.
Dose Response Sequences
Specify the duration, brachial BP interval, and CBP interval for up to four dose response sequences. These sequences are useful for tracking BP after a drug dosage is administered. A sequence begins when the patient presses the Event button. To clear fields, click Reset.Once dosage sequence is initiated, the dosage button should only be pressed to start the next sequence. Manual readings are not included in the dose response analysis.NOTE: If Event Marking is on, Dose Response Sequences is unavailable.
Quality Control Tab (if quality control is selected in the programming monitor window)
UI Item DescriptionQC Review Period: Select start and end times for a quality control review period for the study
program.
Page 25 of 79 80-0062-00-RevL 2020-9-14

UI Item DescriptionMinimum Reading Requirements:
Enter the requirements for a minimum percentage of scheduled readings captured during the defined QC period.The minimum number of readings captured per hour during the defined QC period (between 1 and 12).The minimum number of hours to contain readings for the entire study.NOTE: To access the Quality Control tab you must first turn on the “Quality Control” dial at the bottom of the Program Monitor window.
Fitting a Patient with the Oscar 2 and ABPM CuffAfter you have successfully programmed the Oscar 2 using AccuWin Pro 4, you may begin fitting the patient with the monitor and a blood pressure cuff. Cuffs may be used on either arm.
1. Choose the proper cuff size
To determine the correct cuff size for your patient, wrap the cuff around the patient’s upper arm without sliding the arm through the sleeve. Use the color- coded RANGE indicator on the inside of the cuff and the bold INDEX marker to check that the arm circumference falls within the cuff range. If the arm is within range, this cuff size is correct for your patient. If the marker is outside the RANGE indicator, select a new cuff size as indicated by color.
CAUTION: Using an incorrect cuff size could result in erroneous and misleading blood pressure measure-ments.
2. Apply the ABPM cuff
To apply the ABPM cuff, simply slide the sleeve up the patient’s arm, ensuring the color size indicator is at the top of the cuff. The cuff should be midway between the elbow and shoulder. Be sure the ARTERY indicator is over the patient’s brachial artery, between the bicep and tricep muscles. Wrap the cuff snugly around the patient’s upper arm. There should be space for approximately 1 finger underneath the bottom of the cuff.
Figure 6: Instructions for Applying the ABPM Cuff
3. Connect the BP hose to the cuff
Connect the BP hose to the cuff by pushing the fittings together and twisting until it is locked into place. The hose can be released by twisting the connectors and pulling the female fitting away from the male connec-tion. Drape the hose over the patient’s shoulder, behind the neck and across to the opposite side of the body.
4. Attach to patient
Page 26 of 79 80-0062-00-RevL 2020-9-14

Insert the Oscar 2 into its pouch with the display showing through the window. Attach the pouch to the pa-tient using the belt (Figure 7).
Figure 7: Fitting the ABPM Cuff to the Patient
Preparing and Educating the PatientWhen conducting blood pressure measurements, with an oscillometric NIBP device, it is important to follow suitable procedures to ensure valid, accurate results. Preparing your patient for the ABP study is the most important step to achieving a successful test. Review the following instructions with your patient.
• When the pressure in the cuff increases, the patient must avoid excess movement during mea-surements. Let the cuffed arm hang loosely, slightly away from the body with the middle of the cuff at heart level. Avoid flexing the muscles or moving the hand and fingers of the cuffed arm.
• The patient can stop a measurement in progress by pressing the Start/Stop button momentar-ily.
• If the Manual Readings setting is on, the patient can start a measurement at any time by press-ing the Start/Stop button momentarily.
• The cuff should not be removed between BP measurements. • Before sleeping, the patient should make sure that the hose is not kinked and will not become
kinked. • The batteries can be replaced during a study without the data being lost or interrupting the
monitor’s program. Alternatively, the monitor can be turned off without losing its data. • Instruct the patient on how and when to fill out the patient diary. • If Dose Response Sequences are set up, instruct the patient on how and when to start a se-
quence. • Bluetooth pairing should be connected prior to start of first sequence. • If the Day/Night button is on, instruct the patient on how to set day and night modes. • If Event Marking is on, instruct the patient on how and when to mark events. • Ensure the patient knows how to care for the monitor. Keep the monitor dry and do not drop it. • If the monitor or cuff causes extreme pain, or pain not normally associated with blood pressure
measurement, the patient should remove the cuff and turn off the monitor.
Page 27 of 79 80-0062-00-RevL 2020-9-14

• The patient should not talk during BP measurements. The patient should be seated, standing or lying down. If seated, the patient should have legs uncrossed, feet flat on the floor with back and arms supported.
Starting the StudyBefore the patient leaves with the monitor and cuff, verify that the monitor operates correctly. To verify proper monitor operation, ensure that the monitor is on and start a BP reading by pressing the Start/Stop button. The cuff will inflate and complete the brachial BP measurement. If CBP measurement has been programmed, before the cuff is fully deflated, the monitor will hold pressure in the cuff for ten seconds to capture the waveform data required to derive CBP values. The cuff will then be fully deflated. The clock icon should appear on the display of the Oscar 2 indicating that the study is in progress. If problems occur, review the setup and fitting of the system.
Replace the batteries (2 AA alkaline batteries) for every study with new batteries. Failure to do so may result in incomplete 24-hour studies.
To record an event:
Press the Event button
The monitor sounds a long audible beep for confirmation, and "rcd : 01" appears on the display (Subsequent recordings use 02, 03, and so on). The monitor can record up to 30 events. If the patient tries to record more than 30 events, the monitor beeps four times, and "No rcd" appears on the display.
Note: If Event Marking is enabled, then the Dosage Response feature will be disabled.
To start a dose response sequence:
Press the Event button.
The monitor sounds an audible beep for confirmation and begins the first reading in the sequence. The Event button is disabled until all readings in the sequence are complete.
Note: If Dosage Response is enabled, then the Event Marking feature will be disabled.
To manually set day (Awake) or night (Asleep) mode:
Press the Day/Night button.
The monitor beeps and displays either the sun or moon icon depending on the mode that it was switched to. If switching to Night mode, the monitor will display a moon icon. If switching to Day mode, the monitor will display a sun icon.
Finishing the StudyIf you wish to finish the study before the patient returns, instruct the patient to turn off the monitor by holding down the Start/Stop button for five (5) seconds. The Oscar 2 will beep five (5) times and the display will turn off.
When the patient returns, take the cuff, monitor, and belt off and download the captured data to AccuWin Pro 4 for review.
Page 28 of 79 80-0062-00-RevL 2020-9-14

9. Notes on Blood Pressure DataAny blood pressure reading can be affected by the measurement site, the position of the patient, motion, or the patient’s physiologic condition. Environmental or operational factors which can affect the performance of the device and/or its blood pressure reading are common arrhythmias such as atrial or ventricular prema-ture beats or atrial fibrillation, arterial sclerosis, poor perfusion, diabetes, age, pregnancy, preeclampsia, renal diseases, patient motion, trembling, and shivering.
Retrieving Data from the ABP MonitorTo retrieve the data:
1. Connect the Oscar 2 to the computer.2. In AccuWin Pro 4, click the Retrieve toolbar button, or select Retrieve Data from the Monitor menu.
The dialog box on the screen shows the progress as the data is transferred. After completion, a dialog box appears to confirm patient details.
3. In the dialog box, do one of the following: 1. Click No. A list of current patient files appears. Select the patient file to save the retrieved data. 2. Click Yes. The Patient information dialog box appears. Enter patient information in the data fields4. Click OK to save the data. 5. If the alert for adjusting Awake and Asleep times appears, click Yes or No according to your prefer-
ence. 6. If the study contains quality control settings, review the results in the Quality Control Results dialog
box that appears, and then click Close.
NOTE: A green checkmark in the results indicates that the study meets that requirement. A red x indicates that the study failed to meet that requirement.
The BP file will now open automatically and the patient’s BP data is now saved to the AccuWin Pro 4 patient database.
CAUTION: If you do not retrieve data from the monitor, this data will be lost when you program it for the next study.
10. Reviewing and Editing an ABP Study
Opening A Patient FileAccuWin Pro 4 will automatically open a patient file directly after the data is retrieved.
1. From the File menu, select Open. Alternatively, from the toolbar, click the BP Data button.
2. The Open ABP Study - Select Patient dialog box appears, allowing you to select the patient file to
Page 29 of 79 80-0062-00-RevL 2020-9-14

open. Select the patient whose BP data you wish to review by clicking on the patient’s name.3. Click OK.4. If the patient has more than one ABP study, a second dialog box, Choose Date, appears. Select a
study date and click OK. The patient’s data appears in the display area. You can now review the BP study or print a report.
Figure 8: BP Data View
Patients, Studies and OrdersPatient information and BP data is arranged into Patients, Studies and Orders.
• Patient contains patient ID, name and patient demographic information such as age, height and ad-dress.
• Study contains BP data and study specific patient information such as history and medication. • Order contains study specific information entered by the user or imported prior to the completion of a
study, for example, if a reason for test is provided before a study is retrieved from the monitor.
Each study in a patient file contains data that is displayed in the views accessed by the tabs at the bottom of the application. The study information bar located toward the top of the view identifies the patient name, patient ID, patient age (at the time of the study) and the study date of the displayed file.Tabs and their contents.
• ABP Data: ABP measurement data from the monitor and relevant graphs. • Patient Info: Patient name, ID, contact information, and physical description. • Physician Info: Patient history, clinical information, and interpretation. • Statistics: Statistical analysis of the ABP study. • Dose Response Statistics: Statistical analysis for dose response sequences. • Time-Slice Statistics: Statistical analysis of specific user-defined time windows.
Page 30 of 79 80-0062-00-RevL 2020-9-14

• Hourly Averages: Analysis of ABP study data including study comparison. • Summary: Interpretative summary settings and results for current study.
Viewing an Ambulatory Blood Pressure StudyIn the upper portion of the ABP Data tab, a table displays the results for each of the BP measurements taken or attempted during the study. The table also includes events recorded by the patient and dose response se-quences. To display only these events in the table, select Events Only from the Show pull-down menu. Events and Readings displays all records.
Below the table are tabs offering different graphical representations of the BP data: Overview Graph, Central BP Data, or AASI Graph.
Figure 9: ABP Date Graph, Threshold tab
To adjust the size of the data table:1. Position the mouse pointer over the bottom boundary of the table.2. When the pointer turns to a double arrow, drag it up or down.
Overview GraphThe scale of the vertical axis represents blood pressure (mmHg) and heart rate (bpm). The horizontal axis displays the time in clock hours. Clicking on any point, measurement or event, in the graph highlights the corresponding row in the table.
There are three tabs to the right of the graph: Threshold, Time-Slice, and Legend. The Threshold tab allows the user to change the Threshold settings on the graph. The Time-Slice tab allows users to define specific time windows in which to perform a statistical analysis. The Legend tab provides details on the configuration of colors for the Overview Graph.
Shading on the graph indicates various periods of the study. The default colors (see Display Settings) and definitions are:
• Blue shading: Indicates the asleep period of the study. • Yellow shading: Indicates the white coat period, which is the first hour of the study (appears
only if enabled). • Light green shading: Indicates a dose response period (appears only if programmed). • Light orange shading: Indicates the periods used to calculate Morning Surge (appears only if
enabled).
Page 31 of 79 80-0062-00-RevL 2020-9-14

Central BP Data: The Central BP Data tab provides a detailed view of individual CBP measurements taken during the study. If your Oscar 2 is configured with the SphygmoCor Inside technology, you will be able to collect, display, and analyze these parameters. The tab will display the number, time and date of the selected reading along with the following:
Average Central Pressure Waveform: A graphical representation of the derived average central pressure waveform. The shape of the aortic pressure pulse is a result of the ventricular ejection and physical proper-ties of the arterial system. The waveform shape changes with changes in arterial stiffness.
Central Systolic Pressure (cSYS): The maximum pressure during aortic ejection. High cSYS indicates high cardiovascular load. High arterial stiffness increases the reflected pressure wave in the arterial system, and augments or increases cSYS pressure. With aging, the arteries become stiffer. Consequently, wave reflection increases, leading to increased cSYS and resulting in increased risk of cardiovascular disease or organ dam-age.
Central Diastolic Pressure (cDIA): The minimum pressure during aortic ejection.
Central Pulse Pressure (cPP): Represents the height of the aortic pressure waveform. cPP can also be described as the difference between the maximum and minimum of the central pressure waveform, or cSYS minus cDIA. Aortic cPP greater than 50 mmHg has been shown to predict cardiovascular disease.
Central Augmentation Pressure (cAP): cAP is a measure of the pressure wave reflected back from lower body. It is calculated as the difference between the two pressure peaks during ejection (systole). The first peak is related to cardiac ejection and the second peak is related to wave reflection due to arterial stiffness. The cAP value is affected by both the magnitude and speed of the reflected wave, which is an indicator of arterial stiffness.
Central Augmentation Index (cAIx, cAIx@75): The ratio of cAP to cPP, expressed as a percentage. Studies have shown that patients with diabetes tend to have high cAIx, indicating stiffer arteries and higher risk of organ damage. cAIx is also corrected for a heart rate of 75 beats per minute.
Measured Brachial Waveform: A graphical representation of the brachial waveform captured during the dis-played measurement. The brachial waveform data is used to derive the average central pressure waveform.
The Central BP Data tab also offers the user the option to print or save the details for any single CBP mea-surement from the study. The printed page or saved file will be a single page document containing the same information as is presented on the Central BP Data tab for the selected measurement along with the patient name, patient ID, study date, brachial systolic and diastolic values, and heart rate.
The following diagram shows the central aortic pressure waveform.
Page 32 of 79 80-0062-00-RevL 2020-9-14

Figure 10: Explanation of Central Blood Pressure Waveform Characteristics
AASI GraphThe AASI Graph tab is optional, and can be enabled by selecting Ambulatory Arterial Stiffness Index on the Report>Configuration>Data (see CustomizingandConfiguringAccuWinPro4). The graph on this tab plots the diastolic on systolic BP values for each measurement captured in the study. Additionally, this tab lists the calculated AASI value, diastolic as a function of systolic, systolic as a function of diastolic, the correlation coefficient of the linear regression equation, and the coordinate of the average systolic and diastolic. The cal-culated AASI value will also be added to the Overall results on the Statistics tab. The user can specify which BP values to use in the graph and calculations by selecting Brachial BP Values or Central BP Values near the bottom of the legend.
Figure 11: AASI Graph
Reviewing an Ambulatory Blood Pressure StudyIn the ABP Data view, you can review an ABP study for accuracy and context. When the data is retrieved by AccuWin Pro 4, all readings in an ABP study that have event codes will be “tagged” in the first column of the table. Tagged records are omitted from the analysis of the ABP study displayed in the Statistics and Hourly Averages views, but these readings can be printed in the report.
The monitor tags data with an asterisk(*) based on criteria used to determine the validity of the data. The exclamation point (!) is a permanent tag and is used when an accurate reading cannot be determined by the ABP monitor. This tag cannot be changed and associated data will not be used in data analysis. The asterisk
Page 33 of 79 80-0062-00-RevL 2020-9-14

is a tag that you can edit. Tags numbered r01 to r30 indicate events entered by the patient, and the com-ments can be changed. Data can be tagged or un-tagged based on a number of factors, including patient history, patient diary information, or other factors.
There are two methods to remove or insert an asterisk (*) tag on a measurement.
To remove or insert an asterisk (*) tag using the table:1. Select the reading you want to tag (omit) or un-tag (include). It will be highlighted.2. Click in the first, or left-most, cell under the column labeled “Tag”.
To remove or insert an asterisk (*) tag from the graph:1. Use the cursor on the graph to select the reading you want to tag (omit) or un-tag (include). Conse-
quently, this action highlights the reading in the table.2. Right-click the mouse and select Toggle Tag from the menu.
NOTE: All changes made to the ABP study are saved immediately.
Entering CommentsUse the Comments column, the right-most column in the table, to keep track of patient activity during a BP reading. While activity is only one of the many factors that can affect blood pressure, it can be helpful in un-derstanding a BP reading within the context of the study.
To assist the patient with tracking their activities, a patient diary template is available for printing from the Download Library on the SunTech Medical website.
To enter a patient comment from the table:1. Highlight the reading to which you want to add a comment, and select the corresponding cell in the
Comments column.2. Left-click the mouse over the comment box to open the pull-down menu of predefined entries.3. Select a comment from the list or type a new comment.4. Press Enter.
Figure 12: Diary Comment Drop-Down Selection Box
Page 34 of 79 80-0062-00-RevL 2020-9-14

To enter a comment from the graph:1. Select the reading in the ABP data graph to which you want to add a comment. This causes the corre-
sponding row in the table to be highlighted.2. Right-click the mouse and select Set comment from the menu.3. Add a comment by typing or selecting from predefined list.4. Click OK.
You can add or delete entries appearing in the Comments pull-down list by going to the Diary Comments section of the Configuration window. (For instructions on configuring Diary Comments, see Customizing and Configuring AccuWin Pro 4.)
Figure 13: Text Entry Box for Setting a New Comment
To change the comment for an event marked by the patient:Click the event's checkmark above the graph to cycle through the following selections (symbol: comment): : "Event marked" Rx: "Dosage" Sx: "Symptom"
The selected symbol replaces the checkmark, and the comment appears in the table.
To change time period start times:1. Display an ABP study and choose the Threshold tab.2. Click Edit Awake/Asleep Times.3. In the Times tab (Figure 14), reset the patient’s asleep and awake times to the nearest half-hour by
moving the appropriate sliders right or left. The new times are displayed on the clock face, with the black portion representing time asleep and the white portion, time awake. The clock is displayed in a 24-hour clock (i.e. 12:00 is noon, 18:00 is 6 p.m., and 00:00 or 24:00 is midnight).
4. Click Apply to keep the new settings.
Page 35 of 79 80-0062-00-RevL 2020-9-14

Figure 14: Edit Awake/Asleep Time
Setting BP Threshold LimitsUsers may select the thresholds used to calculate the blood pressure load and above threshold values for brachial and central BP parameters. There are two settings for thresholds: global and custom. Global thresh-olds apply to all patient files; custom thresholds apply to all studies for a particular patient.
To define thresholds:1. Open a study in the ABP Data tab. Within the Overview Graph tab, navigate to the Threshold tab locat-
ed to the right of the graph view.2. Click Edit Thresholds.3. From either the Brachial Thresholds or Central Thresholds tab, click Use custom or Use global thresh-
olds. 4. Move the sliders to change the settings according to your preferences.5. Click OK to apply the changes.
Page 36 of 79 80-0062-00-RevL 2020-9-14

Figure 15: Setting BP Thresholds
Brachial ThresholdsBrachial Thresholds can be set for Awake and Asleep systolic and diastolic BP. The default setting is a global threshold set to 140/90 mmHg for Awake periods and 120/80 mmHg for Asleep periods. If desired, you can set thresholds to match a published standard using the corresponding buttons: JNC7/AHA or ESH. • JNC79 recommends 135/85 mmHg for Awake periods and 120/75 mmHg for Asleep periods. • The American Heart Association (AHA)10 recommends a 24-hour average BP of 130/80 mmHg. • The ESH11 recommends 135/85 mmHg for Awake periods and 120/70 mmHg for Asleep periods. Central ThresholdsCentral thresholds can be set for Awake and Asleep central systolic BP (cSYS), central pulse pressure (cPP), augmented pressure (cAP), and augmentation index (cAIx). The default setting for the Awake thresholds is a global threshold set to calculated values dependent on gender and age of the patient. If no gender or age is provided, the default values will be set to 130 mmHg for central systolic BP and 50 mmHg for central pulse pressure. No settings will be established for augmented pressure or augmentation index. There is also the option to set the central pulse pressure (cPP) according to the published STRONG standard, 50 mmHg.
The default setting for the Asleep thresholds is no selected values. The user does have the option of auto-matically setting Asleep thresholds to match the selected Awake values. If no Asleep thresholds are defined, all graphical representations and related statistics will be left blank.
Setting Pediatric Threshold LimitsThe American Heart Association has a published statement supporting ABP monitoring in children, as hyper-tension is being diagnosed with increasing frequency in pediatric patients.10 The guidelines for hypertension differ from those for adults; hypertension in pediatric patients is generally defined as a blood pressure values above the 95th percentile for that gender and height. Specific ABPM thresholds based on published recom-mendations are programmed into AccuWin Pro 4.12,13,14
Page 37 of 79 80-0062-00-RevL 2020-9-14

To apply a pediatric threshold:1. Open a study in the ABP Data tab. Within the Overview Graph tab, navigate to the Threshold tab locat-
ed to the right of the graph view.2. Click Pediatric Thresholds.3. Enter the patient’s gender and height. The height may be entered in centimeters (cm), inches, or feet/
inches. (Figure 16)4. Select which reference table to use, either Wuhl, et al (2002) or Soergel, et al (1997).5. Click Apply.
Figure 16: Pediatric Threshold Calculator
NOTE: The pediatric threshold is applied as a custom brachial BP threshold, which applies to a single patient’s file.
Defining Time-Slice PeriodsUsers may define up to twelve specific time windows for which to perform a statistical analysis. The statisti-cal analysis corresponding to time-slice periods will appear in the Time-Slice Statistics tab to the right of the Statistics tab.
Page 38 of 79 80-0062-00-RevL 2020-9-14

Figure 17: ABP Data Graph, Time-Slice Tab
To create a time-slice: 1. Open a study in the ABP Data tab. Within the Overview Graph tab, navigate to the Time-Slice tab
located to the right of the graph view. (Figure 17).2. Click the New button. On the graph left-click and hold the mouse to select the starting time of the
time-slice period then drag the mouse to the end time. Releasing the mouse button determines the ending time of the time slice. The selected time-slice will be highlighted on the Overview graph.
3. Once the time-slice is selected, a Time-Slice Settings box (Figure 18) will appear and allow the user to name the time-slice and edit the start and end times, if necessary.
4. Click Save to create the new time-slice.
Page 39 of 79 80-0062-00-RevL 2020-9-14

Figure 18: Time-Slice Settings Window
To edit a time-slice:1. Open an ABP study and click the Time-Slice tab (Figure 17).2. Choose the time-slice from the drop-down menu. The time-slice period will be highlighted on the Over-
view graph.3. Click Edit. The Time-Slice Settings box (Figure 18) will appear.4. Edit the name or the start and end times. 5. Click Save to save the settings.
To delete a time-slice:1. Display the ABP study. Choose the Time-Slice tab.2. Choose a time-slice from the drop-down menu. The time-slice period will be highlighted on the ABP
data graph.3. Choose Delete. Click Yes to delete the time-slice (Figure 19).
Page 40 of 79 80-0062-00-RevL 2020-9-14

Figure 19: Deleting Time-Slice (Configuration Window)
Editing Patient Info and Physician InfoPatient and physician information may be entered when data is retrieved from the monitor or after the patient file is saved.
To edit Patient Info (Figure 20)1. Click the Patient Info tab at the bottom of the screen.2. Click on the Edit button at the bottom of the screen.3. Update any patient information and click Save. Alternatively, you may click Cancel to discard all
changes.
Figure 20: Patient Info Tab
To edit Physician Info (Figure 21): 1. Click the Physician Info tab at the bottom of the screen.2. Click on the Edit button.3. Update any information and click Save. Alternatively, you may click Cancel to discard all changes.
Users are able to enter and edit Patient History, Reason for Test, Current Medications, and Physician Inter-
Page 41 of 79 80-0062-00-RevL 2020-9-14

pretation. As an alternative to typing in the free text field for Current Medications, users may add Medication, Dosage, and Frequency to dictionaries that are stored within AccuWin Pro 4.
Figure 21: Physician Info Tab
To Add Medications (Figure 22)1. Type a medication into the drop-down titled Medication. (See Figure 23 for abbreviations)2. Once the medication is typed, press Enter or Tab on the keyboard or use your mouse to move the
cursor to the Dosage column.3. Enter Dosage and Frequency in the same manner. Predefined entries in the Frequency column are
listed below.4. Once the Medication, Dosage, and Frequency are entered into their respective columns, click the Add
button to add the information to the Current Medications field above and to the dictionary.
Figure 22: Add Medications Menu
Abbreviation Meaningac Before mealsbid Twice dailypc After mealsprn As neededqam Every day before noon
Page 42 of 79 80-0062-00-RevL 2020-9-14

Abbreviation Meaningqd Every dayqh Every hourqhs Every night at bedtimeqid Four times a dayqod Every other dayqpm Every day after noonqwk Every weektid Three times a day
Figure 23: Medication Entry Abbreviation
To locate and choose a previously stored entry:1. Either start to type an entry or choose the down arrow with your mouse. As more characters of the
desired entry are typed, a list of matching entries will be displayed.2. To choose the stored entry, use the down arrow on the keyboard, highlight the desired entry, and press
Enter on the keyboard. Alternatively, use the mouse to highlight the entry, and then double-click the entry.
3. When each of the columns are populated with the correct information, click Add.
To add a reason for test:1. Type a reason for test into the drop-down titled Reason for Test or select an existing entry from the
drop-down. 2. If reason is suspected white coat hypertension, text boxes will appear to allow documentation of prior
measurements in study report.
Viewing StatisticsTo view the statistical analysis for the displayed ABP study, click on the Statistics tab. This window initially shows the following tables:
• Overall: Data for the complete ABPM study• Awake Period: Data collected while the patient is awake• Asleep Period: Data collected while the patient is asleep• White Coat Period: Data collected during the first hour (if enabled).
The Statistics tab can also show additional time periods or BP load charts.
To show additional time periods or BP load charts:Under Show, select one of the following: • Additional Time Periods to show tables with data collected during other time periods, as pro-
grammed. • BP Load Charts to show pie charts for the Overall, Awake, and Asleep periods, illustrating values
above and below established thresholds for brachial and central systolic BP, and brachial diastolic BP. NOTE: All data in these tables is included in exports, except white coat analysis values and BP load charts.
In the Statistics tab, each table includes the mean, standard deviation, coefficient of variation (CV), minimum value, and maximum value for the following parameters: brachial and central systolic, brachial and central diastolic, brachial and central MAP, brachial and central pulse pressure, central augmentation index, central
Page 43 of 79 80-0062-00-RevL 2020-9-14

augmentation index at 75 bpm, and central augmentation pressure.
Additionally, the following calculations are also provided on the Statistics tab: • BP Load: Blood pressure load characterizes the distribution of measurements in an ABPM study rela-
tive to brachial systolic and diastolic thresholds indicative of hypertension. The percentage of readings above this threshold is the BP load which has been shown to predict target organ involvement.14
• Asleep Dip: The nocturnal fall of blood pressure expressed as a percentage of the mean awake values. The expected nocturnal dip for brachial BP is 10-20%. The absence of the expected dip may indicate end-organ damage or risk for cardiovascular events.7,16
The Statistics tab may include any of the following additional calculations if they are enabled under Report>-Configuration>Data:
• Ambulatory Arterial Stiffness Index (AASI): AASI is calculated as one minus the regression slope of the diastolic on systolic blood pressure. (The regression slope is calculated by plotting the diastol-ic against the systolic values.) This index has been used to measure arterial stiffness and has been shown to help predict target organ damage, cardiovascular mortality, and stroke.17 The user can spec-ify which BP values to use when calculating this value by selecting Brachial BP Values or Central BP Values from the AASI Graph tab.
• Morning Surge: Morning Surge is calculated as the difference between the mean systolic BP during the two hours after waking, minus the systolic BP during the Asleep hour containing the lowest BP val-ue measured. This calculation can help to identify cases in which the morning BP increase is unusual-ly high and presents a potential cardiovascular risk or a risk of stroke.14
• CoefficientofVariation: The Coefficient of Variation (CV) can be used as a measure of BP variability, which can be a determinant of end-organ damage.18 CV is calculated as the standard deviation divid-ed by the mean blood pressure of a time period.
• Smoothness Index: Smoothness Index (SI) is the ratio between the average of the blood pressure changes computed for each hour of the recording and its standard deviation. SI is generally used to evaluate the effectiveness of antihypertensive treatment as it shows the averaged trend of blood pres-sure reduction between two studies.19
• White Coat Analysis15: White coat syndrome refers to abnormally elevated blood pressure when the patient is in a medical setting. If selected, this option does the following: • Adds a white coat period to the statistical analysis. • Displays the first hour of the study, or white coat period, with a light blue background in the
graphs. • Evaluates for and reports on the presence of white coat syndrome on the interpretive summary,
when present.
NOTE: Either brachial or central BP values can be used to calculate Morning Surge, Coefficient of Variation, and Smoothness Index. To specify which blood pressure values to use, see Data Settings.
Viewing Dose Response StatisticsTo view the statistical analysis for dose response sequences, click on the Dose Response Statistics tab. This tab is present only when dose response sequences have been recorded. You can specify which sequence to display by selecting its number from the Show Sequence menu. The window shows seven scatter plots for ten parameters measured within the dosage response sequence. Results are also provided for BP load and maximum change from the baseline (the first reading of the sequence) for the systolic (SYS), diastolic (DIA), and central systolic (cSYS) parameters.
Viewing Time-Slice StatisticsTo view the statistical analysis for user defined time-slice periods, click on the Time- Slice Statistics tab (Fig-ure 24).
Page 44 of 79 80-0062-00-RevL 2020-9-14

Figure 24: Time-Slice Statistics
Viewing Hourly AveragesTo display trends in a patient’s ABP study, click the Hourly Averages tab at the bottom of the window (Figure 25). The table shows the average BP readings for each hour the patient was tested. In addition to brachial systolic (SYS) and diastolic (DIA), and the heart rate (HR), the following statistical averages are provided:
• Mean Arterial Pressure (MAP) - This is the average pressure in an artery over the period of one heartbeat. In the brachial artery, it is calculated by adding the diastolic to one-third of the difference between the systolic and diastolic readings.
• Pulse Pressure (PP) - This is calculated by subtracting the diastolic from the systolic reading. It is another hemodynamic parameter that may serve as an indicator for cardiovascular risk. Pulse pressure is provid-ed using both brachial (PP) and central (cPP) values.
• Pressure Rate Product (PRP) - This is the product of the average systolic reading multiplied by the aver-age heart rate. PRP strongly correlates to a patient’s activity level and may be a key indicator of cardio-vascular risk. As typically reported in research and clinical applications, PRP data is divided by 1000.
Use the check boxes at the top of each column to select the statistics you would like to see displayed in the graph at the bottom of the page. You can resize the table and zoom in on the graph with your mouse pointer. (For instructions on resizing and zooming, see Viewing an Ambulatory Blood Pressure Study.)
Page 45 of 79 80-0062-00-RevL 2020-9-14

Figure 25: Hourly Averages
Viewing the Interpretive Report SummaryThis window (Figure 26) shows an interpretation of the ABPM data based on published guidelines. Because traditional BP guidelines might not apply to the 24-hour ABPM readings, AccuWin Pro 4 includes the recom-mendations specifically for evaluation of ABPM levels. The summary provides normal or hypertensive results for the 24-hour average, awake, and asleep systolic and diastolic pressure readings, asleep “dipping” status, and an optional white coat analysis.
To generate an interpretive summary for the displayed ABP study, click the Summary tab on the bottom of the screen and select one of the following options for interpretation: • Joint National Committee Seventh Report (JNC)7 and American Heart Association (AHA)8 guidelines. • European Society for Hypertension (ESH)6. • Pediatric – AHA12
• Pediatric – Soergel Tables11
Based on the calculated brachial dip percentage, AccuWin Pro 4 determines whether the patient is one of the following: • Dipper (normal): A patient shows a decrease of 10% or more in brachial systolic or diastolic blood
pressure values during sleep compared to readings taken when awake. • Non-dipper (abnormal): A patient shows no decrease or less than a 10% decrease in brachial systolic
or diastolic blood pressure values during sleep compared to readings taken when awake.
Page 46 of 79 80-0062-00-RevL 2020-9-14

Figure 26: Summary Tab
Comparing Two StudiesTo further enhance the utility of ABPM, you may want to measure the progress of a patient’s blood pressure by conducting multiple studies. AccuWin Pro 4 allows for the comparison of the hourly averages and statis-tics for two studies conducted on the same patient.To compare two studies:1. Click on the Hourly Averages tab at the bottom of the window.2. Click on the Get Comparison Study button. (If the button is grayed out, the patient file you are viewing
contains only one study.)3. The Choose Date window will appear. Select the study you want to use as a reference for comparison
by highlighting it and clicking OK.
The statistics generated during the previous study are now incorporated into the Hourly Averages window. The table expands to include the hourly average values for the reference study, and the differences between the displayed and the reference studies.
On the graph at the bottom of the window, both studies’ data are displayed. The dotted lines represent data from the reference study, and solid lines represent data from the displayed study. Select Difference and the graph will display one line representing the difference between the two studies. The same navigation tools for the Hourly Average and ABP Data windows also apply to the comparison window.
Page 47 of 79 80-0062-00-RevL 2020-9-14

11. Creating Reports
Configuring and Customizing the ReportTo document a study and its findings, you can create a customized report (Figure 27).
Figure 27: Configuration Window, Report Formats
AccuWin Pro 4 provides the following preconfigured report formats:• One page report: Summary page only.• Standard report: Summary, Patient Information (all information from the Physician Info tab), Statistics,
ABP Data, and Monitor Configuration pages.• Full report: All report pages.
NOTE: All report pages include the SunTech Medical logo, patient demographics (all information from the Pa-tient Info tab), and test date. The footer of each page identifies the type of monitor used and the page number.
To configure or customize your report (Figure 27):1. From the Report menu, select Configure, or click on the Settings button on the toolbar then navigate
to the Report tab in the Configuration window.2. On the Formats tab, do one of the following:
Page 48 of 79 80-0062-00-RevL 2020-9-14

• Choose one of the formats listed in the left pane. When you select a format, the pages included in that format are selected in the Report Pages box.
• Create a new custom report format by clicking New Report. Enter the report format name. Select the pages from the Report Pages list on the right.
3. To include an additional page in your report, click the respective page in the Report Pages box.4. Under Report Title, enter up to five lines of text that will appear in the header of every report page.5. Select either a single-page or multi-page view for the Print Preview window on the Details tab (Figure
28).
Figure 28: Configuration Window, Report Details
You can choose from the following pages to customize your report (listed in the order the pages will print, see Figure 27): • Summary: The Interpretive Summary appears above the data graph and summary statistics. Sum-
mary brachial and peak central BP statistics for the overall, awake, asleep, and white coat (if chosen) periods include: mean systolic and diastolic, mean heart rate, BP load, and asleep dip.
• Patient Information: Includes patient history, reason for test, patient medications, and the physician interpretation.
• Statistics: Displays detailed statistics for brachial and central BP parameters according to the time periods included in the study. Overall, awake and asleep time period results will be displayed first, followed by the white coat period (if enabled), and finally any additional time periods programmed by the user.
• Time-Slice Statistics: Displays statistics for brachial and central BP parameters for each user defined time-slice period.
Page 49 of 79 80-0062-00-RevL 2020-9-14

• Reviewed Data: Shows all the BP readings captured during the study in table format as it is shown on the ABP Data tab within AccuWin Pro 4, excluding the event codes (EC column). The vertical black line between the # and Time columns indicates the asleep time period. A “>” symbol adjacent to the BP values indicates that it has exceeded the threshold.
• Omitted Data: Shows the BP readings that were excluded from the statistics calculations. This page appends to the Reviewed Data page, if printed.
• Events Marked: Shows events marked by the patient during the course of the study. This page ap-pends to the Reviewed Data page, if printed.
• Dosage Response: Displays the statistics and scatter plots for each of the dosage response sequenc-es captured during the study, as they are displayed in the Dose Response Statistics tab.
• AASI: Displays the data and graph for the AASI parameter, as they are displayed in the ABP Data>AASI tab.
• BP Load: Shows the BP load pie charts. • Hourly Averages: Displays hourly average data for the study in graph and table formats, as displayed
on the Hourly Averages tab. • Study Comparison: Displays study comparison data in graph and table formats, as displayed on the
Hourly Averages tab. • Histograms: Contains frequency histograms for awake and asleep time periods for brachial and cen-
tral systolic and diastolic BP, heart rate, MAP, PRP, and PP. • MonitorConfiguration:Shows the programmed time period, dosage response, and monitor settings
for the study. The page also displays the quality control results for the study (if applicable) and defini-tions for event codes.
To configure report details (Figure 28):1. Click the Details tab. From here you can control the following parameters for printing reports:
• Overview Graph Type: Select line, bar, or the type of graph currently displayed according to the type you want to print on the Summary page of the report.
• Overview Graph Scale: Select time scale for the graph that prints on the Summary page of the report.
• Summary Page User Fields: Check desired fields for medications, patient history, test reason, and physician interpretation.
• Horizontal Sight Lines: Select preferred frequency of sight lines in the Reviewed ABP Data table when printing the Reviewed Data Page, or Omitted Data Page in the report.
• Report Viewing Options: Select either a Single-page or multi-page view of the report which will appear in the Print Preview window.
2. Click OK to apply the changes.
Previewing the Report1. From the Report menu, select Preview. Alternatively, click the Print Preview toolbar button. The Print
Preview window is displayed (Figure 29).2. To scroll through the report pages, click the previous or next buttons, or select the page you want to
view using the drop-down menu.3. To change the format and details, click Configure.4. To print the report, click Printer Icon.
Page 50 of 79 80-0062-00-RevL 2020-9-14

Figure 29: Report Print Preview
Printing the ReportAccuWin Pro 4 provides you with flexibility in printing the report. You can either:
• Print the configured report by clicking the Print Report button on the toolbar or by going to the Report menu and selecting Print. The Print dialog box is displayed, where you can choose the preferred printer.
• Print the report page corresponding to the current tab that is being displayed by clicking Print Page.
Saving the Report as a PDFTo save the report as an Adobe Portable Document Format (PDF), from the Report menu, select Create PDF. Alternatively, click the PDF toolbar button. The system creates the PDF and saves the file to the location you specify.
NOTE: You must have a printer installed. If you do not have a printer installed, see the online Help to install a driver to print to a file.
Page 51 of 79 80-0062-00-RevL 2020-9-14
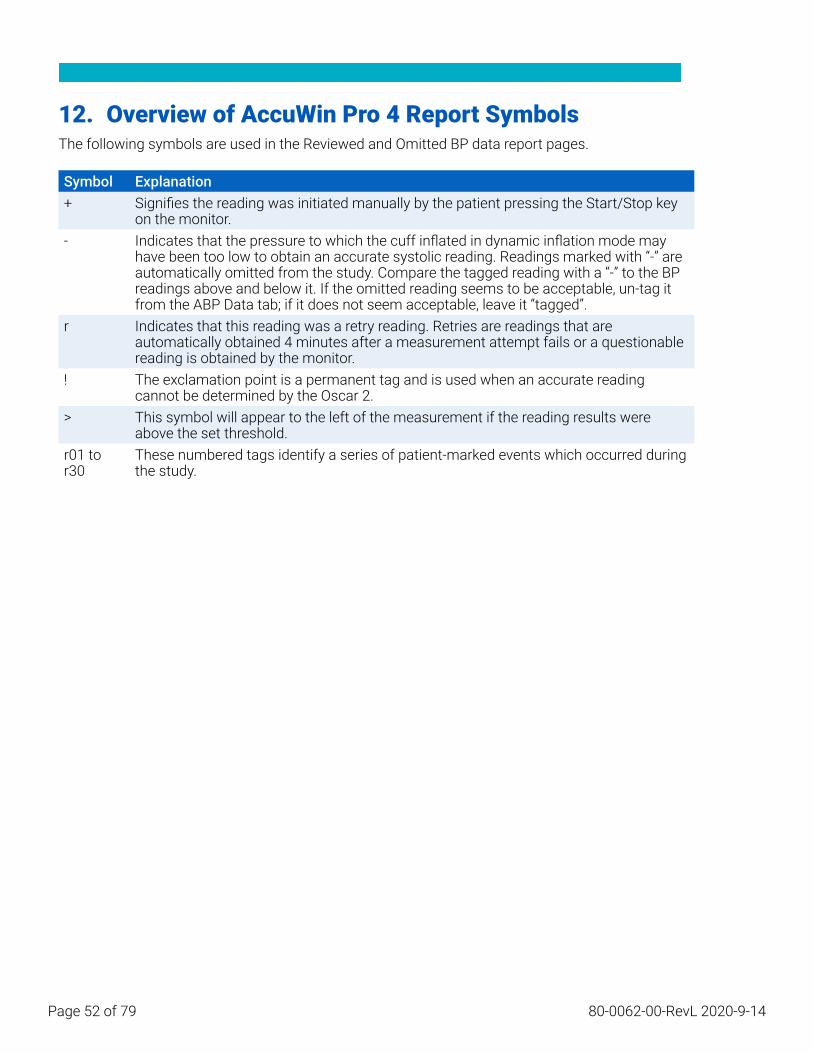
12. Overview of AccuWin Pro 4 Report SymbolsThe following symbols are used in the Reviewed and Omitted BP data report pages.
Symbol Explanation+ Signifies the reading was initiated manually by the patient pressing the Start/Stop key
on the monitor.- Indicates that the pressure to which the cuff inflated in dynamic inflation mode may
have been too low to obtain an accurate systolic reading. Readings marked with “-” are automatically omitted from the study. Compare the tagged reading with a “-” to the BP readings above and below it. If the omitted reading seems to be acceptable, un-tag it from the ABP Data tab; if it does not seem acceptable, leave it “tagged”.
r Indicates that this reading was a retry reading. Retries are readings that are automatically obtained 4 minutes after a measurement attempt fails or a questionable reading is obtained by the monitor.
! The exclamation point is a permanent tag and is used when an accurate reading cannot be determined by the Oscar 2.
> This symbol will appear to the left of the measurement if the reading results were above the set threshold.
r01 to r30
These numbered tags identify a series of patient-marked events which occurred during the study.
Page 52 of 79 80-0062-00-RevL 2020-9-14

13. Managing Patient Studies
Opening a Patient StudyThis feature allows you to retrieve and view a patient study.
1. From the toolbar, click the BP Data button or from the File menu, select Open. The Open ABP Study – Select Patient dialog box appears listing all available patient files.
2. Select the patient whose BP data you wish to retrieve by clicking on the patient’s name or use the search button to locate the patient by any information relevant to the patient’s file. Click OK.
3. If the patient has more than one ABP study, a second dialog box, Choose Date, will be displayed. Se-lect a date and click OK.
4. The patient’s data appears in the Display Area. You can now review the BP data or print a report.
Exporting a Patient StudySelect studies to be exported to AWP, ASCII, or XML format.
1. From the File menu, select Export.2. Choose either to export the Displayed File or select files From Database.3. If exporting files from the database, select the files you want to export and click OK.4. The Export dialog box appears. Click Export to export the file(s). Click Edit to change the list of files
you want to export. ClickConfigure to configure the details of the exported file(s). (For instructions on configuring export, see Export in Customizing and Configuring AccuWin Pro 4).
The exported files will be exported to the selected file location as either a *.ASC, *.GDT, *.XML or *.AWP4, file depending on the format chosen.
Automated export
The Export Icon can be configured to export in a predetermined format when pressed. To config-ure the Export Icon behavior, see Export Settings
Emailing a Patient StudyTo email AccuWin Pro 4 data files as an attachment:1. From the File menu, select Email.2. Choose either to email the Displayed File or select files From Database. If displayed File is chosen, the
data currently displayed on the screen is emailed. If From Database is chosen, the patient database window opens and prompts you to Select file(s) to email. Check the files you want to email and click OK.
3. The Email dialog box will appear. Type in the recipient email address(es), a subject for your message, and a message.
4. Click Send to email the file(s). Click Attach to change the files you want to email. Click Configure to configure the email settings. (For instructions on configuring email, see Email in Customizing and
Page 53 of 79 80-0062-00-RevL 2020-9-14

Configuring AccuWin Pro 4 on page 61).
Deleting a Patient Record This feature allows you to delete one or more patient records at a time. Each patient record contains ALL ABPM studies for that patient; therefore ALL ABPM studies for that patient will be deleted when selected.
To delete selected patient study(s):1. From the file menu click Patient Management. 2. In the Patient Management window, select the patient(s) that you’d like to delete.3. Click Delete. 4. A dialog box Select Date may appear. You may select one study date by clicking on it. Alternatively,
you may use the checkboxes to select more than 1 patient file.5. Click OK to delete the selected study(s). A confirmation window Delete Study will appear. Select Yes
to confirm deletion of selected studies. Click No to cancel and return to the Select Date window.
Importing a Patient RecordYou may import patient studies that are saved on your computer, so that the files are stored in the main Ac-cuWin Pro 4 patient database. To import patient studies:1. Click File then select Import > Import Patient Study. 2. Click Browse Files. A Windows Explorer Window will appear to allow you to select the patient study
files or folder that you would like to import. 3. Select the patient study files that you would like to import. You may select multiple files using stan-
dard windows shortcuts, if you prefer. 4. Click Open. The patient study files will populate in the Import Patient Study window. 5. Click Import. A progress bar will show the status of the import process.
Grouping Patient RecordsGrouping patient records can be useful for organizing patient data based on certain demographics, tem-plates, or studies.
Default Groups
Group Group includes:Studies All patients with at least 1 study saved in the databaseWorklist All patients with at least 1 open order saved in the databaseAll All patients saved in the databaseUnassigned All patients not saved to a custom group
To create a new group:1. Click File then select Group Management. 2. Click Add. A dialog box appears with a text entry box for the new group name.3. Type the new group name in the text entry box. 4. Click OK. 5. A dialog box appears Group added successfully. Click OK.
Page 54 of 79 80-0062-00-RevL 2020-9-14

To move patients between groups:1. Click File then select Patient Management. 2. Using the checkboxes to the left of the dialog box, select the patients that you would like to manage. 3. Click Move Patient. 4. Select the Group Name using the drop-down menu from the dialog box. 5. Click OK. A confirmation window will appear once the patient(s) have been moved successfully.
Page 55 of 79 80-0062-00-RevL 2020-9-14

14. Customizing and Configuring AccuWin Pro 4It may be helpful to have multiple configuration profiles for your users, for example, one for each physician in the practice.
To create or edit configuration profiles in AccuWin Pro 4:1. From the Configure menu, select Preferences. 2. Create a new profile or edit an existing profile. Click on the name of the profile you want to edit and
click Edit. To create additional profiles, click New, name the profile, click Enter, and then select Edit.3. Click OK to choose a configuration.
If you are editing a configuration profile, a window opens to display a number of configuration options which are described in detail on the following pages.
NOTE: On each tab, clicking a Default button returns the settings of that tab to the default factory settings
Hardware SettingsThe Hardware Settings window (Figure 30) allows you to configure your computer to communicate with your ABP monitor via a specified port. You may also test the settings that you have selected.
1. On the tool bar, click on Monitor, then choose ConfigurationPort.2. Under ABP device, select your monitor type.3. Under Serial port, select the port into which you have plugged the device. 4. Click Test port. You will receive a message confirming successful communication.
If you receive an error message, “Cannot communicate with ABP device,” one of the following applies:• You have not selected the appropriate port or device.• The device is not connected properly.
Customizing Export TemplatesXML and Report Templates can be customized to create an output file consistant with individual customer requirements.
XMLThe template.xml file in the install directory can be modified to use placeholders for exporting study data in a configurable format.
ReportsAccuWin Pro 4 report templates can be modified and tailored to individual requirements. Contact SunTech Medical for information.
XML TagsXML Tags can be used in the template.xml file and report templates to additional fields the exported docu-ments. A list of XML tags are available on request from SunTech Medical.
NOTE: It is the responsibility of the customer to validate that changes to template files do not affect clinical
Page 56 of 79 80-0062-00-RevL 2020-9-14

data displayed in output files.
Data SettingsThe Data Settings tab (Figure 30) allows you to configure the following settings:
Figure 30: Configuration Menu, Hardware
Data Source: Select how Morning Surge, and Smoothness Index are displayed or calculated (i.e. using brachi-al or central BP values). A lower-case “c” will designate which values are set to use central BP values (e.g. HR becomes cHR).
Additional calculations: Select which additional parameters will be displayed when viewing a patient file. Options include: • AASI • Smoothness Index • Morning Surge • White Coat Analysis • Coefficient of Variation
Selecting any of these options will make them visible on corresponding tabs and graphs.
Page 57 of 79 80-0062-00-RevL 2020-9-14

Figure 31: Configuration Menu, Data Settings
Display SettingsThis feature allows you to customize the color scheme of the graphs and charts (Figure 32). Customizable palettes allow you to fine-tune the color scheme for optimum reproduction by your printer. Shading on the graph indicates the period of the study. The default colors (which can be changed using the Configura-tion>Display tab) are the following:
• Blue shading: Indicates the asleep period of the study. • Yellow shading: Indicates the white coat period, which is the first hour of the study (appears
only if enabled). • Light green shading: Indicates a dose response period (appears only if programmed). • Light teal shading: Indicates the periods used to calculate Morning Surge (appears only if en-
abled).
To customize the color palette:1. Click on the tab for the attribute you want to change.2. To change a color, click on it. A color palette window will appear, showing 48 basic colors. You may se-
lect one of these, or you may create your own custom colors by clicking on the DefineCustomColors button.
3. Configure the color then click Add to Custom Colors.4. Repeat this process for each color you want to change.5. Click OK to save changes.
Page 58 of 79 80-0062-00-RevL 2020-9-14

Figure 32: Configuration Window, Display Settings
Diary Comment SettingsYou can use this feature to keep track of entries from patient diaries describing the patient’s activities during BP measurements. The entries in this window (Figure 33) are a default list which can be customized by add-ing, editing, or deleting entries. The entries in this list are incorporated into a list that appears in the pull-down menu under the Diary Comments column located on the ABP Data tab.
Page 59 of 79 80-0062-00-RevL 2020-9-14

Figure 33: Configuration Window, Diary Comments
To add a new diary comment:1. In the Diary Comments tab of the Configuration window, Click New.2. Type the text for the new diary comment.3. Click anywhere to exit the text entry window and store the diary comment. 4. Click OK to save your changes and exit the Configuration window
To delete a diary comment:1. In the Diary Comments tab of the Configuration window, select the diary comment that you want to
delete.2. Click Delete.3. Click OK.
To edit a diary comment:1. In the Diary Comments tab of the Configuration window, select the diary comment that you want to
edit.2. Edit the text, as desired. 3. Click anywhere to exit the text entry window and store the diary comment. 4. Click OK to save your changes and exit the Configuration window.
Page 60 of 79 80-0062-00-RevL 2020-9-14

Email SettingsThe Email feature creates a new email message, attaches selected patient data files or programming tem-plates, and sends the email to a specified destination.
Figure 34: Configuration Window, Email Settings
To set up email for AccuWin Pro 4 (Figure 34):1. Choose the type of connection you are using by selecting LAN or Dial up.2. Fill in the Email server settings. This information is available from your Internet service provider (ISP)
or office network administrator. Your ISP may require you to check the Authorize box in order for you to send email.
3. The Email settings you fill in will appear in the header of your email: the name of the recipient, your return email address, the subject of the email and a message of your choosing. All bolded categories on the tab are required.
Report SettingsThis feature allows you to format your reports and to choose what information is included in them.To format a report:1. From the Configure menu, select Preferences. Select a profile and click Edit.2. Click the Reports tab and then the Formats tab.
Page 61 of 79 80-0062-00-RevL 2020-9-14

3. Select which items will be included in your One Page report, Full Report, and Standard Report. Select or de-select the checkboxes on the right to make these changes (Figure 27).
4. To create a new report, click New Report, enter a name, and select the pages you want to appear in the report.
5. To delete any of these reports, select the report and click Delete Report.6. Enter a Report Title by typing the title of your choice in the box provided. The title appears as a header
on each page of the report. Each report format allows for a different report title.7. To change the graph type, graph scale, and horizontal sight line settings, Click Details (Figure 28).8. To add a custom logo to the report, Click Details (Figure 28) and browse to the location of the custom
logo on the hard drive.
Export SettingsThis feature allows you to export patient studies as either ASCII, XML or GDT output (Figure 35), which is useful when the data will be merged with a database. GDT is a format commonly used to share computer medical records.
To change export settings, navigate to Report>Configure in the Toolbar, then click on the Export tab within the Configuration window.
Export ASCII settingsASCII files can be imported into Excel using the Excel csv import wizardASCII file export configuration Delimiter Options • Quoted strings surround strings with quotation marks. • Quoted numbers surround numbers with quotation marks. • Delimiters select between Comma, Space or Tab delimiters
Export Options • All edited BPs BP readings marked as included. • All awake edited BPs BP readings during the day marked as included. • All asleep edited BPs BP readings during the night marked as included. • All omitted BPs BP readings marked as omitted. • All awake omitted BPs BP readings during the day marked as omitted. • All asleep omitted BPs BP readings during the night marked as omitted. • AMUConfigurationThe monitor configuration during the study • Statistics Calculated statistics from the study • Demographics Patient demographic information • Include CBP Include Central Blood Pressure data from the study
Export GDT settings AccuWin Pro 4 support GDT v2.1 communication. GDT communication can be configured in the Export Set-tings tab:
GDT Options • Export GDT on Export Button press GDT File will be exported when Export Button is pressed • Exit after GDT Export Exits the application after GDT export is completed. • Default Test ID Add a Default Test ID to the 6310 export file if a Test ID is not provided by the 6302
import file.
Page 62 of 79 80-0062-00-RevL 2020-9-14

GDT Directory GDT Exchange directory settings.
When AccuWin Pro 4 is started from the command line with the argument /GDT, the application will search the GDT Import Directory for the GDT Import File Name.
NOTE: When started from the command line, the application should be started in the install directory.
When GDT Export is selected, AccuWin Pro 4 will save the GDT Export File Name to the GDT Export Directo-ry.
Export AWP4 Settings AWP4 file output can be configured to use a standard encryption key (less secure) or custom encryption key (more secure). Standard encryption files can be opened and imported by any AccuWin Pro 4 installation without a password. Using a custom encryption key requires the receiving party to enter the encryption key on study import.
NOTE: if a custom encryption key is lost or forgotten, data in AWP4 files are not recoverable. The encryption key should be kept in a secure location.
Export PDF Settings: Choose the report format to be used for the exported PDF report.
Export Button
The Export Button can be configured to export in a predetermined format when pressed. Export Options • Export to API Mark the study as ready for export in the database. (Requires integration) • Export GDT Save 6310 GDT file to export GDT Export Directory (Modify in GDT Export Settings) • Export Ascii Export a file in Ascii fomat. This file can be opened for review in Microsoft Excel. • Export XML Export a file using the template.xml file in the install directory. • ExportAWP4fileExport a file in the .awp format. Files can be imported into AccuWin Pro 4 databas-
es. • Export PDF Export a PDF according to the report format provided in Export PDF settings tab.
Configuring the Export Button
1. Select the file formats to be exported when the Export Icon is pressed. 2. Enter a name for the file to be saved to disc.
• ascii, AWP4, xml, pdf and GDT file names can be configured. • GDT file name export can be configured from the GDT tab. • Placeholders can be used to customize the format of the file.
Page 63 of 79 80-0062-00-RevL 2020-9-14
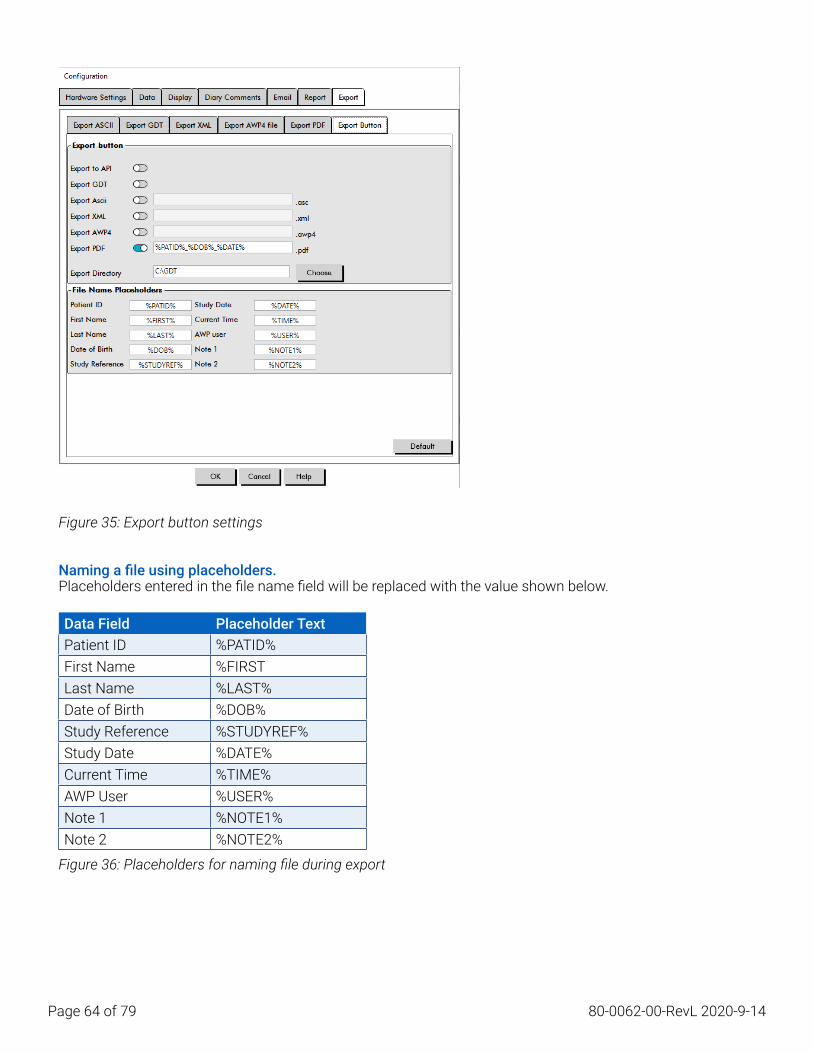
Figure 35: Export button settings
Naming a file using placeholders.Placeholders entered in the file name field will be replaced with the value shown below.
Data Field Placeholder TextPatient ID %PATID%First Name %FIRSTLast Name %LAST%Date of Birth %DOB%Study Reference %STUDYREF%Study Date %DATE%Current Time %TIME%AWP User %USER%Note 1 %NOTE1%Note 2 %NOTE2%
Figure 36: Placeholders for naming file during export
Page 64 of 79 80-0062-00-RevL 2020-9-14

15. Overview of Event CodesEvent Codes (EC) are used during the review of ABPM data. The codes are displayed in the table on the ABP Data tab and in the Reviewed and Omitted BP data report pages under the columns labeled EC. Event Codes describe the conditions under which the BP measurement was taken. They are also accompanied by solu-tions, if applicable, that can be taken to avoid their occurrence in the future.
NOTE: Codes do not automatically indicate that a reading is invalid; they serve only as guides to help you review the data.
Event Code Definitions
Code Description in AccuWin Pro 4 Solution or Response1 Weak or no oscillometric signal Check position and tightness of the cuff.2 Artifact/erratic oscillometric signal Patient should remain still during the BP reading.3 Exceeded retry count: 2 attempts Patient should remain still during the BP reading.4 Exceeded measurement time limit: 140
secondsCheck the air hose connections and make certain the cuff is tight.
5 Results outside of published range: BP: 25-260 mmHg HR: 40-200 bpm
Retry the reading by pushing the Start/Stop button. If the problem persists, return the unit for service.
6 Release interval violation Retry the reading by pushing the Start/Stop button. If problem persists, return the unit for service.
85 Reading aborted – blocked valves or pneumatics
Check the air hose connections and make certain the air tubing is not crimped.
86 Reading aborted – user abort Restart the reading by pushing the Start/Stop button.87 Reading aborted – inflate time-out or air
leakCheck the air hose and cuff.
88 Reading aborted – safety time-out Retry the reading by pushing the Start/Stop button. If the problem persists, return the unit for service.
89 Reading aborted – cuff over- pressure Check for blocks or kinks in the air hose.90 Service required – power supply out of
range or other hardware problemReplace the batteries. If the problem persists, return the unit for service.
91 Service required – safety override fitted or auto-zero out of range
Retry the reading by pushing the Start/Stop button. If the problem persists, return the unit for service.
94 Low battery warning Replace the batteries. If the problem persists, return the unit for service.
96 Calibration Error Return the unit for service.97 Service required – transducer out of range Return the unit for service.98 Service required – A/D out of range Return the unit for service.99 Service required – EEPROM calibration
data CRC failure
The unit needs to be recalibrated. Return for service.
108 Dose response sequence start Review full dose response sequence on Dose Response Statistics tab.
Page 65 of 79 80-0062-00-RevL 2020-9-14

109 Dose response sequence end Review full dose response sequence on Dose Response Statistics tab
110 Event marked by patient In ABP table, select desired comment.111 Day to night mode switch If desired, adjust ABP Data graph to match the time
marked by the patient.112 Night to day mode switch If desired, adjust ABP Data graph to match the time
marked by the patient.
131 Low battery voltage Replace the batteries. If the problem persists, return the unit for service.
Page 66 of 79 80-0062-00-RevL 2020-9-14

16. Administrative ToolsAccuWin Pro 4 includes administrative tools that implement additional security-related features. With Accu-Win Pro 4 Admin Tools, you can create new user accounts, change user access levels, reset user passwords, enable the login process, and enable automatic logoff. The available user roles are as follows:
1. Administrative: Full access to entire functionality of AccuWin Pro 4, including editing Admin Tool set-tings.
2. User: Full access to entire functionality of AccuWin Pro 4, except for editing Admin Tool settings.
To display the Admin Tools window:1. From the Configure menu, select Admin Tools.2. If the Enter Name and Password dialog window appears, enter your administrative name and pass-
word, and click OK. (The window appears if you have not logged in as an administrator or if login security is not enabled.)
3. The first time you access Admin Tools, you must use default user name and password: Username AWP4, Password: enable
Figure 37: Admin Tools Window
Specifying Login OptionsAccuWin Pro 4 includes the flexibility of enabling or disabling login security, which requires users to log in with a password. Enabling this option supports the HIPAA access protection requirements. If your facility uses an Electronic Medical Record (EMR) system or another system that already provides login security, you may not want to enable login security in AccuWin Pro 4.
When login security is enabled, you can also set the software to automatically logoff users after a specified period of inactivity in AccuWin Pro 4.
Page 67 of 79 80-0062-00-RevL 2020-9-14

To enable login security:1. In the Admin Tools window, click the Use Passwords slider. A blue color indicates that the option is
enabled.2. Click Done.
To enable automatic logoff:1. In the Admin Tools window, check the Auto Logoff Enabled slider. 2. In the Auto Logoff Minutes box that appears, enter the number of minutes that must elapse before an
inactive user is automatically logged off. Alternatively, you can click the Up or Down arrow to select a number. You can set the number of minutes between 1 and 240; the default is 20 minutes.
3. Click Done.
Adding User AccountsAn AccuWin Pro 4 administrator can create a user at either an administrative or one of two user levels. Each new user is assigned a default password of “user”. When new users first log in, they must change the default password before they can perform any tasks in AccuWin Pro 4. This applies to both administrative and user accounts.
To add a new user:1. In the Admin Tools window, click New User. 2. In the User Name field that appears, enter the new user login name. 3. In the Select Role field, use the drop-down menu to select the level/role for the user.4. Click OK to create the new user. 5. Click Done to save changes.
Changing User LevelYou can change user account levels, but you cannot change user names.
To change user level:1. In the Admin Tools window, click the user account you want to change.2. Click Change Role. This option toggles the user level that appears in the Role column.3. Click Done.
Deleting User AccountsYou can delete both administrative and user-level accounts; however, you cannot delete an administrator account if it is the only one. You also cannot delete yourself. Deleting a user account prevents the user from logging into AccuWin Pro 4, if the login security feature is enabled.
To delete a user account:1. In the Admin Tools window, click the user account you want to delete.2. Click Delete User.3. A confirmation message appears. Click Yes to continue deleting the user account.4. Click Done.
Page 68 of 79 80-0062-00-RevL 2020-9-14

Resetting User PasswordsWhen a user forgets his or her password, that user must contact the AccuWin Pro 4 administrator, who will reset the user’s password to the default password of “user.” When he or she first logs in again, the user must change the default password before being able to perform any tasks in AccuWin Pro 4.
To reset a user password:1. In the Admin Tools window, click the user account you want to change.2. Click Reset Password.3. Click OK to confirm resetting the password. In the confirmation message that appears, click OK.
17. Maintaining and Cleaning the Oscar 2The Oscar 2 system is designed to perform in conformity with the description contained in this user manual and accompanying labels and inserts, when assembled, operated, maintained, and repaired in accordance with the instructions provided. After use, it is important to perform preventative maintenance to ensure the safe and efficient operation of the monitor. It is your responsibility to:
• Check calibration of the device every two years.• Never knowingly use a defective device.• Immediately replace parts that are broken, worn, missing, incomplete, damaged or contaminated.• Contact the nearest authorized service center should repair or replacement become necessary.
Further, the user of the device bears sole responsibility for any malfunction that results from improper use, faulty maintenance, improper repair, damage or alteration by anyone other than SunTech Medical or autho-rized service personnel.
While usage will have an impact, it is expected the monitor will be in service for 7 years. Typically, an electro-mechanical pump determines the lifetime of the monitor. Service and support, including relevant accessories, will be available up to 7 years following the last date this product is manufactured by SunTech Medical. For a list of service centers, see Section .
Cleaning After UseOscar 2The Oscar 2 monitor cannot be sterilized. DO NOT immerse the monitor in any fluid, or attempt to clean with any liquid detergents, cleaning agents, or solvents. The following methods and cleaning agents have been tested and confirmed not to affect the device housing:
• Clorox Wipes • Dispatch Wipes • Quternary Disinfectant Cleaner • Sani-Wipes
Cleaning Method1. Turn device off or remove batteries and close battery compartment.2. Wipe down device with cleaning agent3. Allow device to sit until dry.
Page 69 of 79 80-0062-00-RevL 2020-9-14

You may use a soft, damp cloth to remove dirt and dust from the monitor. If the unit does become immersed in water, do not use; contact our service department.
Orbit ABPM Cuff & AccessoriesThis cleaning process can be followed for all washable accessories:
• Orbit ABPM cuff • Pouch • Belt • Shoulder Strap
CAUTION: Do not machine wash cuff bladder (inflatable bag inside cuff shell).
Cleaning process1. (Orbit ABPM Cuff only) Remove the bladder from the cuff shell for cleaning. Dampen a soft cloth with
a mild medical grade disinfectant and wipe the bladder, let it air dry. 2. (Orbit ABPM Cuff only) Fold and close the cuff so that the hook and loop (velcro) is connected.3. Machine-wash in cold water with a mild detergent. 4. Line dry only - machine drying can cause damage to Orbit ABPM cuff and accessories.
The bladder needs to be inserted back into the cuff sleeve so the pneumatic hose portion of the bladder goes through the tube opening on the cuff. Please note that the pneumatic hose connection should face upward when using the Orbit ABPM cuff on either the right or the left arm.
Maintenance and Repairs After UseVisually inspect cables, material, pneumatic hoses, and the monitor case for cracks, fraying, or kinks. DO NOT use the monitor or cuff if there are any signs of damage. Please contact our service department if any damage or defects are identified.
The Oscar 2 does not contain any user serviceable internal parts and should only be opened by an autho-rized service representative. To return for service, please send to your nearest SunTech Medical office, listed above, care of Support and Service. Alternatively, please visit our website, SunTechMed.com, to request more information.
Calibration Verification ProcedureIt is recommended that you check the accuracy of the Oscar 2 once every two years. If needed, an authorized service center may recalibrate the pressure transducers in the monitor. To verify calibration, the Oscar 2 must first be placed into the proper mode. Follow the steps below:
1. Remove and then replace one of the two “AA” batteries.2. Press and hold down the Start/Stop key.3. You will hear a click as the valves are closed.4. You will now see “0 mmHg” displayed.
The monitor’s calibration can now be checked against a calibrated mercury column.
1. Place a t-tube (part #98-0030-00) between the hoses connecting the monitor and the cuff.2. Wrap the cuff around a suitably sized can or bottle. This acts as the reservoir for the unit.
Page 70 of 79 80-0062-00-RevL 2020-9-14
3. Attach the third end of the “T” tube into a calibrated mercury column, which gives you access to the bulb and a reference.
4. Using the bulb of the calibrated mercury column, inflate the cuff to 250 mmHg.5. Once the pressure has stabilized at this level, the LCD should match the mercury column by ± 2.0
mmHg.6. Check the unit against the column every 50 mmHg from 250 to 50 mmHg. The monitor should be
within ± 2.0 mmHg. If it is not, the monitor needs to be returned to the service department for recali-bration or repair.
CAUTION: Do not use the monitor if it has failed its diagnostic self-test, or if it displays a greater than zero pressure with no cuff attached. The values displayed by such a unit may be inaccurate.
NOTE: To return the Oscar 2 to its normal operating mode, remove and re-insert one of the batteries.
18. Limited Warranty
Oscar 2 Ambulatory Blood Pressure Monitoring SystemSunTech Medical provides to the original purchaser the following limited warranty from the date of original invoice.
Serialized blood pressure monitor 24 monthsABPM Cuffs 6 monthsAccessories (i.e. patient hoses, interface cables, etc.) 90 days
SunTech Medical, Inc. warrants each instrument to be free from defects in material and workmanship. Liabili-ty under this warranty covers servicing of the instruments when returned from the customer’s facility prepaid to the prospective factory depending on location. SunTech Medical will repair any component(s) or part(s) that it finds to be defective during the period of this limited warranty. Should a defect become apparent, the original purchaser should notify SunTech Medical of the suspected defect. The instrument should be careful-ly packaged and shipped prepaid to the appropriate service center.
The instrument will be repaired in the shortest possible time and returned prepaid by the same shipping method as received by the factory.
This limited warranty is void if the instrument has been damaged by accident, misuse, negligence, or serviced by any person not authorized by SunTech Medical.
This limited warranty contains the entire obligation of SunTech Medical and no other warranties expressed, implied, or statutory are given. No representative or employee of SunTech Medical is authorized to assume any further liability or grant any further warranties except as set herein.
The expected service life for the monitor is 5 years.
Page 71 of 79 80-0062-00-RevL 2020-9-14

19. Technical AssistanceFor any questions, please reference the Help section within the software, this user manual, or our website. If these do not fully address your problem, please contact our service department.
SunTech Medical517 Airport Blvd, Morrisville, USA.
Tel: 919.654.2300 800.421.8626 Fax: 919.654.2300Email: [email protected] Web: SunTechMed.com
Page 72 of 79 80-0062-00-RevL 2020-9-14

20. Radio Frequency Compliance Requirements
This equipment needs special precautions regarding EMC and needs to be installed and put into service according to the EMC information provided in this document. This equipment has been tested and found to comply with the limits for medical devices to IEC60601-1-2: 2014. These limits are designed to provide rea-sonable protection against harmful interference in a typical medical installation. This equipment generates, uses and can radiate radio frequency energy and, if not installed and used in accordance with the instruc-tions, may cause harmful interference to other devices in the vicinity. However, there is no guarantee that interference will not occur in a particular installation. If this equipment does cause harmful interference to other devices, which can be determined by turning the equipment off and on, the user is encouraged to try to correct the interference by one or more of the following measures:
• Reorient or relocate the receiving device. • Increase the separation between the equipment. • Consult the manufacturer or field service technician for help. • Portable and mobile RF communications equipment can affect Medical Electrical Equipment.
WARNING: Use of accessories, transducers, and cables other than those specified may result in increased emissions or decreased immunity of the Oscar 2.
WARNING: The Oscar 2 should not be used adjacent to or stacked with other equipment. If adjacent or stacked use is necessary, the Oscar 2 should be observed to verify normal operation in the configuration in which it will be used.
Page 73 of 79 80-0062-00-RevL 2020-9-14

21. Electromagnetic Compatibility System RequirementsGuidance and manufacturer’s declaration – electromagnetic emissionsThe Oscar 2 is intended for use in a Home Healthcare Environment within the electromagnetic environment specified below. The customer or the user of the Oscar 2 should assure that it is used in such an environment. This equipment has been tested and found to comply with the limits for medical devices to IEC60601-1-2: 2014.Emissions Compliance Electromagnetic environment-- guidanceRF emissionsCISPR 11
Group 1 The Oscar 2 uses RF energy only for its internal function. Therefore, its RF emissions are very low and are not likely to cause any interference in nearby electronic equipment.
RF emissions CISPR 11
Class B The Oscar 2 is suitable for use in all establishments, including domestic establishments and those directly connected to the public low-voltage power supply network that supplies buildings used for domestic purposes.Harmonic emissions
IEC 61000-3-2N/A
Voltage fluctuations/flicker emissions IEC 61000-3-3
N/A
Guidance and manufacturer’s declaration – electromagnetic immunity
The Oscar 2 is intended for use in a Home Healthcare Environment and is suitable for use in all establishments, including domestic establishments and those directly connected to the public low voltage power supply network that supplies buildings used for domestic purposes. This equipment has been tested and found to comply with the limits for medical devices to IEC 60601-1-2: 2014.Immunity test Applies to Compliance level Electromagnetic Environment-Guidance for
Home Healthcare EnvironmentElectrostatic discharge (ESD)IEC 61000-4-2
All device input and output connections and cables
± 2, 4, 6, 8kV contact± 2, 4, 8, 15kV air discharge
Floors should be wood, concrete or ceramic tile. If floors are covered with synthetic material, the relative humidity should be at least 40 %.
Radiated RF EM fields IEC 61000-4-3
All device input and output connections and cables
10V/m80 MHz to 2700MHz80% AM at 1kHz
Radiated electromagnetic fields should be at levels characteristic of a typical location in a Home Healthcare Environment
Radiated RF Wireless communication equipment IEC 61000-4-3
All device input and output connections and cables
See Table A below
This device has been subjected to RF wireless communication bands from cell phones, and other communication devices
Electrical fast transient/burst IEC 61000-4-4
N/A N/A N/A
Surge IEC 61000-4-5 N/A N/A N/A
Page 74 of 79 80-0062-00-RevL 2020-9-14

Power Frequency (50Hz) magnetic field IEC 61000-4-8
All device input and output connections and cables
30A/m Power Frequency magnetic fields should be at levels characteristic of a typical location in a Home Healthcare Environment or domestic environment
Voltage dips, short interruptions and voltage variations on power supplyinput lines IEC 61000-4-11
N/A N/A N/A
Note: In the event of an error, the device will auto-recover within 5 seconds.
Immunity test
IEC 60601 test level
Compliance level
Electromagnetic environment – guidance
Conducted RFIEC 61000-4-6
Radiated RFIEC 61000-4-3
N/A
3 V/m80 MHz to 2.5 GHz
N/A
3 V/m
Portable and mobile RF communications equipment should be used no closer to any part of the monitor including cables, than the recommended separation distance calculated from the equation applicable to the frequency of the transmitter. Minimum separation distance for higher IMMUNITY TEST LEVELS shall be calculated using the following equation.
E = [6/d] √P
Where P is the maximum output power rating of the transmitter in watts (W) according to the transmitter manufacturer and d is the recommended separation distance in meters (m) and E is the Immunity Test Level in V/m.
Field strengths from fixed RF transmitters, as determined by an electromagnetic site survey, a should be less than the compliance level in each frequency range
Recommended separation distances between portable and mobile RF communications equipment and the Oscar 2Rated maximum output power of transmitter (W)
Separation distance according to frequency of transmitter (m)
150 kHz to 80 MHzd = 1.2 √P
80 MHz to 800 MHzd =1.2 √P
800MHz to 2.5GHzd = 2.3 √P
0.01 0.12 0.12 0.230.1 0.38 0.38 0.731 1.2 1.2 2.310 3.8 3.8 7.3100 12 12 23
Page 75 of 79 80-0062-00-RevL 2020-9-14

For transmitters rated at a maximum output power not listed above, the recommended separation distance d in meters (m) can be estimated using the equation applicable to the frequency of the transmitter, where P is the maximum output power rating of the transmitter in watts (W) according to the transmitter manufacturer.NOTE 1: at 80 MHz and 800 MHz, the separation distance for the higher frequency range applies.NOTE 2: These guidelines may not apply in all situations. Electromagnetic propagation is affected by absorp-tion and reflection from structures, objects and people.
a) Field strengths from fixed transmitters, such as base stations for radio (cellular/cordless) telephones and land mobile radios, amateur radio, AM and FM radio broadcast and TV broadcast cannot be predicted theoretically with accuracy. To assess the electromagnetic environment due to fixed RF transmitters, an electromagnetic site survey should be considered. If the measured field strength in the location in which the monitor is used exceeds the applicable RF compliance level above, the monitor should be observed to verify normal operation. If abnormal performance is observed, additional measures may be necessary, such as reorienting or relocating the monitor.b) Over the frequency range 150kHz to 80 MHz, field strengths should be less than 3V/m
Table A – Test specifications for the device’s Signal Input Parts/Signal Output parts to RF wireless communication equipment.Test Frequency (MHz)
Band a) (MHz)
Service b) Modulation b)
Maximum Power (W)
Distance (m)
IMMUNITY TEST LEVEL (V/m)
358 380 – 390 TETRA 400 Pulse Modulation b) 18Hz
1,8 0.3 27
450 430 – 470 GMRS 460, FRS 460
FM c) 5 kHz deviation 1 kHz sine
2 0.3 28
710 704 - 787 LTE Band 13, 17
Pulse Modulation b) 217Hz
0,2 0.3 9745780810 800 - 960 GSM
800/900, TETRA 800, iDEN 820, CDMA 850, LTE Band 5
Pulse Modulation b) 18Hz
2 0.3 28870930
1720 1700 - 1990 GSM 1800, CDMA 1900, GSM 1900, DECT, LTE Band 1, 3, 4, 25, UMTS
Pulse Modulation b) 217Hz
2 0.3 2818451970
Page 76 of 79 80-0062-00-RevL 2020-9-14
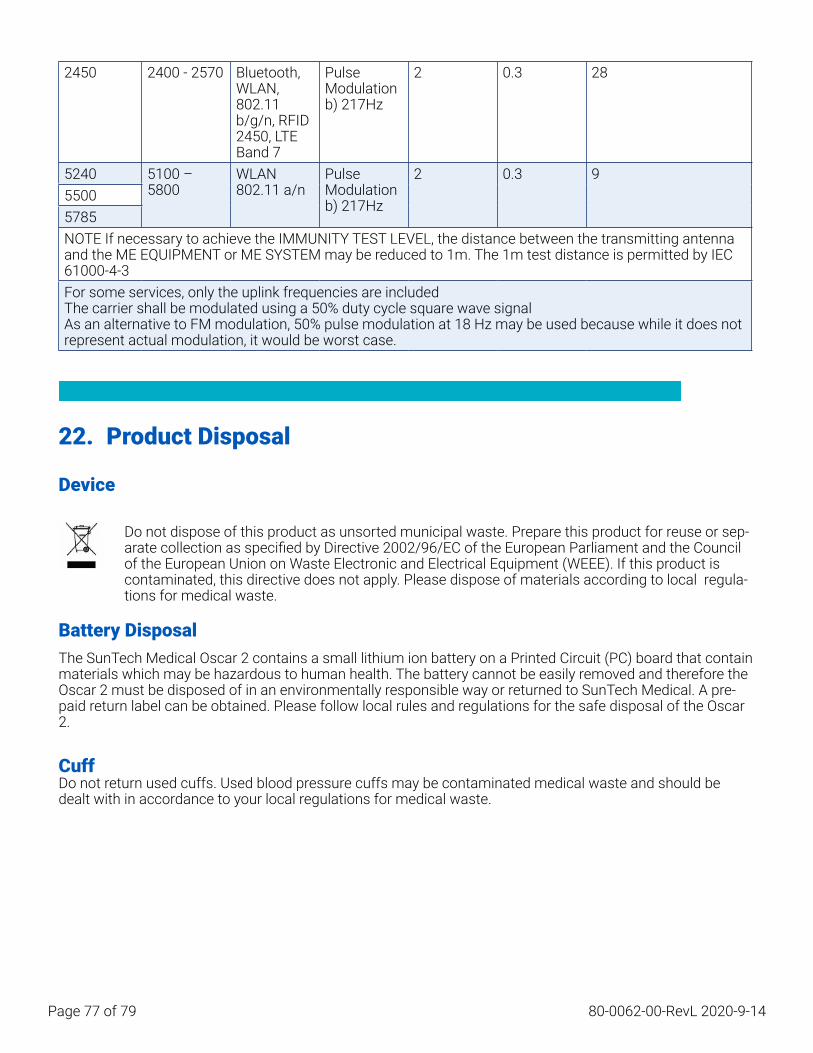
2450 2400 - 2570 Bluetooth, WLAN, 802.11 b/g/n, RFID 2450, LTE Band 7
Pulse Modulation b) 217Hz
2 0.3 28
5240 5100 – 5800
WLAN 802.11 a/n
Pulse Modulation b) 217Hz
2 0.3 955005785NOTE If necessary to achieve the IMMUNITY TEST LEVEL, the distance between the transmitting antenna and the ME EQUIPMENT or ME SYSTEM may be reduced to 1m. The 1m test distance is permitted by IEC 61000-4-3For some services, only the uplink frequencies are includedThe carrier shall be modulated using a 50% duty cycle square wave signalAs an alternative to FM modulation, 50% pulse modulation at 18 Hz may be used because while it does not represent actual modulation, it would be worst case.
22. Product Disposal
Device
Do not dispose of this product as unsorted municipal waste. Prepare this product for reuse or sep-arate collection as specified by Directive 2002/96/EC of the European Parliament and the Council of the European Union on Waste Electronic and Electrical Equipment (WEEE). If this product is contaminated, this directive does not apply. Please dispose of materials according to local regula-tions for medical waste.
Battery DisposalThe SunTech Medical Oscar 2 contains a small lithium ion battery on a Printed Circuit (PC) board that contain materials which may be hazardous to human health. The battery cannot be easily removed and therefore the Oscar 2 must be disposed of in an environmentally responsible way or returned to SunTech Medical. A pre-paid return label can be obtained. Please follow local rules and regulations for the safe disposal of the Oscar 2.
CuffDo not return used cuffs. Used blood pressure cuffs may be contaminated medical waste and should be dealt with in accordance to your local regulations for medical waste.
Page 77 of 79 80-0062-00-RevL 2020-9-14

23. References1. Pickering TG, Shimbo, D, Haas D. Ambulatory Blood-Pressure Monitoring. New England Journal of
Medicine 2006; 354(22): 2368-2374.2. Marchiando RJ, Elston MP. Automated Ambulatory Blood Pressure Monitoring: Clinical Utility in the
Family Practice Setting. American Family Physician 2003; 67(11): 2343-2350.3. White WB. Ambulatory blood pressure as a predictor of target organ disease and outcomes in the
hypertensive patient. Blood Pressure Monitoring 1999; 4(3): 181-184.4. M. Shimizu and K. Kario, Review: Role of the augmentation index in hypertension, Therapeutic Advanc-
es in Cardiovascular Disease, vol. 2, Feb. 2008, pp. 25-35.5. T. Morgan, et al., Effect of different hypertensive drug classes on central aortic pressure, American
Journal of Hypertension, vol. 17, 2004, pp. 118-123.6. Association for the Advancement of Medical Instrumentation. The National Standard of Electronic or
Automated Sphygmomanometer. Arlington, VA: AAMI; 1996.7. Jones SC, Bilous M, Winship S, Finn P, Goodwin J. Validation of the Oscar 2 oscillometric 24-hour
ambulatory blood pressure monitor according to the International Protocol for the validation of blood pressure measuring devices. Blood Pressure Monitoring 2004; 9(4): 219-223.
8. Goodwin J, Bilous M, Winship S, Finn P, Jones S. Validation of the Oscar 2 oscillometric 24-h ambula-tory blood pressure monitor according to the British Hypertension Society protocol. Blood Pressure Monitoring 2004; 12(2): 113-117.
9. Chobanian A, Bakris GL, Black HR, Cushman WC, Green LA, Izzo JL, et al. The seventh report of the Joint National Committee on Prevention, Detection, Evaluation, and Treatment of High Blood Pressure. NIH Publication No. 03-5233 May 2003.
10. Pickering TG, Hall JE, Appel LJ, Falkner BE, Graves J, Hill MN, et al. Recommendations for blood pressure measurement in humans and experimental animals: Part 1: Blood pressure measurement in humans: A statement for profressionals from the subcommittee of professional and public education of the American Heart Association Council on High Blood Pressure Research. Hypertension 2005; 45: 142–161.
11. O’Brien E, Asmar R, Beilin L, Imai Y, Mallion JM, Mancia G, et al. European Society of Hypertension recommendations for conventional, ambulatory, and home blood pressure measurement. Journal of Hypertension 2003; 21: 821-848.
12. Urbina E, Alpert B, Flynn J, Hayman L, Harshfield GA, Jacobson M, et al. Ambulatory blood pressure monitoring in children and adolescents: Recommendations for standard assessment, a scientific statement from the American Heart Association, Atherosclerosis, Hypertension, and Obesity in Youth Committee of the Council on Cardiovascular Disease in the Young and the Council for High Blood Pressure Research. Hypertension 2008; 52: 433-451.
13. Soergel M, Kirschstein M, Busch C, Danne T, Gellerman J, Holl R, et al. Oscillometric twenty-four-hour ambulatory blood pressure values in health children and adolescents: A multicenter trial including 1141 subjects. Journal of Pediatrics 1997; 130(2): 178-184.
14. Wühl E, Witte K, Soergel M, Mehls O, Schaefer F. Distribution of 24-h ambulatory blood pressure in chil-dren: normalized reference values and role of body dimensions. Journal of Hypertension 2002; 20(10): 1995-2007.
15. Owens P, tkins N, O’Brien E. Diagnosis of white coat hypertension by ambulatory blood pressure moni-toring. Hypertension 1999; 34: 267-272.
16. Head G, McGrath BP, Mihailidou AS, Nelson MR, Schlaich MP, Stowasser M, et al. Ambulatory blood pressure monitoring in Australia: 2011 consensus position statement. Journal of Hypertension 2011;
Page 78 of 79 80-0062-00-RevL 2020-9-14

30 (1): 1-14.17. Schillaci G, Parati G. Ambulatory arterial stiffness index: merits and limitations of a simple surrogate
measure of arterial compliance. Journal of Hypertension 2008; 26(2): 182-185.18. Mancia G, Grassi G. Mechanisms and clinical implications of blood pressure variability. Journal of
Cardiovascular Pharmacology 2000; 35(7 Suppl 4): S15-9.19. Parati G, Schumacher H, Bilo G, Mancia G. Evaluating 24-h antihypertensive efficacy by the smooth-
ness index: a meta-analysis of an ambulatory blood pressure monitoring database. Journal of Hyper-tension 2009; 28 (11):2177-2183
Page 79 of 79 80-0062-00-RevL 2020-9-14