webtax file upload tutorial - nhes.nh.gov › webtax › webtax file upload... · webtax file...
TRANSCRIPT
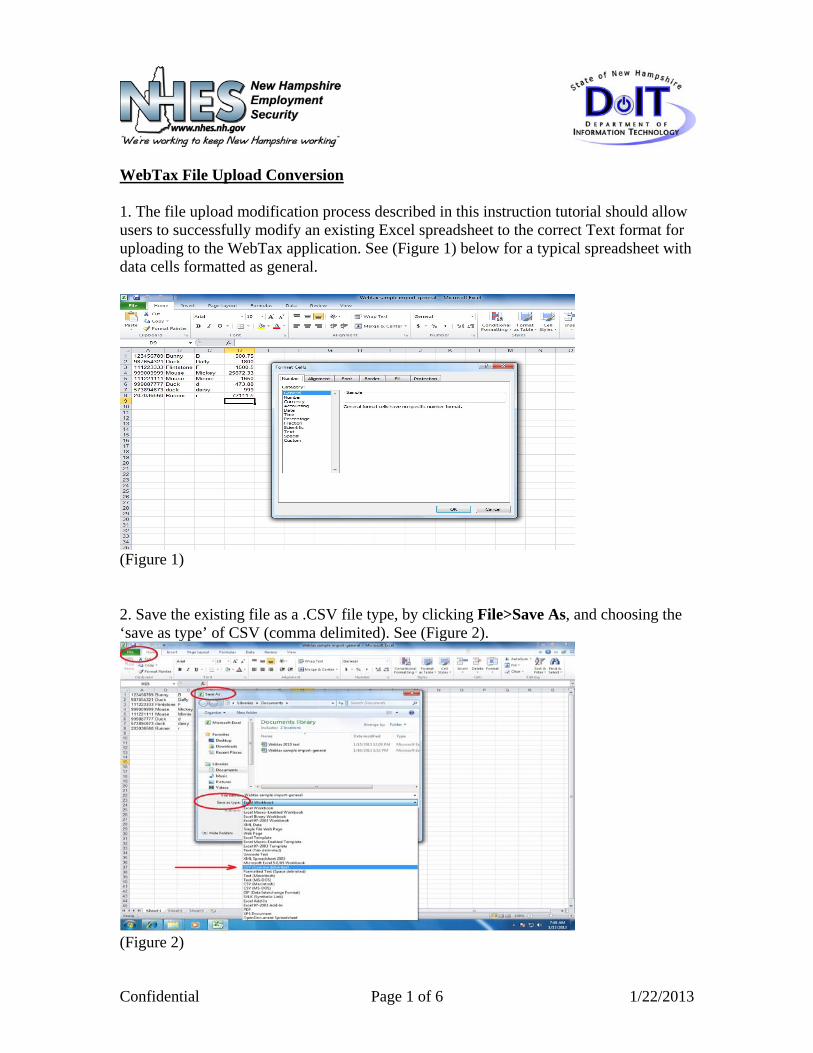
WebTax File Upload Conversion 1. The file upload modification process described in this instruction tutorial should allow users to successfully modify an existing Excel spreadsheet to the correct Text format for uploading to the WebTax application. See (Figure 1) below for a typical spreadsheet with data cells formatted as general.
(Figure 1) 2. Save the existing file as a .CSV file type, by clicking File>Save As, and choosing the ‘save as type’ of CSV (comma delimited). See (Figure 2).
(Figure 2)
Confidential Page 1 of 6 1/22/2013
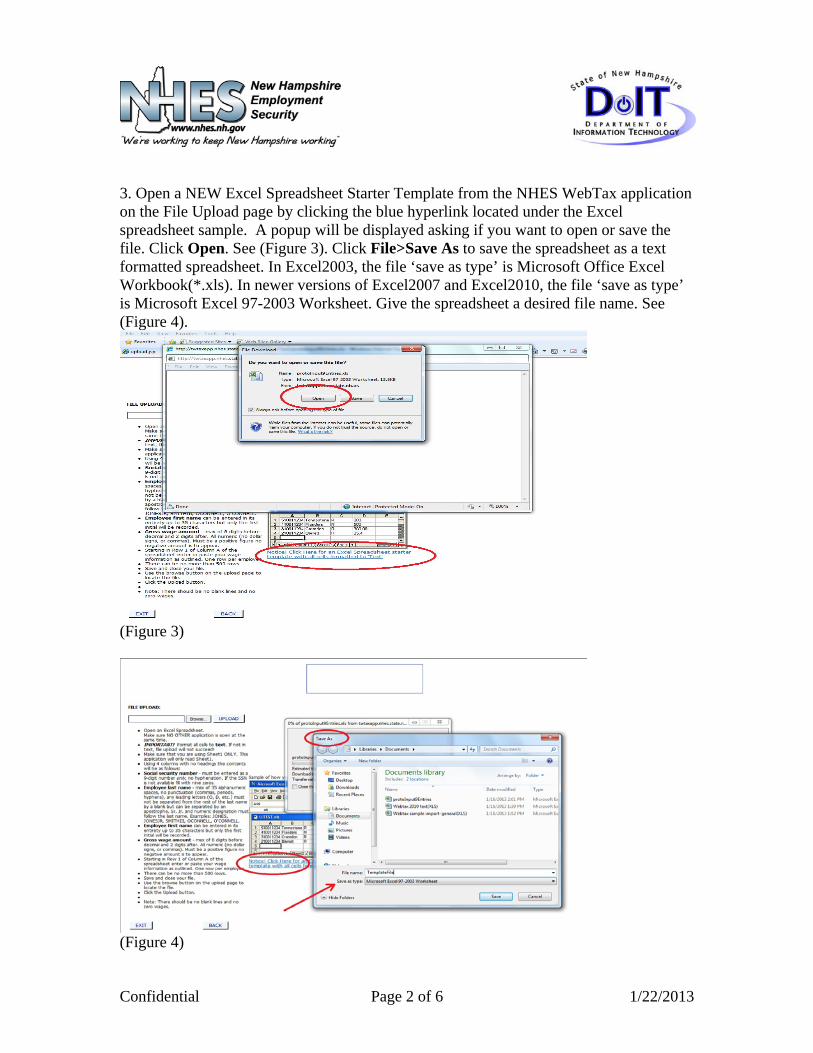
3. Open a NEW Excel Spreadsheet Starter Template from the NHES WebTax application on the File Upload page by clicking the blue hyperlink located under the Excel spreadsheet sample. A popup will be displayed asking if you want to open or save the file. Click Open. See (Figure 3). Click File>Save As to save the spreadsheet as a text formatted spreadsheet. In Excel2003, the file ‘save as type’ is Microsoft Office Excel Workbook(*.xls). In newer versions of Excel2007 and Excel2010, the file ‘save as type’ is Microsoft Excel 97-2003 Worksheet. Give the spreadsheet a desired file name. See (Figure 4).
(Figure 3)
(Figure 4)
Confidential Page 2 of 6 1/22/2013
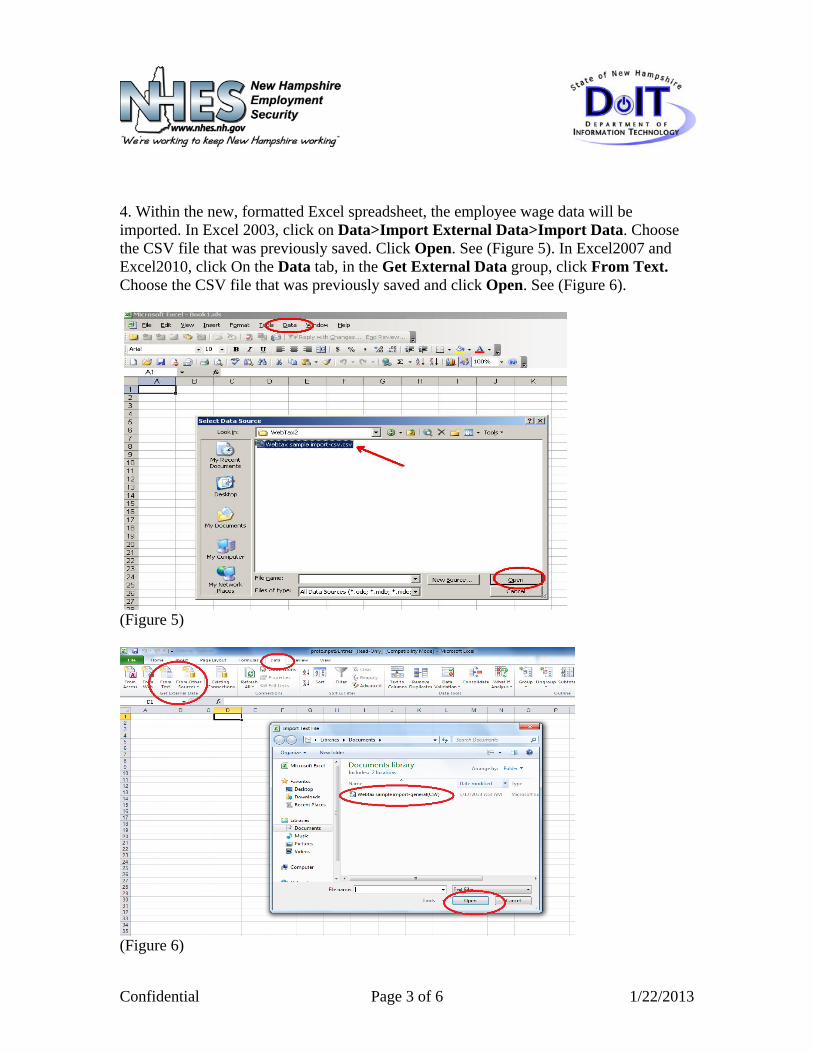
4. Within the new, formatted Excel spreadsheet, the employee wage data will be imported. In Excel 2003, click on Data>Import External Data>Import Data. Choose the CSV file that was previously saved. Click Open. See (Figure 5). In Excel2007 and Excel2010, click On the Data tab, in the Get External Data group, click From Text. Choose the CSV file that was previously saved and click Open. See (Figure 6).
(Figure 5)
(Figure 6)
Confidential Page 3 of 6 1/22/2013
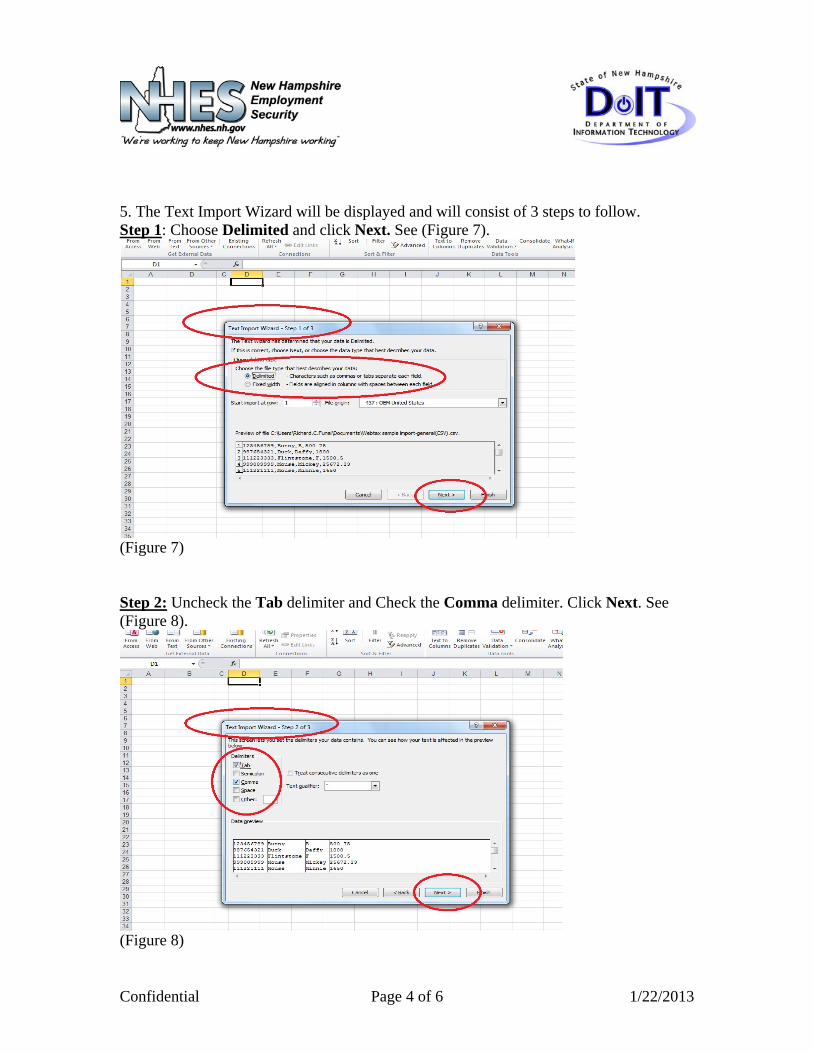
5. The Text Import Wizard will be displayed and will consist of 3 steps to follow. Step 1: Choose Delimited and click Next. See (Figure 7).
(Figure 7) Step 2: Uncheck the Tab delimiter and Check the Comma delimiter. Click Next. See (Figure 8).
(Figure 8)
Confidential Page 4 of 6 1/22/2013
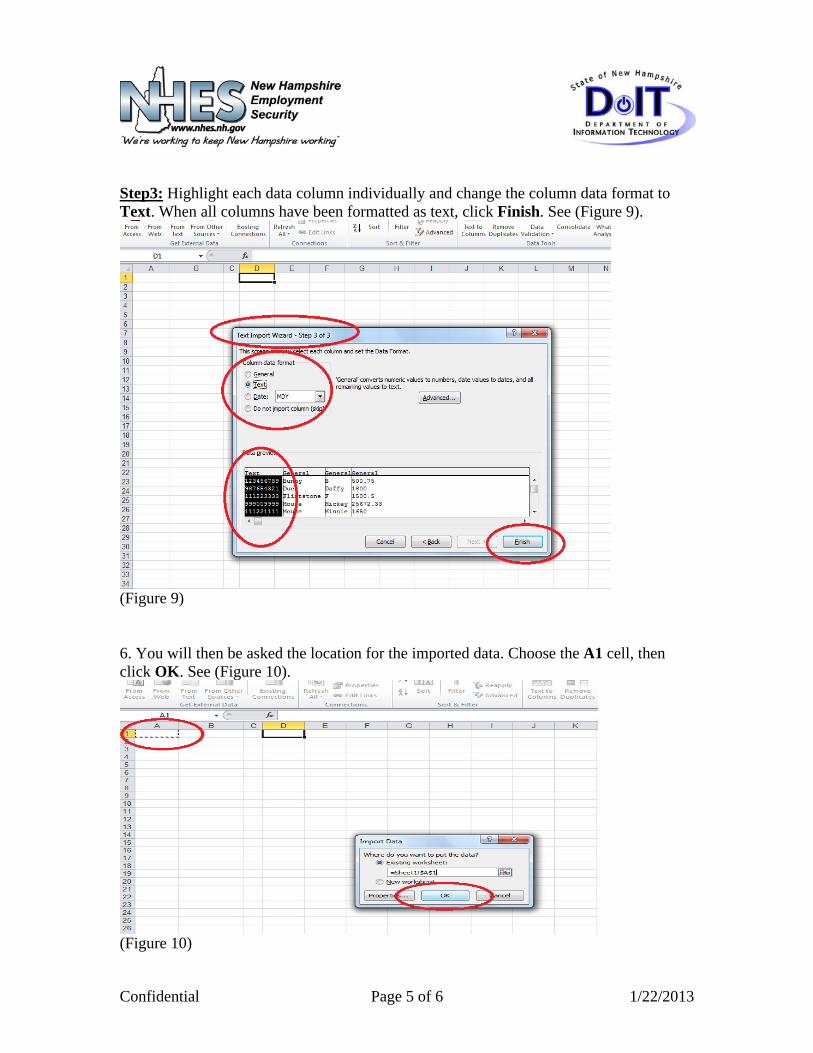
Step3: Highlight each data column individually and change the column data format to Text. When all columns have been formatted as text, click Finish. See (Figure 9).
(Figure 9) 6. You will then be asked the location for the imported data. Choose the A1 cell, then click OK. See (Figure 10).
(Figure 10)
Confidential Page 5 of 6 1/22/2013
Confidential Page 6 of 6 1/22/2013
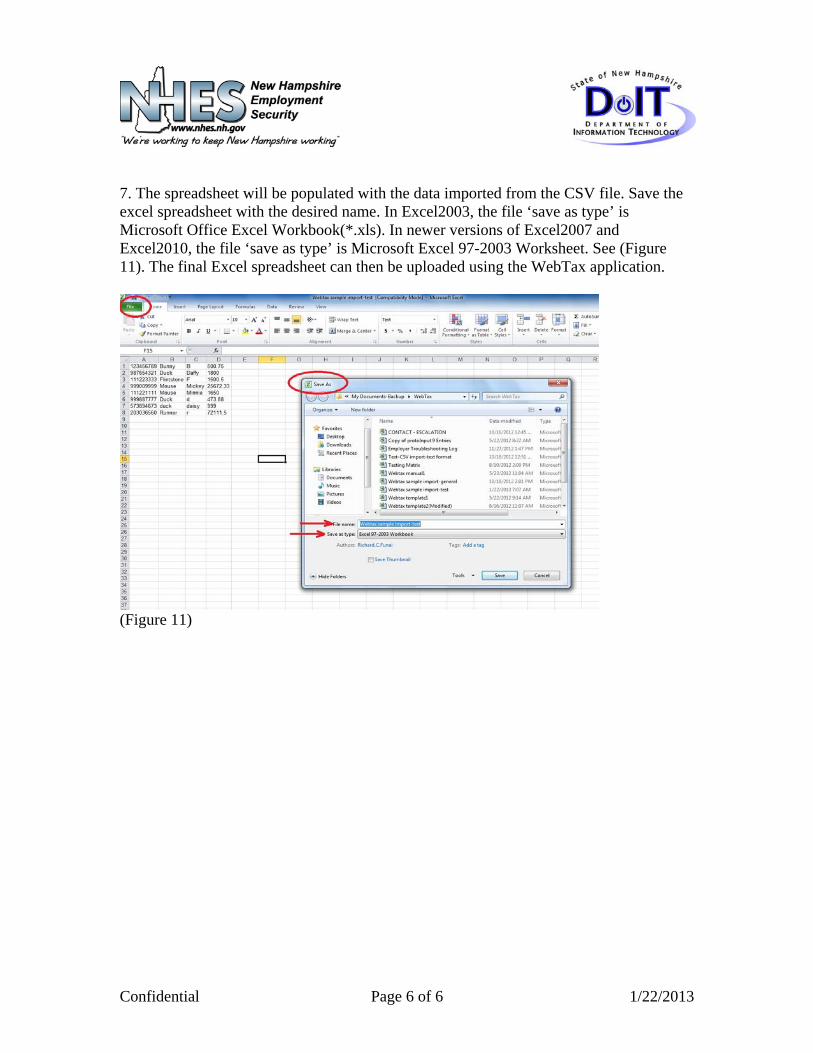
7. The spreadsheet will be populated with the data imported from the CSV file. Save the excel spreadsheet with the desired name. In Excel2003, the file ‘save as type’ is Microsoft Office Excel Workbook(*.xls). In newer versions of Excel2007 and Excel2010, the file ‘save as type’ is Microsoft Excel 97-2003 Worksheet. See (Figure 11). The final Excel spreadsheet can then be uploaded using the WebTax application.
(Figure 11)