wall panel and tile installation - garrett leather leather...nubuck is leather that has been tanned,...
TRANSCRIPT

1360 Niagara Street, Buffalo, NY | 800.342.7738 | fax 716.882.9358 | www.garrettleather.com
Wall Tile Contact Cement Installation
Garrett Leather wall tiles are made with upholstery leather laminated to a recycled leather backer. This unique construction method means that over 600 color options may be used. Tiles require no regular maintenance or waxing and can easily be dusted with a soft damp cloth. Follow care instructions on the last page if cleaning is required.
Required Materials: Ardex or Henry Feather Finish and sandpaper to smooth the
plywood.
1 ½” or 2” metal J Roller, available from Rockler Woodworking and Hardware, or hardware stores.
Premium Water Based Contact Cement such as WilsonArt® H20, Formica® 160 or Weldwood®.
WilsonArt® H20 is available for $50 per gallon from Garrett Leather.
3” wide paint roller for applying adhesive.
Straight edge and utility knife
Level and fine tip marker to draw lines onto wall based on exact measurement of panels
Installation InstructionsTiles should be the last surface installed in a room. The tiles should be taken out of their box and plastic wrap to acclimate in the room they are to be installed in for a minimum of 48 hours.
1. Tiles should be installed on furniture grade (sanded) plywood or similar. Tiles will not properly adhere to drywall or paint. You can install ¼” furniture grade plywood over existing drywall by screwing directly into the studs, or using Liquid Nails® Drywall Adhesive (DWP-24).
2. Fill any screw holes, cracks and seams with Ardex® or Henry® Feather Finish. Sand so that the surface is completely smooth. Wipe down and let dry so that the surface is dust free.
3. Draw out several horizontal and vertical lines, using a level, in the center of your wall. This will be your starting point and you should work outwards from here.
4. Using a roller, spread out the adhesive onto the wall and onto the tiles. Allow the adhesive to cure for 20-30 minutes as it changes colors from milky white to clear.
5. Apply a second coat of adhesive to the wall and to the tiles. The second coat will take a few minutes longer to cure than the first coat. When the second coat turns clear, begin to apply the tiles to the wall according to the pre-drawn lines.
6. Ensure the tile is placed perfectly level, as the adhesive will instantly grab the tile. Push the tile against the wall, then apply significant pressure with the J Roller to bond the entire tile to the wall, especially the edges and corners.
7. Continue to install all tiles until you reach the edges. You may cut the tiles to size for use along the edges of the installation using a utility blade and straight edge tool.
8. Enjoy your beautiful Garrett Leather Wall Tile installation!
Vintage Buckskin Wall Tile

1360 Niagara Street, Buffalo, NY | 800.342.7738 | fax 716.882.9358 | www.garrettleather.com
Wall Panel Z Clip Installation
Z Clip installation offers a secure method for hanging wall panels. Panels can be easily removed and replaced if needed. Z Clip installation can be performed on almost any wall or ceiling structure
Z Clip System Required Materials: 6’ aluminum z track sections.
11⁄2” aluminum z clips. You should have 2 clips per panel for panels smaller than 8”. You should have 3 clips per panel for panels 8” or larger. Clips are pre-drilled.
Stud finder
Drill with Philips head bit and ¼” Cobalt or HSS drill bit for drilling pilot holes in z track to match studs.
#8 - 2 ½” Philips wood screws for z track installation
#8 - ½” Philips wood screws for z clip installation
Level and pencil to draw lines onto wall based on exact measurement of panels
Hack Saw to cut z track
Z Clip System Installation Instructions1. Using a stud finder, mark the location of the studs on the wall.
You should install the first row of panels at the bottom of the wall. Measure the distance between studs and drill additional pilot holes in z track, if existing holes do not line up.
2. The z track should be screwed into the studs at a height equal to 2⁄3 of the panel height. For a 12” x 12” panel, the top of the track should be installed 8” high. The track should be inset from the side edge of the install by approximately 1”.
3. For panels 8” wide or smaller: To find the height to install the z
clip, subtract 5⁄8” from the height of the installed z track and line that height up to the bottom of the clip. In this example, 8” minus 5⁄8” equals 7 3⁄8” height. Install one z clip, centered from side to side, to the back of the panel.
4. For panels larger than 8” wide: Use the same height as above, but install two equally spaced z clips to the back of the panel for added stability.
5. For panels larger than 4” tall: Install a second z clip, centered from side to side, towards the bottom of the panel. This clip does not slide into the track, but instead acts as a stabilizer to keep the panel level against the wall. Panels 4” in height and smaller do not require this second z clip.
6. Slide the panel on to the wall track engaging the upper z clip(s).
7. Repeat steps 3-6 for the remainder of the row. Repeat steps 2-6 for the next row. Small adjustments may need to be made to the z clip height to ensure a level installation. These adjustments are quick and easy to make and the panels can be immediately hung to ensure a level installation.
8. Enjoy your beautiful Garrett Leather wall installation!
Pearlessence Silver Wall Panel
Z Track
Wall
Studs Behind
12"
Back of panel
7 3⁄8"
12"

1360 Niagara Street, Buffalo, NY | 800.342.7738 | fax 716.882.9358 | www.garrettleather.com
Wall Panel 3M™ Dual Lock™ Installation
Dual Lock™ can be used for a quick, easy and inexpensive installation. Dual Lock™ is a reclosable fastener with mushroom shaped stems that provides for a strong bond between the stems (up to 40lbs per square inch). The product comes unmated and is one-sided, meaning it bonds to itself.
The adhesive that attaches the Dual Lock to the panels and to the wall is pressure sensitive and because the bond is very strong, the fibrous nature of MDF, plywood and drywall requires that the Dual Lock be stapled to the panels and to the wall as a secondary means of adhesion.
3M™ Dual Lock™ Required Materials: Level and pencil to draw lines onto wall based on
exact measurement of panels
3M™ Dual Lock SJ3550 Reclosable Fastener ½” width, available from Garrett Leather.
Staple gun with 3/8” staples to attach 3M™ Dual Lock to panels and wall.
3M™ Dual Lock™ Installation Instructions1. Open and inspect all panels. Lay out the bottom row of panels
against the wall, ensuring the size of the panels was properly designed for the wall. Lay out the panels on the floor, in the order that they are to be installed, ensuring they do not get dirty or scratched.
2. Draw out vertical and horizontal lines that are plumb and level for the starting point of your installation.
3. Cut two pieces of Dual Lock, each equal to half the size of the panel (ex. a 12” x 12” panel should use two 6” pieces. Larger panels should use four smaller pieces).
4. Apply the two pieces evenly on the back of the panel. Staple the pieces to the back of every the panel, trying to have the staple driven as far into the Dual Lock™ as possible, as shown.
5. Apply two strips of Dual Lock to the wall, in the approximate location of the Dual Lock on the panels. Staple these two strips to the wall.
6. Push the panels onto the wall. You will hear an audible “click” when the Dual Lock connects.
7. Enjoy your beautiful Garrett Leather wall installation!

1360 Niagara Street, Buffalo, NY | 800.342.7738 | fax 716.882.9358 | www.garrettleather.com
Wall Panel Drywall Adhesive Installation
Wall Panel Cutting Wall Panels
Titebond GREENchoice Professional Drywall Adhesive is a quick and easy way to permanently install Garrett Leather Wall Panels. Drywall and plywood are suitable substrates. Please consult Garrett Leather for other substrates.
Drywall Adhesive Required Materials: Titebond GREENchoice Professional Drywall Adhesive
Caulk gun for adhesive tube
Level and pencil to draw lines onto wall based on exact measurement of panels
Drywall Adhesive Installation Instructions1. Open and inspect all panels. Lay out the bottom row of panels
against the wall, ensuring the size of the panels was properly designed for the wall. Lay out the panels on the floor, in the order that they are to be installed, ensuring they do not get dirty or scratched. The surface of the wall must be smooth and clean.
2. Draw out vertical and horizontal lines that are plumb and level for the starting point of your installation.
3. Begin with the bottom row of panels using a caulk gun, apply an even bead of adhesive to the back of the panel, covering at least half of the surface area.
4. Apply the panel to the wall, slightly above and to the side of its final position. Work the panel into the wall in order to spread the adhesive for full coverage.
5. Hold the panel in place for 15-30 seconds, pushing firmly on all sides of the panel.
6. Care must be taken to not allow any adhesive on the leather. Any adhesive on the leather could discolor the leather.
7. Enjoy your beautiful Garrett Leather wall installation!
Cutting Wall Panels Required Materials: Pencil and ruler for outlining cuts
Utility knife
Saw for cutting MDF
Staple gun
Wall Panel Cutting Instructions1. Using a ruler and pencil, outline on the MDF the area that needs
to be cut.
2. Cut the leather outside of the staples, on the back of the panel, using a utility knife. Pull the leather and foam back, exposing the MDF.
3. Cut the unneeded MDF away with a saw. Cut the extra foam away using a utility knife.
4. Wrap the leather back around the cut edge of the MDF and staple the leather back to the MDF.
1360 Niagara Street, Buffalo, NY | 800.342.7738 | fax 716.882.9358 | www.garrettleather.com
Wall Panel and Wall Tile Maintenance
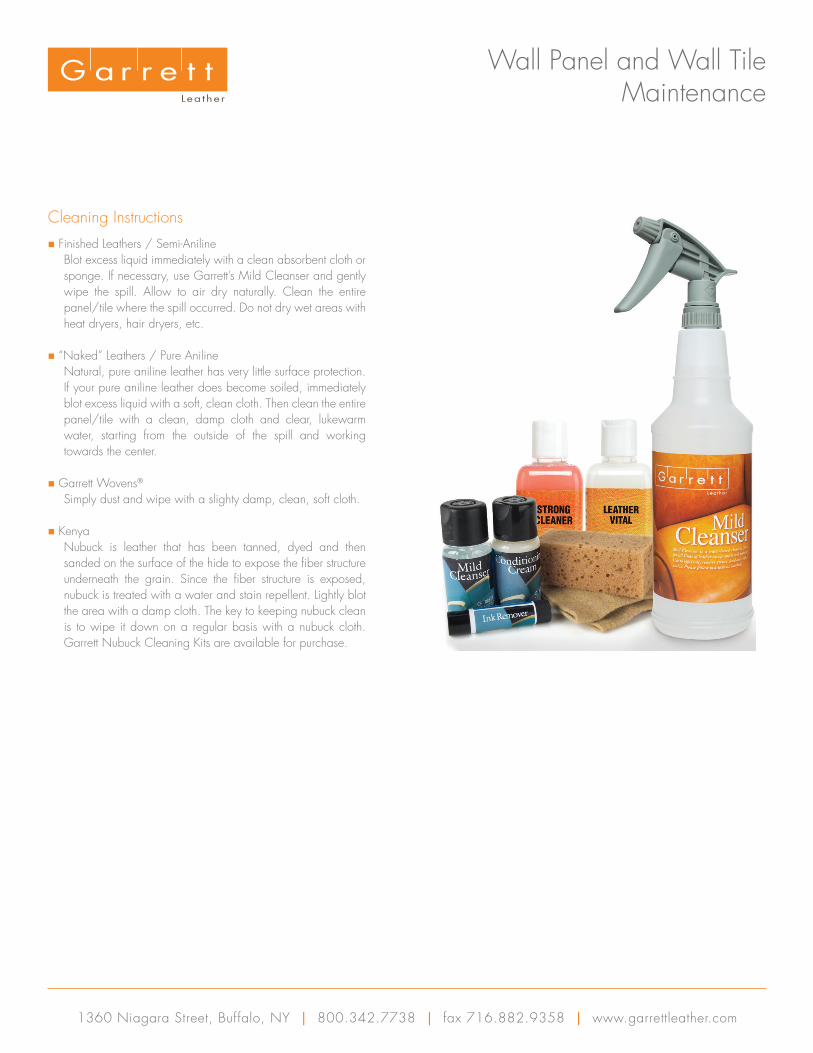
Cleaning Instructions Finished Leathers / Semi-Aniline Blot excess liquid immediately with a clean absorbent cloth or
sponge. If necessary, use Garrett’s Mild Cleanser and gently wipe the spill. Allow to air dry naturally. Clean the entire panel/tile where the spill occurred. Do not dry wet areas with heat dryers, hair dryers, etc.
“Naked” Leathers / Pure Aniline Natural, pure aniline leather has very little surface protection.
If your pure aniline leather does become soiled, immediately blot excess liquid with a soft, clean cloth. Then clean the entire panel/tile with a clean, damp cloth and clear, lukewarm water, starting from the outside of the spill and working towards the center.
Garrett Wovens®
Simply dust and wipe with a slighty damp, clean, soft cloth.
Kenya Nubuck is leather that has been tanned, dyed and then
sanded on the surface of the hide to expose the fiber structure underneath the grain. Since the fiber structure is exposed, nubuck is treated with a water and stain repellent. Lightly blot the area with a damp cloth. The key to keeping nubuck clean is to wipe it down on a regular basis with a nubuck cloth. Garrett Nubuck Cleaning Kits are available for purchase.